Diasonic Technology Co DMP200EN MP3 Player User Manual DMP 200English 1th
Diasonic Technology Co Ltd MP3 Player DMP 200English 1th
UserManual.wiki
>
Diasonic Technology Co
>
DMP200EN User Manual
User Manual
Navigation menu
Upload a User Manual
Namespaces
Wiki Guide
HTML
PDF
Info
Views
User Manual
Discussion / Help
Navigation

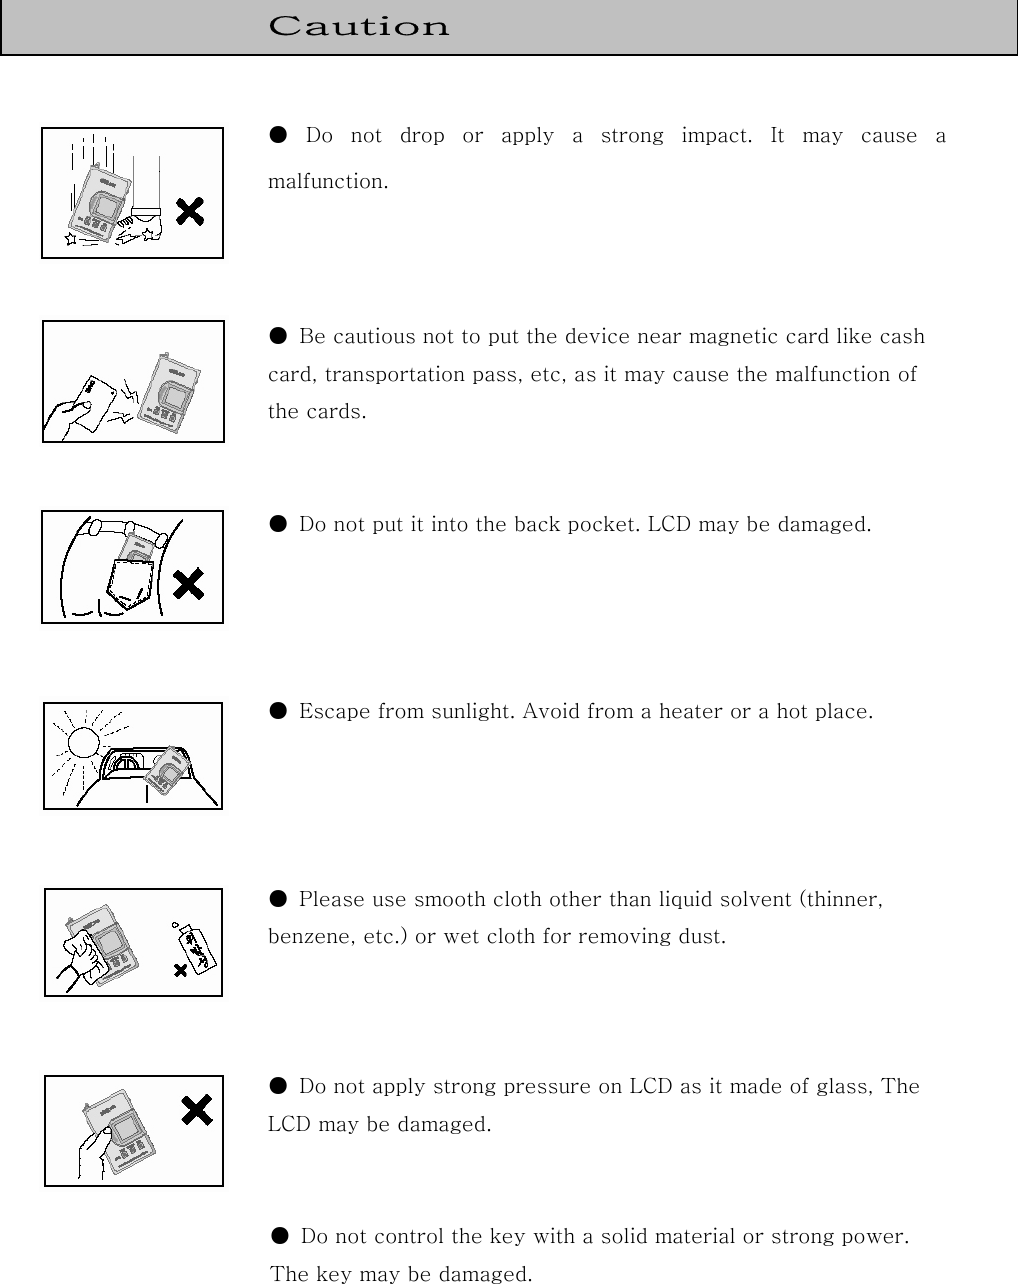
![1. Open battery cover. Open 2. Load 1 ea of LR 03 type battery according to the guide of (+) (-) and close the cover. [Battery: LR 03 or compatible one (Size”AAA” or UM-4)] 3. After turning on power by pushing play/pause button for a few seconds, check the battery level. Battery level is high. Battery level is in middle. Battery level is low. It is time to replace the battery. ※ Caution If LCD display does not show the battery level though you loaded a new battery, please check the polarity of the battery. If it still does not show the battery level when you loaded the battery properly, remove the battery immediately and apply for service. ※ Reference Battery use and its package contents](https://usermanual.wiki/Diasonic-Technology-Co/DMP200EN/User-Guide-347532-Page-10.png)


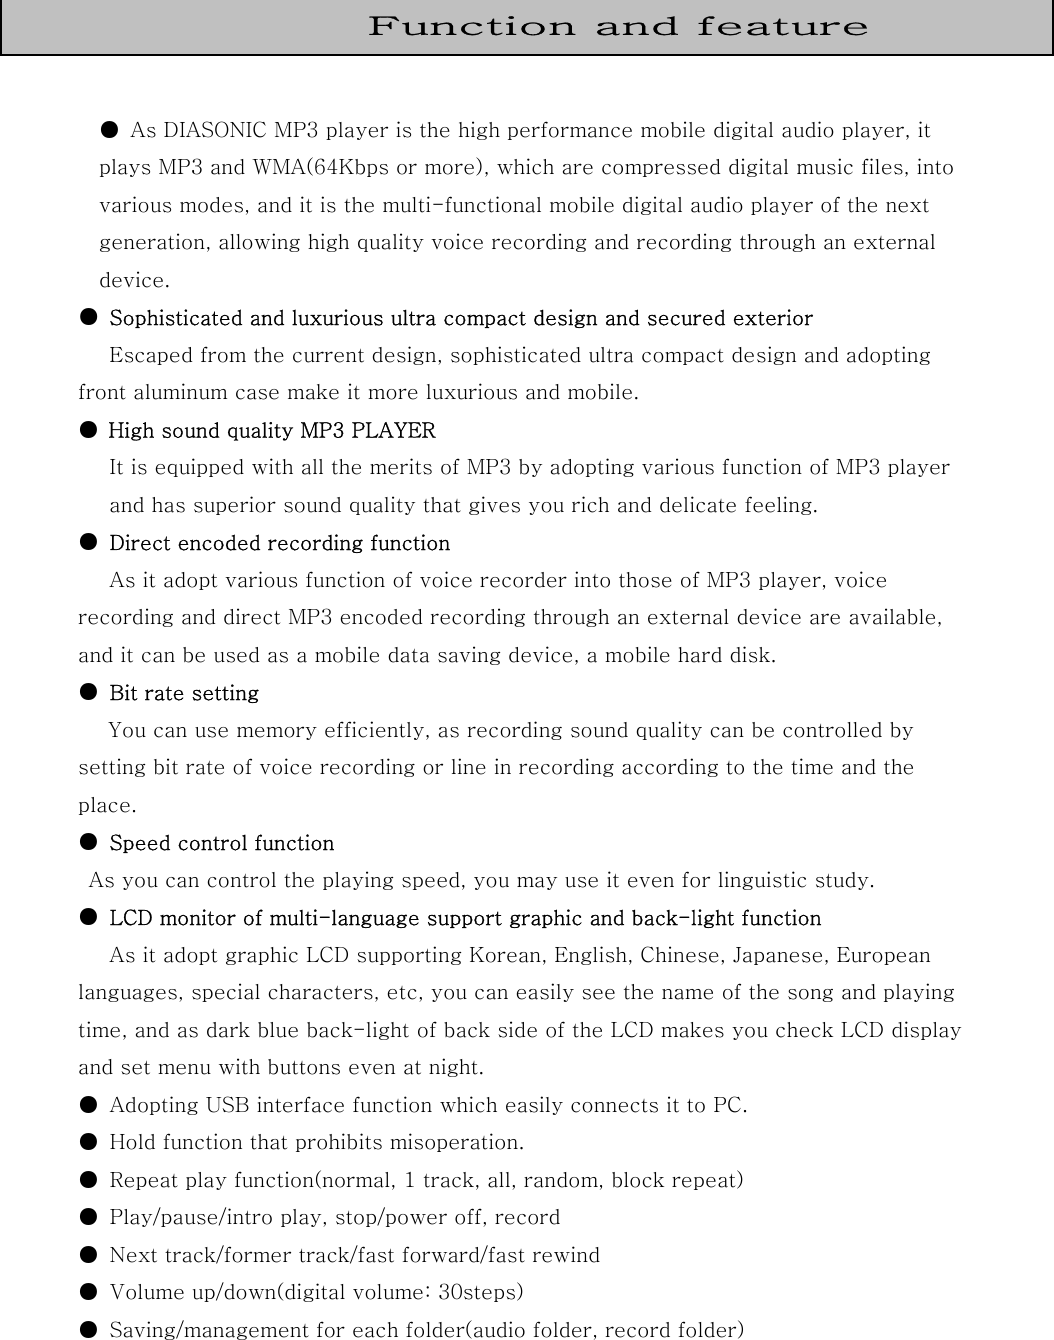
![○6 If you click [Finish] and restart PC, install is completed. ☞ To erase DIASONIC MP3 Ⅱ, you can do it by selecting [Start]-[Settings]-[Control Panel]-[Add/Remove Programs]- [DIASONIC MP3 Ⅱ].](https://usermanual.wiki/Diasonic-Technology-Co/DMP200EN/User-Guide-347532-Page-34.png)

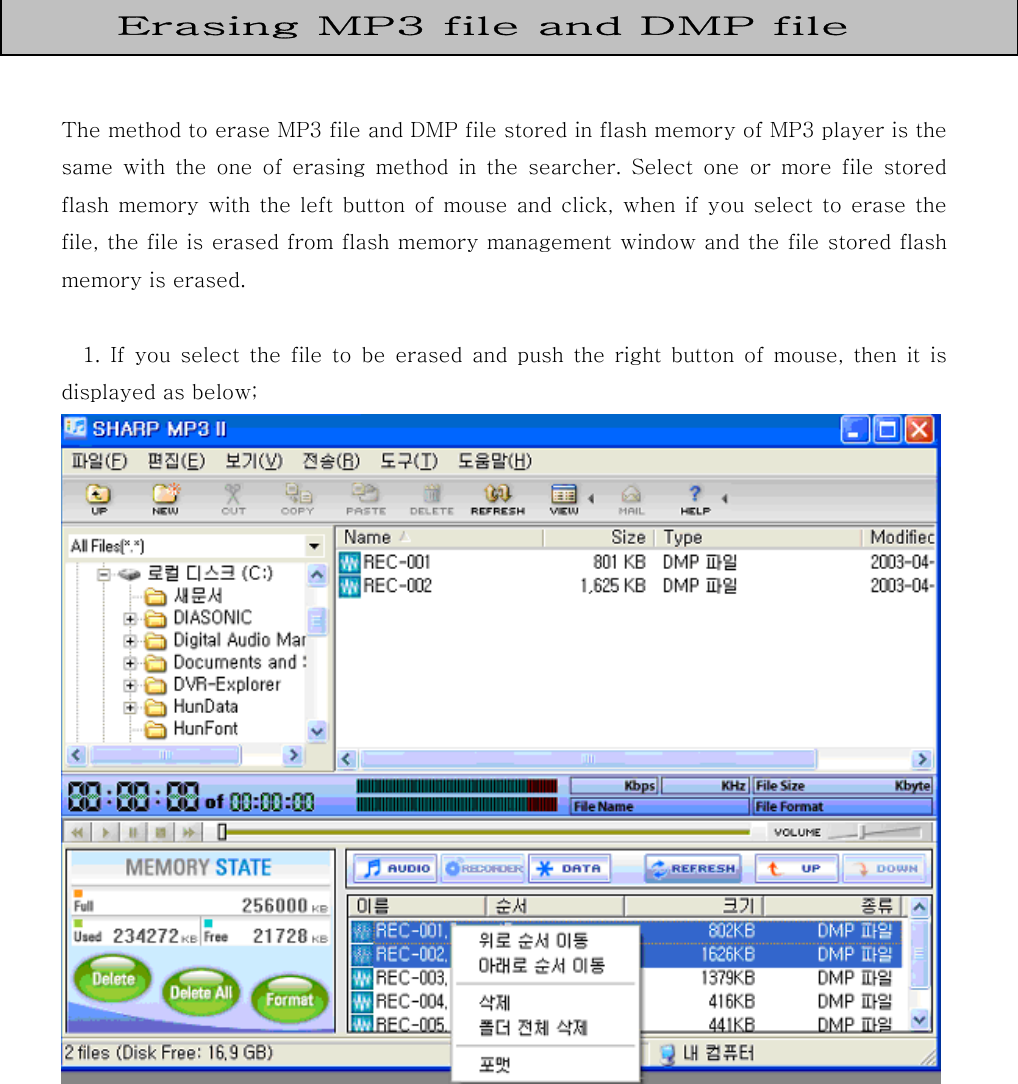
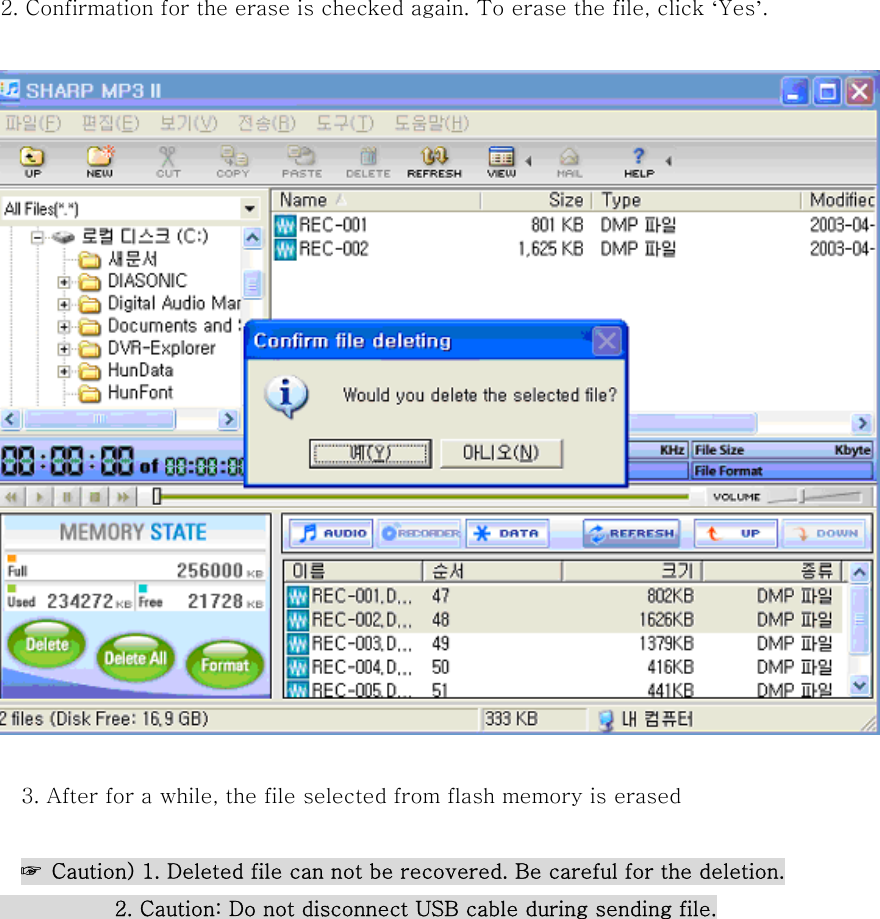
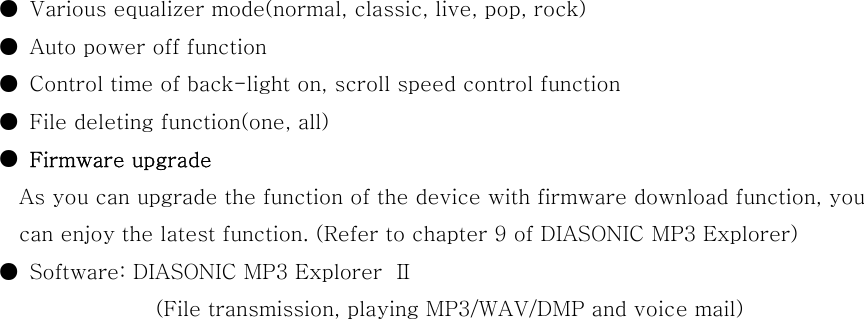
![As like hard disk formatting, flash memory used in the device is also formatted. If you do format flash memory, all the data stored in memory disappears. 1.Select [file] – [flash memory format] in the menu of DIASONIC MP3 Ⅱ. ☞ Select vacant space in flash memory management screen and click the right button of mouse, then popup menu appears. You can do format in the menu too. 2. Format box appears as below and when you click ‘Yes’, format starts. ☞ Caution) 1. Deleted file can not be recovered. Be careful for the deletion. 2. Caution: Do not disconnect USB cable during sending file. Flash memory format](https://usermanual.wiki/Diasonic-Technology-Co/DMP200EN/User-Guide-347532-Page-46.png)
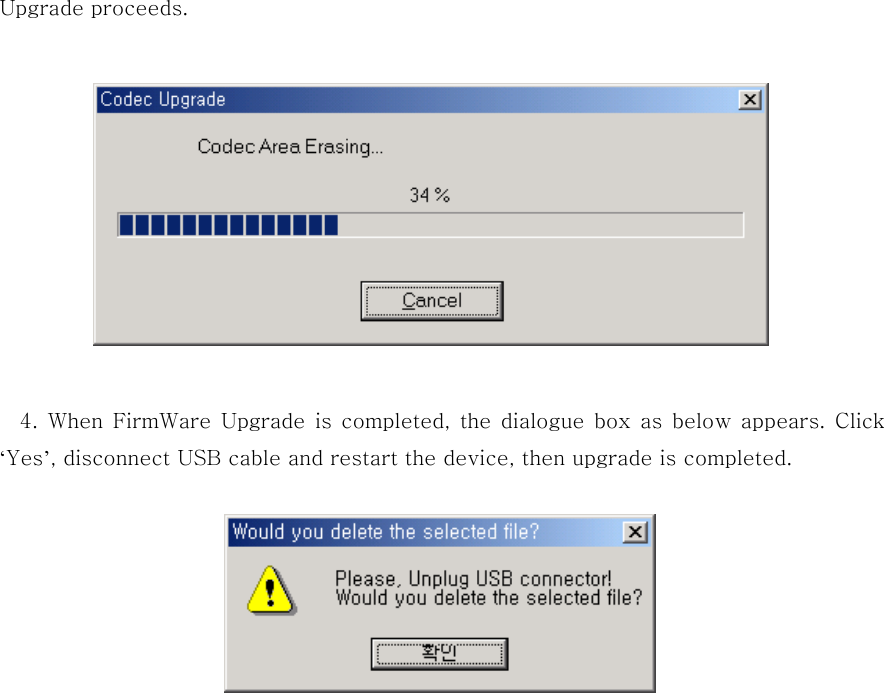
![It is simple to upgrade FirmWare. Upgrade order is as below; 1. Select [tool] – [FirmWare Upgrade] in the menu of DIASONIC MP3 Ⅱ. 2. When the window as below shows, define pass of the relevant FirmWare Upgrade File(*.hex) and click [open]. 3. When you click [open] button, the window as below displayed and FirmWare FirmWare Upgrade](https://usermanual.wiki/Diasonic-Technology-Co/DMP200EN/User-Guide-347532-Page-47.png)