Digital Ally FIRSTVU1 Digital Transmission System 2412-2457 MHz User Manual FirstVu
Digital Ally, Inc. Digital Transmission System 2412-2457 MHz FirstVu
UserManual.wiki
>
Digital Ally
>
FIRSTVU1 User Manual
User Manual
Navigation menu
Upload a User Manual
Namespaces
Wiki Guide
HTML
PDF
Info
Views
User Manual
Discussion / Help
Navigation
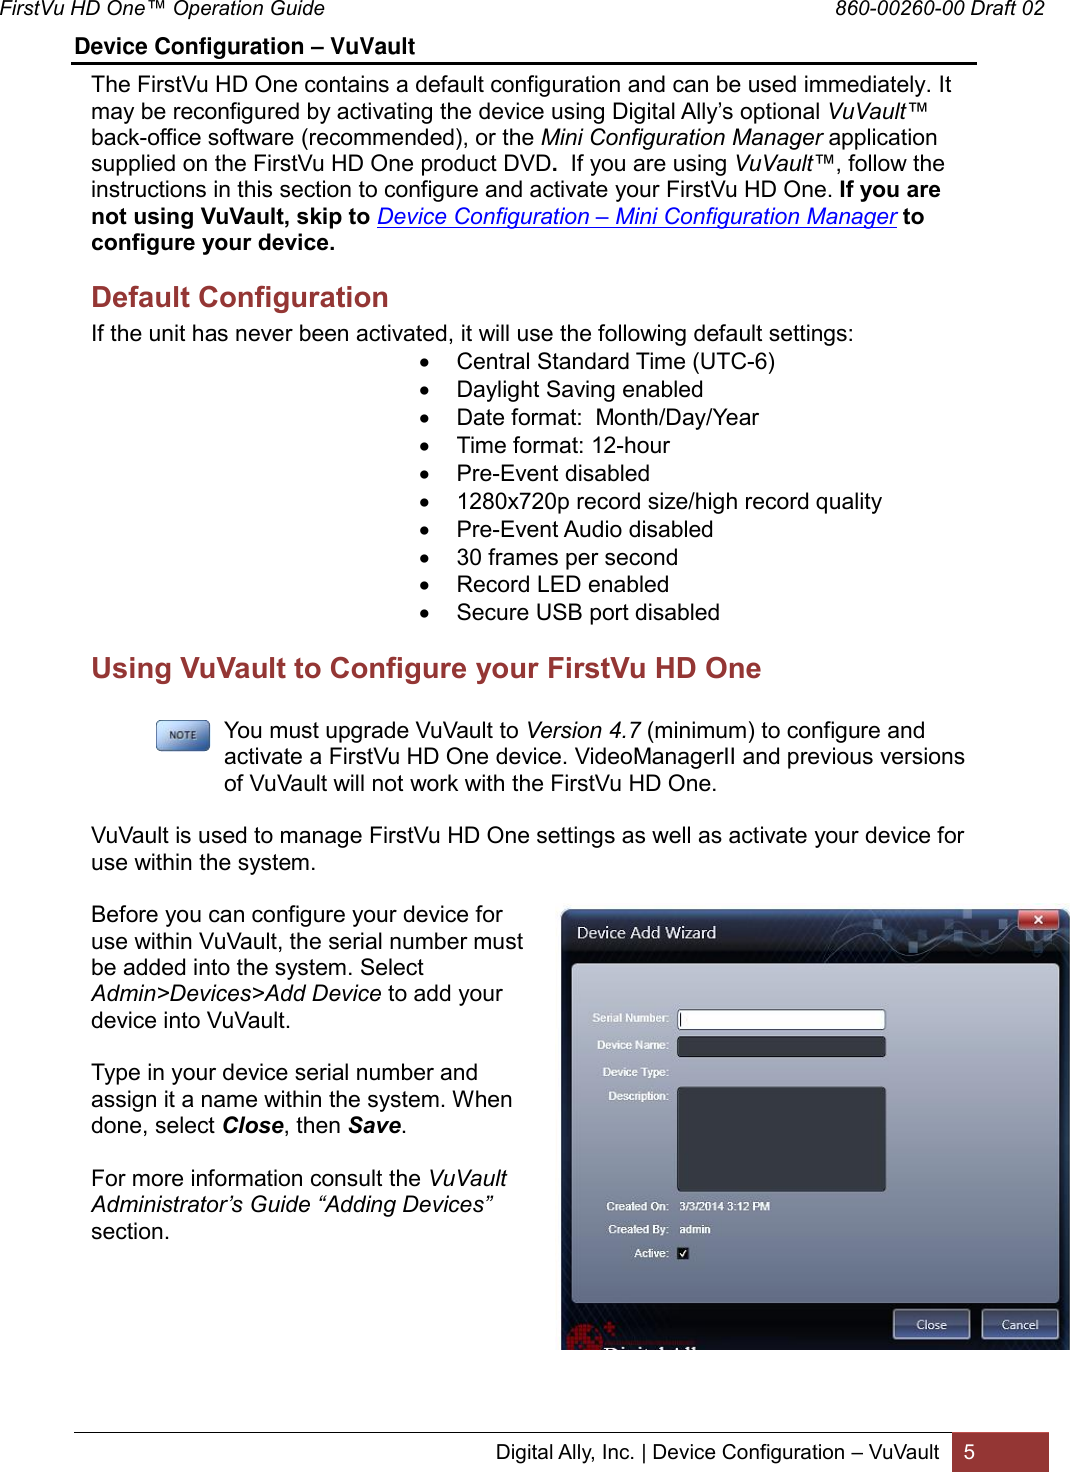
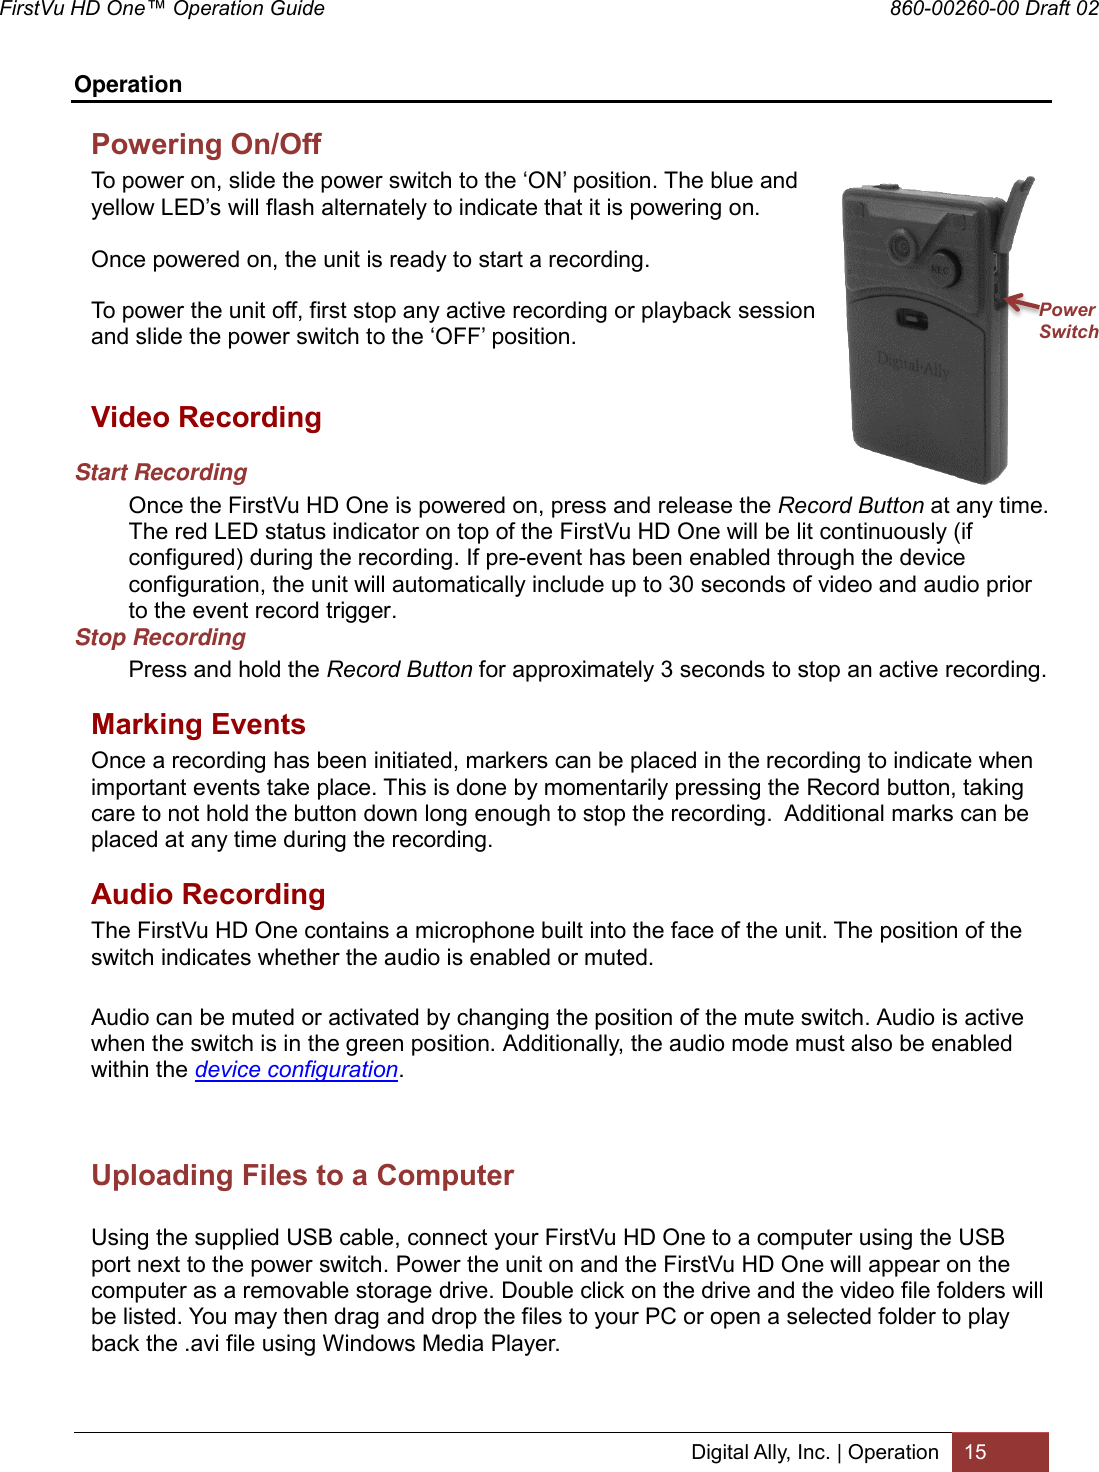
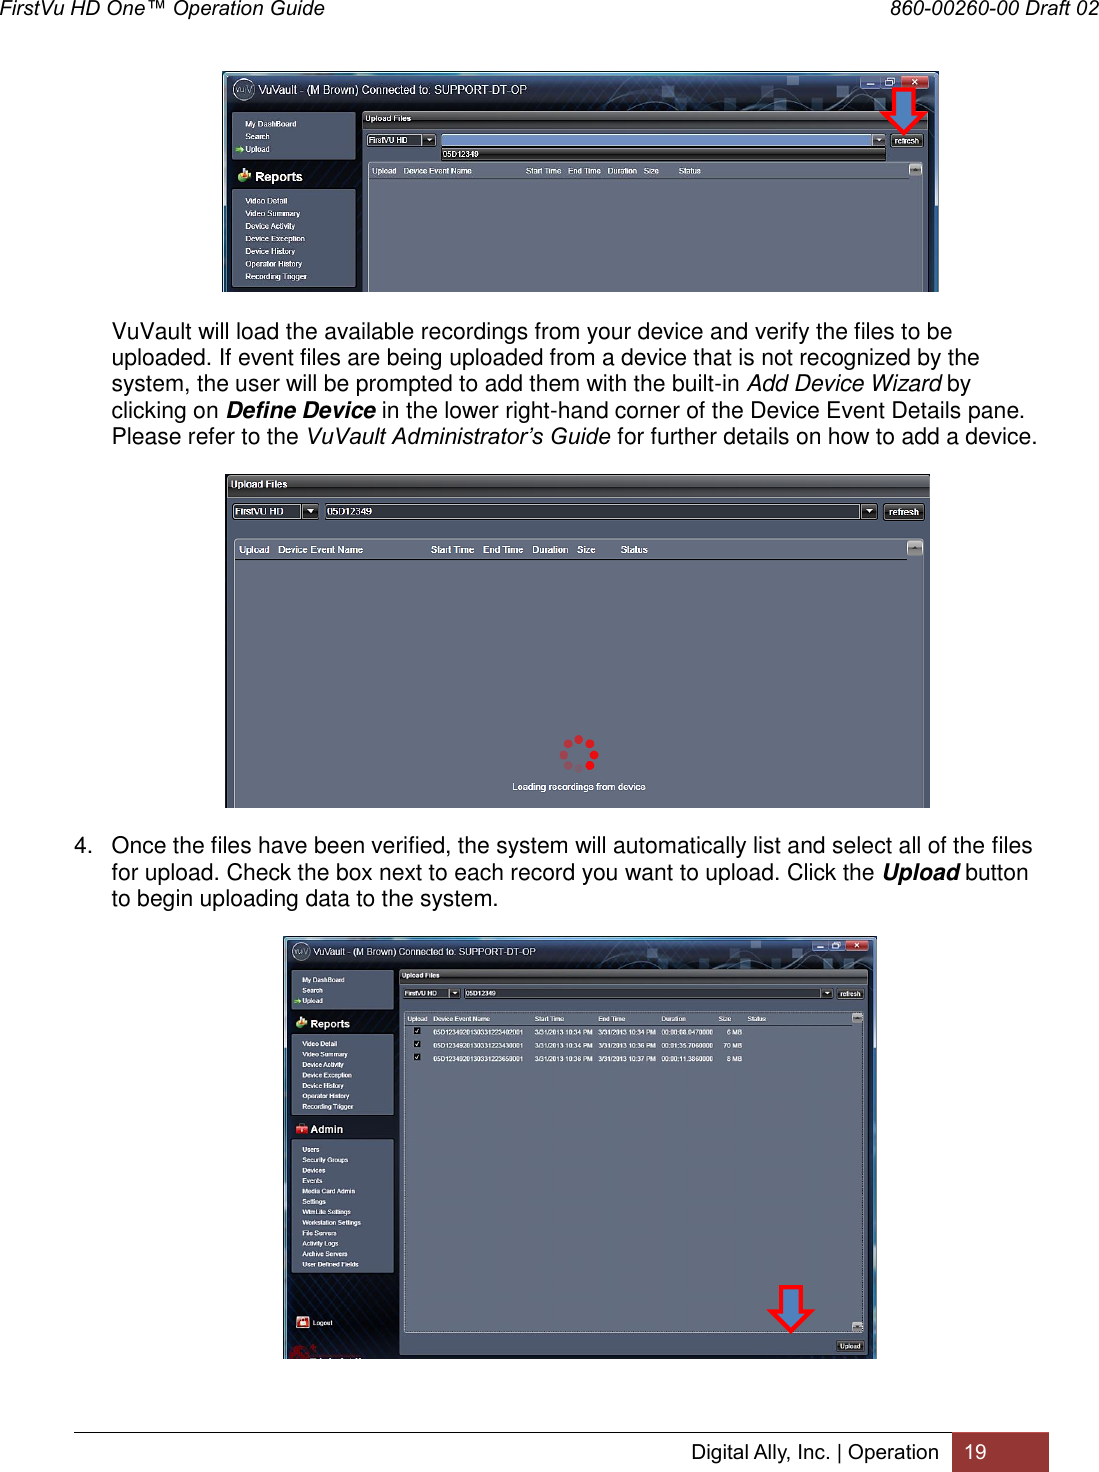
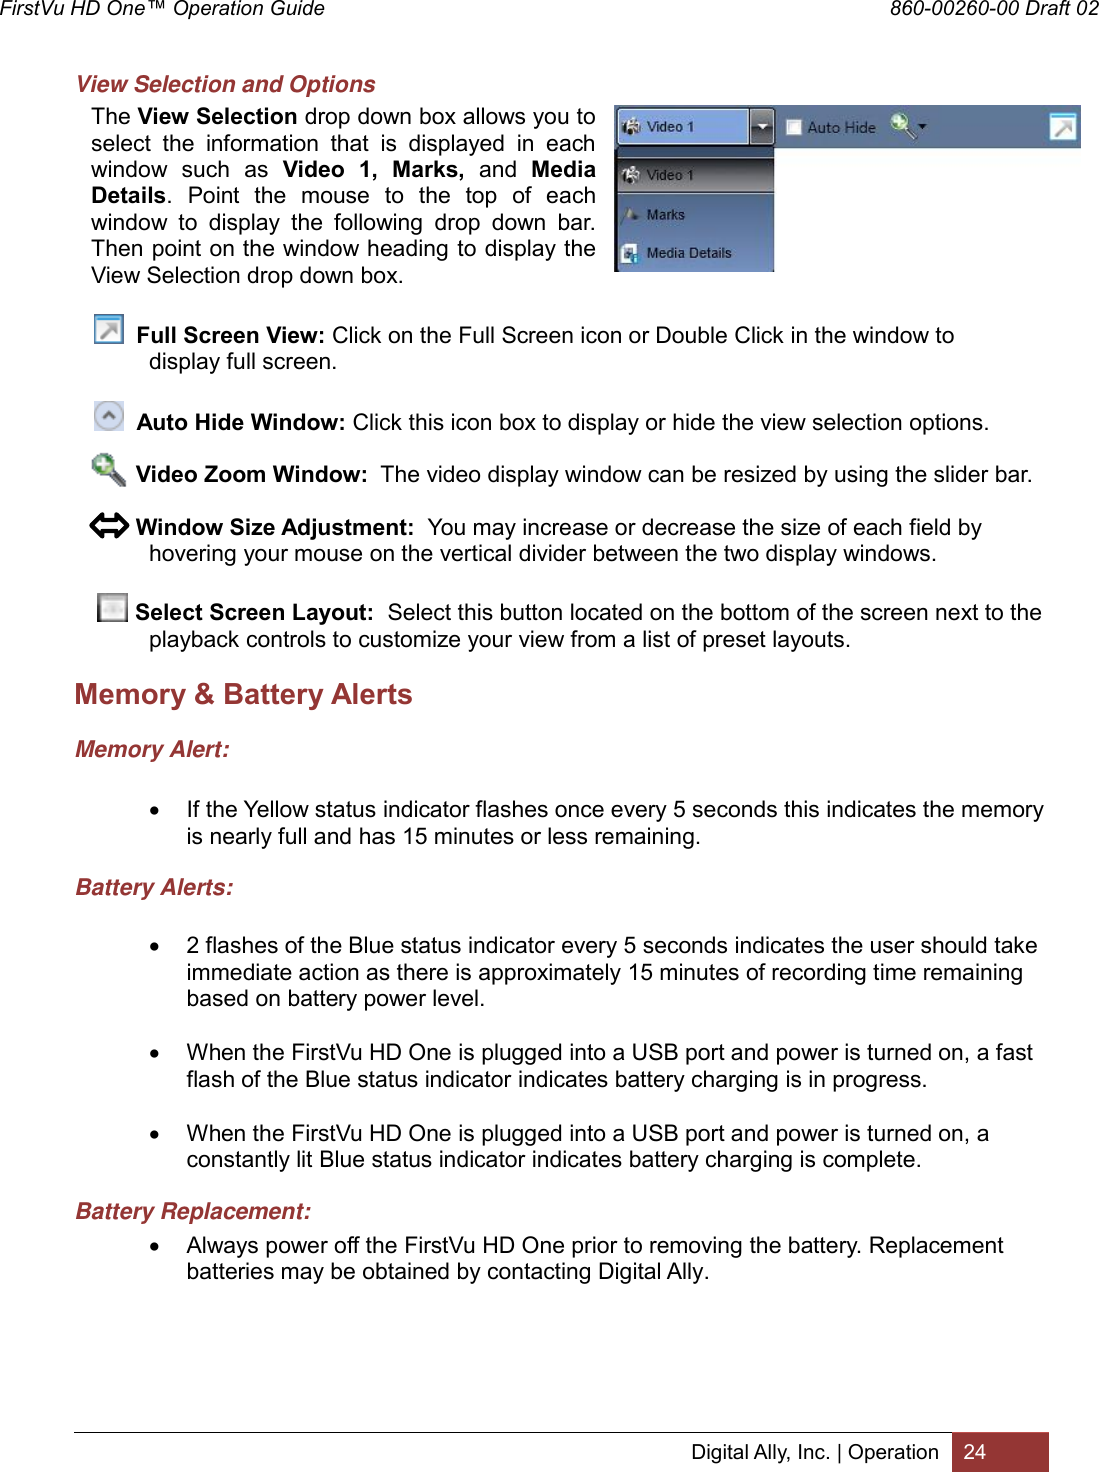
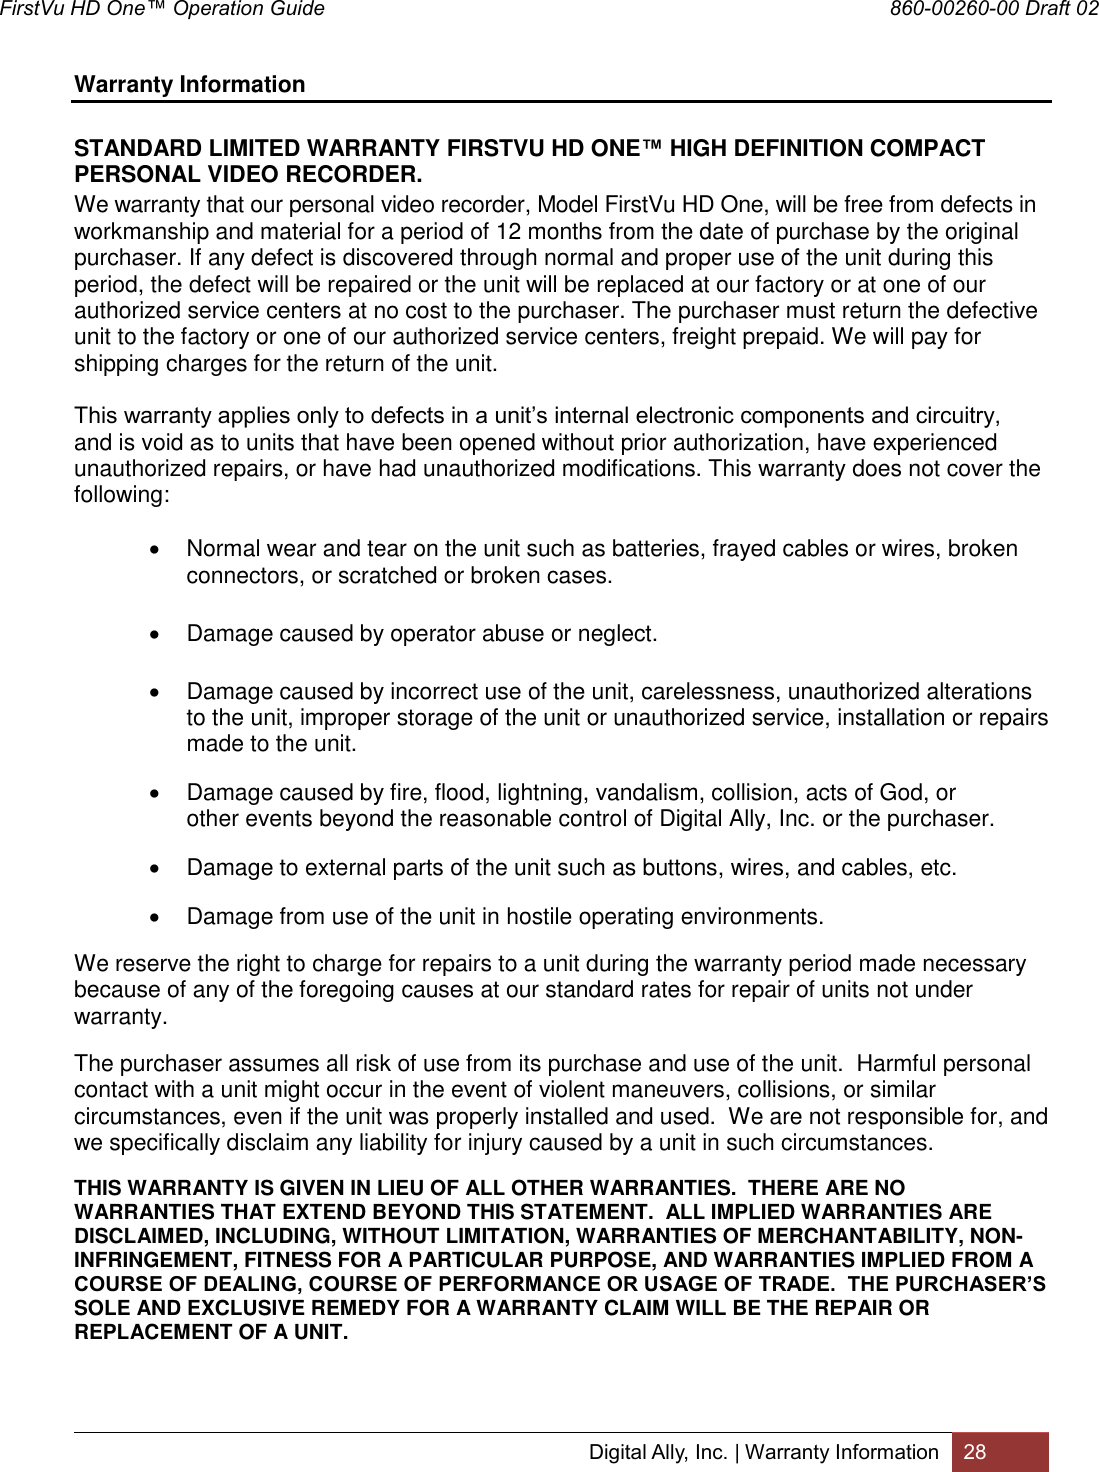
![FirstVu HD One™ Operation Guide 860-00260-00 Draft 02 Digital Ally, Inc. | Device Configuration – VuVault 6 A configuration field will be available in the Admin>Devices tab within VuVault once a valid FirstVu HD One serial number has been added into the system. These global settings will define how all users will interface with the FirstVu HD One. Location Time Zone The local time zone is used to adjust the device when synchronizing to the Greenwich Mean Time. During device configuration, the local time from the PC real time clock will be used, and Central Standard Time is set by default. Settings: UTC, UTC-6 (CST) [default] Daylight Saving When set to On, Daylight Saving setting time will be automatically adjusted for the configured Local Time Zone. If this is disabled, time will not be adjusted for Daylight Saving. Settings: Off, On [default] Date Format The date format displayed on the event recordings is selected through this setting. Settings: mm/dd/yy [default]; yy/mm/dd; dd/mm/yy Time Format This time format allows the device to be configured in a 12-hour format or a 24-hour format. Settings Pre-Event Time The Pre-Event Time option allows you to set the amount of time for the pre-event buffer. The FirstVu HD One will buffer the last 0-60 seconds of audio and video so it can be recorded during a record event. If set for 0 seconds, pre-event function will be disabled.](https://usermanual.wiki/Digital-Ally/FIRSTVU1/User-Guide-3118885-Page-9.png)
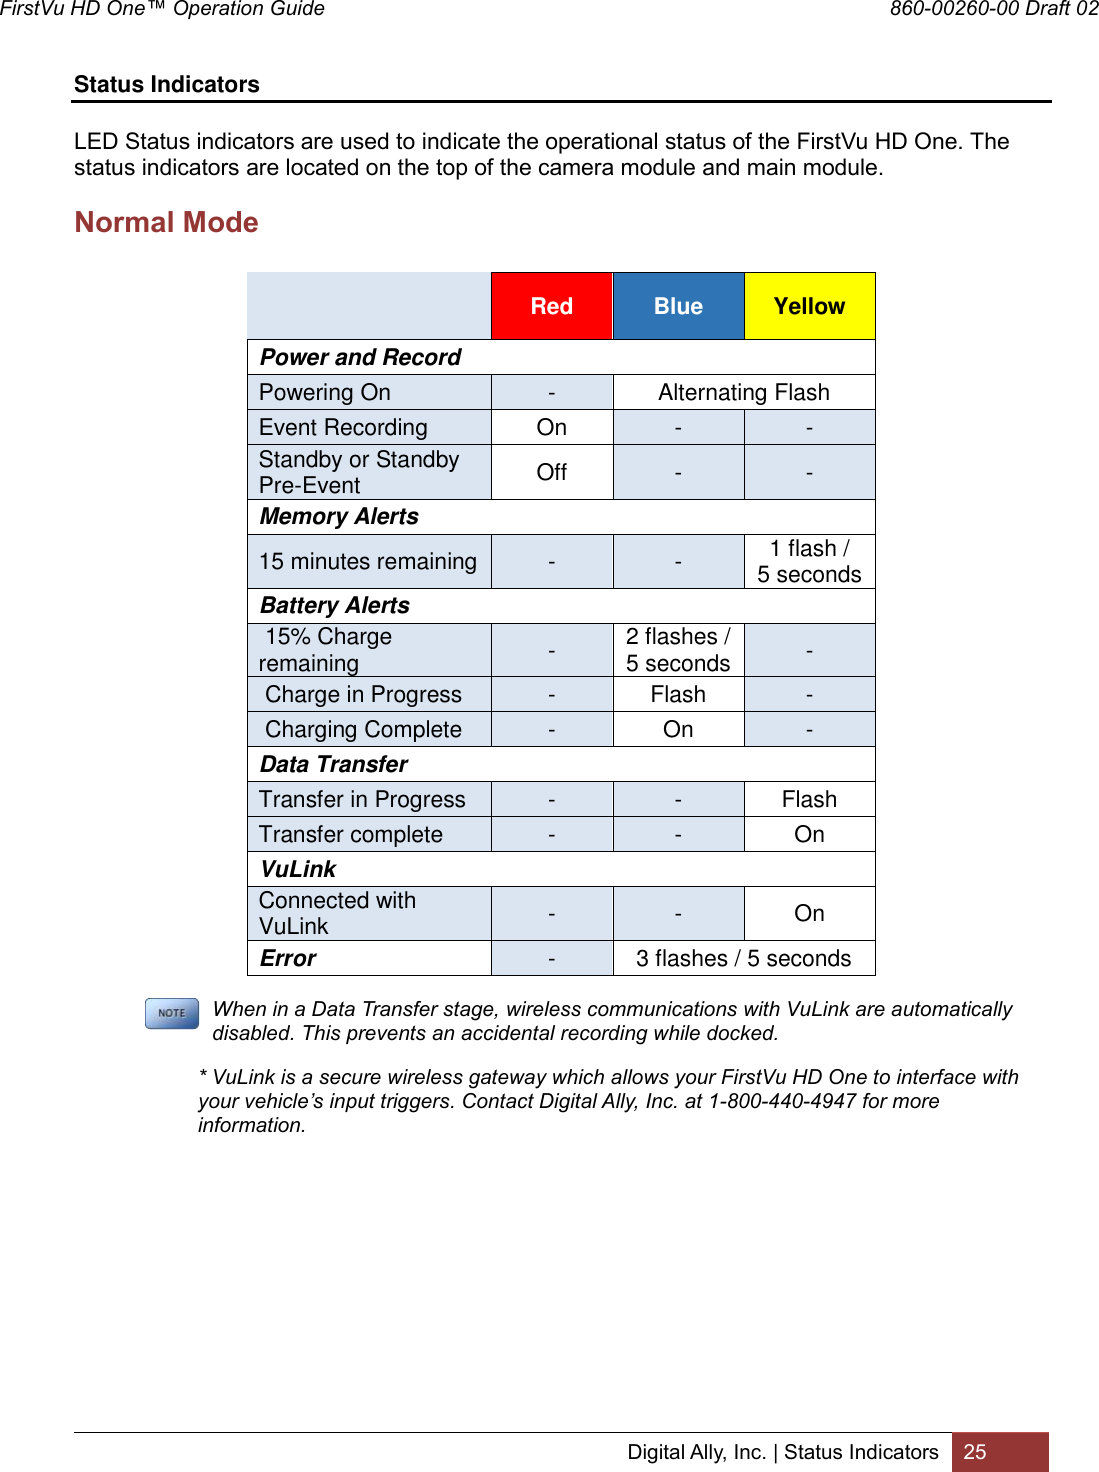
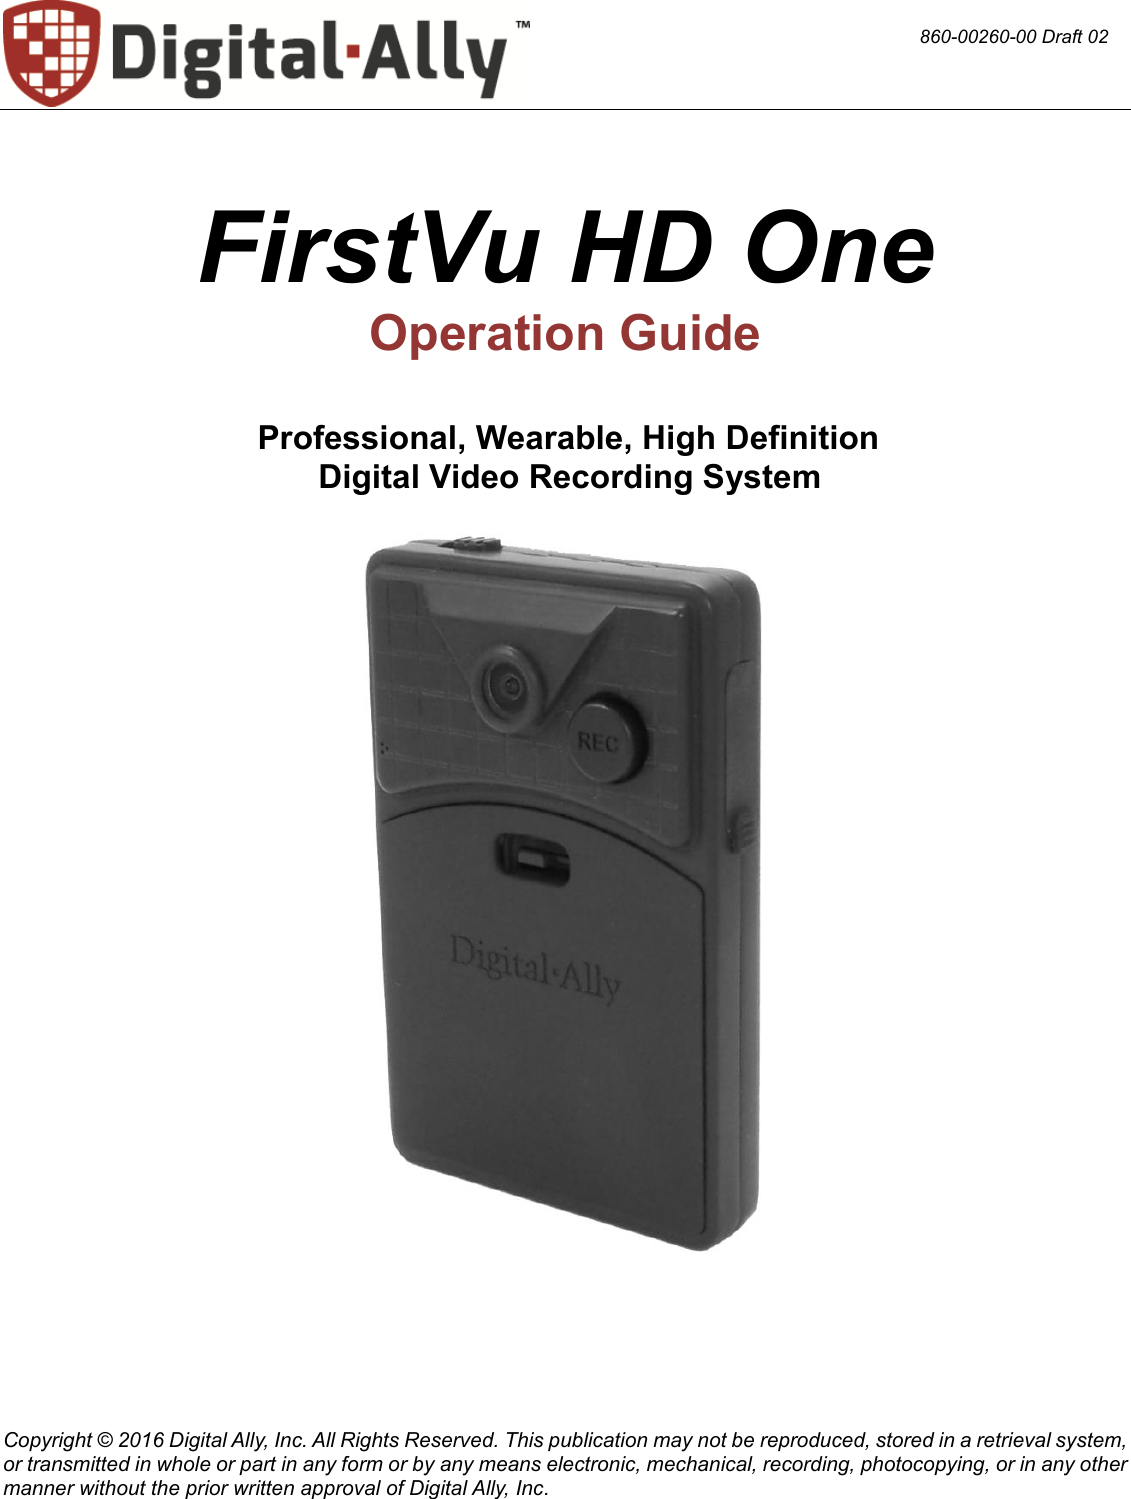
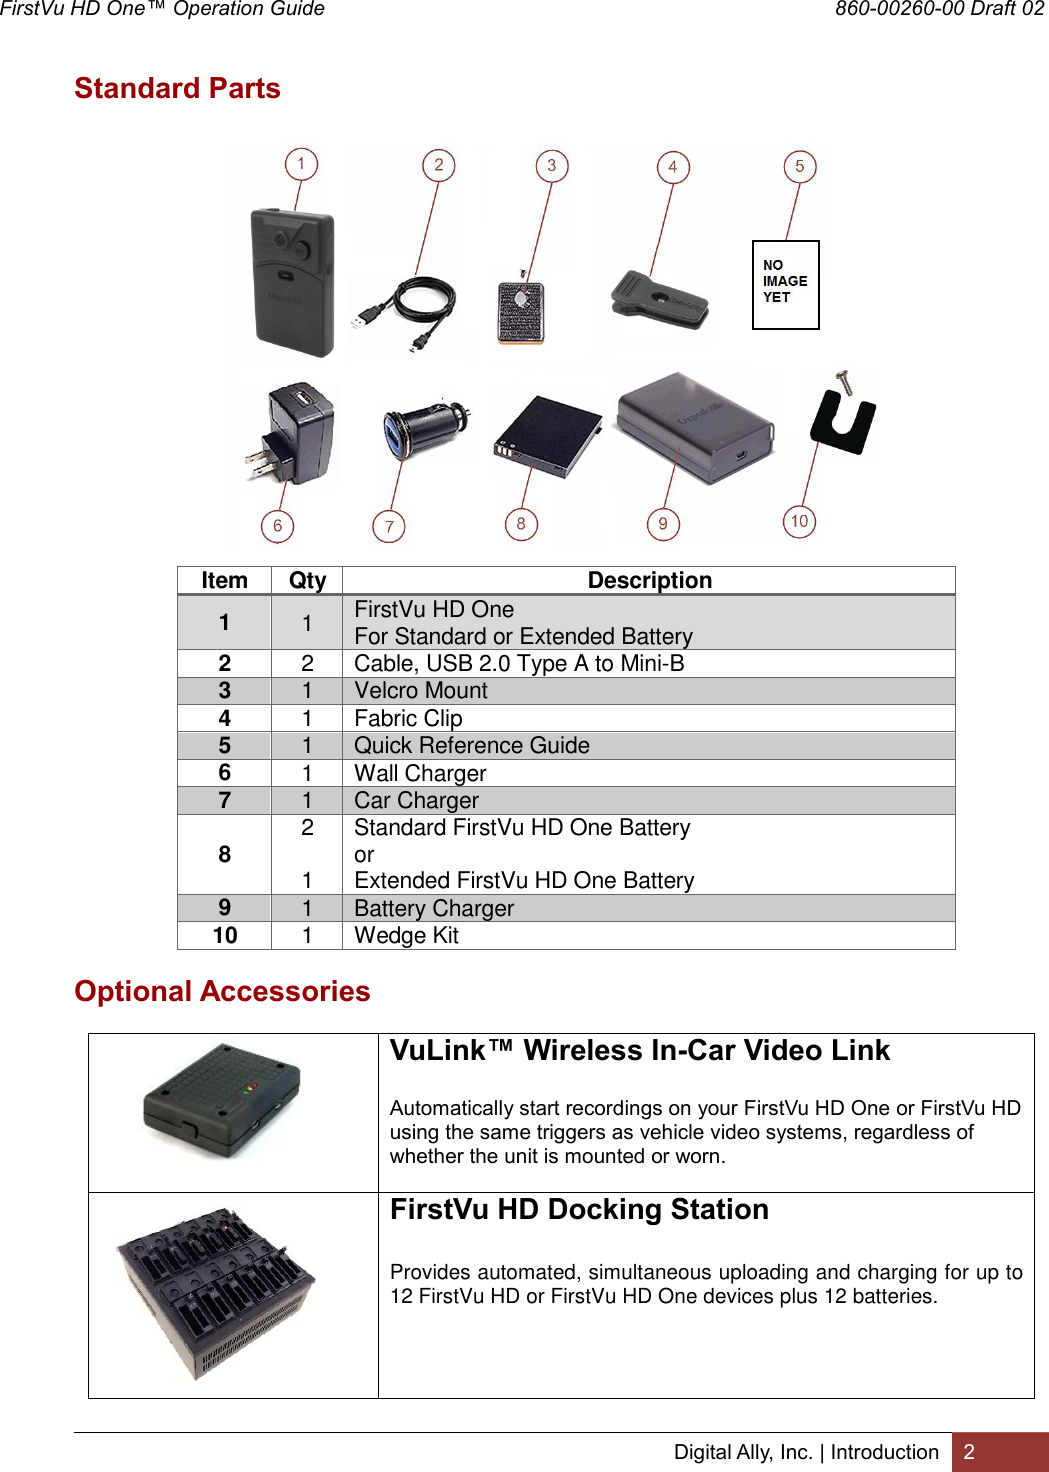
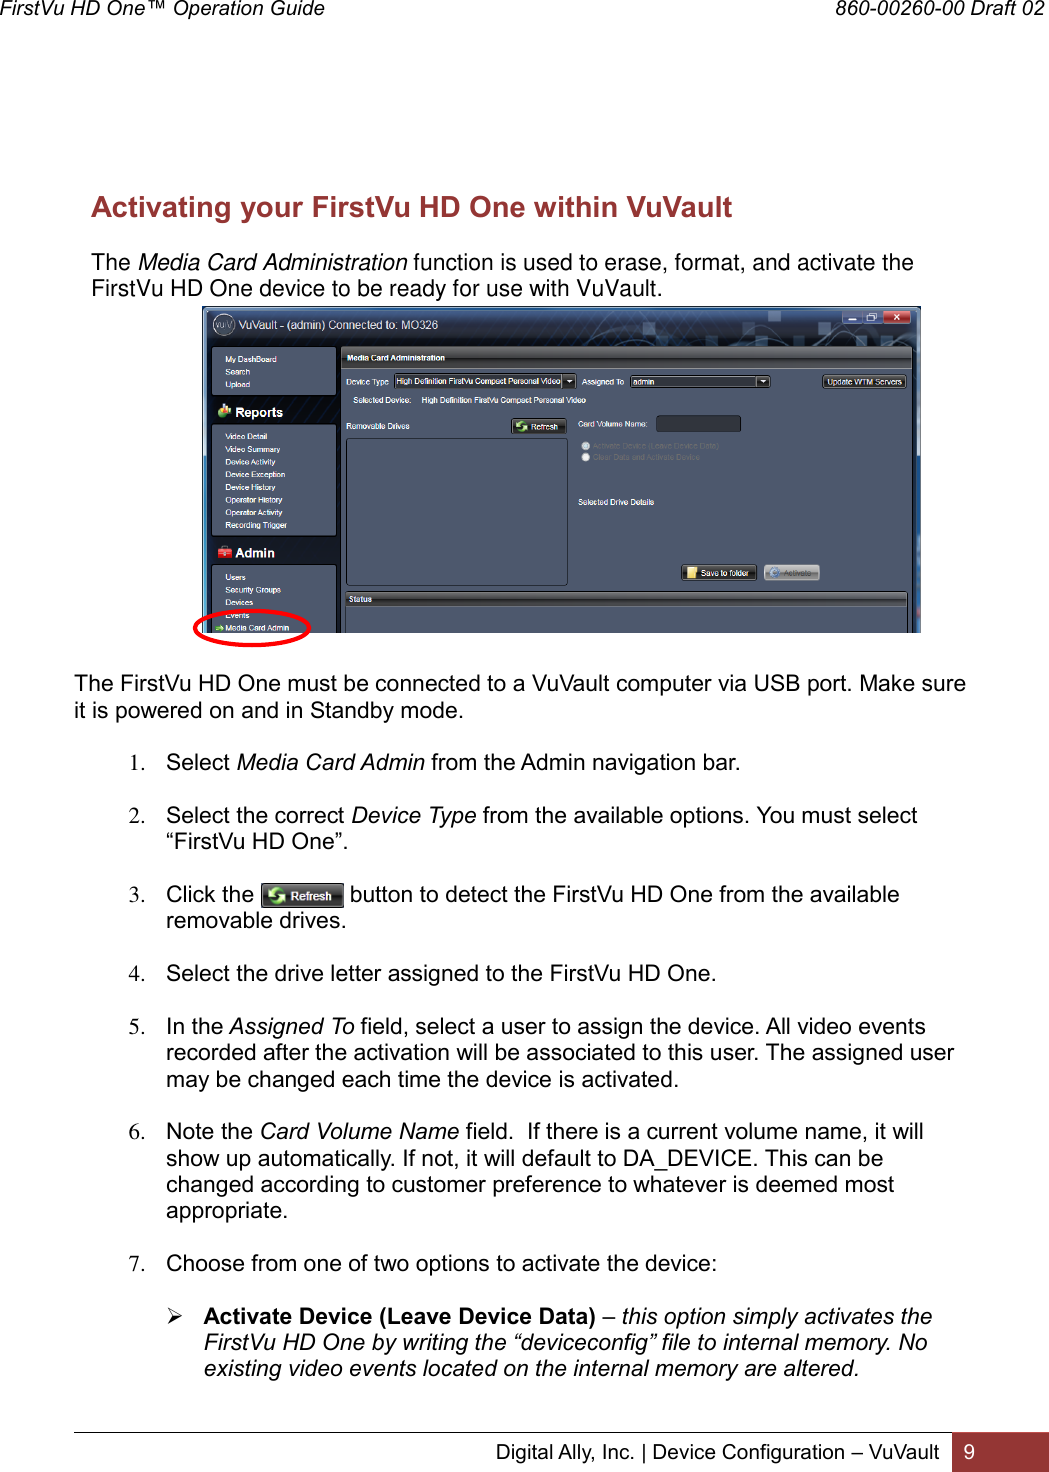
![FirstVu HD One™ Operation Guide 860-00260-00 Draft 02 Digital Ally, Inc. | Device Configuration – VuVault 7 Settings: 0-60 seconds [default = 0 seconds] Record Quality The Record Quality parameter allows the video compression bit rate to be adjusted. Digital video is compressed by taking out data that remains constant from each frame, and only storing data that actually changes. This allows videos with still backgrounds to be much smaller than they would be if the background had to be present in every single frame. The bit rate is the amount of bits that can be used in one second of video. The higher the record quality, the higher the bit rate and the size of the event files. The default setting is “high” for a good mix between video qualities and upload time, but can be lowered or raised to adjust quality and storage space. Settings: Standard (2Mbps), Medium (4Mbps), High (6Mbps) [default], Super High (12Mbps) Record Size The Record Size parameter allows the video image size to be adjusted from VGA (standard definition) to 720p (high definition). VGA has a picture size of 640x480 pixels, whereas 720p has a picture size of 1280x720 pixels. 720p will provide a larger & more defined video picture, but because of its larger size, will require about 3 times as much storage space as VGA. Also, the shape of the final video frame will be slightly different, with 720p being a wider frame (higher width ratio to height). Settings: VGA (640x480), and 720p (1280x720) [default] Audio Mode The audio mode determines how audio will be recorded to your device. If enabled, audio information is recorded during the recorded event and during the configured pre-event time. If enabled (w/o Pre-event), audio will be recorded during the event but not recorded during pre-event. If this option is disabled, no audio will be recorded. Settings: Enabled, Disabled, Enabled (w/o Pre-Event) [default] Frames Per Second This parameter sets the number of frames per second the FirstVu HD One will record. The higher the setting, the better the video quality, and the larger the size of the event files. Settings: 5, 10, 15, 30fps [default = 30fps] Record LED (covert mode) The Red Record LED behavior on the camera can be configured to accommodate your desired operation. If disabled, the LED will not illuminate during a recorded event and will operate in covert mode. Settings: Off, On [default]](https://usermanual.wiki/Digital-Ally/FIRSTVU1/User-Guide-3118885-Page-10.png)
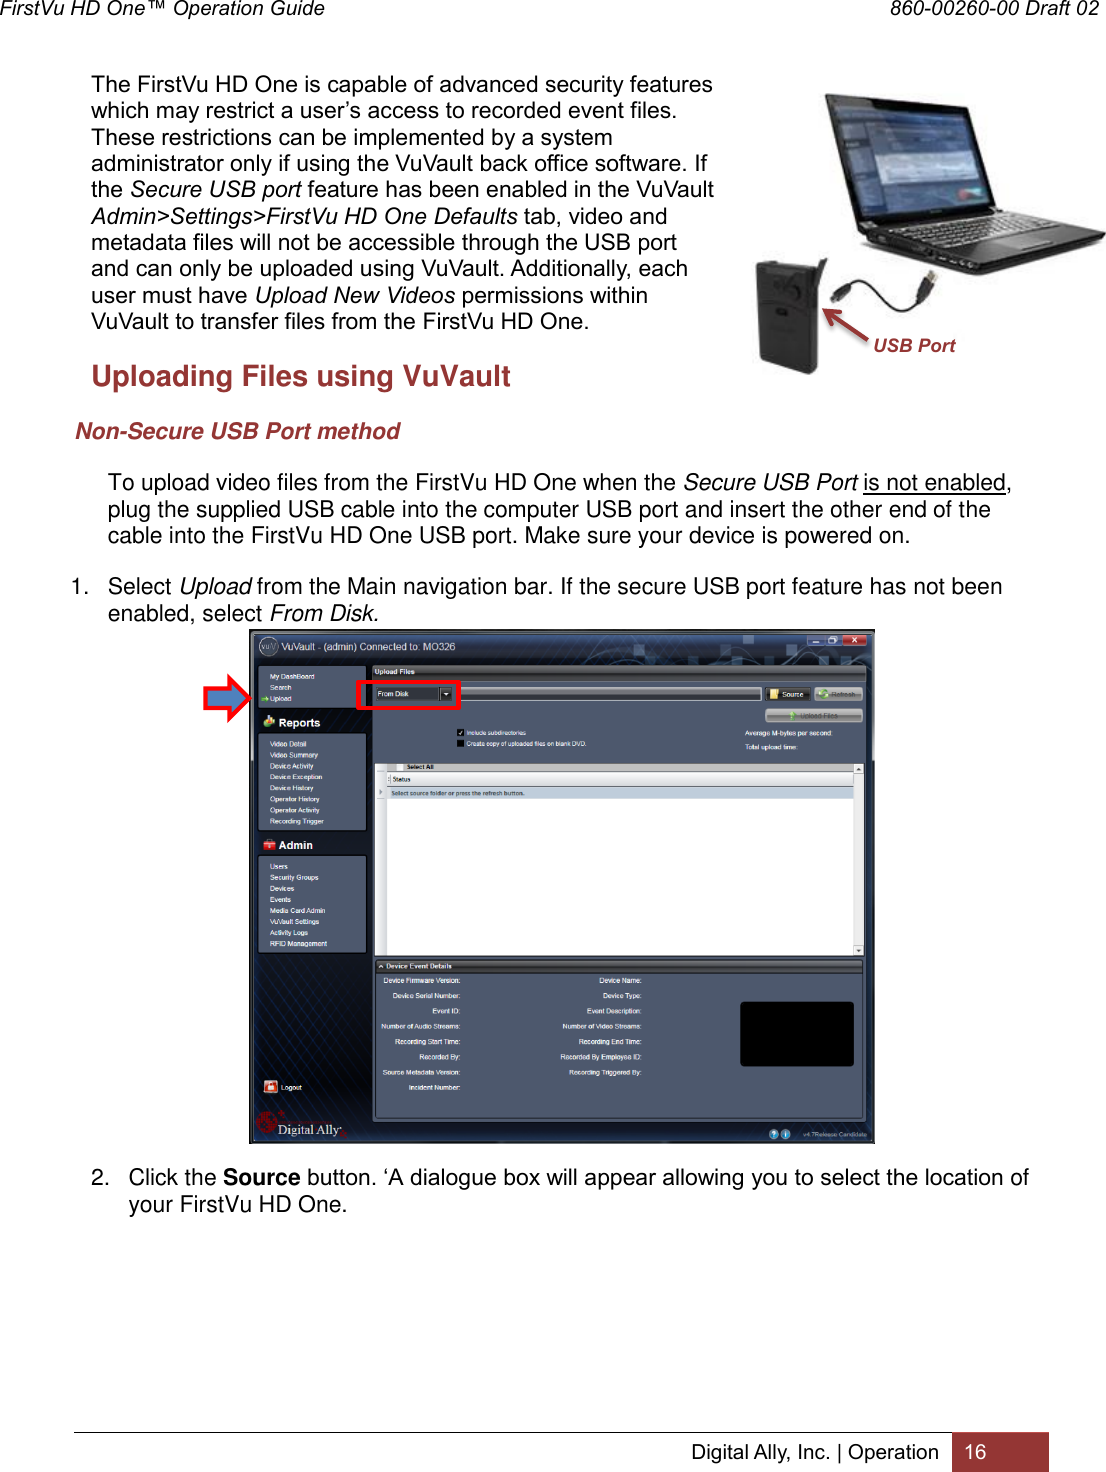
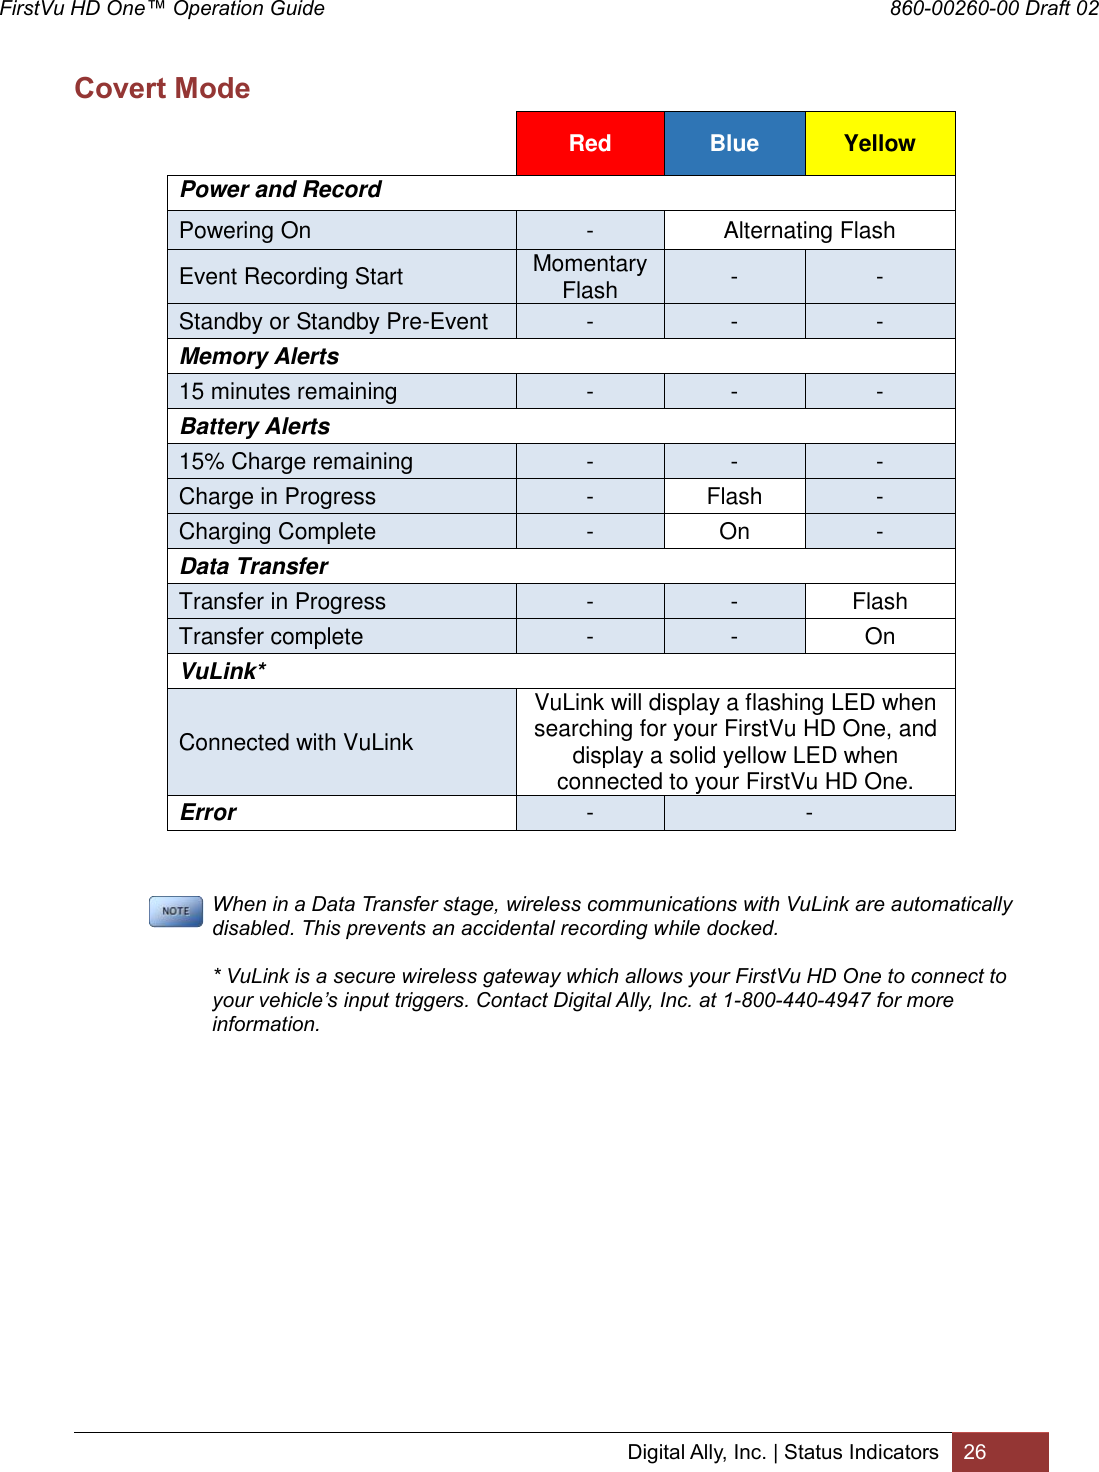
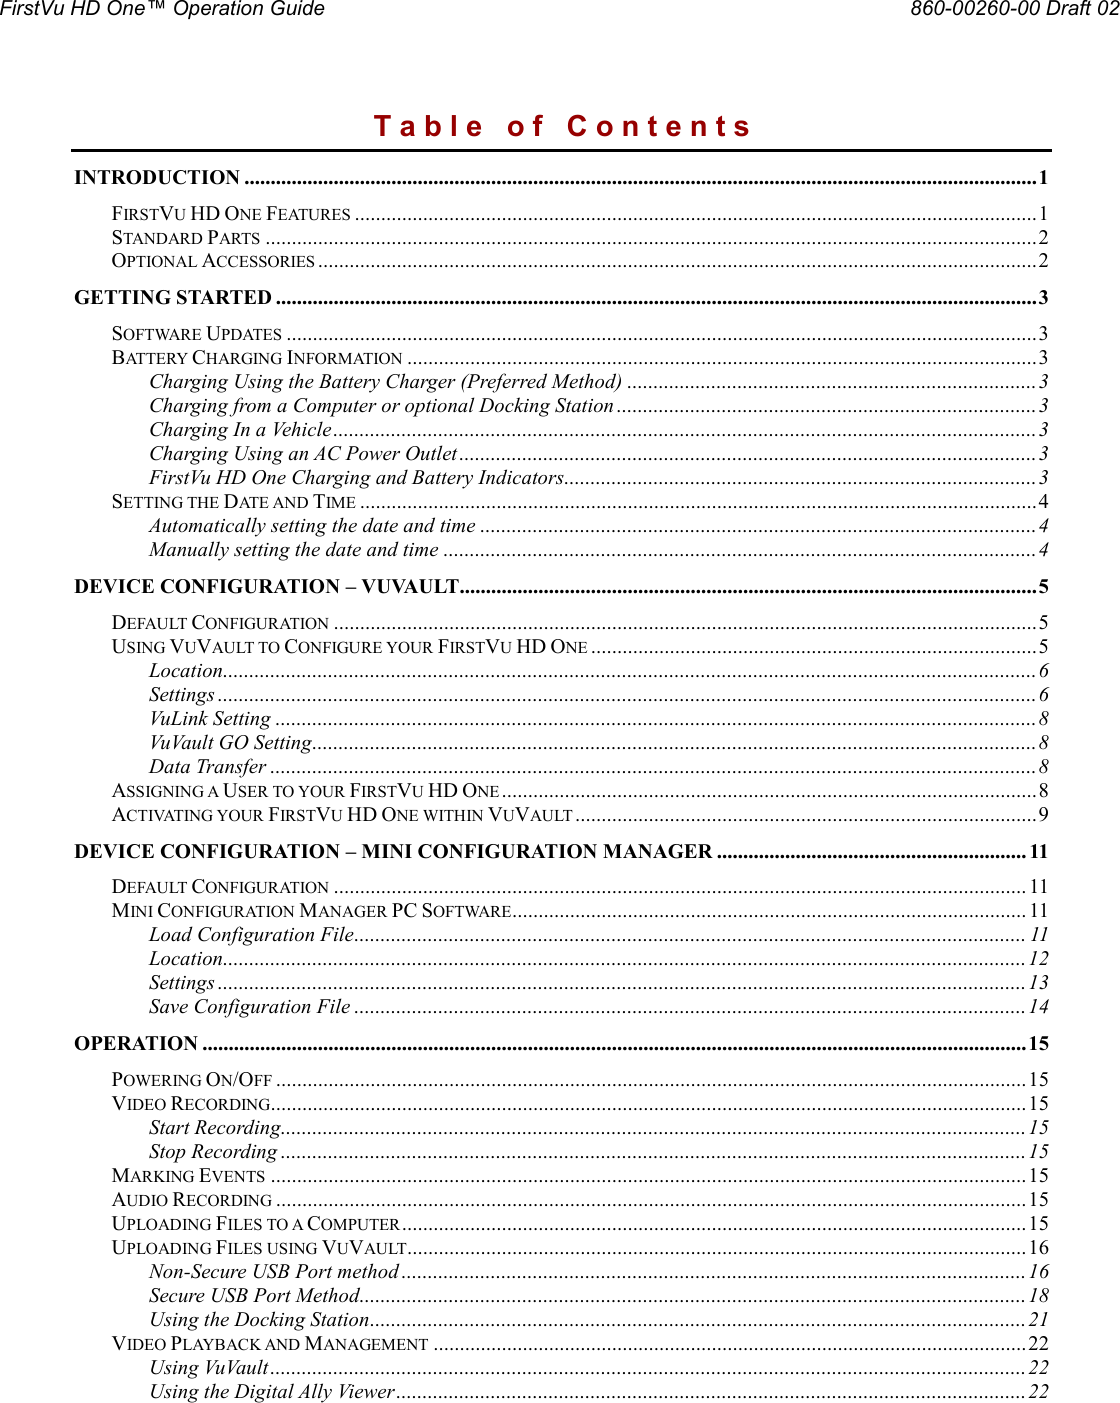
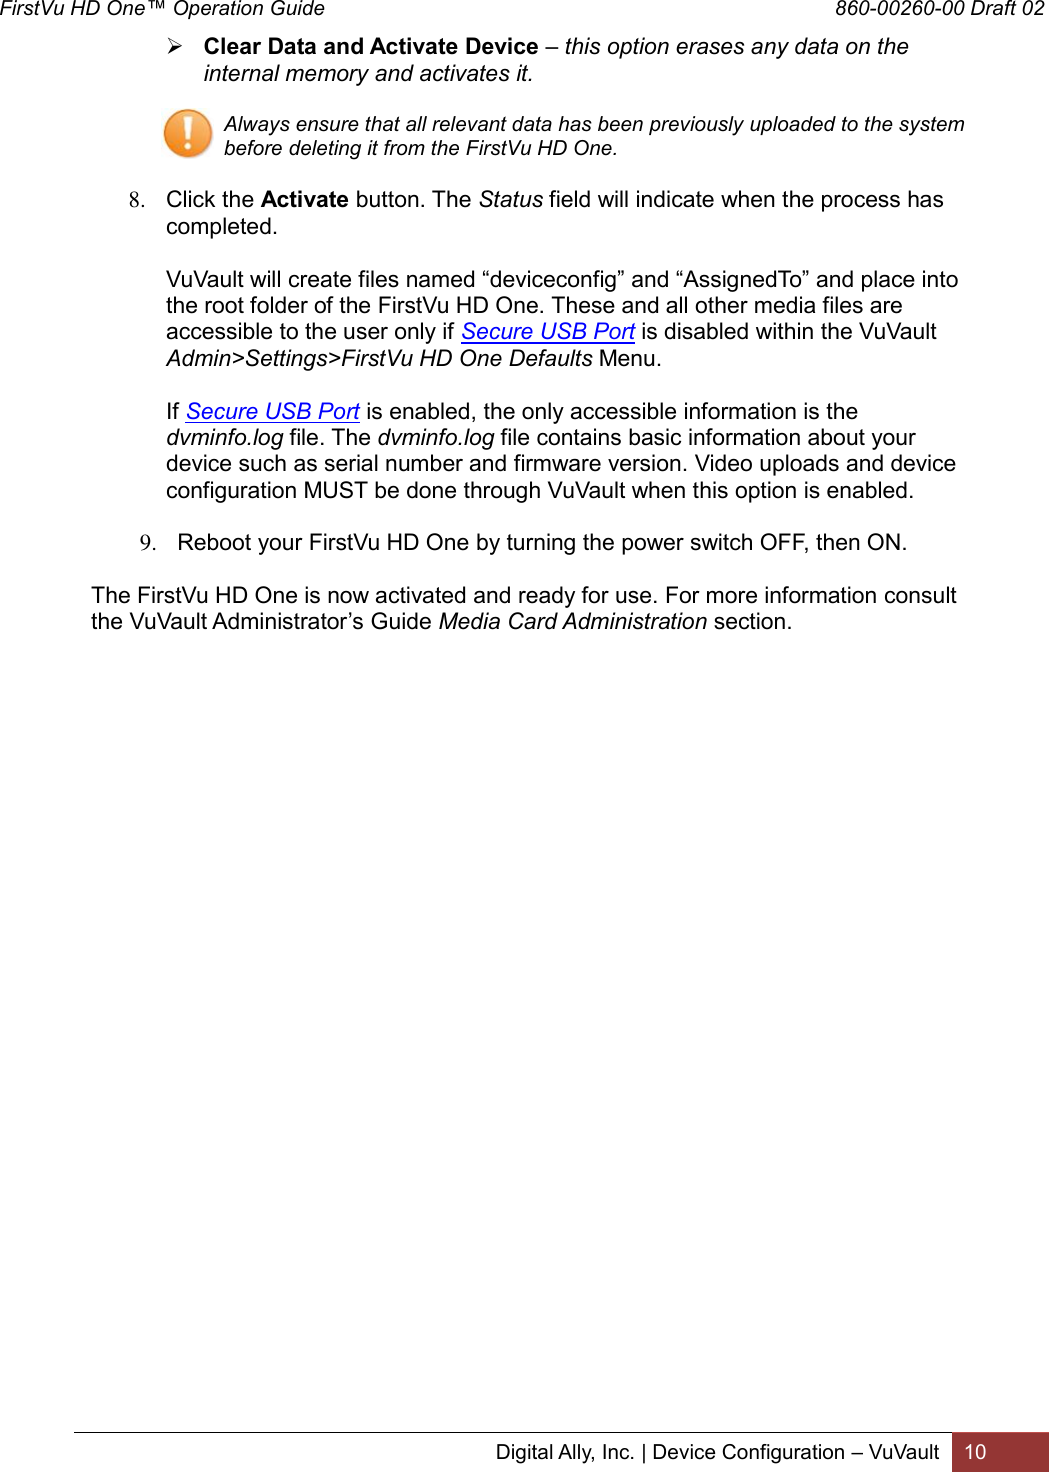
![FirstVu HD One™ Operation Guide 860-00260-00 Draft 02 Digital Ally, Inc. | Device Configuration – VuVault 8 VuLink Setting Set VuLink Assign a VuLink™ device serial number for use with your FirstVu HD One. A Vulink™ wireless link is required (see the “VuLink Operation and Installation Guide”, or call Digital Ally Inc. Technical Support for more information). VuVault GO Setting Set VuVault GO Use this field to enable use of the VuVault GO application. Data Transfer Secure USB Port This parameter determines if the USB port for secure data connections to a PC is enabled or disabled. This feature provides greater security to your recorded evidentiary data. When Secure USB Port is enabled, it is impossible to view, edit, or delete files present on your FirstVu HD One using a normal Windows computer. Video and metadata files can only be accessed when using the upload function within your VuVault stand-alone or networked environment. VuVault creates a proprietary encryption key to restrict access to your FirstVu HD One files when in secure mode. The only user-accessible information when the device is connected to a PC USB port on a normal Windows computer is the dvminfo.log file. The dvminfo.log file contains basic information about your device such as serial number and firmware version. When Secure USB Port is disabled, video and data files will be accessible to any user when the device is plugged into a PC USB port. Event data can then be copied, erased, or uploaded with or without the use of VuVault. Settings: On, Off [default] Once the desired settings have been entered, click and proceed below to activate your device. Assigning a User to your FirstVu HD One Assigning a user to your device is achieved during the VuVault activation process. When a user is assigned to the device, all uploaded video events will appear on his or her My Dashboard screen upon logging into VuVault. Users may be reassigned each time the FirstVu HD One is activated.](https://usermanual.wiki/Digital-Ally/FIRSTVU1/User-Guide-3118885-Page-11.png)
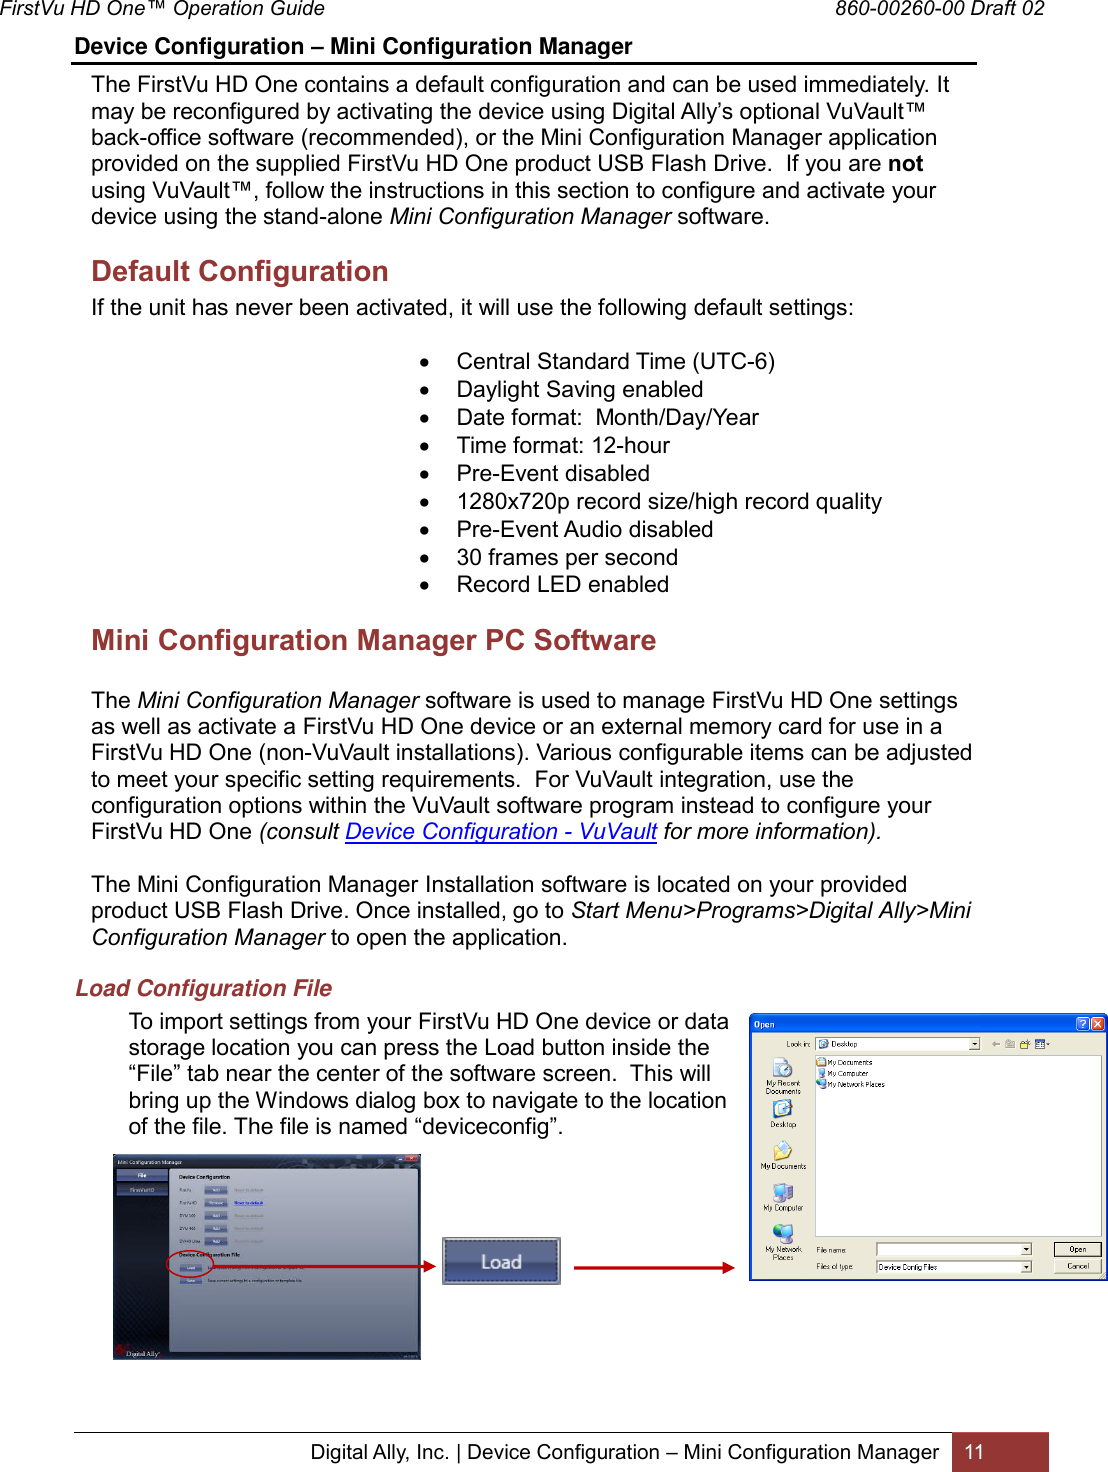
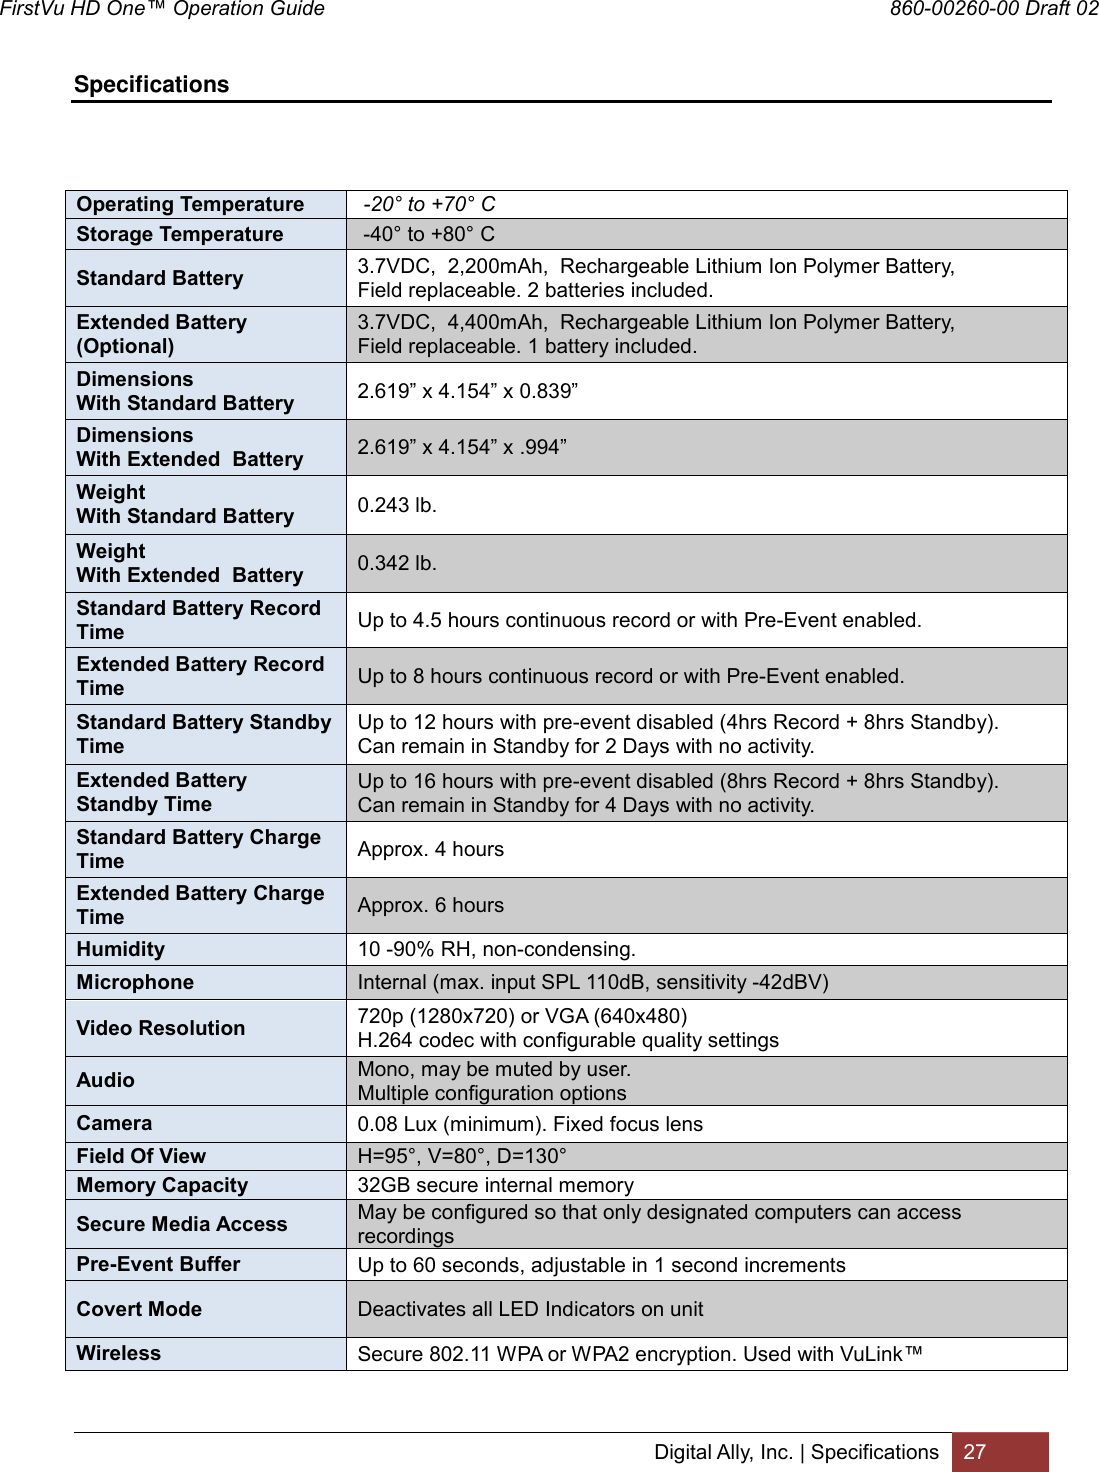
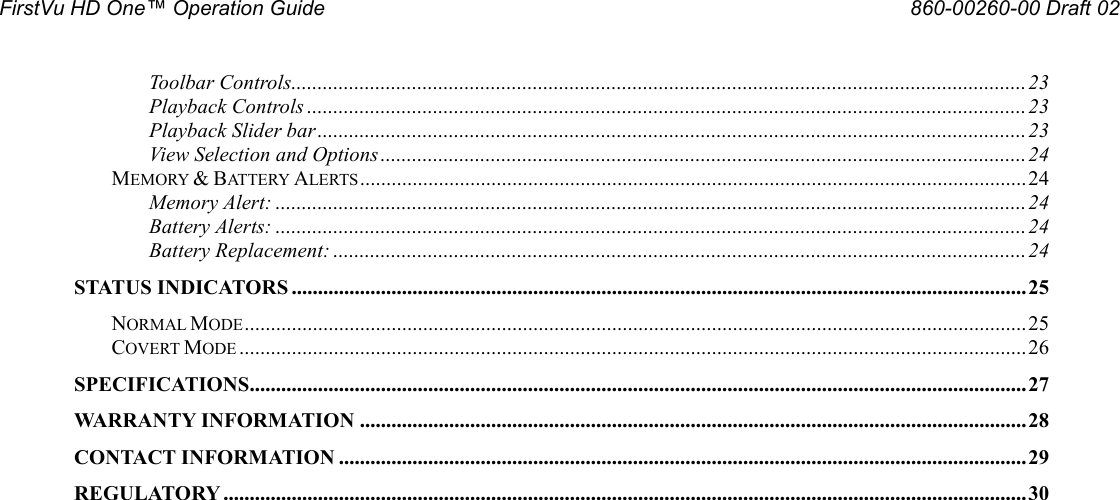
![FirstVu HD One™ Operation Guide 860-00260-00 Draft 02 Digital Ally, Inc. | Device Configuration – Mini Configuration Manager 12 Device Configuration Press the button to create or edit a device configuration. The default device configuration screen will then be available for editing. Use the drop down arrows to make your selections. Location Time Zone The local time zone is used to adjust the device when synchronizing to the Greenwich Mean Time. During device configuration, the local time from the PC real time clock will be used, and Central Standard Time is set by default. Settings: UTC, UTC-6 (CST) [default]](https://usermanual.wiki/Digital-Ally/FIRSTVU1/User-Guide-3118885-Page-15.png)
![FirstVu HD One™ Operation Guide 860-00260-00 Draft 02 Digital Ally, Inc. | Device Configuration – Mini Configuration Manager 13 Daylight Saving When set to On, Daylight Saving setting time will be automatically adjusted for the configured Local Time Zone. If this is disabled, time will not be adjusted for Daylight Saving. Settings: On, Off [default] Date Format The date format displayed on the event recordings is selected through this setting. Settings: mm/dd/yy [default]; yy/mm/dd; dd/mm/yy Time Format This time format allows the device to be configured in a 12-hour format or a 24-hour format. Settings Pre-Event Time The Pre-Event Time option allows you to set the amount of time for the pre-event buffer. The FirstVu HD One will buffer the last 0-60 seconds of audio and video so it can be recorded during a record event. If set for 0 seconds, pre-event function will be disabled. Enabling pre-event will reduce battery life to about 4.5 hours of standby time. Settings: 0-60 seconds [default = 0 seconds] Record Quality The Record Quality parameter allows the video compression bit rate to be adjusted. Digital video is compressed by taking out data that remains constant from each frame, and only storing data that actually changes. This allows videos with still backgrounds to be much smaller than they would be if the background had to be present in every single frame. The bit rate is the amount of bits that can be used in one second of video. The higher the record quality, the higher the bit rate and the size of the event files. The default setting is “high” for excellent video quality, and can be lowered or raised to adjust the bit rate and storage space. Settings: Standard (2Mbps), Medium (4Mbps), High (6Mbps) [default], Super High (12Mbps) Record Size The Record Size parameter allows the video image size to be adjusted from VGA (standard definition) to 720p (high definition). VGA has a picture size of 640x480 pixels, whereas 720p has a picture size of 1280x720 pixels. 720p will provide a larger & more defined video picture, but because of its larger size, will require about 3 times as much storage space as VGA. Also, the shape of the final video frame will be slightly different, with 720p being a wider frame (higher width ratio to height). Settings: VGA (640x480), and 720p (1280x720) [default]](https://usermanual.wiki/Digital-Ally/FIRSTVU1/User-Guide-3118885-Page-16.png)
![FirstVu HD One™ Operation Guide 860-00260-00 Draft 02 Digital Ally, Inc. | Device Configuration – Mini Configuration Manager 14 Audio Mode The audio mode determines how audio will be recorded to your device. If enabled, audio information is recorded during the recorded event and during the configured pre-event time. If enabled (w/o Pre-event), audio will be recorded during the event but not recorded during pre-event. If this option is disabled, no audio will be recorded. If the Pre-Event Time is set for 0, there cannot be pre-event audio. Frames Per Second This parameter sets the number of video frames per second the FirstVu HD One will record. The higher the setting, the better the video quality, and the larger the size of the event files. Settings: 5, 10, 15, 30fps [default = 30fps] Record LED The Red Record LED behavior on the camera can be configured to accommodate your desired operation. If enabled, the red LED will illuminate while the FirstVu HD One is recording. If disabled, the LED will not illuminate during a recorded event and will operate in covert mode. Settings: Disabled, Enabled [default] When done, go to the tab and save your configuration file to a location on your computer. Save Configuration File To save the configured settings to your FirstVu HD One or a data storage location, you can press the Save button near the center of the Mini Device Configuration software screen. This will bring up the Browse for Folder dialog box to select the location to save the file. After the configuration file has been transferred to your FirstVu HD One, reboot the device by turning the power OFF then ON. After the configuration file is copied, reboot your FirstVu HD One. It is now configured & ready for use. If you have also configured a VuLink device using the Mini-Configuration Manager, the necessary information to communicate with VuLink is also contained within the configuration file. For more information about VuLink, consult the “VuLink Installation and User Guide”.](https://usermanual.wiki/Digital-Ally/FIRSTVU1/User-Guide-3118885-Page-17.png)