Digital Cynos DCM-26WT 26" LCD TV User Manual 26WT HY EN
Digital Cynos Co., Ltd. 26" LCD TV 26WT HY EN
UserManual.wiki
>
Digital Cynos
>
DCM 26WT User Manual
USERS MANUAL
Navigation menu
Upload a User Manual
Namespaces
Wiki Guide
HTML
PDF
Info
Views
User Manual
Discussion / Help
Navigation
![Watching TV in a still image for an excessive time may seriously harm the LCD panel. Note that anytroubles from the reckless use are not guaranteed and please be cautious of the use.1. Digital broadcast is delivered in wide screenstandard (16:9) DTV, so if the existingbroadcasting program made in general screensize (4:3) is on the TV, both sides may not becompletely displayed. Any different brightness, in case limits to left/rightsides are fixed, may leave image ghost of thelimits on the LCD penal, if you watch it for a longtime. 2. When you watch panorama broadcasting in ageneral display, it may show the central imagewith up/down parts removed. Any different brightness, in case limits totop/bottom sides are fixed, may leave imageghost of the limits on the LCD penal, if you watchit for a long time.3. Watching the screen in a still image for a longtime may leave image ghost on the LCD panel.Precautions for Image Ghost7ENGLISHOperating Temperature 0~35˚CStorage Temperature -10~50˚COperating Humidity 10~90% RHStorage Humidity 10~90% RHFor dot defect [dead pixel] of LCD ;TFT-LCD produced by using high-end semiconductor technology with precision of 99.9% above isused for this TV (2,949,120 pixels). However the pixels of R.G.B. & White color seem to be right sometimes or some of black pixelscould be seen on the LCD. This is not from bad quality or functional problem and you can use itwithout any problem.Precautions when used as a PC monitor ;Since the LCD TV is not designed for a PC monitor, it may not support very high resolutions thatare supported in a PC. When you use it for the purpose, refer to the supportable resolution levelsas follows. When used as a PC monitor ;Optimal Resolution: 1024 768 @ 60Hz Max. Resolution: 1024 768 @ 85Hz.Available Temperature & HumidityEN 6 26” WIDE TFT-LCD TV](https://usermanual.wiki/Digital-Cynos/DCM-26WT/User-Guide-477612-Page-4.png)
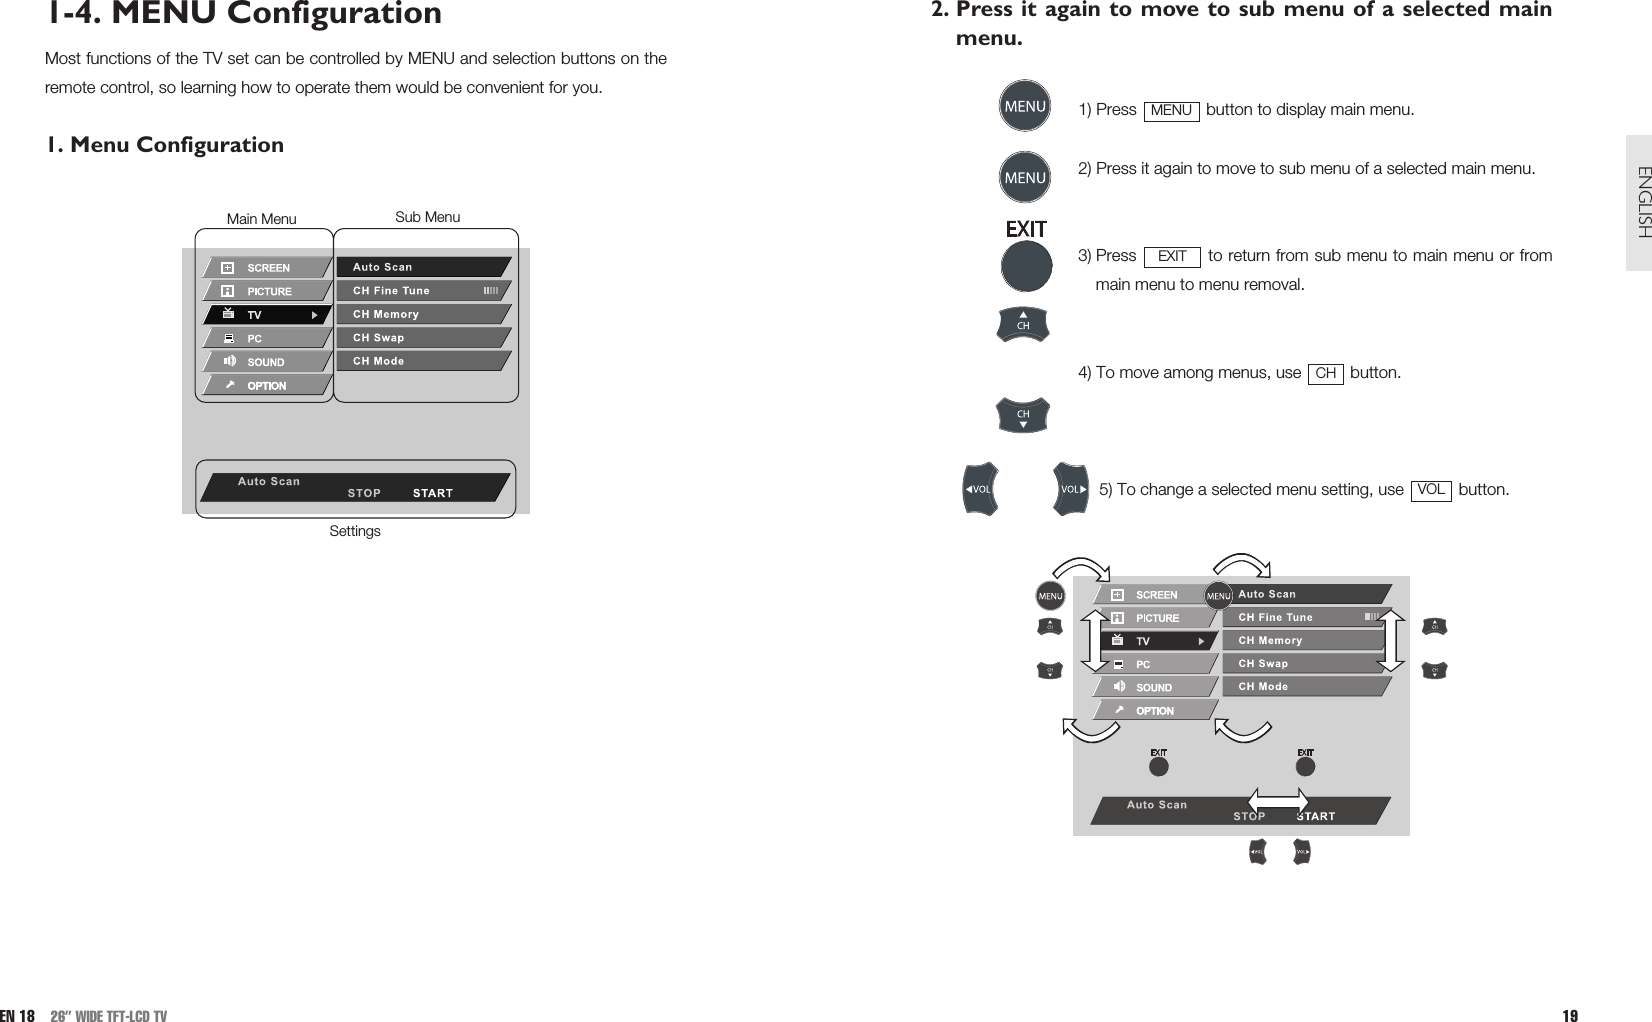

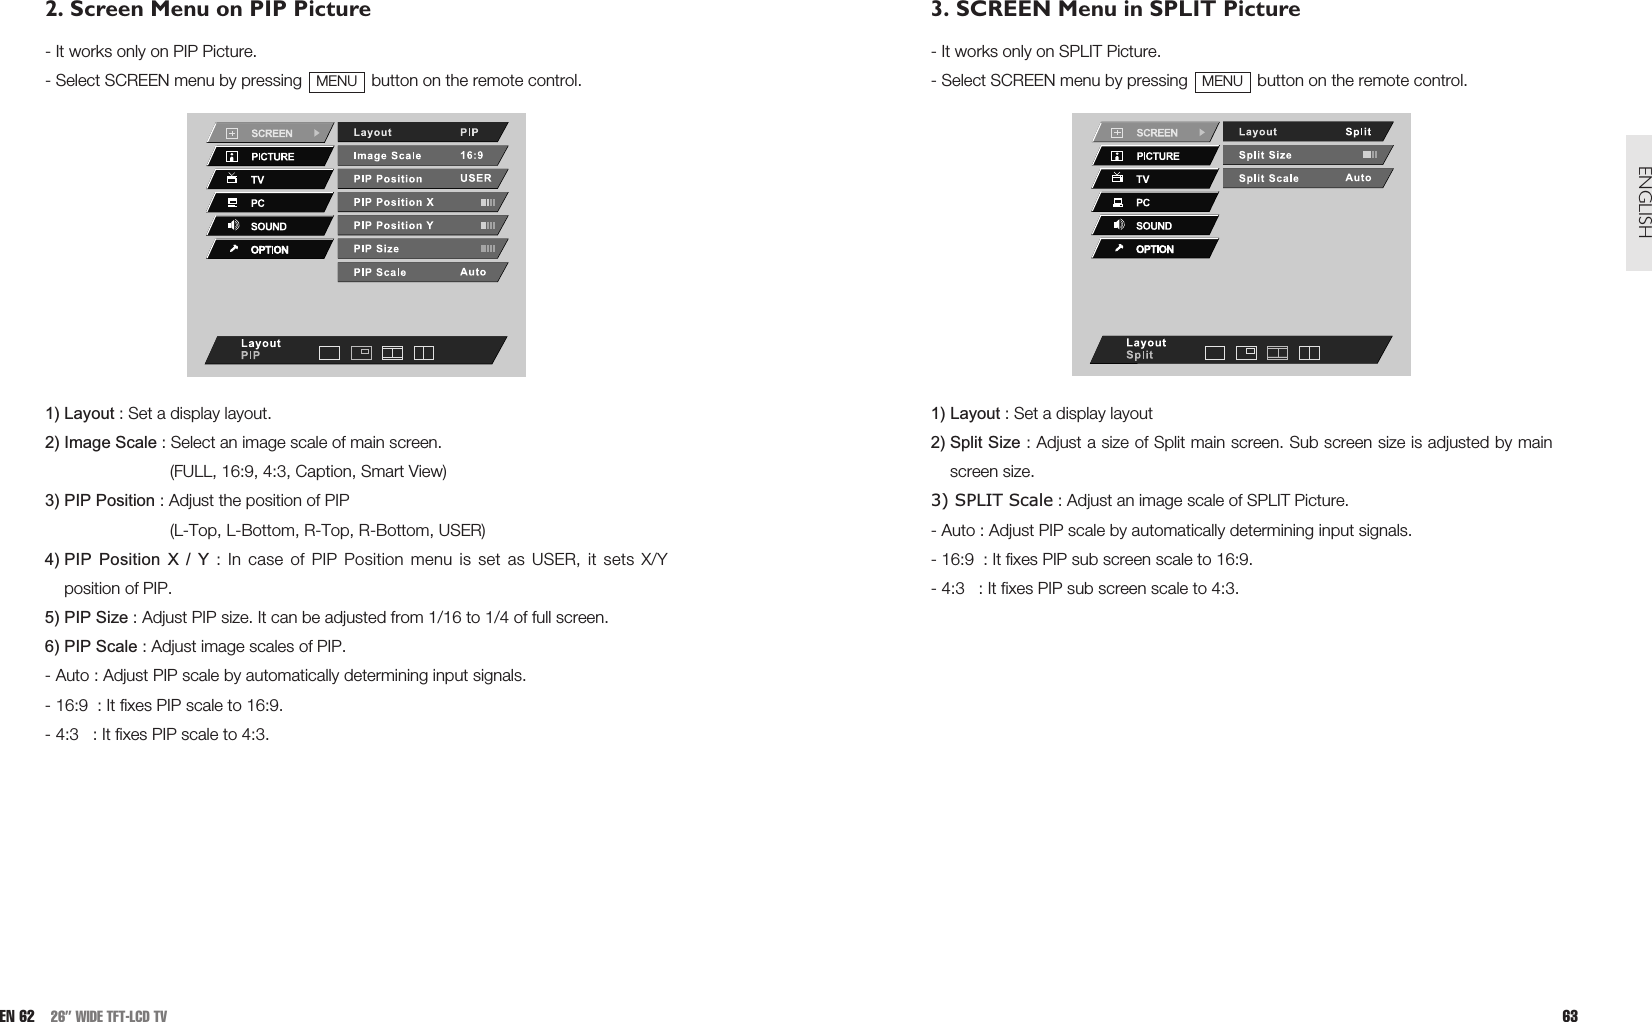
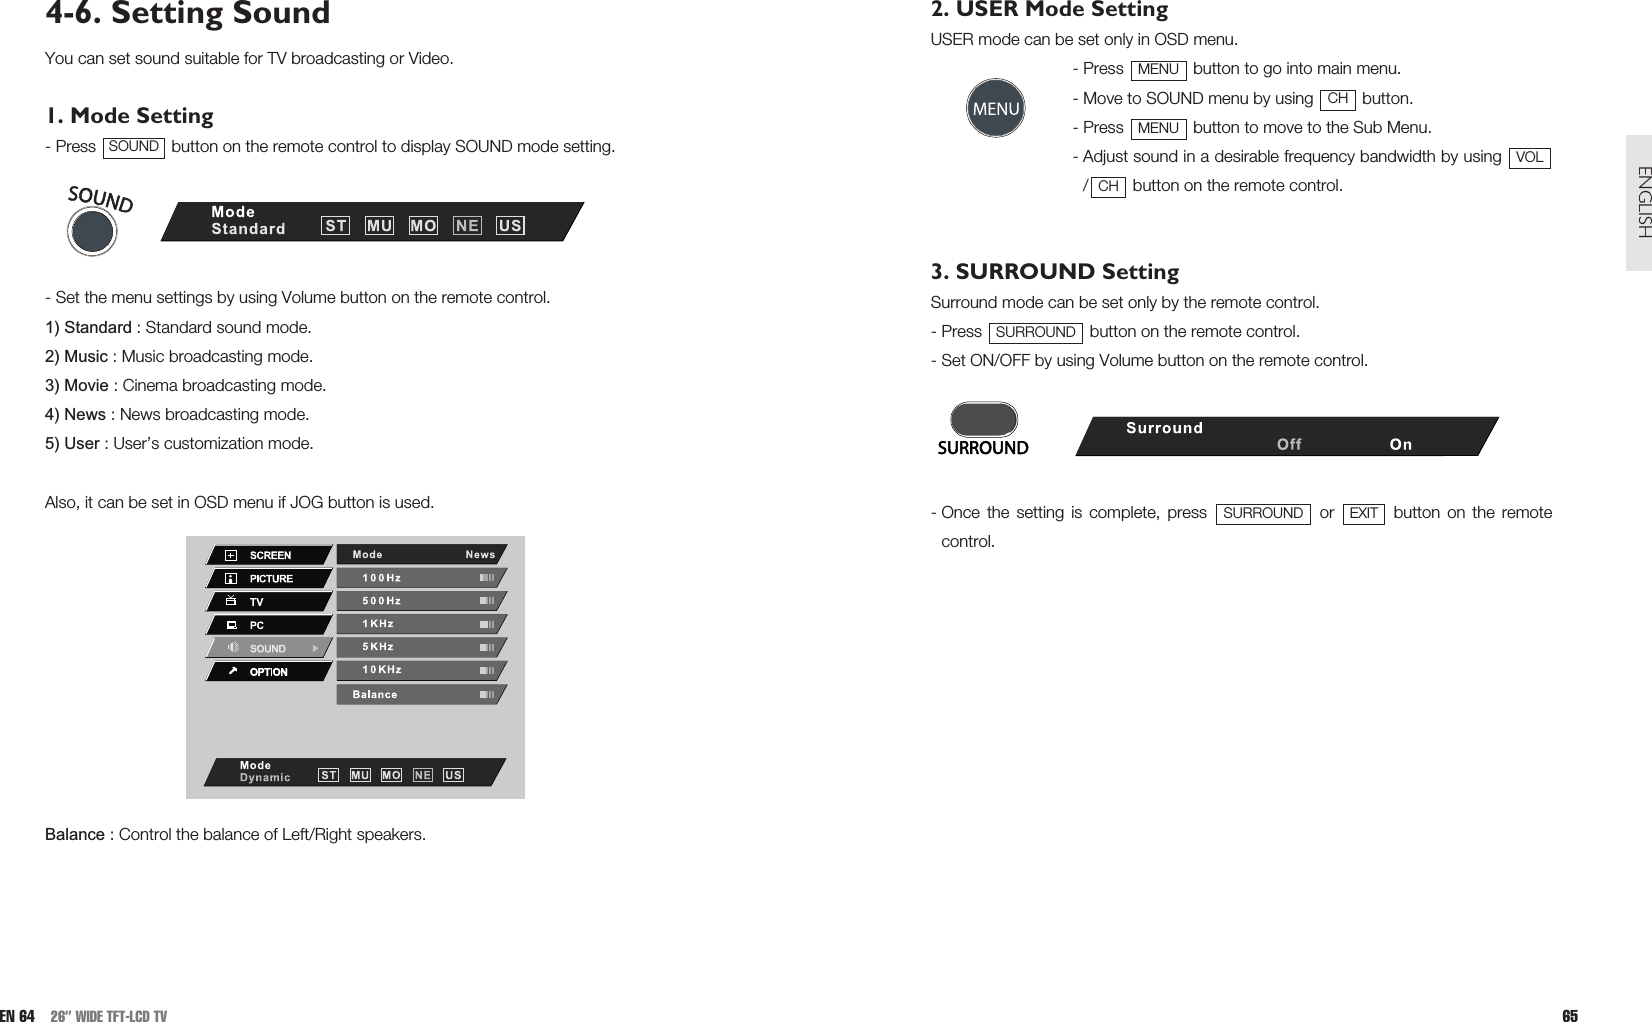
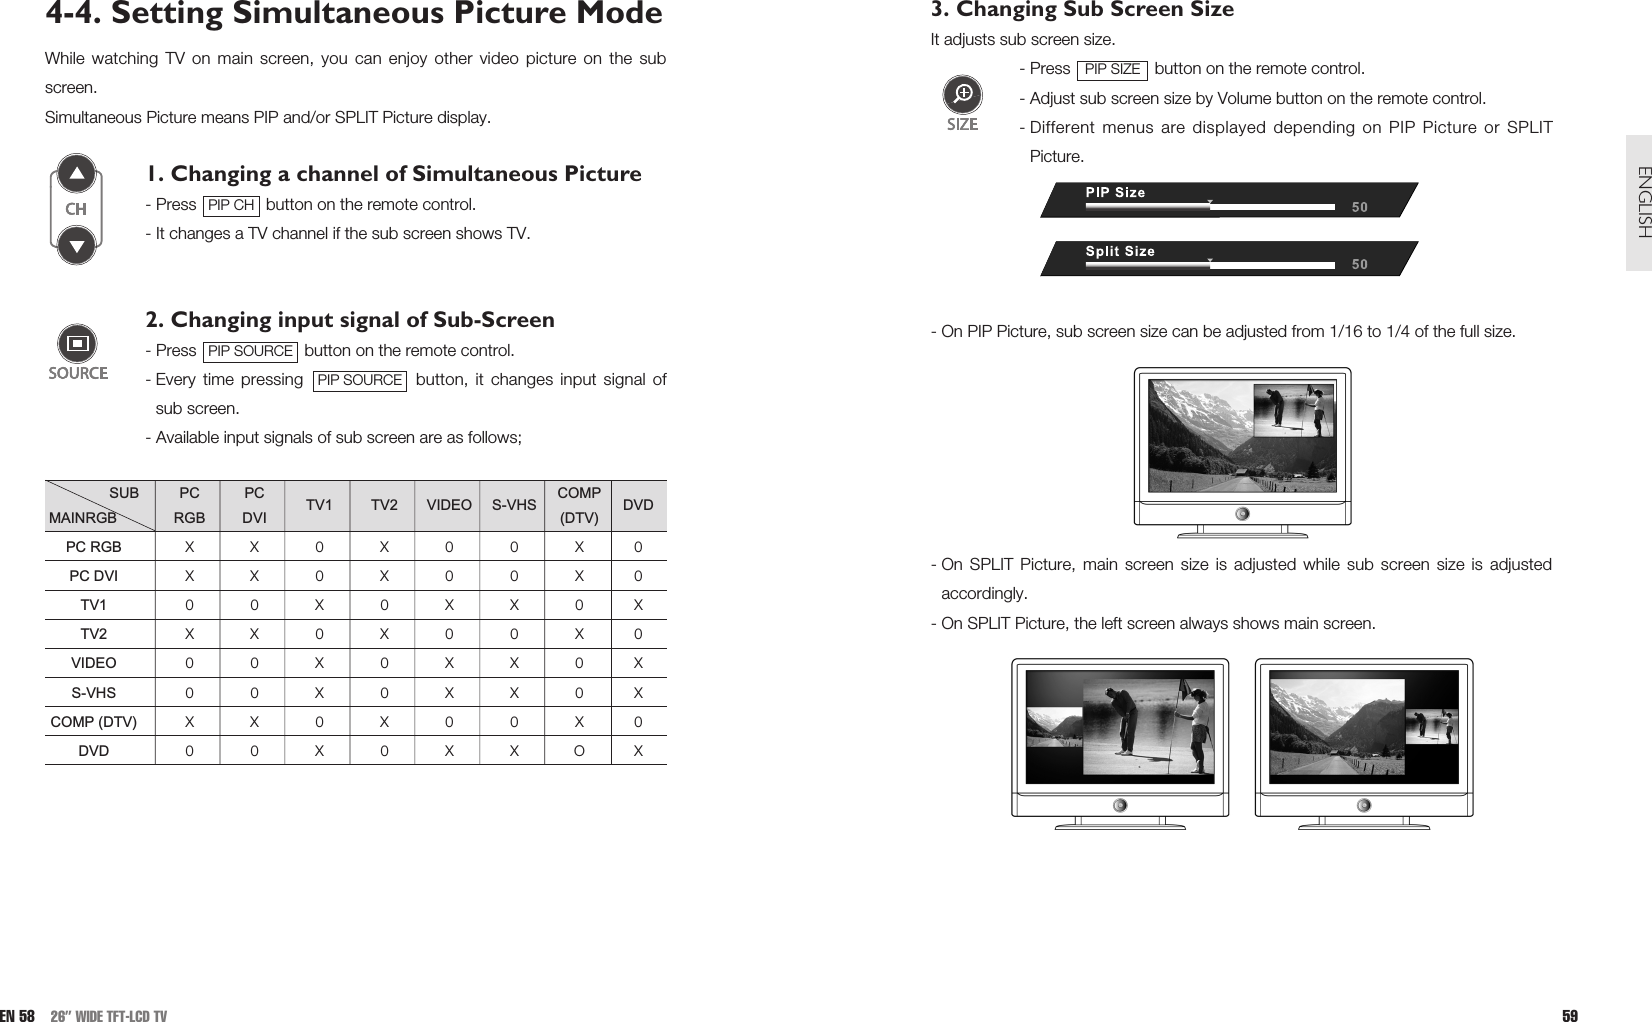
![4) SPLIT FULL : Repressing button in Split display, shows main screen andsub screen in split full screen.5) TV SCAN : Show 16 channels searched and stored in the TV set in 16 pictures inorder on the screen. At the moment, can be operated only by the remotecontrol.- Also, it can be set in OSD menu if JOG button is used.- OSD Menu is different depending on Display Type [Screen Layout].TV SCANSPLIT53ENGLISH4-1. Setting Display ModeYou may view other video screen while watching TV.- Press , , or button.1) NORMAL : Show a selected main screen in full size.2) PIP : Show main screen and sub screen in full size and smallsize together.3) SPLIT : Show main screen and sub screen by horizontallyshared. You can control Main screen’s (left side screen) sizeand Sub screen’s size is controlled inverse ratio of main screen.TV SCANSPLITPIPNORMALEN 52 26” WIDE TFT-LCD TV](https://usermanual.wiki/Digital-Cynos/DCM-26WT/User-Guide-477612-Page-27.png)
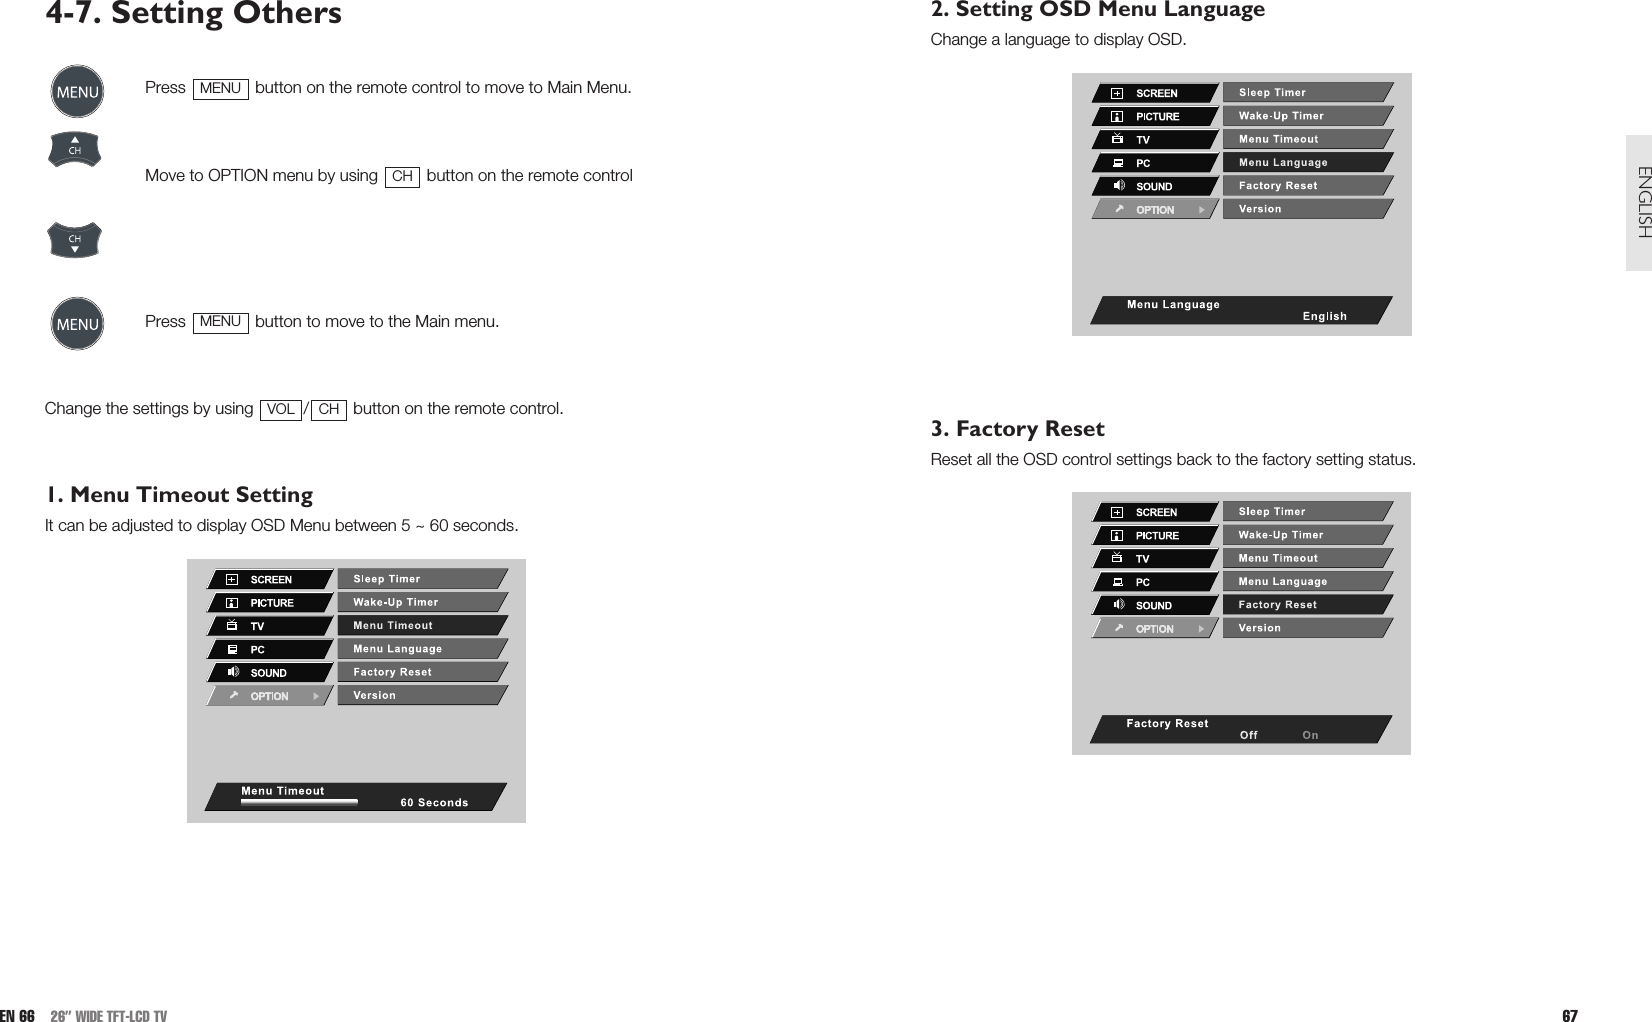
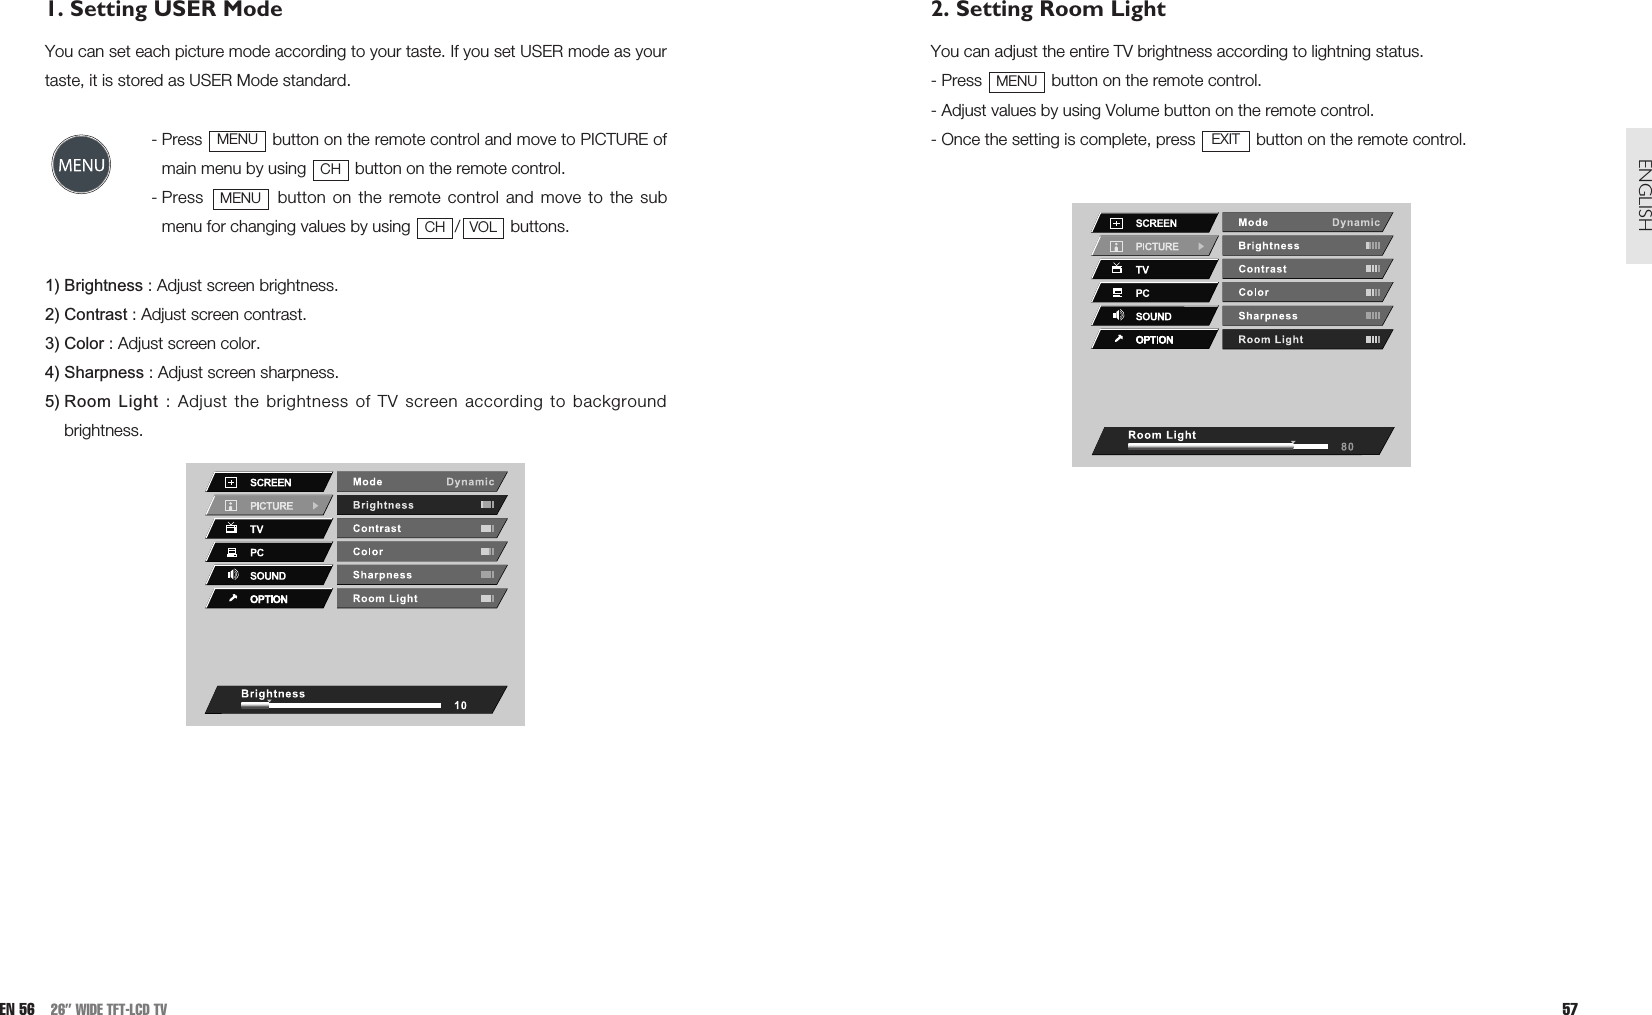
![4-3. Setting Picture ModeBy setting a picture mode suitable for broadcasting/video signals, you may enjoybetter quality picture. - Press button on the remote control. - Set a picture mode by using Volume button on the remote control. 1) Standard : Standard picture mode.2) Soft : It displays a picture softly as a whole and is better for watching a film or TVseries.3) Dynamic : The mode is suitable for watching sports, which changes pictures fast.4) User : It is a picture mode customized by a user. - Also, it can be set in OSD menu if JOG button is used.PICTURE55ENGLISH4-2. Setting Scale ModeYou can set the screen’s suitable image scale of TV or Video input signals and viewthem accordingly. - Press button on the remote control.- Control the scale in desirable size by using button on the remote control.1) FULL : Show a screen in the full LCD Penal.2) 16:9 : Show a screen in 16:9 wide screen size.3) 4:3 : Show a screen in 4:3 screen size for general broadcasting.4) CAPTION : Show a screen suitable for Caption Broadcasting.5) SMART VIEW : Show a screen in a proportion suitable for grand image. In PIP or SPLIT screen, it can be set in types of AUTO, 16:9, 4:3. For moreinformation, see to 4-4 Setting Simultaneous Picture Mode.- Once the setting is complete, press button or button on theremote control. - Also, it can be set in OSD menu if JOG button is used.- OSD Menu is different depending on Display Type [Screen Layout].EXITPICTUREVOLSCALEEN 54 26” WIDE TFT-LCD TV](https://usermanual.wiki/Digital-Cynos/DCM-26WT/User-Guide-477612-Page-28.png)
![4-5. Setting Screen MENU bySimultaneous Picture Depending on Layout in OSD Menu, sub menus of SCREEN are changed.1. SCREEN MENU in NORMAL Picture - It works only in NORMAL Picture.- Select SCREEN menu by pressing button on the remote control (MENU MENU).1) Layout : Set Picture mode [Display Mode].2) Image Scale : Select an image scale(FULL, 16:9, 4:3, Caption, Smart View)- Once the setting is complete, press button to exit it.EXITMENU61ENGLISH4. Changing Sub Screen PositionAdjust a sub screen’s position on PIP Picture.- Press button on the remote control.- Move PIP picture to a desirable position by using / buttonon the remote control.- The position is set as USER setting of OSD menu.- Once the setting is complete, press or button onthe remote control.5. Switching Main/Sub ScreenIt switches main/sub screens.In case of switching main/sub screens, audio is changed accordingly. The left screen always shows main screen. 6. Switching Audio of Main/Sub ScreenIt switches audio of main/sub screen.In case of switching audio of main/sub screen, it switches audio only,not screens. EXITPIP POSITIONVOLCHPIP POSITIONEN 60 26” WIDE TFT-LCD TV](https://usermanual.wiki/Digital-Cynos/DCM-26WT/User-Guide-477612-Page-31.png)