Digital Device DIR-908S Digital Voice Recorder User Manual
Digital Device Inc. Digital Voice Recorder
User Manual

Rev. 1.0
DIGITAL VOICE RECORDER
Recording time
Model SP LP
(Standard Play Mode) (Long Play Mode)
DIR-908S 240min 540min

Key Features
* LCD Display : shows the status of voice recorder
* Long recording time : LP Mode /Max 540min
* 99 messages per folder (Max 396 messages)
* Automatically turns off when not in use
* Recording mode selection : SP/ LP
* Checks the available recording time left
* VOX : When there is no sound input for 5 minutes during recording ,voice recorder automatically turns to stand-by mode
* External input /output jack : provides interactive recording between voice recorder and other equipment
such as computer and audio
* Auto play search : playback all messages for 5 seconds
* Digital volume control : 16 steps sound volume control
* Display sound level during recording and playback .
-1-
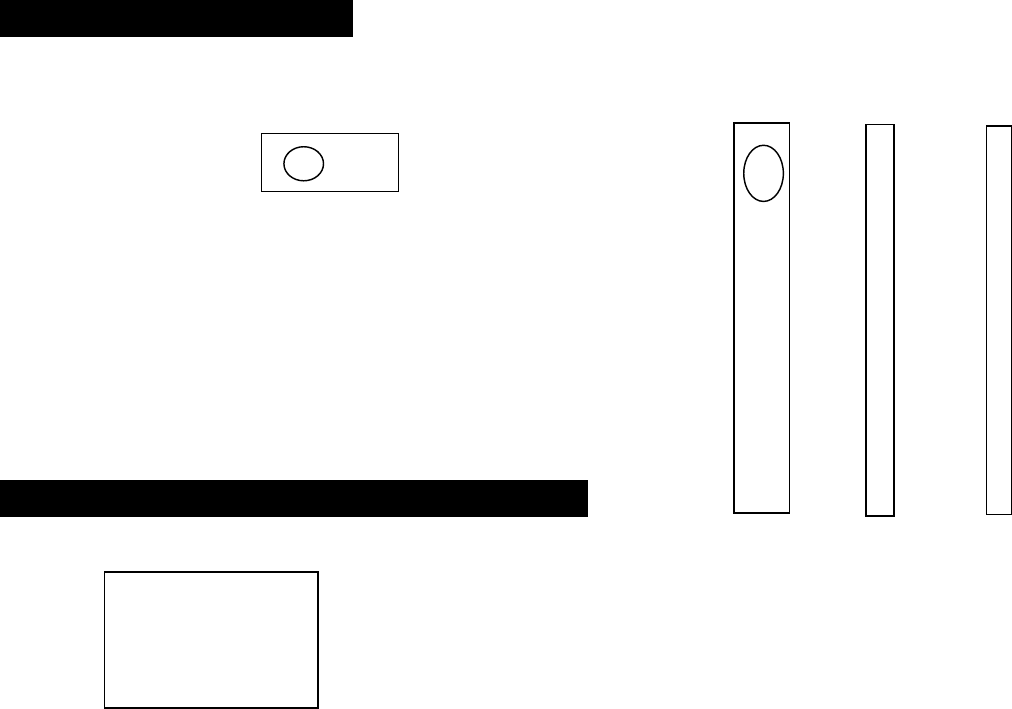
Parts Identification
* TOP *Front *Left *Right
LCD(Liquid Crystal Display) Description
-2-
LCD •.
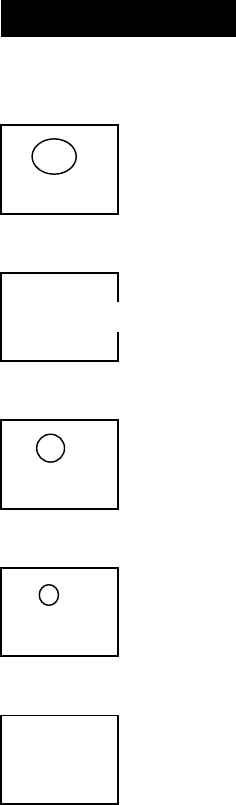
Functions
Play/Stop button : When play ,record /stop playback ,record / playback
PLAY
<< >> << >> : When REW /FF during playback
REW FF
REC : Recording start /stop
REC
Mode button :When institute mode
MODE
• • • : Volume UP/DOWN -3-
•
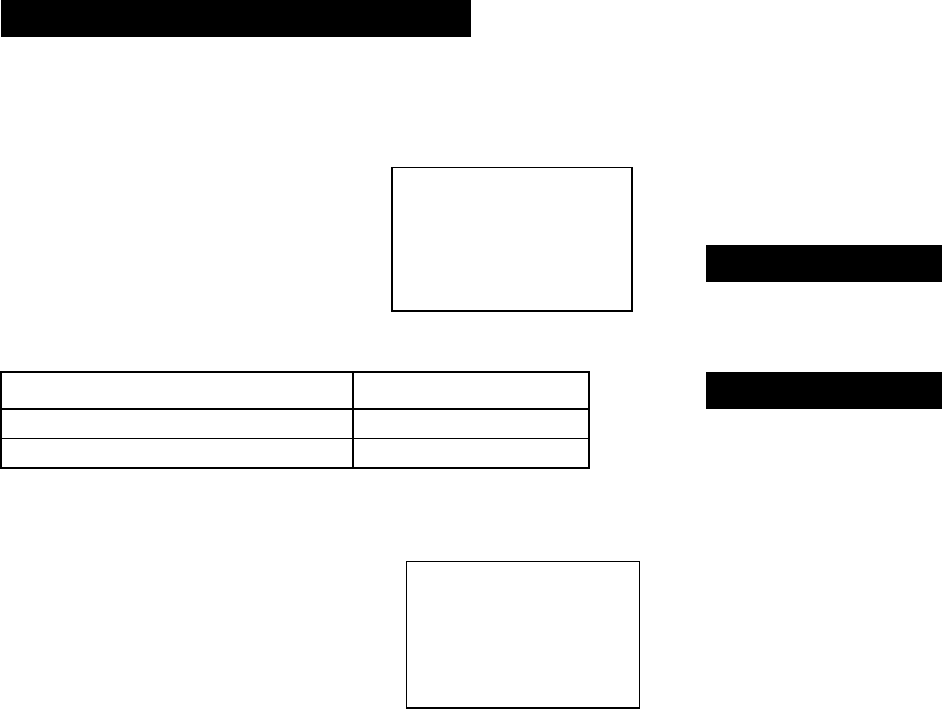
Installing /Replacing batteries
Be sure to replace batteries in stop mode
1. To open the battery cover , press •
and then slide it off.
Insert two AAA(LR03) batteries
according to the polarity indication
and then slide the cover back into For power on
place. *Press Play button
Battery Life Time
Available Time LR03 alkaline batteries For power off
Recording Approximately 10hr. * Voice recorder automatically turns off if no button is
Speaker playback(VOL:5) Approximately 8hr. pressed .
* Press MODE button once and then PLAY button
to Power off by manual.
2. To check the remaining battery power ,
press the PLAY button or REC button
-4-
Battery Cover
picture
Battery •• ••

Recording
Recording by a built-in microphone
1 .Press the PLAY button to power on Voice recorder
2. If press the REC button ,the red Led indicator turns on and recording starts.
When recording starts ,Recording number ,volume level ,time are displayed on LCD.
3. To stop recording ,press REC button .
4. Voice recorder turns off automatically ,if there is no other key input within 1 minute
after stop recording.
5. If recording time exceed the maximum time or messages goes over 99messages per folder,
recording doesn't go on.
Recording by a external microphone
Connect external microphone to line-in jack and follow the same procedure of above built-in microphone recording.
Increasing the recording number during recording
If FF button is pressed during the recording , the recording number will be increased one by one from
current number. The recording number do not exceed 99 .
- 5 -
Pause function
Press MODE button during recording .To restart the recording press MODE button again.
•• ••••
•• STOP ••

Playback
Playback
1.Press PLAY button to power on Voice recorder
2. Press PLAY button once again to playback .When Playback starts ,
recording number ,volume level and playback time are displayed on LCD.
3. To stop Playback press PLAY button .
4. If there is no key input within 1 minute after stop Playback ,voice recorder will turn off automatically.
Volume adjustment
1.You can adjust volume level by UP /DOWN button in stand-by mode.
2. During Playback you can adjust volume level by UP/DOWN buttons.
Fast Forward and Rewind During Playback
If you press the FF/ REW button shortly during playback ,message will be fast forwarded or reversed 5 seconds.
If you press the FF/ REW button long enough ,message will be fast forwarded or reversed in proportion to
the pressing time of button.
Searching the Recording Number
If you press FF/REW button shortly in stand-by mode ,the recording number will be increased or decreased one by one
If you press FF/REW button long enough ,the recording number will be increased or decreased fast. -6 -
Playback Pause
PLAY ••.
PAUSE ••.

If you press MODE button during playback ,voice recorder enter into playback pause mode..
To restart playback ,press MODE button again.
Auto Scanning Playback
If you press the PLAY button long enough in stand-by mode ,all message will playback
for 5 seconds from the current message.
Loop function
If you press UP button long enough in stand-by mode , current message will playback
over again.
- 7 -
Menu Mode explanation
P USE
••.
SCAN ••.
LOOP ••

* Press MODE button to enter Menu mode.
* You can select folder in Menu mode.
* To exit Menu mode ,press MODE button again.
Folder Selection
1. You can select A,B,C,D folder by UP/DOWN button in Menu mode.
Remaining recording time of selected folder is displayed on LCD.
2. Press FF button for next menu.
Message Selection
1. If press FF button 1 time at Menu mode , message number blinks.
Press UP/DOWN button to select message number.
Recording time of selected message is displayed on LCD.
2. Press FF button for next menu or REW button for returning to previous menu.
- 8 -
Erasing one message
Folder ••• ••.
•• ••• ••

1. Press FF button 2 times in Menu mode .
'Erase' appears and the message number blinks on LCD.
2. Select message number by UP/DOWN button
3. Press PLAY button to erase the selected message.
4. Press FF button for next menu or REW button for returning to previous menu.
Erasing a folder
1. Press FF button 3 times in Menu mode
"Erase" appears and a folder blinks on LCD
2. Select folder by UP/DOWN button
3. Press PLAY button to erase all message of the selected folder
4. Press FF button for next menu or REW button for returning to previous menu.
- 9 -
Erasing all
1 •• ••• ••.
••• ••• ••.

1. Press FF button 4 times in Menu mode.
'ABCD' folder will blink on LCD.
2. Press PLAY button to erase all message of the 4 folders.
3. Press FF button for next menu or REW button for returning to previous menu.
Recording Mode selection
1. Press FF button 5 times in Menu mode.
'SP ' or ' LP' recording mode will blink on LCD.
2. Select SP or LP recording mode by UP/DOWN button.
3. Press FF button for next menu or REW button for returning to previous menu.
- 10 -
VOR(Voice Operating Record) Mode
ABCD •• •••
••
SP/LP •• ••.

1. Press FF button 6 times in Menu mode.
the speaker icon ' ' blinks.
2. You can select ON or OFF of VOR mode pressing
the UP/DOWN button.
3. Press FF button for next menu or REW button for returning to previous menu.
* If no voice input during 5 minutes in VOR ON mode ,automatically change to
stand-by mode.
Hold Mode
1. Press FF button 7 times in Menu mode.
'HOLD' blinks on LCD.
2. You can select ON or OFF of Hold mode pressing UP/DOWN button.
3. Press FF button for next menu or REW button for returning to previous menu.
Play Mode
1. Press FF button 8 times , 'ALL/ONE' appear on LCD.
You can select ALL or ONE pressing UP/DOWN button.
'ALL' mode playback message from current one to the last message of folder. - 11-
' ONE ' mode playback current displayed message.
2. Press REW button for previous menu.
Connecting external equipments
••• ••• ••
HOLD ••• ••
ALL/ONE ••

External Mic. Recording messages from external equipments.
Connect between earphone jack of external equipment(EX.AUDIO,
CD PLAYER) and MIC. Jack of the voice recorder with external cable
like attached figure.
You can record using external microphone to get better
sound quality when the microphone is closer to sound
sources.
*At this time, built-in microphone will not operate .
Earphone
If you want to use earphone , connect the earphone to
earphone jack of voice recorder.
* At this time ,built-in speaker will not operate.
-12 -
Recording messages from Voice recorder to external equipments.
Connect between earphone jack of the voice recorder and MIC jack or external in-put jack of external equipment with cable
External Mic , recorder ••.
AUDIO , CABLE ,Voice Recorder •••.

like attached figure.
Press the PLAY button of the voice recorder and REC button of an external equipment.
* If you need ,adjust the volume of the Voice recorder.
Recording call conversation
Recording from normal phone
1. Connect with external cable ,between the MIC JACK of
Voice recorder and the OUT JACK of the adapter for phone recording.
2. Connect the phone to adapter with 30cm line cord.
- 13 -
3. Connect the telephone line to another jack of the adapter
Precaution
Read the following carefully before using the Voice recorder.
AUDIO , CABLE ,Voice Recorder •••.
Phone and Voice Recorder •••

Operation
1. Do not use or place the product in following conditions
* At a high temperature (above 60• C)
* Inside the car with all windows closed (in summer)
* At a high humid place like bathroom.
* At a dusty place
2. Avoid violent vibration or mechanical shock.
3. Do not drop the product . It could cause damage.
4. Do not apply excessive force to the LCD window . It could cause damage.
5. Magnetic cards like credit cards or subway passcard may not operate normally once it is placed near the speaker.
6. Do not use it while driving a car or working .It may cause accident.
Do not use in airplanes or areas restricting the use of electronic devices.
* Our company exclude all liabilities for any loss or damage from the use of Voice recorder.
* Our company does not take any responsibility for lost messages by reasons of breakdown ,repair ,and others.
- 14 -
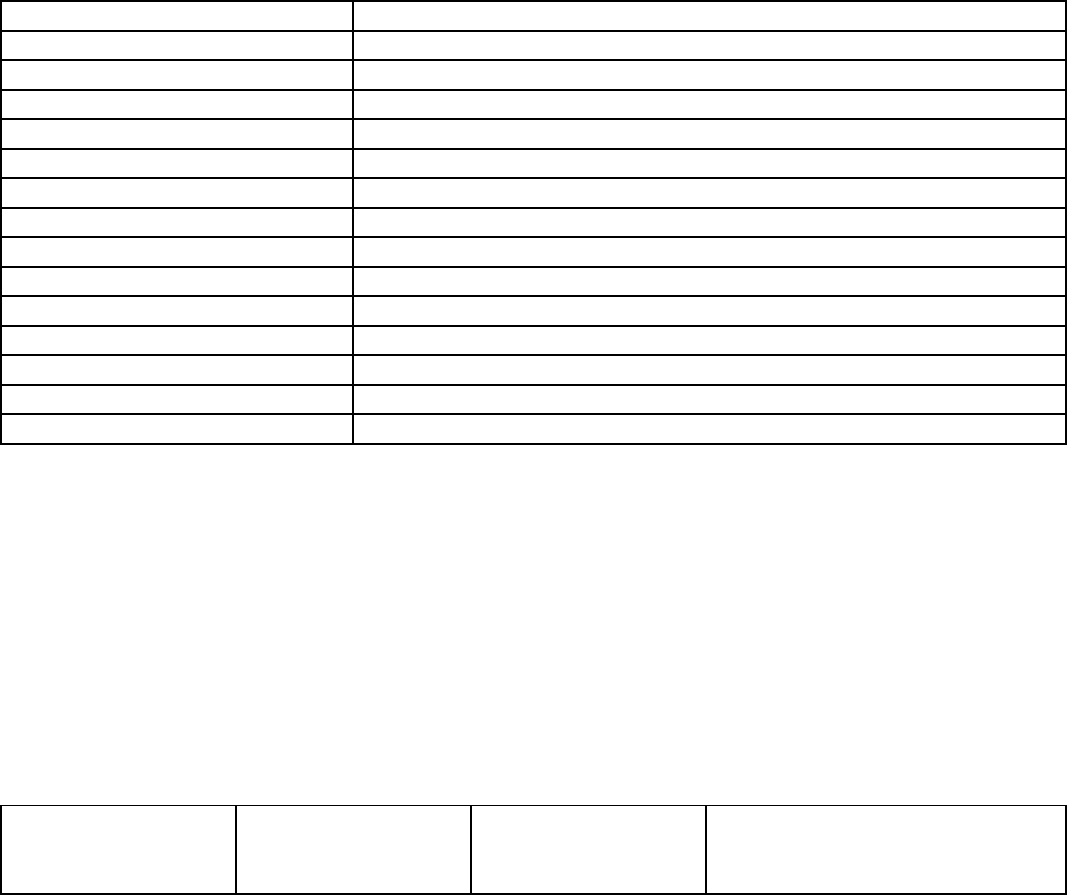
Trouble shooting
If any problem happens check for the following items first
Trouble Check
LCD has no display Have the batteries depleted? *Replace with new batteries
Are the batteries inserted * Match "+" ." - "ends of the batteries with
correctly ? the diagram inside the battery compartment.
Recording does Is the HOLD mode activated? * Release the HOLD mode
not work. Are the 99 messages recorded * Erase unnecessary messages.
already?
Have the batteries depleted ? * Replace with new batteries.
Playback does not Is the HOLD mode activated? *Release the HOLD mode
work No messages recorded in the voice * Check for the recording
recorder? Is any message recorded? number.
Have the batteries depleted ? * Replace with new batteries.
No sound output Is the volume controller set to '0' ? * Adjust the VOLUME controller.
Is the earphone plugged? * Unplug the earphone
-15 -
Specifications
Specifications are subject to change without notice to improve the quality
Model name DIR -908S
Available recording Time SP : 240min / LP : 540 min
Maximum No. of recording 99 messages each folder(Total : 396 messages)
Recording Device Built-in 16MB Flash memory
Microphone Built-in omni directional condenser microphone(mono)
Input Built-in microphone
Output External earphone /built-in speaker
Speaker Built-in speaker (16 Ohm)
Operation Temperature 0• C ~ 40• C
Frequency range 400Hz ~ 3600 Hz
Maximum Output 80mWat ( 16Ohm built-in speaker)
Battery life About 10hr. during recording , About 8hr .during speaker playback.
Power requirements DC 3V ,two "AAA" size alkaline batteries.
Dimensions 25mm * 129* 18mm
Weight 35g(without batteries)
Accessories Earphone ,Battery ,External microphone ,External connecting cable ,Manual
- 16 -
Warranty
Product DIGITAL RECORDER Model DIR- 908S

Assurance period 1 YEAR Item Sales date yy mm dd
Customer tel
sincerely
Sales agency tel
sincerely
FCC NOTICE
NOTE: This equipment has been tested and found to comply with
the limits for a Class B digital device, pursuant to Part 15 of -17 -
the FCC Rules. These limits are designed to provide reasonable
protection against harmful interference in a residential instal-
lation. This equipment generates, uses and can radiate radio
frequency energy and, if not installed and used in accordance
with the instructions, may cause harmful interference to radio
communications. However, there is no guarantee that interference
will not occur in a particular installation. If this equipment
does cause harmful interference to radio or television reception,
which can be determined by turning the equipment off and on, the
user is encouraged to try to correct the interference by one or
more of the following measures:
-Reorient or relocate the receiving antenna.
-Increase the separation between the equipment and receiver.
-Connect the equipment into an outlet on a circuit different from
that to which the receiver is connected.
-Consult the dealer or an experienced radio/TV technician for
help.
NOTE: The manufacturer is not responsible for any radio or TV
interference caused by unauthorized modifications to this equip-
ment. Such modifications could void the user's authority to
operate the equipment.