Displaydata 120-0039-05 Networking Device User Manual 601 0009 01
ZBD Displays Ltd Networking Device 601 0009 01
UserManual.wiki
>
Displaydata
>
120-0039-05 User Manual
>
Manual 2 Installation
Contents
1.
Manual 1
2.
Manual 2 Installation
Manual 2 Installation
Navigation menu
Upload a User Manual
Namespaces
Wiki Guide
HTML
PDF
Info
Views
User Manual
Discussion / Help
Navigation
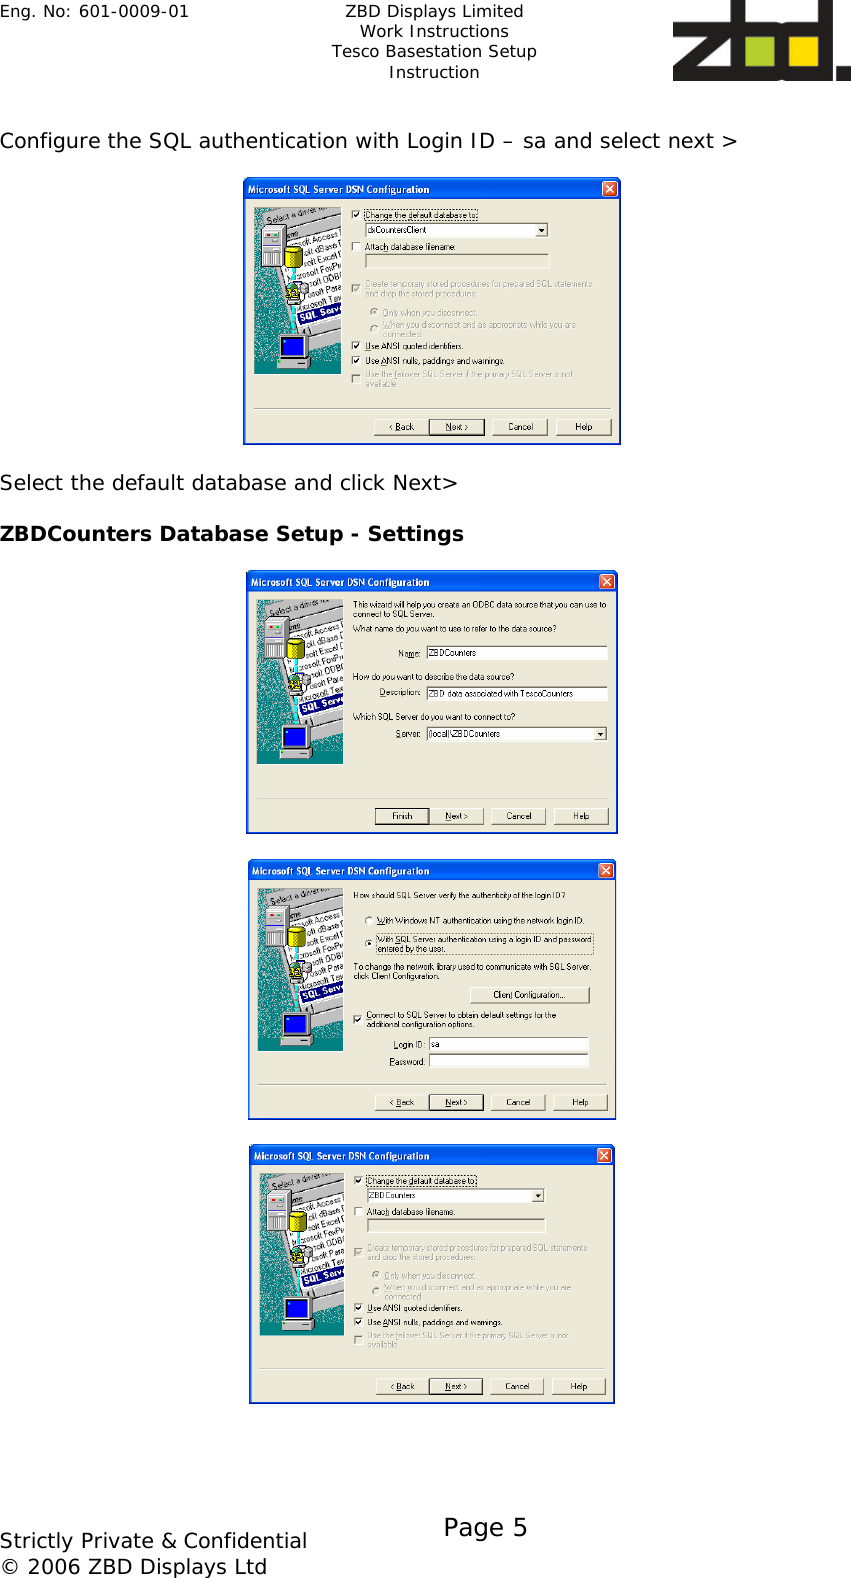
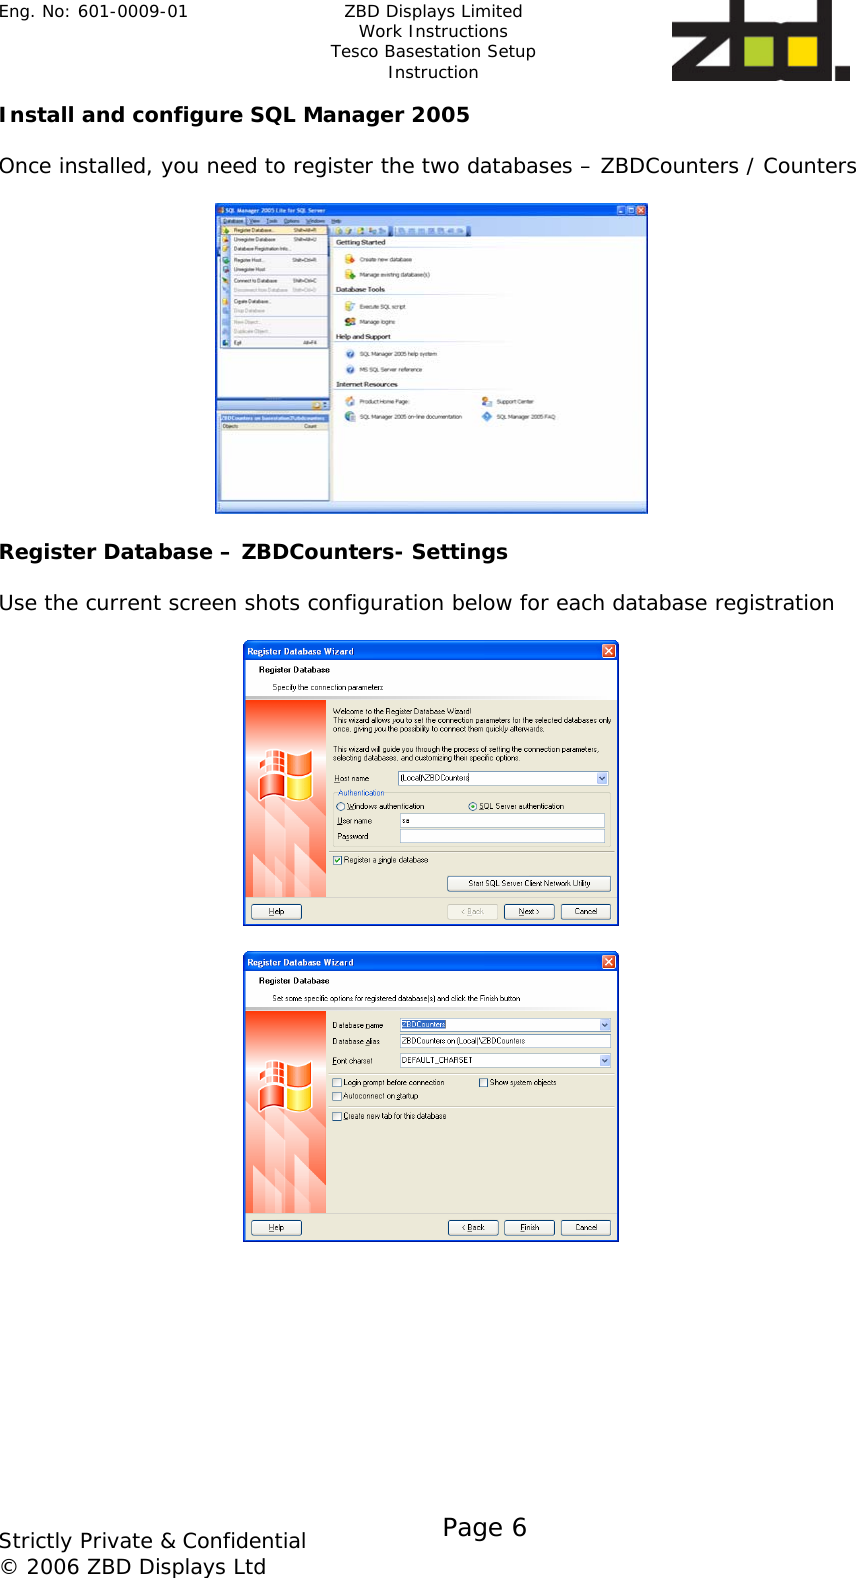
![Eng. No: 601-0009-01 ZBD Displays Limited Work Instructions Tesco Basestation Setup Instruction Strictly Private & Confidential © 2006 ZBD Displays Ltd Page 1 1 INTRODUCTION Below are some notes on how to install the Tesco Basestation. 2 APPLICABLE DOCUMENTS A. BOM – 120-0003-01. 3 TESCO BASESTATION SETUP INSTRUCTION Firstly the following programs below need to be download and installed. MSDE (Rel A) .Net Framework 1.0 – dotnetredist.exe Hot Fix .Net Framework 1.0 SPK 3 EMS – SQL Manager – SQL Manager 2005 for SQL Server Lite Installing .Net Framework 1.0 Double click the executeable file and following the on screen instructions, once completed restart machine. Installing Hot Fix .Net Framework Run the executeable file and follow the on screen instructions and once completed restart machine. Installing MSDE Creating and installing an Instance for both databases – Counters \ ZBDCounters Command: C:\[Location of extracted MSDE]\[ Setup InstanceName=[Name of Instance] SecurityMode=SQL BLANKSAPWD=1 eg. c:\MSDEReIA\Setup InstanceName=Counters SecurityMode=SQL BLANKSAPWD=1 Counters Instance Setup Setup InstanceName=Counters SecurityMode=SQL BLANKSAPWD=1 ZBDCounters Instance Setup Setup InstanceName=ZBDCounters SecurityMode=SQL BLANKSAPWD=1 Configuring Network Access to the database (MSDE) After installing and creating SQL Instances, it is necessary to configure the 'Instance' of the basestation which runs the database. eg. [Basestation name]\[Database name]. This is done with svrnetcn: C:\Program Files\Microsoft SQL Server\80\Tools\Binn\svrnetcn](https://usermanual.wiki/Displaydata/120-0039-05.Manual-2-Installation/User-Guide-826180-Page-3.png)
![Eng. No: 601-0009-01 ZBD Displays Limited Work Instructions Tesco Basestation Setup Instruction Strictly Private & Confidential © 2006 ZBD Displays Ltd Page 2 Select the correct instance and enable TCP, as above. This need to be configured on both Instances. Once configured reboot machine. Copy Folders From P:\Customer\Tesco\TescoBasestationInstall Folder Name: ScalesClientInstall Folder Name: ZBDApps To: Local Hard Disk C:\ Using OSQL - Location - c:\Program Files\Microsoft SQL Server\80\tools\binn> From the local machine: type osql -Usa -S(local)\Counters -P or Remotely: type osql -Usa -S([basestation name])\Counters -P Installing database –Tesco Counters From osql, run the following command: >osql >1 Command: restore database dxCountersClient from disk='c:\ScalesClientInstall\TescoCountersDB\dxCountersClient' with move 'dxCountersClient_data' to 'c:\ScalesClientInstall\dxCountersClient_data.mdf', move 'dxCountersClient_log' to 'c:\ScalesClientInstall\dxCountersClient_log.ldf' go Installing database – ZBD Counters From osql run the following command: >osql >1 Command: Restore database TescoCountersDB from disk=’c:\ScalesClientInstall\ZBDCountersDB\TecountersDB.dat go](https://usermanual.wiki/Displaydata/120-0039-05.Manual-2-Installation/User-Guide-826180-Page-4.png)

![Eng. No: 601-0009-01 ZBD Displays Limited Work Instructions Tesco Basestation Setup Instruction Strictly Private & Confidential © 2006 ZBD Displays Ltd Page 8 Registry Configuration Import the following Reg Key – RF_REG.reg from location c:\ZBDApps\ Check reg key location in regedit HKEY_CURRENT_USER\Software\VB and VBA Program Settings\TescoLabel Updater Batch Files Create shortcuts to the following batch file to location c:\Documents and Settings\ESEL\Start Menu\Programs\Startup from c:\ZBDApps Shortcut to startScales Shortcut to startTescoAdmin Shortcut to startTescoRFUpdater BIOS – Settings Power Management Setup - AC Loss Auto Restart – On Standard CMOS - Halt on [All, but Keyboard] Important .dll & .ocx Check that the following DLL & OCX files are available in c:\windows\system32 folder MSCOMCTL.ocx MSRDO20.dll COMDLG32.ocx MSCOMM32.ocx You may be required to register MSRDO20.dll Register .dll](https://usermanual.wiki/Displaydata/120-0039-05.Manual-2-Installation/User-Guide-826180-Page-10.png)
![Eng. No: 601-0009-01 ZBD Displays Limited Work Instructions Tesco Basestation Setup Instruction Strictly Private & Confidential © 2006 ZBD Displays Ltd Page 9 Command: regsvr32 c:\windows\system32\[.dll name] eg. regsvr32 c:\windows\system32\MSRDO20.dll Windows Firewall Settings Exceptions – Add Program Add all three sqlserver program executables to the exceptions list c:\Program Files\Microsoft SQL Server\MSSQL$ZBDCounters\Binn\Sqlserver.exe c:\Program Files\Microsoft SQL Server\MSSQL$Counters\Binn\Sqlserver.exe c:\Program Files\Microsoft SQL Server\MSSQL\Binn\Sqlserver.exe Attaching RF Dongle – (Matrix Dongle) Go to the following folder location as below c:\ZBDApps\WinDriver Install Double click on the Install batch file (install.bat) to install drivers for dongle. Next install the RF Dongle to any available USB port On the “Welcome to the found new Hardware wizard” box - Can windows connect to windows update to search for software Select – No, not at this time and click Next > Leave default – Install the software automatically (Recommended) and click Next > This will now install the appropriate drivers required. Once completed on the “Completing the found Hardware wizard” click Finish >](https://usermanual.wiki/Displaydata/120-0039-05.Manual-2-Installation/User-Guide-826180-Page-11.png)