Displaydata 120-0084 Bounce Ethernet Communicator User Manual Manual 2
ZBD Displays Ltd Bounce Ethernet Communicator Manual 2
UserManual.wiki
>
Displaydata
>
120-0084 User Manual
>
Manual 2
Contents
1.
Manual 1
2.
Manual 2
3.
Antenna Datasheet
Manual 2
Navigation menu
Upload a User Manual
Namespaces
Wiki Guide
HTML
PDF
Info
Views
User Manual
Discussion / Help
Navigation

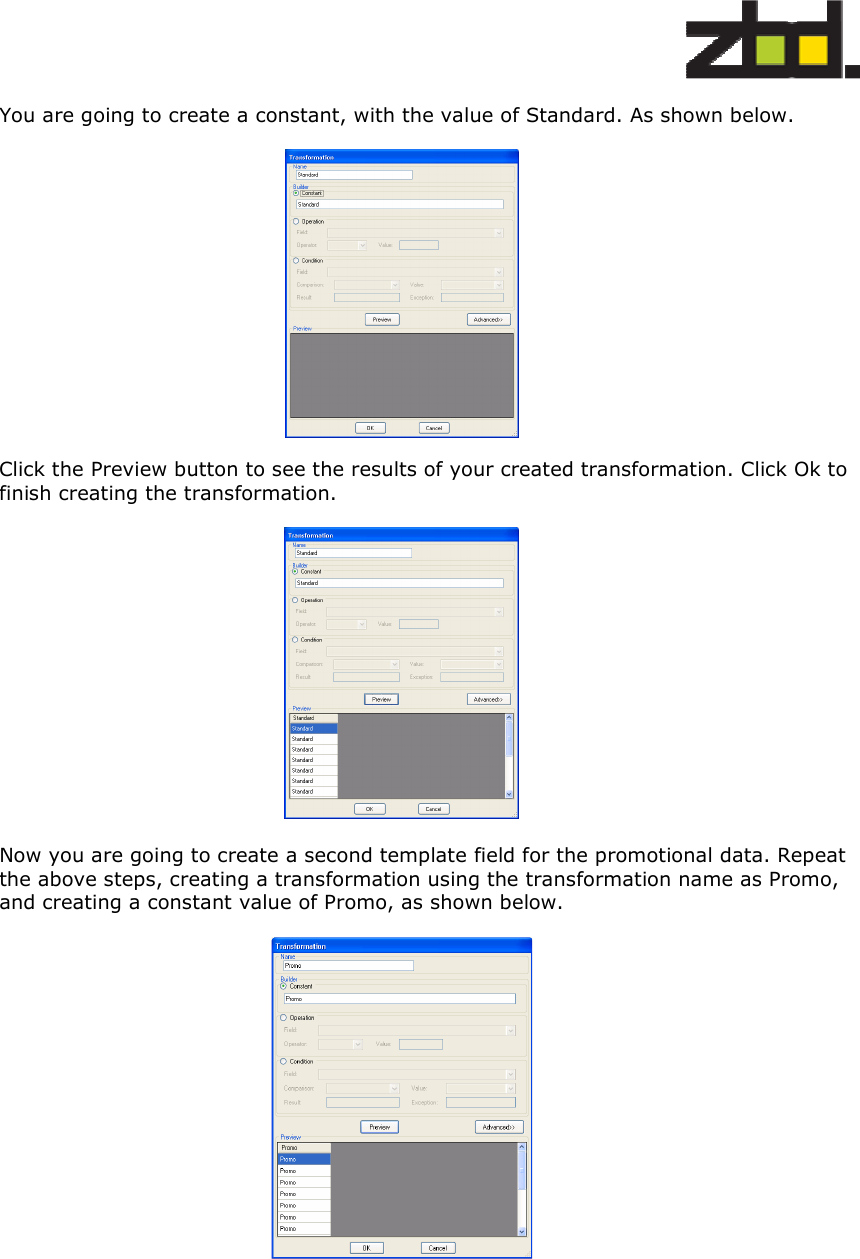
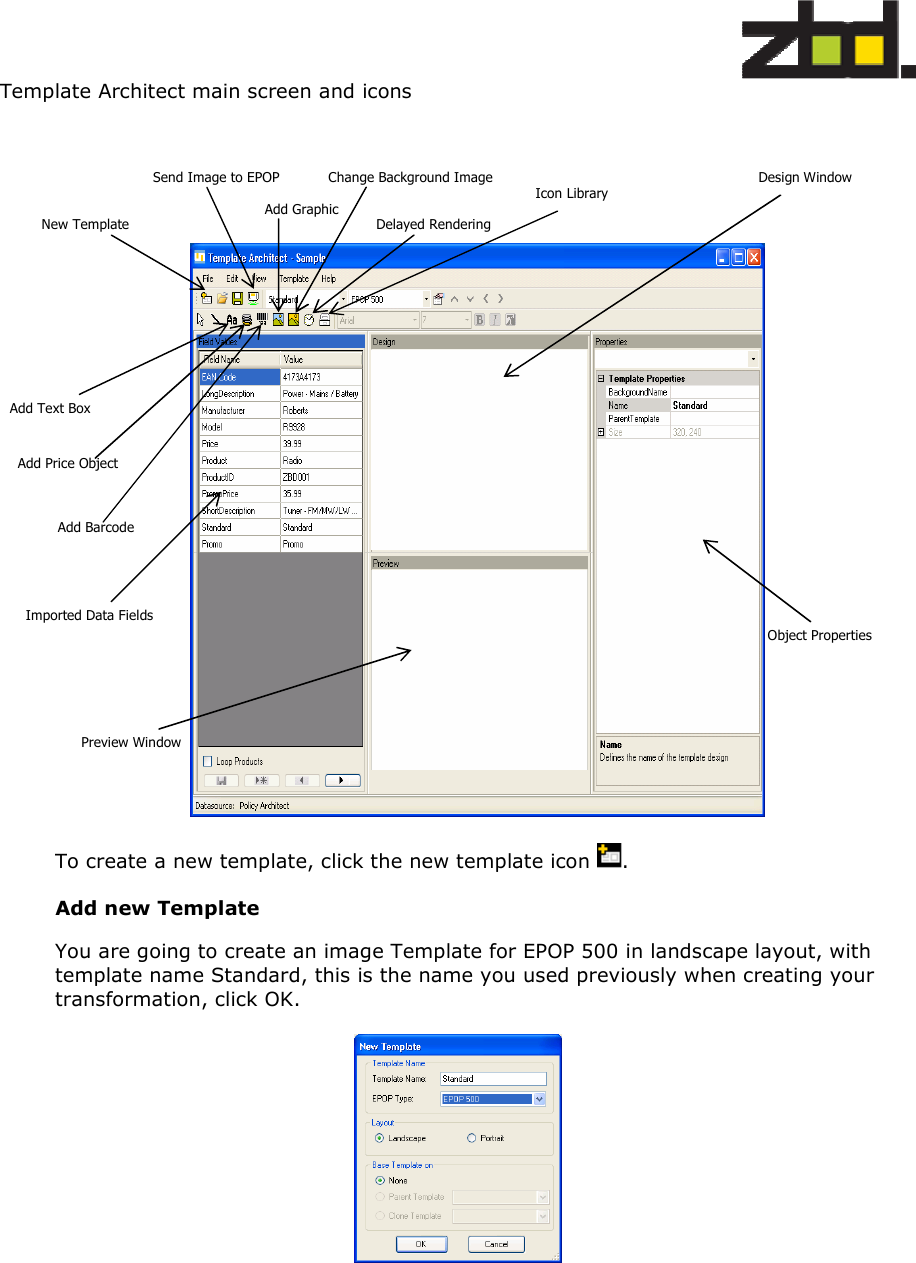
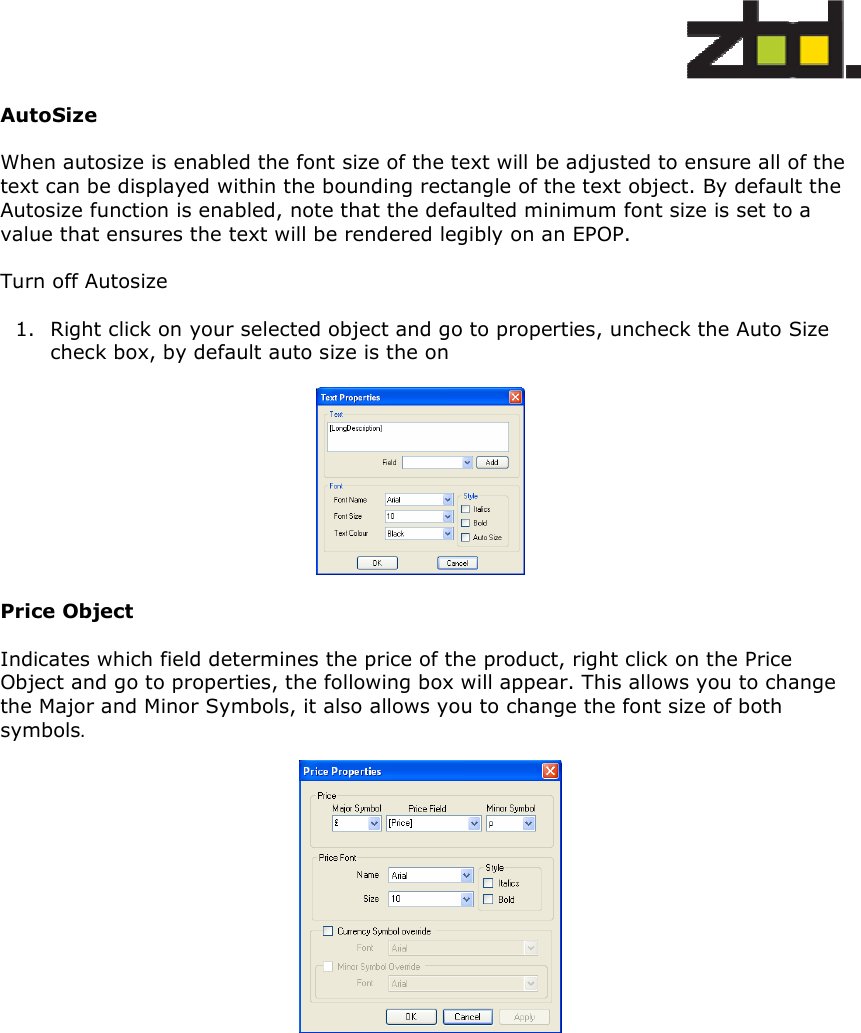
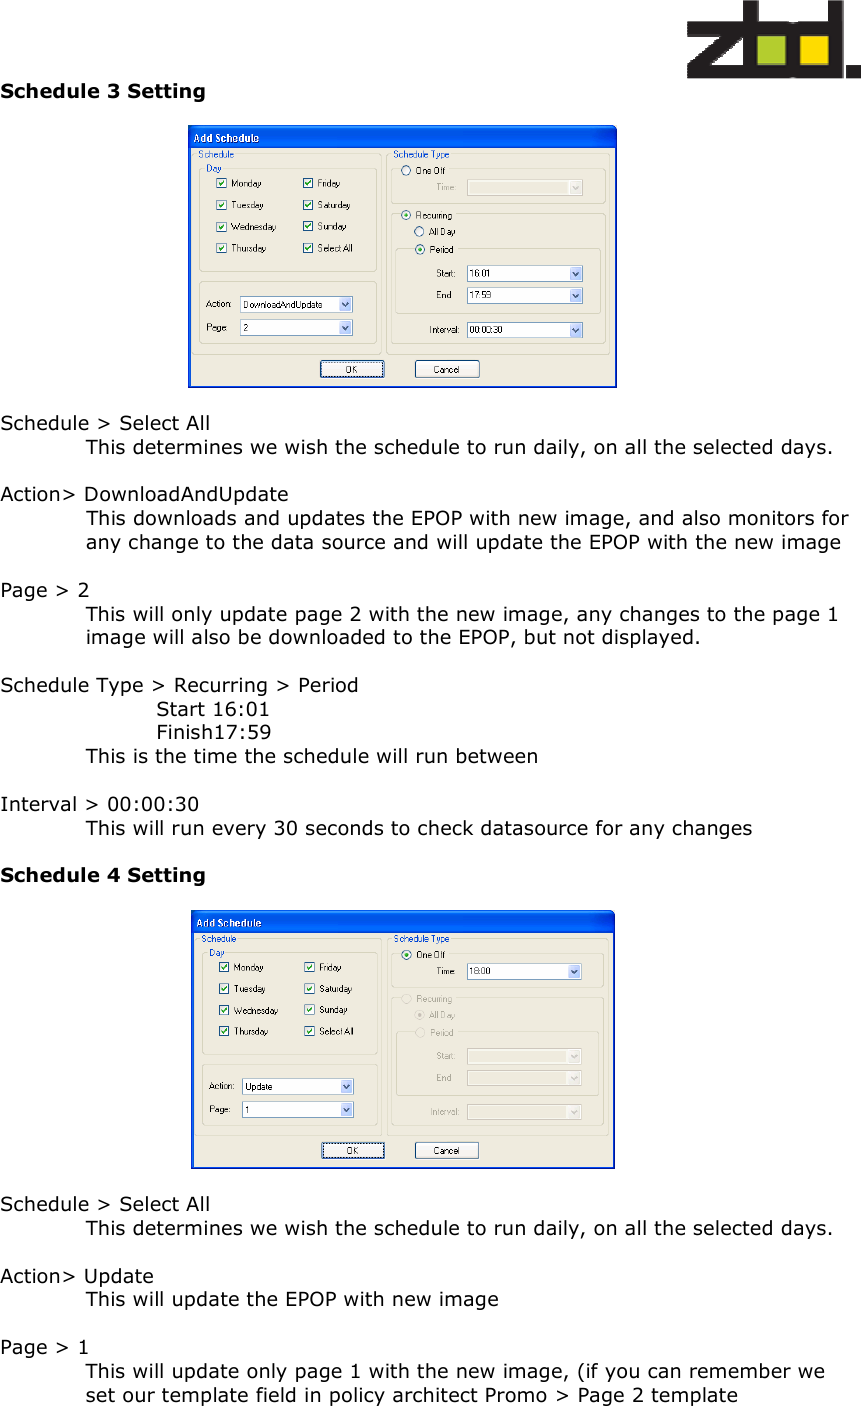
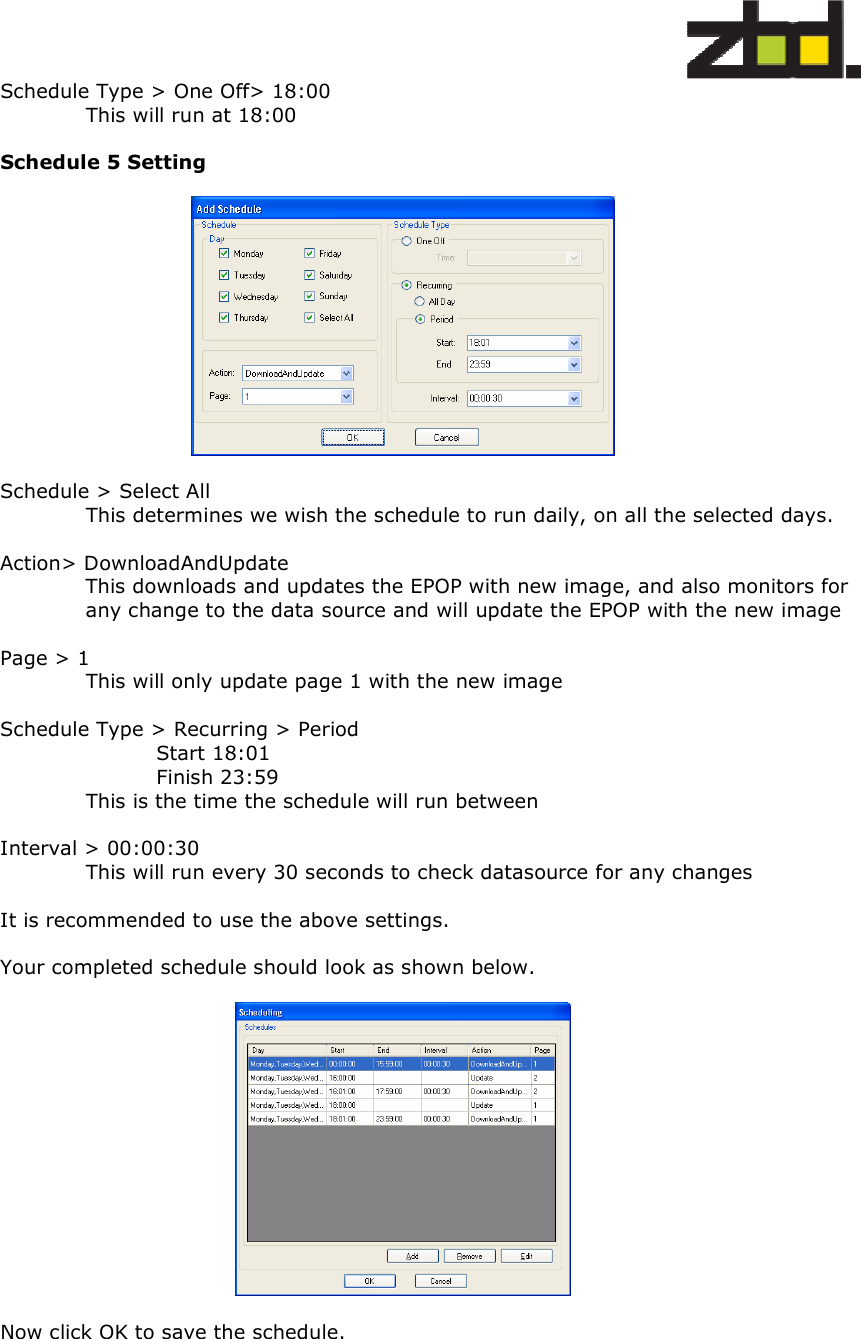
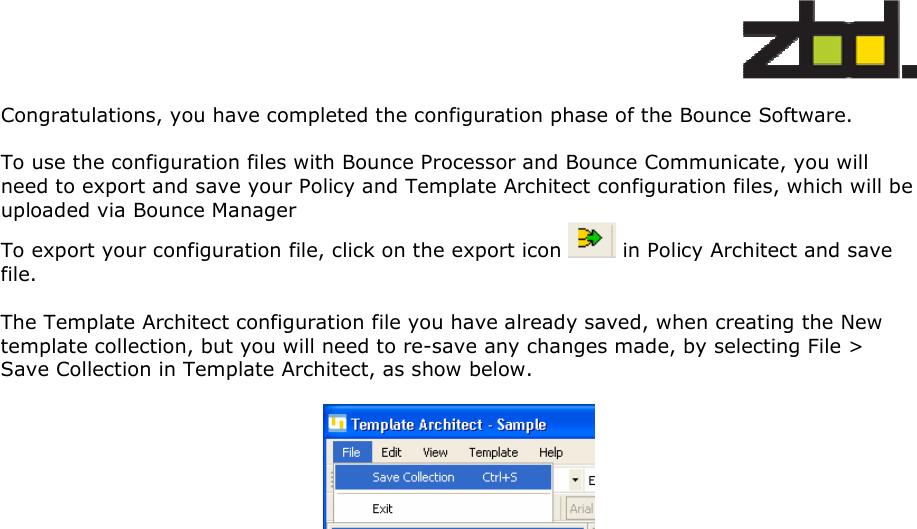
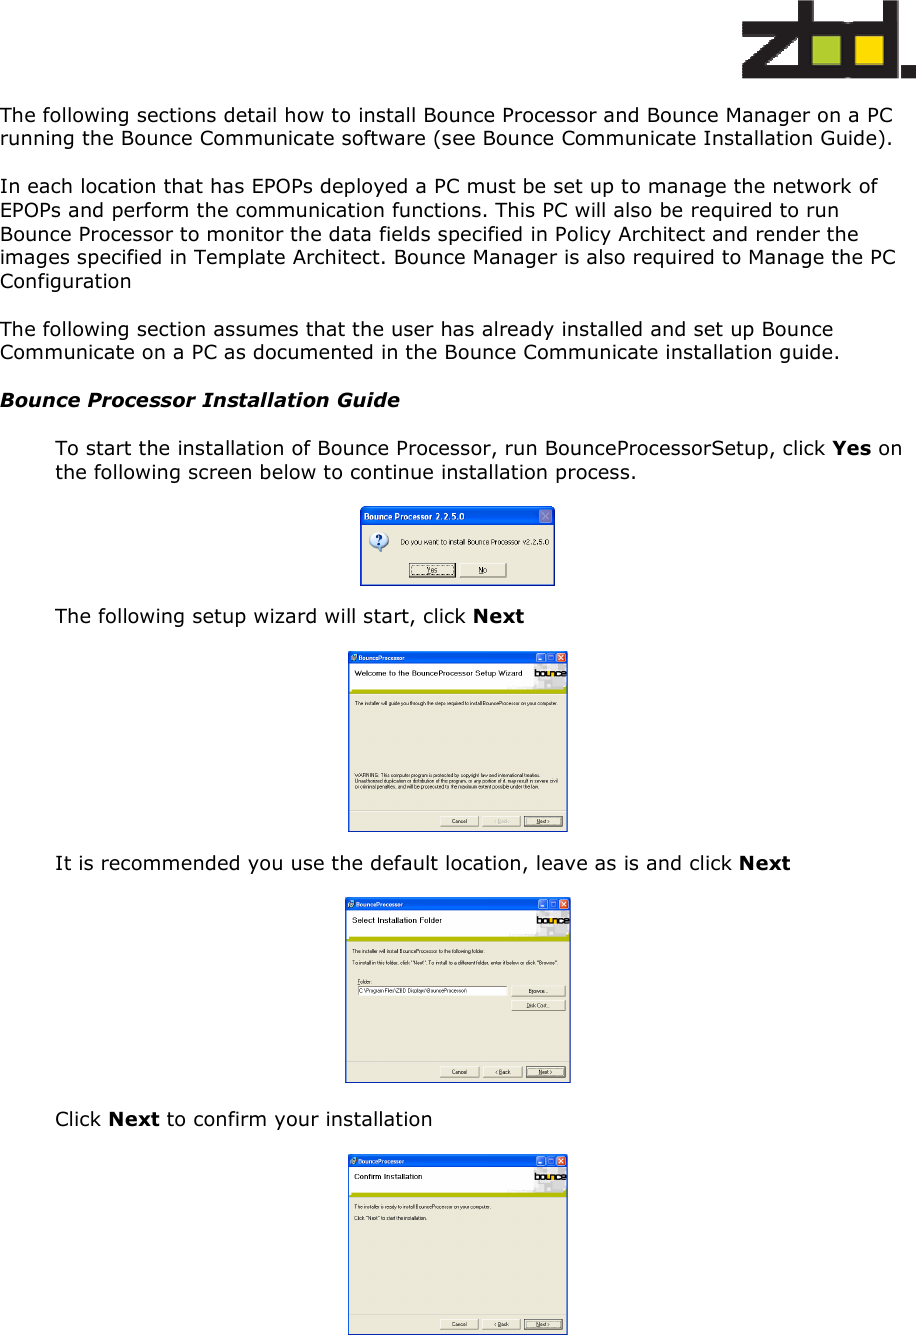
![A special Template Collection field called [Template] must be defined. This field contains the name of a Template Architect template that will be used when creating the product image. Using Policy Architect we are able to create new template fields by applying transformations to the Product data fields e.g. we can create a new template collection field called [UnitPrice] that is calculated from the data source by taking the [Price] and dividing it by the [UnitWeight]. In our example we are going to create two [Template] fields which are populated with ‘Standard’ & ‘Promo’, using transformations. Transformations Transformations allow you to manipulate existing fields or create new constant fields. This consist of standard SQL statements and can include any of the Template Collection Fields previously added. The SQL statement can be made up of anything that is valid in the Select Clause. Creating a Transformation To create a transformation right click transformation and select New Transformation, the follow screen below appears. Enter an appropriate name for the transformation field, in your example you have chosen Standard.](https://usermanual.wiki/Displaydata/120-0084.Manual-2/User-Guide-1519732-Page-15.png)