OPERATING INSTRUCTIONS Software_Voltcraft_LCR_4080_LCR_HANDMESS Ver. 01 121064 An En Software Voltcraft LCR 4080 HANDMESS
User Manual: Software_Voltcraft_LCR_4080_LCR_HANDMESS - Ver. 01 Component er digital VOLTCRAFT LCR 4080 Calibrated to: Manufacturer's standards (no certificate) CAT I Display (cou from Conrad.com
Open the PDF directly: View PDF ![]() .
.
Page Count: 3
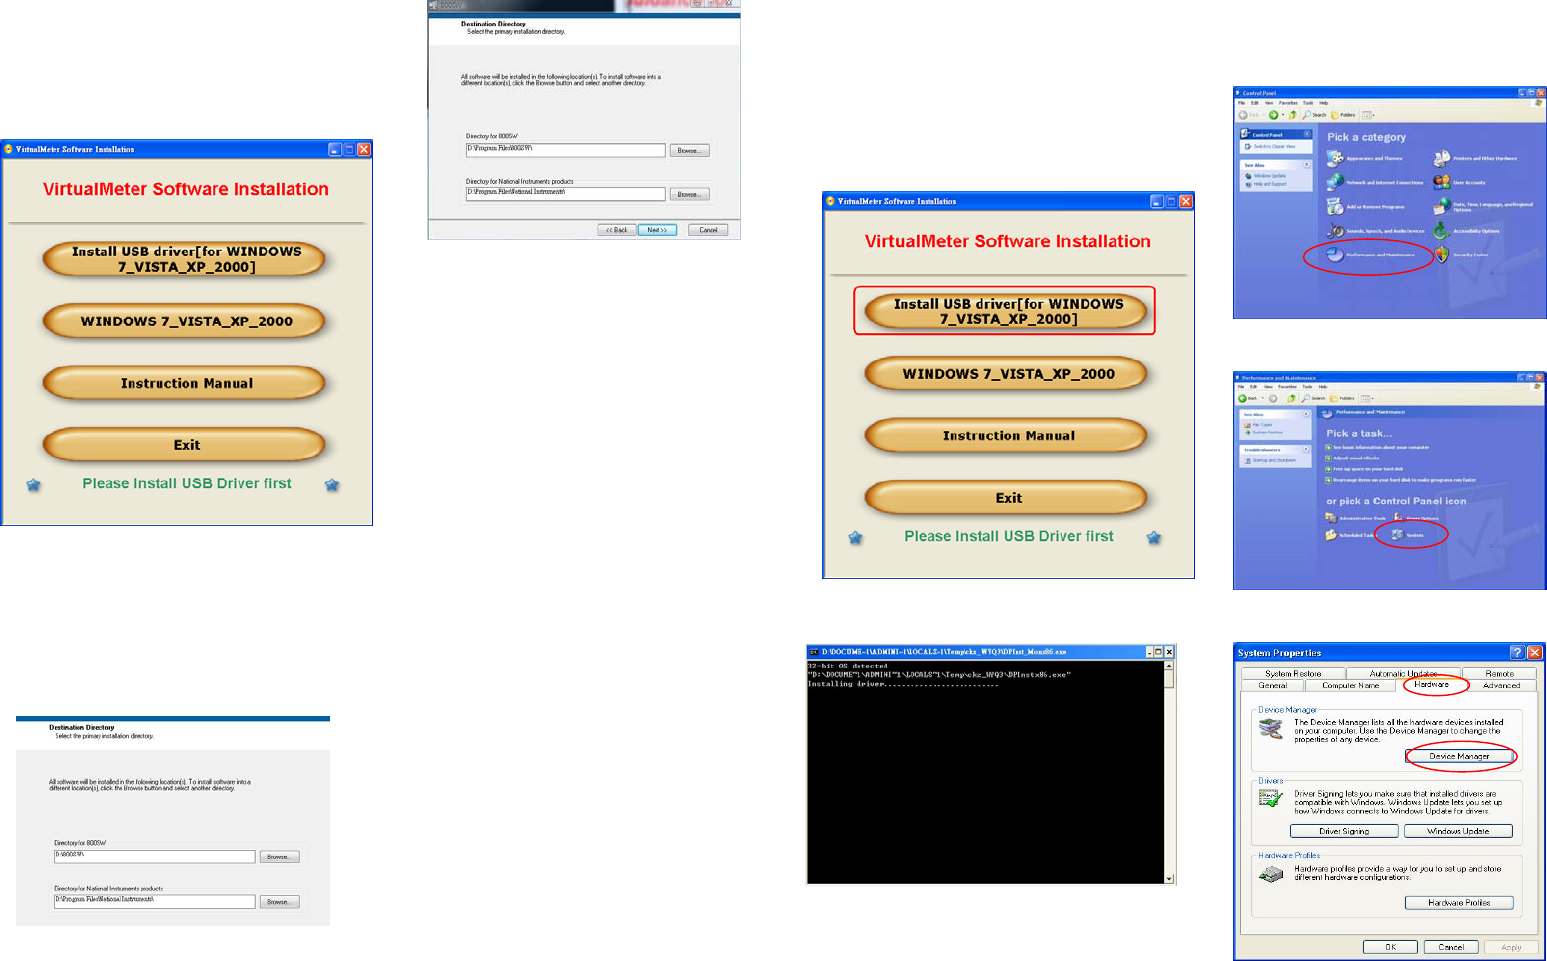
Install PC software &
USB driver
1. Put the disk in the disk drive. Following
dialogue box will appear automatically. Please
execute the “autorun.exe” if it does not appear.
2. Button explanations
• WINDOWS7_VISTA: install pc software for
WINDOWS7 with VISTA.
Directory setting for VISTA.
Following window will comes up
automatically, when click the button
“WINDOWS7_VISTA_XP_2000”.
• INSTALL USB driver (for WINDOWS_
VISTA _XP_2000): Please refer to the
METER and USB DRIVER’S
• WINDOWS_VISTA_XP_2000: Install pc
software for WINDOWS VISTA XP 2000
• Instruction Manual: Operation instruction
manual.
• EXIT: Exit install program.
For WINDOWS VISTA_XP
_2000 and USB Driver’s
Installation
1. Connect meter to PC with USB cable. Following
dialogue box will appear automatically. Please
select “Install USB [for WINDOWS_VISTA_
XP_2000“to install.
2. Installation.
SET CONNECTION PORT
1. StartÆControl PanelÆPerformance and
Maintenance.
2. Select “System”.
3. Select “Hardware” ÆDevice Manager.
4. In this window, you see the number of the port
selected by system auto manically. You can
change it. Please write down the port number, it
will be needed for manual connection.
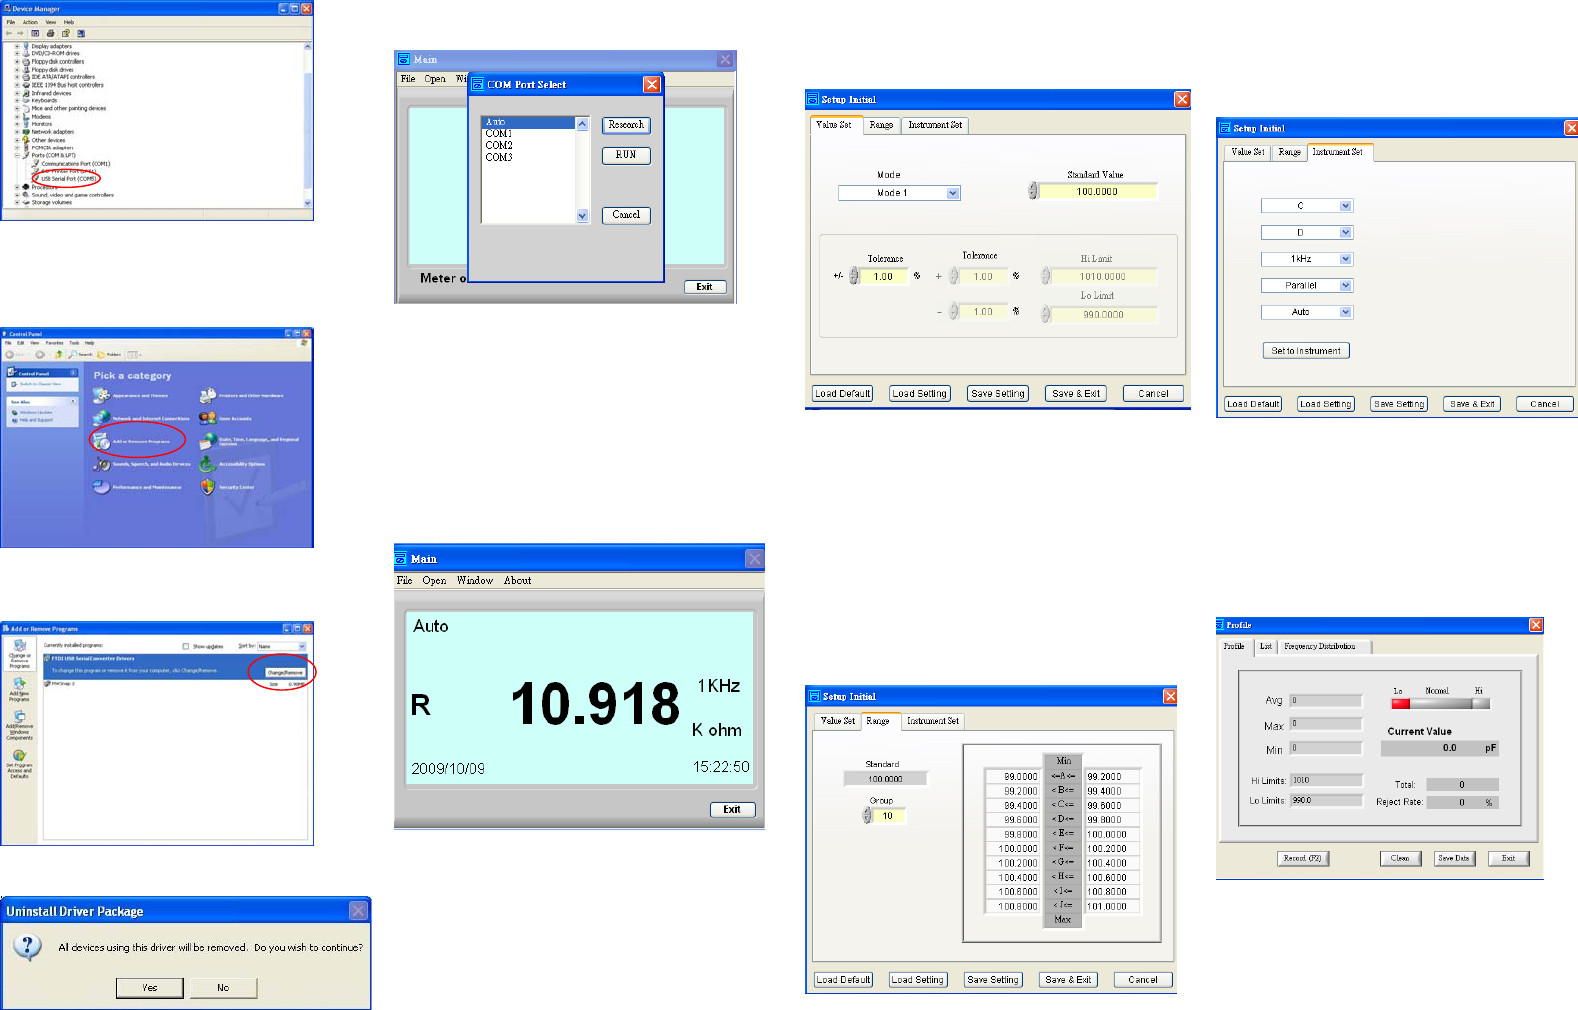
Uninstallation of USB Driver
1. StartÆSettingÆControl PanelÆAdd or Remove
ProgramsÆChange/Remove.
2. Select “FTDI USB Serial Converter
DriversӮChange/Remove.
3. Click “Yes”.
SOFTWARE OPERATION
Com-Port Setup
The user can setup the Com-Port parameter in this
form.
The Virtual Meter Software
When everything is done, the Virtual Meter
software will work.
The form displays the values that appear on the
LCR Meter. Then the user can use all the function
that the Virtual Meter provided from the Menu Bar.
Initial Setup
On the Virtual Meter Main Form please click the
Menu Bar->File->Initial Setup.
Value Set
There are symmetrical, dissymmetrical, and direct
inputs Hi/Lo Limits. The Go/No Go will be the
basis of the three modes.
Range
On the Virtual Meter Main Form please click the
Menu Bar->File->Initial Setup-->Range.
This form shows the current range and the group
number (1~10) that the user can change. The
Auto/Manual selection can calculate automatically
or be changed by hand. When the left side value
bigger than the right side value, the Wrong Range
will light.
While the Wrong Range lights, user should adjust
the value or there will be an error.
Instrument Set
On the Virtual Meter Main Form please click the
Menu Bar->File->Initial Setup-->Instrument Set.
The user also can set the LCR Meter parameter
(L/C/R, Q/D/R, Frequency, Parallel/Serial,
Auto/Menu), then click “Set Instrument” button to
set parameter into the LCR Meter.
Profile
To click the Menu Bar->Open->Profile, and the
Profile form will display as below. The function is
to display the item values including current value,
maximum (Max), minimum (Min), average (Avg),
total number (Total), and Reject Rate.
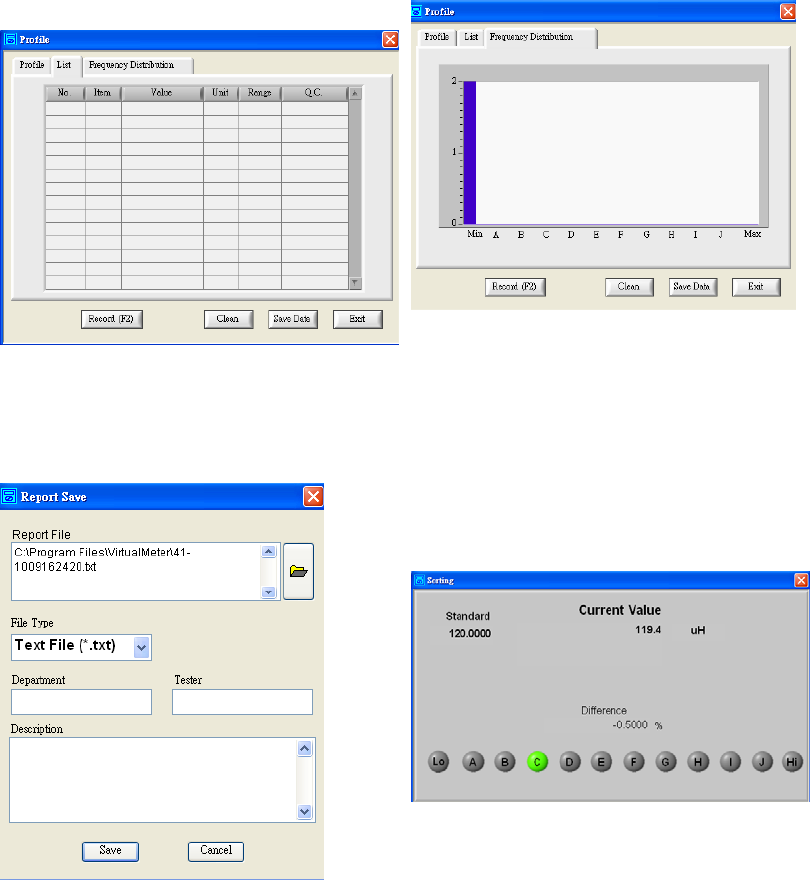
List
In the Virtual Meter Main Form, to click the Menu
Bar->Open->Profile-->List, and the List Form will
display as below.
The table displays the real-time data. To
click ”record” button, then the table will be added
one data including No., Item (L/C/R), Value, Unit,
Range, Q.C., Item (Q/D/R), and Value.
List (Save Data)
user can input information and save them into the
report file.
Frequency Distribution
In the Main Form, to click the Menu
Bar->Open->Profile->Frequency Distribution. And
the Frequency Distribution will display. The
vertical axle means number. The horizontal axle
means distribution points.
Sorting
Please click the Menu Bar->File->Sorting, and the
Sorting form will display as below.
This form displays the current value, difference,
total number, and standard value.
If the user zooms in or zooms out the Sorting Form,
the font and the object size will be changed.
