Da Vinci Resolve 14 Reference Manual
User Manual:
Open the PDF directly: View PDF ![]() .
.
Page Count: 1346 [warning: Documents this large are best viewed by clicking the View PDF Link!]
- PART 1
- PART 2
- PART 3
- Using the Edit Page
- Creating and Working with Timelines
- Preparing Clips for Editing and Viewer Playback
- Editing Basics
- Modifying Clips in the Timeline
- Three and Four Point Editing
- Marking and Finding Clips in the Timeline
- Multicam Editing
- Take Selectors, Compound Clips, and Nested Timelines
- Trimming
- Using Transitions
- Working with Audio in the Edit Page
- Media Management
- PART 4
- PART 5
- PART 6
- Introduction to Color Grading
- Using the Color Page
- Automated Grading Commands and Imported Grades
- Primary Grading Controls
- Curves
- Secondary Qualifiers
- Secondary Windows and Tracking
- Motion Tracking Windows
- Using the Gallery
- Grade Management
- Node Editing Basics
- Serial, Parallel, and Layer Nodes
- Combining Keys and Using Mattes
- Channel Splitting and Image Compositing
- Keyframing in the Color Page
- Copying and Importing Grades Using ColorTrace
- DaVinci Resolve Control Panels
- PART 7
- PART 8
- Using the Fairlight Page
- Setting Up Tracks, Buses, and Patching
- Transport Controls, Timeline Navigation, and Markers
- Recording
- Editing Basics in the Fairlight Page
- Clip Levels, Crossfades, Equalization, and Gating
- Mixing in the Fairlight Page
- Automation Recording
- Audio Effects
- Audio Meters and Audio Monitoring
- Signal Flow Diagrams
- PART 9
- PART 10
- PART 11
- Getting Started
- Switching Among Pages
- The Edit Page
- Edit and Color Page Effects and Fusion Connect
- The Color Page
- The Fairlight Page
- Mixer
- The Monitoring Panel
- The Deliver Page
- Working with the DaVinci Resolve User Interface
- DaVinci Resolve User Interface Conventions
- The Three Buttons of a Mouse or Other Input Device
- Using the Project Manager
- Managing Databases With the Database Sidebar
- Saving Projects
- Dynamic Project Switching
- Archiving and Restoring Projects
- Opening and Editing Project Settings
- Project Settings
- Opening and Editing DaVinci Resolve Preferences
- System
- User
- Camera Raw Decoding Explained
- Using ARRI ALEXA files
- Using RED files
- Using Sony Raw Files
- Using CinemaDNG files
- Using Phantom Cine Files
- Understanding the GPU Status Display
- Prioritizing Audio or Video Playback in the Edit Page
- Performance Mode Improves Overall Performance
- Proxy Mode Improves Effects Performance
- Reducing Decode Quality Improves Raw Performance
- Optimized Media Improves Overall Performance
- The Smart Cache Improves Effects Performance
- Other Project Settings That Improve Performance
- Data Levels Settings and Conversions
- DaVinci Resolve Color Management
- Display Referred vs. Scene Referred Color Management
- Resolve Color Management for Editors
- Resolve Color Management and Camera Raw Formats
- Controlling the Input, Timeline, and Output Color Space
- Single Setting vs. Dual Setting RCM
- Gamut Mapping From Timeline to Output Color Space
- Procedures for Using Resolve Color Management
- Exporting Color Space Information to QuickTime Files
- Color Management Using ACES
- High Dynamic Range (HDR) Grading in Resolve
- Simultaneous SDR and HDR Output While Grading
- Understanding the Media Page User Interface
- Viewer
- Media Pool
- Metadata Editor
- Audio Panel
- Dual Monitor Layout
- Customizing the Media Page
- Copying Media Using the Clone Tool
- Adding Media to the Media Pool
- Adding Media to the Edit and Fairlight Pages
- Removing Media From the Media Pool
- Adding and Removing External Mattes
- Adding Offline Reference Movies
- Extracting Audio
- Organizing the Media Pool
- Creating and Using Power Bins
- Creating and Using Smart Bins
- Finding Clips and Timelines in the Media Pool
- Finding Media in the Media Storage Browser and Finder
- Relinking Media Simply
- Editing Clip Metadata
- Using the Metadata Editor
- Creating Custom Metadata Groups
- Importing and Exporting Media Pool Metadata
- Different Ways of Using Clip Metadata
- Renaming Clips Using Display Names
- Syncing Audio
- Changing Clip Attributes
- Update Timecode from Audio – LTC
- Changing Clip Thumbnails in the Media Pool
- Creating Subclips
- Organizing Stereo 3D Media
- Camera Raw Decoding
- Using Scene Detection
- The Scene Detect Window Interface
- An Example Scene Detect Workflow
- Tape Ingest
- The Tape Capture Interface
- Setting Up to Capture From Tape
- The Three Methods of Capture
- Batch Capture Via EDL
- Controlling the Cintel Film Scanner
- The Cintel Scanner Interface
- Cintel Media Page Settings
- Film Scanning Workflows
- Before You Begin
- Load and Align the Film
- Focus the Scanner
- Check the Automatic Perf Detection Stabilization Overlay
- Reset the Timecode for That Roll
- Choose a Location to Save the Scanned Frames
- Check the Frame Rate
- Adjusting the Color of the Scanner
- Scanning One or More Sections of Film
- Extracting Audio
- Audio Extraction Settings
- Grading and Sizing Scanned Media
- The Edit Page User Interface
- The Interface Toolbar
- The Media Pool
- More About Timelines and Grading
- Using the Effects Library
- Edit Index
- Source and Timeline Viewers
- Metadata Editor
- Inspector
- Timeline
- Toolbar
- The Clip and Track Mixer
- Using Video Scopes
- Navigating the Edit Page Using the Keyboard
- Dual Monitor Layout
- Customizing the Edit Page
- Undo and Redo in the Edit Page
- Creating and Duplicating Timelines
- Timeline View Options
- Modifying Timeline Tracks
- Naming Timeline Tracks
- Using Timeline Snapping and Zooming
- Scrolling Through the Timeline
- Resizing the Timeline’s Video and Audio Track Regions
- Comparing Timelines
- Browsing Clips in the Media Pool
- Selecting Clips in the Media Pool to Edit
- Duplicating Clips in the Media Pool
- Viewer Playback and Navigation
- Source and Timeline Viewers vs. Single Viewer Mode
- Opening Clips Into the Source Viewer to Prepare for Editing
- Viewer Transport Controls
- Simple Keyboard Shortcuts for Playback and Navigation
- Using JKL to Control Playback
- Special-Purpose Playback Commands
- Enabling and Disabling Audio Scrubbing
- Playback Post-Roll
- Moving the Playhead Using Timecode
- Gang Viewers (Playhead Ganging)
- Adding Markers
- Setting In and Out Points
- Saving In and Out Point Ranges as Markers with Duration
- Organizing Media by Creating Subclips
- Drag and Drop Editing
- Other Ways of Assembling Edits Into the Timeline
- Making Selections in the Timeline
- Using Auto Select Controls to Define Selections
- Locking Tracks You Don’t Want to Change
- Position Lock
- Disabling and Re-Enabling Clips in the Timeline
- Deleting Clips and Gaps from the Timeline
- Audio/Video Linking
- Moving, Resizing, and Rolling Clips in Selection Mode
- Trimming Gaps
- Resizing or Trimming Clips in the Source Viewer
- Shuffle or Swap Edits and Inserts
- Splitting and Joining Clips
- Enabling and Disabling Clips and Tracks
- Copying and Pasting Clips in the Timeline
- Duplicating Clips and Transitions in the Timeline
- Introduction to Three-Point Editing
- Choosing a Track to Edit to Using Destination Controls
- Setting In and Out Points in the Timeline
- Preview Marks During Three-Point Editing
- The Rules of Three Point Editing
- Switch Focus to Timeline After Edit
- Different Types of Three and Four Point Edits
- Three Point Editing From the Media Pool
- Using Flags
- Using Markers
- Editing With Markers in the Media Pool
- Color Labeling Clips in the Timeline
- Finding Clips, Media, Markers, Gaps, and Timelines
- Finding Media Using Match Frame Operations
- Finding a Clip in the Media Pool Using a Timeline Clip
- Introduction to Multicam Editing
- Creating and Modifying Multicam Clips
- Logging and Editing Multicam Clips
- Setting up a Timeline for Multicam Editing
- Opening and Altering Multicam Clips
- Performing a Multicam Edit
- Multicam Controls in the Source Viewer
- Editing Multicam Clips in the Timeline
- Grading Multicam Clips
- Take Selectors
- Compound Clips
- Nested Timelines
- Summarizing Trim Operations
- Selection-Based Trimming Using the Trim Tool
- Using the Trim Tool With the Mouse
- Trim Tool Operations With the Keyboard
- Trimming Using Timecode Entry
- Commands to Make Selections and Trim
- Trimming Clips in the Source Viewer
- Ripple Editing Rules
- Using Auto Select Controls to Control Trimming
- Trimming Multiple Edits or Clips at Once
- Keyboard Trimming During Looped Playback
- Dynamic JKL Trimming
- Trim Operations that are Targeted Using the Playhead
- Working With Transitions
- Adding and Editing Transitions
- Adding Transitions When There’s Not Enough Handles
- Adding Transitions By Dragging to Create Overlap
- Transition Properties in the Inspector
- Using Transition Curves
- Organizing Transitions
- Changing the Standard Transition
- DaVinci Resolve Transitions
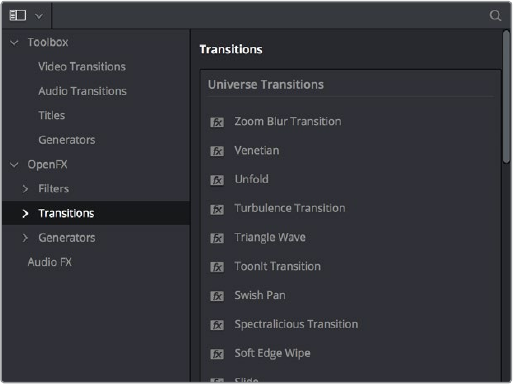
- OpenFX Transitions
- Audio in the Edit vs. Fairlight Pages
- Compatible Audio Formats
- Assigning Audio Channels in the Media Pool
- Editing Audio Into the Timeline
- Editing Audio In the Timeline Using In and Out Points
- Audio Settings in the Inspector
- Setting Clip Levels
- Clip EQ
- Keyframing Audio
- Audio Fade Handles
- Audio Crossfades
- The Audio Mixer
- Using Audio Filters
- The Fairlight Page
- Pro Tools Export
- What is Media Management in DaVinci Resolve?
- File Formats Compatible with Media Management
- Using Media Management
- Options in the Media Management Window
- File Naming When You Consolidate Media
- Using the Effects Library
- Using the Inspector
- Adding Filters to Video Clips
- Adjusting Multiple Clips at the Same Time
- Paste Attributes
- Remove Attributes
- Adding Titles
- Using Safe Area Overlays
- Types of Title Generators
- Title Generator Panels
- Shared Title Generator Parameters
- Saving Titles in the Media Pool for Future Use
- Using Generators
- Using Stills
- Composite Modes and Transparency Effects
- More About Composite Modes
- Opacity
- Video Fader Handles
- Alpha Channel Support
- Keying, External Mattes, and Window Compositing
- Transform and Cropping
- Lens Correction
- On-screen Controls for Transform, Crop, and Dynamic Zoom
- Speed Effects and Retiming
- Creating Freeze Frames
- Creating Simple Linear Speed Effects
- Clip Retiming Controls
- Using Retime Curves
- Speed Effect Processing
- Keyframing Effects in the Edit Page
- Keyframing in the Inspector
- Keyframing Motion Paths in the Timeline Viewer
- Keyframing in the Timeline and Curve Editor
- Using Fusion Connect
- How Clips are translated into Node Trees
- Altering Fusion Connect Clips
- Sending a Fusion Connect Directory to Another Machine
- Updating Fusion Connect Clips Using Render Media and Refresh
- Preparing to Move Your Project to Resolve
- Importing Effects when Conforming Edits
- About Supported Color Corrections
- About Supported Transitions
- Transition Names
- About Supported Opacity, Position, Scale, and Rotation Settings
- About Flip and Flop Support
- Pitch and Yaw
- About “Ken Burns Effect” and Dynamic Zoom
- About Speed Effects
- About Nested Sequences and Compound Clips
- About Supported Composite Modes
- About Supported Still Image Formats
- About Supported Alpha Channels
- About Imported Text Effects
- About Imported Audio in AAF Projects
- Verifying Imported Projects With Offline Reference Clips
- Conforming and Relinking Media
- The Difference Between Unlinked and Missing Clips
- Duplicate Clips are Considered Separate Media
- Summary of Methods for Conforming and Relinking
- Unlinking Clips
- Conforming Clips During XML and AAF Import
- Importing Clips Before Importing an EDL, AAF, or XML
- Conform Missing Clips by Importing Their Source Media
- Using the Import Additional Clips Command
- Using Conform Lock As a Command
- Relinking Clips to Media Files on Disk
- Using “Change Source Folder” to Relink Clips
- Using the “Reconform From Bins” Command
- Using Reconform From Media Storage
- Understanding, Fixing, and Using Reel Conflicts
- Re-editing Media Directly to the Timeline
- How Grades are Linked to Multiple Timelines
- Step 1—Ingest Media and Add/Edit Metadata
- More About Conforming XML Files
- Importing XML Project Files
- Supported Media Types in AAF Round Trips
- Logged Errors When Importing AAF
- Performing an AAF Avid Round Trip
- Step 1—Create a Project in Media Composer
- Step 2—Exporting an AAF for DaVinci Resolve
- Step 3—Conforming Your AAF in Resolve
- Step 4—Continue Editing, Grading, and Finishing the Project
- Step 5—Render Graded Media and Export a New AAF
- Step 6—Copy the Graded Media to Avid MediaFiles
- Step 7—Import the Graded AAF
- Relinking Transcoded Media to AMA Media
- Conforming EDL Files
- EDL Export of a Project and Its Media
- Conforming EDLs to Individual Media Files
- Preconforming “Flat” Media Files to EDLs
- Conforming “Flat” Media Files Using Split and Add
- Importing an EDL to a New Track
- The Goals of Color Correction
- Maximizing the Look of Your Media
- Emphasizing What’s Important
- Audience Expectations
- Balancing Scenes
- Adding Style
- Quality Control
- Never Stop Experimenting
- The Color Page Interface
- Customizing the Color Page
- Using the Viewer
- On-Screen Controls and External Displays
- The On-Screen Control (OSC) Menu
- The Viewer Toolbar
- Zooming into the Viewer
- Using the Scrubber Bar and Transport Controls
- Controlling Playback Using the Spacebar and JKL Keys
- Navigating Using Timecode
- Navigating Using the DaVinci Control Panel
- Viewer and Transport Timecode Displays
- Enhanced Viewing, Full Viewing, and Cinema Viewing
- Safe Area Overlays in the Viewer
- Use Gray Background
- Monitor Calibration
- Viewing Broadcast Safe Exceptions
- Comparing Clips in the Viewer
- Using Video Scopes
- Navigating Using the Color Page Timeline
- Sorting and Filtering Clips in the Thumbnail Timeline
- Using the Lightbox
- The Info Palette and Clip Information
- About Undo and Redo
- Color Match Palette
- Automatic Adjustments in the Color Wheels Palette
- Auto Color Using the DaVinci Control Panel
- Shot Match
- Broadcast Safe
- Black Sun Highlight Correction
- Using CDL Grades
- Using ARRI Looks
- Color Controls Covered in this Chapter
- Camera Raw
- Color Wheels Palette
- Opening the Color Wheels Palette Using the DaVinci Control Panel
- HDR Grading Using Color Wheels Palette Controls
- How to Use Color Balance Controls and Master Wheels
- Understanding the Primaries Wheels Controls
- Shared Adjustment Controls
- The Log Mode of the Color Wheels Palette
- The Primaries Bars Mode of the Color Wheels Palette
- RGB Lift/Gamma/Gain Sliders
- Offset Sliders, Offset Wheel, and Printer Points
- RGB Mixer Palette
- Introduction to Curves
- Custom Curves
- Adjusting Custom Curves with the DaVinci Control Panel
- Soft Clip
- Using Soft Clipping Controls with the DaVinci Control Panel
- The HSL Curves
- Using HSL Curves with the DaVinci Control Panel
- Secondary Qualifiers
- Basic Qualification Using the 3D Keyer
- Basic Qualification Using the HSL Keyer
- HSL Qualifier Presets
- Using Highlight to See What You’re Isolating
- Showing Picker RGB Values
- Qualifier Parameters
- Matte Finesse Controls
- The Many Ways to Invert a Key
- Combining Qualifiers and Windows
- Manipulating Keys Using Additional Nodes
- Power Windows
- The Window Palette Interface
- Drawing a PowerCurve
- Combining Power Windows with the Mask Control
- Copying and Pasting Windows
- Saving Window Presets
- Using Windows and Qualifiers Together
- Manipulating Windows Using a Control Panel
- Motion Tracking Windows
- Tracker Palette Controls in More Detail
- Cloud Tracker Workflows
- Point Tracker Workflows
- Rotoscoping Window Shapes After Tracking
- Using the Gallery
- The Gallery Window
- Importing and Exporting Stills
- Using and Organizing Memories
- Using Versions to Manage Grades
- Copying Grades
- Protecting Adjustments with the Copy Grade Options
- Clip Grades and Timeline Grades in Saved Stills
- Choosing Which Aspect of a Grade to Copy With All/Color/Sizing
- Choosing How to Copy Keyframes
- Copying Grades Using the Mouse
- Copy Forward Commands
- Copying Using Memories
- Copying Using Preview Memory
- Copying from Stills in the Gallery
- Append Node Graph
- Aligning Keyframes to a Specific Frame While Copying Grades
- Copying Individual Nodes and Settings
- Rippling Adjustments Among Multiple Clips
- Appending A Node to Multiple Clips
- Scroll Copy Grades Using the DaVinci Control Panel
- Rippling Changes Using the DaVinci Control Panel
- Using Groups
- Exporting Grades and LUTs
- Node Editor Basics
- Bypass All Grades
- Resetting Nodes
- Editing Node Trees
- Keeping Node Trees Organized
- Using Compound Nodes
- Identifying Nodes
- Grading Order of Operations
- Putting Nodes into HDR Mode
- Applying a LUT Within a Node
- Clip vs. Timeline Grading
- Serial, Parallel, and Layer Node Tree Structures
- Serial Node Structures
- Parallel Node Structures
- Layer Mixer Node Structures
- Introduction to Manipulating and Combining Keys
- Outside Nodes
- Feeding Keys from One Node to Another
- Connecting KEY Outputs to RGB Inputs, and Vice Versa
- Using External Mattes
- Using the Key Mixer
- Using the Key Palette
- Isolating, Splitting, and Converting Color Channels
- Enabling, Disabling, and Converting Node Channels
- Splitting Channels With the Splitter/Combiner Nodes
- Multi-Channel RED HDRx Support
- Introduction to Compositing Using the Alpha Output
- Using a Qualifier Key to Create Transparency
- Using a Matte to Create Transparency
- Use an OFX Plug-in to Create Transparency
- Introduction to Keyframing
- The Keyframe Editor Interface
- All/Color/Sizing
- Keyframing Methods
- Using Specific Keyframing Tracks
- Automatic Keyframing
- Modifying Keyframes
- Copying Keyframes
- Keyframes and Saved Stills
- Adding EDL Marks
- Copying Grades Using ColorTrace
- Using ColorTrace in Automatic Mode
- Using ColorTrace in Manual Mode
- Importing CDL Data Using ColorTrace
- About The DaVinci Resolve Control Panels
- DaVinci Resolve Micro Control Panel
- DaVinci Resolve Mini Control Panel
- DaVinci Resolve Advanced Control Panel
- Copying Grades Using the Advanced Control Panel
- Rippling Changes Using the Advanced Control Panel
- ResolveFX
- OpenFX
- Browsing the OpenFX Library
- Using ResolveFX and OpenFX in the Color Page
- Applying ResolveFX and OpenFX Plug-Ins
- ResolveFX and OpenFX Settings
- ResolveFX and OpenFX On-Screen Controls
- Motion Tracking ResolveFX and Compatible OFX Plug-ins
- Catalogue of ResolveFX Filters
- ResolveFX Blur
- ResolveFX Color
- ResolveFX Generate
- ResolveFX Light
- ResolveFX Refine
- ResolveFX Repair
- ResolveFX Sharpen
- ResolveFX Stylize
- ResolveFX Texture
- ResolveFX Transform
- ResolveFX Warp
- Resolution Independence in DaVinci Resolve Explained
- The Five Color Page Sizing Modes
- Sizing Controls with the DaVinci Control Panel
- Using Node Sizing for Channel and Paint Effects
- Image Stabilization in the Tracker Palette
- Using Stabilization to Create a Match Move
- Tracking and Stabilizing with the DaVinci Control Panel
- Motion Effects Palette
- The Blur Palette
- Introduction to Dust Removal
- Dirt & ROI Settings Parameters
- Algorithms for Dirt and Dust Removal
- Data Burn
- Project vs. Clip Mode
- Setting Up Burned-In Metadata
- Data Burn Metadata
- Custom Output Options
- Gang Rendered Text Styles
- Prefix Render Text
- The Fairlight Page User Interface
- The Interface Toolbar
- The Audio Timeline
- Toolbar
- Mixer
- The Monitoring Panel
- The Media Pool
- Importing Media Into the Media Pool on the Fairlight Page
- Bins, Power Bins, and Smart Bins
- Showing Bins in Separate Windows
- Filtering Bins Using Color Tags
- Sorting the Bin List
- Filtering Clips With Audio in the Fairlight Page
- Searching for Content in the Media Pool
- Taking Advantage of the Media Pool’s Usage Column
- Effects Library
- Index
- Inspector
- Metadata Editor
- Dual Monitor Layout
- Customizing the Fairlight Page
- Undo and Redo in the Fairlight Page
- Audio Tracks
- What is a Bus?
- Controlling Signal Flow
- Managing Audio Tracks
- Linked Group Support for Mono Tracks
- Creating Buses
- Assigning Buses
- Patching Signal Paths
- Transport Controls and JKL Navigation
- Clip, Marker, and Track Navigation
- Zooming and Scrolling
- Using Flags
- Using Markers
- Setting Up to Record
- Recording Using the Onscreen Controls
- Recording and Editing Multiple Takes Using Layering
- Compatible Audio Formats
- Adding Audio Clips to the Timeline
- Making Audio Clip Selections in the Timeline
- Locking Audio Tracks You Don’t Want to Change
- Splitting and Joining Clips
- Trimming Clips Without Rippling the Timeline
- Disabling and Re-Enabling Clips in the Timeline
- Deleting Audio Clips and Regions
- Cut, Copy, and Paste
- Audio Clip Layering
- Fades and Crossfades
- Finding Clips in the Media Pool
- Changing Clip Color in the Timeline
- Sample Editing
- Audio Settings in the Inspector
- Adjusting Audio in the Inspector
- Adjusting Audio in the Timeline
- Clip EQ
- Introduction to Mixing
- The Mixer
- Customizing the Mixer Controls
- Selecting Channel Strips and Tracks
- Track Organization
- Input
- Effects
- Insert
- EQ
- Dynamics
- Aux
- Pan
- Bus Assignment Buttons
- Arm, Solo, and Mute Buttons
- Fader Controls
- Automation Recording
- Automation Controls
- How to Record Automation
- Viewing Automation
- Overwriting Automation
- Playing Automation
- About Audio Plug-Ins
- Using Audio Filters
- Applying Audio Filters to Main and Sub Buses
- The Monitoring Panel
- Track Meters and Monitoring Controls
- Bus Meters
- Compound Meters and Output Bus Selection Menu
- Viewer
- Signal Flow Overview
- Audio Processing Path
- The Deliver Page
- The Interface Toolbar
- Rendering Files vs. Outputting to Tape
- The Render Settings
- The Deliver Page Timeline
- The Viewer
- The Render Queue
- Delivery Effects Processing
- When Rendering a Single Clip or When Outputting to Tape
- When Rendering Individual Source Clips for Round-Trip Workflows
- More About Rendering Speed Effects
- Determining the Rendered Output Resolution of Clips in Mixed Timelines
- Rendering Edit and Input Sizing Adjustments
- Rendering Mixed Frame Rate Timelines
- Export Alpha Channels
- Using Presets for Fast Rendering
- Choosing a Location To Render
- Single Clip vs. Individual Clips
- All Other Render Settings for Output
- Additional Outputs
- How to Avoid Overwriting Clips When Rendering Output Media
- Defining a Range of Clips and Versions to Render
- Using the Render Queue
- Rendering Jobs from Multiple Projects at Once
- Remote Rendering
- Licensing EasyDCP
- EasyDCP Color Management
- EasyDCP Output in the Deliver Page
- KDM Generation and Management
- Publishing Your Encrypted Digital Cinema Package
- The Tape Output Interface
- Setting Up for Tape Output
- Edit to Tape Queue Option Menu Settings
- Tape Output Procedures
- Exporting to AAF/XML
- More About Exporting to AAF
- Exporting an EDL
- Exporting a Missing Clips EDL
- Exporting Timeline Markers to EDL
- Exporting to CDL
- Exporting the Edit Index as a CSV or TXT File
- Exporting to ALE
- Exporting to ALE with CDL
- Exporting Timeline Markers to EDL
- Exporting and Importing Media Pool Metadata
- More About Resolve Live
- Configuring Your System for Resolve Live
- Grading Live
- Using Resolve Live Grades Later
- Using LUTs in Resolve Live Workflows
- Stereoscopic Workflows
- Hardware Requirements for Working in Stereo 3D
- Supported Stereo 3D Media
- Creating Stereo 3D Clips
- Converting Clips Between Stereo and Mono
- Attaching Mattes to Stereo 3D Clips
- Organizing and Grading Stereo 3D Dailies
- Conforming Projects to Stereo 3D Media
- Adjusting Clips Using the Stereo 3D Palette
- Outputting Stereo 3D Media in the Deliver Page
- Using Metadata Variables
- Using Keywords
- About DCTL
- DCTL Syntax
- A Simple DCT LUT Example
- A Matrix DCT LUT Example
- A More Complex DCT LUT Example
- About the TCP Protocol Version 1.2
- TCP Protocol Stream
- Why Use a Project Server?
- Know Which Version of PostgreSQL You’re Using
- Using the DaVinci Resolve Project Server Application
- Using the Project Server Application to Manage Databases
- Sharing Databases to Create a Project Server
- Requirements for Collaboration
- Enabling Project Collaboration
- Opening Projects for Collaboration
- Customizing Your Collaborator Identification
- How Collaboration Works
- Examples of Collaborators Working Together
- Collaboration Chat
- Introduction to Remote Grading
- Requirements for Remote Grading
- Setting Up for Remote Grading
- Remote Grading Restrictions
Reference Manual
January 2018
DaVinci
Resolve 14.3

Welcome
Welcome to DaVinci Resolve 14 for Mac, Linux and Windows!
DaVinci is the world’s most trusted name in color and has been used to grade more
Hollywoodfilms, TV shows, and commercials than anything else. Now, with DaVinci Resolve14,
you get a complete set of editing, advanced color correction and professional audio
postproduction tools combined in one application so you can edit, grade, mix and master
deliverables from start to finish, all in a single tool!
DaVinci Resolve 14 has the features professional editors, colorists and audio engineers
need, and is built on completely modern technology with advanced audio, color and image
processing that goes far beyond what any other system can do. With this release, we hope
to inspire creativity by letting you work in a comfortable, familiar way, while also giving you
an entirely new creative toolset that will help you cut and finish projects at higher quality than
everbefore!
We hope you enjoy reading this manual. With its customizable interface and keyboard
shortcuts, DaVinci Resolve 14 is easy to learn, especially if you’re switching from another editor,
and has all of the tools you need to create breathtaking, high end work!
The DaVinci Resolve Engineering Team
Grant Petty
CEO Blackmagic Design
3
Contents
PART 1
1 Introduction to DaVinci Resolve 9
2 Managing Projects and Databases 45
3 Project Settings and Preferences 63
4 Camera Raw Settings 100
5 Improving Performance, Proxies, and the Render Cache 118
6 Data Levels, Color Management, ACES, and HDR 134
PART 2
7 Using the Media Page 167
8 Adding and Organizing Media 183
9 Using Clip Metadata 207
10 Modifying Clips and Clip Attributes 218
11 Using Scene Detection 232
12 Ingesting From Tape 241
13 Capturing From the Cintel Film Scanner 250
PART 3
14 Using the Edit Page 269
15 Creating and Working with Timelines 303
16 Preparing Clips for Editing and Viewer Playback 313
17 Editing Basics 329
18 Modifying Clips in the Timeline 352
19 Three and Four Point Editing 365
20 Marking and Finding Clips in the Timeline 390
21 Multicam Editing 406
22 Take Selectors, Compound Clips, andNested Timelines 417
23 Trimming 425
4
Contents
24 Using Transitions 457
25 Working with Audio in the Edit Page 471
26 Media Management 496
PART 4
27 Editing, Adding, and Copying Effects and Filters 505
28 Titles, Generators, and Stills 516
29 Compositing and Transforms in the Timeline 524
30 Edit Page Effects 537
31 Keyframing Effects in the Edit Page 549
32 Fusion Connect 561
PART 5
33 Preparing Timelines for DaVinci Resolve Import 571
34 Conforming and Relinking Clips 584
35 Creating Digital Dailies for Round Trip Workflows 610
36 Conforming XML Files 618
37 Conforming AAF Files 624
38 Conforming EDL Files 635
PART 6
39 Introduction to Color Grading 643
40 Using the Color Page 657
41 Automated Grading Commands and Imported Grades 700
42 Primary Grading Controls 715
43 Curves 741
44 Secondary Qualifiers 765
5
Contents
45 Secondary Windows and Tracking 790
46 Motion Tracking Windows 808
47 Using the Gallery 835
48 Grade Management 847
49 Node Editing Basics 883
50 Serial, Parallel, and Layer Nodes 902
51 Combining Keys and Using Mattes 911
52 Channel Splitting and ImageCompositing 933
53 Keyframing in the Color Page 949
54 Copying and Importing Grades Using ColorTrace 963
55 DaVinci Resolve Control Panels 974
PART 7
56 Using OpenFX and ResolveFX 1000
57 ResolveFX 1011
58 Sizing and Image Stabilization 1052
59 The Motion Effects and Blur Palettes 1075
60 Dust Removal 1087
61 Data Burn 1091
PART 8
62 Using the Fairlight Page 1099
63 Setting Up Tracks, Buses, and Patching 1122
64 Transport Controls, TimelineNavigation, and Markers 1135
65 Recording 1142
66 Editing Basics in the Fairlight Page 1147
67 Clip Levels, Crossfades, Equalization, and Gating 1168
68 Mixing in the Fairlight Page 1174
6
Contents
69 Automation Recording 1192
70 Audio Effects 1199
71 Audio Meters and Audio Monitoring 1206
72 Signal Flow Diagrams 1214
PART 9
73 Using the Deliver Page 1219
74 Delivery Effects Processing 1226
75 Rendering Media 1232
76 Delivering Using EasyDCP 1253
77 Delivering to Tape 1259
78 Exporting Timelines and Metadata 1268
PART 10
79 Resolve Live 1280
80 Stereoscopic Workflows 1287
81 Using Variables and Keywords 1307
82 Creating DTCL LUTs 1313
83 TCP Protocol for DaVinciResolve Transport Control 1319
PART 11
84 Managing Databases andProjectServers 1324
85 Collaborative Workflow 1332
86 Remote Grading 1342
87 Regulatory Notices andSafetyInformation 1345
88 Warranty 1346

PART 1
9
Introduction to DaVinci Resolve Part 1 – 1
Introduction to DaVinci Resolve
DaVinci Resolve integrates editing, color correction, audio recording and mixing, and finishing
within a single, easy to learn application. The editing, grading, and audio tools found in DaVinci
Resolve should be immediately familiar to experienced artists who’ve used other
postproduction applications, but they’re also very approachable to folks who are new to
postproduction.
Additionally, dedicated tools available for on-set workflows integrate tasks such as media
duplication, shot and metadata organization, and on-location look management into a complete
tool set that lets you smoothly segue from the camera-original media being acquired in the field
to the organization and use of that media in a wide variety of postproduction workflows that use
DaVinci Resolve at their heart.
The tight integration in DaVinci Resolve of on-set media, metadata, and “look” organization,
editing, grading, and sound work means that you can freely move from one task to the next
without skipping a beat. This makes it easy to back up and organize your media, and then
immediately dive into editing a program, switching over to color-correct clips in the middle of
your editing spree, before going right back to editing, and then perhaps a bit of mixing to make
sure things sound right, all without needing to export projects or launch other applications. And
you can go further, using the collaborative features of DaVinci Resolve to enable multiple
artists, for example an editor, a colorist, and assistants, to work together on the same timeline
simultaneously, for the ultimate integrated workflow.
Of course, no postproduction professional works in a vacuum, and DaVinci Resolve makes it
easy to work with other facilities by importing projects and exporting project exchange formats
and rendered or managed media among applications such as Apple’s Final Cut Pro X, Adobe’s
Premiere Pro, Avid’s Media Composer and ProTools, Autodesk’s Smoke and Flame Premium,
and many other applications via robust support of XML, AAF, and EDL import and export
workflows.
This chapter introduces the DaVinci Resolve user interface (UI), explaining where to find each
group of features, and how the highly focused and tightly integrated Media, Edit, Color, Fairlight,
and Deliver pages of functionality work together to let you pursue nearly any postproduction
workflow you can imagine. After this brief tour, the rest of Part 1 of this manual provides much
more in-depth information about every aspect of functionality found in DaVinci Resolve.
This chapter covers the following topics:
Getting Started 11
The Project Manager 11
Preferences 11
User Preferences 13
Project Settings 13
Switching Among Pages 14
About Keyboard Shortcuts in the Documentation 15
The Media Page 15
The Media Storage Browser 16
Viewer 16
Media Pool 17
Metadata Editor 17
Audio Panel 18
10
Introduction to DaVinci Resolve Part 1 – 1
The Edit Page 18
The Media Pool 19
Eects Library Browsing 19
Edit Index 20
Source/Oine and Timeline Viewers 20
Inspector 21
Toolbar 22
Timeline 22
Edit and Color Page Effects and Fusion Connect 22
The Color Page 23
Viewer 24
Gallery 24
Node Editor 25
Timeline 26
Left Palettes 26
Center Palettes 27
Keyframe Editor 27
The Fairlight Page 28
The Audio Timeline 28
Toolbar 29
Mixer 30
Dedicated Channel Strip Controls 30
The Monitoring Panel 32
The Deliver Page 32
The Render Settings List 33
The Deliver Page Timeline 34
The Viewer 34
The Render Queue 35
Working with the DaVinciResolve User Interface 35
Working Full Screen vs. within a Floating Window 35
Showing and Hiding Panels of Functionality Using the Interface Toolbar 36
Adjusting the Size of Dierent Panels 36
Using Single vs. Dual Monitor Layouts 37
Saving Custom Screen Layouts 38
Resetting to the Default Layout 39
Undocking Specific Panels of the Interface 39
DaVinci Resolve User Interface Conventions 41
Contextual Menus 41
Buttons and Pop-up Menus 41
Adjusting Parameters 42
The Three Buttons of a Mouseor Other Input Device 42
11
Introduction to DaVinci Resolve Part 1 – 1
Getting Started
When you install DaVinci Resolve and then open it for the first time, there are a few things
you’re going to want to do before you begin working on your first project.
The Project Manager
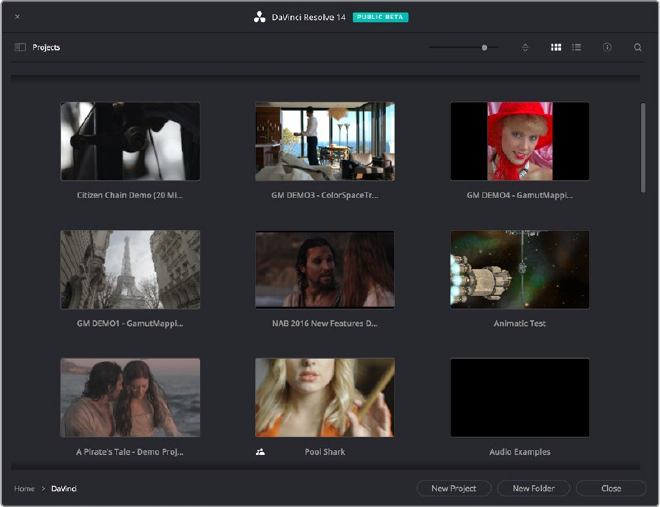
The Project Manager is the first window you’ll see when you open DaVinci Resolve. The Project
Manager is a centralized interface for managing all projects belonging to the user who’s
currently logged in, whose name appears at the upper right-hand corner in a project title bar.
The Project Manager is also the place where you import and export projects to and from
DaVinci Resolve, whether you’re moving projects around from user to user, or moving projects
from one DaVinci Resolve workstation to another. Finally, the Project Manager also lets you
organize the databases that are used to manage everything in DaVinci Resolve using the
Database Sidebar.
To open any project, double-click it. To create a new project, double-click the Untitled Project
icon, or click the New Project button.
The Project Manager shows all projects belonging to the current user
More information about the Project Manager appears in Chapter 2, “Managing Projects
andDatabases.”
Preferences
The Preferences Window, divided into System preferences and User preferences panels, lets
you set up the overall environment of your DaVinci workstation, choosing what hardware to use
with DaVinci Resolve and what user interface settings you prefer as you work.
12
Introduction to DaVinci Resolve Part 1 – 1
The DaVinci Resolve Preferences let you set up your environment
A quick overview of the most important System and User Preferences appears below, but for a
comprehensive overview and for more information, see Chapter 3, “Project Settings and
Preferences.”
System Preferences
The System preferences let you configure the hardware DaVinci Resolve works with. If you have
a system that doesn’t change very often, then you may only rarely use the Preferences window.
On the other hand, if you’re working with a mobile system with changing video interfaces,
control panels, and scratch volumes, then you may use this window more frequently.
Note: Whenever you change certain core System Settings in the Preferences, you may have to
quit and restart DaVinci Resolve for those changes to take effect.
Hardware Configuration
Lets you choose various options governing how to use the GPUs attached to your computer,
and how to configure Viewers in different pages. This panel also provides an overview, for
reference, of all hardware and computer characteristics that are relevant to DaVinci Resolve
running smoothly, including listing of installed GPUs.
Media Storage
This is a list within which you define the scratch disk used by your system. The first volume in
this list is where Gallery stills and cache files are stored, so you want to make sure that you
choose the fastest storage volume that’s connected.

13
Introduction to DaVinci Resolve Part 1 – 1
Video and Audio I/O
The preferences in this panel let you choose which video and audio interfaces you want
DaVinci Resolve to use on your workstation. If you have multiple Blackmagic Design I/O
interfaces connected to your computer, you can choose one to use for monitoring video output,
and one to use for Resolve Live, a feature that lets you grade camera output during a shoot as
part of an on-set workflow.
Control Panels
Lets you choose and configure (if necessary) a control panel that’s connected for use during
grading in Resolve.
User Preferences
User preferences govern the setup of the user interface in Resolve, letting you customize it to
work the way you like.
UI Settings
A Language pop-up at top lets you specify which language the DaVinci Resolve user interface
displays. DaVinci Resolve currently supports English, Chinese, Japanese, and Spanish.
Additional checkboxes let you choose options for which project to open during startup, and
how to configure the Viewers that appear in every page of DaVinci Resolve.
Auto Save
This panel contains the all-important auto-save controls, including the Live Save option that
enables Resolve to incrementally save your changes as you work.
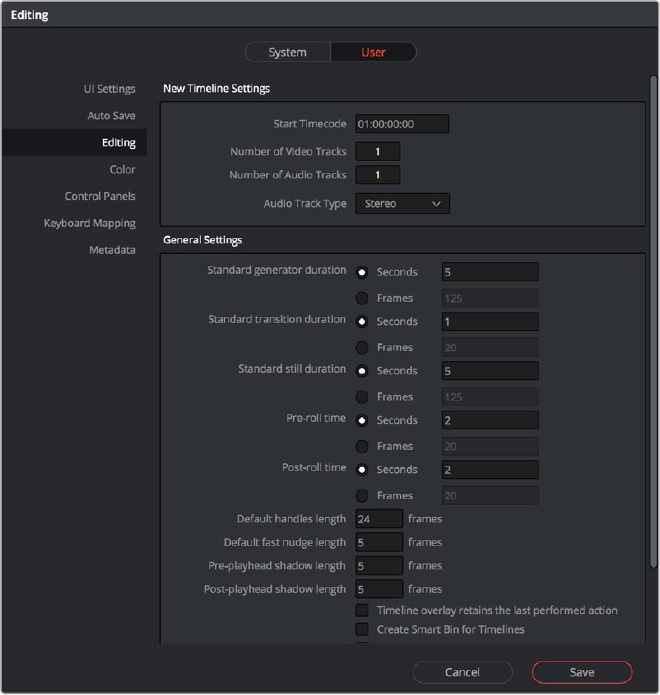
Editing
Numerous controls in this panel let you customize the editing experience in the Edit page,
including default settings to use when making new timelines, and general settings that govern
standard effects durations and trim behaviors.
Color
These controls let you customize the grading experience in the Color page, with options
controlling video scope display, the look of UI overlays, and other color-specific functions.
Keyboard Mapping
This panel has all the controls you need for searching for and customizing the keyboard
shortcuts used for different commands throughout DaVinci Resolve.
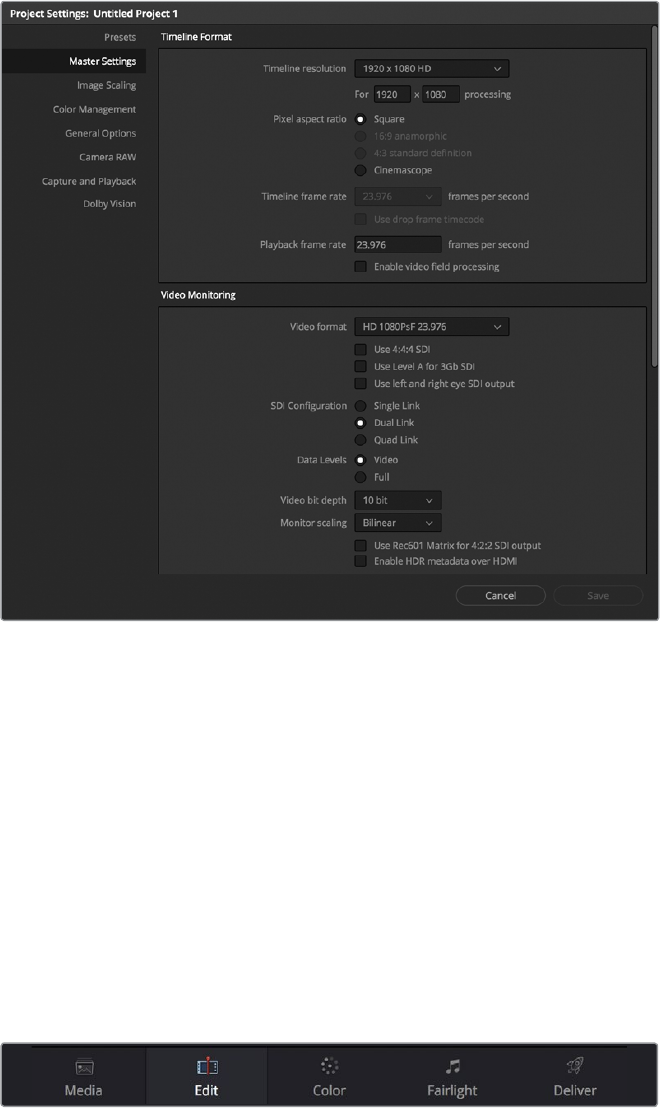
Project Settings
Once you’ve created a project, all project-specific settings are found in the Project Settings
window. To open the Project Settings window, just click the gear button at the bottom right on
any page.
Project Manager and Project Settings buttons
14
Introduction to DaVinci Resolve Part 1 – 1
The Project Settings open in the middle of the screen, divided into a series of panels which can
be selected from a sidebar to the left. Each panel contains a collection of related settings that
affects some category of Resolve functionality. To open a panel of settings, simply click its
name in the sidebar at the left.
The Project Settings show all project-specific settings and attributes
The Master Settings define the principal attributes of a project, such as the timeline resolution,
timeline frame rate, color science, and bit depth. Image Scaling settings define how clips that
don’t match the timeline resolution are scaled to fit. There are other panels for Color
Management, Camera RAW, Capture and Playback, et cetera.
For more information about Project Settings, see Chapter 3, “Project Settings and Preferences.”
Switching Among Pages
DaVinci Resolve is divided into five main pages of functionality, which can be accessed using
buttons at the very bottom of the DaVinci Resolve interface. These buttons are organized in
order of workflow, and they’re always available, letting you quickly switch between importing
media, editing, grading, mixing, and outputting your project in a structured manner.
Buttons for switching pages appear at the bottom of the UI
15
Introduction to DaVinci Resolve Part 1 – 1
You can also switch pages using the following keyboard shortcuts.
Page Keyboard Shortcut
Media Shift-2
Edit Shift-4
Color Shift-6
Fairlight Shift-7
Deliver Shift-8
About Keyboard Shortcuts in the Documentation
Since the majority of DaVinci Resolve users are on Mac OS, this manual presents all keyboard
shortcuts using the OS X conventions of the Command key and the Option key.
Forcompatibility with Windows and Linux, the Control key in Mac OS is not used by default for any
keyboard shortcuts (although it can be assigned if you customized your keyboard shortcuts).
All keyboard shortcuts that use the Option key in macOS use the ALT key in Windows and
Linux, and all keyboard shortcuts that use the Command key in macOS use the Control key in
Windows and Linux.
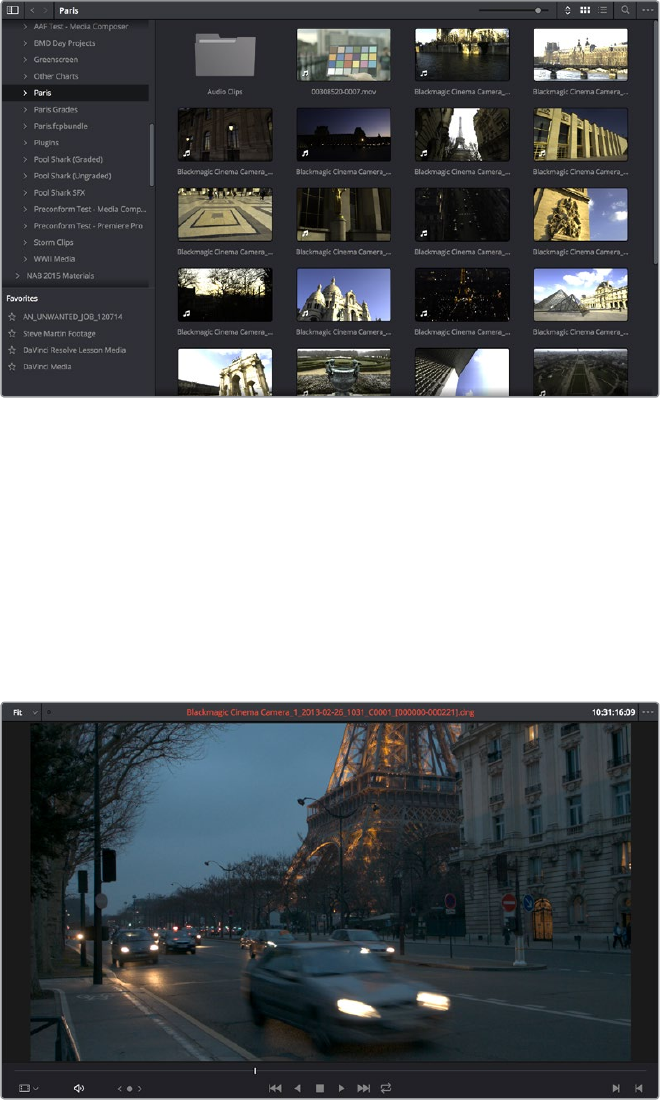
The Media Page
The Media page is the primary interface for media management and clip organization in DaVinci
Resolve. It’s central to the way DaVinci Resolve works that the source media used by a project
is organized separately from the project data that you import and manage in the Edit page. In
this way, you can manage and update the clips used by timelines in the current project with
ease, switching between offline and online media, reorganizing clips, and troubleshooting any
problems that occur.
The Media page also contains much of the core functionality that will be used for on-set
workflows, and in the ingest, organizational, and sound-synching steps of digital dailies
workflows. This chapter covers most of the functionality found in the Media page, including
functions in detail that are referenced throughout this manual.
The Media page is divided into six different areas, designed to make it easy to find, select, and
work with media in your project. Much of the functionality and most of the commands are found
within the contextual menus that appear when you right-click clips in the Library, File Browser,
or Media Pool.
Media page
For more information on using the Media page, see Chapter 7, “Using the Media Page.”
16
Introduction to DaVinci Resolve Part 1 – 1
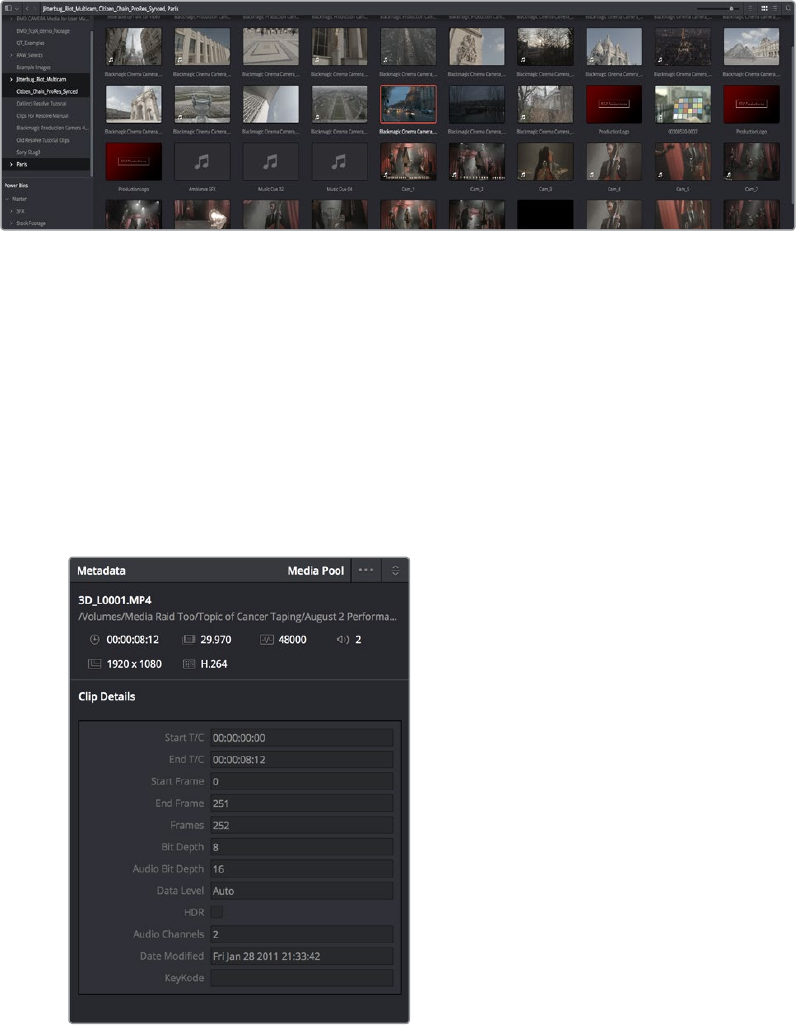
The Media Storage Browser
The Media Storage browser shows a list of all volumes that are currently available to your
Resolve workstation. It’s used to locate media that you want to import manually into
yourproject.
Media Storage with scrubbable Clip view
Viewer
Clips that you select in any area of the Media page show their contents in the Viewer. A jog
barappears at the bottom, letting you drag the playhead directly with the pointer, while a
jogcontrol between the mode pop-up and transport controls lets you move through a long clip
more slowly. The full width of the jog bar represents the full duration of the clip in the Viewer.
The current position of the playhead is shown in the timecode field at the upper right-hand
corner of the Viewer. Simple transport controls appear underneath the jog bar, letting you
Jumpto First Frame, Play/Stop, and Jump to Last Frame.
Media page viewer
You can also put the Viewer into Cinema Viewer mode by choosing Workspace > Viewer Mode
> Cinema Viewer (Command-F), so that it fills the entire screen. This command toggles
CinemaViewer mode on and off.
17
Introduction to DaVinci Resolve Part 1 – 1
Media Pool
The Media Pool contains all of the media that you import into the current project. It also contains
any media that’s automatically imported along with Timelines that have been imported into
Resolve. Ordinarily, all media imported into a project goes into the Master folder, however the
Media Pool can be organized into as many user-definable folders as you like, depending on
your needs. Media can be freely moved from one folder to another from within the Media Pool.
Media Pool with the Folder View closed
Metadata Editor
When you select a clip in any area of the Media page, its metadata is displayed within the
Metadata Editor. If you select multiple clips, only the last clip’s information appears. The
Metadata Editor’s header contains uneditable information about the selected clip, including the
file name, directory, duration, frame rate, resolution, and codec. A series of editable fields within
the Metadata Editor lets you review and edit the different metadata items that are available.
Apop-up menu at the upper-right of the Metadata Editor lets you choose from many different
sets of metadata fields and checkboxes, each grouped for a specific task or workflow.
Clip Metadata Editor
18
Introduction to DaVinci Resolve Part 1 – 1
Audio Panel
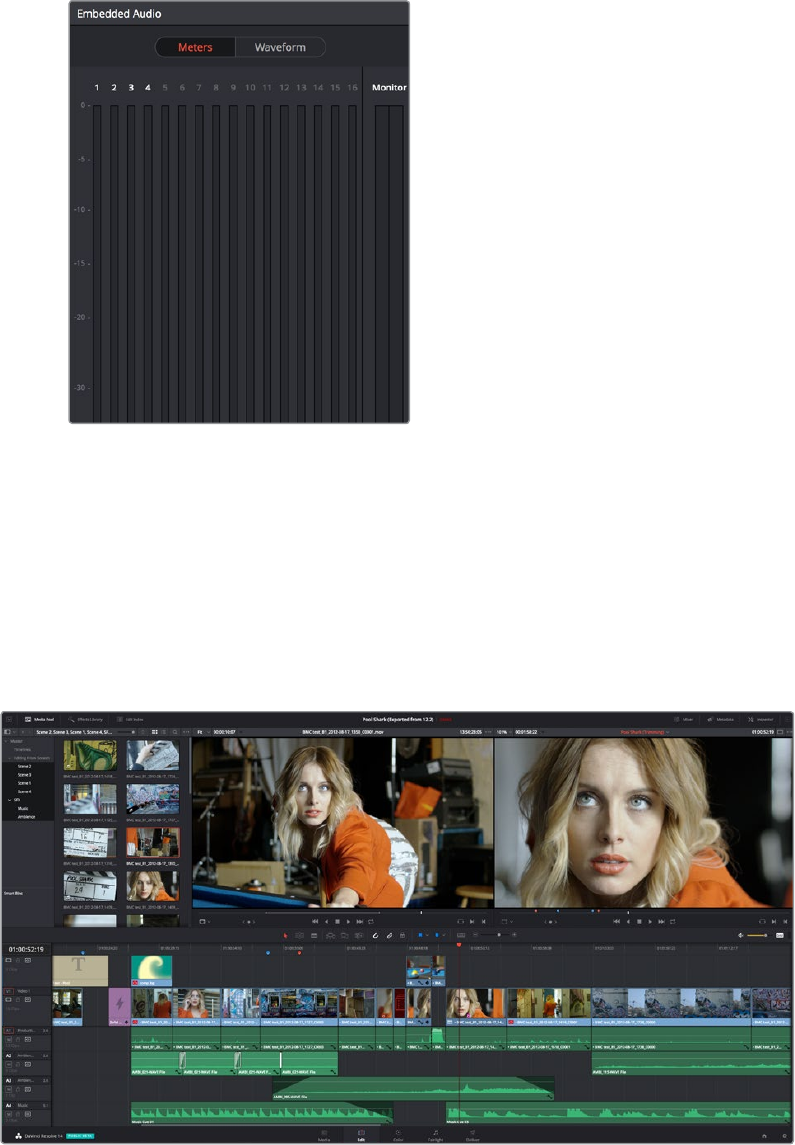
The Audio Panel can be put into one of two modes via a pair of buttons above the audio meters.
In the default Meters mode, Audio Meters are displayed that show the levels of audio in clips
you’re playing. In Waveform mode, you can load audio clips side by side with video clips opened
in the Viewer in order to sync them together manually. The Audio Panel can also be hidden.
Audio Meters exposed
The Edit Page
The Edit page exposes a source-record style NLE that incorporates many specialized features
for both creative editing and finishing. The Edit page is divided into three main regions: the
browsers found at the left, the Viewers at the top, and the Timeline at the bottom, all of which
work together to let you import, edit, and trim timelines with a flexible variety of tools
andmethods.
The Edit page
For more information on the Edit page, see Chapter 14, “Using the Edit Page.”
19
Introduction to DaVinci Resolve Part 1 – 1
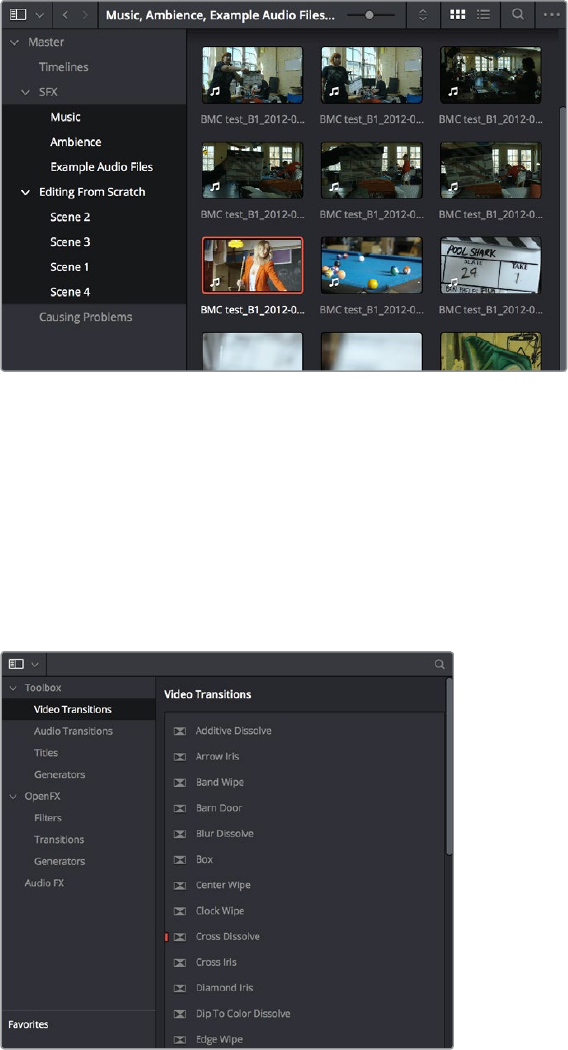
The Media Pool
The Media Pool lets you organize and peruse all of the media and timelines in a project. DaVinci
Resolve projects may contain one or more edited timelines (sometimes called a sequence in
other applications).
The Media Pool in the Edit page is identical to that shown on the Media page, and shows you all
of the source clips and timelines that are available for editing. A Bin list at the left shows a
hierarchical list of folders that you can use to organize your media. By default, the Media Pool
has a single bin, named “Master,” but you can add more bins as necessary to organize your
clips, opening any of them to expose their contents with a single click. The Bin list can be
hidden or shown via the button at the upper-left of the Media Pool. A browser to the right shows
the contents of the currently selected bin.
The Media Pool in Thumbnail mode
Effects Library Browsing
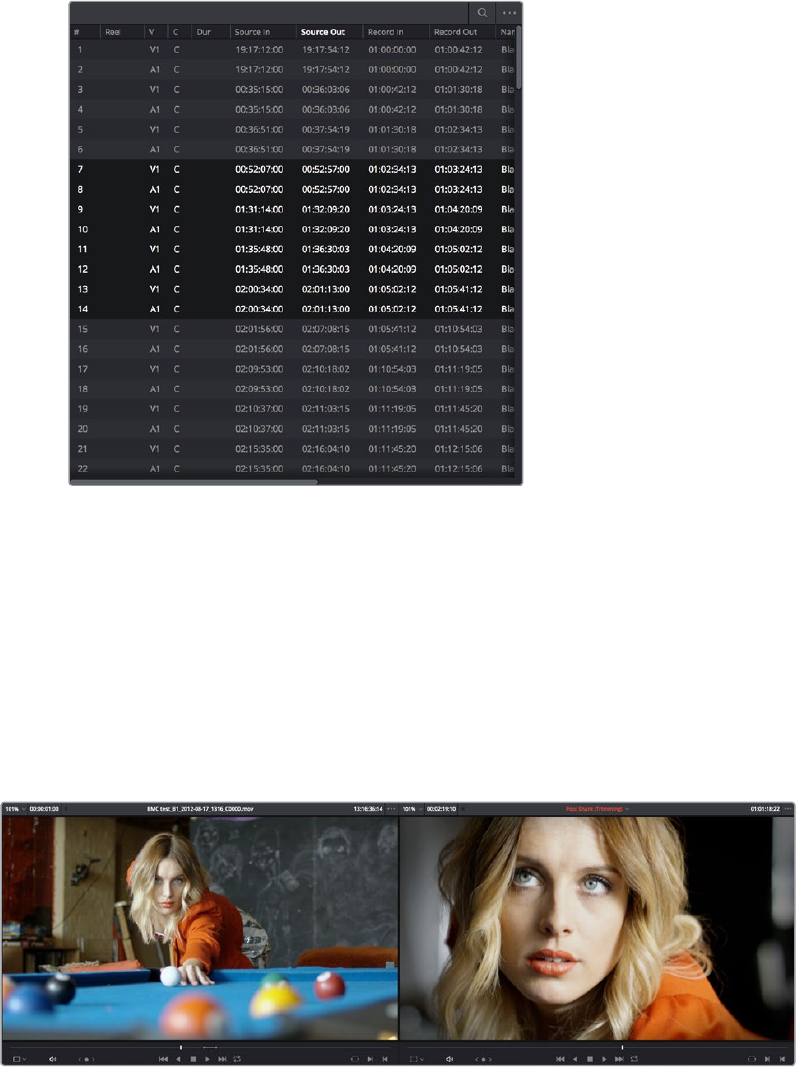
The Effects Library contains a folder with the different Video Transitions, Title Effects,
Generators, and Filters that are available for editing in the Timeline. The Effects Library has
twopanels, a Toolbox panel that contains the default Transitions, Titles, and Generators that
Resolve comes with, and an OpenFX panel that contains any OpenFX transitions and
generators you might have installed on your system.
The Effects Library, made taller to show all of its contents
20
Introduction to DaVinci Resolve Part 1 – 1
Edit Index
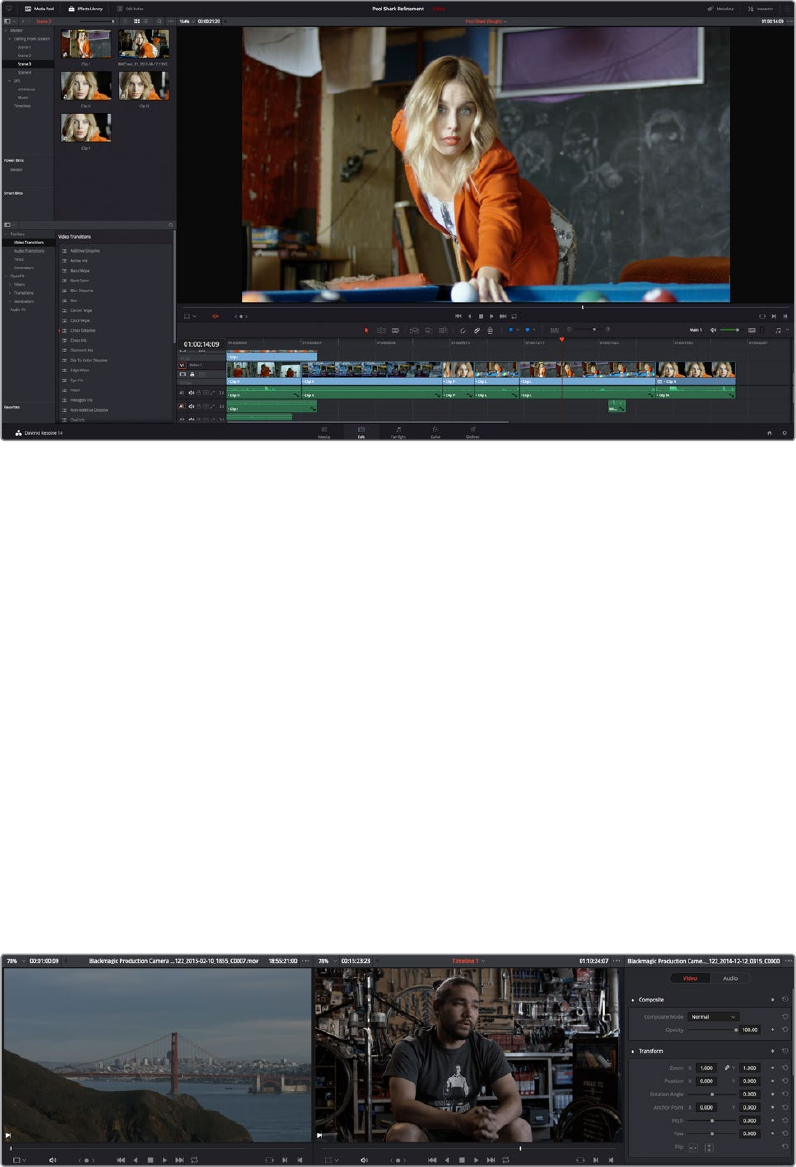
Clicking the Edit Index button opens the Edit Index. By default, this shows an EDL-style list view
of all the edit events in the current Timeline. Whichever timeline is selected in the Timeline list
displays its events here; each clip and transition is shown as an individual event, each of which
contains multiple columns of information. If you re-edit a timeline, your changes are
automatically reflected in this list.
Edit Index List shown open
Source/Offline and Timeline Viewers
The Source Viewer lets you view individual clips from the Media Pool to prepare them for
editing. Meanwhile, the Timeline Viewer shows the frame at the position of the playhead in the
Timeline. You can select either viewer by clicking, and the name of the viewer that currently has
focus appears in orange. The color shown in the Source Viewer usually reflects that of the
original source media, while the Timeline Viewer shows whatever grading you’ve done in the
Color page.
Source and Timeline Viewers
21
Introduction to DaVinci Resolve Part 1 – 1
If you want to change the Edit Page layout to hide the Source Viewer, you can choose View >
Single Viewer Mode to hide the Source Viewer and instead use just a single viewer to
contextually display either a selected Source Clip or the current frame of the Timeline.
Single Viewer mode
In Single Viewer mode, whatever you select in the Media Pool or Timeline determines which
controls appear in the Viewer, which lets you do nearly everything you can do with two
simultaneously open viewers.
You can also put either the Source or Timeline Viewers into Cinema Viewer mode by
choosing Workspace > Viewer Mode > Cinema Viewer (Command-F), causing whichever
Viewer is currently selected to fill the entire screen. This command toggles Cinema Viewer
mode on and off.
Inspector
The Inspector can be opened to let you customize compositing, transform, and cropping
parameters for clips, as well as clip-specific retime and scaling options. Furthermore, the
Inspector lets you edit the parameters of transitions, titles, and generators used in the Timeline,
in order to customize their effect. Ordinarily, the Inspector opens alongside the Source and
Timeline Viewers, but on smaller displays, opening the Inspector switches the Edit page to a
single-viewer mode, showing you the Timeline item that you’re inspecting alongside the
Inspector with that clip’s parameters.
The Inspector, opened and showing a clip’s parameters
22
Introduction to DaVinci Resolve Part 1 – 1
Toolbar
Eleven buttons starting from the left, running along the top of the Timeline, let you choose
different tools for performing various editing functions.
Buttons in the Toolbar
Timeline
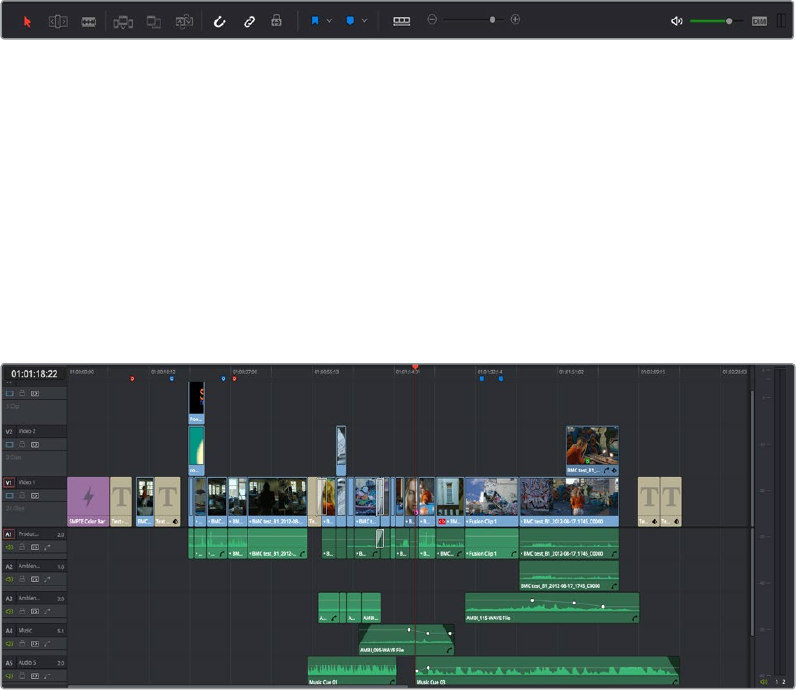
The Timeline shows whichever timeline you’ve double-clicked in the Timelines browser. It’s the
workspace where you either edit programs together from scratch, or import sequences from
other applications to work on inside of Resolve. You can only have one Timeline open at a time.
The Timeline is divided into audio and video tracks, each of which has a series of header
controls at the left that let you choose destination tracks for editing, name tracks, and turn
tracks on and off, among other things. The appearance of the Timeline can be customized
using the Timeline View Options pop-up in the toolbar.
An edited timeline
Edit and Color Page Effects
and Fusion Connect
DaVinci Resolve has a wealth of effects in both the Edit and Color pages for creating titles,
transforming and animating clips, compositing and creating transparency effects, cutting
mattes, applying filters, image stabilization, lens dewarping, etcetera, etcetera. To use Resolve
to best effect, it’s prudent to begin to think of the Edit and Color pages as complementary sets
of controls. For editors, the Color page is really just a giant inspector filled with every control for
color and visual adjustment you could want, that’s only one click away. For colorists, the Edit
page is a refined environment for dealing with conform issues and taking care of a myriad of
finishing tasks quickly and easily, that itself is only one click away. For more information on the
effects that are available in DaVinci Resolve, see the chapters available within Part 4, “Edit Page
Effects,” and Part 7, “Color Page Effects.”

23
Introduction to DaVinci Resolve Part 1 – 1
However, when you run into instances where the various effects in the Edit and Color page
aren’t enough to achieve the effect you require, you can use the Fusion Connect features of
DaVinci Resolve to send one or more clips from the Edit page timeline to Blackmagic Fusion,
the powerful node-based compositing application from Blackmagic Design, in order to do more
robust compositing and effects work there. This is a simple round-trip operation that lets you
send clips from the Resolve timeline to Fusion, add effects, and then render a finished effect
out of Fusion that will automatically appear back in your timeline. For more information, see
Chapter 32, “Fusion Connect.”
The New Fusion Connect Clip dialog
The Color Page
The Color page is where you color correct, or grade, your program. It has all of the controls
available for manipulating color and contrast, reducing noise, creating limited secondary color
corrections, building image effects of different kinds, adjusting clip geometry, and making many
other corrective and stylistic adjustments. The Color page is divided into seven main areas that
work together to let you build a grade. It’s divided into seven regions.
The default layout of the Color page
For more detailed information about the Color page, see Chapter 40, “Using the Color Page.”
24
Introduction to DaVinci Resolve Part 1 – 1
Viewer
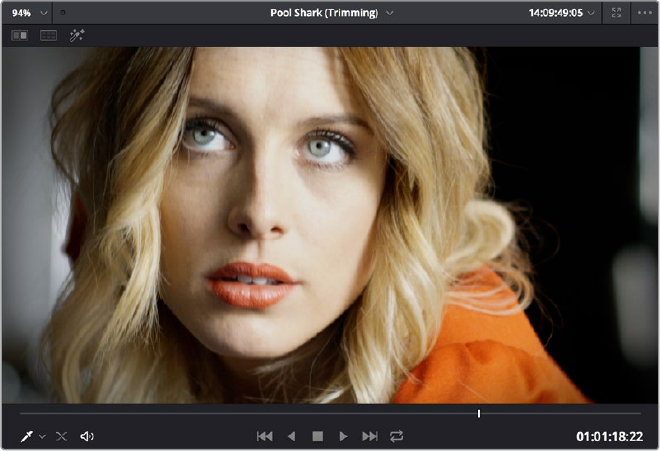
The Viewer shows the frame at the current position of the playhead in the Timeline. The
contents of the Viewer are almost always output to video via whichever I/O interface you have
connected. At the top of the Viewer is a header that displays the Project and Timeline names,
as well as a Viewer Timecode display that shows the source timecode of each clip by default.
The Timeline name is also a pop-up display that lets you switch to any other timeline in the
project. A jog bar (sometimes referred to as a scrubber bar) underneath the image lets you drag
the playhead across the entire duration of the clip, while transport controls underneath that let
you control playback. A toolbar at the top provides controls governing Image Wipes, Split-
Screen controls, and Highlight display. Additional controls let you turn audio playback on and
off, and choose which on-screen controls are currently displayed.
Viewer with transport controls
You can also put the Viewer into Cinema Viewer mode by choosing Workspace > Viewer Mode
> Cinema Viewer (Command-F), so that it fills the entire screen. This command toggles
CinemaViewer mode on and off. Two other modes, Enhanced Viewer (Option-F) and Full
Screen Viewer (Shift-F), are available to provide more working area for tasks such as window
positioning and rotoscoping.
Gallery
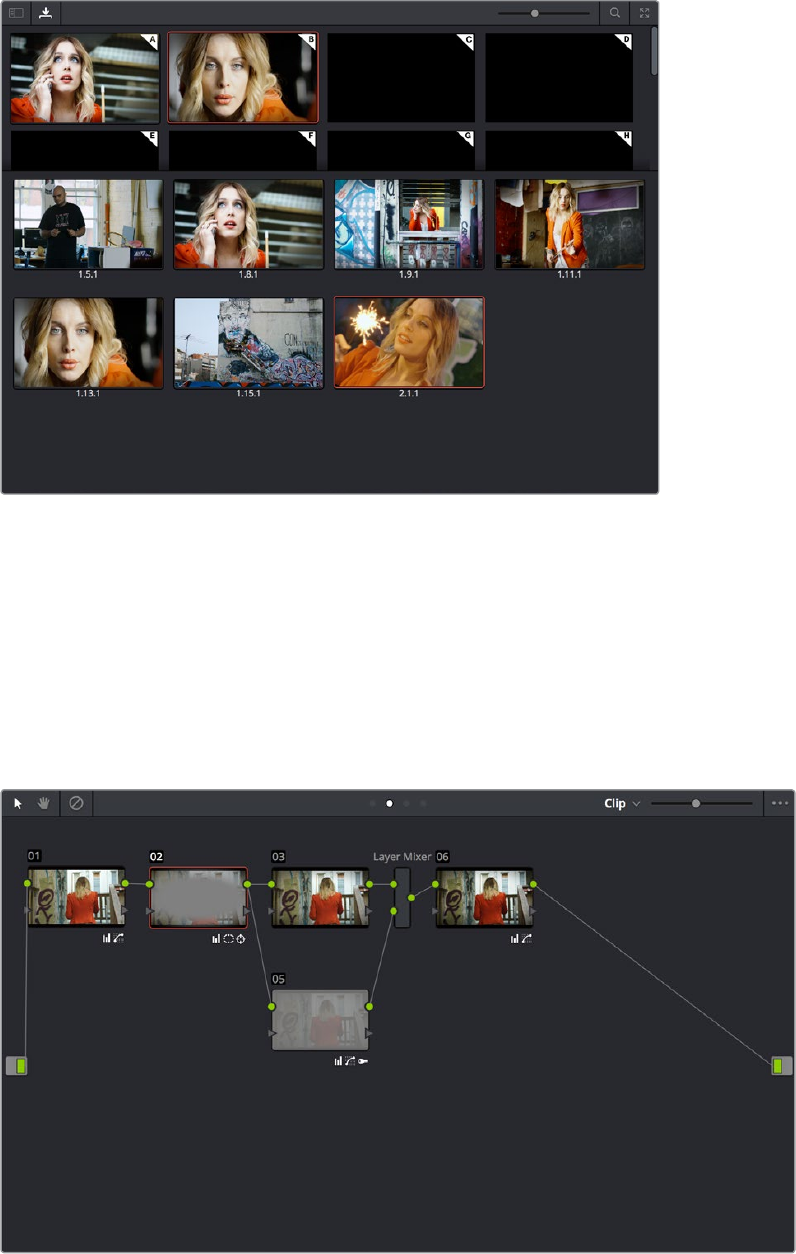
The Gallery is used for storing still frames to use as reference when comparing clips to one
another. Each still frame also stores that clip’s grade so you can copy it later; stills and grades
are stored together. A button lets you open up the Album browser, used for organizing your
stills. At the top of the Gallery, Memories let you store grade information that you can apply
using a control panel or keyboard shortcuts. You can also open a larger Gallery window within
the Color page that provides more room for organizing your saved stills and grades. For more
information on the Gallery page, see Chapter 47, “Using the Gallery.”
25
Introduction to DaVinci Resolve Part 1 – 1
The Gallery has Memories, Stills saved in Albums and your PowerGrades
Node Editor
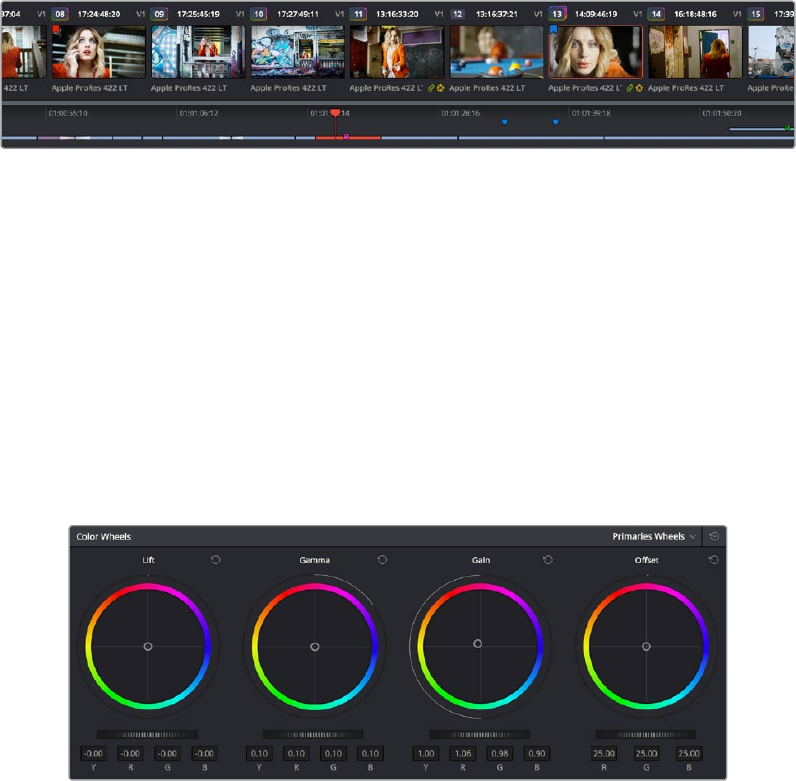
The Node Editor is where you assemble one or more individual corrections (nodes) together to
create multi-correction grades (seen as node trees). This is a powerful way of assembling
grades, since different combinations of nodes let you create different corrections and very
specific adjustments by reordering operations, combining keys, or changing the layer order of
different adjustments. For more information about the Node Editor, see Chapter 49, “Node
Editing Basics.”
Node Editor to construct your grade processing signal flow
26
Introduction to DaVinci Resolve Part 1 – 1
Timeline
The Timeline in the Color page reflects the contents of the Timeline in the Edit page, but has a
different appearance that’s tailored to the requirements of the colorist. However, the content is
identical, and changes made to the Timeline in the Edit page are immediately seen in the Color
page as you switch back and forth. The Color page Timeline provides several ways of navigating
the clips in your project, as well as keeping track of what has been done to which clips.
The Timeline is divided into three parts, each of which shows different information and provides
differing controls. A Timeline Ruler at the top lets you scrub the playhead across multiple clips,
and can be zoomed out enough to show every clip in your entire program. Underneath, the
Mini-Timeline (which can be opened or closed via a button at the right of the palette bar) shows
a small representation of the Timeline in the Edit page wherein each clip is as long as its actual
duration. At the bottom of the Timeline is the Thumbnail timeline, in which each clip is
represented by a single frame. The currently selected clip is outlined in orange, and information
appears above and below each thumbnail such as each clip’s source timecode, clip number
and track number, version name, whether it’s been graded, whether it’s been tracked, if it’s
been flagged, and so on.
The Timeline
Left Palettes
A series of palettes at the bottom left of the Color page provide access to different sets of
grading tools, used principally for manipulating color, contrast, and raw media format settings.
Each individual palette is opened by clicking the corresponding icon at the top of the Palette
panel.
The available palettes are the Camera Raw palette (for making metadata adjustments to raw
media formats), the Color Match palette (for creating automatic grades by sampling on-camera
color charts), the Color Wheels (graphical color balance controls and master wheels or sliders for
adjusting YRGB Lift/Gamma/Gain), the RGB Mixer (for mixing color channels into one another),
and the Motion Effects palette (with controls for noise reduction and artificial motion blur).
Left palette selection buttons
27
Introduction to DaVinci Resolve Part 1 – 1
Center Palettes
At 1920x1080 resolution or higher, a second set of palettes is organized at the bottom center of
the Color page. These palettes span a wide range of functionality, and the adjustments you
make with them can be combined with those made using the Color palettes.
Center palette selection buttons
The eight available Center palettes include the Curves palette, the Qualifiers palette, the
PowerWindows palette, the Tracker palette, the Blur palette, the Key palette, the Sizing palette,
and the Stereoscopic 3D palette.
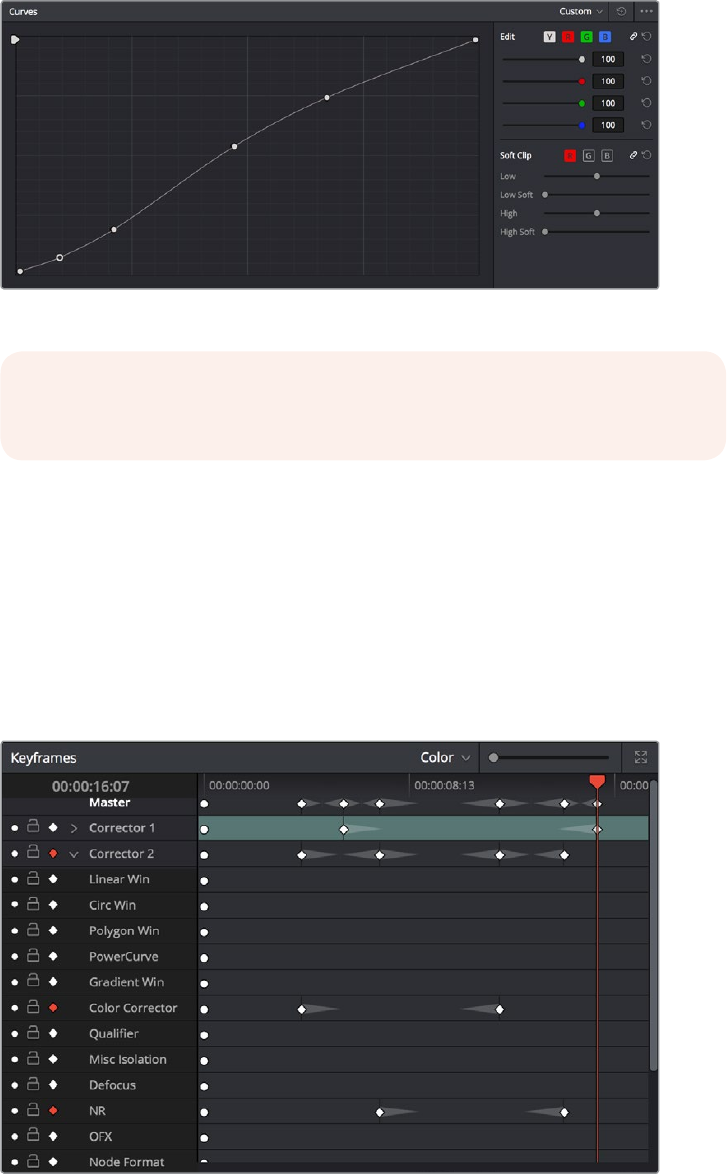
Keyframe Editor
The Keyframe Editor provides an interface for animating Color, Sizing, and Stereo Format
adjustments over time. Each node in the Node Editor corresponds to a track in the Keyframe
Editor, which lets you animate each node’s adjustments independently.
Keyframe Editor displaying dynamic grade changes
NOTE: At lower resolutions, the Left and Center palettes are merged to fit the
DaVinci Resolve interface into a smaller area.
28
Introduction to DaVinci Resolve Part 1 – 1
Furthermore, each node’s track can be opened up to reveal Parameter Groups, so that you can
animate subsets of an individual node’s functions independently of other functions within the
same node.
The Fairlight Page
In single monitor mode, the Fairlight page is an optimized look at the audio tracks of your
project, with an expanded mixer and custom monitoring controls that make it easy to evaluate
and adjust the levels of your program in order to create a smooth and harmonious mix.
Audio page
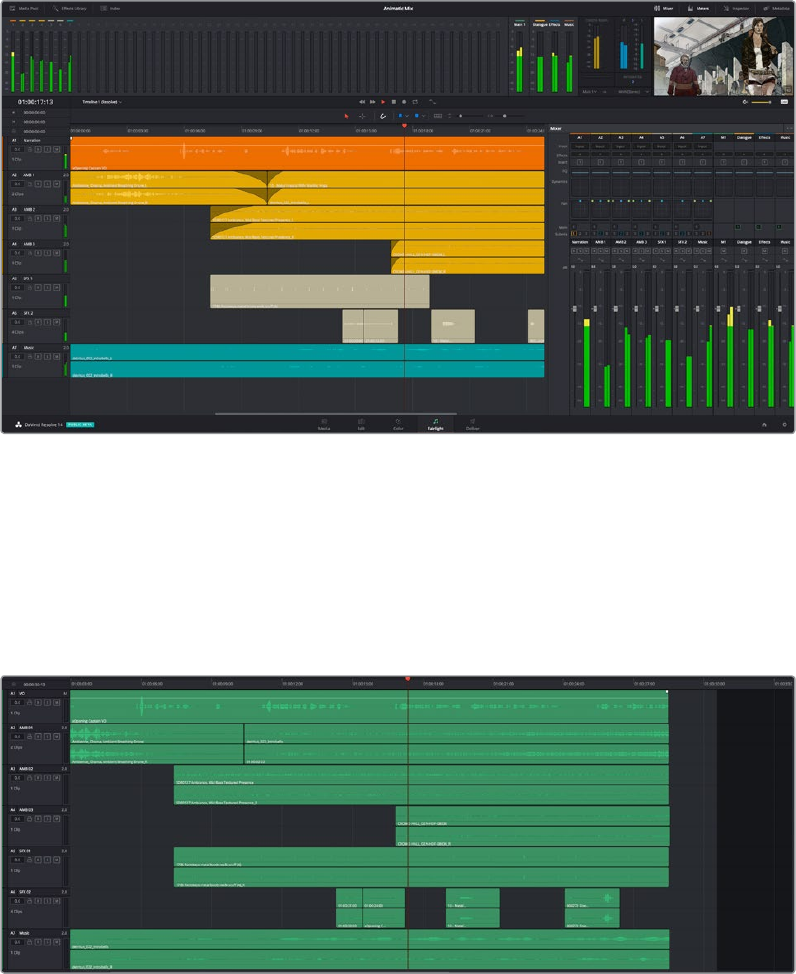
The Audio Timeline
The heart of the Fairlight page, the Audio Timeline presents the audio channels and tracks of
the currently selected timeline differently than the Edit page does, in a one-channel-per-track
format that’s optimized for audio mixing and sweetening. The Audio page Timeline cannot
beclosed.
The Audio page Timeline
29
Introduction to DaVinci Resolve Part 1 – 1
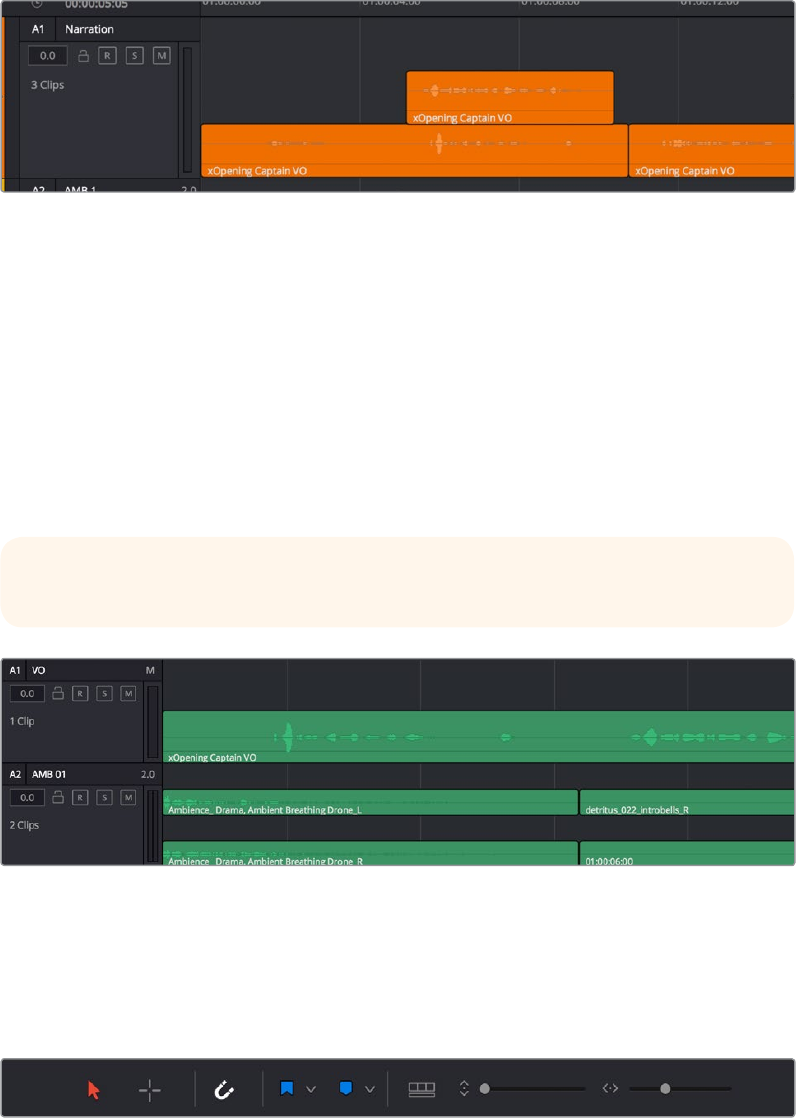
The Fairlight page of DaVinci Resolve supports multiple audio tracks, and each audio track may
contain multiple lanes. The clips edited into the Timeline appear within each track, with the
recorded channels within each clip occupying as many lanes as that clip has available. At the
left of each track is a header area that contains a number of controls.
Audio layering in a mono audio track
The Fairlight page differs in another unique respect from the Edit page Timeline, in that it
supports audio layering. Audio layering is a special audio editing mode that lets you
superimpose multiple audio clips in the same track, and whatever audio clip is on top dictates
which audio will play. In a way, when audio layering is enabled, superimposed audio clips are
treated the same as superimposed video clips that all have opacity set to 100%, with clips on
top obscuring (or muting) clips underneath.
Audio layering is incredibly useful for any situation where you’re combining pieces of multiple
takes together to create a single VO, audio vocal track, or dramatic performance, as you can
choose which pieces to prioritize via their superimposed position in the track, while you’re
preserving the other takes underneath in case you want them later.
Turning on Track Layers opens up space to edit more audio into each track
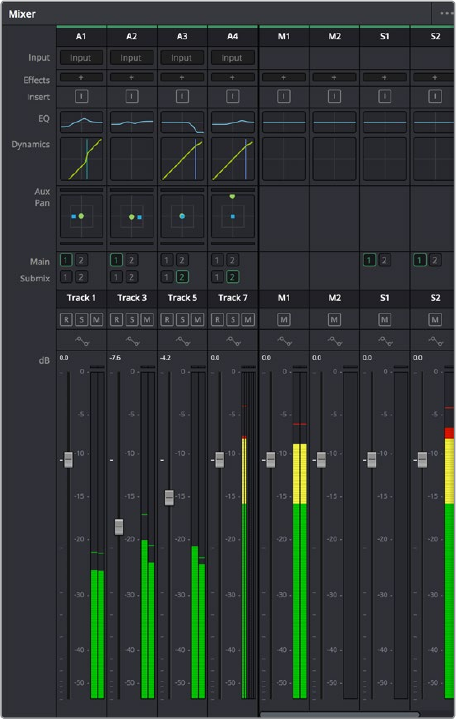
Toolbar
The Toolbar has buttons that let you choose modes of audio-specific functionality and other
buttons that let you execute commands, such as placing markers and flags.
Buttons in the Fairlight Page Toolbar
TIP: Track Layering can be used on the Edit page as well.
30
Introduction to DaVinci Resolve Part 1 – 1
Mixer
The Audio Mixer provides a set of graphical controls you can use to assign track channels to
output channels, adjust EQ and Dynamics, set levels and record automation, pan stereo and
surround audio, and mute and solo tracks, all while you continue to edit.
The Audio Mixer exposes a set of channel strips with controls that correspond to the tracks in
the Timeline, one for each track, plus a Master strip corresponding to the Master audio track in
the Timeline, that lets you choose the number of audio channels to output, and also lets you
adjust the overall level of the mix.
The Audio Mixer, with channel strips corresponding
to the tracks in the Timeline
Dedicated Channel Strip Controls
The Mixer also has a series of dedicated channel strip controls that add powerful mastering
capabilities to DaVinci Resolve. These include:
EQ: Double-clicking exposes a four band parametric equalizer with additional Hi and Lo
Pass filters, that has both graphical and numeric controls for tuning the frequencies of
the audio on each track. You can select from among four types of EQ filtering from the
Equalizer Type pop-up menu, with options for Earth (the default), Air, Ice, and Fire. Each
band has controls for the filter type (Bell, Lo-Shelf, Hi-Shelf, Notch), Frequency, Gain,
and Q-factor (sharpness of the band).
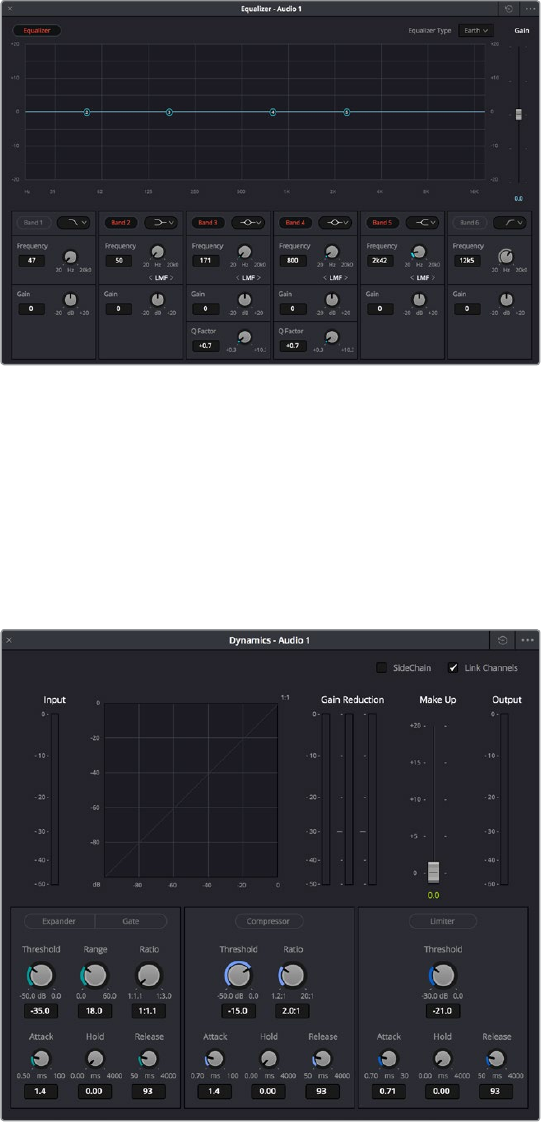
31
Introduction to DaVinci Resolve Part 1 – 1
The channel strip EQ window
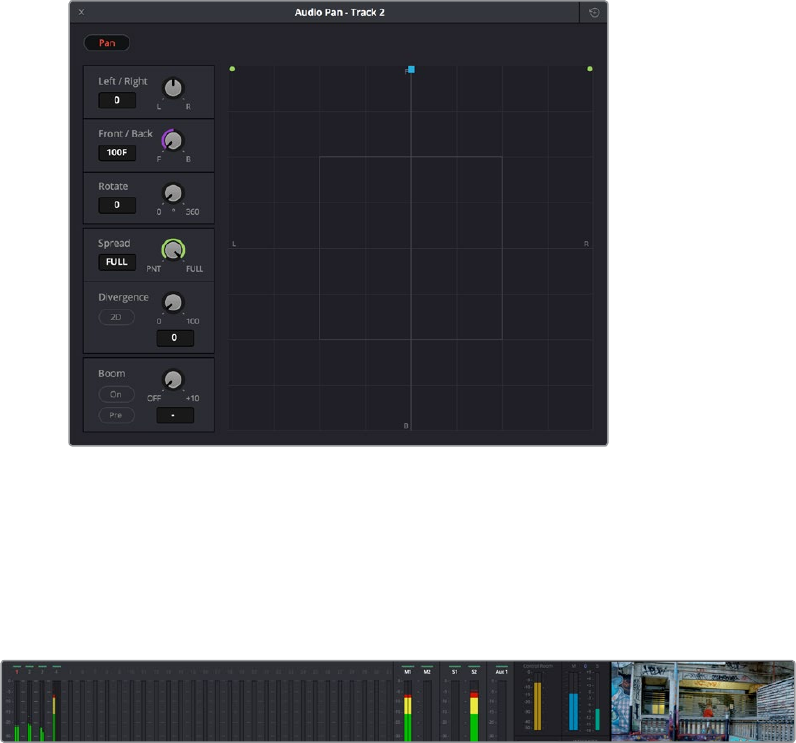
Dynamics: Double-clicking exposes a set of dynamics controls with compressor, limiter,
and expander or gate sections. The Equalizer button at the upper left-hand corner lets
you turn all EQ on and off. The first section can be switched between working as an
Expander or a Gate, with attendant Threshold/Range/Ratio and Attack/Hold/Release
controls. The second section provides Compressor controls, while the third section
provides Limiter controls. These controls may be used either singly or in concert to
manage the dynamics of the audio on that track.
The channel strip Dynamics control window
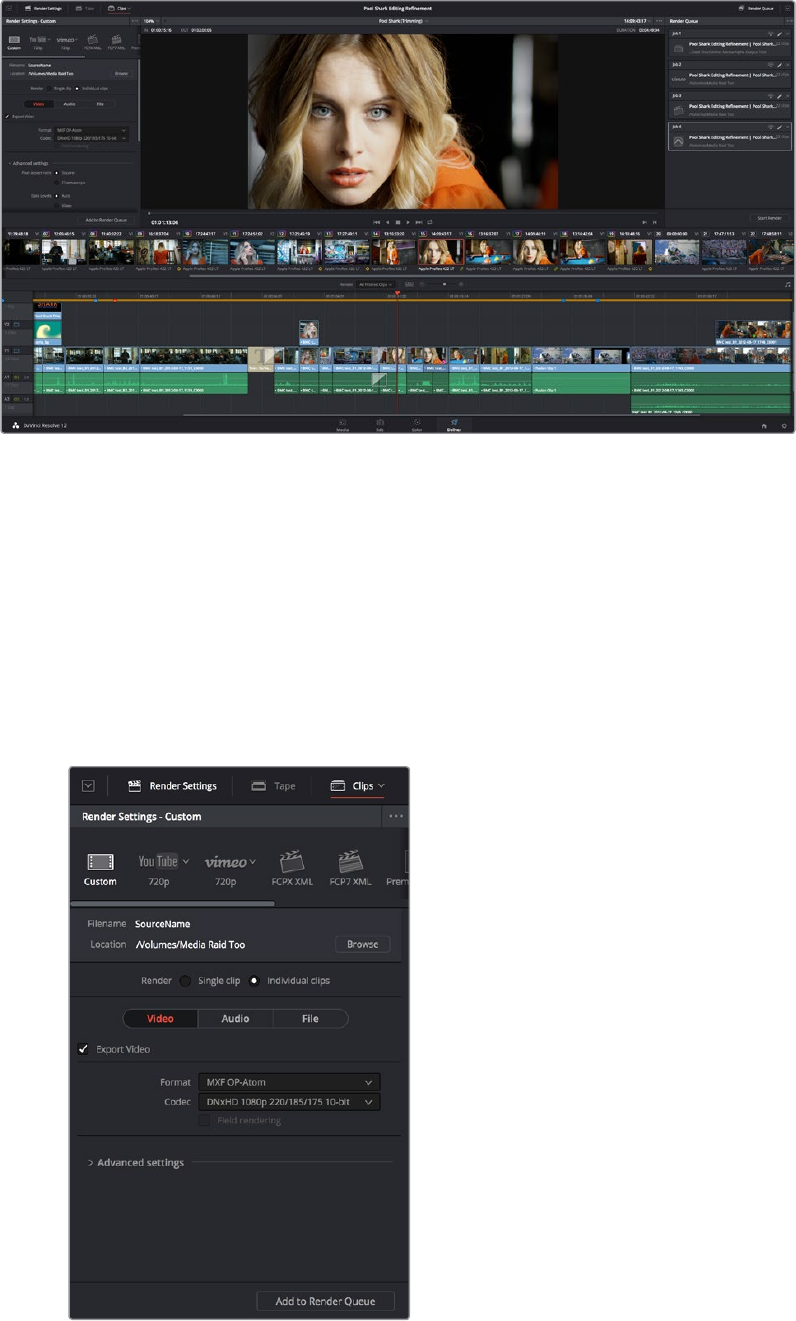
Pan: A pan control compatible with stereo and surround panning. You can drag within
this control to adjust pan, or you can double-click to expose a Pan window. What
controls are available in the Pan window depend on the mapping of the audio track, but
both stereo and surround panning controls are available, with corresponding numeric
controls.
32
Introduction to DaVinci Resolve Part 1 – 1
The Pan control window
The Monitoring Panel
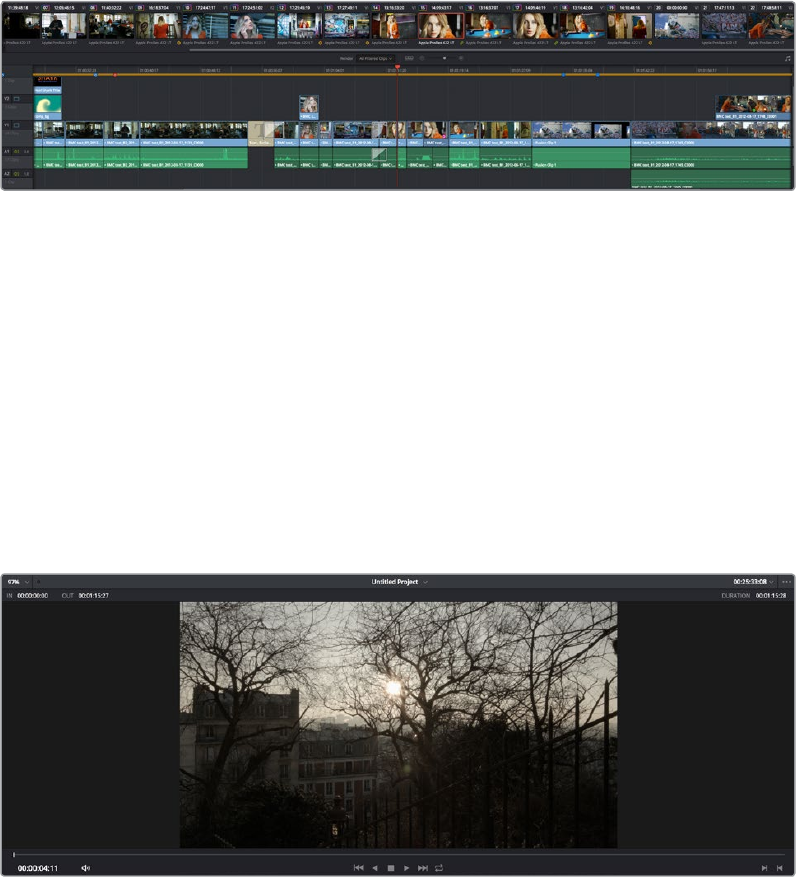
The Monitoring panel shows all of the audio meters corresponding to the tracks in the Timeline,
as well as the Master Output meter, Control Room meters, and a video viewer.
The Monitoring panel
At left, a row of audio meters corresponds to the channel strips of the Mixer, one meter for
every audio track in the Timeline. To the right of these, all buses appear, showing you meters
for the Mains and Subs (submixes) you’re using to mix down your show. Farther to the right of
these, a set of Control Room meters show you the monitored output and loudness meters for a
precise analysis of your mix’s perceived loudness.
Finally, a small viewer to the left of the Monitoring panel shows the frame of video at the
position of the playhead. This viewer can be undocked via a button at the lower right-hand
corner.
The Deliver Page
Once you’ve finished grading your project, you need to either render it, or output it to tape to
deliver it to your client. This is where the Deliver page comes in. The Deliver page can be used
both to output digital deliverables, or to output tape, depending on which mode you enable.
Either way, the Deliver page is divided into five areas of functionality, each of which lets you set
up a different part of a render or output to tape.
The Deliver page is set up to let you queue a series of individual jobs, each of which can have
different settings, or be set up to render different parts of the Timeline. In this way, you can
output multiple deliverables, or re-render multiple areas of a timeline, as your needs require.
33
Introduction to DaVinci Resolve Part 1 – 1
The Deliver page
For more information about using the Deliver page, see Chapter 73, “Using the Deliver Page.”
The Render Settings List
The Render Settings list contains the customizable settings that affect how media is rendered out
of Resolve. These settings are covered in more detail later in “File-based Output.” The Render
Settings you can choose from for outputting from Resolve appear in three panels, separating the
Video, Audio, and File information-based settings in a logical fashion. By default, this list shows
only the most important criteria necessary for defining a render. However, additional controls can
be exposed by clicking the “Advanced settings” button at the bottom of each group of settings.
Render settings
34
Introduction to DaVinci Resolve Part 1 – 1
The Deliver Page Timeline
The Timeline mirrors the Timeline seen in the Color page. You can use the Timeline in the
Deliver page to turn off tracks with clips you don’t want to include in the operation, define the
range of clips you want to render or output to tape, and to choose which versions for each clip
you want to output. You also have the option of switching the Deliver page Timeline to look like
the Color page timeline instead, if that’s what you’re more comfortable with.
The Deliver page’s Thumbnail and Mini-Timeline match the Color page
The Deliver page Timeline also has the Timeline Filter pop-up at the right-hand side of the
toolbar. Using this pop-up to filter the contents of the Timeline lets you restrict the range of
media you want to output in different ways. For example, if you’ve already rendered a timeline,
but you’ve since made some changes, you can use the “Show Modified Clips” option to display
only the clips that have changed within a particular timeframe. Another possibility is to choose
the “Show Unrendered Clips” option to show all clips that have not yet been rendered.
The Viewer
When rendering file-based media, the Viewer shows you exactly how the media being output
will look using the current settings, and the Transport controls move the playhead throughout
the current Timeline.
Deliver Viewer
When outputting to tape, the Viewer shows you the tape output so you can set up insert or
assembly edit points, and the Transport controls move the tape in the deck if device control is
enabled. You can also put the Viewer into Cinema Viewer mode by choosing Workspace >
Viewer Mode > Cinema Viewer (Command-F), so that it fills the entire screen. This command
toggles Cinema Viewer mode on and off.
35
Introduction to DaVinci Resolve Part 1 – 1
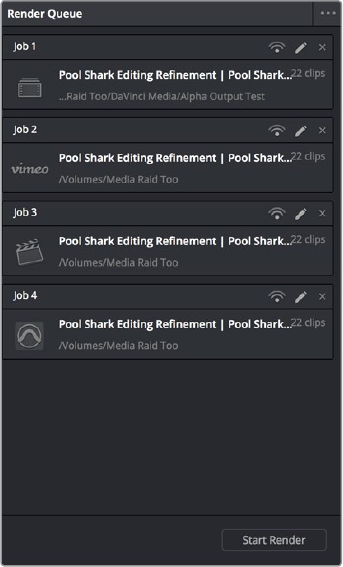
The Render Queue
The Render Queue is a list of all the jobs you’ve queued up for file-based rendering. Each job can
have an individualized range of clips and render settings, which you can use to render multiple
sections or clips of a timeline, the same timeline output to multiple formats, or multiple timelines.
The Render Queue displays all jobs
The Render Queue also has the option to show either just the jobs within the current project, or
jobs queued up and saved within all projects for the current user.
Working with the DaVinciResolve
User Interface
While the DaVinci Resolve interface may not seem very customizable at first, there are actually
many ways in which you can tailor the panels found within each page to your specific needs.
Working Full Screen vs. within a Floating Window
Depending on how you like to work, you can choose to work with DaVinci Resolve in a floating
window with a title bar that can be resized, moved, minimized, and used alongside other
windows. Or, you can choose Workspace > Layout > Full Screen to put DaVinci Resolve into Full
Screen mode, where the title bar disappears and DaVinci Resolve takes up the full dimensions
of your computer display.
Editors may prefer to work within a window if they’re working among multiple applications.
Colorists and Mixers may prefer Full Screen mode as it hides the light-colored title bar that some
find distracting, and provides a tiny bit more screen real estate for the rest of the application.
36
Introduction to DaVinci Resolve Part 1 – 1
Showing and Hiding Panels of
Functionality Using the Interface Toolbar
Each page in DaVinci Resolve has an Interface Toolbar that runs along the top. This toolbar
contains buttons that let you show and hide different panels of functionality, so you can hide
things you don’t need in order to create more room for controls that you’re using.
The interface toolbar for the Color page lets you customize the Color page controls
Each page has a different set of options, that reflect the capabilities of that page.
Adjusting the Size of Different Panels
Each page of Resolve is divided into multiple panels, viewers, and palettes, each of which
contains specific sets of functions. These can be customized in one of three ways.
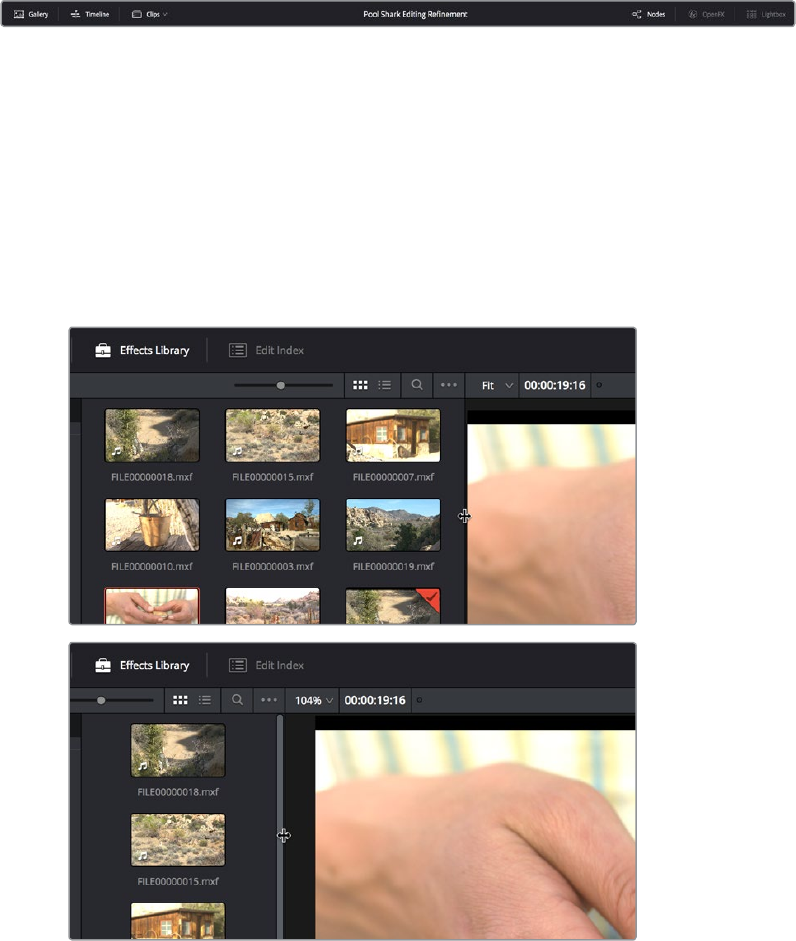
You can resize different regions of the interface by positioning the pointer at the border
between any two panels, and dragging it to enlarge one and shrink the other.
(Before/After) Resizing UI regions
Certain UI elements can be expanded, in the process rearranging another part of the UI, by
clicking a small gray Expand button. For example, an expand button at the top right of the
Keyframe Editor in the Color page can be clicked to make the Keyframe Editor wider, while at
the same time hiding controls at the center to make room.
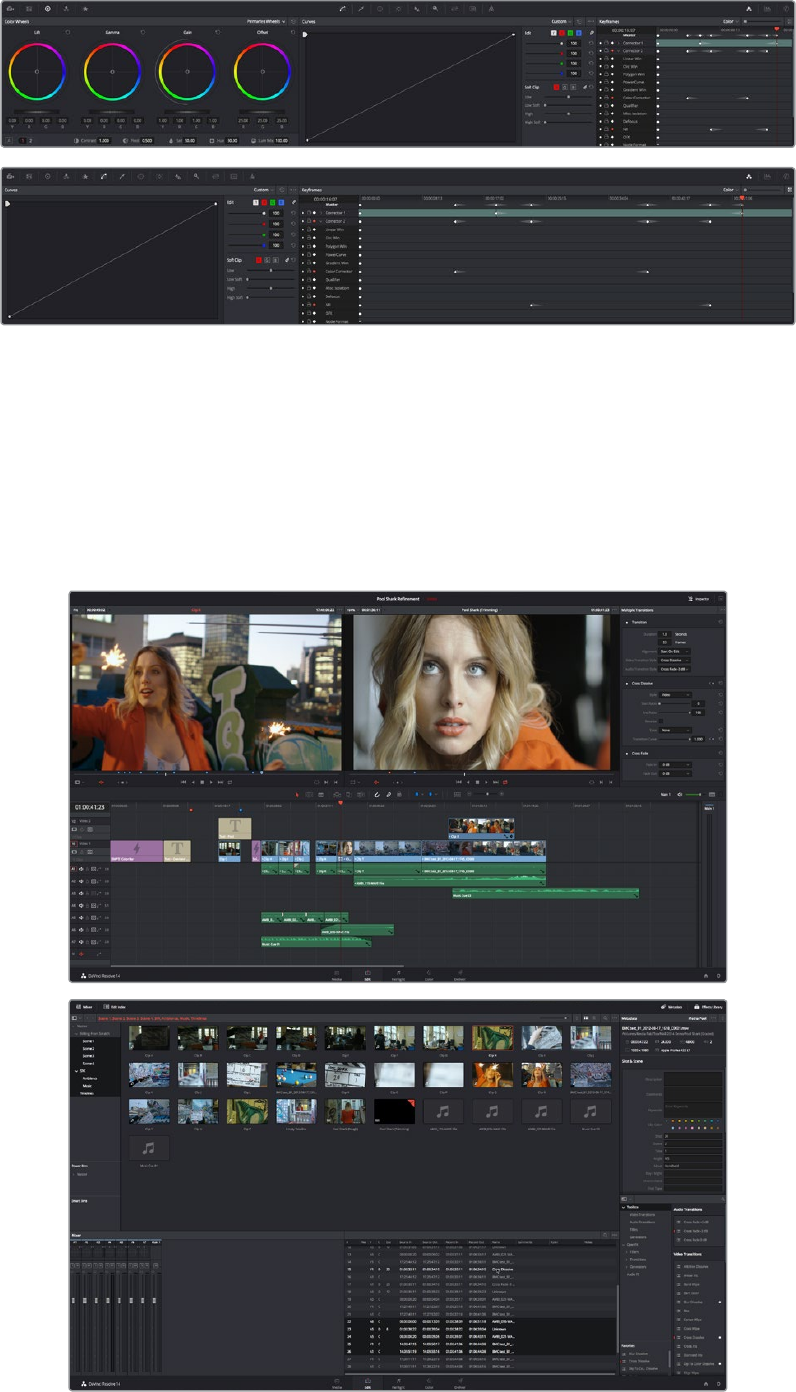
37
Introduction to DaVinci Resolve Part 1 – 1
(Before/After) Expanding the Keyframe Editor
Using Single vs. Dual Monitor Layouts
The Media, Edit, Color, and Fairlight pages can be switched between single screen and dual
screen layouts by choosing Workspace > Dual Screen > On. Each dual screen layout makes it
possible to see many more controls at once, often in a larger workspace that lets you manage
more clips, more Gallery stills, etcetera.
The Edit page in Dual-screen mode
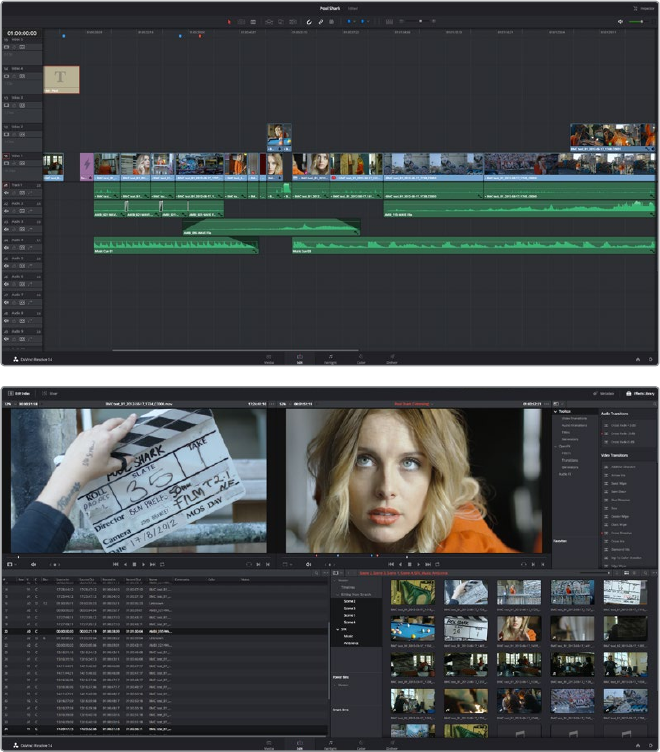
38
Introduction to DaVinci Resolve Part 1 – 1
In Single-screen mode, you can choose which display shows the DaVinci Resolve UI by
choosing Workspace > Primary Display > Display 1 or Display 2. In Dual-screen mode,
thisreverses the contents of both monitors.
Using the Full Screen Timeline Option in the Edit Page
If you’re working in the Edit page in Dual-screen mode and you need the biggest timeline
youcan get for working through your program, you can choose Workspace > Dual Screen >
FullScreen Timeline to expose a layout with one large full-screen timeline, and all the other
Editpage panels on the other screen.
The Edit page in Full screen Timeline mode
Saving Custom Screen Layouts
If you’ve created a particular set of resized panels that you’ll want to use often, you can save it,
alongside other frequently useful screen layouts you may have saved.
Methods of working with custom screen layouts:
To save a custom screen preset: Customize the various pages of DaVinci Resolve
for the purpose at hand, then choose Workspace > Layout Presets > Save Layout As
Preset. Enter a name into the Save Layout as Preset dialog, and click OK.
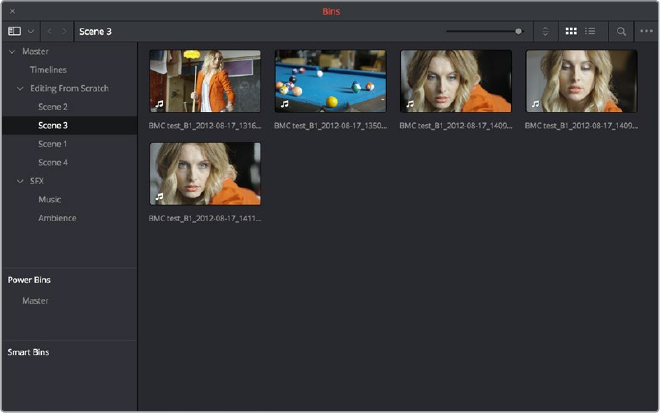
39
Introduction to DaVinci Resolve Part 1 – 1
To choose a previously saved screen preset: Choose Workspace > Layout Presets >
LAYOUT NAME > Load.
To update a previously saved screen preset: Choose the layout you want from the
Workspace > Layout submenu, make your changes, and then choose Workspace >
Layout Presets > LAYOUT NAME > Update Preset.
To delete a screen preset: Choose Workspace > Layout Presets > LAYOUT NAME >
Delete Preset.
To export a screen preset for use on another DaVinci Resolve installation: Choose
Workspace > Layout Presets > LAYOUT NAME > Export Preset.
To import a screen preset: Choose Workspace > Layout Presets > Import Layout
asPreset.
Resetting to the Default Layout
If you don’t like the current layout and you want to go back to the default, choose Workspace >
Reset UI Layout.
Undocking Specific Panels of the Interface
There are certain interface elements that can either be docked in their respective pages, or
opened in separate windows.
Media Pool bins can be opened into floating windows simply by right-clicking on the bin and
choosing Open As a New Window in the contextual menu. Even though you’re opening up the
contents of the selected bin, you’re really creating another Media Pool, complete with Bin list,
Browsing area, and all of the organizational controls found in the docked Media Pool. You can
have as many floating Media Pools as you like. They can be dragged to other monitors, and
they can be closed via a button at the upper left-hand corner of the title bar.
A floating Media Pool window
The Video Scopes let you precisely analyze the color and contrast of clips in the Color page.
They can be exposed in their docked position to the right of the Color page palettes by clicking
the Video Scope button in the Color page toolbar.
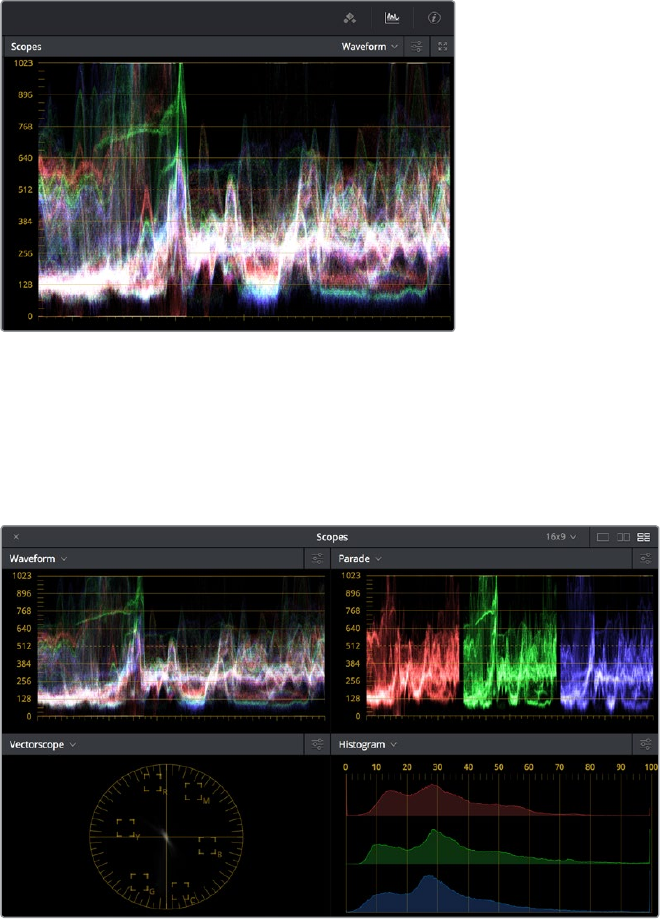
40
Introduction to DaVinci Resolve Part 1 – 1
The Video Scope, docked next to the other
palettes at the bottom of the Color page
Optionally, you can click the expand button at the top right of the video scope to open the
video scopes into a floating window, within which you can display all four video scopes
together, or individually, on any monitor connected to your workstation.
Video scopes in a floating window
Additionally, the Audio Mixer and Video Scopes are available in many of the dual-screen layouts
available in Resolve. The video scopes aren’t just available in the Color page. They’re also
available in the Media and Deliver pages for whenever you need to evaluate the video signal
more objectively, such as when you’re setting up to capture from tape or scan from film, or
when you’re setting up for output.
In the Resolve single screen layout, the Audio Mixer and Video Scopes can be moved to a
second computer display if one’s available, and both disappear temporarily if you change pages
or switch to another application.
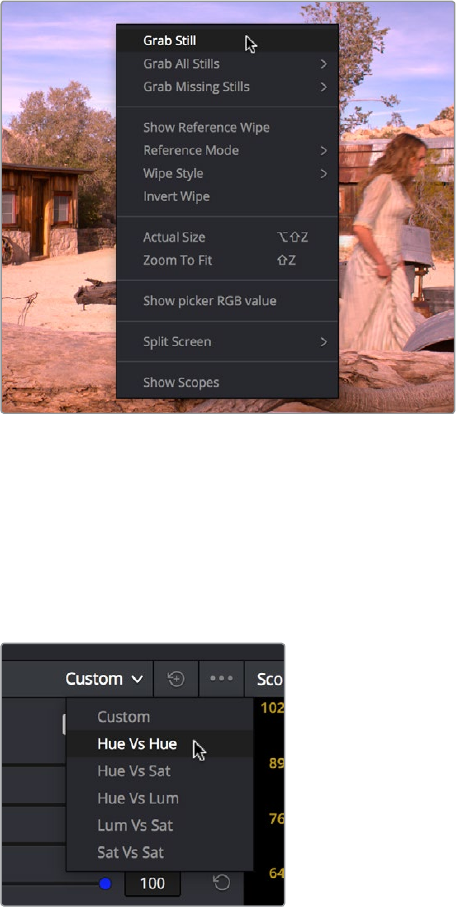
41
Introduction to DaVinci Resolve Part 1 – 1
DaVinci Resolve User
Interface Conventions
While each chapter covers the unique on-screen controls found in each page of DaVinci
Resolve, this section summarizes how to use some of the more common controls you’ll see.
Contextual Menus
Nearly every panel on every page exposes additional functionality via contextual menus, which
appear when you right-click on the appropriate item. Sometimes, different commands become
available depending on whether you right-click the background of a particular panel, or on an
item such as a still or node.
Contextual menus expose additional controls in the Color page Viewer
Buttons and Pop-up Menus
Most of the buttons and pop-up menus that appear in various toolbars are activated with a
single click. Many panels and palettes appear with a Mode pop-up at the upper right-hand
corner that lets you choose a different type of function within that palette.
Mode pop-up
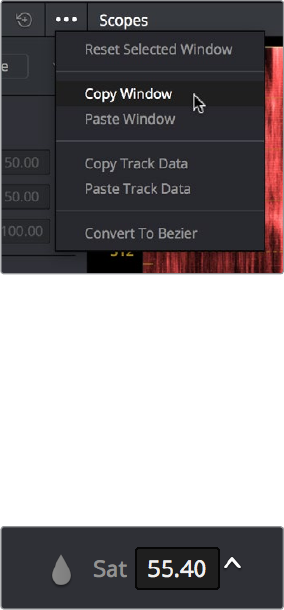
42
Introduction to DaVinci Resolve Part 1 – 1
Additionally, many panels, palettes, and windows expose an Option menu, that appears as
three horizontal dots, which expose additional commands related to that particular function.
Option menus
Adjusting Parameters
Numeric parameters can usually be edited in a few different ways. If a slider appears, you can
drag it to change the value. If a number field appears, it can also be used as a “virtual slider” by
clicking and dragging to the right to raise the value, or to the left to lower the value (white
arrows indicate the direction of change).
Using virtual sliders
Double-clicking the field containing most numeric values highlights the number so that you can
type a new value using the keyboard, pressing Return to confirm the change. Finally, to reset
any editable parameter to its default setting, double-click its text label.
The Three Buttons of a
Mouseor Other Input Device
Resolve uses all three buttons of a multi-button mouse, or the three buttons available on other
type of input devices, when available. This section provides a brief summary of all the different
ways these three mouse buttons can be used.
Left Button
The left button is always referred to as a click, as in, “click the auto select button.” You click to
turn buttons or other controls on or off, to make selections, and to give areas of the Resolve UI
focus so that keyboard shortcuts will do whatever is specific to that panel or area of the
userinterface.
Double-clicking the left button usually opens items that are openable, such as opening a clip
from the Media Pool into the Source Viewer. You can also use double-clicking to do things like
selecting nodes in the Node Editor of the Color page.
43
Introduction to DaVinci Resolve Part 1 – 1
Right Button
The right button is referred to as a right-click, as in, “right-click a clip in the Media Pool.”
Right-clicking an item or area of the Resolve interface usually opens a contextual menu,
exposing additional commands that are specific to the item or area you’ve right-clicked.
However, some areas of the UI use right-clicking in special ways. For example, when you’re
using a color adjustment curve in the Curve palette of the Color page, right-clicking a control
point deletes that point.
Middle Button
The middle button (usually the scroll wheel button, but you may have to turn this on in the
Mouse panel of the System Preferences) is referred to as a middle-click, which does different
things in different places.
In all pages, rolling the scroll wheel while the pointer is within a Viewer lets you zoom
into and out of the image being displayed when you need to do more detailed work.
In the Color page, you can move the pointer over the Thumbnail timeline and roll up to
scroll to the right or roll down to scroll to the left. You can also roll the scroll wheel while
the pointer is within the Mini-timeline to zoom into or out of the currently displayed area.
Rolling up zooms out, while rolling down zooms in.
Middle-clicking and dragging within a Viewer lets you drag the image to pan it around,
which is useful after you’ve used the scroll wheel (or scroll behavior) of your mouse to
zoom in.
You can middle-click and drag within the Edit Page timeline to quickly pan around
youredit.
You can also use middle-click to copy a grade in the Thumbnail timeline of the Color
page, by first selecting the clip that you want to copy TO (with a simple click) and then
middle-clicking the clip or gallery still you want to copy a grade FROM.
Lastly, if you’re drawing a Bezier window in the Color page viewer using the Window
palette, then middle-clicking a control point will delete that point.
45
Managing Projects and Databases Part 1 – 2
Managing Projects and Databases
This chapter covers how to use the Project Manager to organize the projects you’re working on
in DaVinci Resolve, as well as how to deal with managing the databases that serve as the
organizational foundation of the Project Manager. You’ll also see how to export and import
projects, and how to archive a project and its media for long-term storage.
Using the Project Manager 46
Project Management 47
Importing and Exporting Projects in Disk Databases 47
Importing and Exporting Projects in PostgreSQL Databases 48
Project Manager View Options 48
Searching For Projects 49
Organizing Projects in Folders 50
Managing Databases Withthe Database Sidebar 50
Opening the Database Sidebar 51
Moving Projects From One Database to Another on the Same Workstation 52
Managing Databases in the Database Sidebar 52
Legacy User Organization in the Database Sidebar 57
Saving Projects 57
Dynamic Project Switching 58
Archiving and Restoring Projects 59
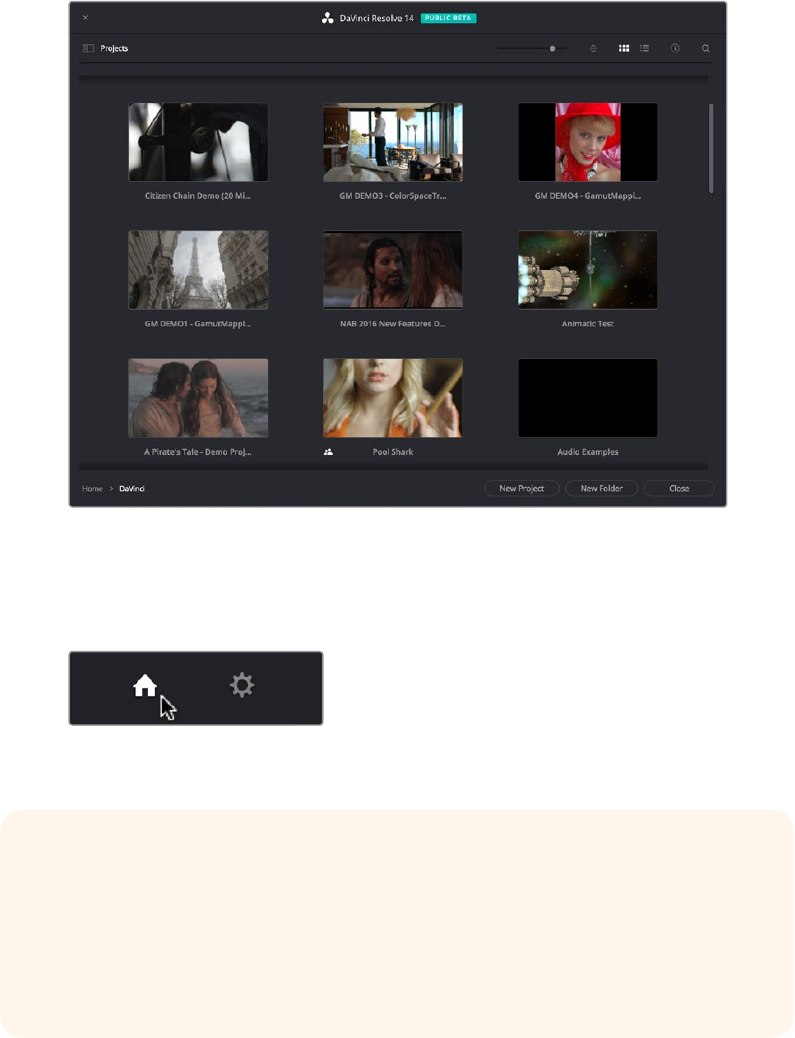
46
Managing Projects and Databases Part 1 – 2
Using the Project Manager
Starting with DaVinci Resolve 14, the Project Manager is the only centralized place in which to
manage all your projects and is the first window you’ll see when DaVinci Resolve starts up. It
shows all projects you’ve created, and provides an overall environment in which you create,
organize, import, and export DaVinci Resolve projects.
Project Manager
If you’ve already opened a project, you can re-open the Project Manager at any time by clicking
the Home button at the bottom right-hand corner of the DaVinci Resolve window.
The Project Manager button at the bottom right
corner of the DaVinci Resolve interface
Launching DaVinci Resolve For the First Time?
If you’ve just installed DaVinci Resolve and have opened it for the first time, it’s time to
set the preferences in order to specify your language, scratch disk volume, and
hardware configuration for video and audio I/O and control panels (if you have one).
For more information about setting the preferences in DaVinci Resolve, see Chapter 3,
“Project Settings and Preferences.”

47
Managing Projects and Databases Part 1 – 2
Project Management
The Project Manager provides an in-application interface for creating, renaming, and deleting
projects. Many of these commands exist within the contextual menu that appears when you
right-click the background of the Project Manager.
Methods of project management:
To create a new project: Double-click the Default Project, or click the New Project
button. A new project is created, and DaVinci Resolve opens up the Media page.
Oncea project is open, you can alter its project settings by clicking the gear icon.
To open a previously saved project: Double-click any Project icon, or Item if you’re in
List view.
To open a project in Read-Only Mode: Right-click a Project icon or Item, and choose
Open in Read Only Mode. This lets you open a project without danger of altering it.
If you make changes, you can use the Save As command to save a new copy of the
project with a new name.
To rename a project: Right-click a Project icon or Item, choose Rename, and type a
new name in the dialog that appears, clicking OK when you’re finished.
To load project settings from another project to the currently open project:
Right-click a Project icon or Item (other than the currently open project), and choose
“Load Project Settings to Current Project.”
To update the thumbnails of a project in the Project Manager: Right-click any project,
and choose “Update Thumbnails.”
To delete a project: Select one or more projects, then right-click one of the selected
projects and choose Delete. Click OK when a dialog asks you to confirm the operation.
Importing and Exporting Projects in Disk Databases
If you’re using Disk Databases to manage your projects, you can copy and import projects using
the project folders in the file manager of either macOS or Windows. This method does not work
for DaVinci Resolve on Linux.
Moving projects from one disk database into another using macOS or Windows:
1 Locate the disk database directory in which the project you want to copy is stored.
If you don’t know where the designated disk database directory is, you can open
DaVinci Resolve and check the directory path for the current disk database in the
Databases sidebar.
2 Copy the project folder from the source workstation to the designated disk database
directory on the destination workstation. If you don’t know where the designated
disk database directory is, you can open DaVinci Resolve on the workstation you’re
copying the project to and check the directory path for the current disk database in the
Databases sidebar.
3 Once you’ve copied the project folder into the correct location, you’ll need to quit
and re-open DaVinci Resolve. Afterwards, the imported project should appear in the
Project Manager.
NOTE: You cannot move or delete the currently loaded project.

48
Managing Projects and Databases Part 1 – 2
Importing and Exporting Projects in PostgreSQL Databases
If you’re using a PostgreSQL database, another set of commands let you import and export
projects using the .drp file format. You can also export .drp files from Disk Databases if you want
to export a more self-contained item to transport.
To export the currently open project as a .drp file:
Choose File > Export Project, and when the Save dialog appears, choose a location,
enter a name, and click Save. The result is a self-contained file with a .drp file suffix
saved at the location you chose.
To export a .drp project file from the Project Manager:
1 Right-click a Project icon or Item in the Project Manager, then choose one of the
following commands:
Export: Exports project data, with no LUTs and no stills. Best when you need to export
the smallest possible file.
Export With Stills and LUTs: Exports the project including both still frames in the
gallery and LUTs used in grades). Best when you want to export the most self-
contained file and you can’t guarantee the recipient will have the same LUTs you do.
2 When the Save dialog appears, choose a location, enter a name, and click Save. The
result is a self-contained file with a .drp file suffix saved at the location you chose.
To import a .drp project file, do one of the following:
Drag the .drp file you want to import from your file system and drop it anywhere into the
Project Manager window.
Right-click any empty area of the Project Manager and choose Import, then find and
select a .drp project file using the Import Project File dialog, and click Open.
Project Manager View Options
Four buttons at the top right let you control how projects are viewed in the Project Manager.
Select Icon or List View
Zoom slider: (Only appears in Thumbnail view) Lets you adjust the size of the
thumbnails in Thumbnail view.
Project Sort Order pop-up: (Only appears in Thumbnail view) Lets you choose the sort
order of projects in Thumbnail view.
Information: (Only appears in Thumbnail view) Lets you show or hide additional project
information displayed underneath each project’s thumbnail, including the frame size,
number of timelines within, and when that project was last modified.
Thumbnail view: Each project is represented by a large image that can be hover-
scrubbed to reveal five representative images from that project.
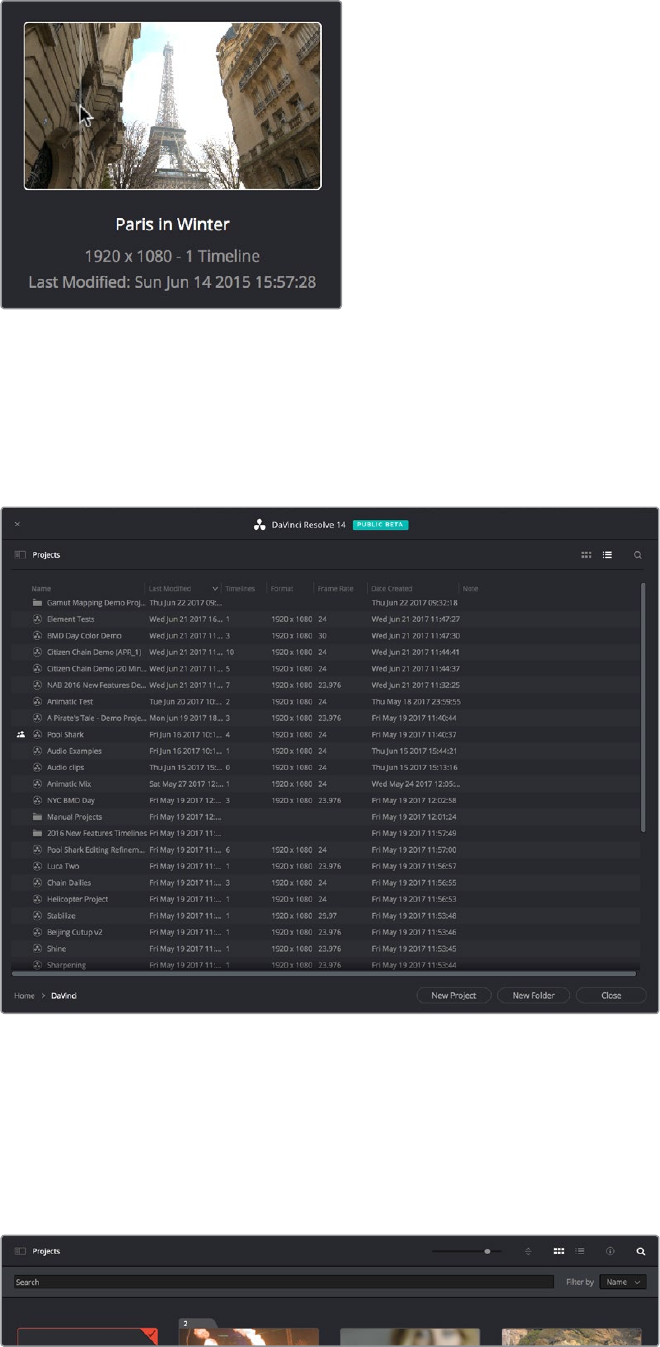
49
Managing Projects and Databases Part 1 – 2
Hover-scrub over Project icon, information is enabled
List View: Every project appears as an item on a list that has seven columns: Name,
Last Modified, Timelines, Format, Frame Rate, Date Created, and Note. You can
click any column header to sort the contents of the Project Manager by that criteria;
clicking the header a second time toggles that column between ascending and
descending sorting.
Project List view
Searching For Projects
Clicking the magnifying glass button at the upper right-hand corner of the Project Manager
exposes the Search Options, which can be used to locate one or more projects based on the
metadata that’s selected in the Filter By pop-up menu to the left of it.
Search field open with Filter by search criteria selected
50
Managing Projects and Databases Part 1 – 2
Using the pop-up menu, you can choose to search by name, or by project format. Once you’ve
chosen a criteria, begin typing into the search field, and the Project Manager will immediately
and dynamically begin to be filtered by your search text.
Organizing Projects in Folders
If you’re organizing a lot of projects, you can create folders to put them into.
A folder (left) and a project (right) in the Project Manager
Methods of working with project folders:
To create a folder: Click the New Folder button, then enter a name into the Create New
Folder dialog and click Create.
To delete a folder: Right-click a folder, choose Delete, and click Yes when prompted.
All projects inside a deleted folder will be deleted as well.
To rename a folder: Right-click a folder, choose Rename, then enter a new name
and click OK.
To open a folder: Double-click a folder to open it and view its contents. At the upper left-
hand corner of the Project Manager, a folder path view shows you which folder is open,
as well as where you are within a nested series of folders if that’s what you’ve set up.
To exit a folder: Use the path control at the bottom left of the Project Manager.
To move a project into a folder: Drag the project onto a folder icon, and drop it to place
it inside the folder.
To move a project out of a folder: Open a folder, select one or more projects you
want to move, then right-click the selection and choose Cut from the contextual menu.
Then, navigate to the next place in the Project manager where you want to place the
cut projects, right-click the background of the Project Manager, and choose Paste. The
projects should appear in the new location.
Managing Databases
Withthe Database Sidebar
Unlike other applications which save self-contained project files to user-specified locations
wherever you like in your file system, DaVinci Resolve takes a more centrally organized
approach to project management, using databases. By default, DaVinci Resolve uses a disk
database to keep track of every project you create. The Database sidebar lets you manage
theprojects found within this database, which are saved to a specific directory on your system
(particular to that database). The default location of this disk database depends on the
operating system you use.
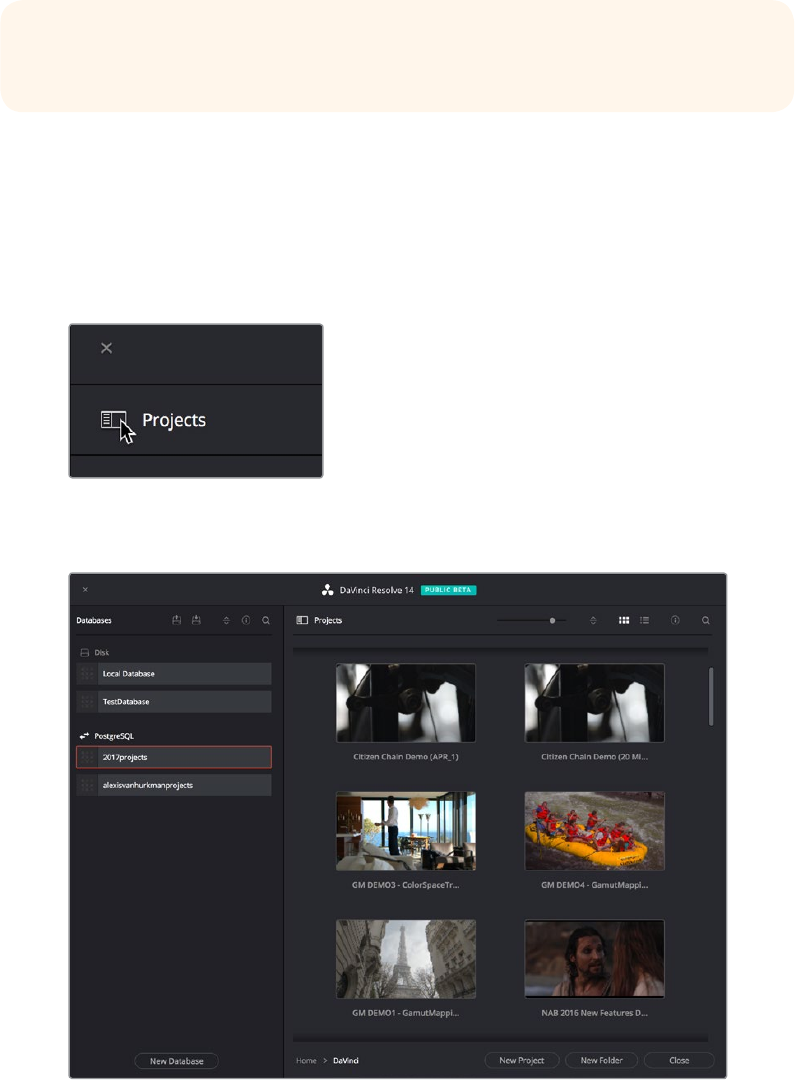
51
Managing Projects and Databases Part 1 – 2
However, you can create additional databases with which to store other projects, if you like.
Forexample, you might create one database each for each year in which you work. If you
workon series television, you could create multiple databases for each program you work on.
Or, youcould create separate databases for each client you do work for. There’s no hard and
fastrule; ultimately how you use databases is entirely up to you and your individual
organizational preferences.
Opening the Database Sidebar
If you already have multiple databases, then clicking the button at the upper-left hand corner of
the Projects Browser reveals a sidebar at the left of the Project Manager that lists every
database on your workstation, with various options for managing these databases and for
browsing the projects found within them.
Database Sidebar button
You can use this sidebar to open different databases and browse the projects found inside.
Project manager with Database sidebar displayed
TIP: However you elect to organize your databases, keep in mind that projects saved
within smaller databases with less project data will load and save faster.

52
Managing Projects and Databases Part 1 – 2
Moving Projects From One Database
to Another on the Same Workstation
If you’ve used multiple databases to organize your projects, you can browse the contents of
each database to search for what you’re looking for, and then copy one or more projects from
one database to another if you need to rearrange how they’re organized.
To view the contents of a database:
1 Click the button at the upper-left hand corner of the Projects window to open the
Databases sidebar.
2 Click to select a database in the sidebar, and an orange highlight will appear
If you had a project already open, you’ll be asked if you want to save it before closing,
because all open projects must be closed prior to viewing the contents of another
database. Then, the projects corresponding to that user within the selected database
appear in the Project Manager window.
To import a project from another database using the Databases sidebar:
1 Click the button at the upper-left hand corner of the Projects window to open the
Databases sidebar.
2 Click to select a database in the sidebar, and if necessary use the pop-up menu at
theright of the database listing to choose a specific user. The projects corresponding
to that user within the selected database appear in the Project Manager window.
3 Select a project you want to import, and press Command-C to copy it.
4 Click to select the current database again (the database you want to work within).
5 Press Command-V to paste the project you copied. A copy appears in the
current database.
To import Project Settings from another Project using the Databases sidebar:
1 Click the button at the upper-left hand corner of the Projects window to open the
Databases sidebar.
2 Select a project you want to import Project Settings to so that it’s highlighted.
3 If necessary, click to select another database in the sidebar, and optionally use the
pop-up menu at the right of the database listing to choose a specific user. Theprojects
corresponding to that user within the selected database appear in the Project
Manager window.
4 Right-click any project and choose “Load Project Settings to Current Project.”
Thatproject’s settings will be copied to the project you selected in step 2.
Managing Databases in the Database Sidebar
Controls within the Database sidebar make it easy to create new databases (via the button at
the bottom), upgrade databases that have been flagged (via circular badges), import and export
databases (via buttons at the top), and reveal additional information about each database (via
buttons at the top of this sidebar).
NOTE: For more detail on shared database setup and operation, see
Chapter84, “Managing Databases and Database Servers.”

53
Managing Projects and Databases Part 1 – 2
Database Sidebar controls
The five controls at the top of the Databases sidebar have the following functions:
Backup Database: You can back up databases just like any other file. This provides
added protection should your system drive fail, but a database backup can also
be used to move multiple projects between systems (particularly if you’re using
PostgreSQL). Clicking this button exports the currently selected database, with all
enclosed projects, to a self contained .resolve.backup file.
Import Database: Imports .resolve.backup files to restore a backed up database.
Sort Order pop-up menu: This menu lets you choose how to sort the various Diskand
PostgreSQL databases displayed in the sidebar. You can sort by Database Name,
Schema (by date), Status, or Location in Ascending or Descending order.
Display Database Info toggle: Turning this control on shows additional information
underneath each database in the sidebar. What information depends on the type of
database. Disk databases display their status (compatible/incompatible) and location
(directory path). PostgreSQL databases display their schema (a date), their status
(compatible/incompatible), their IP location, and any remarks that were appended when
that database was updated.
Show Search Field: Displays a search field and search criteria pop-up that lets you
search for databases in the side bar by Name, Schema, Status, or Location.
Disk Vs. PostgreSQL Databases
When you first install DaVinci Resolve on a workstation it’s never been installed on
before, you are set up to use a Disk database by default, which saves user-accessible
project files to a disk location of your choosing.
In many respects, Disk databases are simple to use. They’re easier to back up, as
they’re located in an easily found directory, and in fact you can create Disk databases
in custom locations, if you like. Disk databases avoid the need to know or care which
version of PostgreSQL is installed on your machine, as PostgreSQL isn’t used.
Furthermore, projects in Disk databases don’t need to go through an explicit
“upgrade” process when you upgrade significant versions of DaVinci Resolve, as the
project is automatically upgraded when you open it (the upgraded project can be
saved independently from the original project using the Save As command if you want
to leave the un-upgraded version intact).
However, many users prefer to use PostgreSQL database project management,
particularly for situations where you want to use a shared database server so multiple
rooms can access the same project files, and for collaborative workflow, where multiple
editors, colorists, and audio professionals can work within the same project file.
Fortunately, it’s easy to create and use either type of project database for maximum
flexibility in organizing your projects. Then, using the Databases sidebar, it’s easy to
go back and forth between the two types of database management simply by creating
the type of database you need and then switching over to it using the sidebar.
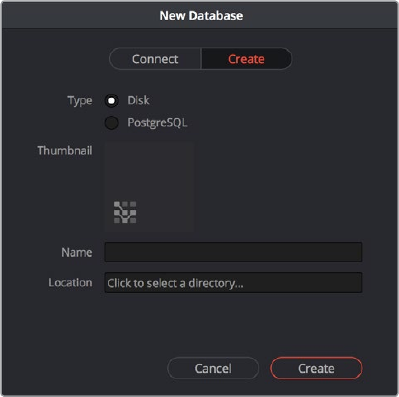
54
Managing Projects and Databases Part 1 – 2
Creating New Disk and PostgreSQL Databases
You can use Disk databases and PostgreSQL databases side by side for switching to the use of
one or the other, depending on your needs.
To create a new Disk database:
1 Click the button at the upper-left hand corner of the Projects window to open the
Databases sidebar.
2 Click the New Database button at the bottom of the sidebar.
3 When the New Database window appears, click Create.
4 Leave Type set to Disk. The New Database window should look like the following
screenshot:
Creating a Disk database
5 In the remaining fields, do the following:
a. Type a name for the new database into the Name field.
b. Click within the Location field and use the Filesystem navigation dialog to choose
where to put the directory that will contain all of the DaVinci Resolve project
directories.
6 Click Create, and the new disk database will appear in the Disk database section of the
Databases sidebar.
To create a new PostgreSQL database:
1 Click the button at the upper-left hand corner of the Projects window to open the
Databases sidebar.
2 Click the New Database button at the bottom of the sidebar.
3 When the New Database window appears, click Create.
4 Change Type to PostgreSQL, and different options will appear at the bottom of the
NewDatabase dialog. The New Database window should look like the following
screenshot:

55
Managing Projects and Databases Part 1 – 2
Creating a PostgreSQL database
5 Type a name for the new database into the Name field. Because all projects in a
PostgreSQL database are saved internally within the PostgreSQL database, no other
changes are necessary.,
6 Click Create, and the new disk database will appear in the PostgreSQL database
section of the Databases sidebar.
Backing Up and Restoring Databases
You can also back up databases by exporting them, and then reimport them later.
To backup/export a database:
1 Click the button at the upper-left hand corner of the Projects window to open the
Databases sidebar.
2 Select the database you want to back up.
3 Click the Backup button at the top of the Databases sidebar.
The Backup Database button
4 Choose a location to which to save the backup in the Backup Database dialog, and
click Save.
To import a database:
1 Click the button at the upper-left hand corner of the Projects window to open the
Databases sidebar.
2 Click the Import Database button at the top of the Databases sidebar.
The Import Database button
3 Find the database you need to import using the file import dialog, and click Open.

56
Managing Projects and Databases Part 1 – 2
Upgrading Databases
Databases display an upgrade badge (circular arrows) only when you’ve installed a new version
of DaVinci Resolve and you have databases that were created in older versions of DaVinci
Resolve that need upgrading.
A circular badge at the right of a database
indicates that database needs to be upgraded
It’s generally a good idea to back up a database prior to upgrading it, in case something goes
wrong. In general, upgrading from a whole version release to the next whole version release of
DaVinci Resolve usually requires an upgrade, while upgrading to a dot release of the same
version may or may not. If the currently used database requires an update, you’ll be told on
application startup.
To upgrade a database from an old version of DaVinci Resolve:
Right-click a database that needs updating, and choose Upgrade from the contextual
menu. A dialog appears to confirm if you really want to upgrade that database. Click
Upgrade to proceed.
Disconnecting and Deleting Databases
You cannot actually delete databases in DaVinci Resolve; you can only disconnect them so they
don’t appear in the Database list. However, disconnected databases can still be reconnected if
you remember their name. The only way to completely delete a database entry in PostgreSQL
is to do so from the command line, or to use the PGAdmin III application that accompanies the
PostgreSQL installation that’s part of the DaVinci Resolve installation process.
To disconnect a database you no longer need:
Right-click a database that is not currently selected, and choose Disconnect from the
contextual menu. A dialog appears to confirm if you really want to disconnect that
database. Click Disconnect to proceed.
Locating Disk Database Directories in Your File System
Because Disk databases have a link to a specific directory in your file system, there’s a way of
locating that directory.
To disconnect a database you no longer need:
Right-click any Disk database, and choose “Reveal in Finder.” A file system window
opens up showing you the location of that Disk database, inside which are all of
its projects.
Optimizing Databases
Only available for PostgreSQL databases. Sometimes, databases in DaVinci Resolve can
become so large that the size affects performance. In these cases you may need to optimize it
to improve access speed by “vacuuming” the database of unnecessary spaces and
reindexing it.
To Optimize a database you no longer need:
Right-click a database, and choose Optimize from the contextual menu. A dialog
appears to confirm if you really want to optimize that database. Click Optimize
to proceed.
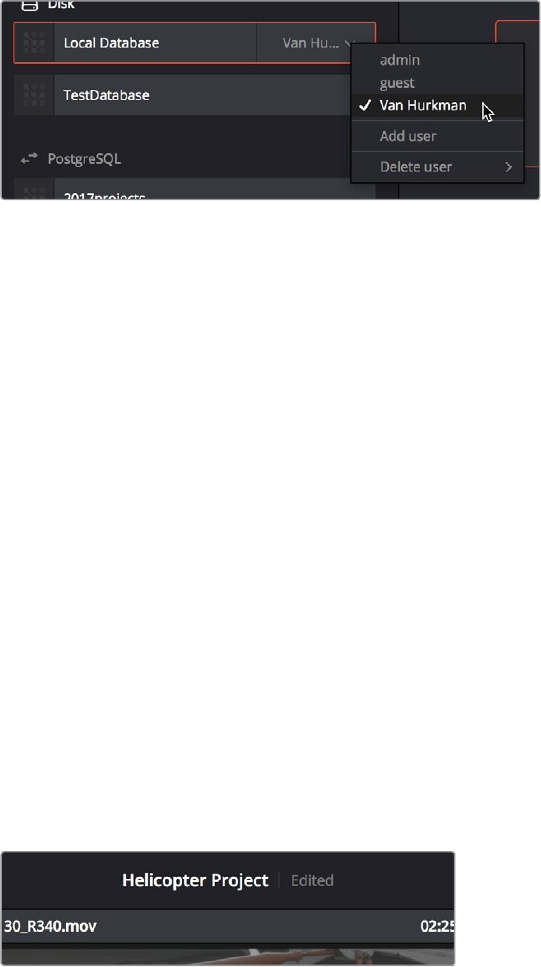
57
Managing Projects and Databases Part 1 – 2
Legacy User Organization in the Database Sidebar
DaVinci Resolve was originally designed as a multi-user application for use in commercial
suites. While DaVinci Resolve is still very much used in that capacity in high-end facilities
around the world, starting in DaVinci Resolve 14 the interface that was previously used to create
and manage multiple users on a single workstation has been eliminated in favor of a simpler
method of managing multiple databases right in the Project Manager, via the Databases
sidebar. However, if you’ve upgraded databases that were previously organized using multiple
users, the Database > User > Project structure of older databases is maintained via a pop-up
menu to the right of that database’s name in the Databases sidebar.
Legacy users in a database
Saving Projects
Once you’ve created and opened a project, you want to make sure that you regularly save
your work.
Methods of saving projects:
Choose File > Save Project (Command-S).
Push the SAVE button on the DaVinci Control Panel.
To save the current state of your project as a copy with a new name, choose File > Save
Project As (Command-Shift-S), then enter a name into the Save Current Project window
and click Save.
To revert to the last saved state of a project:
If you don’t want to save, but you want to revert to last saved state of the project,
choose File > Revert to Last Save.
As you work on your project, the word “Edited” appears to the right of the project name at the
top of the DaVinci Resolve UI to let you know that you have unsaved changes. If you don’t save
in over 15 minutes, the word “Edited” turns yellow, and if you still don’t save in over 30 minutes,
it turns red to let you know that you probably should save. If you move the pointer over the word
“Edited,” a tooltip appears letting you know when the last save was performed.
The word “Edited” to the right of the project name
lets you know you have unsaved changes
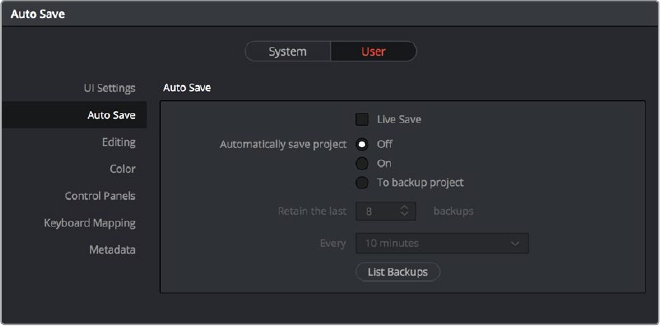
58
Managing Projects and Databases Part 1 – 2
DaVinci Resolve also has two auto save mechanisms that you can enable in the User
Preferences. Enabling Live Save sets DaVinci Resolve to incrementally save changes as you go.
Disabling Live Save enables the more traditional Automatic Save mechanism that automatically
saves your project at periodic intervals. Using Auto Save is highly recommended to prevent the
loss of work in the event you have a problem.
Auto Save controls in the User Preferences
To enable Auto Save:
1 Choose DaVinci Resolve > Preferences, and open the User panel.
2 There are two options available:
Live Save: A progressive, fast, always on autosave mechanism that “saves as you go.”
Automatically save project: A more traditional auto-save mechanism.
There are three settings:
Off: Disables Auto Save. This is the default.
On: Automatically saves the current project every few minutes, as defined by the
pop-up menu below that has options for 5, 10, 20, and 30 minute, or 1 hour intervals.
If you’re using a PostgreSQL database, you have the additional option of saving
over 1 minute intervals, as PostgreSQL database saving is considerably faster. If
DaVinci Resolve unexpectedly quits before you have a chance to save, you’ll see all
autosaved changes the next time you reopen that project.
To backup project: Automatically saves new projects to a backup list. Each backup
is an individual project file, so this lets you version your work. The total number of
backup files that are saved can be selected via the “Retain the last X backups” pop-
up menu. Backups are discarded in first in, first out fashion.
3 Click Save to confirm your change, and then close the Preferences window.
Dynamic Project Switching
Dynamic Project Switching is an option in the Project Manager contextual menu that lets you
load multiple projects into RAM simultaneously, so that you can quickly switch from one to the
other just to work, or when copying and pasting clips, timelines, and node settings back and
forth. If you plan on opening many projects, or even just a few very large projects, you should
be sure your workstation has lots of RAM installed or you could experience a slowdown in
performance.

59
Managing Projects and Databases Part 1 – 2
Methods of using Dynamic Project Switching:
To enable Dynamic Project Switching: Open the Project Manager, right-click anywhere
within the Project Manager and choose Dynamic Project Switching so that it’s checked.
Dynamic Project Switching will remain enabled until you turn it off.
To open multiple projects in RAM: Open any project, then reopen the Project Manager
and open any other project. All projects you open are kept available in RAM.
To switch among open projects: Choose File > Switch Project and select the project
you want to switch to from the submenu. You can also choose other projects that have
been opened into RAM from the pop-up menu that appears to the right of the project
name at the top center of the DaVinci Resolve user interface.
To close a specific project: Choose File > Close Project and select the project you
want to close from the submenu. You may be prompted to save, after which the
project closes.
To close all other open projects: Open the Project Manager. All open projects appear
with a check mark in the upper right-hand corner; the currently open project has an
orange corner mark, while other projects open in memory have a gray corner mark.
Right-click anywhere within the Project Manager, and choose Close Projects in Memory
to close all projects other than the current one.
Switching among open projects using the Project
Title pop-up at the top of the DaVinci Resolve UI
Using dynamic project switching, you can do the following:
Copy and paste clips from the Media Pool of one project into another.
Copy and paste timelines from the Media Pool of one project into another. When you
paste a timeline from another project, all of the clips used in that timeline will be pasted
to the same location as well.
Copy and paste clips from a timeline in one project to a timeline in another.
Copy a node’s settings from one project and paste them to a node in another project.
You can also copy and paste clips, timelines, and node settings from one project to another
without using dynamic project switching, but using switching makes this process faster.
Archiving and Restoring Projects
DaVinci Resolve has a convenient feature for quickly archiving every single media file used by a
project, along with the project itself, to a single location. This can be done to hand a project off
to another DaVinci Resolve user, or to bundle a project and its media up for either short- or
long-term archiving using the backup methodology of your choice. The process is simple.
To Archive a project:
1 Open the Project Manager.
2 Locate and right-click the project you want to archive, and choose Archive.
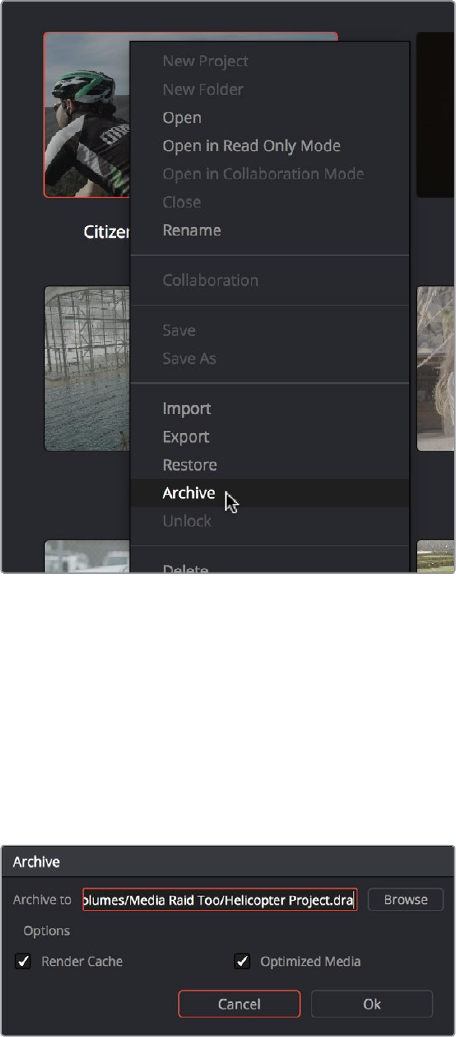
60
Managing Projects and Databases Part 1 – 2
The contextual menu command for archiving projects
3 When the Archive Project window appears, choose a location to save the archive.
Make sure you choose a volume that’s large enough to accommodate the size of all the
media from the project you’re archiving, and click Save.
4 When the Archive dialog appears, verify the location the archive will be saved
to, and choose which optional media you want to save within the archive. As of
DaVinciResolve 12.5 or later, you can optionally save Optimized media and/or Render
Cache media associated with a project.
A dialog letting you choose whether to save
Optimized and/or Render Cache media
5 Click Ok, and a dialog with a progress bar will show you how long the archive operation
will take to finish. If any errors come up, resulting from missing or offline media, they’ll
be presented at the end of the process.
The resulting archive that is written is a directory with the .dra file extension. Inside this folder
are a series of subdirectories containing all of the media that’s used by the archived project.
Each directory of media files used is saved within a directory path that mirrors the exact path it
came from, so you have a reference for where each clip came from originally.
61
Managing Projects and Databases Part 1 – 2
To restore an Archived project:
1 Copy the .dra archive directory you want to restore to the volume where you want
those media files to be. Restoring doesn’t move this directory, it only adds the project
file within to the Project Manager, so you should make sure the .dra archive directory is
located on a storage volume with suitable performance for you to work.
2 Open the Project Manager, right-click anywhere, and choose Restore from the
contextual menu.
3 Choose the .dra archive directory you just copied, and click Open.
4 At the prompt, enter a unique project name for the restored project, and click OK. The
project is restored to the Project Manager, and remains linked to the media located
inside the .dra archive.
If, after restoring an archive, you want to move its media to another location, you can use Media
Management to do a move operation for all clips in that project. For more information on Media
Management, See Chapter 26, “Media Management.”
63
Project Settings and Preferences Part 1 – 3
Project Settings and Preferences
This chapter covers the settings used for defining the properties of each individual project.
It’sagood idea to familiarize yourself with the information in this chapter prior to setting up your
first project.
Opening and Editing Project Settings 64
Project Settings 65
Presets 65
Project Settings 66
Timeline Format 66
Color Management 72
General Options 78
Camera Raw 82
Capture and Playback 82
Opening and Editing DaVinciResolvePreferences 85
System 86
Hardware Configuration 86
Media Storage 87
Video & Audio I/O 88
Audio Plug-ins 89
Control Panels 90
Advanced 90
User 90
Saving User Preference Presets 91
UI Settings 91
Auto Save 92
Editing 93
Color 95
Control Panels 96
Keyboard Mapping 98
Metadata 98
64
Project Settings and Preferences Part 1 – 3
Opening and Editing Project Settings
Once you’ve opened a project, all of the various project settings, deck capture and playback
settings, LUT settings, and application preferences that are available in DaVinci Resolve can be
found in the Project Settings window.
To open the Project Settings window:
Click the gear button at the bottom right on any page.
Project Manager and Project Settings buttons
The Project Settings open in the middle of the screen.
Project Settings window
The Project Settings window is divided into a series of panels which can be selected from a
sidebar at the left. Each panel contains a collection of related settings that affects some
category of DaVinci Resolve functionality.
To alter any project settings:
1 Click on the name of any group of settings in the sidebar at the left to open that panel.
2 Change whatever settings you need to change.
3 Do one of the following to apply your changes:
Click Apply to apply the changes you’ve made and close the Project Settings.
Option-click Apply to apply the changes you’ve made and keep the Project Settings
window open, so you can make other changes.
65
Project Settings and Preferences Part 1 – 3
It may be necessary to keep the Project Settings window open in order to continue making
changes that may visibly affect the clips and timelines in your project.
Project Settings
The Project Settings window contains all project-specific parameters that are saved along with
that project. These include essential project properties such as the timeline format, video
monitoring settings, how to optimize media, and where to save cache files. It also includes
image scaling properties, color management settings, and many other properties that affect
projects in fundamental ways.
Presets
The Presets panel lets you save customized collections of Project Settings for future recall.
Presets can save the state of nearly every parameter and setting in every panel of the Project
Settings window, and make it easy to switch among different setups for different tasks, or to
accommodate different types of projects.
There are three default items in the Presets list:
Current Project: The current project’s settings. If you load a preset, the current project
becomes selected, showing that the preset you loaded has been applied to the
current project.
System Config: The System Config contains the default Project Settings that are
used for all new projects that you create, and consists of the installed defaults that
accompanied DaVinci Resolve. This config is uneditable, but you can use the Save As
button to duplicate it as the basis for a new preset.
Guest default config: This setting is a holdover from previous versions of DaVinci
Resolve that had multi-user support. The default configuration for all new projects
created by the currently logged in user. The actual name of this config reflects the
current user name. This config can no longer be altered.
If you like, you can create your own presets, adding as many as you need to accommodate the
types of projects you work on.
To create a new preset:
1 Do one of the following:
Right-click a project in the Project Manager, and choose Project Settings from the
contextual menu.
Open any project, then open the Project Settings, and select the Presets panel.
2 Select any config in the Presets list that you want to use as the starting point of a new
project preset, and click Save As.
3 Enter a name for the new preset you’re creating into the Preset Name dialog, and click
OK. A new preset should now appear in the Presets list.
4 Select the new preset you’ve just created.
5 Now, use the different panels of the Project Settings window to alter whichever settings
you need to. There’s no need to save your changes as you go.
6 When you’re finished customizing the Project Settings, re-open the Presets panel and
click Save. Your new preset is updated with the new settings you’ve chosen.
Once you’ve created one or more custom presets, you can load them into a project at any time.
66
Project Settings and Preferences Part 1 – 3
To load a preset’s settings into a project:
1 Open a project with a preset you want to update.
2 Click an item in the Presets list.
3 Click Load.
If a dialog appears saying either “Do you want to replace current project’s config with
this selected Preset” or “Apply Current Configuration to System?”, click Yes.
If there’s a custom preset that you’ve created that has outlasted its usefulness, you can delete it.
To delete a custom preset:
1 Do one of the following:
Right-click a project in the Project Manager, and choose Project Settings from the
contextual menu.
Open any project, then open the Project Settings, and select the Presets panel.
2 Click an item in the Presets list to select it.
3 Click Delete.
4 When the Confirm Delete dialog appears, click Yes.
Project Settings
This panel is project specific and lets you set up and adjust the most essential properties of a
clip, including the timeline format, video monitoring method, and conform options. In many
workflows, you’ll want to adjust these settings before getting started with your project.
Timeline Format
This group of settings affects the geometry and image processing of the current project.
Timeline resolution: A pop-up menu that lets you choose a frame resolution preset to
use for image processing while grading. DaVinci Resolve is resolution independent,
so you can change the resolution at any time and all windows, tracks, sizing changes,
and keyframe data will be automatically recalculated to fit the new size. For example,
you can work on a 4K project while monitoring at HD resolutions if your room is only
set up with an HD monitor, and then render the finished project at 4K resolution
for final delivery. Alternately, you can downsize an HD project to an SD resolution
to create another set of deliverables. For more information on Resolve’s resolution
independence, see Chapter 58, “Sizing and Image Stabilization.”
Frame size (Labeled “For X x Y processing”): Lets you set resolutions not found in the
“Timeline resolution” pop-up menu.
Pixel aspect ratio: Used to select PAR settings for image formats that don’t use the
default square pixel format. You can apply a 16:9 anamorphic PAR, a 4:3 PAR for
SDprojects, or a Cinemascope ratio.
Timeline frame rate: Determines the primary frame rate used by the project. A variety
of standard and high frame rate (HFR) settings are available. If you’re importing an
AAFor XML file, this setting is automatically set via an option in the Project Import
dialog. Ideally, you should choose a frame rate before importing media into the Media
Pool. However, the first time you import media into an empty Media Pool, you’re
prompted if the incoming media frame rate doesn’t match the Timeline frame rate set
here, and you have the option of automatically updating this setting to match that of the
media you’re importing. Once one or more files have been added to the Media Pool,
this setting cannot be changed.
67
Project Settings and Preferences Part 1 – 3
Use drop frame timecode: Enables or disables drop frame timecode for the current
project. Off by default.
Playback frame rate: Usually mirrors the frame rate selected in the “Video format”
setting (in the Video Monitoring section below), which is typically based on the
frame rate of the external display that’s connected to your video interface, given
the “TimelineFrame Rate” setting. For example, a 50Hz monitor requires a 25 fps
playback frame rate for synchronous display without dropped frames. If you want to
monitor playback at a slower frame rate, type the frame rate of your choice in this field
and DaVinci Resolve will make the appropriate calculations to drop or repeat frames
as necessary to match it. This can be useful for temporarily seeing how clips look in
slow motion.
Enable video field processing: Interlaced media is supported throughout DaVinci
Resolve. The “Enable video field processing” checkbox forces Resolve to process all
operations internally using separated fields. A corresponding checkbox in the Format
settings of the Deliver page, “Field rendering,” lets you enable and disable field
rendering when rendering file-based output. In addition, each clip in the Media Pool
has a Field Dominance pop-up menu in the Video panel of the Clip Attributes window
that lets you specify whether clips are upper- or lower-field dominant; an Auto setting
makes this choice by default.
If you’re working with progressive-frame media, it is not necessary to turn this checkbox
on. Furthermore, if you’re using interlaced clips in a progressive-frame project and
you’re intending to deinterlace those clips using the Enable Deinterlacing checkbox
inthe Clip Attributes window, then you must keep “Enable video field processing” off.
Otherwise, the Enable Deinterlacing checkbox will be disabled for all clips. For more
information about deinterlacing clips, see Chapter 10, “Modifying Clips and
ClipAttributes.”
Whether or not it’s necessary to turn field processing on to maintain the field integrity of
interlaced clips in your program depends on what types of corrections you’re applying
to your clips. If you’re mastering your program to an interlaced format, and you’re
applying any adjustments that would cause pixels from one field to move or bleed into
adjacent fields, then field processing should be enabled; effects requiring field
processing include filtering operations such as blur, sharpen, and OpenFX operations,
as well as sizing transforms that include pan, tilt, zoom, rotate, pitch, and yaw.
On the other hand, regardless of whether you’re outputting interlaced or progressive-
frame media, if you’re not filtering or resizing your clips, and you’re only applying
adjustments to color and contrast, it’s not necessary to turn on field processing for
interlaced material, and in fact, leaving it off may somewhat shorten your project’s
rendering time.
Video Monitoring
The settings available in this group control the signal that’s output by the video output interface
that’s connected to your workstation, and let you specify what standard of signal is output, and
via which signal path.
By default the frame size and frame rate match those in the Timeline resolution and Playback
frame rate options. However, if necessary you can change these settings to match those of the
external display you’re using to monitor your work. For example, if you’re working with 2K files
for 2K output, but you’re color correcting using a high definition monitor set to 1080 resolution,
you can select the appropriate HD standard for that monitor without changing the Timeline
Resolution settings.
68
Project Settings and Preferences Part 1 – 3
Video format: Lets you choose a video standard combination of frame size and frame
rate to be output via your connected video output interface.
Video connection checkboxes: Lets you choose the signal standard to output from your
connected video output interface to the video monitor. Make sure to choose a standard
that’s supported by both your video interface and your monitor. The options are:
Use 4:4:4 SDI: A signal path for monitoring image data to monitors that support 4:4:4
chroma sampling via dual SDI connections.
Use Level A for 3Gb SDI output: A signal path for monitoring image data via a single
3Gb/s SDI connection.
Use left and right eye SDI output: All DaVinci Resolve systems can generate a
side-by-side display that can be sent to a Stereoscopic monitor via the HD-SDI output
of an UltraStudio 4K or DeckLink card. When dual SDI 3D monitoring is enabled, each
eye is output separately at full resolution. In this mode, split-screen wipes and cursors
will not be visible on the grading monitor.
SDI Configuration: Lets you choose from among Single Link, Dual Link, and
Quad Link SDI.
Data Levels: This setting only affects the data levels being output via the video
interface that connects the Resolve workstation to your external display. It has no
effect on the data that’s processed internally by Resolve, or on the files written when
you render in the Deliver page. It is imperative that the option you choose in Resolve
matches the data range to which your external display is set. Otherwise, the video
signal will appear to be incorrect, even though the internal data is being processed
accurately by DaVinci Resolve.
There are two options:
Video: This is the correct option to use when using a broadcast display set to the Rec.
709 video standard.
Full: If your monitor or projector is capable of displaying “full range” video signals, and
you wish to monitor the full 10-bit data range (0- 1023) while you work, this is the correct
option to use.
For more information about data levels, see Chapter 6, “Data Levels, Color
Management, ACES, and HDR.”
Video bit depth: Choose the bit depth that corresponds to the capability of your
display. You can choose between 8-bit and 10-bit. Monitoring in 10-bit is more
processor intensive, but preferable to avoid the appearance of banding that may not in
fact be in the image data being processed by Resolve.
Monitor scaling: Defaults to basic, and is only enabled to smooth the edges of video
being viewed on a projector with very large screens. These settings minimize high
frequency artifacts that may be seen. This may also be noticeable if you have a 2K or
HD project but are monitoring on an SD monitor. The other option, Bilinear, has different
effects on the monitored image depending on your display device, so you may need to
check to verify that it’s appropriate for your environment.
Use Rec601 Matrix for 4:2:2 SDI output: Don’t use this checkbox unless you know
what it does.
Enable HDR metadata over HDMI: (only available in Studio version) Turning on this
checkbox outputs the metadata necessary to send High Dynamic Range signals over
HDMI 2.0a and have it be correctly decoded by an HDR-aware video display. When this
checkbox is enabled, it’s recommended to also enable the “HDR mastering is for X nits”
checkbox in the Color Management page, and set the “nit” level (slang for cd/m2) to
whatever peak luminance level your HDMI connected HDR display is capable of.

69
Project Settings and Preferences Part 1 – 3
Optimized Media and Render Cache
These settings govern the resolution and codec of optimized media that DaVinci Resolve can
generate in order to facilitate greater real time performance, as well as cached media that’s
generated by the Smart and User Cache.
Optimized Media Resolution: Radio buttons let you choose whether to generate
optimized media at each clip’s Original size, or at Half, Quarter, One-Eighth, or
One-Sixteenth the resolution of the original media.
Optimized Media Format: Specifies the format in which optimized media files will be
written. You can choose from among a variety of Uncompressed, ProRes, and DNxHD
formats, depending on your requirements.
Render Cache Format: Specifies the format in which render cache files will be written.
You can choose from among a variety of Uncompressed, ProRes, and DNxHD formats,
depending on your requirements.
Enable background caching after X seconds: Specifies the duration of inactivity after
which automatic background caching will begin.
Automatically cache transitions in User Mode: If you’re using User mode and you
find that your workstation does not have adequate performance to play transition
effects in real time, you can force these categories of effects to be included in the
Sequence Cache.
Automatically cache composites in User Mode: If you’re using User mode and you find
that your workstation does not have adequate performance to play composite mode or
opacity effects in real time, you can force these categories of effects to be included in
the Sequence Cache.
Working Folders
Two fields let you specify to which folders cache and gallery files are written.
Cache files location: All render cache files that you create are saved in the directory
path specified by this field. This path defaults to a hidden “CacheClip” directory that’s
created at the location of the first Media Storage Volume you specify in the DaVinci
Resolve Preferences window.
Gallery stills location: By default, all stills you save are saved in the DPX format, and
are placed in the directory path specified by this field. This path defaults to a hidden
“.gallery” directory that’s created at the location of the first Media Storage Volume you
specify in the DaVinci Resolve Preferences window.
Frame Interpolation
These settings determine the default state for all retiming and speed change effects, including
when clips are in mixed frame rate timelines.
Retime Process: This pop-up menu lets you choose a default method of processing
clips in mixed frame rate timelines and those with speed effects (fast forward or slow
motion) applied to them, throughout the project. Since each clip in every timeline
defaults to “Project Settings,” changing this setting will change the way most speed
effected clips will be processed, except for those that have custom settings selected.
There are three options:
NOTE: If the volume you’ve selected to use for the cache becomes unavailable,
DaVinciResolve will warn you with a dialog.
70
Project Settings and Preferences Part 1 – 3
Nearest: The most processor efficient and least sophisticated method of processing;
frames are either dropped for fast motion, or duplicated for slow motion.
Frame Blend: Also processor efficient, but can produce smoother results; adjacent
duplicated frames are dissolved together to smooth out slow or fast motion effects.
This option can provide better results when Optical Flow displays unwanted artifacts.
Optical Flow: The most processor intensive, but highest quality method of speed effect
processing. Using motion estimation, new frames are generated from the original
source frames to create slow or fast motion effects. The result can be exceptionally
smooth when motion in a clip is linear. However, two moving elements crossing in
different directions or unpredictable camera movement can cause unwanted artifacts.
Motion estimation mode: When using mixed frame rate clips in a timeline that has
Optical Flow retiming selected, or when using Optical Flow to process speed change
effects, this pop-up menu lets you choose between higher speed (Faster) or higher
quality processing (Better).
Motion range: When using mixed frame rate clips in a timeline that has Optical Flow
retiming selected, or when using Optical Flow to process speed change effects, this
pop-up menu lets you choose the default setting to use, small, medium or large motion,
for all speed and motion related calculations so you can try and improve the result by
matching the type of motion in the source media. This setting can also be changed on a
clip by clip basis in the Edit page Inspector.
Image Scaling
The Image Scaling panel contains settings that determine how and when clips are resized for
various reasons.
Scaling Options
These settings affect the methods used to resize clips in various situations.
Resize Filter: The first group of settings lets you choose the filter method used to
interpolate image pixels when resizing clips:
Sharper: Usually provides the best quality in projects using clips that must be scaled up
to fill a larger frame size, or scaled down to HD resolutions.
Smoother: May provide higher quality for projects using clips that must be scaled down
to fit an SD resolution frame size.
Bicubic: While the Sharper and Smoother options are slightly higher quality, Bicubic is
still an exceptionally good resizing filter and is less processor intensive than either of
those options.
Bilinear: A lower quality setting that is less processor intensive. Useful for previewing
your work on a low-performance computer before rendering, when you can switch to
one of the higher quality options.
Override input scaling: Checking this box lets you choose an Input Sizing preset to
apply to the project.
Override output scaling: Checking this box lets you choose an Output Sizing preset to
apply to the project.
Anti-alias edges: A second group of settings lets you choose how to handle edge anti-
aliasing for source blanking.
Auto: Adds anti-aliasing when any of the Sizing controls are used to transform the
image. Otherwise, anti-aliasing is disabled.
On: Forces anti-aliasing on at all times.
Off: Disables anti-aliasing. It might be necessary to turn anti-aliasing off if you notice
black blurring at the edges of blanking being applied to an image.
71
Project Settings and Preferences Part 1 – 3
Deinterlace quality: (only available in Studio version) A fourth group of settings lets
you choose the quality/processing time tradeoff when deinterlacing Media Pool clips
using the Enable Deinterlacing checkbox in the Clip Attributes window. There are
two settings:
Normal: A high-quality deinterlacing method that is suitable for most clips. For many
clips, Normal is indistinguishable from High. Normal is always used automatically during
playback in Resolve.
High: A more processor-intensive method that can sometimes yield better results,
depending on the footage, at the expense of slower rendering times.
Input Scaling
Contains one setting, Mismatched resolution files, that lets you choose how clips that don’t
match the current project resolution are handled. There are four options:
Center crop with no resizing: Clips of differing resolution are not scaled at all. Clips that
are smaller than the current frame size are surrounded by blanking, and clips that are
larger than the current frame size are cropped.
Scale full frame with crop: Clips of differing resolution are scaled so that the clip’s
shortest dimension is fit to match the frame. Excess pixels are cropped.
Scale entire image to fit: The default setting. Clips of differing resolution are scaled so
that the clip’s longest dimension is fit to match the frame. The shorter dimension has
blanking inserted (letterboxing or pillarboxing).
Stretch frame to all corners: Useful for projects using anamorphic media. Clips of
differing resolutions are squished or stretched to match the frame size in all dimensions.
This way, anamorphic media can be stretched to match full raster, or full raster media
can be squished to fit into an anamorphic frame. An added benefit of this setting is that
it makes it easy to mix anamorphic and non-anamorphic clips in the same project.
Output Scaling
These settings let you optionally choose a different resolution to be output via your video
output interface, for monitoring, outputting to tape, or rendering. In particular, if you set the
resolution in the Render Settings list of the Deliver page to something other than the Timeline
Resolution, these settings are used to make the change (for example, if you’re rendering a
downconversion of the current timeline). This can be used in situations where you’re working on
a high resolution 4K project, but you want to monitor using an HD display and output HD
resolution media for approval.
Match timeline settings: Turned on by default, so that these settings mirror the
Timeline Resolution, Image Scaling, and Input Image Scaling settings described above.
Turning this checkbox off lets you choose different settings for monitoring, outputting
to tape, or rendering, using the other settings in this group.
Output resolution: Lets you choose an alternate resolution.
For: Lets you specify a different custom alternate resolution.
Pixel aspect ratio: Lets you specify an alternate pixel aspect ratio to match the
alternate timeline format.
Mismatched resolution files: Lets you choose an alternate way of handling mismatched
resolution files given the alternate resolution you’ve chosen. These options work
identically to those of the “Input Image Scaling” group.
72
Project Settings and Preferences Part 1 – 3
Color Management
The various options found in the Color Management panel let you configure DaVinci Color
Management (RCM) or ACES if you have either enabled, and they also allow you to pre- or
post-process the DaVinci Resolve image processing pipeline using LUTs and Broadcast Safe
settings, in order to accommodate a wide range of different color workflows.
Color Space & Transforms
If you choose DaVinci YRGB Color Managed or ACES in the Color Science menu at the top,
then the other pop-up menus in this section become enabled. For more information about
DaVinci Resolve Color Management and ACES, see Chapter 6, “Data Levels, Color
Management, ACES, and HDR.” If you’re new to color or color management, you’re strongly
recommended to read this chapter.
If you choose to use Resolve Color Management (RCM), ACEScc, or ACEScct, the settings in
this panel give you extensive control over how color is transformed, starting with choosing the
default color settings for the source media in your project (via the Input Color Space), through
choosing how you want your grading controls in DaVinci Resolve to behave (via the Timeline
Color Space), and then specifying how the final color will look on your monitor and output
device (via the Output Color Space).
While this manual gives you a lot to read, keep in mind that as powerful as this method of color
management is, it’s also incredibly simple to use. All you have to do is choose an Input Color
Space for your clips, a Timeline Color Space (although most will probably default to the
standard Rec.709 Gamma 2.4 setting), and an Output Color Space that’s suitable for creating
the deliverables that are requested of you, and DaVinci Resolve takes care of the rest, making
all necessary color transforms automatically and in real time.
Color science: There are four options. The default is the well established DaVinci YRGB
color science, in which you have to manage all and any color transforms from one color
space to another manually, using either LUTs or manual adjustments. Choosing DaVinci
YRGB Color Managed enables the Resolve color-managed workflow (RCM) for grading.
Alternately, you can choose DaVinci ACEScc or ACEScct color science, which are both
standardized color management schemes that are available for facilities using ACES
workflows. For more information about Color Management and ACES, see Chapter 6,
“Data Levels, Color Management, ACES, and HDR.”
ACES version: This pop-up only appears if you choose one of the DaVinci ACES
options from the Color science pop-up menu. Lets you switch between different
versions of the ACES specification. This lets you choose the appropriate older version
of ACES whenever you open an older project. As of DaVinci Resolve 14, only ACES 1.0.3
is supported.
Use Separate Color Space and Gamma: If this checkbox is turned off (the default),
the Color Management panel of the Project Settings exposes one pop-up each for
the Input, Timeline, and Output color space settings, and each setting simultaneously
transforms the gamut and gamma, depending on which option you choose. If you
turn this checkbox on, then the Color Management panel changes so that the Input,
Timeline, and Output color space settings each display two pop-ups. The first pop-
up lets you explicitly set the gamut, while the second pop-up lets you explicitly set
the gamma.
73
Project Settings and Preferences Part 1 – 3
The global controls available for Resolve Color Management (RCM) are:
Input Color Space: The default color space that all clips in the Media Pool to which
you’ve not assigned an Input Color Space will default to.
Timeline Color Space: The working color space that affects how effects and grading
controls work. All clips in the Media Pool are transformed from the Input Color Space
that’s either manually or automatically assigned to them, to the Timeline Color
Space setting.
Output Color Space: The color space that you’ll be monitoring and outputting as you
work. The Viewers in DaVinci Resolve show you each clip’s image as it’s transformed
from the Timeline Color Space into the Output Color Space.
Timeline to Output Tone Mapping: Accommodates workflows where you need to
transform one color space into another with a dramatically larger or smaller dynamic
range by automating an expansion or contraction of image contrast in such a way as
to give a pleasing result with no clipping. There are three options: None, Simple, and
Luminance Mapping.
Simple: Uses a simple curve to perform this transformation, compressing or expanding
the highlights and/or shadows of the timeline dynamic range to better fit the output
dynamic range. Note that this option maps between approximately 5500 nits and 100
nits, so if you’re mapping from an HDR source with more than 5500 nits to an SDR
destination there may still be some clipping of the highlights above 5500 nits.
Luminance Mapping: Actually uses a customized curve operation to precisely map the
timeline dynamic range to the output dynamic range, and automatically populates the
value of the Max. Timeline Luminance control that guides this transform, but leaves it
user-adjustable in case you want to customize the result.
Max. Timeline Luminance: The maximum luminance level of the Timeline color space,
in nits. Changing the Timeline Color Space gamma setting automatically updates this
parameter to the appropriate value for mapping the Timeline Color Space to the Output
Color Space, but these two color spaces need to be different in order for tone mapping
to work. In Simple mode, this setting is not used. In Luminance Mapping mode, you can
manually alter this setting to customize how the Timeline color space is remapped to
the Output color space.
Timeline to Output Gamut Mapping: Accommodates workflows where you need to
transform one color space into another with a dramatically larger or smaller gamut
by helping to automate an expansion or contraction of image saturation in such a
way as to give a pleasing and naturalistic result with no clipping. Choosing Saturation
Mapping from this menu enables saturation mapping of the image during the Timeline
to Output Color Space transformation that RCM performs when rendering or outputting
a timeline to video.
Saturation Knee: Sets the image level at which saturation mapping begins. Below this
level, no remapping is applied. All saturation values from this level on up are remapped
according to the Saturation Max. slider. A value of 1.0 is maximum saturation in the
currently selected output color space.
Saturation Max: The new maximum level to which you want to either raise or lower all
saturation values that are above the Saturation Knee setting. A value of 1.0 is maximum
saturation in the currently selected output color space.
ACES Input Device Transform: (aka IDT) When Color Science is set to ACES, this
pop-up menu lets you choose which IDT to use for the dominant media format in
DaVinci Resolve.
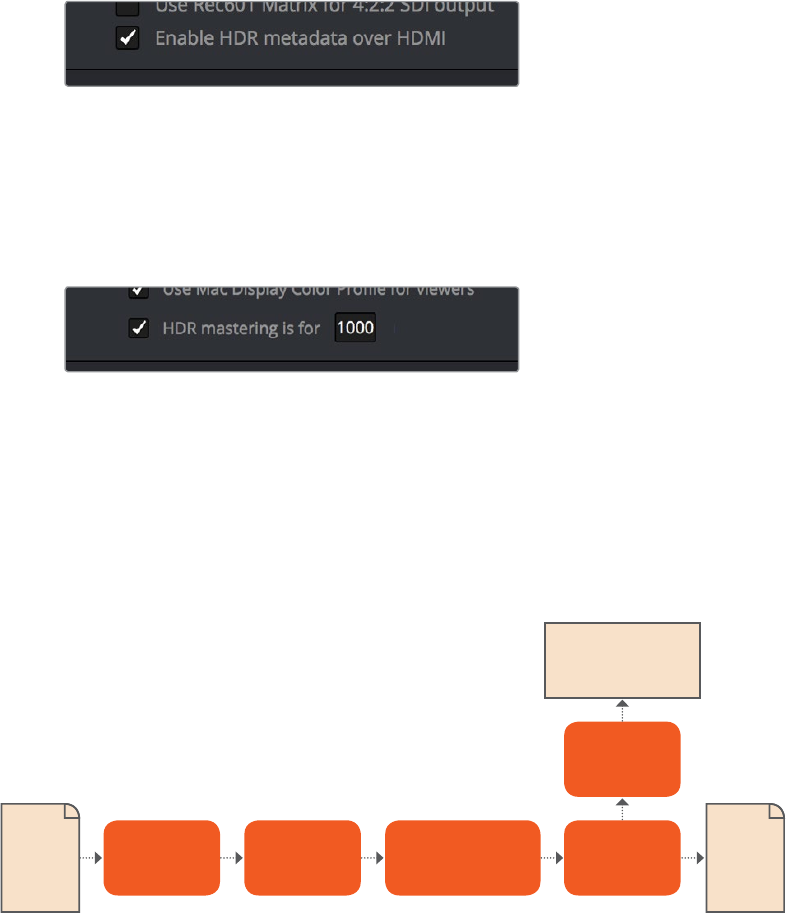
74
Project Settings and Preferences Part 1 – 3
ACES Output Device Transform: (aka ODT) When Color Science is set to ACES, this
pop-up menu lets you choose an ODT with which to transform the image data for
monitoring on your calibrated display, and when exporting a timeline in the Deliver
page. For more information on ACES workflows using these settings, see Chapter 6,
“Data Levels, Color Management, ACES, and HDR.”
HDR Mastering is for: (Only available in Studio version) If you have a DeckLink 4K
Extreme 12G or an UltraStudio 4K Extreme video interface, then DaVinci Resolve 12.5
and above can output the metadata necessary to correctly display HDR video signals
to display devices using HDMI 2.0a when you turn on the “Enable HDR metadata over
HDMI” checkbox in the Master Project Settings.
The Enable HDR metadata over HDMI option in the Master Project
Settings lets you output HDR via HDMI 2.0a
When you do so, a setting in the Color Management panel of the Project Settings, “HDR
mastering is for X” lets you specify the output, in nits, to be inserted as metadata into the HDMI
stream being output, so that the display you’re connecting to correctly interprets it. The output
you specify should match what your display is expecting.
The HDR mastering is for setting lets you insert metadata for HDR output via HDMI 2.0a
Lookup Tables
This group of controls lets you add LUTs to the Resolve image processing pipeline that affect
every timeline in the entire project all at once. These LUTs can be used for a wide variety of
functions, such as to trim Timeline grades, apply Log to Linear conversions, simulate film output,
and limit the signal to accommodate Broadcast Safe requirements. Different options let you
insert image processing to different stages of the pipeline as seen in the following diagram:
Keep in mind that since you can apply both 1D and 3D LUTs simultaneously, 1D LUTs at each
step are always applied before 3D LUTs.
DISPLAY LUT
Monitored Image
Color Page
Image Processing
INPUT LUT
Camera Raw
Decoding OUTPUT LUT
Raw
Image
Data
Delivery
Page
Output
Media
75
Project Settings and Preferences Part 1 – 3
1D/3D Input Lookup Table: Two pop-up menus let you add 1D and/or 3D LUTs that
process the current Timeline before every other image processing operation in
DaVinci Resolve.
1D/3D Output Lookup Table: Two pop-up menus let you add 1D and/or 3D LUTs that
process the current Timeline after the operations applied in the Color page, but before
the temporarily applied Display LUT.
1D/3D Video Monitor Lookup Table: Two pop-up menus let you add 1D and/or 3D
LUTs that process the current Timeline after every other image processing operation
in DaVinci Resolve. However, Display LUTs are only temporarily applied for purposes
of monitoring; they’re never applied to rendered media, or to the signal that is output
to tape using the controls in the Deliver page. Display LUTs are particularly valuable
for applying a film print emulation LUT in a Log workflow, or for applying a monitor
calibration LUT if you’re outputting to a single display and you don’t have dedicated
outboard calibration hardware.
Here’s an example. It’s common, when grading for film output using a Log workflow,
that you’ll use the Display LUT pop-up menu to apply a film emulation LUT that
simulates the image as it will be output from the film recorder, taking into account the
film lab and print stock used, in order to make sure that the image you’re grading will
appear as close as possible to what the eventual release print will look like in
the cinema.
1D/3D Color Viewer Lookup Table: Two pop-up menus let you add 1D and/or 3D LUTs
that process the image shown in the Viewer on your computer display, independently
of the Display LUT that’s used to output to your broadcast display. By default, this
follows the Video Monitor LUT setting, but you can also use this option to apply a
specific calibration transform for your computer monitor. Alternately, you could use it to
desaturate the GUI Viewer to be able to specifically evaluate image contrast, or if you
don’t want to have to argue with your client over which display looks correct.
1D/3D Scopes Lookup Table: Ordinarily, Resolve’s internal software video scopes
provide an unbiased analysis of the actual video data levels within the Resolve image
processing pipeline. However, you can choose to have the software scopes use the
Video Monitor LUT selection, or any other LUT installed on your system, to transform
this analysis to reflect the monitored output.
3D Lookup Table Interpolation: 3D Lookup tables (LUTs) are 3D tables of red, green,
and blue values that specify an output color value for each input color value, thereby
providing a method of making color transformations using pre-calculated data. While
powerful, 3D LUTs have finite detail; for example, one might have a 17x17x17 LUT that
specifies 4913 individual color transforms. When applied to a floating point image that
contains more data than the LUT specifies transforms for, color values falling between
the 17x17x17 color transforms specified by the LUT need to be interpolated. You can
choose from two methods that trade off processing efficiency for higher quality:
Trilinear: (Default) Trilinear is backward-compatible with grades that use LUTs from
previous versions of Resolve and matches the look of LUTs being applied in other
applications.
Tetrahedral: Tetrahedral is slightly more processor-intensive, but results in higher
image quality, with reduced color-banding. Tetrahedral is recommended for projects
that don’t need to match grades from previous versions of Resolve, or LUTs created in
other applications.
Update Lists button: Refreshes the LUT pop-up menus if you’ve added new LUTs to
your system since DaVinci Resolve has been opened.
Open LUT Folder button: This selection opens the master folder in your file system, as
described in the list of DaVinci Resolve LUT paths shown above.

76
Project Settings and Preferences Part 1 – 3
Broadcast Safe
Broadcast Safe settings can be enabled while you grade to limit both the luma and chroma of
the video signal to one of three levels of acceptable overshoots and undershoots.
Broadcast safe IRE (mV) levels: A pop-up menu for choosing one of three levels of
aggressiveness when limiting the signal. Choose the range that corresponds to your
QC requirements.
Make Broadcast Safe: A checkbox that turns broadcast safe limiting on and off.
Generate Soft Clip LUT
Similar to the Soft Clip mode of the Curves, a Soft Clip LUT lets you create an image processing
LUT that applies a timeline-wide “knee” to any clipping that occurs at the upper or lower
extremes of the image. Soft clipping in this context is used to quickly ease off any unpleasantly
harsh loss of detail occurring as a result of blowing out the highlights or crushing the shadows
too aggressively.
Adding Lookup Tables to Your DaVinci Resolve Installation
The pop-up menus in the Color Management panel include a series of factory preset
LUTs that were installed with DaVinci Resolve, along with any LUTs that have been
generated by DaVinci Resolve, or that you’ve imported into the proper directory for
your operating system.
On OS X: Library/Application Support/Blackmagic Design/DaVinci Resolve/LUT/
On Windows: C:\ProgramData\Blackmagic Design\DaVinci Resolve\Support\LUT
On Linux: /home/resolve/LUT
If you downloaded the non-studio version of DaVinci Resolve from the Apple App
Store, LUTs are saved in a different location in order for DaVinci Resolve to remain
totally self-contained. In this case, you can click the “Open LUT Folder” button in the
Lookup Tables panel of the Project Settings, to open up a Finder window at the
location these LUTs are stored. You can use this window to copy LUTs that you want
Resolve to have access to, or delete LUTs that you no longer need.
If you add a LUT to one of these directories after DaVinci Resolve has been opened,
you can click the Update Lists button to refresh the contents of the pop-up menus.
DaVinci Resolve uses both 1D and 3D LUTs. 3D LUTs that are created by DaVinci
Resolve are in the .cube format, configured as 33x33x33 cubes with 32-bit floating
point processing. DaVinci Resolve can also read and use LUTs in the Shaperlut format.
NOTE: The clipping imposed by Broadcast Safe itself does not have an inherently soft
roll-off. For best results, Broadcast Safe should be used in conjunction with the Soft
Clip controls in the Color page, or a Soft Clip LUT (described in the following section).
77
Project Settings and Preferences Part 1 – 3
To be effective, a Soft Clip LUT should be ideally applied using the 3D Output Lookup Table
pop-up menu in the Look Up Tables panel, so it’s the very last operation in the image
processing pipeline.
Generate: Lets you choose whether you create a soft-clip LUT as a 1D or 3D LUT. 1D
LUTs are more accurate for this operation, using 1023 data points, as opposed to the
33x33x33 cube of the 3D LUT.
Generates LUT based on: Defaults to “No LUT selected,” which generates a soft clip
LUT using only the settings within this panel. Choosing another LUT from the list lets
you concatenate the calculations you specify in this panel with the selected LUT, thus
outputting a single LUT that applies both sets of calculations all at once.
Scaled to clipping range: Enables the Maximum and Minimum settings below to work.
Maximum video level: Sets the maximum value that will be output. All image data
above this value will be clipped.
Upper Clipping softness: Sets the threshold, as a percentage below the clipping point,
at which highlights in the image data begin to compress before hard clipping. At 0, no
soft clipping occurs. As you raise this value, more of the clipped highlight values are
compressed, rather then clipped, resulting in softer, more pleasant “glowing” highlights.
Minimum video level: Sets the minimum value that will be output. All image data below
this value will be clipped.
Lower Clipping softness: Sets the threshold, as a percentage above the minimum
clipping point, at which shadows begin to compress before hard clipping. At 0, no soft
clipping occurs. As you raise this value, more of the clipped shadow values are
compressed, rather then clipped, resulting in a softer, more pleasant rolloff in the toe of
the shadows.
Save LUT as: A field into which you can enter a name for a Soft Clip LUT you
want to save.
Generate LUT button: Click this button after entering a name in the Save LUT as field
to save a Soft Clip LUT.
Here’s a procedure for creating a Soft Clip LUT using the controls in this area.
To create a Soft Clip LUT:
1 Open the Project Settings and open the Look Up Tables panel.
2 Choose the settings for the Soft Clip LUT you want to create.
3 Type a name for the new LUT in the “Save LUT as” field, click “Generate LUT.”
The new LUT is saved in the default directory for your system, and is now available in
the LUT pop-up menus of this panel.
Generate LUT From Analyzed Pattern
This somewhat hidden command allows you to analyze a special test pattern in order to derive
a LUT from whatever adjustments were made to that image. It relies on the use of the “trim_lut.
dpx” file that’s located in one of the following directories:
On Mac OS X: Library/Application Support/Blackmagic Design/DaVinci Resolve
On Windows: C:\ProgramData\Blackmagic Design\DaVinci Resolve\Support
On Linux: /home/resolve
78
Project Settings and Preferences Part 1 – 3
This procedure is most useful when you want to reverse-engineer an adjustment that’s being
made via a third-party application. Be aware that it’s only useful for analyzing primary
adjustments, such as lift/gamma/gain style adjustments, saturation adjustments, or curve
adjustments. Secondary adjustments and filters such as blurs or sharpen operations cannot be
analyzed, and in fact may cause an incorrect analysis.
To use Generate LUT From Current Grade:
1 Import a duplicate of the trim_lut.dpx file into an application in which to make an
adjustment.
2 Make a primary color adjustment of some kind, and save the file. Don’t overwrite the
original file.
3 Import the altered trim_lut.dpx file into Resolve, edit it into a timeline, open the Color
page, and select that clip.
4 Open the Color Management panel of the Project Settings, type a name for the LUT
you’re about to create into the Save LUT as field at the bottom of this panel, and click
Generate LUT.
A LUT is generated and saved into the LUT directory of your workstation. To see this LUT’s
effect on another clip, select another clip, right-click a node in the Node Editor, and choose the
LUT you created from the 3D LUT submenu.
General Options
This panel presents a selection of general preferences that affect the interface and operation of
DaVinci Resolve.
Conform Options
The settings in this group determine how clips are conformed to match imported project files
with source media on disk by extracting timecode, reel names, file names, file paths, and so on.
For more information on conforming and relinking, see Chapter 34, “Conforming and
Relinking Clips.”
Use Timecode: Determines how DaVinci Resolve extracts timecode from referenced
media files. There are two options:
Embedded in the source clip: The preferred setting for most projects to conform
automatically and apply grades to the resulting clips. As long as DaVinci Resolve can
reference the timecode in either a media file’s timecode track, or in the header
metadata of the frames in a DPX sequence, you can use timecode to re-conform clips,
or even completely change the media file to which a clip refers.
From the source clip frame count: This setting is useful if the source media lacks
timecode metadata, and all that’s available is a frame count that identifies frames via
sequentially numbered integer values.
Conform partial clips with black gaps: Inserts black frames whenever you conform a clip
that doesn’t contain all the required frames. When this option is selected, partial clips are
flagged in the Edit page with a P in the thumbnail of the clip that it is lacking frames.
Auto conform clips with media added into Media Pool: Enabled by default, must be
disabled to use collaborative workflow. When this checkbox is turned on, DaVinci
Resolve maintains a dynamic relationship between clips in the Media Pool and those
in a project’s various timelines. When this checkbox is on and you import clips with
matching timecode/file names/reel names to clips in a timeline, DaVinci Resolve will
automatically reconform all matching missing clips, and all other timeline clips that have
force conform turned off.
79
Project Settings and Preferences Part 1 – 3
Assist using reel names from the: When this checkbox is turned on, DaVinci Resolve
uses reel numbers when conforming clips to match any imported project. This setting
must also be turned on if you want to choose different reel name extraction methods
for individually selected clips using the Clip Attributes window. Turning this checkbox
off forces DaVinci Resolve to identify clips using file names when conforming XML and
AAF projects. File names can only be used for conforming XML or AAF files, or when
importing a DaVinci Resolve project. There are four options:
Source clip file pathname: Obtains the reel number by extracting it from each media
file’s path. This makes it possible to extract a reel number from all or part of the file
name, or from all or part of the name of any folder in the path that encloses that file.
This extraction is defined using the Pattern field.
Pattern: A code that defines how a reel number should be extracted from the source
clip path name. For more information about creating patterns, see “Using the Pattern
Field” in Chapter 34, “Conforming and Relinking Clips.”
Media Pool folder name: The reel number is obtained from the name of the bin in the
Media Pool that encloses that clip. This option is often used for stereo projects, deriving
the reel number from “Left” and “Right” named directories. It’s also useful for projects
that are inheriting new VFX clips on a daily basis.
Embedding in source clip file: Useful for file formats where the reel number is
embedded within the media file itself. QuickTime files created by Final Cut Pro, DPX
frame files, and CinemaDNG files are all formats that are capable of containing reel
number header data.
Source clip filename: If there is no defined reel number, often it’s easy to just use the
source clip filename. This is a safe option to use in situations where you want to
manually choose different reel name extraction methods for individual clips using the
Clip Attributes window.
Extract reel names from EDL comments: Media file formats such as R3D have reel
names, obtained from the file names, that are longer than the eight characters that are
allowable in a standard EDL. This option allows DaVinci Resolve to extract reel names
from appropriately formatted EDL comments, such as those output from Final Cut Pro 7.
Sort timeline using reel number and timecode: Lets you change the behavior of
Cmode sorting in the Timeline. With this checkbox turned on (the default), all clips
in the Timeline are sorted by reel number first, and then by source timecode. This
way, clips with similar timecode from the same reel will appear next to one another
in Cmode. If you turn this checkbox off, reel number is ignored, and all clips in the
Timeline are sorted only by source timecode. This may result in clips from multiple
sources being mixed together, but it is useful in specific situations.
Mixed frame rate format: (Only available prior to importing media into a project)
Thispop-up menu lets you choose the method used to conform mixed frame rates for
rendering and playback. Which option you choose dictates the accuracy with which
retimed clips in DaVinci Resolve match the same clips that were retimed in other editing
applications when you import those timelines into DaVinci Resolve via XML or AAF. This
pop-up menu also appears in the Load AAF or XML dialogs.
If you’re editing from scratch in DaVinci Resolve: You should leave this setting set
to“Resolve.”
When importing timelines via XML from Apple software: Choose the “Final Cut Pro 7”
or “Final Cut Pro X” methods of conform.
When importing timelines via XML or AAF from Premiere Pro, Media Composer,
Smoke, or other NLEs: You should choose “Resolve.”
80
Project Settings and Preferences Part 1 – 3
When none is selected: DaVinci Resolve conforms and processes all clips in the
Timeline to play at the frame rate that’s selected in the “Timeline frame rate” pop-up
menu. For example, 23.98, 29.97, 30, 50, 59.94 and 60 fps clips will all play at 24 fps
ifthat’s what “Timeline frame rate” is set to in the Master Project Settings, and clips will
play slower or faster accordingly.
How clips in mixed frame rate timelines are rendered out depends on whether the Render
Settings are set to render individual source clips or one single clip. When you render the
Timeline as individual source clips, all clips are rendered individually at their original frame rate.
If you select ‘single clip,’ all clips are converted to the “Timeline frame rate” frame rate and
rendered as a single media file.
Audio Metering
Two options in the General Options of the Project Settings let you customize the Loudness
Meters on the Fairlight page, while the others affect all other audio meters in DaVinci Resolve.
Target Loudness level: Lets you set the LUFS value that’s used as a reference level
for loudness metering. Defaults to –23 LUFS which conveniently makes the display of
these meters scale similarly to traditional audio meters that you’re already used to.
Loudness Scale: Lets you choose which scale you want to use with which to measure
the meters. Options currently include the default of EBU +9 Scale (–18 to +9), and EBU
+18 Scale (–36 to +18).
Track Meters: Lets you choose how meters in the Fairlight page display their audio
analysis. There are two options:
Post Fader: Meters always display the level of each clip’s signal after whatever fader
adjustments have taken place. Fading a track’s level down diminishes the visible level
of that audio signal in the meter. This setting is good if you prefer a visual indication
of the relative levels you’ve set your various audio tracks to, which is a very NLE-
oriented behavior.
Track Source: Meters always use the volume levels of the audio clips in that track,
even if you’ve lowered the level using the sliders. If you’ve keyframed a clip’s volume,
that change will be reflected by the audio meters, even though fader changes are not.
Viewing meters this way means you can always see how much level is available to clips
in your mix regardless of what the current fader levels are set to, in the event you want
to keep track of audio you want to bring back into the mix later on. This is a very DAW-
oriented behavior.
Color
These settings affect clip versions and timeline interactions when working in the Color page.
Luminance mixer defaults to zero: Selecting this option sets the Y channel of the
YRGB parameters for all grades to zero. This is required to be able to export a
compliant ASC-CDL, and will impact all grades that use the Lum Mix control.
Use legacy Log grading ranges and curve: DaVinci Resolve 12.5 introduced a
modification to the Log grading controls that provides smoother, more pleasing results
using the same controls. To maintain backward compatibility with older projects, a
“Use legacy Log grading ranges and curve” checkbox in the Color panel of the Project
Settings lets you switch your project between the older Log control behavior and the
newer one. Older projects that are opened in DaVinci Resolve have this checkbox
turned on by default, while new projects have this turned off by default.
81
Project Settings and Preferences Part 1 – 3
Use S-curve for contrast: On by default, this checkbox sets the contrast control in the
Color Wheels palette to apply an “S-curve” to the image, such that the shadows and
highlights of a signal will not be clipped when you increase the value. If you would
prefer for these contrast adjustments to be made linearly, and for the signal to be
allowed to clip when you reach the upper and lower boundaries of the video signal, you
can turn this checkbox off.
Use legacy sizing interactions for windows and effects: DaVinci Resolve 14.1.1
improved how window tracking applies transformations, to correctly handle things like
pixel aspect ratio (par). New projects should leave this setting disabled, however older
projects should leave this checkbox enabled to ensure tracking and transforms remain
applied the way they were before.
Apply stereoscopic convergence to windows and effects: When enabled,
automatically applies convergence as appropriate to windows and effects in the
opposite eye of stereo timelines.
Use local version for new clips in timeline: Automatically sets all new clips that
are added to existing timelines, or all clips that are added to new timelines that are
imported via AAF, EDL, or XML, to use local grades by default. If you want all clips
added to new timelines to use remote grades instead, as with DaVinci Resolve version
9 and earlier, you can turn this checkbox off.
Automatically match master timeline with media pool: If you turn on this option before
importing any media into the Media Pool, or importing any timelines that will in turn
import media into the Media Pool, you can create projects with a Master Timeline.
When enabled, clips are added to and removed from the Master Timeline as they’re
added to and removed from the Media Pool, so that the Master Timeline always
contains all media in the Media Pool. Once media has been imported into a project, this
setting cannot be changed.
Save timeline thumbnails with project: To minimize project size, and maximize the
speed of saving and loading projects, you should leave this checkbox unchecked. If
you select the checkbox, all of your Timeline thumbnails will be stored inside every
project, instead of in the default directory that’s ordinarily dedicated to stills, during
both Save and Auto Save operations. This provides a good history of the project but
takes much longer to complete and uses more hard disk space.
Use BGR pixel order for DPX v2: Lets you choose a different pixel order for projects
using DPX version 2 media.
Embed timecode in audio output: When turned on, directs DaVinci Resolve to output
LTC timecode that’s embedded in channel 16 of the SDI stream and channel 2 of the
analog audio output from your video interface.
Use Timelines Bin: This option is only available to be changed before you add clips
to the Media Pool; after you’ve added clips, it’s no longer available. Turning Use
Timelines Bin on creates a dedicated Timelines bin in the Media Pool, at the top of the
Bin List. When enabled, the Timelines bin contains all timelines in a project, and you’re
prevented from putting timelines into any other bin in the Media Pool. Whenever you
create or import a new timeline, it automatically appears in the Timelines bin. You can
add subfolders to the Timelines bin for more specific organization.
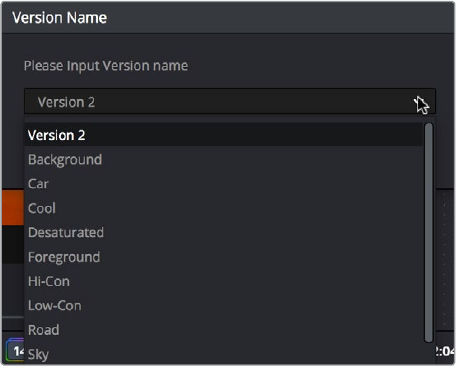
82
Project Settings and Preferences Part 1 – 3
Dynamics Profile
Defines the default transition from one dynamic keyframe to the next for keyframed effects in
the Color page. By default this transition is linear, with the “Dynamic profile start” and “Dynamic
profile end” parameters set to 1. However, if you need to alter the acceleration of the
interpolation of values from one dynamic keyframe to the next, then you can change that
keyframe’s Dissolve Type in order to “ease” the effect transition you’re creating. The values in
these settings correspond to the graph curves found in the Dynamic Attributes dialog when
editing keyframes in the Color page. For more information, see “Changing Dynamic Attributes”
in Chapter 53, “Keyframing in the Color Page.”
Versions
Ten text fields provide a way for you to designate automatic names for the versions of grades
that you select in the Color page. To the right of each text field, a pop-up menu lets you add a
name from a handy list of predefined terms that’s been provided. Alternately, you can simply
click any field and type your own custom name.
When you change the name of a version in the Color page, the names you define in this list are
available from a pop-up menu in the Version Name dialog.
Using the named pop-up when editing the name of a version
Using a predefined list of names for your different versions avoids typos that can later create
folder naming issues when you use the “Commercial Workflow” options for rendering your
media in the Deliver page.
Camera Raw
This panel contains groups of parameters that correspond to every camera raw media format
that’s supported by DaVinci Resolve. Using these parameters in the Camera Raw panel, you can
override the original camera metadata that was written at the time of recording, and make
simultaneous adjustments to all camera raw clips using the “project” raw settings.
These settings are covered in detail in Chapter 4, “Camera Raw Settings.”
Capture and Playback
All settings in this panel let you define the functionality of capture and playout to tape using
device controlled VTRs connected to your Resolve workstation via the connected video
capture and output interface. For more information on deck capture, see Chapter 12, “Ingesting
from Tape.” For more information on video output to tape, see Chapter 77, “Delivering to Tape.”
83
Project Settings and Preferences Part 1 – 3
Deck Settings
These settings affect both capture and playback when using the tape ingest options of the
Media page, or the tape output options of the Deliver page.
Video capture and playback: You can choose the video format (frame size and
frame rate) with which to output to tape from this pop-up menu. HD timelines can be
downconverted to SD, and SD timelines can be upconverted to HD using the format
conversion of your DeckLink card.
Use left and right eye SDI: A checkbox that enables supported video interfaces to
ingest and output muxed stereoscopic video when used with supported VTRs, such
as HDCAM SR decks with 4:2:2 x 2 mode. (When muxed stereoscopic signals are
ingested, each eye is separated into individual left-eye and right-eye image files.)
Thisparameter only appears when your hardware is set up appropriately.
Video connection operates as: Selects between the available signal options: Use4:4:4
SDI and Enable Single Link. Which options are available depend on which video
capture card you are using.
Data Levels: Lets you specify the data range (normally Video or Full) that’s used when
ingesting from or outputting to tape. This option switches the data range of the signal
output by your video capture card, but only during capture from tape in the Media
page, or output to tape in the Deliver page. When capture or output is not currently
occurring, your video capture card goes back to using the identically-named data range
setting in the Master Project Settings pane, which governs how you monitor the signal
being output on an external broadcast display or projector.
Video bit depth: Choose the bit depth that corresponds to the capability of your deck.
Depending on your workstation’s configuration, you can choose between 8-bit and 10-
bit. Outputting to 10-bit is more processor intensive, but higher quality for compatible
devices, and is the default setting.
Use deck autoedit: If supported by your video deck, this is the best method to record
video to the deck, as it enables the deck to roll the edit using the specified preroll, and
control the edits via serial device control. If this checkbox is turned off, a basic edit On/
Off mode is used by the deck, with the potential for frame inaccuracies if the “Non auto
edit timing” setting is not properly adjusted.
Non auto edit timing: Adjusts the edit synchronization of the connected deck when
auto edit is turned off.
Deck preroll: Sets the number of seconds for preroll. How much is appropriate
depends on the performance of your deck.
Video output sync source: When using a DeckLink card this is set to Auto. Other
capture cards may require you to set the sync source to “Reference” for playout and
“Input” for ingest. This setting is only available if you have a DVS card installed on
your system.
Add 3:2 pulldown: Inserts or removes the 3:2 pulldown required to record or play
23.98 fps media to or from a 29.97 tape format.
Capture
These settings are used when you use the Capture mode in the Media page to capture clips
from tape into the Media Pool.
Capture: Lets you choose whether to capture both Video and Audio, or Video Only.
Video Format: The format that scanned film frames are saved as. When capturing from
tape, the available options are DPX and QuickTime. When capturing from the Cintel
film scanner, this is restricted to Cintel Raw Image (CRI), which is a raw data format that
DaVinci Resolve automatically debayers as a Cineon log-encoded image for grading.
84
Project Settings and Preferences Part 1 – 3
Codec: The codec used to write captured media. When capturing from tape, these
include the various type of Apple ProRes, 8- and 10-bit YUV 422, 10-bit RGB, and the
various types of DNxHD. Cintel Raw Image files default to rgb.
Save clips to: A field that displays the directory path to which media files captured from
tape are written. You want to choose a volume that’s fast enough to accommodate the
data rate of the media format you’re capturing.
Browse: Click this button to choose a directory to write captured media to. The
directory you choose appears in the field above.
Save in this folder path: A series of checkboxes let you specify what other information
to use to define the directory hierarchy that will hold the captured media. Every
checkbox you turn on adds an additional directory with a name defined by that
checkbox’s metadata. You can choose any or all of the following: Program name, Clip
number, Reel number, and Roll/Card.
Apply reel number to: Lets you choose how to write the reel name. Two checkboxes
let you write the reel number to the file’s name, and/or to the Header data.
Use prefix: A field lets you type in a prefix to be used in the media file’s name. This
lets you add text identification that will make the media more easily identifiable and
searchable.
Apply prefix to: Two checkboxes let you choose to use the prefix you typed in the file
name, and/or in the folder name.
Use frame number with: When capturing to image sequences, you can choose how
many digits to use when writing the frame number into the name of each frame file.
Set batch ingest handles to: When capturing to image sequences from a batch list,
defines how many frames of additional handles to ingest along with each logged clip.
Enable audio input: Turn this checkbox on to capture audio along with the video. If
you’re capturing QuickTime or MXF files, the audio will be written as additional tracks
inside each file. If you’re capturing to a DPX image sequence, then a broadcast .wav file
is recorded separately.
Input: Lets you choose how many tracks of audio to capture, from 2 to 16.
Playout
These settings only affect the video signal that’s output when you use the Edit to Tape mode of
the Deliver page.
Output: Lets you choose whether to output both Video and Audio, Video Only, or
Audio Only if you’re doing an audio layback.
Output Source Timecode: Turn this checkbox on to output each individual clip’s source
timecode. This option is only applicable when assemble editing to tape.
Output LTC: With a Blackmagic Design DeckLink or UltraStudio device using HD-SDI,
longitudinal timecode (LTC) is available on track 16 of the HD-SDI video signal, making
it easy to use a Mini Converter de-embedder to extract this analog timecode audio
signal and feed it directly to a recording device. This is particularly helpful if you have
outboard video processing equipment such as a noise reducer or format converter that
does not pass through the VITC timecode.
Delay LTC by x frames: When outputting LTC to bypass outboard processing gear, such
as a noise reducer or format converter, you can compensate for the processing delay
by delaying the timecode by a matter of frames to ensure that the processed image
and timecode reach the deck at the same time. With a DVS card there is a separate
timecode output.
Enable audio output: When this checkbox is enabled, DaVinci Resolve will play audio
during output.
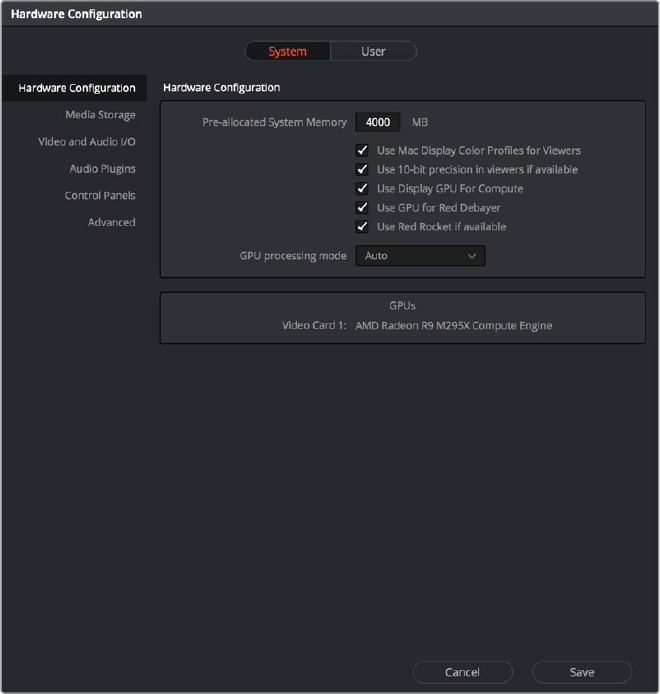
85
Project Settings and Preferences Part 1 – 3
Offset audio by x frames: Lets you specify an offset between the audio track and video
to achieve proper A/V sync in cases where the video is being delayed by outboard
processing hardware.
Output x channels of audio: Choose the number of audio tracks to output to tape.
Set batch playout head handle to x seconds: When batch outputting multiple clips, you
can specify a number of frames before the In point of each clip to be output as well.
Set batch playout tail handle to x seconds: When batch outputting multiple clips, you
can specify a number of frames after the Out point of each clip to be output as well.
Apply gaps between clips: This checkbox lets you add a black gap, of the specified
duration in frames, between every clip in a timeline when outputting in batch mode.
Opening and Editing
DaVinciResolvePreferences
The DaVinci Resolve Preferences window contains workstation-specific settings for customizing
how DaVinci Resolve works, divided into System and User panes, selectable via buttons at the
top of this window.
To open the Project Settings window, do one of the following:
Choose DaVinci Resolve > Preferences
Press Command-Comma
System Settings of the Preferences Window
86
Project Settings and Preferences Part 1 – 3
The System and User panes are each divided into a series of panels which can be selected
from a sidebar at the left. Each panel contains a collection of related settings that affects some
category of DaVinci Resolve functionality.
To alter any preference setting:
1 Click on the name of any group of settings in the sidebar at the left to open that panel.
2 Change whatever settings you need to change.
3 Click Save to apply the changes you’ve made and close the Preferences window.
If you’ve updated certain System Preferences, you’ll be prompted to restart DaVinci Resolve,
but if you’ve updated the User Preferences, this will probably be unnecessary.
System
The System pane of the Preferences window consists of a series of panels that configure the
computer and other hardware that comprises your DaVinci Resolve workstation.
Hardware Configuration
The bottom section of this panel provides an overview, for reference, of all hardware and
computer characteristics that are relevant to DaVinci Resolve running smoothly, including listing
of installed GPUs. Some other options are also available at the top:
Pre-allocated System Memory: Most users don’t have to worry about this option, and
should probably ignore it. To understand when this might be useful, DaVinci Resolve
uses RAM to store images as they’re being processed. By default, Resolve only pre-
allocates 50% of the available RAM of your workstation for this purpose, which typically
comes to the 4 GB listed in this field. Workstations with enormous amounts of RAM
available (64 to 128 GB, for example), may find it desirable to raise this cap in order
to improve performance when rendering 5K, 6K, or 8K resolution clips, although the
maximum recommended pre-allocation is 12 GB of RAM.
Use Mac Display Color Profile for Viewers: If you’re using DaVinci Resolve on macOS,
this checkbox enables all Viewers in DaVinci Resolve to use whatever display profile is
selected in the Displays panel of the System Preferences. This lets DaVinci Resolve use
ColorSync on macOS so your Viewer image should better match your output display.
Use 10-bit precision in viewers if available: This checkbox only appears on Mac OS
X 10.11 (El Capitan) and higher installations of Resolve. Turning this checkbox on lets
Resolve display 10-bit images in the Viewer.
Use Display GPU For Compute: By default, a single GPU system uses this one GPU
for the DaVinci user interface and also for image processing. As greater processing
speeds are achievable with two or more GPUs, if two GPUs are installed for image
processing this checkbox enables the shared use of the display GPU instead of
dedicating it to just the DaVinci user interface. Users of the non-studio version of
DaVinci Resolve are restricted to the use of a single GPU, unless DaVinci Resolve is
installed on a 2013 or later Mac Pro, in which case both installed GPUs will be used.
Use GPU for RED Debayer: Lets you use your GPU to accelerate debayering of R3D
media for systems without a RED Rocket installed.
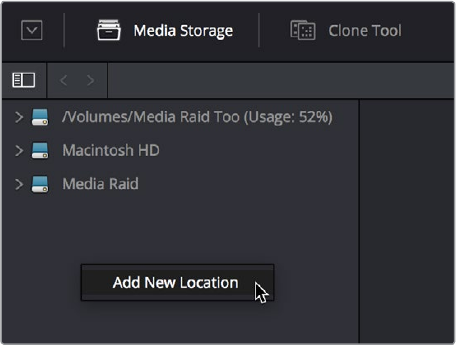
87
Project Settings and Preferences Part 1 – 3
Use Red Rocket if available: (only appears if a RED ROCKET-X or RED ROCKET is
installed) This checkbox lets you disable Red Rocket support if you need to force
DaVinci Resolve to use standard RED software CPU debayering to accommodate your
specific workflow, or when troubleshooting. If you are required to debayer R3D media
using your CPU, turn this checkbox off. Additional options appear letting you choose
decompression and debayer settings.
GPU processing mode: Lets you set DaVinci Resolve to use either OpenCL or CUDA
on systems that have both ATI and Nvidia GPUs installed, to make sure that you’re
using your most powerful GPU for processing. If you choose either OpenCL or CUDA
from this pop-up menu, then a GPU selection mode pop-up appears below that gives
you the option of choosing exactly which GPUs you want to either use or disable. If
you’re using a system that only has ATI GPUs, you should only use OpenCL. Most users
can leave this set to Auto, and DaVinci Resolve will use what’s appropriate.
GPU selection mode: Lets you choose between Auto, which lets DaVinci Resolve
choose which of the available GPUs on your computer to use for processing, and
Manual, which lets you choose which GPUs to enable or disable for processing from a
list that appears below.
GPU selection list: This list only appears when GPU processing mode is set to either
OpenCL, CUDA, or Metal, and when GPU selection mode is set to Manual. A list of
every GPU installed in your computer appears, and you can use checkboxes to the left
of each GPU to enable or disable specific GPUs from being used for processing.
Media Storage
This panel lets you define the scratch disk and other media storage locations used by DaVinci
Resolve, as well as the default cache directories locations to be used when creating
new projects.
The Media Storage Locations: This list lets you define the scratch disk of the system.
The first volume in this list is where Gallery stills and cache files are stored, so you want
to make sure that you choose the fastest storage volume to which you have access.
Automatically display attached local and network storage locations: This checkbox
lets DaVinci Resolve access media on all temporarily and permanently mounted
volumes, including SATA and eSATA, SAS, USB, FireWire, Thunderbolt, Gigabit Ethernet
(GbE or GigE), Fibre Channel, and otherwise connected hard drives, without having to
add them to this list. This is on by default.
Some versions of DaVinci Resolve do not allow automatic display of attached volumes.
In this case, you can right-click anywhere in the background of the Media Storage
panel’s volumes list on the Media page and choose “Add New Location” to open a
dialog you can use to choose a volume you want to add.
Manually adding a volume to the Media Storage
panel’s volumes list

88
Project Settings and Preferences Part 1 – 3
If you’re using the Apple App store version of DaVinci Resolve, turning on
“Automatically display attached local and network storage locations” automatically
prompts you via a dialog to add “Macintosh HD” as a storage location. Clicking Add
Location prompts you to select the Macintosh HD volume with another dialog, and
clicking Open then adds that volume to the Media Storage Volumes list. After you click
Save to close the Preference windows, Resolve should now auto-mount any volumes
attached to your computer in the Media Storage browser of the Media page. Don’t do
this until after you’ve added a fast storage volume to the Media Storage Locations list,
because you don’t want Macintosh HD as the first volume in this list – the very first
volume in this list should always be reserved for your fast scratch volume.
Using Path Mapping to Access Volumes From Other Operating Systems
Shared media path mapping support for Mac, Linux and Windows makes it easier for multi-
system shops to share Resolve projects among different platforms that use different file path
conventions.
To add a mapped mount string:
1 Open the Media Storage panel of the Resolve Preferences window.
2 Add the volume you want to map to the Scratch Disks list.
3 Double-click the Mapped Mount column of the drive you added to edit it.
4 Enter the alternate file path you want that volume to have. For example, if you’re on a
Windows workstation and you want to access a Linux volume, type the Linux file path
into the Mapped Mount column.
Video & Audio I/O
The preferences in this panel let you choose video and audio interfaces on your workstation.
Video & Audio I/O
This section lets you choose which Blackmagic Design video interfaces you want to use for
monitoring, capture, playback, and Resolve Live, assuming you have any connected to your
workstation. If no interfaces are connected, no options will be available.
For capture and playback use: If you have a compatible video capture card, you should
choose from the card options that appear here. Leaving this set to “None” disables
external video output. Disabling video output can improve real time performance when
external monitoring and output is not a priority. You can also choose “None” when
you’re using Resolve with another application open at the same time that’s using your
workstation’s video output interface. When you’ve quit the other application, you can
reselect the video output interface for use by Resolve.
For DaVinci Resolve Live use: When using Resolve Live to monitor the live output
from a camera, you must have a video interface that’s dedicated to doing just that. If
you have only one video interface connected to your computer, you’ll need to disable
it for capture and playback, and enable it for Resolve Live use. However, if you have
two video interfaces connected at the same time, you can use one to monitor camera
output, and the other to output to a video display for critical evaluation.
NOTE: If the volume you’ve selected to use for the cache becomes unavailable,
Resolve will warn you with a dialog.
89
Project Settings and Preferences Part 1 – 3
Release video I/O hardware when not in focus: When turned on, DaVinci Resolve
releases control of the video output device whenever you switch to another application.
Use System Audio Output: Lets you force Resolve to output audio via your
workstation’s built-in audio output, even if a compatible video I/O interface is enabled
for capture and playback or for Resolve Live. If no video I/O interface is installed, audio
is output via system audio output automatically.
Enable Fairlight Audio Accelerator: Turning this checkbox on enables an installed
Fairlight Audio Accelerator PCI card to be used by DaVinci Resolve for accelerated
audio processing and for all audio I/O monitoring and recording.
Audio Interface: Turning Enable Fairlight Audio Accelerator on exposes an additional
menu that lets you choose which audio interface to use for audio I/O; the choices are
MADI (if you’re going to use a third party MADI interface) or Fairlight Audio Interface
and MADI (if you also want to use the Fairlight Audio Interface).
Speaker Setup
This section lets you define different sets of speakers with which to monitor audio playback.
Toaccess more than the default stereo system output that most workstations default to, you
must use whatever software is available for your operating system to choose the desired audio
hardware you want to use, and define how many audio outputs are required for the type of
monitoring you want to do (stereo, surround, etcetera). For example, on macOS you’ll use the
Audio Midi Setup utility to choose output hardware and select a speaker configuration to be
made available on your system. For more information, see the DaVinci Resolve Configuration
Guide, available on the web from the Blackmagic Design support page at
https://www.blackmagicdesign.com/support/family/davinci-resolve-and-fusion.
Monitor Circuit: Lets you choose for which monitoring circuit, of two available, to define
a set of speakers. The choices are Control Room, which corresponds to the room the
audio engineer inhabits, and Studio 1, which corresponds to the recording room the
talent inhabits. This way, you can set up separate monitoring speaker setups for each
area, as necessary.
Monitor Set: For each Monitor Circuit, you can define multiple sets of monitoring
speakers. The default two are MAIN (your primary monitoring speakers) and NEAR
(usually a secondary set of inferior speakers for checking the mix on cheaper consumer
gear). However, options for Set 2-15 lets you define up to 15 different combinations
of monitoring speakers that you can switch among for checking or creating different
mixes. Click the Rename button to rename any of the more generically labeled monitor
sets to something more memorable.
Monitor Set Format: This menu lets you define the format of the currently selected
Monitor Set. Options include Mono, Stereo, LCR (left/center/right), LCRS (left/center/
right/sub), LCRSS, 5.1, 6.1, 7.1.
Monitor output list: Depending on the Monitor Set Format you choose, each stem of
the mix will have an entry in this list with controls that let you map which output goes to
that particular speaker, as well as what gain adjustment (if any) you want to make. The
number of outputs available in this list reflects the number of speakers made available
by your operating system, so if you don’t see the required number of outputs that you
want to map to different stems, you should configure your system audio using the
procedures available in the DaVinci Resolve Configuration Guide.
Audio Plug-ins
A list at top lets you manually add and remove VST plug-in effects directories, if necessary. VST
effects aren’t installed in a standard location, so it may sometimes be necessary to add a newly
installed directory of VST plug-ins that you’ve just installed on your system.

90
Project Settings and Preferences Part 1 – 3
Once you’ve added one or more VST directories to the list, a second list underneath shows all
audio plug-ins that are available within these directories. Each plug-in on the list has a
checkbox that shows whether or not it’s currently enabled. Any VST plug-ins that cause Resolve
to crash while loading them during startup will be automatically disabled. You can use this list to
see which plug-ins have been disabled, for troubleshooting purposes, and to reenable such
“blacklisted” plug-ins by turning their checkboxes back on.
Control Panels
Two sections let you specify which Color Grading Panel and Audio Console is connected to
your workstation list.
Color Grading Panel: A menu lets you choose which color grading panel you have
connected to your workstation. Some panels expose additional controls.
If you have a DaVinci Resolve Mini or Micro Panel, leave this setting set to None and
these panels will be auto-detected by Resolve when you plug them in.
If you have a control panel that connects via USB, choose your panel from the list.
If you have a DaVinci Resolve Mini Panel connected over Ethernet, choose “DaVinci
Resolve Mini Panel (Ethernet)” and then choose your panel from the pop-up
that appears.
If you’re using a JLCooper Eclipse, choose “JKCooper Eclipse CX” and then enter the IP
and Port number into the fields that appear.
Use MIDI Audio Console: A checkbox lets you enable the use of a third-party
audio console that’s connected to your workstation. Turning this on exposes three
additional menus.
MIDI Protocol: Lets you choose either the HUI or MCU protocol, whichever is
compatible with the audio console you want to use.
MIDI Input: Lets you choose the MIDI input used to connect your console.
MIDI Output: Lets you choose the MIDI output used to connect your console.
Advanced
This tab is used for special Resolve configurations and SAN parameters that are applicable to
older file systems.
User
This panel lets you choose user preferences, specific to your workstation, that govern such
things as UI behaviors and appearance, auto save settings, editing and color defaults, control
panel action, and keyboard shortcut mappings
TIP: Many of the settings in the User panel used to be found in the Project Settings
window prior to version 14, but they were moved here to accommodate collaborative
workflows with each user having their own independent general, editing, and color
settings, as well as their own keyboard shortcuts.

91
Project Settings and Preferences Part 1 – 3
Saving User Preference Presets
It’s possible to save multiple presets for instant recall of different User Preference settings,
using the Option menu in the UI Settings window.
The commands for managing User Preference presets in
theoption menu of the UI Settings window
Methods of managing User Preference presets:
To save a preset: Choose whatever settings you want to use, then click the UI Settings
window Option menu, and choose Save User Preferences as Preset. Enter a name into
the dialog, and click OK. That preset will now appear at the top of the Option menu.
To load a preset: Click the UI Settings window Option menu, and choose Load Preset
from the submenu of the preset you want to load.
To update a preset: Load a preset you want to edit, then change whatever settings
you need to, and choose Update Preset from the submenu of that preset in the
Option menu.
To export a Preset: Choose Export Preset from the submenu of any preset in the
Option menu. A file with the .userprefs extension is saved at the location you chose.
To import a Preset: Choose Import User Preferences as Preset in the Option menu, use
the dialog to find the exported .userprefs preset file you want to import, and click Open.
To delete a preset: Choose Delete Preset from the submenu of any preset in the
Option menu.
To reset all presets: Choose Reset User Preferences from the Option menu to restore
all User Preferences to their default settings.
UI Settings
A collection of operational preferences.
Language: A Language pop-up at the top lets you specify which language the DaVinci
Resolve user interface displays. DaVinci Resolve currently supports English, Chinese,
Japanese, and Spanish.
Reload last working project when logging in: Automatically reopens the last project
a user had open whenever that user logs back into Davinci Resolve. This checkbox
can only be enabled when editing a preset configuration in the Presets panel, so that
it’s always on no matter which project you open as long as you’re using that particular
preset. Ideally, enable it for your User config (if you’re using a multi-user configuration
of DavInci Resolve) or your Guest Default config (if you’re using a single-user
configuration).
Use gray background interface: By default, DaVinci Resolve uses a blue-gray
UIbackground, intended to provide a more attractive experience for users focused
on theless color-critical aspects of DaVinci Resolve, namely editing. Turning this
checkbox on switches DaVinci Resolve to a totally neutral, desaturated gray UI, which
can be valuable as a point of reference for colorists concerned about the blue-gray UI’s
potential to bias the eye in the dark environment of the grading suite.
92
Project Settings and Preferences Part 1 – 3
Use gray background in viewers: When turned on, sets the background of all Viewers
to gray, making it easier to evaluate image blanking or minor sizing adjustments than
with the default dark background.
Resize image in viewer for correct aspect ratio: This control will select between using
a square or non-square pixel aspect ratio within the Viewer. This is important when
working with SD images which do not have a square pixel aspect ratio.
Show all viewers on video output: When this setting is disabled, video output is locked
to the Color page viewer only. When this setting is turned on, other elements of the GUI
that have focus in the Media, Edit, and Deliver pages are also output to video.
Delay viewer display by X frames: When turned on, you can enter a number of frames
to delay the Viewers in DaVinci Resolve, so that they better sync up with external
displays that are delayed due to various signal processing processes.
Output single field when paused: This setting will reduce flicker when grading using
a computer monitor or when working with interlaced material. Ordinarily, when viewing
interlaced material in Stop or Pause mode, field one is displayed followed by field two.
Depending on the image, this can result in a flicker on the display. When this option
is enabled, only field one will be shown on the monitor when playback is paused;
however both fields will be shown when the clips are played.
Hide UI overlays for optimized playback: When using a single GPU for both display
and CUDA or OpenCL processing, or if your display GPU is underpowered, or if you
lack the PCIe bandwidth required for the currently specified resolution or frame rate,
you may be able to improvereal time performance by turning this option on. When
enabled, on-screen controls such as the cursor, Power Window outlines, and split-
screen views are disabled and hidden during playback. When playback is paused, all
onscreen controls reappear.
Minimize Interface updates during playback: When enabled, gives priority to real
time performance during playback by reducing user-interface updates. This is helpful
when you’re creating complex grades on systems with low processing power, or when
working on projects at high resolutions.
Stop playback when a dropped frame is detected: When enabled, sets DaVinci
Resolve to stop playback whenever a frame is dropped on output, to warn you that
there are performance issues on your workstation. This is particularly useful when
you’re outputting to tape.
Auto Save
DaVinci Resolve’s Autosave feature can save you from the heartache of lost work resulting from
an unexpected problem. DaVinci Resolve 12.5 has significantly improved save times, so using
Auto Save is highly recommended to prevent the loss of work in the event you have a problem.
Live Save: A progressive, fast, always on autosave mechanism that “saves as you go.”
While Live Save is enabled, the rest of the auto save options are disabled.
Automatically save project: These options are only available if Live Save is turned off,
as they enable a more traditional auto saving method. There are three options.
Off: Disables auto saving completely.
On: Automatically saves the current project every few minutes, as defined by the
pop-up menu below that has options for 5, 10, 20, and 30 minute, or 1 hour intervals.
Ifyou’re using a PostgreSQL database, you have the additional option of saving in
1minute intervals, as PostgreSQL database saving is considerably faster. If
DaVinciResolve unexpectedly quits before you have a chance to save, you’ll see all
autosaved changes the next time you reopen that project.
93
Project Settings and Preferences Part 1 – 3
To backup project: Saves a full alternate copy of the active database while you work.
While this full backup takes longer than the simpler incremental autosave option, it
offers a complete backup, and is often used by colorists at the end of each workday or
grading timeline.
Retain the last X backups: Sets how many backup versions of the project to save.
Backups are eliminated in a first in, first out fashion. The default is 8 backups.
Every: A pop-up menu lets you define how frequently to execute the selected
autosave behavior.
List Backups: Shows a window listing all auto saved backup projects. This list can be
sorted by name, date modified, width, or height. Buttons running along the bottom
provide an interface to Load or Delete any item in the list, Delete all, or Refresh the
list. When you load an autosave backup, the current project is lost, and completely
replaced by the autosaved project. You are recommended to export the project first,
before loading, if you want to preserve the current state of the project.
Editing
The settings in this panel affect new timeline settings, editorial default values, trim behaviors,
timeline UI appearance, and frame interpolation settings.
New Timeline Settings
These settings define the presets that populate the New Timeline Options window whenever
you create a new timeline.
Start Timecode: You can change the Start Timecode if a specific start time is required.
No. of Video Tracks: Enter how many video tracks you want to have. You can also drag
within this field to adjust the number of video tracks with a virtual slider.
No. of Audio Tracks: Enter how many audio tracks you want to have. You can also drag
within this field to adjust the number of audio tracks with a virtual slider.
Audio Track Type: Choose the channel mapping you want the new audio tracks to use.
General Settings
These settings define the timing of resolve-generated effects and editing operations.
Standard generator duration: Defines the default duration of generators you edit into
the Timeline, in Seconds or Frames. The default value is 5 seconds.
Standard transition duration: Defines the duration of transitions, in Seconds or
Frames, that you add to an edit point in DaVinci Resolve. The default value is 1 second.
Standard still duration: Defines the duration of stills that you import such as TIFF, PNG
and other supported graphic file formats, in Seconds or Frames. The default value is
5 seconds.
Pre-roll time: Determines how much of the Timeline before the current position of the
playhead to play when using the Play Around command.
Post-roll time: Determines how much of the Timeline after the current position of the
playhead to play when using the Play Around command.
Default handles length: The value used when creating a timeline with handles. The
default is one second worth of frames.
Default fast nudge length: The number of frames that are nudged when you use the
Shift-comma (,) and Shift-period (.) keyboard shortcuts.
94
Project Settings and Preferences Part 1 – 3
Pre-playhead shadow length: The number of frames in the Timeline prior to the
playhead covered by the Playhead Shadow, if enabled by choosing View > Show
Playhead Shadow.
Post-playhead shadow length: The number of frames in the Timeline after the
playhead covered by the Playhead Shadow, if enabled by choosing View > Show
Playhead Shadow.
Timeline overlay retains the last performed action: Turn this checkbox on if you
want DaVinci Resolve to always remember the last edit type you used in the Timeline
Viewer Overlay, and highlight it on this Overlay whenever you drag another clip over
the Timeline Viewer to let you know that the last edit you performed is the new default
edit if you drop clips to the left of the overlay.
Create Smart Bin for Timelines: Turning this option on automatically creates a Smart
Bin in the Bin List of the Media Pool that filters out all timelines in your project. Unlike
the “Use Timelines Bin” option, this smart bin doesn’t move where these timelines are
actually stored in the Media Pool. Instead, it preserves your original organization of
timelines and clips, and gives you a way of quickly finding them all at once.
Always highlight current clip in the media pool: When turned on, any clips at the
position of the playhead on the Edit or Color pages will be automatically highlighted in
the Media Pool.
Sync the Master Timeline to the current frame: If you turned on “Automatically match
master timeline with media pool” in the Color settings, then this option lets you make
sure that whenever you open the Master Timeline, the playhead is at the same clip
and frame that it was in the previous Timeline you were working on.
Show offline reference for timeline gaps: If there’s a missing clip in a conformed
timeline that results in a gap in the Timeline Editor, turning this option on sets
Davinci Resolve to show the corresponding frames of an “offline reference movie,”
if one has been assigned to that timeline, instead of black. This can be helpful in
emergency situations when you’re missing timeline clips right before a screening
or review session; this feature lets you play or output the missing frames using the
corresponding media from the offline reference movie, instead of outputting black. For
more information on using and assigning Offline Reference Movies, see Chapter 33,
“Preparing to Move a Project to DaVinci Resolve.”
Show offline reference for non-conformed edits: If there’s missing media in a project
that results in an unlinked clip in the Timeline Editor (represented by a red exclamation
point overlay on that clip), turning this option on sets DaVinci Resolve to show the
corresponding frames of an “offline reference movie,” if one has been assigned to
that timeline, instead of black. This can be helpful in emergency situations when
you’re missing source media right before a screening or review session; this feature
lets you play or output the missing frames using the corresponding media from the
offline reference movie, instead of outputting black. For more information on using and
assigning Offline Reference Movies, see Chapter 33, “Preparing to Move a Project to
DaVinci Resolve.”
95
Project Settings and Preferences Part 1 – 3
Color
The settings in this panel govern different behaviors in the Color page.
General Settings
Affect a variety of behaviors while working in the Color page.
Enable HDR Scopes for ST.2084: (only available in Studio version) If you’re doing
an HDR grade and monitoring with the built-in video scopes in DaVinci Resolve, you
can turn this checkbox on to replace the 10-bit scale of the video scopes with a scale
based on “nit” values (or cd/m2) instead.
Master reset maintains RGB balance: Defines how the DaVinci control panel trackball/
ring reset buttons reset primary color adjustments. When this option is turned off (the
default), pressing the ALL Reset button returns the primary correction values to their
default values. When this checkbox is turned on, then pressing the ALL Reset button
(a) resets the YRGB values so that the overall values are kept and the ratio of YRGB to
each other is maintained, and (b) pressing the RGB Reset button sets the three color
channels to the average of what they were previously set to.
Wipe wraps when viewing reference stills: Turning this on (the default) lets stills wrap
around the edge of the screen while you’re adjusting the wipe using the mouse, rather
than stopping at the screen’s edge. If you find this behavior awkward when trying to
quickly create full-frame comparisons with stills to flip on and off, it can be disabled.
High-Visibility Power Window Outlines: Turning this on sets power window outlines
to be drawn as green (for the center shape) and yellow (for the softness shapes), to
make these windows easier to see in certain circumstances, instead of the default
white and gray.
Mattes display high contrast black and white: When enabled, the HILITE command,
which displays the current key, shows a black and white matte (i.e., high contrast)
rather than the standard gray matte. For more information on this setting, and on use
of the HILITE command, see Chapter 44, “Secondary Qualifiers.”
Next scene switches to visible track: When grading a project with multiple tracks,
you can use this option to alter the “next scene” command to work better in projects
with multi-clip composites. With this option turned off, pressing NEXT SCENE on
the DaVinci control panel, or using the Down Arrow keyboard shortcut, moves the
playhead to the very next clip in the Thumbnail timeline, regardless of whether it’s
in front of or behind another clip. Turning this option on causes the NEXT SCENE
command to move the playhead to the clip in the highest track if the next clip is part of
a multi-clip composite with multiple clips stacked over one another.
Automatically cue x frames into timeline clips: This setting affects the operation of
the NEXT SCENE and PREV SCENE commands in the Color page. The default cue
point when moving from one clip to the next is the first frame of each clip. Entering
a value, in frames, in this field sets the default cue point to the specified number
of frames after the first frame of each clip you move the playhead to. This can be
convenient if the source material has black or camera rollup flashes at the beginning of
every clip while you’re trying to grade dailies.
Neighboring Clips in Split Screen: Lets you choose how many neighboring clips next
to the current clips are shown in a grid in the Color page Viewer when you turn on the
Neighbor Clips option of the Split-Screen shot comparison control.
96
Project Settings and Preferences Part 1 – 3
Switching clips: (this setting can also be changed from the Option menu in the Node
Editor) When switching clips, DaVinci Resolve can switch to the same or another node
in the node graph. The four options below determine which node is selected:
Selects last adjusted node: The default setting, where each clip in the Timeline retains
its own independent node selection that’s remembered whenever you move back to
that clip.
Selects first node: The first node is always selected when you move to another clip.
Selects last node: The last node is always selected when you move to another clip.
Selects same node: If the clip you’ve moved to has as many or more nodes as the last
clip, the node of the same number will be selected. If the clip you’ve moved to has
fewer nodes than the last clip, the next highest node will be selected.
Color picker: Changes the way that colors are selected when using the Secondary
color correction controls. DaVinci Resolve is the normal and modern mode, however
some colorists who are familiar with the legacy 2K prefer the DaVinci 2K mode.
Ripple Mode
This setting determines the behavior of the Ripple command that’s initiated when using the
RIPPLE VALUE button on the DaVinci Advanced control panel.
Target clips are set to: The Ripple mode that’s used when you press the RIPPLE VALUE
button on the DaVinci control panel. For more information on using this function, see
Chapter 48, “Grade Management.”
Exact values changed: Changes made to the current clip are rippled to the specified
clips using the exact parameters that were changed. For example, if the Master Gain
level in the current clip is changed to 0.75 of its range, each clip you ripple will have a
Master Gain level of 0.75. Only parameters you adjust are rippled.
Percent value changed: Changes made to the current clip are rippled to the specified
clips by the percentage of change you made to the altered parameters. For example, if
the current clip has a Master Gain level of 1.00 and is changed to 0.90 units, then the
Master Gain level of each clip you ripple will have a relative reduction of 10% relative to
its previous value.
Unit values changed: Changes made to the current clip are rippled to the specified
clips by the same delta of change, using whichever units make sense for the affected
parameter. For example, if the current clip had a Master Gain of 0.80 and you increased
it to 0.90, each rippled scene’s Master Gain level increases by 0.10.
All values are copied: The current clip’s grade is rippled to the specified clips in its
entirety. No comparison is made with the original clip’s parameters, and all memory
parameters are rippled.
Printer Light Step Calibration
For film projects, when you have tight integration with a film lab, it is possible to adjust the
printer light calibration sets to match the lab you are using. You should work with your lab
technician to set up the Lab Aim settings, the Steps adjustments, which is an incremental value,
and the Density Increment adjustment, which is the amount of correction applied within each
step. Usually, the Step and Density values will be identical, but this will be up to your lab and
your preference.
Control Panels
The parameters in this panel let you customize the functionality of the DaVinci Control panel.
Some, but not all, of these settings apply to third party panels.
97
Project Settings and Preferences Part 1 – 3
Panel Sensitivity
Lets you choose the orientation of red on the trackballs, how sensitive trackballs and rings are,
and how sensitive the qualifier knobs are.
Classic DaVinci trackball alignment: When enabled, this checkbox sets all color
balance controls in DaVinci Resolve to the traditional orientation they’ve always used,
which is close to, but not exactly the same as the vectorscope alignment of hues.
When disabled, the alignment of color balance controls is exactly the same as the
vectorscope alignment of hues, which is similar to how other color grading applications
work. You should choose the mode you’re most familiar with.
Grading style: Controls the orientation of the trackballs relative to the corrections they
make. There are two options:
DaVinci: Most users will be familiar with the standard DaVinci controls as this mimics
the vectorscope (how closely depends on the Classic DaVinci trackball
alignment setting).
Rank: The Rank settings are somewhat different, so this option is for users who are
familiar with color controls that the Rank control system offered. In this mode, the
orientation of red and green are reversed.
Lift RGB balance: Controls how quickly adjustments made to the Lift trackball (on the
left) will adjust the Lift Color Balance parameters in the Color page. This setting affects
third party panels.
Lift master: Controls how quickly adjustments made to the Lift ring (surrounding the
leftmost trackball) will adjust the Lift Contrast parameter in the Color page. This setting
affects third party panels.
Gamma RGB balance: Controls how quickly adjustments made to the Gamma trackball
(second from the left) will adjust the Gamma Color Balance parameters in the Color
page. This setting affects third party panels.
Gamma master: Controls how quickly adjustments made to the Gamma ring
(surrounding the second trackball from the left) adjust the Gamma parameter in the
Color page. This setting affects third party panels.
Gain RGB balance: Controls how quickly adjustments made to the Gain trackball (third
from the left) will adjust the Gain Color Balance parameters in the Color page. This
setting affects third party panels.
Gain master: Controls how quickly adjustments made to the Gain ring (surrounding the
third trackball from the left) will adjust the Gain Contrast parameter in the Color page.
This setting affects third party panels.
Cursor offset: Controls how quickly adjustments made to the fourth trackball affect the
cursor, window position, log-mode offset, and other controls that can be manipulated
via this trackball.
Cursor master: Controls how quickly adjustments made to the fourth ring affect log-
mode master offset, and other controls that can be manipulated via this ring.
Hue/Saturation/Luminance qualifier: Controls the sensitivity of the HSL panel
control knobs.
Display Settings
Lets you adjust the display of your Blackmagic Design control panels.
LCD brightness: Controls the overall brightness of the DaVinci control panel displays.
Key backlighting: Depending on which control panel you have selected, two controls
let you choose LCD Brightness and Key backlighting of the DaVinci Resolve Mini
panel, or three controls let you adjust the color balance of the lit buttons of the DaVinci
Resolve Advanced control panel (the default is red).
98
Project Settings and Preferences Part 1 – 3
Keyboard Mapping
This panel lets you choose which set of keyboard shortcuts to use. Using the “Map keyboard
to” pop-up, you can choose the default DaVinci Resolve set, or one of the other sets that mimic
popular NLEs. You also have the ability to create your own custom sets of keyboard shortcuts.
A hierarchical list of commands organized by the menu they appear within lets you select
individual commands to remap, while a Search field lets you search among the available
keyboard shortcuts to find commands you want to customize.
To search for specific keyboard shortcuts:
1 Open the DaVinci Resolve Preferences, then open the User panel and choose
Keyboard Mapping from the sidebar.
2 Choose whether you want to search for a Command or a Shortcut from the Search
pop-up menu.
3 Type into the Search field, and the Keyboard Mapping list will change to show whatever
commands match the search criteria you’re entering.
Methods of creating and managing keyboard mappings:
To create a new keyboard mapping: Choose a keyboard mapping from the pop-
up to use as your starting point, click New, then enter a preset name in the dialog,
and click OK.
To change the keyboard shortcut for a particular command: Find the command you
want to remap in the Keyboard Mapping list, double-click its keyboard shortcut, and
type a new one using any combination of modifier keys you like. If you remap a key
that was already assigned to another command, the previous command’s mapping is
cleared. When you’re finished changing keyboard shortcuts, click the Save button at
the bottom right of the Keyboard Mapping list.
To export a keyboard shortcut file for use by another DaVinci Resolve workstation:
Click Export, choose a name and a location for the new file, and click Save.
To import a keyboard shortcut file: Click Import, choose a DaVinci Resolve keyboard
shortcut file, and click Open.
To delete a keyboard mapping: Choose a keyboard mapping to delete, then click the
trash can button.
Metadata
The metadata panel lets you create custom sets of metadata parameters that will be exposed in
the Metadata Editor. For more information on using this panel, see Chapter 9, “Using
ClipMetadata.”
100
Camera Raw Settings Part 1 – 4
Camera Raw Settings
This chapter discusses in detail each of the settings available for every camera raw format that
is supported in DaVinci Resolve. These settings are available in the Camera Raw panel of the
Project Settings, via a contextual menu command in the Media Pool that exposes a floating
window, or in the Camera Raw palette of the Color page.
This chapter covers the following topics:
Camera Raw Decoding Explained 101
Using ARRI ALEXA files 102
Master Settings 102
Project Settings 103
Use Camera Metadata 103
Using RED files 104
Master RED Settings 104
Master 105
Project Settings 106
Decoder Settings 108
Use Camera Metadata 109
Using Sony Raw Files 109
Master Settings 109
Project Settings 110
Use Camera Metadata 111
Using CinemaDNG files 112
Master Settings 112
Project Settings 112
Use Camera Metadata 114
Using Phantom Cine Files 115
Master Settings 115
Project Settings 115
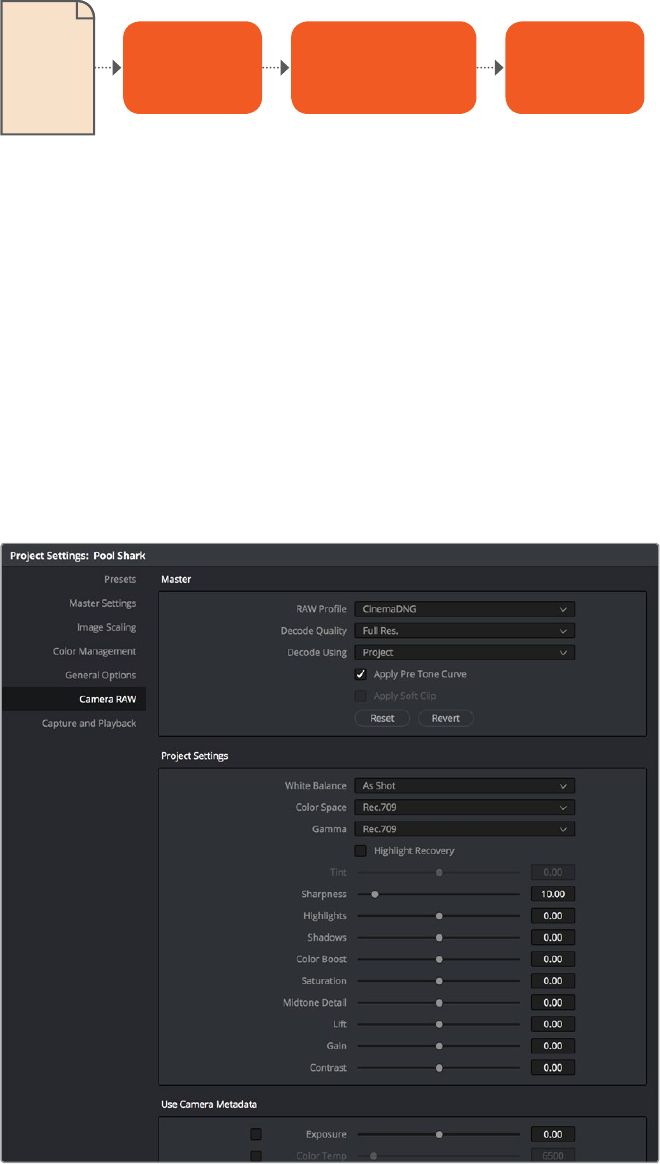
101
Camera Raw Settings Part 1 – 4
Camera Raw Decoding Explained
Camera raw media formats are so named because they capture raw color space data directly
from the sensor of whatever digital cinema camera did the recording. Raw image data is not
human readable, and must be debayered or demosaiced to convert the original raw data into
image data that can be handed off to DaVinci Resolve’s image processing pipeline.
Raw decoding is the very first image processing operation that takes place, and it takes place
before all other operations in the Color page, before even the Source bar in the Node Editor.
For this reason, it’s important to understand that the ideal transformation of raw image data to
DaVinci Resolve-friendly image data is one that preserves the maximum amount of image data
for continued processing. Since the 32-bit floating point accuracy of DaVinci Resolve’s image
processing pipeline preserves all transformed raw data with exceptional fidelity, the Camera
Raw parameters are primarily useful for making whatever initial adjustments will produce the
most optimum starting point for grading.
The Camera Raw panel of the Project Settings contain groups of parameters that correspond to
every camera raw media format that’s supported by DaVinci Resolve. Using these parameters in
the Camera Raw panel, you can override the original camera metadata that was written at the
time of recording, and make simultaneous adjustments to all camera raw media throughout
yourproject.
Camera Raw project settings
Color Page
Image Processing
Camera Raw
Decoding
Deliver
Page Output
Raw
Image
Data
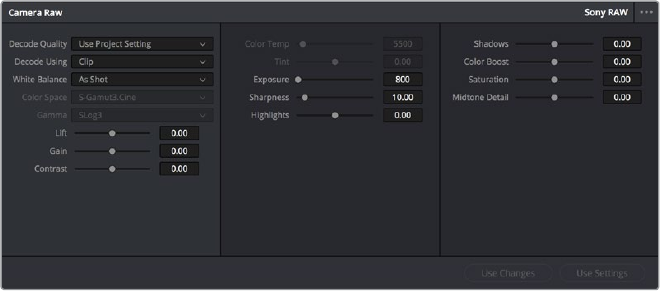
102
Camera Raw Settings Part 1 – 4
Each supported camera format has different controls that are specific to that format. These
controls are also mirrored in the Camera Raw palette in the Color page, which lets you
individually adjust the Camera Raw parameters for individual clips in a Timeline when you set
Decode Using to Clip.
Camera Raw project palette in the Color page
Each group of Camera Raw settings is available from the RAW Profile menu. This description
covers the settings that are available for each of the camera raw media formats supported by
DaVinci Resolve.
Using ARRI ALEXA files
The ARRI ALEXA can record ProRes, DNxHD, or raw image data. When shooting raw, image
data is recorded straight from the Bayer sensor, and must be debayered by DaVinci Resolve.
Master Settings
ARRI ALEXA media is extremely simple to debayer. There is only one Master setting, for
determining whether or not to alter the clip decoder settings.
Decode Quality: Lets you debayer ARRI ALEXA raw files at Full, Half, or Quarter
resolution to improve performance on slower systems. Lower resolution media is
lower quality, but faster to work with and process. If necessary, you can choose a
lower resolution setting that provides better real time playback on systems with
limitedperformance while you work, and then switch to a higher quality when rendering
the final output. A “Force debayer res to highest quality” checkbox in the Render
Settings list of the Deliver page makes it easy to follow this workflow.
Decode Using: The option you select determines whether all ARRI ALEXA media
throughout the project is decoded using the original Camera Metadata settings (the
default selection), using Project settings in which you choose custom settings to be
applied to all clips, or using the ARRI default settings.
Import Media at Open Gate Resolution: Enables DaVinci Resolve to access the
“opengate” area of clips from ALEXA cameras capable of shooting in this mode,
whichproduces a 3.4K image with extra area for stabilization and repositioning.
103
Camera Raw Settings Part 1 – 4
Project Settings
The following decoder settings let you adjust the color and exposure of ALEXA clips.
Lift: Adjusts the black point of the media, raising it or lowering it while scaling all
midtone values between it and the white point. Regardless of how you adjust this
control, all image data is preserved and can be retrieved in subsequent adjustments.
The range is –100 to +100.
Gain: Adjusts the white point of the media, raising or lowing it while scaling all midtone
values between it and the black point. Regardless of how you adjust this control, all
image data is preserved and can be retrieved in subsequent adjustments. 0 is unity.
The range is –100 to +100.
Contrast: Raising contrast reduces shadows and raises highlights, while leaving
midtones at 50 percent unaffected. Regardless of how you adjust this control, all image
data is preserved and can be retrieved in subsequent adjustments. 0 is unity. The
range is –100 to +100.
Tint: Adjusts color balance to push the image between magenta and green; useful for
balancing images with a green or magenta color cast, such as fluorescent or sodium
vapor bulbs. 0 is unity. The range is –150 to +150.
Sharpness: A debayer-specific sharpness filter applied to provide the appearance of
enhanced image detail. 0 is unity, and 10 is the default. The range is 0 to 100.
Highlights: Makes it easy to selectively retrieve blown-out highlight detail in high-
dynamic-range media by lowering this parameter, and achieves a smooth blend
between the retrieved highlights and the unadjusted mid tones for a naturalistic result.
0 is unity. The range is –100 (minimum) through +100 (maximum).
Shadows: Lets you selectively lighten or darken shadow detail. Raising this value
retrieves shadow detail recorded below 0 percent, while leaving the midtones alone. 0
is unity. The range is –100 (minimum) through +100 (very high).
Color Boost: Lets you naturalistically raise the saturation of regions of low saturation,
sometimes referred to as a vibrance operation. Can be used also to lower the
saturation of regions of low saturation. 0 is unity. The range is –100 (minimum) through
+100 (very high).
Saturation: Adjusts the color intensity of the image. 0 is unity. The range is –100
(minimum) through +100 (very high).
Midtone Detail: When this parameter is raised, the contrast of regions of the image with
high edge detail is raised to increase the perception of image sharpness, sometimes
referred to as definition. When this parameter is lowered to a negative value, regions
of the image with low amounts of detail are softened while areas of high detail are left
alone. 0 is unity. The range is –100 (minimum) through +100 (very high).
Use Camera Metadata
The most elemental camera metadata settings for exposure and color that are available.
Color Temp: Adjusts color balance to alter the “warmth” of the image. Adjustable in
Kelvin. Lower values correct for “warmer” lighting, while higher values correct for “cool”
lighting. +2000 is unity. The range is +2000 to +11,000.
Exposure: Increases or lowers image lightness in units relative to ASA values. If your
intended exposure adjustment lifts image data above the maximum white level, don’t
worry; all image data is preserved and can be retrieved in subsequent adjustments. 160
is unity. The range is +160 to +3200.

104
Camera Raw Settings Part 1 – 4
Using RED files
R3D source media, recorded by the various models of RED DIGITAL CINEMA cameras, contains
one of the most elaborate sets of raw parameters of any of the camera formats. These settings
are divided into four different groups.
Master RED Settings
The Master RED settings are the most important, handling decode quality and the control
governing whether the original camera metadata is used, or if you’re overriding the camera
metadata project-wide with custom settings.
These settings also contain the pop-up menus that let you choose the color space and gamma
curve used to transform the raw image data into image data for processing in DaVinci Resolve
when debayering R3D clips. Which Color Space and Gamma Curve settings you use are solely
a matter of preference; there is no absolute requirement to use one or the other for any given
type of workflow. You’re simply looking for settings that provide the best starting point for the
media you have, given the type of grading you’re looking to do.
For example, in many cases combining the REDcolor3 Color Space setting and REDlog Film
gamma curve will offer a starting point that retains the most image detail with the greatest
latitude for adjustment. On the other hand, if you’re working in a hurry, for example to generate
ARRI Media and Log-C
ALEXA media is usually recorded using Log-C gamma and color processing, which is
very similar to the Cineon Log gamma curve, developed by Kodak to produce flat-
contrast, wide-gamut image data that preserves image detail with a wide latitude for
adjustment. There is no ALEXA raw parameter to adjust this, so for Rec. 709
monitoring and deliverables you need to “normalize” Log-C clips in one of three ways.
You can use Resolve Color Management (RCM) to automatically normalize log-
encoded media according to the type of media it is.
You can create your own adjustment to normalize Log-C clips as part of the grading
process, using the parameters of the Color page. This approach gives you the most
flexibility, as you’ll be making custom settings that maximize the image data that’s
available in every scene.
Alternately, you can use a LUT to normalize Log-C clips to obtain a fast starting point
for additional grading. Used in this way, LUTs can be applied either as an output LUT, if
the entire Timeline is nothing but ALEXA raw media, or as a LUT that’s applied to an
individual node of a grade, if you’re mixing ALEXA raw media with other formats. This
provides a fast and easy solution to linearizing ALEXA media that can be useful for
creating dailies for offline editing. However, one LUT may not be suitable for all clips. If
you’re applying individual LUTs to each clip, you can create multiple LUTs, each with
differing contrast settings, in order to gain the speed benefits of using LUTs, while
taking into account the individual differences among clips.
ARRI has a LUT generator available online that you can use to create custom LUTs for
use with a variety of color correction applications at: www.arri.com/camera/digital_
cameras/tools/lut_generator.html
105
Camera Raw Settings Part 1 – 4
dailies for offline editing, using one of the REDcolor Color Space settings with one of the
REDgamma settings can offer an image that’s more immediately pleasing and that requires
fewer adjustments to achieve an acceptable result. These are not recommendations, they’re
only examples. As always, the ideal settings for your project depend heavily on the quality of
the source media, so you should experiment with media from your own projects to find the most
suitable results to your eye.
Master
These top settings determine the image quality that you’re choosing to extract from the R3D
source media. The tradeoff is that higher quality media at higher resolution will be more
processor-intensive to debayer, depending on your workstation’s capabilities.
Decode Quality: Determines the image quality of the decoded R3D data that’s handed
off to the DaVinci Resolve image processing pipeline. The Decode Quality you select
has a direct impact on real time performance. Decoding performance depends entirely
on the hardware capabilities of your system. DaVinci Resolve decodes R3D files
using multi-core CPU processing, but can also decode 4K at Premium quality if you’ve
installed a RED ROCKET card. 5K R3D media requires two RED ROCKET cards or,
subject to release, a single RED ROCKET-X for the same performance. 6K R3D media
requires a RED ROCKET-X card.
If necessary, you can choose a lower quality setting that provides better real time
playback on systems with limited performance while you work, and then switch to a
higher quality when rendering the final output. A “Force debayer res to highest quality”
checkbox in the Render Settings list of the Deliver page makes it easy to follow this
workflow.
Bit Depth: DaVinci Resolve can decode R3D files with 8-, 10-, or 16-bit image data for
processing. Choosing 16-bit for maximum quality may impact playback performance on
some hardware.
Timecode: The timecode recorded for R3D media depends on the camera setting in
use when it was shot. There are three choices:
Camera: This setting automatically selects between Absolute and Edge depending on
what was chosen as the default timecode mode on the camera. This setting needs to
be selected before you add R3D media to the Media Pool. If you’re browsing R3D
media when you change this setting, you should refresh the folder in the Library of the
Media Pool before adding media to the Media Pool.
Absolute: The default. Records “time of day” timecode. If an external timecode source
was connected and the camera was put into Jam Sync mode, the external timecode
would have been recorded instead.
Edge: The first recorded clip for each magazine starts at 01:00:00:00, and the timecode
of each subsequent clip is recorded sequentially and continuously.
Decode Using: The option you select determines whether all R3D media throughout
the project is decoded using the original Camera Metadata settings (the default
selection), using Project settings in which you choose custom settings to be applied to
all clips, or using the RED default settings.
106
Camera Raw Settings Part 1 – 4
Project Settings
These settings control the fundamental methods used to debayer R3D media. The selections
you make to these settings determine the basic color and contrast that you’re choosing to
extract from the camera raw image data.
Color Science: The two options are Original, which was the color science used by
early builds of the REDone camera, and Version 2, which is the current version of
color science used by the entire RED camera line. Unless you need to match the look
of older projects using the older color science, the newest color science is generally
preferable.
Color Space: Because RED cameras record R3D data which uses a raw color space,
debayering the native R3D data requires choosing a color space to convert the raw
signal into. Bear in mind that the color space you choose is merely a starting point for
further correction. There is no requirement that you choose one or the other color
space for any given workflow. You should choose the color space that provides the
most pleasing starting point for your particular project.
DragonColor2: A further optimized version of DragonColor that is especially
recommended for underwater footage.
REDcolor4: A further optimized version of REDcolor3 that is especially recommended
for underwater footage.
REDWideGamutRGB: Part of RED’s IPP2 (image processing pipeline 2) initiative; this is
a camera color space designed to encompass all colors that can be recorded by RED
cameras without clipping, and is meant to provide a single common starting point for all
models of RED cameras, for convenient grading to HDR or SDR workflows.
Rec. 2020: Decodes into the standard color space specified by the Rec. 2020 standard
for high definition video, UHD video, and beyond. While you may find this option useful,
it is not required for programs being output to video.
Rec. 709: Decodes into the standard color space specified by the Rec. 709 standard
for high definition video. While you may find this option useful, it is not required for
programs being output to video.
sRGB: Decodes into the standard color space defined by the sRGB standard, typically
used for computer display.
Adobe1998: Decodes into Adobe’s unique version of the sRGB standard.
CameraRGB: Outputs the original, unmodified sensor data. Not a recommended
setting.
REDspace: Fits the raw R3D image data into a color space thatʼs larger than that of Rec.
709. Appropriate for digital cinema mastering and film output. REDspace was the
predecessor to the REDcolor setting.
REDcolor: A color space thatʼs similar to the Rec. 709 option, but modified to balance
accuracy with pleasing color rendition, emphasizing accurate skin tones.
REDcolor2: Similar, but less saturated than, REDcolor.
REDcolor3: Similar saturation to REDcolor, but with additional modifications to improve
the color rendition of skin tone. Introduced as the optimum color space for Epic
cameras, but also appropriate for previous generations of RED cameras.
DragonColor: A color space optimized for cameras with the RED Dragon sensor,
although this color space can be used for previous generations of RED cameras as well.
107
Camera Raw Settings Part 1 – 4
Gamma Curve: There are several options available for choosing a gamma profile to be
used when debayering the raw R3D data:
REDgamma4: The latest iteration of the REDgamma curve, designed to give a good
in-camera look without the need for grading, while retaining great dynamic range and
highlight handling. REDgamma4 is suitable for all RED cameras.
REDlog Film: An improved logarithmic gamma setting that’s designed to remap the
original 12-bit R3D data to the standard Cineon gamma curve. This setting produces
flat-contrast image data that preserves image detail with a wide latitude for adjustment,
and is compatible with log workflows, including those intended for film output.
Linear: No gamma adjustment is made, this is a linear-to-light representation of data
from the RED camera’s sensor.
Rec. 709: A gamma curve typical for Rec. 709 display. Does not provide an abundance
of latitude for grading.
sRGB: Similar gamma setting to that employed by Rec. 709.
HDR ST.2084: The standardized gamma curve for high-dynamic-range (HDR) video.
Also referred to as the PQ curve.
BT.1886: The standardized gamma curve for standard-dynamic-range HD and UHD
display. Does not provide an abundance of latitude for grading.
Log3G12: A wide dynamic range log space developed by RED to support HDR
monitoring and grading.
Log3G10: Part of RED’s IPP2 (image processing pipeline 2) initiative; this is a wide
dynamic range log space designed to encode camera data from all RED models to a
common starting point in RWG color space, for convenient grading to HDR or SDR
workflows.
PDlog 685: A logarithmic gamma setting that maps the native 12-bit RED image data
into the linear portion of a Cineon or film transfer curve.
PDlog 985: A logarithmic gamma setting with different mappings.
Custom PDlog: A logarithmic gamma setting that exposes user adjustable Black Point,
White Point, and Gamma PDlog parameters so you can customize your own log gamma
curve.
REDspace: Similar to Rec. 709, but slightly altered to be more appealing, primarily
through higher contrast and lighter midtones. The predecessor to the REDgamma curve.
REDlog: A logarithmic gamma setting that maps the original 12-bit R3D image data to a
10-bit curve. The blacks and midtones occupying the lowest 8 bits of the video signal
maintain the same precision as in the original 12-bit data, while the highlights that
occupy the highest 4 bits are compressed. While reducing the precision of highlight
detail, the tradeoff is that there’s an abundance of precision throughout the rest of the
signal. This is a good setting for maintaining maximum latitude.
REDgamma: An improved gamma curve designed to be perceptually appealing on
displays calibrated for Rec. 709, with an improved soft roll-off in the highlights to
maintain highlight detail while grading.
REDgamma2: Similar to REDgamma, with higher contrast.
REDgamma3: The most recent iteration of the REDgamma curve. Based on a log
starting point, but with a pleasing “ready to view” contrast curve applied, designed to
be a visually pleasing starting point that maintains excellent dynamic range.
REDgamma3 is also designed to work with REDcolor3.
108
Camera Raw Settings Part 1 – 4
Blend Type: Works to control how RED HDRX media is used. When using either Simple
or Magic Motion to blend HDRX exposures, there’s no need to use the second output
in the Node Editor. You can choose from three options:
None: Only the regular exposure is used.
Simple: Blends the two HDRX exposures to achieve a pleasing middle ground.
Magic Motion: Uses a proprietary algorithm to combine the dual exposures to combine
overexposed and well-exposed regions of the picture in a more targeted fashion, while
blending the sharpness of the regularly exposed source with the motion blur of the
underexposed source.
Blend Bias: Lets you adjust how much of the regular exposure and how much of the
underexposure are combined.
Apply Metadata Curves: If the R3D media files were preprocessed in REDCINE X Pro,
and saved with color curve metadata, you can use this setting to either use or discard
that metadata.
D.E.B. (Dragon Enhanced Blacks): A checkbox that enables the elimination of red
noise in RED cameras using the Dragon sensor.
Embedded Audio: Enables embedded audio in R3D media.
Decoder Settings
This second group of settings contains additional controls for finessing the debayering of
REDraw image data. Many of the settings in this group are color correction adjustments, some
of which resemble analogous controls in the Color page. However, the FLUT and DRX controls
manage the exposure of the debayered media being fed to the DaVinci Resolve image
processing pipeline, and so can be used to retrieve image detail from R3D source media in
cases where the default settings are clipping or crushing detail in the highlights or shadows
thatwould be unavailable to DaVinci Resolve as a result.
De-noise: Applies image-wide noise reduction. There are seven settings available,
from mild to maximum, that you can use to balance noise reduction against any
possible image degradation.
OLPF Compensation: OLPF compensation applies a low pass filter to reduce color
moiré. There are four options: Off (the default), Low, Medium, and High.
Image Detail: Controls the demosaicing algorithm that’s used for the software
decoding of R3D media. You can choose a level of sensor detail extraction: Low,
Medium, and High (recommended). If you’re using a RED ROCKET card, this setting is
ignored as there is a fixed algorithm that’s used.
FLUT: A gain operation that lets you boost or attenuate the ISO in smaller increments.
0is unity. The range is -8 to +8.
Contrast: Raising contrast reduces shadows and raises highlights, while leaving
midtones at 50 percent unaffected. The image is compressed rather then clipped at the
limits of 100 and 0 percent. 0 is unity. The range is –1 to +1.
Saturation: Adjusts the color intensity of the image. 1 is unity. The range is 0 (minimum)
through 5.0 (very high).
Tint: Color balance correction for images with a green or magenta color cast, such as
fluorescent or sodium vapor bulbs. This parameter is designed specifically to adjust
RED linear light image data to make the most photometrically accurate correction. 0 is
unity. The range is -100 to +100.
DRX: A Dynamic Range control (X) that lets you recover highlights while taking
into account Color Temperature (degrees Kelvin) and Tint. 0 is unity, and 1.0 is the
maximumvalue.
109
Camera Raw Settings Part 1 – 4
Shadow: Provides control over the toe (low range) of the FLUT adjustment. 0 is unity.
The range is -2 to +2.
Brightness: Adjusts image lightness. Image data is compressed rather then clipped at
100 and 0 percent. 0 is unity. The range is –10 to +10.
Use Camera Metadata
The most elemental camera metadata settings for exposure and color that are available.
ISO: A gain operation that keeps the black point at 0 while raising or lowering the white
point of the image, linearly scaling everything in between. Raising the ISO results only
in boosted highlights being more compressed, no clipping will occur. 320 is unity. The
range is 50–6400.
Exposure: Increases or lowers image lightness in units relative to ƒ-stops. Using
exposure to boost the image beyond 100 or to lower it below 0 will clip, not compress,
the image data that’s passed along to the DaVinci Resolve image processing pipeline.
0 is unity. The range is –7 to +7.
Color Temp: Designed to alter the “warmth” of the image while keeping white elements
of the scene looking neutral. Adjustable in degrees Kelvin. Lower values correct
for “warmer” lighting, while higher values correct for “cool” lighting. This parameter
is designed specifically to adjust RED linear light image data to make the most
photometrically accurate correction. 5600 is unity. The range is 1700 to 10,000.
Using Sony Raw Files
Sony makes several digital cinema cameras, such as the F65 and F55, that record wide latitude,
high-gamut media either using Sony’s 12-bit SR codec, or as 16-bit raw media files. Since Sony’s
cameras do not use a traditional Bayer pattern, special debayering is necessary when working
with F65 raw media, and the image data is demosaiced using the following raw controls and
parameters.
Master Settings
These parameters let you choose the decode quality, white balance, color space, and gamma
that Sony raw clips will be transformed to use when debayered.
Decode Quality: Determines the image quality of the decoded Sony raw data that’s
handed off to the DaVinci Resolve image processing pipeline regardless of the
Play Quality setting. The Decode Resolution you select has a direct impact on real
time performance, and decoding performance depends entirely on the hardware
capabilities of your system.
If necessary, you can choose a lower resolution setting that provides better real time
playback on systems with limited performance while you work, and then switch to a
higher quality when rendering the final output. A “Force debayer res to highest quality”
checkbox in the Render Settings list of the Deliver page makes it easy to follow this
workflow.
Decode Using: The option you select determines whether all F65 media throughout
the project is decoded using the original Camera Metadata settings (the default
selection), using Project settings in which you choose custom settings to be applied to
all clips, or using the Sony default settings.
110
Camera Raw Settings Part 1 – 4
Project Settings
These settings control the fundamental methods used to debayer Sony raw media. The
selections you make to these settings determine the basic color and contrast that you’re
choosing to extract from the camera raw image data.
White Balance: Designed to very subtly alter the “warmth” of the image. Adjustable in
degrees Kelvin. Lower values correct for “warmer” lighting, while higher values correct
for “cool” lighting. +5500 is unity. The range is +3200 to +5500.
Color Space: Two color spaces are adjustable, depending on your intended workflow:
Rec. 709: Decodes into the standard color space specified by the Rec. 709 standard
for high definition video.
P3 D60: Decodes RGB-encoded image data with a D60 white point, intended for
monitoring with a P3-compatible display.
SGamut: Decodes into Sony’s wider S-gamut color space, designed to provide the
widest range of image data for adjustment.
SGamut3: The gamut is identical to SGamut, but color reproduction is more accurate,
according to Sony’s “Technical Summary for S-Gamut3Cine/S-Log3 and
S-Gamut3/S-Log3” whitepaper.
SGamut3.Cine: According to Sony’s “Technical Summary for S-Gamut3Cine/S-Log3
and S-Gamut3/S-Log3” whitepaper, S-Gamut3.Cine is designed to provide a more
traditionally log-encoded workflow with color reproduction that is slightly wider than
the P3 gamut.
P3: Decodes to a RGB-encoded image data with a D61 white point, intended for use
when outputting media for DCI mastering.
Gamma: Five gamma settings are available, depending on what starting point you want
to use for further grading.
Gamma 2.4: A simple power-function gamma setting commonly used for broadcast.
Gamma 2.6: A simple power-function gamma setting commonly used for digital cinema
projection.
Rec. 709: A gamma curve typical for Rec. 709 display.
SLog: Not designed for viewing, Sony’s SLog gammas are designed to provide a wide
latitude for grading; 14-stops according to Sony. 18% gray is at 38%.
SLog2: This version has a half stop offset from SLog to allow for a higher dynamic
range. 18% gray is at 32%.
SLog3: An “easier to grade” version of SLog. 18% gray is at 40%. According to Sony’s
“Technical Summary for S-Gamut3Cine/S-Log3 and S-Gamut3/S-Log3,” SLog3 is
designed to provide a more traditionally log-encoded workflow, with a gamma curve
that is similar, but not identical, to Cineon workflows.
Linear: A simple linear gamma setting.
Lift: Adjusts the black point of the media, raising it or lowering it while scaling all
midtone values between it and the white point. Regardless of how you adjust this
control, all image data is preserved and can be retrieved in subsequent adjustments.
The range is –100 to +100.
Gain: Adjusts the white point of the media, raising or lowing it while scaling all midtone
values between it and the black point. Regardless of how you adjust this control, all
image data is preserved and can be retrieved in subsequent adjustments. 0 is unity.
The range is –100 to +100.
Contrast: Raising contrast reduces shadows and raises highlights, while leaving
midtones at 50 percent unaffected. Regardless of how you adjust this control, all image
data is preserved and can be retrieved in subsequent adjustments. 0 is unity. The
range is –100 to +100.

111
Camera Raw Settings Part 1 – 4
Tint: Color balance correction for images with a green or magenta color cast, such as
fluorescent or sodium vapor bulbs. 0 is unity. The range is –150 to +150.
Sharpness: A debayer-specific sharpness filter applied to provide the appearance of
enhanced image detail. 20 is unity. The range is 0 to 100.
Highlights: Makes it easy to selectively retrieve blown-out highlight detail in high-
dynamic-range media by lowering this parameter, and achieves a smooth blend
between the retrieved highlights and the unadjusted mid tones for a naturalistic result.
0 is unity. The range is –100 (minimum) through +100 (maximum).
Shadows: Lets you selectively lighten or darken shadow detail. Raising this value
retrieves shadow detail recorded below 0 percent, while leaving the midtones alone. 0
is unity. The range is –100 (minimum) through +100 (very high).
Color Boost: Lets you naturalistically raise the saturation of regions of low saturation,
sometimes referred to as a vibrance operation. Can be used also to lower the
saturation of regions of low saturation. 0 is unity. The range is –100 (minimum) through
+100 (very high).
Saturation: Adjusts the color intensity of the image. 0 is unity. The range is –100
(minimum) through +100 (very high).
Midtone Detail: When this parameter is raised, the contrast of regions of the image with
high edge detail is raised to increase the perception of image sharpness, sometimes
referred to as definition. When this parameter is lowered to a negative value, regions
of the image with low amounts of detail are softened while areas of high-detail are left
alone. 0 is unity. The range is –100 (minimum) through +100 (very high).
Use Camera Metadata
The most elemental camera metadata settings for exposure and color that are available.
Exposure: Increases or lowers image lightness in units relative to ASA values. If your
intended exposure adjustment lifts image data above the maximum white level, don’t
worry; all image data is preserved and can be retrieved in subsequent adjustments.
+800 is unity. The range is +1 to +65,535.
Color Temp: Designed to alter the “warmth” of the image. Adjustable in degrees
Kelvin. Lower values correct for “warmer” lighting, while higher values correct for “cool”
lighting. +6500 is unity. The range is +2000 to +50,000.
Sony Media and SLog
Sony’s proprietary SLog gamma setting, which produces flat-contrast, wide-gamut
image data that preserves image detail with a wide latitude for adjustment, is also
available on some other Sony cameras. Similarly to working with clips using the ARRI
ALEXA’s Log-C gamma, you need to normalize SLog clips by using Resolve Color
Management (RCM), by making a manual adjustment to color and contrast, or by
applying a LUT, using the same techniques discussed previously.
When applying a LUT, there are two methods that Sony recommends. A 1D LUT can be
used to transform SLog clips into the standard Cineon (or Log-C) curve if your ultimate
goal is to output Log media for film printing. If you’re planning to output to a normalized
format, you can use a dedicated LUT to make this transformation.
For more information, search the web for Sony’s document “SLog: A new LUT for
digital production mastering and interchange applications.”
112
Camera Raw Settings Part 1 – 4
Using CinemaDNG files
CinemaDNG is an open format capable of high-resolution raw image data with a wide dynamic
range, and is one of the formats recorded by the Blackmagic Design Camera when you shoot in
raw mode. CinemaDNG images are decoded with full dynamic range when the Highlight
Recovery checkbox is selected.
DaVinci Resolve version 11.2.1 introduced improved debayering for raw CinemaDNG media
acquired using any of the Blackmagic Design cameras. The “Apply Pre Tone Curve” setting
controls whether you’re using the older debayering method (when turned on), or the newer,
visually improved debayering method (when turned off).
Master Settings
These parameters let you choose the decode quality, white balance, color space, and gamma
that raw CinemaDNG clips will be transformed to use when debayered.
Decode Quality: Lets you debayer CinemaDNG raw files at Full, Half, or Quarter
resolution to improve performance on slower systems. Lower resolution media is
lower quality, but faster to work with and process. If necessary, you can choose a
lower resolution setting that provides better real time playback on systems with limited
performance while you work, and then switch to a higher quality when rendering the
final output. A “Force debayer res to highest quality” checkbox in the Render Settings
list of the Deliver page makes it easy to follow this workflow.
Decode Using: The option you select determines whether all CinemaDNG media
throughout the project is decoded using the original Camera Metadata settings (the
default selection), using Project settings in which you choose custom settings to be
applied to all clips, or using the CinemaDNG default settings.
Apply Pre Tone Curve: When this checkbox is turned off (the default for new projects
created in DaVinci Resolve 11.2.1 or later), DaVinci Resolve debayers CinemaDNG raw
media using an improved method that delivers better-looking results, specifically for
media acquired using any of the Blackmagic Design cameras. When this checkbox is
turned on (the default for projects created in earlier versions of DaVinci Resolve), the
older debayering method is reenabled for backward compatibility. However, turning
Pre Tone Curve onmay also provide better results for CinemaDNG raw files coming
from other sources. If you’re importing .dng media from cameras other than those from
Blackmagic Design, you should try both settings to see which type of debayering you
prefer.
Apply Soft Clip: This checkbox is only available when Apply Pre Tone Curve is turned
off. When turned on, high dynamic range parts of the signal (super-white highlights) are
brought back into the picture as visible image detail you can adjust, similar to using the
Highlights control to retrieve these otherwise clipped parts of the signal.
Project Settings
CinemaDNG has a variety of settings that can be adjusted to alter the image quality of the
debayered result. The Color Temp and Tint parameters are only available if the White Balance
pop-up menu is set to Custom.
White Balance: The first seven options offer White Balance presets, which
automatically adjust the Color Temp and Tint parameters. These options include
Daylight, Cloudy, Shade, Tungsten, Fluorescent, and Flash. An eighth option, Custom,
makes the Color Temp and Tint parameters user-adjustable.
113
Camera Raw Settings Part 1 – 4
Color Space: Two color spaces are adjustable, depending on your intended workflow:
Rec. 709: Decodes into the standard color space specified by the Rec. 709 standard
for high definition video.
P3 D60: Decodes into the standard P3 color space specified by the DCI standard for
digital cinema projection.
Blackmagic Design: Decodes into a log-encoded color space that remaps the raw data
into an approximation of the Log-C standard. Choosing Blackmagic Design Film also
forces the Gamma setting to Blackmagic Design Film. This setting produces flat-
contrast image data that preserves image detail with a wide latitude for adjustment,
which is suitable as a starting point for detailed grading, and is also compatible with log
workflows intended for film output.
Gamma: Five gamma settings are available, depending on what starting point you want
to use for further grading.
2.4: A simple power-function gamma setting commonly used for broadcast.
2.6: A simple power-function gamma setting commonly used for digital cinema
projection.
Rec. 709: A gamma of 2.35, with a linear segment near black, approximating the EBU
recommended gamma for broadcast.
sRGB: A gamma of 2.2, with a linear segment near black, intended for reproduction on
computer displays alongside the sRGB color space.
Linear: A simple linear gamma setting.
Blackmagic Design Film: A log-encoded gamma setting that approximates Cineon
encoding, the main difference being that more data is encoded in the darkest portion
of the Blackmagic Design Film signal. When you choose this setting, the appropriate
variation of gamma will be applied based on your particular sensor, be it 4K or 4.6K.
Blackmagic Design Video: A normalized gamma setting that provides a fast starting
point for grading if you don’t want to begin with a log-encoded image.
ISO: A gain operation that keeps the black point at 0 while raising or lowering the white
point of the image, linearly scaling everything in between. Raising the ISO can push
image values above maximum white, but these values are not permanently clipped and
are retrievable using the Highlights parameter, or using later adjustments. This control’s
default value and range is dependent on the type of camera the media was shot with.
You should also know that different log curves are applied to 4.6K media depending on
which ISO you choose, to deliver the best possible output.
Highlight Recovery: A checkbox that lets you include additional highlight sensor
data that’s usually clipped by the standard decoding matrix. In cases where you have
extremely clipped highlights, you may obtain additional image detail this way, although
it may have unusual color artifacts.
Tint: Color balance correction for images with a green or magenta color cast, such as
fluorescent or sodium vapor bulbs. 0 is unity. The range is –150 to +150.
Sharpness: A debayer-specific sharpness filter applied to provide the appearance of
enhanced image detail. 20 is unity. The range is 0 to 100.
Highlights: Makes it easy to selectively retrieve blown-out highlight detail in high-
dynamic-range media by lowering this parameter, and achieves a smooth blend
between the retrieved highlights and the unadjusted midtones for a naturalistic result.
0is unity. The range is –100 (minimum) through +100 (maximum).
Shadows: Lets you selectively lighten or darken shadow detail. Raising this value
retrieves shadow detail recorded below 0 percent, while leaving the midtones alone.
0is unity. The range is –100 (minimum) through +100 (very high).

114
Camera Raw Settings Part 1 – 4
Color Boost: Lets you naturalistically raise the saturation of regions of low saturation,
sometimes referred to as a vibrance operation. Can be used also to lower the
saturation of regions of low saturation. 0 is unity. The range is –100 (minimum) through
+100 (very high).
Saturation: Adjusts the color intensity of the image. 0 is unity. The range is –100
(minimum) through +100 (very high).
Midtone Detail: When this parameter is raised, the contrast of regions of the image with
high edge detail is raised to increase the perception of image sharpness, sometimes
referred to as definition. When this parameter is lowered to a negative value, regions
of the image with low amounts of detail are softened while areas of high-detail are left
alone. 0 is unity. The range is –100 (minimum) through +100 (very high).
Lift: Adjusts the black point of the media, raising it or lowering it while scaling all
midtone values between it and the white point. Regardless of how you adjust this
control, all image data is preserved and can be retrieved in subsequent adjustments.
The range is –100 to +100.
Gain: Adjusts the white point of the media, raising or lowing it while scaling all midtone
values between it and the black point. Regardless of how you adjust this control, all
image data is preserved and can be retrieved in subsequent adjustments. 0 is unity.
The range is –100 to +100.
Contrast: Raising contrast reduces shadows and raises highlights, while leaving
midtones at 50 percent unaffected. Regardless of how you adjust this control, all image
data is preserved and can be retrieved in subsequent adjustments. 0 is unity. The
range is –100 to +100.
Use Camera Metadata
The most elemental camera metadata settings for exposure and color that are available.
Exposure: Increases or lowers image lightness in units relative to ƒ-stops. If your
intended exposure adjustment lifts image data above the maximum white level, don’t
worry; all image data is preserved and can be retrieved in subsequent adjustments.
0 is unity. The range is –5 to +5.
Color Temp: Designed to alter the “warmth” of the image. Adjustable in Kelvin. Lower
values correct for “warmer” lighting, while higher values correct for “cool” lighting.
+6500 is unity. The range is +2000 to +50,000.
CinemaDNG Files and Blackmagic Design Film
Blackmagic Design’s logarithmically-encoded Blackmagic Design Film gamma setting,
which produces flat-contrast, wide-gamut image data that preserves image detail with
a wide latitude for adjustment, is a modified version of the standard Cineon curve.
However, the modifications are designed to emphasize the strengths of the sensors
used by the Blackmagic Design cameras. Similarly to working with clips using Cineon,
the ARRI ALEXA’s Log-C gamma, or Sony’s proprietary S-Log or S-Log2 formats, you
need to normalize clips using Blackmagic Design Film by using Resolve Color
Management (RCM), by making a manual adjustment to color and contrast, or by
applying a LUT, using the same techniques discussed previously.
115
Camera Raw Settings Part 1 – 4
Using Phantom Cine Files
The Phantom line of high-speed digital cinema cameras record wide latitude, high-gamut media
using the Cine Raw format.
Master Settings
These parameters let you choose the decode quality, white balance, color space, and gamma
that raw Phantom Cine clips will be transformed to use when debayered.
Decode Using: The option you select determines whether all Phantom Cine media
throughout the project is decoded using the original Camera Metadata settings
(thedefault selection), using Project settings in which you choose custom settings to be
applied to all clips, or using the Cine default settings.
Timecode: There are four types of timecode that Phantom Cine files can be set to use:
Set to zero: Camera timecode is ignored, instead using a simple frame count with the
first frame considered 0.
Time of day (Local): Time of day timecode recording.
Time of day (GMT): Time of day timecode recording based on Greenwich Mean Time.
SMPTE: Standard SMPTE timecode.
Project Settings
The the following settings for exposure, color, and sharpness are available.
Gamma: Three options are available for setting the gamma of the debayered output:
Rec. 709
Log 1
Log 2
Lift: Adjusts the black point of the media, raising it or lowering it while scaling all
midtone values between it and the white point. Regardless of how you adjust this
control, all image data is preserved and can be retrieved in subsequent adjustments.
The range is –100 to +100.
Gain: Adjusts the white point of the media, raising or lowing it while scaling all midtone
values between it and the black point. Regardless of how you adjust this control, all
image data is preserved and can be retrieved in subsequent adjustments. 0 is unity.
The range is –100 to +100.
Contrast: Raising contrast reduces shadows and raises highlights, while leaving
midtones at 50 percent unaffected. Regardless of how you adjust this control, all image
data is preserved and can be retrieved in subsequent adjustments. 0 is unity. The
range is –100 to +100.
Sharpness: A debayer-specific sharpness filter applied to provide the appearance of
enhanced image detail. 20 is unity. The range is 0 to 100.
Highlights: Makes it easy to selectively retrieve blown-out highlight detail in
high-dynamic-range media by lowering this parameter, and achieves a smooth blend
between the retrieved highlights and the unadjusted mid tones for a naturalistic result.
0 is unity. The range is –100 (minimum) through +100 (maximum).
Shadows: Lets you selectively lighten or darken shadow detail. Raising this value
retrieves shadow detail recorded below 0 percent, while leaving the midtones alone.
0is unity. The range is –100 (minimum) through +100 (very high).
116
Camera Raw Settings Part 1 – 4
Color Boost: Lets you naturalistically raise the saturation of regions of low saturation,
sometimes referred to as a vibrance operation. Can be used also to lower the
saturation of regions of low saturation. 0 is unity. The range is –100 (minimum) through
+100 (very high).
Saturation: Adjusts the color intensity of the image. 0 is unity. The range is –100
(minimum) through +100 (very high).
Midtone Detail: When this parameter is raised, the contrast of regions of the image with
high edge detail is raised to increase the perception of image sharpness, sometimes
referred to as definition. When this parameter is lowered to a negative value, regions
of the image with low amounts of detail are softened while areas of high detail are left
alone. 0 is unity. The range is –100 (minimum) through +100 (very high).
118
Improving Performance, Proxies, and the Render Cacher Part 1 – 5
Improving Performance, Proxies,
and the Render Cache
DaVinci Resolve is a high-performance piece of software designed to enable real time effects
on a variety of workstations. This section describes the various ways you can monitor your
performance to make sure you’re maintaining real time playback, along with different methods
of optimizing real time performance, including using on-the-fly proxies and the background
Render Cache.
Understanding the GPU Status Display 119
Prioritizing Audio or Video Playback in the Edit Page 119
Performance Mode Improves Overall Performance 120
Proxy Mode Improves Effects Performance 120
Reducing Decode Quality Improves Raw Performance 121
Optimized Media Improves Overall Performance 121
Creating Optimized Media 122
Seeing Which Clips Have Been Optimized 122
Optimized Media for Raw Source Clips 122
Customizing the Type of Optimized Media You Create 123
Switching Between Optimized and Original Media 124
Rediscovering Lost Optimized Media 124
Deleting Optimized Media 124
Using Optimized Media for Delivery 125
The Smart Cache Improves Effects Performance 125
How Cached Media is Organized 126
Choosing a Cache Format and Location 127
When Caching Happens 128
The Dierence Between the Smart Cache and User Cache Modes 128
Manually Choosing What to Cache 129
Clearing Cached Media 130
Using Cached Media When Rendering in the Deliver Page 130
Other Project Settings ThatImprove Performance 131

119
Improving Performance, Proxies, and the Render Cacher Part 1 – 5
Understanding the GPU Status Display
Every viewer in Resolve exposes a a GPU status indicator and a frame-per-second (FPS) meter,
which appears in the Viewer’s title bar, which shows you your workstation’s performance
whenever playback is initiated. Since DaVinci Resolve uses one or more GPUs (graphics
processing units) to handle all image processing and effects, the GPU status display shows you
how much processing power is being used by whichever clip is playing.
Frame rate and GPU indication,
green is good
A green status indicator shows there is plenty of GPU processing headroom available. As the
GPU resources is increasingly taxed, this green graph eventually turns red to show that the
available GPU power is insufficient for consistent real time playback.
Red indicates that playback is at
slower than real time
Eventually, as you add more and more effects and corrections, you’ll reach the limits of
available performance, forcing DaVinci Resolve to either drop frames, or play video at a slower
speed in order to maintain high image quality, shown by the red FPS indicator.
When real time performance falls short, DaVinci Resolve provides a variety of controls and
options that let you enhance real time playback and effects. Each is useful for different
situations, and all can work together so you can choose the best trade-off between image
quality and performance while you work. All of these methods can be set up to have no effect
on your delivered output.
Prioritizing Audio or Video
Playback in the Edit Page
When available processing power is insufficient to play the clip or clips at the position of the
playhead due to the grade, transforms, or effects that are applied at that moment in the
Timeline, you have the ability to choose exactly how performance in Resolve degrades, by
turning the “Show All Video Frames” on or off in the Option menu of the Edit page Viewers.
Show All Video Frames off: The default setting, ideal for video editing. Prioritizes audio
playback at the expense of dropping video frames when processing power is tight,
resulting in a more conventional playback experience.
Show All Video Frames on: An alternate setting that’s ideal when you’re doing effects
work, for which you need to see every single frame play back, sequentially. Audio
quality is compromised while every frame of video plays in slower-than-real-time, if
necessary, to maintain playback.
Keep in mind that this setting only affects playback when GPU performance is lacking. In areas
of the Timeline where performance is adequate, playback remains uncompromised.

120
Improving Performance, Proxies, and the Render Cacher Part 1 – 5
Performance Mode Improves
Overall Performance
On by default, Performance Mode (Playback > Performance Mode) analyzes your computer’s
configuration, the CPU, GPU, connected video interface, etcetera, and automatically tunes
DaVinci Resolve’s under-the-hood image processing settings to provide the best interactivity
on your machine. On less powerful computers, Performance Mode dramatically improves the
experience of editing, mixing, and grading.
While Performance Mode is turned on, DaVinci Resolve always outputs to video and renders in
the Delivery page and processes via the Media Management command at the highest quality,
so there is no compromise in your output. Creative Editors and Audio Mixers can leave this
on always.
Finishing Editors and Colorists might notice subtle differences between the image on your
computer monitor on less powerful computers when Performance Mode is on versus when it’s
off, which is why this setting can be disabled for instances where GUI interactivity is less
important than your on-screen display.
Proxy Mode Improves
Effects Performance
If you don’t want to either drop frames or play at slower then real time speed whenever the GPU
Status indicator is in the red, an immediate way of improving performance is to turn on the Use
Proxies option in the View menu. Using Proxies reduces processing demands by taking
advantage of the resolution independence of Resolve to lower the resolution of your clips
on-the-fly, thereby increasing real time playback performance without the need to spend time
caching part or all of the timeline, or create optimized media (both discussed later).
To turn Use Proxies on and off, do one of the following:
Choose Playback > Proxy Mode > Half Resolution, Quarter Resolution, or None.
Press PROXY ON/OFF on the T-bar panel of the DaVinci control panel (Defaults to
the last proxy resolution you selected from the menu. Half is the default if you haven’t
selected a resolution yet.).
Turning on one of the proxy resolutions reduces the working resolution by either half or a
quarter of whatever the current Timeline resolution is for your project. Working at a temporarily
reduced resolution increases your workstation’s real time performance, while the resolution
independence of Resolve guarantees that every window you draw and sizing operation you
make scales correctly to the actual resolution of your project.
Proxy Resolution Width Height
Full 8K UHD 7680 4320
Full UHD/Half 8K UHD 3840 2160
Full-HD/Half UHD/Quarter 8K UHD 1920 1080
Half-HD/Quarter UHD/Eighth 8K UHD 960 540
Quarter-HD/Eighth UHD/Sixteenth 8K UHD 480 270
Table of half and quarter proxy resolutions for different television frame sizes
121
Improving Performance, Proxies, and the Render Cacher Part 1 – 5
Reducing Decode Quality
Improves Raw Performance
The Use Proxy command will improve performance when grades and effects are responsible
for your project’s slower than real time playback, but Use Proxy won’t help when real time
performance is being used up by the need to debayer raw media. The only way to improve
playback performance for debayered clips without taking the time to either generate optimized
media or render to the Source Cache by enabling the Smart Cache is to open the Camera Raw
panel of the Project Settings, and reduce the Decode Quality and/or Play Quality of the raw
media formats you’re using:
Decode Quality: Camera raw formats such as R3D and F65 can be debayered at
different levels of quality. For higher real time performance, you can choose a lower
quality setting while you work, and then switch to a higher quality when rendering
the final output. A “Force debayer res to highest quality” checkbox in the Advanced
settings of the Video Panel of the Render Settings list in the Deliver page makes it easy
to follow this workflow.
Play Quality: This option provides the additional ability to set a lower resolution
for debayering during playback than for when the playhead is stopped. By default
playback uses the same setting as the Decode Quality pop-up menu.
Options for reducing resolution vary by format, but at the very least include full, half, and quarter
resolution (R3D and Sony Raw have options for full, half, quarter, eighth, and sixteenth). The one
exception is the Phantom Cine format, which doesn’t have Decode Quality options at all.
If you reduce the Decode Quality of raw media formats in your project to improve performance,
you can use the “Force debayer res to highest quality” checkbox in the Render Settings list of
the Deliver page to ensure that Resolve renders all raw formats at the highest quality available,
so you don’t have to worry about forgetting to change the decode quality back when it’s time
to render.
Optimized Media Improves
Overall Performance
If you’re editing or grading processor-intensive media such as camera raw or H.264 sourced
media or 8K raw media, you can create pre-rendered, optimized media in one of a variety of
finishing formats that lets you work more efficiently, by seamlessly turning slow-to-decode
media formats into a more processor-efficient format and resolution, and giving you the ability
to easily switch your project back and forth between these optimized “proxy” files and the
original source media.
The advantage of using optimized media to help you work faster is that it’s pre-generated,
meaning you can render it once and then use the files for the duration of your work in that
project (unless you change the debayering settings of the raw media). Also, optimized media
improves the playback performance of clips throughout Resolve, including in the Media page
and in the Media Pool and Source Viewer of the Edit page, whereas the similar but different
Source Cache component of the Smart Cache only improves the performance of clips that are
already in the Timeline by caching them at the Timeline resolution. This makes optimized media
ideal for editing workflows of all kinds.

122
Improving Performance, Proxies, and the Render Cacher Part 1 – 5
Creating Optimized Media
Creating optimized media to work with is easy. Resolve automatically manages the relationship
between source clips and the optimized media you create, so all you need to do is choose
which clips to make optimized media for. You can manually choose which clips to optimize, or
you can use a Smart Bin to collect all of the media corresponding to one or more formats you
need to optimize to gather it procedurally. In either case, this gives you the option of only
optimizing clips in formats that require optimization, saving you time.
For example, if you’re editing a project that consists half of camera raw media, and half of
DNxHD media, you probably only need to optimize the camera raw media, so you can create a
Smart Bin that gathers all of it, based on Resolution, Codec, File Name, or whatever other
metadata is appropriate. Once gathered, it’s an easy thing to select all of these clips in
preparation for the next step.
To create optimized media for one or more selected clips:
Right-click one of the selected clips, and choose Generate Optimized Media from the
contextual menu.
All optimized media is written to the same directory as the Cache files are written, which
defaults to the first scratch disk listed in the Preference dialog’s Media Storage panel. The
location of Cache and Optimized files is also selectable via the “Cache files location” setting in
the Master Settings panel of the Project Settings.
Seeing Which Clips Have Been Optimized
If you want to check to see which clips have been optimized, an Optimized Media column in the
list view of the Media Pool will be populated with the resolution of whatever optimized media
you’ve created (Original, Half, Quarter, etcetera). Clips that have not been optimized appear
with “None.”
Optimized Media for Raw Source Clips
In general, once you create optimized media, Resolve keeps track of it and continues using it
regardless of whatever changes you make to your project, including changing the Timeline
resolution. However, any change to the camera raw settings of optimized clips will automatically
discard the optimized media, requiring you to re-generate optimized media for them.
Choose the Right Optimized Media Format for Your Project
You have the option of choosing the Resolution and Format of the optimized media
you create, using controls in the Master Settings panel of the Project Settings. Be
aware that the format you choose will determine whether out-of-bounds image data is
preserved when the signal is optimized. If you find that image data (typically bright
highlights) are clipped after optimizing, you should switch to 16-bit float, ProRes 4444,
or ProRes 4444 XQ; in particular, any of these three codecs are appropriate for
HDR grading.
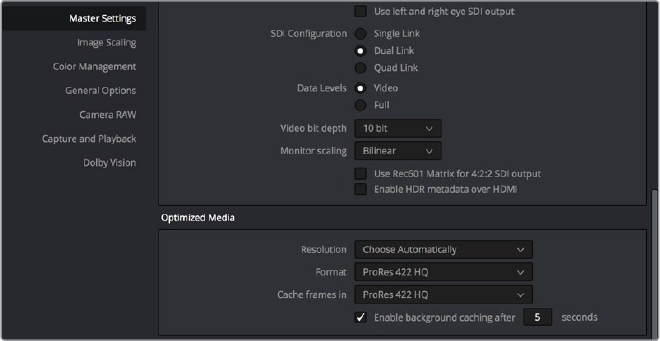
123
Improving Performance, Proxies, and the Render Cacher Part 1 – 5
Customizing the Type of Optimized Media You Create
The Master Settings panel of the Project Settings has a set of controls that govern what kind of
media files are created when you create optimized media.
Options available for creating Optimized media in
the Master Settings panel of the Project Settings
There are two settings at the top of the Optimized Media section:
Resolution: Lets you choose whether to create optimized media at the same size
as your original media files (by choosing Original), or to reduce the bandwidth of
your optimized media further by reducing its resolution by a Half, Quarter, Eighth,
or Sixteenth. The “Choose automatically” option tries to balance visual quality with
efficiency by only reducing the resolution of media files that are larger than the
currently selected Timeline resolution, using whatever reduction ratio best matches the
Timeline resolution.
Format: Lets you choose the format and codec with which to generate optimized
media. Options include Uncompressed 10-bit and Uncompressed 16-bit float for
maximum quality, which stores image data in the optimized and proprietary .dvcc image
format. Other options include ProRes Proxy through 4444 XQ, and DNxHR LB through
444. Be aware that the format you choose will determine whether out-of-bounds
image data is preserved when the signal is optimized. If you find that image data
(typically super-white levels) are clipped after optimization, you should switch to 16-bit
float, ProRes 4444, or ProRes 4444 XQ; in particular, any of these three codecs are
appropriate optimized formats for HDR grading.
The “Choose automatically” option of the Resolution setting bears a bit more explanation.
When selected, only source media with a higher resolution than the selected Timeline
resolution will generate downsized optimized media. How much each clip will be downsized
depends on how much larger each clip is than the Timeline resolution. For example, if you’re
working within a 1080 resolution project, then 8K clips will generate quarter-resolution
optimized media, and 4K clips will generate half-resolution optimized media, such that all
optimized media is somewhere around 1080 resolution. All clips that are 1080 and smaller
generate optimized media at the same resolution as the source clips.
In the example of a 4K project, 8K clips will generate half-resolution optimized media, and all
other clips that are 4K and smaller will generate optimized media at the same resolution as the
source clips.
124
Improving Performance, Proxies, and the Render Cacher Part 1 – 5
Proxy Resolution Width Height
Full 8K UHD 7680 4320
Full UHD/Half 8K UHD 3840 2160
Full-HD/Half UHD/Quarter 8K UHD 1920 1080
Half-HD/Quarter UHD/Eighth 8K UHD 960 540
Quarter-HD/Eighth UHD/Sixteenth 8K UHD 480 270
Eighth-HD/Sixteenth UHD 240 135
Table of optimized resolutions for different television frame sizes
Switching Between Optimized and Original Media
Choosing whether or not you’re using optimized media is easy. Simply choose Playback > Use
Optimized Media if Available to switch your entire project between using optimized media (if it’s
been generated), or the original media. Furthermore, a checkbox in the Render Settings of the
Deliver page lets you choose whether you want to use optimized media to speed up rendering,
or render using the original media only.
Rediscovering Lost Optimized Media
It’s difficult, but it is possible to lose track of optimized media you’ve generated in certain rare
circumstances. For example, if you generate optimized media on another workstation, but failed
to save the project, DaVinci Resolve may lose the relationship between the clips in the Media
Pool and the optimized media files you created. In these cases, it’s possible to rediscover the
optimized media so you don’t have to regenerate it.
To rediscover lost optimized media:
Select the clips in the Media Pool for which you know you have optimized media, then
right-click one of the selected clips and choose Rediscover Optimized Media from the
contextual menu.
Deleting Optimized Media
The optimized media you generate within a project is persistent; it’s saved for future use even
when the project is closed and later reopened. If you need to delete optimized media to free up
space on your scratch volume, you can do so with a single command.
To clear optimized media:
Open the project, and choose Playback > Delete Optimized Media.
NOTE: Optimized media is not included in Media Management operations, nor is it
included as part of Archive operations in the Project Manager.

125
Improving Performance, Proxies, and the Render Cacher Part 1 – 5
Using Optimized Media for Delivery
An option in the More options section of the Render Settings in the the Deliver page, “Use
Optimized Media,” lets you output using Optimized Media, rather then the original media, in
order to save rendering time. If you’re planning on using this option, it’s advisable to set the
Optimized media format to a suitably high-quality format to guarantee the best results.
The Smart Cache Improves
Effects Performance
Another option for achieving real time performance when the GPU Status indicator is in the red
due either to Timeline effects, Color page grading, or processor-intensive media in the
Timeline, is to use the Smart Cache or User Cache modes of the Render Cache. What DaVinci
Resolve calls caching is sometimes referred to by other applications as “rendering.” Both terms
refer to the behind-the-scenes creation of new media, with all effects “baked in,” that DaVinci
Resolve can play back in real time, as opposed to making DaVinci Resolve play the original
source media while processing intensive effects at the same time and risking dropped frames
as a result.
The DaVinci Resolve Smart Cache automatically renders and caches processor-intensive
grades, or clips that you manually flag for caching when right-clicking any clip in the Color page
or Edit page timeline and enabling the Render Cache Clip Output option. When Smart Cache is
enabled, frames of each automatically or manually flagged clip are cached as they play, or
automatically cached whenever you pause work, to the “Cache files location” specified in the
Master Settings panel of the Project Settings.
The settings governing caching in the Master Settings panel of the Project Settings
Once you’ve cached part of the Timeline using either mode, these clips play back in real time
until they’re modified, which triggers the need to re-cache.
To use clip caching on any page, do one of the following:
Choose Playback > Render Cache > Smart to set DaVinci Resolve to automatically
cache computationally intensive effects.
Choose Playback > Render Cache > User to set DaVinci Resolve to only cache clips
and effects that you manually choose to cache.
Choose Playback > Render Cache > Off to disable all render caching.
In the Color and Edit pages, press Option-R to cycle among Off, Smart, and User.
Press CACHE MODE on the T-bar panel of the DaVinci control panel to toggle among
the available options..

126
Improving Performance, Proxies, and the Render Cacher Part 1 – 5
How Cached Media is Organized
The cache mechanism in DaVinci Resolve actually comprises three independently managed
media caches that interact with one another. This is done to keep you working quickly by
ensuring that changes you make to your timeline don’t require a grade to be re-cached, and
that changes you make to a grade don’t require the timeline to be re-cached. The three levels
of caching are:
First, the Source Cache
Caches the portion of each source media file that appears in the Timeline in its pre-graded
state at the Timeline resolution. By caching media formats that DaVinci Resolve considers to be
processor-intensive to decode, such as H.264 and various raw camera formats, as well as any
clip with Speed or Retime effects applied to them, you’ll experience vastly improved editing
and grading performance. At any time, you have the option to turn the Source Cache on or off
for individual clips, or for multiple selected clips all at once. This lets you switch between using
the native source format of each clip, or the cache format you’ve chosen.
The advantage of the Source Cache over Optimized Media is that you only cache clips that are
used in a timeline, which is ideal for finishing workflows. However, the Smart and User caches
aren’t useful for speeding up work done with source media in the Media Pool and Source
Viewer when you’re at the very beginning of an edit; that’s what Optimized Media is for (as
described in the previous section).
If Optimized media exists for a given clip, and “Use Optimized Media if available” is turned on,
then Optimized media will be used instead of the Source Cache.
Second, the Node Cache
The Node Cache, which is a separate level of caching from the Source Cache, can be triggered
in several different ways, corresponding to the three different purposes it serves.
When enabled by turning on the Smart Cache, nodes with processor-intensive
operations (along with all nodes appearing upstream in that grade’s node tree) are
automatically cached, meaning that, for example, if Nodes 1 and 2 are cached, you can
continue adjusting Nodes 3, 4, and 5 to your heart’s content without needing to
re-render your grade to the cache. Operations that trigger caching include Noise
Reduction, Motion Blur, and any ResolveFX or OFX plug-in that’s added to a node. If
you’ve added a ResolveFX to a node that’s capable of playing in real time but that node
is being flagged for caching anyway, you can force caching off for that node by right-
clicking it and choosing Node Cache > Off from the contextual menu.
Choose the Right Cache Media Format for Your Project
You have the option of choosing the Resolution and Format of the cached media you
create, using controls in the Master Settings panel of the Project Settings. Be aware
that the format you choose via the “Cache frames in” menu will determine whether
out-of-bounds image data is preserved when the signal is cached. Formats in this
menu that end in “– HDR” preserve out-of-bounds image data, while formats that
don’t, wont. If you find that image data (typically bright highlights) are clipped after
caching or optimizing, you should switch to 16-bit float, ProRes 4444, ProRes 4444 XQ,
or DNxHR 444; in particular, any of these codecs are appropriate for HDR grading.
127
Improving Performance, Proxies, and the Render Cacher Part 1 – 5
You can manually force any node to cache if it and its upstream nodes are
compromising performance but somehow not being automatically flagged, by
right-clicking a node and choosing Node Cache > On from the contextual menu.
You can also turn on the “Render Cache Clip Output” option for a clip in the Timeline of
either the Edit or Color pages. This forces that clip’s entire grade to be cached via the
Node Cache, all the way through the Node tree’s output. This can result in higher real
time performance in the Edit page, at the expense of needing to completely re-cache
that clip whenever you adjust any part of its grade.
If you apply ResolveFX or OFX filters to clips in the Edit page, these will also be cached
via the Node Cache. If necessary, you can can choose which OFX to cache via the
Render Cache OFX Filter submenu in the contextual menu for clips in the Timeline. This
is useful when you have a combination of realtime and non-realtime filters applied to a
clip; caching the non-realtime filters only enables you to continue adjusting realtime
filters without the need to re-cache. However, be aware that making changes to a filter
being cached in the Edit page timeline will force that clip’s grade to be re-cached in the
Color page, and vice versa.
If multiple nodes are flagged for caching in a particular node tree, than each node will be
individually cached. That way, you can turn a cached node off and on to get a before-and-after
look without needing to re-cache the entire node tree. If a clip is part of a group in the Color
page, you can enable a Group Cache in the Group Pre-Clip and Group Post-Clip Node Editor
modes, which cache these parts of a group grade as part of the Node Cache..
Third, the Sequence Cache
The Sequence Cache is a separate cache for effects that are applied within the Timeline in the
Edit page. These include transitions, opacity adjustments, and composite mode
superimpositions.
Choosing a Cache Format and Location
The cache format is user selectable by opening the Master Settings panel of the Project
Settings, and using the “Cache frames in” pop-up menu to choose one of the ProRes, DNxHR,
or uncompressed 10- or 16-bit float uncompressed .dvcc formats. Selecting a higher quality
cache format guarantees high quality image playback, but makes more demands on the
throughput and size of your available disk storage. On the other hand, choosing a more highly
compressed cache format makes real time playback possible on less capable computers with
slower and smaller storage, at the expense of slightly compromised image quality. Ideally, you
should choose the highest quality cache format that your workstation’s storage can
accommodate.
The format you choose via the “Cache frames in” menu will determine whether out-of-bounds
image data (including “super white” or HDR strength highlights) is preserved when the signal is
cached. Formats in this menu that end in “– HDR” preserve out-of-bounds image data, while
formats that don’t, wont. If you find that image data (typically bright highlights) are clipped after
caching or optimizing, you should switch to 16-bit float, ProRes 4444, ProRes 4444 XQ, or
DNxHR 444; in particular, any of these codecs are appropriate for HDR grading.
The Cache files location defaults to the first volume you add to the Scratch Disks list of the
Media Storage panel of the System Preferences. If no scratch disk is specified, your System disk
will be used, which may pose problems with capacity and/or performance depending on the
size and type of System disk you’re using, and on the media format you choose to cache to. For
this reason, it’s nearly always advisable to set your first scratch disk to the largest, fastest
storage volume available to your workstation.

128
Improving Performance, Proxies, and the Render Cacher Part 1 – 5
When Caching Happens
When either Smart or User caching is enabled, caching always happens whenever you play
clips that are to be cached. Cache indicators on the Edit and Color page timelines show the
status of the cache. Red means “to be cached,” while blue means “has been cached.”
If background caching is enabled in the Project settings, and there are no UI or control panel
adjustments made for a user-definable number of seconds (this is adjustable in the Master
Settings panel of the Project Settings), caching will automatically begin during periods of user
inactivity.
The Difference Between the Smart
Cache and User Cache Modes
The Smart Cache option of the Render Cache submenu provides the best user experience
when you want to “set it and forget it.” Choosing Smart triggers a variety of automatic caching
behaviors designed to optimize playback in DaVinci Resolve by rendering clip formats, grading
operations, and timeline effects that are known to be performance-intensive, while also letting
you manually flag clips that you’d like to cache that the Smart cache hasn’t. The User Cache, on
the other hand, does not automatically cache anything, instead relying on you to control what is
cached and what is not by manually flagging specific clips and effects.
Here are the differences between the Smart and User cache modes for each type of caching
DaVinci Resolve does.
Source Caching
In Smart mode, H.264, DCP, JPEG2K or camera raw clips that have been edited into a timeline,
with Source Clip settings set to either Auto (by default) or On, are automatically cached at their
source. Source Cached clips are resized to the current Timeline resolution regardless of the
media’s original resolution. Camera Raw clips are cached using the currently selected project or
clip debayer settings. Additionally, speed effects are cached at the source level, which makes it
possible to move cached speed effects clips on the Timeline without needing to re-cache them.
In User mode, clips with Render Cache Clip Source set to On are cached, while clips set to Auto
are ignored.
Node Caching in the Node Tree
In Smart mode, DaVinci Resolve automatically caches all nodes that use Motion Blur, Noise
Reduction, or OFX plug-ins. Manually flagged nodes are also cached in Smart mode.
In User mode, DaVinci Resolve only caches nodes that have been manually flagged by right-
clicking them and choosing Node Cache > On to force that node to cache in User mode, along
with all upstream nodes to the left of it.
Node Cache indicator seen as a red colored node number on
node two of the Node Editor of the Color page

129
Improving Performance, Proxies, and the Render Cacher Part 1 – 5
Cache Clip Output Is Actually Node Caching
In Smart mode, manually flagged clips with Render Cache Clip Output turned on cache the
entire output of the Color page node graph, effectively caching that clip’s entire grade. This is
most useful when you want to improve trimming and playback performance in the Edit page.
Flagging a clip for caching also causes EVERY SINGLE VERSION associated with that clip to be
cached as well.
In User mode, manually flagged clips with Render Cache Clip turned on also cache the entire
output of the Color page node graph.
Node Caching for Edit Page Filters Is Also Node Caching
Caching of ResolveFX and OFX filters applied to clips in the Edit page can only be set manually.
Only filters that you have flagged to cache by right-clicking the clip they’re applied to and
choosing them in the Render Cache OFX Filter submenu are cached in either Smart and
User modes.
Sequence Caching
In Smart mode, DaVinci Resolve automatically caches all superimposed clips that use
composite modes other then “Normal,” any clips with opacity or speed effects, and any
transitions. Clips cannot be manually flagged for Sequence caching.
In User mode, Sequence caching is disabled; Sequence caching only happens in Smart mode.
However, if you’re using User mode and you find that your workstation does not have adequate
performance to play composite mode, opacity, and transition effects in real time, you can force
these categories of effects to be included in the Sequence Cache when Render Cache is set to
User via two checkboxes in the Master Settings of the Project Settings, “Automatically cache
transitions in User Mode,” and “Automatically cache composites in User Mode.” When these
options are enabled, you also gain the ability to exclude specific tracks from being cached, by
right-clicking the track header of any video track you want to exclude from caching, and
choosing Exclude track from caching.
Source, Clip, and Sequence Cache bars seen in the Timeline of the Edit page; red bars show
areas of the Timeline that need caching, blue shows areas that have been cached
Manually Choosing What to Cache
This section describes how to manually control each type of caching that happens in
DaVinci Resolve.
Controlling Source Caching
You can manually control which clips in the Timeline are cached, and which are not. You can
select one or more clips in the Timeline of the Edit page, or in the Thumbnail Timeline of the
Color page, right-click one of the selected clips or thumbnails, and choose an option from the
Render Cache Clip Source submenu. There are three options:
Auto: The clip will only be cached in Smart mode, and only if it’s a format designated
for caching.
On: The clip will be cached in either Smart or User mode, no matter what format.
Off: The clip will not be cached, in either Smart or User modes.
130
Improving Performance, Proxies, and the Render Cacher Part 1 – 5
Controlling Node Caching
You can manually control which nodes in a grade are cached, and which are not. Right-click any
node in a node tree, and choose an option from the Node Cache submenu. There are
three options:
Auto: The flagged node and all upstream nodes will only be cached in Smart mode if it
contains an operation that’s designated for caching.
On: The node will always be cached in either Smart or User mode, no matter what
operations it performs.
Off: The node will not be cached, in either Smart or User modes. This lets you
exclude nodes from caching in smart mode if they’re capable of real time operation on
your system.
Controlling Clip Output Caching
Each clip has a Clip Output setting that you can turn on or off by right-clicking that clip in the
Timeline of the Edit page, and choosing Render Cache Clip Output from the contextual menu.
Acheckmark indicates when this setting is turned on.
Controlling Edit Page Filter Caching
You can choose which of the OFX filters applied to a particular clip should be cached by
right-clicking that clip in the Timeline of the Edit page, and choosing which of the filters in the
Render Cache OFX Filter submenu you want to cache.
Each filter applied to that clip appears in this submenu in the order in which it’s applied to the
clip, and you can turn the caching of specific filters on and off (selected filters appear with a
checkmark to the left of their menu item).
Clearing Cached Media
Each project’s cache is persistent; the cache is saved for future use even when the project is
closed and later reopened. If you need to delete a project’s cache to free up space on a
storage volume, there are three options in the Delete Render Cache submenu:
All: You can delete all media in the cache to reset every single cached clip.
Unused: You can choose to delete only Unused cache clips that no longer correspond
to clips or effects in the Timeline.
Selected clips: You can make a manual selection of clips in the Timeline, and delete
the cache corresponding to just those clips.
To clear a project’s cache:
Open the project, and choose Playback > Delete Render Cache > All, Unused, or
Selected Clips.
Using Cached Media When Rendering in the Deliver Page
An option in the “More options” section of the Render Settings in the Deliver page, “Use Render
Cached Images,” lets you export media from the cache, rather then re-rendering from scratch,
in order to save time. If you’re planning on using this option, it’s advisable to set the cache
format to a suitably high-quality format to guarantee the best results.

131
Improving Performance, Proxies, and the Render Cacher Part 1 – 5
Other Project Settings
ThatImprove Performance
In addition to working with proxies, using reduced raw decoding quality, generating optimized
media, and enabling the Smart and User caches, there are five additional options in the Project
Settings window and one setting in the UI Settings panel of the User Preferences that you can
use to further improve real time performance if you’re working on an underpowered computer,
at the expense of lower image quality while you work. These settings can then be changed
back to higher quality modes prior to rendering.
Set timeline resolution to: (Master Project Settings, Timeline Format) DaVinci Resolve
is resolution independent, so you can change the resolution at any time and all
windows, tracks, sizing changes, and keyframe data will be automatically recalculated
to fit the new size. Lowering the Timeline resolution while you’re grading will improve
real time performance by reducing the amount of data being processed, but you’ll want
to increase Timeline resolution to the desired size prior to rendering. This is effectively
the same as using the Proxy command, but you get to choose exactly what resolution
you want to work at.
Enable video field processing: (Master Project Settings, Timeline Format) You can
leave this option turned off even if you’re working on interlaced material to improve
real time performance. When you’re finished, you can turn this setting back on prior to
rendering. However, whether or not it’s necessary to turn field processing on depends
on what kinds of corrections you’re making. If you’re applying any filtering or sizing
operations such as blur, sharpen, pan, tilt, zoom, or rotate, then field processing should
be on for rendering. If you’re only applying adjustments to color and contrast, field
processing is not necessary.
Video bit depth: (Master Project Settings, Video Monitoring) Monitoring at 8-bit
improves real time performance, at the expense of possibly introducing banding to the
monitored image.
Uses Bilinear filter: (Image Scaling) A lower quality image transform setting that is less
processor intensive. A “Force sizing highest quality” checkbox in the Render Settings
list of the Deliver page helps make sure you don’t accidentally render your final media
at this lower quality setting.
Using Proxies, Optimized Media, and Caching Together
How you use DaVinci Resolve’s various performance-enhancing features together is
entirely up to you, but you should know that they’re not an either/or proposition. For
example, you can create optimized media from the camera raw original clips in your
project, then enable Proxy playback to enhance the performance of your 4K timeline,
and turn on Smart Cache to speed up your work in the Color page as you add noise
reduction and Open FX to every clip. All three of these optimization methods work
happily and seamlessly together to improve your performance while keeping the
image quality of your project as high as the Optimized and Cache formats you’ve
selected in the Master Settings panel of the Project Settings.
132
Improving Performance, Proxies, and the Render Cacher Part 1 – 5
Match Timeline Settings checkbox: (Image Scaling, Output Scaling Preset) If the
Output resolution doesn’t match the Video format resolution in the Master Project
Settings, there is performance overhead since images need to be resized before
they’re output to SDI. For the best performance while you’re grading, it’s recommended
to set the Output resolution to match the Video format resolution while you’re working.
However, once you’re ready to output via the Deliver page, you should make sure
this setting isn’t using a smaller resolution than you intend to render out with. If
necessary, you can turn Match Timeline Settings back on if the Timeline is set to the
actual resolution you need to output, or you can manually change this to the correct
resolution.
Minimize interface updates during playback: (User Preferences, UI Settings) Enabling
this setting improvesreal time performance by hiding on-screen controls that appear in
the Viewer, such as the cursor, Power Window outlines, and split-screen views during
playback. When playback is stopped, onscreen controls reappear.
134
Data Levels, Color Management, ACES, and HDR Part 1 – 6
Data Levels, Color Management,
ACES, and HDR
This chapter covers operational details that affect how color is managed for media that is
imported into and exported from DaVinci Resolve. If color accuracy is important to you, then it’s
a good idea to learn more about how Resolve handles the data levels of each clip, how DaVinci
Resolve Color Management helps you to work with different formats, and how to use ACES.
Data Levels Settings and Conversions 135
Internal Image Processing and Clip Data Levels 135
Assigning Clip Levels in the Media Pool 136
Video Monitoring Data Levels 136
Deck Capture and Playback Data Level 137
Output Data Level Settings in the Deliver Page 137
So, What’s the “Proper” Data Range for Output? 138
DaVinci Resolve Color Management 138
Display Referred vs. Scene Referred Color Management 138
Resolve Color Management for Editors 139
Resolve Color Management and Camera Raw Formats 140
Controlling the Input, Timeline, and Output Color Space 140
Single Setting vs. Dual Setting RCM 141
Gamut Mapping From Timeline to Output Color Space 142
Procedures for Using Resolve Color Management 144
Exporting Color Space Information to QuickTime Files 145
Color Management Using ACES 145
Setting Up ACES in the Project Settings Window 146
Tips For Rendering Out of an ACES Project 149
High Dynamic Range (HDR) Grading in Resolve 150
The Dierent Formats of HDR 150
Dolby Vision 151
SMPTE ST.2084, Ultra HD Premium, and HDR 10 158
Hybrid Log-Gamma (HLG) 160
Simultaneous SDR and HDR Output While Grading 162
You Can’t Use Resolve Color Management While Outputting SDR and HDR 162
Setting Up to Display Dual Video Streams via Two SDI Outputs 162
Converting Mono Clips or an Entire Timeline to Stereo 163
Outputting Both Video Streams in the Deliver Page 164

135
Data Levels, Color Management, ACES, and HDR Part 1 – 6
Data Levels Settings and Conversions
Different media formats use different ranges of values to represent image data. Since these
data formats often correspond to different output workflows (cinema vs. broadcast), it helps to
know where your project’s media files are coming from, and where they’re going, in order to
define the various data range settings in DaVinci Resolve and preserve your program’s data
integrity.
To generalize, with 10-bit image values (with a numeric range of 0-1023), there are two different
data levels (or ranges) that can be used to store image data when writing to media file formats
such as QuickTime, MXF, or DPX. These ranges are:
Video: Typically used by Y’CBCR video data. All image data from 0 to 100 percent must
fit into the numeric range of 64–940. Specifically, the Y’ component’s range is 64–940,
while the numeric range of the CB and CR components is 64–960. The lower range of
4–63 is reserved for “blacker-than-black,” and the higher ranges of 941/961–1019 are
reserved for “super-white.” These “out of bounds” ranges are recorded in source media
as undershoots and overshoots, but they’re not acceptable for broadcast output.
Full: Typical for RGB 444 data acquired from digital cinema cameras, or film scanned
to DPX image sequences. All image data from 0 to 100 percent is simply fit into the full
numeric range of 4 to 1023.
Keep in mind that every digital image, no matter what its format, has absolute minimum and
maximum levels, referred to in this section as 0–100 percent. Whenever media using one data
range is converted into another data range, each color component’s minimum and maximum
data levels are remapped so that the old minimum value is scaled to the new data level
minimum, and the old maximum value is scaled to the new data level maximum:
(minimum Video Level) 64 = 4 (Data Level minimum)
(maximum Video Level) 940 or 960 = 1023 (Data Level maximum)
Converting an image from one data range to another should result in a seamless change. All
“legal” data from 0–100 percent is always preserved, and is linearly scaled from the previous
data range to fit into the new data range.
The sole exception is that the undershoots and overshoots of “Video Levels” media, if present,
are usually clipped when converted to full-range “Full Levels.” However, Resolve preserves this
data internally, and these clipped pixels of detail in the undershoots and overshoots are still
retrievable by making suitable adjustments in the Color page to bring them back into the
“legal” range.
Internal Image Processing and Clip Data Levels
It’s useful to know that, internally to DaVinci Resolve, all image data is processed as full range,
uncompressed, 32-bit floating point data. What this means is that each clip in the Media Pool,
whatever its original bit-depth or data range, is scaled into full-range 32-bit data. How each clip
is scaled depends on its Levels setting in the Clip Attributes window, available from the Media
Pool contextual menu.
Selecting Video or Full levels

136
Data Levels, Color Management, ACES, and HDR Part 1 – 6
By converting all clips to uncompressed, full-range, 32-bit floating point data, Resolve
guarantees the highest quality image processing that’s possible. As always, the quality of your
output is dependent on the quality of the source media you’re using, but you can be sure that
Resolve is preserving all the data that was present in the original media.
Assigning Clip Levels in the Media Pool
When you first import media into the Media Pool, either manually in the Media page or
automatically by importing an AAF or XML project in the Edit page, Resolve automatically
assigns the “Auto” Levels setting. When a clip is set to Auto, the Levels setting used is
determined based on the codec of the source media.
DaVinci Resolve generally does a good job of figuring out the appropriate Levels setting of
each clip on its own. However, in certain circumstances, such as when you’re mixing video-
originated media and digital cinema camera-originated media, you may find that you need to
manually choose the appropriate settings so that the levels of each clip are interpreted
correctly. This can be done using each clip’s Levels setting in the Clip Attributes window,
available from the Media Pool contextual menu in either the Media or Edit pages.
To change a clip’s Data Level setting:
1 Open the Media or Edit page.
2 Select one or more clips, then right-click one of them and choose Clip Attributes.
3 Click the Levels ratio button corresponding to the data level setting you want to assign,
then click OK.
Once you change a clip’s Levels setting, that clip will automatically be reconverted based on
the new assignment. If it appears to be correct, then you’re ready to work. If it doesn’t, then you
may want to reconsider the Levels assignment you’ve made, and you should check with the
person who provided the media to find out how it was generated, captured, and exported.
So long as the Levels settings used by your clips are accurate, you should be ready to work.
However, problems can still occur based on what external video hardware you’re using with
your workstation, and how you need to deliver the finished media to your client. For this reason,
there are three additional data level settings that you can use to maintain data integrity, while at
the same time seeing the proper image as you work.
Video Monitoring Data Levels
Superficial problems may result if the settings used by your external display differ from the
settings you’re using to process data levels in Resolve. Accordingly, there is a Video/Full Level
setting in the Master Settings panel of the Project Settings (in the Video Monitoring section).
When you change this setting, the image being output to your external display should change,
but the image you see in your Viewer will not. That’s because this setting only affects the data
levels being output via the video interface connecting the Resolve workstation to your external
display. It has no effect on the data that’s processed internally by Resolve, or on the files written
when you render in the Deliver page.
TIP: If you need to change the Levels setting of a range of clips that share a unique
property such as reel name, resolution, frame rate, or file path, you can view the Media
Pool by column, and sort by the particular column that will best isolate the range of
media to which you need to make a data level assignment.

137
Data Levels, Color Management, ACES, and HDR Part 1 – 6
There are two options:
Video: This is the correct option to use when using a broadcast display set to the Rec.
709 video standard (10-bit 64-940).
Full: If your monitor or projector is capable of displaying “full range” video signals, and
you wish to monitor the full 10-bit data range (4-1023) while you work, then this is the
correct option to use.
It is imperative that the option you choose in Resolve matches the data range the external
display is set to. Otherwise, the video signal will appear to be incorrect, even though the
internal data is being processed accurately by DaVinci Resolve.
Video/Full Level selection for monitoring
Deck Capture and Playback Data Level
There is a separate “Video/Data Level” setting that is specific to when you’re capturing from or
outputting to VTRs. This setting also affects the video signal that is output via the video
interface connecting the Resolve workstation to your VTR (which is usually also in the signal
chain used for monitoring). However, it only takes effect when you’re capturing from tape in the
Media page, or editing to tape in the Deliver page. If you never capture or output to tape, this
setting will never take effect.
This setting is found in the Deck Capture and Playback panel of the Project Settings.
The reason for a separate option for tape capture and output is that often you’d want to monitor
in one format (normally scaled Rec. 709), but output to tape in another (full range RGB 444). This
way, you can set up Resolve to accommodate this workflow, and then not have to worry about
manually switching your video interface back and forth.
There are two options:
Video: This is the correct option to use when you want to output conventional Rec. 709
video to a compatible tape format.
Full: This is the correct option to use when you want to output “full range” RGB 444
video to a compatible tape format.
Once tape ingest or output has finished, your video interface goes back to outputting using the
setting specified by the “Colorspace conversion uses” setting in the Master Settings panel of
the Project Settings (in the Video Monitoring section).
Output Data Level Settings in the Deliver Page
Finally, there’s one last set of data level settings, available in the Render Settings list, within the
Format group. It’s the “Set to video or data level” pop-up menu. It’s there to give you the ability
to convert the data level of your rendered output, if necessary.
All media is output using a single data level, depending on your selection. There are
three options:
Automatic: The output data level of all clips is set automatically based on the codec
you select to render to in the “Render to” pop-up menu.
Video: All clips are rendered as normally scaled for video (10-bit 64-940).
Full: All clips are rendered as full range (10-bit 4-1019).
138
Data Levels, Color Management, ACES, and HDR Part 1 – 6
For most projects, leaving this setting on “Automatic” will yield the appropriate results. However,
if you’re rendering media for use by another image processing application (such as a
compositing application) that is capable of handling “full range” data, then full range output is
preferable for media exchange as it provides the greatest data fidelity. For example, when
outputting media for VFX work as a DPX image sequence, or as a ProRes 4444 encoded
QuickTime file, choosing “Unscaled full range data” guarantees the maximum available image
quality. However, it is essential that the application you use to process this media is set to read
it as “full range” data, otherwise the images will not look correct.
So, What’s the “Proper” Data Range for Output?
Strictly speaking, there is no absolutely “proper” data range to use when outputting image data.
As long as the Levels setting of each clip in the Media Pool is set to reflect how each clip was
created, your primary consideration is which data range is compatible with the media format or
application you’re delivering to. If the media format you’re exporting to supports either normally
scaled or full range, and the application that media will be imported into supports either normally
scaled or full range, then it’s really your choice, as long as everyone involved with the project
understands how the data range of the media is meant to be interpreted once they receive it.
Outputting to hardware is a bit trickier, in that you need to make sure that the external display or
VTR you’re outputting to is set up to receive a signal using the data range you’ve chosen. If the
device is limited to only one data range, then you need to be sure that you’re outputting to it
using that data range, or the levels of the image will appear to be incorrect, even though the
image data being processed by Resolve is actually fine.
DaVinci Resolve Color Management
How color is managed in DaVinci Resolve depends on the “Color Science” setting at the top of
the Color Management panel of the Project Settings. There are four options: DaVinci YRGB,
DaVinci YRGB Color Managed, DaVinci ACEScc, and DaVinci ACEScct. This section discusses
the second setting, DaVinci YRGB Color Managed. ACEScc and ACEScct is discussed in the
following section in this chapter.
Display Referred vs. Scene Referred Color Management
The default DaVinci YRGB color science setting, which is what DaVinci Resolve has always
used, relies on what is called “Display Referred” color management. This means that Resolve
has no information about how the source media used in the Timeline is supposed to look; you
can only judge color accuracy via the calibrated broadcast display you’re outputting to.
Essentially, you are the color management, in conjunction with a trustworthy broadcast display
that’s been calibrated to ensure accuracy.
Starting in DaVinci Resolve 12, there’s a color science option called “DaVinci YRGB Color
Managed,” or more simply “Resolve Color Management” (RCM). This is a so-called “Scene
Referred” color management scheme, in which you have the option of matching each type of
media you’ve imported into your project with a color profile that informs DaVinci Resolve how to
represent each specific color from each clip’s native color space into the common working color
space of the timeline in which you’re editing, grading, and finishing.
This is important, because two clips that contain the same RGB value for a given pixel may in
actuality be representing different colors at that pixel, depending on the color space that was
originally associated with each captured clip. This is the case when you compare raw clips shot
with different cameras made by different manufacturers, and it’s especially true if you compare
clips recorded using the differing log-encoded color spaces that are unique to each camera.

139
Data Levels, Color Management, ACES, and HDR Part 1 – 6
Scene Referred color management via RCM doesn’t do your grading for you, but it does try to
ensure that the color and contrast from each different media format you’ve imported into your
project are represented accurately in your timeline. For example, if you use two different
manufacturer’s cameras to shoot green trees, recording Blackmagic Film color space on one,
and recording to the Sony SGamut3.Cine/SLog3 color space on the other, you can now use
RCM to make sure that the green of the trees in one set of clips match the green of the trees in
the other, within the shared color space of the Timeline.
This sort of thing can also be done manually in a more conventional Display Referred workflow,
by assigning LUTs that are specific to each type of media, in order to transform each clip from
the source color space to the destination color space that you require. However, RCM uses
mathematical transforms, rather then lookup tables, which makes it easier to extract high-
precision, wide-latitude image data from each supported camera format, in order to preserve
high-quality image data from acquisition, through editing, color grading, and output. RCM is also
easier to use, freeing you from the need to locate and maintain a large number of LUTs to
accommodate your various workflows.
The preservation of wide-latitude image data deserves elaboration. LUTs clip image detail that
goes outside of the numeric range they’re designed to handle, so this often requires the
colorist to make a pre-LUT adjustment to “pull back” image data in the highlights that you want
to retrieve. Using RCM eliminates this two-step process, since the input color space math used
to transform the source preserves all wide-latitude image data, making highlights easily
retrievable without any extra steps.
Resolve Color Management for Editors
RCM is also easier for editors to use in situations where the source material is log-encoded.
Log-encoded media preserves highlight and shadow detail, which is great for grading and
finishing, but it looks flat and unpleasant, which is terrible for editing.
Even if you have no idea how to do color correction, it’s simple to turn RCM on in the Color
Management panel of the Project Settings, and then use the Media Pool to assign the particular
Input Color Space that corresponds to the source clips from each camera. Once that’s done,
each log-encoded clip is automatically normalized to the default Timeline Color Space of
Rec.709 Gamma 2.4. So, without even having to open the Color page, editors can be working
with pleasantly normalized clips in the Edit page.
How is DaVinci Resolve Color Management Dierent from ACES?
This is a common question, but the answer is pretty simple. Resolve Color
Management (RCM) and ACES are both Scene Referred color management schemes
designed to solve the same problem. However, if you’re not in a specific ACES-driven
cinema workflow, DaVinci Resolve Color Management can be simpler to use, and will
give you all of the benefits of color management, while preserving the the same “feel”
that the DaVinci Resolve Color page controls have always had.
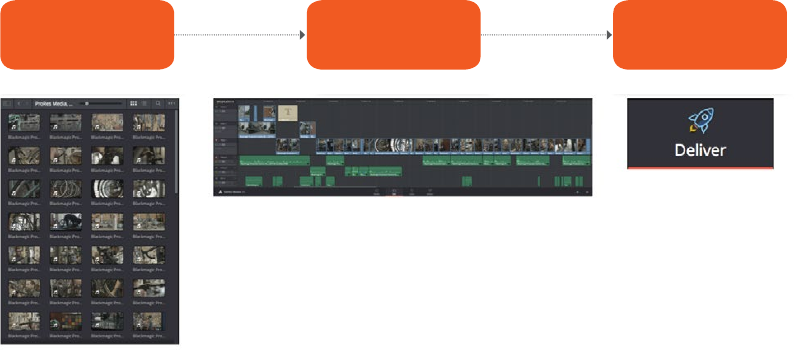
140
Data Levels, Color Management, ACES, and HDR Part 1 – 6
Resolve Color Management and Camera Raw Formats
When you use RCM in a project that uses Camera Raw formats, color science data from each
camera manufacturer is used to debayer each camera raw file to specific color primaries with
linear gamma, so that all image data from the source is preserved and made available to
DaVinci Resolve’s color managed image processing pipeline. As a result, the Camera Raw
project settings and Camera Raw palette of the Color page are disabled, because RCM now
controls the debayering of all camera raw clips, and all image data from the raw file is available
no matter which Timeline Color Space you choose to work within.
Controlling the Input, Timeline, and Output Color Space
An additional benefit of using Scene Referred color management via RCM is that, not only do
you have the ability to identify the color science of each source media format (the Input Color
Space), but you also have explicit control over the working color space (the Timeline Color
Space), and you have separate control over the Output Color Space. Basically, Resolve Color
Management consists of two color transforms working together, converting the source clips via
assignable Input Color Spaces to the Timeline Color Space in which you work, and then
converting the Timeline Color Space to whatever Output Color Space you require to deliver
the project.
Resolve Color Management consists of three color transforms working together
This means that, as a colorist, you can set the Timeline Color Space that you’re working in to
whatever you prefer. If you prefer grading log media because you like the way the grading
controls behave in that color space, you can set the Timeline Color Space in the Color
Management panel of the Project Settings to any of the available log formats, including ARRI
Log C and Cineon Film Log. If you instead prefer grading in the Rec. 709 color space because
you’re more comfortable with how the controls feel in that color space, you can choose that
instead. Whatever Timeline Color Space you assign is what all source clips will be transformed
to for purposes of making grading adjustments in the Color page, so you can make this choice
using a single setting.
A key benefit of the color space conversions that RCM applies is that no image data is ever
clipped during the Input to Timeline color space conversion. For example, even if your source is
log-encoded or in a camera raw format, grading with a Rec. 709 Timeline Color Space does
nothing to clip or otherwise limit the image data available to the RCM image processing
pipeline. All image values greater than 1.0 or less than 0.0 are preserved and made available to
the next stage of RCM processing, the Timeline to Output color space conversion.
Input Color Space Timeline Color Space Output Color Space
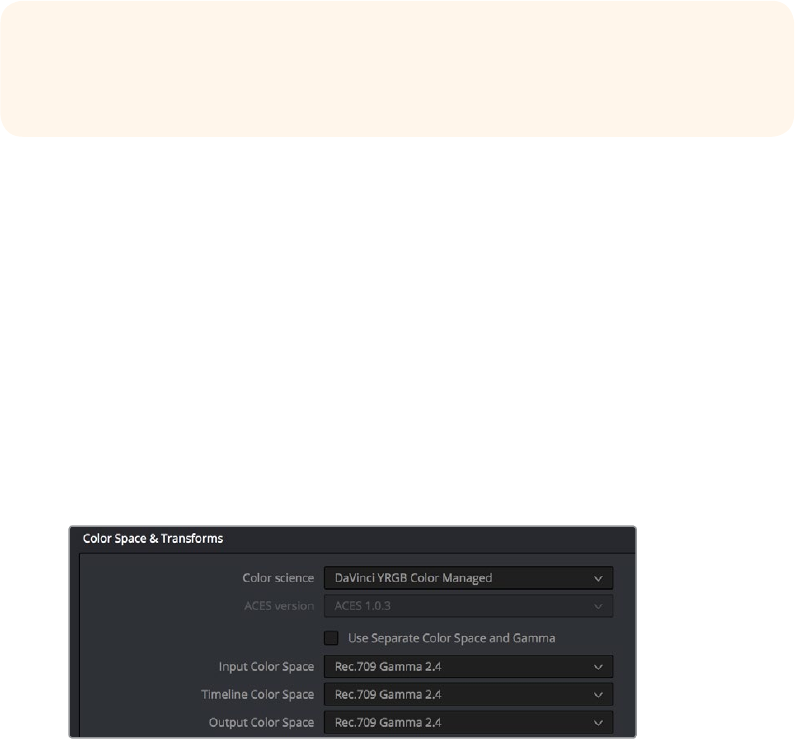
141
Data Levels, Color Management, ACES, and HDR Part 1 – 6
Consequently, if you’re grading in a color space other than the one you need to output to, you
don’t have to worry about data loss during the color transformation back to the color space you
actually want to output to. The Output Color Space setting gives you the freedom to work using
whatever Timeline Color Space you like while grading, with Resolve automatically converting
your output to the specific color space you want to monitor with and deliver to. And thanks to
the precision of the image processing in DaVinci Resolve, you can convert from a larger color
space to a smaller one and back again without clipping or a loss of quality. Of course, if you
apply a LUT or use Soft Clip within a grade, then clipping will occur, but that’s a consequence of
using those particular operations.
Finally, it is the Output Color Space that determines the final color space of your rendered
result. While no image data is clipped during the Source to Timeline color space conversion,
image data will be clipped during the Timeline to Output color space conversion in order for the
final image to conform to the color space being rendered and output, unless you use the Gamut
Mapping options to compress image data during the Timeline to Output Color Space
conversion.
Single Setting vs. Dual Setting RCM
Starting in Resolve 12.5, there are two ways you can set up RCM. When the “Use Separate
Color Space and Gamma” checkbox is turned off, the Color Management panel of the Project
Settings exposes one pop-up each for the Input, Timeline, and Output Color Space settings.
Each setting lets you simultaneously transform the gamut and gamma, depending on which
option you choose. This makes it a bit simpler to set up the transform you need.
Single setting Resolve Color Management
If you turn the “Use Separate Color Space and Gamma” checkbox on, then the Color
Management panel changes so that the Input, Timeline, and Output Color Space settings each
display two pop-ups. The first pop-up lets you explicitly set the gamut, while the second
pop-up lets you explicitly set the gamma. This makes it easier to see exactly which pair of
transforms is being used at each stage of RCM.
TIP: If you want to use Resolve Color Management, but you want the Input and Output
Color Spaces to match whatever you set the Timeline Color Space to, you can choose
“Bypass” in the “Input Colorspace” and “Output Colorspace” pop-up menus.
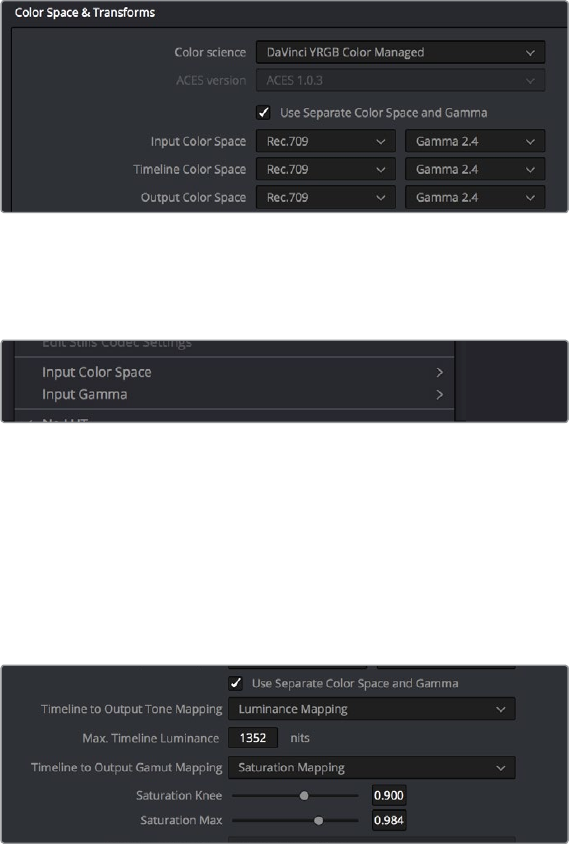
142
Data Levels, Color Management, ACES, and HDR Part 1 – 6
Dual setting Resolve Color Management
Additionally, Dual Setting RCM enables you to assign separate gamut and gamma transforms to
clips in the Media Pool.
Dual setting Resolve Color Management assignments for Media Pool clips
Gamut Mapping From Timeline to Output Color Space
Starting in DaVinci Resolve 14, to accommodate workflows where you need to transform one
color space into another that has a dramatically larger or smaller gamut, an additional group of
settings have been added that can help to automate the expansion or contraction of image
data necessary to give a pleasing result.
Additional Gamut Mapping controls in DaVinci Resolve Color Management
Enabling one of the the “Timeline to Output Tone Mapping” and/or “Timeline to Output Gamut
Mapping” options will compress or expand your image data as necessary during the Timeline to
Output Color Space transformation that RCM performs when rendering or outputting a timeline
to video, in order to make sure that the final result is either not clipping or taking better
advantage of the new color space. This is not meant to provide your final grade. Rather, it’s
meant to give you a faster starting point, when you need it, for proceeding with your own more
detailed grade of the result.
Here are some examples of what the Gamut Mapping controls of RCM can be used for:
If you’re working with high-dynamic-range log-encoded media and you’re outputting
to Rec. 709 as you work, turning on Gamut Mapping lets RCM use saturation and tone
mapping to give you a more immediately pleasing image with highlight detail that’s
not clipped.
If you’re working with standard-dynamic-range log-encoded media and you’re
outputting to an HDR format as you work, turning on Gamut Mapping lets RCM use
saturation and tone mapping to expand the highlights of the image to HDR strength to
give you an image with more immediate visual impact on HDR screens.
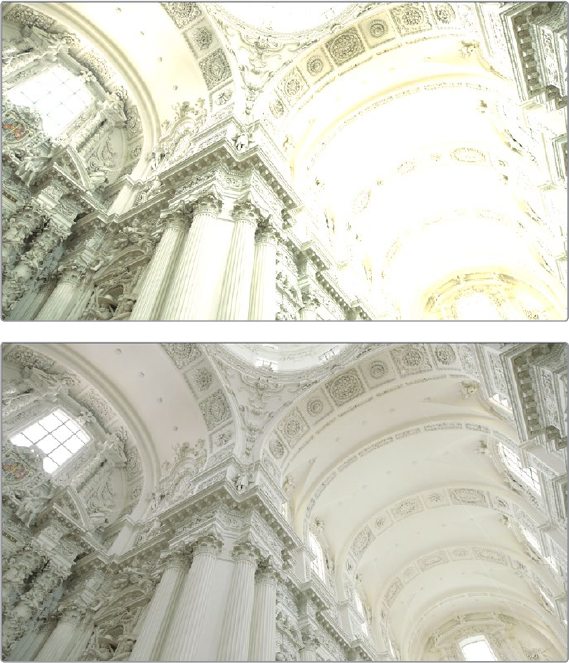
143
Data Levels, Color Management, ACES, and HDR Part 1 – 6
(Before/After) Gamut Mapping used to automatically fit
high-dynamic-range media into the Rec. 709 color space
Here are the various gamut mapping settings that are available in the Color Management panel
of the Project Settings:
Timeline to Output Tone Mapping: Accommodates workflows where you need to
transform one color space into another with a dramatically larger or smaller color space
by automating an expansion or contraction of image contrast in such a way as to give a
pleasing result with no clipping.
There are three options, None, Simple, and Luminance Mapping. Choosing “Simple“
uses a static S-curve to perform this transformation as it compresses or expands the
highlights and/or shadows of the timeline dynamic range to fit the output dynamic
range, and automatically populates the value of the Max. Timeline Luminance field that
guides this transform. Choosing “Luminance Mapping” actually uses a customized
curve operation to precisely map the timeline dynamic range to the output dynamic
range, and automatically populates the value of the Max. Timeline Luminance control
that guides this transform, but leaves it user-adjustable in case you want to customize
the result.
Max. Timeline Luminance: The maximum luminance level of the Timeline color space,
in nits. Changing the Timeline Color Space gamma setting automatically updates this
parameter to the appropriate value for mapping the Timeline Color Space to the Output
Color Space, but these two color spaces need to be different in order for tone mapping
to work. In Simple mode, this setting is non-adjustable. In Luminance Mapping mode,
you can manually alter this setting to customize how the Timeline color space is
remapped to the Output color space.
144
Data Levels, Color Management, ACES, and HDR Part 1 – 6
Timeline to Output Gamut Mapping: Accommodates workflows where you need to
transform one color space into another with a dramatically larger or smaller gamut
by helping to automate an expansion or contraction of image saturation in such a
way as to give a pleasing and naturalistic result with no clipping. Choosing Saturation
Mapping from this menu enables saturation mapping of the image during the Timeline
to Output Color Space transformation that RCM performs when rendering or outputting
a timeline to video.
Saturation Knee: Sets the image level at which saturation mapping begins. Below this
level, no remapping is applied. All saturation values from this level on up are remapped
according to the Saturation Max. slider. A value of 1.0 is maximum saturation in the
currently selected output color space.
Saturation Max: The new maximum level to which you want to either raise or lower all
saturation values that are above the Saturation Knee setting. A value of 1.0 is maximum
saturation in the currently selected output color space.
Procedures for Using Resolve Color Management
Despite the seeming complexity of color management, using it is actually pretty simple, since
the goal is to enable Resolve to automatically take care of as much of the complexity as
possible, freeing you up to focus on doing creative work. In essence, all you have to do is (A)
turn RCM on, (B) assign the appropriate Input Color Space to each clip in the Media Pool based
on its source, and (C) choose the Timeline and Output Color Space combination you
want to use.
To enable Resolve Color Management:
Open the Color Management panel of the Project Settings, and choose DaVinci YRGB
Color Managed from the “Color Science” pop-up menu.
To choose the default color space for all clips with an unassigned Input Color Space:
Open the Color Management panel of the Project Settings, choose whether you want
to use Single Setting or Dual Setting color management, and then choose the desired
options from the “Input Colorspace” pop-up menu or menus. This setting determines
the color space of all clips you haven’t manually assigned an Input Color Space to. The
default setting is “Rec.709 Gamma 2.4.” If you choose “Bypass,” then all clips will
default to whatever color space is selected in the “Timeline Colorspace” pop-up menu.
To assign an Input Color Space to one or more selected clips in the Media Pool:
1 Select the clip or clips you want to assign. Since you can assign an Input Color Space to
more then one clip at a time, it will speed things up if you use a sort or find operation,
or create a Smart Bin or Smart Filter, to identify every clip from a specific camera using
a particular format, so you can assign them all at once.
2 Do one of the following:
In the Media Pool, right-click one of the selected clips, and choose the Input Color
Space and/or Input Gamma (if Dual Setting color management is enabled) that
corresponds to those clips from the contextual menu.
In the Color page, right-click any clip’s thumbnail in the Thumbnail timeline, and
choose the Input Color Space and/or Input Gamma (if Dual Setting color management
is enabled) that corresponds to those clips from the contextual menu.
145
Data Levels, Color Management, ACES, and HDR Part 1 – 6
To change the Timeline and Output Color Space:
Open the Color Management panel of the Project Settings, and choose the desired options
from the single menu or pair of pop-up menus for the “Timeline Colorspace” and “Output
Colorspace” RCM settings. The default settings are “Rec.709 Gamma 2.4.” If you choose
“Bypass” in the “Output Colorspace” pop-up menu, then the Output Color Space will match
whatever you’ve selected in the “Timeline Colorspace” pop-up menu.
To enable Gamut Mapping:
1 Open the Color Management panel of the Project Settings, and do one or both of
thefollowing:
a. Set the “Timeline to Output Tone Mapping” pop-up to Simple or Luminance Mapping.
b. Set the “Timeline to Output Gamut Mapping” pop-up to Saturation Mapping.
2 If necessary, adjust the Max. Timeline Luminance and Saturation Knee and/or
Saturation Max controls to refine the desired output.
All in all, using RCM is an easy way to ensure high image quality and a predictable starting point
when working on projects requiring log-encoded conversion, or that incorporate multiple
media formats.
Exporting Color Space Information to QuickTime Files
If you render QuickTime files from the Deliver page, then color space tags will be embedded
into each file based on either the Timeline Color Space (if Resolve Color Management is
disabled) or the Output Color Space (if Resolve Color Management is enabled).
The following tags will be written, if currently selected:
REC 709
REC 2020
REC 2021
CIE XYZ
P3DCI
P3D60
Color Management Using ACES
The ACES (Academy Color Encoding Specification) color space has been designed to make
scene-referred color management a reality for high-end digital cinema workflows. ACES also
makes it easier to extract high-precision, wide-latitude image data from raw camera formats, in
order to preserve high-quality image data from acquisition through the color grading process,
and to output high-quality data for broadcast viewing, film printing, or digital cinema encoding.
An oversimplification of the way ACES works is that every camera and acquisition device is
characterized to create an IDT (Input Device Transform) that specifies how media from that
device is converted into the ACES color space. The ACES gamut has been designed to be large
enough to encompass all visible light, with more than 25 stops of exposure latitude. In this way
ACES has been designed to be future-proof, taking into consideration advances in image
capture and distribution.
Meanwhile, an RRT (Reference Rendering Transform) is used to transform the data provided by
each image format’s IDT into standardized, high-precision, wide-latitude image data that in turn
is processed via an ODT (Output Device Transform). Different ODT settings correspond to each
146
Data Levels, Color Management, ACES, and HDR Part 1 – 6
standard of monitoring and output, and describe how to accurately convert the data within the
ACES color space into the gamut of that display in order to most accurately represent the image
in every situation. The RRT and ODT always work together.
ACES signal and processing flow
By using the ACES color space and specifying an IDT and an ODT, you can ingest media from
any capture device, grade it using a calibrated display, output it to any destination, and
preserve the color fidelity of the graded image.
Setting Up ACES in the Project Settings Window
There are four parameters available in the Color Science pop-up of the Color Management
panel of the Project Settings that let you set up DaVinci Resolve to use the ACES workflow:
Color science is: Using this pop-up menu, you can choose either DaVinci ACES,
or DaVinci ACEScc color science, which enables ACES processing throughout
DaVinci Resolve.
DaVinci ACEScc: Choose DaVinci ACEScc color science to apply a standard Cineon-
style log encoding to the ACES data before it is processed by Resolve. This well
defined common encoding makes it possible for ASC CDL values to be used across
systems using the same ACEScc encoding. After processing, a reverse encoding is
applied in order to output ACES linear data.
DaVinci ACEScct: A variation of ACEScc that adds a roll-off at the toe of the image
that’s different from the encoding of ACEScc, in order to make color correction lift
operations “feel” more like they do with film scans and LogC encoded images, which
makes it easier to raise the darkest values of the image and get milky shadows,
something that can be difficult with ACEScc. After processing, a reverse encoding is
applied in order to output ACES linear data.
ACES Version: When you’ve chosen one of the ACES color science options, this
pop-up becomes available to let you choose which version of ACES you want to use.
As of DaVinci Resolve 14, only ACES 1.0.3 is supported.
DaVinci Decoding
to Normal or Log
DaVinci Image
Processing
IDT ACES
Reencoding
ODT RRT
Monitoring
Image
Data
Disable
ODT for
Deliver
page
Output
147
Data Levels, Color Management, ACES, and HDR Part 1 – 6
ACES Input Transform: This pop-up menu lets you choose which IDT (Input Device
Transform) to use for the dominant media format in use. DaVinci Resolve currently
supports the following IDTs:
ALEXA/BMD Film/4K/4.6K/Canon 1D/5D/7D/C300/C500/Panasonic V35/Sony RAW/
slog2/slog3: Each listed camera has its own transform in this list that is specific to each
camera’s sensor. Some of these transforms (specifically the Canon C300 and C500
transforms) have multiple selections for daylight and tungsten, and for different
combinations of gamut and gamma.
Rec.709 (Camera): A deprecated legacy IDT for Rec. 709 that’s included for backward
compatibility. Converts the source data to linear based on Rec. 709 and transforms the
result to ACES, but while this transformation is technically correct, it’s not necessarily
pleasing after conversion through the matching ODT. For this reason, the academy
updated to the following Rec. 709 IDT, which is the inverse of the Rec. 709 ODT.
Rec.709: A standard transform designed to move media in the Rec. 709 color space
into the ACES color space. This option is used for any other file type that might be
imported, such as ProRes from Final Cut Pro, DNxHD from Media Composer, and any
media file captured from tape.
Rec.709 (D60 Sim): A standard transform designed to move media in the Rec. 709
color space with a white point of D60 into the ACES color space.
Rec.2020 (Camera): A deprecated legacy IDT for Rec. 2020 that’s included for
backward compatibility.
Rec.2020: This IDT transforms media created with the wide-gamut standard for
consumer and broadcast television.
Rec.2020 ST2084 (1000 nits): This IDT transforms media created within the wide-
gamut standard for consumer and broadcast television, using the SMPTE standard PQ
(ST.2084) tone curve for High Dynamic Range (HDR) postproduction. A single setting is
provided for HDR televisions with peak luminance at 1000 nits.
Rec.2020 ST2084 (1000 nits, P3 gamut clip): This IDT transforms media within with
the wide-gamut standard for consumer and broadcast television but with hard clipping
at the boundary of the P3 gamut, for televisions that are limited to the smaller P3 gamut
for digital cinema; also uses the SMPTE standard PQ (ST.2084) tone curve for High
Dynamic Range (HDR) postproduction. A single setting is provided for HDR televisions
with peak luminance at 1000 nits.
REDcolor/2/3/4/DRAGONcolor/2 and REDgamma3/4/REDlogFilm combinations:
Different combinations of the latest REDcolor, DRAGONcolor, REDgamma, and
REDlogFilm settings are provided for RED workflows.
DCDM (Camera): A deprecated legacy IDT for DCDM that’s included for backward
compatibility.
DCDM: This IDT transforms X’Y’Z’-encoded media with a gamma of 2.6.
P3-D60: Transforms RGB-encoded image data with a D60 white point, intended for
monitoring with a P3-compatible display using a D60 white point.
P3-D60 (Camera): A deprecated legacy IDT for P3 D60 that’s included for backward
compatibility.
P3-D60 ST2084 (1000/2000/4000 nits): Transforms an image that’s compatible with
the P3 color gamut, using the SMPTE standard PQ (ST.2084) tone curve for High
Dynamic Range (HDR) postproduction. Three settings for three different peak
luminance ranges are provided; which one is appropriate to use depends on the
maximum white level of the display used to create the media. Preliminary standards
exist for HDR displays with peak luminance at 1000 nits, 2000 nits, and 4000 nits.
148
Data Levels, Color Management, ACES, and HDR Part 1 – 6
P3-D65: Transforms RGB-encoded image data with a D65 white point, intended for
monitoring with a P3-compatible display using a D65 white point.
P3-D65 ST2084 (1000/2000/4000 nits): Transforms an image that’s compatible with
the P3 color gamut, using the SMPTE standard PQ (ST.2084) tone curve for High
Dynamic Range (HDR) postproduction. Three settings for three different peak
luminance ranges are provided; which one is appropriate to use depends on the
maximum white level of the display used to create the media. Preliminary standards
exist for HDR displays with peak luminance at 1000 nits, 2000 nits, and 4000 nits.
P3-DCI (Camera): A deprecated legacy IDT for P3 DCI that’s included for backward
compatibility.
ADX (10 or 16): 10-bit or 16-bit integer film-density encoding transforms meant for use if
you’re working with film scans that were initially encoded in an ACES workflow. This
transform is designed to maintain the variation in look between different film stocks.
sRGB: A standardized transform designed for media created for computer display in a
consumer environment.
sRGB (D60 Sim.): A standardized transform designed for media created for computer
display in a consumer environment.
ACEScc/ACEScct/ACEScg: Standardized transforms for each of these ACES standards.
If you’re working on a project that mixes media formats that require different IDTs, then you can
assign different IDTs to clips using the Media Pool’s contextual menu, or using the Clip
Attributes window, which is also accessible via the Media Pool’s contextual menu.
ACES Output Transform: This pop-up menu lets you choose an ODT (Output Device
Transform) with which to transform the image data for monitoring on your calibrated
display, and when exporting a timeline in the Deliver page. You can choose from the
following options:
Rec.709: This ODT is used for standard monitoring and deliverables for TV.
Rec.709 (D60 Sim): A standard transform designed to move media in the Rec. 709
color space with a white point of D60 into the ACES color space.
Rec.2020: This ODT is for compatibility with the wide-gamut standard for consumer
and broadcast television.
Rec.2020 ST2084 (1000 nits): This ODT transforms media created within the wide-
gamut standard for consumer and broadcast television, using the SMPTE standard PQ
(ST.2084) tone curve for High Dynamic Range (HDR) postproduction. A single setting is
provided for HDR televisions with peak luminance at 1000 nits.
Rec.2020 ST2084 (1000 nits, P3 gamut clip): This ODT transforms media within with
the wide-gamut standard for consumer and broadcast television but with hard clipping
at the boundary of the P3 gamut, for televisions that are limited to the smaller P3 gamut
for digital cinema; also uses the SMPTE standard PQ (ST.2084) tone curve for High
Dynamic Range (HDR) postproduction. A single setting is provided for HDR televisions
with peak luminance at 1000 nits.
DCDM: This ODT exports X’Y’Z’-encoded media with a gamma of 2.6 intended for
handoff to applications that will be re-encoding this data to create a DCP (Digital
Cinema Package) for digital cinema distribution. This can be displayed via an XYZ-
capable projector.
P3 D60: Outputs RGB-encoded image data with a D60 white point, intended for
monitoring with a P3-compatible display using a D60 white point.
149
Data Levels, Color Management, ACES, and HDR Part 1 – 6
P3 D60 ST2084 (1000/2000/4000 nits): Outputs an image that’s compatible with the
P3 color gamut, using the SMPTE standard PQ tone curve for High Dynamic Range
(HDR) postproduction. Three settings for three different peak luminance ranges are
provided; which one is appropriate to use depends on the maximum white level of your
display. Preliminary standards exist for HDR displays with peak luminance at 1000 nits,
2000 nits, and 4000 nits.
P3 DCI: Outputs RGB-encoded P3 image data with the native P3 white point, intended
for monitoring with a P3-compatible display(using its native white point).
P3-D65: Transforms RGB-encoded image data with a D65 white point, intended for
monitoring with a P3-compatible display using a D65 white point.
P3-D65 ST2084 (1000/2000/4000 nits): Transforms an image that’s compatible with
the P3 color gamut, using the SMPTE standard PQ (ST.2084) tone curve for High
Dynamic Range (HDR) postproduction. Three settings for three different peak
luminance ranges are provided; which one is appropriate to use depends on the
maximum white level of the display used to create the media. Preliminary standards
exist for HDR displays with peak luminance at 1000 nits, 2000 nits, and 4000 nits.
P3 DCI: A standardized ODT that outputs RGB-encoded image data with a D61 white
point, intended for use when outputting media for DCI mastering.
ADX (10 and 16): A standardized ODT designed for media destined for film output. Two
settings accommodate 10-bit and 16-bit output. This ODT is not meant to be used for
monitoring.
sRGB: A standardized transform designed for media created for computer display in a
consumer environment.
sRGB (D60 Sim.): A standardized ODT designed for media destined for computer
display in a consumer environment. Suitable for monitoring when grading programs
destined for the web.
ACEScc/ACEScct/ACEScg: Standardized transforms for each of these ACES standards.
You must manually select an ODT that matches your workflow and room setup when
working in ACES.
The Initial State of Clips When Working in ACES
Don’t worry if the initial state of each image file appears differently than what was monitored
originally on set. What’s important is that if the camera original media was well exposed, the IDT
used in ACES mode will retain the maximum amount of image data, and provide the maximum
available latitude for grading, regardless of how the image initially appears on the Timeline.
Tips For Rendering Out of an ACES Project
When choosing an output format in the Deliver page, keep the following in mind:
If you’ve delivering graded media for broadcast, set the ACES Output Device Transform
to be Rec. 709, then you can output to whatever media format is convenient for
your workflow.
When you’re delivering graded media files to another ACES-capable facility using the
DCDM or ADX ODCs, you should choose the OpenEXR RGB Half (uncompressed)
format in the Render Settings, and set the ACES Output Device Transform to “No
Output Device Transform.”
When you’re rendering media for long-term archival, you should choose the OpenEXR
RGB Half (uncompressed) format in the Render Settings, and set the ACES Output
Device Transform to “No Output Device Transform.”

150
Data Levels, Color Management, ACES, and HDR Part 1 – 6
High Dynamic Range (HDR)
Grading in Resolve
The HDR features found in DaVinci Resolve are only available in DaVinci Resolve Studio.
High Dynamic Range (HDR) video describes an emerging family of video encoding and
distribution technologies designed to enable a new generation of television displays to play
video capable of intensely bright highlights and increased saturation. The general idea is that
the majority of an HDR image will be graded similarly to how a Standard Dynamic Range (SDR)
image is graded now, with the shadows, midtones, and low highlights being mostly the same
between traditionally SDR and HDR-graded images, to maintain a comfortable viewing
experience and easier backward compatibility. However, HDR provides abundant additional
headroom for very bright highlights and color saturation that far exceed what has been visible in
SDR television and cinema, without clipping, that enable the colorist to create more vivid and
life-like highlights in images such as sunsets, lit clouds, firelight, explosions, sparkles, and other
intensely bright and colorful imagery. This not only provides more life-like lighting intensity and
saturation, but it also dramatically expands the contrast available in the scene. For example, an
SDR display may have a peak luminance level of 100 “nits” (cd/m2), but HDR displays may have
peak luminance levels of 500, 1000, or even 4000 nits.
However, because it’s an emerging technology, the technical standards being proposed far
exceed what the first few generations of consumer displays are capable of. At the time of this
writing, consumer televisions are only capable of outputting closer to 300, 500, or 800 nits,
and are saddled with automatic brightness limiting (ABL) circuits in order to limit power
consumption to acceptable levels for home use, which means that only a certain percentage of
the picture may reach these peak values at any one time. This is fine, because the point of HDR
is not that you’re making the entire image brighter, it’s that you have more headroom for high
saturation and specific bright highlights.
For this reason, HDR standards focus on describing what displays should be capable of, not
how these levels are to be used. This means that the question of how to utilize the expansive
headroom for brightness and saturation that HDR enables is fully within the domain of the
colorist, as a series of creative decisions that must be made regarding how to assign the
varying levels of brightness that are available in your source media to the HDR standard you’re
mastering to as you grade.
The Different Formats of HDR
While different HDR technologiesuse different methods to map the video levels of your
program to an HDR display’s capabilities, they all output a “near-logarithmically” encoded signal
that requires a compatible television that’s capable of correctly stretchingthis signal into its
“normalized” form for viewing. This means if you look at an HDR signal that’s output from
thevideo interface of your grading workstation on an SDR display, it will look flat, desaturated,
and unappealing until it’s plugged into your HDR display of choice.
A graded HDR image being output looks similar to a log-encoded image
151
Data Levels, Color Management, ACES, and HDR Part 1 – 6
At the time of this writing, there are three approaches to mastering HDR that DaVinci Resolve is
capable of supporting, includingDolby Vision, HDR 10andST.2084 (derived from the PQ curve
developed by Dolby), and Hybrid Log-Gamma (HLG).Each of theseHDR standards focuses on
describing how an HDR signal isencoded for output and later mapped to the output of an
HDR display.
Each of these standardsis most easily enabled usingResolve Color Management (RCM) via
Color Space options in the Color Management panel of the Project Settings. Alternately, LUTs
are available for each of these color space conversions if you want to do things the old
fashioned way, but Resolve Color Management has become so mature in the last year that, from
experience, I personally recommend this approach to handling HDR in Resolve.
However, thesestandards have nothing to say abouthow these HDR-strength levels are to be
used creatively. This means that the question of how to utilize the expansive headroom for
brightness and saturation that HDR enables is fully within the domain of the colorist, as a series
of creative decisions that must be made regarding how to assign the range of highlightsthat are
available in your source media to the above-100 nit HDR levelsyou’re mastering to as you
grade, given the peak luminance level that you’re mastering with. Which HDR peak luminance
level you use (1000 nit, 4000 nit) probably depends on which monitor you have access to, and
which HDR mastering technology you’re using.
The following sections will describe how to work with Dolby Vision, HDR 10, and Hybrid
Log-Gamma in Resolve.
Dolby Vision
Long a pioneer and champion of the concept of HDR for enhancing the consumer video
experience, Dolby Labs has developed a method for delivering HDR called Dolby Vision. Dolby
Vision uses the SMPTE 2084 “PQ” EOTF along with colorist-controlled metadata that maintains
a program’s artistic intent across multiple displays capable of a wide luminance range, from 0 to
10,000 cd/m2. Resolve provides access to the SMPTE 2084 PQ EOTF settings required for
mastering Dolby Vision, both as Color Space settings in RCM and as a set of 3D LUTs. While
Dolby Vision content is not limited to a particular color space, Resolve Color Management
provides a P3 D65 setting that matches the capabilities of the current generation of mastering
monitors available from Dolby.
However, to accommodate backward compatibility with SDR displays, as well as the
varyingmaximum brightness of different makes and models of HDR consumer displays, Dolby
Vision offers both dual layer backward compatible and single layer non-backward compatible
output options (mastering is identical for both). The dual layer backward compatible output
option accommodates a two-stream video delivery method thatconsists of abase layer and an
enhancement layer with metadata. On an SDR television, only the base layer is played, which
contains a Rec. 709-compatible imagethat’s a colorist-guidedapproximation of the HDR image.
On a Dolby Vision-enabled HDR television, however, both the base and enhancement layers
will be recombined, using additional “artistic guidance” metadata generated by the colorist to
determine how the resulting HDR image highlights should be scaled to fit the varied peakwhite
levels and color volume performance that’s available on any given Dolby Vision television.
Those, in a nutshell, arethe twin advantages of the Dolby Vision system. It’s backward
compatible with SDR televisions, and it’s capable of intelligently scaling the HDR highlights to
provide the best representationof the mastered image forwhatever peak luminance and color
volume a particular television is capable of. All of this is guided by decisions madeby the
colorist during the grade.
152
Data Levels, Color Management, ACES, and HDR Part 1 – 6
So, who’s using Dolby Vision? At the time of this writing, all seven major Hollywood studios are
mastering in Dolby Vision for Cinema. Studios that have pledged support to master content in
Dolby Vision for home distribution include Universal, Warner Brothers, Sony Pictures, and MGM.
Content providers that have agreed to distribute streaming Dolby Vision content include Netflix,
Vudu, and Amazon. If you want to watch Dolby Vision content on television at home, consumer
display manufacturers LG, TCL, Vizio, and HiSense have all announced models with Dolby
Vision support.
DaVinci Resolve Hardware Setup forDolby Vision
To master with Dolby Vision in DaVinci Resolve, you need a somewhat elaborate hardware
setup, consisting of the following equipment:
Your DaVinci Resolve grading workstation, outputting via either a DeckLink 4K Extreme
12G or an UltraStudio 4K Extreme video interface
ADolby Vision Certified HDR Mastering Monitor
An SDR (probably Rec. 709-calibrated) display
A standalone hardware video processor called theContent Management Unit (CMU),
which is a standard computer platform with a Video I/O card. The CMU is only available
from Dolby Authorized System Integrators; please contact Dolby for an Authorized
Systems Integrator near you.
A video router such as the BMD Smart Videohub
This hardware is all connected as seen in the following illustration:
Illustration of how to connect the necessary equipment for Dolby Vision grading in Resolve
Your Resolve workstation will connect its dual SDI outputs to the BMD Smart Videohub, which
splits the video signal to two mirrored sets of SDI outputs. One mirrored pair of SDI outputs
goes to your HDR display. The other mirrored pair of SDI outputs goes to the CMU(Content
Mapping Unit), which is itself connected to your SDR display via SDI. Lastly, the Resolve
workstation is connected to the Dolby CMU via Gigabit Ethernet to enable the CMU to
communicate back toResolve.
The CMU is an off-the-shelf video processor that uses a combination of proprietary automatic
algorithms and colorist-adjustable metadata within Resolve to define how an HDR-graded
video shouldbe transformed into an SDR picture that can be displayed on a standard Rec. 709
display, as well as how theenhancement layer should scale itself to varying peak
luminance levels.
Master
HDR Monitor
SDR or
EDR Monitor
Dolby CMU
DeckLink 4K
Extreme 12G
Gigabit Ethernet
SDI
A-Link
B-Link
DaVinci Resolve
A-Link
B-Link
A-Link
B-Link
A-Link
B-Link
BMD Smart Videohub
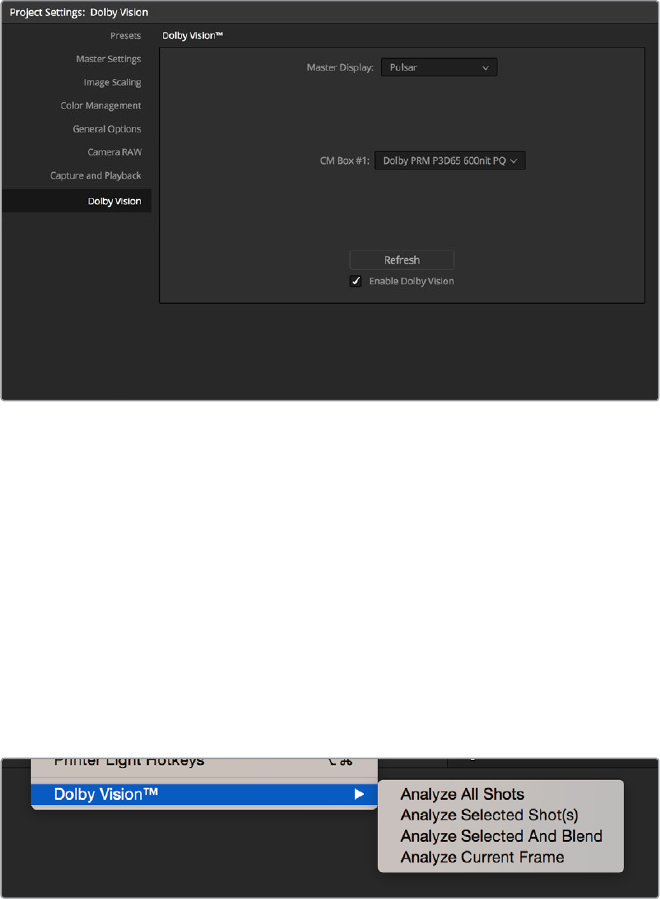
153
Data Levels, Color Management, ACES, and HDR Part 1 – 6
Authorizing Resolve to Work With Dolby Vision
To expose the Dolby Vision controls in DaVinci Resolve Studio, you need a Dolby Vision
Mastering license from Dolby. To install this license, refer to the instructions provided with the
license from Dolby. After installation, analyze any clip using the Color > Dolby Vision submenu
controls, and the Dolby Vision palette should become visible.
Dolby Vision Controls in DaVinci Resolve
When your DaVinci Resolve workstation is authorized, a variety of controls become available in
DaVinci Resolve, starting with the Dolby Vision panel in the Project Settings, which exposes
settings for choosing what kind of Master Display you’re using, how the CMU should be
configured to output, a button to let you refresh your connection to the CMU, and a checkbox
that enables and disables Dolby Vision controls.
The Dolby Vision panel that appears in the Project Settings
All of the Dolby Vision analysis commands appear in the Color > Dolby Vision submenu. There
are four commands that let you analyze clips in the Timeline in different ways:
Analyze All Shots: Automatically analyzes each clip in the Timeline and stores the
results individually.
Analyze Selected Shot(s): Only analyzes selected shots in the Timeline.
Analyze Selected And Blend: Analyzed multiple selected shots and averages the
result, which is saved to each clip. Useful to save time when analyzing multiple clips
that have identical content.
Analyze Current Frame: A fast way to analyze clips where a single frame is
representative of the entire shot.
The Analyze commands in the Color > Dolby Vision menu
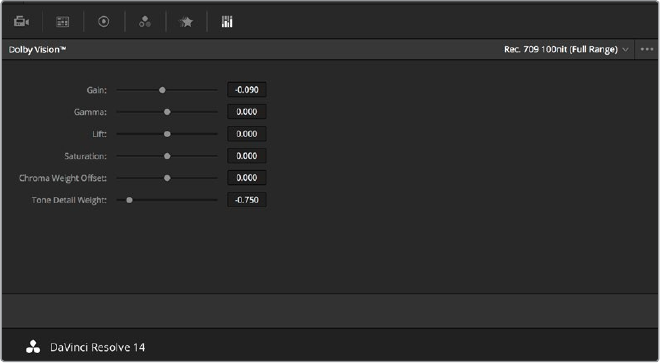
154
Data Levels, Color Management, ACES, and HDR Part 1 – 6
A Dolby Vision palette exposes a set of six controls, consisting of luminance-only Lift/Gamma/
Gain controls (that work slightly differently than those found in the Color Wheels palette),
Saturation, Chroma Weight Offset (which darkens parts of the picture to preserve colorfulness
that’s clipping in Rec. 709), and Tone Detail Weight, which preserves contrast detail in the
highlights that might otherwise be lost when the highlights are mapped to lower dynamic
ranges, usually due to clipping. Currently, this control is disabled for 100 nit/Rec. 709 grades (for
grades higher than 100 nits, increasing Tone Detail Weight increases the amount of highlight
detail that’s preserved).
Controls found in the Dolby Vision palette are only visible once you’ve
authorized your system with a special key, available from Dolby
These Dolby Vision analysis and trim controlsin DaVinci Resolve send metadata to the CMU by
encoding it into the first line of the SDI output. This metadata guideshow the CMU makes this
transformation, because the CMU is actually the functional equivalent of the Dolby Vision chip
that’s inside each Dolby Vision-enabled television; what you’re really doing is using the CMU to
makeyour SDR display simulatea 100 nit Dolby Vision television.
Additionally, the CMU can be used to output 600 nit, 1000 nit, and 2000 nit versions of your
program, if you want to see how your master will scale to those peak luminance levels. This, of
course, requires the CMU to be connected to a display that’s capable of being set to those
peak luminance output levels.
Though not required, you have the option to visually trim your grade at up to four different peak
luminance levels, including 100 nit, 600 nit, 1000 nit and 2000 nit reference points, so you can
optimize a program’s visuals for the peak luminance and color volume performance of many
different televisions with a much finer degree of control. If you take this extra step, Dolby
Vision-compatible televisions will use the artistic guidance metadata you generate in each trim
pass to ensure the creative intent is preserved as closely as possible, in an attempt to provide
the viewer with the best possible representation of the director’s intent.
For example, if a program were graded relative to a 4000 nit display, along with a single 100 nit
Rec. 709 trim pass, then a Dolby Vision-compatible television with 750 nit peak output will
reference the 100 nit trim pass artistic guidance metadata in order to come up with the best way
of “splitting the difference” to output the signal correctly. On the other hand, were the colorist to
do three trim passes, the first at 100 nits, a second at 600 nits, and a third at 1000 nits, then a
750 nit-capable Dolby Vision television would be able to use the 600 and 1000 nit artistic intent
metadata to output more accurate HDR-strength highlights that take better advantage of the
750 nit output of that television.
155
Data Levels, Color Management, ACES, and HDR Part 1 – 6
Dolby Vision Certified Mastering Monitors
At the time of this writing, only three displays have been certified as Dolby Vision Certified
Mastering Monitors. Requirements include a minimum peak brightness of 1000 nits, a 200,000:1
contrast ratio, greater than Rec. 709 color gamut (preferably P3), and native support for SMPTE
ST.2084 (otherwise known as the PQ curve) as the EOTF. These displays include:
The Sony BVM X 300 (30”, 1000 nit, 4K)
The Dolby PRM 32FHD (32”, 2000 nit, 1080)
The Dolby Pulsar (42”, 4000 nit, 1080)
Of these, only the Sony is commercially available. The Dolby monitors are not commercially
available and are provided only in limited availability from Dolby.
When gradingDolby Vision, the HDR monitor should set to use P3/D65.
Setting Up Resolve Color Management ForGrading HDR
Once the hardware is set up, setting up Resolve itself to output HDR forDolby Vision mastering
is easy using Resolve Color Management (RCM). This procedure is pretty much the same no
matter which HDR mastering technology you’re using; only specific Output Color Space settings
will differ.
1 Set Color Science to DaVinci YRGB Color Managed in the Color Management panel of
the Project Settings.
2 Then, open the Color Management panel, and set the Output Color Space pop-up to
the ST.2084 setting that corresponds to the peak luminance, in nits, of the grading
display you’re using. For example, if you’re grading with a Sony BVM X300, choose
ST.2084 1000 nits. Be aware that whichever HDR setting you choose will impose a hard
clip at the maximum nit value supported by that setting. This is to prevent accidentally
overdriving HDR displays, which can have negativeconsequences.
ST.2084 300 nit
ST.2084 500 nit
ST.2084 800 nit
ST.2084 1000 nit
ST.2084 2000 nit
ST.2084 4000 nit
This setting is only the output EOTF (a sort of gamma transform, if you will, using the
terminology that DaVinci Resolve’s UI has used up until now).
3 Next, choose a setting in the Timeline Color Space that corresponds to the gamut you
want to use for grading, and that will be output. For example, if you want to grade the
Timeline as alog-encoded signal and “normalize” it yourself, you can choose ARRI Log
C or Cineon Film Log (this workflow is highly recommended for the best results). If you
would rather save time by having DaVinci Resolve normalize the Timelineto P3-D65
and grade that way, you can choose thatsetting as well. In terms of defining the output
gamut, the rule is that if “Use Separate Color Space and Gamma” is turned off, the
Timeline Color Space setting will define your output gamut. If “Use Separate Color
Space and Gamma” is turned on, then you can specify whatever gamut you want in
the leftOutput Color Space pop-up menu, and choose the EOTF from the right pop-up
menu (as described in step 2).
156
Data Levels, Color Management, ACES, and HDR Part 1 – 6
4 Be aware that, when it’s being properly output, HDR ST.2084 signals appear very
“log-like,” in order to pack awide dynamic range into the bandwidth of a standard
video signal. It’s theHDR display itself that “normalizes” this log-encodedimage to look
as it should. For this reason, the image you see in your Color page Viewer is going to
appear flat and log-like, even though the image being displayed on your HDR reference
display looks vivid and correct. If you’re using a typical SDR computer display, and you
want to make the image in the Color Page Viewer look “normalized” at the expense of
clipping the HDR highlights (in the Viewer, not in the grade), you canuse the 3D Color
Viewer Lookup Tablesetting in the Color Management panel of the Project Settings
to assign the appropriate ST.2084 setting with a peak nit levelthat corresponds to the
HDR broadcast display you’re outputting to.
5 Additionally, the “Timelineresolution” and “Pixel aspect ratio” (in the project settings)
that your project is set to use is savedto the Dolby Vision metadata, so make sure your
project is set to the final Timeline resolution and PAR before you begin grading.
Resolve Grading Workflow For Dolby Vision
Oncethe hardware and software is all set up, you’re ready to begin grading Dolby Vision HDR.
The workflow is fairly straightforward.
1 First, grade the HDR image on your DolbyVision Certified Mastering Monitor to look as
you want it to. Dolby recommends starting by setting the look of the HDR image, to set
the overall intention for the grade.
2 When using various grading controls in the Color page to grade HDR images, you may
find it useful to enable theHDR Mode of the node you’re working on by right-clicking
that node in the Node Editor and choosing HDR mode from the contextual menu. This
settingadaptsthat node’scontrols to work within an expanded HDR range. Practically
speaking, this makes controls that operate by letting you make adjustments at different
tonal ranges, such as Custom Curves, Soft Clip, etcetera, work more easilywith wide-
latitude signals.
3 When you’re happy with the HDR grade, click the Analysis button in the Dolby Vision
palette. This analyzesevery pixel of every frame ofthe current shot, and performs and
stores a statistical analysisthat is sent to the CMU to guide itsautomatic conversion of
the HDR signal to an SDR signal.
4 If you’re not happy with the automatic conversion, use the Lift/Gamma/Gain/Chroma
Weight/Chroma Gain controls in the Dolby Vision palette to manually “trim” the result to
the best possible Rec. 709 approximation of the HDR grade you created in step 1. This
stores what Dolby refers to as “artistic guidance” metadata.
5 If you obtain a good result, then move on to the next shot and continue work. If you
cannot obtain a good result, and worry that you may have gone too far with your HDR
grade to derive an acceptable SDR downconvert, you can always trim the HDR grade a
bit, and thenre-trim the SDR grade to try and achieve a better downconversion. Dolby
recommends that if you make significant changes to the HDR master, particularly if you
modify the blacks or the peak highlights, you should re-analyze the scene. However, if
you only make small changes, then reanalyzing is not strictly required.
As you can see, the generalidea promoted by Dolby is that a colorist will focus on gradingthe
HDR picture relative to the 1000, 2000, 4000, or higher nit display that is being used, and will
then relyonthe colorist to use the Dolby Vision controls to “trim” this into a 100 nit SDR
versionwith artistic guidance. This “artistic guidance” metadata is saved as part of the mastered
media, and it’s used to more intelligently scale the HDR highlights to fit within any given HDR
display’s peak highlights, to handle how to downconvert the image for SDR displays, and also
how to respond when a television’s ABL circuit kicks in. In all of these cases, the colorist’s
artistic intent is used to guide all dynamic adjustments to the content.
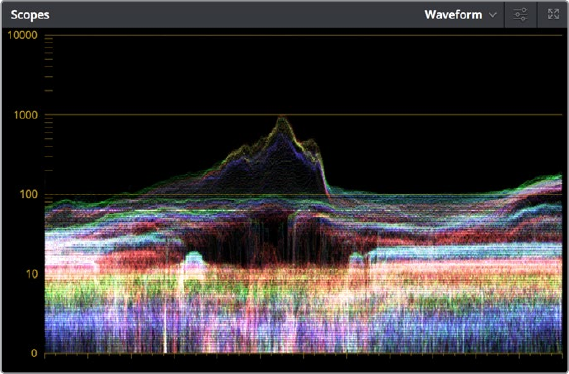
157
Data Levels, Color Management, ACES, and HDR Part 1 – 6
Analyzing HDR Signals Using Scopes
When you’re using waveform scopes of any kind, including parade and overlay scopes, the
signal will fit withinthe 10-bit scale much differently owing to the way HDR is encoded. The
following chart of values will make it easier to understand what you’re seeing:
1023 = 10,000 nits (no known display)
920 = 4000 nits (peak luminance on a Dolby Pulsar Monitor)
844 = 2000 nits (peak luminance on a Dolby PRM 32FHD)
767 = 1000 nits (peak luminance on a Sony BVM X300)
528 = 108 nits (Dolby Cinema projector peak luminance)
519 = 100 nits
447 = 48 nits (DCI projection and Dolby Cinema 3D peak luminance)
0 = 0 nits
If you’re monitoring with the built-in video scopes in DaVinci Resolve, you can turn on the
“Enable HDR Scopes for ST.2084” checkbox in the Color panel of the User Preferences,
whichwill replace the 10-bit scale of the video scopes with a scale based on “nit” values
(or cd/m2) instead.
The Video Scopes with “Enable HDR Scopes for ST.2084”
enabled in the Color panel of the User Preferences
If you’re unsatisfied with the amount of detailyou’re seeing in the 0 – 519 range (0 – 100 nits) of
the video scope graphs, then you can use the 3D Scopes Lookup Table setting in the Color
Management panel of the Project Settings to assign the appropriate “HDR X nits to Gamma 2.4
LUT,” with X beingthe peak nit levelof the HDR display you’re using. This converts the way the
scopes are drawn so that the0 – 100 nit range of the signal takes up the entire range of the
scopes, from 0 through 1023. This will pushthe HDR-strength highlights up past the top of the
visible area of the scopes, making them invisible, but it willmake it easier to seedetail in the
midtones of the image.
Rendering a Dolby Vision Master
To deliver a Dolby Vision master after you’ve finished grading, you wantmake sure that the
Output Color Space of the Color Management panel of the Project Settings is set to the
appropriate HDR ST.2084 setting, based on the peak luminance in nits of your HDR display.
Then, you want to set your render up to use one of the following Format/Codec combinations:
TIFF, RGB 16-bit
EXR, RBG-half (no compression)
158
Data Levels, Color Management, ACES, and HDR Part 1 – 6
When you render for tapeless delivery, the artistic intent metadata is rendered into a Dolby
Vision XML and delivered with either the Tiffs or EXR renders. These two sets of files are then
delivered to afacility that’s capable of creating the Dolby Vision Mezzanine File (this cannot be
done in Resolve).
Playing Dolby Vision at Home
On distribution, televisions that have licensed Dolby Vision use the base layer and
enhancement layer+metadata to determine how the HDR image should be rendered given each
display’s particular peak luminance capabilities. Distributors, for their part, need to provide a
minimum 10-bit signal to accommodate Dolby Vision’s wide range. As a result, DolbyVision
videos will look as they should on displays from100 nitsthrough1000 nits peak luminance and
above, scalingthe enhancement layer’s HDR-strength highlights to whatever peak luminance
level is possible on that display and recombining these highlights with the base layer, with no
unpredictable clipping.
SMPTE ST.2084, Ultra HD Premium, and HDR 10
Many displaymanufacturers who have no interest in licensing Dolby Vision for inclusion in their
displays are instead going with the simpler method of engineering their displays to be
compatible with SMPTE ST.2084. It requires only a single stream for distribution, there are no
licensing fees, no special hardware is required to master for it (other than an HDR mastering
display such as the Sony X300), and there’s no special metadata to write or deal with (at
this time).
Interestingly, SMPTE ST.2084 ratifies the “PQ” EOTF that was developed by Dolby and that’s
used by Dolby Vision that accommodates displays capable of peak luminance up to 10,000 cd/
m2 into a general standard. This standard requires at minimum a 10-bit signal for distribution,
and the EOTF is described such that the video signal utilizes the available code values of a
10-bit signal as efficiently as possible, while allowing for such a wide range of luminance in
the image.
SMPTE ST.2084 is also part of the “Ultra HD Premium” industry specification, which stipulates
that televisions bearing the Ultra HD Premium logo have the following capabilities:
A minimum UHD resolution of 3840 x 2160
A minimum gamut of 90% of P3
A minimum dynamic range of either 0.05 nits black to 1000 nits peak luminance (to
accommodate LCD displays), or 0.0005 nits black to 540 nits peak luminance (to
accommodate OLED displays)
Compatibility with SMPTE ST.2084
Finally, ST.2084 has been included inthe HDR 10 standard adopted by the Blu-ray Disc
Association (BDA) that covers Ultra HD Blu-ray. HDR 10 stipulates that Ultra HD Blu-ray discs
have the following characteristics:
UHDresolution of 3840 x 2160
Up to the Rec. 2020 gamut
SMPTE ST.2084
Mastered with a peak luminance of 1000 nits
The downside is that, by itself, this EOTF is not backwards compatible with Rec. 709 displays
using BT.1886 (although theemerging metadata standardSMPTE ST.2086 seeks to address
this). Furthermore, no provision is made to scale the above-100 nit portion of the image to
accommodate different displays with differing peak luminance levels. For example, if you grade
and masteran image to have peak luminance of 4000 nits, and you play that signal on an
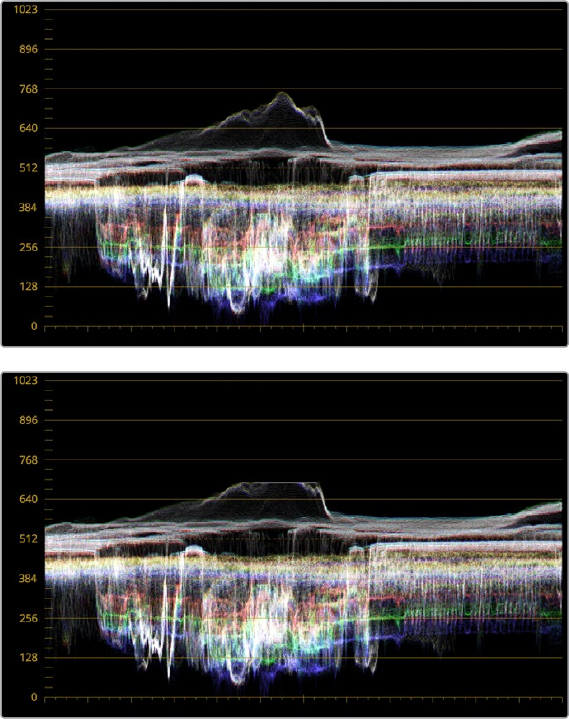
159
Data Levels, Color Management, ACES, and HDR Part 1 – 6
ST.2084-compatible television that’s only capable of 800 nits, then everything above 800 nits
will be clipped, while everything below 800 nits will look exactly as it should relative to
your grade.
This is because ST.2084 is referenced toabsolute luminance. If you grade an HDR image
referencinga 1000 nit peak luminance display, as is recommended by HDR10, then any display
using ST.2084 will respect and reproduce all levels from the HDR signal that it’s capable of
reproducing as you graded them, up to the maximum peak luminance level it can reproduce.
For example, on an HDR10-compatible television capable of outputting 500 nits, all mastered
levels from 501 – 1000 will be clipped, as seen in the screenshot below.
Comparing the original 1000 nit waveform representing the grading monitor to
a 500 nit clipped waveform representing the consumer television
How much of a problem this is really depends on how you choose to grade your HDR-strength
highlights. If you’re only raisingthe most extreme peak highlights to maximum HDR-strength
levels, then it’s entirely possible that the audience might not notice that the display is only
outputting 800 nits worth of signal and clipping any image details from 801– 1000 nits because
there weren’t that many details above 800anyway. Or, if you’re gradinglarge explosive fireballs
up above 800 nits in their entirety because it looks cool, then maybe the audience will notice.
The bottom line is, when you’re grading for displays that are only capable of ST.2084, you need
to think about these sorts of things.
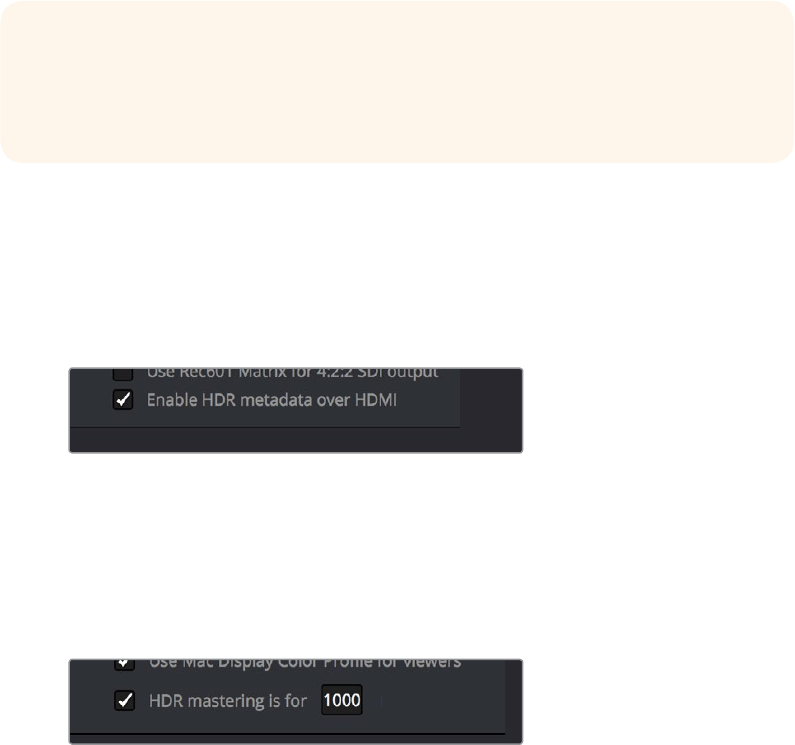
160
Data Levels, Color Management, ACES, and HDR Part 1 – 6
Monitoring and Grading to ST.2084 in DaVinci Resolve
Monitoring an ST.2084 image is as simple as getting a ST.2084-compatible HDR display (such
as the Sony X300), and connecting the output of your video interface to the input of the display.
In the case of the Sony X300, which is a 4K capable display, you can connect four SDI outputs
from a DeckLink 4K Extreme 12G with the optional DeckLink 4K Extreme 12G Quad SDI
daughtercard, or an UltraStudio 4K Extreme, directly from your grading workstation to the X300,
and you’re ready to go.
Setting up Resolve Color Management to gradefor ST.2084 is identical to setting up tograde
for Dolby Vision. You’ll also monitor the video scopes identically, and output a master
identically, given that both standards rely uponthe same PQ curve.
Connecting to HDR-Capable Displays using HDMI 2.0a
If you have a DeckLink 4K Extreme 12G or an UltraStudio 4K Extreme video interface, then
DaVinci Resolve 12.5 and above can output the metadata necessary to correctly display HDR
video signals to display devices using HDMI 2.0a when you turn on the “Enable HDR metadata
over HDMI” checkbox in the Master Settings panel of the Project Settings.
The Enable HDR metadata over HDMI option in the Master Settings panel
of the Project Settings lets you output HDR via HDMI 2.0a
When you do so, a setting in the Color Management panel of the Project Settings,
“HDRmastering is for X” lets you specify the output, in nits, to be inserted as metadata into the
HDMI stream being output, so that the display you’re connecting to correctly interprets it. The
output you specify should match what your display is expecting.
The HDR mastering is for setting lets you insert metadata
for HDR output via HDMI 2.0a
Hybrid Log-Gamma (HLG)
The BBC and NHK jointly developed another method of encoding HDR video, referred to as
Hybrid Log-Gamma (HLG). The goal of HLG was to develop a method of mastering HDR video
that would support a range of displays of different peak luminance capabilities without
additional metadata, that could be broadcast via a single stream of data, that would fit intoa
10-bit signal, and that in the words of the ITU-R Draft Recommendation BT.HDR, “offers a
degree of compatibility with legacy displays by more closely matching the previous established
television transfer curves.”
TIP: If you’re monitoring with the built-in video scopes in Resolve, you can turn on the
“Enable HDR Scopes for ST.2084” checkbox in the Color panel of the User
Preferences, which will replace the 10-bit scale of the video scopes with a scale based
on “nit” values (or cd/m2) instead.
161
Data Levels, Color Management, ACES, and HDR Part 1 – 6
The basic idea is that the HLG EOTF functions very similarly to BT.1886 from 0 to 0.6 of the
signal (with a typical 0 – 1 range), while 0.6 to 1.0 smoothly segues into logarithmic encoding for
the highlights. This means that, if you just send an HDR Hybrid Log-Gammasignal to an
SDRdisplay, you’d be able to see much of the image identically to the way it would appear on
an HDR display, and the highlights would be compressed to present an acceptable amount of
detail for SDR broadcast.
On a Hybrid Log-Gamma compatible HDR display, however, the log-like highlights of the image
(not the BT.1886-like bottom portion of the signal, just the highlights) would be stretched back
out, relative to whatever peak luminance level a given HDR television is capable of outputting,
to return the image to its true HDR glory.This is different fromthe HDR10 method of distribution
described previously, in which the graded signal is referenced toabsolute luminance levels
dictated by ST.2084, andlevels that cannot be represented by a given display will be clipped.
And while this facility to support multiple HDR displays with differing peak luminance levels is
somewhat analogous to Dolby Vision’s ability to tailor HDR output to the unique peak luminance
levels of any given Dolby Vision-compatible television, HLG requires no additional metadata to
guide how the highlights are scaled, which depending on your point of view is either a benefit
(less work), or a deficiency (no artistic guidance to make sure the highlights are being scaled in
the best possible way).
As is true for most things, youdon’t get something for nothing. The BBC White Paper WHP 309
states that, for a 2000 cd/m2 HDR display with a black level of 0.01 cd/m2, up to 17.6 stops of
dynamic range without visible quantization artifacts (“banding”) is possible. BBC White Paper
WHP 286 states that the proposed HLG EOTF should support displays up to about 5000 nits.
So, partially, the backwards compatibility that HLG makes possible is due in part to discarding
long-term support for 10,000 nit displays. However, given that the brightest commercially-
available HDR display at the time of this writing is only 1000 nits peak luminance (the Sony
X300), and the brightest HDR display currently in use outputs 4000 nits peak luminance (the
experimental Dolby Pulsar), it’s an open question whether or notover 5000 nits is even
necessary for consumer enjoyment.
At the time of this writing, only Sony has demonstrated consumer HDR televisions capable of
displaying HLG encoded video. DaVinci Resolve, however, supports this standard through
Resolve Color Management.
Grading Hybrid Log-Gammain DaVinci Resolve
Monitoring an ST.2084 image is as simple as getting a Hybrid Log-Gamma-compatible HDR
display, and connecting the output of your video interface to the input of the display.
Setting up Resolve Color Management to gradefor HLGisidentical to setting up togradefor
Dolby Vision, except that there are four HLG settings to choose from for the Output
Color Space:
Rec.709 HLG ARIB STD-B67
Rec.2020 HLG ARIB STD-B67
Rec.2100 HLG
Rec.2100 HLG (Scene)
Optionally, if you choose to enable “Use Separate Color Space and Gamma,” you can choose
either Rec. 2020, Rec. 2021, or Rec. 709 as your gamut, and Rec. 2100 HLG as your EOTF.
The levels you’ll be monitoring in your scopes will be different from the table of data to “nit”
values listed previously for grading to the PQ EOTF.
162
Data Levels, Color Management, ACES, and HDR Part 1 – 6
Simultaneous SDR and
HDR Output While Grading
It’s usually the case that you need to deliver both SDR and HDR versions of a program as
deliverables. Opinions vary about whether it’s better to grade the HDR version first and then do
a trim pass to produce the SDR version, versus grading the SDR version first and then doing a
trim pass to produce the HDR version. Either way, it can be a big help to see both the HDR and
SDR signals output at the same time to displays that are side-by-side, so you can directly
compare them as you trim.
The Dolby Vision workflow accounts for this by virtue of the hardware setup that’s required, but
if you’re grading using a more generic HDR 10 or HLG workflow, there’s still a way you can set
this up using the Stereo 3D features that have been upgraded in DaVinci Resolve 12.5.1.
What you do is to convert your media and timeline to stereo, so that you can use the Stereo 3D
palette to keep all of your SDR grades associated with one eye’s output, and all your HDR grades
associated with the other eye’s output. You can switch back and forth between each eye using
the Stereo 3D palette’s controls to choose which version you’re grading, and as you work, the
SDR and HDR versions of each shot will be simultaneously output to different displays via your
compatible Blackmagic Design video interface’s dual SDI outputs. It’s a bit of a hack, but it works.
You Can’t Use Resolve Color Management
While Outputting SDR and HDR
Resolve Color Management (RCM) cannot be used in this workflow, because it doesn’t let you
choose different Output Color Space settings for each SDI output. Instead, you must turn RCM off,
and use the built-in HDR LUTs found in the 3D LUT submenu of each Corrector node’s contextual
menu in the Node Editor of the Color page to convert one of the two streams into HDR.
The easiest way to do this is to apply the necessary LUT using the Timeline grade, since that’s
the very last operation applied to every clip in a timeline. When you work on a timeline in
stereo, the left and right eye streams of the Timeline grade are capable of holding separate
corrections, which is a new feature as of 12.5.1.
Setting Up to Display Dual Video
Streams via Two SDI Outputs
Originally intended for high-quality Stereo 3D monitoring, two separate SDI signals can be
simultaneously output at full resolution using one of the following Blackmagic Design video
interfaces:
DeckLink HD Extreme 3D+
DeckLink 4K Extreme
DeckLink 4K Extreme 12G
UltraStudio 4K
UltraStudio 4K Extreme
UltraStudio 4K Extreme 3

163
Data Levels, Color Management, ACES, and HDR Part 1 – 6
The following procedures describe how to set up stereo 3D monitoring in two different ways.
Monitoring via dual SDI to dual SDI:
1 Open the Master Settings panel of the Project Settings, then do the following:
Make sure Video Connection is set to YUV 4:2:2 SDI.
Turn on the “Use left and right eye SDI output” checkbox.
2 Open the Stereo 3D palette, and do the following:
Set Vision to Stereo.
Set the Out pop-up menu to None.
Converting Mono Clips or an Entire Timeline to Stereo
If you want to grade an HDR and non-HDR version of your timeline at the same time while
outputting each to a separate display for monitoring, you need to do the following:
Convert the clips used by that timeline from mono into stereo so each clip can have
separate grades for each of the two SDI streams you’ll be outputting.
Convert that timeline into a stereo timeline to enable dual-SDI output.
Apply an HDR LUT to the Timeline grade of the left- or right-eye video stream so that
stream can be output to the SDI output being connected to an HDR display.
First, you need to convert your media into stereo clips. This won’t actually do anything to add
depth effects to the clips, it just flags them to be able to contain two grades capable of being
output separately.
To convert one or more mono clips into stereo clips:
1 Select one or more non-stereo clips in the Media Pool. In this case, you’ll want to
convert all of the clips used by a particular timeline you’re grading.
2 Right-click one of the selected clips and choose Convert to Stereo from the
contextual menu.
Afterwards, the selected clips appear in the Media Pool as Stereo 3D clips and can
expose their controls in the 3D Stereo palette of the Color page when they appear in
a timeline.
Once you have a timeline full of clips that you’ve converted into stereo using the above
procedure, you need to take the additional step of setting the Timeline to stereo in order to
enable dual-SDI output of that timeline.
To convert a timeline to have to stereo for simultaneous HDR/SDR output while grading:
Right-click a timeline in the Media Pool and choose Timelines > Set Timeline to Stereo
Once you’ve set a timeline and its media to be faux Stereo 3D, you’re ready to set up which
stream should be graded and output as HDR.
NOTE: When “Enable dual SDI 3D monitoring” is turned on, split-screen wipes and
cursors will not be visible on the grading monitor, nor will you be able to view
image resizing
164
Data Levels, Color Management, ACES, and HDR Part 1 – 6
To set one of the stereo streams to output HDR:
1 Open the Stereo 3D palette, and click the Left or Right button to choose which video
stream you want to monitor, grade, and output as HDR.
2 Turn off the Link button that’s to the right of the Left and Right buttons to make sure
that each stream’s grade is unlinked. This is necessary to keep the SDR and HDR
grades separate.
3 Choose the Timeline grade mode in the Node Editor, and press Option-S to create
a new node.
4 Right-click the node you just created, and choose the desired output option from the
3D LUT > HDR ST.2084 or 3D LUT > HDR Hybrid Log-Gamma submenus. The output
option you choose should correspond to the type of HDR display you have, and in the
case of ST.2084, the maximum luminance value your display can output.
At this point, you’re all set up to grade and output the SDR version of your program using one
eye of the Stereo 3D palette, with the HDR version of your program graded and output via the
other eye using the 3D LUT you’ve chosen.
To choose which stereo stream you want to grade:
Open the Stereo 3D palette, and click the Left or Right button to choose which video
stream you’re grading.
The Left and Right buttons of the Stereo 3D palette choose which video stream you’re set to
grade in every single clip of the timeline. If you look at the small 3D badge at the bottom of
each clip in the Thumbnail timeline, Orange indicates you’re grading the left eye stream, and
light blue indicates you’re grading the right eye stream.
Outputting Both Video Streams in the Deliver Page
After you’ve graded both the SDR and HDR streams, you can choose to render one or both of
them using the Render Stereoscopic 3D settings in the Video panel of the Render Settings in
the Deliver page. You can choose to render “Both eyes as” with the option “Separate Files,” or
you can choose to render just the Left eye or Right eye media.

PART 2
167
Using the Media Page Part 2 – 7
Using the Media Page
The Media page is the primary interface for media import and clip organization in
DaVinciResolve. As of version 12, it’s also where all timelines that you edit in DaVinci Resolve or
import from other applications are organized. Although timelines and clips are now saved in the
same place, it’s central to the way DaVinci Resolve works that the source media used by a
project is managed separately from your timelines. In this way, you can manage and update the
clips used by timelines with ease, importing and reorganizing clips, switching between offline
and online media, and troubleshooting any problems that occur.
The Media page also contains much of the core functionality used for on-set workflows, as well
as most of the functions that are used in the ingest, organization, and sound-synching
procedures corresponding to digital dailies workflows.
This chapter covers the following topics:
Understanding the Media Page User Interface 168
The Interface Toolbar 168
The Media Storage Browser 169
The Media Storage Browser’s Volume List 169
The Media Storage Browser Area 170
Viewer 172
Live Media Preview 173
Media Pool 174
The Bin List 174
Showing Bins in Separate Windows 174
Bins, Power Bins, and Smart Bins 175
Filtering Bins Using Color Tags 176
Sorting the Bin List 177
Thumbnail View and List View in the Media Pool 177
Searching for Content in the Media Pool 178
Taking Advantage of the Media Pool’s Usage Column 178
Metadata Editor 178
Audio Panel 179
Dual Monitor Layout 180
Customizing the Media Page 181
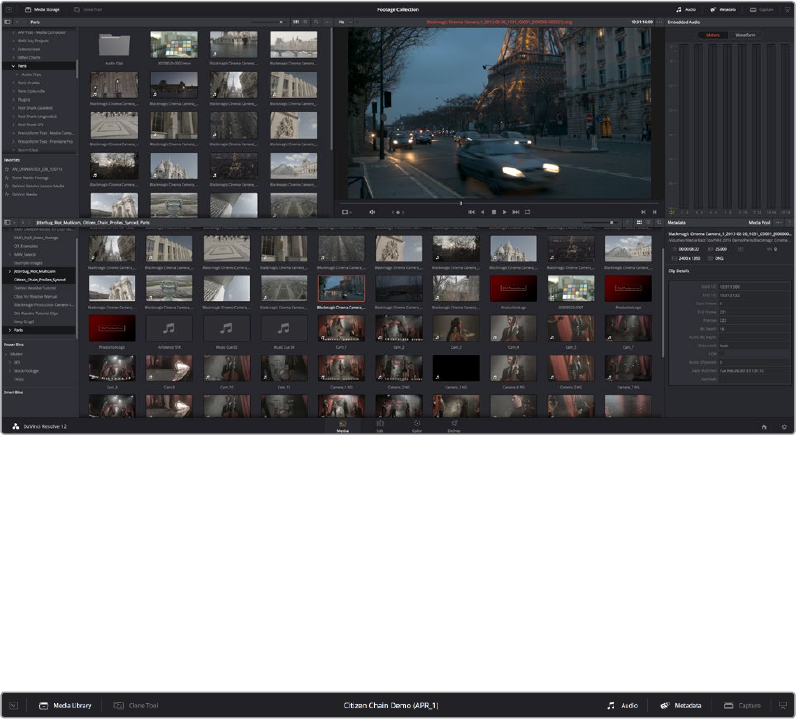
168
Using the Media Page Part 2 – 7
Understanding the Media
Page User Interface
By default, the Media page is divided into five different areas, designed to make it easy to find,
select, and work with media in your project.
Media page
Much of the functionality and most of the commands are found within the contextual menus that
appear when you right-click clips in the Media Storage browser or Media Pool.
The Interface Toolbar
At the very top of the Media page is a toolbar with buttons that let you show and hide different
parts of the user interface. These buttons are as follows, from left to right:
The interface toolbar
Media Storage full/half height button: Lets you set the Media Storage browser to take
up the full height of your display, if you need more area for browsing at the expense of
a smaller Media Pool.
Media Storage: Lets you hide or show the Media Storage browser. Hiding the Media
Storage browser creates more room for the Viewer.
Clone Tool: Shows or hides the Clone tool, used for cloning media from camera cards
or hard drives.
Audio Panel: Hides or shows the Audio Panel.
Metadata: Hides or shows the Metadata Editor.
Capture: Switches the Viewer and Audio Panel to Capture Mode, exposing the controls
necessary for cuing up a device-controllable deck, and batch recording from tape.
Audio Panel/Metadata Editor full/half height button: Lets you set the Audio Panel
or Metadata Editor to take up the full height of your display, if you need more area for
either of those functions.
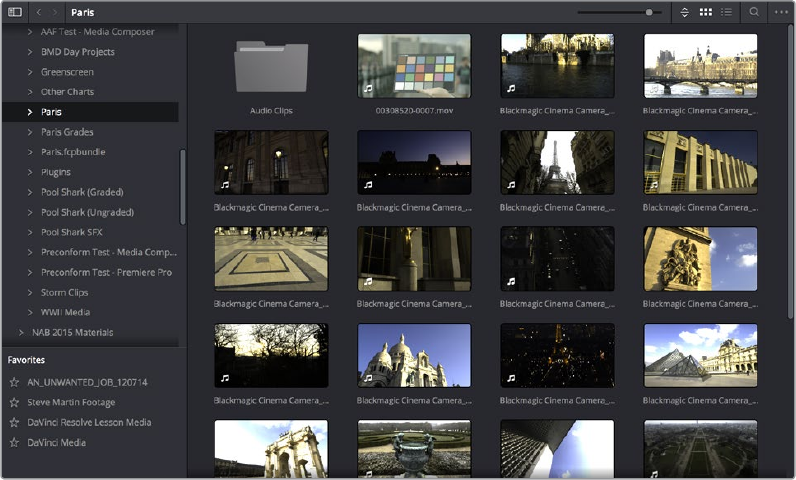
169
Using the Media Page Part 2 – 7
The Media Storage Browser
The Media Storage browser lets you see all of the volumes connected to your workstation,
browsing them for media that you want to import into your DaVinci Resolve project in one way
or another. Whereas other applications have some sort of import dialog, DaVinci Resolve has
the Media Page. To facilitate media import, the Media Storage browser is divided into two
areas, the Volume List, and the Media Browser.
Media Storage browser with scrubbable clip view
The Media Storage Browser’s Volume List
At the left of the Media Storage browser is a list of all volumes that are currently available to
your DaVinci Resolve workstation. It’s used to locate media that you want to import manually
into your project. The list is divided into two vertical areas of volumes. At the top are the actual
volumes on your workstation:
Scratch volumes: Indicated by a usage statistic to the right of the volume name that
lists how full that volume is, these are disks that you’ve added to the Media Storage
panel of the System Preferences window. The topmost of these scratch disks is used to
store Gallery stills and cache files.
Available volumes: Indicated by disk icons, this is a list of all fixed, removable,
and network volumes that are currently available to your workstation. When the
“Automatically display attached local and network storage locations” checkbox is
turned on in the Media Storage panel of the System Preferences, new volumes that are
attached to your workstation should automatically appear in this list.
This is a hierarchical list; clicking the disclosure triangle to the left of any volume opens up an
additional list of that volume’s subdirectories, with additional disclosure triangles next to each
subdirectory. Using the Media Storage browser, you can drill down into as many subdirectories
as you need to.
170
Using the Media Page Part 2 – 7
Adding Volumes That Don’t Appear in This List
If you need to access a storage volume that doesn’t appear on this list, for example if you’re
using the version of DaVinci Resolve that is available in the Apple App Store, then you can
right-click anywhere in the background of the Volume list and choose “Add New Location” to
open a dialog you can use to choose a volume you want to add.
If you’re using the Apple App Store version of DaVinci Resolve, auto-mounting of attached
storage volumes is not enabled automatically. However, you can enable this in the Media
Storage panel of the System Preferences. For more information, see the DaVinci Resolve
Preferences section of Chapter 3, “Project Settings and Preferences.”
Media Storage Browser Favorites
Underneath this is the Favorites area. If there are special directories that you find yourself
frequently accessing, you can add them to the Favorites in order to avoid having to traverse
complex hierarchies in order to access the media you need. The Favorites can be easily
customized and used.
Methods of organizing favorite file system locations in the Media Storage Browser:
To add a favorite: Right-click any folder in the Media Storage browser folder list, and
choose “Add folder to favorites” from the contextual menu. The new favorite appears at
the bottom of the Favorites area.
To open a favorite: Click any favorite to expose the contents of the corresponding
directory in the Media Storage browser.
To remove a favorite: Right-click the favorite you want to remove, and choose “Remove
folder from favorites” from the contextual menu.
The Media Storage Browser Area
Once you’ve selected a volume or subdirectory in the Media Storage browser, you can view its
contents in List view or Thumbnail view to search though the media that’s available to you as
you try to find what you need.
List View
In List view, the following columns are available for sorting media prior to importing it into the
Media Pool:
File name: The name of a file.
Reel name: The reel name as it’s currently derived according to the Conform Options
that are currently chosen in the General Options panel of the Project Settings.
Start TC: The first timecode value in the source media.
Start: The first frame number in the source media.
End: The last frame number in the source media.
Frames: The duration of each clip in frames.
Resolution: The frame size of the source media.
Bit Depth: The bit depth of the source media.
FPS: The frame rate of the source media.
Audio Ch: The number of audio channels within the source media.
Date Modified: The date modified metadata from the source media file.
Shot: Additional metadata from media formats that support it.
Scene: Additional metadata from media formats that support it.
171
Using the Media Page Part 2 – 7
Angle: Additional metadata from media formats that support it.
Take: Additional metadata from media formats that support it.
Good Take: Additional metadata from media formats that support it.
If you work in List view, you gain additional organizational control by exposing columns that
show the metadata that each clip contains, prior to media being added to your timeline. You can
use these columns to help organize your media.
Methods of customizing metadata columns in List view:
To show or hide columns: Right-click at the top of any column in the Media Storage
browser and select an item in the contextual menu list to check or uncheck a particular
column. Unchecked columns cannot be seen.
To rearrange column order: Drag any column header to the left or right to rearrange
the column order.
To resize any column: Drag the border between any two columns to the right or left to
narrow or widen that column.
To sort by any column: Click the column header you want to sort with. Each additional
time you click, the same header toggles that column between ascending and
descending sort order.
You can also customize column layouts in the Media Storage area. Once you’ve customized a
column layout that works for your particular purpose, you can save it for future recall.
Methods of saving and using custom column layout:
To create a column layout: Show, hide, resize, and rearrange the columns you need
for a particular task, then right-click any column header in the Media Pool and choose
Create Column Layout. Enter a name in the Create Column Layout dialog, and click OK.
To recall a column layout: Right-click any column header in the Media Pool and choose
the name of the column layout you want to use. All custom column layouts are at the
top of the list.
To delete a column layout: Right-click any column header in the Media Pool and
choose the name of the column layout you want to delete from the Delete Column
Layout submenu.
Thumbnail View
While in Thumbnail view, you can scrub through a clip’s icon to see its contents, and you can
also click the Clip Info pop-up menu at the bottom right corner of any clip’s thumbnail to see an
instant summary of that clip’s vital information, including:
File name: The name of that file.
In timecode: The first frame in the source media.
Out timecode: The last frame in the source media.
Duration: The total duration of the source media.
Resolution: The frame size of the source media.
Frame Rate: The frame rate, in fps, of the source media.
Pixel Aspect Ratio: The aspect ratio of the source media.
Codec: Which codec is used by the source media.
Date Created: The date created metadata from the source media file.
Flags: Flag metadata applied either by the camera that shot the media, in the Metadata
Editor, or in the Color page Timeline.
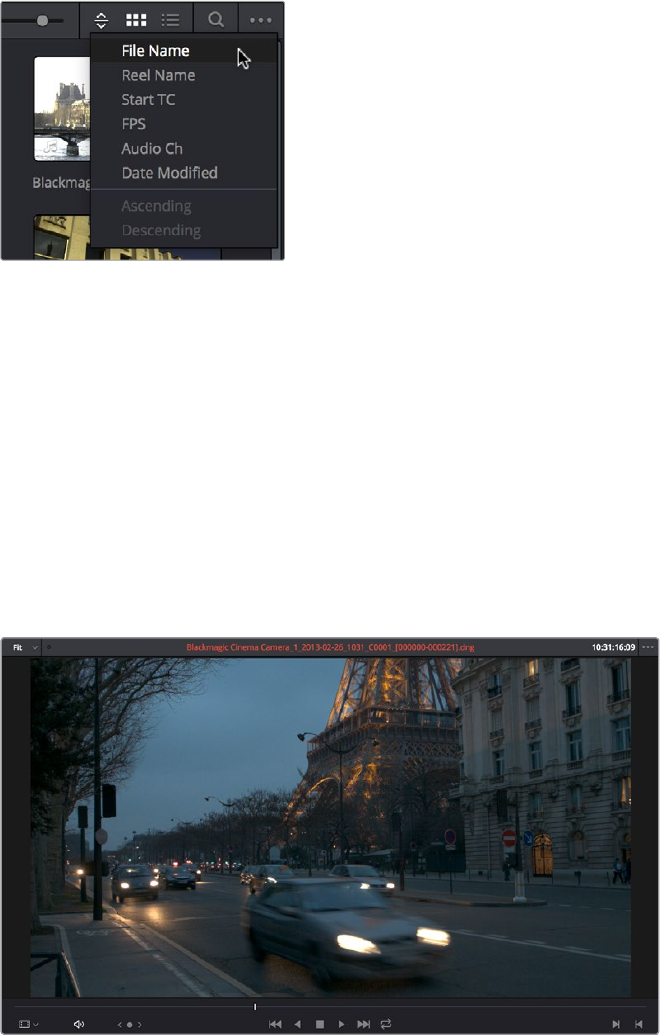
172
Using the Media Page Part 2 – 7
Also while in Thumbnail view, you can use the Thumbnail Sort pop-up menu (between the zoom
slider and the Thumbnail view button) to choose a criteria by which to organize the thumbnails.
Options include File Name, Reel Name, Start TC, FPS, Audio Ch, and Date Modified.
The Thumbnail Sort pop-up in the
Media Storage browser
Going Immediately to a Finder Location in the Media Browser
If you drag a folder from the Finder into the Media Storage browser, the Media Storage browser
will immediately update to show the location of that folder.
Viewer
Clips that you select in any area of the Media page show their contents in the Viewer. The
current position of the playhead is shown in the timecode field at the upper right-hand corner of
the Viewer.
Viewer
Simple transport controls appear underneath the jog bar, letting you Jump to First Frame,
PlayBackwards, Stop, Play Forward, and Jump to Last Frame. A jog control to the left of these
buttons lets you move through a long clip more slowly; click it and drag to the left or right to
move through a clip a frame at a time.
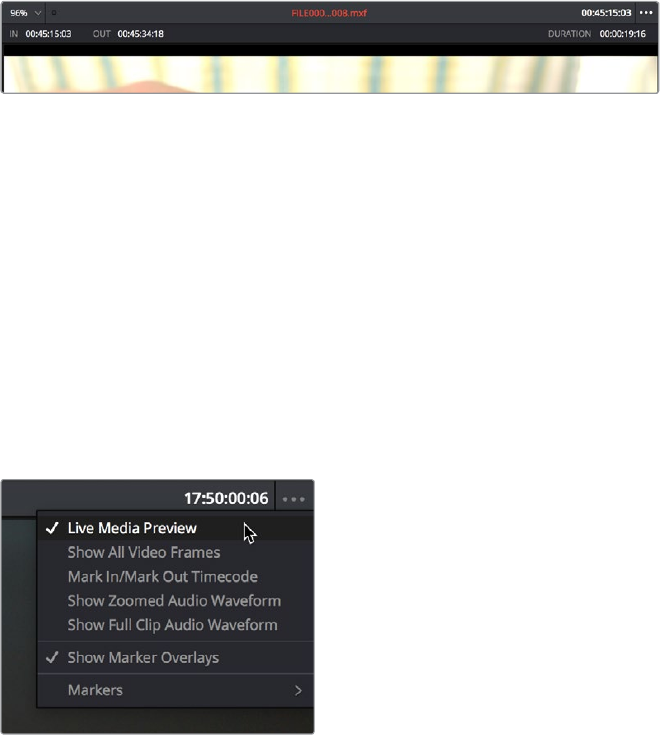
173
Using the Media Page Part 2 – 7
To the right of the transport controls, In and Out buttons let you set In and Out points for the
current clip. The current In and Out points are indicated in the jog bar, and their timecode
values, along with the resulting clip duration, are shown in the In, Out, and Duration timecode
fields below. The Cue buttons move the playhead to these In and Out cue points. The clip’s
timecode is also displayed at the top right.
A jog or scrubber bar appears directly underneath the image, letting you drag the playhead
directly with the pointer. The full width of the jog bar represents the full duration of the clip in
the Viewer.
There’s an additional option for the Media Page Viewer that you can expose by choosing Mark
In/Mark Out Timecode from the Viewer option menu. This reveals an info bar at the top of the
Viewer that displays the In and Out timecode, as well as the duration of the currently marked
section of media.
An optional info bar for showing the timecode and duration of a marked section of media
You can also put the Viewer into Cinema Viewer mode by choosing Workspace > Viewer Mode
> Cinema Viewer (Command-F), so that it fills the entire screen. This command toggles Cinema
Viewer mode on and off.
Live Media Preview
Enabled by default, the Live Media Preview setting found in the Viewer options menu (the
three-dots menu found at the upper right-hand corner of the Viewer) makes it possible for
thumbnails that you’re skimming in either the Media Storage browser or Media Pool to show the
skimmed frame in the Viewer. When skimming with Live Media Preview enabled, the playhead
that appears in the thumbnail is locked to the playhead displayed in the Viewer’s jog bar. You
can turn Live Media Preview on or off.
When Live Media Preview is on in
the Viewer options menu, skimming
thumbnails mirrors to the Viewer

174
Using the Media Page Part 2 – 7
Media Pool
The Media Pool contains all of the media that you import into the current project and all of the
timelines you create. It also contains all media that’s automatically imported along with Projects
or Timelines that have themselves been imported into DaVinci Resolve. In the Media page,
enough room is given to the Media Pool to make it an ideal place to sort, sift through, and
organize the clips in your project. However, the Media Pool is also mirrored in the Edit and
Fairlight pages, so you can access clips to build your projects.
Media Pool with the Bin list open
The Bin List
Ordinarily, all media imported into a project goes into the Master bin, which is always at the top
of the Bin list and encompasses everything in a given project. However, you can add bins of
your own, and the Media Pool can be organized into as many user-definable bins as you like,
depending on your needs. Media can be freely moved from one bin to another from within the
Media Pool. When working in projects with multiple bins, you can choose to expose the bin
structure in one of two ways:
Bin list open: The Bin List button at the upper left-hand corner of the Media Pool lets
you open a separate List view showing all bins in your project, hierarchically. Bins that
contain other bins appear with a disclosure button to their left, that you can use to show
or hide the contents. With the Bin list exposed, it’s easy to organize clips among a large
collection of bins.
Bin list closed: When the Bin list is closed, all bins are hidden, and contents of
whichever bin is currently selected populate the Media Pool browser.
Showing Bins in Separate Windows
If you right-click a bin in the Bin list, you can choose “Open As New Window” to open that bin
into its own window. Each window is its own Media Pool, complete with its own Bin, Power Bins
and Smart Bins lists, and display controls.
This is most useful when you have two displays connected to your workstation, as you can drag
these separate bins to the second display while DaVinci Resolve is in single screen mode. If you
hide the Bin list, not only do you get more room for clips, but you also prevent accidentally
switching bins if you really want to only view a particular bin’s contents in that window. You can
have as many additional Bin windows open as you care to, in addition to the main Media Pool
that’s docked in the primary window interface.
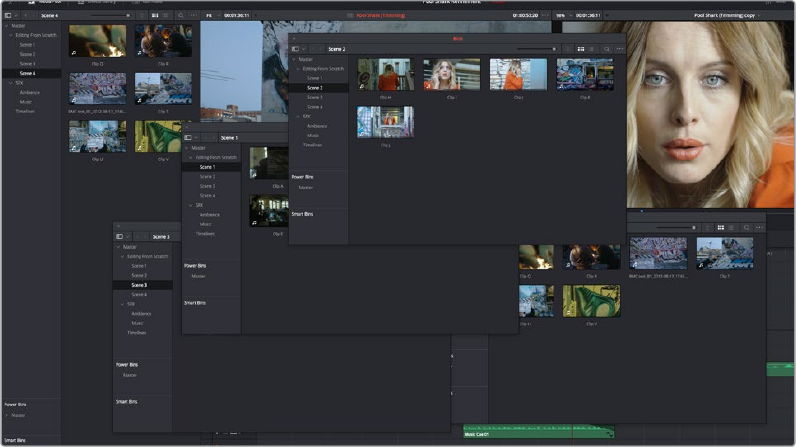
175
Using the Media Page Part 2 – 7
Media Pool bins opened as new windows
Bins, Power Bins, and Smart Bins
There are actually three kinds of bins in the Media Pool, and each appears in its own section of
the Bin list. The Power Bin and Smart Bin areas of the Bin list can be shown or hidden using
commands in the View menu (View > Show Smart Bins, View > Show Power Bins).
Here are the differences between the different kinds of bins:
Bins: Simple, manually populated bins. Drag and drop anything you like into a bin,
and that’s where it lives, until you decide to move it to another bin. Bins may be
hierarchically organized, so you can create a Russian dolls nest of bins if you like.
Creating new bins is as easy as right-clicking within the Bin list and choosing Add Bin
from the contextual menu.
Power Bins: Hidden by default. These are also manually populated bins, but these
bins are shared among all of the projects in your current database, making them ideal
for shared title generators, graphics movies and stills, sound effects library files, music
files, and other media that you want to be able to quickly and easily access from any
project. To create a new Power Bin, show the Power Bins area of the Bin list, then right-
click within it and choose Add Bin.
Smart Bins: These are procedurally populated bins, meaning that custom rules
employing metadata are used to dynamically filter the contents of the Media Pool
whenever you select a Smart Bin. This makes Smart Bins fast ways of organizing the
contents of projects for which you (or an assistant) has taken the time to add metadata
to your clips using the Metadata Editor, adding Scene, Shot, and Take information,
keywords, comments and description text, and myriad other pieces of information to
make it faster to find what you’re looking for when you need it. To create a new Smart
Bin, show the Smart Bin area of the Bin list (if necessary), then right-click within it and
choose Add Smart Bin. A dialog appears in which you can edit the name of that bin and
the rules it uses to filter clips, and click Create Smart Bin.

176
Using the Media Page Part 2 – 7
Filtering Bins Using Color Tags
If you’re working on a project that has a lot of bins, you can apply color tags to identify particular
bins with one of eight colors. Tagging bins is as easy as right-clicking any bin and choosing the
color you want from the Color Tag submenu.
For example, you can identify the bins that have clips you’re using most frequently with a red
tag. A bin’s color tag then appears as a colored background behind that bin’s name.
Using Color Tags to identify bins
Once you’ve tagged one or more Media Pool bins, you can use the Color Tag Filter pop-up menu
(the pop-up control to the right of the Bin List button) to filter out all but a single color of bin.
Using Color Tag filtering to isolate the blue bins
To go back to seeing all available bins, choose Show All from the Color Tag Filter pop-up.
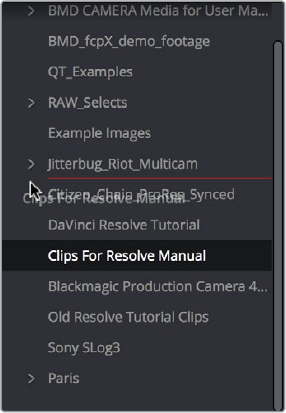
177
Using the Media Page Part 2 – 7
Sorting the Bin List
The Bin list (and Smart Bin list) of the Media Pool can be sorted by bin Name, Date Created, or
Date Modified, in either ascending or descending order. Simply right-click anywhere within the
Bin list and choose the options you want from the Sort by submenu of the contextual menu.
You can also choose User Sort from the same contextual menu, which lets you manually drag all
bins in the Bin list to be in whatever order you like. As you drag bins in this mode, an orange line
indicates the new position that bin will occupy when dropped.
Dragging a bin to a new position
in the Bin list in User Sort mode
If you use User Sort in the Bin list to rearrange your bins manually, you can switch back and forth
between any of the other sorting methods (Name, Date Created, Date Modified) and User Sort
and your manual User Sort order will be remembered, making it easy to use whatever method of
bin sorting is most useful at the time, without losing your customized bin organization.
Thumbnail View and List View in the Media Pool
The contents of the Media Pool can be browsed one of two ways:
Thumbnail view: Each clip is represented by an icon, with its file name appearing
underneath. When you move the pointer over a clip’s icon, DaVinci Resolve
automatically scrubs through that clip, showing you its contents. Also, a Clip Info pop-
up menu appears in the lower right-hand corner. Click the Clip Info pop-up to see an
overlay appear showing essential information about that clip. In Thumbnail view, you
can use the Sort Order pop-up to choose how clips are sorted.
List view: Each clip is represented by an item on a text list. Additionally, multiple
columns of information appear, organized by headers. Clicking any header lets you sort
the list by that column, in either ascending or descending order.
For more information about browsing the contents of the Media Pool, see Chapter 8, “Adding
and Organizing Media with the Media Pool.”

178
Using the Media Page Part 2 – 7
Searching for Content in the Media Pool
An optional Search field can be opened at the top of the Media Pool that lets you quickly find
clips by name, partial name, or any of a wide variety of Media Pool metadata.
To search for a clip by name:
1 Select which bin or bins you want to search.
2 Click the magnifying glass button at the upper right-hand corner of the Media Pool.
3 Choose the particular column of information you want to search (or All Fields to search
all columns) using the Filter by pop-up menu. Only selected bins will be searched.
4 Type your search string into the Search field that appears. A few letters should be
enough to isolate only those clips that have that character string within their name.
Toshow all clips again, click the cancel button at the right of the search field.
Taking Advantage of the Media Pool’s Usage Column
In List view, the Usage column does not automatically update to show how many times a
particular clip has been used. However, you can manually update this metadata by right-clicking
within the Media Pool and choosing Update Usage Data from the contextual menu that
appears. Afterwards, each clip will display how many times it’s been used in this column.
Clipsthat have not been used yet display an x.
Metadata Editor
Both the Media and Edit pages have a Metadata Editor. When you select a clip in any area of
the Media page, its metadata is displayed within the Metadata Editor. If you select multiple clips,
only the last clip’s information appears. The Metadata Editor’s header contains uneditable
information about the selected clip, including the file name, directory, duration, video codec,
frame rate, resolution, audio codec, sample rate, and number of channels.
Because there are so very many metadata fields available, two pop-up menus at the top let you
change which set of metadata is displayed in the Metadata Editor.
Metadata Presets (to the left): If you’ve used the Metadata panel of the User
Preferences to create your own custom sets of metadata, you can use this pop-up to
choose which one to expose. Surprisingly enough, this is set to “Default” by default.
Metadata Groups (to the right): This pop-up menu lets you switch among the various
groups of metadata that are available, grouped for specific tasks or workflows.
The heart of the Metadata Editor is a series of editable fields underneath the header that let you
review and edit the different metadata criteria that are available. For more information on
editing clip metadata and creating custom metadata presets, see Chapter 9, “Using Clip
Metadata.”
TIP: Smart Bins are essentially multi-criteria search operations that scope the entire
project at once and are saved for future use.

179
Using the Media Page Part 2 – 7
Clip Metadata Editor showing the Clip Details panel
Audio Panel
The Audio Panel can be put into one of two modes via an option menu. In the default Meters
mode, Audio Meters are displayed that show the levels of audio in clips you’re playing. In
Waveform mode, you can open audio clips side by side with video clips in the Viewer in order
to sync them together manually.
When set to Levels mode, you can check audio embedded within clips you’ve imported into the
Media Pool. As you play a clip, each audio meter shows the levels for whichever of these tracks
contain audio. You can toggle individual tracks on and off by clicking the track number
underneath. A Mute button, at the bottom-left of the meters, lets you disable and enable
audio playback.
Audio Meters Exposed

180
Using the Media Page Part 2 – 7
Dual Monitor Layout
The Edit page has a dual monitor layout that provides maximum space for the Media Storage
browser and Media Pool on the primary monitor, and an enlarged Viewer, Audio Panel, and
Metadata Editor on the secondary monitor, along with a complete set of video scopes for
helping you to evaluate media as you organize it.
To enter dual screen mode:
Choose Workspace > Dual Screen > On.
The Media page in dual-screen mode
To switch which UI elements appear on which monitors:
Choose Workspace > Primary Display > Display 1 or Display 2, which reverses the
contents of both monitors in dual screen mode.
181
Using the Media Page Part 2 – 7
Customizing the Media Page
The Media Page can be customized to create more room in different areas to accommodate
specific tasks.
To resize any area of the Media page:
Drag the vertical or horizontal border between any two panels to enlarge one and
shrink the other.
Methods of hiding different parts of the Media Page:
To toggle the Clone Tool on and off: Click the Clone Tool button in the UI toolbar
at the top.
To toggle the Audio Panel on and off: Click the Audio button in the UI toolbar
at the top.
To toggle the Metadata Editor on and off: Click the Metadata button in the UI toolbar
at the top.
To toggle the Media Storage browser folder list on and off: Click the button at the
top-left corner of the Media Browser.
To toggle the Media Pool Bin list on and off: Click the button at the top-left corner of
the Media Pool.
Methods of organizing favorite file system locations in the Media Storage browser:
To add a favorite: Right-click any folder in the Media Storage browser folder list, and
choose “Add folder to favorites” from the contextual menu.
To remove a favorite: Right-click the favorite you want to remove, and choose “Remove
folder from favorites” from the contextual menu.
To return all pages to their default layout:
Choose Workspace > Reset UI Layout.
183
Adding and Organizing Media with the Media Pool Part 2 – 8
Adding and Organizing Media
Before you can edit or grade media, you need to add it to the Media Pool, which is the central
repository of clips in DaVinci Resolve. The Media Pool is a feature-rich environment, giving you
many different methods of importing clips into your project and organizing them.
This chapter covers the following topics:
Copying Media Using the Clone Tool 184
Adding Media to the Media Pool 186
Basic Methods for Adding Media in the Media Page 186
Adding Subclips From the Media Storage Browser 187
Adding Individual Frames From Image Sequences 188
Adding Media Based on EDLs 188
Splitting Clips Based on EDLs 188
Adding Media With Oset Timecode 189
Adding Clips From the Timeline to the Media Pool 189
Adding Media to the Edit and Fairlight Pages 190
Removing Media From the Media Pool 190
Adding and Removing External Mattes 191
Using Embedded Mattes in OpenEXR Files 193
Adding Offline Reference Movies 193
Extracting Audio 194
Organizing the Media Pool 194
Organizing Media into Bins 194
Showing Bins in Separate Windows 195
Using the Media Pool in Thumbnail View 195
Working With Columns in List View 196
Creating and Using Power Bins 199
Creating and Using Smart Bins 200
Finding Clips and Timelinesin the Media Pool 202
Finding Clips and/or Timelines in the Media Pool 202
Finding Timeline Clips in the Media Pool 203
Finding Timelines in the Media Pool 203
Finding Media in the Media Storage Browser and Finder 203
Going Immediately to a File System Location in the Media Browser 203
Relinking Media Simply 204
Relink Selected Clips 204
Change Source Folder 204

184
Adding and Organizing Media with the Media Pool Part 2 – 8
Copying Media Using the Clone Tool
One of the few things you may want to do before you add media to your project is to clone all
camera original media onto a safe set of backup volumes, for redundancy in case any one
volume fails. Additionally, you should consider cloning all media to an off-site backup as well.
Whether you’re on-set working as a DIT, or doing data ingest at a post facility, the Clone Tool in
the Media page lets you safely and accurately copy media from SD Cards, SSDs, or disk drives,
to multiple destinations, with a checksum report (based on a choice of six checksum options)
written to the root of each destination volume that verifies the absolute accuracy of the
duplicate media saved to each destination.
To duplicate media using the Clone Tool:
1 Open the Clone tool by clicking the Clone button at the far left of the Media Pool
toolbar, which reveals the Clone Tool palette.
2 Click the Add Job button at the bottom left to create a new job. A job item appears
within the Clone Tool palette, with overlays to guide you through its use.
3 Drag a volume or folder from the Media Storage browser to the “Drop source here”
drop zone. Alternately, you can right-click any volume or folder in the Media Storage
browser and choose Set As Clone Source.
4 Next, drag one or more volumes or folders from the Media Storage browser to the
“Drop destination here” drop zone. Alternately, you can right-click any volume or folder
in the Media Storage browser and choose Set As Clone Destination. You can have
more then one destination.
5 If you want to preserve the top level folder name from the source volume or folder, click
the Clone Tool panel’s option menu and choose “Preserve Folder Name.” The overall
folder structure of the cloned media is always preserved.
6 If you want to change the checksum method used by DaVinci Resolve to verify that
each clip has copied properly, you can choose an option from the Checksum submenu
of the Clone Tool’s option menu. Each option is a tradeoff between the speed of
your file copy operation and the security of the verification process. Greater security
generally means a slower copy operation.
The options are:
File Size: Fast, but minimal data verification. Data verification is done simply by
comparing the file size of a duplicate file with that of the original. “Collision resistance”
refers to whether two files (or a file and an incorrectly duplicated file) may coincidentally
have the same comparison value (be it file size, an error-detecting code, or a hash). File
Size is very fast, but it’s minimally collision resistant.
CRC 32: Faster than MD5, but less secure. An error-detecting code rather than the
hash used by the next three options. A “check value” is generated based on the
remainder of a polynomial division of the file’s contents. By comparing the check value
derived from an original file with that derived from a copy, data integrity can be verified.
This is a much faster data verification scheme than MD5 (the default), but it is
significantly less collision resistant.
NONE: Disables data verification, sacrificing safety for speed.
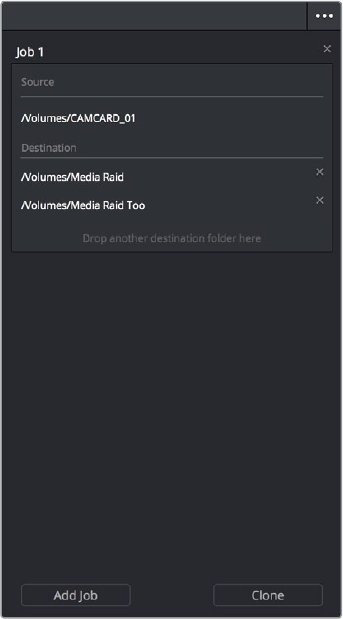
185
Adding and Organizing Media with the Media Pool Part 2 – 8
MD5: This is the default setting. A reasonable tradeoff between speed and security.
Ahash function generates a 128-bit value that’s unique to a particular file; Data integrity
is checked by comparing the hash value generated by the original file to that generated
by the copied file. MD5 is not as collision resistant as the SHA options, but it’s a faster
operation, and the probability of such collisions in conventional film and video
workflows is probably small.
SHA 256, SHA 512: Slower, but more secure. SHA is a more collision resistant hash
function than MD5; options are provided for 256- and 512-bit value generation, with 512
being even more collision resistant than 256. However, these options are progressively
slower than MD5, and will result in significantly slower copy times. Similarly to MD5,
data integrity is checked by comparing the hash value generated by the original file to
that generated by the copied file.
7 When you’re ready, click the Clone button to initiate the cloning process.
To duplicate media quickly using the Clone Tool:
1 Right-click any volume or folder in the Media Storage browser and choose Set as Clone
Source. A job item appears within the Clone Tool palette, populated by the volume or
folder you selected.
2 Next, right-click any volume or folder in the Media Storage browser and choose Set As
Clone Destination. You can do this more than once because you can have more than
one destination.
3 If you want to preserve the top level folder name from the source volume or folder, click
the Clone Tool panel’s option menu and choose “Preserve Folder Name.” The overall
folder structure of the cloned media is always preserved.
4 When you’re ready, click the Clone button to initiate the cloning process.
The Clone tool with a job set up
186
Adding and Organizing Media with the Media Pool Part 2 – 8
Adding Media to the Media Pool
At minimum, you’ll be using the Media page to add clips to a project to begin editing, in
preparation to create dailies, or as a prelude to conforming a project using an EDL. All clips you
want to work with must first be added to the Media Pool to be available for grading and
processing in DaVinci Resolve, regardless of whether or not there’s edited project data to go
along with it.
If you import XML or AAF projects, you can choose to automatically import all accompanying
media as part of the import process you initiate in the Edit page. However, if you find yourself
needing to replace updated effects or stock footage in the Timeline, or you’re called upon to
add additional media such as animated titles or superimposed clips for compositing, then you’ll
still need to use the Media page to do so.
Whatever kind of project you’re working on, you can add clips to the Media Pool from as many
different volumes as you need. All imported clips are linked to the original media on whichever
disks you found them; files are not moved, copied, or otherwise transcoded when you add
them to the Media Pool. Consequently, it’s a good idea to make sure that all media you want to
import into your project has already been copied to a suitably fast volume before importing it.
Basic Methods for Adding Media in the Media Page
There are several ways of adding clips to the Media Pool.
To add individual clips from the Media Storage browser to the Media Pool:
1 Use the Media Storage browser to find a media file to import.
2 If you have multiple bins available in the Bin list, choose the bin you want to add the
incoming media to.
3 Do one of the following:
Shift-click or Command-click multiple files, then right-click one of the selected files
and choose “Add into Media Pool.”
Drag a clip from the Media Storage browser browser to the Media Pool, or to a
specific bin in the Bin list.
4 If a dialog appears asking if you want to change your project to match the criteria,
click“Change” to alter the project’s settings, or click “Don’t Change” to continue
importing the media while leaving the project at its previous frame rate. Once clips
have been imported into the Media Pool, the frame rate cannot be changed again,
sochoose carefully.
You also have the option of dragging media directly from the Mac OS Finder into the
Media Pool.
To drag one or more clips from the Finder to the Media Pool (macOS only):
1 Select one or more clips in the Finder.
2 Drag those clips into the Media Pool of DaVinci Resolve, or to a bin in the Bin list.
Those clips are added to the Media Pool of your project.
If you need to add the contents of all directories and subdirectories to the Media Pool as a flat
group of media, that’s easily accomplished. A good example of this is when you’re importing
camera-original media from a cloned file structure, in which clips are organized into
subdirectories that are many levels deep. DaVinci Resolve can easily import all of these clips
and put them all into the same bin.
187
Adding and Organizing Media with the Media Pool Part 2 – 8
To add the entire contents of a directory of clips to the Media Pool:
1 Use the Media Storage browser to find the directory containing the files you need
to import.
2 If you have multiple bins available in the Bin list, choose the bin you want to add the
incoming media to.
3 Do one of the following:
Right-click the directory and choose Add Folder into Media Pool to add only clips
from the selected directory. Subdirectories are ignored.
Right-click the directory and choose Add Folder and SubFolders into Media Pool to
add clips from the selected directory, and all subdirectories within.
Drag the folder you want to the browser area of the Media Pool to add its contents to
the currently selected folder in the Folder View.
You also have the option of using the directories and subdirectories that organize media in your
file system as bins in the Media Pool, so that you can preserve the original organization of
your media.
To add all clips and folders in a directory organized into matching folders in the Media Pool:
1 Use the Media Storage browser to find the directory containing the files you need
to import.
2 Do one of the following:
Right-click the directory and choose “Add Folder and SubFolders into Media Pool
(as Folders)”
Drag the folder you want to import from the Media Storage browser to the Folder
View of the Media Pool to add that folder, and all subfolders within, as a new folder in
the Folder View.
A folder appears in the Media Pool with the same name as the folder you dragged in.
All clips and all subdirectories appear within, nested hierarchically in the Media Pool as
they were in the file system.
Adding Subclips From the Media Storage Browser
If you’re browsing long source clips in the Media Storage browser, but you only want to import a
small segment of a much longer clip into the Media Pool, you can create subclips directly from
the Media Storage browser.
To add a subclip from a clip in the Media Storage browser to the Media Pool:
1 Single-click any clip in the Media Storage browser to open it into the Viewer in order to
create a subclip without needing to first import that clip into the Media Pool.
2 Set In and Out points in the Source Viewer to define the section you want to turn into
a subclip.
3 Right-click the jog bar and choose Make Subclip from the contextual menu.
188
Adding and Organizing Media with the Media Pool Part 2 – 8
Adding Individual Frames From Image Sequences
If you’re working with image sequences, or with sequentially numbered image files from any
source, DaVinci Resolve automatically presents them as clips in the Media Storage browser.
This is good if that’s what they are, but there are instances where sets of photos, of which each
frame is in actuality a separate media file, are also sequentially numbered. For this reason, you
can import individual frames, rather then entire image sequences.
To add an individual frame from a number sequence of images in the Media Storage browser:
1 Click the Media Storage browser option menu, and choose Show Individual Frames.
Each image sequence is now separated into its individual frames, allowing you to select
only the frames you need.
2 Use any of the previous described methods to add the frames you want to the
MediaPool as individual clips.
Adding Media Based on EDLs
Another strategy for adding media to the Media Pool is to use an EDL to add only the clips it
refers to from a directory. This lets you add only the clips that are necessary for conforming a
particular imported project before conforming an EDL, and eliminates the need to add too much
media to the Media Pool, which might slow you down in the case of projects referencing
terabytes of media. Furthermore, you can choose multiple EDLs to base the import on, and
many directories to examine.
The EDLs will reference clips via their timecode and sometimes reel name and path. It is these
settings and the conform frame rate that you made previously in the Configuration screen that
are now used to place images correctly into the Media Pool.
To add only media used in an EDL to the Media Pool:
1 If necessary, open the General Options panel of the Project Settings, turn on the “Assist
using reel names from the” checkbox, and choose a method with which to extract reel
name information from the media files you’re about to import. For more information, see
Chapter 9, “Using Clip Metadata.”
2 Right-click a directory in the Media Storage browser, and choose one of the
following commands:
Add Folder Based on EDLs into Media Pool
Add Folder and SubFolders Based on EDLs into Media Pool
3 Using the file dialog that appears, select one or more EDLs to use.
DaVinci Resolve searches the directory hierarchy, either one level deep or all levels deep, for
every media file matching the source timecode and the reel ID of an event in one of the
selected EDLs.
Splitting Clips Based on EDLs
You can also use EDLs to split a media file into multiple clips in the Media Pool, either as an
alternate means of “preconforming” a flattened master media file, or to import multiple sections
of a longer media file that happen to be referenced by an EDL.

189
Adding and Organizing Media with the Media Pool Part 2 – 8
To split and add clips based on an EDL:
1 Right-click a directory in the Media Storage browser, and choose “Split and add into
Media Pool.”
2 Using the file dialog that appears, select an EDL to use, and click Open.
3 Choose a frame rate to use to conform the clips to in the “File Conform Frame Rate”
dialog, and click OK.
4 Choose a handle size, in frames, and whether or not you want to split unreferred clips
from the “Enter handle size for splitting” dialog, and click Split & Add. The media file is
split into the component clips specified in the EDL, and added to the Media Pool.
Adding Media With Offset Timecode
Sometimes source media was created with incorrectly offset timecode, due to mistakes made
earlier in the postproduction process. If this offset is consistent, you can use the “Add Folder
with Source Offset” command to add media to the Media Pool as clips with a timecode offset.
To add a folder of clips to the Media Pool with offset timecode:
1 Right-click a directory in the Media Storage browser, and choose one of the
following commands:
Add Folder with Source Offset
Add Folder and SubFolders with Source Offset
2 Choose a number of frames with which to offset the timecode from the “Change Frame
Offset” dialog, and click Apply.
The media is imported as clips with offset timecode in the Media Pool. However, the original
source timecode of the clips on disk has not been altered. All media rendered out of the Deliver
page will reflect the offset timecode.
Adding Clips From the Timeline to the Media Pool
Starting with DaVinci Resolve 12.5, it is possible to drag a clip from the Timeline back into the
Media Pool, in order to create a duplicate of that clip for future use. This duplicate is entirely
separate from the original instance of that clip that was imported into DaVinci Resolve, capable
of storing its own metadata and its own markers that are completely distinct from the original
clip that was imported into your project.
In fact, the original clip in the Timeline remains “Force Conformed” to the original clip that was
imported into the Media Pool; deleting the original clip from the Media Pool will make that clip
“non-conformed” in the Timeline, even though the duplicate you just created is still there
(although you can always turn Force Conform off for that clip in the Timeline and re-conform the
Timeline Clip to the duplicate you just created).
You can also duplicate clips in the Media Pool for whatever reason.
TIP: Turning on the Split Unreferred Clips checkbox automatically splits out sections of
the file that were not referred to by the EDL you selected, and adds them to the Media
Pool separately, giving you access to every piece of media that’s available.

190
Adding and Organizing Media with the Media Pool Part 2 – 8
Adding Media to the
Edit and Fairlight Pages
While adding clips to the Media Pool in the Media page provides the most organizational
flexibility and features, if you find yourself in the Edit or Fairlight page and you need to quickly
import a few clips for immediate use, you can do so in a couple of different ways.
To add media by dragging one or more clips from the Finder to the Edit page Media Pool
(Mac OS only):
1 Select one or more clips in the Finder.
2 Drag those clips into the Media Pool of DaVinci Resolve, or to a bin in the Bin list.
Those clips are added to the Media Pool of your project.
To use the Import Media command in the Edit page Media Pool:
1 With the Edit page open, right-click anywhere in the Media Pool, and choose
Import Media.
2 Use the Import dialog to select one or more clips to import, and click Open.
Those clips are added to the Media Pool of your project.
Removing Media From the Media Pool
If you’ve added clips to the Media Pool that you need to eliminate, this is easy to do, either
singly, or in the aggregate.
To remove clips from the Media Pool:
Select one or more clips in the Media Pool, then press the Delete or Backspace key
Select one or more clips in the Media Pool, right-click one of the selected clips, and
then choose Remove Selected Clips
Right-click anywhere in the Media Pool, and choose Remove All Clips in Bin
To remove clips from the Master Timeline (if it’s exposed):
Open the Edit page, then select one or more clips in the Media Pool, right-click one of
the selected clips, and choose “Remove Selected Clips from Master Timeline.”
For more information about using the Master Timeline, see Chapter 14, “Using the
Edit Page.”
NOTE: If you’ve turned on “Automatically match master timeline with media pool” in
the General Options panel of the Project Settings, you cannot remove all clips from the
Media Pool if there are other timelines using that media.
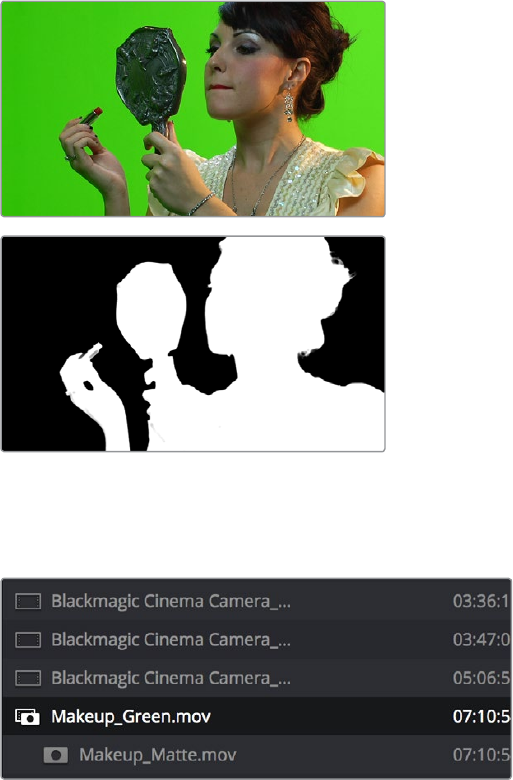
191
Adding and Organizing Media with the Media Pool Part 2 – 8
Adding and Removing External Mattes
If you’ve been provided with matte files to accompany one or more media files used by a
program you’re grading, you can attach them directly to specific clips in the Media Pool, in order
to use them as key sources for a Clip Grade in the Node Editor of the Color page. You can even
use matte files that pack multiple mattes within a single piece of media. This can be done by
either writing different mattes to each of the red, green, and blue channels of a clip, or by
embedding multiple matte passes within a single OpenEXR file.
Matching RGB and Matte images
Attached mattes appear listed underneath a clip in the Media Pool when it’s in List view. When
the Media Pool is in Icon view, clips with attached mattes appear with a badge.
An attached matte, seen in List view
Alternately, you can add an unattached matte clip (also referred to as a Timeline matte) to the
Media Pool, which isn’t attached to any clip, that can be used as a key source in the Color page
within any clip’s Clip grade, or within a Timeline Grade. Unattached matte clips appear as
stand-alone clips in the Media Pool.
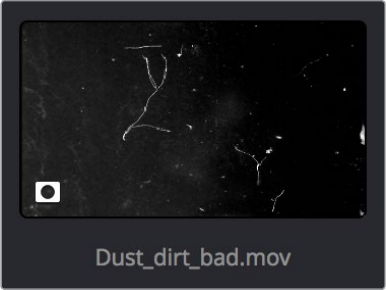
192
Adding and Organizing Media with the Media Pool Part 2 – 8
An unattached matte, seen in Thumbnail view
Matte files are useful for two things. Traditionally, mattes are grayscale media files that identify
regions of varying opacity, with white representing solid areas, and black representing
transparency. For example, exported clips from a compositing application sometimes are
accompanied by one or more matte files that correspond to keys or rotoscoped mattes from the
composite. By importing these matte files using the “Add as Matte” command, you can attach
them to the clips they belong to in the Media Pool, so that they’re only available to the clips
they’re synced to.
However, mattes can also be used as creative tools to apply grain and texture for effect. What a
matte does depends on how you connect it in the Node Editor of the Color page. These are
media files that you may want to use as mattes for potentially any clip, so they can also be
added to the Media Pool as a so-called unattached matte, that can be applied to any
clip you want.
Tip: If necessary, you can also apply LUTs to both attached and unattached mattes in the Media
Pool, simply by right-clicking a matte, and choosing a LUT from the 1D LUT or 3D LUT
submenus. This can be helpful for adjusting incorrectly formatted mattes.
To add an assigned matte to a clip in the Media Pool:
1 Select a clip in the Media Pool to which you want to attach an external matte.
2 Select the matching external matte file in the Media Storage browser, right-click it, and
choose Add to Media Pool as a Matte.
The external matte is attached to the clip. A badge indicates that clip has a matte when
the Media Pool is in Icon view, and the matte itself can be seen, if you put the Media
Pool into List view, appearing as a nested item underneath the clip it’s attached to.
Removing external mattes from clips in the Media Pool:
1 Put the Media Pool into List view.
2 Right-click the external matte file you need to remove, and choose Remove
Selected Clips.
Removing an external matte clip also removes that matte’s key from any clip grades that
use it, such that any clips using it as a key input change from a secondary operation to
a primary operation, where the color adjustment affects the entire image.

193
Adding and Organizing Media with the Media Pool Part 2 – 8
To add an unassigned matte to the Media Pool:
1 Make sure no clip is selected in the Media Pool.
2 Select an external matte file in the Media Storage browser, right-click it, and choose
Add to Media Pool as a Matte.
The external matte appears in the Media Pool, unattached.
For more information on using external matte clips as keys when grading, see Chapter 51,
“Combining Keys and Using Mattes.”
Using Embedded Mattes in OpenEXR Files
If you’re importing OpenEXR files with embedded matte passes, there’s nothing special you
need to do, as the mattes are within the clip you’ve just imported into the Media Pool. For more
information on how to use mattes within OpenEXR files, see Chapter 51, “Combining Keys and
Using Mattes.”
Adding Offline Reference Movies
When moving a project from another application to DaVinci Resolve, it’s useful to export the
entire program as a single media file for use as an Offline Reference Movie. Then, you can
import this file in a special way to use for dual Viewer comparison in the Edit page, or as a
split-screen comparison for fade wipe in the Color page.
To add a clip as an offline reference clip:
Right-click it in the Media Storage browser, and choose “Add As Offline Clip.”
That clip appears with a small checkerboard badge in its icon in the Media Pool, or as the icon
to the left of the Media Pool.
Checkerboard icon indicating an Offline comparison video
For more information on using an Offline video to compare with an imported Timeline in the Edit
page, see Chapter 33, “Preparing Timelines for DaVinci Resolve Import.” For more information
on split-screen reference of Offline video in the Color page, see Chapter 40, “Using the
Color Page.”
194
Adding and Organizing Media with the Media Pool Part 2 – 8
Extracting Audio
If there’s a video clip in the Media Storage browser that has audio you need, but you don’t want
the video component, you can use the Extract Audio command to create a self-contained audio
clip that you can then import into the Media Pool by itself.
To extract the audio from a media file:
1 Right-click a clip in the Media Storage browser and choose “Extract Audio.”
2 Click the Browse button in the the Extract Audio dialog to find another disk location for
the extracted clip.
3 Click “Extract.” The audio channels are extracted and written as a .WAV file to the
selected destination.
4 After you’ve extracted the stand-alone .WAV file, you’ll need to import it into the Media
Pool if you want to use it in your project.
Organizing the Media Pool
Whether you’re doing onset work, creating digital dailies, organizing media to edit, or ingesting
media to conform to an imported project, it’s vitally important to stay organized. The Media Pool
provides many different tools for doing so.
Organizing Media into Bins
You can easily organize clips into different bins in the Media Pool. For some workflows, this is
required, while with other workflows it’s purely optional.
Methods of working with bins in the Media Pool:
To add a bin to the Media Pool: Right-click in the Bin list and choose Add Bin. To add a
bin inside another bin, right-click any bin and choose Add Bin.
To add a bin and move selected clips into it: Select all the clips you want to put into
a new bin, then right-click one of the selected clips, and choose Create Bin With
Selected Clips.
To rename a bin: Select the bin you want to rename, and then click its name a second
time to make it editable. With the bin name highlighted, type a new name and press
Return. Alternately, you can right-click a bin, choose Rename Bin, and then type a new
name and press Return.
To add incoming clips to a specific bin in the Media Pool: Click a bin to select it, then
use any of the previously described methods to add media from the Media Storage
browser directly to that bin.
To move media from one bin to another: Drag one or more selected clips from their
current location in the Media Pool into that bin. Multiple clips in the Media Pool can be
selected by Shift-clicking or Command-clicking them, or by dragging a bounding box
over a group of clips. You can also drag one bin into another one.
To delete a bin: Select the bin you want to delete, and press the Backspace or Delete
key. Or, right-click a bin and choose Delete Bin. Deleting a bin with nested bins inside
of it results in that entire set of bins being deleted.
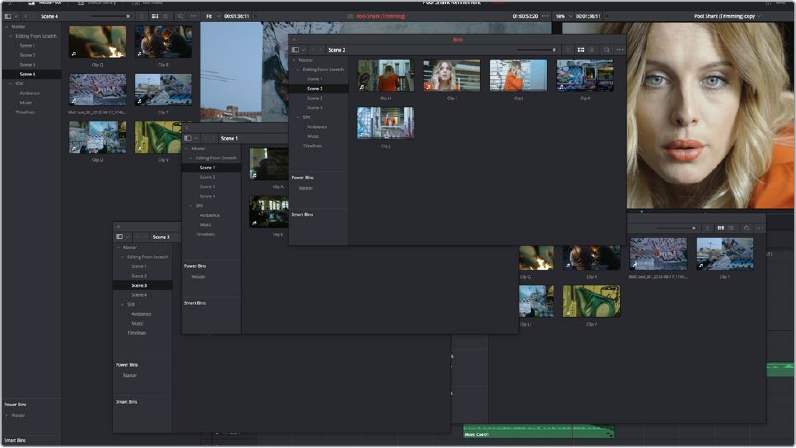
195
Adding and Organizing Media with the Media Pool Part 2 – 8
To sort bins: Right-click anywhere within the Bin list and choose an option from the Sort
By submenu. You can choose from Name, Date Created, Date Modified, and User Sort.
To reorganize bins manually: Right-click anywhere within the Bin list and choose Sort
By > User Sort. Then, drag bins up or down in the Bin list to put them into the order you
want. An orange dividing line shows where dragged bins will be placed when you drop
them and helps you see when a bin you’re dragging will become nested within another
bin or not. The User Sort order is saved even when you change to another sort order,
and selecting User Sort again results in your custom sort order being recalled.
Showing Bins in Separate Windows
If you right-click a bin in the Bin list, you can choose “Open As New Window” to open that bin
into its own window. That window is basically its own Media Pool, complete with its own Bin List,
Power Bins and Smart Bins lists, and display controls. This is most useful when you have two
displays connected to your workstation, as you can drag these separate bins to the second
display while DaVinci Resolve is in single screen mode. If you hide the Bin list, not only do you
get more room for clips, but you also prevent accidentally switching bins if you really want to
only view a particular bin’s contents in that window.
Multiple Media Pool bins opened as new windows
Using the Media Pool in Thumbnail View
If you work in Thumbnail view using the controls at the top right of the Media Pool, you have the
option to resize the thumbnails to make them easier to see, and you can move the mouse
pointer over each clip to hover scrub through its contents. Clicking any clip to select it displays
it in the Media page Viewer. Whichever clip is currently selected is also output to video for
monitoring.
In Thumbnail view, you can use the Sort Order pop-up, at the top right of the Media Pool,
between the Icon Size slider and the Icon/List view buttons, to choose how clips are sorted.
There are eleven options: File Name, Reel Name, Display Name, Start TC, Duration, Type, FPS,
Audio Ch, Flags, Date Modified, Date Created.
196
Adding and Organizing Media with the Media Pool Part 2 – 8
Working With Columns in List View
If you work in List view using the controls at the top right of the Media Pool, you gain additional
organizational control by exposing columns that show the metadata that each clip contains,
prior to media being added to your timeline. You can use these columns to help organize
your media.
Methods of customizing metadata columns in List view:
To show or hide columns: Right-click at the top of any column in the Media Pool to reveal the
column list, and while the column list is open, click the checkboxes of any columns you want to
show or hide. Unchecked columns cannot be seen. When you’re finished, click anywhere else
in the Media Pool to dismiss the column list.
To rearrange column order: Drag any column header to the left or right to rearrange
the column order.
To resize any column: Drag the border between any two columns to the right or left to
narrow or widen that column.
To sort by any column: Click the column header you want to sort with. Each additional
time you click, the same header toggles that column between ascending and
descending sort order.
Once you’ve customized a column layout that works for your particular purpose, you can save it
for future recall.
Methods of saving and using custom column layouts:
To create a column layout: Show, hide, resize, and rearrange the columns you need
for a particular task, then right-click any column header in the Media Pool and choose
Create Column Layout. Enter a name in the Create Column Layout dialog, and click OK.
To recall a column layout: Right-click any column header in the Media Pool, choose the
name of the column layout you want to use from the contextual menu, and choose Load
from that item’s submenu. All custom column layouts appear at the top of the list.
To edit a column layout: Load the column layout you want to edit, make whatever
changes you need to, then right-click any column header in the Media Pool, choose
the name of the column layout you just edited from the contextual menu, and choose
Update from that item’s submenu.
To delete a column layout: Right-click any column header in the Media Pool, choose
the name of the column layout you want to delete from the contextual menu, and
choose Delete from that item’s submenu.
While the available columns of metadata correspond to those fields shown in the Metadata
Editor, the available columns in the Media Pool of the Media and Edit pages are a subset of the
total amount of metadata that’s available, although they represent the most commonly used
metadata you’ll find yourself referring to when editing and finishing. The available columns in
List view include:
File Name: The file name of that clip.
Reel Name: The reel name of that clip. Dynamically generated by the “Assist using reel
names from the” setting in the General Options panel of the Project Settings.
197
Adding and Organizing Media with the Media Pool Part 2 – 8
Display Name: Editing the Display Name lets you change the name with which clips
appear throughout DaVinci Resolve when View > Use Display Name for Clip Titles is
enabled. By default, the display name mirrors the source clip’s file name. When editing
the display name in the List view of the Media Pool, you can use “metadata variables”
that you can add as graphical tags that let you reference clip metadata. For example,
you could add the corresponding metadata variable tags %scene_%shot_%take and
that clip would display “12_A_3” as its name if “scene 12,” “shot A,” “take 3” were its
metadata. The display name can also be edited in the Clip Attributes window. For more
information on the use of variables, as well as a list of all variables that are available in
DaVinci Resolve, see Chapter 81, “Using Variables and Keywords.”
Start TC: The timecode value of the first frame in the media file.
End TC: The timecode value of the last frame in the media file.
Duration: The total duration of the clip, in timecode.
In: The timecode value of the In point, if any, that’s stored for that clip.
Out: The timecode value of the Out point, if any, that’s stored for that clip.
Start: The first frame number of the media file.
End: The last frame number of the media file.
Frames: The total duration, in frames.
Type: The type of item, such as Video+Audio, Video, Audio, Timeline, Multicam, Still,
et cetera.
Resolution: The frame size of the media file.
FPS: The frame rate of the media file.
Audio Ch: The total number of audio tracks in the media file.
Audio Bit Depth: The bit depth of any audio channels in the media file.
File Path: The file path where that media file is located on disk.
Format: The image format used by that clip, such as QuickTime, MXF, WAVE, et cetera.
Video Codec: The specific codec used by the video portion of the media file.
Audio Codec: The specific codec used by the audio portion of the media file.
Optimized Media: Populated with the resolution of whatever optimized media you’ve
created (Original, Half, Quarter, etcetera). Clips that have not been optimized appear
with “None.”
Flags: Which flags, if any, have been added to a media file.
Usage: After a Timeline has been created by importing an AAF, EDL or XML project,
you can right-click the Media Pool and choose “Update usage” to refresh the
information shown in the Usage column to reflect how many times each clip is used
in the project. This makes it easy to identify clips that aren’t in use, and which can be
removed from the Media Pool.
IDT: If ACES color science is selected in the Color Management panel of the Project
Settings, the IDT used by that clip is listed here.
Input LUT: Which Input Look-Up-Table has been assigned, if any.
PAR: The Pixel Aspect Ratio, if assigned.
Data Level: The data level setting for the media file.
Date Created: The date the media file was created.
Date Modified: The last date the media file was modified.
198
Adding and Organizing Media with the Media Pool Part 2 – 8
Slate TC: The Slate timecode track used to sync audio with video.
Description: A user-editable field for entering information about that clip.
Comments: A user-editable field for entering information about that clip.
Keyword: A user-editable field for entering searchable keywords pertaining to that clip.
Shot: An editable field to contain the shot number of the media, relative to the scene.
Scene: An editable field to contain the scene number of the media, relative to the script.
Take: An editable field to contain the take number of the media, relative to the shot.
Angle: An editable field to contain the angle of the media in a multi-camera shoot.
Good Take: An editable field to contain the circled state of media, relative to the script
supervisor’s notes.
Roll/Card: An editable field to contain the roll number of media that was scanned
from film.
HDRX: Only displayed for R3D media, indicates whether or not it’s HDRX media.
Frame/Field: Whether that media file is progressive or interlaced.
H-FLIP: Whether that media file is horizontally flipped in DaVinci Resolve.
V-FLIP: Whether that media file is vertically flipped in DaVinci Resolve.
Input Color Space: If Resolve Color Management is selected in the “Color Science”
menu of the Color Management panel of the Project Settings, then this column will
show the Input Color Space that has been assigned to each clip. By default, all clips
inherit the Input Color Space setting that’s been selected in the Color Management
panel of the Project Settings.
Input Sizing Preset: The currently selected Input Format Preset, if there is one.
Start KeyKode: The starting KeyKode value of a scanned negative.
Duration: The duration of the media file.
Bit Depth: The bit depth of the media file.
Sample Rate: The sample rate of the media file’s audio, if there is any.
S3D Sync: Shows a frame count when you slip an eye to fix non-synced timecode
using the “Slip Opposite Eye One Frame Left/Right” commands. This parameter is
editable in the Media Pool.
Audio Offset: Lists the audio offset, in frames, for clips that have been synchronized to
separately recorded audio. This parameter is editable in the Media Pool.
Offline Video: Lists the offline reference video that has been assigned to a
given timeline.
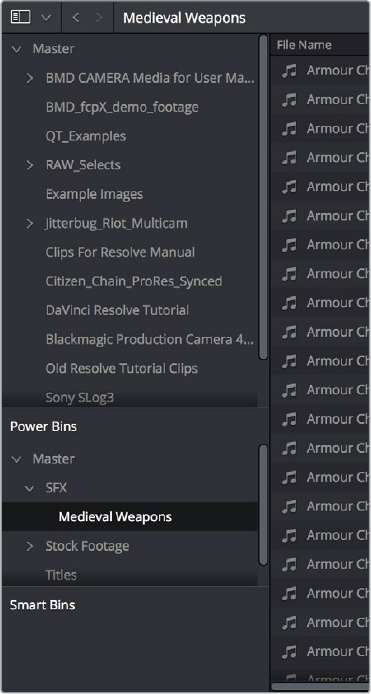
199
Adding and Organizing Media with the Media Pool Part 2 – 8
Creating and Using Power Bins
Power Bins provide a way of importing and organizing media that you want to be available to all
projects in DaVinci Resolve. Power Bins reside in a separate area of the Media Pool, with
resizable dividers separating them from both the ordinary bins and Smart Bins areas. Power Bins
are hierarchical, just like regular bins, and you can nest as many as you like, one inside another.
The Power Bins area of the Bin list
Like regular bins, Power Bins must be manually created by right-clicking within the Power Bins
area and choosing Add Bin. The difference is that whatever clips you import into Power Bins are
shared among all projects in a single-user installation, or all projects belonging to a particular
user in a multi-user installation. In this way, they’re similar to Power Grades in the gallery of the
Color page. This makes Power Bins ideal for storing shared media that’s re-used often, such as
stock video, sound effects, stills, and things like company slates and network graphics and
animations that go into every show of a series.
Power Bins are created and used like any other bin, using the procedures described previously.
To show or hide the Power Bin area of the Bin list:
Choose View > Show Power Bins to toggle the visibility of all power bins on and off.

200
Adding and Organizing Media with the Media Pool Part 2 – 8
Creating and Using Smart Bins
Another completely automated way of organizing media in the Media Pool is to create your own
custom Smart Bins, in order to sift out clips based on any of the intrinsic or user-entered
metadata that’s available in the Metadata Editor and Media Pool. Smart Bins work much the
same way as Smart Filters in the Color page, and they’re created and edited using the same
procedures. For more information about Smart Filters, see Chapter 40, “Using the Color Page.”
In fact, Smart Bins can be very sophisticated, allowing you to automatically gather clips together
using multiple criteria, and using multiple groups of multiple criteria for situations where you
need to gather clips that match all of one set of criteria, but only one of a second set of criteria.
In this way, you can create Smart Bins to solve a wide variety of organizational needs as you
edit your program.
It’s important to point out, however, that as much intrinsic metadata is available to every clip in
DaVinci Resolve automatically (clip properties such as frame rate, frame size, codec, file name,
et cetera), the more time you take entering extra metadata in the Metadata Editor to prepare
your project for editing and grading, for example entering scene and take information, and
keywords for things like character names, day and night, interior and exterior, framing, et cetera,
the more powerful Smart Bins can be in helping you to sift and sort through the contents of a
program you’re grading.
Imagine being able to gather all the clips in a particular scene, find all the interview clips for a
particular subject, or find all the establishing shots corresponding to a particular location. If you
or an assistant can take the time to enter metadata for the source material in a project that
identifies these characteristics, you’ll be able to work even more quickly to find the clips you
need for any given situation.
To show or hide the Smart Bin area of the Bin list:
Choose View > Show Smart Bins to toggle the visibility of all Smart Bins on and off.
To create a Smart Bin:
1 If necessary, open the Bin List and choose View > Show Smart Bins, and then right-click
anywhere in the background of the Smart Bin area of the Bin List and choose Create
Smart Bin.
2 In the Create Smart Bin dialog, enter a name for the filter, and use the following controls
to create one or more filter criteria (you can have as many filter criteria as you like):
The Create Smart Bin dialog
Match options: For multi-criteria filtering, choosing All ensures that every single criteria
you specify is met for a clip to be filtered. Choosing Any means that if only one out of
several criteria is met, that clip will be filtered.
Filter criteria enable checkbox: Lets you enable or disable any criteria without having
to delete it.
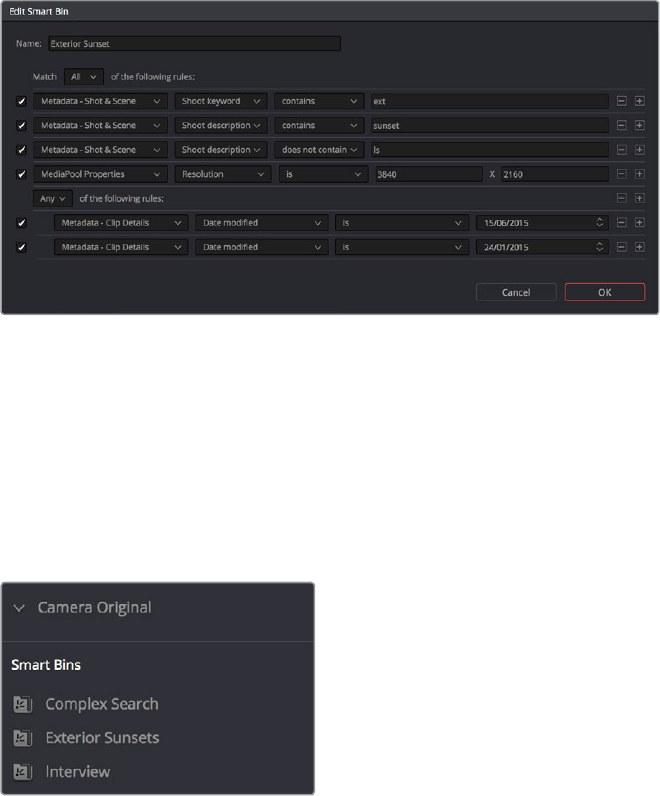
201
Adding and Organizing Media with the Media Pool Part 2 – 8
Metadata category pop-up: Lets you choose which category of metadata you want to
select a criteria from. Each category of metadata that’s available in the Metadata Editor
is available from this pop-up menu. Additionally, Color Timeline Properties (containing
many properties unique to the Color page timeline) and Media Pool Properties
(containing every column in the Media Pool) provide access to additional metadata you
can use for filtering.
Metadata type pop-up: For choosing which exact type of metadata to use, of the
options available in the selected metadata category.
Metadata criteria pop-up: Lets you choose the criteria by which to filter, depending on
the metadata you’ve selected. Options include “true/false,” integer ranges, date ranges,
string searches, flag and marker colors, et cetera.
Add filter criteria button: Lets you add additional criteria to create multi-criteria filters.
You could use multiple criteria to, for example, find all exterior clips, that also contain
the keyword “Sunset,” that aren’t closeups, in order to find all the exterior long and
medium shots in sunset lighting. Additionally, if you Option-click this button, you can
add a nested match option in order to create even more sophisticated filters, such as
when the filter must match all of one set of criteria, and any of another set of criteria.
A complicated Smart Bin with multiple criteria and a second match option setting
As you’re editing the filter criteria, the thumbnail timeline automatically updates to show you
how the Smart Bin you’re creating is working.
When you’re done editing the filter criteria, click Create Smart Bin. The resulting Smart Bin
appears in the Smart Bin area of the Bin list, at the left of the Media Pool’s browser area.
Once you’ve created a Smart Bin, it appears in the lower half of the Media Pool’s Bin list,
alongside every other Smart Bin in that project. This keeps them organized, separate from the
manually-created bin shown above.
All Smart Bins appear together at the bottom
ofthe Media Pool’s Bin list
Once you’ve created a Smart Bin, you can re-edit it whenever the situation requires.

202
Adding and Organizing Media with the Media Pool Part 2 – 8
Methods of modifying existing Smart Bins:
To rename a Smart Bin: Right-click the Smart Bin you want to rename, choose Rename
from the contextual menu, enter a new name, and press return.
To edit a Smart Bin: Double-click the smart bin, then edit the filter criteria, and click OK.
To delete a Smart Bin: Right-click the Smart Bin you want to delete, choose Delete
Smart Bin from the contextual menu, and click Delete in the warning dialog. Deleting a
Smart Bin does not delete any gathered media associated with that bin.
Finding Clips and
Timelinesin the Media Pool
There are several ways to locate different items in the Media Pool, be they clips or timelines.
Finding Clips and/or Timelines in the Media Pool
Clicking the magnifying glass button at the upper right-hand corner of the Media Pool exposes
the Search Options, which can be used to locate one or more clips based on the metadata
that’s selected in the Filter By pop-up menu to the left of it.
Smart Bins Work Better With Metadata
Keep in mind that the more metadata you associate with each clip, the more methods
you have at your disposal for creating custom Smart Bins (for editing) and Smart Filters
(for grading) with which to zero in on the clips you need for any given situation. This
will not only make it easier to find what you need, but it’ll help you to work faster. At
the very least, it would be valuable for you to use the Metadata Editor to add
information to each clip such as a Description, Shot and Scene designations, take
information, and possibly some useful keywords such as character names, shot
framing, interior or exterior keywords, et cetera.
For example, if you’ve entered enough metadata, then you can create multi-criteria
Smart Bins or Smart Filters that let you find the equivalent of “every close-up of Sally
inside the diner,” or “every long shot of Antonio outside in the parking lot.” In a
documentary, you could easily isolate “every interview shot of Louis from camera 1,” or
“every B-roll clip with Robyn.” All of this will help you find media faster for editing, or
quickly isolate similar clips that you need to match together for grading.
For more information about using the Metadata Editor, see Chapter 9, “Using
ClipMetadata.”
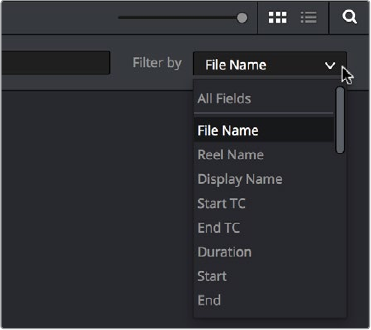
203
Adding and Organizing Media with the Media Pool Part 2 – 8
To find a clip in the Media Pool, first choose a criteria from the Search Options pop-up menu at
the top right of the Media Pool; you can choose All Fields to do a simultaneous search of every
metadata column in the Media Pool at once, or you can choose a specific criteria to restrict your
search. Then, type a search term in the Search field. As soon as you start typing, all clips that
don’t match the search criteria are temporarily hidden. To show all clips in the Media Pool again,
click the cancel button at the right of the search field.
Finding Timeline Clips in the Media Pool
If you have a clip in a timeline and you want to find the corresponding clip that it’s conformed to
in the Media Pool, you can right-click that clip and choose Find in Media Pool from the
contextual menu.
Finding Timelines in the Media Pool
If you’d like to find the currently open timeline’s location in the Media Pool, you can choose
Timeline > Find Current Timeline in Media Pool.
Finding Media in the Media
Storage Browser and Finder
If you find yourself needing to determine the location of a clip’s source media file on disk, you
can right-click an item in the Media Pool and choose Reveal in Media Storage browser. The
Library automatically opens to the folder containing the media file you’ve selected, with that
media file selected in the Library browser to the right.
Another feature that’s only available for OS X systems is the ability to right-click an item in the
Media Pool and choose Reveal In Finder. A file system window opens up, revealing the media
file that clip is linked to.
Going Immediately to a File System
Location in the Media Browser
Conversely, if you drag a folder from the Mac OS Finder into the Media Storage browser, the
Media Storage browser will immediately update to show the location of that folder.
The Search Options
pop-up menu (as
seen in the Edit page
Media Pool) lets you
choose what metadata
you’re searching
204
Adding and Organizing Media with the Media Pool Part 2 – 8
Relinking Media Simply
DaVinci Resolve keeps track of the relationship between clips in your project and their
corresponding source media on disk. If, for whatever reason, source media that links to clips in
your project becomes unavailable, DaVinci Resolve has several different methods of relinking
those clips in the Media Pool.
This section summarizes the top two methods of relinking. For more comprehensive information
on conforming projects and relinking media, see Chapter 34, “Conforming and Relinking Clips.”
Relink Selected Clips
The easiest method of relinking clips in your project that have gone offline is to use the
appropriately named “Relink selected clips” command. This is the most flexible method of
relinking clips in your project with clips in a file system directory of your choice, using file name
and timecode as the primary criteria for drawing a correspondence between each clip and the
corresponding media file on disk. When you relink clips this way, the original file path in DaVinci
Resolve is ignored, so this is a good command to use to relink to media that’s been
reorganized on disk.
To relink selected clips:
1 Select one or more offline clips to relink, or select a bin in the Media Pool bin list
that contains clips you want to relink, then right-click one of the selected clips or the
selected bin, and choose “Relink Selected Clips” from the contextual menu.
2 When the Relink File dialog opens, choose a directory in which to look for the files
you want to relink to, and click OK. DaVinci Resolve attempts to find every clip with a
matching file name in the subdirectories of the directory you chose, using the original
file paths of the clips being relinked to do this as quickly as possible. By first looking for
the clips in the directories they were originally in, relinking can be quite fast.
3 If there are any clips that couldn’t be found using the method in step 2, you’re prompted
with the option to do a “deep search” by a second dialog. If you click Yes, then DaVinci
Resolve will look for each clip inside every subdirectory of the directory you selected
in step 2. This may take significantly longer, but it should be completely successful so
long as the media that’s required is within the selected directory structure.
4 If there are still other clips that couldn’t be found, you’re prompted to either choose
another directory altogether to continue searching, or quit.
Change Source Folder
If you’ve used your file system to move media that’s associated with a DaVinci Resolve project,
but you haven’t changed the directory structure with which it’s organized, you can use the
“Change Source Folder” command to quickly relink selected clips in the Media Pool to the new
file path of the media on disk, using the original file paths as a guide. This is a good relinking
method to use, if possible, for projects on a SAN where you don’t want to risk the excessively
long search times that could result from using the Relink command to examine a nested
hierarchy of folders in a more flexible way.
205
Adding and Organizing Media with the Media Pool Part 2 – 8
To relink your Media Pool clips to a new location:
1 Select one or more clips in the Media Pool, then right-click one of the selected clips,
and choose “Change Source Folder” from the contextual menu. The Relink Media
window appears displaying the original path for the material, with controls for choosing
a new directory.
2 Click the “…” button to the right of the “Change To” field, and then use the file
navigation dialog to find the new location of the media file, select it, and click Open.
3 If you succeeded in finding the appropriate media file, click Change. Otherwise,
click Cancel.
207
Using Clip Metadata Part 2 – 9
Using Clip Metadata
DaVinci Resolve has powerful tools for viewing, editing, exporting, and importing metadata
associated with each clip in the Media Pool. Once your metadata house is in order, you can use
this metadata in the Edit, Color, and Audio pages to find, sort, and organize the clips in your
project, so you can work faster.
This chapter covers the following topics:
Editing Clip Metadata 208
Using the Metadata Editor 208
Editing Keywords 210
Creating Custom Metadata Groups 211
Importing and Exporting Media Pool Metadata 212
Different Ways of Using Clip Metadata 214
Renaming Clips Using Display Names 214
Switching Between File Names and Display Names 215
Using Metadata to Define Display Names 215
208
Using Clip Metadata Part 2 – 9
Editing Clip Metadata
Whether you’ve imported media in preparation for editing, or you’ve imported a project for
grading that resulted in media being imported automatically, once you’ve added clips to the
Media Pool, it would behoove you to consider taking the time to review and add metadata to
your clips.
At the very least, it would be valuable for you to use the Metadata Editor that’s available in
either the Media page or the Edit page to add information to each clip such as a Description,
Shot and Scene designations, Take information, and possibly some useful keywords such as
Character Names, Shot Framing, Interior or Exterior keywords, et cetera. If you’re especially
ambitious (or you have a very responsible assistant), you could go further and add Shoot Day,
Camera Type, Audio Notes, and other valuable information. Much of the metadata that is useful
in the day to day work of editing and grading can be found in the Shot & Scene group, but there
are many other potentially useful groups as well that you should explore.
Keep in mind that the more metadata you associate with each clip, the more methods you have
at your disposal for creating custom Smart Bins (for editing) and Smart Filters (for grading) with
which to zero in on the clips you need for any given situation. This will not only make it easier to
find what you need, but it’ll help you to work faster.
For example, if you’ve entered enough metadata, then you can create multi-criteria Smart Bins
or Smart Filters that let you find the equivalent of “every close-up of Sally inside the diner,” or
“every long shot of Antonio outside in the parking lot.” In a documentary, you could easily
isolate “every interview shot of Louis from camera 1,” or “every B-roll clip with Robyn.” All of this
will help you to find media faster for editing, or to quickly isolate similar clips that you need to
match together for grading.
Using the Metadata Editor
Whenever you select a clip in the Media Pool, its editable metadata appears in the
appropriately named Metadata Editor (so long as it’s displayed). You can use this editor to
further massage the metadata of the clips in a project, adding information on set that will be of
help later during editing and finishing.
By default, clips initially appear with a set of clip metadata called “Clip Details,” that shows some
of the most fundamental details of the clip such as start and end timecode, duration, bit depth,
et cetera.
Because there are so very many metadata fields that are available, two pop-up menus at the
top right of the Metadata Editor let you change which set of metadata is displayed.
Metadata Presets (to the left): If you’ve used the Metadata panel of the User
Preferences to create your own custom sets of metadata, you can use this pop-up to
choose which one to expose. Surprisingly enough, this is set to “Default” by default.
Metadata Groups (to the right): This pop-up menu lets you switch among the various
groups of metadata that are available, grouped for specific tasks or workflows.
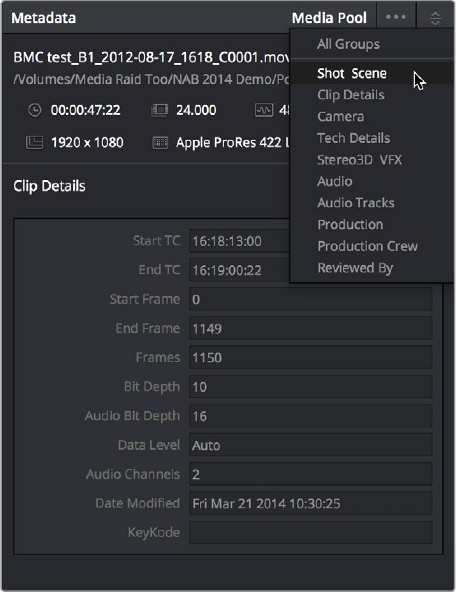
209
Using Clip Metadata Part 2 – 9
Metadata categories pop-up menu
If you want to see a list of every piece of metadata in a clip, you can choose All Groups.
Otherwise, you can choose any set of metadata to narrow your focus to just those items of
information.
To edit metadata for a single clip:
Select any clip in the Media Pool, and edit whatever metadata fields you require.
Theedited metadata is immediately saved.
To edit metadata for multiple clips:
1 Choose a metadata set using the pop-up menu in the Metadata Editor.
2 Select multiple clips in the Media Pool by Shift-clicking, Command-clicking, or dragging
a bounding box around them.
3 Edit whichever metadata fields you want to. Checkboxes are automatically turned on
for any metadata fields you edit.
4 When you’re done, always click the Save button at the bottom of the Metadata Editor.
When you edit metadata for multiple clips at once, it’s not automatically saved if you
create a new selection in the Media Pool without clicking the Save button first.
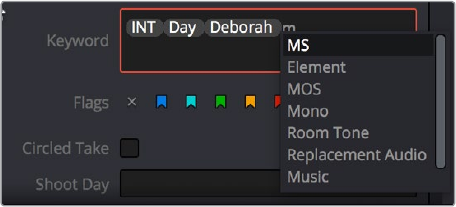
210
Using Clip Metadata Part 2 – 9
Editing Keywords
While most metadata in the Metadata Editor is edited via text fields, checkboxes, or multiple
button selections (such as Flags and Clip Color), the Keyword field is unique in that it uses a
graphical “tag” based method of data entry. The purpose of this is to facilitate consistency with
keyword spelling by making it easy to reference both a built-in list of standardized keywords, as
well as other keywords that you’ve already entered to other clips.
Once added, keywords are incredibly useful for facilitating searching and sorting in the Media
Pool, for creating Smart Bins in the Media and Edit pages, and for use in Smart Filters on the
Color page. Reaping these benefits by adding and editing keywords is simple, and works
similarly to the method of entering metadata variables that’s described in Chapter 81, “Using
Variables and Keywords.”
To add a keyword:
Select the Keyword field of the Metadata Editor, and begin typing the keyword you want to use.
As you begin typing, a scrolling list appears showing all keywords that are available using the
string of characters you’ve just typed.
To find a specific keyword in the list, start typing that keyword’s name and this list automatically
filters itself to show only keywords that contain the characters you’ve just typed. Choose which
keyword you want to use in the list using the Up and Down Arrow keys, and press Return to
choose that keyword to add.
The keyword list that appears when you type
within the Keyword field
As soon as you add one or more keywords, they appear as a graphical tag. To re-edit any
keyword, simply click anywhere within the Keyword field to edit it.
To edit a keyword:
Double-click any keyword to make it editable, then edit it as you would any other piece
of text, and press Return to make it a graphical keyword tag again.
To remove a keyword:
Click any keyword to select it, and press Delete.
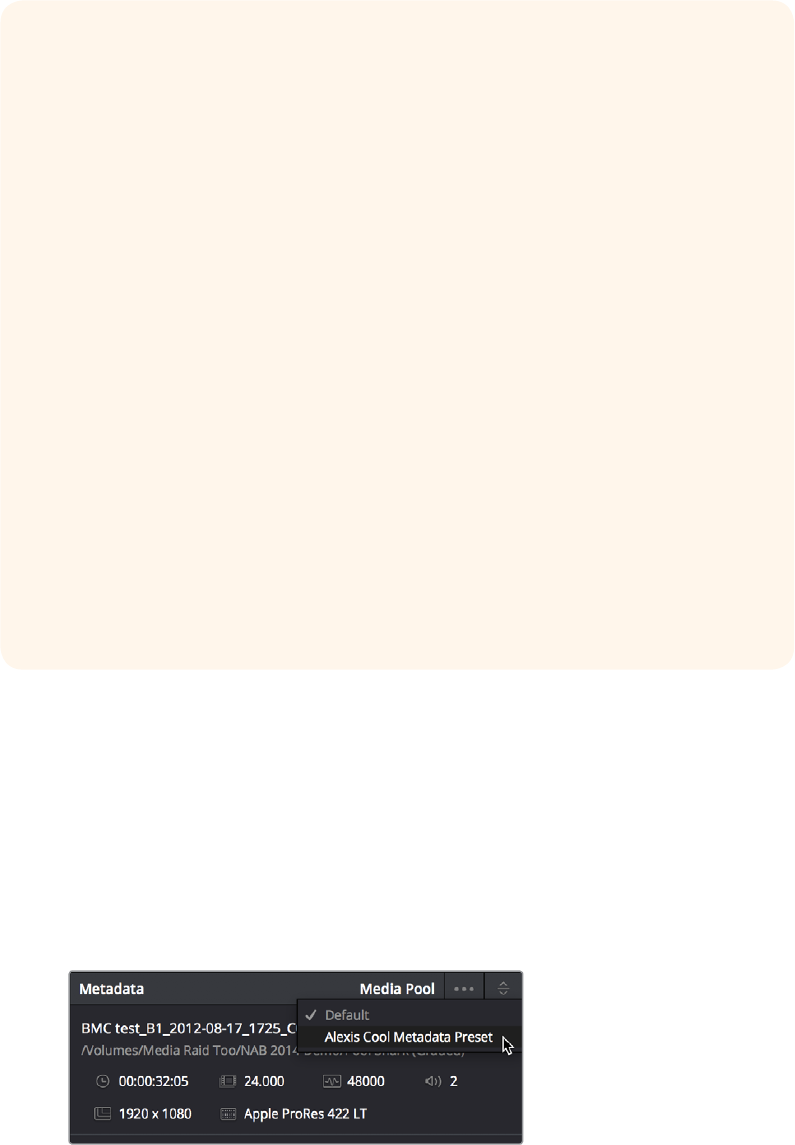
211
Using Clip Metadata Part 2 – 9
Creating Custom Metadata Groups
The Metadata panel in the User Preferences lets you create custom sets of metadata
parameters that will be exposed in the Metadata Editor. Using this panel, you can create
customized subsets of metadata that are focused on your particular needs.
Presets that you create are available from the Option menu that’s just to the left of the Metadata
categories pop-up menu.
Custom metadata categories pop-up menu
Choose any custom preset to restrict the Metadata Editor to only showing the metadata fields in
that preset. To see the full set of custom metadata fields you’ve saved to a particular preset, you
should set the Metadata Categories pop-up menu to All Groups. To make the full set of
metadata fields reappear, just choose default presets in the same pop-up.
Making and managing metadata presets is simple.
Tips For Editing Metadata
Editing metadata is like taking vitamins. Nobody wants to, but you know you probably
should. To encourage you to undertake this task so you can reap the benefits, here
are a few pointers.
Don’t start editing until you review your footage and add metadata. If you get into
the habit of entering your clip metadata before you get preoccupied with your
edit, you’ll be in a much better position to edit faster using organizational tools that
leverage the metadata you’ve entered.
Enter metadata starting with groups of clips and then moving to individual clips.
Since the Metadata Editor lets you add metadata for multiple selected clips at once,
it becomes easy to select groups of clips based on their thumbnails for entering
information such as Scene designations, Interior or Exterior keywords, Character
keywords, and Framing keywords. You’ll be surprised how fast this goes, and how
useful this information is later on, for both editing and grading.
After you’ve entered all the metadata you can in groups of clips, then switch
to entering clip-specific metadata such as Shot designations, Take numbers,
descriptions of action, and other clip-specific keywords.
There’s no right or wrong way to edit or use metadata, but a lack of consistency will
make it less useful. For example, if you’re identifying each clip that takes place at
the same diner, try to use the same keyword or descriptive text. If you call half the
shots “diner” and the other half “restaurant,” your ability to easily search for all the
diner shots will be compromised.
212
Using Clip Metadata Part 2 – 9
To create a new metadata preset:
1 Open the Metadata panel of the User pane of the Preferences window, and click New.
2 Click the checkboxes of every metadata tag you want to include in this preset, or click
the checkbox of a group name on the list to include all metadata tags within it.
Every single metadata tag available in DaVinci Resolve appears within one of several
groups that appear as a list. To open any group to see its contents, move the pointer
over that group’s entry on the list, and click the Open button when it appears.
3 When you’re finished, click the Save button.
To edit an existing metadata preset:
1 Select a preset from the list, and click Edit.
2 Turn checkboxes on and off to include or exclude whatever tags you need.
3 Click the Save button.
To delete a metadata preset:
Select a preset from the list and click Delete.
Importing and Exporting
Media Pool Metadata
Once you’ve taken the trouble to add metadata to the clips in your project, DaVinci Resolve
makes it possible to export metadata from the Media Pool of one project for import into the
clips of another project, for instances where you need to move metadata around.
For example, a DIT might have entered a lot of metadata to the DaVinci Resolve project used
for generating dailies, but then an impatient editor might have created a separate project to
begin editing those dailies. Instead of requiring the editor to enter each clip’s metadata all over
again, you can export the metadata from the DIT’s project and import it into the editor’s new
project, automatically matching the relevant metadata to each corresponding clip.
To export Media Pool metadata:
1 Open a project containing Media Pool metadata you want to export.
2 Optionally, select which clips in the Media Pool you want to export metadata for.
3 Choose File > Export Metadata From > Media Pool to export metadata from every clip
in the Media Pool, or choose File > Export Metadata From > Selected Clips to only
export metadata from clips you selected in step 2.
4 When the Export Metadata dialog appears, enter a name and choose a location for the
file to be written, then click Save. All metadata is exported into a .csv file that can be
viewed and/or edited in any spreadsheet application.
If you open the resulting metadata .csv file, the first line is a header that lists what metadata is to
be found for each item listed in this document, and in what order. Only metadata fields that
have been populated for at least one clip are exported and listed in this header; unused
metadata fields in the Metadata Editor or Media Pool are ignored.
This file can now be imported into another project file to reattach the metadata to the
same clips.
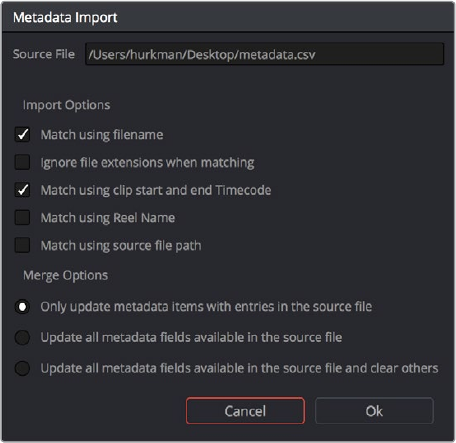
213
Using Clip Metadata Part 2 – 9
To import Media Pool metadata:
1 Open a project containing clips you want to populate with imported metadata.
2 Optionally, select which clips in the Media Pool you want to import metadata to.
3 Choose File > Import Metadata To > Media Pool to import metadata to potentially every
clip in the Media Pool, or choose File > Import Metadata To > Selected Clips to only
import metadata to clips you selected in step 2.
4 When the Import Metadata dialog appears, choose a metadata .csv file to import, and
click Open.
5 When the Metadata Import dialog appears, choose the Import Options you want to
use to match the .csv file’s metadata to the correct clips in the currently open project.
By default, DaVinci Resolve tries to use “Match using filename” and “Match using clip
start and end Timecode” to match each line of metadata in the .csv file with a clip in the
Media Pool, but there are other options you can use such as ignoring file extensions,
using Reel Name, and using source file paths.
6 Next, choose which Merge Option you want to use in the Metadata Import dialog.
There are three options:
Only update metadata items with entries in the source file: The default setting. Only
updates a clip’s metadata if there’s a valid entry in the imported .csv file. Other clip
metadata fields are left as they were before the import.
Update all metadata fields available in the source file: For each clip that corresponds
to a line of metadata in the imported .csv file, every single metadata field referenced by
the .csv file is overwritten, regardless of whether or not there’s a valid entry for that field.
Update all metadata fields available in the source file and clear others: For each
clipthat corresponds to a line of metadata in the imported .csv file, every single
metadata field referenced by the .csv file is overwritten, regardless of whether or not
there’s a valid entry for that field. Furthermore, metadata fields that aren’t referenced by
the imported .csv file are cleared of whatever metadata was there before.
The Metadata Import dialog that lets you choose options
for how to match and merge imported metadata
7 When you’re finished choosing options, click Ok and all available metadata from the
source .csv file will be imported.
214
Using Clip Metadata Part 2 – 9
Different Ways of Using Clip Metadata
To encourage you to take advantage of the clip metadata tools that exist in DaVinci Resolve,
here’s a short list of the many different ways you can use clip metadata to help you work faster.
Searching for clips in the Media Pool
Searching for clips in the Timeline
Sorting the Media Pool by metadata columns in list view
Creating Smart Bins in the Edit page
Creating Timeline Filters in the Color page
Using Metadata to create clip Display Names
Displaying Metadata in frame using the Color page Burn In palette
Renaming Clips Using Display Names
The most fundamental piece of clip metadata is each clip’s name, which is used to identify clips
nearly everywhere they appear inside DaVinci Resolve. By default, clips show the file name of the
corresponding media file on disk. Since the dawn of tapeless recording, however, editors have
been stuck with camera original media having names that are not exactly “human readable.”
Fortunately, you have the option of entering a more user-friendly display name to use instead,
while preserving the original file name that’s critical for maintaining the link between a clip and
its media, as well as for tracking an offline clip’s corresponding link to the online media from
which it originated. There are a few ways you can edit the display name of a clip.
Note: You can also edit the display names of timelines, compound clips, and multicam clips, so
that you can have two sets of naming conventions for these items, one for when you’re doing
creative editing, and one for when you’re doing finishing tasks.
To edit a clip’s display name, do one of the following:
In the Media Pool’s List view, show the Display Name column (hidden by default). By
default, the Display Name mirrors the source clip’s file name, but you can click the
Display Name column for any clip to add a new name from scratch.
With the Display Name column exposed in the Media Pool’s List view, Option-click
the Display Name column for any clip to edit the file name, rather than entering a
brand new name.
To edit the display name of multiple clips, select all of the clips for which you want to
change the display name, then right-click one of the selected clips and choose Clip
Attributes. Open the Name panel of the Clip Attributes window, edit the Display Name
field, and click OK.
After you’ve changed a clip’s display name, that clip appears in the following places using the
display name instead of the original file name:
The Media Pool’s Thumbnail view
The name bar of each clip in the Timeline
The Source Viewer title bar
The Display Name field of the Clip Attributes dialog’s Name panel

215
Using Clip Metadata Part 2 – 9
Switching Between File Names and Display Names
Since different tasks require different information, you have the ability to switch between using
clip file names and display names. For example, finishing editors will probably have more
reason to refer to the file name of each clip, making it easier to troubleshoot problems with
reconforming and relinking. Creative editors, on the other hand, will want to use easier-to-read
display names to make it easier to find what they need.
To switch between file names and display names:
Choose View > Show Display Names for Clip Titles to toggle between both naming
conventions.
Using Metadata to Define Display Names
If you’re an enthusiastic user of clip metadata (and you should be), you can use “metadata
variables” that you can add into a field that let you reference other metadata for that clip. For
example, you could add the combination of variables and text seen in the following screenshot.
Variables, once they’ve been entered, are represented as graphical tags shown with a
background, while regular text characters that you enter appear before and after these tags.
Variables and text characters entered to create a display
name based on a clip’s metadata
As a result, that clip would display “12_A_3” as its name if scene “12,” shot “A,” and take “3”
were its metadata. When you do this, you can freely mix metadata variables with other
characters (the underscore, as in the example above) to help format the metadata to make it
even more readable.
Every single item of metadata that’s available in the Metadata Editor can be used as a variable,
and several other clip and timeline properties such as the version name of a clip’s grade, a clip’s
EDL event number, and that clip’s timeline index number can be also referenced via variables.
Since the use of metadata variables is a great way to automatically generate names for multiple
clips, you may find it more useful to add metadata variable-driven display names by selecting all
of the clips you want to edit, and opening the Clip Attributes window. By editing the Display
Name field found in the Name panel, you can add a single display name to all selected
clips at once.
To add a variable to a text field that supports the use of variables:
1 Type the percentage sign (%) and a scrolling list appears showing all variables that are
available.
2 To find a specific variable quickly, start typing the characters of that variable’s name
and this list automatically filters itself to show only variables that contain the characters
you’ve just typed.
3 Choose which variable you want to use using the Up and Down Arrow keys, and press
Return to choose that variable to add.
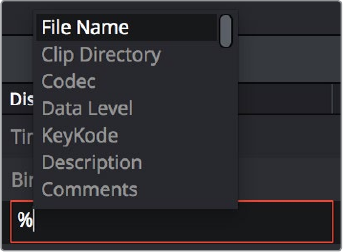
216
Using Clip Metadata Part 2 – 9
The variable list that appears when
you type the % character
As soon as you add one or more metadata variables to a clip’s Display Name column and press
return, the string is replaced by its corresponding text. To re-edit the metadata string, simply
click within that column, and the metadata variables will re-appear. Be aware that, for clips
where a referenced metadata field is blank, no characters appear for that corresponding
metadata variable in the Display Name column.
To remove a metadata variable:
Click within a field using variables to begin editing it, click a variable to select it, and
press Delete.
For more information on the use of variables, as well as a list of all variables that are available in
DaVinci Resolve, see Chapter 81, “Using Variables and Keywords.”
218
Modifying Clips and Clip Attributes Part 2 – 10
Modifying Clips and Clip Attributes
Once you’ve added clips to the Media Pool, you may find you have to make some changes to
prepare it for use in your project. This chapter covers diverse tasks that include syncing
dual-source audio, redefining the clip attributes associated with each source clip to reinterpret
video and audio attributes, timecode values, and display names, converting LTC timecode
recorded on an audio track into usable timecode, chopping long clips into more manageable
subclips, and creating stereo clips from left and right eye media.
This chapter covers the following topics:
Syncing Audio 219
Syncing Dailies Using Timecode 219
Syncing Dailies by Matching Waveforms 220
Manually Syncing Clips in the Timeline 221
Osetting the Sync of Previously Synched Clips 222
Changing Clip Attributes 222
Video Attributes 223
Audio Attributes 224
Timecode Attributes 226
Reel Name Attributes 227
Update Timecode from Audio – LTC 228
Changing Clip Thumbnails in the Media Pool 229
Creating Subclips 229
Organizing Stereo 3D Media 229
Camera Raw Decoding 230
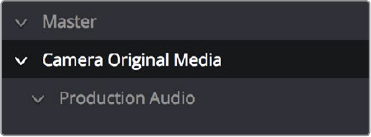
219
Modifying Clips and Clip Attributes Part 2 – 10
Syncing Audio
If you’re processing dailies for a shoot that used dual-system recording, where audio is
recorded to a separate device than video, you can sync the dailies in DaVinci Resolve in one of
two ways. Synced clips can be output as media files with embedded audio, or output to tape,
whatever your client requires.
Syncing Dailies Using Timecode
Ideally, if the sound recordist on set was highly organized, and the camera and audio recorder
both used synchronized timecode, you can use a single command to automatically sync every
clip in a Timeline to a bin of Broadcast .wav files that have matching timecode.
To batch sync dailies using timecode:
1 Create a new project, open to the Media page by default, and import the video media
you need to sync into any bin of the Media Pool.
2 Import the matching Broadcast .wav files into the same bin as the accompanying video
media you imported in Step 1. If you want to stay more organized, you can create
another bin to contain the audio clips, but it must be inside the bin that contains the
video files. The audio bin can be named anything you like.
Organizing production audio in a bin created
within the accompanying camera media bin
3 Right-click the bin containing the matching audio and video clips, and choose one of
the following commands from the contextual menu:
Auto-Sync Audio Based on Timecode: Replaces each video clip’s previous audio
channels with audio channels from the newly synced .wav files.
Auto-Sync Audio Based on Timecode and Append Tracks: Adds new channels
in addition to the audio channels that were previously in the media file. The newly
synced channels are added to an additional track, so when edited into the Timeline,
a clip that’s synced this way appears with one video clip and two audio clips
that occupy two different audio tracks, so you can edit the camera original audio
independently from the synced audio.
Every clip in the selected bin for which there was an accompanying Broadcast .wav file
with matching timecode is immediately synced with an audio track. All synced clips
appear with an audio icon at the bottom left in the Media Pool when Thumbnail view is
selected. Now that the clips are synced, you can edit them in the Edit page, or use the
Deliver page to export offline dailies or online media with embedded synch audio for
use in other applications.
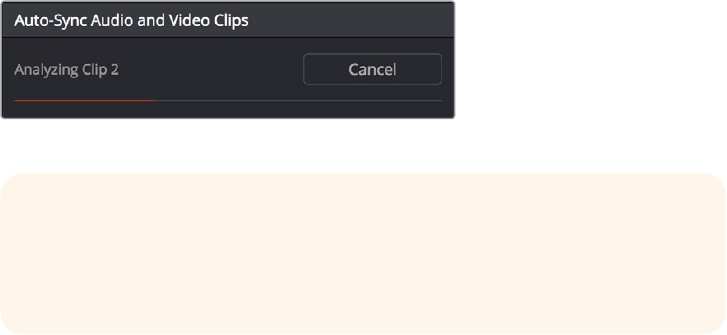
220
Modifying Clips and Clip Attributes Part 2 – 10
Syncing Dailies by Matching Waveforms
If you don’t have matching timecode in the audio and video source clips you’re syncing, but you
had the foresight to record camera audio at the same time as the dual source production audio
you want to sync to, DaVinci Resolve can use waveform syncing to compare the audio
waveforms of your audio and video source files, and sync the ones that match.
To batch sync dailies using waveform syncing:
1 Create a new project, open to the Media page by default, and import both the video
and audio media you need to sync. There’s no need to organize your files in any
particular way, but it’s not a bad idea, on multi-day shoots, to organize the audio
and video files so that it’s easy to select all of a single day’s clips at once so that
you can sync your files in smaller batches. Even organizing your clips by scene can
make waveform syncing go faster by reducing the number of files that need to be
compared at once.
2 If you’ve placed the audio and video into separate bins, then you can Command-click
both bins in the bin list to select them and expose all of their contents in the Media
Pool. If you placed your media in the same bin, this is not necessary.
3 Select one of the exposed clips in the Media Pool, and press Command-A to select all
audio and video clips you want to sync.
4 Right-click one of the selected clips, and choose one of the following commands from
the contextual menu:
Sync Video and Audio Clips: Analyzes and compares the waveforms of each of the
selected clips, and replaces each video clip’s previous audio channels with the newly
synced .wav files.
Sync Video and Audio Clips and Append Tracks: Adds new channels in addition
to the audio channels that were previously in the media file. The newly waveform-
synced channels are added to an additional track, so when edited into the Timeline,
a clip that’s synced this way appears with one video clip and two audio clips that
occupy two different audio tracks, so you can edit the camera- original audio
independently from the synced audio.
A progress bar dialog appears, showing you how long the syncing operation will take.
When it’s complete, your clips will be synced.
Progress dialog for syncing dialog using waveforms
TIP: After syncing, you may be notified via a dialog that one or more clips
could not be synced. Note these clips, as it may be possible to use waveform
syncing more successfully on just the selected pair of audio and video items
that belong together.
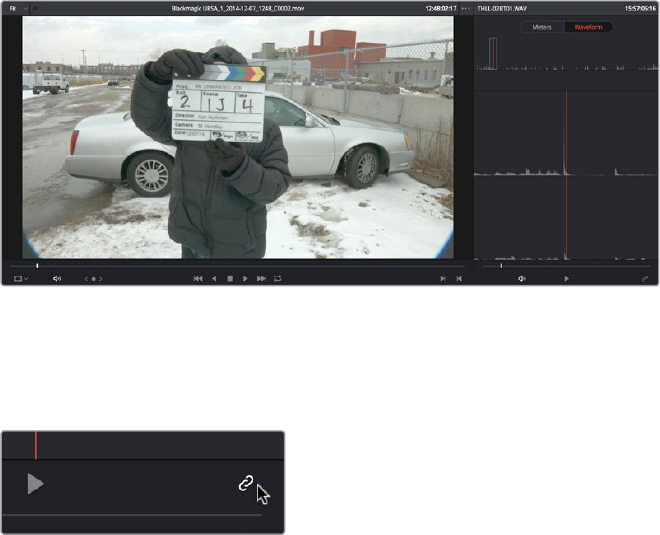
221
Modifying Clips and Clip Attributes Part 2 – 10
Manually Syncing Clips in the Timeline
If you have a collection of WAV or AIFF audio files with video source media that lacks matching
timecode, you need to manually sync each pair of media files together, one-by-one, using a
sync reference such as the clap of a clapperboard, or any other sharp sound with a distinct
audio/visual correspondence.
To manually sync dailies:
1 Create a new project, and import the video media you need to sync into the Media
Pool. If a dialog appears asking whether or not you want to update the project to match
the media, click OK.
2 If you want to stay organized, create a second bin in the Media Pool, named Audio
Clips, and import the matching Broadcast .wav files into it. The name of the bin is not
important, and having all the audio in one bin is simply a matter of convenience.
3 Click the Waveform button at the top of the Audio Panel, which lets you view and scrub
along the waveform of audio clips you select in the Media Pool.
4 Select a video clip to sync, and move the Viewer playhead to line up with the first visual
sync point in the first clip. This could be the clap of a clapper board, the red flash of
a tablet computer’s slate app, a hand clap, or any clear visual cue to which there is a
corresponding audible sound.
5 Now, select whichever audio clip corresponds to the current video clip in the Viewer, to
open its waveform into the audio panel.
6 Use the Audio panel transport controls and scrubber bar in the Source Viewer to move
the playhead to the audio sync point that corresponds to that video sync point. This
may be a clap, a beep, or some other staccato sound that’s easy to sync to. As you play
through the clip, the bottom half of the Viewer shows a zoomed out waveform for the
entire clip, while the top half of the Viewer shows a zoomed in section of the waveform
that immediately surrounds the playhead. Hopefully, the sync point you’re looking for
is a distinct, loud spike somewhere towards the beginning or the end (in the case of a
tailslate) of the audio clip.
Aligning video and audio sync points with the Audio Panel Set to show the Waveform panel
7 When you’ve found the audio sync point that matches the video sync point, click the
Link/Unlink Audio button at the bottom right of the audio panel to embed the now
synched audio into the video clip.
Clicking the sync link button to lock sync
222
Modifying Clips and Clip Attributes Part 2 – 10
The audio and video items are linked. At this point, you can use the newly synced clips
in the Edit page, and use the Deliver page to export offline or online media with
embedded audio for editing.
Offsetting the Sync of Previously Synched Clips
If you need to offset the audio (or stereo 3D) sync of the items that make up a clip later on, you
need only select the synced clip you want to resync in the Media Pool, then click the Waveform
button at the top of the Audio Panel to show the clip’s audio waveform, turn off the linked clip
button, change either the audio or video sync points, and turn the linked clip button back
on again.
You can also use two sets of commands for slipping the sync of any clip:
Trim > Slip Audio > Slip Audio One Frame Forward/Reverse: (Option-period and
Option-comma) Slips the audio/video sync of any clip in whole frame increments.
Trim > Slip Audio > Slip Audio One Subframe Forward/Reverse: (Option-right arrow
and Option-left arrow) Slips the audio/video sync of any clip in 1/10th frame increments.
Trim > Slip Eye > Slip Eye One Frame Forward/Reverse: (Command-Option-period and
Command-Option-comma) Slips the sync relationship between the eyes within a stereo
clip in whole frame increments.
Changing Clip Attributes
Using the Clip Attributes window, you can alter additional attributes for multiple clips all at once.
This window has some overlap with other clip attributes that are editable directly from
submenus within the Media Pool clip contextual menu.
To edit the attributes of one or more clips in the Media Pool:
1 Select one or more clips in the Media Pool by Shift-clicking, Command-clicking, or
dragging a bounding box around them.
2 Right-click one of the selected clips, and choose Clip Attributes.
3 Click to open the panel of the attributes you want to edit. If you’ve selected multiple
clips, then making your alterations automatically checks the box of the attributes
being changed.
4 When you’re finished, click OK to accept the changes.
Starting in DaVinci Resolve 12.5, you can also edit select clip attributes for clips that have been
edited into the Timeline.
To edit the attributes of one or more clips in the Timeline:
1 Select one or more clips in the Timeline by Shift-clicking, Command-clicking, or
dragging a bounding box around them.
2 Right-click one of the selected clips, and choose Clip Attributes.
3 Click to open the panel of the attributes you want to edit. If you’ve selected multiple
clips, then making your alterations automatically checks the box of the attributes
being changed.
4 When you’re finished, click OK to accept the changes.
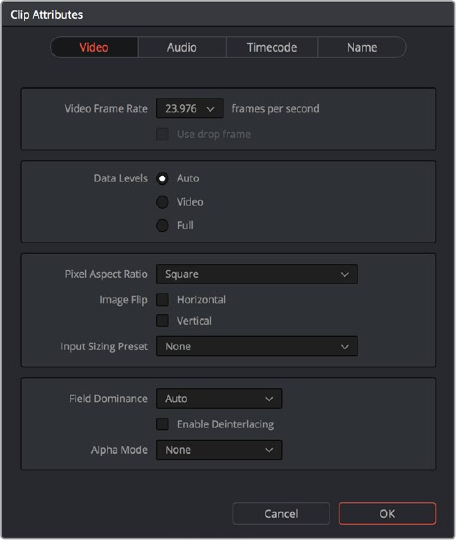
223
Modifying Clips and Clip Attributes Part 2 – 10
Video Attributes
These affect individual clip frame rate, geometry, and data levels.
The Video panel of the Clip Attributes Window
Video Frame Rate: In cases where a clip’s frame rate was specified incorrectly by
another application or recording device, or if there is no frame rate metadata available
at all, you can change what DaVinci Resolve considers the frame rate of the source clip
to be by either choosing “Custom” and typing a value, or using this menu to choose
a frame rate from 1 to 120 fps. Changing a clip’s Video Frame Rate will change its
duration and relative playback speed in DaVinci Resolve. A clip’s audio, however, will
be unaffected.
Data Levels: In certain circumstances, you may find that you need to manually choose
appropriate data levels for clips that are not being interpreted correctly, choosing
between “Video Level” and “Data Level.” For more information on this setting, and
how it affects the image data in your project, see Chapter 6, “Data Levels, Color
Management, ACES, and HDR.”
Pixel Aspect Ratio: In projects using a mix of media with different frame sizes, you can
assign specific pixel aspect ratios using this pop-up menu.
Horizontal and Vertical Image Flip: Modifies the horizontal and vertical image flip
camera metadata for r3d clips, which is useful for stereoscopic 3D projects shot with a
mirrored camera rig that reverses the media from one eye, or in cases where steadicam
rigs result in upside-down clips. These settings are different from the Flip Image
controls in the Sizing palette of the Color page.
Input Sizing Preset: You can use this panel to assign a Sizing palette preset to select
clips. For example, if you have a special Input Format Preset for standard definition
PALwidescreen clips that you’ve edited into a high definition project, you can do a sort
in the Media Pool to isolate them, and then select them all and apply this preset.
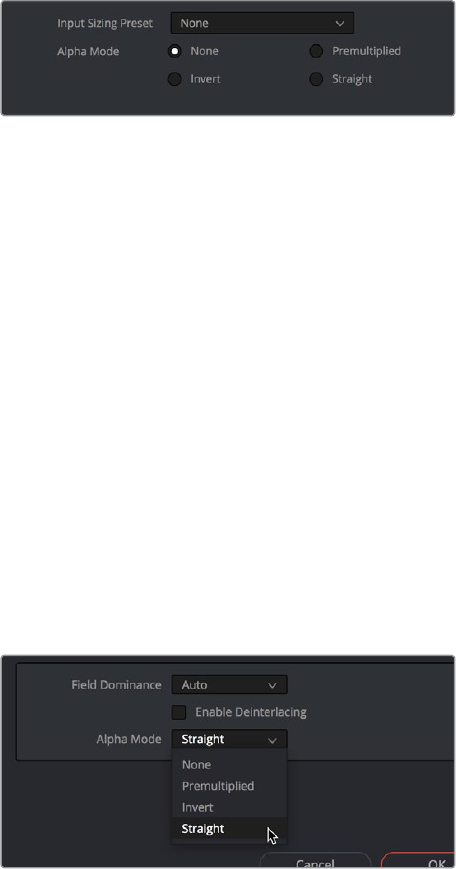
224
Modifying Clips and Clip Attributes Part 2 – 10
Alpha Mode: The options presented here depend on the format of the clip you’ve
selected, since only certain formats (such as ProRes 4444, QuickTime Animation,
OpenEXR, TIFF sequences, et cetera) are capable of containing alpha channels. If
you’ve imported clips with embedded alpha channels, this panel lets you enable or
disable their use in DaVinci Resolve (by choosing None), choose the type of alpha
channel (Premultiplied or Straight), or invert the alpha channel. If you select a clip that
doesn’t contain an alpha channel, then most of these options don’t appear.
The Alpha Mode options that are available when a clip has
an embedded alpha channel
Field Dominance: By default, the Auto setting enables DaVinci Resolve to automatically
determine whether a particular clip is Upper- or Lower-field dominant. If this automatic
determination is wrong, you can choose Upper or Lower to manually override this..
Enable Deinterlacing: (only available in Studio version) This checkbox is only enabled
if “Enable video field processing” is turned off in the Master Settings panel of the
Project Settings. Turning the “Enable Deinterlacing” checkbox on sets DaVinci Resolve
to deinterlace clips using the “Deinterlace quality” setting that’s located in the Image
Scaling panel of the Project Settings. Normal is a high-quality deinterlacing method
that is suitable for most clips, while High is a more processor-intensive method that can
sometimes yield better results, depending on the footage.
Alpha Mode: The options presented here depend on the format of the clip you’ve
selected, since only certain formats (such as ProRes 4444, QuickTime Animation,
OpenEXR, TIFF sequences, et cetera) are capable of containing alpha channels. If
you’ve imported clips with embedded alpha channels, this panel lets you enable or
disable their use in DaVinci Resolve (by choosing None), choose the type of alpha
channel (Premultiplied or Straight), or invert the alpha channel. If you select a clip that
doesn’t contain an alpha channel, then most of these options don’t appear.
The Alpha Mode options that are available when a clip has an embedded alpha channel
Audio Attributes
The Audio panel lets you alter the channel format and channel assignments for one or more
clips. These settings affect what appears in the audio tracks of the Timeline when you edit a
clip into a program. When you first import clips into the Media Pool, you can use the Audio
Attributes panel to define which embedded audio tracks can be used for editing, and how they
will appear in the Timeline.
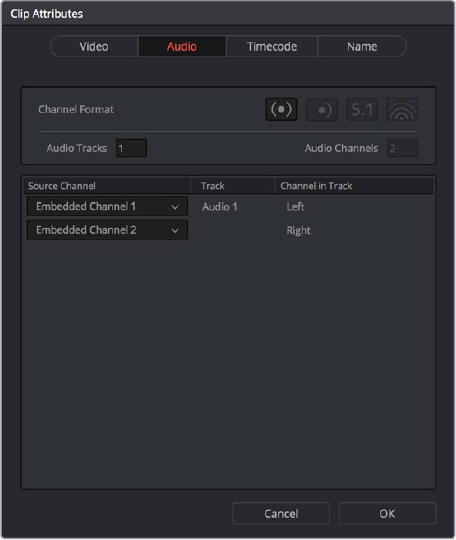
225
Modifying Clips and Clip Attributes Part 2 – 10
The Audio panel of the Clip Attributes Window
Channel Format: A pop-up that lets you choose what format each specified track of a
clip’s audio uses. The setting you choose here affects how many channels appear in
the Channel Assignments list below, as well as what kind of Timeline audio track will be
required to expose all channels of that clip. If you choose a Channel Format with fewer
channels than are embedded in a clip, all extraneous channels will be disabled. The
available options are:
Mono: Appropriate for single-channel clips
Stereo: Appropriate for clips with two-channel left/right audio
5.1: Appropriate for 5.1 surround mixes.
7.1: Appropriate for 7.1 surround mixes.
Adaptive: Appropriate for multiple-mono production audio, such as multi-channel
recordings where a boom microphone, two separate lavaliere microphones, and a
mix-down track are recorded simultaneously.
Audio Tracks: Shows how many tracks of embedded audio a clip has, this parameter
is freely editable. Each track specified will result in an additional linked audio item
being edited into an additional audio track when this clip is edited into the Timeline.
For example, if you have a multi-channel production recording with four different
microphones, you can set the Channel format to Mono, then specify 3 Audio Tracks and
assign each channel to a separate track to expose each channel as an individual audio
clip in the timeline for purposes of editing each microphone separately.
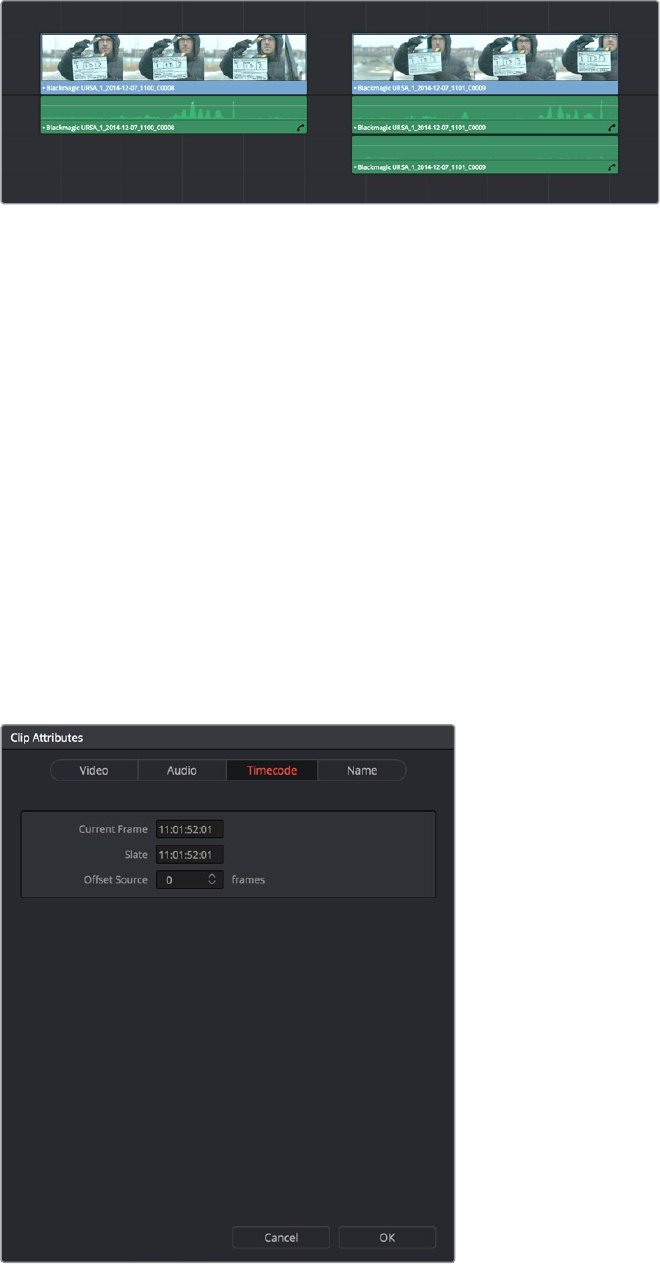
226
Modifying Clips and Clip Attributes Part 2 – 10
A clip with a single track of two-channel stereo audio at left, compared to a
clip with two tracks of single channel mono audio at right
Audio Channels: Defined by the Channel Format, shows how many channels will be
embedded in each Track. This value is only editable if the Channel Format is set to
Adaptive, in which case it can be set from 1 to 16.
Source Channel Assignments list: This list shows an entry for each track made
available by the selected Channel Format. A pop-up menu lets you change which
embedded clip audio channel is mapped to each available track as determined by
the Channel Format. Alternately, you can disable channels you don’t want to use by
choosing Mute.
Timecode Attributes
If you find yourself dealing with clips that have incorrect timecode, or timecode with an
incorrect relationship to the EDL, XML, or AAF project you’ve been given, you can use these
attributes to modify the timecode and reel name of clips in the Media Pool. None of these tools
alter the source media on disk. They simply change the timecode metadata in your DaVinci
Resolve project, which by extension affects the timecode of any media you render.
The Timecode panel of the Clip Attributes Window
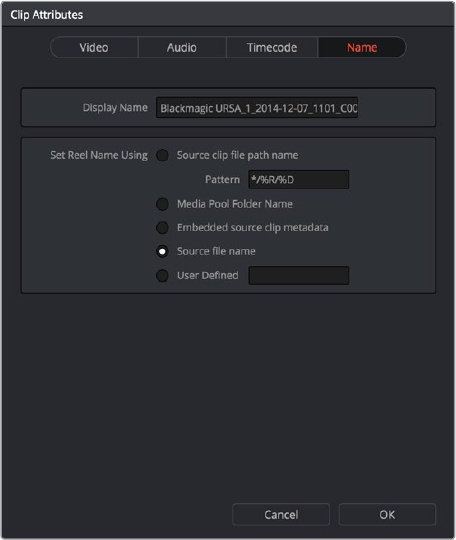
227
Modifying Clips and Clip Attributes Part 2 – 10
Current Frame Timecode: Lets you assign a new time for the timecode at the currently
viewed frame of the clip.
Slate Timecode: In situations where source media comes from a shoot where a
timecode slate was used during the shoot, then you can assign the slate timecode as
a second timecode track that can be used for various operations, without changing the
primary timecode of the clip, which may already be in use for program sync.
To set appropriate Slate timecode, select a clip in the Media Pool with a visible
timecode slate, and move the playhead to a frame where the timecode in the slate is
clearly readable. Then, open the Timecode panel of the Clip Attributes window, and
type the timecode value you see in the image into the Slate Timecode field.
Offset Source Timecode: If an entire set of clips has timecode that’s merely offset, you
can correct the timecode offset for as many selected clips as you like.
Reel Name Attributes
The “Assist using Reel Names” checkbox in the General Options panel of the Project Settings is
an extremely important setting for controlling how the conform process works. By default it’s
turned off, and Reel Names are left blank. This is fine for conform workflows where all you need
is the file path or file name and source timecode to successfully identify which media files
correspond to what clips. However, if you need more information than that to reconform the
clips in your project, you can turn on the “Assist using Reel Names” checkbox to enable DaVinci
Resolve to use one of four different methods to automatically define reel names for every clip in
the Media Pool.
Using the Clip Attributes dialog, you also have the option of manually defining how one or more
selected clips in the Media Pool have their Reel Names defined. This is useful when there are
certain clips in a project that need to use a different method of reel name extraction, or
manually entered reel names. Once you’ve used Clip Attributes to change the reel names of
clips, those clips no longer automatically update when you change the “Assist using Reel
Names” options in the Project Settings.
You must first turn on “Assist using Reel Names” in the General Options of the Project Settings,
and choose a Reel Assist setting, for the reel name attributes in the Clip Attributes window to
be editable.
The Reel Name panel of the Clip Attributes Window
228
Modifying Clips and Clip Attributes Part 2 – 10
Source clip file pathname: Obtains the reel name by extracting it from each media
file’s path. This makes it possible to extract a reel name from all or part of the file name,
or from all or part of the name of any folder in the path that encloses that file. This
extraction is defined using the Pattern field.
Pattern: A code that defines how a reel name should be extracted from the source clip
pathname. More information about creating patters appears later in this chapter.
Media Pool bin name: The reel name is obtained from the name of the bin in the
Media Pool that encloses that clip. For example, in a stereoscopic workflow you might
want to export offline stereo media with the “Left” and “Right” bin names in which
they’re organized as reel names. Another example would be organizing VFX being
incrementally processed in individually named bins, such as “VFX_Tuesday_10-12.”
Embedding in Source clip file: Useful for file formats where the reel name is
embedded within the media file itself. CinemaDNG and other digital cinema cameras,
QuickTime files created by Final Cut Pro, and DPX frame files are formats that can
contain reel name header data.
Source clip filename: If there is no defined reel number, often it’s easy to just use the
Source clip filename.
User Defined: This option is only available when you manually alter the reel name for
one or more selected clips in the Media Pool using the Clip Attributes dialog. Choosing
User Defined lets you type any string of text you like to use as the reel name.
Update Timecode from Audio – LTC
Some cameras do not offer the ability to sync to an external timecode source. Their recorded
timecode may be time of day or free run timecode, but it would not be frame accurately synced
to other cameras, the dual system audio recorder or the digital slate. This makes multi-cam or
dual sound system syncing a time consuming manual operation.
DaVinci Resolve offers a solution to this problem if, by connecting an externally generated
timecode to the camera audio input, the video that’s recorded by the camera has a timecode
reference recorded on the audio track during the shoot.
Select this clip, or clips, in the media pool, then right-click on one of the highlighted clips and
select “Update timecode from audio - LTC.” DaVinci Resolve automatically and instantly updates
the clip timecode using the LTC it finds on the audio tracks. You can now use the clips as
though they were synced on set.
229
Modifying Clips and Clip Attributes Part 2 – 10
Changing Clip Thumbnails
in the Media Pool
When the Media Pool is in Thumbnail mode, each clip is represented by a small image that
defaults to the first frame of that clip. You can scrub the thumbnail of any clip to view its
contents using the pointer after hovering over it for a moment. However, when you’re done
scrubbing, moving the pointer away from any clip returns its thumbnail to the first frame of
media, which may or may not be representative of its contents. You can change this, if you like.
To customize the thumbnail of any clip:
1 Move the pointer over a clip you want to customize the thumbnail of.
2 Hover for a moment, then scrub to a representative frame.
3 Right-click that clip, and choose Set Poster Frame.
To clear the custom poster frame of any clip:
Right-click a clip and choose Clear Poster Frame.
Creating Subclips
Subclips give you another way of organizing media in the Media Pool, letting you break
excessively long clips into shorter ones. For example, if the director of a project is fond of
“rolling takes” where multiple takes are all recorded within a single clip, you can break these
takes up by making them into subclips.
To create a subclip:
1 Select any clip in the Media Pool to open it into the Viewer.
2 Set In and Out points to define the section you want to turn into a subclip.
3 Right-click the jog bar and choose Make Subclip.
A new subclip appears in the Media Pool, automatically selected so that you can
immediately edit its metadata in the Metadata Editor.
Once created, subclips appear and work like any other clip in DaVinci Resolve.
Organizing Stereo 3D Media
When working with stereo media in DaVinci Resolve, one of the first tasks you must perform is
that of syncing each stereo pair of clips to act as a single clip. This is easily accomplished so
long as you’re careful about how you organize your media in the Media Pool.
Each set of right- and left-eye media should always be organized into separate left-eye bins and
right-eye bins, to facilitate later syncing of these clips using the Stereo 3D Sync command in the
Media Pool contextual menu. For more information about setting up media for stereo
workflows, see the “Stereoscopic Workflows” section of Chapter 80, “Stereoscopic Workflows.”
230
Modifying Clips and Clip Attributes Part 2 – 10
Camera Raw Decoding
Camera raw media formats are so named because they capture raw color space data directly
from the sensor of whatever digital cinema camera did the recording. Raw image data is not
human readable, and must be debayered or demosaicked to convert the original raw data into
image data that can be handed off to DaVinci Resolve’s image processing pipeline.
There are four ways you can control how camera raw media is debayered into a useful,
“normalized” image for adjustment or output:
The Camera Raw panel of the Project Settings contain groups of parameters that
correspond to every camera raw media format that’s supported by DaVinci Resolve.
Using these parameters in the Camera Raw panel, you can override the original camera
metadata that was written at the time of recording, and make simultaneous adjustments
to all camera raw media throughout your project.
When you right-click one or more selected camera raw clips in the Media Pool, there
are a series of “Edit Codec Settings” menu options corresponding to each supported
camera format in the contextual menu that appears. Choosing one of these commands
opens a Camera Raw window that exposes controls mirroring those found in the
Camera Raw panel of the Project Settings.
The Camera Raw palette in the Color page lets you individually adjust Camera Raw
parameters for individual clips in the Timeline.
When you use Resolve Color Management (RCM) in a project that uses Camera Raw
formats, color science data from each camera manufacturer is used to debayer each
camera raw file to specific color primaries with linear gamma, so that all image data
from the source is preserved and made available to DaVinci Resolve’s color managed
image processing pipeline. As a result, the Camera Raw project settings and Camera
Raw palette of the Color page are disabled, because RCM is controlling the debayering
of all camera raw clips, and all image data from the raw file is available for conversion to
the Timeline Color Space you choose to work with as you grade.
For more information about each of the Camera Raw formats that can be adjusted in DaVinci
Resolve, see Chapter 4, “Camera Raw Settings.”
232
Using Scene Detection Part 2 – 11
Using Scene Detection
If you have a program that someone has delivered as a single media file, with no accompanying
EDL with which to split it up, you can use DaVinci Resolve’s Scene Detect window to
automatically find the cut points and split it into individual clips, ready for grading.
This chapter covers the following topics:
Using Scene Detection 233
The Scene Detect Window Interface 233
The Scene Detect Viewers 233
The Scene Detect Graph 235
Cut List 236
The Scene Detect Options Pop-Up Menu 237
An Example Scene Detect Workflow 237
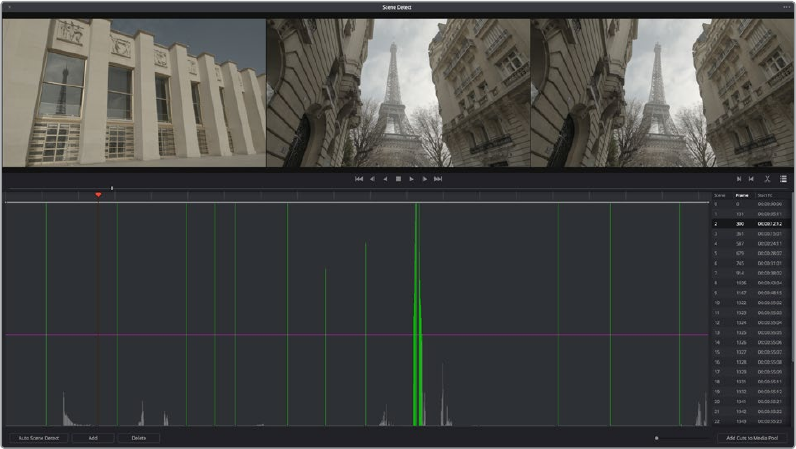
233
Using Scene Detection Part 2 – 11
Using Scene Detection
Initiating scene detection is easy:
To open a clip into the Scene Detect window:
1 Open the Media page, and use the Media Storage browser to find and select the clip
you need to split apart. Do not add a clip you want to use scene detection on to the
Media Pool first. You need to use Scene Detection before the clip has been imported.
2 Do one of the following:
Right-click the file and choose Scene Cut Detection.
Using the DaVinci control panel, press SHIFT DOWN and DECK/REVIVAL/SCENE on
the T-bar panel.
The Scene Detect window opens up, containing the clip you selected.
The Scene Detect Window Interface
The Scene Detect Window is divided into three main areas, the Viewers, the Graph, and the Cut
List. Together, these controls let you analyze the movie, examine the automatically found cuts,
and manage the Cut List in preparation for sending back to your project.
Scene Detector window
The Scene Detect Viewers
A set of three viewers appear at the top of the Scene Detect window. These three viewers are
designed to make it easy to test whether the playhead in the Scene Detect Graph is on a cut
point or not. The leftmost viewer is the last outgoing frame of a detected cut point. The center
viewer shows the first incoming frame of that cut point, and the rightmost viewer shows the
second incoming frame of that cut point.

234
Using Scene Detection Part 2 – 11
If the playhead in the Scene Detect Graph is directly on top of an edit point, the leftmost viewer
should show a completely different frame than the center and rightmost viewers, which should
be very similar to one another. This can be seen in the following example.
The Scene Detect Viewers show the last frame of the outgoing clip, and the
first two frames of the incoming clip
If all three viewers appear to display a continuous series of frames, then you’re not looking at a
cut point.
No scene cut here as all images are almost the same
Underneath the viewers are a series of controls.
The Scene Detect viewer transport controls
Transport Controls: A set of seven transport controls include: first frame, step back,
play reverse, stop, play forward, step forward, last frame.
The In, Out, Prune, and Show Cut List controls
In: Lets you set a red In point, with which to define a range of the Scene Detection
Graph to prune.
Out: Lets you set a cyan Out point, with which to define a range of the Scene Detection
Graph to prune.
Prune: If you’ve identified a large number of false positive scene cuts (for example, a
cluster of cuts corresponding to a dissolve from one shot to another), use the In and
Out buttons to surround the undesirable range of scene cuts in the Scene Detect
Graph, and then click Prune Scene Cuts to eliminate all scene cuts between these
points that are within one frame of another scene cut. Within the group of identified
cuts, the highest probability cut will remain while the other cuts are deleted.
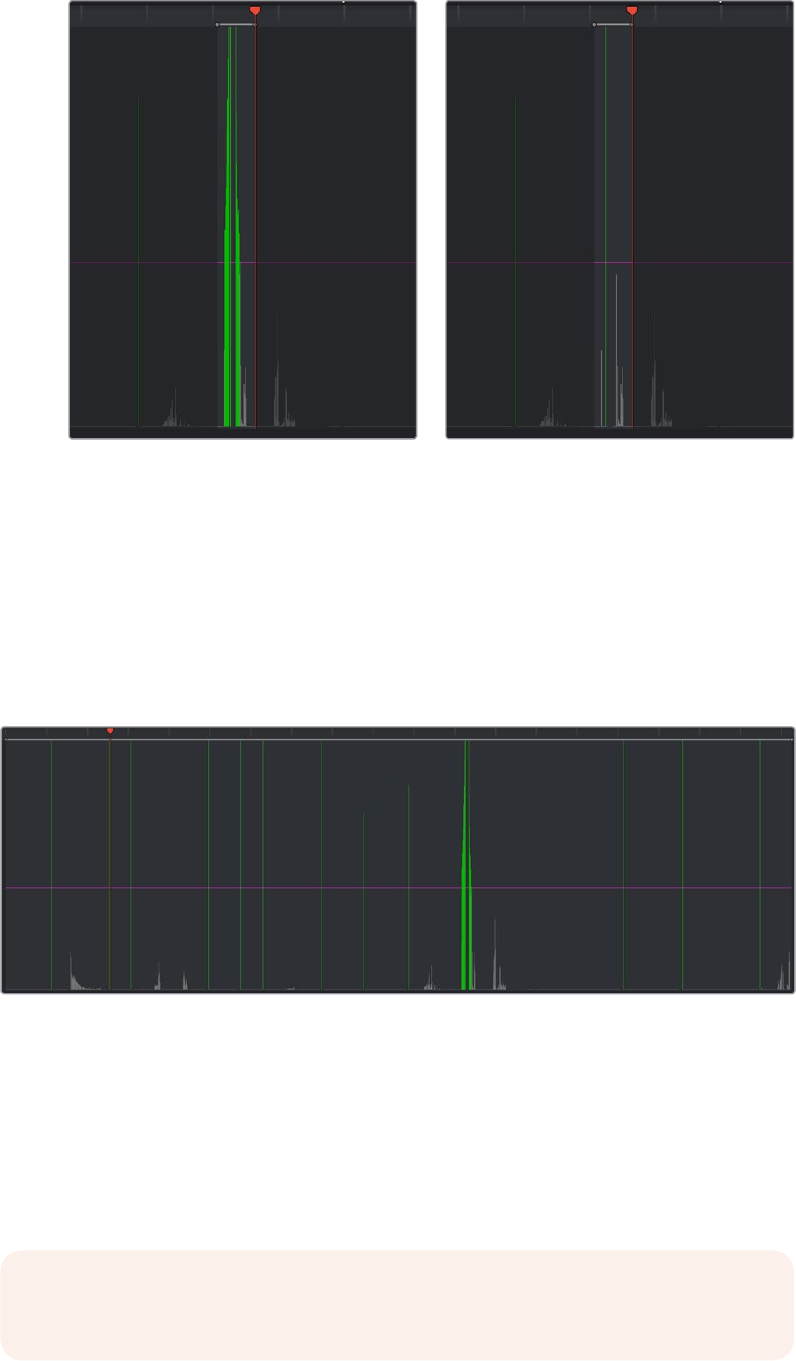
235
Using Scene Detection Part 2 – 11
(Left) Isolating scene cuts to prune with In and Out points,
(Right) The result of clicking the Prune button to eliminate all unwanted scene cuts but one
Show Cut List: Shows and hides the Cut List, which shows the currently detected
scene cuts.
The Scene Detect Graph
The majority of the bottom half of the Scene Detect window, to the left, consists of the Scene
Detect Graph, which shows the scene detect analysis results after you’ve clicked the
Start button.
Detection graph displays potential scene cuts
Frames that DaVinci Resolve thinks are cut points appear as green vertical “scene cuts” of
various heights. The height of each scene cut corresponds to the likelihood that frame is really
an edit point, and not a swish pan, sudden jump in the motion of the frame, or abrupt change in
color or lighting, all of which can fool the scene detection algorithm.
A horizontal magenta confidence bar lets you choose the threshold of confidence required for
scene cuts to be added to the Cut List. If you drag this bar up above any shorter scene cuts of
low confidence, those lines turn gray and are omitted from the Cut List.
NOTE: Dissolves and other transitions are not automatically detected, although
dissolves most often appear as a triangular cluster of lines peaking in the middle.

236
Using Scene Detection Part 2 – 11
Three controls appear underneath the graph.
Start Scene Detect: This initiates the scene cut detection process.
Add: Lets you manually add a scene cut at the current position of the playhead.
Sometimes two adjacent clips with similar color and lighting will appear to be a single
clip to the scene detection algorithm. This lets you add scene cuts at frames where
they weren’t initially found.
Delete: Lets you manually delete a scene cut located at the position of the current
frame indicator within the graph.
Zoom Slider: Lets you zoom into and out of the Scene Detect Graph to see more or
less detail as you examine the results.
Cut List
At the lower right of the Scene Detect window, the Cut List displays one entry for each of the
scene cuts that intersect the confidence bar.
The Cut List shows all currently detected cuts
Three columns show each cut’s order number, frame number, and timecode value. You can
select items in the Cut List to evaluate each cut using the three viewers above. Whenever you
select a new item in the Cut List, the playhead jumps to that frame in the Scene Detect Graph.
237
Using Scene Detection Part 2 – 11
To select items in the Cut List:
Click any item in the Cut List.
Press N (next) or the Down Arrow to select the next item down.
Press P (previous) or the Up Arrow to select the next item previous.
As you move up and down the list, you can delete items that you can confirm aren’t real cuts
using the viewers above. If it’s a long list and you don’t have time to check it all at once, it can
be saved for later recall using commands found in the Scene Detect Options pop-up menu.
Once you’re finished checking the list and are satisfied that each cut is accurate, you can use it
to split the media file into individual clips in the Media Pool by clicking “Add Cuts to Media Pool,”
located immediately below.
The Scene Detect Options Pop-Up Menu
The Options pop-up menu, located at the upper right-hand corner of the Scene Detect window,
contains a variety of commands.
Reset Zoom: Sets the zoom level of the Scene Cut Graph such that the entire clip fits
within the current width.
Reset Marks: Clears the current In and Out points you’ve set.
Prune SceneCuts: If you’ve identified a large number of false positive scene cuts (for
example, a cluster of cuts corresponding to a dissolve from one shot to another), use
the In and Out buttons to surround the undesirable range of scene cuts in the Scene
Detect Graph, and then click Prune Scene Cuts to eliminate all scene cuts between
these points that are within one frame of another scene cut. Within the group of
identified cuts, the highest probability cut will remain while the other cuts are deleted.
Save SceneCut: Saves the current scene cut detection information, including the
probability metadata, to disk. SceneCut files use the file extension .sc and can be
reimported later to continue working on a lengthy scene detection task.
Load SceneCut: Imports an existing .sc file into the Scene Detect window. You must
first open the media file you’re working on into the Scene Detect window before you
can load a SceneCut file.
Save EDL: Exports the Cut List as a CMX-style EDL.
Load EDL: Loads a CMX-style EDL into the Cut List, letting you use the cut information
from the EDL during the Scene Cut Detection process.
Auto Cue: When enabled, the playhead jumps to each new scene cut as it’s detected
when you initiate scene detection. This lets you evaluate each scene cut as it’s found
using the three viewers above.
An Example Scene Detect Workflow
This section describes an ideal workflow for using scene detection without an EDL.
To scene detect a media file:
1 Locate a media file to scene detect using the Media Storage browser of the
Media page.
2 Verify its frame rate and if it uses drop-frame timecode, and make sure that the
“Timeline frame rate” matches the “Use drop frame timecode” parameter in the Master
Settings panel of the Project Settings. These parameters are not automatically set if the
project already has media in the Media Pool, and you may have problems if they don’t
match your media.

238
Using Scene Detection Part 2 – 11
3 Right-click the media file, and choose Scene Cut Detection.
4 When the Scene Detect window appears, click the Options pop-up menu and choose
Auto Cue (it should be on by default, but it’s always good to check), then click Auto
Scene Detect.
Scene detection initiates, and you can evaluate each scene cut as it’s found. If any
scene cut looks wrong (three sequential frames in a row), note its place in the list for
future evaluation.
5 When DaVinci Resolve has finished scene detection, move the playhead to some of
the shorter scene cuts, and verify if they’re actual cuts by checking the three viewers
above. If the frames being displayed are “different-same-same,” then it’s a genuine cut.
If the frames being displayed are “same-same-same” (actually three sequential frames),
then these aren’t cuts.
6 If there are numerous low-confidence scene cuts that you’ve verified aren’t cuts, drag
the magenta confidence bar so that the low-confidence scene cuts fall below it to
automatically remove them all from the list.
7 Next, you may want to move down the Cut List, evaluating each scene cut to verify that
it’s correct. Click the first scene cut in the list, check it, then press the keyboard down
arrow to select the next list item down, check it, and repeat until you’ve checked every
item in the list. If you need to move back up the list, you can press the up arrow to
select the previous list item. If any item is not a cut point, click the “Minus” button at the
bottom left corner of the Scene Detect window to eliminate that scene cut.
8 If there are sections in the Scene Detect Graph with dense groups of spikes, these are
probably frames with types of motion that confused the Scene Cut Detector. To delete
this unwanted “noise” in the data, use the In and Out buttons to isolate the data, and
then click “Prune” to delete these unwanted scene cuts.
9 If there’s a gap between any two scene cuts that you’re positive should have another
scene cut, then scrub the playhead or use the transport controls to find the missing cut,
and click the “Plus” button at the bottom left corner of the Scene Detect window to add
another scene cut.
TIP: Fast camera motion such as whip pans, sudden changes in lightness such
as camera flashes, or even film coming up to speed causing the shutter to
“flash” can confuse the analysis, which looks for large changes in the image.
TIP: Adjacent shots with very similar ranges of color and contrast may
sometimes go undetected by the scene detection algorithm. If you know of
scenes in the media you’re analyzing that are like this, you may want to scrub
through them a bit more carefully to make sure you’re not missing anything.
However, if you find you’ve missed a cut later, you can always use the Split
Clipcontrol in the Edit page timeline to add a new edit point.
239
Using Scene Detection Part 2 – 11
10 When you’re confident that the Cut List is accurate, split the media file into individual
clips in the Media Pool by clicking “Add Cuts to Media Pool.”
11 When the Conform Settings dialog appears, click OK if you checked your settings
in step 2.
12 Close the Scene Detect window.
The individually cut up clips of the media file you analyzed now appear in the Media
Pool, and you can edit the entire sequence of clips into a new Timeline in order, ready
for grading.
241
Ingesting From Tape Part 2 – 12
Ingesting From Tape
DaVinci Resolve is capable of capturing media from tape using a compatible video input device,
such as a Blackmagic Design UltraStudio, DeckLink, or Intensity device.
This chapter covers the following topics:
Tape Ingest 242
The Tape Capture Interface 242
Setting Up to Capture From Tape 243
Capture and Playback Project Settings 243
Capture 244
The Three Methods of Capture 245
Using Capture Now 245
Logging and Capturing Individual Clips 245
Logging and Capturing Multiple Clips 246
Batch Capture Via EDL 247
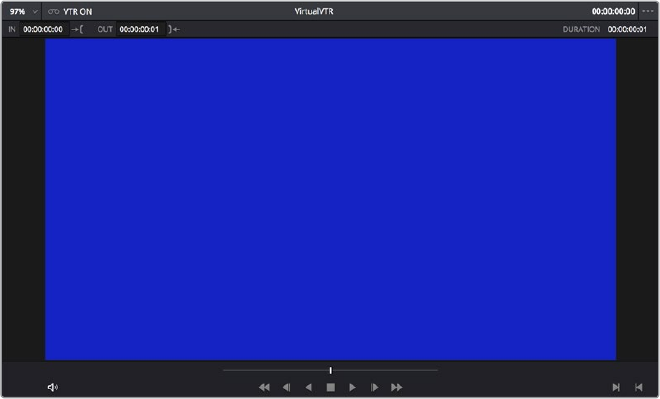
242
Ingesting From Tape Part 2 – 12
Tape Ingest
This chapter covers how to capture media from tape directly into the Media Pool in DaVinci
Resolve. Whether you need to capture a handful of clips to incorporate into an existing project,
or you need to recapture every clip corresponding to the events of an EDL, you can use the
Media page in Capture mode to capture from any device-controllable deck via a compatible
video interface.
To switch to tape capture in the Media page:
Click the Capture button, located to the left of the Interface toolbar at the top of the
Media page.
The Media page updates to reflect the relevant controls for editing to tape, and the Audio panel
is replaced by a dedicated set of capture metadata and controls to help you track the
resulting clips.
The Tape Capture Interface
While in Capture mode, the Media page is used to control the VTR, in order to establish In and
Out points for logging or capturing a selected range of the tape.
Tape Capture viewer in the Media page
Transport Controls: The transport controls, while similar in appearance to those
used when simply playing through selected clips in the Media page, now work to
control the VTR.
Shuttle Control: A Shuttle Control appears in what was formerly the Scrubber Bar,
which lets you shuttle through the range of reverse and forward speeds compatible
with the connected deck.
In and Out Controls: In Capture mode, the In and Out buttons to the right of the
transport controls define a range of the tape from which to capture.
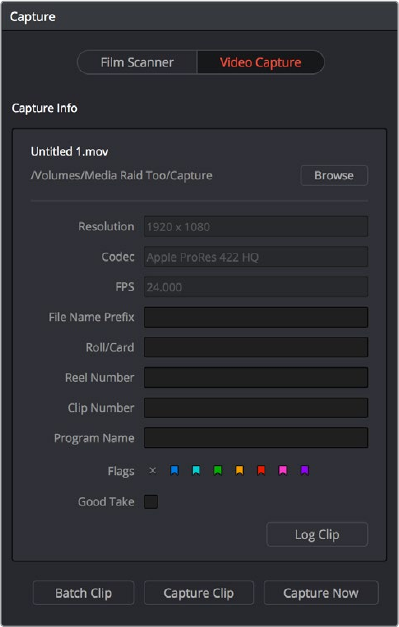
243
Ingesting From Tape Part 2 – 12
Capture panel: The panel automatically switches to the Capture panel, with
tape-specific metadata and capture controls. Populating File Name Prefix updates
the file name preview that’s shown above in the Header, that also shows the Capture
directory, Resolution, and Frame Rate specified in the Capture and Playback panel of
the Project Settings.
Editable capture metadata
Setting Up to Capture From Tape
Before you begin capturing from tape, you need to adjust a variety of settings in the Capture
and Playback panel of the Project Settings. Two groups of settings, in particular, need to
be defined.
Capture and Playback Project Settings
These settings affect both capture and playback when using the Tape Ingest options of the
Media page, or the Tape Output options of the Deliver page.
Video capture and playback: You can choose the video format (frame size and
frame rate) with which to output to tape from this pop-up menu. HD timelines can be
downconverted to SD, and SD timelines can be upconverted to HD using the format
conversion of your DeckLink card.
Use left and right eye SDI: A checkbox that enables the Blackmagic Design DeckLink
HD Extreme 3D+ to ingest and output muxed stereoscopic video when used with
supported VTRs, such as HDCAM SR decks with 4:2:2 x 2 mode. (When muxed
stereoscopic signals are ingested, each eye is separated into individual left-eye and
right-eye image files.)
244
Ingesting From Tape Part 2 – 12
Video connection operates as: Selects between the available signal options: Use
4:4:4 SDI and Enable Single Link. Which options are available depend on which video
capture card you are using.
Video/Full Data Level: Lets you specify the data range (normally scaled or full range)
that’s used when ingesting from or outputting to tape. This option switches the data
range of the signal output by your video capture card, but only during capture from
tape in the Media page, or output to tape in the Deliver page. When capture or output
is not currently occurring, your video capture card goes back to using the identically
named data range setting in the Master Settings panel of the Project Settings pane,
which governs how you monitor the signal being output on an external broadcast
display or projector.
Video bit depth: 10-bit is the only available option.
Use deck autoedit: If supported by your video deck, this is the best method to record
video to the deck, as it enables the deck to roll the edit using the specified preroll, and
control the edits via serial device control. If this checkbox is turned off, a basic edit On/
Off mode is used by the deck, with the potential for frame inaccuracies if the “Non auto
edit timing” setting is not properly adjusted.
Non auto edit timing: Adjusts the edit synchronization of the connected deck when
auto edit is turned off.
Deck preroll: Sets the number of seconds for preroll. How much is appropriate
depends on the performance of your deck.
Video output sync source: When using a DeckLink card this is set to Auto. Other
capture cards may require you to set the sync source to “Reference” for playout and
“Input” for ingest. This setting is only available if you have the DVS card installed on
your system.
Add 3:2 pulldown: Inserts or removes the 3:2 pulldown required to record or play
23.98 fps media to or from a 29.97 tape format.
Capture
These settings are used when you use the Capture mode in the Media page to capture clips
from tape into the Media Pool, or when controlling the Cintel Film Scanner to scan film of
different formats.
Video Format: The format captured media will be saved to. When capturing from tape,
the available options are DPX and QuickTime.
Codec: The codec used to write captured media. When capturing from tape, these
include the various type of Apple ProRes, 8- and 10-bit YUV 422, 10-bit RGB, and the
various types of DNxHD.
Save clips to: A field that displays the directory path to which media files captured from
tape are written. You want to choose a volume that’s fast enough to accommodate the
data rate of the media format you’re capturing.
Browse: Click this button to choose a directory to write captured media to. The
directory you choose appears in the field above.
Save in this folder path: A series of checkboxes lets you specify what other information
to use to define the directory hierarchy that will hold the captured media. Every
checkbox you turn on adds an additional directory with a name defined by that
checkbox’s metadata. You can choose any or all of the following: Program name, Clip
number, Reel number, Roll/Card.
Apply reel number to: Lets you choose how to write the reel name. Two checkboxes
let you write the reel name to the file’s name, and/or to the Header data.
245
Ingesting From Tape Part 2 – 12
Use prefix: A field lets you type in a prefix to be used in the media file’s name. This
lets you add text identification that will make the media more easily identifiable and
searchable.
Apply prefix to: Two checkboxes let you choose to use the prefix you typed in the file
name, and/or in the folder name.
Use frame number with: When capturing to image sequences, you can choose how
many digits to use when writing the frame number into the name of each frame file.
Set batch ingest handles to: Lets you add additional frames of handles to the
beginning and end of each scanned clip when batch capturing with the scanner.
Enable audio input: Turn this checkbox on to capture audio along with the video. If
you’re capturing QuickTime or MXF files, the audio will be written as additional tracks
inside each file. If you’re capturing to a DPX image sequence, then a Broadcast .wav file
is recorded separately.
Input x channels of audio: A pop-up that lets you choose how many tracks of audio
to capture.
The Three Methods of Capture
Once you’ve set up all relevant settings in the Project Settings window, including at minimum
“Video Capture and Playback,” “Capture Clips Saved to,” and Apply Reel Name to” settings,
then you’re ready to start capturing. Depending on your workflow, there are three methods of
capturing from tape that you can use.
For all capture methods, media can only be ingested as DPX image sequences.
Using Capture Now
If you simply need to capture a section of tape quickly, you can use the Capture Now command.
To Capture Now:
1 Use the transport controls and the In button to identify what you want to capture.
2 Enter all relevant information into the various fields of the Metadata Editor. The Header
updates to show a preview of the file name that will be saved.
3 Use the transport controls to start playback, and then click the Capture Now button at
the bottom of the Metadata Editor.
4 When the section of tape you wanted to record has finished, click Capture Now again
to stop capture.
A new clip appears in the Media Pool, automatically placed in a new folder in the Media
Pool with a name defined by the timecode value converted into a frame count, based
on the ingest frame rate. For example, 00086400.dpx is the file name of a clip
captured at timecode 01:00:00:00.
Logging and Capturing Individual Clips
If you’re capturing an exact range of tape, or multiple sections at once, you can also work by
logging each section of tape you want to capture in advance, before using the Capture Clip or
Batch Clips commands in a second step.
246
Ingesting From Tape Part 2 – 12
To capture a single clip using device control:
1 Use the transport controls to find the beginning of the section of tape you want to
record, and click the In button. Then, find the end of the section of tape you want to
record, and press the Out button.
2 Enter all relevant information into the various fields of the Metadata Editor. The Header
updates to show a preview of the file name that will be saved.
3 When you’re finished, click Capture Clip.
Deck control is automatically used to play through the specified range of tape and
capture that clip. When capture is complete, the new clip appears in the Media Pool.
Logging and Capturing Multiple Clips
For efficiency’s sake, you can also log multiple clips at once, from multiple tapes if necessary,
and then batch capture them all at once.
To log one or more clips:
1 Use the transport controls to find the beginning of the section of tape you want to
record, and click the In button. Then, find the end of the section of tape you want to
record, and press the Out button.
2 Enter all relevant information into the various fields of the Metadata Editor. The Header
updates to show a preview of the file name that will be saved.
3 When you’re finished, click Log Clip.
That clip is added to the Media Pool as an offline tape clip, indicated by a black icon
with a tape badge.
Logged clip in the Media Pool prior to capture
To batch capture one or more logged clips:
1 (Optional) Put the Media Pool into List view, and click the Reel No column header to sort
the Media Pool clips by reel number. This makes it easier to select a range of clips to
capture from a particular reel.
2 Select one or more offline tape clips in the Media Pool that come from a particular reel.
3 Click Batch Clips, at the bottom of the Metadata Editor. To interrupt capture at any time,
click Batch Clips again.
Deck control is automatically used to play through the current tape in the VTR and
capture every logged clip you’ve selected that can be found on that tape, starting with
the clip with the lowest timecode value and ending with the clip having the highest
timecode value. A progress bar with accompanying text shows how much longer to go
until capture is complete. As each clip is captured, its corresponding logged clip in the
Media Pool updates with a thumbnail reflecting the captured media.
When DaVinci Resolve finishes capturing all clips from a particular reel,
BatchCapture stops.
247
Ingesting From Tape Part 2 – 12
Batch Capture Via EDL
You can also use an EDL to create offline tape clips, one for each event in the EDL, with which
to batch capture all the media necessary to conform a project from tape.
To import an EDL as a batch capture list:
1 Open the Project Settings, click Master Panel in the sidebar, and make sure of
thefollowing:
Set “Timeline frame rate” to the frame rate of your EDL.
Turn on “Use drop frame timecode” if your EDL requires it.
Make sure “Use Timecode” is set to “Embedded in the source clip”
Turn on “Assist using reel names from the”
2 Choose File > Import Batch List From EDL.
3 When a Conform Settings dialog appears asking you to confirm the current Project
Settings, click OK if the settings are good.
4 Use the controls of the Select EDL files dialog to select one or more EDLs, then click
Open. If you select multiple EDLs, then every event in each EDL is imported at once.
5 In the dialog that appears next, choose a frame rate to conform the EDL at,
and click OK.
Each event in the EDL now appears as offline tape clips in the Media Pool, ready for
capturing. If you load an EDL and there are already clips in the Media Pool that have the
same reel name and start timecode as events in the EDL, DaVinci Resolve will not
create new offline tape clips for those.
A set of logged clips imported from an EDL
6 (Optional) Put the Media Pool into List view, and click the Reel No column header to sort
the Media Pool clips by reel number. This makes it easier to select a range of clips to
capture from a particular reel.
7 (Optional) If there are any offline clips that you don’t need to capture, you can remove
them from the Media Pool by right-clicking them and choosing Remove Selected Clips.
8 Select which of the offline tape clips you want to capture. It’s best to select ranges of
clips that come from the same reel.
248
Ingesting From Tape Part 2 – 12
9 Click the Capture mode button to the left of the transport controls, and then click Batch
Clips to begin capture. To interrupt capture at any time, click Batch Clips again. Deck
control is automatically used to play through the current tape in the VTR and capture
every logged clip you’ve selected that can be found on that tape, starting with the clip
with the lowest timecode value and ending with the clip having the highest timecode
value. A progress bar with accompanying text shows how much longer to go until
capture is complete. As each clip is captured, its corresponding logged clip in the
Media Pool updates with a thumbnail reflecting the captured media.
When DaVinci Resolve finishes capturing all clips from a particular reel,
BatchCapture stops.
250
Capturing From the Cintel Film Scanner Part 2 – 13
Capturing From the Cintel Film Scanner
This chapter covers the following topics:
Controlling the Cintel Film Scanner 251
The Cintel Scanner Interface 252
Cintel Media Page Settings 254
Calibration 254
Film Type 254
Light Source 255
Image Stabilization 256
Film Protection 257
Film Scanning Workflows 258
Before You Begin 258
Load and Align the Film 258
Focus the Scanner 258
Check the Automatic Perf Detection Stabilization Overlay 259
Reset the Timecode for That Roll 259
Choose a Location to Save the Scanned Frames 260
Check the Frame Rate 260
Adjusting the Color of the Scanner 260
Scanning One or More Sections of Film 261
Extracting Audio 262
Audio Extraction Settings 263
Grading and Sizing Scanned Media 266
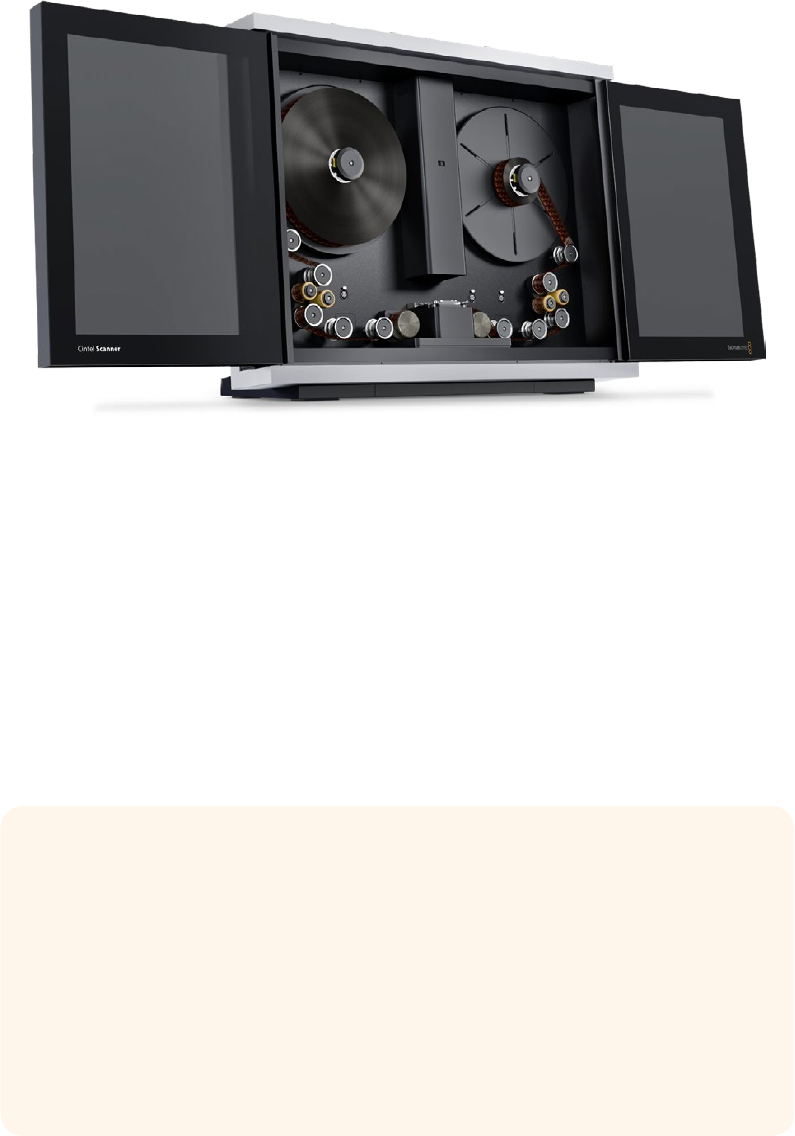
251
Capturing From the Cintel Film Scanner Part 2 – 13
Controlling the Cintel Film Scanner
The Blackmagic Cintel film scanner is a compact, easy to use, real time film scanner capable of
converting 35mm and 16mm (with a separately purchased gate) positive and negative film
formats into Cintel Raw Image (CRI) digital files that can be organized, edited, and graded using
DaVinci Resolve, delivered to any format DaVinci Resolve can output, and archived for later use.
The Cintel scanner
DaVinci Resolve can control any Blackmagic Cintel film scanner that’s connected to your
computer via Thunderbolt 1 or 2. Once connected, the Film Scanner controls in the Media page
can be enabled, which let you choose the film type to be scanned, align the film frames to the
sensor, adjust the scanner’s light source for optimal exposure and color, and choose whether to
use the scanner’s hardware-based Automatic Perf Detection to perform image stabilization.
Note: This chapter of the DaVinci Resolve manual describes the use of a Cintel film scanner
connected to DaVinci Resolve for the purpose of ingesting scanned film. For other operational
inquiries, please see the documentation that accompanies the scanner itself, or visit the
Blackmagic Design support page on the web to download it.
Similar to Tape Capture, you can choose to scan sections of film a shot at a time, or as part of a
batch capture workflow by logging all of the clips on a particular roll that you want to scan.
The Cintel Raw Format
The raw Bayer pattern of each film frame scanned with the Cintel scanner sensor is
saved with embedded scanner metadata as a 12-bit linear Cintel Raw Image (CRI)
image sequence. When grading in DaVinci Resolve, CRI raw images are automatically
debayered as 12-bit log-encoded image data. The logarithmic encoding is similar, but
not identical to, Cineon encoding; negative film is encoded using a gamma of 2.046
for density, while print film is encoded using a full-range Gamma 2.2 curve to ensure
that no image data is clipped. Both of these logarithmic encodings can be converted
to a linear color space using the “Cintel to Linear” 1D LUT, as a precursor to converting
to other color spaces you may want to work in.
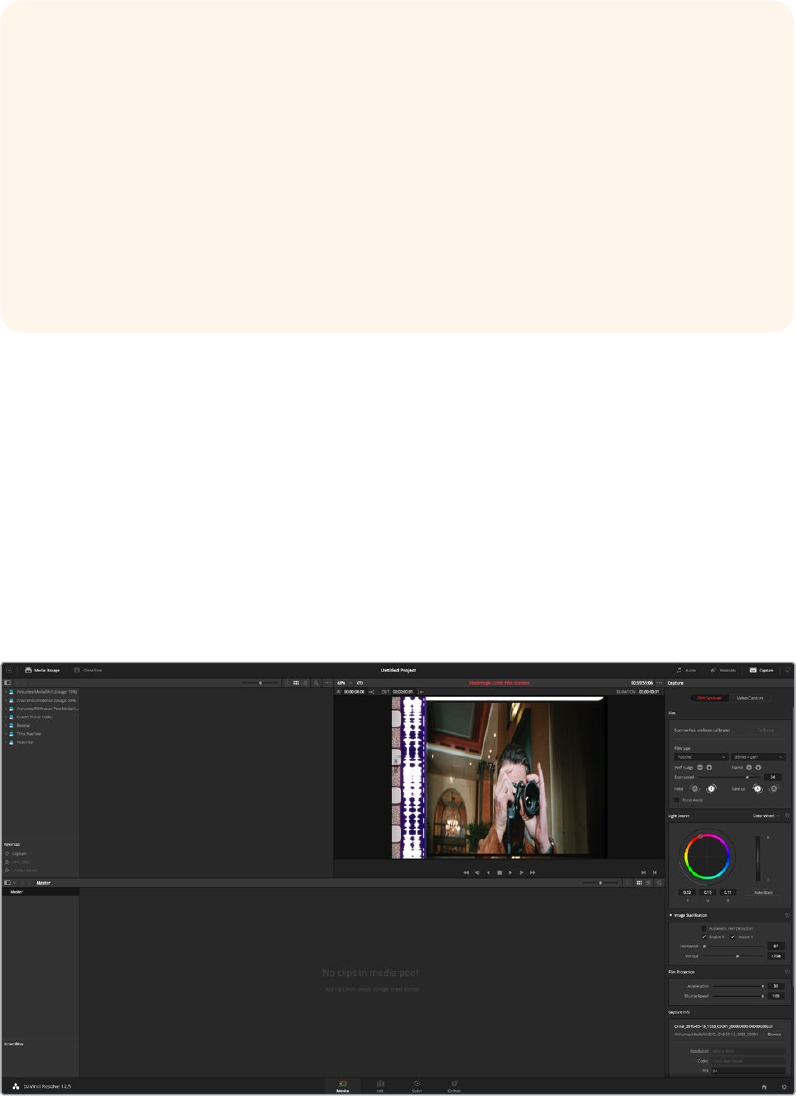
252
Capturing From the Cintel Film Scanner Part 2 – 13
The Cintel Scanner Interface
If you have a Cintel Scanner connected to your computer, then clicking the Capture button in
the UI toolbar at the top of the DaVinci Resolve screen sets the Media page to control either the
Cintel scanner or a video deck that’s been connected to your workstation. For film scanning,
open the Film Scanner panel to set up, calibrate, and choose options for logging or scanning a
selected range of the currently spooled roll of film. If you want more room for viewing the Cintel
scanner controls, click the full height button that’s all the way to the right of the UI toolbar, and
turn off the Metadata panel.
Cintel scanner controls in the Media page
Transport Controls: These controls, while similar in appearance to those used while in
Playback mode, now work to control the Cintel scanner. Additional controls appear for
moving forward or backward a frame at a time.
In and Out Controls: In Cintel Scanner mode, the In and Out buttons to the right of the
Transport controls define a range of the film roll from which to capture.
The film is scanned using the full sensor aperture of 4096x3072 for an extracted
35mm or 16mm image to accommodate waveform visibility for audio extraction and
perforation visibility for stabilization, but 16mm is cropped to 2160x1702. The resolution
of the resulting files depends on the source film format; Super 35 film is at the UHD
resolution of 3840x2877, while Super 16 format scans are at nearly HD resolution at
1903x1143. The resultant files are approximately 22.4MB for a 35mm frame and
6.6MB for 16mm.
Cintel Raw Image files don’t have dedicated debayering controls in DaVinci Resolve.
To control the quality of debayered CRI files, use the Decode Quality and Play Quality
CinemaDNG settings of the Camera Raw panel of the Project Settings.
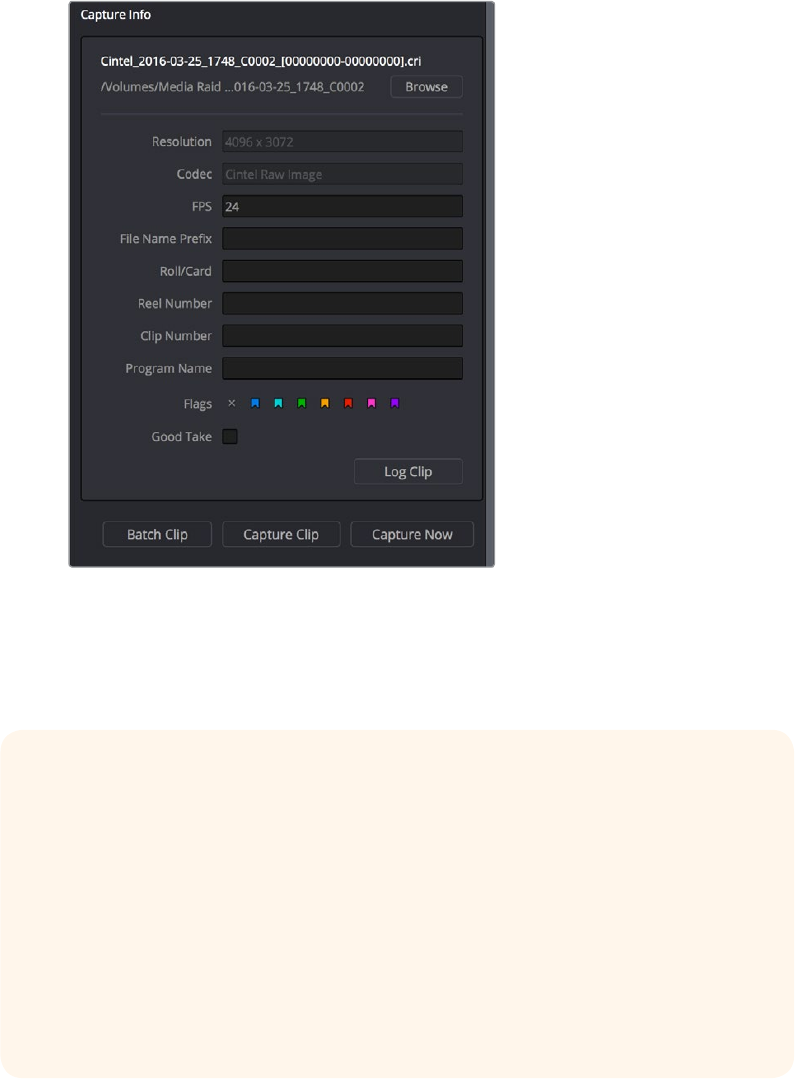
253
Capturing From the Cintel Film Scanner Part 2 – 13
Capture Info: In Cintel Scanner mode, a set of capture metadata fields appears at
the bottom of the Film Scanner panel. Populating the File Name Prefix updates the
file name preview that’s shown above in the Header, that also shows the file path,
Resolution, Frame Rate, Duration, and Format (Cintel Raw Image).
Editable capture metadata
Before you begin scanning, you may want to adjust the settings in the Cintel Scanner panel of
the Project Settings, and you’ll definitely need to adjust some settings in the Cintel panel of the
Media page.
Capture Location in the Capture Info Section
Prior to beginning a film scanning session, you should scroll down to the Capture Info
section of the Capture panel to make sure the scanned files are being saved to the
directory and volume where you want them. Click the Browse button and choose a
location from the File Destination dialog. It’s good to do this first, as this step is easy
to forget.
Your clips will be saved to independent sub-folders in the destination folder, with a
timecode prefix in the file name. If you want to save all your clips into one master
destination folder, deselect the Timestamp Prefix checkbox in the Capture
Info section.
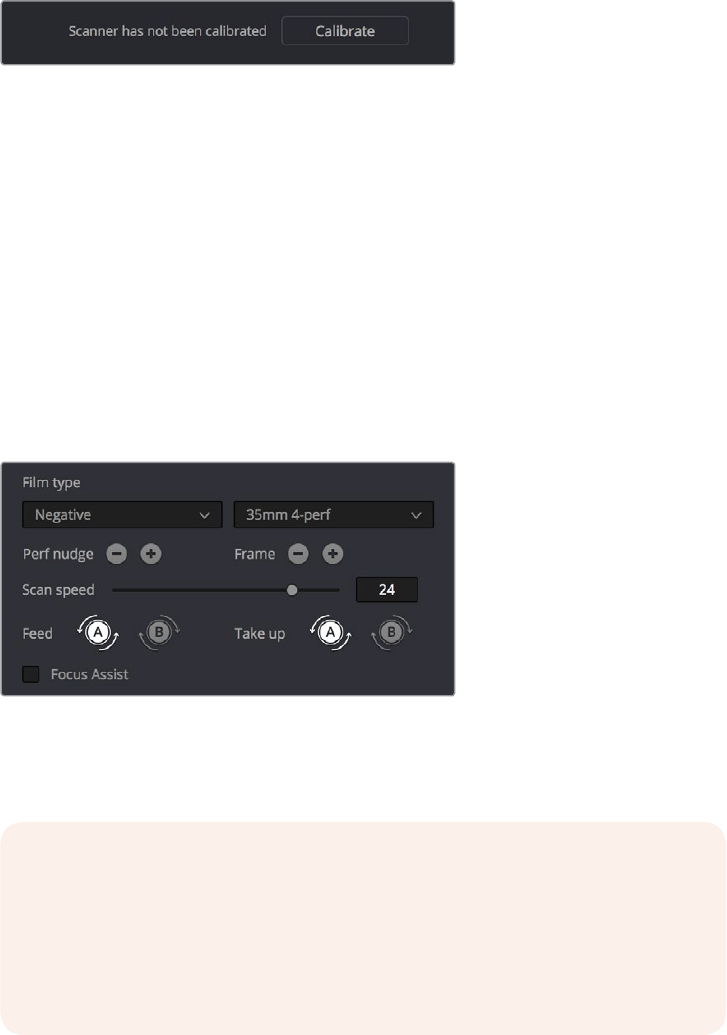
254
Capturing From the Cintel Film Scanner Part 2 – 13
Cintel Media Page Settings
The following groups of settings appear to the right of the Media page Viewer when in Cintel
Scanner mode to scan clips from film into the Media Pool.
Calibration
This option lets you calibrate the optics of the scanner to eliminate optical blemishes or dust
that cannot be removed (this is not for dust-busting the film itself).
The calibration button underneath Image Stabilization
Calibrate button: Lets you eliminate light optical blemishes and dust from theoptics
of the Cintel scanner via digital calibration. While it’s recommended to spray dust the
optics before scanning new material, it’s possible over time for some blemishes on the
optics to be unremovable, in which case using the Calibrate button will eliminate them
from the scanned image. The skid plate does not normally need to be removed for
calibration; however, in cases where there is severe dirt, remove the skid plate and dust
it first. You must use the Calibrate button before you load film into the scanner, while
there’s nothing in the optical path, to remove any remaining optical blemishes or dust.
Film Type
These controls let you select the type of film you’re scanning, align the film with the sensor, and
choose what speed you’re scanning at.
Film Type controls in the Media page
Film Type pop-up: Lets you choose what type of film you’re scanning. The choices are
Positive, Negative, Interpositive, and Internegative.
NOTE: when scanning interpositive film, the increased density of the film
requires slightly extended pulse durations from the light source. Normally, this
does not affect the scan, however, a slight reduction in resolution may occur
when scanning at above 12 frames per second. If you do notice a difference in
resolution, simply reduce your scanning speed to 12 frames per
second or less.
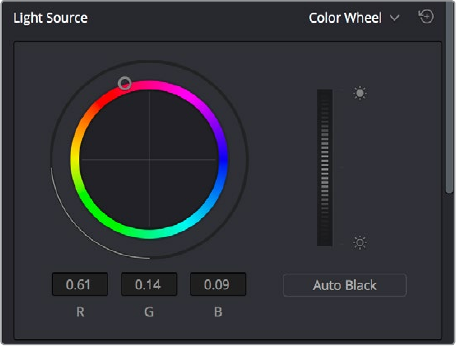
255
Capturing From the Cintel Film Scanner Part 2 – 13
Gauge and perf count pop-up: Lets you choose what reel type you’re scanning, the
choices are 35mm 2, 3, and 4 perf, and 16mm 1 perf.
Perf nudge buttons: Used for making fine adjustments of the perf position relative to
the scanner gate aperture. Command-J nudges up, while Command-L nudges down.
Frame buttons: These buttons are push and hold to activate; when on, the film is slowly
advancedto move the frame up or down and when released the film stops in place.
This is useful for aligning the film frame with the scanner’s sensor. Using the Perf Nudge
and Frame buttons, align the visible film frame such that the bottom of the previous
frame and the top of the next frame are just visible at the top and bottom of the Viewer,
and the current frame is centered vertically (it’s important to make sure the image in the
Viewer is not zoomed in when you do this). Command-Left Arrow moves the frame up,
while Command-Right Arrow moves the frame down.
Scan speed slider: With adequate disk performance, you should be able to scan at
30 fps. However, if you’re scanning to a slow hard drive, you can reduce the scanning
speed to a frame rate that’s suitable for your workstation without dropping frames.
Feed buttons: Sets the wind direction of the left-hand side feed spool. While auto-
detection will prevent incorrect operation, you should manually configure the reel
winding direction based on how each film roll is wound.
Take up buttons: Sets the wind direction of the right-hand side take up spool.While
auto-detection will prevent incorrect operation, you should manually configure the reel
winding direction based on how each film roll is wound.
Focus Assist check-box: Enables luminance peaking on the scanner HDMI monitor
output, which makes it easy to obtain optimum focus adjustments.
Light Source
These controls let you adjust the scanner’s light source to adjust the optimal Dmin (the minimum
scanned signal value) and color temperature of the scanned material. Using the built-in software
scopes in DaVinci Resolve, which can be opened in the Media page by choosing Workspace >
Video Scopes > On, you can adjust these settings to make sure you’re not clipping image data
during the scanning process.
Light Source controls in the Media page
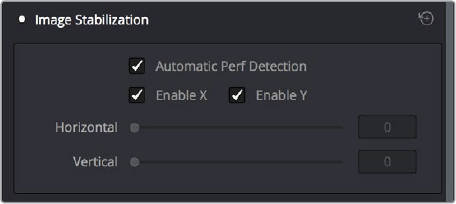
256
Capturing From the Cintel Film Scanner Part 2 – 13
Master Offset control: Adjusts the intensity of the light source used to illuminate the
film, raising or lowering the RGB channels all at once. For typical camera negative, this
lets you adjust the black point of the film image (the darkest part of the image, which in
fact corresponds to the highlights of the film image) to sit just above the typical Dmin
value of 95, as measured on the Histogram of the video scopes, which guarantees that
the highlights won’t be clipped by a Cineon-style LOG conversion. For positive film,
simply adjust Master offset so that no part of the signal is being clipped.
Auto Black button: Analyzes the current frame displayed in the Viewer and does an
automatic adjustment to put the film base of the signal at the Dmin value of 95 for
negative, or for print to set the white point to 90%.
RGB controls: By default, a color balance control lets you adjust all three color
channels by varying amounts to alter the color temperature of the light source used to
illuminate the film, while the adjusted R, G, and B values are displayed in three fields
below. Optionally, you can choose to put this control into Color Bars mode using the
mode pop-up to the right of the Light Source title bar, which changes this control to
three vertical Red, Green, and Blue color channel sliders.
Image Stabilization
These controls let you enable and disable as well as control image stabilization to eliminate
vertical film hop and horizontal gate weave.
Image Stabilization controls in the Media page
Image Stabilization enable/disable control: The dot to the left of the Image
Stabilization title bar lets you enable or disable the scanner’s hardware-based image
stabilization altogether. While hardware stabilization is typically desirable when you
have high-quality perforations, you may want to turn this option off if the condition
of the perforations is poor and you decide to use DaVinci Resolve’s software-based
stabilization instead. When Image Stabilization is enabled (the default), small white
vertical (Y axis) and horizontal (X axis) detection overlays are displayed in the Viewer,
highlighting which part of the film perforation is to be used as the reference for
stabilization. These overlays are automatically hidden when recording.
Enable X and Y checkboxes: Lets you choose whether to use hardware image
stabilization to fix horizontal gate weave (Enable X) and vertical gate hop (Enable Y). If
the results are unsatisfactory with both axes enabled, you can turn off the axis that’s
causing issues with stabilization.
Automatic Perf Detection checkbox: When enabled (the default), the Cintel scanner
attempts to automatically place the stabilization detection overlay at the best location,
with reference to the perforation shown on the currently loaded frame, for the best
stabilization result. For optimum stabilization, the position of the overlay should
resemble the following screenshot, with the box over the flat bottom area of the perf
and the bar positioned in the middle of the perf. If the automatic positioning is not
ideal, you can turn Automatic Perf Detection off, and manually move the overlay to a
more ideal position, either by dragging it in the Viewer, or by using the Horizontal and
Vertical sliders described below.
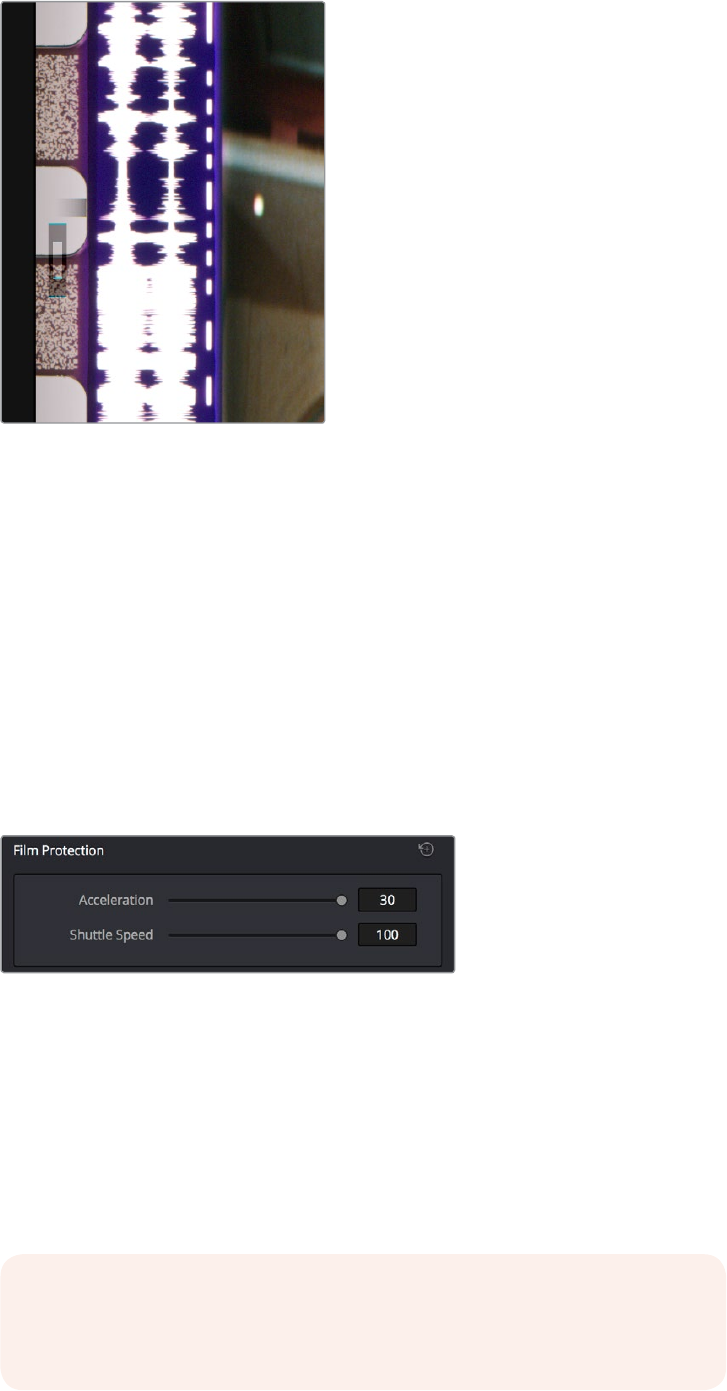
257
Capturing From the Cintel Film Scanner Part 2 – 13
Hardware stabilization control correctly positioned
over a perforation in the Viewer
X and Y sliders: Used to manually reposition the stabilization overlay when Automatic
Perf Detection is turned off. Ideal placement of the stabilization overlay should position
the top box to surround the top flat edge of the perf, with the lower part of the overlay
flush against and centered on the side of the perf. This enables hardware stabilization of
vertical gate hop (along the Y axis), as well as gate weave (along the X axis). If the default
position of the stabilization overlay is not ideal, you can either drag it to another location
in the Viewer, or use the Horizontal and Vertical sliders to position it numerically.
Film Protection
These controls are intended to allow delicate film to be handled gently by the Cintel Scanner.
Fast acceleration and shuttle speeds can be hard on archival footage, so it’s recommended to
lower both of these sliders from their defaults whenever you’re scanning older film.
The Acceleration and Shuttle Speed sliders should be lowered
when scanning older, delicate archival film
Max Acceleration: Changes the scanning speed to operate between 5–30 frames
per second.
Max Shuttle Speed: Changes the speed of shuttling from one section of film to another
between 1–100 frames per second for 35mm film, and between 1-200 frames per
second for 16mm film.
Film Tension Adjust: Adjusts the amount of tension applied to the film. For example,
when loading delicate archival film, or compensating for film shrinkage.
NOTE: There is no possible way you can damage the film using the Film
Tension Adjust setting. The adjustment values are very small and only gentle
changes are all that’s required to prevent sprocket picking.
258
Capturing From the Cintel Film Scanner Part 2 – 13
Film Scanning Workflows
The following sections describe how to scan film using DaVinci Resolve to control the Cintel
scanner. Throughout, the procedures outlined above are presented in the order in which you’ll
perform each step of the scanning process.
Before You Begin
Following the instructions that accompany your Cintel scanner, connect the Scanner to your
workstation using a Thunderbolt cable. The Cintel scanner is compatible with either
Thunderbolt 1 or 2, and either has the bandwidth to transfer the scanner’s output to
your computer.
Before turning your scanner on and loading film, you should first dust the gate to make sure
your scans are as clean as possible. This can be accomplished using compressed air, but if the
gate is extremely dirty, you can remove it to give it a more thorough cleaning. Once that’s
finished, turn on the Cintel scanner, open DaVinci Resolve and create the project you’ll be using
to scan film, then click the Cintel Scan button on the Media page. Next, click the Film Scanner
tab to select the Cintel panel.
Before you load film into the scanner or do anything else, click the Calibrate button at the
bottom left of the Cintel panel. While you should always dust the gate of the scanner before
loading a new reel of film, clicking the Calibrate button eliminates any unremovable blemishes
in the scanner’s optics from the scans you’re about to make.
Load and Align the Film
Load the film you want to scan. In the presence of an image, the scanner will automatically align a
frame. You should note that the image may be framed incorrectly if you first load blank film leader.
Next, choose the Film type. If necessary, use the Perf Nudge and Frame buttons to manually
improve the alignment of the framing bar to the scanner’s sensor such that the bottom of the
previous frame and the top of the next frame are just visible at the top and bottom of the
Viewer, and the current frame is centered vertically. It’s important to make sure the image in the
Viewer is not zoomed in when you do this.
Focus the Scanner
Just as you need to focus the lens on a camera, you’ll need to focus the projected film image
on your scanner’s sensor. To achieve perfect focus, turn on the Focus Assist checkbox in the
Film Scanner capture settings of DaVinci Resolve. This superimposes a focus peaking overlay
over the Ultra HD image that’s output from the scanner’s HDMI output, and is also displayed in
DaVinci Resolve’s Capture window. For best results, connect an Ultra HD display to your Cintel
scanner, so that you can monitor at the maximum available resolution while you focus.
With Focus Assist turned on, focus peaking will detect the film grain of the scanned image
whenever the film plane is in perfect focus. This enables the operator to focus the scanner even
if the film image is out of focus. Simply monitor the Ultra HD output of the scanner while you
turn the Cintel scanner’s focus wheel. Your image will be in focus when the grain running
throughout the image displays peaking outlines.
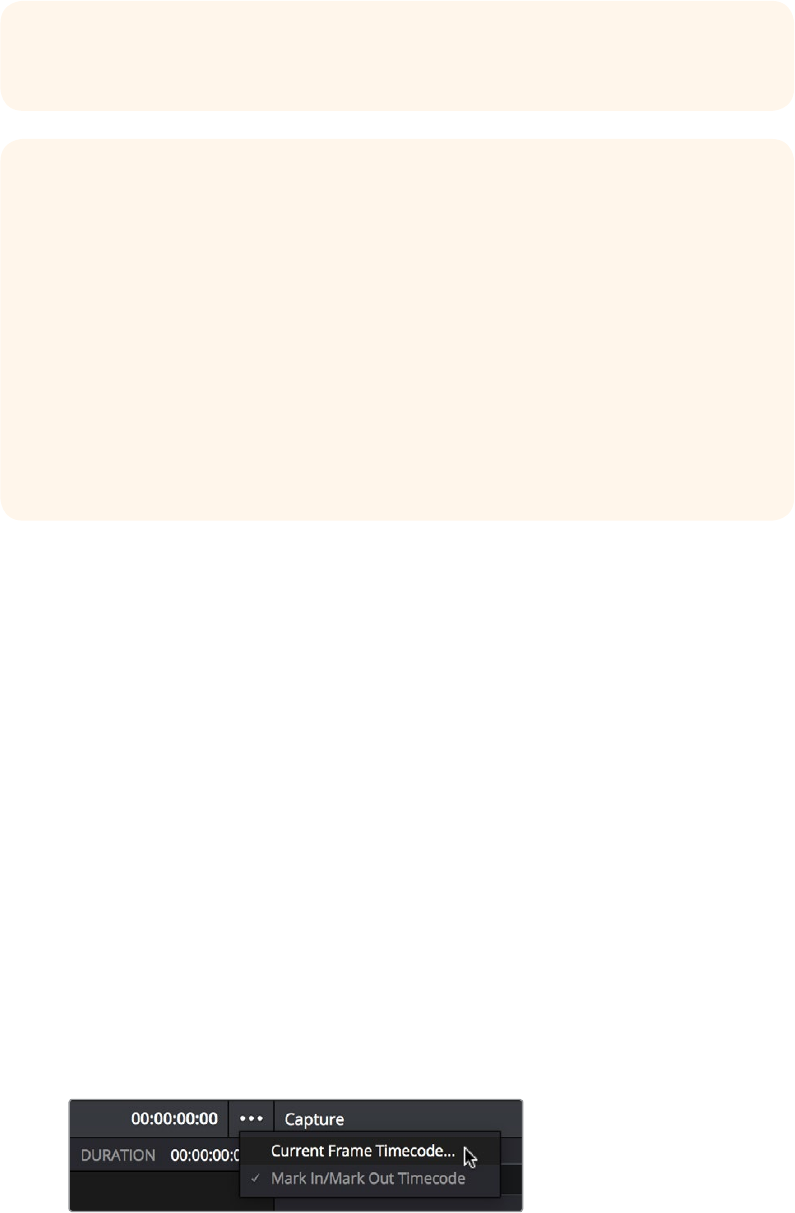
259
Capturing From the Cintel Film Scanner Part 2 – 13
Check the Automatic Perf Detection Stabilization Overlay
Next, play the loaded film and check that the automatic perf detection has found an appropriate
section of the perf to successfully stabilize the film. If necessary, you can drag the stabilization
overlay that appears in the Viewer so that the top box surrounds the top flat edge of the visible
perf to make best use of the hardware-based stabilization built into the scanner.
Reset the Timecode for That Roll
To set the timecode for the roll of film you’re about to scan, you need to locate the zero frame
for that roll. It’s standard practice to punch a small physical hole within the frame before the first
frame of necessary film on a roll, to use as a permanent reference for whenever that roll is
scanned. This is referred to as the marker frame, lab roll hole, or head punch. By always setting
the first frame of timecode to match the marker frame, subsequent film scans will have the same
frame count as previous scans, making it possible to rescan and reconform the same material
whenever necessary.
To reset scanned timecode at the marker frame of a new film roll:
1 Use the transport controls to locate the marker frame.
2 Click the Viewer option menu and choose “Current Frame Timecode.”
Choosing Current Frame Timecode from the Viewer Option menu
TIP: You can verify the focal adjustments you’ve made by checking the edges of your
film’s perforations. When these are sharp, your film will be in focus.
Other Ways to Focus the Scanner
Another accurate way to achieve perfect focus, if you don’t have a display connected
directly to the scanner, is to use DaVinci Resolve’s RGB Parade scope to monitor the
signal while you focus. Open the Video Scopes by choosing Workspace > Video
Scopes > On. To see the Parade Scope in more detail, you can set the Video Scopes
window to display only a single scope using the layout buttons at the upper right-hand
corner of the Video Scope window, and then choose the Parade Scope from the
pop-up in the scope title bar (if necessary).
To focus, watch the tops of the red, green, and blue scope graphs while you turn the
Cintel scanner’s focus wheel. Your image will be in perfect focus when all three color
channels in the scopes are “peaking,” or displaying the maximum amount of information
at their highest point.
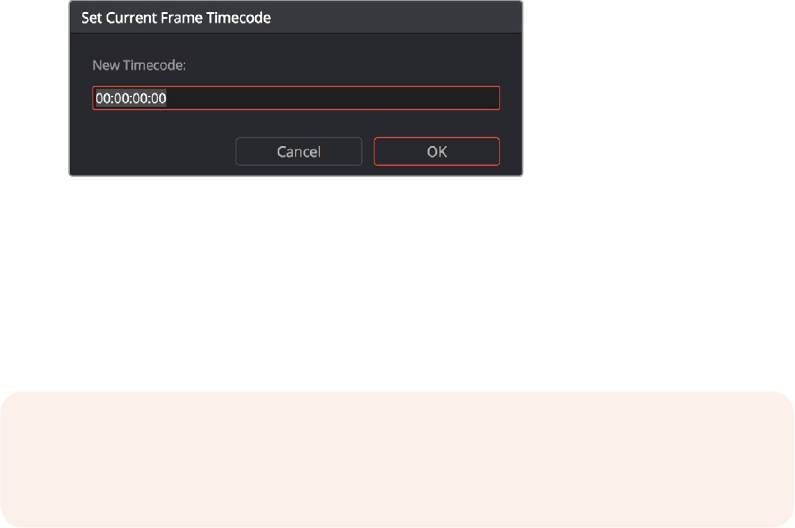
260
Capturing From the Cintel Film Scanner Part 2 – 13
3 Enter a timecode value in the dialog box that appears. For example, if you’re scanning
the first roll of a project, you can enter 01:00:00:00.
The Set Current Frame Timecode dialog
4 When you’re done, click OK.
Timecode cannot be negative, so don’t set the start frame to zero. Another common
organizational technique is to change the hour number whenever you change rolls, to coincide
with the film roll’s number, which makes it easy to track the correspondence between a
scanned clip and the source roll and frame range it was scanned from.
Choose a Location to Save the Scanned Frames
Once all this is done, scroll down to the Capture Info controls in the Capture panel, and click the
Browse button to choose a location for the scanned files. You can use the other fields in this
section to set what prefix (if any) you want to add to the name of the scanned files and
enclosing folders, and what Roll, Reel, Clip, and Program information you want associated with
the scanned media.
The Timestamp Prefix checkbox in the Capture info controls is selected by default and will save
your clips to independent sub-folders within the destination folder, together with a timecode
prefix in the file name. If you want to save all your clips together in one master destination
folder, simply deselect the checkbox.
Check the Frame Rate
There’s an FPS field in the Capture Info that identifies the frame rate of the scanned clips. Make
sure this frame rate is set correctly to ensure that the header data of your film scans is correct.
Adjusting the Color of the Scanner
The Cintel panel gives you control over the exposure and color temperature of the light used to
illuminate the film for scanning via the Master Offset and RGB Offset controls, in order to
maximize the amount of information you’re extracting from each frame, while preventing any
part of the image from being irretrievably clipped. While it’s true that CRI is a raw image format,
there’s no latitude beyond the internal data range used by DaVinci Resolve; be mindful that if
you’re clipping data in the built-in video scopes while scanning, it might be clipped permanently
in the scanned media.
NOTE: The Cintel scanner does not read Keykode, Aaton code, or edge code from
camera negative. However, the Cintel Scanner does have“Options Interfaces” ports for
adding optional third-party hardware in the future to accomplish this.

261
Capturing From the Cintel Film Scanner Part 2 – 13
How often you’ll adjust the color and exposure of scanned shots depends on how much variety
there is in the scenes on a particular film roll. For example, some rolls may have many takes of
the same scene, all of which have the same lighting and which can share the same adjustments.
Meanwhile, other rolls may have a variety of different scenes with widely different lighting in
each one, necessitating you to make individual adjustments for each scanned clip to maximize
data quality.
This is important because the Master Offset and RGB Offset settings cannot be automatically
changed between scanned clips in a log and capture workflow. This means that the current
Light Source settings will be used for all clips you scan until you manually change those settings
again, even for clips that you’ve logged from different parts of a film roll. This means that the log
and capture style of working is only advisable in situations where it makes sense to log multiple
clips that share the same Master Offset and RGB Offset adjustments.
Otherwise, it’s recommended you make lighting adjustments on a clip by clip basis, as you scan
each clip, in situations where you need maximum image quality for finishing. Keep in mind that
the goal for these adjustments is to maximize image data from the scan, not to create the final
look of the clips, which you’ll accomplish later in the grading phase of work using the controls of
the Color page.
To adjust the Light Source settings, find a typical image for the section of roll or for the first
series of shots you’re going to scan, and adjust the light source while viewing the built-in
Video Scopes.
Adjust Master Offset to set the intensity of the light source used to illuminate the film, raising or
lowering the level of the R, G, and B channels all at once. For typical camera negative, this lets
you adjust the black point of the film image (the darkest part of the image, which in fact
corresponds to the highlights of the film image) to sit just above the typical Dmin value of 95, as
measured on the Histogram of the video scopes, which guarantees that the highlights won’t be
clipped by the Cineon LOG conversion that DaVinci Resolve uses to debayer the CRI image for
grading. For positive film, simply adjust Master offset so that no part of the highlights or
shadows of the signal is being clipped.
Once that’s accomplished, adjust the RGB Offset controls to rebalance all three color channels
by varying amounts to alter the color temperature of the light source used to illuminate the film,
to produce the most useful (typically neutral) color balance in the scanned result.
Scanning One or More Sections of Film
After you’ve adjusted the Light Source, it’s a good idea to stay organized as you scan each clip
by entering all relevant metadata into the Metadata Editor as you go. The Capture group of
metadata fields contains information for defining the File Name Prefix, Roll, Reel Number, Clip
Number, Program Name, Flags, and whether a particular take is good. If you populate these
fields before scanning a clip, that metadata will be written into the clip.
TIP: You can turn on Show Reference Levels in the Waveform, RGB Parade, or
Histogram scopes, and set the Low value to indicate the digital Dmin value of 95.
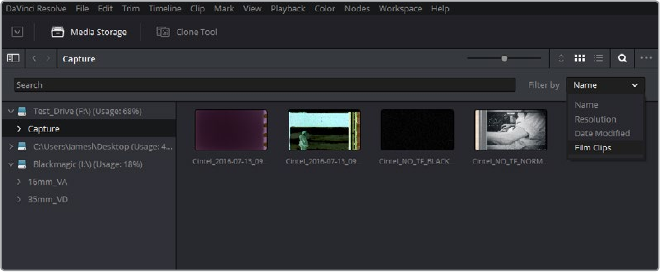
262
Capturing From the Cintel Film Scanner Part 2 – 13
With all of this accomplished, you can scan clips from film in one of three ways:
Capture Now: Clicking Capture Now begins scanning near the current frame, ending
whenever you click Stop Capture. Using Capture now, you can capture long sections of
a roll all at once.
Capture Clip: A more controlled means of scanning specific sections of film. After
you’ve used the Transport controls and the In and Out button to define a section of film,
clicking Capture Clip scans that one clip and then stops.
Batch Clips: A way you can log multiple clips in advance of scanning them all at once
using the current Light Source settings in the Cintel panel. Log each clip in advance by
setting In and Out points for each section of film you want to scan, and click the Log
Clip button to save that frame range as an unscanned clip in the Media Pool. When you
click Batch Clips, all unscanned clips will be scanned one after the other until the job is
complete. You can also select one or more unscanned clips, and only the selected clips
will be scanned. Furthermore, you can import an EDL that corresponds to a particular
film roll, and use the resulting logged clips for scanning.
For more information on Batch Capture workflows, see Chapter 12, “Ingesting From Tape.”
Extracting Audio
If the film you’re scanning also contains an optical sound track, you can extract the audio in a
separate step. There is a standard image frame to audio frame offset of 26 frames for 16mm and
21 frames for 35mm that DaVinci Resolve automatically aligns when extracting the audio. Select
all of the clips that have an optical sound track, then right-click one of the selected clips and
choose Extract Audio. DaVinci Resolve analyzes the overlapping optical track area of each
frame and automatically generates a matching audio track, synchronized with the scanned
image sequence. Each clip’s audio will be automatically extracted, embedded in the clip, and
saved to the same directory the scanned frames have been written to.
Each clip’s audio will be automatically extracted, embedded in the clip, and saved to the same
directory the scanned frames have been written to. A small audio icon will appear on the corner
of your clip’s thumbnail so you know there is a corresponding audio file.
To make extraction easier, you can filter the clips in the media storage by name, resolution, date
modified, or by film clips only. Filtering your clips makes it easier for you to find and select
exactly what you need. You can also make a large selection and extract audio from multiple
clips at once by right-clicking on your selection and choosing Extract Audio… from the
drop-down menu.
You can filter the contents in the media storage to make it easier to manage them
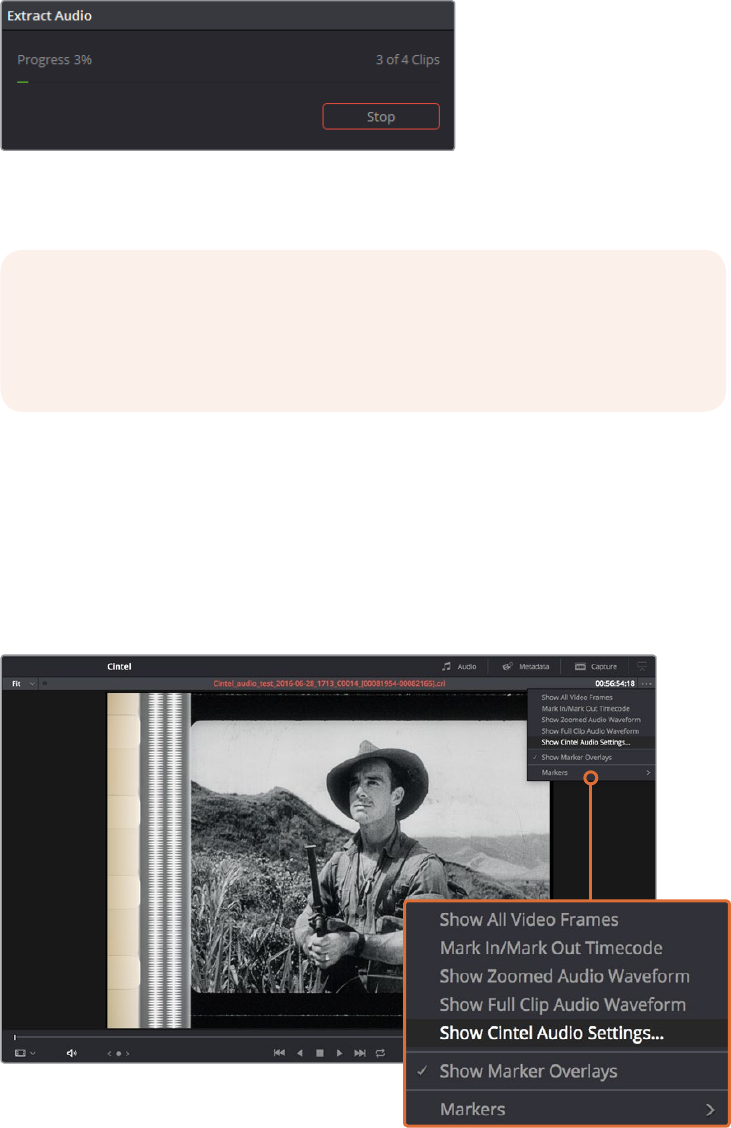
263
Capturing From the Cintel Film Scanner Part 2 – 13
During audio extraction, an information box will appear to
indicate the progress. You can stop the extraction at any
time by clicking on the Stop button
Audio Extraction Settings
Normally, once you have selected the film type, the automatic features in DaVinci Resolve will
extract your optical audio perfectly. However, the condition of the optical track can vary with
the condition of the film being loaded and in some instances this can confuse the automation.
Ifthis happens, you can bypass the automatic features and make adjustments manually.
For manual adjustments, open the Audio Extraction settings window by clicking Show Cintel Audio
Settings in the Inspector options near the top right of the Viewer
NOTE: If the Timestamp Prefix checkbox was deselected in the Capture Info
section when your clips were scanned, and you want to have extracted audio
automatically embedded in your clips, always remember to extract audio from
the clips inside the Media Pool.
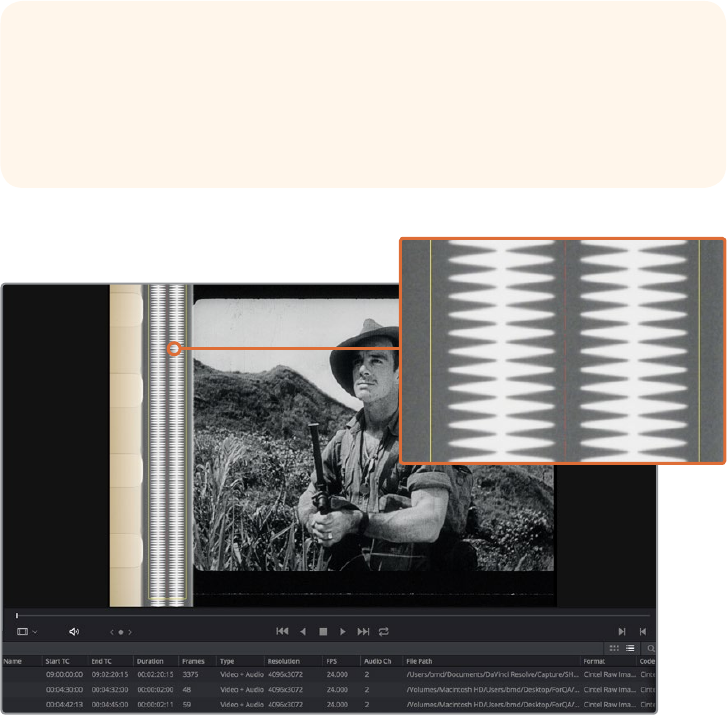
264
Capturing From the Cintel Film Scanner Part 2 – 13
Audio extraction settings let you make the following manual adjustments:
Show audio scan area: This checkbox turns the audio scan area guides on or off. The
guides are displayed as a box on the side of the frame covering the optical audio scan
area and show what optical information will be used during extraction. The position of
the guides will conform to the film type you have selected; however, you can change
the position manually if you need to. The audio scan area guides are also great
indicators to show you what is happening during the extraction process so you can
identify any potential troubles and make manual adjustments.
Inside the box is a thin red line. This line is the mid point detector which detects the
separation between stereo audio channels. When mono sound is detected during
audio extraction, the mid point detector disappears and the guides will adjust
automatically to suit the width of the mono optical track.
When Show Audio Scan Area is turned on, the audio area guides will be visible so you
can see exactly what information is being used and monitor the extraction process
Override audio scan area: This setting provides sliders for adjusting the horizontal
and vertical positioning, width, and height of the audio scan area guides. These
settings include:
Left and Width: If your film type is such that audio appears on the right side of the
frame, you can simply adjust the Left slider to move the guide box to the right. Normally,
this will happen automatically if you have the corresponding film type selected, but the
setting gives you more flexibility for adjustments if you need it. Similarly, the Width
setting is used to adjust the width of the scan area.
TIP: If you need a closer inspection of the audio scan area guides, you can
zoom into the Viewer and move the Viewer position up or down, and left or
right. Simply choose the amount of zoom from the sizing options at the top left
corner of the Viewer, then click and drag the Viewer with your mouse or
track pad.

265
Capturing From the Cintel Film Scanner Part 2 – 13
These are helpful tools for making subtle adjustments to the side edges of the guide
box if there are unwanted elements inside the film’s optical audio area. This can happen
due to perforation wear and tear, or varying print qualities, and can sometimes interfere
with the quality of the audio extraction. You can help avoid this by making a subtle
movement to the side edges to keep the stray elements outside of the guide box.
Top: Adjusts the vertical position of the guide box.
Height: Sometimes film frames on older rolls of film may be slightly smaller than normal
due to shrinkage over time. When making manual adjustments to the guide box, you
can make adjustments for film shrinkage using the Height slider.
Auto adjust audio scan height: This setting is on by default and automatically adjusts
the guide box height to align with the audio waveform at the top of each frame. The
automatic feature works well for normal audio conditions; however, if during extraction
you notice the box moving randomly and the quality of the extraction is affected, it may
be due to similar features in the audio track overlapping between frames. If this occurs,
deselect the checkbox and try the extraction again.
Audio waveform color is white: Depending on the scanned film type, the audio
waveform may be black or white. If the waveform is white, make sure the corresponding
checkbox is enabled. This will ensure the white information in the waveform is used
during audio extraction. If the waveform is black and the surrounding audio area is
white, disable the checkbox so DaVinci Resolve knows to use the black information in
the waveform. Other automatic features, such as mid point and mono detection, also
rely on this setting being set correctly.
Override firmware stability: In rare instances, the condition of the film may have
created large movements in the frame due to the internal firmware stabilization. This
can cause the audio extraction guide box to misalign with the optical track. If this
occurs, enabling “Override Firmware Stability” lets the audio extraction guide box
to track the film perforations independently and adjust its positioning for potentially
better results.
Variable density audio: If your film contains variable density audio, make sure you
select the Variable Density Audio checkbox so DaVinci Resolve knows the type of
audio to extract. The default state is set to Off for variable area audio soundtracks.
TIP: If deselecting the Auto Adjust Audio Scan Height checkbox, make sure
the Height setting places the guide box at the optimal position for the frame.
Making manual adjustments can help if you need them, but don’t forget to turn
the automatic features back on afterwards
TIP: If you haven’t used variable density audio before, you can visually identify
it as a tight sequence of shaded lines, similar to a bar code with the lines
squeezed closer together. By comparison, Variable Area soundtracks appear
as an audio waveform.
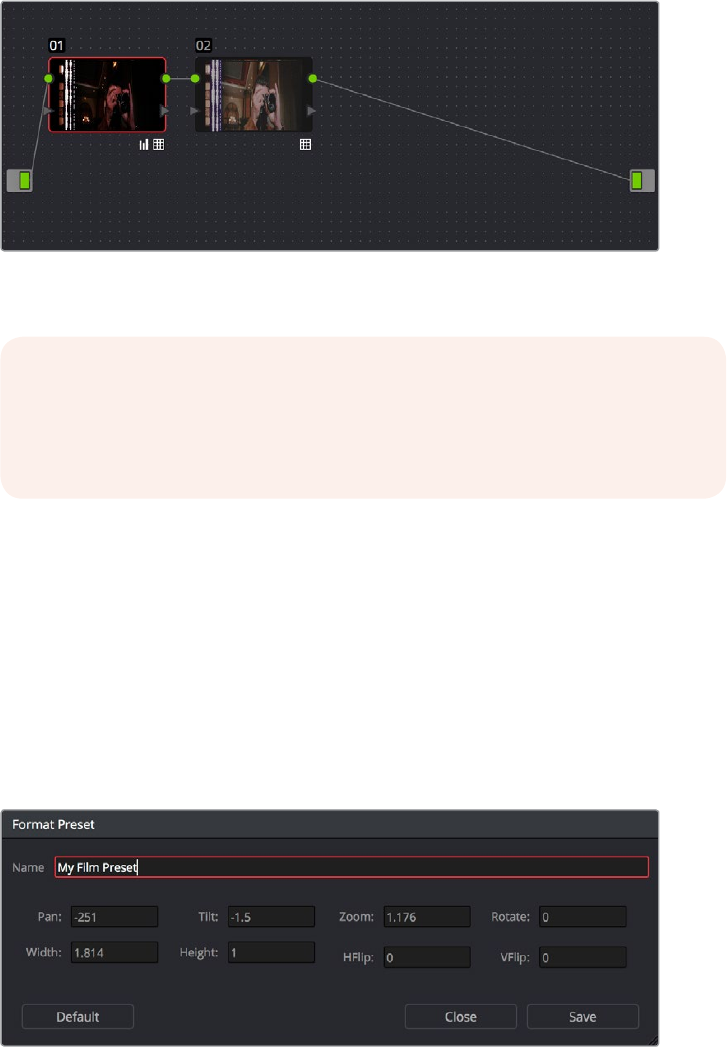
266
Capturing From the Cintel Film Scanner Part 2 – 13
Grading and Sizing Scanned Media
A pair of 1D LUTs, “Cintel Negative to Linear,” and “Cintel Print to Linear,” have been provided to
help you convert scanned media to a color space in which you can do further work. You can
apply these LUTs via a node in the Color page to convert the original scans to a Linear color
space. However, if you want to convert the image to Rec. 709 or to Cineon for further
adjustment, you’ll want to apply a second LUT in a second node. In general for Negative film, it’s
best to ‘color invert’ after the second LUT is applied so you can then apply grade operations on
the Linear data. There are a variety of VFX IO LUTs available in the 3D LUT submenu of each
node’s contextual menu that let you convert an image from Linear color space to any other color
space you want to work within. For more information, see Chapter 49, “Node Editing Basics.”
Using three nodes to convert a film scan using LUTs, node 1 converts from Negative or Print to Linear,
node 2 converts from Linear to Rec. 709, and node 3, if required, inverts the color
Depending on the format you’re scanning and the way the material was shot, you may
need to also resize the resulting scans, resizing, zooming, stretching, panning, and
tilting to create the final framing you require. You can use the Input Sizing mode of the
Sizing palette in the Color page to create the necessary framing, and save a sizing
preset (by clicking the Create button and entering a name in the resulting dialog). Once
you’ve created an appropriate sizing preset for a given type of media, you can apply
that preset to multiple film scans all at once, in either the Color page or in the Media
Pool using the Change Input Sizing Preset command, found in the contextual menu of
selected clips. For more information on sizing in DaVinci Resolve, see Chapter 58,
“Sizing and Image Stabilization.”
Creating a sizing preset in the Sizing palette of the Color page
NOTE: Applying a LUT within a node will clip any image data falling below 0
and above 1. To correct for this, you can use the Lift/Gamma/Gain controls
within any node with a LUT applied to adjust your image levels prior to the
transform applied by the LUT within that node.

PART 3
269
Using the Edit Page Part 3 – 14
Using the Edit Page
In this chapter, you’ll learn how to use and configure the Edit page user interface to prepare for
editing projects in DaVinci Resolve. For more information on how to use the Edit page to import
and conform projects edited in other applications for color correction and finishing in DaVinci
Resolve, see Chapter 34, “Conforming and Relinking Clips.”
This chapter covers the following topics:
The Edit Page User Interface 271
The Interface Toolbar 271
The Media Pool 272
Importing Media Into the Media Pool on the Edit Page 272
Bins, Power Bins, and Smart Bins 273
Showing Bins in Separate Windows 273
Filtering Bins Using Color Tags 274
Sorting the Bin List 275
Searching for Content in the Media Pool 276
Taking Advantage of the Media Pool’s Usage Column 276
More About Timelines and Grading 276
Timelines, Grades, and Versions 276
Enabling the Use of a Master Timeline 277
Using the Effects Library 278
The Toolbox 279
OpenFX 279
AudioFX 279
Eects Library Favorites 280
Edit Index 280
Navigating The Timeline Using the Edit Index 281
Edit Index Columns 281
Filtering the Edit Index 282
Exporting the Edit Index 283
Source and Timeline Viewers 283
How Each Clip’s Grade Looks in Each Viewer 284
Source and Timeline Viewers vs. Single Viewer Mode 284
Viewer Controls 284
Simultaneous Audio Waveform Display in the Source Viewer 287
Cinema Viewer Mode 287
Viewer Indicators 287
Other Viewer Options 288
Opening Clips in the Source Viewer 288
Timeline Viewer Edit Overlays 289
270
Using the Edit Page Part 3 – 14
Metadata Editor 289
Inspector 291
Timeline 291
Timeline Options 293
Switching Among Multiple Timelines 295
Toolbar 295
Toolbar Audio Monitoring Controls 297
The Clip and Track Mixer 297
Using Video Scopes 298
Navigating the Edit Page Using the Keyboard 299
Dual Monitor Layout 299
Customizing the Edit Page 300
Undo and Redo in the Edit Page 301
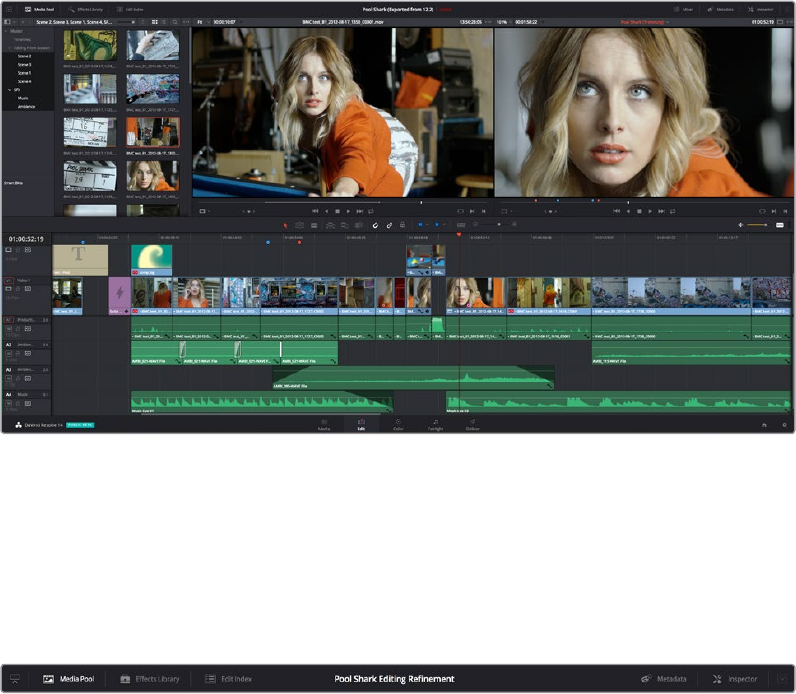
271
Using the Edit Page Part 3 – 14
The Edit Page User Interface
The Edit page has evolved into a source-record style NLE that contains nearly every editorial
tool you need for creative editing through finishing. The Edit page is divided into three main
regions: the browsers found at the left, the Viewers at the top, and the Timeline at the bottom,
all of which work together to let you import, edit, and trim timelines with a flexible variety of
tools and methods.
The Edit Page in its entirety
The Interface Toolbar
At the very top of the Edit page is a toolbar with buttons that let you show and hide different
parts of the user interface. These buttons are as follows, from left to right:
The Interface toolbar
Media Pool/Effects Library/Edit Index height button: Lets you set the area used by the
Media Pool, Effects Library, and/or Edit Index to take up the full height of your display
(you can display two at a time), giving you more area for browsing at the expense of a
narrower timeline. At half height, the Media Pool/Effects Library/Edit Index are restricted
to the top of the UI (you can only show one at a time), and the timeline takes up the full
width of your display.
Effects Library: Opens or hides the repository of all transitions, generators, OpenFX,
and audio filters available to use in the Edit page.
Edit Index: Opens or hides the list of all edit events in enabled tracks of the Timeline.
Metadata: Hides or shows the Metadata Editor.
Inspector: Shows or hides the Inspector, which shows you the transform and
compositing effects of selected clips, or the editable options of selected effects such
as transitions or generators.
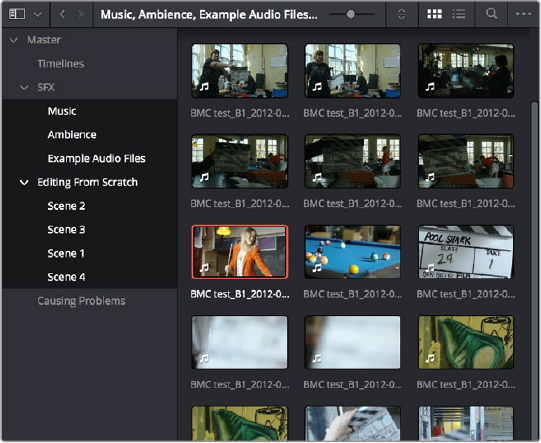
272
Using the Edit Page Part 3 – 14
The Media Pool
In the Edit page, the Media Pool contains all of the media you’ve imported for editing into the
project at hand, as well as all of the timelines that you’re going to be editing into. The Media
Pool is also mirrored on the Media and Fairlight pages, so you can access any clip or timeline
from any page where they can be used.
The Bin list at the left shows a hierarchical list of bins used for organizing your media, which is
also used to organize your timelines. By default, the Media Pool consists of a single bin, named
“Master,” but you can add more bins as necessary to organize timelines and clips by right-
clicking anywhere in the empty area of the Media Pool and choosing Add Bin. You can rename
any custom bin by double-clicking on its name and typing a new one, or by right-clicking a bin’s
name and choosing Rename Bin. The Bin list can be hidden or shown via the button at the
upper left-hand corner of the Edit page toolbar.
The Media Pool in Thumbnail mode, shown in half-height mode
The browser area to the right shows the contents of the currently selected folder. Every timeline
you create, and every AAF, XML, or EDL file you import, appears here. You can create or import
as many timelines as you need within a single project.
As in the Media page, the Media Pool can be displayed in either Icon or List view. In List view,
you can sort the contents by any one of a subset of the total metadata that’s available in the
Metadata Editor of the Media page. Of particular interest to editors are columns for Name, Reel
Name, different timecode streams, Description, Comments, Keyword, Shot, Scene, Take, Angle,
Circled, Start KeyKode, Flags, Usage, Resolution, and Frames Per Second.
For more information on using the myriad features of the Media Pool, see Chapter 8, “Adding
and Organizing Media with the Media Pool.” In the sections that follow, some key features of the
Media Pool are summarized for your convenience.
Importing Media Into the Media Pool on the Edit Page
While adding clips to the Media Pool in the Media page provides the most organizational
flexibility and features, if you find yourself in the Edit or Fairlight page and you need to quickly
import a few clips for immediate use, you can do so in a couple of different ways.
273
Using the Edit Page Part 3 – 14
To add media by dragging one or more clips from the Finder to the Edit page Media Pool
(macOS only):
1 Select one or more clips in the Finder.
2 Drag those clips into the Media Pool of DaVinci Resolve or to a bin in the Bin list.
Those clips are added to the Media Pool of your project.
To use the Import Media command in the Edit page Media Pool:
1 With the Edit page open, right-click anywhere in the Media Pool, and choose
Import Media.
2 Use the Import dialog to select one or more clips to import, and click Open.
Those clips are added to the Media Pool of your project.
For more information on using the myriad features of the Media Pool, see Chapter 8, “Adding
and Organizing Media with the Media Pool.” Below, some key features of the Media Pool are
summarized for your convenience.
Bins, Power Bins, and Smart Bins
There are actually three kinds of bins in the Media Pool, and each appears in its own section of
the Bin list. The Power Bin and Smart Bin areas of the Bin list can be shown or hidden using
commands in the View menu (View > Show Smart Bins, View > Show Power Bins). Here are the
differences between the different kinds of bins:
Bins: Simple, manually populated bins. Drag and drop anything you like into a bin,
and that’s where it lives, until you decide to move it to another bin. Bins may be
hierarchically organized, so you can create a Russian dolls nest of bins if you like.
Creating new bins is as easy as right-clicking within the bin list and choosing Add Bin
from the contextual menu.
Power Bins: Hidden by default. These are also manually populated bins, but these
bins are shared among all of the projects in your current database, making them ideal
for shared title generators, graphics movies and stills, sound effects library files, music
files, and other media that you want to be able to quickly and easily access from any
project. To create a new Power Bin, show the Power Bins area of the Bin list, then right-
click within it and choose Add Bin.
Smart Bins: These are procedurally populated bins, meaning that custom rules
employing metadata are used to dynamically filter the contents of the Media Pool
whenever you select a Smart Bin. This makes Smart Bins fast ways of organizing the
contents of projects for which you (or an assistant) has taken the time to add metadata
to your clips using the Metadata Editor, adding Scene, Shot, and Take information,
keywords, comments and description text, and myriad other pieces of information to
make it faster to find what you’re looking for when you need it. To create a new Smart
Bin, show the Smart Bin area of the Bin list (if necessary), then right-click within it and
choose Add Smart Bin. A dialog appears in which you can edit the name of that bin and
the rules it uses to filter clips, and click Create Smart Bin.
Showing Bins in Separate Windows
If you right-click a bin in the Bin List, you can choose “Open As New Window” to open that bin
into its own window. Each window is its own Media Pool, complete with its own Bin List, Power
Bins and Smart Bins lists, and display controls.
This is most useful when you have two displays connected to your workstation, as you can drag
these separate bins to the second display while DaVinci Resolve is in single screen mode. If you
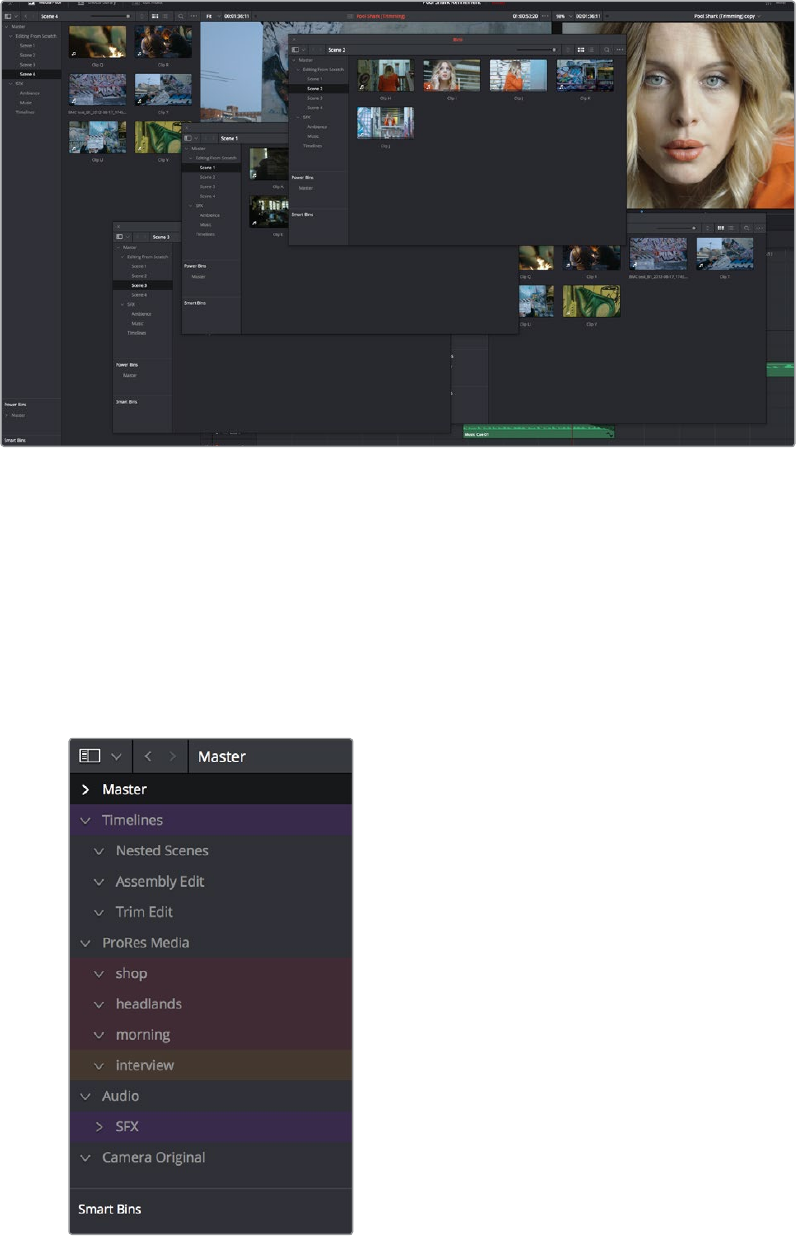
274
Using the Edit Page Part 3 – 14
hide the Bin list, not only do you get more room for clips, but you also prevent accidentally
switching bins if you really want to only view a particular bin’s contents in that window. You can
as many additional Bin windows open as you care to, in addition to the main Media Pool that’s
docked in the primary window interface.
Media Pool bins opened as new windows
Filtering Bins Using Color Tags
If you’re working on a project that has a lot of bins, you can apply color tags to identify particular
bins with one of eight colors. Tagging bins is as easy as right-clicking any bin and choosing the
color you want from the Color Tag submenu.
For example, you can identify the bins that have clips you’re using most frequently with a red
tag. A bin’s color tag then appears as a colored background behind that bin’s name.
Using Color Tags to identify bins

275
Using the Edit Page Part 3 – 14
Once you’ve tagged one or more Media Pool bins, you can use the Color Tag Filter pop-up
menu (the pop-up control to the right of the Bin List button) to filter out all but a single
color of bin.
Using Color Tag filtering to isolate the red bins
To go back to seeing all available bins, choose Show All from the Color Tag Filter pop-up.
Sorting the Bin List
The Bin list (and Smart Bin list) of the Media Pool can be sorted by Bin Name, Date Created, or
Date Modified, in either ascending or descending order. Simply right-click anywhere within the
Bin list and choose the options you want from the Sort by submenu of the contextual menu.
You can also choose User Sort from the same contextual menu, which lets you manually drag all
bins in the Bin list to be in whatever order you like. As you drag bins in this mode, an orange line
indicates the new position that bin will occupy when dropped.
Dragging a bin to a new position
in the Bin list in User Sort mode

276
Using the Edit Page Part 3 – 14
If you use User Sort in the Bin list to rearrange your bins manually, you can switch back and
forth between any of the other sorting methods (Name, Date Created, Date Modified) and User
Sort and your manual User Sort order will be remembered, making it easy to use whatever
method of bin sorting is most useful at the time, without losing your customized bin
organization.
Searching for Content in the Media Pool
An optional Search field can be opened at the top of the Media Pool that lets you quickly find
clips by name, partial name, or any of a wide variety of Media Pool metadata.
To search for a clip by name:
1 Select which bin or bins you want to search.
2 Click the magnifying glass button at the upper right-hand corner of the Media Pool.
3 Choose the particular column of information you want to search (or All Fields to search
all columns) using the Filter by pop-up menu. Only selected bins will be searched.
4 Type your search string into the Search field that appears. A few letters should be
enough to isolate only those clips that have that character string within their name.
Toshow all clips again, click the cancel button at the right of the search field.
Taking Advantage of the Media Pool’s Usage Column
In List view, the Usage column does not automatically update to show how many times a
particular clip has been used. However, you can manually update this metadata by right-clicking
within the Media Pool and choosing Update Usage Data from the contextual menu that
appears. Afterwards, each clip will display how many times it’s been used in this column. Clips
that have not been used yet display an x.
More About Timelines and Grading
DaVinci Resolve projects contain one or more edited timelines (sometimes called a sequence in
other applications) which are also organized in the Media Pool, and displayed in the Timeline
Editor (referred to as “the Timeline”). Timelines contain clips, the source media of which is kept
in the Media Pool, and which also appear as edit events in the Edit Index that can be shown at
the right of the Timeline.
Timelines, Grades, and Versions
Within any given timeline, grades are associated with the timecode of the source clip they’re
applied to. That means that as you alter the timeline, each clip’s grade moves along with it,
making it extremely easy to move back and forth between editing and grading as your needs
require. By default, each timeline in a project has independent sets of grades using Local
versions; this is true even if your timelines are duplicates. That means each clip within every
timeline has a completely independent grade.
TIP: Smart Bins are essentially multi-criteria search operations that scope the entire
project at once and are saved for future use.
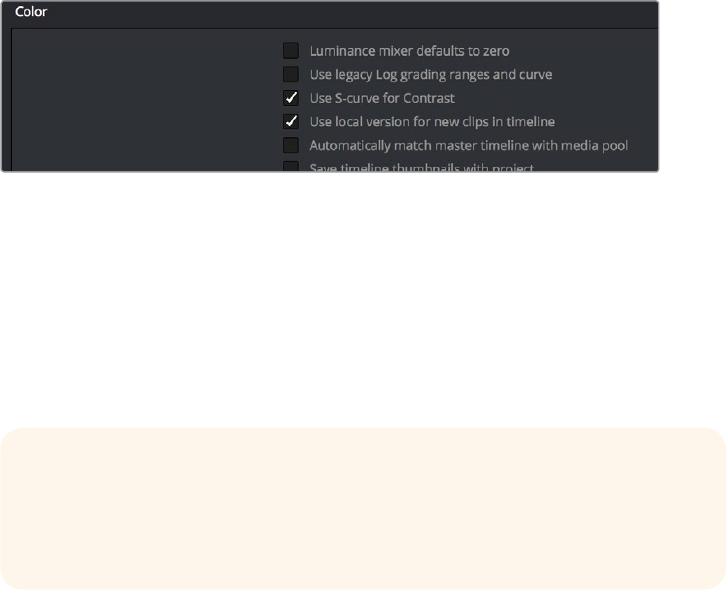
277
Using the Edit Page Part 3 – 14
However, if you switch the clips in one or more timelines to use Remote versions, a clip’s grades
are shared by every instance of that clip in all timelines with clips that also use Remote versions.
If you import a new timeline that rearranges clips into a different order and switch it to using
Remote versions, then grades will automatically follow the clips, so that the clips within each
new timeline inherits the grades applied to those same clips in other timelines.
You can switch a timeline between using Local and Remote grades at any time. For more
information on using Local versus Remote versions, see Chapter 48, “Grade Management.” You
can also copy grades from one timeline to another using the ColorTrace feature. For more
information about ColorTrace, see Chapter 54, “Copying and Importing Grades Using
ColorTrace.”
Enabling the Use of a Master Timeline
Previous versions of DaVinci Resolve had a Master Timeline, which consisted of one long
timeline containing every clip in the Media Pool, arranged by default in ascending order by
timecode. While the Master Timeline was useful for a variety of tasks, architectural
improvements have rendered it unnecessary, and by default the Master Timeline does not
appear in new projects created by DaVinci Resolve version 10 or later.
However, if you want a Master Timeline in order to have a single timeline that always contains
all clips currently in the Media Pool, there’s a way you can create one. You need to do it
immediately upon creating a new project, before adding any media to the Media Pool. Once
you’ve added one or more clips to the Media Pool, the option you need to do so will
be disabled.
To create a new Master Timeline:
1 Create a new project, open the General Options panel of the Project Settings, and turn
on the “Automatically match master timeline with media pool” checkbox. If you also
want all clips to use Remote versions as you grade by default as in previous versions of
DaVinci Resolve, you can turn off the “Store grade with local version by default.”
The option to use a Master Timeline is in the Color section of the
General Options panel of the Project Settings
2 Click Save to close the Project Settings window.
3 Open the Edit page, and choose File > New Timeline (Command-N).
4 When the New Timeline Properties window appears, turn the Empty Timeline checkbox
off, and click Create New Timeline.
Now, in addition to the new timeline, a Master Timeline appears in the Timeline list.
TIP: If you want to make sure that you always have a Master Timeline when
you create new projects, you can alter the Project Setting preset for your user
account to reflect these settings, or you can create a new Project Setting
preset with these settings that you can easily switch to.
278
Using the Edit Page Part 3 – 14
Creating a Master Timeline
The Master Timeline consists of one long sequence of every clip in the Media Pool, arranged in
ascending order by timecode. Each clip in the Master Timeline appears at its full duration,
regardless of the duration of corresponding clips in an EDL-, AAF-, or XML-imported timeline.
Whenever you add more clips to the Media Pool, they’re automatically added to the Master
Timeline.
The Master Timeline is useful for organizing media for which no editing has yet been done, such
as when grading digital dailies. The Master Timeline is also useful for identifying a range of
similar clips, based on their similar ranges of timecode. For example, you could find all the
talking head shots from a particular section of tape clustered together in the Master Timeline.
Using the Effects Library
All effects that you can add to your edit, including filters, transitions, titles, and generators, are
found in the Effects Library, which is split into two parts. To the left is a bin list that shows a
hierarchical list of all of the different Transitions, Title Effects, Generators, and Filters that are
available, sorted by category. To the right is a browsing area in which you can see the contents
of whichever bins are selected.
The Effects Library
Similar to the Media Pool, the Effects Library’s bin list can be opened or closed using a button
at the top left, while a menu just to the right of this button lets you sort the list into
differentcategories.
279
Using the Edit Page Part 3 – 14
The Toolbox
All of the video and audio transitions, titles, and generators that ship along with DaVinci Resolve
appear in the Toolbox category of the Effects Library.
Toolbox: Exposes all Transitions, Titles, Generators, and Effects at once.
Video Transitions: Contains all of the built-in transitions that are available from DaVinci
Resolve. You can drag any video transition to any edit point in the Timeline that has
overlapping clip handles to add it to your edit; you have the option to drag the transition
so that it ends on, is centered on, or starts on the edit point.
For more information, see Chapter 24, “Using Transitions.”
Audio Transitions: Contains audio transitions for creating crossfades.
Titles: Titles can be edited into the Timeline like any other clip. Once edited into the
Timeline, you can edit the title text and position directly in the Timeline Viewer, or you
can access its controls in the Inspector for further customization.
Generators: Generators can also be edited into the Timeline like any other clip.
Selecting a generator and opening the Inspector lets you access its controls for further
customization. You can also choose a standard duration for generators to appear with
in the Editing panel of the User Preferences.
OpenFX
DaVinci Resolve supports the use of third-party OpenFX filters, transitions, and generators in
the Edit page. Once you install these effects on your workstation, they appear in this section of
the Effects Library, organized by type and group depending on the metadata within each effect.
OpenFX: Exposes all ResolveFX and third-party OpenFX installed on your
workstation at once.
Filters: Contains the ResolveFX filters that ship with DaVinci Resolve, as well as any
third-party OFX plug-ins you’ve installed on your workstation. Filters can be dragged
onto video clips to apply an effect to that clip. Once applied, filters can be edited and
customized by opening the OpenFX panel of the Inspector.
Transitions: Contains any third party OFX transitions you have installed on your
workstation. OFX transitions can be used similarly to any other transition, but they also
expose an OpenFX panel next to the Transition panel in the Inspector, where you can
customize settings that are unique to that transition.
Generators: Contains any third party OFX generators you have installed on your
workstation. Can be edited into the Timeline just like the native Generators that ship
with DaVinci Resolve, but they also expose an OpenFX panel next to the Transition
panel in the Inspector, where you can customize settings that are unique to that
transition.
AudioFX
On OS X and Windows, DaVinci Resolve supports the use of third-party VST audio plug-ins.
OnOS X, DaVinci Resolve supports Audio Unit (AU) audio plug-ins. Once you install these
effects on your workstation, they appear in this panel of the Effects Library. Audio plug-ins let
you apply effects to audio clips or an entire track’s worth of audio to add creative qualities such
as echo or reverb, or to take care of mastering issues using noise reduction,
compression, or EQ.
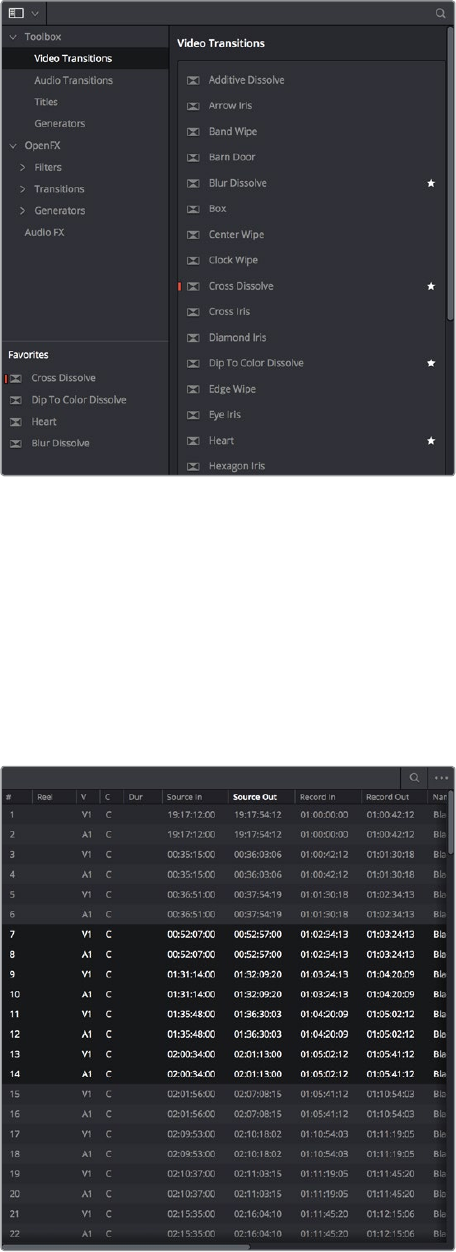
280
Using the Edit Page Part 3 – 14
Effects Library Favorites
You can click on the far right of any transition, title, or generator to flag that effect with a star as
a favorite effect. When you do so, the favorited effects appear in a separate Favorites area at
the bottom of the Effects Library Bin list.
Stars indicate a flagged favorite effect; all
favorites are currently filtered
Edit Index
Clicking the Edit Index button opens the Edit Index. By default, this shows an EDL-style list view
of all the edit events in the current timeline. Whichever timeline is selected in the Timeline list
displays its events here. However, the contents of the Edit Index can be filtered using
commands found in the Option pop-up, described later in this section.
Edit Index List shown open
281
Using the Edit Page Part 3 – 14
Each clip and transition is shown as an individual event, each of which contains multiple
columns of information. If you re-edit a timeline, your changes are also reflected in this list. The
Edit Index is useful for creative editors that are looking for specific effects that are used in the
current timeline, or for finishing editors that need more information about a specific clip, or who
might need to filter the entire edit by specific criteria in order to troubleshoot various issues.
Navigating The Timeline Using the Edit Index
Whenever you move the Timeline playhead to intersect a clip, the Edit Index updates to show
only the clips on the video track the intersecting clip is on, and that clip’s event is highlighted in
the Edit Index. This makes it easy to see the correspondence between a clip in the Timeline
and its event, which is helpful when troubleshooting problems. There are also commands
available in the Option menu to display only clips on enabled tracks, only video clips, and only
audio clips.
Edit Index Columns
Each event populates several columns of information. These columns can be rearranged by
dragging them to the left or right, depending on what information is most important to you.
The available columns of information are:
#: The event number (which corresponds to the clip number shown in the Thumbnail
timeline of the Color page).
Reel: The reel name of the corresponding clip.
Match: Flags clips that have clip conflicts, which display a question mark in this column.
Once the clip conflict has been resolved, this flag disappears.
V: Video event.
C: The event type (C for cut, D for dissolve or transition).
Dur: A number showing the duration of a transition in frames.
Source In/Source Out: The Source In and Source Out timecode indicating the range of
timecode referenced by that clip; corresponds to the timecode locations of each clip’s
In and Out point relative to the source media it comes from.
Record In/Record Out: Record In and Record Out timecode indicating that clip’s
position in the Timeline.
Name: The name of the clip.
Comments: Whatever comments were present in the EDL that was imported. For
example, clip names exported from the original NLE to be used as reel names in RED
workflows using EDL import.
Source Start/ Source End: The very first and last frame of media available in the
Source Media for that clip.
Source Duration: The duration, in timecode, of the total source media available in
that clip.
Codec: The codec of the corresponding clip.
Source FPS: The frame rate of the corresponding clip.
Resolution: The frame size of the corresponding clip.
Color: The color of flags or markers applied to that clip.
Notes: Notes entered inside of markers applied to clips or the Timeline.
The columns in the Edit Index can be customized to prioritize the information that’s
important to you.
282
Using the Edit Page Part 3 – 14
Methods of customizing metadata columns in the Edit Index:
To show or hide columns: Right-click at the top of any column in the Edit Index and
select an item in the contextual menu list to check or uncheck a particular column.
Unchecked columns cannot be seen.
To rearrange column order: Drag any column header to the left or right to rearrange
the column order.
To resize any column: Drag the border between any two columns to the right or left to
narrow or widen that column.
You can also customize column layouts in the Edit Index. Once you’ve customized a column
layout that works for your particular purpose, you can save it for future recall.
Methods of saving and using custom column layout:
To create a column layout: Show, hide, resize, and rearrange the columns you need
for a particular task, then right-click any column header in the Media Pool and choose
Create Column Layout. Enter a name in the Create Column Layout dialog, and click OK.
To recall a column layout: Right-click any column header in the Media Pool and choose
the name of the column layout you want to use. All custom column layouts are at the
top of the list.
To delete a column layout: Right-click any column header in the Media Pool and
choose the name of the column layout you want to delete from the Delete Column
Layout submenu.
Filtering the Edit Index
You can use options found in the Edit Index’s option menu to filter specific things that you want
to check out, whether to go through all of the marked clips to see if there are any notes you
need to address, or to isolate all offline clips, or to go through edits to see if there’s anything
you need to fix. You can filter the Edit Index in the following ways:
Show All: Shows all entries in the list. Choose this option after using any of the other
options to go back to seeing the entire timeline.
Show Active Track Items: Filters out all clips that appear on tracks above or below
tracks identified with a Destination Control. For example, if you have three video tracks
and the Destination Control is on track V2, then all clips on tracks V1 and V3 will be
hidden from the Edit Index.
Show Video Track Items: Filters out all audio clips so only video clips appear in the list.
Show Audio Track Items: Filters out all video clips so only audio clips appear in the list.
Show Flags: Isolates clips with flags in the list. A submenu lets you choose to show all
clips with flags or only clips with a particular color of flag.
Show Markers: Isolates all clips with markers in the list. A submenu lets you choose to
show all clips with markers or only clips with a particular color of marker.
Show Clip Colors: Isolates all clips that have been labelled with clip colors in the list. A
submenu lets you choose to show all clips that are labelled using any clip color or only
clips labelled with a particular color.
Show Through Edits: Filters only clips that have through edits, or cuts where
continuous timecode appears from the outgoing to the incoming half of the edit, that
you may or may not want to remove, depending on why they’re there.
Show Offline Clips: Isolates all offline clips (clips that have become unlinked from the
corresponding source media on disk) in the Timeline, so you can quickly navigate to
each one and troubleshoot the issue.

283
Using the Edit Page Part 3 – 14
Show Clip Conflicts: Filters all clips with clip conflict warning badges (indicating there is
reel, name, and timecode metadata that overlap that of another clip) in the Timeline, so
you can quickly navigate to each one and check whether they’re using the correct clip.
Show Clips With Speed Effects: Filters all clips with linear or variable Speed Effects in
the Timeline.
Show Clips With Composite Effects: Filters all clips with Composite mode or Opacity
settings other than the default (Normal, 100).
Show Clips With Transform Effects: Filters all clips with altered Transform settings.
Show Clips With Filters: Filters all clips with ResolveFX or OFX filters applied to them.
Show Stills and Freeze Frames: Filters all clips that are stills or that have freeze frame
speed effects applied to them.
Show Compound Clips and Nested Timelines: Filters all compound clips and nested
timelines in the Timeline.
Show Fusion Connect Clips: Filters all Fusion Connect Clips.
Exporting the Edit Index
If you’ve filtered a series of edits in the Edit Index that you’d like to share with someone else,
this is easy to do. For example, you might filter the Edit Index to show a list of all the offline clips
in the current timeline, and then export a list as either a .csv or .txt file to give to your assistant
editor so they can chase down the necessary media. Both types of files are widely compatible
with spreadsheet and database software in the event you want to import the data into another
application.
To export the Edit Index:
1 Right-click the currently open timeline in the Media Pool, and choose Timelines >
Export > Edit Index… from the contextual menu.
2 Use the Export Edit Index window to choose a location to save the exported file, and
choose a format from the pop-up menu at the bottom. You can export either a Comma
Separated Values (.csv) file, or a Tab Delimited Values (.txt) file.
3 Click Save.
Source and Timeline Viewers
By default, the Edit page presents a traditional source/record style editing experience. The
Source Viewer lets you view individual clips from the Media Pool to prepare them for editing.
Meanwhile, the Timeline Viewer lets you play through your program, showing you the frame at
the position of the playhead in the Timeline.
Source and Timeline Viewers
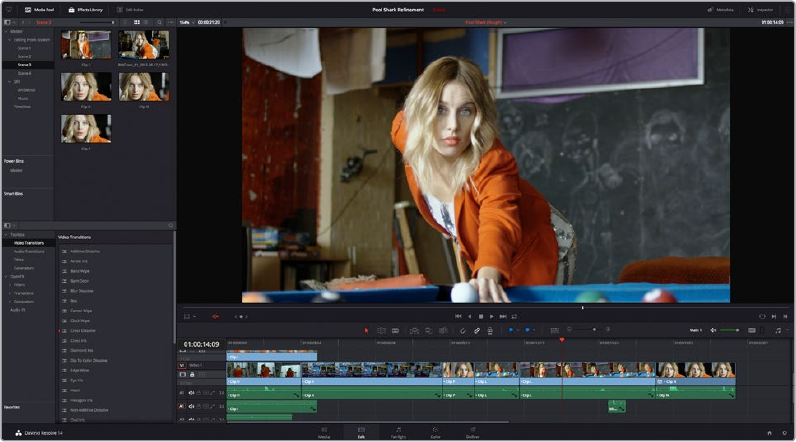
284
Using the Edit Page Part 3 – 14
You can select either viewer by clicking with the pointer, or by pressing Q (Source/Timeline
Viewer), and the name of the viewer that currently has focus appears in orange.
How Each Clip’s Grade Looks in Each Viewer
The Color Viewer Lookup Table options in the Color Management panel of the Project Settings
only affect the GUI Viewer in the Color page. They do not affect the viewers in the Edit page.
Source and Timeline Viewers vs. Single Viewer Mode
If you want to change the Edit Page layout to hide the Source Viewer, you can choose View >
Single Viewer Mode to instead use just a single viewer to contextually display either a selected
Source Clip or the current frame of the Timeline.
Single Viewer mode turned on
In Single Viewer mode, whatever you select in the Media Pool or Timeline determines which
controls appear in the Viewer, which lets you do nearly everything you can do with two
simultaneously open viewers.
Viewer Controls
Both viewers share the following onscreen controls:
Zoom pop-up menu: Choosing Fit fits the currently visible frame to the available size
of the viewer. Choosing a percentage zooms the visible frame to that size. You can also
use the scroll wheel functionality of your mouse, trackpad, or tablet to zoom in and out
of the viewer.
Duration field: At the top left-hand side of the Source Viewer, this displays the
total duration of the clip, or the duration from the In to the Out point, if these have
been placed. In the Timeline tab, this displays the total duration of the currently
selected timeline.
GPU Status Display: Every viewer in DaVinci Resolve exposes a a GPU status indicator
and a frame-per-second (FPS) meter, which appears in the viewer’s title bar, which
shows you your workstation’s performance whenever playback is initiated. Since
DaVinci Resolve uses one or more GPUs (graphics processing units) to handle all image
processing and effects, the GPU status display shows you how much processing power
is being used by whichever clip is playing.
285
Using the Edit Page Part 3 – 14
Clip Name: The clip name is displayed at the center of the Source Viewer title bar.
The Timeline Viewer displays the timeline name and is also a pop-up menu that lets
you switch among other timelines in the current project. The clip/timeline name is
highlighted orange when either the Source or Timeline Viewer has focus.
Source/Timeline Timecode/Frame/Keykode Display: At the top right-hand side of
the Source Viewer, this field shows the timecode of the current frame at the position
of the playhead in the Source Viewer’s jog bar, and can be switched between
source timecode, source frame, and keykode by right-clicking and choosing from the
contextual menu. In the Timeline Viewer, this field shows the record timecode of the
current frame at the position of the playhead in the Timeline, and can be switched
between source and record timecode, source and record frames, and keykode by right-
clicking and choosing from the contextual menu.
Source Viewer Option menu: Contains the following commands:
Gang Viewers: With Gang Viewers enabled, the movement of the Source and Timeline
Viewer playheads is locked together, so that they move in unison. This is useful when
you’re matching the timing of part of a clip in the Source Viewer to match an event in
the Timeline.
Live Media Preview: Enabled by default, makes it possible for thumbnails that you’re
skimming in the Media Pool to show the skimmed frame in the Viewer. When skimming
with Live Media Preview enabled, the playhead that appears in the thumbnail is locked
to the playhead displayed in the Viewer’s jog bar.
Show All Video Frames: When available processing power is insufficient to play the
clip or clips at the position of the playhead due to the grade, transforms, or effects that
are applied at that moment in the Timeline, you have the ability to choose exactly how
performance in DaVinci Resolve degrades. When off, DaVinci Resolve prioritizes audio
playback at the expense of dropping video frames when processing power is tight,
resulting in a more conventional playback experience. When on, audio quality is
compromised while every frame of video plays in slower-than-real time to
maintain playback.
Show Zoomed Audio Waveform: When enabled, shows an audio waveform overlay at
the bottom of the Source Viewer with a zoomed in section of the audio surrounding the
current position of the playhead.
Show Full Clip Audio Waveform: When enabled, shows an audio waveform overlay at
the bottom of the Source Viewer that displays the audio over the entire duration
of the clip.
Show Marker Overlays: Enabled by default, markers that intercept the playhead when
playback is paused appear superimposed in the Viewer.
Markers submenu: When one or more markers are applied to the clip in the Source
Viewer, they appear in this list in chronological order, listed by Name and Note.
Choosing a marker from this menu jumps the playhead to that marker in the
Source Viewer.
Timeline Viewer Option menu: Contains the following commands:
Gang Viewers: With Gang Viewers enabled, the movement of the Source and Timeline
Viewer playheads is locked together, so that they move in unison. This is useful when
you’re matching the timing of part of a clip in the Source Viewer to match an event in
the Timeline.
Show All Video Frames: When available processing power is insufficient to play the
clip or clips at the position of the playhead due to the grade, transforms, or effects that
are applied at that moment in the Timeline, you have the ability to choose exactly how
performance in DaVinci Resolve degrades. When off, DaVinci Resolve prioritizes audio
playback at the expense of dropping video frames when processing power is tight,
resulting in a more conventional playback experience. When on, audio quality is
compromised while every frame of video plays in slower-than-real time to
maintain playback.
286
Using the Edit Page Part 3 – 14
Show Marker Overlays: Enabled by default, markers that intercept the playhead when
playback is paused appear superimposed in the Viewer.
Markers submenu: When one or more markers are applied to a Timeline, they appear
in this list in chronological order, listed by Name and Note. Choosing a marker from this
menu jumps the playhead to that marker in the Timeline.
Source Viewer Mode pop-up (Source Viewer only): This pop-up menu lets you set the
Source Viewer to display different views of the clips you’re working on, depending on
what you need to do.
Offline Reference Movie button: If you’ve assigned an offline reference movie to the
currently selected timeline, clicking the Offline Mode button lets you display the offline
movie so you can compare it with the currently open timeline. In this mode, Source and
Timeline playback are synched; an Offset field replaces the duration field, letting you
re-sync the offline reference movie, if necessary.
Video button: Shows the video of the currently open clip in the Source Viewer.
Audio button: Shows the audio waveforms corresponding to all channels of the
currently open clip in the Source Viewer. The top of this audio-only view shows the
waveform for the entire duration of the clip, while the main region of the viewer shows a
zoomed in section of the audio waveform. The level of zoom displayed is controlled by
the zoom pop-up at the upper left-hand corner of the Source Viewer.
Multicam: Shows you the multi-angle Multicam Viewer that you can use to switch
among different angles of video and audio while multicam editing a clip in the Timeline.
For more information on multicam editing, see Chapter 21, “Multicam Editing.”
Transform Mode pop-up (Timeline Viewer Only): This functions as both a toggle
switch and a pop-up menu. Clicking the button control to the left enables or disables
onscreen controls that you can use to transform the clip right in the viewer. Clicking the
pop-up control to the right lets you switch between two modes of transforms:
Transform: Exposes controls for Pan (X) and Tilt (Y), Scale X and Y, and Rotation.
Crop: Exposes controls to crop from the top, bottom, left, and right.
Jog control: Clicking the Jog control and dragging left and right lets you move slowly
through a clip or the Timeline a frame at a time.
Transport controls: These controls include, from left to right, Jump to First Frame, Play
Reverse, Stop, Play Forward, Jump to Last Frame.
Loop Playback: Enables or disables looped playback. Looping is also controllable via
the Playback > Loop/Unloop command (Command-/). When enabled, each playback
command loops back to the beginning when the end of that command’s range is
reached. In and Out points in the Source or Timeline Viewers do not trigger looping.
For example, when enabled, the Play command will play through the entire clip or
timeline, and then loop back to the beginning when the end is reached and start
playing automatically. The Play Around command, on the other hand, will start at the
beginning of pre-roll, play through the post-roll, and then immediately loop back around
to the beginning of pre-roll, continuing playback in this manner until you stop it.
Match Frame: In the Source Viewer, Match Frame attempts to move the playhead in
the Timeline to match the current frame of the clip in the Source Viewer. In the Record
Viewer, Match Frame opens the Media Pool clip corresponding to the clip at the current
position of the playhead into the Source Viewer, setting In and Out points and the
playhead position to match those of the clip in the Timeline.
In/Out buttons: Places In and Out points with which to define a range of the clip, or of
the Timeline, in preparation for making different kinds of edits.
Jog bar: In the Source Viewer, drag within the jog bar to reposition the Source
playhead, scrubbing through the clip. In the Timeline tab, drag to reposition the
playhead throughout the entire program.
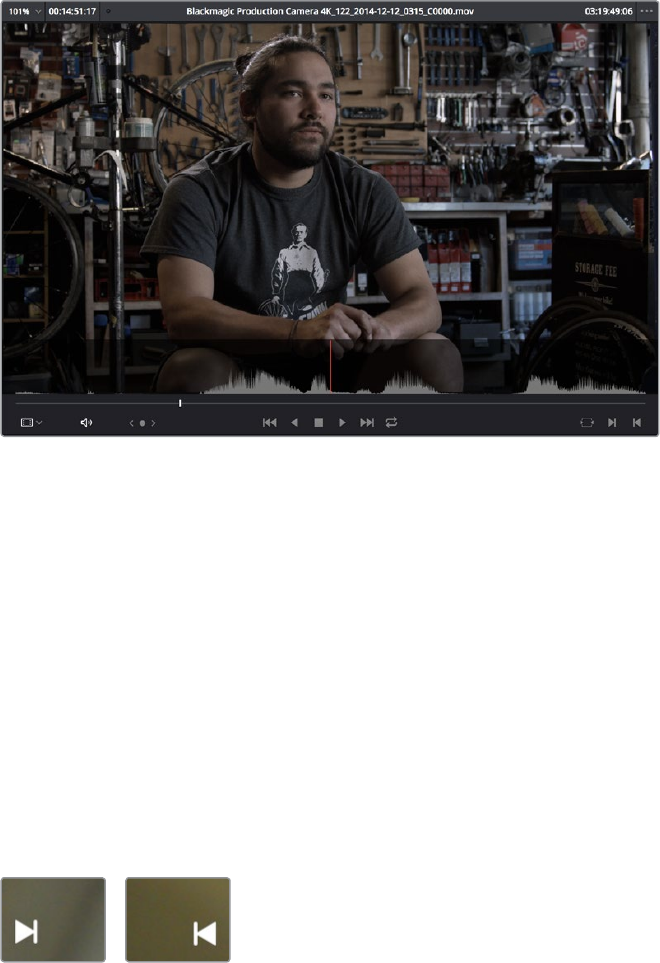
287
Using the Edit Page Part 3 – 14
Simultaneous Audio Waveform Display in the Source Viewer
When the Source Viewer is set to Source, two options in the Option Menu let you see a
superimposed audio waveform running along the bottom of the viewer, over the video of the
currently selected clip.
Show Current Frame Audio Waveform: Shows a zoomed-in section of audio that
scrolls as you play the clip. Useful for seeing dialog and music cues as you play
through a clip.
Show Full Clip Audio Waveform: Shows the audio waveform for the entire source
media of that clip. The section of audio from the In to Out points you’ve set in the
Source Viewer are highlighted. Useful for using the audio waveform to navigate
throughout that clip using the waveform as a reference.
The Source Viewer with “Show Current Frame Audio Waveform” enabled
Cinema Viewer Mode
You can also put either the Source or Timeline Viewers into Cinema Viewer mode by choosing
Workspace > Viewer Mode > Cinema Viewer (Command-F), causing whichever viewer is
currently selected to fill the entire screen, which is good for doing a test viewing of your edit
without the distractions of the DaVinci Resolve Edit Page UI. This command toggles Cinema
Viewer mode on and off.
Viewer Indicators
Certain frames trigger visible indicators in either the Source or Timeline viewers. For example,
ifthe playhead is at the very first or last frame of media available to a particular clip, indicators
appear in the lower-left or right corner of the frame to let you know there’s no more media in
that direction.
The first and last frame clip indicators
288
Using the Edit Page Part 3 – 14
If the playhead in the Timeline is on the first frame of black immediately after the last video clip
in the Timeline, an end of sequence indicator appears in the Timeline Viewer to let you know
that you’re viewing the last frame of the current sequence of clips, even though the playhead is
actually on a frame of black. This makes it easy to see what you’re doing while you’re first
assembling clips together.
The end-of-sequence indicator
Other Viewer Options
There are additional overlays and options you can use to customize how the viewer appears,
available in the View menu.
Safe Area: Choosing View > Safe Area > On lets you turn on Safe Area overlays
showing you Title Safe, Action Safe, among other available overlays. If you want to
choose the aspect ratio with which these overlays are represented, you can do so from
the View > Select Aspect Ratio submenu.
Use Gray Background: Choosing View > Use Gray Background in Viewers sets the
empty area of the viewer (if there is any) to a lighter gray, making it easier to see which
parts of the viewer are black because of blanking, and which parts are simply empty
because of the way the image is zoomed or panned.
Opening Clips in the Source Viewer
There are two methods of opening clips into the Source Viewer. Which is enabled depends on
the “Live Media Preview” setting found in the Viewer options menu (the three-dots menu found
at the upper right-hand corner of the Viewer).
When Live Media Preview is enabled (by default), skimming a thumbnail in the Media
Pool also shows the skimmed frame in the Source Viewer, effectively opening each
clip you skim in the Media Pool into the Source Viewer. As you skim, the playhead
that appears in the thumbnail is locked to the playhead that’s displayed in the
Viewer’s jog bar.
When Live Media Preview is disabled, you must either double-click a clip in the Media
Pool to open it into the Source Viewer, or you can select a clip in the Media Pool and
press the Return key to open it into the Source Viewer.
Which method is best is purely a matter of preference.
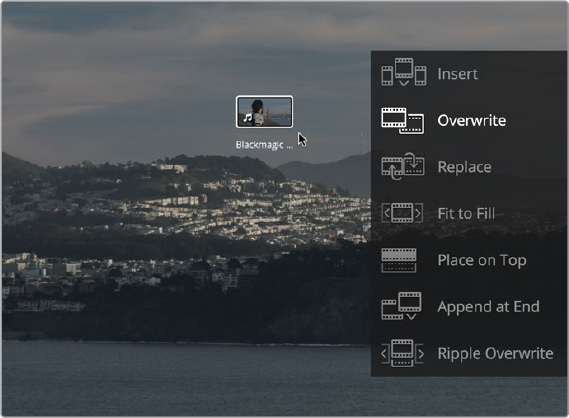
289
Using the Edit Page Part 3 – 14
Timeline Viewer Edit Overlays
Dragging a clip from the Media Pool or Source Viewer onto the Timeline Viewer also exposes
edit overlays that let you choose what kind of edit you want to make by choosing which overlay
to drop the clip onto.
The overlay that appears when you drag a clip onto the Timeline
Viewer lets you choose from a variety of edits
This overlay exposes every type of edit that’s available in DaVinci Resolve, including the Insert,
Overwrite, Replace, Fit to Fill, Place On Top, Ripple Overwrite, and Append at End edits, all of
which are also available from the Edit menu. It’s a useful method of making three-point edits if
you like drag and drop editing, but it also provides a nice reminder of what types of edits are
available, given all the different options that are available.
By default, the larger empty area to the left of these overlays defaults to the highlighted
Overwrite overlay, while all the smaller buttons let you perform each of the other edit types that
are available.
However, the “Timeline overlay retains the last performed action” checkbox in the Editing panel
of the User Preferences can be turned on if you want DaVinci Resolve to always remember the
last edit type you used, and highlight it on this Overlay whenever you drag another clip over the
Timeline Viewer to let you know that the last edit you performed is the new default edit if you
drop clips to the left of the overlay. For example, with this option enabled, if you perform a Place
On Top edit, then the next time you drop a clip into the empty area to the left of the overlays,
the result will be another Place On Top edit. This option is off by default.
Metadata Editor
Both the Media and Edit pages have a Metadata Editor. In the Edit page, the Metadata Editor
opens in the same place as the Inspector, to the right of the Source and Timeline Viewers.
When you select a clip in the Media Pool or Timeline, its metadata is displayed within the
Metadata Editor, and the title bar indicates whether you’re evaluating a clip in the Timeline or
Media Pool. If you select multiple clips, only the last clip’s information appears. The Metadata
Editor’s header contains uneditable information about the selected clip, including the file name,
directory, duration, frame rate, resolution, and codec.
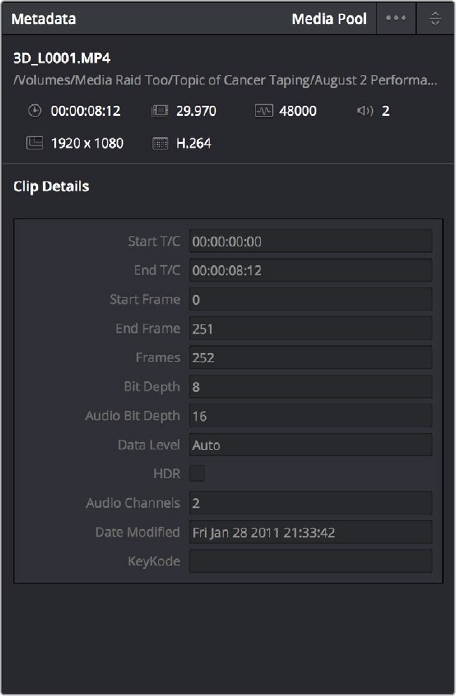
290
Using the Edit Page Part 3 – 14
Because there are so very many metadata fields available, two pop-up menus at the top let you
change which set of metadata is displayed in the Metadata Editor.
Metadata Presets (to the left): If you’ve used the Metadata panel of the User
Preferences to create your own custom sets of metadata, you can use this pop-up to
choose which one to expose. Surprisingly enough, this is set to “Default” by default.
Metadata Groups (to the right): This pop-up menu lets you switch among the various
groups of metadata that are available, grouped for specific tasks or workflows.
The heart of the Metadata Editor is a series of editable fields underneath the header that let
youreview and edit the different metadata criteria that are available. For more information on
editing clip metadata, and on creating custom metadata presets, see Chapter 9, “Using
ClipMetadata.”
Clip Metadata Editor showing the Clip Details
panel for a clip in the Timeline
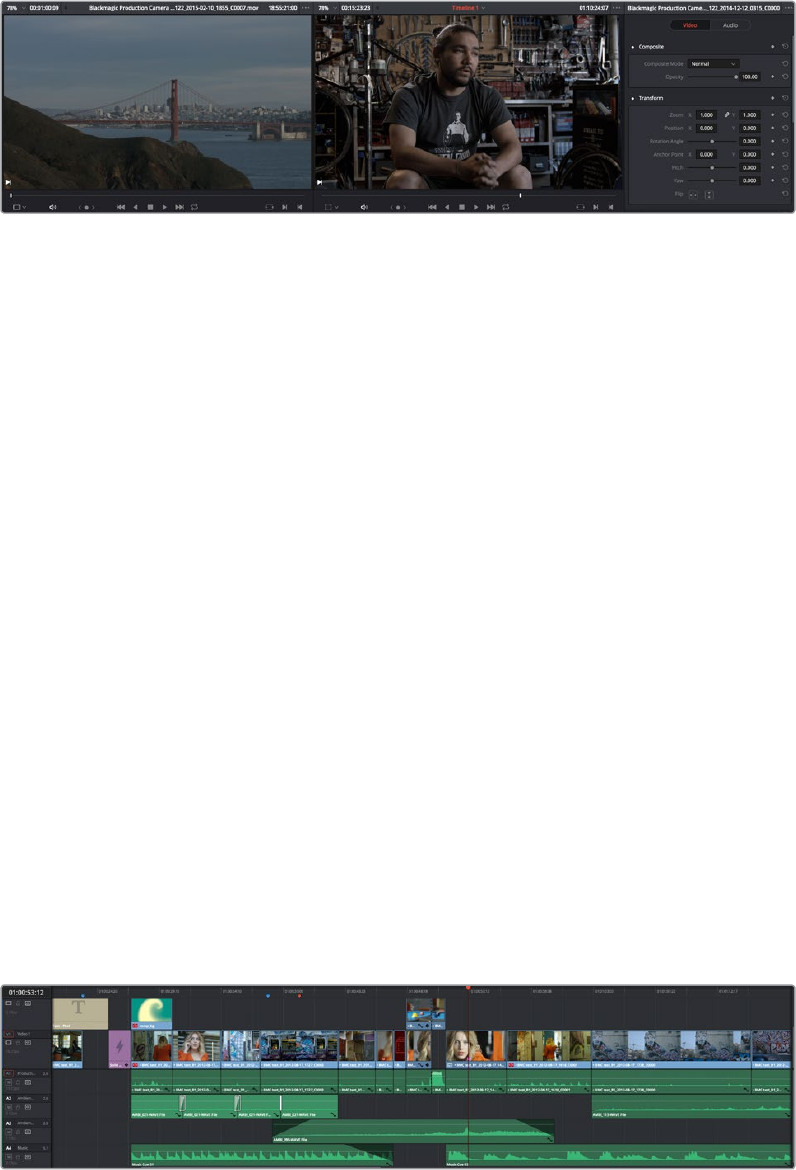
291
Using the Edit Page Part 3 – 14
Inspector
The Inspector can be opened to let you customize compositing, transform, and cropping
parameters for clips, as well as clip-specific retime and scaling options. Furthermore, the
Inspector lets you edit the parameters of transitions, titles, and generators used in the Timeline,
in order to customize their effect.
The Inspector, opened and showing a clip’s parameters
When the Inspector is open, the Source and Timeline viewers move to the left, to sit alongside the
Inspector showing the selected clip’s parameters. However, if your computer display’s resolution
is not high enough, opening the Inspector may result in the Source Viewer being hidden.
Methods of showing parameters in the Inspector:
To open a video or audio clip’s transform settings when the Inspector is closed:
Select that clip, and then click the Inspector button at the far right of the Edit
page toolbar.
If the Inspector is already open: You need only select a clip or effect to reveal its
controls in the Inspector.
If the Inspector is closed: Double-clicking any Transition will automatically open it.
The Inspector shows different buttons at the top that let you switch among different pages of
parameters. For example, when you select a clip with both audio and video components, the
Inspector shows Video and Audio buttons at the top that let you switch among each set of
controls. If you select a Generator effect, the Inspector only shows the controls corresponding
to that generator.
Timeline
The Timeline shows whichever timeline you’ve double-clicked in the Timelines browser. It’s
where you either edit programs together from scratch, or import sequences from other
applications. For imported programs, the Timeline provides a visual representation of the edited
program that’s helpful for verifying that the project was imported correctly, checking the media
corresponding to each clip in the program, and performing whatever editorial tasks are
necessary to prepare a project for grading (such as replacing or adding clips, superimposing
composites, and modifying composite modes or transitions).
An edited timeline
292
Using the Edit Page Part 3 – 14
Timeline Ruler: The Timeline Ruler shows the program’s timecode, and the playhead
indicates the current frame of the current clip. Whichever clip intersects the playhead is
the one that you’ll be working on in the Color page. Dragging within the Timeline Ruler
moves the playhead. When you add markers to the timeline, these markers appear
within the Timeline Ruler, as well.
Playhead: The playhead automatically syncs with the Timeline Viewer’s jog bar
playhead, the playheads in the Mini-Timeline and Thumbnail timeline of the Color
page, and the playhead on the Deliver page. Furthermore, the Edit Index event that
corresponds to the clip intersecting the playhead is automatically highlighted.
Timecode field: Shows the current timecode value corresponding to the position of
the playhead.
Video Tracks: DaVinci Resolve supports multiple video tracks. At the left of each track
is a header area that contains a number of controls.
Track Header: The Track Header contains different controls for selecting, locking/
unlocking, and enabling/disabling tracks. Each track header also lists how many clips
appear on that track. The Track Header contains the following five controls, from
left to right:
Track Header area showing the controls
for each track that are located within
Track Color: Each track can be color-coded with one of 16 different colors. These color
codes correspond to the Edit page Mixer, and to the Fairlight page Mixer and Audio
Meters. You can choose a new color for any track by right-clicking the track header and
choosing from the Change Track Color submenu.
Destination control and Track Number: These controls are highlighted orange when
that track is selected for editing, dark gray when that track is not selected, and flat gray
if that track is disabled for editing. The Destination buttons dictate into which tracks
audio and video media in the Source Viewer will be placed when an edit is executed.
Ordinarily, there is one video destination control (V1) and one audio destination control
(A1). If you add additional tracks, you can see that each destination control is numbered
according to its track position. The bottom track is “V1,” and subsequently numbered
tracks appear higher in the Timeline. Click any track’s number to select that track for
different editing functions; the selected track is highlighted black.
Track Name: Each track has a name that defaults to the type of track and the track
number, such as Video 1, Audio 1. However, you can click any track’s name and edit it to
be whatever you like. For example, you can rename each audio track with the type of
audio you’re editing onto it, such as Production, Ambience, SFX, or Music. These track
names are also used to identify each track’s channel in the Edit page Mixer and in the
Fairlight page Mixer.
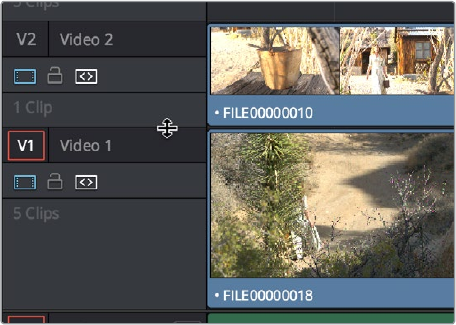
293
Using the Edit Page Part 3 – 14
Enable Track/Mute button: A slash indicates when a track is disabled. This control lets
you turn tracks on and off. Clips on tracks that are turned off aren’t visible in the viewer,
don’t show up in the Color page, and aren’t available for rendering or output. For Audio
tracks this is the Mute button.
Lock Track button: Light gray when turned on, dark gray when turned off. When a track
is locked, clips can’t be replaced, moved, or otherwise edited, although clips on locked
tracks can be graded.
Auto Select button: On by default. Light gray when that track is selected, dark
gray when that track is not selected. When this control is on, clips on that track are
automatically included in operations that affect all clips that intersect the position of
the playhead, or that intersect a region defined by the Timeline In and Out points.
When this control is off, clips on that track are ignored by those same operations.
Furthermore, rippling is suspended on tracks with Auto Select turned off for operations
that would otherwise ripple the Timeline. Note, manual selections made in the Timeline
that highlight specific clips take precedence over the Auto Select controls, so if Auto
Select is turned off on track 1, but you’ve selected a clip on track 1, the selected clip will
be still be affected by whatever operation you’re about to perform.
Audio Channel Type indicator: Audio tracks also show which channel configuration
that track uses, listing the number of channels for mono, stereo, 5.1, 7.1, and adaptive.
Number of clips: The number of clips on that particular track of the Timeline is listed,
but only if the track is tall enough to have room for them.
Vertical and horizontal scroll bars: If your project is longer than the current width of the
Timeline, or the number of video tracks is taller than the current height of the Timeline,
these scroll bars let you drag to navigate around your program.
Individual Timeline track resizing: Any track in the Timeline can be individually resized
by dragging its top divider in the Track Header area.
Resizing an individual timeline track by dragging
its top border in the Track Header
Timeline Options
Specific elements and behaviors within the Timeline can be customized in various ways.
Show Playhead Shadow
Ordinarily, the playhead is shown in the Timeline as a single line that indicates the beginning of
the frame that you’re viewing in the Timeline Viewer. However, you can choose View > Show
Playhead Shadow to display an orange-ish background surrounding the playhead.
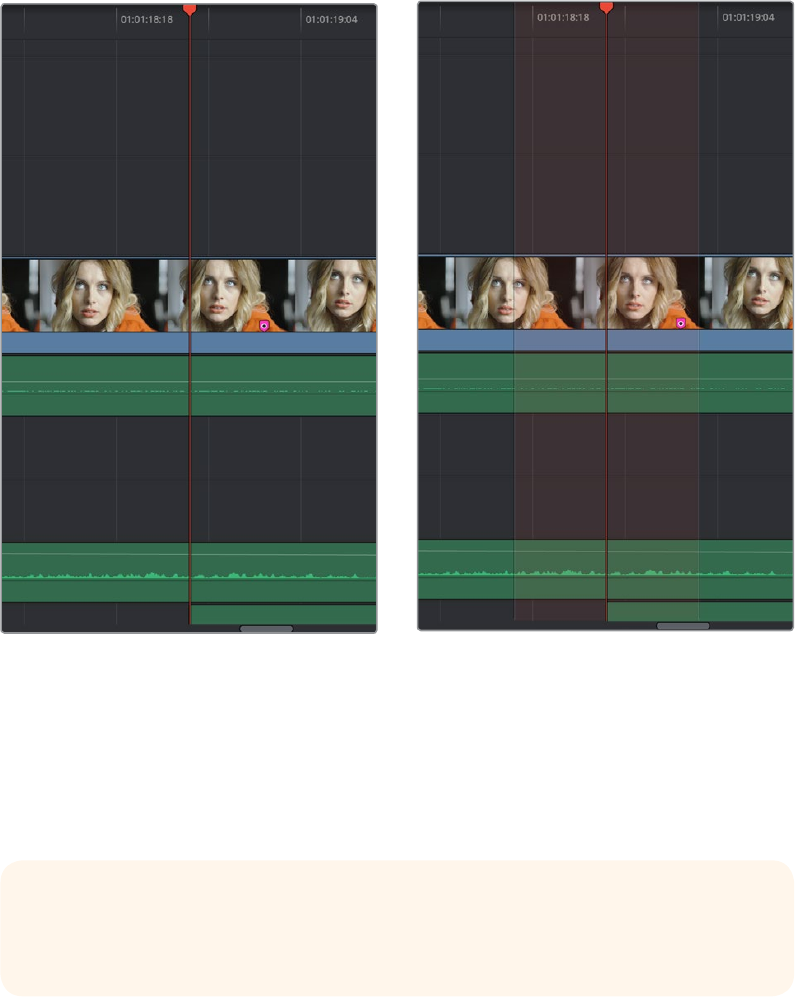
294
Using the Edit Page Part 3 – 14
(Left) The playhead’s default look, (Right) The playhead showing the optional Playhead Shadow
This shadow can make it easier to see the playhead’s position, and it can also serve as a
measuring tool for projects where you have an interest in visualizing a specific offset, in frames,
both before and after the current position of the playhead. This offset can be adjusted by
changing the Pre- and Post-Playhead Shadow Length parameters in the Editing panel of the
User Preferences, which let you specify the number of frames to shadow both before and after
the playhead. The default length of the Playhead Shadow is 5 frames.
Enabling and Disabling Audio Scrubbing
Audio scrubbing is enabled by default, meaning that you’ll hear audio when dragging the
playhead with the mouse back and forth. While this can be useful when you’re searching for
audio cues, it can also be distracting if you’re just focused on the picture.
To enable or disable audio scrubbing:
Choose Timeline > Audio Scrubbing (Shift-S)
TIP: You can set the “Pre-playhead shadow length” to 0, and the “Post-playhead
shadow length” to 1 if you want to display a “Media Composer-style” playhead that
shows the duration of the current frame.

295
Using the Edit Page Part 3 – 14
Playback Post-Roll
Enables the playhead to continue playing past the last clip in the Timeline for a duration equal
to the “Post-roll time” Project Setting in the Editing panel. This is good for editors that want to
experience a few moments of playback after cutting or fading to black after the last frame of
audio and video in the Timeline.
To enable or disable Playback Post-Roll:
Choose Timeline > Playback post-roll
Switching Among Multiple Timelines
Timelines can be organized like any other clip in the Media Pool. To open or switch among
timelines, use the following procedures.
To switch timelines, do one of the following:
In the Edit page Media Pool, double-click a timeline.
In the Edit page Timeline Viewer, choose a timeline from the Timelines pop-up menu at
the top of the viewer.
In the Color page, choose a timeline from the Timelines pop-up menu at the top of
the viewer.
In the Audio page, choose a timeline from the Timelines pop-up menu to the left of the
transport controls.
Toolbar
At the center of the toolbar that sits above the Timeline, eleven buttons let you choose different
tools and options for performing various editing functions.
Buttons in the Toolbar
Selection Mode: The default mode in which you can move and resize clips in the
Timeline, roll edits, and do other basic editing tasks.
Trim Edit Mode: In this mode, the Trim tool lets you make slip, slide, ripple and roll edits
by dragging different parts of clips in the Timeline, or by making specific selections
and using the “nudge” keyboard shortcuts of comma and period to move the selection
left or right.
Razor Edit Mode: Lets you add cuts to the Timeline by clicking.
Insert Edit: Performs an insert edit to the Timeline with whatever clip is in the
Source Viewer.
Overwrite Edit: Performs an overwrite edit to the Timeline with whatever clip is in the
Source Viewer.
Replace Edit: Performs a replace edit to the Timeline with whatever clip is in the
Source Viewer.
Snapping: Enables or disables clip snapping. When turned on, clip In and Out points,
markers, and the playhead all snap to one another for reference while you’re editing.
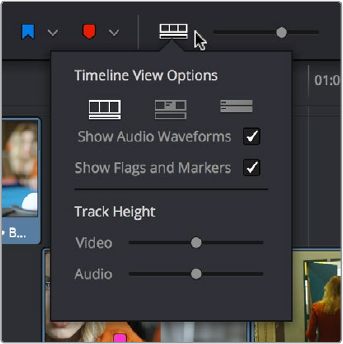
296
Using the Edit Page Part 3 – 14
Link Audio/Video: Enables or disables Audio/Video linking. When turned on, clicking a
video clip in the Timeline automatically selects the corresponding audio clip if they’re
linked together. When turned off, clicking a video clip won’t select its audio. Clip linking
can be toggled while you work by pressing the Option key while clicking to make
selections in the Timeline.
Flag Clip/Flag Colors pop-up menu: Flags identify clips, and indicate all clips that
correspond to the same item of media in the Media Pool. Clips can have multiple flags.
Clicking the Flag button automatically adds a flag to whichever clip is currently selected
in the Timeline. A pop-up menu to the right lets you choose differently colored flags,
and clear all flags from the currently selected clip.
Add Marker/Marker Colors pop-up menu: Markers identify specific frames of individual
clips. Clicking the Add Marker button adds a marker of the currently displayed color
to the clip at the position of the playhead in the Timeline. A pop-up menu to the right
lets you choose differently colored markers, and clear all markers from the currently
selected clip.
Customize Timeline pop-up menu: Three controls at the top let you customize the look
of the clips on the tracks (filmstrip, thumbnail, or minimized), whether or not to display
audio waveforms, whether or not to display flags and markers, and the adjustable
height of the video and audio tracks.
Selecting the Timeline View options
Zoom slider: Lets you zoom into or out of the clips in the Timeline. Use the scroll wheel
of your mouse to horizontally zoom into and out of the Timeline. Scrolling up zooms
in, while scrolling down zooms out. You can also use Command-Plus to zoom in, and
Command-Minus to zoom out, and Shift-Z to fit every clip in your program into the
available width of the Timeline.
Show Audio Meters/Audio Mixer button and pop-up: Opens and closes the Edit
page audio meters or Audio Mixer, which you can switch between. The Audio Mixer
also contains the audio mute button. If you have a display with 2560x1440 resolution
you can see all 16 audio meters, but on lower resolution displays only 8 audio
meters appear.
These functions are described in greater detail in the following sections of this chapter.

297
Using the Edit Page Part 3 – 14
Toolbar Audio Monitoring Controls
At the far right of the toolbar, a set of three monitoring controls lets you quickly control the
output volume of your mix. An audio Enable/Disable button lets you turn audio playback on and
off, while a slider lets you change the volume, and a DIM button lets you temporarily duck the
monitored volume being output in order to have a quick chat with your client about sports or
the state of the world while keeping half an ear on the mix.
The monitoring controls in the Edit page
The Clip and Track Mixer
The Audio Mixer provides a set of graphical controls you can use to assign track channels to
output channels, set levels, pan stereo audio, and mute and solo tracks, all while you
continue to edit.
To open the Audio Mixer, do one of the following:
Choose Workspace > Audio Mixer.
Click the Mixer button on the Interface toolbar.
The Audio Mixer exposes a set of channel strips with controls that correspond to the tracks in
the Timeline, one for each track, plus a Main 1 bus by default that lets you adjust the overall
level of the mix.
The Audio Mixer, with four channel strips
corresponding to the four tracks in the Timeline
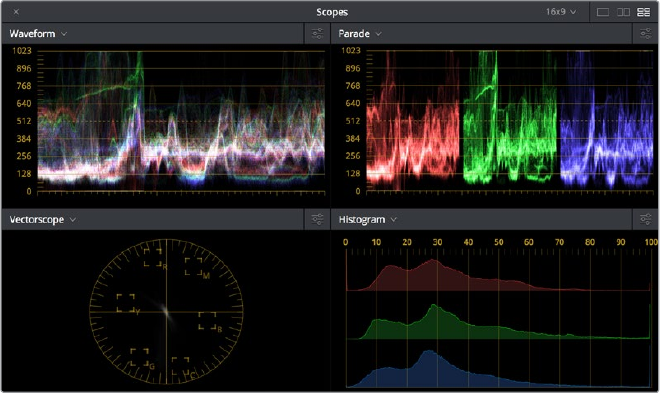
298
Using the Edit Page Part 3 – 14
For more information about the use of the Mixer in the Edit page, see Chapter 25, “Working
With Audio in the Edit Page.” For more information about using the Mixer in the Fairlight page,
see Chapter 68, “Track Level Mixing.”
Using Video Scopes
DaVinci Resolve has a set of four real-time video scopes that you can use to monitor the internal
data levels of clips in your project as you work. Each scope provides an unambiguous graphical
analysis of the various characteristics of the video signal, showing you the relative strength and
range of individual color components including luma, chroma, saturation, hue, and the red,
green, and blue channels that, together, comprise the color and contrast of the images in
your program.
To open video scopes from the Media, Color, or Deliver pages, do one of the following:
Choose Workspace > Video Scopes > On/Off (Command-Shift-W) to open video
scopes into a floating window.
Choose Workspace > Dual Screen > On to open video scopes as part of a dual
screen layout.
Video scopes in a floating window
The video scopes aren’t just available in the Color page. They’re also available in the Media and
Deliver pages for whenever you need to evaluate the video signal more objectively, such as
when you’re setting up to capture from tape or scan from film, or when you’re setting up
for output.
For more information on using the Video Scopes, see Chapter 40, “Using the Color Page.”
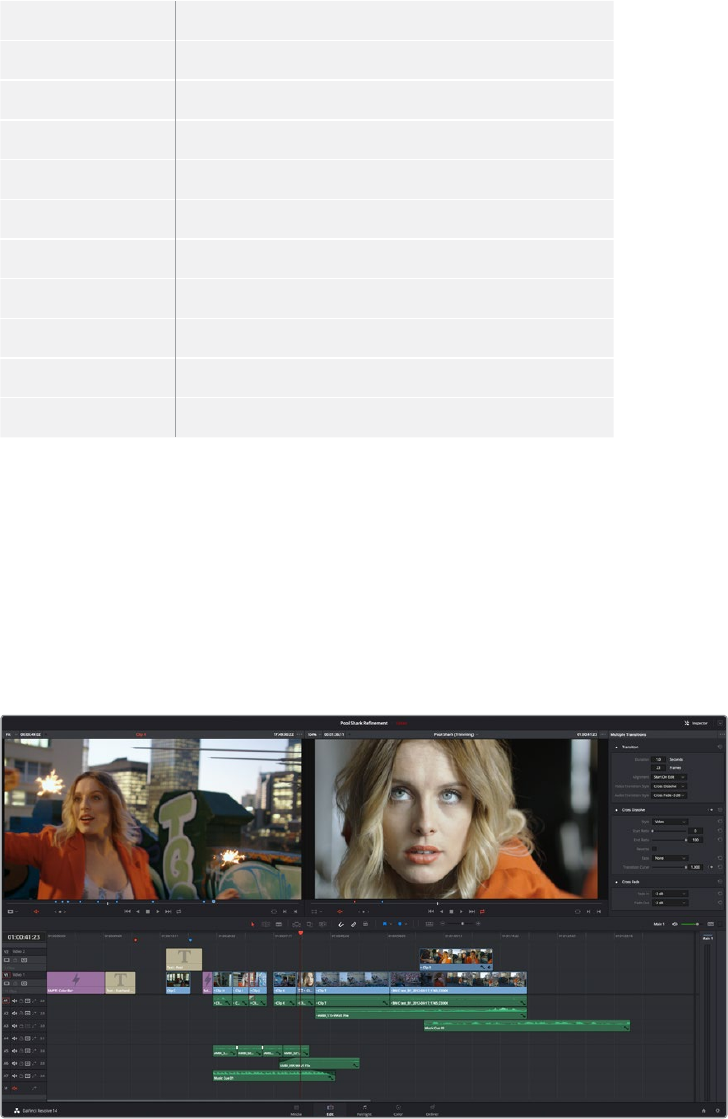
299
Using the Edit Page Part 3 – 14
Navigating the Edit Page
Using the Keyboard
The following keyboard shortcuts can be used to give focus to different parts of the Edit page
in order to select bins, clips, the Source and Timeline Viewers, the Timeline, the Effects Library,
Edit Index, and Inspector.
Key Function
QToggle between Source and Timeline Viewers.
Command-1 Source Viewer
Command-2 Timeline Viewer
Command-3 Timeline
Command-4 Bin List
Command-5 Media Pool
Command-6 Effects Library
Command-7 Edit Index
Command-8 n/a
Command-9 Inspector
Dual Monitor Layout
The Edit page has a dual monitor layout that provides maximum space for the Timeline and
Viewers on the primary monitor, and an enlarged Media Pool, simultaneously displayed
Timelines browser, Edit Index, Effects Library, and Metadata Editor on the secondary monitor.
To enter dual screen mode:
Choose Workspace > Dual Screen > On.
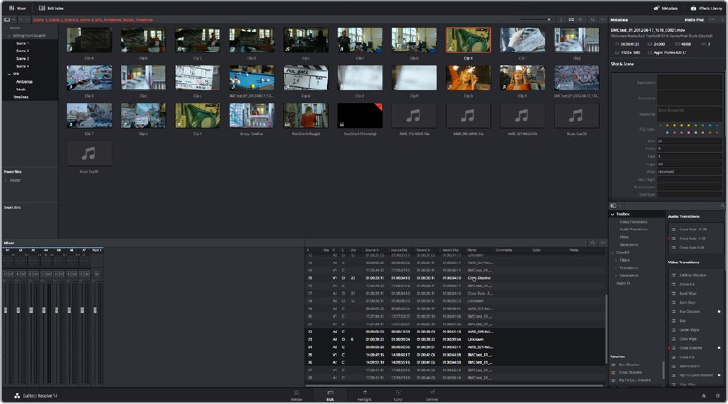
300
Using the Edit Page Part 3 – 14
The Edit page in dual-screen mode
To switch which UI elements appear on which monitors:
Choose Workspace > Primary Display > Display 1 or Display 2, which reverses the
contents of both monitors in dual screen mode.
Customizing the Edit Page
The default layout is quite efficient for a number of tasks on most displays. You can always
return to the default layout by choosing Workspace > Reset UI Layout. However, the Edit page
can be customized to create more room for specific areas of the interface to accommodate
different tasks.
To resize any area of the Edit page:
Drag the vertical or horizontal border between any two panels to enlarge one and
shrink the other.
To expand the width of the Timeline:
Click the Media Pool/Effects Library/Edit Index height button to reduce the area used
by the Media Pool, Effects Library, and/or Edit Index to shrink to half height. At this size,
the Media Pool/Effects Library/Edit Index are restricted to the top of the UI (you can
only show one at a time), and the Timeline takes up the full width of your display.
Hiding the Edit Index and the Effects Library causes the Timeline to expand to the full
width of your screen.
To resize the height of individual video or audio tracks:
Move the pointer to the top border of any video track header, or the bottom border of
any audio track header, and when it becomes a resize cursor, drag that border up or
down to resize that track. Each track can have an independent size when you do this.
To enable a full-screen timeline in Dual Screen mode:
Choose Workspace > Layout > Dual Screen > Full Screen Timeline, which causes the
Timeline to fully occupy the primary display, while the Browser, Viewers, Audio Mixer,
Edit Index, and Effects Library appear on the secondary display.
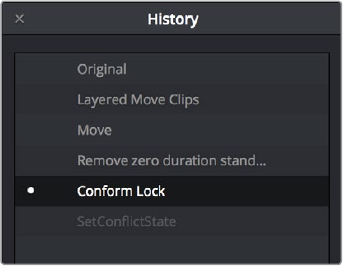
301
Using the Edit Page Part 3 – 14
To customize the columns in the Edit Index:
To show or hide columns in the Edit Index: Right-click any column header, and choose
the column you want to show or hide from the contextual menu. Checked columns are
shown, unchecked columns are hidden.
To resize any column of the Edit Index:
Move your pointer over the divider between any two columns and drag when the
horizontal resize cursor appears.
To sort the Edit Index by any column:
Click the Option button at the top right to display all active tracks, just the video, or just
the audio tracks.
To rearrange Edit Index columns:
Drag the header of any column to the left and right to move that column.
To show and hide the Audio Meters or Audio Mixer:
Click the Mixer button in the UI Toolbar.
To switch between the Audio Meters and the Audio Mixer:
Choose Meters or Mixer from the Option menu at the top right corner of the Mixer.
Undo and Redo in the Edit Page
The Edit page shares its multiple-undo stack with the Fairlight page. However, the Edit and
Fairlight page undo stack is entirely separate from the multiple-undo stacks maintained for each
clip in the Color page, making it easy and reliable to undo edits and other changes you make in
the Timeline without disturbing your work in the Color page.
There are two ways you can undo.
To undo and redo:
Press Command-Z to Undo, and Shift-Command-Z to Redo.
To undo and redo using the Undo list:
1 Choose Edit > Undo List.
2 When the History dialog appears, click an item on the list to undo back to that point.
The most recent thing you’ve done appears at the bottom of this list.
The Undo List
3 When you’re done, close the History window.
303
Creating and Working with Timelinesr Part 3 – 15
Creating and Working with Timelines
In this chapter, you’ll learn how to create and modify the timelines into which you edit clips to
create the edited sequences that are your programs.
This chapter covers the following topics:
Creating and Duplicating Timelines 304
Creating Blank and Stringout Timelines 304
Creating Timelines by Drag and Drop 305
Creating Timelines From Bins and Selections 305
Duplicating Timelines 306
Timeline View Options 306
Modifying Timeline Tracks 307
Naming Timeline Tracks 308
Using Timeline Snapping and Zooming 308
Scrolling Through the Timeline 309
Resizing the Timeline’s Video and Audio Track Regions 309
Comparing Timelines 310
The Timeline Comparison Window 310

304
Creating and Working with Timelinesr Part 3 – 15
Creating and Duplicating Timelines
If you’re not importing a project that’s been edited elsewhere, you can create a new timeline to
cut together a new edit from scratch, or to grade a set of dailies. When you create a new
timeline, you can either create a timeline that contains all clips found in the Media Pool to
quickly create a big batch of offline dailies, or an empty timeline that’s ready for you to add
specific clips to.
Creating Blank and Stringout Timelines
If you’re cutting a new program, you’ll want a blank timeline. However, it’s often useful to create
blank timelines when putting together dailies. For example, you could create an empty timeline,
sort the Media Pool by reel name, and add all clips from a particular reel to a dedicated timeline.
To create a new blank timeline:
1 Select or create a Folder in the Bin list in which to put the new timeline (optional).
2 Do one of the following:
Choose File > New Timeline (Command-N).
Right-click within the Media Pool, and choose Timelines > Create New Timeline.
3 When the New Timeline Options window opens, set the following options:
Start Timecode: You can change the Start Timecode if a specific start time
is required.
Timeline Name: Enter a name into the Timeline Name field.
No. of Video Tracks: Enter how many video tracks you want to have. You can also
drag within this field to adjust the number of video tracks with a virtual slider.
No. of Audio Tracks: Enter how many audio tracks you want to have. You can also
drag within this field to adjust the number of audio tracks with a virtual slider.
Audio Track Type: Choose the channel mapping you want the new audio
tracks to use.
Empty Timeline: Checked by default, this sets new timelines to be created empty.
If you turn off the Empty Timeline checkbox, the new Timeline that’s created will
contain all media found within the Media Pool, effectively creating a stringout of
everything you’ve imported.
Use Selected Mark In/Out: Only available when “Empty Timeline” is turned off. When
you turn this checkbox on, each clip’s duration in the new Timeline is defined by the
In and Out points saved within each clip. If there are no In/Out points in a clip, the
clip’s entire duration is used.
4 Click Create New Timeline.
A new timeline is created. If necessary, you can duplicate an existing timeline in order to alter
an edit or create an alternate grade.
TIP: If you’re going to be creating several new timelines with a specific set of
parameters, you can open the User pane of the Preferences and edit the New
Timeline Settings, found in the Editing panel. This will define new presets that
populate the New Timeline Options window from that point forward.

305
Creating and Working with Timelinesr Part 3 – 15
Creating Timelines by Drag and Drop
When you first create a new project, no timeline inhabits the Timeline Editor, and you have an
opportunity to create a new timeline by drag and drop.
To create a timeline by dragging and dropping a clip:
Drag any clip into the empty Timeline Editor area underneath the Viewers on the
Editpage, and a new timeline will automatically be created.
Creating Timelines From Bins and Selections
The “Create Timeline Using Bin” and “Create Timeline Using Selected Clips” commands let you
quickly assemble a timelineusing the contents of the Media Pool, using whatever In and Out
points have been added to each clip, and using the sort order of the enclosing bin to determine
the order in which the clips will be assembled.
To create a timeline using the full contents of a bin:
1 (optional) Put the Media Pool into List mode, set In and Out points for each clip in your
Bin, and sort the Media Pool by the column that will put all clips in the order you want
them to be assembled.
2 Right-click the bin in the Bin list, and choose “Create Timeline Using Bin.”
3 Type the name of the new timeline in the New Timeline Properties dialog. If you want
to use the In and Out points of each clip, make sure “Use Selected Mark In/Out” is
checked, and click Create New Timeline.
To create a timeline using manually selected clips:
1 (optional) Put the Media Pool into List mode, set In and Out points for each clip in your
Bin, and sort the Media Pool by the column that will put all clips in the order you want
them to be assembled.
2 Select one or more clips you want to assemble into a new timeline.
3 Right-click one of the selected clips, and choose “Create Timeline Using
Selected Clips.”
4 Type the name of the new timeline in the New Timeline Properties dialog. If you want
to use the In and Out points of each clip, make sure “Use Selected Mark In/Out” is
checked, and click Create New Timeline.
TIP: These commands are especially useful for putting together quick assembly edits
if you have metadata-rich media with scene, shot, and take information that you can
use to sort clips into the proper order, and In and Out points that you’ve
already logged.
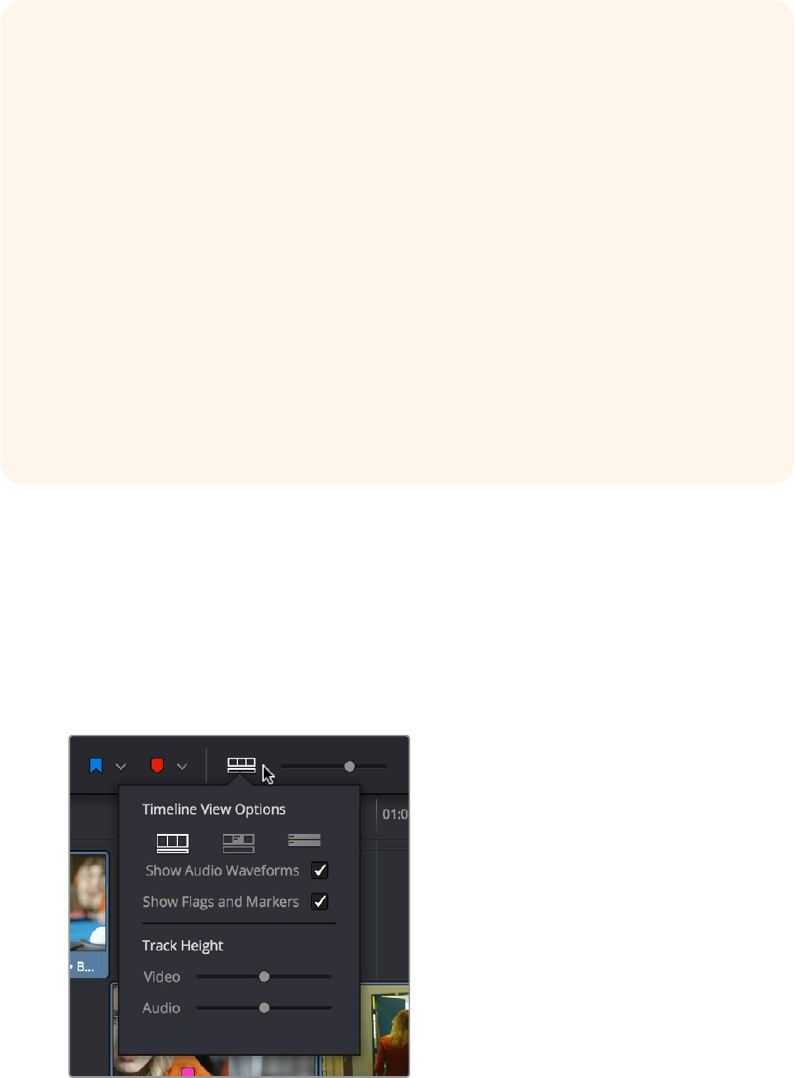
306
Creating and Working with Timelinesr Part 3 – 15
Duplicating Timelines
You can also duplicate existing timelines in preparation for saving a copy prior to making
modifications, or as a starting point for a different version of your content.
To duplicate a Timeline:
Right-click any timeline in the Media Pool, and choose Timelines > Duplicate Timeline
from the contextual menu. The duplicate timeline appears with “copy” appended
to the name.
Timeline View Options
As you’re working on an edit, it can often be useful to modify the appearance of the Timeline,
changing the height of video or audio clips, choosing whether audio waveforms are drawn or
not, etcetera. Using the Timeline View Options pop-up at the bottom right of the Timeline, you
can make these kinds of changes as you work.
The Timeline View Options pop-up
Where Are Timelines Stored?
Ordinarily, timelines are created in the currently selected Media Pool bin. However, if
you’d enabled “Use Timelines Bin” in the General Options panel of the Project Settings
before you added anything to the Media Pool, a dedicated Timelines bin appears at
the top of the Bin List, which contains all timelines in a project.
When using the Timelines bin, you’re prevented from putting timelines into any other
bin of the Media Pool. Whenever you create or import a new timeline, it automatically
appears in the Timelines bin. You can add subfolders to the Timelines bin for more
specific organization.
If you don’t want this kind of strict organization, but you would like an easy way to
browse all the timelines in your project at once, regardless of their diverse locations,
you can enable the “Create Smart Bin for Timelines” option, which is in the Editing
panel of the User Preferences. This creates a Smart Bin in the Bin List of the Media
Pool that filters all timelines in your project, making it easy to see all your timelines
without altering your original organization.
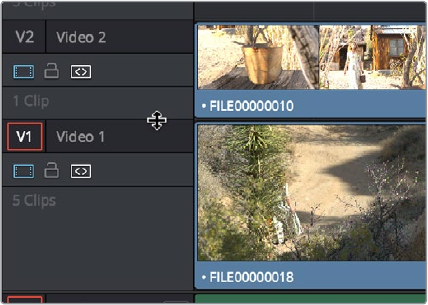
307
Creating and Working with Timelinesr Part 3 – 15
You have the following options:
Track appearance buttons: Three buttons let you choose the overall appearance of
video and audio tracks. From left to right, the options are: Video Filmstrips, Video tracks
with thumbnails, Minimized tracks.
Show Audio Waveforms checkbox: Lets you turn audio waveform viewing off and on.
When Audio Waveform is turned off, audio tracks are minimized.
Show Flags and Markers checkbox: Lets you turn the drawing of Flags and Markers
off and on.
Video track height slider: Lets you resize the size of all video tracks at once,
independently of the audio tracks.
Audio track height slider: Lets you resize the size of all audio tracks at once,
independently of the video tracks.
In addition, any track in the Timeline can be individually resized by dragging its top divider in
the Track Header area.
Resizing an individual Timeline track by dragging its top border in the Track Header
Modifying Timeline Tracks
When you’re getting ready to edit clips into the Timeline, you need to make sure you’ve got
enough tracks to do the job. The following procedures cover the different methods available for
adding, removing, and rearranging tracks as you work. These commands are all available via
the contextual menu that appears when you right-click anywhere in the Timeline header area
(the header of the Timeline is the area to the left where each track’s various buttons and
controls are located).
Methods for adding, deleting, and rearranging tracks:
To add a track to the Timeline: Right-click anywhere in the Timeline header and
choose Add Track. If you add an audio track, you can choose what type of channel
mapping you want. For more information about audio track channel mappings, see
Chapter 25, “Working with Audio in the Edit Page.”
To add multiple tracks to the Timeline at a specific position: Right-click anywhere in
the Timeline header and choose Add Tracks. When the Add Tracks dialog appears,
choose the number of video and audio tracks you want to add, choose the position you
want to insert the tracks above or below, and choose the Audio Track Type you want to
add if you’re adding audio tracks. When you’re done, click “Create New Tracks.”
To delete a track from the Timeline: Right-click within a track’s Timeline header and
choose Remove Track. If there are clips on a track you remove, they are deleted from
the Timeline.

308
Creating and Working with Timelinesr Part 3 – 15
To delete all unused tracks in the Timeline: Right-click anywhere in the track header
area and choose Delete Empty Tracks. All tracks without clips will be deleted at once.
To move tracks and the clips on them up and down: Right-click within a track’s
Timeline header and choose Move Track Up or Move Track Down from the contextual
menu. That track, along with all clips on it, will be moved up or down relative to the
other tracks in the Timeline.
Naming Timeline Tracks
If you’re a stickler for organization, you can also name the tracks on a timeline to identify
its purpose.
To rename a track:
1 Make sure the Timeline View Options are set to either the Filmstrip view or the
Thumbnail view, and that audio tracks are tall enough, so that track names are visible.
2 To edit the name of any track, click the default “Video X” or “Audio X” track name to
select it, then type your preferred name and press the Return key.
Using Timeline Snapping and Zooming
When preparing to make an edit into the Timeline, you can set the snapping and zoom controls
to whichever state is most useful for the operation you need to perform. For example, if you’re
editing an insert shot into a rapid-fire section of edits in the Timeline, you may want to zoom in
to better see the exact place where you want to place the incoming clip. Since there are many
edits at that point, disabling snapping might make it useful to avoid having the clip jump to the
nearest edit point if you need to move the incoming clip to a very specific frame.
Playhead Snapping and Timeline Zoom:
To turn clip and playhead snapping on and off: Click the Snapping button in the
toolbar, or press N. When snapping is turned on, the In and Out points and markers
of clips all snap to one another and to the playhead. You can also press N to turn
snapping on or off while dragging a clip in the Timeline.
The snapping button in the toolbar
To zoom into and out of the Timeline: Drag the zoom slider to the left to zoom out, and
right to zoom in. You can also press Command-Minus (–) and Command-Equal (=) to
zoom out and in. Either way, zooming is always centered on the current position of the
playhead, even if the playhead is off screen.
To frame every clip into the width of the Timeline: Press Shift-Z. This is a toggle,
so pressing Shift-Z frames your whole edited sequence to the width of the Timeline,
and then pressing Shift-Z again returns the Timeline to whatever level of zoom you
were using previously. Using this keyboard shortcut makes it really easy to navigate
the Timeline when you’re zoomed in, as you can press Shift-Z, move the playhead to
another part of the Timeline you want to work on, and then press Shift-Z again to zoom
back into the new location of the Timeline.
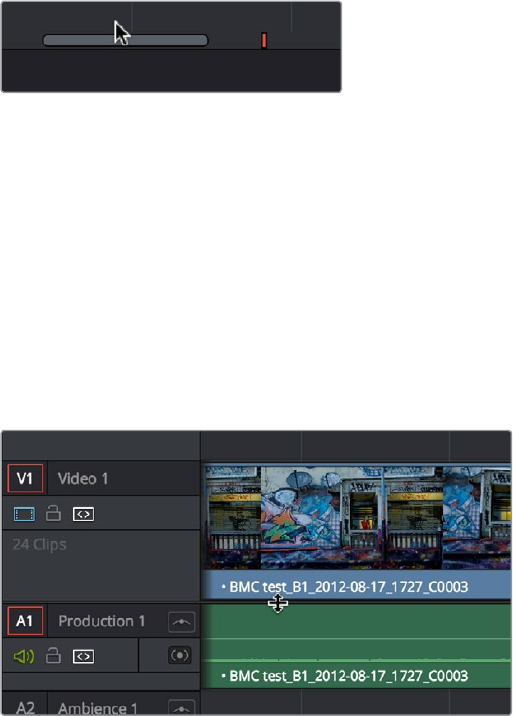
309
Creating and Working with Timelinesr Part 3 – 15
Scrolling Through the Timeline
When you’re zoomed into the Timeline, there are several methods you can use to scroll around
as you work.
You can scroll left and right, or up and down, by dragging the Timeline’s horizontal and
vertical scroll bars.
You can also scroll up and down the tracks of the Timeline using the scroll wheel, scroll
ball, or scroll gestures of your mouse, trackball, trackpad, or other pointing device.
You can also scroll within the Timeline by middle-clicking and dragging in any direction,
which works the same as panning around a viewer that you’ve zoomed into. This frees
you from having to use the scroll bars as you move around your edited clips.
If you scroll past the position of the playhead, a small playhead indicator appears in the bottom
scroll bar to let you know where it is relative to the entire duration of your edited sequence.
A small indicator shows the position of the playhead if it’s
outside of the visible area of the Timeline
Resizing the Timeline’s Video
and Audio Track Regions
If you need to see more of the video or audio tracks in the available area of the Timeline, you
can drag the horizontal divider that separates the audio and video tracks up or down to create
room where you need it.
Dragging the Timeline center divider to make
more room for audio or video tracks

310
Creating and Working with Timelinesr Part 3 – 15
Comparing Timelines
For instances where you’re importing multiple versions of a timeline that’s been edited in
another application, or where you’re working with multiple editors on different versions of the
same Timeline in either collaborative mode or on multiple separate DaVinci Resolve
installations, DaVinci Resolve provides a method of comparing two timelines with one another.
Using the Timeline Comparison window, you can both see a visual comparison of which
sections of two timelines differ, and you can derive a more traditional change list by opening up
the Difference Index.
To compare two timelines:
1 Open the first timeline you want to compare.
2 Right-click a second timeline in the Media Pool, and choose Compare With
Current Timeline.
A Timeline Comparison window appears, showing you the currently opened Timeline at
the bottom and the Timeline you right-clicked at the top.
The Timeline Comparison Window
When you first open the Timeline Comparison window, the first thing you see is a pair of
miniature timelines. The currently open Timeline appears at the bottom and the Timeline you
right-clicked appears at the top.
The Timeline Comparison window
Comparison Window Playhead Output
By default, the two playheads are ganged together, with the top playhead being displayed in
the Source Viewer, and the bottom playhead being displayed in the Timeline Viewer. These
playheads can be unganged if you want to compare different areas of both timelines, simply by
turning off Gang Playheads in the option menu.
Highlighting Dierences
Special highlights indicate sections of both timelines that are different. Individual changes are
not individually highlighted, although they can be seen, on the premise that you’re more
interested in a section by section analysis of what your collaborating editor has been doing, for
purposes of deciding whether to incorporate changes or reversions based on this comparison.
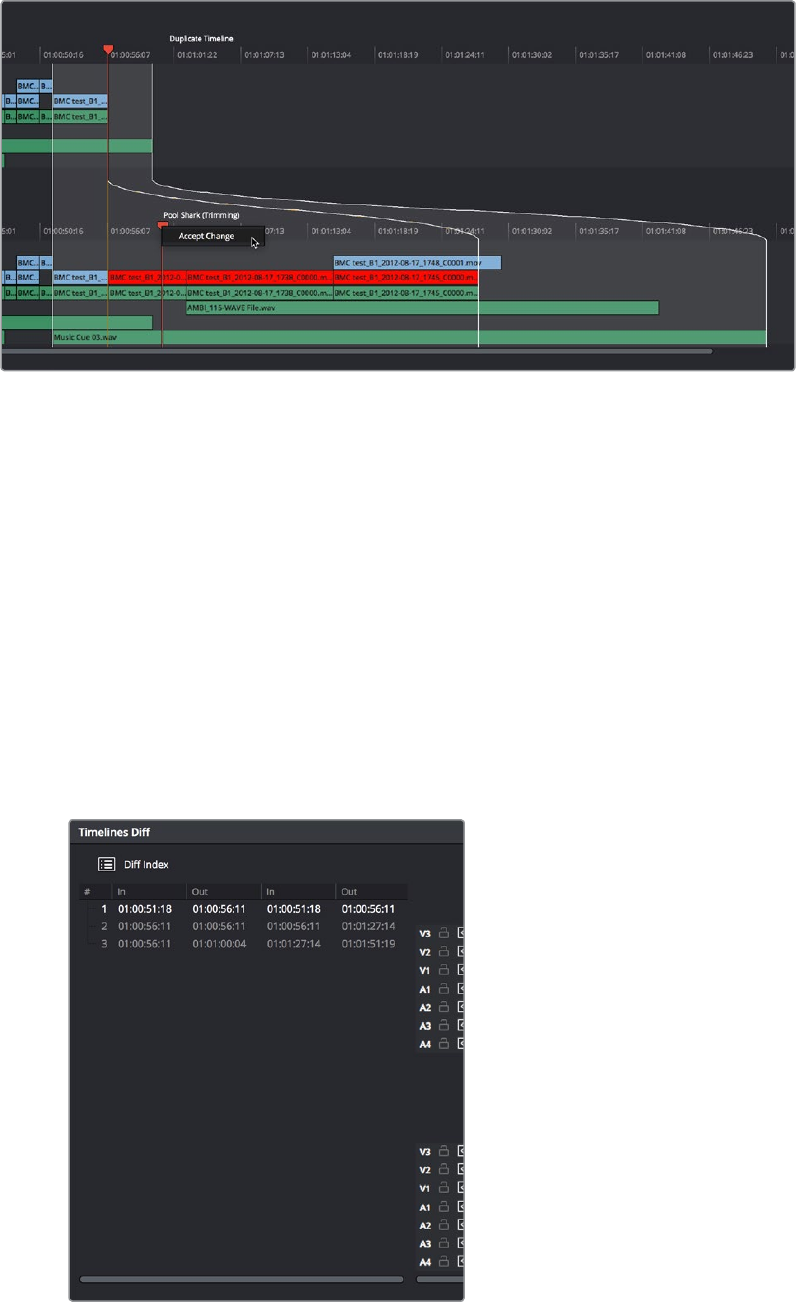
311
Creating and Working with Timelinesr Part 3 – 15
Each section of differences between the two timelines are highlighted
When using this tool, you can change the bottom Timeline to match the top Timeline, on a
section by section basis, by right-clicking a highlighted section and choosing Accept Change
from the contextual menu. When you do this, the currently open Timeline is immediately
changed to incorporate the altered section from the Timeline you’re comparing to. If necessary,
you can undo this.
Identifying Dierences Using Clip Labelling
You can also use the Timeline Comparison window to use clip labeling to indicate all
differences between the comparison Timeline and the currently open Timeline. The method for
doing this has not yet been defined at the time of this writing.
The Change List
Clicking the Diff Index button opens the change list, which shows you a more conventional item
by item comparison of the differences between the two timelines.
The Change List of the Timeline Comparison window
The method of exporting this change list has not yet been defined at the time of this writing.
313
Preparing Clips for Editing and Viewer Playback Part 3 – 16
Preparing Clips for Editing
and Viewer Playback
Before you start editing, there are a wide variety of things you can do to prepare your clips for
editing. In this chapter, you’ll learn how to browse, select, and play through clips that you need
to log, adding markers, setting In and Out points, and creating subclips as you identify pieces
you’ll be using later as you edit.
This chapter covers the following topics:
Browsing Clips in the Media Pool 314
Selecting Clips in the Media Pool to Edit 315
Duplicating Clips in the Media Pool 316
Viewer Playback and Navigation 316
Source and Timeline Viewers vs. Single Viewer Mode 317
Opening Clips Into the Source Viewer to Prepare for Editing 317
Viewer Transport Controls 318
Simple Keyboard Shortcuts for Playback and Navigation 319
Using JKL to Control Playback 320
Special-Purpose Playback Commands 320
Enabling and Disabling Audio Scrubbing 321
Playback Post-Roll 321
Moving the Playhead Using Timecode 321
How to Enter Timecode Values 322
Gang Viewers (Playhead Ganging) 323
Adding Markers 323
Adding Markers to Clips 323
Setting In and Out Points 324
Saving In and Out Point Ranges as Markers with Duration 326
Organizing Media by Creating Subclips 327
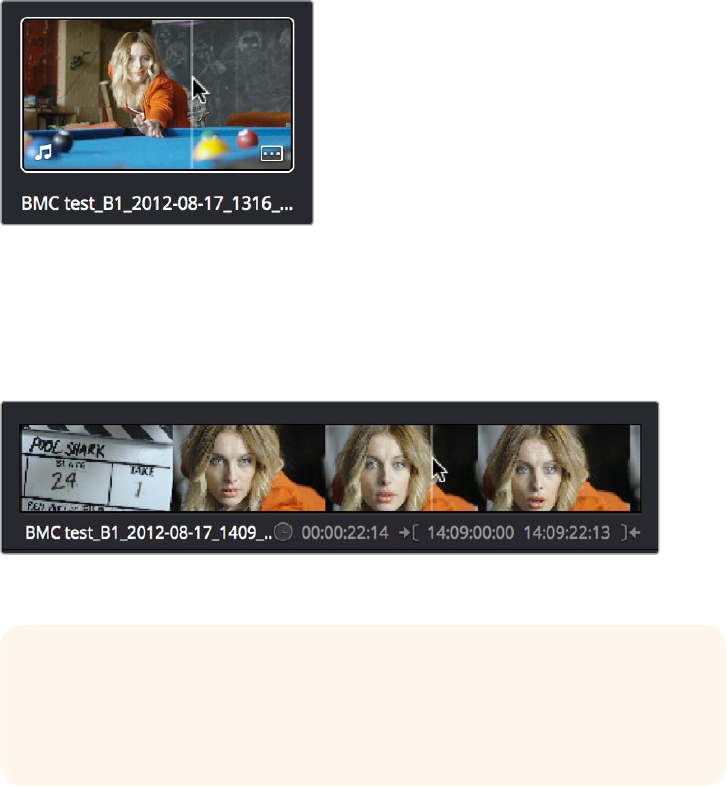
314
Preparing Clips for Editing and Viewer Playback Part 3 – 16
Browsing Clips in the Media Pool
The following procedures show how to select one or more clips in the Media Pool to accomplish
various editing tasks, either by opening a clip in the the Source Viewer, or selecting a group of
clips with which you want to do drag and drop editing. This section starts by presenting
different ways you can browse the contents of the Media Pool to find clips you want to use, in
preparation for making a selection for your next operation.
Methods of browsing clips in the Media Pool:
Using thumbnail hover scrub in the Media Pool’s Thumbnail view: Drag the pointer
over a thumbnail to scrub though its contents.
Thumbnail hover scrubbing
Using the Media Pool Filmstrip in the Media Pool’s List view: Select a clip to expose it
in the Filmstrip at the top of the Media Pool, and hover the pointer over the Filmstrip to
watch it play. At any time, you can double-click a clip in the Filmstrip to open it into the
Source Viewer.
Using the Filmstrip when the Media Pool is in List view
TIP: When browsing media, you can open clips you want to have a closer look
at in the Source Viewer by double-clicking them in the Media Pool. Meanwhile,
you can continue to open other clips in the Filmstrip with a single clip in order
to compare different clips with your main selection that remains in the Viewer.
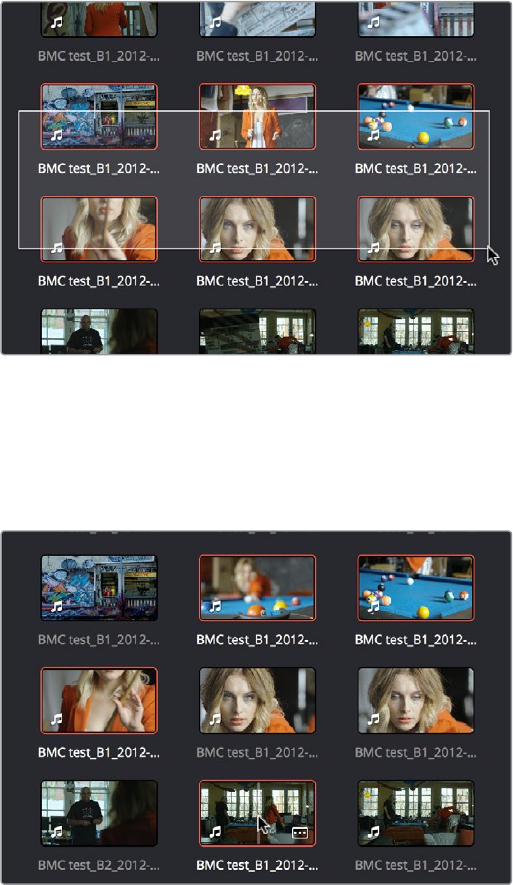
315
Preparing Clips for Editing and Viewer Playback Part 3 – 16
Selecting Clips in the Media Pool to Edit
Once you’ve found one or more clips that you want to use in your edit, you’ll need to make a
selection in preparation for performing an edit.
Methods of selecting clips in the Media Pool using the mouse:
To select a single clip using the mouse: Click a clip in the Media Pool with the mouse.
To select a contiguous range of clips: In either Thumbnail or List view, drag a selection
box over all the clips you want to select, or click to select the first clip in a series, then
Shift-click the last clip to select those clips and everything in between.
Selecting a contiguous range of clips
To select a noncontiguous range of clips: Command-click each clip you want to
include in the selection. Or, you can hold the Command key down while you drag
bounding boxes over unselected clips to add them to the current selection, or over
selected clips to remove them from the selection.
Selecting a discontiguous range of clips
To select all clips in the Media Pool: Make sure the Media Pool has focus by clicking a
clip or clicking anywhere in the background of the Media Pool, then press Command-A
to select all clips.

316
Preparing Clips for Editing and Viewer Playback Part 3 – 16
Methods of selecting clips using the keyboard:
To navigate the Bin list: Either click any bin in the Bin list to the left of the Media Pool,
or press Command-4 to make the Bin list the active pane of the Edit page, then use
the Up and Down Arrow keys to to move up and down among the available bins. Use
the Right Arrow key to open a bin that’s closed, and use the Left arrow key to close the
bin again.
To select a single clip using the keyboard: Press Command-5 to make the Media
Pool browser the active pane of the Edit page, then use the Arrow keys to change the
selection from clip to clip in the Media Pool, up, down, left, and right. Once a clip is
selected, you can press an edit keyboard shortcut to edit the selected Media Pool clip
straight to the currently open Timeline.
To select multiple clips using the keyboard: Hold the Shift key down while you’re using
the Arrow keys to move the selection to expand or contract a continuous selection in
the Media Pool.
To open a selected clip into the Source Viewer: Press the Enter or Return key. Once
you’ve opened a clip into the Source Viewer, you can use the transport controls to play
through it.
Duplicating Clips in the Media Pool
If you want to create duplicates of clips in the Media Pool, you can Option-drag one or
moreclips to another bin. The duplicate clips have their own individual links to the source
media on disk.
Viewer Playback and Navigation
By default, the Edit page presents a traditional source/record style editing experience. The
Source Viewer lets you view individual clips from the Media Pool to prepare them for editing.
Meanwhile, the Timeline Viewer lets you play through your program, showing you the frame at
the position of the playhead in the Timeline.
Source and Timeline Viewers

317
Preparing Clips for Editing and Viewer Playback Part 3 – 16
Source and Timeline Viewers vs. Single Viewer Mode
If you want to change the Edit Page layout to hide the Source Viewer, you can choose View >
Single Viewer Mode to instead use just a single viewer to contextually display either a selected
Source Clip or the current frame of the Timeline.
Single Viewer mode
In Single Viewer mode, whatever you select in the Media Pool or Timeline determines which
controls appear in the Viewer, which lets you do nearly everything you can do with two
simultaneously open viewers.
Opening Clips Into the Source Viewer to Prepare for Editing
Once you’ve decided which clips you want to use in your program, you can open them into the
Source Viewer to review them more completely. How this works depends on the Source
Viewer’s Live Media Preview setting.
To skim through a Media Pool thumbnail and view clips in the Source Viewer using Live
Media Preview:
1 Turn on Live Media Preview (if necessary) by clicking the Source Viewer option menu
and choosing Live Media Preview.
2 With the Media Pool open and in Thumbnail mode, position the pointer over a clip,
and after a few moments when that clip’s thumbnail starts to skim, you can see the clip
you’re scrubbing in the Source Viewer. Do one of the following:
a. As you skim within the thumbnail, the playhead that appears in the thumbnail is locked
to the playhead displayed in the Viewer’s jog bar. While skimming, you can add markers
and set In and Out points.
b. Leaving the pointer positioned over that clip, use the JKL keyboard shortcuts to play
through the clip, adding markers and setting In and Out points as you like.
3 It takes a moment for skimming to begin, which allows you to quickly move the pointer
from that clip back to the Source Viewer without opening any other clip.
Turning off Live Media Preview lets you use more traditional and controlled methods of opening
clips into the Source Viewer.
318
Preparing Clips for Editing and Viewer Playback Part 3 – 16
To open a clip into the Source Viewer using the mouse:
Double-click any clip in the Media Pool, or in the Filmstrip of the Media Pool, to open it into the
Source Viewer.
To open a clip into the Source Viewer using the keyboard:
1 If necessary, press Command-4 to select the Bin list, and press the Up and Down
arrows to choose a folder to view its contents. Press the Right Arrow key to open
folders and show any nested folders within, or the Left Arrow key to close folders and
hide their nested contents.
2 Press Command-5 to select the Media Pool browser, and use the Arrow keys to change
the selection from clip to clip in the Media Pool, up, down, left, and right.
3 When the clip you want is highlighted, press Return to open it into the Source Viewer.
To open a timeline into the Source Viewer:
Drag and drop any timeline into the Source Viewer in preparation for either ganging it
to the existing Timeline, or editing it, in whole or in part using In and Out points, into the
currently open Timeline.
Viewer Transport Controls
The Edit page has two Viewers. The left Viewer, when you’re editing, should be set to show
either source video or source audio, so it shows the source clip in any edit you’re setting up.
Atright is the Timeline Viewer, that shows the frame at the current position of the playhead in
the Timeline. Using the Source and Timeline Viewers, you can set up a wide variety of edits.
There are identical transport controls underneath each of the Viewers.
The transport controls at the bottom of the Source Viewer
A jog bar appears directly underneath the transport controls, letting you drag the playhead
directly with the pointer. The full width of the Source Viewer’s jog bar represents the full
duration of a clip, while the full width of the Timeline Viewer’s jog bar represents the full
duration of the current timeline. The current position of each playhead is shown in the timecode
field at the upper right-hand corner of each viewer.
Monitoring With An External Video Display
While working in the Edit page, the image that’s displayed on an external
video display (if one is connected) is determined either by the current
selection in the Media Pool, or by which part of the Edit page interface has
focus. For example, if you select a clip in the Media Pool so it’s displayed
within the Filmstrip, that clip is output to video. If you then open it into the
Source Viewer, then the contents of the Source Viewer are output to video.
Ifyou switch to the Timeline Viewer, then your timeline is output to video.

319
Preparing Clips for Editing and Viewer Playback Part 3 – 16
A separate jog control, to the left of the other transport controls, provides a way to jog more
slowly through long clips or a long timeline. Click and drag to the left and right to move through
a clip or the Timeline a frame at a time.
Transport controls appear above the jog bar. In the Source Viewer, these controls let you Jump
to the First Frame, Play Reverse, Stop, Play Forward, and Jump to the Last Frame. In the
Timeline Viewer, these control move to the Previous Edit, Play Reverse, Stop, Play Forward, and
move to the Next Edit. A loop control governs the looping behavior during playback.
Simple Keyboard Shortcuts for Playback and Navigation
There are many different keyboard shortcuts you can use to simply navigate clips and timelines,
and control playback.
Spacebar: You can use the spacebar to start and stop playback.
Step One Frame Forward/Step One Frame Back: The Left Arrow and Right Arrow keys
move the playhead back and forth one frame at a time, while Shift-Left Arrow and Shift-
Right Arrow move the playhead in one second increments.
Step One Second Forward/Step One Second Reverse: Shift-Left Arrow and Shift-Right
Arrow moves the playhead back and forth one second at a time.
Next Edit/Previous Edit: Up Arrow moves the playhead to the previous edit and selects
the edit point, while Down Arrow moves the playhead to the next edit and selects the
edit point.
First Frame/Last Frame of the Current Clip: The Semicolon key moves the playhead
to the first frame of the clip intersecting the playhead, while the Apostrophe key moves
the playhead to the last frame of the clip intersecting the playhead.
Previous Keyframe/Next Keyframe: Shift-Semicolon moves the playhead to the next
previous keyframe on the left when keyframes are displayed in the Timeline, while
Shift-Apostrophe moves the playhead to the next keyframe to the right.
Previous Marker/Next Marker: If there are markers in either the Timeline Ruler or within
clips in the Timeline, Shift-Up Arrow and Shift-Down Arrow moves the playhead left and
right from one marker to the next.
Previous Gap/Next Gap: If any tracks of the Timeline that have auto-select control
enabled have gaps between clips, Option-Command-Semicolon and Option-
Command-Apostrophe moves the playhead left and right from one gap to the next.
Timeline Start/Timeline End: The Home key moves the playhead to the first frame of
the Source or Timeline Viewer, while the End key moves the playhead to the last frame
of the Source or Timeline Viewer.
Go to In Point/Go to Out Point: Shift-I moves the playhead to the In point set in either
the Viewer or the Timeline. Shift-O moves the playhead to the Out point.
TIP: One of the options in the Editing panel of the User Preferences window, “Always
highlight current clip in the media pool,” lets you decide whether the current selection
in the Timeline is mirrored in the Media Pool.
320
Preparing Clips for Editing and Viewer Playback Part 3 – 16
Using JKL to Control Playback
The JKL keyboard shortcuts are common to many editing applications, and experienced editors
know these to be some of the most useful controls for playback and editing there are. Here’s a
list of the many different ways you can use these three keyboard shortcuts to play through clips
and timelines as you work.
JPlays 100% backward.
KStops playback.
LPlays 100% forward
Press J repeatedly Increases backward play speed each time you press J, for a range of
fast-reverse speeds.
Press L repeatedly Increases forward play speed each time you press L, for a range of
fast-forward speeds.
Shift-J Plays in fast reverse.
Shift-L Plays in fast forward.
K+J Plays backward at slow motion (with slow motion audio playback).
K+L Plays forward at slow motion (with pitch-corrected audio
playback on OS X).
Pressing K while tapping J Moves the playhead back one frame.
Pressing K while tapping L Moves the playhead forward one frame.
Command-J and Command-L
Holding the Command key down while using the J and L keyboard
shortcuts lets you dynamically resize or trim selected edit points or
clips at 100 percent or faster speed, depending on whether the
Selection or Trim tool is enabled. More information on dynamic
trimming appears later in this chapter.
Once you learn all the different methods of JKL playback, they will probably become one of the
main ways you move the playhead around in DaVinci Resolve.
Special-Purpose Playback Commands
In addition to the standard transport controls, there are some additional playback controls,
available via keyboard shortcuts or the Playback menu, that let you perform different playback
operations.
Loop: Command-Forward Slash (/). Toggles looped playback off and on. While
looped playback is on, playback initiated with any of the following commands will loop
automatically until you stop playback.
Play around selection: Forward Slash (/). This command works contextually depending
on what’s selected in the Timeline. Plays a section of the Timeline from x frames before
to y frames after (a) the playhead (if nothing’s selected), (b) the currently selected edit
point, (c) the currently selected clip, (d) a selection of multiple clips. This command is
useful for previewing how the current selection plays within the context of the clips
immediately surrounding it. The pre-roll and post-roll time is customizable in the Editing
panel of the User Preferences.
321
Preparing Clips for Editing and Viewer Playback Part 3 – 16
Play around current frame: Plays a section of the Timeline from x frames before to y
frames after the current position of the playhead. This command is useful for previewing
how edits play within the context of the clips immediately surrounding them. The pre-
roll and post-roll time is customizable in the Editing panel of the User Preferences.
Play around current clip: (no default key assigned). Plays a section of the Timeline
from x frames before to y frames after the current clip intersecting the position of the
playhead. The pre-roll and post-roll time is customizable in the Editing panel of the User
Preferences.
Play Around In: Option-Space. Plays a section of the Timeline from x frames before to
y frames after the current assigned In point, letting you preview the transition from one
clip to the next. The pre-roll and post-roll time is customizable in the Editing panel of
the User Preferences.
Play Around Out: Shift-Space. Plays a section of the Timeline from x frames before to y
frames after the current assigned Out point, letting you preview the transition from one
clip to the next. The pre-roll and post-roll time is customizable in the Editing panel of
the User Preferences.
Play In to Out: Option-Forward Slash (/). If you’ve marked a section of a clip or timeline
with In and Out points, this command lets you preview how it will play.
Play to In: (no default key assigned). Initiates playback and stops at the current In point.
Play to Out: Option-Command-Option-Forward Slash (/). Initiates playback and stops at
the current Out point.
Enabling and Disabling Audio Scrubbing
Audio scrubbing is enabled by default, meaning that you’ll hear audio when dragging the
playhead with the mouse back and forth. While this can be useful when you’re searching for
audio cues, it can also be distracting if you’re just focused on the picture.
To enable or disable audio scrubbing:
Choose Timeline > Audio Scrubbing (Shift-S)
Playback Post-Roll
Enables the playhead to continue playing past the last clip in the Timeline for a duration equal
to the “Post-roll time” Project Setting in the Editing panel. This is good for editors that want to
experience a few moments of playback after cutting or fading to black after the last frame of
audio and video in the Timeline.
To enable or disable Playback Post-Roll:
Choose Timeline > Playback post-roll
Moving the Playhead Using Timecode
You can use absolute or relative timecode entry to either move the playhead in both the Source
and Timeline Viewers, or to move or trim selected edit points or clips. When navigating the
Timeline, timecode entry lets you move the playhead very precisely, or jump to specific
timecode values really quickly.

322
Preparing Clips for Editing and Viewer Playback Part 3 – 16
How to Enter Timecode Values
When entering timecode, type each pair of hour, minute, second, and frame values from left to
right, with a period representing a pair of zeros for fast entry. The numbers you enter appear in
the timecode field at the upper left-hand corner of the Viewer with focus. When you’re finished
typing, press the Return key to execute the timecode command. The rules for timecode entry
are as follows:
The right-most pair of timecode values (or period) you enter is always the
frame number.
A period to the left or to the right of any number you type is considered to be a pair
of zeroes.
A single period between two numbers is considered to either be a single zero, or
ignored if it’s between two pairs of numbers.
Any untyped pairs of values to the left of what you enter are assumed to be whatever
those values were prior to the timecode you entered; this makes it easy to type partial
timecode values even when the Timeline starts at hour one.
It’s not necessary to enter colons or semicolons.
Absolute timecode is entered simply by typing in a timecode value. So long as no clips or edit
points are selected when you press the Return key, the playhead will move to that timecode
value. If an edit point or clip is selected, those will be moved or trimmed to the corresponding
timecode value, if possible.
Here are some examples of absolute timecode entry using this method:
Original TC Value User-Typed Value New TC Value
01:10:10:10 15245218 15:24:52:18
01:10:10:10 2.. 01:02:00:00
01:10:10:10 15 01:10:10:15
01:10:10:10 12 01:10:10:12
01:10:10:10 1.2 01:10:01:02
01:10:10:10 115.. 01:15:00:00
01:10:10:10 23... 23:00:00:00
Relative timecode is entered by starting the timecode value with a plus (+) or minus (–). Adding
a plus results in the value you type being added to the current timecode value for purposes of
offsetting the playhead or moving a selection. Adding a minus will subtract the value you type
from the current timecode value.
Here are two examples of relative timecode entry:
+20. 00:00:20:00 is added to the current timecode value.
-5 00:00:00:05 is subtracted from the current timecode value.
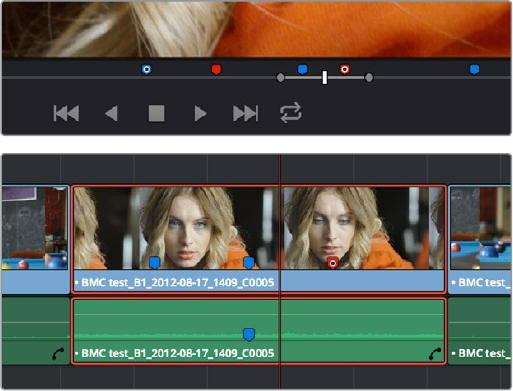
323
Preparing Clips for Editing and Viewer Playback Part 3 – 16
Gang Viewers (Playhead Ganging)
Ordinarily, the playhead movement in the Source and Timeline Viewers is independent.
However, if you click the Option menu at the upper right-hand corner of either Viewer and turn
Gang Viewers on, the movement of the Source and Timeline Viewer playheads is locked
together, so that they move in unison.
This is useful when you’re marking the In and Out points of a clip in the Source Viewer to match
the duration of a clip or other event in the Timeline.
Adding Markers
While markers, flags, and clip labels are covered in much more detail elsewhere in the editing
section, the use of markers is so important that a summary of how to add and edit markers
appears here. Markers are used to call attention to a particular frame within a specific clip.
Markers can be individually colored, and can have customized name and note text. Whenever
you enter text into a marker, that marker displays a small dot that indicates there’s more
information inside of it. Once placed, markers snap to In and Out points, edit points, the
playhead, and other markers whenever snapping is enabled, making it easy to use markers to
“measure” edits and trims that you make in the Timeline.
Adding Markers to Clips
You can place markers on the jog bar of source clips in the Source Viewer (or in the Media Page
Viewer) and on clips that are selected within a timeline.
(Top) Markers placed on a source clip,
(Bottom) Markers placed on a clip in the Timeline
To mark a source clip in the Source Viewer or Media Page Viewer, do one of the following:
To place a marker without doing anything else, move the playhead to the frame you
want to mark, and then press M.
To place a marker and immediately open the marker dialog to enter a name or note
within it during playback, press Command-M. Playback pauses until you enter the text
you want to and close the marker dialog again, at which point playback continues.
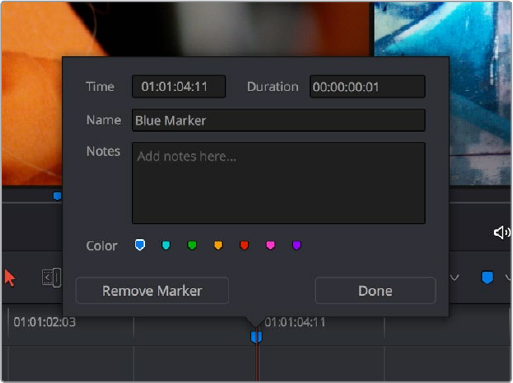
324
Preparing Clips for Editing and Viewer Playback Part 3 – 16
Move the playhead to the frame you want to mark, then right-click in the jog bar and
choose a marker color from the Add Marker submenu of the contextual menu.
Once you’ve added some markers, you may want to edit their contents to make them
more useful.
To open a marker’s edit dialog to alter its properties:
1 Do one of the following:
Press Command-M to add a marker during playback and immediately open its
edit dialog.
Double-click any marker you want to edit.
Move the playhead to the frame containing the marker you want to annotate using
Shift-Up Arrow/Down Arrow and press M.
Select a marker anywhere in the Source Viewer or Timeline, and press Shift-M.
2 When the marker dialog opens, you can modify several properties.
The properties found in the Marker Dialog
For much more information about markers, see Chapter 20, “Marking and Finding Clips in the
Timeline.”
Setting In and Out Points
Now that you’ve used playback commands to review your clips, you can place In and Out points
to set the range of each clip that you want to edit into the Timeline. If you don’t set In or Out
points, then the entire clip will be edited into the Timeline. If you do set In and Out points, those
points will be saved in the Media Pool and used the next time you edit that clip.
To set In and Out points while skimming a thumbnail in the Media Pool’s Thumbnail view:
Set the Media Pool to Thumbnail view, then move the pointer over a clip and wait a moment
until dragging the pointer begins to skim through that clip. As you skim, press I and O to set In
and Out points to encompass the part of that clip you’re going to want to use. When you’re
finished, that clip’s thumbnail will show a range indicator at the bottom to show how much of the
clip you’ve selected.
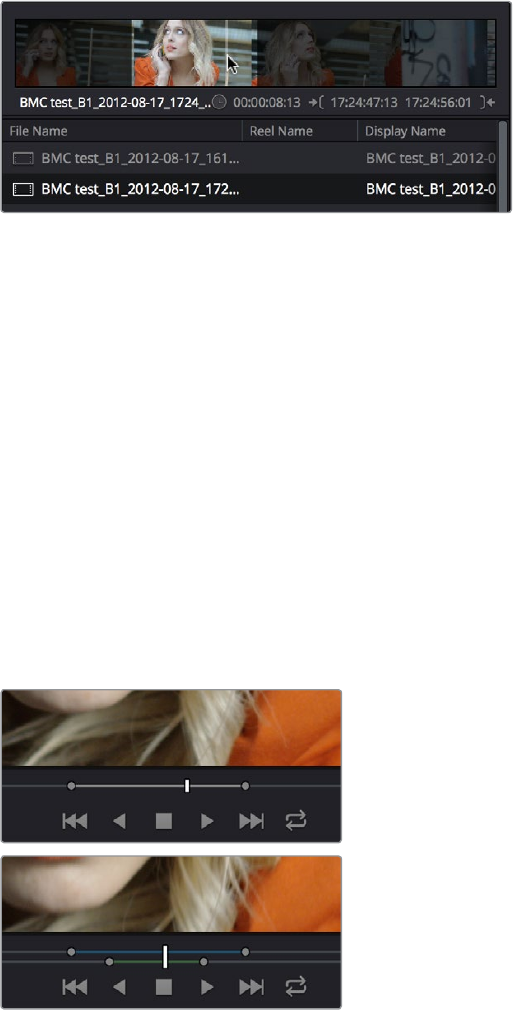
325
Preparing Clips for Editing and Viewer Playback Part 3 – 16
To set In and Out points using the Media Pool’s List view Filmstrip:
Set the Media Pool to List view, then select a clip to expose it in the Filmstrip at the top of the
Media Pool, drag the pointer through the Filmstrip to watch it play, and press I and O to set In
and Out points to the appropriate range.
Marking In and Out points in the Filmstrip of the Media Pool in List view
The Filmstrip will dim the heads and tails to let you see the range of media you’ve marked.
Once you’ve marked In and Out points in the Filmstrip, you can drag them to the left and right to
move them.
To set In and Out points in the Source Viewer:
1 Either skim a Media Pool thumbnail with Live Media Preview enabled in the Source
Viewer’s option menu, or open a clip into the Source Viewer.
2 Use JKL, the spacebar, the transport controls, or drag in the jog bar to move the
playhead to where you want to set an In or Out point.
3 Do one of the following:
To mark simple In and Out points: Use the In and Out buttons to the right of the
transport controls, or press the I or O keys.
To mark split In and Out points in preparation for making a split edit: Right-click
the Jog Bar and choose Mark Split > Video In (Shift-Option-I) / Audio In
(Command-Option-I) / Video Out (Shift-Option-O) / Audio Out (Command-Option-O).
(Top) Marking In and Out points in the Source Viewer, both as simple
(Bottom) Split edits
Simple In and Out points let you join the audio and video of two clips at a single edit point in the
Timeline. However, setting split In or Out points sets you up to create split edits where the
video is offset from the audio in a single step.
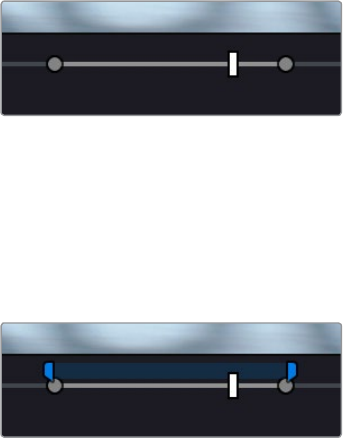
326
Preparing Clips for Editing and Viewer Playback Part 3 – 16
To clear In and Out points:
To clear In or Out points: Move the pointer over a marked thumbnail in the Media Pool
or over the Media Pool film strip, or open a clip in the Source Viewer, and then press
Option-I to clear the current In point, or Option-O to clear the current Out point.
To clear Split In or Split Out points: Press Shift-Option-X to clear the Video In and
Video Out points. Press Command-Option-X to clear Audio In and Audio Out points.
To clear both the In and Out points at once: With the pointer over a marked thumbnail
in the Media Pool or over the Media Pool film strip, or with the Source Viewer selected,
press Option-X.
To jump the playhead to the current In or Out points in the Source or Timeline Viewer:
Press Shift-I to move the playhead to the current In point,
Press Shift-O to move the playhead to the current Out point.
Once set, In and Out points remain in place within each source clip or timeline until you
set new ones.
Saving In and Out Point Ranges
as Markers with Duration
This chapter will be updated during the beta testing period for the final release.
If you want to log the most important sections of clips using In and Out points, you can only log
a single section at a time, as In and Out points are used to identify the next section of a clip to
be edited in a three point edit. However, you can save any pair of In and Out points as a marker
with duration, which lets you identify multiple regions of a clip that you might later want to edit
into a program.
To turn In and Out points into a marker with duration:
1 Set In and Out points in the Source Viewer jog bar to identify a region you want to log
for future reference.
Marking In and Out points in preparation
to log that section of the clip
2 Do one of the following:
Right-click the jog bar and choose Convert In and Out to Duration Marker
A marker with duration appears above the In and Out points. To edit its name or notes,
double-click the marker, press Shift-M, or choose Mark > Modify Marker.
A marker with duration is created from the
In and Out points
In this way, you can log several regions within a single clip for future use.

327
Preparing Clips for Editing and Viewer Playback Part 3 – 16
A clip with multiple logged sections identified via markers with duration
This an extremely useful logging technique for two reasons. First, markers with duration can be
searched for in the Media Pool using the All Fields, Marker Name, and Marker Notes Filter by
options. Second, they can be filtered with Smart Bins using the Marker Name and Marker Notes
Media Pool Properties options.
Organizing Media by Creating Subclips
Subclips give you another way of organizing media in the Media Pool, letting you break
excessively long clips into shorter ones. For example, if the director of a project is fond of
“rolling takes” where multiple takes are all recorded within a single clip, you can break these
takes up by making them into subclips.
To create a subclip in the Edit page:
1 Do one of the following to open a clip into the Source Viewer in either the Media page
or the Edit page, in preparation for creating subclips.
Double-click any clip in the Media Pool.
Single-click any clip in the Media Library of the Media page to create a subclip
without needing to first import that clip into the Media Pool.
2 Set In and Out points in the Source Viewer to define the section you want to turn into
a subclip.
3 Do one of the following:
Choose Mark > Create Subclip
Press Option-B
Right-click the jog bar and choose Make Subclip from the contextual menu
A new subclip appears in the Media Pool, automatically selected so that you can
immediately edit its metadata in the Metadata Editor.
Once created, subclips appear and work like any other clip in DaVinci Resolve. You can also
create subclips in the Media page while performing other organizational tasks there.
329
Editing Basics Part 3 – 17
Editing Basics
In this chapter, you’ll learn many of the fundamental methods and commands you’ll use when
beginning to assemble clips into the Timeline. This includes drag and drop operations to begin
assembling a timeline, different ways of selecting and deselecting the clips you’ve edited in
preparation for different tasks, maintaining sync between the audio and video components of
clips you’re editing, and deleting clips and gaps you don’t want.
This chapter covers the following topics:
Drag and Drop Editing 330
Drag and Drop Editing of Individual Clips Into the Timeline 330
Drag and Drop Editing of Several Clips Into the Timeline At Once 331
Drag and Drop Editing of Video-Only or Audio-Only Edits 332
Dragging Clips From the macOS Finder Into the Timeline 333
Other Ways of Assembling Edits Into the Timeline 333
Example: Assembling Clips Into the Timeline From the Source Viewer 333
Example: Assembling Clips Into the Timeline from the Media Pool 335
Making Selections in the Timeline 336
Manually Selecting Clips in the Timeline 336
Selecting Clips Based on Markers, Flags, and Clip Color 337
Selecting Edits in the Timeline 337
A Practical Example of Keyboard-Driven Selections 339
Using Auto Select Controls to Define Selections 340
Defining Selections With the Help of Auto Select Controls 340
Overriding Automatic Selections By Making Manual Selections 340
Using Auto Select Controls to Control Other Operations 341
Locking Tracks You Don’t Want to Change 343
Position Lock 343
Position Locking All Tracks 344
Position Locking Individual Tracks 344
Disabling and Re-Enabling Clips in the Timeline 345
Deleting Clips and Gaps from the Timeline 345
Finding, Selecting, and Deleting Gaps in the Timeline 347
Audio/Video Linking 348
Controlling Audio/Video Linking While Making Selections 348
Dealing with Audio Video Sync Osets 348
Manually Unlinking and Relinking Audio and Video 349
Linking Multiple Clips in the Timeline 350
Commands for Slipping Audio/Video Sync 350
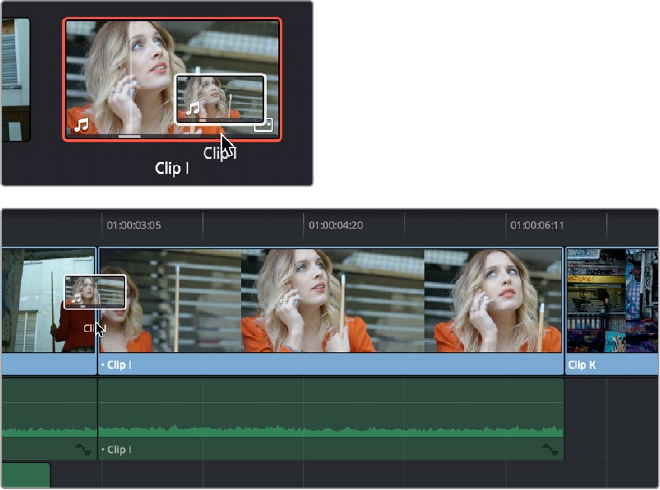
330
Editing Basics Part 3 – 17
Drag and Drop Editing
If you’ve already used other editing programs, the procedures in this section will almost
certainly be remedial, but if you’re just getting started, this section covers the most basic
methods of editing a series of clips into the Timeline. The simplest method of editing is to drag
clips from the Media Pool and drop them into the Timeline. You can do this with individual clips,
or with selected groups of clips.
Drag and Drop Editing of Individual Clips Into the Timeline
If you’re just editing one clips at a time to create an edited sequence in a timeline, this is how
that works.
1 If you need to edit specific ranges of the clips you’re editing, you can set In and Out
points in source clips first by doing one of the following:
Setting In and Out points while skimming a thumbnail in the Media Pool: As you’re
skimming over a clip’s thumbnail in the Viewer, press I and O to set In and Out points to
encompass the part of that clip you’re going to want to use. When you’re finished, that
clip’s thumbnail will show a range indicator at the bottom to show how much of the clip
you’ve selected.
Using the Media Pool Filmstrip in the Media Pool’s List view: Set the Media Pool to
List view, then select a clip to expose it in the Filmstrip at the top of the Media Pool,
drag the pointer through the Filmstrip to watch it play and press I and O to set In and
Out points to the appropriate range. The Filmstrip will dim the heads and tails to let you
see the range of media you’ve marked.
Using the Source Viewer: Open a clip in the Viewer by double-clicking it in the Media
Pool, or selecting it in the Media Pool and pressing the Return key. Then use the
transport controls, jog bar, or control panel buttons to move the playhead, and place In
and Out points using the In and Out buttons to the right of the transport controls, or by
pressing the I or O keys.
2 Drag the clip you want to edit from either the Media Pool or the Source Viewer, and
drop it onto the desired position in the Timeline to perform an overwrite edit. If you
drag a clip on top of another clip that’s already in the Timeline, the clip you’re dragging
will overwrite the part of the clip that it overlaps.
Dragging a clip from the Media Pool to overwrite a clip in the Timeline
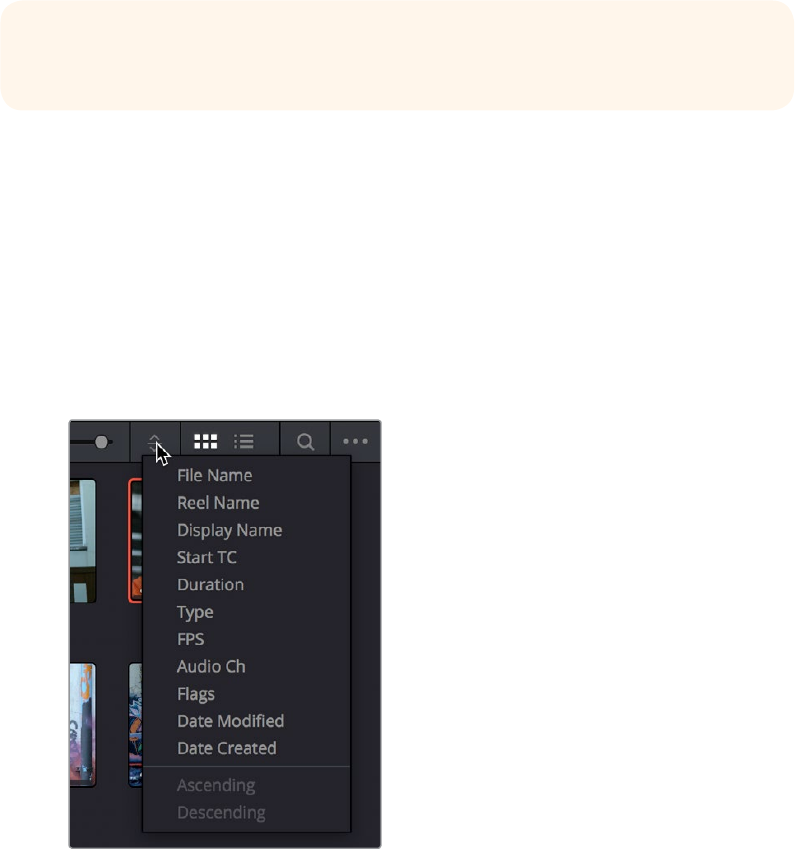
331
Editing Basics Part 3 – 17
Drag and Drop Editing of Several Clips
Into the Timeline At Once
The procedure above also works when you want to edit several clips into the Timeline at once
by dragging them from the Media Pool.
1 Change the sort order of the Media Pool’s browser area to put the clips into the order
in which you want them to appear. In Thumbnail view you can use the Sort Order
menu, but in List view you can click the header of any metadata column to sort by that
column’s data.
Using the Sort Order menu to change the sort
order of clips in the Media Pool
2 Use the Media Pool thumbnails, the Media Pool List view Filmstrip, or the Source
Viewer to set In and Out points to define the part of each clip that you want to edit into
the Timeline.
3 Select the the Media Pool clips you want to edit into the Timeline by dragging a
bounding box, Command-dragging multiple bounding boxes over different sets
of clips, by Shift-clicking a range of clips, or by Command-clicking individual non-
contiguous clips.
4 Drag any of the selected clips to the desired position in the Timeline to perform an
overwrite edit.
TIP: If you drag a clip into the blank area above an existing video track or below an
existing audio track, a new track will automatically be created.
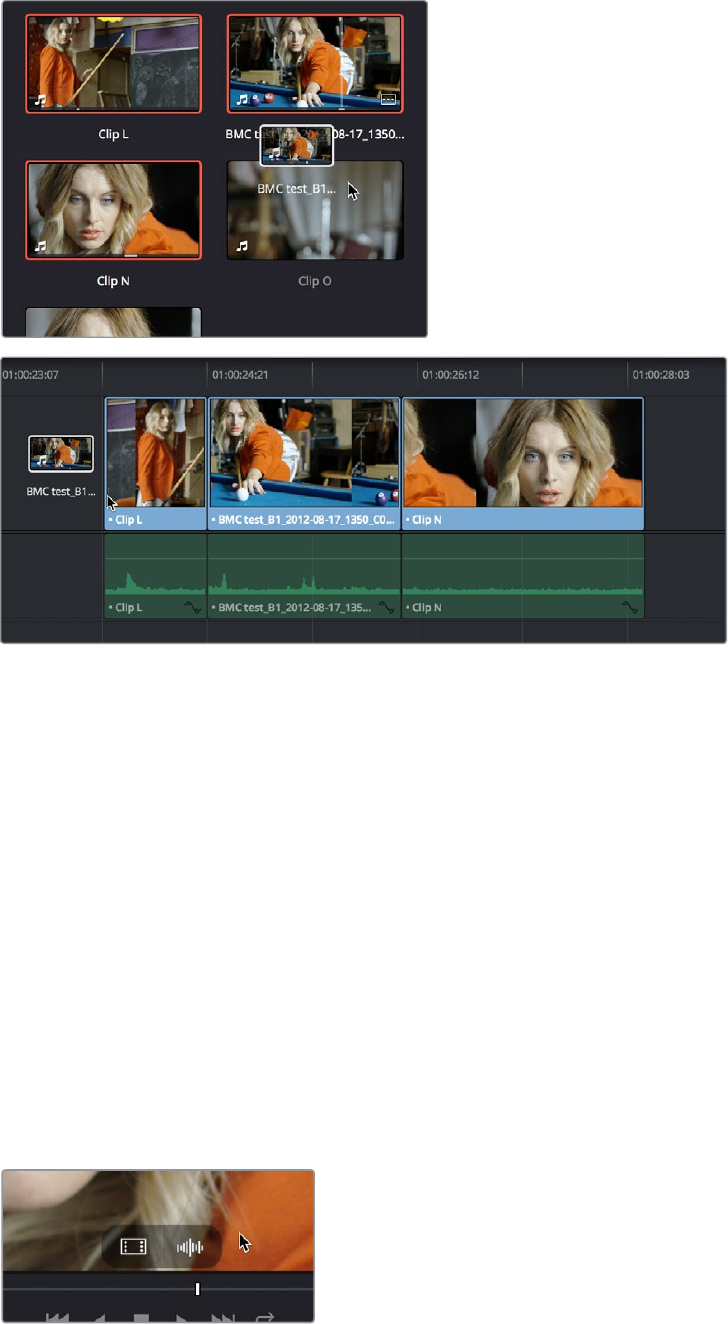
332
Editing Basics Part 3 – 17
Dragging multiple clips into the Timeline in the sort order of the Media Pool
The clip(s) you drag overwrite whatever other clips they overlap in the Timeline.
Multiple clips dragged from the Media Pool will be edited in the order in which they’re
sorted in the Media Pool, using each clip’s In and Out points.
Drag and Drop Editing of Video-Only or Audio-Only Edits
While it’s easy to edit just the video or just the audio of a clip by disabling the audio or video
destination control in the Timeline prior to doing any sort of edit (described later in Chapter 19,
“Three and Four Point Editing”), there’s also a pair of keyboard modifiers you can use to do the
very same thing while you’re dragging.
Option-drag clips from the Media Pool/Filmstrip, Source Viewer, or Finder into the
Timeline to edit only the video component of that clip into the Timeline.
Shift-drag clips from the Media Pool/Filmstrip, Source Viewer, or Finder into the
Timeline to edit only the audio component of that clip into the Timeline.
Open a clip into the Source Viewer, then move the pointer over the Source Viewer and
drag from either the Video-only or Audio-only overlays that appear over the bottom of
the image.
Video and Audio-only overlay controls appear in
the Source Viewer that let you drag just the video
or just the audio into the Timeline
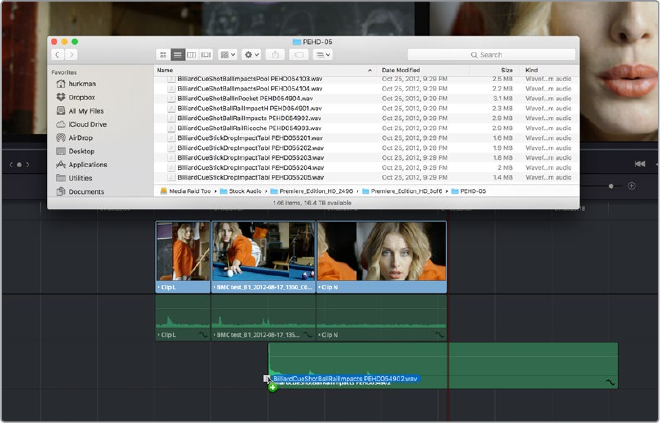
333
Editing Basics Part 3 – 17
Dragging Clips From the macOS Finder Into the Timeline
You can also drag a clip directly from the Finder to the Timeline using the macOS version of
DaVinci Resolve.
Dragging multiple clips into the Timeline from the Mac OS Finder
Other Ways of Assembling
Edits Into the Timeline
While drag and drop editing is intuitive enough, there are other simple methods of editing clips
into the Timeline by using the playhead to define where those clips will start. The examples in
this chapter all use “Overwrite” edits, which are also shown above. Because Overwrite edits
delete overlapping clips in the Timeline with the new incoming clip, they let you both delete
unwanted media from the Timeline, and add clips that you do want. Here are two examples of
how to do this.
Example: Assembling Clips Into the
Timeline From the Source Viewer
The following example shows how you can use the Edit page to assemble a quick first cut of
edits using different features of the Media Pool, Viewers, and Timeline.
1 Open the first clip you want to edit into the Source Viewer.
2 If necessary, set In and Out points to define the section of that clip you want to edit into
your program.
3 Choose what video and audio tracks you want to edit the clip to in the Timeline by
clicking, dragging, using the Command-Option and Command-Shift Up and Down
Arrow Key shortcuts, or using the Option-1–8 and Command-Option-1–8 key shortcuts
to assign the video and audio destination controls. By default, the destination controls
are assigned to tracks V1 and A1.
4 Click any destination control itself to disable the video or audio component if you want
to edit clips into the Timeline as audio or video only. By default, all destination controls
are enabled.
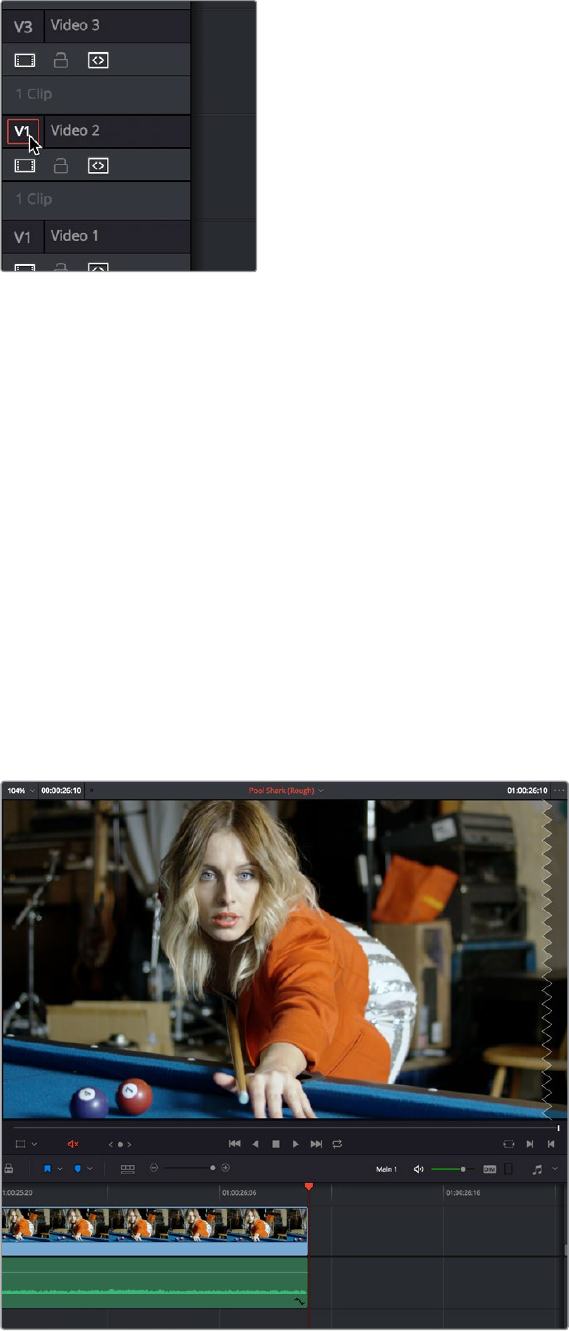
334
Editing Basics Part 3 – 17
Setting the destination control to the track
you want to edit into.
5 In the Timeline Viewer or the Timeline itself, move the Timeline playhead to the frame
you want the beginning of the clip you’re about to edit to start.
6 To perform the edit, do one of the following:
Drag the clip from the Source Viewer to the Timeline Viewer and drop it on the
Overwrite overlay. (Note: If you’re in single viewer mode, this overlay only appears
when you drag a clip from the Media Pool to the Timeline Viewer)
Click the Overwrite Clip button at the middle of the Toolbar.
Choose Edit > Overwrite ( or press F10).
The selected clip(s) are overwritten to the selected track at the position of the
playhead, and the playhead automatically moves to the end of the newly edited clip,
ready for you to perform another edit. If that clip is the last one on the Timeline, you’ll
see the last frame to the left of the playhead (with a jagged overlay at the right-hand
side of the Timeline Viewer) instead of the black that is the actual frame after that clip.
This makes it easier for you to line up the next edit. Otherwise, the playhead will show
whatever frame happens to be at that point in time.
The Timeline playhead at the first frame after the clip you’ve just edited, the Timeline
Viewer shows a jagged overlay at the right to let you know this isn’t a real frame
335
Editing Basics Part 3 – 17
7 To edit another clip, open the next clip you want to edit into the Source Viewer,
set In and Out points, and use the Overwrite Clip button or command to edit it into
the Timeline. Continue this process until you’ve edited together the assembly of
edits you want.
Example: Assembling Clips Into the
Timeline from the Media Pool
If you want, you can also edit clips directly into the Timeline from the Media Pool using a variety
of commands. This can be a fast way of appending clips to the end of the Timeline (although
you can also perform Insert edits this way).
To edit one or more clips from the Media Pool to the Timeline:
1 If necessary, set In and Out points for each of the clips you want to edit into the
Timeline using either the Media Pool thumbnails (in Thumbnail view), the Media Pool
Filmstrip Viewer (in List view), or by opening each one into the Source Viewer. For each
method, press I to set an In point, and O to set an Out point.
Change the sort order of the Media Pool’s browser area to put the clips into the order in
which you want them to appear. In Thumbnail view you can use the Sort Order menu,
but in List view you can click the header of any metadata column to sort by that
column’s data.
2 Click, drag, use the Command-Option and Command-Shift Up and Down Arrow Key
shortcuts, or use the Option-1–8 and Command-Option-1–8 key shortcuts to assign the
video and audio destination controls to the tracks you want to edit the video and audio
of the incoming clip(s) to. Click any destination control itself to disable it if you want to
edit clips into the Timeline as audio or video only.
3 Select one or more clips you want to edit. Insert, Overwrite, Place On Top, Ripple
Overwrite, and Append At End edits are all capable of editing multiple clips at once,
while Replace and Fit to Fill edits can only edit one clip at a time, and will only edit the
first of multiple selected clips into the Timeline.
4 To perform the edit, do one of the following:
Use any of the editing commands in the Edit menu.
Use the equivalent keyboard shortcuts to Insert (F9), Overwrite (F10), Replace (F11),
Place On Top (F12), Ripple Overwrite (Shift-F10), Fit to Fill (Shift-F11), or Append To End
of Timeline (Shift-F12) the selected clips into the Timeline.
Right-click one or more selected clips in the Media Pool, and choose “Insert Selected
Clips to Timeline” or “Append Selected Clips to Timeline.”
The selected clip(s) are edited into the Timeline.
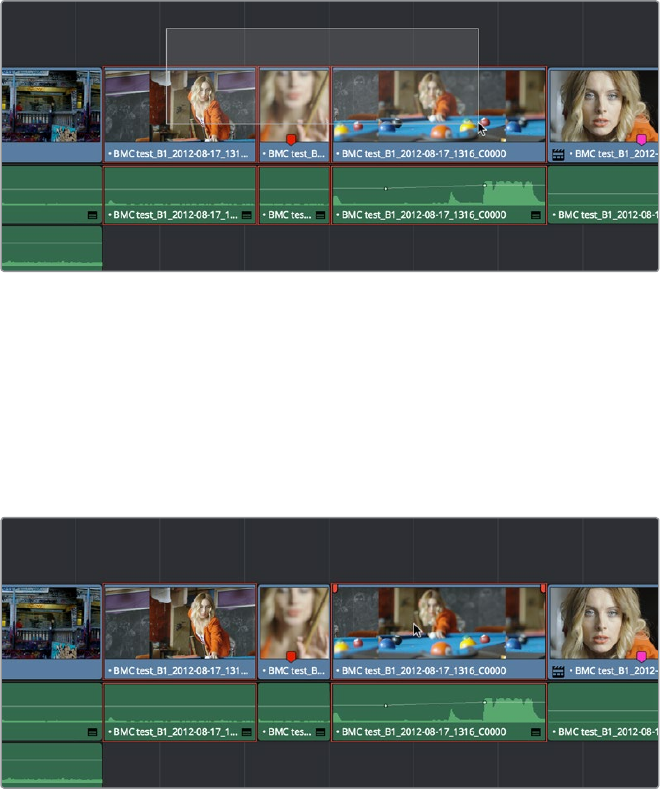
336
Editing Basics Part 3 – 17
Making Selections in the Timeline
Once you’ve assembled a sequence of clips in the Timeline, you’ll probably need to manipulate
them further, moving, deleting, trimming, or otherwise adjusting the clips in the Timeline to
make the edit play with the pacing and verve you require.
Manually Selecting Clips in the Timeline
Many operations require you to make a selection first, to define the scope of what you’re about
to do. There are many ways to do so.
Selections you can make using the mouse:
To select one clip: Click a clip with the mouse.
To select a continuous range of clips by dragging: Drag a bounding box from an
empty area of the Timeline to surround a group of clips.
Dragging a bounding box to select a continuous range of clips in the Timeline
To select a continuous range of clips by Shift-clicking: Click the first clip you want to
select, and then shift-click the last clip you want to select, and all clips in-between will
automatically be selected as well.
To select a discontinuous range of clips: Command-click any clips to select them
no matter where they appear on the Timeline. Command-clicking a selected clip
deselects it.
Command-clicking to select a discontinuous range of clips in the Timeline
337
Editing Basics Part 3 – 17
Selecting clips using the keyboard or menu commands:
To select one clip: Using the keyboard, make sure the Auto Select button for
the track the clip is on is enabled, then move the playhead over that clip and
press Shift-V.
To select all clips forward of the playhead on the current track: Move the playhead
to the first clip you want to include in the selection, then press the Y key (Timeline >
Select Clips Forward > On This Track) to select that clip and every clip to its right in
the same track of the Timeline.
To select all clips forward of the playhead on all tracks: Move the playhead to the
first clip you want to include in the selection, then press Option-Y (Timeline > Select
Clips Forward > On All Tracks) to select that clip and every clip to its right in all tracks
of the Timeline.
To select all clips backward from the playhead on the current track: Move the
playhead to the last clip you want to include in the selection, then press Command-Y
(Timeline > Select Clips Backward > On This Track) to select that clip and every clip to
its left in the same track of the Timeline. By default, there’s no keyboard shortcut for
this command, but you can assign one.
To select all clips backward from the playhead on all tracks: Move the playhead to
the last clip you want to include in the selection, then choose Command-Option-Y
(Timeline > Select Clips Backward > On All Tracks) to select that clip and every clip
to its left in all tracks of the Timeline. By default, there’s no keyboard shortcut for this
command, but you can assign one.
To select all clips in the Timeline: Make sure the Timeline has focus, then press
Command-A.
To change which clip is selected using the keyboard:
Select a clip, then use the Left Arrow and Right Arrow keys to change the selection to
the previous or next clip among all tracks with Auto Select turned on.
Selecting Clips Based on Markers, Flags, and Clip Color
It’s also possible to select multiple clips that have a particular color of marker, flag, or clip
coloration. This is useful in any situation where you’re using these organizational tools to keep
track of clips with specific characteristics that you might need to later select for multi-clip
operations.
For example, you might add purple markers to a series of audio clips that might need special
EQ settings. Later, you can choose Timeline > Select Clips With Marker Color > Purple to select
all of those clips in order to move them to another track, where you can apply the same EQ to
all of them using an audio filter applied to the track. There are three ways of selecting
groups of clips.
To select groups of clips based on Marker, Flag, or Clip Color:
Choose Timeline > Select Clips With Flag Color > Blue – Purple
Choose Timeline > Select Clips With Marker Color > Blue – Purple
Choose Timeline > Select Clips With Clip Color > Green – Gray
Selecting Edits in the Timeline
A variety of editing and trimming methods require you to select an edit point, or part of an edit
point, in order to resize, ripple, or roll an edit. You can do so using the mouse or using
the keyboard.
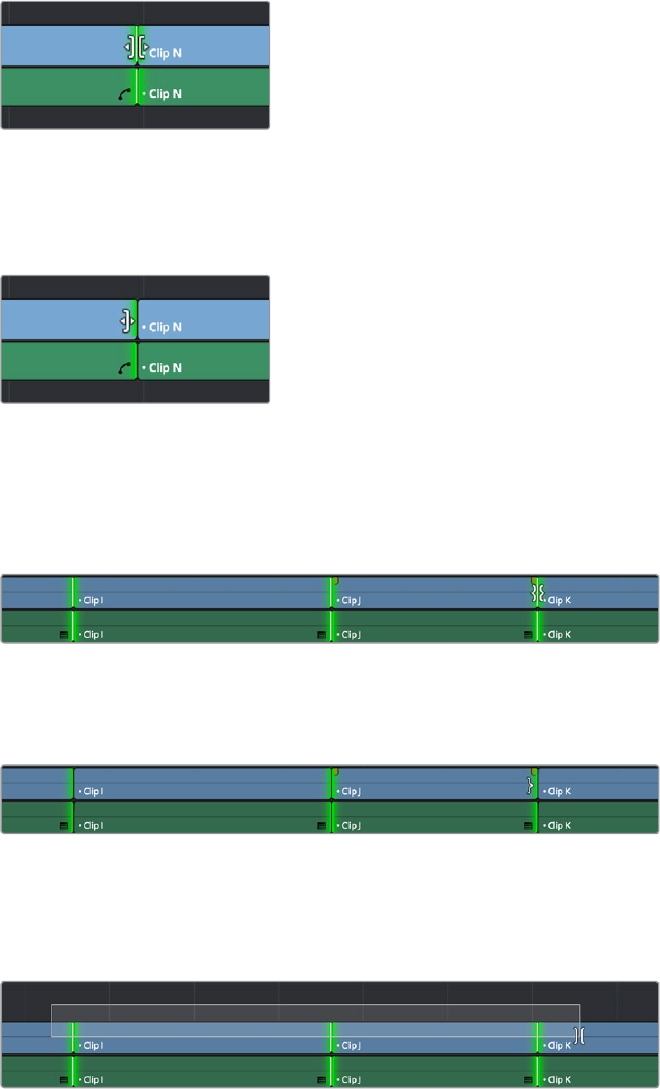
338
Editing Basics Part 3 – 17
Methods for selecting edit points using the mouse:
To select an edit to roll: Move the mouse to the center of an edit point, and when the
ripple cursor appears, click to select the edit.
Selecting an edit point to roll
To select just the incoming or outgoing half of an edit point to resize or ripple: Move
the mouse to the left or right of the center of an edit, and when the resize/ripple cursor
appears, click to select that portion of the edit.
Selecting incoming or outgoing halves of an
edit point to resize or ripple
To select multiple edit points, do one of the following:
To select multiple roll points: Command-click the center of multiple edit points.
Command-click a selected edit point to deselect it.
Command-clicking the center of several edits to prepare to roll them all
To select multiple ripple points: Command-click the left or right sides of multiple
edit points.
Command-clicking the left or right of several edits to ripple them all
To drag to select many edit points: Select the Trim tool (T), and drag a bounding-box
over the edit points you want to select. You can press U to switch all selected edit
points among rippling incoming edits, rippling outgoing edits, and rolling edits.
Using the Trim tool, you can drag to select multiple edits
There is also a flexible set of keyboard shortcuts that makes it easy to select edit points in
preparation for various operations if you like to avoid using the mouse.
339
Editing Basics Part 3 – 17
Keyboard shortcuts for selecting edits:
V: Selects the nearest edit point to the playhead on the lowest track with Auto Select
enabled. Selects both the audio and video edit points of a clip together.
Option-C: Selects the nearest video edit point to the playhead on the lowest track with
Auto Select enabled. Linked audio edit points are not selected.
Shift-C: Selects the nearest audio edit point to the playhead on the lowest track with
Auto Select enabled. Linked video edit points are not selected.
U: Once you’ve selected an edit point, this shortcut toggles among selecting the
outgoing half, incoming half, or the entire edit.
Option-U: Once you’ve selected an edit point, this shortcut toggles among selecting
the video+audio of the edit, just the video, or just the audio.
To move the selection to another edit:
Select a single edit point, then use the Up Arrow key (Previous Edit) or Down Arrow key
(Next Edit) to change the selection to the previous or next edit point among all tracks
with Auto Select turned on.
To deselect all edit points:
Using the mouse: Click any empty area of the Timeline.
Using the keyboard: Press Shift-Command-A.
A Practical Example of Keyboard-Driven Selections
Here’s an example of how you would use these keyboard shortcuts together as a sequence of
operations.
To select an edit point using the keyboard:
1 Move the Timeline playhead close to the edit point you want to select using
the JKL keys.
2 Press the V key to select the nearest edit point to the playhead on the lowest track with
Auto Select enabled. If there are overlapping superimposed clips on multiple tracks,
turn off the Auto Select controls of tracks with edits you don’t want to select using
Option-F1 through Option-F8 corresponding to the auto select controls on tracks 1-8.
Using the mouse, you can solo a track’s Auto Select state by Option-clicking its Auto
Select button. (Option-F9 toggles the auto select controls of all video tracks.)
3 Initially, the entire edit is selected, in preparation for a roll edit. To toggle among
selecting the outgoing half, incoming half, and the entire edit, press the U key.
4 To toggle among selecting the video+audio of the edit, just the video, or just the audio,
press Option-U.
5 Perform whatever operation you need to. When you’re finished, using Up-Arrow or
Down-Arrow to move the selection backward or forward in the Timeline, or press
Command-Shift-A to deselect it.
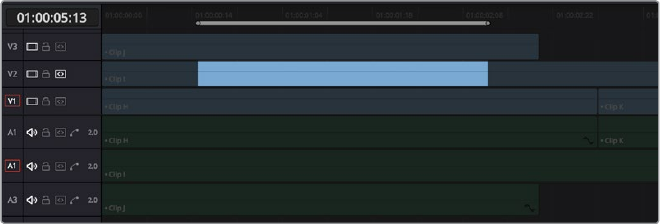
340
Editing Basics Part 3 – 17
Using Auto Select Controls
to Define Selections
The Timeline Auto Select controls are extremely useful and versatile controls that serve many
purposes. In short, they give you a way to specify which tracks will be affected or considered
when you’re performing an operation upon multiple superimposed clips on multiple tracks of
the Timeline.
Also, the Timeline Auto Select controls are particularly convenient when you’re using keyboard
shortcuts to edit and you don’t want to have to grab your mouse to explicitly select a single clip,
since you can turn Auto Select on or off via keyboard shortcuts.
Defining Selections With the Help of Auto Select Controls
Here is the easiest example of when the Auto Select controls are indispensable. In the following
example, there are two superimposed video clips and three superimposed audio clips.
Supposing you only want to delete the media from tracks V2, V1, and A1, but you want to leave
the media on A2 and A3 alone, you can turn off the Auto Select controls for tracks A2 and A3,
and set Timeline In and Out points to define the range of the clips you want to delete. When
you press the Delete key, only the media on the Auto Select-enabled tracks is deleted.
Overriding Automatic Selections By
Making Manual Selections
It’s important to note that manual selections that you make which highlight specific clips in the
Timeline always override whatever the Auto Select control of a track is set to. In the following
example, three clips are superimposed and the Auto Select control of every track except V2
has been turned off. Setting Timeline In and Out points now automatically defines that region of
the clip on track V2 to be deleted were you to press the Delete key. You can see the affected
part of the Timeline because it’s highlighted while the rest of the Timeline is dimmed.
Soloing the Auto Select control on track V2 to limit a Delete operation
However, if you clicked the clip on track V1 to select it manually, the automatic selection defined
by the In and Out points disappears in favor of the highlighted clip you just clicked. This is
because manual selections almost always take precedence over automatic selections you
define using the In and Out points and Auto Select controls.
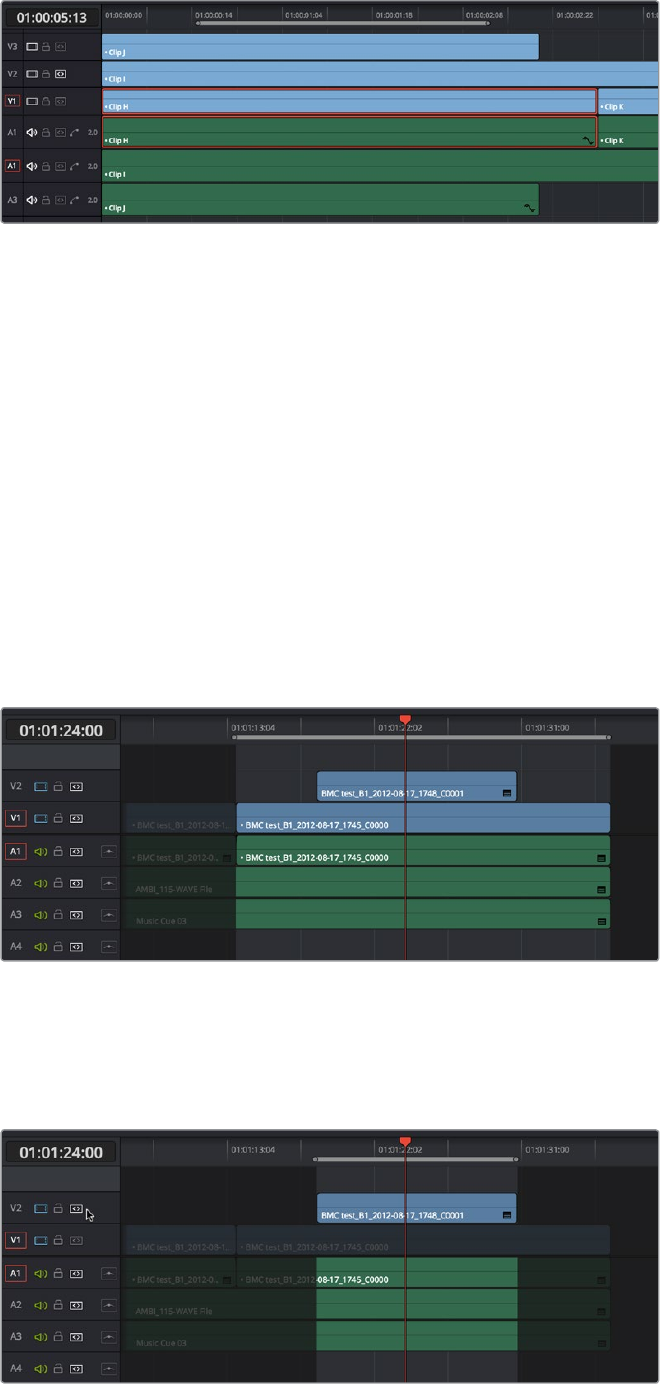
341
Editing Basics Part 3 – 17
Making a manual selection overrides the Auto Select controls
This is good to keep in mind for situations where the fastest way to do the operation you need
to do is to simply manually select the clip you want to define the operation.
Using Auto Select Controls to Control Other Operations
Other operations that are affected by the Auto Select controls include any command that uses
“the clip on the lowest-numbered track with Auto Select enabled” to define what happens.
Thisincludes Copy and Paste, Mark Clip, Go To Next Edit/Previous Edit, the Selection Follows
Playhead mode, Next Gap/Previous Gap, etcetera (a full list of affected operations
appears later).
A common example of when this is important is whenever you use the Mark Clip command to
automatically set In and Out points to match the duration of a clip on the Timeline. If that clip
happens to be at a section of the Timeline where there are multiple superimposed clips, each
of which has a different duration, then by default the In and Out points (first and last frames) of
the clip on the lowest numbered track is used to set Timeline In and Out points when you use
Mark Clip.
Using Mark Clip with all Auto Select controls enabled, the clip on the
lowest-numbered video track with Auto Select enabled defines the result
However, if you disable the Auto Select control of track V1, then whichever clip is on the lowest
video track with Auto Select still enabled is used as the target clip for the Mark Clip operation.
In this example, the shorter clip on track V2 now sets the locations of the In and Out points.
Using Mark Clip with Auto Select controls enabled
342
Editing Basics Part 3 – 17
Methods of enabling and disabling the Auto Select controls:
To toggle Auto Select for any track: Click any track’s Auto Select control.
To toggle Auto Select for video tracks: Press Option-F1 through F8 to toggle Auto
Select for tracks V1 through V8.
To toggle Auto Select for all video tracks off and on: Press Option-8.
To toggle Auto Select for audio tracks 1-8: Press Option-Command-F1 through F8.
To toggle all video track Auto Select tracks off and on: Press Option-F9.
To toggle all audio track Auto Select tracks off and on: Press Option-Command-F9.
To “solo” Auto Select for a track and disable Auto Select on all other tracks:
Option-click any Auto Select control to leave that control on while turning off all other
Auto Select controls of that type (video or audio).
To turn all audio or video Auto Select controls on and off: Shift-click any video or
audio Auto Select control to toggle on or off all Auto Select controls of that type (video
or audio).
The following operations are affected by the state of each track’s Auto Select control:
Cutting, Ripple Cutting, Copying, or Deleting clips: When using Timeline In and Out
points to delete a range of media from the Timeline, only media on tracks with an
enabled Auto Select control will be cut, copied, or deleted.
Deleting gaps: When selecting and deleting gaps in the Timeline, clips on other tracks
that overlap the selected gap will also be deleted on tracks with an enabled Auto
Select control. Media to the right of affected tracks will ripple left to close the gap.
Selecting edit points using the keyboard: When you press V to select the nearest edit
point, the edit point on the lowest track with Auto Select enabled is selected. When
pressing the Up Arrow and Down Arrow keys to move the selection from edit point to
edit point, edit points on tracks with a disabled Auto Select control are ignored.
Selecting clips using the keyboard: When a clip is selected, you can press the Up
Arrow and Down Arrow keys to move the selection from clip to edit clip, but clips on
tracks with a disabled Auto Select control are not seen by this operation.
Using Mark Clip: When using the Mark Clip command, clips on tracks with disabled
Auto Select controls are ignored. This lets you choose a target clip to use for marking
the clip when there are multiple overlapping superimposed clips.
Match Frame: When making a Match Frame operation, clips on tracks with disabled
Auto Select controls are ignored. This lets you choose a target clip to use for matching
a frame when there are multiple overlapping superimposed clips.
Rippling the Timeline during a trim operation: Tracks with Auto Select turned off
will not be rippled. More information on the rules of ripple trimming appear later in
this chapter.
Pasting clips: All copied clips will be pasted to the lowest numbered track with
Source Control enabled. If all tracks of a particular type have their Auto Select controls
turned off, then no clips of that type will be pasted at all.
Paste Insert: Tracks with Auto Select turned off will not be rippled or affected by clips
being pasted via a Paste Insert command.
Using the Insert or Ripple Overwrite edits: Only clips on tracks with Auto Select
turned on will be rippled during an Insert edit or Ripple Overwrite edit.
Finding gaps: When using Playback > Previous Gap (Command-Option-;) or Next Gap
(Command-Option-‘ ), gaps on tracks with Auto Select disabled will be ignored.
Using Selection Follows Playhead: When you turn on “Selection Follows Playhead” so
that all clips intersecting the position of the playhead are automatically selected, clips
on tracks with Auto Select disabled will not be selected.

343
Editing Basics Part 3 – 17
Locking Tracks You
Don’t Want to Change
Another step you can take to prepare before performing any kind of editorial operation is to
lock tracks with media that you don’t want to be affected by whatever it is you’re about to do.
For example, if you have a complex set of music edits on track A3 that you don’t want to be
affected by operations that will ripple the Timeline, you can lock track A3 so those clips
remainunaffected.
Tracks V2, V1, and A1 are unlocked, while tracks A2, A3, and A4 are locked
Clips on locked tracks cannot be moved, deleted, cut, or otherwise affected by editorial
operations. Furthermore, parameters of locked clips cannot be edited in the Inspector.
However, clips on locked tracks can be graded and otherwise modified in the Color page.
To toggle the lock or unlock state of tracks, do one of the following:
Click any track’s lock control to toggle lock on and off.
Shift-click any track’s lock control to toggle locking on and off for all tracks.
Press Option-Shift-1 through 8 to lock or unlock tracks V1 through V8.
Press Option-Shift-9 to lock or unlock all video tracks.
Press Option-Shift-F1 though F8 to lock or unlock tracks A1 through A8.
Press Option-Shift-F9 to lock or unlock all audio tracks.
Position Lock
In a nutshell, turning position lock on prevents clips from being moved to the left or right, and it
prevents all ripple operations. This is primarily useful when you’re near the end of post on a
project for which the cut has been locked (or at least as “locked” as directors and producers
allow any more), but you still need to make surgical changes that don’t risk throwing the video
out of sync with audio that may be being edited and mixed elsewhere because of an
accidentally rippled edit.
With position lock on, you can still make edits (such as Replace), slip clips, roll edits, add
ResolveFX and other OpenFX, and alter all manner of effects in the Inspector. You just can’t do
anything that alters the position of clips in the Timeline, or ripples entire sections of the
Timeline.
There are two ways you can enable Position Lock.
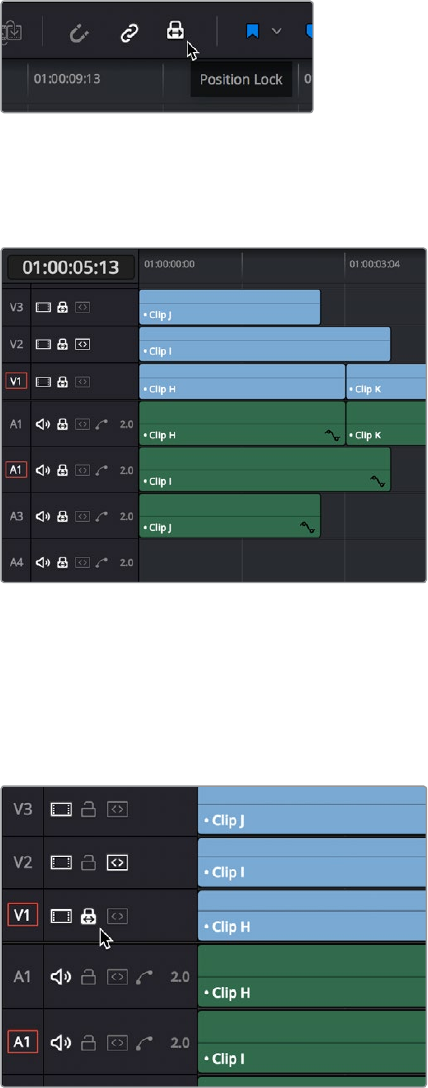
344
Editing Basics Part 3 – 17
Position Locking All Tracks
You can turn Position Lock on and off for all tracks via a button in the toolbar above the Timeline.
The Position Lock button on the toolbar
When you turn position lock on, the Lock button of all tracks changes to show that position lock
is enabled instead.
Position lock indicated by each track’s Lock icon changing
Position Locking Individual Tracks
You can also be extra tricky and enable position lock on a track-by-track basis by Command-
clicking any track’s Lock button.
Command-click any track’s Lock button to put that
track into Position Lock mode
Position lock can be released by simply clicking that track’s Lock icon.
345
Editing Basics Part 3 – 17
Disabling and Re-Enabling
Clips in the Timeline
Sometimes there’s one or more video or audio clips in the Timeline that you don’t want to play
along with the rest of the edited sequence, but you don’t want to remove from the Timeline
either, in case you change your mind later. For this reason, it’s possible to Disable clips,
effectively turning them off without removing them.
Disabled clips appear dimmed in the Timeline. They don’t play back, they’re not rendered, and
they’re not output to video. However, their position is preserved in the Timeline, so you can
always re-enable them at a later time if you change your mind and decide you want
to use them.
A clip that’s been disabled between two enabled clips; the disabled clip is dimmed
To disable or re-enable one or more selected clips:
Right-click part of the selection and choose Enable Clip from the contextual menu
Choose Clip > Enable Clip
Press D
Deleting Clips and Gaps
from the Timeline
There are two ways you can delete clips you don’t want in the Timeline. Using the Delete key,
you can perform what’s sometimes called a “lift edit,” removing the unwanted clips and leaving
a gap. Using the Forward Delete key, you can perform a “ripple delete,” removing unwanted
clips and closing the gap by rippling the rest of the edited Timeline to the right of the deleted
clip/s by moving it to the left.
Deleting clips as a “lift edit” operation:
To remove one or more clips from the Timeline, leaving a gap: Select a clip in the
Timeline, or Shift-click or Command-click to select the clips you want to remove, and
press the Delete key (or right-click the selection and choose Delete).
To remove a range of media from the Timeline on multiple tracks, leaving a gap:
SetTimeline In and Out points defining the range of media you want to delete, then
turn off the Auto Select controls of any tracks with media you want to preserve, and
press the Delete key (or right-click the selection and choose Delete).
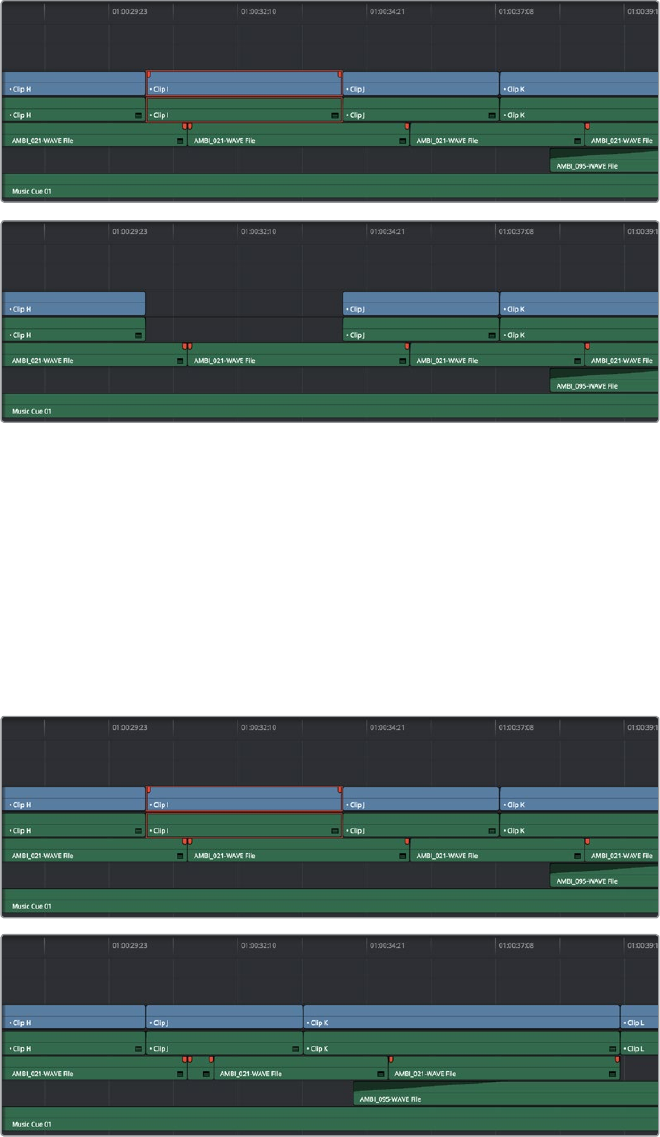
346
Editing Basics Part 3 – 17
Deleting Clip I using the Backspace or Delete key and leaving a gap
Deleting clips as a “ripple delete” operation:
To delete one or more clips and close the gap by rippling the Timeline left: Select
a clip in the Timeline, or Shift-click or Command-click to select the clips you want to
remove, and press the Forward Delete key.
To delete a range of media and close the gap by rippling the Timeline left: Set
Timeline In and Out points defining the range of media you want to delete, then turn off
the Auto Select controls of any tracks with media you want to preserve, and press the
Forward Delete key.
Deleting Clip I using the Forward Delete key to ripple all clips with In
points to the right in the Timeline to close the gap
As with any ripple operation, all clips with In points to the right of the deleted range of media on
tracks with auto -select enabled are rippled to close the gap, and any clips with In points to the
left of the In point of the affected range of media are unaffected.

347
Editing Basics Part 3 – 17
Finding, Selecting, and Deleting Gaps in the Timeline
A gap is defined as a space between any two clips on the same track. Often gaps are desirable
as they allow audio or video clips to be spaced apart from one another very specifically, but
sometimes they’re not. If you want to find accidental gaps in your timeline that may be too small
to see, a pair of commands lets you do this.
To move the playhead to the next gap on the Timeline:
1 Turn off the Auto Select controls of any tracks you want to omit from this operation.
2 Do one of the following:
Choose Playback > Previous Gap, or press Option-Command-Semicolon (;) to move
the playhead to the next gap to the left of the playhead’s current position.
Choose Playback > Next Gap, or press Option-Command-Apostrophe (‘) to move the
playhead to the next gap to the right of the playhead’s current position.
To select or deselect a gap:
Click once to select a gap, and click that gap again to deselect it.
You can only select one gap at a time. The principal reason to select a gap is to delete it, in the
process rippling the Timeline to close the gap. In the following example, there’s a gap between
two clips on track V1 that you’d like to close.
Selecting a gap on Track V1
To delete a gap:
Press the Delete key to close the gap. All clips to the right of it on tracks with Auto
Select enabled will be rippled to the left to close the gap. Clips on tracks with Auto
Select disabled will not ripple.
If you select a gap in a timeline with clips on multiple tracks, which clips will be deleted
depends on the state of the Auto Select controls for each track in the Timeline.
All tracks with Auto Select enabled: The range of media that overlaps the selected
gap will also be deleted. Clips on those tracks will ripple left to fill the gap.
All tracks with Auto Select disabled: The range of media that overlaps the selected
gap will be left intact, and clips on those tracks will not ripple left, going out of sync with
whichever clips do ripple.
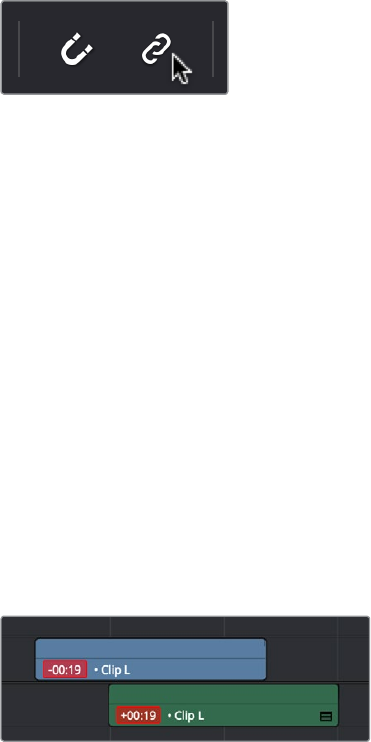
348
Editing Basics Part 3 – 17
Audio/Video Linking
DaVinci Resolve gives you complete control over the linked relationship between the video and
audio associated with a clip. By default, DaVinci Resolve tries its best to keep the video and
audio of clips and timelines in sync. However, there are several ways you can suspend
automatic syncing when you need to make a specific kind of edit.
Controlling Audio/Video Linking While Making Selections
While selecting edits and clips, you can also choose whether the video and audio associated
with a clip should be selected together (linked) or not. This determines whether operations
performed to the video of a clip automatically affect the audio of the clip, and vice versa. In
most instances, you’ll probably want to leave Audio/Video Linking turned on, so that selecting
the video of a clip to move it elsewhere in the Timeline also results in the audio being selected
and moved at the same time. Disabling A/V linking in this case could cause your video and
audio to go out of sync undesirably.
However, there are plenty of instances when you’ll want to temporarily suspend this linked A/V
relationship, such as when you want to create a split edit, where a clip’s audio In point is at a
different frame than the video In point. In this case, you can suspend Audio/Video Linking to
select just the audio In point, then roll it either further back or forward to create the split, without
changing the In point of that clip’s video. When you’re finished, you can re-enable A/V linking.
At all times, the state of Audio/Video Linking is visible via the Chain-link button at the right of
the toolbar.
The Audio/Video Linking button
To turn Audio/Video Linking off and on:
Click the Link Audio/Video button (or press Shift-Command-L).
To temporarily suspend Audio/Video Linking while making a selection:
Press the Option key while clicking a clip or edit point to select the video without
selecting the audio, or vice versa.
Dealing with Audio Video Sync Offsets
Audio/Video sync is one of the most important things to maintain in any edited program.
However, there are times when you may want to override the sync relationship of a clip’s audio
and video to make a particular edit, so moving a clip’s audio and video out of sync is allowed.
If you disable Audio/Video Linking and then move the audio or video of a clip independently of
its linked video or audio counterpart, you’ll see red “out-of-sync” indicators at the right of each
clip’s name bar, that displays the timecode offset by which the audio and video of that clip are
out of sync. In the following example, the audio and video of a clip have been moved out of
sync by Option-clicking the video and dragging it to the right.
Sync markers on a clip with audio and video out of sync
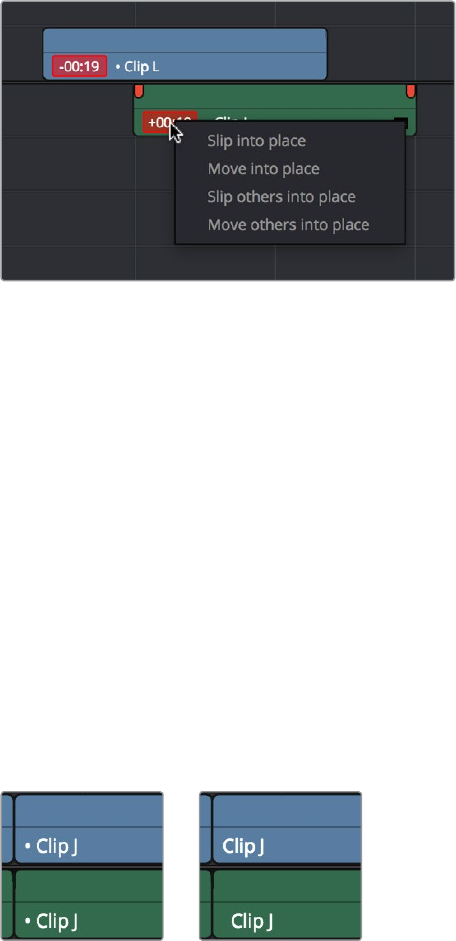
349
Editing Basics Part 3 – 17
If you’ve moved the audio and video of a clip out of sync with one another, there’s a really easy
way of getting them back into sync, by right-clicking the red out-of-sync indicator of any clip and
choosing one of the available commands:
Slip into place: Slips the content of the selected clip, without moving the clip, so that it’s
in sync with the other items that are linked to that clip.
Move into place: Moves the selected clip so that it’s in sync with the other items that
are linked to that clip.
Slip others into place: Slips the content of all other items that are linked to the selected
clip, without moving them, so that all linked items are in sync.
Move others into place: Moves all other items that are linked to the selected clip so
that all linked items are in sync.
Commands in the contextual menu of sync tooltips
Manually Unlinking and Relinking Audio and Video
By default, clips that you import into DaVinci Resolve have their video and audio linked
together, which makes it easy to maintain the relationship and sync of the audio and video
components of a clip while you’re editing. However, there are many reasons you might want to
override this automatic relationship, either breaking the a/v linking of a clip’s audio and video
completely, or breaking it and relinking in a different way, or to different clips.
Methods of permanently changing Audio/Video Linking in the Timeline:
To unlink audio and video from one another: Select a clip, then right-click it and
choose Link from the contextual menu (or press Option-Command-L). Unlinked clips do
not appear with a dot before the clip name in the Timeline.
To link audio and video clips to one another: Command-click an audio clip and a video
clip so they’re both selected, then right-click the selected clips and choose Link from
the contextual menu (or press Option-Command-L). A dot appears before the name of
linked clips in the Timeline.
Left - linked video and audio with a dot to the left of the clip name,
Right - unlinked audio and video items have no dot
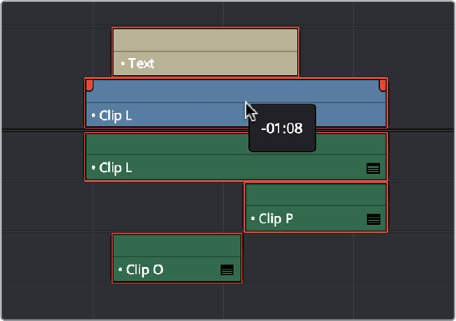
350
Editing Basics Part 3 – 17
Linking Multiple Clips in the Timeline
You don’t just have to link audio and video clips that sync together, though. You can actually link
any number of video and audio clips that you want to be able to select, move, and edit together
as one, even if they were never originally meant to be synced. This makes linking an
organizational mechanism as much as a sync management tool. Here are some examples of
how you can use this:
You can link a text generator with a subtitle to the clip it plays along with.
You can link a sandwich of overlapping audio sound effects with the video clip they
accompany.
You can link off camera audio to an on camera shot.
You can link the background and foreground clips of a green screen composite, with
sound from both.
Linking multiple clips in the Timeline works the same as linking a single audio and video clip
together; every single linked item appears with a dot to the left of the clip name, and
suspending linked selection to force any single clip out of sync will result in the display of an
“out-of-sync” indicator.
Multiple audio and video items that have been manually linked
together to act as a single clip in the Timeline when Linked
Selection is enabled
Commands for Slipping Audio/Video Sync
Another set of commands in the Trim > Slip Audio submenu let you slip the contents of one or
more selected clips in order to alter the sync between the audio and video, either in whole
frame increments, or in sub-frame increments if there are clips with marginal sync that you want
to improve.
One Frame Forward (Option-Period)
One Frame Reverse (Option-Comma)
One Subframe Forward (Option-Right Arrow)
One Subframe Reverse (Option-Left Arrow)
352
Modifying Clips in the Timeline Part 3 – 18
Modifying Clips in the Timeline
Once you’ve edited a variety of clips into the Timeline, you’ll start working with them as you
refine your edit. In this chapter, you’ll learn simple methods of modifying clips, including
resizing, splitting, shuffling, disabling, copying and pasting, and duplicating.
This chapter covers the following topics:
Moving, Resizing, and Rolling Clips in Selection Mode 353
Trimming Gaps 355
Resizing or Trimming Clips in the Source Viewer 355
Shuffle or Swap Edits and Inserts 357
Splitting and Joining Clips 359
Enabling and Disabling Clips and Tracks 360
Copying and Pasting Clips in the Timeline 361
Paste Insert 361
Copying and Pasting Partial Clip Segments Using In and Out Points 361
Copying and Pasting Clips to a Dierent Track 362
Audio Channels When Copying and Pasting Audio Clips 362
Duplicating Clips and Transitions in the Timeline 363
353
Modifying Clips in the Timeline Part 3 – 18
Moving, Resizing, and Rolling
Clips in Selection Mode
After editing a series of clips into a timeline, the next thing even the most careful of editors
probably needs to do is to start making changes. The simplest changes are made in Selection
Mode, using the regular arrow pointer.
The Selection Mode button at left is enabled;
theTrim mode button at right is disabled
This is the default mode when you open DaVinci Resolve, and allows you to move clips to other
places in the Timeline, resize them to make them longer or shorter, and roll the edit points
between two clips to move the edit to an earlier or later position on the Timeline. What this tool
does depends entirely on what you click to select as you work.
Manipulating clips using the mouse:
1 Click the ”Selection Mode” tool (the arrow), or press A.
2 Do one of the following:
To move clips in the Timeline: Drag any clip in the Timeline to any other position. If you
drag a clip to overlap another clip, the clip you’re dragging overwrites the clip you’re
dropping it onto.
Moving a clip in the Timeline to overwrite part of another
clip; a tooltip shows you how many frames you’ve moved
To move clips in the Timeline up or down to other tracks while keeping them at the
same time: Hold the Shift key down while dragging clips up or down in the Timeline.
Or, you can hold the Option key down and press Up or Down Arrow.
Moving a clip into another track without sliding it in time by holding the Shift key down
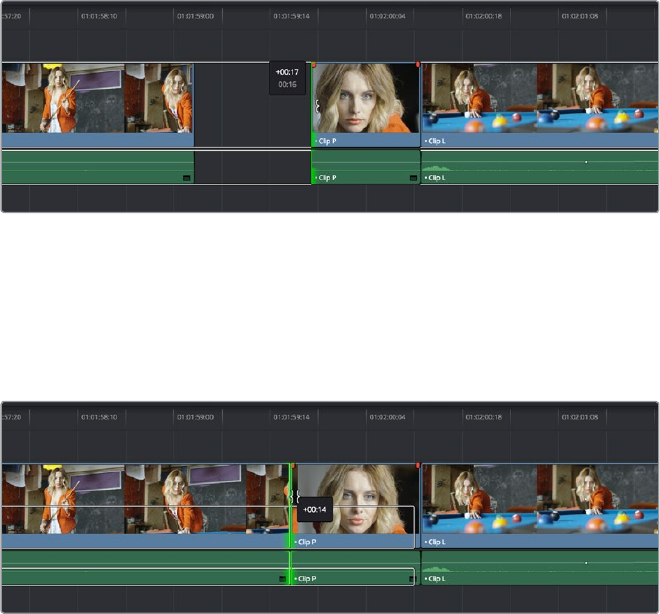
354
Modifying Clips in the Timeline Part 3 – 18
To shorten or lengthen clips: Move the Selection Mode pointer over the beginning or
end of a clip, and when it turns into the Resize cursor, drag the In or Out point to the left
or right to change the clip’s length.
Resizing a clip in the Timeline to create a gap; a tooltip shows the offset, and
outlines show you how much media is available in the clip being adjusted
To roll any edit: Move the Selection Mode pointer over any edit point, and when it turns
into the Roll Edit cursor, drag it to the left or right to move the edit point while
simultaneously resizing the outgoing and incoming edits points of the two clips
surrounding it.
Rolling an edit; a tooltip shows the offset, and an outline
shows the available area you can roll within
Manipulating clips using the keyboard:
1 Press A to choose ”Selection Mode.”
2 Do one of the following:
To roll any edit: Select the closest edit point to the playhead using the V key, moving
the selection to another edit, if necessary, using the Up Arrow and Down Arrow keys,
and then press the Comma key (nudge 1 frame left) or Period key (nudge 1 frame right)
to roll the selected edit to the left or right. Shift-Comma and Shift-Period nudges
by 5 frames.
To shorten or lengthen clips: Select the closest edit point to the playhead using the V
key, then use the U key to toggle the selection among the end of the outgoing clip and
the beginning of the incoming clip. Then, press the Comma key (nudge 1 frame left) or
Period key (nudge 1 frame right) to shorten or lengthen that side of the clip. If you nudge
one end of a clip to overlap another, the clip you’re nudging overwrites the adjacent
clip. Shift-Comma and Shift-Period nudges by 5 frames.
To move clips forward or back in the Timeline: To select a clip in preparation for
moving it, either click it, or move the playhead over it and press Shift-V. Then press the
Comma key (nudge 1 frame left) or Period key (nudge 1 frame right) to move the clip to
the left or right. If you nudge a clip to overlap another clip, the clip you’re nudging
overwrites the adjacent clip. Shift-Comma and Shift-Period nudges by 5 frames.
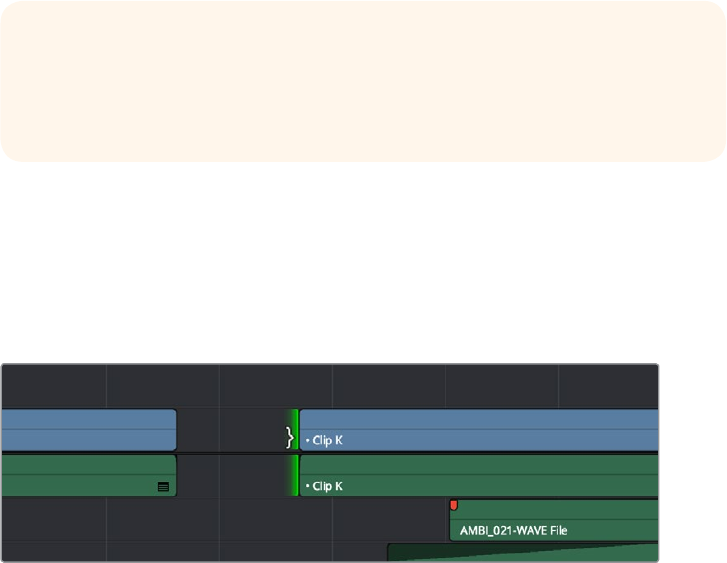
355
Modifying Clips in the Timeline Part 3 – 18
To move clips up or down to other tracks: To select a clip in preparation for moving it,
either click it, or move the playhead over it and press Shift-V. Then, press Option-Up
Arrow to move the Video and Audio of that clip to the next higher-numbered track, or
press Option-Down Arrow to move the Video and Audio to the next lower-
numbered track.
Trimming Gaps
The start and end of gaps can also be rippled using the Trim tool. For more information, see
“Using Trim Mode and the Trim Tool” later in this chapter.
Using the Trim tool to ripple the out point of a gap to narrow it
Resizing or Trimming Clips
in the Source Viewer
You can also double-click a clip in the Timeline to open it into the Source Viewer for trimming.
When the Selection tool is selected, you can drag the In and Out markers, or use the playhead
and I and O keyboard shortcuts to resize that clip in the Timeline.
TIP: When holding down the Shift key while nudging a selection to do a “fast
nudge,” the duration of the nudge is customizable in the Editing panel of the
User Preferences. By default it’s five frames, but you can set it to
whatever you want.
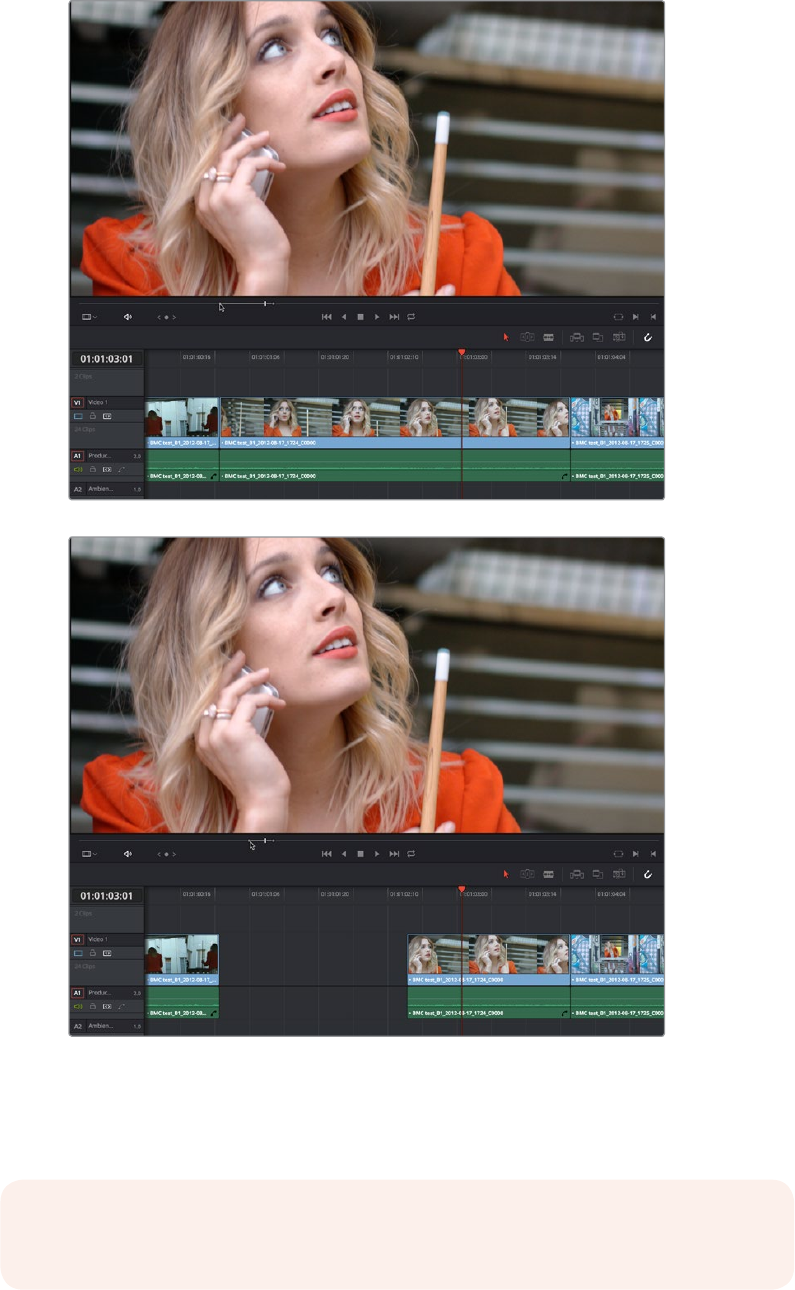
356
Modifying Clips in the Timeline Part 3 – 18
A Timeline clip being resized by opening it in the Source Viewer and dragging its In point
Additionally, you can open Timeline clips into the Source Viewer for trimming using the Trim
tool, dragging to ripple the In and Out points, and slipping the contents of the clip by holding
the Shift key down and dragging the In and Out points.
NOTE: To open a match frame of a clip in the Timeline using the mouse as in previous
versions of DaVinci Resolve, hold the Option key down while double-clicking a clip.

357
Modifying Clips in the Timeline Part 3 – 18
Shuffle or Swap Edits and Inserts
A Shuffle edit (sometimes referred to as a Swap edit) lets you quickly rearrange selected clips in
the Timeline simply by Command-Shift dragging them to the left or right (or Command-Option
dragging them to do a shuffle insert). When you do so, the surrounding clips automatically move
to the right or left to switch places with the clip or clips that you’re dragging. This is a really fast
way to reorder clips to try out different arrangements, without needing to drag clips onto
multiple tracks to get them out of the way, first.
You have a lot of flexibility in how you shuffle clips around. You can select one clip, or multiple
consecutive clips to shuffle. If you select multiple consecutive clips, they’ll move together as a
single block. You can even select multiple consecutive clips on multiple tracks to shuffle around
the Timeline as a single item.
Furthermore, you can also select clips that are part of split edits, where the audio and video In
and Out points start or end at different frames. In this case, how other clips move in the
Timeline to make room for the Split-edit clip you’re dragging depends on whether you click the
video or audio portion of the clip to start dragging:
If you click-and-drag the video portion of the clip, then all clips will rearrange
themselves based on the duration of that video item on that track, so that all video
items on that track rearrange themselves without either overwriting one another or
leaving gaps. As you drag to shuffle the selection through the Timeline, overlapping
linked audio items will either overwrite the audio on neighboring clips, or leave a gap.
If you click-and-drag the audio portion of the clip, then all clips will rearrange
themselves based on the duration of that audio item on that track, so that all audio
items on that track rearrange themselves without either overwriting one another or
leaving gaps. As you drag to shuffle the selection through the Timeline, overlapping
linked video items will either overwrite the video on neighboring clips, or leave a gap.
Given the rules previously described, shuffling clips is really easy, and you can do so in one
of two ways.
To shuffle clips with adjacent clips in the Timeline:
Select one or more consecutive clips you want to shuffle, then press and hold the
Command and Shift keys down and drag either the Video or Audio portion of the
selected clips to the left or right. Adjacent clips will automatically switch places with the
selection of clips you’re dragging, until you drop it in the desired location.
Before and after clip L being shuffled with clips I, K, and J in a scene to rearrange the sequence
To shuffle insert one clip into adjacent clips in the Timeline:
Select one or more consecutive clips you want to shuffle, then press and hold the
Command and Option keys down and drag either the Video or Audio portion of the
selected clips to the left or right. The selection of clips you’re dragging will be inserted
in the middle of adjacent clips as you drag, with the cut portion of each clip being
moved into the gap left behind by the clip you’re dragging. Drop the clip into the
desired location when you’re finished.
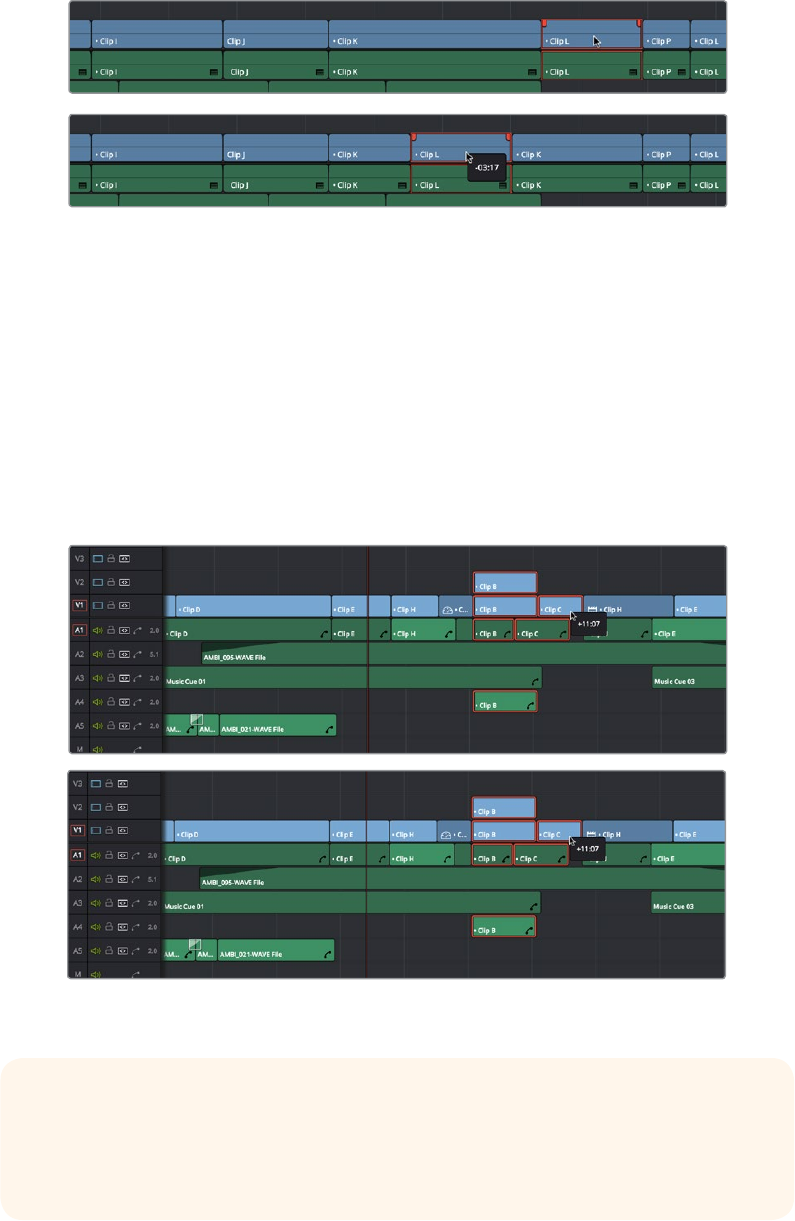
358
Modifying Clips in the Timeline Part 3 – 18
Before and after clip L being inserted into the middle of Clip K, which is split in half to make way for it
To shuffle multiple clips to another position in the Timeline:
Select all of the clips you want to move to another position of the Timeline, then press
and hold the Command and Shift keys, and drag the clips left or right. Make sure the
item you click to drag is on the same track as the majority of clips you’re rearranging;
the item you click defines which track is used to guide the rearrangement of clips. In
the following example, the video item of Clip C is selected on track V1, so as it’s
dragged to the right, all clips on other tracks are rearranged according to the duration
and location of clips B and C on track V1. As a result, clips on tracks other than V1 may
be overwritten, or leave gaps, as necessary for the items on track V1 to be
rearranged cleanly.
Before and after a group of clips being shuffled to the right. The clip that
was clicked to drag defines how all other clips will be rearranged
IMPORTANT: If you begin Command-Shift-dragging a superimposed clip on a track
with large gaps, the resulting shuffle edit operation will jump all the way to the next
clip on that track. For this reason, shuffle edits work best on tracks containing the
majority of clips in your edit.
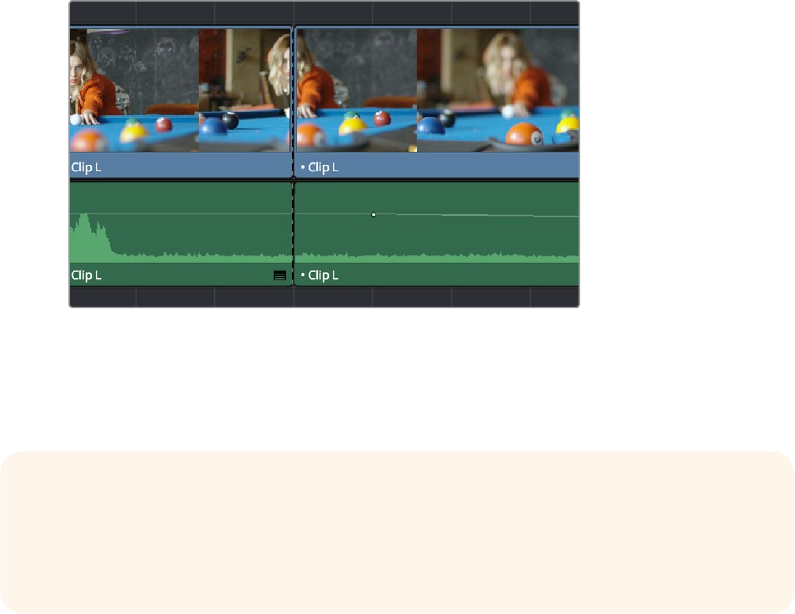
359
Modifying Clips in the Timeline Part 3 – 18
Splitting and Joining Clips
In many situations you may find yourself splitting clips in order to separate multiple clips that
were inadvertently baked together, or to cut up clips into sections that you’re planning on
applying different effects to or grading differently.
Methods of splitting and joining clips:
To split a clip once: Drag the playhead to the frame where you want to split a clip, and
press Command-Backslash (\) to split every clip on a track with Auto Select enabled.
To split many clips: Click the Razor Edit mode button (or press B), and then click clips in
the Timeline to split as many clips as you want.
To split clips using the DaVinci control panel on the Color page: Move the playhead to
the frame you want to split, then press SHIFT UP and SPLIT/UNDO on the T-bar panel.
To join clips using the DaVinci control panel on the Color page: Move the playhead to
the edit point you want to join, and press SHIFT UP and JOIN/REDO on the T-bar panel.
Both clips must be from the same media file, and the frames to either side of the edit
point need to be continuous for those clips to be joined.
When you split a clip, a through edit appears to show that you currently have an edit with
continuous timecode running from the outgoing to the incoming half. This is called a Through
Edit, and is displayed with a dotted line running along its edge so you know that it’s special.
A through edit seen in the Timeline
To eliminate a through edit:
Select it in the Timeline, and press Delete.
TIP: You can show an isolated list of every Through Edit in the Timeline by opening the
Edit Index and choosing “Show Through Edits Only” in the Edit Index Option menu.
Clicking any item in the list jumps the playhead to that Through Edit, making it easy to
check all the Through Edits in a timeline to see if they’re necessary or not.
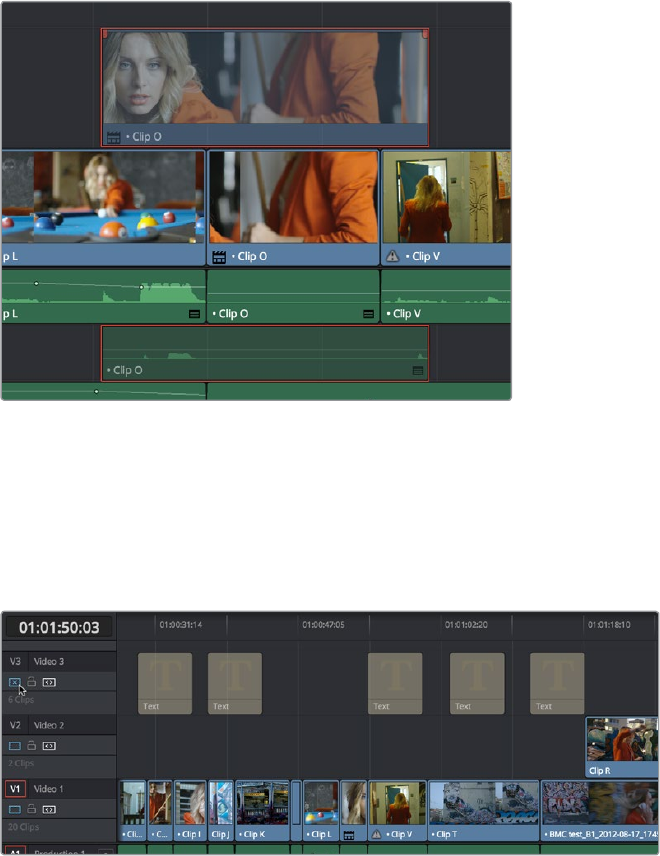
360
Modifying Clips in the Timeline Part 3 – 18
Enabling and Disabling Clips and Tracks
As you work in the Timeline, you’ll find there are times when you want to disable clips that you
don’t want to appear during playback, without actually removing them from the edit. For
example, you may decide to disable superimposed clips that are positioned as insert shots in
the middle of a scene because of a client’s notes, but you don’t want to eliminate the clips
because they might change their minds.
A disabled clip on track V2
In another example, you’ve edited a series of titles on track V3, so you need to disable track V3
in its entirety to output a textless version of the movie as a deliverable.
When a clip or track is disabled, clips within it appear dimmed, and these disabled clips don’t
appear in the Color page, and aren’t output to tape or rendered to disk in the Deliver page until
that track is re-enabled first.
Track V3 is disabled, making the Timeline textless as a result
To disable/enable one or more clips in the Timeline:
Select one or more clips, then right-click the selection and check or uncheck Clip
Enable in the contextual menu, or press D to toggle a clip’s enabled state.
To disable/enable an entire track:
Click the track enable button.
361
Modifying Clips in the Timeline Part 3 – 18
Copying and Pasting Clips
in the Timeline
Clips can be cut, copied, and pasted in a variety of ways using standard keyboard shortcuts.
You can cut or copy one clip or a selection of several, and you can also choose to copy or cut
just the video or audio media of a clip. When pasting, you can paste to the same timeline, or to
a different timeline if you want to move media from one to another.
Methods of doing simple cut, copy, and paste:
To Cut one or more clips, leaving a gap: Make a selection, and choose Edit > Cut
(Command-X). The selected clip or clips are removed from the Timeline and stored in
memory for pasting.
To Ripple Cut one or more clips and ripple the Timeline to close the gap: Make a
selection, and choose Edit > Ripple Cut (Command-Shift-X). The selected clip or clips
are removed from the Timeline and stored in memory for pasting. All clips on tracks
with Auto Select enabled will be rippled to the left to fill the gap left by the cut clips.
To Copy one or more clips: Make a selection, and choose Edit > Copy (Command-C).
The selected clip or clips are left in the Timeline, but copies are stored in memory
for pasting.
To Paste one or more clips to the same track: Move the playhead to the frame where
you want the pasted selection to start, and then choose Edit > Paste (Command-V). By
default, each copied clip is pasted onto the same track it was copied from. Pasted clips
overwrite any clips in that track that are in the way.
To Paste one or more clips to a different track: Pasting clips to a different track
requires a slightly different procedure. Move the playhead to the frame where you want
the pasted selection to start, then either Option-click any empty area on the track you
want to paste the clip(s) to or Option-click the Auto Select control of that track to solo
that track, and then choose Edit > Paste (Command-V). Pasted clips overwrite any clips
in that track that are in the way.
Paste Insert
Another paste command, Edit > Paste Insert (Command-Shift-V), lets you paste clips that you cut
or copied via an Insert Edit, so that an edit is added at the position of the playhead to clips that
are already in the Timeline, and all media to the right of the playhead is rippled farther right to
make room for the clip or clips being pasted. As with all other ripple edits, only clips on tracks
with their auto select control turned on are affected.
Copying and Pasting Partial Clip
Segments Using In and Out Points
You can use the Timeline’s In and Out points to cut and copy partial segments of longer clips in
various ways. This is a valuable technique for doing in-depth audio and dialog editing, although
it’s useful for copying partial segments of any kind of clip in the Timeline.
To Cut or Copy part of a clip to Paste elsewhere:
1 Set In and Out points to isolate the part of the clip you want to cut or copy. You can
use the Auto Select controls to include or omit clip segments on specific tracks while
you do this.
362
Modifying Clips in the Timeline Part 3 – 18
2 Press Command-X to cut or Command-C to copy that clip segment.
3 Clear the In and Out points by pressing Option-X. Otherwise, you’ll paste the clip
segment right back into the same place it started.
4 Move the playhead to the frame of the Timeline you want the pasted clip to start, and
use the Paste or Paste Insert commands to paste the clip segment there.
You can also use In and Out points to paste only a partial segment of a much longer clip that
you’ve cut or copied.
To Paste only part of a clip:
1 Select a clip, and press Command-X to cut or Command-C to copy that clip.
2 Set In and Out points to identify the region of the Timeline you want to paste into.
3 Use the Paste or Paste Insert commands to paste only as much of the Cut or Copied
clip as will fit between the In and Out points you’ve placed.
Copying and Pasting Clips to a Different Track
If all Auto Select controls on all tracks are turned on, clips are always pasted back to the same
track they were copied from, starting at the position of the playhead. This is valuable for the
many instances where you’ll find yourself copying and pasting clips you want to repeat,
especially when doing audio editing.
However, if you want to paste the clips you cut or copied to a different track entirely, you need
to use the Auto Select controls to specify which track you want to paste to. Here are the rules:
You can force paste what you copied to a specific track by Option-clicking that track’s
Auto Select control to solo it before pasting. Another way to do this is to Option-click
any empty area of the track you want to Auto Select solo.
When one or more Auto Select controls are disabled, then clips are pasted to the
lowest-numbered track with an enabled Auto Select control.
If you’ve copied clips on multiple tracks, clips on the lowest copied track will be pasted
to the lowest Auto Select enabled track, and all other clips will be pasted to higher
tracks, with new tracks automatically created, if necessary.
If Auto Select is disabled on every single track, then a new track will be created above
all other video tracks and/or below all other audio tracks, and the clip will be pasted
into this new track, which has Auto Select turned on.
Audio Channels When Copying and Pasting Audio Clips
Copying and pasting audio has one other consideration. If you’re force pasting a clip into a
different track, the track you solo the Auto Select control of could possibly be set to an audio
channel mapping that doesn’t match the clips you’re pasting there. An example of when this
would happen is if you copy stereo audio clips from a stereo track and paste them to a mono
audio track.
DaVinci Resolve allows you to do this, so you have the freedom of pasting audio clips to any
track you want to. However, extra audio channels within clips that exceed the number of
channels supported by the audio track they’re on will be muted. Fortunately, this situation is
easy to rectify. Simply right-click the track header of the problem audio track, and use the
Change Track Type To submenu to change its channel mapping to one more appropriate to the
clips you’ve pasted into it.
363
Modifying Clips in the Timeline Part 3 – 18
Duplicating Clips and
Transitions in the Timeline
One or more clips can be duplicated by making a selection, and then Option-dragging the
selected clips to another position and/or track in the Timeline. When duplicating clips in this
way, you must hold the Option key down until you release the mouse button.
Individual selected transitions can also be duplicated by Option-dragging them to another
edit point.
365
Three and Four Point Editing Part 3 – 19
Three and Four Point Editing
A more controlled form of editing is to use three and four point editing to make a specific range
of source media fit into a specific range of the Timeline. This chapter covers the basics of three
and four point editing, as well as the wide variety of edit commands that are available.
This chapter covers the following topics:
Introduction to Three-Point Editing 366
Choosing a Track to Edit to Using Destination Controls 366
Setting In and Out Points in the Timeline 367
Mark Clip and Mark Current Selection 368
Preview Marks During Three-Point Editing 370
Dragging Preview Marks to Change an Edit 371
The Rules of Three Point Editing 371
Editing Rules for Split In and Out Points 373
Editing a Specific Range of the Source Clip Into the Timeline 373
Editing Part of a Source Clip to Fit Into a Specific Range of the Timeline 374
Backtiming a Source Clip When Editing Into the Timeline 375
Switch Focus to Timeline After Edit 377
Different Types of Three and Four Point Edits 377
Overwrite Edits 377
Insert Edits 378
Replace Edits 379
Fit to Fill 382
Place On Top 383
Ripple Overwrite 384
Append at End 387
Insert Selected Clips to Timeline with Handles 387
Three Point Editing From the Media Pool 388
Example: Assembling Clips Into the Timeline From the Media Pool 388
366
Three and Four Point Editing Part 3 – 19
Introduction to Three-Point Editing
Three-point editing is a standard editorial method that’s shared with many other postproduction
applications, so this procedure should feel familiar. The idea is that you need only set any
combination of three In and Out points in the source clip and Timeline to edit a clip into your
program at a specific time, and DaVinci Resolve automatically figures out the fourth edit point
that’s necessary to execute the edit. Three-point editing is most commonly accomplished using
Overwrite and Insert edits.
Choosing a Track to Edit to Using
Destination Controls
The orange destination controls, found in the Timeline header area, let you specify which video
and audio tracks you want incoming source clips to be edited to when you use editing methods
other then drag and drop. No matter how many video or audio channels may be embedded
within a single clip of media, only one video and one audio destination control is available. In
the case of video, you can only expose one video channel of a clip at a time. In the case of
audio, all audio channels for a given clip are embedded within a single Timeline track, making it
a snap to edit stereo or other multi-channel audio sources together. (For more information
about working with audio, see Chapter 25, “Working with Audio in the Edit Page.”)
Setting the destination control of a track is a vital step in the process of creating an edit, and is
easy to do. You can set the video and audio destination controls to be separate tracks.
To set the destination tracks of incoming source clips, do one of the following:
Click the destination control of any unassigned track to enable that track as the
destination.
Drag the destination control to any unassigned track in the Timeline.
Press Command-Option Up Arrow and Down Arrow to move the Video Destination
control up and down among different video tracks, or press Command-Shift Up Arrow
and Down Arrow to move the Audio Destination control up and down among different
audio tracks.
Press Option-1 through 8 to set a video destination, or press Option-Command-1
through 8 to set an audio destination on tracks 1 through 8.
Moving the destination control to
track V2, labeled “Titles”
You can also disable the Video or Audio Destination controls in situations where you want to
edit a source video clip into the Timeline without its audio, or vice versa.
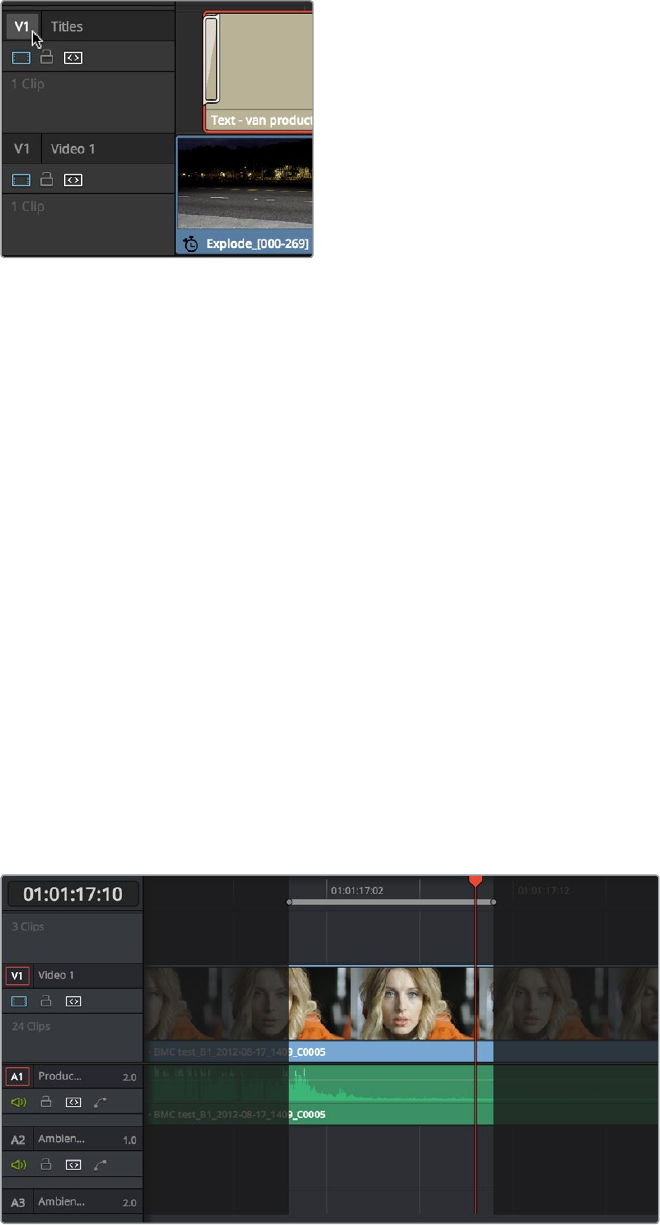
367
Three and Four Point Editing Part 3 – 19
To disable or reenable a destination control, do one of the following:
Click an already assigned destination control to toggle it off and then on again.
Disabled destination controls are highlighted white.
A disabled destination control
Setting In and Out Points in the Timeline
When you’re setting up an edit to the Timeline, you can oftentimes get away with simply putting
the Timeline playhead at the frame where you want to edit the incoming source clip. In the
absence of In or Out points, the playhead is used as the In point. However, you can set up
different kinds of edits by setting specific In and Out points to define different ranges of
the Timeline.
Methods of setting and clearing In and Out points in the Timeline:
To set an In or Out point: Select the Timeline or Timeline Viewer by clicking or
pressing the Q key, then use the transport controls, jog bar, or control panel buttons
to move the playhead, and press the I key to set an In point, or the O key to set an
Out point.
To clear In or Out points: With the Timeline Viewer selected, press Option-I to clear the
current In point, or Option-O to clear the current Out point.
To clear both the In and Out points at once: Press Option-X.
To jump the playhead to the current In or Out points: Press Shift-I to immediately
move the playhead to the current In point, or Shift-O to move the playhead to the
current Out point.
In and Out points shown in the Timeline, with unmarked areas outside the selection dimmed
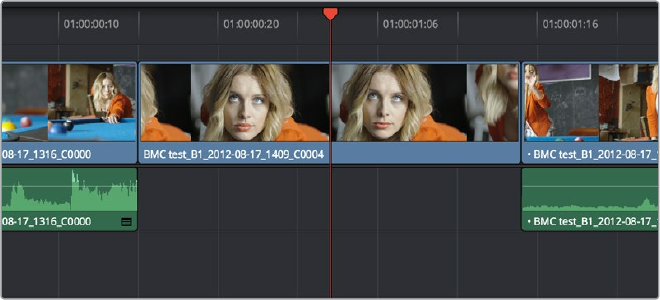
368
Three and Four Point Editing Part 3 – 19
Methods of moving In and Out points in the Timeline:
Press the I or O keys at any time to change the In or Out points.
Drag any In or Out point in the Timeline ruler to another position.
The area of the Timeline outside the region that’s currently defined by In and Out points is
dimmed, to call attention to the portion of the Timeline that will be affected by the next edit
you’ll make.
Mark Clip and Mark Current Selection
These commands are automatic ways of setting In and Out points in the Timeline both at once,
using the timing of other clips. They’re both exceptionally handy for defining the range of an
incoming edit using clips that are already in the Timeline that you want to replace, or gaps in the
Timeline that you want to fill.
In short, Mark Clip uses the first and last frame of a target clip or gap in the Timeline to
automatically set Timeline In and Out points for editing. For example, if there’s a shot in an edit
that you want to replace with a different take of the same action, or there’s a gap in a sequence
of clips that you’d like to quickly fill with b-roll, you can use the Mark Clip command to help
set this up.
Mark Current Selection uses the first and last frames of a range of selected clips to
automatically set Timeline In and Out points for editing. A good example is when you have a
series of clips in the Timeline, all of which you’d like to overwrite with a single incoming source
clip, you can use the Mark Current Selection command.
To use Mark Clip:
1 Move the playhead to intersect either a clip you want to use to set In and Out points, or
a gap (empty area) between two other clips that you want to target. The playhead can
be on any frame of this clip, it doesn’t matter which.
Positioning the playhead at a clip you want to mark
2 If there are other clips on a multi-track timeline that overlap the clip you’re targeting
for this operation, then the clip on the lowest video track will be used as the target
to set the In and Out points. If you want to target a clip on a higher track, then either
disable the Auto Selection controls of all timelines underneath, or Option-Click the Auto
Selection control of the track with the clip you’re targeting to solo it, which will force that
track to be the target of this operation.
3 Press the X key to automatically set In and Out points that match the first and last
frames of the target clip.
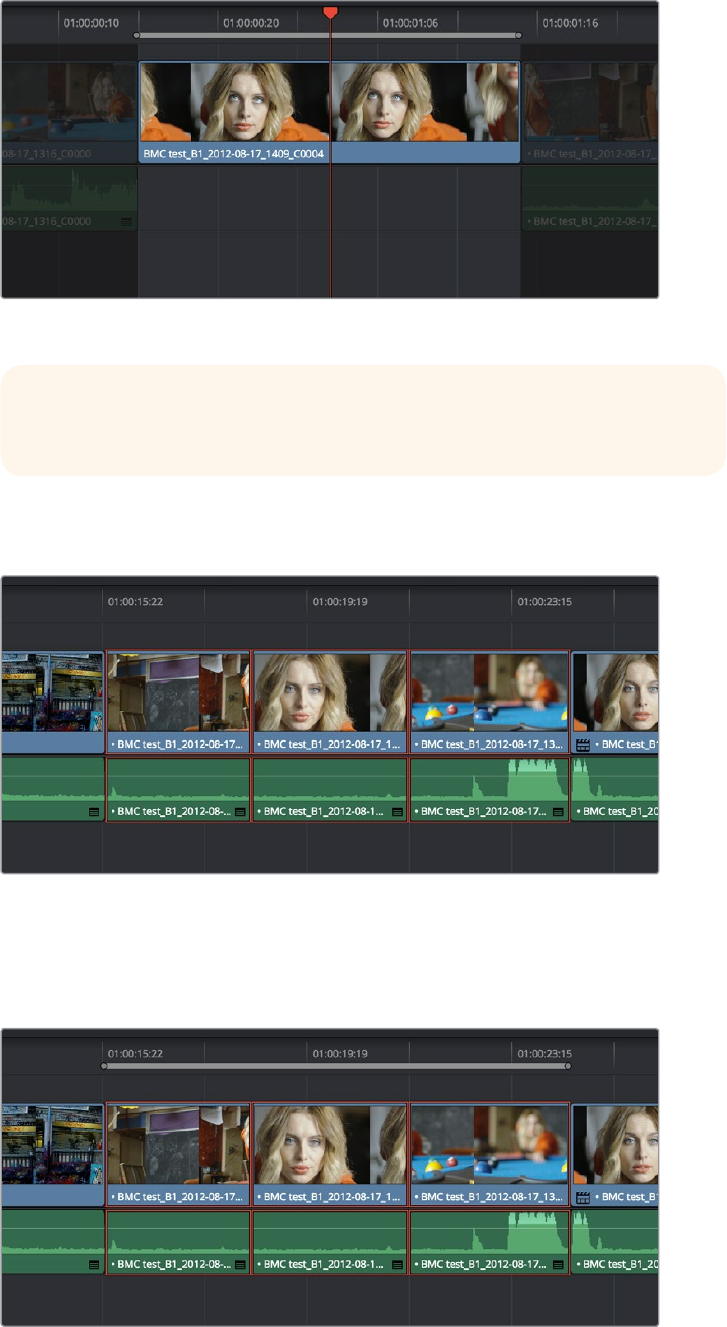
369
Three and Four Point Editing Part 3 – 19
Using Mark clip to set In and Out points that match a clip’s duration
To use Mark Selection:
1 Select one or more clips in the Timeline.
Selecting clips you want to use as a range to mark In and Out points
2 Press Shift-A to automatically set In and Out points that match the first and last frames
of the selection. A range of discontinuous clips will produce the same result as a range
of continuous clips.
Marking a selection to set In and Out points
TIP: To clear both In and Out points, press Option-X, which is the opposite of
this command.
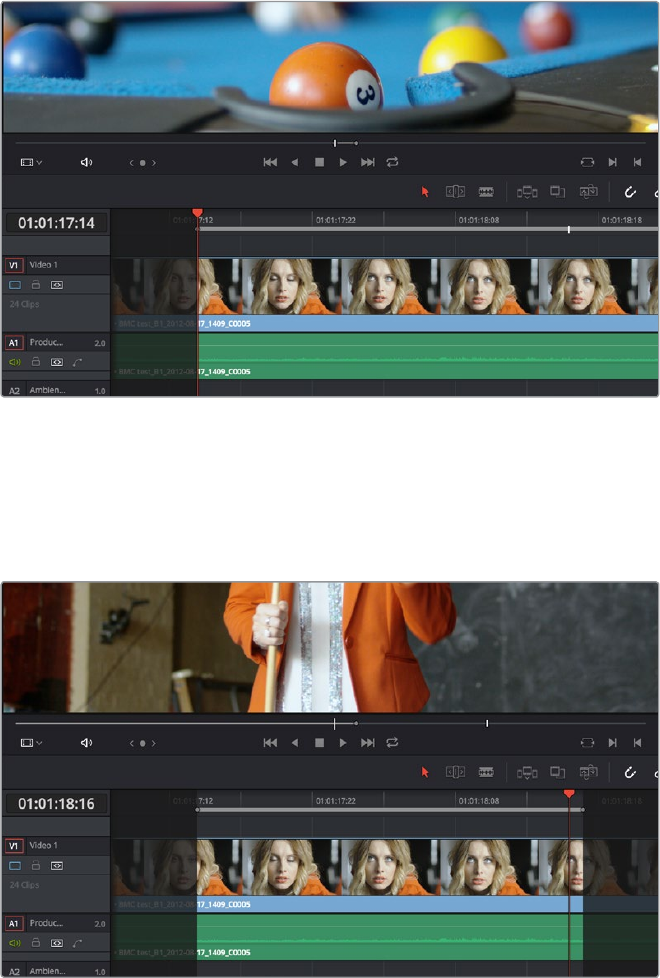
370
Three and Four Point Editing Part 3 – 19
Preview Marks During Three-Point Editing
In order to help you see what will happen whenever you execute a three-point edit, preview
marks appear in either the Source Viewer or the Timeline Ruler to let you know the exact
duration of the Timeline that’s about to be affected by the edit you’re preparing to make. To
prevent them from being a distraction, preview marks only appear once you’ve explicitly
marked three edit points in the Source Viewer and Timeline, and they can be turned on and off
by choosing View > Show Preview Marks.
For example, if you set In and Out points in the Source Viewer, and an In point in the Timeline,
then a preview marker will appear in the Timeline Ruler to show the implied Out point in the
Timeline of the edit you’re about to make.
A preview marker in the Timeline shows the Timeline Out point being automatically
calculated by DaVinci Resolve based on the In and Out points that are set in the Viewer,
and the In point in the Timeline
On the other hand, if you set both In and Out points in the Timeline, and only an Out point in the
Source Viewer, a preview marker appears in the jog bar of the Source Viewer to show you the
implied In point, in the Source Viewer, of the edit you’re about to make.
A preview marker in the Source Viewer shows the Source Viewer In point being
automatically calculated by DaVinci Resolve based on the In and Out points that are set in
the Timeline, and the In point in the Source Viewer
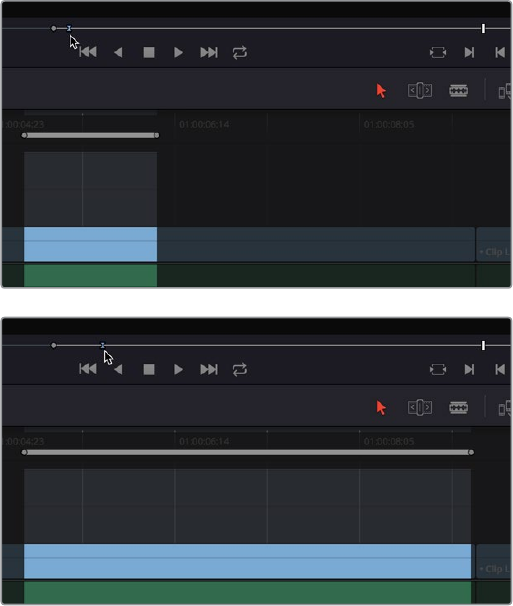
371
Three and Four Point Editing Part 3 – 19
If you like, you can move the playhead to the position of the preview mark by using Shift-I if the
preview mark is an In point, or Shift-O if the preview marker is an Out point.
Dragging Preview Marks to Change an Edit
You can drag preview marks to alter the edit you’re about to make. When you drag a preview
mark, the corresponding In or Out point that’s opposite the Viewer with focus is altered to
accommodate the new three point edit you’re setting up. For example, if you have an In point in
the Source Viewer, and In and Out points set in the Timeline, a preview mark appears in the
Source Viewer to show the Out point that will be used to edit the clip in the Source Viewer into
the Timeline. However, you can drag this preview mark to the left in the Source Viewer, and the
result will be that the Out point in the Timeline will move along with it, since you’re
retiming the edit.
Dragging a preview mark in the Source Viewer changes
the opposite edit point in the Timeline
The Rules of Three Point Editing
In the previous examples, three point editing was being used by virtue of source In and Out
points being set to define a range of the source clip to be edited into the Timeline, and the
Timeline playhead being used as the acting Timeline In point; three points defined the edit to
be made. However, three point editing is also very useful when you need to overwrite sections
of a previously edited timeline with new source clips in a controlled manner, such as when
adding an insert shot to a scene to cover a particular change you’re making that would
breakcontinuity.
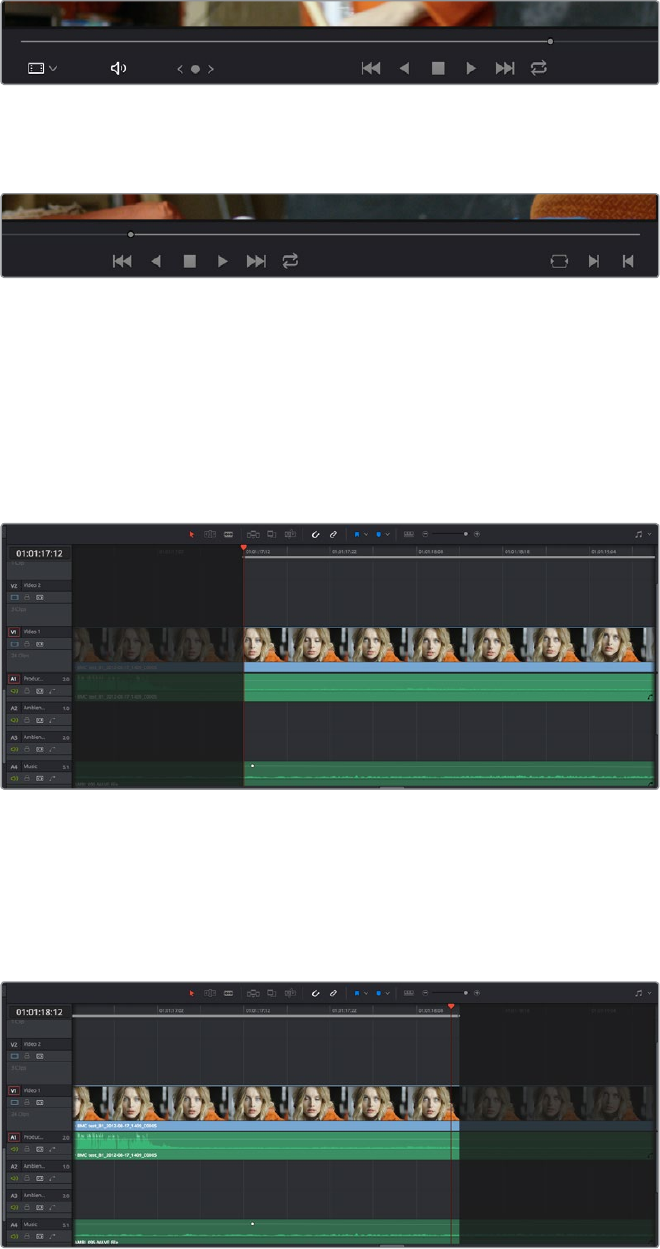
372
Three and Four Point Editing Part 3 – 19
Depending on the combination of Source and Timeline In and Out points you set, the following
rules govern three-point editing:
If there is no In point in the source clip: The first frame of media will be used as the
acting source In point. This can be seen by the thick bar that extends to the left of the
Out point in the Source Viewer’s jog bar.
If there is no Out point in the source clip: The last frame of media will used as the
acting source Out point. This can be seen by the thick bar that extends to the right of
the In point in the Source Viewer’s jog bar.
A thick bar indicates which part of the source clip
will be used in the absence of a Source Out point
If there are no In or Out points in the Timeline: The playhead will be used as the
acting Timeline In point.
If you set a Timeline In point but no Timeline Out point: The whole range from the In
to Out points of the source clip is edited into the Timeline such that the Source In point
is aligned with the Timeline In point. This can be seen by the thick bar that extends to
the right of the In point in the Timeline Ruler.
A thick bar indicates where the Source clip will be
edited in the absence of a Timeline Out point
If you set a Timeline Out point but no Timeline In point: The incoming source clip
will be backtimed so the Out point of the source clip is aligned with the Timeline Out
point. This can be seen by the thick bar that extends to the left of the Out point in the
Timeline Ruler.
A thick bar indicates a backtimed edit in the absence of a Timeline In point
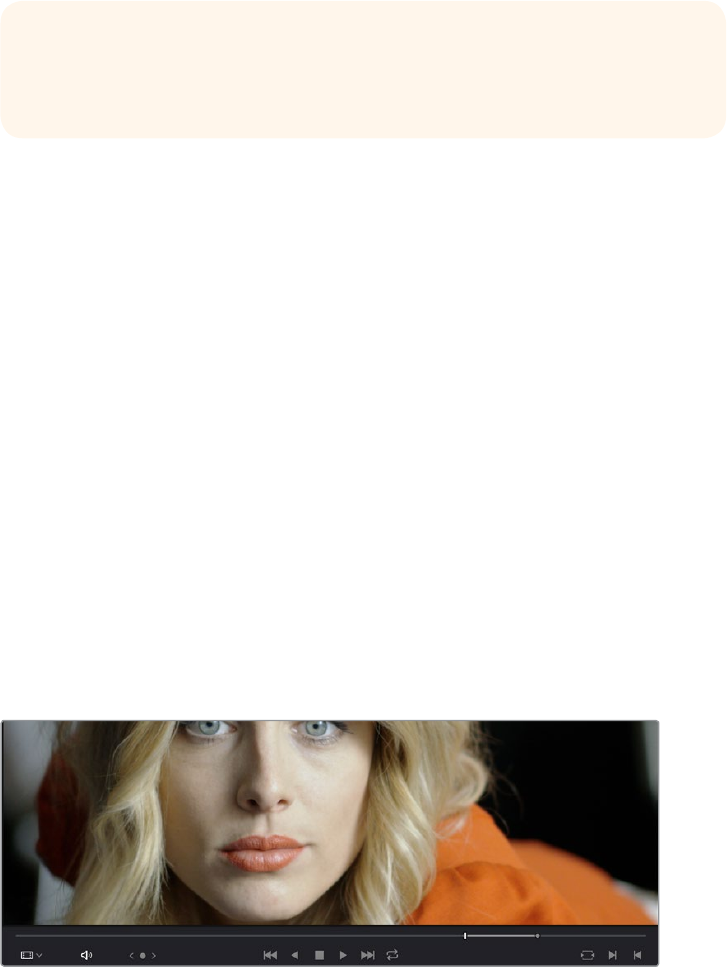
373
Three and Four Point Editing Part 3 – 19
If you set Timeline In and Out points but only a Source Out point: In this case, the
incoming source clip will also be backtimed so the Out point of the source clip is
aligned with the Timeline Out point, with the Timeline edit points defining the duration
of the source clip being edited.
If you set all four Source In and Out and Timeline In and Out edit points: The Timeline
edit points dictate the duration of source clip that is edited into the Timeline, and the
frame at the Source In point is aligned with the Timeline In point, unless you perform a
Fit to Fill or Ripple Overwrite edit, both of which can be done as four point edits.
Editing Rules for Split In and Out Points
If you’ve created split In and Out points in the Source Viewer or Timeline, the following
rules apply:
If the Source Viewer has split In and Out Points: The leftmost split point of the
incoming clip, whether video or audio, will be aligned with the playhead when the clip is
edited; the other split point will be offset to the right.
If the Timeline has split In and Out Points: The In point of the incoming clip will be
aligned with the left-most split point, whether video or audio; the accompanying audio
or video In point will be offset to the split point to the right.
Editing a Specific Range of the
Source Clip Into the Timeline
This section provides some common examples of three-point editing when performing edits in
the middle of a previously edited timeline. In the following example, you have a specific range
of source media that you need to edit into the Timeline, and you don’t particularly care what
gets overwritten in the Timeline by the incoming clip.
1 Set In and Out points in a source clip, either in the Media Pool or in the Source Viewer.
Setting source clip In and Out points
2 To set where you want the incoming clip to go, set the destination control to the tracks
you want to edit onto, and then do one of the following:
Move the Timeline playhead to the frame you want to use as the Timeline In point
for the edit.
Set a Timeline In point for the edit.
TIP: If you want to use all four Source and Timeline edit points to retime a
source clip to fit into a specific range of the Timeline, use a Fit-to-Fill edit
instead of an Overwrite edit.
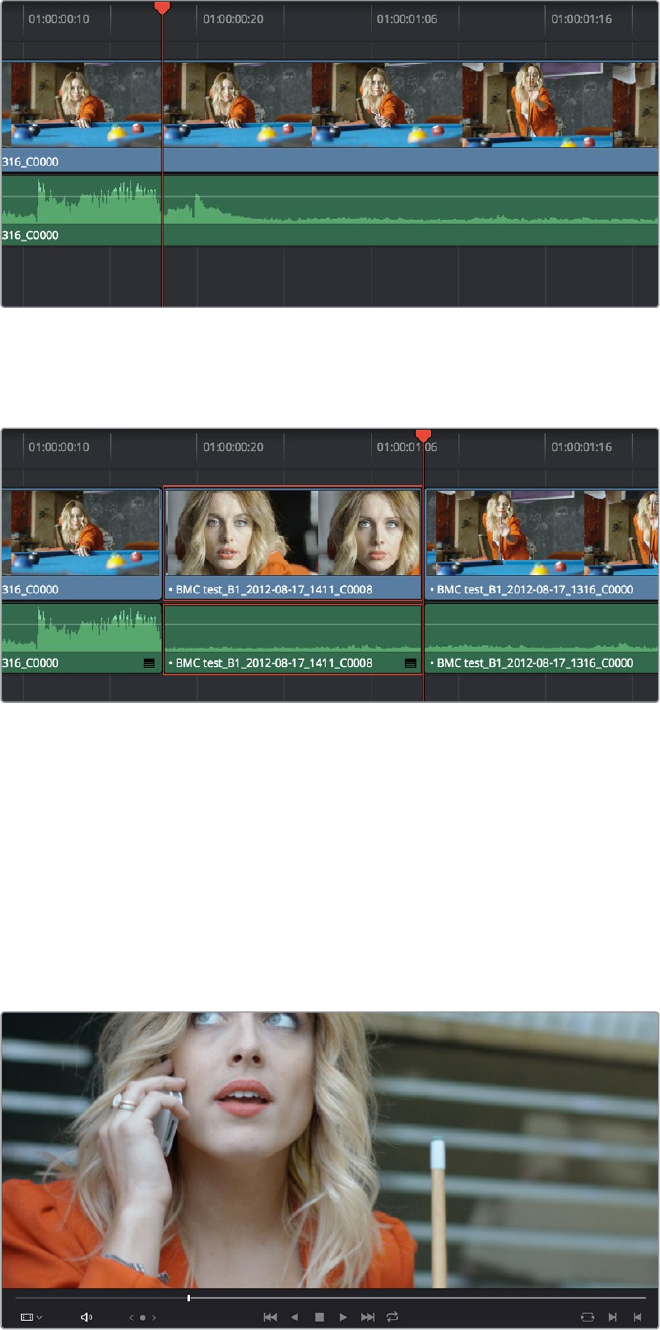
374
Three and Four Point Editing Part 3 – 19
Setting a Timeline In point
3 To make the edit, click the Overwrite Clip button in the toolbar, press the F10 key, or
drag a clip onto the appropriate overlay in the Timeline Viewer.
The resulting edit; the duration of the source clip defines the duration of the edit
Editing Part of a Source Clip to Fit Into a
Specific Range of the Timeline
In this example, you have a section of a clip or a gap in the edited sequence of clips in the
Timeline that you want to fill with as much of the current source clip as it will take to “plug
the hole.”
1 Set an In point in the source clip, if necessary, to define the first frame of the range of
source media that you want to edit into the Timeline.
Setting a source clip In point only
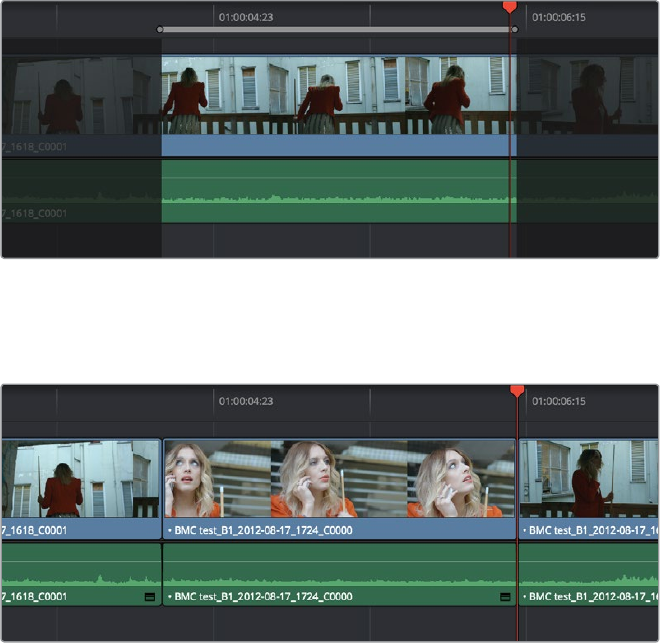
375
Three and Four Point Editing Part 3 – 19
2 Set In and Out points in the Timeline to set both where you want the incoming clip to
go, and how much of the incoming clip you want to use.
Setting both In and Out points of the Timeline for a gap
3 To make the edit, click the Overwrite Clip button in the toolbar, press the F10 key, or
drag a clip onto the appropriate overlay in the Timeline Viewer.
The resulting edit; the duration of the Timeline edit points
define how much of the source clip is edited
Backtiming a Source Clip When Editing Into the Timeline
In this last example, you’ve got a specific moment in the second half of a source clip that you
need to align with an Out point in the Timeline, such that the remaining duration of the incoming
clip overwrites the edited sequence of clips from the right to the left. This is referred to as
backtiming, when you’re lining up a Source Out point with a Timeline Out point in order to make
an edit, and can be set up one of two ways.
Backtiming method one:
1 Set In and Out points in the source clip, either in the Media Pool or in the
Source Viewer.
2 Set an Out point in the Timeline, at the frame where you want the corresponding
Outpoint of the incoming source clip to be aligned.
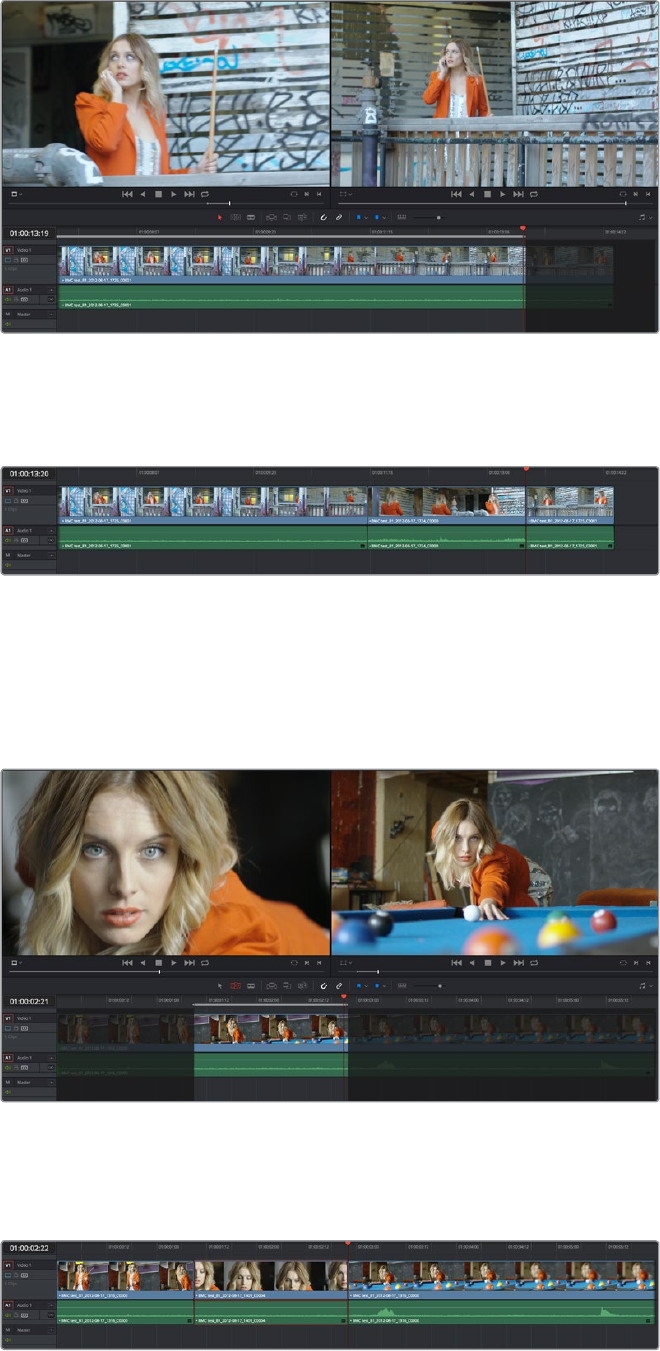
376
Three and Four Point Editing Part 3 – 19
Setting up a backtimed match-on-action edit via In and Out points
in the Source Viewer, and only an Out point in the Timeline
3 To make the edit, click the Overwrite Clip button in the toolbar, press the F10 key, or
drag a clip onto the overwrite overlay in the Timeline Viewer.
The resulting edit, aligning the Out point of the source clip with the Out point of the Timeline
Backtiming method two:
1 Set an Out point in the source clip, either in the Media Pool or in the Source Viewer.
2 Set In and Out points in the Timeline to set both where you want the incoming clip to
go, and how much of the incoming clip you want to use.
Setting up a backtimed edit by setting an Out point in the Source Viewer,
and In and Out points in the Timeline to define the duration of the edit
To make the edit, click the Overwrite Clip button in the toolbar, press the F10 key, or
drag a clip onto the appropriate overlay in the Timeline Viewer.
The resulting edit, aligning the Out point of the source clip with the Out point of the Timeline
377
Three and Four Point Editing Part 3 – 19
Switch Focus to Timeline After Edit
A setting in the Edit menu, “Switch focus to timeline after edit,” lets you set whether or not
DaVinci Resolve changes the application focus from the Source Viewer to the Timeline Viewer/
Timeline every time you make an edit. This setting is on by default.
For example, if you’re assembling clips from many different source files into the Timeline, and
trimming the results as you go, leaving this option on may save you time. In this case, after
every edit, the focus switches from the Source Viewer to the Timeline, so you can quickly select
the clip or edit point you want to trim and make your adjustments before loading the next clip
into the Source Viewer in preparation for the next edit.
On the other hand, if you’re editing several pieces from a long interview clip into the Timeline,
you may want to turn this setting off to make it easy to continue playing forward in the Source
Viewer, setting In and Out points and editing clips into the Timeline as you go. After every edit,
focus remains on the Source Viewer, so you can continue making edits from the same source
clip without interruption.
Different Types of Three
and Four Point Edits
This section covers the different types of edits that are available for cutting source clips into the
currently open Timeline.
Overwrite Edits
The most common type of edit you’ll make, an overwrite edit eliminates whatever media was in
the Timeline previously with the incoming source clip taking the place of whatever was there.
Overwrite edits are commonly used when initially assembling clips, or doing three-point editing.
Overwrite edits do not ripple the Timeline.
To overwrite one or more clips in the Timeline:
1 Move the playhead to the frame of the Timeline where you want to insert a clip.
2 Click the appropriate audio and video destination controls of the tracks you want to edit
the incoming source clip onto. If necessary, create new tracks.
3 Select a single clip in the Media Pool to open it into the Source Viewer, then set In and
Out points to define the range of media you want to insert.
4 To make the edit, choose Edit > Overwrite, click the Overwrite Clip button in the toolbar,
press the F10 key, or drag a clip onto the Overwrite overlay in the Timeline Viewer.
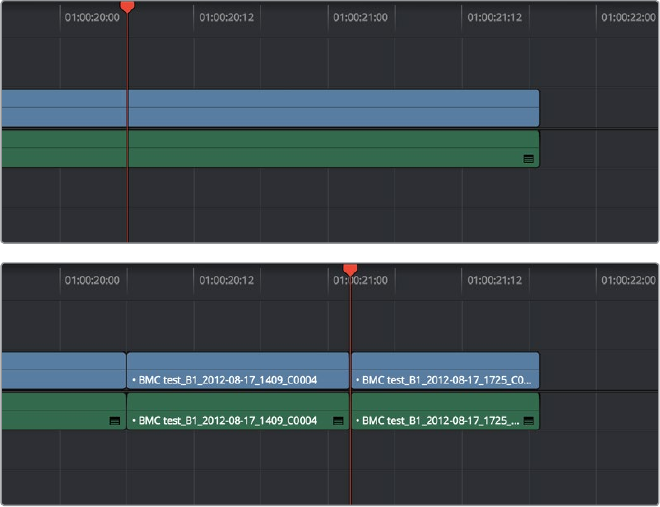
378
Three and Four Point Editing Part 3 – 19
Before and after an overwrite edit, the Timeline duration stays the same
The selected clips in the Media Pool are overwrite edited to the selected track starting
at the position of the playhead, eliminating whatever was there originally while adding
incoming clip. No other clips are rippled during this operation.
Insert Edits
An insert edit splits whatever media is already in the Timeline at the position of the playhead,
and pushes that media to the right to make room for the incoming clip.
Insert edits have the effect of rippling almost all clips in the Timeline that are to the right of the
Insert Edit point you’re making, pushing them further to the right by the duration of the incoming
source clip. However, clips in any tracks of the Timeline that overlap to the left of the Insert Edit
point aren’t rippled, and remain in place.
For example, if you’re insert editing a clip into the middle of a sequence of clips in track V1 and
A1 of the Timeline, and there’s also a clip of music edited into track A2 that overlaps well to the
left of the insert edit point, the music clip remains where it is, but the other clips on track V1 and
A1 that are to the right of your edit point on are pushed to the right.
To insert edit one or more clips into the Timeline:
1 Move the playhead to the frame of the Timeline where you want to insert a clip.
2 Click the appropriate audio and video destination controls of the tracks you want to edit
the incoming source clip onto. If necessary, create new tracks.
3 If necessary, set In and Out points in the clip or clips you want to insert edit into the
Timeline using the controls of the Media Pool or the Source Viewer.
4 Do one of the following:
Select one or more clips in the Media Pool, right-click one of the selected clips, and
choose “Insert Selected Clips to Timeline.”
Choose Edit > Insert, click the Insert Edit button in the toolbar, press the F9 key, or
drag any clip onto the Insert overlay in the Timeline Viewer.
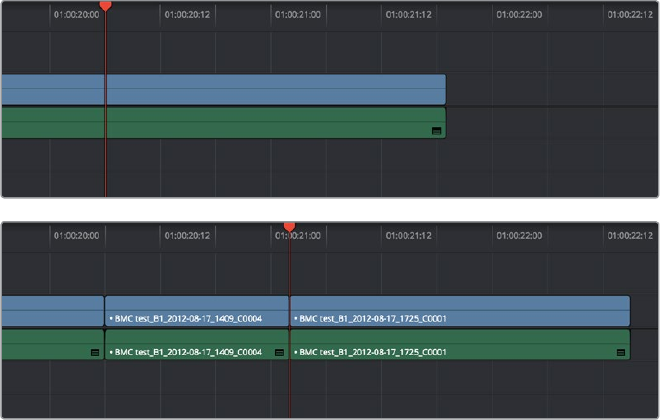
379
Three and Four Point Editing Part 3 – 19
The selected clips are insert edited to the selected track at the position of the
playhead, pushing all other media in the destination track back by the total duration of
the selected clips, except for clips on other tracks that overlap to the left of the edit
point (as seen by the overlapping music clip in the example below).
Before and after an overwrite edit, the Timeline gets longer as non-
overlapping clips to the left of the edit point are rippled to the right
Replace Edits
Replace edits are a unique three-point edit type that aligns the frame at the Source Viewer
playhead with the frame at the Timeline playhead when the edit is executed. This is the fastest edit
type to use when you need to align an action at a specific frame of video, or a sound at a specific
frame of audio, to a particular frame’s action or sound in the video or audio of the Timeline.
The fastest way of using the Replace Edit is to not bother setting either In or Out points in the
Source Viewer, and to either use the duration of an existing clip intersecting the Timeline to
define the edit, or a pair of timeline In/Out points specifying either a section of a clip you want
to overwrite, or an empty section of the Timeline to which you want to edit.
Replace edits do not ripple the Timeline.
Replace Edits to Replace Existing Clips in the Timeline
A replace edit automatically replaces an existing clip in the Timeline with a clip in the Source
Viewer, so long as that clip overlaps the playhead and is on a track with its destination control
enabled. When you make a Replace edit in this way, DaVinci Resolve automatically uses the
duration of the Timeline clip to define the duration of the incoming media, and the positions of
the Viewer and Timeline playheads to line up how the incoming media should be placed. This is
an extremely fast edit to make, since you needn’t use any In or Out points at all.
To replace a clip in the Timeline:
1 Move the playhead in the Timeline to the clip that you want to replace, and align it with
a frame that you want to line up with a frame in the clip you’ll be replace editing into
the Timeline.
2 Click the appropriate audio and video destination controls of the track containing the
clip you want to replace.
3 Open a clip into the Source Viewer.
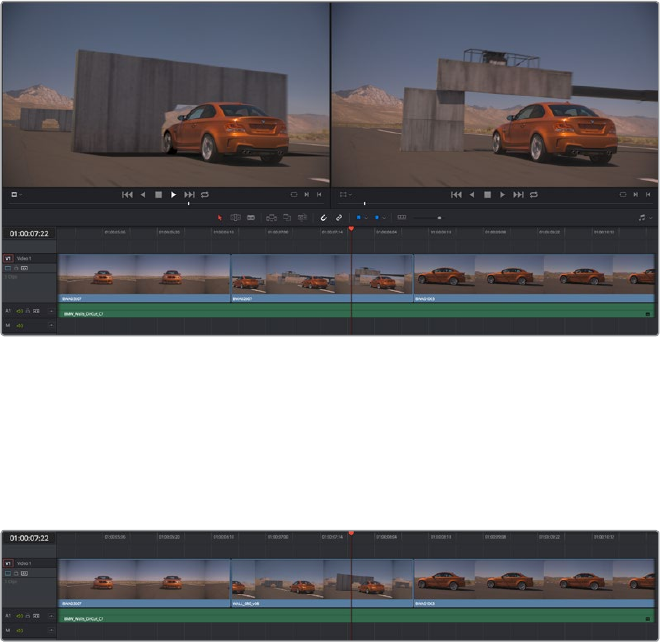
380
Three and Four Point Editing Part 3 – 19
4 Move the playhead in the Source Viewer to the frame that you want to line up with the
frame at the position of the playhead in the Timeline.
In the example shown below, the original clip that was shot on location of a car driving
past a slab of real concrete (shown in the Timeline Viewer at right) is going to be replaced
by a VFX shot of a concrete wall with a small hole for the car to drive through (shown in
the Source Viewer at left). The playhead in the Source Viewer is aligned on the very
same frame as the playhead in the Timeline Viewer, which can be seen by the identical
position of the white stripe on the road in the lower right-hand corner of the picture.
In the Source Viewer to the Left is a VFX clip we want to edit into the Timeline to
replace the existing Timeline clip, shown in the Timeline Viewer at Right
5 Now that the playheads are aligned on the frames that must match one another in
both the Source and Timeline Viewers, choose Edit > Replace, click the Replace
Clip button in the toolbar, press F11, or drag any clip onto the Replace overlay in the
Timeline Viewer.
The resulting replace edit, in which the original timeline clip is replaced by the
incoming Source Viewer clip by aligning the frames at each playhead
The camera original clip in the Timeline is now replaced with the VFX source clip from the
Media Pool, with the source frame at the Source Viewer playhead aligned with the frame at the
Timeline playhead.
Replace Edits to Edit Clips Into Empty Tracks
You can also use a replace edit to edit a clip into an empty track of the Timeline so that the
frame at the position of the Source playhead is aligned with the Timeline playhead, and the In
and Out points of the incoming clip fall where they may. This is useful when you want to “spot” a
particular action of an alternate take or a cue in a sound effect to a specific frame of
the Timeline.
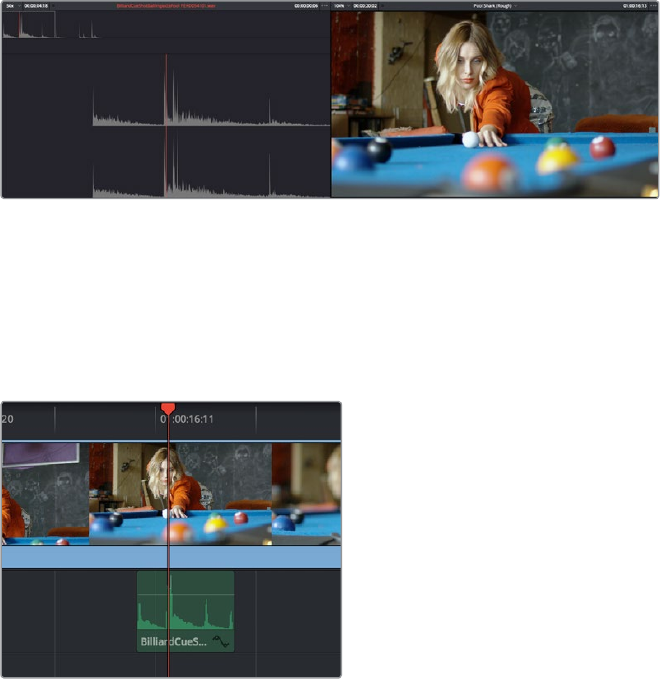
381
Three and Four Point Editing Part 3 – 19
To use Replace Edit to spot a sound effect or action video clip into the Timeline:
1 Move the playhead in the Timeline to the clip that contains the moment you want to
align the new incoming audio or video clip with, and position it on the exact frame that
you want to line up with a frame of the clip you’re going to edit into the Timeline.
2 Click the appropriate audio and video destination controls of the empty track you want
to edit the incoming clip into.
3 Open a clip into the Source Viewer.
4 Move the playhead in the Source Viewer to the frame that you want to line up with
the frame at the position of the playhead in the Timeline. This may be the sample
of a sound effect that corresponds to the action in a particular frame of your
program’s video, or a frame of video that corresponds to a particular sound in your
program’s audio.
5 If necessary, set In and Out points in the Timeline to restrict how much of the incoming
clip will be edited. Otherwise, the entire source clip will be edited into the Timeline.
In the Source Viewer to the Left is an SFX clip, shown in the Timeline
Viewer at Right
6 Now that the playheads are aligned on the frames that must match one another in
both the Source and Timeline Viewers, choose Edit > Replace, click the Replace
Clip button in the toolbar, press F11, or drag any clip onto the Replace overlay in the
Timeline Viewer.
The resulting replace edit, in which the incoming Source Viewer
clip is aligned perfectly with the video
The SFX source clip has now been edited into the specified audio track, with the
source frame at the Source Viewer playhead perfectly aligned with the frame at the
Timeline playhead
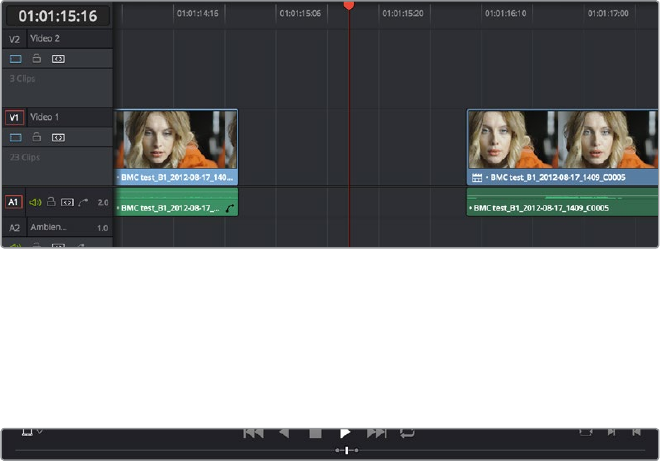
382
Three and Four Point Editing Part 3 – 19
Fit to Fill
Fit-to-fill edits are the only edit type that actually use all four edit points, and it’s the only edit
type that retimes clips at the same time as they’re being edited. By setting In and Out points in
the incoming source clip, and another pair of In and Out points in the Timeline, you can stretch
or compress the timing of the specified range of source media to cover the entire specified
range of the Timeline. In the process, the speed ratio of the clip changes so the clip plays in
either fast or slow motion.
Fit-to-fill edits are especially valuable when you have a source clip in which the action is slightly
slow, and you just want to speed it up by squeezing it into a shorter duration of the Timeline.
They’re also incredibly handy in situations when you have a gap in an edited sequence of clips
to fill with a source clip that’s just not long enough, but in which slightly slower motion won’t be
noticeable.
Fit-to-fill edits do not ripple the Timeline.
To use Fit-to-fill to edit a clip into the Timeline:
1 Do one of the following to define where in the Timeline to edit the incoming clip:
a. You can set both In and Out points in the Timeline, to define the duration you want to fill
with the incoming source clip as a three point edit.
b. You can clear the Timeline In and Out points (pressing Option-X), so that you can
instead use the duration of whichever clip or gap intersects the playhead on the track
with the destination controls assigned to them. In the following screenshot, the clip can
easily be edited to take the place of the gap by positioning the playhead anywhere
within it.
Setting timeline In and Out points to mark a gap
2 Next, you’ll need to set both In and Out points in the Source Viewer to define a longer
or shorter source clip that you want to fill into the available space. In this example, we
have a very short section of the source clip defined that, because of the matching
action in the Timeline, must be fit into the larger gap seen above.
Setting In and Out points in a source clip to define a shorter
duration segment that you want to completely fill the gap
3 Click the audio and video destination controls of the tracks you want to edit the
incoming source clip onto. If necessary, create new tracks.
4 Choose Edit > Fit to Fill, drag any clip onto the Fit-to-Fill overlay in the Timeline Viewer,
or press Shift-F11.
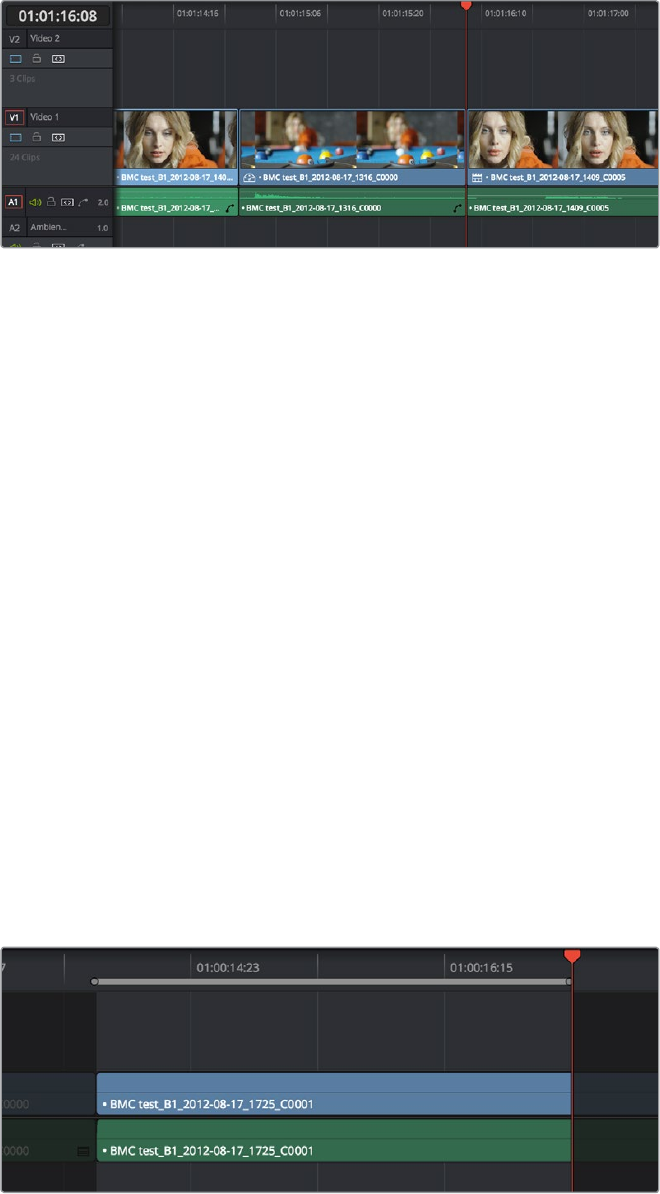
383
Three and Four Point Editing Part 3 – 19
The resulting edit; the shorter source clip is retimed to fit into the longer timeline gap
The incoming source clip is retimed, as necessary, to fit into the specified duration of
the Timeline. This can be seen by the retiming badge that appears within the clip that’s
just been edited into the Timeline.
Place On Top
Place-on-top edits automatically superimpose clips onto the first empty track above (for video
clips) or below (for audio clips) any other clips in the Timeline that either intersect the playhead
or fall in between the currently set Timeline In and Out points, regardless of the current track
specified by the destination controls. It’s designed to make it easy to superimpose titles and
other clips you want to composite over another clip, or to add additional versions of clips such
as VFX on top of previous versions that you want to preserve.
Place-on-top edits create new timeline tracks if necessary, and do not ripple the Timeline.
To use Place-on-top to edit a clip into the Timeline:
1 To choose where in the Timeline the clip will be “placed on top,” do one of the following:
Move the playhead to intersect the clip you want to edit the incoming source clip
on top of.
Set In and Out points in the Timeline to define the duration within which you want to
place the incoming source on top.
2 Set In and Out points in a source clip that you want to edit.
3 Choose Edit > Place on Top, drag any clip onto the Place-on-Top overlay in the Timeline
Viewer, or press F12.
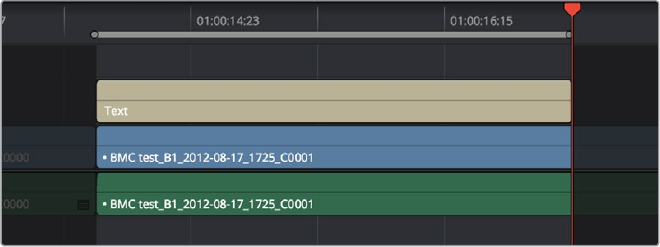
384
Three and Four Point Editing Part 3 – 19
Before and after using Place on top, the incoming text generator is
superimposed to a track above the clip at the position of the playhead
Incoming video clips will be edited to the topmost video track so they are above any
previously existing video in the Timeline. Incoming audio clips are edited to the
bottom-most audio track so they are below any previously existing audio. If necessary,
new video and/or audio tracks will be created automatically to hold the new
incoming clip.
Ripple Overwrite
Ripple Overwrite is a four-point edit that’s useful when you can identify a segment of the
Timeline you want to overwrite, but the incoming clip is of a different duration and you want
DaVinci Resolve to automatically ripple the Timeline to accommodate the difference.
You can use the Ripple Overwrite command one of two different ways:
You can overwrite an entire clip in the Timeline with a another clip of different length.
You can overwrite a section of the Timeline marked with In and Out points with a
another clip of different length.
In both cases, all clips to the right of the clip or timeline section being overwritten are rippled to
the right or left to make room or fill the gap. Because of this, the Ripple Overwrite edit will most
likely change the overall duration of your edited sequence of clips.
Using Ripple Overwrite on an Entire Clip in the Timeline
Using Ripple Overwrite as an automatic four-point edit, you can overwrite whichever clip in the
Timeline intersects the playhead on the tracks defined by the destination controls, in its
entirety, with the incoming clip. For this to work, there must be no In or Out points set in
the Timeline.
After performing a Ripple Overwrite in this way, the original timeline clip is eliminated and the
incoming clip takes its place, and all clips to the right of the clip being replaced are either (a)
rippled to the right if the incoming clip is longer than the original timeline clip, or (b) rippled to
the left if the incoming clip is shorter than the original timeline clip. All of this is done in a
single step.
This is useful in situations where you want to quickly switch one clip in the Timeline with another
of unequal duration and have the Timeline automatically make room to allow this all in one step.
To use Ripple Overwrite to replace an entire clip in the Timeline with another source clip:
1 Move the playhead in the Timeline to intersect the clip that you want to replace; the
playhead’s exact position is not important.
2 Click the appropriate audio and video destination controls of the track containing the
clip you want to replace, and press Option-X to eliminate any In and Out points there
might be in the Timeline.
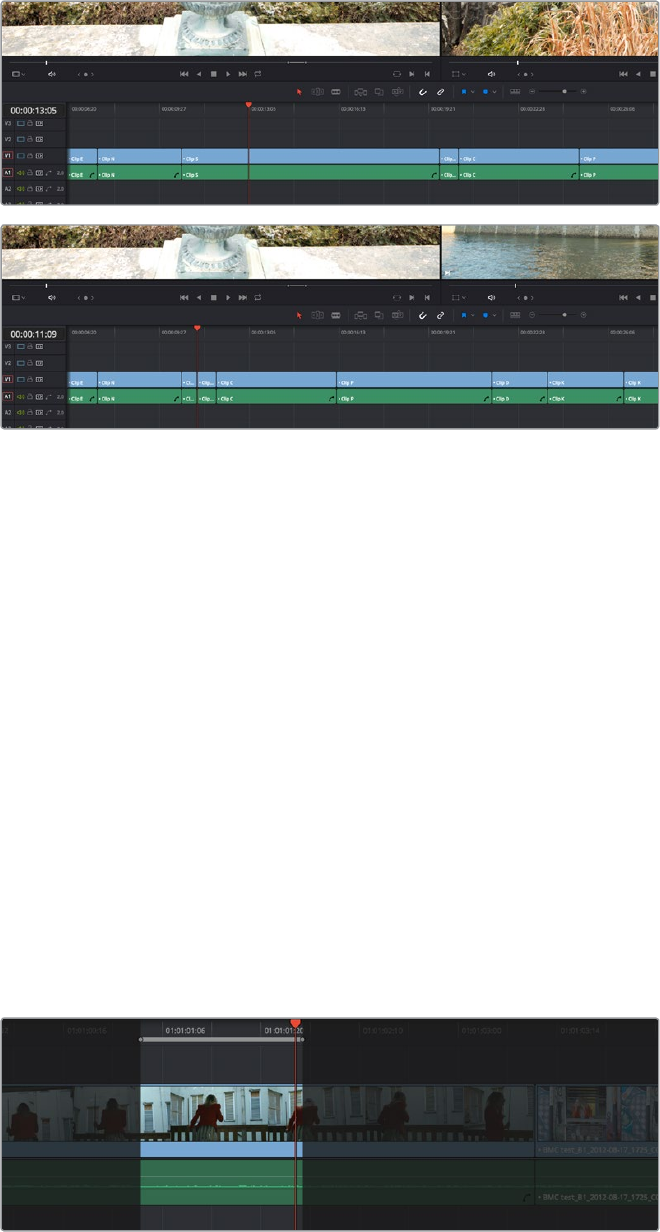
385
Three and Four Point Editing Part 3 – 19
3 Open a clip into the Source Viewer, and set In and/or Out points as necessary to define
how much of the clip you want to edit into the Timeline.
4 To execute the edit, choose Edit > Ripple Overwrite, drag the clip to the Ripple
Overwrite overlay of the Timeline Viewer, or press Shift-F10.
Before and after of using Ripple Overwrite with no Timeline In or Out points; Clip K at the
position of the playhead is replaced in its entirety by the short segment of Clip U from the
Source Viewer; all clips with In points to the right are rippled to the left to fill the gap
Using Ripple Overwrite on a Section of the Timeline Defined by In/Out Points
You can also use Ripple Overwrite as an explicit four-point edit, to overwrite a section of the
Timeline that’s marked with In and Out points with an incoming clip that’s also marked with In
and Out points that is of unequal duration.
After performing a Ripple Overwrite in this way, the section of the Timeline marked with In and
Out points is eliminated and the incoming clip takes its place, and all clips to the right of the clip
being replaced are either (a) rippled to the right if the incoming clip is longer then the original
timeline clip, or (b) rippled to the left if the incoming clip is shorter then the original timeline clip.
All of this is done in a single step.
A good example of when this can be useful is when you’re cutting a close-up of an actor
performing a particular action into a medium shot of the actor performing the same action that’s
already in the Timeline, and the action you’re matching is of different durations in each of the shots.
To use Ripple Overwrite to replace a section of the Timeline with another source clip:
1 Set In and Out points in the Timeline to mark what part of the clip or clips you want
to overwrite. You must set both In and Out points for this to work as expected. In this
example, the part of the clip where the woman leans forward is marked.
Setting In and Out points to identify an action in the Timeline that you want
to overwrite with another clip that has a matching action
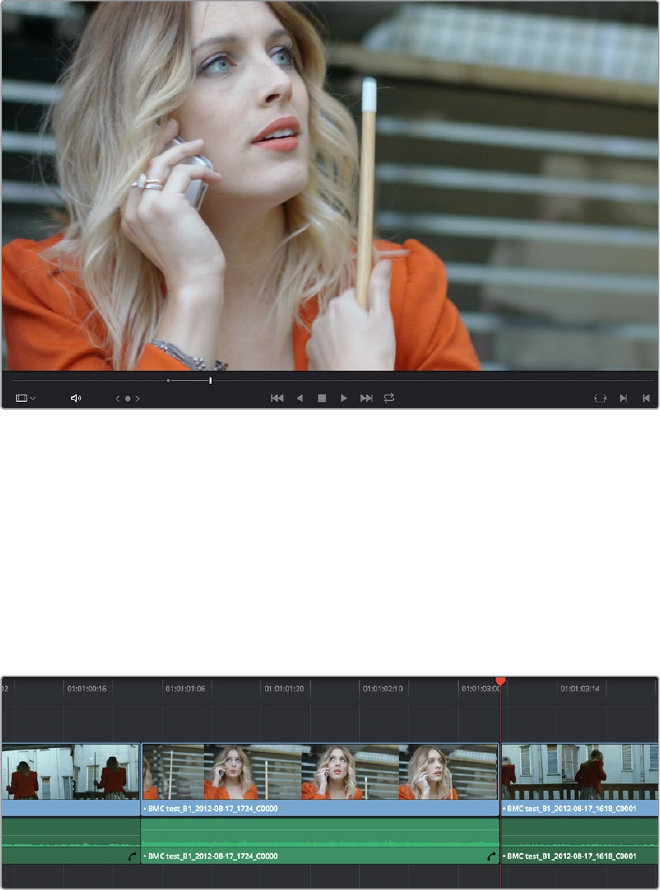
386
Three and Four Point Editing Part 3 – 19
2 Open a clip into the Source Viewer, and set In and/or Out points as necessary to define
how much of the clip you want to edit into the Timeline. In this example, a section of the
woman’s close up where she leans forward in a way that matches the same movement in
the wider shot is marked.
Setting In and Out points to identify an action in a source clip that you want to
overwrite the action you’ve marked in the Timeline. It’s a matching action, but
thetiming might be different, and that’s okay with this kind of edit.
3 To execute the edit, choose Edit > Ripple Overwrite, drag the clip to the Ripple
Overwrite overlay of the Timeline Viewer, or press Shift-F10. As a result, the section of
the timeline that was marked in step 1 is overwritten by the section of the source clip
marked in step 2, and all clips to the right of this edit in the Timeline are rippled to the
right to make room for the much longer source clip. The final result is an edit where the
movements match nicely.
After the Ripple Overwrite, the part of the Timeline clip marked with In and Out points
has been overwritten by the part of the Source clip marked with In and Out points, and
all clips to the right ofthisedit in the Timeline are rippled left or right as necessary
387
Three and Four Point Editing Part 3 – 19
Append at End
Append at End always puts the edited clip at the very end of the current Timeline. It’s a very
useful edit type when you’re quickly stringing together a series of clips.
To use Append at End to edit a clip into the Timeline:
1 Set In and Out points in a source clip that you want to add to the end of the current
Timeline. If necessary, change the sort order of the Media Pool to put these clips into
the order in which you want them to be added to the Timeline.
2 Click the audio and video destination controls of the tracks you want to edit the
incoming source clip onto. If necessary, create new tracks.
3 Choose Edit > Append to End Of Timeline, drag the clip to the Append At End overlay
of the Timeline Viewer, or press Shift-F12.
Incoming video clips are added after the very end of the last clip in the Timeline.
Insert Selected Clips to Timeline with Handles
“Insert Selected Clips to Timeline With Handles” is a command that’s available from the Media
Pool contextual menu for editing one or more selected clips to the currently open timeline, such
that the default handles length is subtracted from the beginning and end of each clip. The goal
is to make it easy to string together a series of clips that you want to connect using transitions
by automatically changing the In and Out points of each clip being edited into the Timeline in
order to add handles.
To use Insert Selected Clips to Timeline with
Handles to edit one or more clips into the Timeline:
1 Select one or more clips in the Media Pool that you want to add to the Timeline. If
necessary, change the sort order of the Media Pool to put these clips into the order in
which you want them to be added to the Timeline.
2 Click the audio and video destination controls of the tracks you want to edit the
incoming source clip onto, and position the playhead where you want the incoming
clips to start. If necessary, create new tracks.
3 Right-click one of the selected clips in the Media Pool and choose “Insert selected clips
to timeline with handles” from the contextual menu.
The selected clips are added to the Timeline starting at the position of the playhead.
To change the length of handles that are removed, open the Editing panel of the User
Preferences and change the “Default handles length” setting. Handles will not be added in
either of the following two cases:
If any of the selected clips in the Media Pool already have handles because of In and
Out points that you’ve set, then additional handles won’t be added.
If the duration of the frames to be removed to create handles in this operation is greater
than the duration of one or more of the clips you’ve selected in the Media Pool, then
handles won’t be added at all.
388
Three and Four Point Editing Part 3 – 19
Three Point Editing From the Media Pool
You can also execute three point edits directly from the Media Pool, with no need to use the
Source Viewer.
Example: Assembling Clips Into the
Timeline From the Media Pool
If you want, you can also edit clips directly into the Timeline from the Media Pool using a variety
of commands. This can be a fast way of appending clips to the end of the Timeline (although
you can also perform Insert edits this way).
To edit one or more clips from the Media Pool to the Timeline:
1 If necessary, set In and Out points for each of the clips you want to edit into the
Timeline using either the Media pool thumbnails (in Thumbnail view), the Media Pool
Filmstrip Viewer (in List view), or by opening each one into the Source Viewer. For each
method, press I to set an In point, and O to set an Out point.
2 Change the sort order of the Media Pool’s browser area to put the clips into the order
in which you want them to appear. In Thumbnail view you can use the Sort Order
menu, but in List view you can click the header of any metadata column to sort by that
column’s data.
3 Position the playhead to where you want to edit the clips.
4 Click, drag, use the Command-Option and Command-Shift Up and Down Arrow Key
shortcuts, or use the Option-1–8 and Command-Option-1–8 key shortcuts to assign the
video and audio destination controls to the tracks you want to edit the video and audio
of the incoming clip(s) to. Click any destination control itself to disable it if you want to
edit clips into the Timeline as audio or video only.
5 Select one or more clips you want to edit. Insert, Overwrite, Place On Top, Ripple
Overwrite, and Append At End edits are all capable of editing multiple clips at once,
while Replace and Fit to Fill edits can only edit one clip at a time, and will only edit the
first of multiple selected clips into the Timeline.
6 To perform the edit, do one of the following:
Drag the selected clips to the Timeline Viewer and drop them on an editing overlay
to execute that edit type.
Right-click one or more selected clips in the Media Pool, and choose “Insert Selected
Clips to Timeline,” or “Append Selected Clips to Timeline.”
The selected clip(s) are edited into the Timeline.
390
Marking and Finding Clips in the Timeline Part 3 – 20
Marking and Finding Clips in the Timeline
As you work on your project, you’ll find it useful to identify important information about each
clip, and about significant moments in each timeline, using a combination of Flags, Markers, and
clip Label colors. These can be applied to source clips in the Media Pool, or to clips that have
already been edited into timelines. In the case of markers, these can also be added to the
Timeline ruler itself to help you keep track of important moments or notes, and to help you with
snapping. You’ll also find yourself modifying clips in different ways, unlinking and relinking the
audio and video of different clips, enabling and disabling clips in the timeline.
This chapter covers the following topics:
Using Flags 391
Using Markers 391
Adding Markers to Clips 391
Adding Markers to Timelines 393
Saving In and Out Point Ranges As Markers with Duration 393
Editing Marker Information 394
Reading Marker Information 396
Using Markers for Navigation 397
Exposing Markers in Lists 397
Editing With Markers in the Media Pool 398
Color Labeling Clips in the Timeline 399
Finding Clips, Media, Markers, Gaps, and Timelines 400
Finding Clips in the Timeline 400
Finding Oine Clips in the Timeline 400
Finding Edit Index Events Using Clips in the Timeline 400
Finding Clips in the Media Pool 400
Finding Clips Using Markers or Flags 401
Finding Gaps 401
Finding the Currently Open Timeline in the Media Pool 401
Finding Media Using Match Frame Operations 402
Matching From the Timeline 402
Matching From a Source Clip 403
Finding a Clip in the Media Pool Using a Timeline Clip 404
Using a Clip in the Source Viewer to Find a Media Pool Clip 404
Using a Clip in the Timeline to Find a Media Pool Clip 404
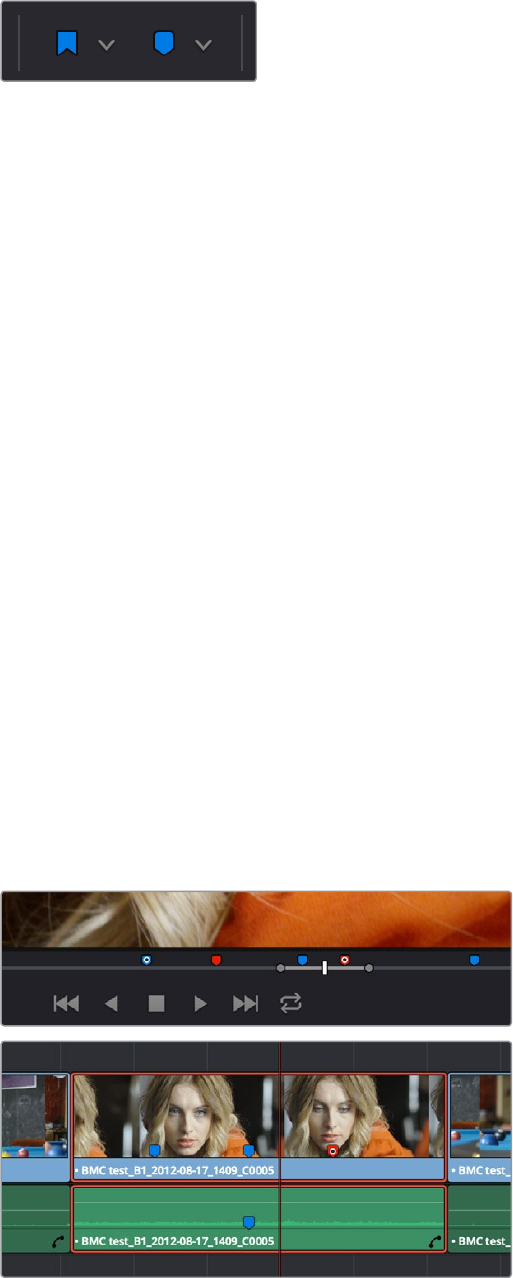
391
Marking and Finding Clips in the Timeline Part 3 – 20
Using Flags
Flags are meant to mark an entire clip, and they also flag every other clip in the Timeline that
shares the same Media Pool source clip, making this a handy way of quickly identifying which
clips in a given timeline come from the same Media Pool source.
The Flag and Marker buttons and pop-ups.
You can apply multiple flags to clips, with a variety of colors to choose from. In addition to
flagging specific media files, flags can be useful for timeline filtering in the Color page, sorting
by column in the Media Pool, and a variety of other operations.
Methods for flagging clips:
To flag a clip: Select one or more clips, and either click the Flag button to flag that
clip with the current color, or click the Flag pop-up in the toolbar to choose a different
color and then click the Flag button. In the Edit page, flags appear in the Timeline
superimposed in the name bar of each clip.
To remove all flags from a clip: Select one or more clips with flags you want to remove,
then click the Flag pop-up in the toolbar, and choose the top “Clear All” option.
To filter all flagged clips in the Edit Index: Click the Option menu of the Edit Index
and choose Show Flags. Each flagged clip appears in a list, with a column showing the
color(s) of the flags applied to each entry in the list.
Using Markers
Markers are used to call attention to a particular frame within a specific clip. Markers can be
individually colored, and can have customized name and note text. Whenever you enter text
into a marker, that marker displays a small dot that indicates there’s more information inside of it.
Once placed, markers snap to In and Out points, edit points, the playhead, and other markers
whenever snapping is enabled, making it easy to use markers to “measure” edits and trims that
you make in the Timeline.
Adding Markers to Clips
You can place markers on the jog bar of source clips in the Source Viewer (or in the Media page
Viewer), and on clips that are selected within a timeline.
(Top) Markers placed on a source clip, (Bottom) Markers placed on a clip in the Timeline
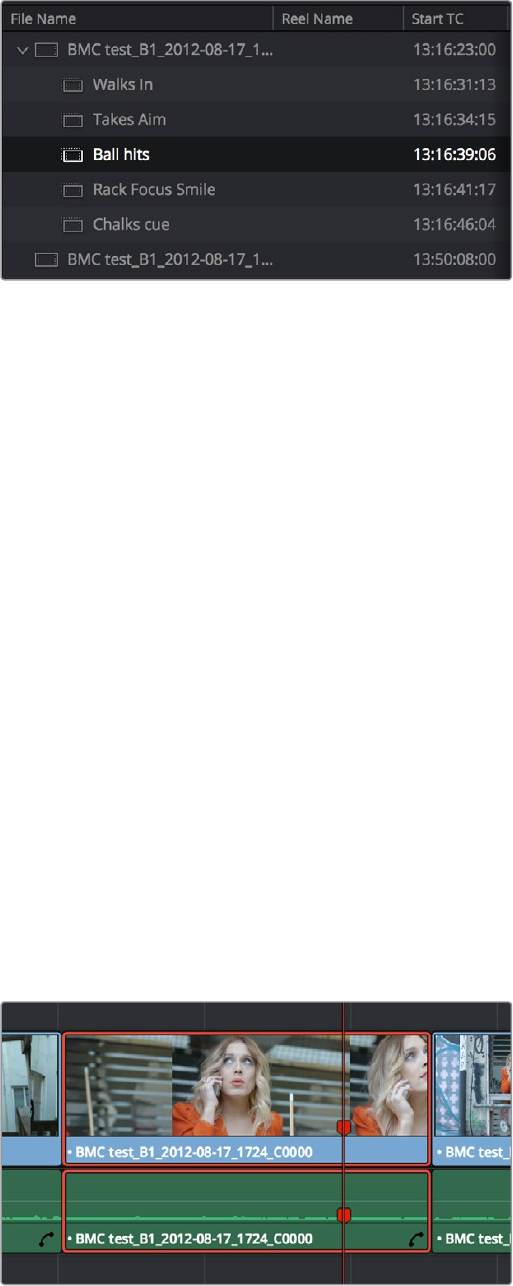
392
Marking and Finding Clips in the Timeline Part 3 – 20
When you add markers to a source clip, those markers also appear in the Media Pool as
hierarchically disclosable items attached to that clip in List view (markers are not visible in
Thumbnail view). More information about using markers in the Media Pool’s List view appears
later in this chapter.
Markers can be viewed as separate clips identified by marker
name when the Media Pool is set to List view
The following procedures describe how to add markers to clips and timelines in
DaVinci Resolve.
To mark a source clip in the Source Viewer or Media Page Viewer, do one of the following:
To place a marker without doing anything else, move the playhead to the frame you
want to mark, and then press M.
To place a marker and immediately open the marker dialog to enter a name or note
within it during playback, press Command-M. Playback pauses until you enter the text
you want to and close the marker dialog again, at which point playback continues.
Move the playhead to the frame you want to mark, then right-click in the jog bar and
choose a marker color from the Add Marker submenu of the contextual menu.
To mark a clip in the Timeline, do one of the following:
Select one or more clips you want to mark, then move the playhead to the frame of a
selected clip in the Timeline, and click the Marker button in the toolbar (or press M) to
place a marker at that frame, using the current color (if multiple overlapping clips are
selected, you’ll add a marker to all clips).
To place a marker during playback and immediately open the marker dialog to enter
a name or note within it, select one or more clips you want to mark, play through the
selection until you want to place a mark, then press Command-M. Playback pauses
until you enter some text and close the marker dialog again, at which point playback
continues.
Select one or more clips you want to mark, and then click the Marker pop-up to choose
a different color, and click the Marker button.
Markers appear in the Timeline at the top of the title bar of the clip to which they’re applied
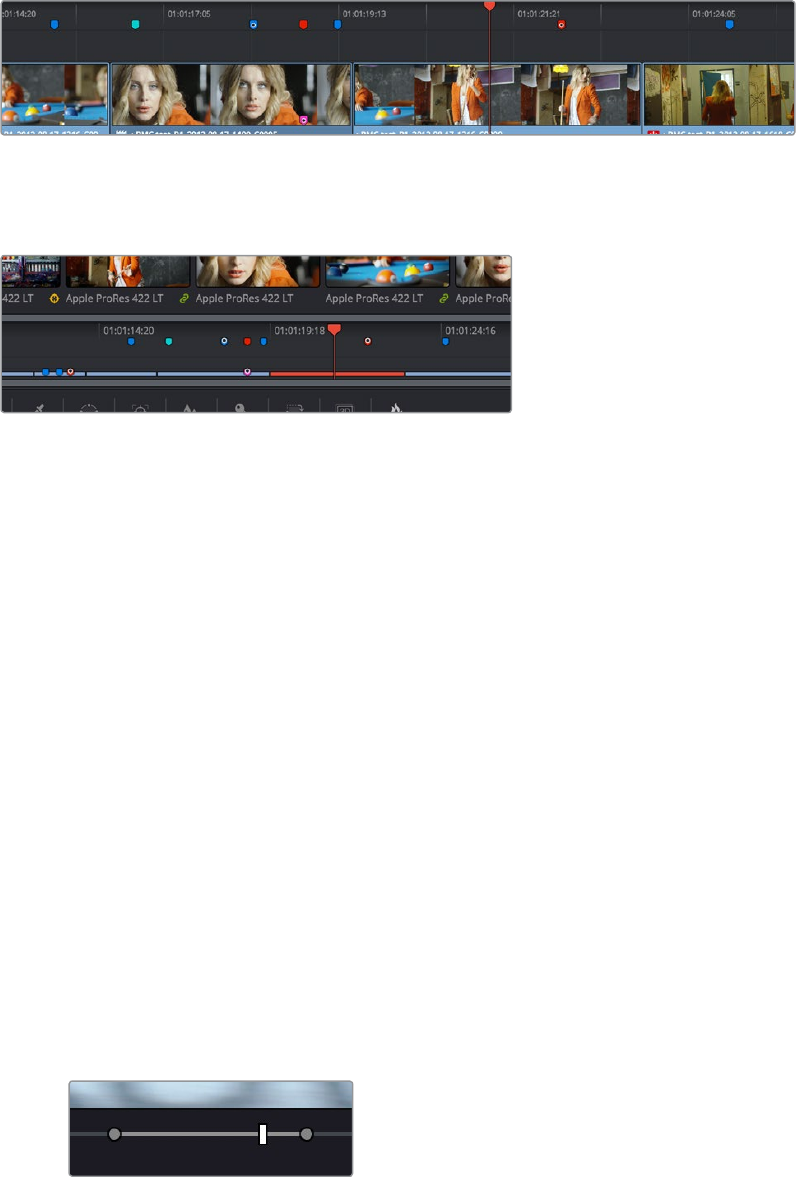
393
Marking and Finding Clips in the Timeline Part 3 – 20
Adding Markers to Timelines
You can also place markers of any color into the Timeline ruler to denote specific times for
future reference, or add notes about issues you want to keep track of.
Timeline markers placed for future reference
You should note that all markers placed on clips or in the Timeline also appear within the
Mini-Timeline of the Color page, making it easy to place notes for later reference when grading.
Clip and Timeline markers as seen in the Mini-Timeline of the Color page
Once you’ve added one or more markers placed on clips, snap to clip In and Out points, edit
points, the playhead, and other markers whenever snapping is enabled.
To mark the Timeline itself, make sure all clips are deselected, and do one of the following:
Click the Marker button (or press M) to place a marker of the currently selected color in
the Timeline ruler.
To place a marker during playback and immediately open the marker dialog to
enter a name or note within it, select one or more clips you want to mark, then press
Command-M. Playback pauses until you enter some text and close the marker dialog
again, at which point playback continues.
Click the Marker pop-up to choose a different color, and click the Marker button.
Right-click in the Timeline ruler and choose a marker color from the Add Marker
submenu of the contextual menu.
Saving In and Out Point Ranges As Markers with Duration
You can also create markers with duration to keep track of any region of a clip or timeline that
you’ve defined with In and Out points. This lets you identify multiple regions of a clip that you
might later want to edit into a program.
To turn In and Out points into a marker with duration:
1 Set In and Out points in the Source Viewer jog bar to identify a region you want to log
for future reference.
Marking In and Out points in preparation to log
that section of the clip
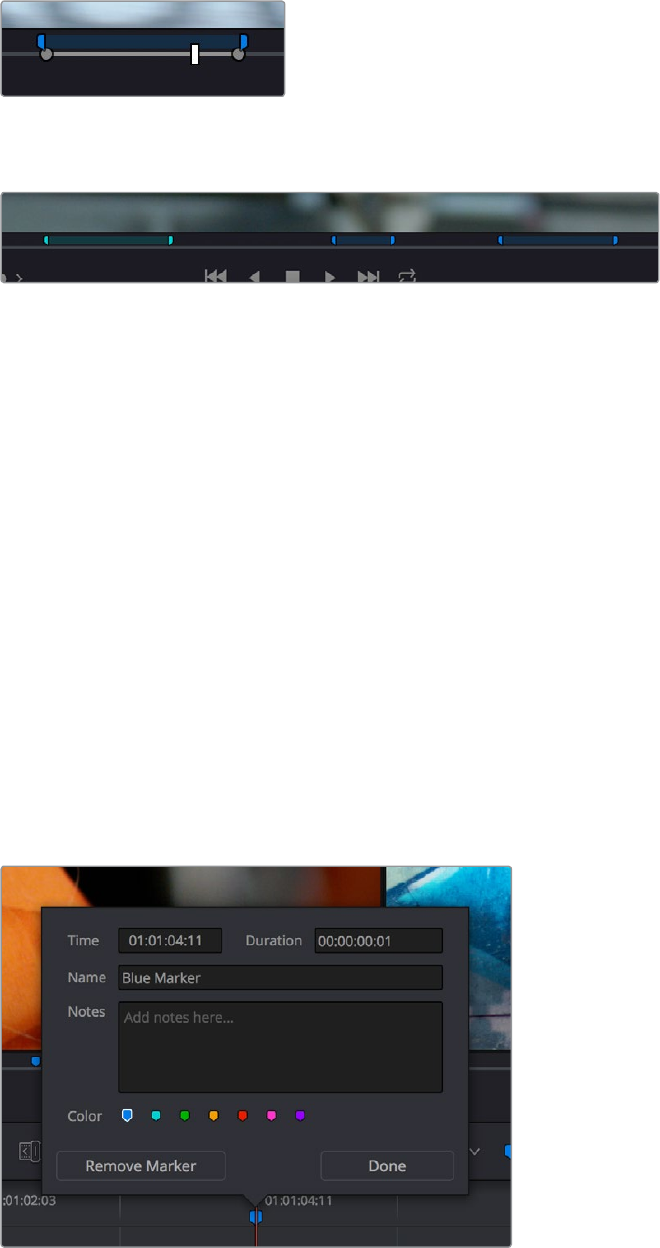
394
Marking and Finding Clips in the Timeline Part 3 – 20
2 Do one of the following:
Right-click the jog bar and choose Convert In and Out to Duration Marker
A marker with duration appears above the In and Out points. To edit its name or
notes, double-click the marker, press Shift-M, or choose Mark > Modify Marker.
A marker with duration is created from the In and Out points
In this way, you can log several regions within a single clip for future use.
A clip with multiple logged sections identified via markers with duration
This an extremely useful logging technique for two reasons. First, markers with duration can be
searched for in the Media Pool using the All Fields, Marker Name, and Marker Notes Filter by
options. Second, they can be filtered with Smart Bins using the Marker Name and Marker Notes
Media Pool Properties options.
Editing Marker Information
Once you’ve added some markers, you may want to edit their contents to make them
more useful.
To open a marker’s edit dialog to alter its properties:
1 Do one of the following:
Press Command-M to add a marker during playback and immediately open its
edit dialog.
Double-click any marker you want to edit.
Move the playhead to the frame containing the marker you want to annotate using
Shift-Up Arrow/Down Arrow and press M.
Select a marker anywhere in the Source Viewer or Timeline, and press Shift-M.
2 When the marker dialog opens, you can modify several properties.
The properties found in the Marker Dialog
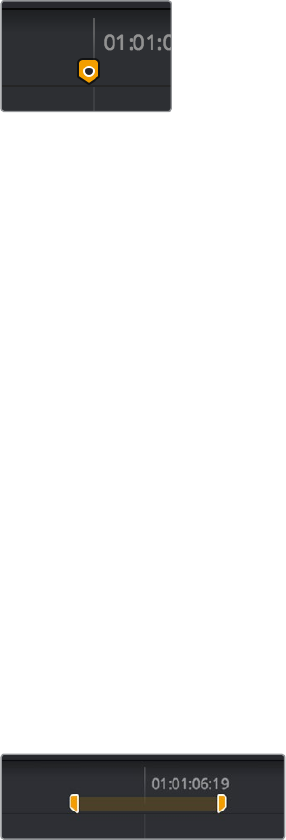
395
Marking and Finding Clips in the Timeline Part 3 – 20
Time: The frame the marker is positioned at relative to that clip or timeline.
Duration: Optional, the length of a marker that’s been assigned a duration.
Name: The name of the marker, defaults to the number of that marker in the order it
was added.
Notes: A field where you can enter any information you want to keep track of.
Color: A series of buttons for choosing the color of the marker.
Remove Marker: Deletes that marker.
Done: Closes the marker edit dialog.
3 When you’re finished, click Done.
Once you add notes to a marker, a small symbol appears on top of that marker to show you it
has information.
A small dot on a marker shows
that it contains notes
To move one or more markers in the Timeline or Source Viewer:
Click a marker or Command-click multiple markers you want to move, and drag them
to a new location.
Drag a bounding box from the Timeline up into the Timeline ruler to select multiple
markers, and drag them to a new location.
To enable marker rippling:
Choose Timeline > Ripple Timeline Markers. When checked, all markers to the right of a
clip being ripple edited, trimmed, or ripple deleted will ripple to the left along with the
rest of the Timeline. You can turn this behavior off and on at will.
To modify marker duration:
Option-drag any marker to the right or left to create a marker with duration.
Move the playhead to the frame containing the marker you want to modify and press
M, or double-click the marker you want to edit, then type a number into the duration
field, and click Done.
Markers with duration appear as a bar in the Timeline ruler or jog bar of the Source
Viewer. Drag the middle of a marker with duration to move it, or drag the left or right
edge to change its duration.
To eliminate a marker’s duration, set its numeric duration to 00:00:00:00 in the
marker dialog, or drag either end so that it merges with the other as a single marker.
A marker with duration in the Timeline
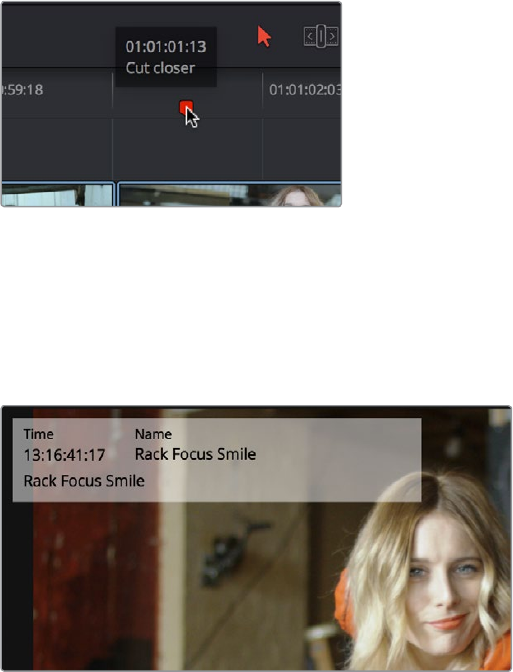
396
Marking and Finding Clips in the Timeline Part 3 – 20
Methods of deleting markers:
To remove one or more markers using the mouse: Click to select a marker, or
Command-click to select multiple markers, and press the Delete key. You can also
double-click a marker to open its dialog, and click the Delete button.
To remove a marker using the keyboard: Move the playhead to the marker you want
to delete, and press Option-M.
To remove all markers from a clip: Select one or more clips with markers you want
to remove, then either press the Backspace key, or click the Marker pop-up in the
Toolbar, and choose Clear All.
To remove all markers from the Timeline: With all clips deselected, choose Clear
All from the marker pop-up menu in the Toolbar, or right-click the Timeline ruler, and
choose Remove All Markers from the contextual menu.
Reading Marker Information
Once you’ve added a number of markers with custom information, there are two ways of
viewing this information without having to open the marker dialog.
To read marker notes using your pointer:
Double-click a marker to open its marker dialog.
Move the pointer over any marker in the Source Viewer or Timeline to see a tooltip
showing that marker’s information.
Moving the pointer over a marker displays its information in a tooltip
To read marker information in the Source and/or Timeline viewers:
1 Open the Source or Timeline Viewer’s option menu, and turn on Show Marker Overlays.
2 Stop playback, and move the playhead to a marker. That marker’s information is
displayed in the Viewer, superimposed.
Marker information shown in the Source Viewer
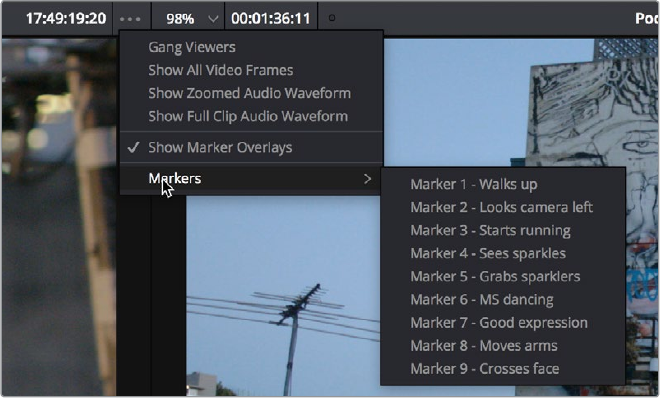
397
Marking and Finding Clips in the Timeline Part 3 – 20
Using Markers for Navigation
Markers can be used to aid navigation, via two keyboard shortcuts that let you jump the
playhead from marker to marker. When moving the playhead among markers, Clip and Timeline
markers are mixed together.
To move the playhead to the next or previous marker:
Press Shift-Up Arrow to move the playhead to the next marker to the left in
the Timeline.
Press Shift-Down Arrow to move the playhead to the next marker to the right in
the Timeline.
To move the playhead to a specific marker using the Source or Timeline Viewer’s Marker list:
For a source clip or timeline with multiple markers, you can move the playhead
immediately to a specific marker by opening the Source or Timeline Viewer’s Option
menu, and choosing a marker from the Markers submenu, which exposes all the
markers that are available in that Viewer, by name and note.
All markers in the currently open clip as seen in the Source Viewer Option menu Markers list
Exposing Markers in Lists
You can also use the Edit Index to filter out a list of markers appearing within the current
Timeline. You can filter all markers at once, in which case columns expose the notes and colors
applied to each marker. You can also filter by a specific marker color if you only want to see one
type of marker.
Methods of working with markers in the Edit Index:
To filter all clips with markers in the Edit Index: Click the Option menu of the Edit
Index and choose Show Markers > All or choose a specific color. Each clip with a
matching marker appears in a list, with columns corresponding to the color(s) and notes
of each Timeline and Clip marker.
To move the playhead to the position of a marker in the Edit Index: Click that marker’s
entry in the list.
To show hidden marker columns: Right-click any column header, and turn on either
Color or Notes to reveal that column. If necessary, columns can be rearranged by
dragging them left or right.
You also have the option to export lists of markers as an EDL, a .txt, or .csv file.
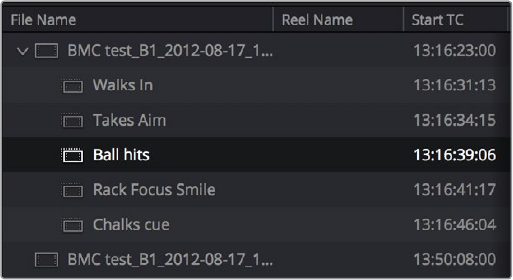
398
Marking and Finding Clips in the Timeline Part 3 – 20
Exporting lists of markers:
To export Timeline markers as an EDL: Right-click that timeline in the Media Pool, and
choose Timelines > Export > Timeline Markers to EDL. Choose a location and export
format from the Export Edit Index dialog, and click Save. Each Timeline marker is listed
in the resulting EDL, with any notes included along with a duration, where applicable.
To export all filtered markers in the Edit Index as a .txt or .csv file: After you choose
Show Markers in the Edit Index option menu, then right-click that timeline in the Media
Pool, and choose Timelines > Export > Edit Index. Choose a location and export format
from the Export Edit Index dialog, and click Save.
Editing With Markers in the Media Pool
Once you’ve added one or more markers to source clips in the Media Pool, you can use them
for editing in a considerably more direct way than just using them to move the playhead around.
Markers can be exposed in the List view of the Media Pool, and once exposed, they can be
opened into the Source Viewer, and they can be edited into the Media Pool just like any other clip.
To show markers in the Media Pool:
Set the Media Pool to List view, then click the disclosure button to the left of the clip
with markers you want to work with. They appear as a hierarchical list underneath the
clip to which they’re attached.
Markers exposed in the Media Pool in List view
To open a marker in the Media Pool into the Source Viewer:
Double-click any marker to open that clip into the Source Viewer with the playhead at
the position of that marker.
To edit a clip defined by the marker into the Timeline:
Drag any marker into the Timeline. A clip will be edited into the Timeline with the In
point defined as the frame at the marker, and the Out point defined by either (a) the
frame before the next marker in that clip, or (b) the duration of that marker if the duration
is greater than the default 1 frame.
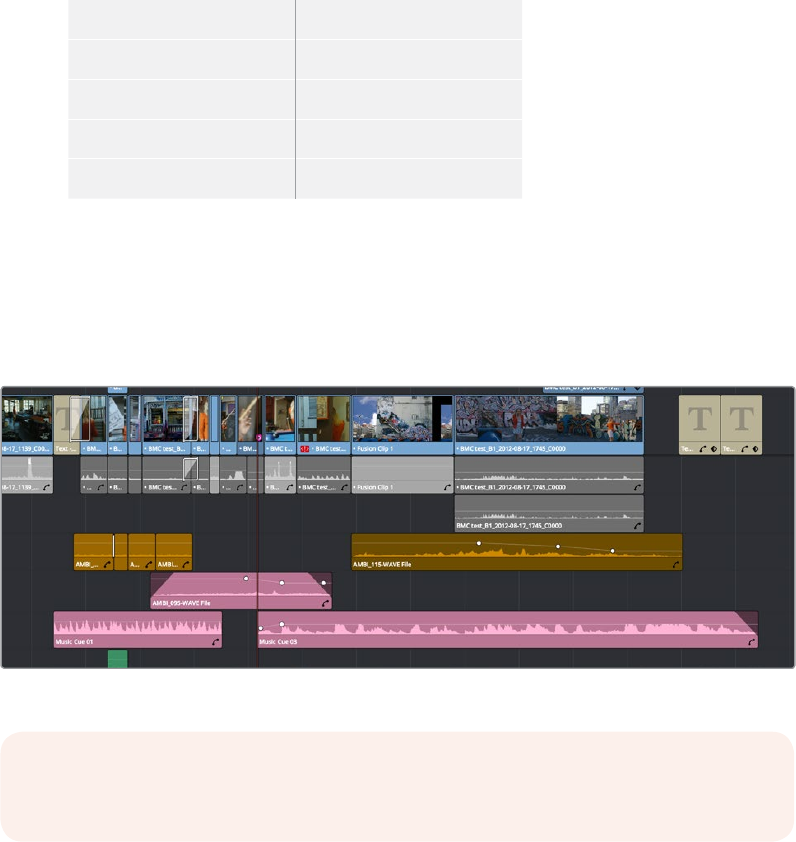
399
Marking and Finding Clips in the Timeline Part 3 – 20
Color Labeling Clips in the Timeline
By default, different clips have specific colors that identify each type of clip. Furthermore, clips
with effects applied to them (adjustments in the Inspector, volume level changes, speed
changes, etcetera), appear as a darker shade of their default color to help you identify at a
glance which clips have been modified. The following table lists what these default colors are.
Clip Type Color
Video Clip Steel Blue
Audio Clip Light Green
Generator Light Purple
Tex t Beige
Additionally, you can assign one of sixteen colors to clips that appear in the Timeline. While you
can assign clip colors in a variety of ways, they only appear once a clip has been edited into the
Timeline, as a way to tint clips to identify them at a glance. Each clip can only have a single color
assigned to it. Clip colors are also clip-specific, so assigning a clip color to one clip in the
Timeline has no effect on other clip that share the same source media in the Media Pool.
A timeline with audio clips that have been tinted to identify what they are to the editor
To assign a clip color to one or more clips, do one of the following:
Use the Media page to assign clip colors to clips in the Media Pool using the Shot &
Scene preset in the Metadata Editor. Clip colors do not appear in the Media Pool. Clip
colors can be removed by clicking the X to the left of the Clip Color buttons in the
Metadata Editor.
Right-click one or more selected clips in the Timeline, and choose a color from the
Clip Color submenu of the contextual menu. Clip colors can be removed by choosing
Default Color from this same submenu.
NOTE: Clip colors are distinct from flags, which appear as badges in the Timeline,
Media Pool, and Color page.
400
Marking and Finding Clips in the Timeline Part 3 – 20
Finding Clips, Media, Markers,
Gaps, and Timelines
DaVinci Resolve has several methods of locating clips, markers, and gaps, to help you
troubleshoot problem timelines, or to find media that you want to edit into a timeline differently.
Finding Clips in the Timeline
DaVinci Resolve makes it easy to find one or more clips in the Timeline that correspond to
specific criteria using the Edit Index.
To find a clip in the Timeline:
1 Open the Edit Index.
2 Click the magnifying glass button to open the search controls.
3 Choose a criteria from the Filter By pop-up menu
4 Type a search term in the Search field at the top right of the Edit Index.
As soon as you start typing, all edit events that don’t match the search criteria are
temporarily hidden. To show all of the clips in the Edit Index again, click the cancel
button at the right of the search field.
5 Click any event in the Edit Index to move the playhead to that clip in the Timeline.
Finding Offline Clips in the Timeline
It’s also easy to use the Edit Index to find all of the offline clips that may be in the Timeline.
To locate offline media in the current Timeline via the Edit Index:
1 Open the Edit Index
2 Click the Option menu of the Edit Index and choose Show Offline Clips Only.
The Edit Index is filtered to only show the offline clips in the currently open Timeline,
and you can click any item on the list to jump the playhead to that particular clip in
the Timeline.
3 Click any event in the Edit Index to move the playhead to that clip in the Timeline.
Finding Edit Index Events Using Clips in the Timeline
You can also locate specific Edit Index events using the Timeline playhead.
To locate a clip in the Edit Index from the Timeline:
Move the Timeline playhead to intersect a clip you want to find in the Edit Index. That
clip’s corresponding event (or events if the playhead intersects multiple clips) are
automatically highlighted in the Edit Index.
To move the playhead to a clip in the Timeline via the Edit Index:
Click any event in the Edit Index to move the Timeline playhead to the In point of
that clip.
Finding Clips in the Media Pool
As you work, there are a variety of methods you can use to find clips in the Media Pool.
401
Marking and Finding Clips in the Timeline Part 3 – 20
Methods of finding clips in the Media Pool:
To find a clip in the Media Pool: Open the Media Pool, if necessary, and click the
magnifying glass button to open the search controls. Then choose a criteria from the
Filter By pop-up menu, and type a search term in the Search field. As soon as you start
typing, all clips that don’t match the search criteria are temporarily hidden.
To locate a Timeline clip in the Media Pool: Right-click any clip in the Timeline, and
choose Find in Media Pool. That clip appears highlighted in the Media Pool.
To locate a Source Viewer clip in the Media Pool: With any clip open in the Source
Viewer, press Option-F.
To locate a media file in the Finder from the Media Pool: Right-click any clip in the
Media Pool and choose Reveal in Finder. A Finder window, or its equivalent in Windows
and Linux, opens to the directory with that clip, which appears highlighted.
Finding Clips Using Markers or Flags
If you’re using markers to keep track of notes, issues, or items on your to-do list, there are a few
different ways of finding and moving among them.
Methods of finding Markers or Flags:
To find all markers or flags via the Edit Index: Click the Option menu of the Edit Index
and choose Show Markers or Show Flags. Each clip with one or more markers appears
in a list, with columns corresponding to the color(s) and notes of each timeline and
clip marker.
To find a specific marker or flag in the Edit Index: Click the magnifying glass button
in the Edit Index, choose Notes in the Filter by pop-up, and type a search term in the
Search field.
To move the playhead to the next marker forward or previous: Choose Playback >
Previous Marker (Shift-Up Arrow) or Next Marker (Shift-Down Arrow).
Finding Gaps
Gaps, or spaces between two clips on the Timeline, appear by default as black. Unwanted gaps
may appear as black flashes while your program plays back, and are generally to be avoided.
DaVinci Resolve makes it easy to find gaps in specific tracks of your timeline.
To find gaps in the Timeline:
1 Make sure that the Auto Select control is enabled on any track you want to search for
gaps. Turn Autoselect off on any tracks you don’t want to search for gaps (for example,
title tracks where gaps are to be expected).
2 Do one of the following:
Choose Playback > Previous Gap or press Option-Command-; (semicolon)
Choose Playback > Next Gap or press Option-Command-‘ (apostrophe)
The playhead will automatically move to the first frame of the next gap in the Timeline.
Finding the Currently Open Timeline in the Media Pool
If you’re not using one of the available methods for organizing timelines separately from clips,
itcan be easy to lose track of where your timeline happens to be. To find the currently open
Timeline in the Media Pool, choose Timeline > Find Current Timeline in Media Pool.
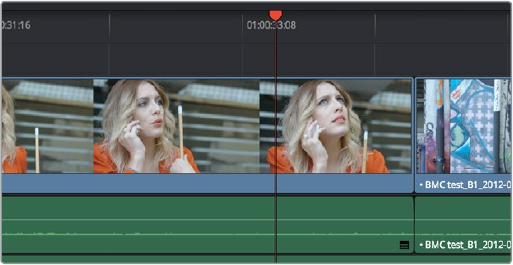
402
Marking and Finding Clips in the Timeline Part 3 – 20
Finding Media Using
Match Frame Operations
Match frame operations are a terrific time saver when you need to match the original source clip
to a clip in the Timeline, or when you want to use a clip in the Source Viewer to find that same
clip in the Timeline. With a single command, you can match one clip to another in order to set up
a new edit to take care of a variety of tasks.
Matching From the Timeline
A classic example of using Match Frame is when you originally edited a video clip into the
Timeline without its corresponding audio, and you later decide you want that audio in the
Timeline after all. An easy fix is to move the playhead in the Timeline to intersect the clip you
need to fix, and use the Match Frame command to automatically load the original source media
for that clip into the Source Viewer, setting Source In and Out points that match those of the
Timeline clip, and putting the Source playhead at the same frame as the Timeline playhead. At
that point, you can simply edit the source audio and video back into the Timeline to overwrite
the video-only clip you started with, confident that you’re editing exactly the same range of
media at the same place.
Using the pointer to Match Frame from the Timeline to find a source clip:
Hold the Option key down and double-click the clip in the Timeline.
The original source media for that clip is automatically loaded into the Source Viewer, with In
and Out points that match those of the targeted Timeline clip; the Source playhead is at the
same frame as the Timeline playhead.
Using keyboard shortcuts or Viewer controls to
MatchFrame from the Timeline to find a source clip:
1 Move the Timeline playhead to intersect the clip you want to target.
Placing the playhead over a clip to Match Frame
2 If there are other clips on a multi-track timeline that overlap the clip you’re targeting
for this operation, then the clip on the lowest video track will be used as the target
for Match Frame operations. If you want to target a clip on a higher track, then either
disable the Auto Selection controls of all timelines underneath, or Option-Click the Auto
Selection control of the track with the clip you’re targeting to solo it.
3 Press the F key, or click the Match Frame button at the bottom right of the Timeline
Viewer (it’s at the left of the In and Out buttons).
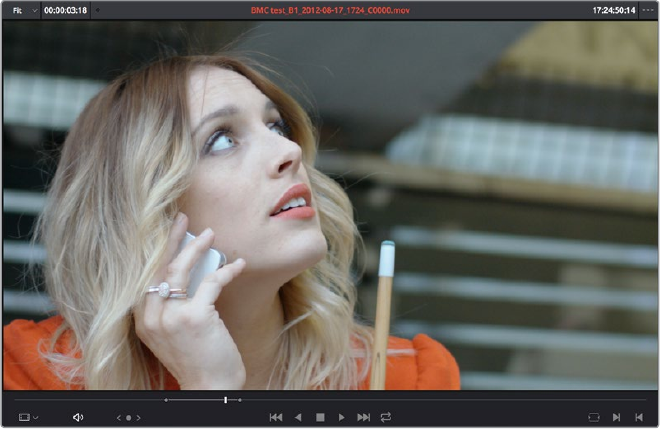
403
Marking and Finding Clips in the Timeline Part 3 – 20
The frame that’s matched to the frame at the playhead in the Timeline;
In and Out points are set to match those of the clip in the Timeline
4 The original source media for that clip is automatically loaded into the Source Viewer,
with In and Out points that match those of the targeted Timeline clip; the Source
playhead is at the same frame as the Timeline playhead.
Matching From a Source Clip
Match Frame also works in the opposite direction. You can open a source clip into the Source
Viewer that you know corresponds to a clip in the Timeline, and then you can use Match Frame
to automatically find any clip in the Timeline that corresponds to media found within the
source clip.
To use Match Frame in the Source Viewer to find a clip in the Timeline:
1 Open a clip in the Source Viewer that includes a range of media that’s already been
edited into the Timeline. If no part of the source clip has been edited into the Timeline,
source match framing won’t work.
2 Move the Source Viewer playhead to a frame that you want to find in the Timeline.
Again, if the frame at the position of the playhead in the Source Viewer hasn’t already
been edited into the Timeline, the Source Match Frame command won’t work.
3 Click the Match Frame button at the bottom right of the Source Viewer (it’s at the left of
the In and Out buttons), or press the F key.
The Timeline playhead automatically moves to the the clip and frame after the current
playhead position that matches the clip in the Source Viewer.
404
Marking and Finding Clips in the Timeline Part 3 – 20
Finding a Clip in the Media
Pool Using a Timeline Clip
There are two ways you can use a clip in the Timeline to find a clip in the Media Pool.
Using a Clip in the Source Viewer to Find a Media Pool Clip
To locate the original clip in the Media Pool that corresponds to a clip in the Timeline:
1 Open a Timeline clip into the Source Viewer by doing one of the following:
Double-click a clip in the Timeline.
Move the playhead to a clip in the Timeline, press Shift-V to select it, then press the
Return key.
2 Press Option-F to locate the source clip corresponding to the clip that’s open in the
Source Viewer in the Media Pool. That clip appears highlighted in the Media Pool.
Using a Clip in the Timeline to Find a Media Pool Clip
To locate a Timeline clip’s corresponding clip in the Media Pool, right-click any clip in the
Timeline, and choose Find in Media Pool from the contextual menu. That clip appears
highlighted in the Media Pool.
406
Multicam Editing Part 3 – 21
Multicam Editing
If you’re working with media that was shot simultaneously using multiple cameras, then you can
use the Multicam Editing tools in DaVinci Resolve to create multicam clips that can be edited
using a visual switcher. Additional controls let you change the angles of multicam clips that have
already been edited into the Timeline.
This chapter covers the following topics:
Introduction to Multicam Editing 407
Creating and Modifying Multicam Clips 407
Logging and Editing Multicam Clips 409
Setting up a Timeline for Multicam Editing 409
Opening and Altering Multicam Clips 410
Performing a Multicam Edit 411
Multicam Controls in the Source Viewer 413
Multicam Keyboard Controls 413
Editing Multicam Clips in the Timeline 414
Grading Multicam Clips 415
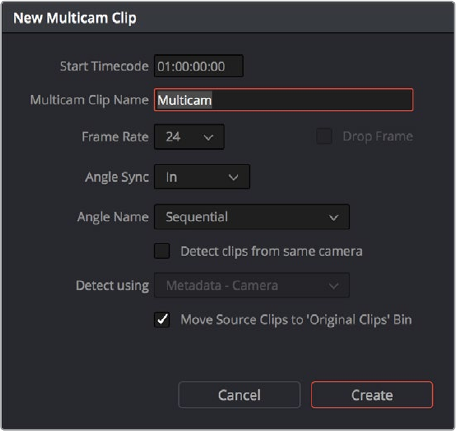
407
Multicam Editing Part 3 – 21
Introduction to Multicam Editing
If you’re working on a program where a performance, interview, or event was recorded using
multiple simultaneous cameras, DaVinci Resolve has multi-camera editing tools; multicam
editing for short. Editing using these tools is a three part process:
First, you have to create multicam clips from the individual camera angles (called“ISOs,”
or isolated cameras).
Second, you need to put the multicam clips you’ve created into a timeline.
Third, you turn on the Multicam Viewer, and then you’re ready to start cutting and
switching among angles, as if you were a live multi-camera director.
This section describes all of these steps, and the various options available for each of them.
Creating and Modifying Multicam Clips
Before you do anything else, you need to create one or more multicam clips.
To create a multicam clip:
1 Import all the ISO (isolated camera) clips that correspond to the multi-camera
performance or event that you’ll be editing into the Media Pool.
2 Select all the clips that you need to sync together, right-click the selection, and choose
“Create Multicam Clip Using Selected Clips.”
3 When the New Multicam Clip Properties dialog opens, choose from the
following options:
New Multicam Clip Properties dialog
Start Timecode: Presents the start timecode of the new multicam clip you’re about
to create, which is determined by either the timecode value of the sync point if Angle
Sync is defined by timecode, or by the sync point timecode value of the clip with the
earliest timecode if Angle Sync is defined by waveform.
Multicam Clip Name: Use to choose a more descriptive name than “Multicam 1” for
the multicam clip you’re about to create.
408
Multicam Editing Part 3 – 21
Frame Rate: Automatically lists the frame rate associated with the clips you selected.
Angle Sync: The method used to synchronize all of the different angles. If you’re
manually syncing all of the angles, you can use In or Out points that you set within
each clip, or you can use the first Marker that you’ve set within each clip. If matching
timecode was jam synced to each camera recording an angle, you can choose
Timecode for a fast sync that’s as accurate as the timecode is. If each camera had a
microphone with which to simultaneously record the location audio, you can choose
Sound to use the shape of each audio waveform to align all of the angles.
Angle Name: The method used to name each angle within the multicam clip being
created. The angles can have Sequential numbering, use Angle or Camera metadata,
or use the Clip name.
Detect clips from same camera: Turning on this checkbox results in multiple clips
that are identified as being from the same camera being put into the same angle
track of the resulting multicam clip being created. It also enables the “Link using”
pop-up menu.
Detect Using: The metadata used to determine which clips come from the same
camera. You can choose from Camera ID, Angle, Reel Number, and Roll/Card, which
are user-editable in the Metadata Editor of the Media page, or you can choose Reel
Name which is automatically or manually derived using either the Conform Options
of the General Options panel of the Project Settings, or the Name panel of the Clip
Attributes window. For more information on the Conform Options, see Chapter 3,
“Project Settings and Preferences.”
Move Source Clips to “Original Clips” Bin: A checkbox that lets you move all of
the original ISO clips into an Original Clips bin to get them out of the way after the
multicam clip has been created.
4 When you’re done choosing options, click Create. Depending on the Angle Sync
method you chose, a waveform analysis might generate a progress bar, and then the
new multicam clip is created in whichever bin is currently selected in the Media Pool.
Multicam clips appear with a multicam badge in the lower left-hand corner of the clip
thumbnail.
A Multicam clip showing its badge in the Media Pool
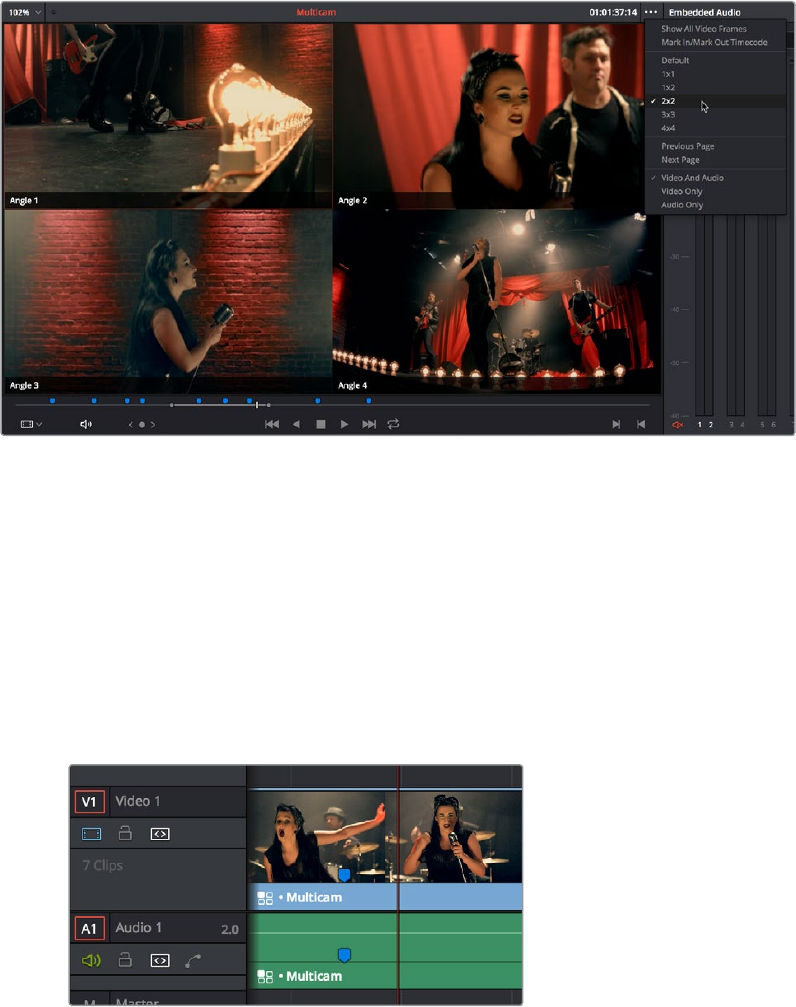
409
Multicam Editing Part 3 – 21
Logging and Editing Multicam Clips
Once you create one or more multicam clips, you can view them in the Media page or in the
Source Viewer of the Edit page, and add markers to them (all angles share the same markers) to
prepare for the multicam edit you’re planning on performing. When viewing multicam clips in the
Media page, you can choose how many angles to show in the viewer via the Viewer
Option menu.
Markers set in a multicam clip in the Media page to prepare for editing
Setting up a Timeline for Multicam Editing
Once you’ve created one or more multicam clips, preparing them for editing is as simple as
editing them into the Timeline, either by dragging and dropping the multicam clip to the
Timeline from the Media Pool, or by opening the multicam clip into the Source Viewer, and then
using any of the available editing methods to cut it into the Timeline from there. Once edited,
they appear in the Timeline like any other clip, just with a multicam badge to the left of the
clip name.
Multicam clip badge in the Timeline
When you perform a multicam edit, DaVinci Resolve plays the entire audio mix while you’re
editing, so if you want to take the opportunity to edit a master audio mix file or additional piece
of music to play along with the multicam clip, you can do so.
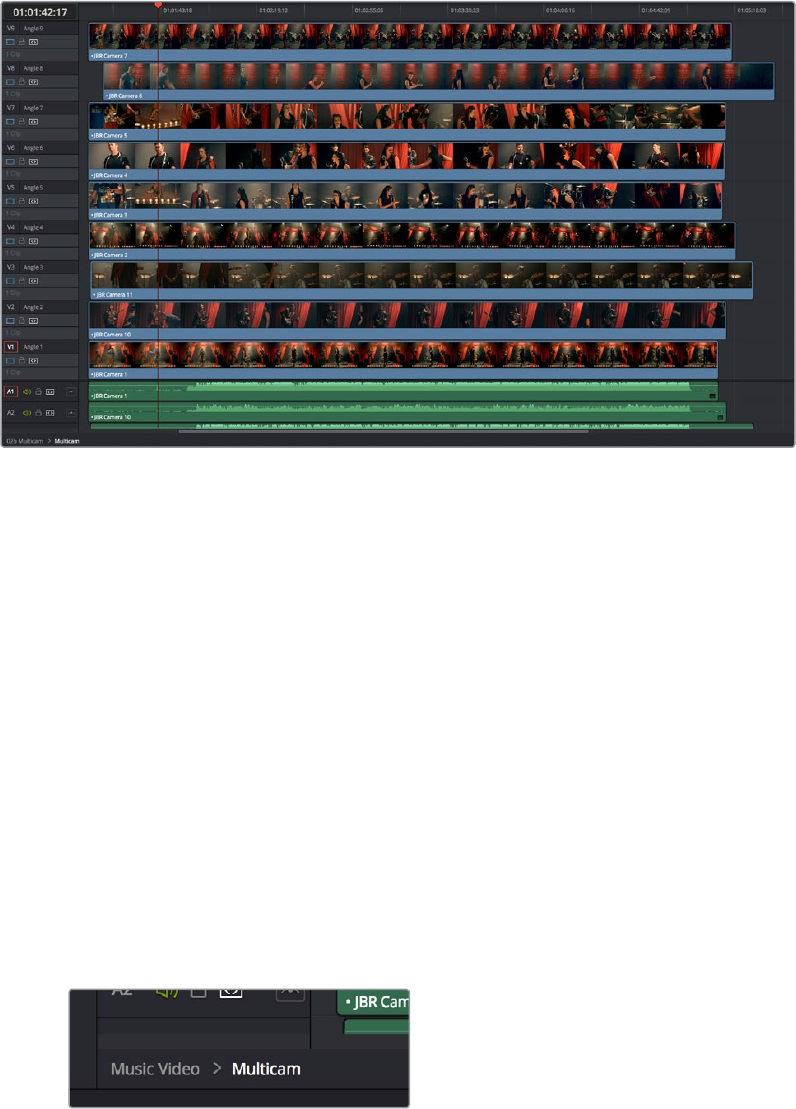
410
Multicam Editing Part 3 – 21
Opening and Altering Multicam Clips
After you’ve created a multicam clip and put it into a timeline, you can modify it in a variety of
ways by right-clicking it in the Media Pool and choosing “Open in Timeline.” This replaces the
contents of the Timeline with a vertical stack of superimposed angles, one per track, each of
which is offset from the beginning of the Timeline to align with one another.
An open multicam clip appears like a timeline with a vertical stack of clips
With the multicam clip open, you can make a variety of changes in preparation for editing:
You can slide a multicam clip left or right to alter its sync (selecting an angle and
using the period (.) and comma (,) “nudge” keyboard shortcuts can be a good way of
doing this).
You can delete the track of an angle you don’t need (right-click the track header and
choose Delete Track).
You can rearrange tracks to rearrange the order in which angles appear (right-click any
track header and choose Move Track Up or Move Track Down).
You can rename tracks to change the angle name that appears by default in the
Multicam Viewer.
You can disable audio or video tracks that correspond to angles you don’t want to see,
but don’t want to eliminate, either.
You can grade each multicam angle separately (discussed later in this section).
When you’ve finished altering the contents of the multicam clip, you can close it using the path
control at the bottom left-hand corner of the Timeline. Click the name of the edited timeline to
go back, in preparation for the next steps.
A path control lets you exit the multicam clip
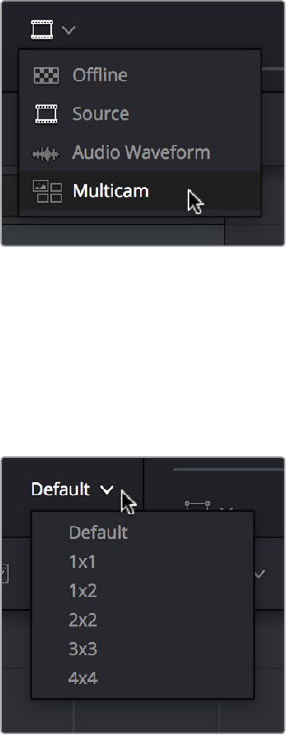
411
Multicam Editing Part 3 – 21
Performing a Multicam Edit
After you’ve created one or more multicam clips and edited them into a timeline, actually
executing a multicam edit is simple.
1 Open the Timeline you created to hold the multicam clip or clips comprising your edit,
and position the playhead where you want to start editing.
2 Choose Multicam from the Source Viewer mode pop-up.
Switching the Source Viewer to Multicam viewing
The Source Viewer changes to display all of the different angles within that clip as
switching controls.
3 Choose how many angles you want to display from the pop-up menu at the bottom
right of the Source Viewer. If you’re using a computer that’s not very fast, you may need
to reduce the number of angles you’re viewing to maintain real time playback.
Choosing how many angles to view in the Multicam Viewer
If there are more angles within the multicam clip intersecting the playhead in the
Timeline than the Multicam Viewer is set to show, then page controls appear to the left
of this pop-up menu that let you choose which set of angles you want to view. You can
move to another page of angles by doing one of the following:
Click any dot to jump to that page of angles.
Click the arrows to move among next/previous sets of angles.
Choose Edit > Multicam > Previous Page (Option-Shift-Left Arrow) or Next Page
(Option-Shift-Right Arrow).
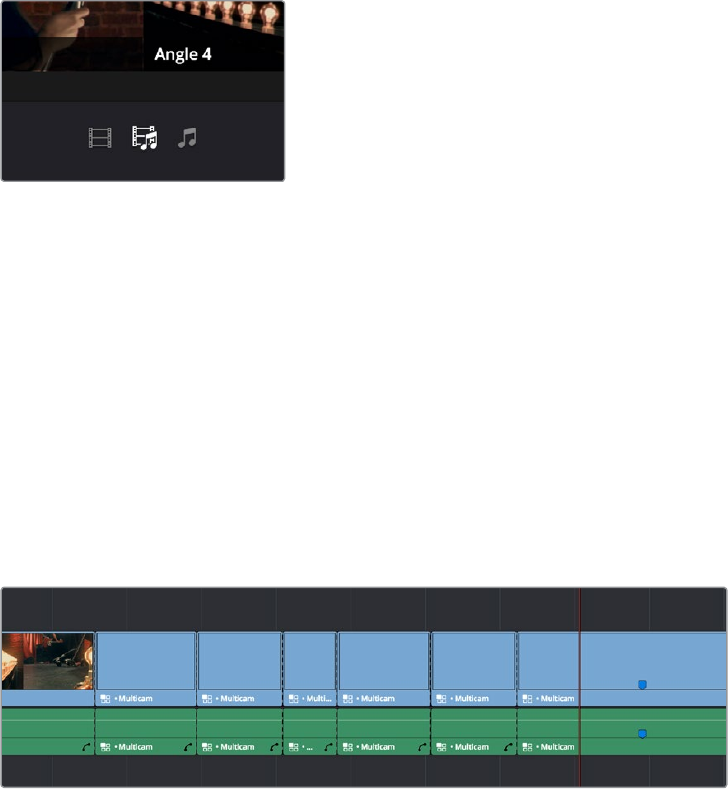
412
Multicam Editing Part 3 – 21
4 Choose whether you want to switch both the audio and video, just the video, or just the
audio using the Audio/Video selection buttons at the bottom center of the Multicam
Viewer. You can also choose Edit > Multicam > Video and Audio (Option-Shift-[ ), Video
Only (Option-Shift-] ), Audio Only (Option-Shift-\).
Buttons for choosing whether to switch the
video, the audio, or both
5 Start playback, and while watching the program play, do one of the following:
Click any angle in the Multicam Viewer to insert a cut in the Timeline and switch to
that angle. As you cut-and-switch, the cuts immediately appear in the Timeline while
you play onward.
Option-click any angle to switch the angle used by the current clip without adding
a cut. This is useful if you later regret the angle you cut to and just want to switch
the entire segment since the last cut you made. This can also be accomplished by
choosing Edit > Multicam > Previous Angle (Command-Shift-Left Arrow) or Next Angle
(Command-Shift-Right Arrow).
As you play, the entire mix in the Timeline will play along with what you’re switching, so
you can work in context.
A timeline while it’s being edited using cut and switch
6 When you’re ready to stop multicam editing, simply stop playback. If you want to start
trimming the Timeline to fine-tune what you’ve done, choose Source from the Source
Viewer mode pop-up, and you can re-edit and trim the multicam clips in the Timeline
just like any others.
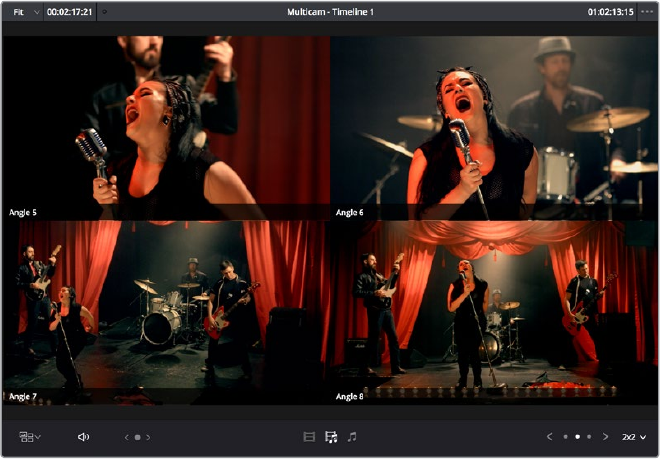
413
Multicam Editing Part 3 – 21
Multicam Controls in the Source Viewer
The Source Viewer, in Multicam mode, has four sets of controls that let you set up and execute
multicam editing.
The Source Viewer showing Multicam switching controls
Multicam Angle buttons: Each multicam angle displayed in the Source Viewer is a
button that lists the angle name underneath. Clicking any of these buttons inserts a cut
and switches the angle of the next clip, while Option-clicking changes the angle of the
clip at the position of the playhead without adding a cut.
Audio/Video Selection buttons: Clicking any of these buttons inserts a cut and
switches the angle of the next clip, while Option-clicking changes the angle of the clip
at the position of the playhead without adding a cut.
Multicam display pop-up: Lets you choose how many angles to view while switching.
Depending on your workstation’s performance, reducing the number of angles can
improve playback performance while you edit. You can choose from a grid of 1x1, 1x2,
2x2, 3x3, or 4x4 angles to view.
Multicam Page buttons: If there are more angles within the multicam clip intersecting
the playhead in the Timeline than the Multicam Viewer is set to show (via the multicam
display pop-up), then page controls appear that let you choose which set of angles you
want to view. Click any dot to jump to that page of angles, or click the arrows to move
among next/previous sets of angles.
Multicam Keyboard Controls
There’s also a full set of keyboard shortcuts that can be used for multicam editing.
Multicam Cut: (Clip > Multicam Cut submenu) Pressing the 1 through 9 number keys
performs a cut-and-switch operation, the same as if you’d clicked on an angle button of
a multicam clip in the Source Viewer.
Multicam Switch: (Clip > Multicam Switch submenu) Pressing Option-1 through 9
performs a switch operation, the same as if you’d Option-clicked an angle button of a
multicam clip in the Source Viewer.

414
Multicam Editing Part 3 – 21
Previous/Next Angle: (Edit > Multicam submenu) Pressing Command-Shift-Left or
RightArrow lets you switch to the previous or next angle.
Audio/Video Switching: (Edit > Multicam submenu) Pressing Option-Shift-[ sets the
Multicam Viewer to cut or switch both Video and Audio at the same time. Pressing
Option-Shift-] sets the Multicam Viewer to cut or switch Video only. Pressing Option-
Shift-\ sets the Multicam Viewer to cut or switch Audio only.
Previous/Next Page: (Edit > Multicam submenu) Pressing Option-Shift-Left or Right
Arrow lets you move to the previous or next page of multicam angles, if there are more
angles than can be displayed in the Viewer’s current multi-angle setting.
Editing Multicam Clips in the Timeline
When it comes to editing and trimming, there’s no functional difference between multicam
clipsand any other kind of clip. Because you’re technically adding through-edits to a single clip,
you have the option or deleting any edit by selecting it and pressing the Delete key.
But multicam clips are special in that you always have the option of switching angles, either
using the Multicam Viewer, or right in the Timeline via each clip’s contextual menu.
To switch the angle of any multicam clip in the Timeline:
Right-click any clip and choose a new angle from the “Switch Multicam Clip
Angle” submenu.
In the event that you want to eliminate all unused angles from a multicam clip and “flatten” it to
simply be a single clip in the Timeline, there’s a command for that.
To flatten a multicam clip in the Timeline:
Right-click any clip and choose Flatten Multicam Clip from the contextual menu.
Allunused angles are deleted, the clip becomes shorter if it included black tails
because of another unused angle, and you end up with a single ordinary clip in
theTimeline.
Referencing a Line Cut
You may sometimes be provided with what’s called a “Line Cut” from a production.
This is a pre-edited version of the program, cut live with the switcher and recorded
during the performance or event, that’s meant to be used as a reference for what
you’re doing. If you want to reference a Line Cut that’s been given to you as a movie
file, you can add it as an Offline Reference Movie, and compare it to the Timeline using
the Offline Reference Movie mode of the Source Viewer in the Edit page. For more
information on using an Offline video to compare with a timeline in the Edit page, see
Chapter 33, “Preparing Timelines for DaVinci Resolve Import.”
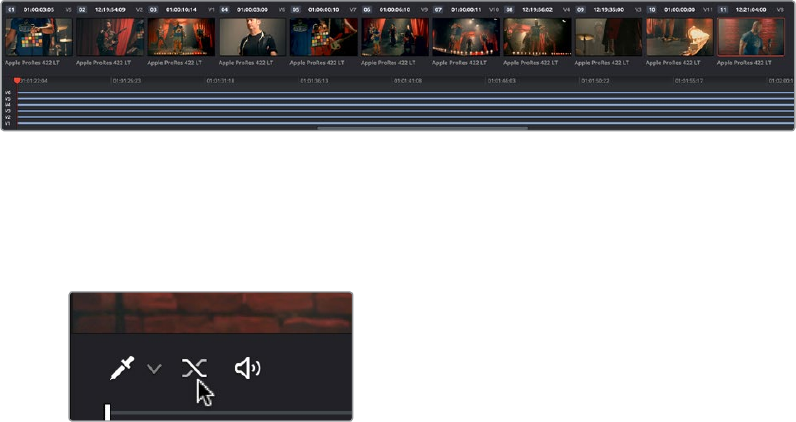
415
Multicam Editing Part 3 – 21
Grading Multicam Clips
Multicam clips appear like any other clip in the Color page. However, each angle within a
multicam clip has its own grade (unlike the Take Selector described later, in which all takes
share the same grade). If you grade a multicam clip, you’re actually editing the grade of the
specific angle that’s currently exposed in that clip.
If you want access all of the angles within a multicam clip for grading, right-click it and choose
“Open in Timeline” to expose each angle within a superimposed stack. Then you can open the
Color page and grade whatever angles you want, whether they’re visible back in the Edit page
or not. You might do this to make the different angles match one another better, or to pre-grade
all of the angles to give them the look you want prior to multicam editing.
An open multicam clip in the Color page exposes all of its angles for individual grading
Because opening multicam clips in the Timeline results in a vertical stack of superimposed
clips, you’ll want to turn on Unmix in the Color page viewer so that you can actually see the
currently selected angle in the Thumbnail Timeline while you work.
The Unmix control lets you see only one
of a superimposed stack of clips
When you’re done grading the individual angles, go back to the Edit page, and use the path
control at the bottom left-hand corner of the Timeline to return to your edited timeline.
417
Take Selectors, Compound Clips, and Nested Timelines Part 3 – 22
Take Selectors, Compound Clips,
andNested Timelines
This chapter covers a variety of different ways you can turn multiple clips into a single object in
the Timeline, to accommodate a variety of different editing tasks. Take Selectors, Compound
Clips, and Nested Timelines all appear as a single clip in the Timeline, but they all organize
multiple clips in different ways. Take Selectors let you organize multiple clips vertically, making it
easy to associate clips with one another so you can easily switch among them. Compound Clips
and Nested Timelines let you organize multiple clips horizontally, so that you can manage long
or short sequences of clips within an edit as a single clip, when convenient.
This chapter covers the following topics:
Take Selectors 418
Compound Clips 419
Grading Compound Clips 421
Nested Timelines 422
Editing the Contents of a Nested Timeline 422
Swapping the Source Viewer With the Timeline 423
Decomposing Nested Timelines in Place 423
Decomposing Nested Timelines While Editing 423
Grading Nested Timelines 423
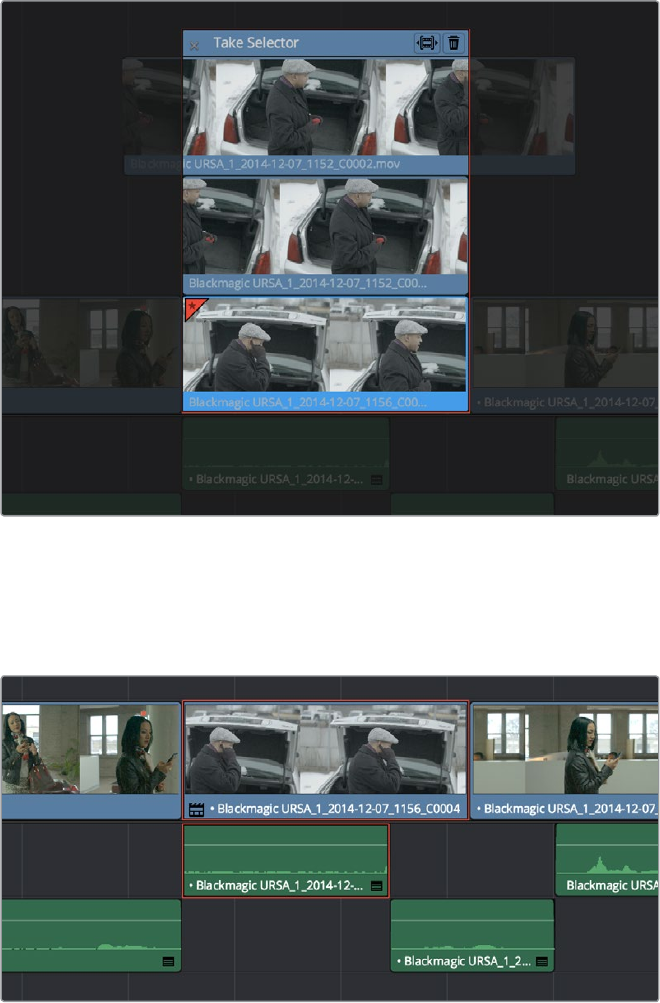
418
Take Selectors, Compound Clips, and Nested Timelines Part 3 – 22
Take Selectors
Take Selectors in DaVinci Resolve provide a way for you to manage multiple takes or versions
of a particular clip in the Timeline. They’re ideal for storing multiple useful takes for scenes
where you or the client can’t quite decide which one is the best, or for maintaining multiple
versions of VFX clips that are going through different iterations.
When you place a number of clips inside a Take Selector, only one clip appears in the Timeline,
but you can open that Take Selector and switch to any other take or version that’s stored within
to switch which clip appears in the Timeline whenever you want.
A Take Selector, shown open, with several alternate takes placed within
Take selectors are easy to create and use and populate. Once you’ve placed a number of clips
inside the Take Selector, you can slip each clip’s range of media, or choose a new clip to appear
in the Timeline, before closing the Take Selector.
When closed, a Take Selector appears as a regular clip with a badge
419
Take Selectors, Compound Clips, and Nested Timelines Part 3 – 22
When closed, multi-take clips can be edited, trimmed, graded, and rendered like any other clip
in the Timeline. A Take Selector badge appears to the left of the name of a clip to which it’s
applied to show its status; double-clicking this badge opens the Take Selector so you can
adjust its contents.
Methods of using Take Selectors:
To create a Take Selector: Right-click any clip that’s not a Title or Generator, and
choose Take Selector from the contextual menu. The Take Selector interface
appears, disabling the rest of the Timeline temporarily while you work with the Take
Selector’s contents.
To populate a Take Selector: Drag any clip from the Media Pool into the Take Selector,
and it appears “stacked” on top of the original clip in the Timeline.
To choose the current clip: Click any clip so that it’s highlighted in blue, and click the
close button at the upper-left corner of the Take Selector. When next you open the
Take Selector, the current clip appears at the bottom of the stack, with a star at the
upper-left corner.
To set a Take Selector to ripple the Timeline when a longer or shorter take is
selected: Click the Ripple Take button, at the upper right-hand corner of the Take
Selector panel, to the left of the trash can button.
To slip a clip within the Take Selector: Drag any clip to the left or right to slip the range
of media that appears within the Take Selector’s duration in the Timeline.
To remove a clip from a Take Selector: Click the clip you want to remove to select it,
then click the garbage can button at the upper-right corner of the Take Selector.
To close a Take Selector: Click the X close button.
To reopen a Take Selector: Double-click the Take Selector badge at the left of
a clip’s name, or right-click a multi-take clip and choose Take Selector from the
contextual menu.
To eliminate a Take Selector: Close the Take Selector, if open, then right-click that clip
in the Timeline and choose Finalize Take from the contextual menu.
Compound Clips
You can select a series of clips in the Timeline, be they edited one after the other in serial or
superimposed and stacked in parallel, and turn them into a Compound Clip, which is a single
clip in the Timeline that’s actually comprised of many other audio and video clips embedded
inside. This allows you to work with a block of clips as if it were a single unit, governed by a
single set of Inspector controls, and able to be connected to another clip in your timeline by a
single transition.
Editing a compound clip works the same as editing any other type of clip. They can be edited,
trimmed, and deleted using all the same methods. In addition, compound clips can be renamed,
and decomposed back into their component clips right in the Timeline.
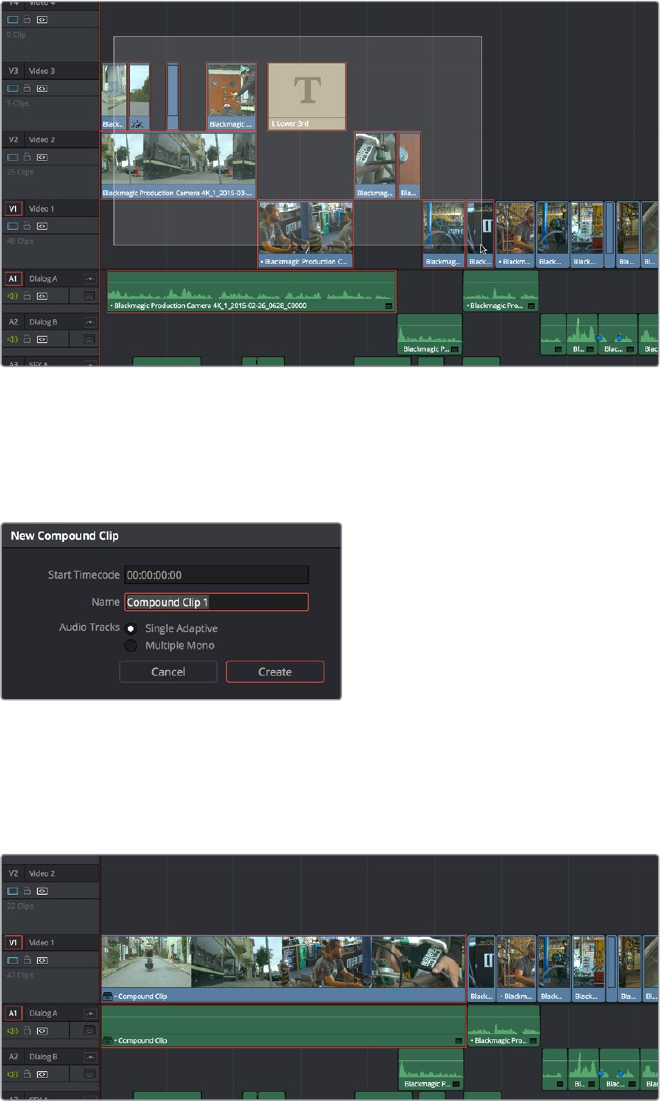
420
Take Selectors, Compound Clips, and Nested Timelines Part 3 – 22
To create a compound clip:
1 Select a range of clips.
Selecting a range of clips to turn into a compound clip
2 Right-click one of the selected clips and choose New Compound Clip.
3 Enter an optional start timecode, a name, and choose what kind of audio tracks you
want for the compound clip you’re about to make, and click Create.
The New Compound Clip Properties dialog
A compound clip is created which takes the place of the original clips you selected on
the Timeline. Additionally, a copy of that compound clip appears in the currently
selected bin of the Media Pool.
The resulting compound clip
To rename a compound clip:
1 Either click the name of the compound clip twice to select the name text, or right-click
the clip and choose Rename from the contextual menu.
2 Type a new name, and press the Return key to accept the change.
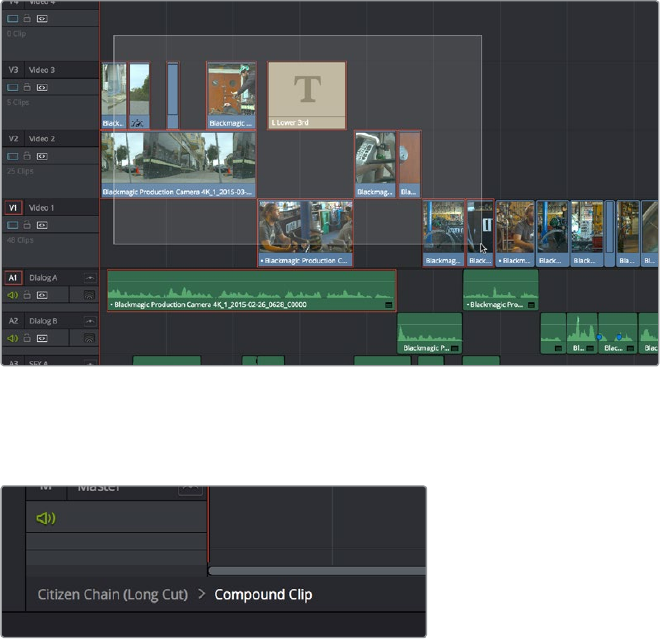
421
Take Selectors, Compound Clips, and Nested Timelines Part 3 – 22
To edit a compound clip:
1 Right-click any compound clip and choose Open in Timeline from the contextual menu.
The Timeline updates with the contents of the compound clip, which you can re-edit at
your discretion.
An open compound clip in the Timeline
2 To return to the original timeline when you’re finished, click the name of the enclosing
timeline in the Path Control at the bottom left-hand corner of the Timeline.
The path control you can use to close the compound clip
To decompose a compound clip into its individual clips:
Right-click any compound clip and choose Decompose in Place from the contextual
menu. The compound clip is replaced by the individual clips it was made from.
To edit a compound clip from the Media Pool to the Timeline as individual clips:
Command-drag a compound clip from the Media Pool or Source Viewer to the Timeline
to edit it as a sequence of individual, decomposed clips. You can press or release the
Command key any time while dragging to choose whether to edit it as a single
compound clip or multiple decomposed clips.
Grading Compound Clips
Since compound clips act like a single clip in the Timeline, you can grade them as a single clip
in the Color page. However, if you want to individually grade the original clips inside the
compound clip, you can use the Open in Timeline command to access its constituent clips, and
then open the Color page, where you’ll find each of the individual clips available for separate
grading. When you’re done, go back to the Edit page and close the compound clip, and you’ll
go back to seeing it as a single clip whenever you open the Color page.
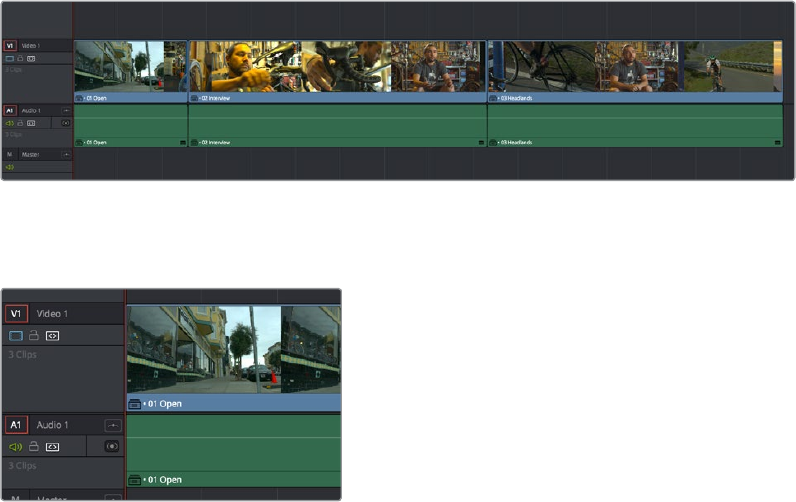
422
Take Selectors, Compound Clips, and Nested Timelines Part 3 – 22
Nested Timelines
Timelines can be edited inside other timelines, either partially or whole. For example, if you’ve
edited a program in scenes or reels such that each reel is contained in a separate timeline, you
can edit all of the timelines together, one after the other, into a single timeline to assemble them
into a final program.
Multiple timelines edited together into a single sequence
Nested Timeline clips appear with a special badge to the left of the Timeline name.
The badge that indicates a nested timeline
Timelines can be edited like any other clip, you can select one or more timelines and drag and
drop them into another timeline, drag them onto the Timeline Viewer editing overlay, or use the
toolbar editing buttons or keyboard shortcuts to edit them, just as you would any other clip.
Additionally, you can select multiple timelines in the Media Pool, right-click them, and choose
Create Timeline Using Selected Clips to quickly assemble a group of timelines into a
nested sequence.
The one exception is that you must drag and drop a timeline into the Viewer if you want to use it
to set In and Out points, since double-clicking a timeline, or selecting a timeline and pressing
Return simply opens it into the Timeline Editor. However, you can set In and Out points for
timelines in the Filmstrip of the Media Pool, or you can edit a timeline into another timeline in its
entirety, and then trim the head and tail down to just what you need. Double-clicking a nested
timeline opens it into the Source Viewer for trimming, exactly like any other clip.
Editing the Contents of a Nested Timeline
If you want to edit the contents of a nested timeline, you can right-click it and choose Open in
Timeline. Unlike Compound Clips, no path control appears when you do this, because you’ve
simply opened the original timeline. To go back to the previous timeline, find and double-click it
in the Media Pool, or choose it from the Timeline pop-up at the top of the Timeline Viewer.
Editing an original timeline does nothing to change the duration of nested instances of that
timeline inside other timelines. If you trim or delete clips in the original timeline that appear in
nested instances of that timeline, then those areas of the nested timeline simply go black.
423
Take Selectors, Compound Clips, and Nested Timelines Part 3 – 22
Swapping the Source Viewer With the Timeline
When editing the partial contents of one timeline into another, it can be useful to see the
contents of a timeline that’s open in the Source Viewer in the Timeline Editor. To do so, choose
Timeline > Swap Timeline and Source Viewer (Command-Page Up). This puts the Timeline that
was open in the Source Viewer into the Timeline Editor, and the Timeline that was in the
Timeline Editor into the Source Viewer. This makes it easier to mark In and Out points while
seeing the exact boundaries of clips, prior to pressing Command-Page Up to swap the contents
of the Source Viewer and Timeline Editor once again in preparation for executing the next edit.
Decomposing Nested Timelines in Place
To decompose a nested timeline that’s already been edited into another timeline back into its
constituent clips, right-click it and choose Decompose in Place. You can also do this for multiple
selected nested timelines, all at once.
Decomposing Nested Timelines While Editing
You can also Command-drag a Timeline clip from the Media Pool or Source Viewer to the
Timeline to edit it as a sequence of individual, decomposed clips. You can press or release the
Command key at any time while dragging to choose whether to edit a timeline as a single clip,
or as individual decomposed clips.
Grading Nested Timelines
Similarly to Compound Clips, nested timelines act like a single clip in the Timeline; you can
grade them as a single clip in the Color page. However, if you want to individually grade the
original clips inside the Nested Timeline, you can either open that timeline from the Media Pool,
or right-click that clip and choose Open in Timeline in order to access its constituent clips.
425
Trimming Part 3 – 23
Trimming
Most editors would agree that trimming is half the job of editing. While you can make many
kinds of changes in the Timeline using the selection and razor blade tools, there is a dedicated
Trim mode in which you can perform more sophisticated trim operations in fewer steps using
either the mouse or keyboard shortcuts, depending on how you like to work. Mastering DaVinci
Resolve’s trimming operations will save you time when doing the necessary work of fine-tuning
your edit.
This chapter covers the following topics:
Summarizing Trim Operations 426
Selection-Based Trimming Using the Trim Tool 426
How the Trim Tool Diers From the Selection Tool 426
Using the Trim Tool With the Mouse 428
Turning O the Heads Up Display While You Trim 432
Trim Tool Operations With the Keyboard 432
Trimming Using Timecode Entry 435
How to Enter Timecode Values 435
Commands to Make Selections and Trim 436
Trimming Clips in the Source Viewer 437
Ripple Editing Rules 438
Using Auto Select Controls to Control Trimming 440
Using Auto Select to Control Which Clips are Trimmed 440
Using Manual Selections to Control Which Clips Are Trimmed 441
Using Auto Select to Control Which Tracks Are Rippled 442
Trimming Multiple Edits or Clips at Once 444
Resizing and Rolling Multiple Edit Points 444
Rippling Multiple Edit Points 444
Asymmetric Trimming 446
Slipping Multiple Clips 448
Sliding Multiple Clips 449
Keyboard Trimming During Looped Playback 449
Dynamic JKL Trimming 450
Quick Trimming 450
Trimming in Dynamic Mode 451
Trim Operations that are Targeted Using the Playhead 452
Trim Start and Trim End 452
Resize, Ripple, and Roll Start and End Commands 453
Slip and Slide Playhead to In and Out Commands 454
Extend Edits 454
426
Trimming Part 3 – 23
Summarizing Trim Operations
Before going into the different methods of trimming that are available, users who are new to
editing might benefit from a quick summary of what each trimming operation actually does.
Each trim operation is designed to let you move edits and clips in relation to whichever clips are
around them, by performing several operations at once. The five primary methods of
trimming are:
Resize: Shortens or lengthens the end of an outgoing clip or the beginning of an
incoming clip, while either overwriting a neighboring clip or leaving a gap behind as
necessary. While this isn’t usually included in a discussion of “trim” operations, it’s
actually the simplest kind of trimming you can do.
Roll: Moves an edit point to the left or right by either shortening the outgoing clip while
lengthening the incoming clip, or vice versa. Roll edits do not change the duration of
the overall Timeline.
Ripple: Shortens or lengthens the end of an outgoing clip or the beginning of an
incoming clip, while simultaneously moving all clips either to the right in the Timeline
(if you’re rippling to lengthen a clip) or left in the Timeline (if you’re rippling to shorten a
clip) to fill the gap or prevent overwriting that would otherwise occur if you were doing
a resize operation. Ripple edits do change the duration of the overall Timeline and can
alter the sync relation between different tracks if you’re not careful.
Slip: Keeps a clip in the same place in the Timeline, while changing the range of media
that appears in that spot. Slip edits do not change the duration of the overall Timeline.
Slide: Keeps a clip’s range of media the same, but moves that clip to the left or right by
either shortening the outgoing clip to its left while lengthening the incoming clip to its
right, or vice versa.
Selection-Based Trimming
Using the Trim Tool
Trim mode differs from Selection mode in that operations that would move clips with the
Selection tool will either slip or slide clips with the Trim tool. Other operations that would resize
edits with the Selection tool instead ripple the Timeline to automatically close gaps when using
the Trim tool. The following sections describe the various trim operations that are available,
both when using the mouse, and when using the keyboard.
To enter Trim Edit mode:
Click the Trim Edit button, or press the T key.
How the Trim Tool Differs From the Selection Tool
Aside from the actual trimming operations that are available, there are a few other important
differences between the Trim tool and the Selection tool.
Selecting Edit Points
When the Trim tool is selected, dragging a bounding box over a series of clips in the Timeline
selects the edit points to join clips together, instead of the clips themselves. This makes it fast
and easy to select multiple edit points that you want to operate on simultaneously.
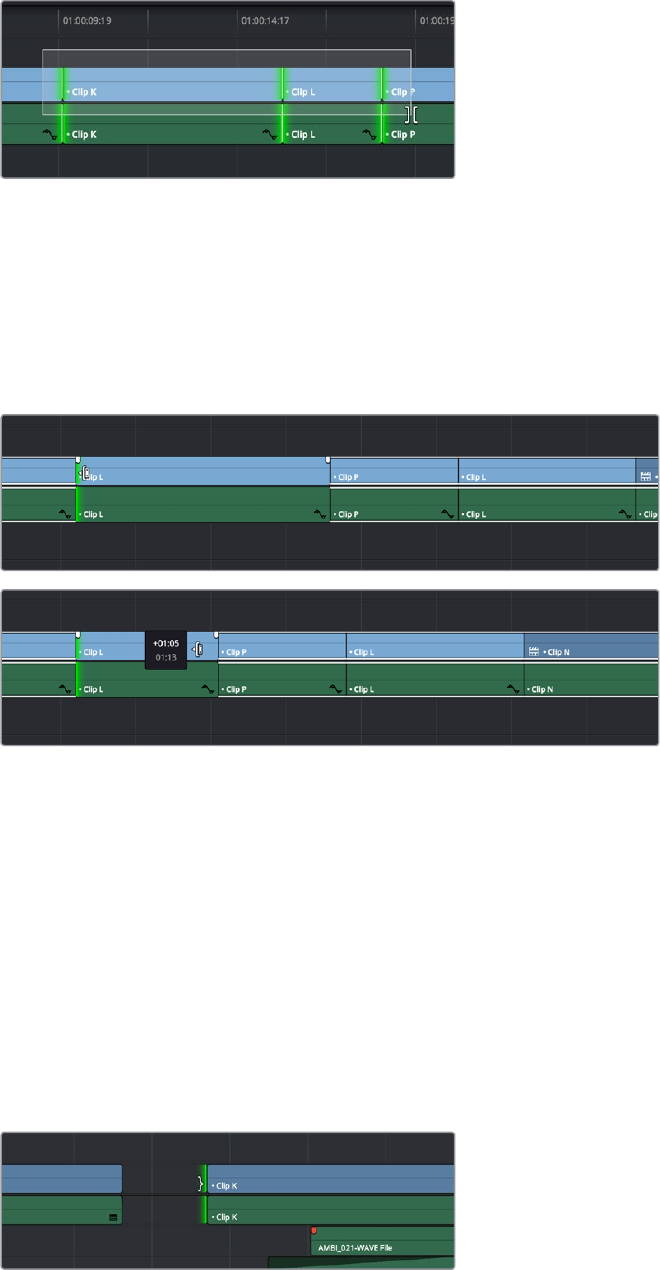
427
Trimming Part 3 – 23
Selecting edit points in the Timeline using the Trim tool
Rippling the Timeline With Dierent Operations
When the Trim tool is selected, other commands and controls that would ordinarily resize a clip
or clips and leave gaps in the Timeline instead move (ripple) clips that are to the right of the clip
or edit you’re trimming over to the left to prevent gaps whenever clips or edits are moved
or resized.
Rippling the incoming edit point of Clip L to resize it and prevent a gap from
appearing by moving all clips that are to the right (Clips P, L, and N) over to the left
For example, the Retime controls, the Extend and Trim Start/End commands, and the Nudge
keyboard shortcuts all work differently depending on whether you’re using the Selection or
Trim tools. This lets you use one set of tools to do different operations, depending on what you
need to do.
Rippling Gap
You can also use the Trim tool (or other trim operations described later in this chapter) to ripple
the start and end of a gap in the Timeline. Rippling a gap lets you grow or shrink the gap while
moving the portion of the Timeline to the right of the gap forward or backward in time.
Whenever you ripple against gap, a two-up display appears that lets you see both the clip
you’re trimming and whatever superimposed clips may be showing through that gap.
Using the Trim tool to ripple the out point of a gap to narrow it
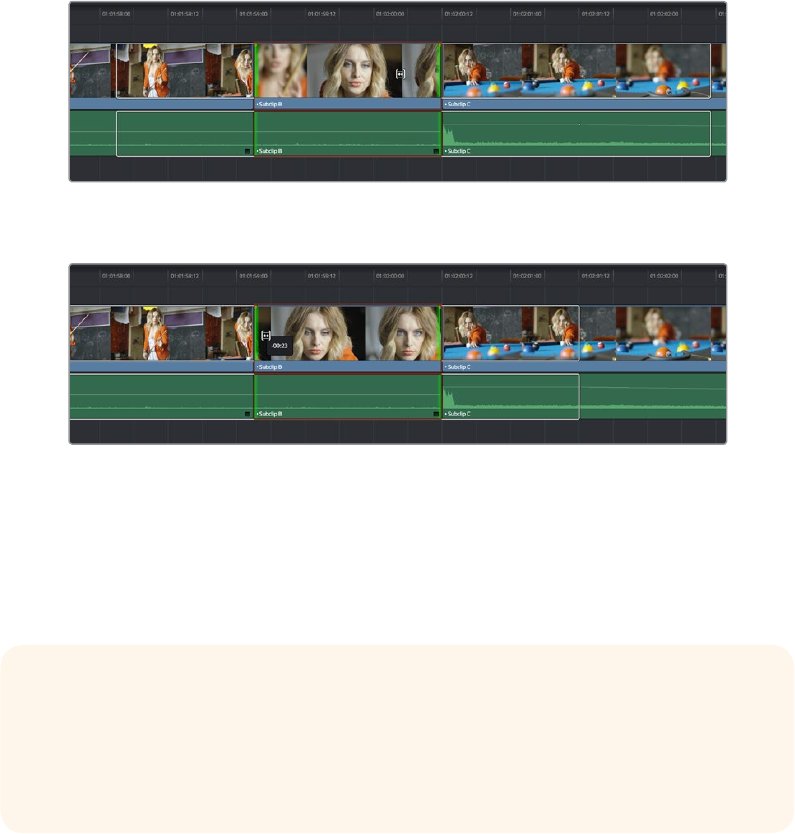
428
Trimming Part 3 – 23
Using the Trim Tool With the Mouse
When trimming using the mouse, you can perform every kind of trim operation that’s available
using a single tool, simply by clicking the Trim mode/tool button, and then dragging on the
appropriate area of a clip in the Timeline.
Methods of trimming with the mouse in Trim Edit mode:
To slip a clip: To slip a clip’s range of content without changing its position in the
Timeline, click the middle top region of a clip, and then drag to the left or right to
“slip” the clip to contain a different range of frames. A dashed overlay shows the total
duration of media available for you to slip with, which moves left and right as you drag.
Clicking the top clip area before a slip, an overlay shows the clip’s available range of media
After dragging to slip, clips don’t move, but the slipped clip’s range of media has changed
When slipping clips, a 4-up display shows all relevant outgoing and incoming frames, so you
can compare the continuity of action from one clip to the next. During a slip, the top two frames
update to show you the new incoming and outgoing frames of the clip being slipped, relative to
the unchanging outgoing frame of the clip to the left and incoming frame of the clip to the right.
TIP: You can temporarily disable this four-up display by pressing the Shift key while
you ripple so that you only see the frame at the position of the playhead. This makes it
possible for you to see which frame passes the playhead by as you ripple the
Timeline. You can toggle this two-up display off completely by choosing View > Enable
Preview During Editing, or by pressing Shift-Q.
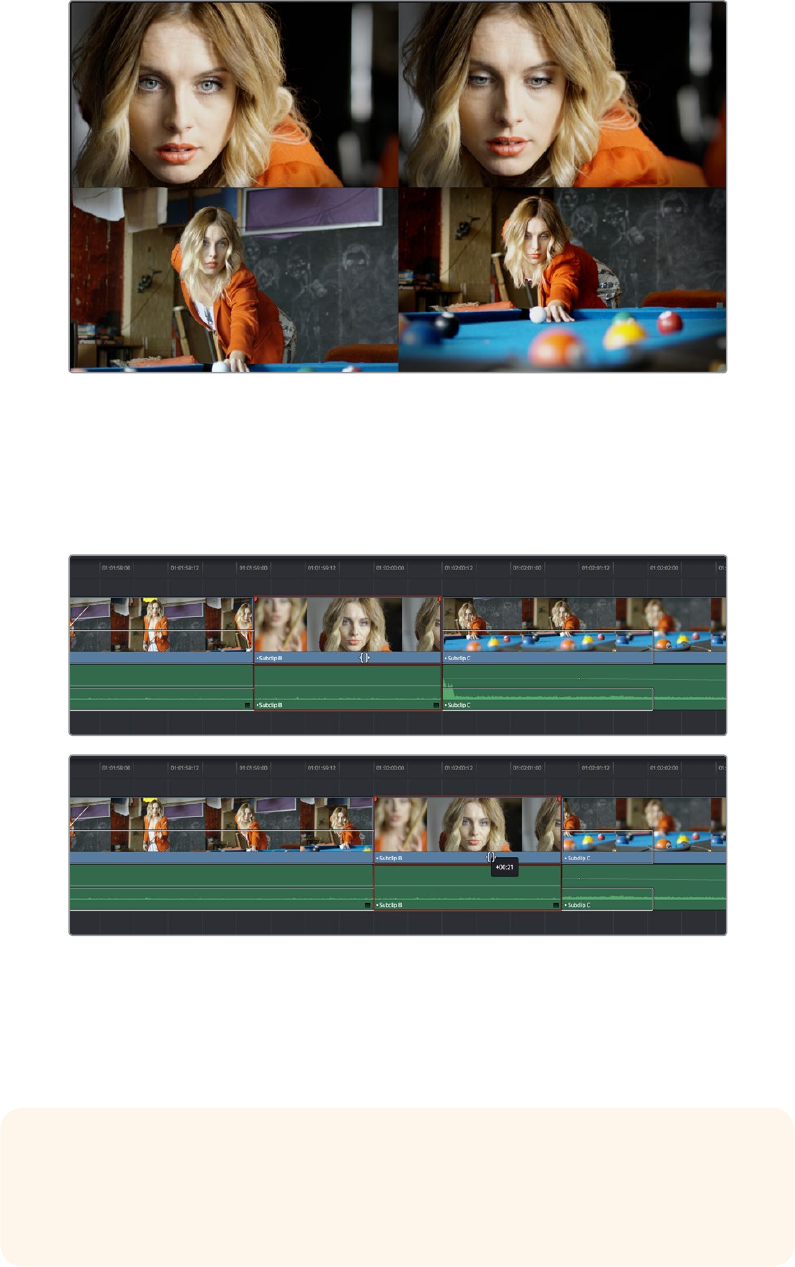
429
Trimming Part 3 – 23
Four-up display when slipping a clip
To slide a clip: To slide a clip, moving it to another position in the Timeline while
simultaneously adjusting the Out point of the previous clip and the In point of the next
clip to accommodate the change in position of the current clip being dragged, click the
bottom-middle name bar of the clip and drag it to another position.
After dragging to slide, the selected clip is at a new location, surrounding clips filled the gap
When sliding clips, a 4-up display shows all relevant outgoing and incoming frames, so you can
compare the continuity of action from one clip to the next. During a silde, the bottom two
frames update to show you the new outgoing frame of the clip to the left, and the new incoming
frame of the clip to the right of the clip being slid.
TIP: You can temporarily disable this four-up display by pressing the Shift key while you
ripple so that you only see the frame at the position of the playhead. This makes it
possible for you to see which frame passes the playhead by as you ripple the Timeline.
You can toggle this two-up display off completely by pressing Shift-Q
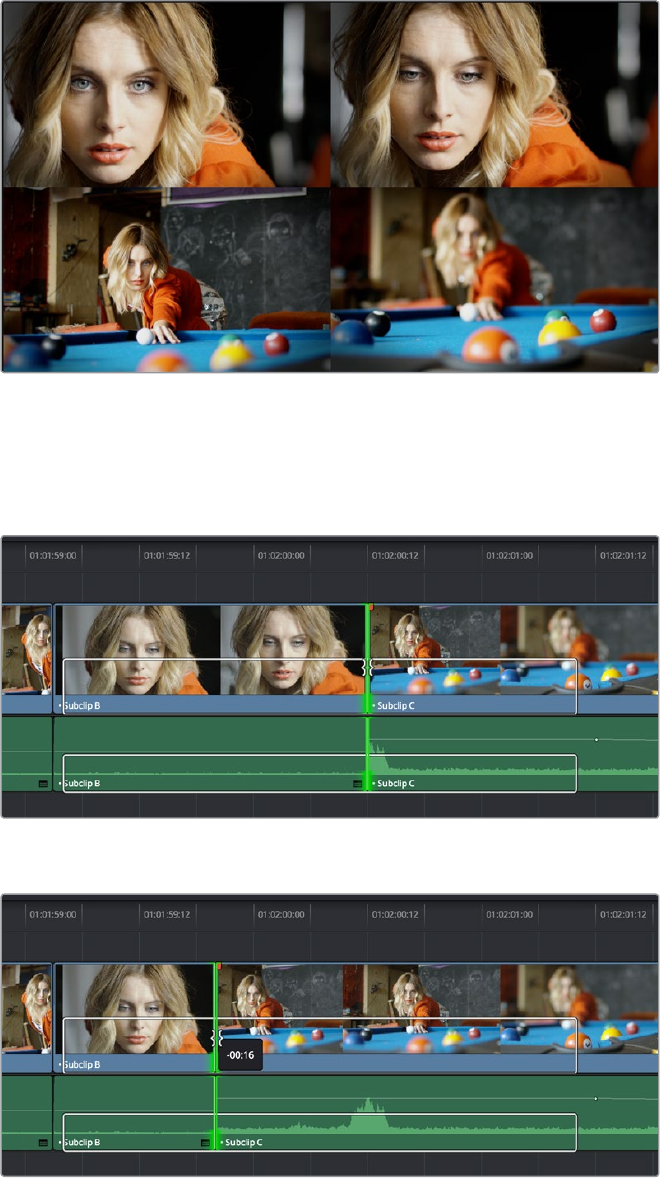
430
Trimming Part 3 – 23
Four-up display when sliding a clip
To roll an edit point: To roll an edit, moving the Out point of the outgoing clip and the In
point of the incoming clip at the same time, drag an edit point between two clips to the
left or right. (Roll edits can also be done in Selection Mode.)
Selected edit point before roll
Edit point moved further to the right, both adjacent clips resized to prevent gap
When rolling an edit, a 2-up display shows the changing continuity of action from the
outgoing frame of the clip to the left to the incoming frame of the clip to the right.
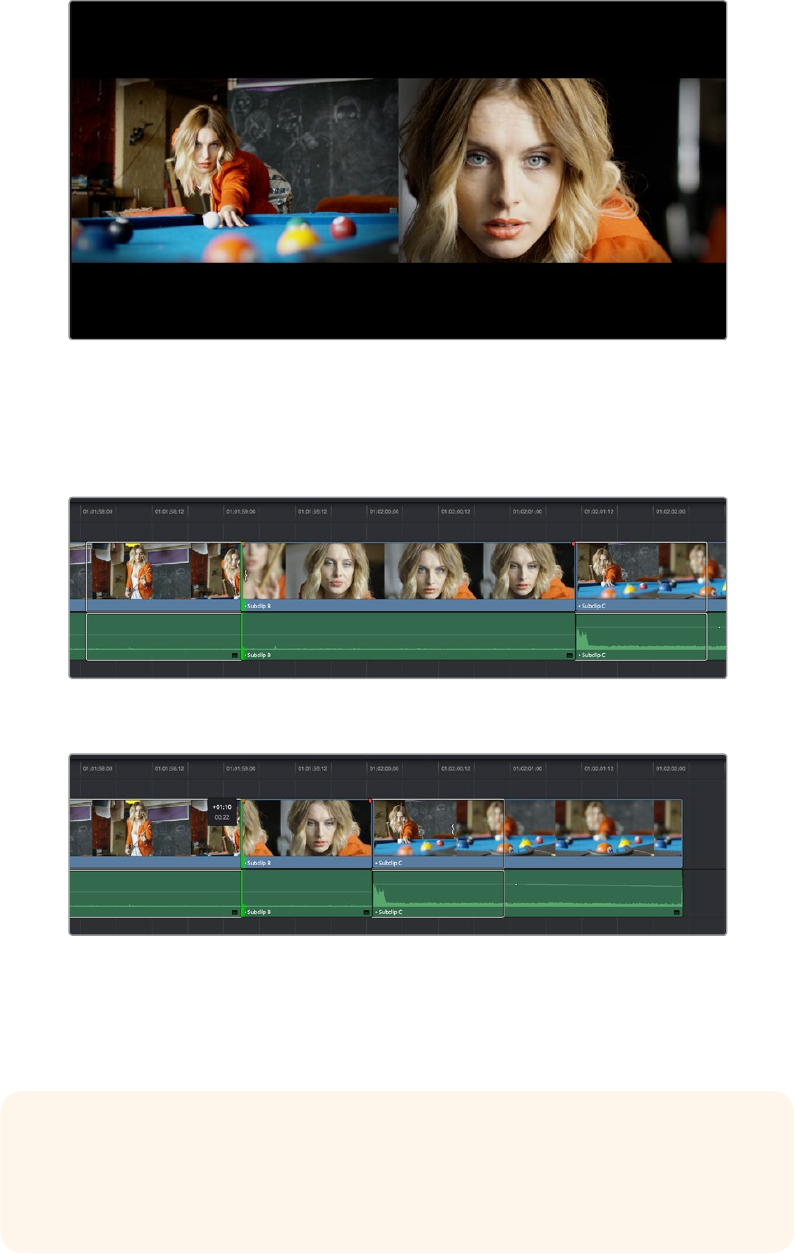
431
Trimming Part 3 – 23
Two-up display when rolling an edit
Ripple Edit: To ripple the outgoing or incoming part of an edit to add or remove media
to a clip while simultaneously moving all other clips at the left in the Timeline to make
room, click the Ripple tool, and drag an edit point to a new position in the Timeline
Selected outgoing half of an edit point before ripple
Rippled clip is shorter, the rest of the Timeline has moved left to fill the gap
When rippling an edit, a 2-up display shows the continuity of action from the outgoing
frame of the clip to the left to the incoming frame of the clip to the right. Which frame
updates depends on which side of the edit you’re rippling.
TIP: You can temporarily disable this two-up display by pressing the Shift key while
you ripple so that you only see the frame at the position of the playhead. This makes it
possible for you to see which frame passes the playhead by as you ripple the
Timeline. You can toggle this two-up display off completely by pressing Shift-Q.
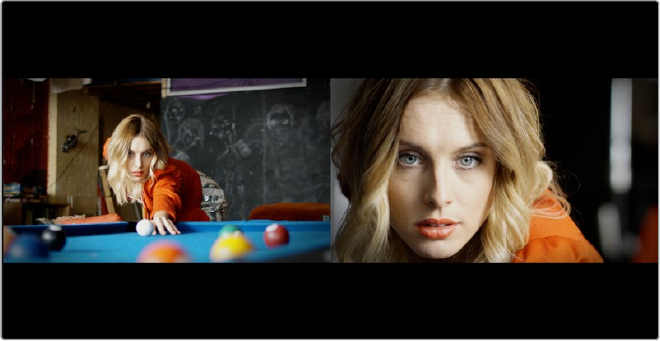
432
Trimming Part 3 – 23
Two-up display when rippling an edit
Turning Off the Heads Up Display While You Trim
If you press the Shift key while performing most drag and trim operations, you can suspend the
multi-frame heads up displays that appear in the Timeline window in order to focus on the frame
that intersects the Timeline.
To toggle the two- and four-frame heads up displays off or on:
Choose View > Enable Preview During Editing
Press Shift-Q to toggle the trimming display off, and Shift-Q again to toggle it back on.
Trim Tool Operations With the Keyboard
You can also perform every trim operation more precisely using the Nudge keyboard shortcuts.
To trim with the keyboard:
1 Press T to select the Trim tool.
2 To trim the selection, do one of the following:
To slide a clip: Press Shift-V to select a clip, and press the Comma key to slip it one
frame to the left, or the Period to slip it one frame to the right. Shift-Comma and Shift-
Period slips the clip in 10 frame increments.
To slip a clip: Press Shift-V to select a clip, then press the S key to toggle to Slip
mode (pressing S again toggles back to Slide mode) and press Comma or Period to
slide its contents to the left or right. Shift-Option-Comma and Shift-Option-Period
slides the contents in 5 frame increments.
To roll an edit: Press V to select an edit point, then press the Comma key to nudge
it one frame to the left, or the Period to nudge it one frame to the right. Shift-Comma
and Shift-Period rolls the edit in 5 frame increments.
To ripple an edit: Press V to select an edit point, then press U to select either the
incoming or outgoing side of the edit by itself. Then, press the Comma key to ripple
the selected In or Out point of the clip to the left, or the Period to ripple it one frame
to the right. Shift-Comma and Shift-Period ripples in 5 frame increments.
3 If you want to suspend the two or four-up display that appears in the Timeline Viewer
while trimming, you can press Shift-Q to toggle the trimming displays off and on.

433
Trimming Part 3 – 23
Important Trimming Keyboard Shortcuts
When trimming using the keyboard, the following keyboard shortcuts are important for you to
remember. Most of these commands, and many more that haven’t been assigned to keyboard
shortcuts, can also be found in the Trim menu. You can remap many of these commands to
different keyboard shortcuts using the Keyboard Mapping panel of the User Preferences.
Formore information, see Chapter 3, “Project Settings and Preferences.”
Key Shortcut Function
TTrim mode, ripples edits and slips or slides clips.
A Selection mode, resizes edits and moves clips.
Command-L and J Fast trim commands, lets you dynamically trim the selection at 100%
forward and reverse speeds.
W Dynamic trim or resize mode, uses JKL to trim the selection
S Toggles between Slip and Slide mode when a clip is selected in
Trim mode.
V Selects the edit point closest to the playhead, and moves the
playhead there.
Shift-V Selects the clip or gap that intersects the playhead, and moves the
playhead to the center of the clip or gap. Ifthere are superimposed
clips, turn off the Auto Select controls of tracks containing clips you
don’t want to select.
Shift A modifier that temporarily disables the 2- and 4-up display that
appears when trimming edits and clips with either the pointer or
keyboard shortcuts.
Shift-Q Toggles Enable Preview During Editing, which controls visibility of
the 2- and 4-up displays that appear in the Viewer when trimming
edits and clips.
Option-F1 through F9 Toggles Auto Select for video tracks 1 through 9, making it possible
to restrict certain selection and trim operations performed with
the keyboard.
Command-Option
F1through F9
Toggles Auto Select for audio tracks 1 through 9, making it possible
to restrict certain selection and trim operations performed with
the keyboard.
U Toggles the currently selected edit point among the outgoing,
centered, or incoming part of the edit.
Option-U Toggles the currently selected edit point or clip among Video+Audio,
Video Only, or Audio Only.
TIP: When holding down the Shift key while nudging to do a “fast nudge,” the duration
of the nudge is customizable in the Editing panel of the User Preferences. By default
it’s five frames, but you can set it to whatever you want.
434
Trimming Part 3 – 23
Key Shortcut Function
Comma (,) After you’ve made a selection, nudges selected edits or clips one
frame to the left. Shift-Comma nudges 5 frames (the duration is
customizable in the Editing panel of the User Preferences).
Period (.) After you’ve made a selection, nudges selected edits or clips one
frame to the right. Shift-Period nudges 5 frames (the duration is
customizable in the Editing panel of the User Preferences).
Forward-Slash (/) This command works contextually depending on what’s selected in
the Timeline. Plays a section of the Timeline from x frames before to
y frames after (a) the playhead (ifnothing’s selected), (b) the currently
selected edit point, (c) the currently selected clip, (d) a selection of
multiple clips. This command is useful for previewing how the current
selection plays within the context of the clips immediately
surrounding it. The pre-roll and post-roll time is customizable in the
Editing panel of the UserPreferences.
Command-/ Toggles looped playback off and on.
Down Arrow, Up Arrow Moves both the playhead and selection state to the next or previous
edit point. If multiple clips or edits are superimposed, the first clip on
the lowest numbered track will be selected first, then the next clip
up, and so on until the topmost superimposed clip is selected, before
selecting the next clip in the Timeline.
E Extend edit. Resizes or ripples selected edit points to the current
position of the playhead.
Shift-[ Trim Start. Resizes (Selection) or ripples (Trim) the In point of all clips
on auto-select-enabled tracks that intersect the playhead to the
position of the playhead.
Shift-] Trim End. Resizes (Selection) or ripples (Trim) the Out point of all clips
on auto-select-enabled tracks that intersect the playhead to the
position of the playhead.
Shift-Command-[ Ripple Trim Start. Regardless of whether Selection or Trim mode is
enabled, always ripples the In point of clips on auto-select-enabled
tracks that intersect the playhead to the position of the playhead.
Shift-Command-] Ripple Trim End. Regardless of whether Selection or Trim mode is
enabled, always ripples the Out point of clips on auto-select-enabled
tracks that intersect the playhead to the position of the playhead.
IMPORTANT: While the Slip, Roll, and Slide tools will change the sync relationship of
the clips you’re adjusting with a matching soundtrack, the rest of the Timeline won’t be
affected. Using the Ripple tool can alter the overall sync relationship of large portions
of your timeline and its matching soundtrack, so you should use it with extreme care.
435
Trimming Part 3 – 23
Trimming Using Timecode Entry
You can also use absolute or relative timecode entry to trim clips and edits. What is trimmed
depends on the selection you’ve made prior to entering timecode. If you want to use timecode
to trim the selection forward relative to its current position, be sure to type an equal sign or plus
(= or +) before the timecode value; to trim the selection backward relatively, type minus (–)
before the timecode value.
To roll an edit: Select the center of an edit point, enter a timecode value, and
press Return.
To ripple an edit: Select either the outgoing or incoming half of an edit point, enter a
timecode value, and press Return.
To slip a clip: Select a clip, and press S if necessary to switch to Slip mode, enter a
timecode value, and press Return.
To slide a clip: Select a clip, and press S if necessary to toggle to Slide mode, enter a
timecode value, and press Return.
How to Enter Timecode Values
When entering timecode, type each pair of hour, minute, second, and frame values from left to
right, with a period representing a pair of zeros for fast entry. The numbers you enter appear in
the Timecode field at the upper left-hand corner of the Viewer with focus. When you’re finished
typing, press the Return key to execute the Timecode command. The rules for timecode entry
are as follows:
The right-most pair of timecode values (or period) you enter is always the
frame number.
A period to the left or to the right of any number you type is considered to be a pair
of zeroes.
A single period between two numbers is considered to either be a single zero or
ignored if it’s between two pairs of numbers.
Any untyped pairs of values to the left of what you enter are assumed to be whatever
those values were prior to the timecode you entered; this makes it easy to type partial
timecode values even when the Timeline starts at hour one.
It’s not necessary to enter colons or semicolons.
Absolute timecode is entered simply by typing in a timecode value. So long as no clips or edit
points are selected when you press the Return key, the playhead will move to that timecode
value. If an edit point or clip is selected, those will be moved or trimmed to the corresponding
timecode value, if possible.

436
Trimming Part 3 – 23
Here are some examples of absolute timecode entry using this method:
Original TC Value User-Typed Value New TC Value
01:10:10:10 15245218 15:24:52:18
01:10:10:10 2.. 01:02:00:00
01:10:10:10 15 01:10:10:15
01:10:10:10 12 01:10:10:12
01:10:10:10 1.2 01:10:01:02
01:10:10:10 115.. 01:15:00:00
01:10:10:10 23... 23:00:00:00
Relative timecode is entered by starting the timecode value with a plus (+) or minus (–). Adding
a plus results in the value you type being added to the current timecode value for purposes of
offsetting the playhead or moving a selection. Adding a minus will subtract the value you type
from the current timecode value.
Here are two examples of relative timecode entry:
+20. 00:00:20:00 is added to the current timecode value.
-5 00:00:00:05 is subtracted from the current timecode value.
Commands to Make Selections and Trim
A series of commands in the Trim menu make it fast to automatically select the In or Out point of
the clip that’s nearest to the current position of the playhead, and go into either Selection or
Trim mode in preparation for resizing or ripple trimming that edit point. These commands are:
Select Nearest Edit to Resize In
Select Nearest Edit to Resize Out
Select Nearest Edit to Ripple In
Select Nearest Edit to Ripple Out
Select Nearest Edit to Roll
Select Nearest Clip to Move
Select Nearest Clip to Slip
Select Nearest Clip to Slide
These commands are similar to using the Edit Selection (V) or Clip Selection (Shift-V) keyboard
shortcuts along with those for choosing the Selection (A) or Trim tool (T) both at once, to get
you ready for trimming in the way that you want. However, they have the added benefit of, in
some cases, letting you specifically choose the In or Out points of the clip nearest the current
position of the playhead. These commands don’t have keyboard shortcuts by default, but if you
prefer this way of working, you can assign them to keyboard shortcuts of your choosing using
the Keyboard Mapping panel of the User Preferences.
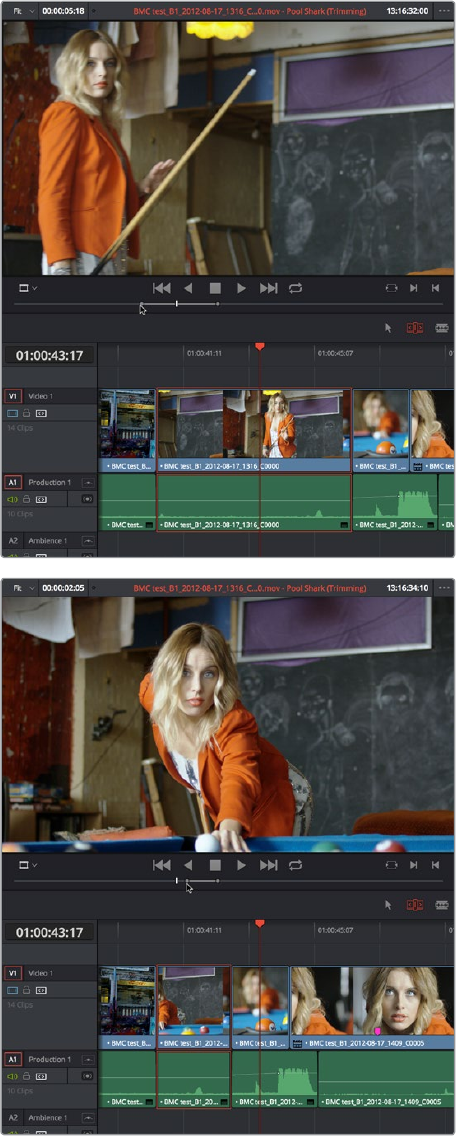
437
Trimming Part 3 – 23
Trimming Clips in the Source Viewer
Additionally, you can double-click a clip in the Timeline to open it into the Source Viewer for
trimming. When the Selection tool is selected, you can drag the In and Out markers, or use the
playhead and I and O keyboard shortcuts to resize that clip in the Timeline. With the Trim tool
selected, you can ripple the In and Out points of the clip.
A Timeline clip being ripple-resized by opening it into the
Source Viewer dragging its In point using the Trim tool
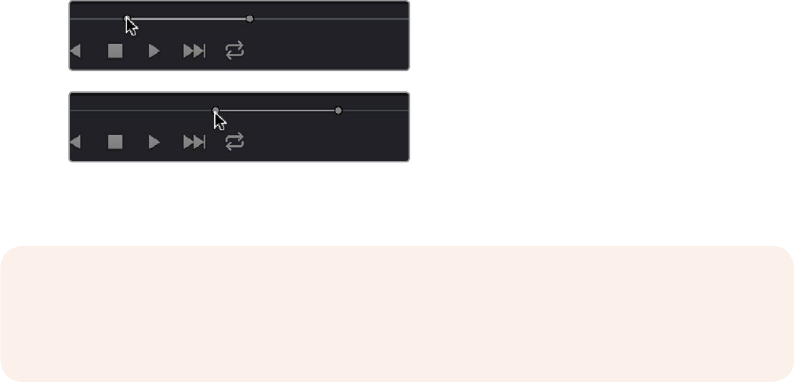
438
Trimming Part 3 – 23
You can slip the contents of the clip by holding the Shift key down and dragging either the In or
Out point.
A Timeline clip being slipped by opening it into the Source
Viewer and Shift-dragging its In point using the Trim tool
Ripple Editing Rules
Ripple operations are the only trim functions that change the duration of the overall Timeline,
and that can potentially alter the sync relationship between multiple clips on different tracks.
This makes them incredibly useful, but it’s important to understand which parts of the Timeline
will move as part of a ripple operation, and which parts won’t.
The following operations ripple the Timeline:
Ripple deleting a clip or gap (Forward-Delete)
Ripple cutting a clip (Shift-Command-X)
Rippling one or more edits or gaps using the Trim tool (press T to choose the Trim tool)
Using the Extend Edit (E), Trim Start (Shift-[), or Trim End (Shift-]) commands
in Trim mode
Using the Ripple Start (Command-Shift-[) or Ripple End (Command-Shift-]) commands
in any mode
Performing an Insert Edit (F9) or Ripple Overwrite (Shift-F10) edit
Using the Retime controls to speed up or slow down a clip in Trim mode
Using the Change Speed dialog with the Ripple Sequence checkbox turned on
Changing clips in a Take Selector with the Ripple control enabled
During a ripple edit, superimposed clips with an In point that’s to the left of the edit point or clip
being rippled are not moved. This can be seen in the previous example via the audio clip at the
bottom of the Timeline, which stays in place even as the clips on track V1 and A1 are rippled. All
clips with In points to the right of the edit point or clip being rippled move left to follow the trim
operation you’re making.
NOTE: To open a match frame of a clip that’s part of an edited sequence into the
Source Viewer using the mouse, hold the Option key down while double-clicking a
clip in the Timeline.
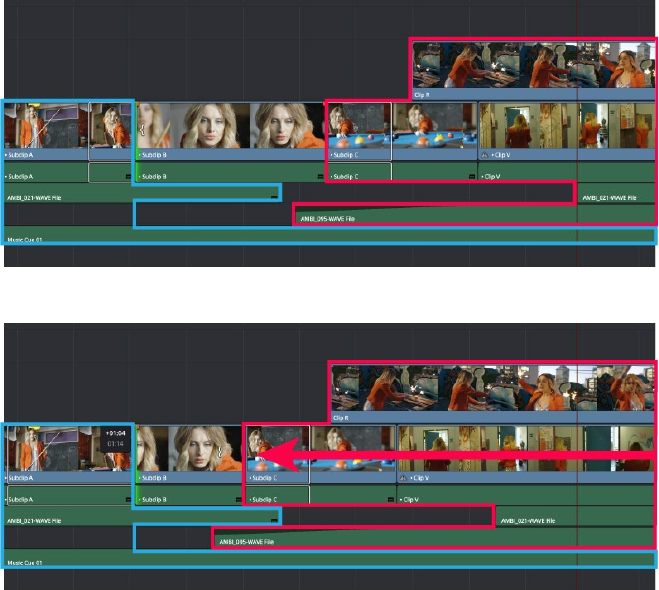
439
Trimming Part 3 – 23
Before Ripple
After Ripple
The rules of timeline rippling illustrated. All clips with In points to the left of Subclip B (the clip being
rippled) are left in place (area in blue), while all clips to the right of the edit being rippled are moved by
the duration of the ripple operation (in red)
This simple rule means that, if you’re in the habit of building sequences of clips from left to
right, long overlapping superimpositions such as titles, graphics, and music clips will stay in
place while you’re rippling various clips within a montage that you’re editing in relation to these
longer clips.
However, there’s one exception to this rule. It is often the case that split edits, where linked
audio and video are cut at different places, creates a situation where the audio In point of a pair
of linked audio and video items precedes a video In point that you want to ripple. In other
words, the audio In point extends to the left of the video In point, which ordinarily would trigger
the rule that clips with edit points to the left of a rippled edit point won’t be moved, which
would throw the audio and video of this item out of sync. In this case, you probably want to
maintain sync, so all items that are linked to a clip being rippled always ripple along with it, even
if they do have In points that extend to the left of the edit point being rippled.
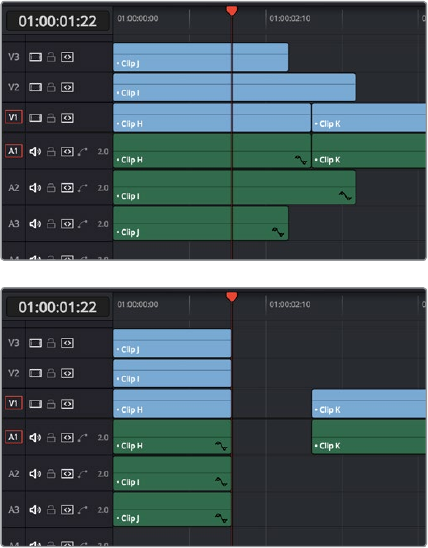
440
Trimming Part 3 – 23
Using Auto Select Controls
to Control Trimming
The Auto Select buttons on each track in the Timeline control a host of different operations, but
while they’re deceptively powerful, they’re also among the most misunderstood controls of the
Timeline. When a track’s Auto Select control is on, clips on that track are automatically included
in three different types of operations:
Operations that affect clips intersecting the position of the playhead
Operations that affect clips intersecting a region defined by timeline In and Out points
Operations that ripple clips to the right of an affected clip on the Timeline
When a track’s Auto Select control is off, clips on that track are ignored by those same
categories of operations, unless you manually select one or more clips or edit points.
The next three sections go into detail on how the Auto Select buttons help you control the
trimming operations described in this chapter, particularly when it comes to operations that
ripple the Timeline, and the kinds of “playhead-targeted” trim operations described later in this
chapter. For more information on using the Auto Select controls to define selections and control
other editing operations, see Chapter 17, “Editing Basics.”
Using Auto Select to Control Which Clips are Trimmed
One of the principal uses of the Auto Select controls is to let keyboard shortcut-driven editors
choose which specific clips on which tracks will be affected by an operation that would
otherwise affect every superimposed clip at the position of the playhead or encompassed by In
and Out points set in the timeline.
For example, if multiple clips are superimposed in V1, V2, and V3, and A1, A2, and A3, all six tracks
have their Auto Select controls turned on, and you park the playhead over one of them and use
the Trim End command in Selection mode, then all six superimposed clips will be trimmed.
Trimming all clips at the position of the playhead
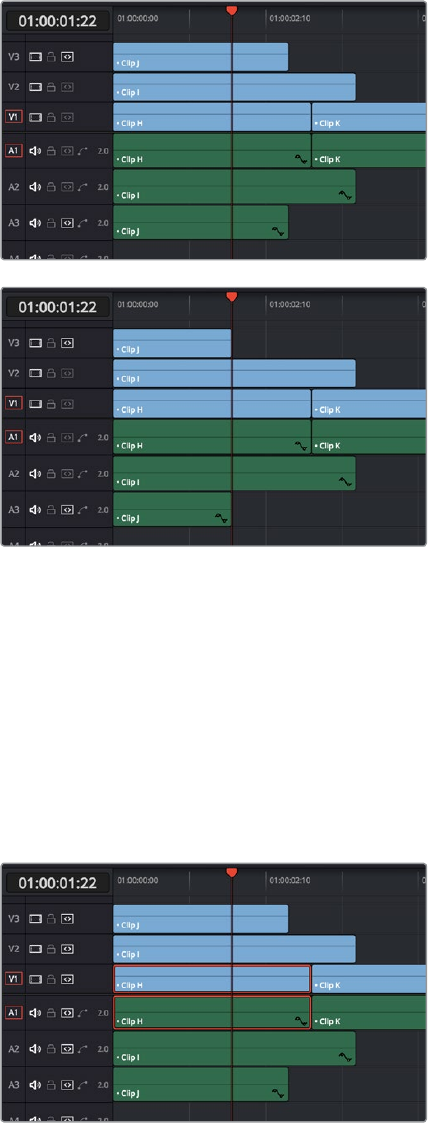
441
Trimming Part 3 – 23
However, if you only want to trim the clip in track V3, then you can solo the Auto Select control
of V3 by Option-clicking it, and then when you use the Trim End command, the clip on V3 is the
only one that’s trimmed, the other clips are ignored.
Trimming only the clip in V3 by soloing the V3 auto select controls
Using Manual Selections to Control
Which Clips Are Trimmed
It’s important to know that manual selections you make in the Timeline that highlight specific
clips always take precedence over whatever the Auto Select controls are set to. For example, if
Auto Select is turned on for tracks V1, V2, and V3, but you’ve selected a clip on track V1, only
the selected clip will be still be affected by whatever operation you decide to perform. For
example, if you use Trim End, the clip on track V1 will be affected.
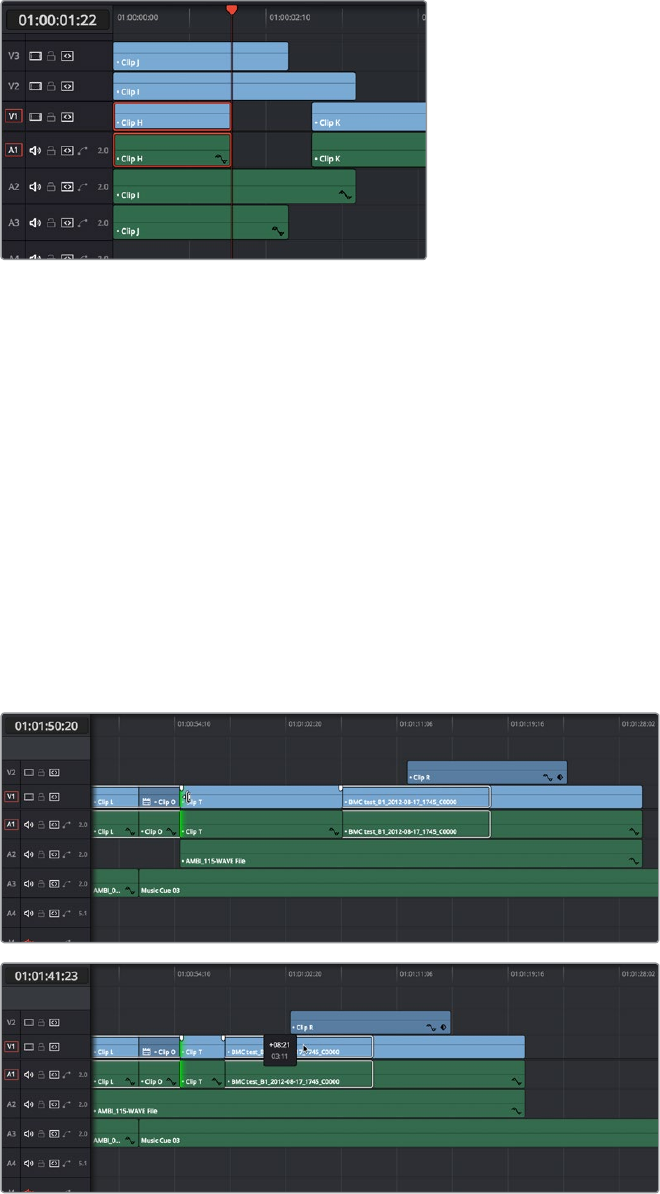
442
Trimming Part 3 – 23
Manual selection of a clip on track V1 overrides
the auto select controls on all tracks
Using Auto Select to Control Which Tracks Are Rippled
Each track’s Auto Select control is also used to control how trimming and editing operations
that ripple the Timeline affect timelines with multiple tracks and superimposed clips. Using Auto
Select controls, you can turn off rippling on specific tracks, while leaving it on for others.
For ease of use, you’ll typically want to leave Auto Select on for all tracks when rippling clips, to
ensure that all the parts of your timeline stay in sync with one another. However, when the
occasion requires, the Auto Select controls provide the option to suspend rippling on specific
tracks while allowing rippling on others.
The rules are simple:
Tracks with Auto Select enabled: Ripple editing or ripple deleting affects all clips to
the right of the clip or clips on that track being trimmed.
Before and After, clip to the right of Clip T on tracks V2, V1, A1, and A2 are rippling because those
track’s Auto Select controls are enabled
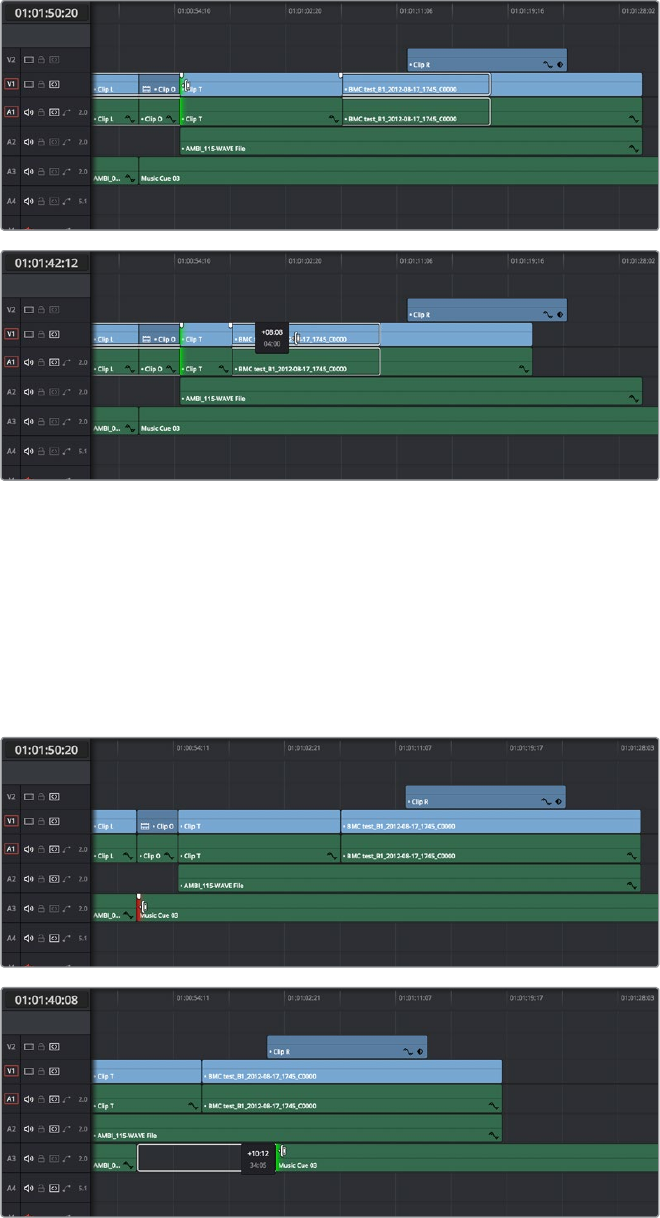
443
Trimming Part 3 – 23
Tracks with Auto Select disabled: Rippling is disabled on these tracks.
Before and After, clip to the right of Clip T on tracks V1 and A1 are rippling because
those tracks’ Auto Select controls are enabled, but clips on tracks V2 and A2 aren’t
rippling because those tracks’ Auto Select controls are disabled
Another set of rules govern what happens when you select clips or edits for trimming
on tracks with Auto Select disabled:
Selected Tracks with Auto Select turned off with an edit selection: If you select the
outgoing or incoming half of an edit on a track that has Auto Select off, the result will be
a resize operation. Ripple deleting clips leaves a gap.
Before and After, clips to the right of Music Cue 03 on tracks V1, V2, A1, and
A2 are rippling because Auto Select is enabled on those tracks, but because
the clip being trimmed on track A3 has Auto Select disabled, it doesn’t ripple,
instead resizing to open up a gap

444
Trimming Part 3 – 23
Trimming Multiple Edits or Clips at Once
DaVinci Resolve lets you select multiple edit points or clips for certain trimming operations,
making it possible to trim multiple edits and clips at the same time. In simple cases, this makes it
easy to resize, ripple, slip, and slide several superimposed clips at the same time, which is a real
convenience, or you can select the In point of every title generator in a credit sequence at once
in preparation for shortening or lengthening them all at once. In more complicated cases, this
lets you create more complicated trimming scenarios, such as multi-track asymmetric trimming,
to quickly take care of difficult tasks.
No matter how ambitious a trim operation you want to set up, the procedure is exactly the same
as for an ordinary trim operation. Just make sure you follow these three general steps, and
you’ll be good:
1 Choose Selection mode, and select the edit points or clips you want to trim. To make
multiple selections, click once to select the first item, then Command-click each
subsequent item you want to add to the selection. You can select as many clips and/or
edit points on as many tracks as you like.
2 To ripple, slip, or slide the entire selection at once, choose Trim mode. To resize or
move each selected item at once, continue using Selection mode.
3 Use the mouse, keyboard shortcuts, or timecode entry to execute the trimming
operation, just as you would if a single edit point or clip were selected.
The following sections describe each of the special-case multi-selection trim operations that
are possible, along with each one’s special rules and limitations.
Resizing and Rolling Multiple Edit Points
You can resize or roll multiple edit selections at once. In this way, you can adjust the edit points
of multiple superimposed clips all together. Trimming multiple edit points essentially lets you
“gang” them so that all selected edits move together as one.
To resize multiple clips at once, select the left (outgoing) or right (incoming) half of each edit
point you need to adjust, then use the Selection tool to drag those edit points to resize them all.
To roll multiple clips at once, select every edit point you need to adjust right at the center, so
that both the incoming and outgoing halves of each edit point are selected, then use either the
Selection or Trim tools to drag those edit points to roll them all.
Rippling Multiple Edit Points
It’s also possible to select multiple incoming or outgoing edit points on either superimposed
video tracks, or on the same video track, in order to ripple them all at once. A good example of
when you’d want to ripple multiple clips on the same track is if you’ve got an end credit
sequence of fourteen text generators, and you’d like to shorten the entire sequence by a
particular amount. This example can be seen below.
NOTE: You cannot combine ripple and roll operations at the same time.
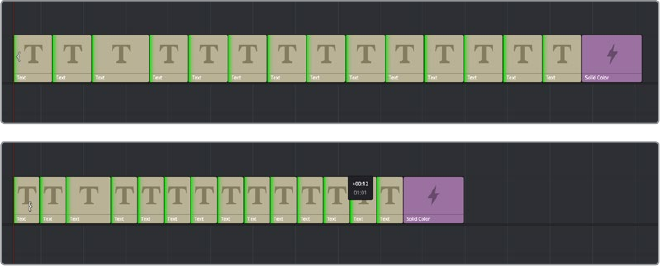
445
Trimming Part 3 – 23
When you ripple trim multiple edits on the same track, how many frames are trimmed in a
particular trim depends on what method you use to do your trimming.
If you use use the Trim tool via dragging in the Timeline, then you can choose to
ripple the entire selection of edits by an arbitrary duration, for example, shortening or
lengthening the entire selection by 8 frames. To do this, DaVinci Resolve performs your
multi-selection trim operation one edit at a time, removing a frame at a time from each
selected edit from the left to the right as you trim, until either you stop the operation,
or every single selected edit has had a frame removed, at which point DaVinci Resolve
begins trimming the second frame from each selected edit from the left to the right, and
then the third, and so on, until you stop trimming. Working this way, you can use the
mouse to trim any number of clips to fit into any duration.
You can also choose to ripple each selected edit by the same amount, for example
removing 3 frames from each of the selected edits, all at once. To do so, hold the
Command key down while dragging selected edits with the Trim tool, or use Dynamic
JKL trimming, or trim by entering relative timecode values, or use the nudge keys
(period and comma).
To ripple trim multiple edits on the same track:
1 Click the Trim tool, and drag a bounding box in the Timeline to select all forty-
nine edits.
2 Press the U key to select the incoming half of each selected edit.
3 Use whichever trimming method you prefer to ripple the sequence to be shorter or
longer. Dragging using the Trim tool lets you trim by an arbitrary number of frames,
while holding the Command key down while dragging with the Trim tool, using
timecode entry to trim, using the comma and period nudge keys, or using Dynamic JKL
trimming lets you trim every selected edit by the same number of frames
(Before) Selecting fourteen incoming credits edit points, (After) Trimming them all at once
In the following example, the incoming edit of three clips in the following montage are selected
and simultaneously rippled using the Trim tool. Notice that each overlapping clip ripples along
with the nearest selected edit that’s to the left of it; this means that the superimposed clip in
track V2 and the audio clip in track A4 ripples along with the third selected edit, while the audio
clip in track A2 ripples along with the second selected edit. Since the audio clip in track A3
starts to the left of the first selected edit, it does not ripple.
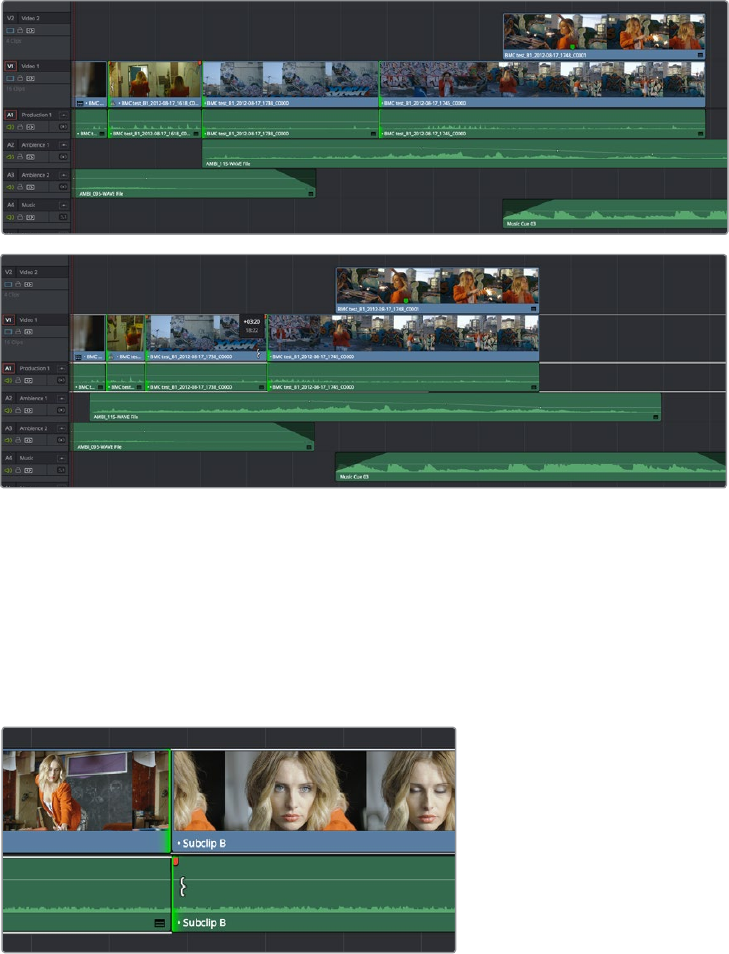
446
Trimming Part 3 – 23
(Before) Selecting three incoming edit points, (After) Trimming them all at once
Asymmetric Trimming
Asymmetric resize or ripple trimming can also be done to multiple clips, with one selection per
track allowable on as many tracks as you require. To asymmetrically trim two or more clips,
select an outgoing edit point on one track, and then Command-click an incoming edit on
another track.
Selecting opposite outgoing video and incoming audio edit points
in preparation for performing an asymmetric ripple trim
To select the outgoing video edit of one clips and the incoming audio edit of the next clip in
preparation for making a split edit, you can Option-click the outgoing video edit to suspend
linked selection, and then Command-click the incoming audio edit to add it individually to the
selection. Now when you drag, nudge, or use timecode to trim, each selected edit point will
move in the opposite direction.
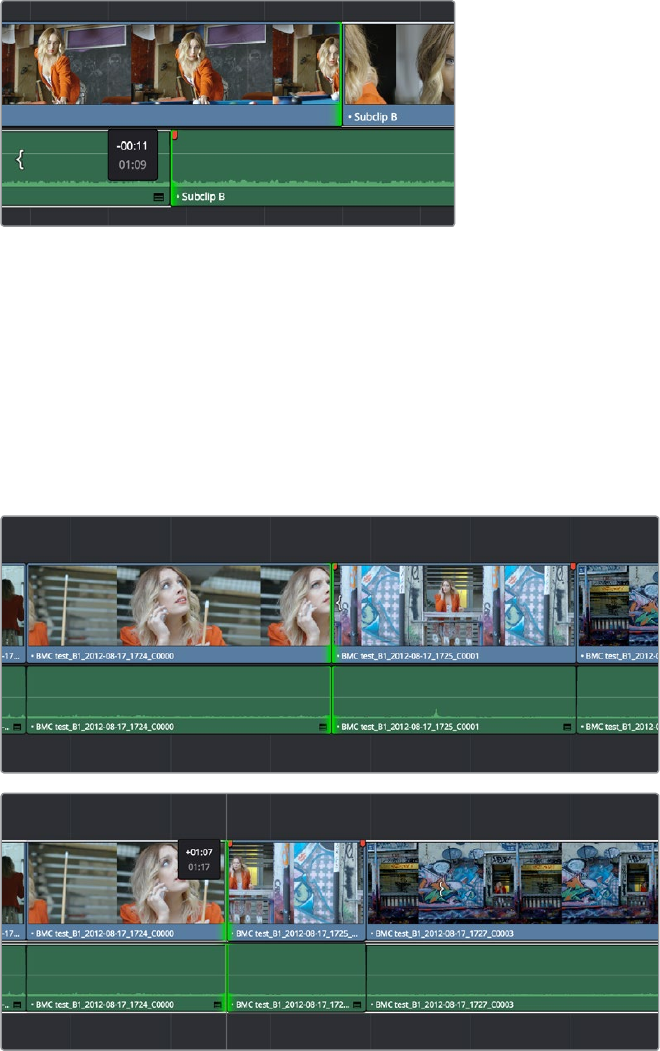
447
Trimming Part 3 – 23
Dragging to perform an asymmetric ripple trim to create a
split edit using the Trim tool
Starting in version 12, you can also do asymmetric trims to multiple edits in the same video and/
or audio track. There are two compelling reasons for doing so:
Select the outgoing half of an edit point (the left side), then Command-click to select the
incoming half of the same edit point (the right side) separately. This will not perform a roll edit,
but will allow you to either use the Selection tool to resize both edit points away from each
other to create a gap, or use the Trim tool to ripple both sides of the edit to shorten both clips
while tightening up the Timeline at the same time.
Before and After ripple trimming both the incoming and outgoing
halves of an edit to shorten the duration of both clips at once
You can also select the In and Out points of a clip in the Timeline at the same time, and use the
Trim tool to ripple both the beginning and end of the clip closer to the center, shortening the
clip while preserving the content in the middle, while tightening up the Timeline.
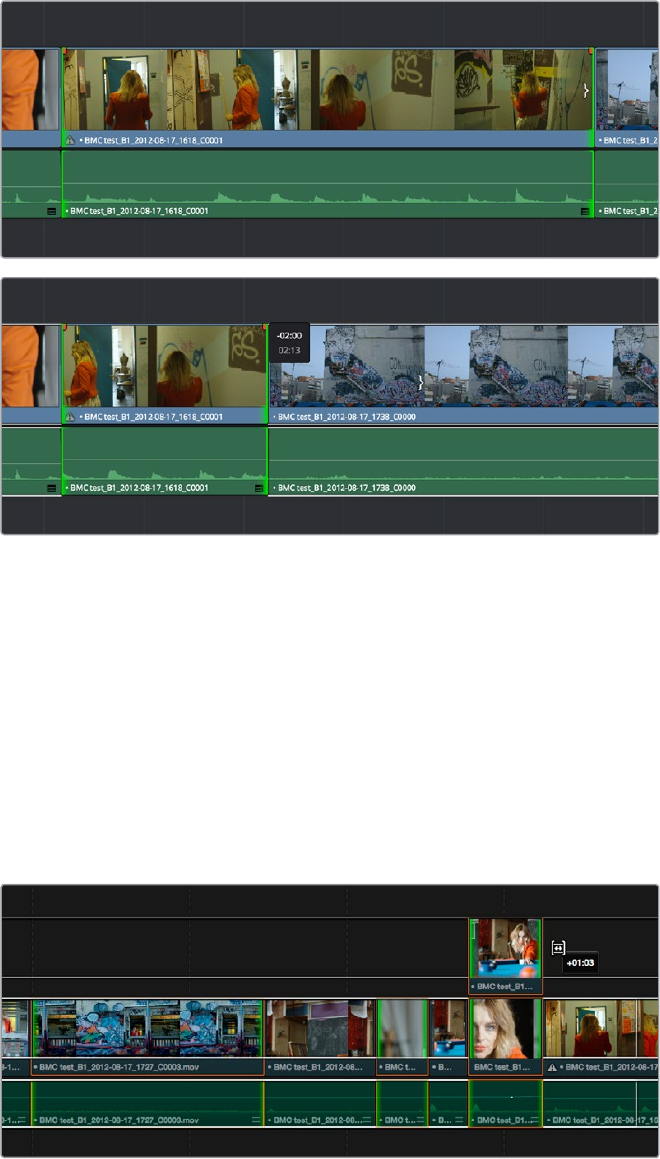
448
Trimming Part 3 – 23
Before and After ripple trimming both the In and Out points of a clip at the same time, shortening the
clip by removing heads and tails, and preserving the action in the middle
In short, you can use nearly any combination of edit selections you need to simultaneously trim
multiple clips in the same track, in multiple tracks, whatever you need to do to save time.
Furthermore, asymmetric trimming can be done in either Selection or Trim mode, either to open
and close gaps, or to move edit points to overlap one another to create split edits.
Slipping Multiple Clips
You can simultaneously slip any number of selected clips (so long as they have handles) on any
combination of tracks by selecting the clips you want to slip, then choosing the Trim tool, and
dragging their name bars or using the comma and period keys to nudge the selection.
Dragging to slip multiple selected clips at once
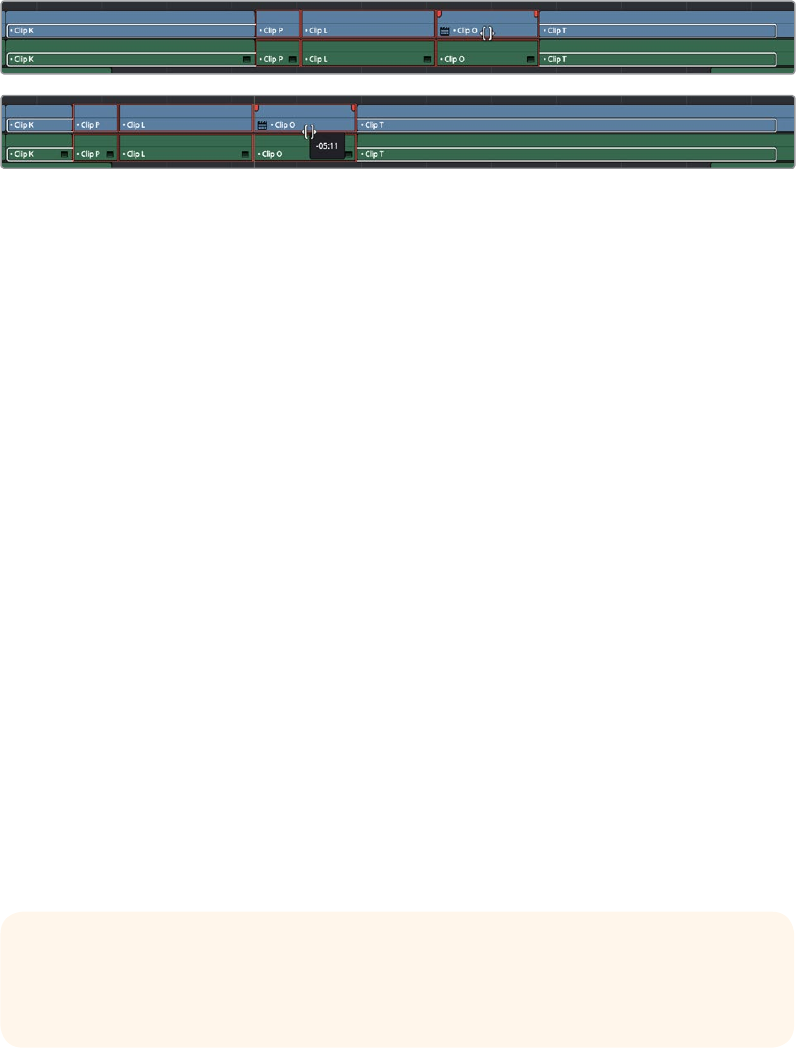
449
Trimming Part 3 – 23
Sliding Multiple Clips
Starting in version 12, you can select as many clips as you like in preparation for a slide
operation. If you select multiple contiguous clips, they slide together as one.
(Before) Selecting four clips to slide, (After) All four clips slid to the right using the mouse
Keyboard Trimming During
Looped Playback
A great technique for editors who like to do precision trimming using the Nudge commands is
the ability to enable looped-playback so that the Play Around command (Forward Slash) will
loop continuously around the edit point you’re trimming as you nudge one or five frames at a
time to fine tune the cut.
To trim while looping:
1 Move the playhead near the edit point you want to trim, and press V to select it.
2 Press the U to choose which side of the edit you want to select in order to ripple or roll
it, and/or Option-U to choose whether you want to trim video+audio, the video only, or
the audio only.
3 Press Command-Forward Slash (/) to enable looped playback.
4 Press Forward Slash (/) to play around the current selection. With looping on, playback
will continue until you stop it. Pre-roll and post-roll can be changed in the Edit panel of
the User Preferences.
5 During looped playback, press the comma (,) and period (.) keys to trim the selection
back or forward by a single frame, or Shift-comma and Shift-period to trim the selection
in 5 frame increments.
6 When you’re finished, press the Space Bar or K key to stop playback.
TIP: When holding down the Shift key while nudging to do a “fast nudge,” the duration
of the nudge is customizable in the Editing panel of the User Preferences. By default
it’s five frames, but you can set it to whatever you want.

450
Trimming Part 3 – 23
Dynamic JKL Trimming
One of DaVinci Resolve’s most interactive trimming features is the ability to dynamically resize,
ripple, roll, slip, slide, or move selected edit points and clips using the JKL transport control
keyboard shortcuts. This means that you can make an appropriate selection in the Timeline
(edit points to resize, ripple or roll, or clips to slip or slide) then trim them during playback, while
monitoring audio and watching the video.
Trimming while viewing the selected clip or edit point playing back has the advantage of letting
you get emotionally involved in what you’re watching, as well as experiencing the timing of a
clip as it plays, in order to help you get a better feel for how, exactly, you need to trim a
particular cut.
While you’re dynamically trimming, you see the same two-up or four-up display, the same
Timeline overlays, and the same dynamically updating Timeline that appear when you use the
Trim tool with the mouse. The only difference is that you’re trimming while your program plays.
There are two methods of doing dynamic trimming:
Quick Trim: You can select one or more edit points or clips, and immediately trim it
by pressing Command-J or Command-L to trim back or trim forward. This is a fast way
of dynamically trimming, but you can only trim forward and backward at 100 percent
speed or greater.
Turning on Dynamic Mode: If you want to do more detailed work, you can press the W
key to enable Dynamic mode (or choose Trim > Dynamic Trim Mode), at which point you
are in a special mode where the JKL shortcuts only trim the current selection, whatever
it happens to be. However, this mode also gives you additional options for controlling
which part of the selection, in the case of multiple selection trims, you want to monitor
for audio/video playback.
Quick Trimming
If you’re in a hurry and you can accomplish the trim you want via real time or faster playback,
then pressing the Command key while using the J or L keyboard shortcuts lets you dynamically
trim any selection in the Timeline, with audio/video playback.
To dynamically trim using Command-J or Command-L:
To dynamically roll an edit: In either Selection or Trim mode, select the center of one
or more edit points, and hold the Command key down while using J or L to move the
selection around.
To dynamically ripple an edit: Choose Trim mode, select the outgoing or incoming half
of one or more edit points, and hold the Command key down while using J or L to move
the selection around.
To dynamically resize an edit: Choose Selection mode, select the outgoing or
incoming half of one or more edit points, and hold the Command key down while using
J or L to move the selection around.
To dynamically move a clip: Choose Selection mode, select one or more clips, and
hold the Command key down while using J or L to move the selection around.
TIP: If nothing is selected while you’re in Dynamic Trim mode, JKL simply plays through
the Timeline, as usual.
451
Trimming Part 3 – 23
To dynamically slip or slide a clip: Choose Trim mode, select one or more clips to slip,
or a single clip to slide, press S to toggle between Slip or Slide modes, then hold the
Command key down while using J or L to execute either slip or slide operations.
If you’re trimming multiple selections, you can control which edit point you monitor during the
trim operation by positioning the playhead at one of the selected edit points.
Trimming in Dynamic Mode
If you want to also have the option of trimming in slow motion or frame by frame, in addition to
trimming at 100% or greater playback speeds, then you’ll need to enable Dynamic mode.
To use dynamic mode to dynamically trim one or more selected clips or edits:
1 Press W to enter Dynamic mode. The word Dynamic and Slip or Slide (depending on
what mode you’re in) appears in the toolbar and the playhead turns yellow to let you
know you’re in Dynamic Trim mode, in which all you can do is trim.
Dynamic appears in the toolbar to let you know you’re in
Dynamic mode, followed by either Slip or Slide depending
on what mode you’re in
2 Choose the type of operation you want to perform by selecting either Selection mode
(A) or Trim mode (T):
In Selection mode, you can dynamically resize or roll edits, and move or slip clips.
In Trim mode, you can dynamically ripple or roll edits, and slip or slide clips.
3 Make a selection that’s appropriate to the trim operation you need to accomplish.
Select edit points to resize, ripple or roll, or select clips that you want to slip or
slide (using the S key to toggle between slipping and sliding). You can also select
combinations of multiple clips to trim.
4 If you have selected multiple edit points, then you can use the Left and Right arrow
keys in Dynamic mode to move the playhead to the selected edit point you want to
monitor while trimming. If the playhead isn’t on a selected edit point, then it will jump to
the nearest selected edit point once trimming commences.
5 Use any combination of the JKL keyboard shortcuts to initiate playback and trimming,
including:
J+K or K+L to trim in slow motion, with slow motion audio playback
Pressing K while tapping J or L to trim a frame at a time
Pressing J or L to trim with real time playback
Pressing J or L repeatedly to trim in fast-reverse or fast-forward, at a variety of speeds
As you dynamically trim, all audio clips in all audio tracks will play back as they cross
the playhead, so you can hear your entire mix as you’re trimming.
TIP: When you’re finished with a dynamic trim operation and you want to see how that
edit plays, you can press the Forward Slash key (/) to play around the current selection
to quickly preview that section of the Timeline.
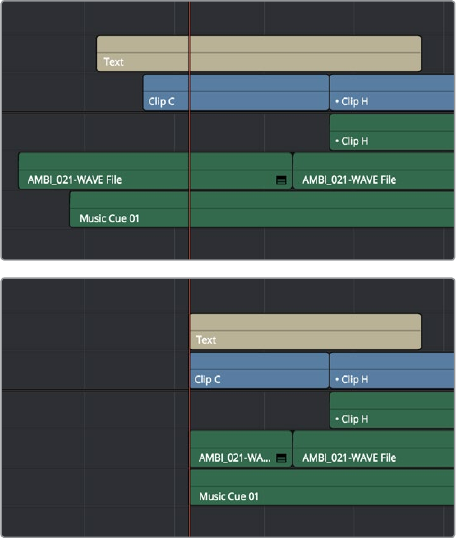
452
Trimming Part 3 – 23
6 After you’ve made a trim, you can press the Spacebar to initiate Play Around Current
Selection to see how that trim plays. In Dynamic Mode, the spacebar only executes
a Play Around Current Selection operation, rather than play forward. What is played
by Play Around Current Selection depends on what is selected; a selected edit plays
around just that edit, a selected clip plays around the whole clip, multiple clips or edits
play around the total selection, including the current Pre-Roll and Post-Roll settings in
the Editing panel of the User Preferences.
7 When you’re finished, press W again to toggle Dynamic mode off.
You always want to be sure to turn Dynamic mode off when you’re done, because otherwise
using JKL will continue trimming selections, instead of playing the Timeline.
Trim Operations that are
Targeted Using the Playhead
The following series of Trim editing commands let you trim clips and edits in different ways
using the position of the playhead to guide the result.
Trim Start and Trim End
The Trim > Trim Start (Shift-[) and Trim End (Shift-]) commands let you move the In orOut point of all
clips that intersect the playhead as either a ripple operation (in Trim mode) or a resize operation
(inSelection mode). You do not need to make a selection to use Trim Start and Trim End, making
these commands fast to use in the right situation. A classic use of Trim End is when you have
several superimposed clips of different lengths that you want to either start or end at the
same time.
Trim Start resizes or ripples (depending on what mode you’re in) all clips that intersect the
playhead, so that each clip’s In point is moved to the current playhead position.
Before and After a Trim Start operation, all clips
that intersect the playhead are trimmed
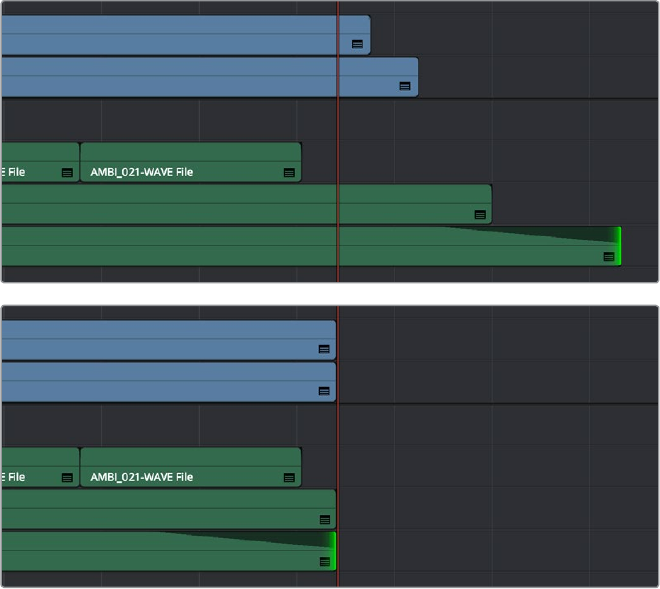
453
Trimming Part 3 – 23
Trim End resizes or ripples intersecting clips so that each intersecting clip’s Out point is moved
to the current playhead position.
Before and After a Trim End operation, all clips that intersect the playhead
are trimmed; clips that don’t intersect the playhead are not affected
Clips that don’t intersect the playhead are not affected. Furthermore, you can exclude clips on
specific tracks from this operation by disabling the auto-select controls on those tracks.
Resize, Ripple, and Roll Start and End Commands
Another set of commands in the Trim menu lets you combine the Trim Start and Trim End
functions with the act of choosing either Selection or Trim mode, and the ability to resize, ripple,
or roll, all with single commands.
Resize Start to Playhead
Resize End to Playhead
Ripple Start to Playhead (Command-Shift-[)
Ripple End to Playhead (Command-Shift-])
Roll Start to Playhead
Roll End to Playhead
Just as with Trim Start and Trim End, these commands use the Timeline Auto Select controls to
determine, of all clips intersecting the playhead, which clips on which tracks to trim. Many of
these commands don’t have keyboard shortcuts by default, but if you prefer this way of
working, you can assign them to keyboard shortcuts of your choosing using the Keyboard
Mapping panel of the User Preferences.
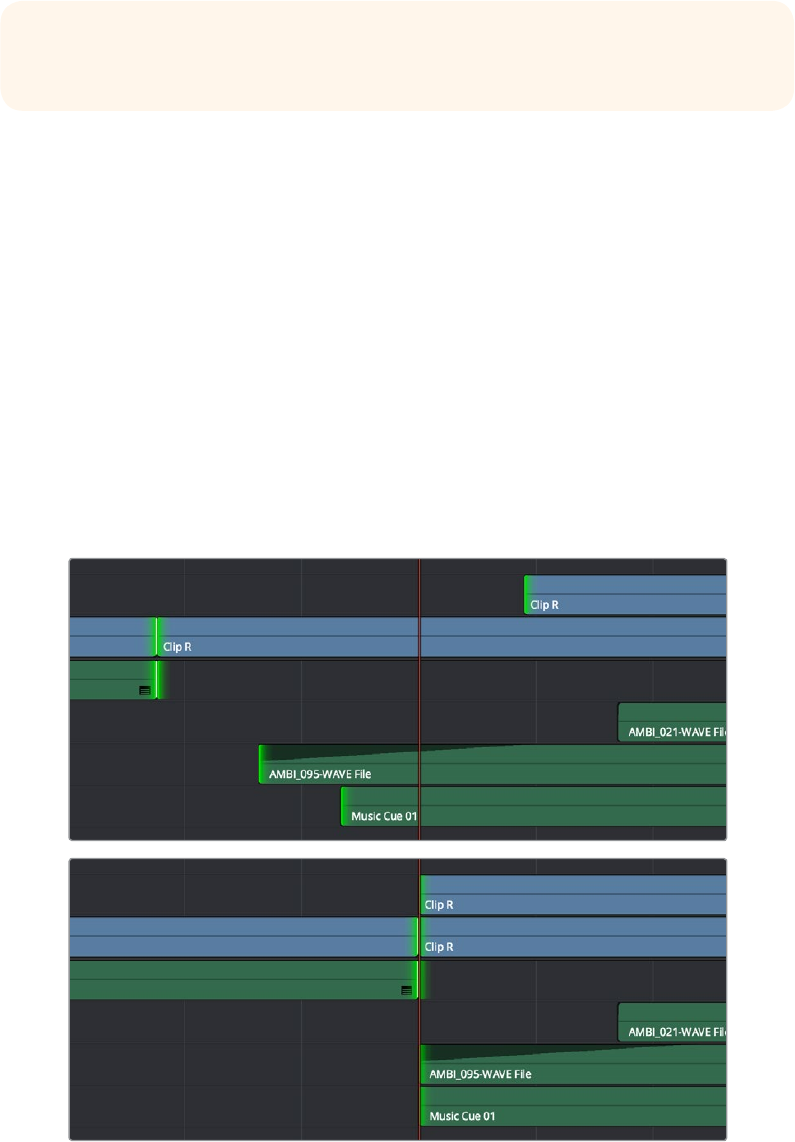
454
Trimming Part 3 – 23
Slip and Slide Playhead to In and Out Commands
Yet another set of commands in the Trim menu lets you either Slip or Slide a clip from the frame
at the current position of the Playhead to the In or Out point of that clip.
Slip Playhead to In
Slip Playhead to Out
Slide Playhead to In
Slide Playhead to Out
Just as with Trim Start and Trim End, these commands use the Timeline Auto Select controls to
determine, of all clips intersecting the playhead, which clips on which tracks to trim. These
commands don’t have keyboard shortcuts by default, but if you prefer this way of working, you
can assign them to keyboard shortcuts of your choosing using the Keyboard Mapping panel of
the User Preferences.
Extend Edits
The Extend Edit command (choose Trim > Extend Edit, or press E) lets you resize or ripple one
or more selected edit points or clips. Unlike Trim Start and Trim End, it doesn’t matter if the
playhead intersects clips when doing an Extend edit.
Extend Editing Edit Points
Make one selection per track of any combination of In or Out points, and press the E key to
move those edit points to the current position of the playhead.
Before and After a multi-track extend edit performed in selection mode
TIP: The Slip Playhead to In command functions identically to using the Extend edit
while the playhead intersects a selected clip.
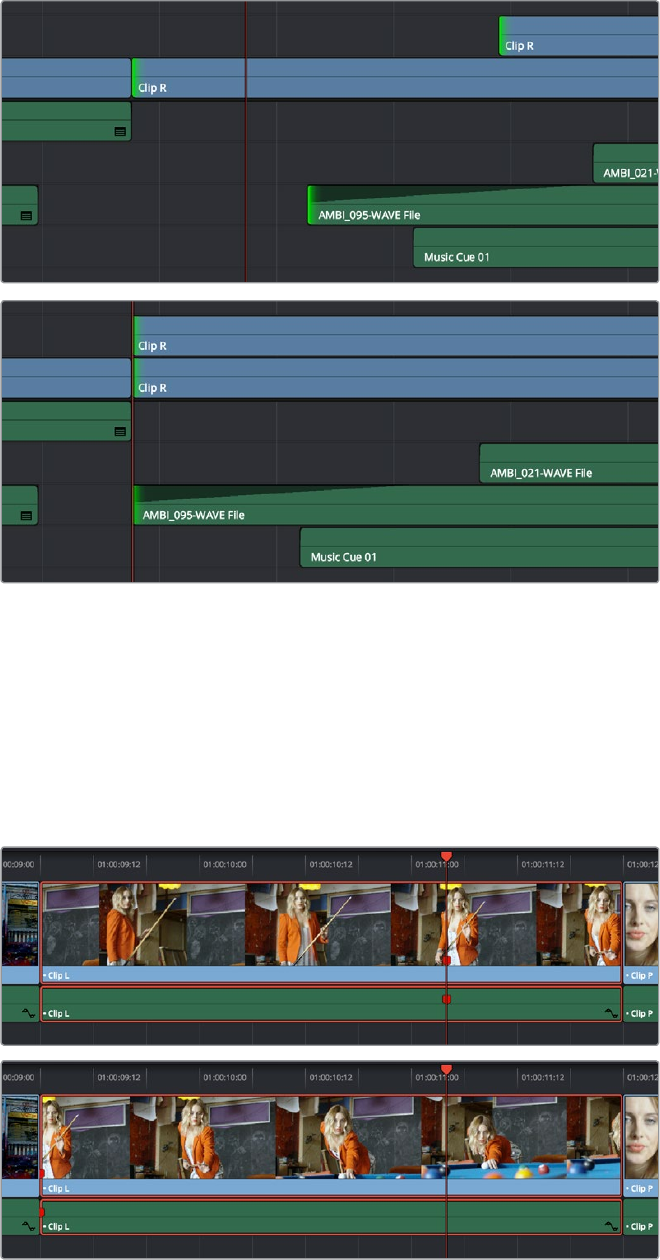
455
Trimming Part 3 – 23
In Trim mode, selected edit points will ripple instead of resizing affected clips. However, to
simplify multi-track extend edit operations when using the Trim tool, the lowest numbered video
track with auto-select enabled defines the amount by which the extend edit will ripple the rest
of the Timeline; all selected edit points on other tracks are simply resized to the position of
the playhead.
Before and After a multi-track extend edit performed in Trim mode; you can see that the lowest
numbered track with a selection defines how far the Timeline will be rippled
Extend Editing to Slide Clips
You can also use the Extend edit command to slide the contents of a single selected clip using
either the Selection or Ripple tools. Simply select a clip, position the playhead over the frame of
that clip you want to slip to the In point of that clip’s position in the Timeline, and press E to
perform the slip. You can even do this during playback if you want to watch the clip play and
press E to slip that frame back when the moment feels right.
Using the Extend edit to Slip a clip in the Timeline, the red marker shows that the
frame at the playhead is slipped back to the In point of that clip in the Timeline
457
Using Transitions Part 3 – 24
Using Transitions
Transitions are the connective tissue binding together moments requiring a more significant
way of changing from one image to the next than a simple cut. This chapter shows the many
ways you can add and edit transitions in your program.
This chapter covers the following topics:
Working With Transitions 458
Adding and Editing Transitions 458
Adding Transitions When There’s Not Enough Handles 460
Adding Transitions By Dragging to Create Overlap 460
Transition Properties in the Inspector 461
Using Transition Curves 462
Organizing Transitions 463
Changing the Standard Transition 464
DaVinci Resolve Transitions 464
OpenFX Transitions 469
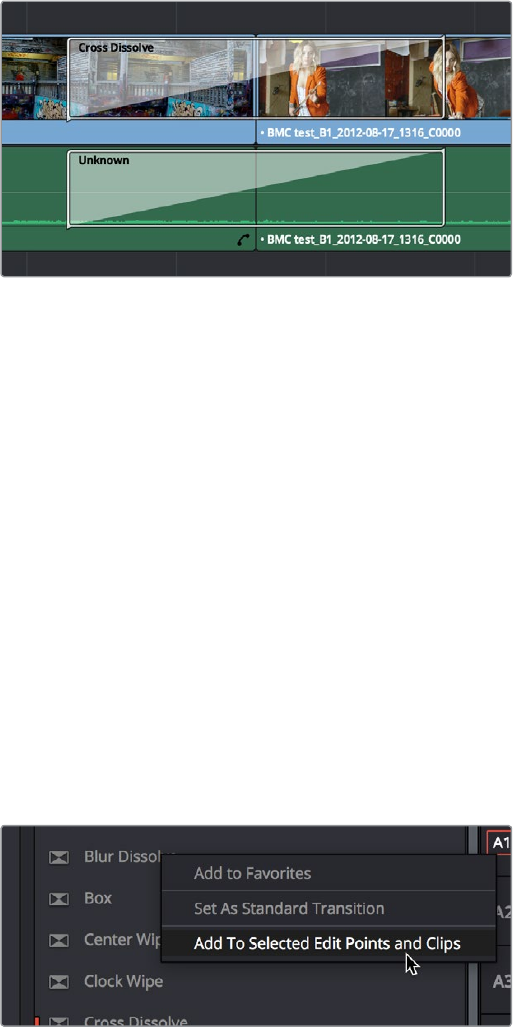
458
Using Transitions Part 3 – 24
Working With Transitions
Transitions provide another way of bridging the change from one clip to another, and are often
used to indicate a change in time or location when changing scenes. DaVinci Resolve supports
a variety of transitions ranging from various forms of the traditional cross-dissolve to different
types of wipes, allowing for great flexibility when finishing creative edits. In addition, DaVinci
Resolve supports third-party OpenFX transitions that you install on your system. Transitions are
applied at edit points, and appear as editable objects in the Timeline.
Video and audio transitions in the Timeline
The default transitions that come with DaVinci Resolve appear within the Toolbox panel of the
Effects Library, while OpenFX transitions appear within the OpenFX panel.
Adding and Editing Transitions
The following procedures describe how to work with add and edit transitions in the Timeline
using both the mouse and keyboard shortcuts.
Methods of adding transitions using the mouse:
To add a transition by dragging it from the Effects Library: Drag a video transition
from the Effects Library to an edit point in the Timeline so that it’s centered at, ends at,
or starts at the edit point. If there is no overlap between the heads and tails of the two
clips, you may not be able to add a transition where you want.
To add a transition using the Effects Library contextual menu: Select one or more
edit points (one per track), then right-click a video transition in the Effects Library and
choose Add to Selected Edit Points. That transition will be added to every selected edit
point at once.
The Transition contextual menu in the Effects Library
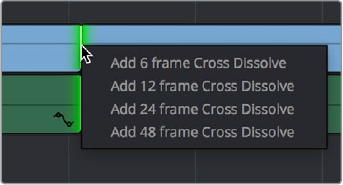
459
Using Transitions Part 3 – 24
To add a transition using the Edit Point contextual menu: Right-click any edit point between clips
with overlapping handles, and choose one of the four durations available for the Standard
Transition; the available choices are quarter-second, half-second, one second, and two
seconds, expressed in frames at whatever the current frame rate of the Timeline is.
The Transition contextual menu for an edit in the Timeline
Methods of adding transitions using keyboard shortcuts:
To add a video+audio transition using the keyboard: Select one or more edit points
using the Selection tool, or move the playhead near an edit you want to select and
press V to select it, then press Command-T (Timeline > Add Transition) to add the
standard transition. Transitions are added using the “Standard transition duration” as
specified in the Editing panel of the User Preferences, which defaults to one second, or
however long the overlapping handles of the selected edit point allow.
To add a video or audio-only transition using the keyboard: Select one or more
edit points, and press Option-T (Timeline > Add Video Only Transition) to add only a
video transition, or Shift-T (Timeline > Add Audio Only Transition) to add only an audio
transition. Transitions are added using the “Standard transition duration” as specified
in the Editing panel of the User Preferences, which defaults to one second, or however
long the overlapping handles of the selected edit point allow.
To add a transition with specific alignment using the keyboard: Select an edit, press
the U key to choose the start, center, or end of the edit, then press Command-T.
The standard transition will be added with its alignment based on the edit selection;
selecting the start of the edit places a transition that ends on the edit; selecting the end
of the edit places a transition that starts on the edit, and choosing the center of the edit
places a transition that is similarly centered.
Methods of moving and duplicating transitions:
To move a transition from one edit to another: Select a transition, then drag it to
another edit point.
To copy a transition from one edit to another: Select a transition, then option-drag it to
another edit point.
Methods of altering transitions in the Timeline:
To change a transition’s type: Drag a different transition from the Effects Library onto
the current one in the Timeline.
To change a transition’s duration: Drag the beginning or end of the transition in the
Timeline to be longer or shorter symmetrically about the current edit. Alternately, you
can double-click any transition to open it in the Inspector, and set a new duration in
seconds or frames.
To change a transition’s alignment: Right-click a transition in the Timeline and choose
a new method of alignment from the contextual menu. Alternately, you can double-
click any transition to open it in the Inspector, and choose a new option from the
Alignment pop-up.
To remove a transition: Select a transition in the Timeline and press the Delete key.
Or,right-click a transition in the Timeline and choose Delete from the contextual menu.
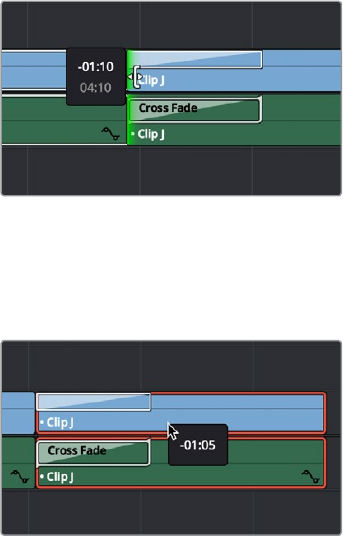
460
Using Transitions Part 3 – 24
Adding Transitions When
There’s Not Enough Handles
If the outgoing and incoming overlapping handles at a given edit point don’t have enough
frames to fit the standard transition duration, and you try to add a transition by selecting one or
more edit points and pressing Command-T, or by right-clicking an edit point and using the
transition options in the resulting contextual menu, then you’ll be presented with a dialog that
gives you three choices:
Trim Clips: You can automatically trim the incoming and outgoing sides of each
selected edit point to create the overlap needed for adding the standard transition.
Skip Clips: Don’t add transitions to the selected edit points that lack the
appropriate overlap.
Cancel: Cancel the operation entirely.
Adding Transitions By Dragging
to Create Overlap
There’s another method you can use to create transitions that makes it easy to create
transitions while you’re doing drag-and-drop editing by simply overlapping the beginning and
end of two clips where you want a transition to appear. Just press and hold the Option and Shift
keyboard modifiers together while you drag a clip or edit to create overlap with another clip.
You can do this in three ways:
Select the In or Out point of a clip, then press and hold Option-Shift down and drag the
selected edit point to overlap a neighboring clip where you want to create a transition.
Creating a transition by Option-Shift-Dragging an
edit point to create an overlap between two clips
Select a clip, then press and hold Option-Shift down and drag the entire clip to overlap
a neighboring clip where you want to create a transition.
Creating a transition by Option-Shift-Dragging a whole clip
to create an overlap between it and another clip
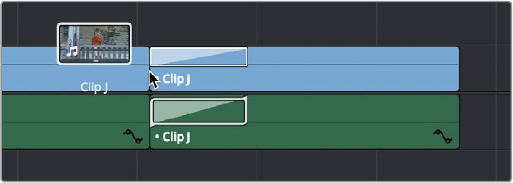
461
Using Transitions Part 3 – 24
Hold the Option-Shift keys down while you drag a clip from the Media Pool to overlap a
clip that’s already in the Timeline.
Creating a transition by Option-Shift-Dragging a clip from
the Media Pool to overlap a clip in the Timeline
Transition Properties in the Inspector
Double-clicking a transition in the Timeline opens that transition’s properties in the inspector.
Each transition has the following properties you can edit.
Duration: The duration of the transition, shown in both seconds and frames.
Alignment: A pop-up that lets you choose the transition’s position relative to the
edit point it’s applied to. Your choices are “End on Edit,” “Center on Edit,” and
“Begin on Edit.”
Video Transition style: A pop-up that lets you change the type of transition; you can
choose from among all of the transitions that come with DaVinci Resolve by default.
Audio Transition style: If an audio transition is simultaneously selected, presents
a pop-up that lets you change the type of audio transition; you can choose from
among all of the audio transitions that come with DaVinci Resolve by default. For
more information about Audio Transitions, see Chapter 25, “Working with Audio in the
Edit Page.”
Additional properties that are specific to each type of transition appear in another group below.
Since the Cross Dissolve transition is the most common transition used, its properties will be
shown as an example.
Style: The different Dissolve transitions (Cross Dissolve, Additive Dissolve, etcetera)
expose this pop-up that lets you choose different ways for the outgoing clip to
blend into the incoming clip during the dissolve. There are six different options to
choose from:
Video: A simple linear dissolve; the outgoing clip fades out as the incoming
clip fades in.
Film: A logarithmic dissolve, simulating film dissolves as created by an optical printer.
Additive: The outgoing and incoming clips are cross faded using the Additive
composite mode. As a result, the transition seems to brighten at the halfway point.
Subtractive: The outgoing and incoming clips are cross faded using the Subtractive
composite mode. As a result, the transition seems to darken at the halfway point.
Highlights: The outgoing and incoming clips are cross faded using the Lighten
composite mode. The lightest parts of each clip are emphasized during this transition.
Shadows: The outgoing and incoming clips are cross faded using the Darken
composite mode. The darkest parts of each clip are emphasized during this transition.
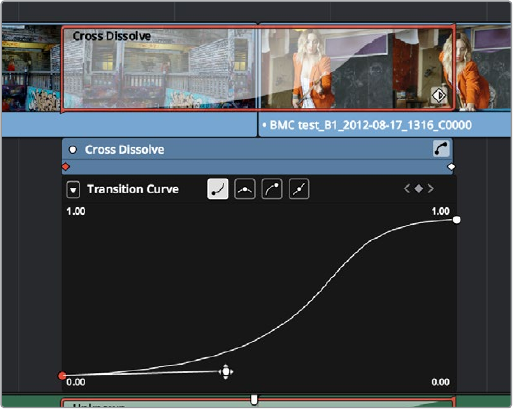
462
Using Transitions Part 3 – 24
Start Ratio: Defines the percentage of completion for the transition at its first frame,
from 0 to 100 percent. Setting the Start Ratio to anything but 0 results in the transition
immediately appearing at a more fully cross-dissolved state from the very first frame.
End Ratio: Defines the percentage of completion for the transition at its last frame.
Setting the End Ratio to anything but 0 results in the transition never fully dissolving to
the incoming shot at its last frame.
Reverse: Reverses the transition. This parameter is disabled for Dissolve transitions.
Ease: A pop-up that lets you apply non-linear acceleration to the beginning, ending,
or overall duration of a transition. The result is to add inertia to the transition from the
outgoing clip to the incoming clip, and providing a gentler change from each clip into
and out of the transition.
In: The outgoing clip lingers as the beginning of the transition dissolves more slowly
than the end.
Out: The outgoing clip fades away more quickly, as the beginning of the transition
dissolves more quickly than the end.
In & Out: Both the outgoing and incoming clips make slower transitions at the
beginning and end of the dissolve, but the very center of the transition is faster
as a result.
Other types of transitions display properties that are specific to that transition’s particular effect.
These are described at length in the following section.
Using Transition Curves
You can create even more highly customized transition effects using the transition curve
associated with each transition you add to the Timeline. Clicking the button at the bottom-right
corner of a transition in the Timeline reveals a Keyframe Editor, and clicking the Curve Editor
button in the Keyframe Editor track for the transition reveals the Transition Curve Editor.
A Transition Curve opened underneath a Cross Dissolve transition
The Transition Curve Editor works identically to the Curve Editor you can access from any clip,
except instead of using the curve to animate image transforms, you use the curve to retime the
transition. Combined with eased or bezier keyframes at the beginning and end of a transition
curve, you can create transitions that slowly start and quickly end, quickly start and slowly end,
or any variation your project requires.
463
Using Transitions Part 3 – 24
Methods of editing a Transition Curve:
To change the interpolation of a control point: Click the control point you want to edit,
and then click one of the four bezier interpolation buttons in the Curve Editor title bar.
Adding bezier handles to a transition control point lets you create an eased transition. If
you chose an option from the Ease pop-up of the Transition Properties in the Inspector,
one or both of the transition curve keyframes may already be set to bezier.
To adjust a bezier handle: Drag the bezier handle in any direction to alter the curve.
Whenever you customize bezier handles on a Transition curve, the Ease pop-up of the
Transition Properties in the Inspector changes to Custom.
To add a new control point to a curve: Option-click anywhere on a curve to add a new
control point.
To drag a control point on a curve: Click any control point and drag left or right to
retime it, and up or down to change the value of the control point. Once you begin to
move the pointer, the control point is constrained in that direction.
To delete a control point from a curve: Right-click a keyframe and choose Delete
Selected from the contextual menu. You cannot delete the last two control points of a
transition curve.
To turn a curve on and off: Clicking the green dot at the upper left-hand corner of the
Keyframe Editor lets you turn a transition curve’s effect on and off, without disabling the
transition. When you turn the keyframes off, the transition defaults to a linear transition
with no easing.
Organizing Transitions
While DaVinci Resolve provides a wide variety of transitions by default, most editors typically
only use a subset of these in their day-to-day work. Also, it’s typical to save customized versions
of a particular transition in order to reuse that specific set of transition settings over and
over again.
To set a transition or other effect as a favorite in the Effects Library:
Move the pointer over any transition, and click the star button when it appears to set
that transition as a favorite. Click any transition’s star to “un-favorite” it. Favorites are
displayed in the Favorites area of the Effects Library bin list.
To save a Transition Preset for future use:
1 Add a transition to the Timeline, then double-click it to open it in the Inspector to adjust
its settings to be the way you need it to be.
2 (optional) if necessary, open the transition’s Curve Editor and set the type of curve you
want the transition to have. A customized transition curve will be saved inside of that
transition’s preset.
3 Right-click on the transition you want to save, and choose “Create Transition Preset.”
4 Type a name for the Transition Preset in the dialog that appears, and click OK. That
transition is saved to the bottom of the Toolbox Video Transitions area, where you can
apply it just like any other transition.
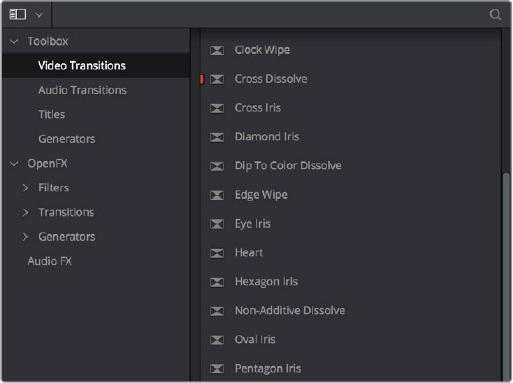
464
Using Transitions Part 3 – 24
Changing the Standard Transition
Different projects may require different transitions be used as the Standard Transition.
DaVinciResolve gives you several tools for dealing with this.
To change the Standard Transition:
Right-click any transition or effect and choose “Set as Standard Transition.” The
standard transition appears with an orange indicator to the left of its name in the
Effects Library.
The Effects Library open, showing starred transitions that have been favorited,
and the standard transition with an orange indicator to the left of its name
To change the standard transition duration:
Open the Editing panel of the User Preferences, and change the “Standard transition
duration” setting (there are controls for setting the duration in either Seconds or
Frames). Click Save when you’re finished.
DaVinci Resolve Transitions
The following are transitions that are available within DaVinci Resolve by default, along with the
parameters that are available for each of them from the Inspector:
Audio Transitions:
Cross Fade +3/–3/0 dB: An audio-only transition that lets you fade from one audio clip
to another. Three different crossfades let you choose the power of the actual transition
from one level to the other.
Video Transitions:
Additive Dissolve: Style lets you choose what type of cross dissolve you want;
choices include: Video, Film, Additive, Subtractive, Highlights, Shadows. Start Ratio
lets you adjust how far along the transition is when it first begins. End Ratio lets you
adjust how far the transition gets at the very end. The Reverse checkbox reverses the
direction of the transition.
465
Using Transitions Part 3 – 24
Arrow Iris: Color sets the color of the border, if there is one. Border sets the width of
the border, in pixels, with 0 creating no border. Offset to center lets you alter the center
point at which this transition is positioned. Feather is a checkbox that, when turned
on, uses the Border slider to determine the amount of feathering at the edge of the
transition.
Box mode lets you choose one of the following presets:
Arrow Head Up
Arrow Head Bottom
Arrow Head Left
Arrow Head Right
Band Wipe: Color sets the color of the border, if there is one. Border sets the width of
the border, in pixels, with 0 creating no border. Feather is a checkbox that, when turned
on, uses the Border slider to determine the amount of feathering at the edge of the
transition. Preset lets you choose one of the following presets:
Horizontal
Vertical
Horizontal Bilinear
Vertical Bilinear
Barn Door: Color sets the color of the border, if there is one. Border sets the width of
the border, in pixels, with 0 creating no border. Feather is a checkbox that, when turned
on, uses the Border slider to determine the amount of feathering at the edge of the
transition. Box mode lets you choose one of the following presets:
Barn Door Vertical
Barn Door Horizontal
Blur Dissolve: Horizontal/Vertical Strength sets how much blur is performed in the X
and Y dimensions during the course of this transition. Start Ratio lets you adjust how
far along the transition is when it first begins. End Ratio lets you adjust how far the
transition gets at the very end. The Reverse checkbox reverses the direction of the
transition.
Box: Color sets the color of the border, if there is one. Border sets the width of the
border, in pixels, with 0 creating no border. Feather is a checkbox that, when turned
on, uses the Border slider to determine the amount of feathering at the edge of the
transition. Box mode lets you choose one of the following options:
Upper Left
Upper Right
Lower Left
Lower Right
Left Center
Top Center
Right Center
Bottom Center
Center Wipe: Color sets the color of the border, if there is one. Border sets the width
of the border, in pixels, with 0 creating no border. Angle specifies the angle of the wipe
as it emerges from the middle of the screen. Feather is a checkbox that, when turned
on, uses the Border slider to determine the amount of feathering at the edge of the
transition.
466
Using Transitions Part 3 – 24
Clock Wipe: Color sets the color of the border, if there is one. Border sets the width
of the border, in pixels, with 0 creating no border. Angle specifies the starting angle
of the wipe as it spins around the center of the screen. The Clockwise checkbox sets
the direction of the clock wipe. Feather is a checkbox that, when turned on, uses the
Border slider to determine the amount of feathering at the edge of the transition.
Cross Dissolve: Style lets you choose what type of cross dissolve you want; choices
include: Video, Film, Additive, Subtractive, Highlights, Shadows. Start Ratio lets you
adjust how far along the transition is when it first begins. End Ratio lets you adjust how
far the transition gets at the very end. The Reverse checkbox reverses the direction of
the transition.
Cross Iris: Color sets the color of the border, if there is one. Border sets the width of
the border, in pixels, with 0 creating no border. Offset to Center identifies the center
point at which the cross wipe begins, as X and Y coordinates on the screen. Feather
is a checkbox that, when turned on, uses the Border slider to determine the amount of
feathering at the edge of the transition.
Diamond Iris: Color sets the color of the border, if there is one. Border sets the width
of the border, in pixels, with 0 creating no border. Offset to Center identifies the center
point at which the diamond-shaped wipe begins, as X and Y coordinates on the screen.
Feather is a checkbox that, when turned on, uses the Border slider to determine the
amount of feathering at the edge of the transition.
Dip to Color Dissolve: Start Ratio lets you adjust how far along the transition is when
it first begins. End Ratio lets you adjust how far the transition gets at the very end. The
Reverse checkbox reverses the direction of the transition. Color lets you choose what
color the dissolve dips to at the midpoint.
Edge Wipe: Color sets the color of the border, if there is one. Border sets the width of
the border, in pixels, with 0 creating no border. Angle specifies the angle of the wipe
as it moves across the screen. Feather is a checkbox that, when turned on, uses the
Border slider to determine the amount of feathering at the edge of the transition.
Eye Iris: Color sets the color of the border, if there is one. Border sets the width of the
border, in pixels, with 0 creating no border. Feather is a checkbox that, when turned
on, uses the Border slider to determine the amount of feathering at the edge of the
transition.
Heart: Color sets the color of the border, if there is one. Border sets the width of the
border, in pixels, with 0 creating no border. Offset to Center identifies the center point
at which this circular wipe begins, as X and Y coordinates on the screen. Feather is
a checkbox that, when turned on, uses the Border slider to determine the amount of
feathering at the edge of the transition.
Hexagon Iris: Color sets the color of the border, if there is one. Border sets the width of
the border, in pixels, with 0 creating no border. Offset to center lets you alter the center
point at which this transition is positioned. Feather is a checkbox that, when turned
on, uses the Border slider to determine the amount of feathering at the edge of the
transition. Box mode lets you choose one of the following presets:
Hexagon
Hexagon Rotate
Non-Additive Dissolve: Start Ratio lets you adjust how far along the transition is when
it first begins. End Ratio lets you adjust how far the transition gets at the very end. The
Reverse checkbox reverses the direction of the transition.
Oval Iris: Color sets the color of the border, if there is one. Border sets the width of
the border, in pixels, with 0 creating no border. Offset to Center identifies the center
point at which this circular wipe begins, as X and Y coordinates on the screen. Oval
Ratio changes the aspect ratio of the oval, making it either wider or taller. Feather is
a checkbox that, when turned on, uses the Border slider to determine the amount of
feathering at the edge of the transition.
467
Using Transitions Part 3 – 24
Pentagon Iris: Color sets the color of the border, if there is one. Border sets the width
of the border, in pixels, with 0 creating no border. Offset to center lets you alter the
center point at which this transition is positioned. Feather is a checkbox that, when
turned on, uses the Border slider to determine the amount of feathering at the edge of
the transition. Box mode lets you choose one of the following presets:
Pentagon Up
Pentagon Down
Push: Color sets the color of the border, if there is one. Border sets the width of the
border, in pixels, with 0 creating no border. Feather is a checkbox that, when turned
on, uses the Border slider to determine the amount of feathering at the edge of the
transition. Box mode lets you choose one of the following presets:
Push Left
Push Right
Push Up
Push Down
Radial Wipe: Color sets the color of the border, if there is one. Border sets the width of
the border, in pixels, with 0 creating no border. Feather is a checkbox that, when turned
on, uses the Border slider to determine the amount of feathering at the edge of the
transition.
Slide: Direction determines whether or not the incoming clip slides in or the outgoing
clip slides out. Color sets the color of the border, if there is one. Border sets the width
of the border, in pixels, with 0 creating no border. Feather is a checkbox that, when
turned on, uses the Border slider to determine the amount of feathering at the edge of
the transition.
Box mode lets you choose one of the following presets:
Slide, Left-Right
Slide, Right-Left
Slide, Bottom-Up
Slide, Top-Down
Slide, Top-Left
Slide, Bottom-Right
Smooth Cut: A special-purpose transition designed to make short jump cuts in the
middle of a clip less noticeable. This is done by using optical flow processing to match
the same features on either side of a cut in order to automatically morph a subject
from one position to another over the duration of the transition. This effect works
best on clips such as sit-down interviews and close-up head shots with a minimum of
background and subject motion, and where the subject’s position on either side of the
cut is not significantly different. A good example of when Smooth Cut is effective is
when you’re cutting pauses, partial repeats, filler sounds such as “um” or “you know,”
or other speech disfluencies out of an interview clip to tighten the dialog, and you want
to eliminate the little “jump” that occurs at the cut without having to cut away to b-roll.
Applying a short two or four frame Smooth Cut transition to the edit can make this kind
of edit invisible, as long as the speaker doesn’t change position significantly during
the cut. The more motion there is in the background of the shot, and the more the
speaker changes position, the harder it will be to get a useful result using Smooth Cut.
Although the default duration for any transition is one second, you’ll find that Smooth
Cut transitions work much better when they’re short; 2-6 frame Smooth Cut transitions
often work best to disguise jump cuts.
468
Using Transitions Part 3 – 24
Spiral Wipe: Color sets the color of the border, if there is one. Border sets the width of
the border, in pixels, with 0 creating no border. Feather is a checkbox that, when turned
on, uses the Border slider to determine the amount of feathering at the edge of the
transition.
Split: Color sets the color of the border, if there is one. Border sets the width of the
border, in pixels, with 0 creating no border. Feather is a checkbox that, when turned
on, uses the Border slider to determine the amount of feathering at the edge of the
transition.
Star: Color sets the color of the border, if there is one. Border sets the width of the
border, in pixels, with 0 creating no border. Offset to Center identifies the center point
at which this circular wipe begins, as X and Y coordinates on the screen. Feather is
a checkbox that, when turned on, uses the Border slider to determine the amount of
feathering at the edge of the transition.
Triangle Iris: Color sets the color of the border, if there is one. Border sets the width of
the border, in pixels, with 0 creating no border. Offset to center lets you alter the center
point at which this transition is positioned. Feather is a checkbox that, when turned
on, uses the Border slider to determine the amount of feathering at the edge of the
transition.
Box mode lets you choose one of the following presets:
Triangle Up
Triangle Bottom
Triangle Left
Triangle Right
Triangle Left: Color sets the color of the border, if there is one. Border sets the width of
the border, in pixels, with 0 creating no border. Feather is a checkbox that, when turned
on, uses the Border slider to determine the amount of feathering at the edge of the
transition.
Triangle Right: Color sets the color of the border, if there is one. Border sets the width
of the border, in pixels, with 0 creating no border. Feather is a checkbox that, when
turned on, uses the Border slider to determine the amount of feathering at the edge of
the transition.
Venetian Blind Wipe: Color sets the color of the border, if there is one. Border sets the
width of the border, in pixels, with 0 creating no border. Repeat specifies how many
“blinds” appear within the wipe effect. Angle specifies the angle of this multi-wipe
effect. Feather is a checkbox that, when turned on, uses the Border slider to determine
the amount of feathering at the edge of the transition.
X Wipe: Color sets the color of the border, if there is one. Border sets the width of the
border, in pixels, with 0 creating no border. Feather is a checkbox that, when turned
on, uses the Border slider to determine the amount of feathering at the edge of the
transition.
471
Working with Audio in the Edit Page Part 3 – 25
Working with Audio in the Edit Page
DaVinci Resolve has a solid set of features for editing, mixing, and mastering audio in your
programs right in the Edit page. Whether you’re adjusting synced audio for dailies, finessing the
levels of an edited project you’re assembling, mixing a program for output, or importing and
laying in audio mix files from the sound designer to output for mastering, DaVinci Resolve has
Level, Pan, and Channel Assignment controls to control your audio output for both monitoring
and delivery, automated fader recording at both the track and clip level for mixing, and VST and
Audio Unit audio filter support for mastering audio tracks and channels using industry-standard
noise reduction, compression, EQ, and other filters. And, if all that’s not enough for you, you can
export to Pro Tools in the Delivery page to hand off your program and its audio in a state ready
for further work.
When you’ve finished doing the editorial audio work in your program, and you want to really drill
into your program’s audio for detailed audio editing and mixing, you can use the audio-specific
tools of the Fairlight page. For more information, see Chapter 62, “Using the Audio Page.”
This chapter has the following topics:
Audio in the Edit vs. Fairlight Pages 473
Compatible Audio Formats 473
Assigning Audio Channels in the Media Pool 473
Editing Audio Into the Timeline 476
Editing Audio Using the Source Viewer 476
Simultaneous Audio Waveform Display in the Source Viewer 476
Using Multi-Channel Timeline Tracks 477
Editing Audio Clips Into the Timeline 478
Changing Audio Clip Attributes After Editing 479
Displaying Waveforms in the Timeline 480
Editing Audio In the Timeline Using In and Out Points 481
Audio Settings in the Inspector 483
Setting Clip Levels 483
Adjusting Audio in the Inspector 483
Adjusting Audio in the Timeline 483
Adjusting Clip Levels Using Keyboard Shortcuts 484
Clip EQ 485
Master EQ Controls 485
Graphical EQ controls 486
Bands 1 and 4 486
Bands 2-3 486
472
Working with Audio in the Edit Page Part 3 – 25
Keyframing Audio 487
Curve Editor Controls for Clip Audio 487
How to Add and Adjust Audio Keyframes 487
Audio Fade Handles 488
Audio Crossfades 489
The Audio Mixer 490
Audio Mixer Controls 491
Disabling Track Audio vs. Muting Tracks 491
Displaying Audio Meters 491
Using Audio Filters 492
Installing Audio Filters 493
The Fairlight Page 494
Pro Tools Export 494
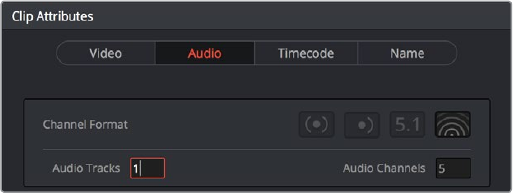
473
Working with Audio in the Edit Page Part 3 – 25
Audio in the Edit vs. Fairlight Pages
While the Fairlight page provides dedicated audio editing and mixing capabilities that are
suitable for sweetening the audio of your program once it’s been edited, the Edit page has
extensive audio capabilities of its own. This enables editors to edit and refine audio clips, set
levels, and do simple mixes as they assemble the program in the first place. However, once
things have been edited together, you’re meant to go freely back and forth between the Edit
and Fairlight page as you refine your work, using whichever environment is most suitable for the
task at hand.
Compatible Audio Formats
DaVinci Resolve is compatible with WAVE, Broadcast WAVE, AIFF, MP3, AAC (M4A), CAF
(macOS only), MTS and QuickTime containers using the AC3 audio format, and Enhanced AC-3
(macOS and Windows) at sample rates including 32, 44.1, 48, 88.2, 96, and 192 kHz.
Assigning Audio Channels
in the Media Pool
When you first import audio into the Media Pool, it’s a good idea to make sure that whatever
channels those files contain are assigned correctly before you start editing clips into the
Timeline. In other words, you want to make sure that stereo files are set to be stereo clips, that
5.1 and 7.1 files are set to be surround clips, and that multi-channel files are set to expose
however many channels you want to edit separately in your program. Clip channel assignments
are made in the Audio panel of the Clip Attributes window.
This is particularly important when clips have more than two channels of audio. For example,
production sound recordists might record three, six, or even more audio channels,
corresponding to a variety of microphones on set along with mixdown tracks. In this case, you
need to define how many of these channels you want to play, and how many items you want to
appear in the Timeline.
Mono, stereo, 5.1, and 7.1 clips are handled automatically, but multi-channel clips needing
custom assignments in the Media Pool should be remapped as necessary using Clip Attributes,
so that DaVinci Resolve can more easily place incoming audio clips into the correct track of the
Timeline. You can alter the clip attributes for clips one at a time, or for multiple selected clips at
once. For more information on these settings, see Chapter 10, “Modifying Clips and
ClipAttributes.”
Each clip with audio has the following options in the Audio panel of the Clip Attributes window:
The controls available for defining tracks and channels
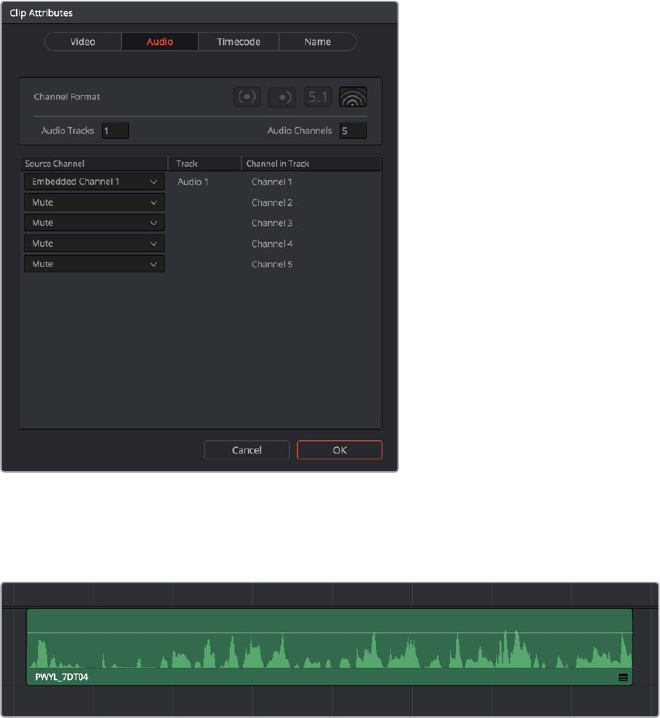
474
Working with Audio in the Edit Page Part 3 – 25
Channel Format: Defines the relationship between audio tracks and audio channels.
Select Mono, Stereo, 5.1, 7.1, or Adaptive as appropriate for your clip. The selected
channel format determines how many default channels appear in the Source Channel
list below. For multi-channel production audio, Adaptive is probably the best choice.
Audio Tracks: Defines how many audio items will appear in the Timeline when this clip
is edited. Each audio track can be edited independently, if necessary, with separate In
and Out points.
Audio Channels: Defines how many audio channels appear within each track.
How you handle audio in your timeline is up to you. In the case of production audio consisting
of five channels, four for different microphones plus one mixdown channel, you might use Clip
Attributes to map all channels to a single track, muting all channels except for the mixdown
channel.
The Channels controls in the Audio panel of the Clip Attributes window
With this mapping, this audio clip exposes only one item in the Timeline.
A single audio channel exposed in the Timeline
Alternately, you might elect to set these clips up with five separate audio tracks with a
singleaudio channel each, in order to expose each channel separately in the Timeline for
independent editing.
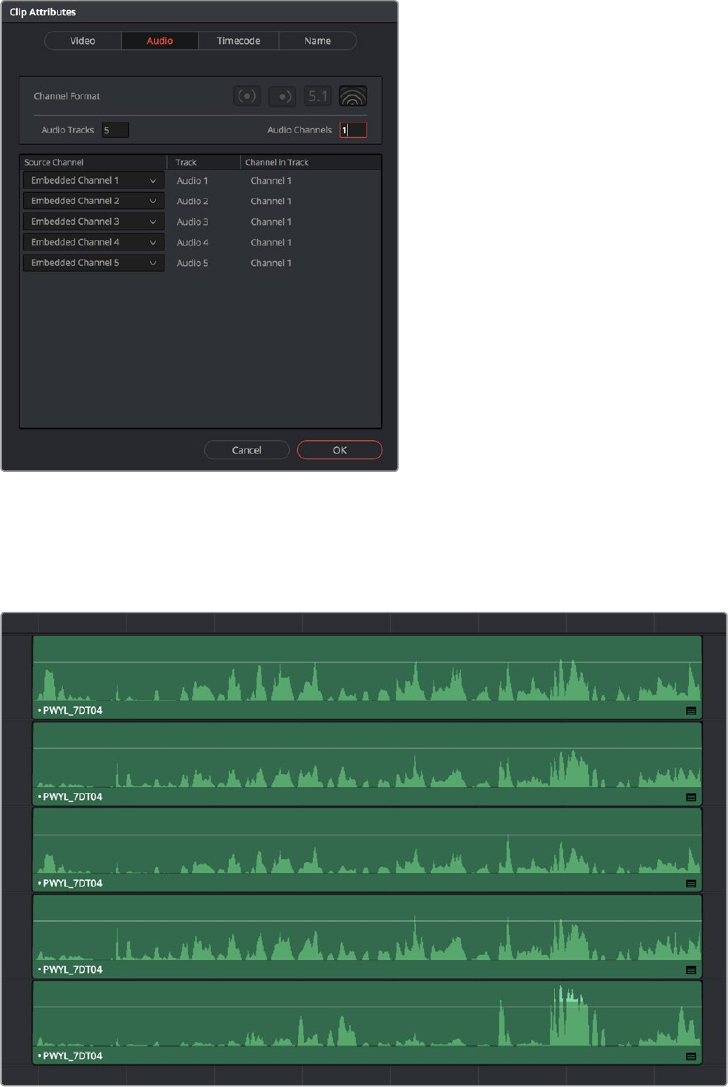
475
Working with Audio in the Edit Page Part 3 – 25
The Channels controls in the Audio panel of the Clip Attributes window
Editing such a clip into the Timeline results in five linked audio items appearing on five separate
audio tracks, each of which can be edited separately in the Timeline.
Each channel exposed as a separately editable clip in the Timeline
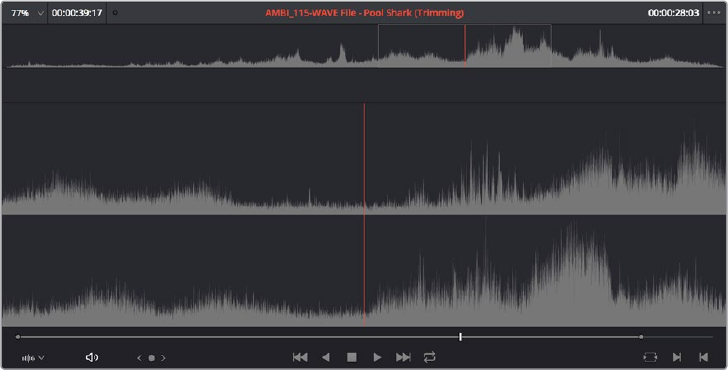
476
Working with Audio in the Edit Page Part 3 – 25
Editing Audio Into the Timeline
A separate set of audio tracks contain all of the audio that you edit into the Timeline, as well as
any stand-alone audio files that might have been imported along with an AAF or XML files.
Editing Audio Using the Source Viewer
Opening an audio-only clip into the Source Viewer, or opening a clip with both video and audio
and setting the Viewer to Audio Waveform results in a split view, with the complete waveform of
the entire source clip shown in the top half, and a zoomed-in view of the waveform in the
bottom half that can be set to zoom from 1x to 50x from the Zoom menu at the upper left-hand
corner of the Source Viewer. This view makes it easy to drag the box at the top to find the
section of audio you need relative to the entire clip, and yet still place In and Out points with
great precision using the scrubber bar below.
This view shows every channel within each track of the current clip.
An audio clip opened into the Source Viewer
You can add markers and set In and Out points for audio clips just as you would for any other
clip, in preparation for editing.
Simultaneous Audio Waveform Display in the Source Viewer
It’s also possible to edit using audio waveforms even when the Source Viewer is set to Source.
Two options in the Option Menu let you see a superimposed audio waveform running along the
bottom of the Viewer, over the video of the currently selected clip.
Show Current Frame Audio Waveform: Shows a zoomed-in section of audio that
scrolls as you play the clip. Useful for seeing dialog and music cues as you play
through a clip.
Show Full Clip Audio Waveform: Shows the audio waveform for the entire source
media of that clip. The section of audio from the In to Out points you’ve set in the
Source Viewer are highlighted. Useful for using the audio waveform to navigate
throughout that clip using the waveform as a reference.
477
Working with Audio in the Edit Page Part 3 – 25
The Source Viewer with “Show Current Frame Audio Waveform” enabled,
displaying the audio waveform along the bottom of the image
Using Multi-Channel Timeline Tracks
Multi-channel audio tracks are extremely convenient when you’re dealing with clips that are
stereo, 5.1, 7.1, or have an arbitrary number of channels that were recorded in the field, as you
can fit all of these channels as a single clip into a single track, that will be correctly mapped to
your project’s outputs, and that can be edited conveniently as a single item in the Timeline.
However, there are different types of audio tracks just like there are different types of audio
clips: Mono, Stereo, 5.1, and Adaptive. While you can edit any kind of audio clip into any kind of
audio track, all audio channels in excess of the number of audio channels enabled by a
particular timeline track will be muted. For example, you’re allowed to edit a six-channel
Adaptive audio clip into a Mono audio track, but only the first channel will play because of the
way that track is mapped to the mixer outputs.
Because of this, it’s a good idea to organize your timeline such that all clips appear on tracks
that can accommodate the number of channels they have.
Defining Timeline Audio Track Channels at Creation
When you first create a new audio track, you have to choose what kind of audio track it will be.
Right-clicking in the bottom audio portion of the Timeline track header reveals a contextual sub-
menu that lets you create one of three different kinds of audio tracks.
Mono: Holds a single channel.
Stereo: Holds stereo left and right channels. Stereo tracks can be panned.
5.1: Holds the six channels corresponding to a 5.1 surround mix. For broadcast, SMPTE
specifies Left, Center, Right, Left Surround, Right Surround, and LFE. For cinema
distribution these tracks are ordered Left, Right, Center, LFE, Surround Left, Surround
Right, and LFE.
7.1: Holds the eight channels corresponding to a 7.1 surround mix. For broadcast,
SMPTE specifies Left, Center, Right, Left Surround, Right Surround, LFE, Back Surround
Left, and Back Surround Right. For cinema distribution these tracks are ordered Left,
Right, Center, LFE, Left Surround, Right Surround, Back Left Surround, and Back
Right Surround.
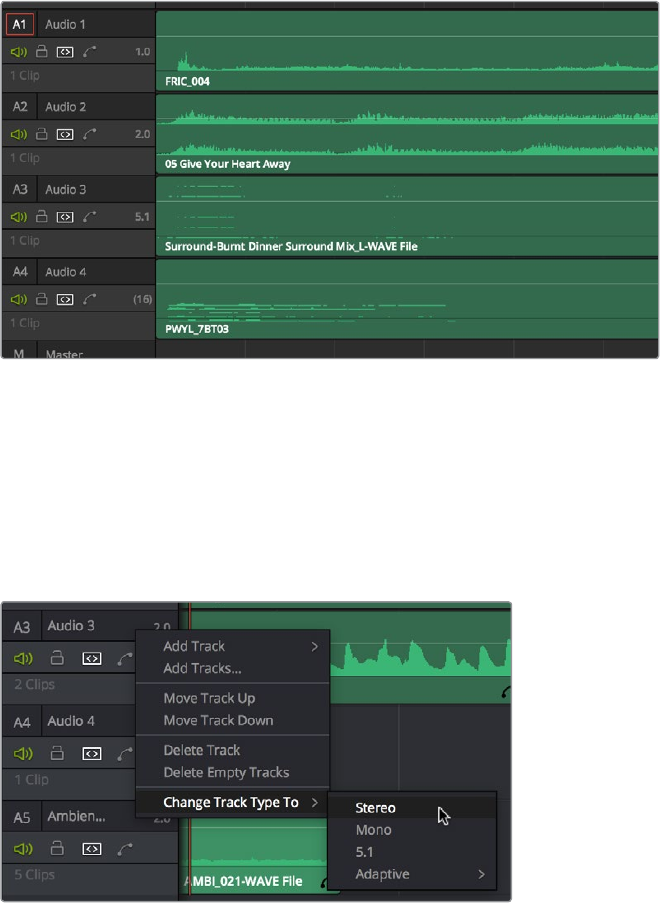
478
Working with Audio in the Edit Page Part 3 – 25
Adaptive: Capable of holding up to 24 audio channels. An adaptive audio track can
hold clips with different combinations of channels, up to the maximum number of
channels allowed within that track. The number of channels allowable on a particular
Adaptive track is user-definable (1–24) at the time that track is created. If you edit a clip
with more channels into an Adaptive track that was created to hold fewer channels, the
extra channels are muted.
Four audio tracks with each type of audio track shown. From the
top down, Mono, Stereo, 5.1, Adaptive
Changing How Many Channels an Audio Track Has
If you had set up your timeline with one kind of audio track, but you discover you actually need
a different kind, you can change any audio track’s type at any time. Just right-click anywhere in
that audio track’s timeline header, and choose an option from the Change Track Type To
submenu of the contextual menu.
Contextual menu for changing audio track types
Editing Audio Clips Into the Timeline
When you edit a video clip with accompanying audio, or an audio-only clip, into the Timeline,
what you see depends on how the audio’s internal tracks and channels were defined in the
Media Pool, using Clip Attributes.
If you’ve defined a clip to expose multiple channels of audio via multiple tracks, you exchange
the convenience of managing multiple channels of audio as a single item for the freedom to
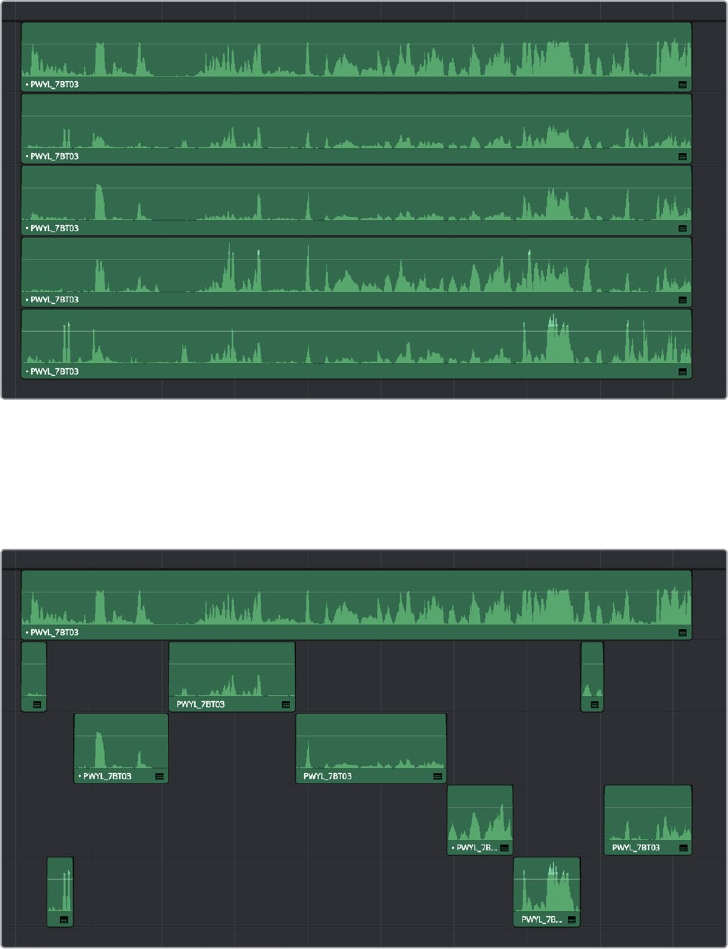
479
Working with Audio in the Edit Page Part 3 – 25
individually edit each channel of audio separately, as individual clips in the Timeline.
Forexample, if you’ve been given a multi-channel recording that consists of a two boom
microphones, two separate lavaliere microphones, and a mix-down track that were recorded
simultaneously, you can use the Audio Panel of the Clip Attributes window to set that clip’s
audio up as 5 channel Adaptive audio with 5 tracks containing one channel each. Editing this
into the Timeline, you end up with five separate audio items appearing in five tracks.
Editing a multi-channel production recording as five separate tracks of audio
This way, when you edit that clip into the Timeline, each audio channel appears as its own clip
in its own audio track of the Timeline, which can be separately edited so you can edit the scene
to isolate the best dialog from each microphone.
Editing multi-track audio to isolate the best dialog from each microphone
Changing Audio Clip Attributes After Editing
It’s best to make decisions about which audio tracks and channels are assigned prior to
beginning editing. This is because once you’ve edited a clip into a timeline, you can’t use the
Clip Attributes window to edit how many Audio Tracks and Audio Channels are assigned or
exposed.
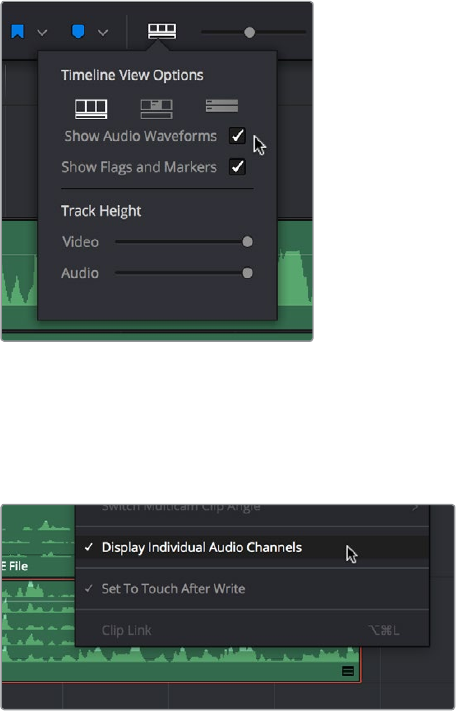
480
Working with Audio in the Edit Page Part 3 – 25
However, you can use Clip Attributes to change which channels are assigned and/or muted
within the available Tracks and Channels. For example, if you’re editing clips that have five
channels of source audio (channels 1 and 2 are a stereo mix and channels 3 through 5 are three
different microphones), you may have set your synced source clips to have one audio track and
five audio channels, with channels 3-5 muted. Later you have a few clips that would sound
much better if you only used channel 4, which is the isolated lavaliere microphone for that actor,
so you can select those clips and use the Audio panel of Clip Attributes to mute all channels but
channel 4.
If, for whatever reason, you need to expose more audio tracks in the Timeline than you
originally set an audio clip to use, you can do the following.
To re-edit an audio clip to expose more audio tracks than were originally available:
1 Right-click the clip you want to change the audio track mapping of in the Timeline, and
choose Find in Media Pool from the contextual menu.
2 Right-click that clip in the Media Pool and choose Clip Attributes from the contextual
menu.
3 Open the Audio panel of the Clip Attributes dialog, and choose how many audio tracks
and audio channels you want to set that clip up with. Click OK.
4 Once that’s done, edit the changed audio clip from the Media Pool to the Timeline
toreplace the original clip using whichever method makes sense.
Displaying Waveforms in the Timeline
The Timeline View options palette lets you turn Audio Waveform display on and off via a
checkbox. If the audio waveform is turned off, then all audio channels are minimized.
The Audio Waveform display option in the
Timeline View pop-up
While a single averaged audio waveform representing all the channels in that clip is shown by
default, you can switch any clip to seeing each individual waveform in a vertical stack by
right-clicking any audio clip and choosing Display Individual Audio Channels.
Enabling the display of multiple channel waveforms in the Timeline
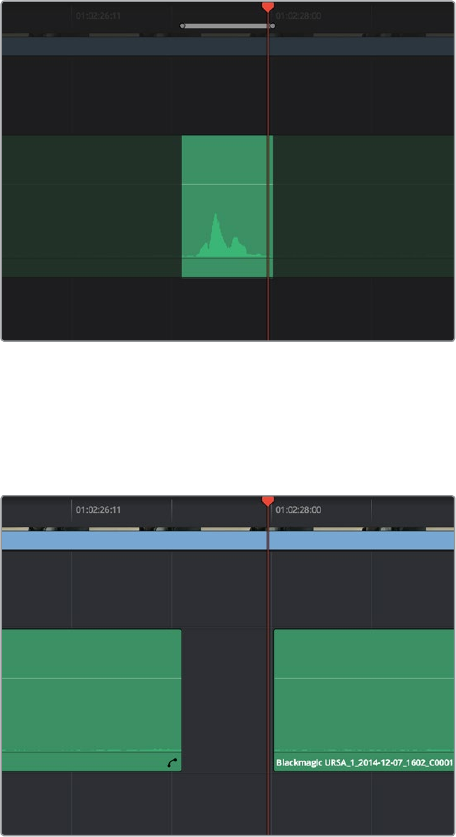
481
Working with Audio in the Edit Page Part 3 – 25
Whenever you cut an audio clip, you cut all audio channels with it. Audio channels that are
embedded within a single track cannot be individually edited.
Editing Audio In the Timeline
Using In and Out Points
Audio clips can be edited using all of the commands and tools available for video clips.
However, it’s good to know that one of the most common techniques of editing audio in
otherenvironments is available in DaVinci Resolve, and that is the ability to identify a range of
audio to cut, copy, or delete using Timeline In and Out points, so that you can easily eliminate,
move, or duplicate partial sections of audio without having to use the Razor Edit or Split Clip
commands.
To delete a section of audio using In and Out points:
1 Set In and Out points in the Timeline to identify the range of audio you want to
eliminate. If necessary, turn off the auto select controls of tracks to omit overlapping
audio clips you don’t want to delete from this operation.
Setting In and Out points to identify a range of audio to delete
2 Press the Backspace key to delete the section of audio and leave a gap, or press the
Forward Delete key to delete the section of audio and ripple the Timeline to close
thegap.
Deleting the audio using the Backspace key to leave a gap
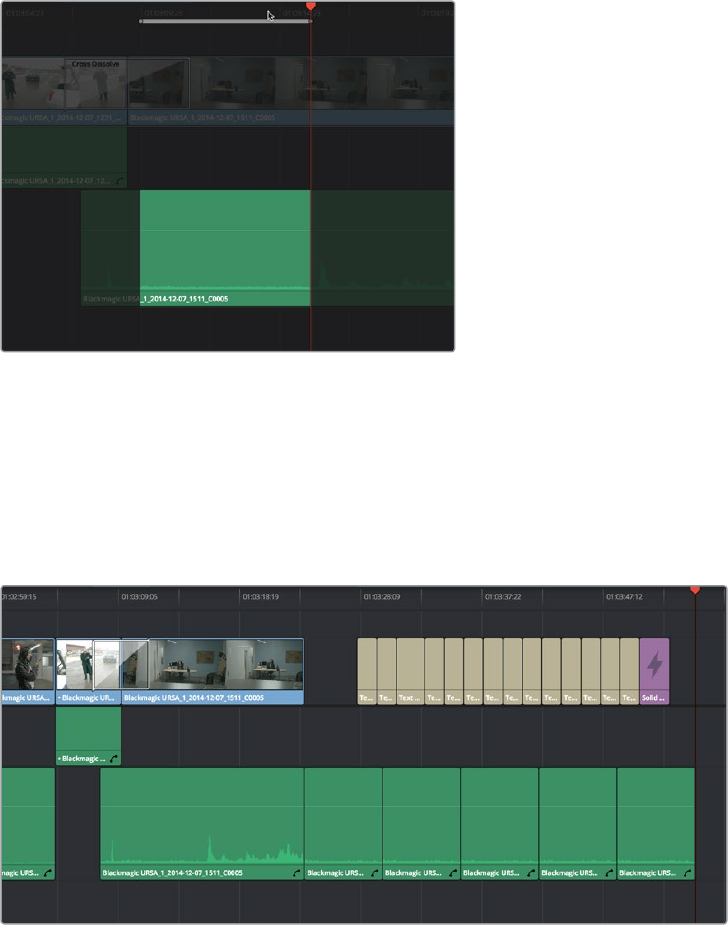
482
Working with Audio in the Edit Page Part 3 – 25
To copy a section of audio using In and Out points:
1 Set In and Out points in the Timeline to identify the range of audio you want to copy.
Ifnecessary, turn off the auto select controls of tracks with overlapping audio you don’t
want to copy; you can Option-click the auto-select control of the audio track you’re
copying from to solo it, and you can Shift-click any video track’s auto-select control
to turn them all off. In this example, we’re copying some background ambience to
continue building an ambience track.
Setting In and Out points to identify a range of audio to copy
2 Press Command-C to copy that section of audio.
3 Press Option-X to clear the Timeline In and Out points, and move the playhead to
where you want to paste the copied section of audio.
4 Press Command-V to paste the copied audio. If you’re looping a section of audio, you
can paste many times to loop what you’ve copied.
Pasting the background ambience several times to loop it
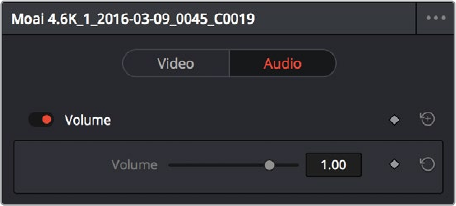
483
Working with Audio in the Edit Page Part 3 – 25
Audio Settings in the Inspector
Each clip has some simple audio-related parameters in the Audio panel of the Inspector.
Volume: Each clip has a single volume control that corresponds to the volume overlay
over each audio clip.
Equalizer: Each clip also has a four-band EQ, complete with low-pass, high-pass, and
parametric settings for fine tuning and problem-solving audio issues at the clip level.
Additionally, when you apply other audio plug-ins from the Audio FX panel of the Effects
Library, additional parameters and controls are exposed (covered towards the end of this
chapter).
Setting Clip Levels
Each audio clip, or audio item in the case of audio clips with linked audio on multiple tracks, has
its own Volume level. This means that audio clips with multiple channels share a common
Volume setting. There are several ways you can adjust these levels simply.
Adjusting Audio in the Inspector
Each clip has individual Level parameters that are accessible in the Audio panel of the Inspector
when one or more audio clips are selected.
The Volume and Pan parameters available for
audio clips in the Inspector
Selecting an audio clip in the Timeline and adjusting its Volume or Pan only alters that clip,
which lets you set basic levels for individual clips in your program. The Volume control affects
every channel within that clip simultaneously.
If you select multiple clips in the Timeline, then adjusting the Volume or Pan sliders or virtual
sliders for all of them simultaneously will make a relative adjustment to all of the clips,
preserving their offsets from one another. If you want to set all clips to the same level, then
making a numeric adjustment will set all selected clips to the same absolute level.
Adjusting Audio in the Timeline
Each clip (or item) of audio in the Timeline has a Volume overlay that lets you set that clip’s level
by simply dragging it up or down with the pointer. This overlay corresponds to the Volume
parameter in the Inspector.
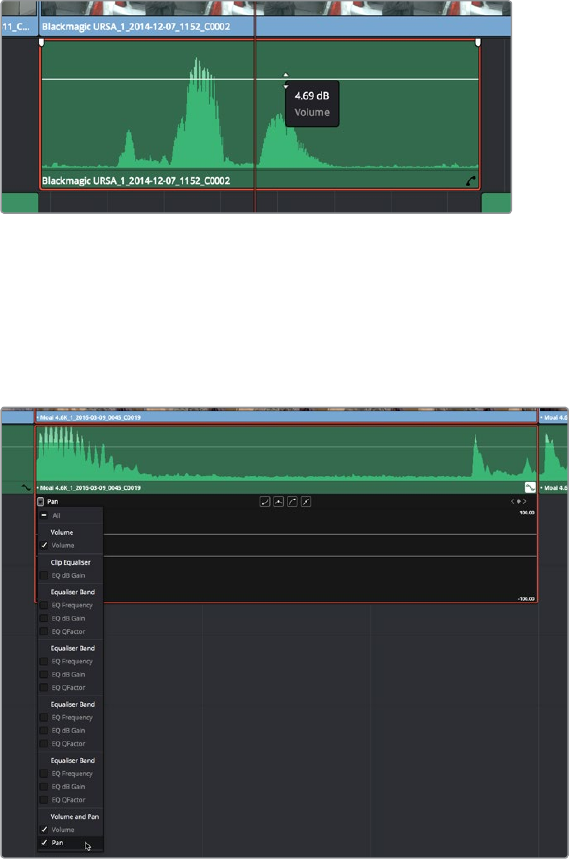
484
Working with Audio in the Edit Page Part 3 – 25
Dragging a Volume overlay to adjust the clip level
If you want to adjust the Pan of that clip in the Timeline, you need to click the Curve Editor
button at the bottom right-hand corner of the audio clip, which opens the Audio Curve Editor.
You can then use the Parameter pop-up at the upper left-hand corner of the Curve Editor to
turn on the Pan checkbox and select the Pan overlay. This overlay can then be dragged up or
down to adjust the pan of the clip.
Showing the Pan overlay in the Curve Editor
The Audio Curve Editor can also expose curves for the various parameters of the clip-based EQ
that’s available.
Adjusting Clip Levels Using Keyboard Shortcuts
You can also adjust the Volume of selected clips using keyboard shortcuts, even while the
Timeline is playing. There are several ways you can set this up.
To adjust just one clip: Select that clip, and choose Clip > Increase Audio Level 1dB
(Option-Command-Plus) or Clip > Decrease Audio Level 1dB (Option-Command-Minus).
To adjust any clip at the position of the playhead: Turn on Timeline > Selection
Follows Playhead (Command-W) so that whichever clip intersects the playhead
becomes selected, and then choose Clip > Increase Audio Level 1dB (Option-
Command-Plus) or Clip > Decrease Audio Level 1dB (Option-Command-Minus).
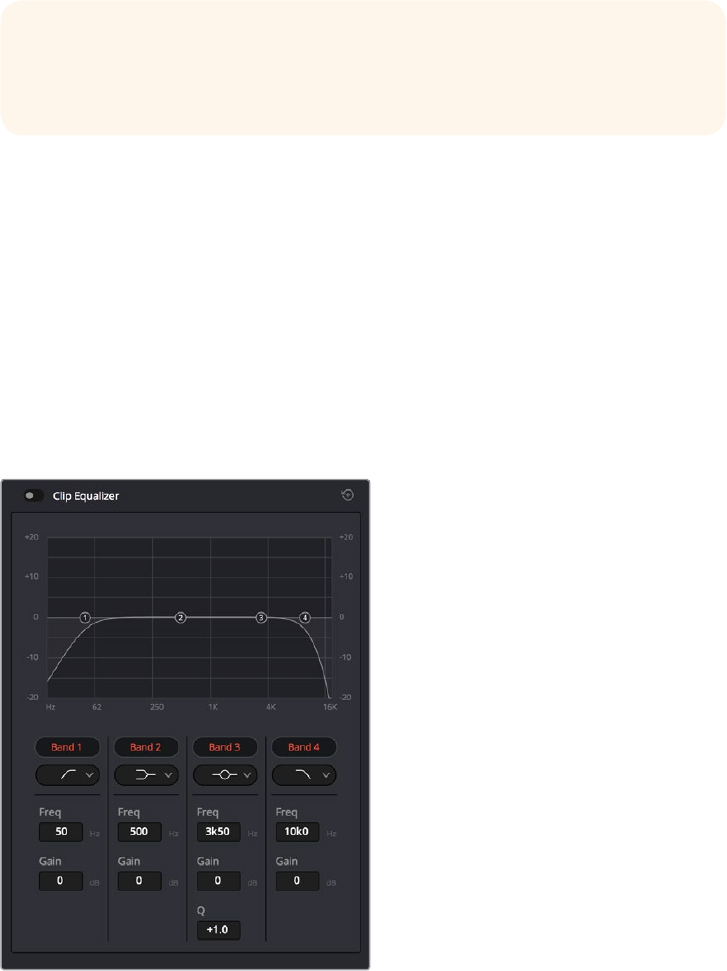
485
Working with Audio in the Edit Page Part 3 – 25
To adjust multiple clips all together: Select all of the clips you want to adjust, all
at once, and choose Clip > Increase Audio Level 1dB (Option-Command-Plus) or
Clip> Decrease Audio Level 1dB (Option-Command-Minus). If the clips you select
have differing Volume levels, these differences will be maintained as you make
youradjustments.
Clip EQ
Each audio clip in the Timeline has a four band equalizer that has both graphical and numeric
controls for boosting or attenuating different ranges of frequencies within that clip, before it
even gets to the EQ built into the mixer. Each band has controls for the filter type (Bell, Lo-Shelf,
Hi-Shelf, Notch), Frequency, Gain, and Q-factor (sharpness of the band), with the available
controls for each band of EQ changing depending on the filter type.
When a channel strip’s EQ is enabled, the EQ button displays the equalization curve that’s
being applied. This indicator cannot be adjusted; you must open the EQ window to make
modifications.
The channel strip’s EQ indicator, (Left) EQ is at detente, (Right) EQ is adjusted
Master EQ Controls
The Equalizer window has the following overall controls:
Enable button: Turns the overall EQ effect off and on, without resetting the controls.
Reset button: Resets all controls of the EQ window to their defaults.
TIP: An additional pair of commands in the Clip menu, Increase/Decrease
Audio Level 3 dB, are available, but unmapped to keyboard shortcuts by
default.
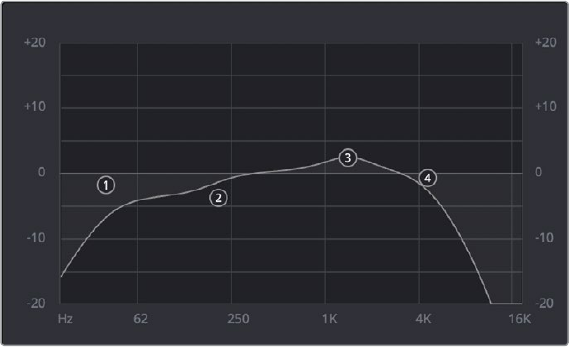
486
Working with Audio in the Edit Page Part 3 – 25
Graphical EQ controls
A graph at the top shows a curve with handles that correspond to each of the enabled EQ bands
listed below. You can drag any numbered handle to boost or attenuate the range of frequencies
governed by that band, using whatever type of equalization that band has been set to.
The EQ graph with user-draggable handles
Dragging the numbered handles on this graph in turn modifies the parameters of the
corresponding band, and changing each band’s parameters will also alter the EQ graph, which
serves the additional purpose of providing a graphical representation of the equalization being
applied to that track.
Bands 1 and 4
The outer two sets of band controls let you make high-pass and low-pass adjustments, if
necessary.
Band enable button: Turns each band of EQ on and off.
Band filter type: Bands 1 and 6 can be switched among four specific filtering options
for processing the lowest or highest frequencies in the signal. These include (from top
to bottom) Hi-Shelf, Hi-Pass, Lo-Pass, and Lo-Shelf.
Freq: Adjusts the center frequency of the EQ adjustment.
Gain: Adjusts the amount by which the affected frequencies are affected. Negative
values attenuate those frequencies, while positive values boost those frequencies.
Bands 2-3
The middle two sets of band controls let you make a wide variety of equalization adjustments.
Band enable button: Turns each band of EQ on and off.
Band filter type: Bands 2–5 can be switched among four different filtering options
(from top to bottom) Lo-Shelf, Bell, Notch, and Hi-Shelf.
Frequency: Adjusts the center frequency of the EQ adjustment.
Gain: Adjusts the amount by which the affected frequencies are affected. Negative
values attenuate those frequencies, while positive values boost those frequencies.
Q Factor: Adjusts the width of affected frequencies. Lower values include a wider
range of frequencies, higher values include a narrower range of frequencies.
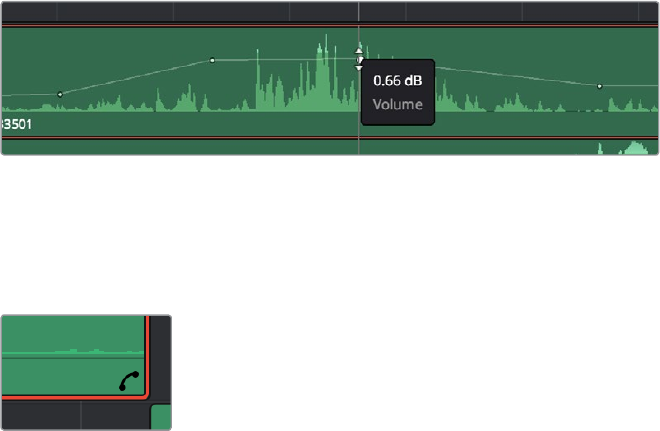
487
Working with Audio in the Edit Page Part 3 – 25
Keyframing Audio
There are two ways you can keyframe audio in the Edit page. You can use each audio clip’s
Volume Curve in the Timeline, or you can use the keyframe controls in the Inspector to animate
the Volume parameter of individual clips as you would any other clip attribute, fading the level
up or down, panning from left to right, or dynamically changing any one of a host of
filtercontrols.
For more information on keyframing in the Inspector, see Chapter 31, “Keyframing.”
Anykeyframes you create using the Keyframe controls of the Inspector automatically appear on
the Volume Curve of that audio clip in the Timeline.
Curve Editor Controls for Clip Audio
Each audio clip in the Timeline appears with a Curve control overlaid on top of it, that by default
starts out completely flat. Similar to such controls found in other applications, the Level Curve
lets you alter each clip’s volume, either overall, or dynamically using keyframes.
Volume curves adjusting the level of a clip’s audio in the Timeline
Additionally, you can click any clip’s Audio Curve Editor button, at the bottom right-hand corner
of each audio clip, to open an audio-specific Curve Editor with which you can keyframe not just
Volume, but Pan, and the parameters of any audio filters you might have applied to that clip.
The button for opening an
audio clip’s Curve Editor
A pop-up at the upper left-hand corner of the Audio Curve Editor lets you choose which audio
parameters you want to expose for editing and keyframing. This includes the individual
parameters of any audio filters you’ve applied to that clip, which appear in submenus
corresponding to each filter you’ve applied. When you’re finished using the clip Audio Curve
Editor, you can click the close button at the bottom right of the audio clip to hide it.
How to Add and Adjust Audio Keyframes
Mixing audio by adding and adjusting individual keyframes can be a fast and effective way of
balancing clip levels with one another, fixing level problems within a particular clip, or even
creating simple mixes (although the mixing capabilities of the Fairlight page are considerably
more robust). When manually editing any audio parameter curve, you can use the following
procedures.
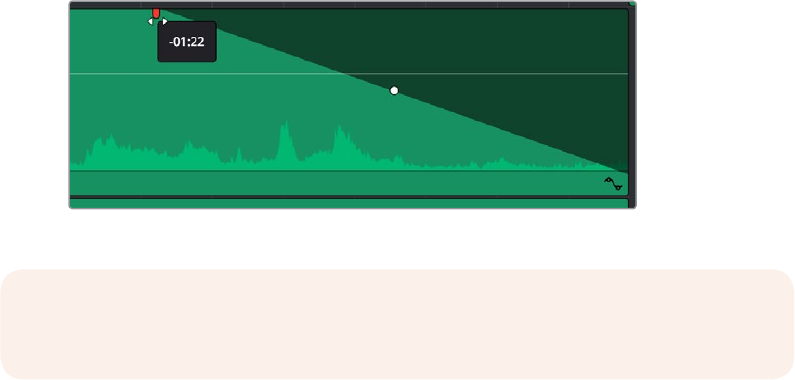
488
Working with Audio in the Edit Page Part 3 – 25
Methods of adjusting different audio curves using the pointer:
To adjust any curve segment: Position the pointer between any two keyframes,
directly on top of the curve segment you want to raise or lower, and when the move
cursor is displayed, click and drag up to raise the level, or down to reduce the level.
To add keyframes to the level curve: Hold the Option key down and click the curve
to place a keyframe at that frame. You must add at least two keyframes to create an
automated change in volume.
To adjust any keyframe: Move the pointer over a keyframe so that the four-way
cursor appears, and then click and drag in the intended direction of adjustment,
either vertically to change the volume of the clip at that frame, or horizontally to move
the keyframe to a different point in time. Once you start dragging a keyframe into
a particular direction, keyframe movement is constrained in that direction until you
release that keyframe.
To change the interpolation of a keyframe: Click the keyframe you want to edit, and
then click one of the four bezier interpolation buttons at the top of the Curve Editor.
To adjust a bezier handle: Drag the bezier handle in any direction to alter the curve.
To delete keyframes: Select any keyframe on a curve, and press the Delete key to
make it disappear.
Audio Fade Handles
When you position the pointer directly over an audio clip, a pair of Audio Fade handles appear
at the In and Out points. Dragging each of these handles towards the center of the clip lets you
fade in the clip volume at the beginning of the clip, and fade out the clip volume at the end of
the clip.
Audio Fade handles at either end of an audio clip
Once you’ve created a fade effect, you can adjust the curve of the fade by dragging the handle
that appears right on top of the fader curve. Dragging the handle up and down affects the angle
of the curve, and dragging the handle left and right affects the shape of the curve. In this way,
you can create all manner of fade effects.
NOTE: When you import a Final Cut Pro X project, the fade handles for each clip
automatically import as well.
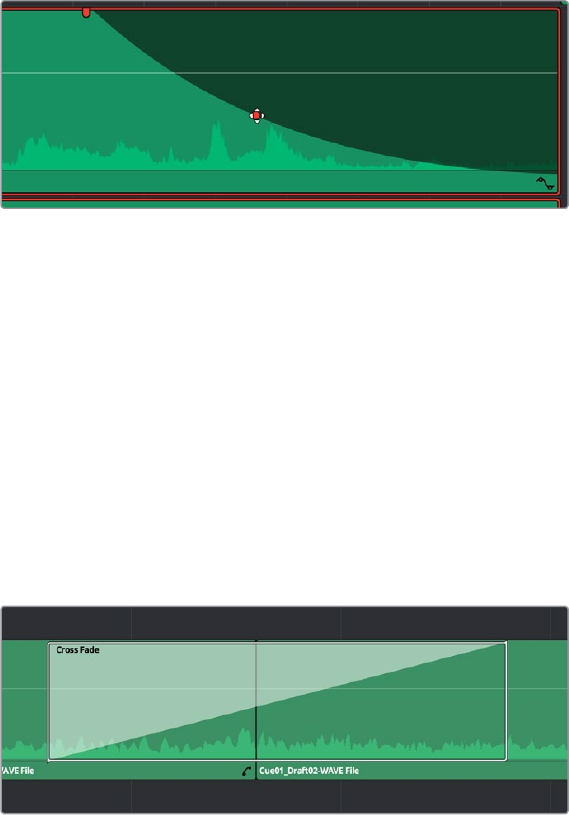
489
Working with Audio in the Edit Page Part 3 – 25
Adjusting the curve of the fade
Fade effects can be created and edited on both the Edit and Fairlight pages.
Audio Crossfades
You can add Cross Fade transitions to any edit point between two overlapping audio clips, the
same way you’d add video transitions, by dragging and dropping from the Effects Library, by
right-clicking an edit and choosing an option from the contextual menu, or by selecting an audio
edit point and choosing Timeline > Add Audio Only Transition (Shift-T).
Cross Fade transitions fade the volume of the outgoing clip down while simultaneously fading
the volume of the incoming clip up, letting you create a smooth aural transition between two
audio clips.
An audio Cross Fade transition applied between two clips
You can double-click a Cross Fade transition to open it into the Inspector, revealing the
following parameters:
Duration: The duration of the transition, shown in both seconds and frames.
Alignment: A pop-up that lets you choose the transition’s position relative to the
edit point it’s applied to. Your choices are “End on Edit,” “Center on Edit,” and
“Begin on Edit.”
Transition style: For Cross Fade transitions, there is only one style available.
Fade In/Fade Out levels: There are three options that affect the incoming and outgoing
halves of the Cross Fade effect independently. 0dB applies a linear fade. +3dB applies
a boosted curve; when applied to both Fade In and Fade Out, this can compensate
for diminished levels in the middle of a Cross Fade. -3dB applies an attenuating curve,
which deliberately lowers the level of the Cross Fade.
Crossfades can be created and edited on both the Edit and Fairlight pages.
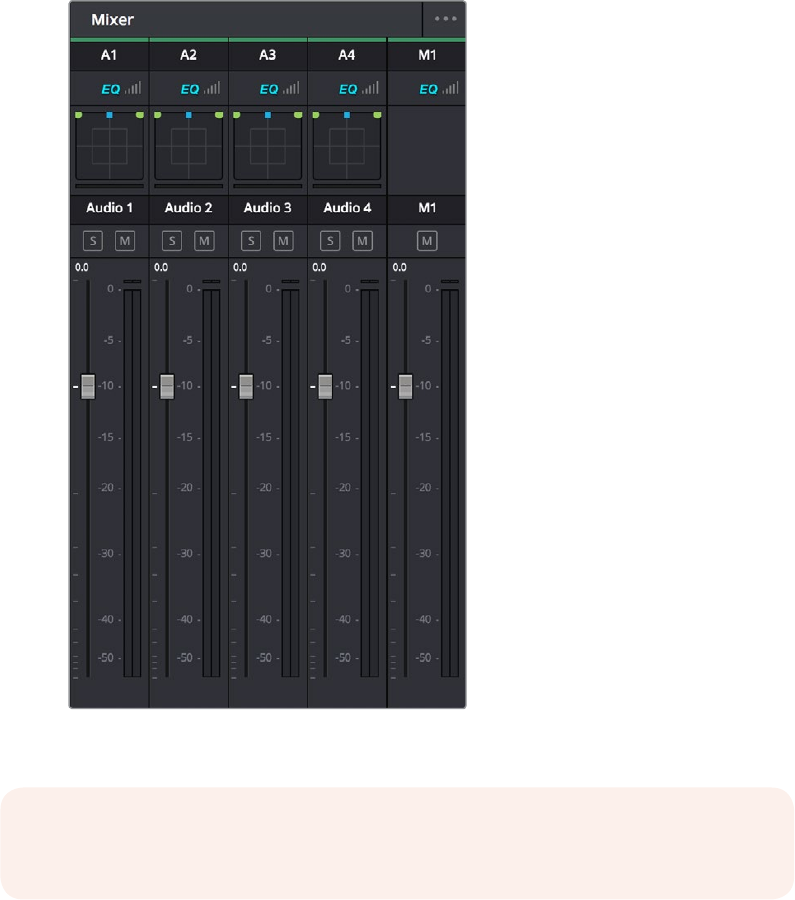
490
Working with Audio in the Edit Page Part 3 – 25
The Audio Mixer
The Audio Mixer on the Edit page is a simplified version of the Mixer on the Fairlight page,
designed to provide a streamlined set of graphical controls you can use to set basic track
levels, pan stereo audio, and mute and solo tracks, while you work.
To open the Audio Mixer, do one of the following:
Click the Mixer button on the interface toolbar.
The Audio Mixer exposes a set of channel strips with controls that correspond to the tracks in
the Timeline, one for each track, plus (by default) a Main 1 that lets you adjust the overall level of
the mix. Each channel strip’s controls affect the level and panning of every single clip on
thattrack.
The Audio Mixer, with four channel strips
corresponding to the four tracks in the Timeline
NOTE: You cannot record automation in the Edit page. Comprehensive mixing controls
with full automation recording are found in the Fairlight page.
491
Working with Audio in the Edit Page Part 3 – 25
Audio Mixer Controls
Each track’s channel strip has the following controls:
Track Color: Each track can be differently color-coded to help you keep organized.
These colors also appear in the timeline track header and the Fairlight page.
Track Number: The number of the timeline audio track corresponding to each channel
strip appears here.
Pan control: Lets you pan a Mono channel’s audio from left to right, or invert a Stereo
channel’s left and right audio channels, or do surround mixing.
Name: The name of the audio track that channel strip corresponds to. If you’ve edited
the audio track names in the Timeline, those names will appear here. Double-clicking a
channel strip names toggles between your custom track name and the number of each
audio track in the Timeline. You can also choose whether or not to show track names in
the Mixer by choosing View > Use Track Names in Audio Mixer.
Solo: Mutes all tracks other than ones that are soloed.
Mute: Disables that audio track.
dB: Shows you the volume, in decibels, that track is currently set to.
Fader: Each track’s vertical fader can be dragged with your mouse or other pointing
device to adjust the volume of that track and perform automation recording. Dragging
up increases volume, dragging down decreases volume.
Audio meters: Audio meters to the right of each fader display the audio volume of
all channels on that track during playback. Each channel strip has individual meters
corresponding to the number of channels that track has been set to accommodate.
Disabling Track Audio vs. Muting Tracks
When you use the mute or solo controls of the Audio Mixer, track audio is disabled during
playback. However all muted (or non-soloed) tracks are re-enabled for output to tape or
rendering as file-based output when you use the controls in the Deliver page. If you want to
disable tracks for output, you can use the Enable Track button, in the track header of the
Timeline in the Edit page or the Deliver page, to turn any tracks off that you don’t want to output.
Displaying Audio Meters
Clicking the Mixer button in the interface toolbar of the Edit page opens up the Mixer by default,
but you can choose Audio Meters from the Mixer’s Option menu to display simple audio meters
to the right of the Timeline that let you monitor the level of the Master mix during playback.
Theaudio meters are capable of displaying however many channels you’ve defined as your
output format.
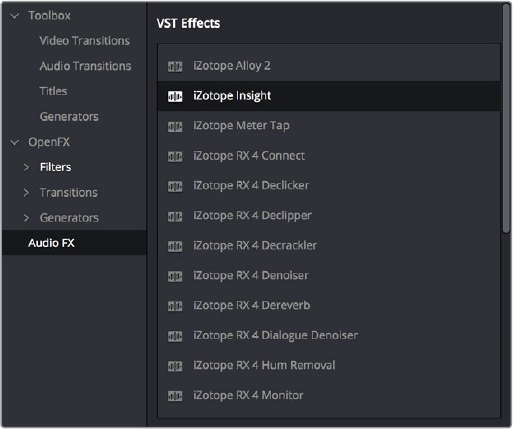
492
Working with Audio in the Edit Page Part 3 – 25
Using Audio Filters
On Mac OS X and Windows, DaVinci Resolve supports the use of third-party VST audio
plug-ins. On Mac OS X, DaVinci Resolve supports Audio Unit (AU) audio plug-ins. Once you
install these effects on your workstation, they appear in the Audio FX panel of the Effects
Library.
Audio filters in the Effects Library
Audio plug-ins let you apply effects to individual audio clips or entire tracks worth of audio, to
add creative qualities such as echo or reverb, or to take care of mastering issues using noise
reduction, compression, or EQ.
Methods of applying Audio Filters to clips in the Edit Page:
To apply an audio filter to a clip: Drag any filter from the Audio FX panel of the Effects
Library onto the clip in the Timeline you want to apply it to.
To apply an audio filter to multiple clips: Select all of the clips you want to apply an
audio filter to, then drag any filter from the Audio FX panel of the Effects Library onto
any of the selected clips.
To edit a clip’s audio filters:
Select that clip and open the Inspector. All audio filters applied to that clip appear
under the volume and pan controls, with that filter’s controls appearing directly in the
Inspector.
Many VST and Audio Unit audio filters have a custom user interface that makes it much easier
to manipulate that filter’s controls. These can be opened from within DaVinci Resolve.
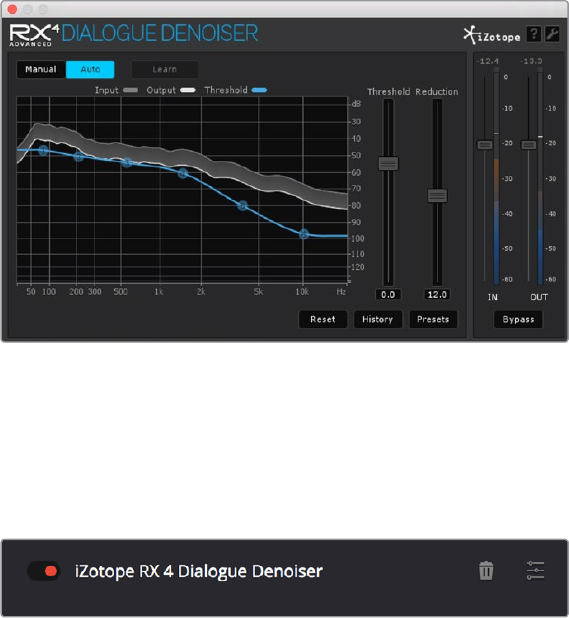
493
Working with Audio in the Edit Page Part 3 – 25
The custom audio filter interface for Izotope RX4
To expose a filter’s custom controls:
Click the Custom Control button (the button to the right of the trash can). The custom
controls appear in a floating window. When you’re finished adjusting the custom
controls, close the window.
The button for opening a filter’s custom control
Methods of working with audio filters in the Inspector:
To disable or re-enable a filter: Click the toggle button at the far left of each filter’s
title bar.
To remove a filter: Click the Trash Can button.
Once applied to a clip or track, audio filters can also be keyframed or automated just like
volume and pan settings, to create dynamic audio effects that change over time.
Installing Audio Filters
VST effects aren’t installed in a standard location, so it may sometimes be necessary to add a
newly installed directory of VST plug-ins that you’ve just installed on your system. To help you
deal with this, the Audio Plugins panel of the System Preferences window has a list that lets you
manually add and remove VST plug-in directories, if necessary.
Once you’ve added one or more VST directories to the list, a second list underneath shows all
audio plug-ins that are available within these directories. Each plug-in on the list has a
checkbox that shows whether or not it’s currently enabled. Any VST plug-ins that cause DaVinci
Resolve to crash while loading them during startup will be automatically disabled. You can use
this list to see which plug-ins have been disabled, for troubleshooting purposes, and to
reenable such “blacklisted” plug-ins, by turning their checkboxes back on.
494
Working with Audio in the Edit Page Part 3 – 25
The Fairlight Page
The audio controls of the Edit page are geared more towards simple mixing to have sensible
levels as you work putting a program together. For comprehensive audio sweetening, mixing,
automation, and mastering controls, the Fairlight page is only one click away.
Pro Tools Export
It bears mentioning that, if the audio editing, mixing, and effects capabilities of DaVinci Resolve
aren’t enough for you to take care of the audio in your program, you can export an AAF with
audio and a reference movie to Pro Tools using the Deliver page. The resulting media can be
handed off to a Pro Tools-based audio facility to be worked on by a dedicated team of audio
specialists, who will most likely output a stereo or 5.1 mix file that you can then reinsert in the
Timeline you’re using to master the final output of your program.
For more information on exporting in the Deliver page, see Chapter 73, “Using the
DeliverPage.”
496
Media Management Part 3 – 26
Media Management
Media Management in DaVinci Resolve refers to operations that let you copy, move, or
transcode the media that’s linked to clips in your timeline, with the option to eliminate unused
media in the process. Even though Media Management is only available in the Media page, it’s
very typical that it be used to consolidate media from an edited timeline, or from a project
nearing completion, so it’s presented here in the editing section.
What is Media Management in DaVinci Resolve? 497
File Formats Compatible with Media Management 497
Using Media Management 498
Options in the Media Management Window 501
Options for Transcode Only 502
File Naming When You Consolidate Media 502
497
Media Management Part 3 – 26
What is Media Management
in DaVinci Resolve?
If you’ve edited a program within DaVinci Resolve, you can use the Media Management
command to take care of a variety of tasks, including but not limited to:
Moving all clips used in a project to a specific storage location.
Creating a duplicate of your project’s clips that eliminates unused media in preparation
for handing the media off to another facility.
Transcoding all clips in a timeline to another format while eliminating unused heads and
tails.
For example, if you’re preparing to export a project to hand off to another DaVinci Resolve user
somewhere else, or even an XML or AAF to give to someone using a completely different NLE
or finishing application, you can use Media Management in DaVinci Resolve to consolidate and
relink the media used by the timeline you’re handing off, so the exported project or timeline
references a smaller set of media.
Even if you’re not handing a project off, if you’ve ingested an enormous amount of source media
into a project, and after the majority of the editing decide that you want to create a consolidated
set of the media you’re using in order to lighten the project’s load in the Media Pool, you can
create a duplicate of the media to reconform to, omitting unused clips and trimming the unused
heads and tails of the clips you are using in the process.
But Media Management isn’t just useful for projects you’ve edited in DaVinci Resolve.
Forexample, if you’re importing a project from another application and you’ve been given an
enormous amount of source media to conform to, you may be hesitant to copy all of it to your
accelerated storage volume, since (a) most of it is probably unused by the project file you’ve
been given, (b) it’ll take forever to copy from the cheap USB 2 hard drive they’ve given you, and
(c) it will clog up your local storage, taking valuable space away from other projects. In this case,
you can use the Media Management to copy a reduced set of media files consisting of only the
clips used in the current timeline of the Edit page.
File Formats Compatible
with Media Management
No matter what you use if for, Media Management is designed to work with all video formats
that are have decode support within DaVinci Resolve, and is capable of outputting a few more
formats than the Deliver page can. Compatible formats include but are not limited to:
QuickTime
MXF
R3D
Image-based raw media formats including CinemaDNG raw and Alexa raw
DPX, EXR, JPEG 2000, TIFF, Cineon, and other compatible image sequence formats
AVI
The “trim unused media” options of the Copy or Move operations are not compatible with clips
that use codecs employing temporal compression, such as H.264, or for any format for which
DaVinci Resolve lacks encoding support. If you’re trying to trim media in a Media Management
operation for a project containing untrimmable media formats, the full media files will be moved
or copied, instead.
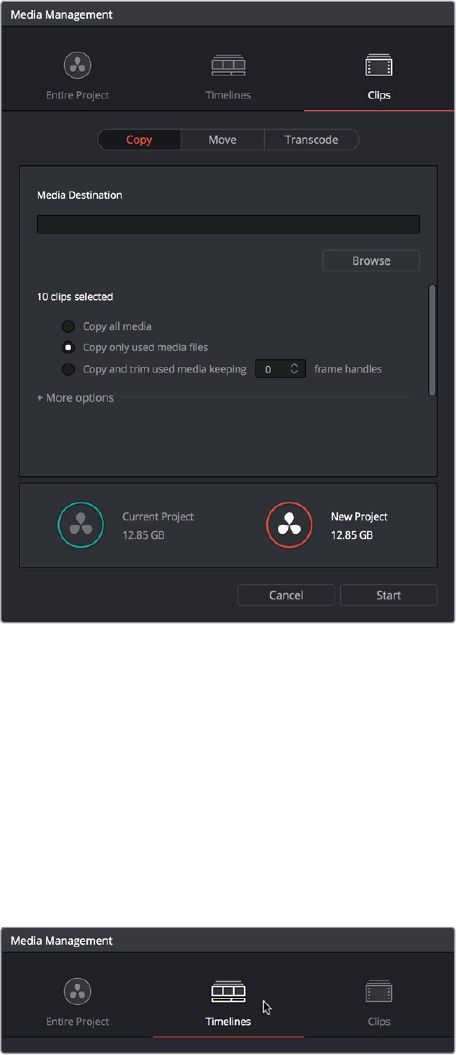
498
Media Management Part 3 – 26
Using Media Management
Using Media Management is simple.
To media manage clips and timelines in a project you’ve created:
1 Select the items you want to media manage, either clips or one or more Timelines.
2 Choose File > Media Management, and the Media Management window appears.
Media Management Window
3 Choose the scope of the Media Management operation, shown at the top of the
window. You can choose to affect the Entire Project, only one or more Timelines, or
only Clips. What you had selected prior to opening the Media Management window
affects the scope that is selected when you open this window, but it doesn’t limit to
operation to only the selected items. So, if nothing was selected in the Media Pool,
then “Entire Project” is automatically highlighted. If any clips were selected, then
“Clips” is highlighted automatically. If any Timelines were selected, then “Timelines” is
highlighted. However, if for whatever reason the wrong option is highlighted, you need
only click the option you want to select it instead.
Media Management scope options
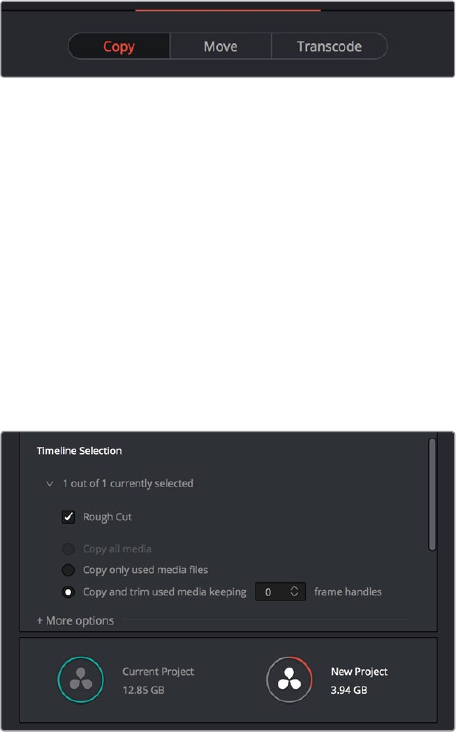
499
Media Management Part 3 – 26
4 Next, choose which operation you want to perform:
Copy: Creates duplicates of all media associated with clips or timelines at
thedestination.
Move: Relocates all media associated with clips or timelines to the destination,
removing it from the original locations.
Transcode: Creates duplicates of all media associated with clips or timelines in a
newformat that you specify; all transcoded clips are written to the same destination.
Media Management operations
5 Click the Browse button and use the File Destination dialog to choose a location for
the managed media to be written. The file path of this location appears in the Media
Destination field.
6 Choose the options associated with the operation you selected. If you choose to
media manage Timelines, then a Timeline Selection option lets you choose which
Timelines you want to include in this operation. Additional options for advanced users
can be revealed by clicking “More options.” The current size of the selected media is
listed below, alongside an estimate of the size of the media after the operation you’ve
selected. Depending on which options you select, the estimate may be larger or
smaller, but this will show you if you need to change the selected options to achieve a
more desirable final size.
Media Management options shown for copying trimmed
media from a specific timeline
7 When you’ve finished choosing options, click Start. A progress bar appears
showingyou how long the operation will take.
The following workflow illustrates how you can use Media Management to cut down the amount
of media you need to deal with when you’re conforming a project imported from elsewhere, and
you’ve been given far more media then you actually need, because you only need what’s
actually in the timeline you’re importing.
To use Media Management to create a consolidated duplicate of
media for a project you’reconforming:
1 Connect the portable drive containing the media to be conformed to your workstation.
2 Import the AAF or XML project file you were given into the Edit page, and conform it to
the media on the portable drive you connected in step 1. You’re only doing this to identify
what clips you need to Media Manage, not because you’ll be working off that volume.
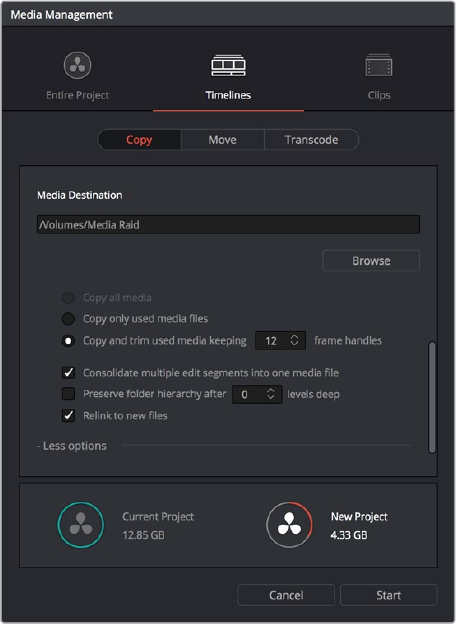
500
Media Management Part 3 – 26
3 Choose File > Media Management. The Media Management window appears.
4 Choose Timelines at the top of the window, and then open the Timeline selection
section and turn on the checkbox of the timeline you want to consolidate the media for.
5 Click the Browse button and choose the volume you want to write the
consolidated media to.
6 Choose the following options for consolidating the media. For this operation, you’ll want
to enable:
Click the Browse button, and choose the accelerated storage volume you’re using for
all media you’re using with DaVinci Resolve.
Choose the “Timelines” Media Management scope, if it’s not selected already, to
manage all media from the selected timeline.
Choose “Copy” to make a duplicate of the media from the portable storage volume to
your accelerated storage.
Choose “Copy and trim used media keeping 12 frame handles” if you’re comfortable
with 12 frame handles.
Open More Options and turn on “Consolidate multiple edit segments into one media
file” if you don’t mind having larger media files that preserve the relationship of what
clips come from which single media files. This can make grading simpler later on.
Turn on “Relink to new files” to automatically relink the timeline you’ve selected to the
new media that’s being generated.
The Consolidate dialog lets you choose how and where to copy the
trimmed media (the Timeline Selection options are scrolled offscreen)
7 When you’re done choosing these settings, click Start. A progress bar appears showing
you how long the operation will take.
A subset of media used by that timeline is copied to the specified directory, and is
automatically relinked to the timeline and clips in the Media Pool. You are now ready to
continue working on the project.
501
Media Management Part 3 – 26
Options in the Media
Management Window
The different Media Management operations offer different options.
Copy/Move/Transcode all media: (Not available for Timelines) Choosing this option
copies the full amount of source media for every single clip in the project.
Media Destination: Click the Browse button to choose a destination to which to copy
the managed media. To create a new directory, right-click a Volume icon in the File
Browser list, choose New Folder, type a name into the resulting dialog, and click OK.
Timeline selections: If you’ve selected the Timelines mode of media management, you
can open the Timeline Selection controls and turn on the checkbox by each timeline
with media you want to include.
Copy/Move/Transcode all media: Copies all media available to that operation.
Copy/Move/Transcode only used media files: Only copies media files for clips that are
used in a timeline, and copies them in their entirety.
Copy/Move/Transcode and Trim used media keeping x frame handles: Only copies
media files that are used in a timeline, but eliminates unused heads and tails except for
user-specified handles.
Consolidate multiple edit segments into one media file: (found by opening more
options) This option only becomes available if you’ve selected “Copy and trim used
media…” If multiple clips in a timeline come from the same media file, then a single
consolidated media file will be generated that contains all frames from all of these
clips, along with whatever additional frames lie between them. Even though this
option results in more media being copied or moved, it’s extremely useful if you’re
consolidating media that you want to grade using the automatic grade linking of remote
versions, as this preserves the original relationship between each Timeline clip and the
source media file it’s from.
Preserve folder hierarchy after x levels deep: (more options) Retains a user-specified
depth of the original directory structure used by a clip’s corresponding source
media file, recreating it when rendering new files for output. The number you select
determines how many levels of subdirectories DaVinci Resolve will automatically create
within the currently specified “Render job to” directory to match the path used by the
source files. Defaults to 0, which creates no matching subdirectories. The number of
path levels is defined relative to the head of each media file path.
Relink to new files: (Appears for the Copy operation only) Relinks the selected clips
and/or timelines to the new media you’ve created by copying, wherever you’ve copied
it to.
Delete unused media: (Appears for the Move operation only) Moves all unused media
to your file system’s trash when you perform a Move operation. It’s up to you to do the
final deletion of the media being discarded, so proceed with caution.
502
Media Management Part 3 – 26
Options for Transcode Only
The following options appear in the “More Options” area only when Transcode is the selected
Media Management operation.
Video format: Choose the video format to which you want to transcode. The format you
select determines which codecs and other options will be available to choose from.
Codec: A pop-up menu listing every codec that’s available for the currently selected
Video Format.
Compression quality: Disabled for certain formats. Lets you choose the level of
compression quality that’s used, if available.
Render at source resolution: A checkbox that lets you transcode each clip at the frame
size of the original media file, rather than at the shared resolution selected below.
Resolution: A pop-up menu lets you choose a specific resolution to transcode to.
Frame rate: Depending on the frame rate of the original media files, this pop-up menu
lets you choose a compatible frame rate that you can transcode to. For example,
if the source media frame rate is 24 fps, you can choose between 23.98 and 24 in
thispop-up.
Audio format: Choose the audio format you want to transcode all audio channels to.
Render: Choose how many audio channels you want to transcode. You can also
choose “Same as source” if you want to transcode each clip with the same number of
channels as its source media file.
Audio bit depth: Choose the bit depth that you want to transcode the audio to.
File Naming When You
Consolidate Media
When you’re media managing clip-based formats like QuickTime or MXF, if the “Trim Used
Media” option is on, and the “Consolidate Multiple Edit Segments Into One Media File”
checkbox is off, then timelines that use multiple clips derived from the same media file will
generate multiple trimmed media files. To prevent these files from overwriting one another,
additional characters are appended to each trimmed media file coming from the same source;
which characters are used depends on the video format.
For DPX files, _0, _1
For R3D files, _S000.RDC, _S001.RDC
For QuickTime files: _S000.mov, _S001.mov

PART 4
505
Editing, Adding, and Copying Effects and Filters Part 4 – 27
Editing, Adding, and
Copying Effects and Filters
DaVinci Resolve 14 added the ability to apply ResolveFX and OFX effects as filters in the Edit
page. This chapter covers how to browse for and apply effects to clips in the Timeline, how to
copy them from clip to clip, how to remove them, and how to edit them in the Inspector once
they’ve been added. For more information about the specific ResolveFX that are available, see
Chapter 57, “ResolveFX.”
This chapter covers the following topics:
Using the Effects Library 506
The Toolbox 506
OpenFX 507
AudioFX 507
Eects Library Favorites 507
Using the Inspector 508
Opening Eects Using Selection Follows Playhead 509
Inspector Controls 509
Adding Filters to Video Clips 510
Adjusting Multiple Clips at the Same Time 512
Paste Attributes 513
Remove Attributes 514
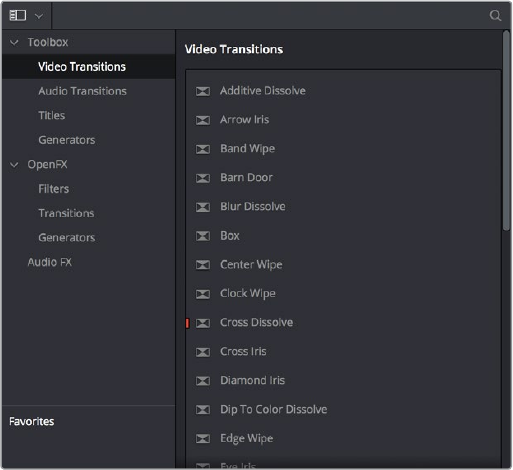
506
Editing, Adding, and Copying Effects and Filters Part 4 – 27
Using the Effects Library
All effects that you can add to your edit, including filters, transitions, titles, and generators, are
found in the Effects Library, which is split into two parts. To the left is a Bin list that shows a
hierarchical list of all of the different Transitions, Title Effects, Generators, and Filters that are
available, sorted by category. To the right is a browsing area in which you can see the contents
of whichever bins are selected.
The Effects Library
Similar to the Media Pool, the Effects Library’s Bin list can be opened or closed using a button
at the top left, while a menu just to the right of this button lets you sort the list into different
categories.
The Toolbox
All of the video and audio transitions, titles, and generators that that ship along with
DaVinci Resolve
Toolbox: Exposes all Transitions, Titles, Generators, and Effects at once.
Video Transitions: Contains all of the built-in transitions that are available from DaVinci.
You can drag any video transition to any edit point in the Timeline that has overlapping
clip handles to add it to your edit; you have the option to drag the transition so that it
ends on, is centered on, or starts on the edit point. For more information, see Chapter
24, “Using Transitions.”
Audio Transitions: Contains audio transitions for creating crossfades.
Titles: Titles can be edited into the Timeline like any other clip. Once edited into the
Timeline, you can edit the title text and position directly in the Timeline Viewer, or you
can access its controls in the Inspector for further customization.
Generators: Generators can also be edited into the Timeline like any other clip.
Selecting a generator and opening the Inspector lets you access its controls for further
customization. You can also choose a standard duration for generators to appear within
the Editing panel of the User Preferences.
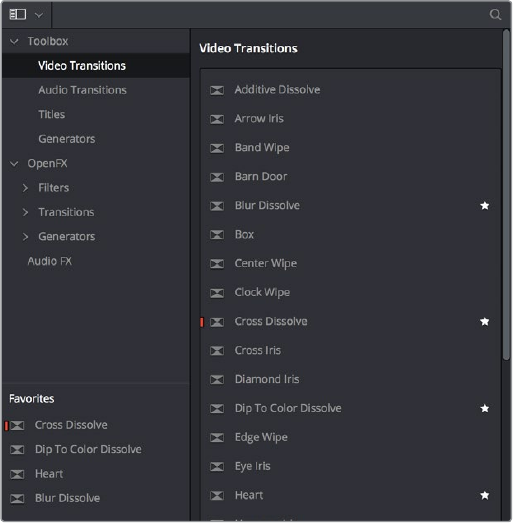
507
Editing, Adding, and Copying Effects and Filters Part 4 – 27
OpenFX
DaVinci Resolve supports the use of third-party OpenFX filters, transitions, and generators in
the Edit page. Once you install these effects on your workstation, they appear in this section of
the Effects Library, organized by type and group depending on the metadata within each effect.
OpenFX: Exposes all ResolveFX and third-party OpenFX installed on your
workstation at once.
Filters: Contains the ResolveFX filters that ship with DaVinci Resolve, as well as any
third-party OFX plug-ins you’ve installed on your workstation. Filters can be dragged
onto video clips to apply an effect to that clip. Once applied, filters can be edited and
customized by opening the OpenFX panel of the Inspector.
Transitions: Contains any third party OFX transitions you have installed on your
workstation. OFX transitions can be used similarly to any other transition, but they also
expose an OpenFX panel next to the Transition panel in the Inspector, where you can
customize settings that are unique to that transition.
Generators: Contains any third party OFX generators you have installed on your
workstation. Can be edited into the Timeline just like the native Generators that ship with
DaVinci Resolve, but they also expose an OpenFX panel next to the Transition panel in
the Inspector, where you can customize settings that are unique to that transition.
AudioFX
On macOS and Windows, DaVinci Resolve supports the use of third-party VST audio plug-ins.
On macOS, DaVinci Resolve supports Audio Unit (AU) audio plug-ins. Once you install these
effects on your workstation, they appear in this panel of the Effects Library. Audio plug-ins let
you apply effects to audio clips or entire tracks’ worth of audio, to add creative qualities such as
echo or reverb, or to take care of mastering issues using noise reduction, compression, or EQ.
Effects Library Favorites
You can click on the far right of any transition, title, or generator flag that effect with a star as a
favorite effect. When you do so, the favorited effects appear in a separate Favorites area at the
bottom of the Effects Library Bin list.
Stars indicate a flagged favorite effect, all favorites are currently filtered
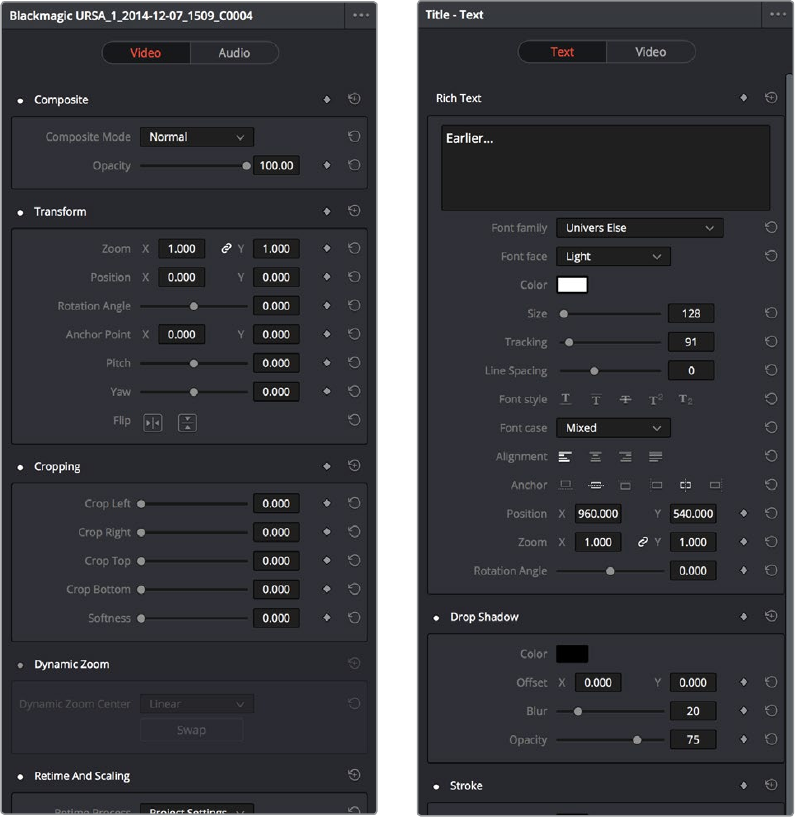
508
Editing, Adding, and Copying Effects and Filters Part 4 – 27
Using the Inspector
Once you’ve added effects to a timeline, the Edit page Inspector is where you can edit their
parameters. Closed by default, the Inspector is the central area for editing all of the settings
relating to filters, compositing, sizing, titling, transitions, generators, and effects of all kinds.
Many of the instructions in this section require the use of the Inspector, which can be opened or
closed by clicking the Inspector button at the far right of the Edit page toolbar, or by double-
clicking a transition or generator in the Timeline.
The Inspector displays different parameters depending on what you’ve selected in the Timeline;
(left) parameters of a clip, (right) parameters of a title
The parameters displayed in the Inspector are those of the currently selected item in the
Timeline. Changing the selection changes which parameters are displayed, and the parameters
you edit in the Inspector only alter the currently selected clip. If multiple clips are selected, the
Inspector displays and edits only the leftmost clip within the selection.
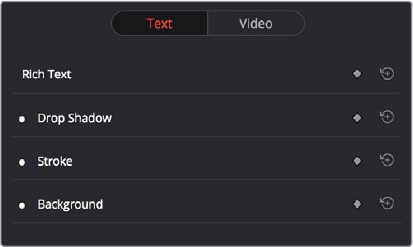
509
Editing, Adding, and Copying Effects and Filters Part 4 – 27
Opening Effects Using Selection Follows Playhead
Ordinarily, it’s possible for the Inspector to show the parameters of a selected clip even when
the playhead is over another clip. You can change this behavior by choosing Timeline >
Selection Follows Playhead, which sets DaVinci Resolve to always select whichever clip
intersects the playhead in the Timeline. The result is that the Inspector always displays the
parameters of the clip at the playhead, without you needing to do anything other than moving
the playhead back and forth in the Timeline.
The result is that the Inspector always displays the parameters of the clip at the playhead,
without you needing to do anything other than moving the playhead back and forth in
theTimeline.
If there are multiple superimposed clips intersecting the playhead all at once, the top-most
video clip with an enabled auto-select control will be selected, thus exposing its parameters in
the Inspector, and all other clips will be ignored.
Inspector Controls
Different clips in the Timeline expose different controls. For example, ordinary video clips
expose Video and Audio panels, while text generators expose Title and Video panels.
Whichever panels are exposed, parameters within each panel are organized into groups, with a
title bar providing the name of that group, along with other controls that let you control all
parameters within that group at the same time.
Closed and open Inspector group controls
These controls include:
Enable button: A toggle control to the left of the parameter group’s name lets you
disable and re-enable every parameter within that group at once. Orange means that
track’s enabled. Gray is disabled.
Parameter group title bar: Double-clicking the title bar of any group of parameters
collapses or opens them. Even more exciting than that, Option-clicking the title bar of
one parameter group collapses or opens all parameter groups at once.
Keyframe button: This button lets you add or remove keyframes at the position of
the playhead to or from every single parameter within the group. When the button is
highlighted orange, a keyframe is at the current position of the playhead. When it’s dark
gray, there is no keyframe.
Reset button: Lets you reset all parameters within that group to their default settings.
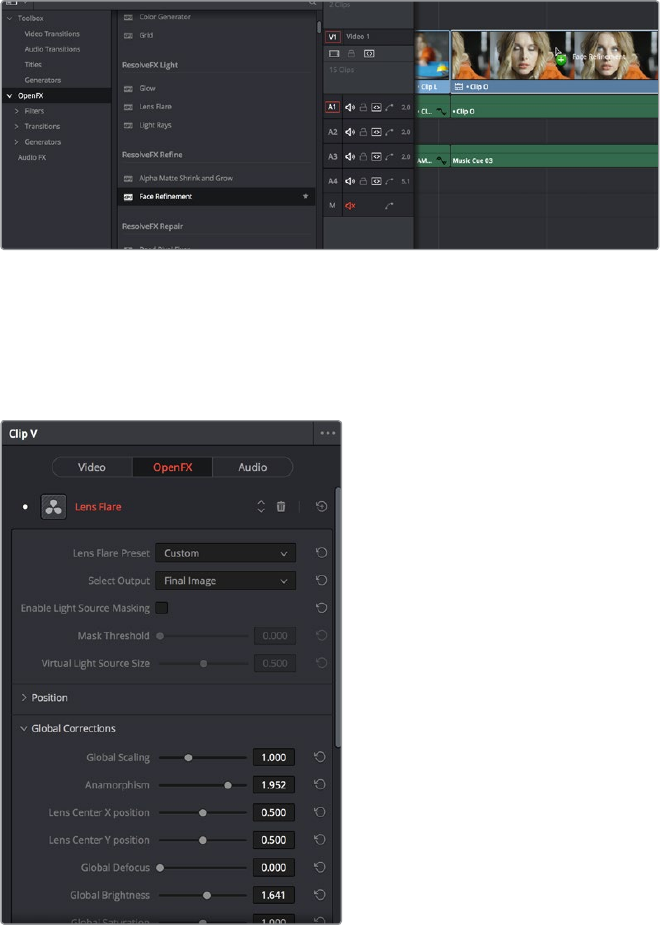
510
Editing, Adding, and Copying Effects and Filters Part 4 – 27
Adding Filters to Video Clips
DaVinci Resolve supports both built-in ResolveFX and third-party OFX plug-ins to create
various effects. These effects can be applied both to clips in the Edit page, and to nodes in the
Color page. This section shows how to apply, edit, and remove these filters in the Edit page. For
more information about using video effects in the Color page, see Chapter 56, “Using OFX and
ResolveFX.”
For a detailed explanation of each of the ResolveFX plug-ins that accompany DaVinci Resolve,
see Chapter 57, “ResolveFX.”
Methods of applying Video Filters in the Edit Page:
To apply a video filter to a clip: Drag any filter from the OpenFX category of the Effects
Library onto the clip in the Timeline you want to apply it to.
To apply a video filter to multiple clips: Select all of the clips you want to apply a filter
to in the Timeline, and then drag any filter from the OpenFX category of the Effects
Library onto any of the selected clips. This is undoable.
Applying a video filter to a single clip in the Timeline
To edit a clip’s video filters:
Select that clip and open the Inspector. All video filters applied to that clip appear
within the OpenFX panel.
ResolveFX controls appear in the OpenFX panel of the Inspector
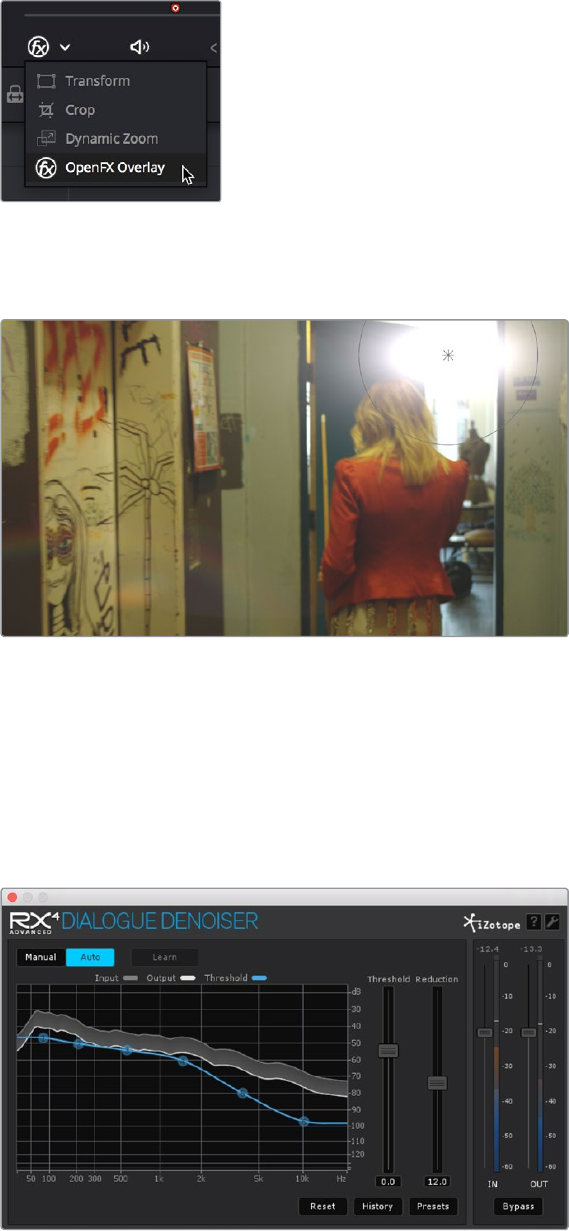
511
Editing, Adding, and Copying Effects and Filters Part 4 – 27
Some video filters have custom on-screen controls that can be modified in the Viewer. These
can be exposed in the Edit page using the OFX mode of the Viewer.
Turning on the on-screen controls for ResolveFX
in the Edit Page Timeline Viewer
Once enabled, the OFX on-screen controls appear in the Viewer.
Modifying on-screen controls for ResolveFX in the Edit Page Timeline Viewer
Many audio filters expose custom controls that appear in a floating window.
To expose a filter’s custom controls:
Open the parameters if they’re not open already by double-clicking that filter’s title bar.
A button should appear at the top of the parameters for filters that have custom UI.
Clicking this button opens a floating window with all the custom controls. When you’re
finished adjusting the custom controls, close the window.
The custom audio filter interface for Izotope RX4
512
Editing, Adding, and Copying Effects and Filters Part 4 – 27
Methods of working with audio filters in the Inspector:
To rearrange the order of multiple video filters applied to a clip: Click the move up or
move down buttons in any filter’s title bar, to the left of each filter’s Trash Can button.
To disable or re-enable a filter: Click the toggle control at the far left of each filter’s title
bar. Orange means that track’s enabled. Gray is disabled.
To remove a filter: Click the Trash Can button.
To reset a filter: Click the Reset button at the far right of the filter’s title bar.
To open or collapse a filter’s parameters: Double-click the title bar.
To open or collapse the parameters of all filters: Option-click the title bar.
Once applied to a clip, video filters can also be keyframed or automated just like any other
Inspector setting, to create dynamic effects that change over time.
Adjusting Multiple Clips
at the Same Time
There’s an easy way to make adjustments to the Inspector parameters of multiple clips at the
same time, without needing to use Paste Attributes (described later in this chapter). All you
need to do is simultaneously select every clip you want to alter, and then modify the parameter
in the Inspector that you want to change. As a result, every selected clip will be adjusted by the
same amount. This works for compositing effects, transforms, text parameters, filters, and audio
settings, just about anything that can be simultaneously exposed in the Inspector for multiple
selected clips.
When you select multiple clips, the Inspector will display “Multiple Clips” as the title. If each of
the selected clips have different values in the parameter you’re adjusting, that parameter will
have two dashes in the value field. There are two ways you can make adjustments to
multiple clips:
If you want to make a relative adjustment to all selected clips while keeping their
original offsets from one another, then drag the virtual slider in the parameter field
which will display a + or – before however many units your adjustment is.
However, if you want to set all selected clips to the same value, you can double-click in
the number field, type the value, and press Return.
Making a relative adjustment of plus 4.9 in the
Rotation Angle of all selected clips
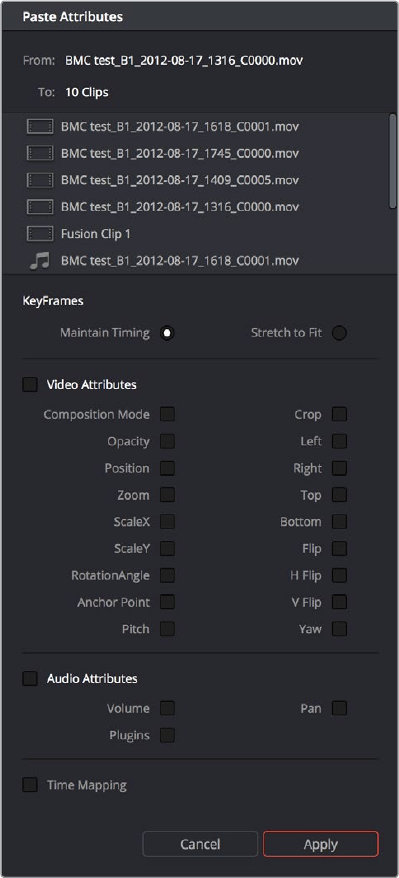
513
Editing, Adding, and Copying Effects and Filters Part 4 – 27
Paste Attributes
You can copy and paste attributes from one clip to multiple clips using the Paste Attributes
command. This is a fast way to apply video and audio adjustments and effects from one clip to
many others in the Timeline.
To copy attributes:
1 Select a clip with attributes you want to apply to other clips, and press Command-C.
2 Select one or more other clips to paste to.
3 Choose Edit > Paste Attributes (Option-V), or right-click one of the selected clips and
choose Paste Attributes from the contextual menu.
4 When the Paste Attributes window appears, click the checkboxes of each of the
attributes you want to paste, and click Apply when you’re done.
The Paste Attributes window
514
Editing, Adding, and Copying Effects and Filters Part 4 – 27
The Paste Attributes window shows you the clip you’re copying from and the clip(s) you’re
pasting to at the top, and provides checkboxes you can use to select which attributes you’d like
to paste. A pop-up menu below lets you choose how you’d like to apply any keyframes that are
part of the attributes being pasted; the options are Maintain Timing or Stretch-to-Fit.
Remove Attributes
You can also eliminate specific attributes from one or more clips, using a window that’s the
opposite of the Paste Attributes window.
To remove attributes:
1 Select one or more other clips that have effects you want to remove.
2 Choose Edit > Remove Attributes, or Right-click one of the selected clips and choose
Remove Attributes from the contextual menu.
3 When the Remove Attributes window appears, the checkboxes of effects that can be
removed are automatically turned on, so turn off any attributes you want to keep, and
click Apply when you’re done.
516
Titles, Generators, and Stills Part 4 – 28
Titles, Generators, and Stills
Using the Edit page, you can add titles, effects generators, and stills to your timelines. You can
also save customized titles, generators, and stills back to the Media Pool for future use.
This chapter covers the following topics:
Adding Titles 517
Using Safe Area Overlays 518
Types of Title Generators 518
Title Generator Panels 519
Shared Title Generator Parameters 519
Title Generator Video Parameters 521
Saving Titles in the Media Pool for Future Use 521
Using Generators 521
Using Stills 522
Photoshop File Support 522
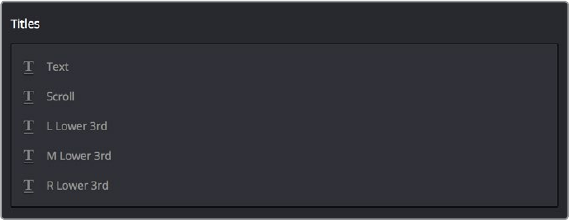
517
Titles, Generators, and Stills Part 4 – 28
Adding Titles
There’s a collection of titles and generators in the Toolbox that you can use to create leader
when outputting to tape, add slates, create subtitles, and otherwise fulfill any textual needs your
program has.
The available titles in the toolbox
Titles and generators can be edited much like any other clip. Furthermore, when selected, both
titles and generators expose the same Composite, Transform, and Cropping parameter groups
as any other clip; these parameters can be used to composite titles and fly them around in
order to create different text effects.
Methods of adding and editing generators and titles:
To drag and drop a generator directly into the Timeline: If you simply drag and
drop titles or generators into the Timeline, the default duration of the resulting clip is
5seconds. This duration can be customized in the Edit panel of the User Preferences.
To edit a generator using the edit overlays of the Timeline Viewer: Click the
destination control of the clip you want to edit a generator into, then set Timeline In and
Out points to define the duration of the resulting edit, and drag the generator you want
to edit onto the edit overlay of the Timeline Viewer that corresponds to the type of edit
you want to perform.
To reposition the text of a title in the Timeline Viewer: Select the title generator you
want to edit in the Timeline, then click the visible text in the Timeline Viewer so that
its bounding box is selected; in this state you can reposition, scale, and rotate the text
item. As you reposition text, it will snap to key regions of the frame such as the vertical
and horizontal center of the Viewer.
To edit the text of a title in the Timeline Viewer: Select the title generator you want to
edit in the Timeline, then double-click the visible text in the Timeline Viewer to insert
a text editing cursor. At this point, you can select, delete, or add any text you want by
typing directly in the Timeline Viewer.
To edit the parameters of a generator or title: Open the Inspector, and select the
generator or title you want to edit to open it into the Inspector.
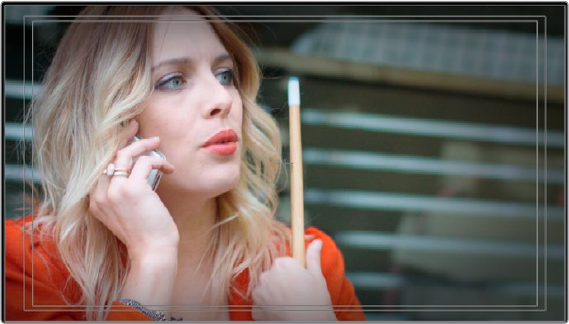
518
Titles, Generators, and Stills Part 4 – 28
Using Safe Area Overlays
If you’re working on a broadcast program and you want to adhere to guidelines for title safe and
broadcast safe, you can choose to display overlays that indicate where these regions are in the
Edit page.
To do so, choose View > Safe Area > Master On/Off.
The available safe area overlays
If necessary, there are a number of ways you can customize this overlay by choosing one of the
other options in the View > Safe Area submenu to toggle specific parts of the Safe Area overlay
on and off. These options include:
Extents: An outline showing the exact outer edge of the frame. Especially useful when
the safe markers are set to an aspect ratio other than that currently used by the Viewer.
Action: An outline showing the outer 90% action safe area of the frame.
Title: An outline showing the outer 80% title safe area of the frame.
Center: A crosshairs showing the center of the frame.
Aspect: Enables use of the View > Select Aspect Ratio submenu to change the aspect
ratio of the safe area markers. You can choose among the following aspect ratios: 1.33
(a.k.a. 4:3), 1.66, 1.77 (a.k.a. 16:9), 1.85, and 2.35.
Types of Title Generators
When opened into the Inspector, titles expose a set of text parameters that allow you to style
the contents of that clip’s Text field within the Inspector. Each of the titles supports rich text, so
you can individually style words, lines, or paragraphs of text using the available parameters
including Color, Font, and Size. Other attributes such as Alignment, Anchor, Position, and
Shadow affect the entire title.
The following titles are available:
Simple: Useful for creating titles consisting of one word, line, or paragraph of text.
Asingle body of text shares one set of rich text controls.
Scroll: Automatically automates a scrolling title sequence from the bottom to the top of
the screen. The duration of the generator clip in the Timeline determines the speed of
the scroll. Identical parameters as the Simple title.

519
Titles, Generators, and Stills Part 4 – 28
L Lower 3rd: Automatically positions two lines of text at the bottom left corner of title
safe, each with a different set of rich text and Position/Zoom/Rotation controls for
independent sizing and animating.
M Lower 3rd: Automatically positions two lines of text at the bottom middle of title
safe, each with a different set of rich text and Position/Zoom/Rotation controls for
independent sizing and animating.
R Lower 3rd: Automatically positions two lines of text at the bottom right corner of
title safe, each with a different set of rich text and Position/Zoom/Rotation controls for
independent sizing and animating.
Title Generator Panels
The parameters of text generators are divided into two panels: the Title panel and the
Video panel.
The Title panel contains all of the text editing, styling, and sizing controls used to edit
the contents and look of a title in your project, including the Rich Text, Drop Shadow,
Stroke, and Background parameters.
The Video panel contains the same Composite, Transform, and Cropping parameters
that all other clips in DaVinci Resolve have. These parameters are intended for
compositing and animating a title.
Shared Title Generator Parameters
The title generators in DaVinci Resolve are all capable of rich text styling, meaning that you can
select any portion of a generator’s text and style it differently. For example, you could have
three lines of text within a single generator, and style each line individually to create a
particular design.
A single generator with three lines of differently styled text
Each title generator shares the same parameters in the Title panel of the Inspector for editing
and styling text:
Rich Text: A control group consisting of a text entry field and parameters that can be
used to style different parts of the text independently.
Text: A text entry field for editing the title being generated. If no characters are
selected, the styling controls affect the entire block of text. If you select a specific set
of characters, the styling controls only affect the selection. Text in this field can also be
edited directly in the Timeline Viewer.
520
Titles, Generators, and Stills Part 4 – 28
Font family: A pop-up for choosing one of the font families installed on your
workstation.
Font face: A pop-up for choosing which face of the font family currently selected to use.
Color: Opens the standard color picker for choosing a font color.
Size: Slider for choosing the text size.
Tracking: Slider that sets the spacing between characters.
Line spacing: Slider for setting the spacing between the selected line of text and the
next one below.
Font style: Buttons to apply underline, overhead line, strikethrough, superscript, and
subscript styling.
Font case: A pop-up for forcing the text selection to be Mixed Case (the default),
AllCaps, All Lowercase, Small Caps, or Title Caps.
Alignment: Buttons to select the method of alignment: left, centered, right, or justified.
Anchor: Buttons for selecting how text is anchored to the current position, both
horizontally (top, centered, bottom) and vertically (right, centered, left).
Position: X and Y parameters determining the bottom left-hand corner (the default
Anchor settings) of the rich text block being generated. Corresponds to the act of
dragging a selected text box in the Timeline Viewer.
Zoom: X and Y parameters determining the scale of the text. A link button lets you
keep the X and Y parameters locked together. Corresponds to the act of resizing a
selected text box in the Timeline Viewer from either the corners (to resize
proportionally), or the top/bottom/sides (to stretch or squeeze the text).
Rotation: A slider for rotating the orientation of the text. Corresponds to the act of
rotating a selected text box in the Timeline Viewer using the rotation handle.
Drop shadow: A group of controls that lets you apply a customizable drop shadow to
every character of text being generated.
Color: Opens the standard color picker for choosing a drop shadow color.
Offset: X and Y parameters determining how offset the drop shadow is from the
original text.
Blur: A slider for blurring the drop shadow.
Opacity: A slider determining how transparent the drop shadow is.
Stroke: Lets you add an outline to every character of text being generated.
Color: Opens the standard color picker for choosing the stroke color.
Size: A slider lets you choose the thickness of the stroke, in pixels.
Background: This group of controls provides an extremely flexible rectangle or
rounded rectangle shape that you can use to add a background, bar, outline, or other
intersecting shape to use when designing a title.
Color: Opens the standard color picker for choosing the interior color of the
background shape.
Outline color: Opens the standard color picker for choosing outline color of the
background shape.
Outline width: A slider lets you choose the thickness of the background shape outline,
in pixels.
Width: A slider lets you choose how wide to make the background shape.
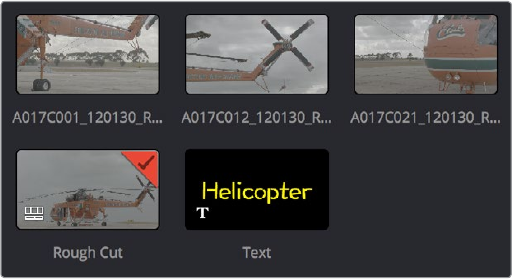
521
Titles, Generators, and Stills Part 4 – 28
Height: A slider lets you choose how tall to make the background shape.
Corner radius: A slider lets you choose the roundness of the rectangle edges.
Center: X and Y parameters you can use to offset the background shape from the text
being generated.
Opacity: A slider lets you set the transparency of the background shape.
Title Generator Video Parameters
Additionally, each generator has Composite, Transform, and Cropping parameters in the Video
panel of the Inspector that let you composite, resize, and animate titles against other clips in the
Timeline for motion graphics effects. These parameters are the same as those available for
every clip, as described later in this chapter.
Saving Titles in the Media Pool for
Future Use
If you’ve created a title in a style that you want to later re-use, for example, a particularly-
formatted lower third that will be the basis for every lower-third in your program, you can drag
any title from the Timeline to the Media Pool, and it will be saved as a separate clip. Title clips in
the Media Pool are shown with a thumbnail showing a preview of the text they contain. If you’ve
keyframed any animated text or video adjustments, those keyframes are also saved with this clip.
A text generator saved as a clip in the Media Pool
Once saved in the Media Pool, text generators can be opened in the Source Viewer and edited
just like any other clip.
Using Generators
Generators, with the exception of Solid Color, lack editable parameters with the exception of
the Composite, Transform, and Cropping parameters that are standard for every clip.
Additionally, Generators have a Display Name field in the Inspector that lets you give a
particular clip a custom name that appears in the Timeline.

522
Titles, Generators, and Stills Part 4 – 28
The following generators are available:
Gray Scale: A simple grayscale ramp from black to white.
EBU Color Bar: A 1.77:1 aspect ratio set of color bars for PAL-using countries.
Four Color Gradient: A gradient that blends four different colors at each corner of the
frame. You can adjust the Center X and Center Y parameters to move the center at
which all four colors blend together, and you can change the four colors that appear at
each corner using corresponding color parameters.
SMPTE Color Bar: An updated 1.77:1 aspect ratio set of color bars for NTSC-using
countries.
10 Step: A grayscale ramp segmented into 10 steps from black to white.
100mV Steps: A grayscale ramp segmented into segments of exactly 100mV each.
Window: A simple white on black shape generator, defaulting to a white rectangle
against a black background.
YCbCr Ramp: A gradient designed to test the Y’CbCr signal.
Solid Color: A simple fullscreen color generator. A Color parameter lets you choose
what color this generator outputs.
Using Stills
You can import still images into the Media Pool, and edit them into the Timeline as clips with
custom durations. By default, imported stills are 10 seconds long, but you can extend a still
image’s Out point to a maximum of 17 hours and 40 minutes in length, which ought to cover just
about any project you’re planning on working on, so long as you’re not Andy Warhol. DaVinci
Resolve is correspondingly capable of importing still image clips referenced by XML or AAF
project files, so long as they’re in a supported format.
DaVinci Resolve supports the use of stills in the following formats:
File Format Alpha Channel Support
.tif Yes
.png Yes
.jpg No
.dpx No
.exr Yes
.dng No
.psd No
Once edited into the Timeline, still image clips have the same Composite, Transform, Cropping,
Retime and Scaling attributes as any other clip.
Photoshop File Support
Only the bitmapped layers of Photoshop (.psd) files appear within DaVinci Resolve as a single
clip in the Timeline. Photoshop text layers and layer effects are not supported.
524
Compositing and Transforms in the Timeline Part 4 – 29
Compositing and
Transforms in the Timeline
The Edit page is also home to many of the compositing and transform effects found in DaVinci
Resolve. Many of these kinds of effects can be imported into DaVinci Resolve, including
composite modes, opacity settings, and clips using alpha channels. Once in DaVinci Resolve,
you can make changes to these effects in the Edit page. Alternately, you can also use DaVinci
Resolve’s controls to create effects from scratch.
This chapter covers the following topics:
Composite Modes and Transparency Effects 525
More About Composite Modes 526
Opacity 529
Video Fader Handles 529
Alpha Channel Support 530
Keying, External Mattes, and Window Compositing 531
Transform and Cropping 531
Transform 532
Cropping 532
Dynamic Zoom 532
Retime and Scaling 533
Lens Correction 533
On-screen Controls for Transform, Crop, and Dynamic Zoom 534
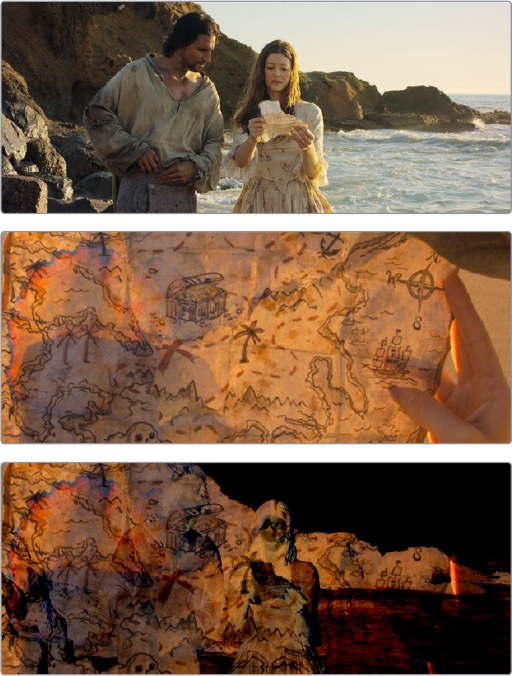
525
Compositing and Transforms in the Timeline Part 4 – 29
Composite Modes and
Transparency Effects
Composite modes are effects that use various mathematical operations to combine one
superimposed clip with another, relying on standard image processing math for each color
channel whereby black pixels have a value of 0, white pixels have a value of 1, and descending
levels of gray are represented by decimal point values (for instance, 0.5 represents 50% gray).
When using composite modes to blend two clips together on the Timeline, the three color
channels of each pair of pixels are combined using that particular composite mode’s math.
Theresults can create transparency effects, increase image exposure, and combine multiple
images in many creative and useful ways.
Two source clips combined with the Subtract composite mode
When using composite modes, it’s easy to push parts of the resulting image above the
maximum or below the minimum values for brightness. However, this image data is not clipped,
even through such areas of the picture may appear flat white or black. Out-of-range data as a
result of a composite mode effect is preserved, and may be retrieved by later image processing
operations in the Color page.
When you import XML project files, DaVinci Resolve imports whatever composite modes were
used by clips in the original sequence. If necessary, you can then change a clip’s composite
mode to one that will work better with whatever grade you’re creating. Of course, you can also
add composite modes to clips that didn’t originally have them, adding new effects of your own.

526
Compositing and Transforms in the Timeline Part 4 – 29
All composite modes interact with the Opacity slider (found below the Composite Mode pop-up
menu in the Inspector) to make a clip more or less transparent in addition to compositing
already being done.
Composite modes can be used on clips that are superimposed over other clips in the Timeline.
However, these composite modes are also available for use within a grade on the Color page
using the Layer Mixer node, within which you can combine differently graded versions of an
image in creative ways. For example, the Add and Overlay composite modes can be useful for
creating glow effects, while Subtract and Difference can create more surreal effects.
Working with composite modes in the Edit page is simple.
To set or change a composite mode for any clip:
Select a clip in the Timeline, then open the Inspector and choose one of the options
from the Composite Mode pop-up menu.
Composite mode and Opacity controls in the Timeline
To turn a clip’s composite mode off:
Select a clip in the Timeline, then open the Inspector and choose Normal from the
Composite Mode pop-up menu.
More About Composite Modes
There are ten composite modes to choose from. For clarity, simple image math is used to help
explain the available Composite Mode effects.
Normal
No image compositing is done. The topmost image on the Timeline or the bottom input
of the Layer Mixer node occupies the entire frame.
Add
Each pair of pixels in both superimposed layers is added together. Layer order does not
matter. This can result in a dramatic brightening of light areas of both images with areas
of the picture that are blown out to maximum white, and this effect is often used by
adding the brighter part of an image to itself to create hot glow effects. Image data
going above 1.0 is preserved and may be retrieved by later color correction operations.
On the other hand, black areas of either image do not alter the combined image at all
(0 + n = n).
Color
Recombines two layers using HSL image components by combining the Luma of the
bottom layer with the Hue and Saturation of the top layer.
Color Burn
Inverts the bottom layer, which is divided by the top layer, and the end result is
itself inverted.
527
Compositing and Transforms in the Timeline Part 4 – 29
Color Dodge
The bottom layer pixels are divided by the top layer, which has been inverted.
Darken
Each pair of pixels in each color channel is compared, and the darker of the two is the
output. Layer order does not matter. Darken is useful when you want the darker
features of both layers to take precedence, but the output for any given pixel may be a
color that doesn’t actually exist for that pixel in either of the source layers.
Darker Color
For each pair of pixels, all three color channels from the bottom layer are added
together, and all three color channels from the top layer are added together. These
results are compared, and the darker pixel of the two layers is the output. Layer order
does not matter. Darker Color is useful when you want the darker features of both
layers to take precedence. Unlike the Darken composite mode, the result will always be
a specific color from either the bottom or top layers.
Difference
The absolute value is taken of the top layer minus the bottom layer, and returned as the
result, which is always a positive number. Layer order does not matter. This Blend mode
is often used to compare two differently-processed versions of the same image to see
if there are any alterations, and how large they are.
Divide
Divides the bottom layer by the top layer. Any color divided by itself = 1.0, or white,
while any color divided by white (1.0) = itself.
Exclusion
Similar to the Difference composite mode, but results in lower contrast.
Hard Mix
The R, G, and B channel values of the bottom layer are added to the R, G, and B
channel values of the top layer. Layer order does not matter. Can result in
extreme effects.
Hardlight
Hardlight is the opposite of Overlay. All bottom layer pixels above 50% are Multiplied,
while all bottom layer pixels 50% and below are Screened.
Hue
Recombines two layers using HSL image components, by combining the Luma and
Saturation of the bottom layer, with the Hue of the top layer.
Lighten
Each pair of pixels in each color channel is compared, and the lighter of the two is the
output. Layer order does not matter. Lighten is useful when you want the lightest
features of both layers to take precedence, but the output for any given pixel may be a
color that doesn’t actually exist for that pixel in either of the source layers.
Lighter Color
For each pair of pixels, all three color channels from the bottom layer are added
together, and all three color channels from the top layer are added together. These
results are compared, and the lighter pixel of the two layers is the output. Layer order
does not matter. Lighten Color is useful when you want the lighter features of both
layers to take precedence. Unlike the Lighten composite mode, the result will always be
a specific color from either the bottom or top layers.
528
Compositing and Transforms in the Timeline Part 4 – 29
Linear Burn
Each pair of pixels is summed, and 1 is subtracted from the total. Layer order does not
matter. Regions of white in one layer let the other layer show through, while colors and
darker tones from both layers interact to tint or darken the resulting image.
Linear Dodge
Each pair of pixels is summed. This composite mode is identical to Add.
Linear Light
All regions where the bottom layer is above 50% are Linear Dodged so as to lighten
these parts of the final result, while all regions where the bottom layer is below 50% are
Linear Burned so as to darken these parts of the final result. This composite mode
intensifies image contrast in the final result.
Luminosity
Recombines two layers using HSL image components by combining the Hue and
Saturation of the bottom layer with the Luma of the top layer.
Multiply
Each pair of pixels is multiplied together. Layer order does not matter. This generally has
the effect of emphasizing the darkest parts of both images in the resulting output; in
particular black areas of either image are preserved (0 * n = 0) while white areas of either
image have no effect on the output image (1 * n = n). Multiply is good for compositing
darker elements in a field of white into an image, and can be used to emphasize the
darkest parts of a noise, grain, or damage layer you’re blending with an image.
Overlay
Overlay combines useful aspects of both the Screen and Multiply composite modes,
based on the pixel values of the bottom-most image on the Timeline; all bottom layer
pixels above 50% are Screened, while all bottom layer pixels 50% and below are
Multiplied. Overlay is an excellent composite mode for combining a layer of noise,
grain, or damage imagery with another clip, as it combines both images in visually
useful ways throughout the tonal range of shadows through highlights.
Pin Light
In regions where bottom layer pixels are below 50% gray, lighter pixels in the top layer
are replaced by darker pixels from the bottom layer, and darker pixels in the top layer
replace lighter pixels in the bottom layer, so that the darker half of the final image
combines darker pixels from both layers. In regions where bottom layer pixels are
above 50% gray, darker pixels in the top layer are replaced by lighter pixels from the
bottom layer, and lighter pixels in the top layer replace darker pixels from the bottom
layer, so that the brighter half of the final image combines lighter pixels from
both layers.
Saturation
Recombines two layers using HSL image components, by combining the Luma and Hue
of the bottom layer, with the Saturation of the top layer.
Screen
The pixel values of each layer are inverted, then multiplied, and the result is itself
inverted. Layer order does not matter. Screen is the inverse of Multiply, as it preserves
the lightest parts of both images, and is useful when compositing lighter elements in a
field of black into an image, and can be used to emphasize the lightest parts of a noise,
grain, or damage layer you’re blending with an image.
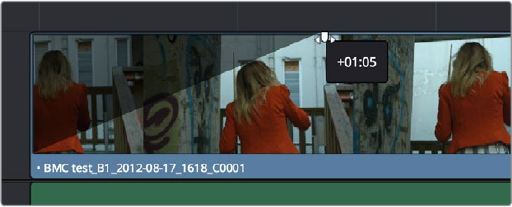
529
Compositing and Transforms in the Timeline Part 4 – 29
Softlight
A less intense method of applying the Hardlight composite mode that results in a more
even blend between the two layers.
Subtract
Within each pair of pixels, those of the bottom layer are subtracted from those of the
top. This can result in dark areas of the image that hit flat black, but image data going
below 0 is preserved and may be retrieved by later color correction operations.
Vivid Light
All regions where the bottom layer is above 50% are Color Dodged so as to lighten
these parts of the final result, while all regions where the bottom layer is below 50% are
Color Burned so as to darken these parts of the final result. This composite mode vastly
intensifies both image contrast and saturation in the final result, for an extreme effect.
Unknown
When importing XML or AAF project files with composite modes that aren’t available in
DaVinci Resolve, the Composite Mode pop-up menu is set to Unknown; practically, this
is the same as Normal.
Opacity
Each clip has an Opacity parameter, available in the Inspector, that lets you make it more
transparent, in a range from 0 (totally transparent) to 100 (totally opaque). When set to a value
less then 100, the selected clip is mixed with whatever clip is underneath it on the Timeline,
according to the composite mode that’s currently used. If no clip appears underneath the
Timeline, then the clip is mixed with black.
By keyframing this parameter, you can create more complicated fade to black effects or
cross-dissolves. Keyframing is covered in more detail in Chapter 31, “Keyframing.”
To change a clip’s opacity:
Open the Inspector, then select the clip you want to adjust, and set the Opacity slider
to create the desired amount of transparency.
Video Fader Handles
If you want to dissolve a clip to or from another clip, or to or from black, the traditional way to do
so has been to use one of the transitions in the Effects Library. However, you can also use
Fader Handles that appear at the beginning and end a clip when you position the pointer right
over it. Fader handles are a fast, ubiquitous method of creating a fade to or from black.
However, they also make it easy to fade to or from other clips that are underneath one that’s
superimposed, as seen in the following screenshot.
Dragging a video fader handle on a clip in track V2
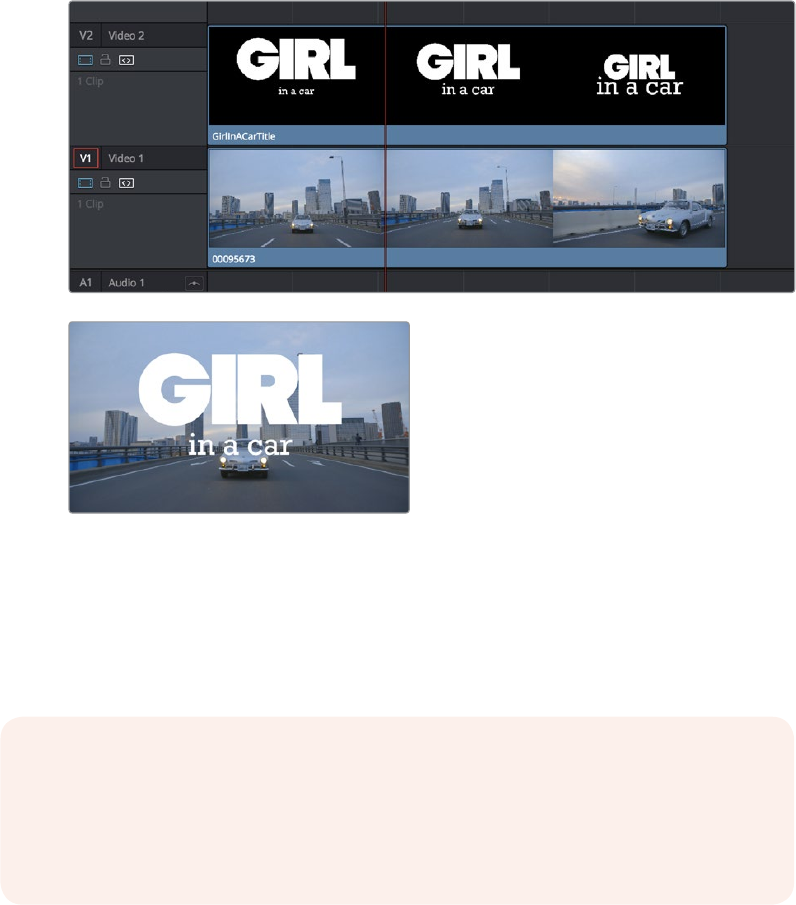
530
Compositing and Transforms in the Timeline Part 4 – 29
To use a fader handle, move the pointer over the clip you want to adjust, and when small green
fader handles appear at the upper left and upper right of the video of the clip, drag them to the
left or right for the duration you want the fade effect to last.
Alpha Channel Support
If a superimposed video or still image clip in the Timeline has an embedded alpha channel, that
alpha channel automatically creates transparency within that clip, compositing it against
whatever is in the track underneath. There’s no need for you to do anything for this to work.
Superimposing a clip with an alpha channel above automatically
composites that clip against the clip beneath it
However, if you need to disable or alter the interpretation of an alpha channel for any clip, for
example if a clip is being interpreted as having an alpha channel of the wrong type, you can
right-click that clip, choose Clip Attributes from the contextual menu, and use the Alpha Mode
pop-up menu of the Clip Attributes Video panel to correct the problem.
NOTE: If you’ve imported clips with Alpha channels, those alpha channels can be
rendered back out for Round Trip workflows if you set Render to Individual Clips in the
Deliver page, choose a Format and Codec combination that supports alpha channel
output, and turn on the Export Alpha checkbox in the Video panel of the Render
Settings list.
531
Compositing and Transforms in the Timeline Part 4 – 29
Keying, External Mattes,
and Window Compositing
It’s also possible to use the Qualifier, Power Window controls, and External Matte clips in the
Color page to create compositing effects by connecting a key that you create to the optional
Alpha Output that can be added to the Node Editor. In this way, you can pull a simple
greenscreen key using a qualifier, do rotoscoping or matte work using a Power Window, or use
an External Matte to composite two or more clips together, and see these effects on the
Edit page.
For more information on the use of the Alpha Output to do node-based compositing, see
Chapter 51, “Combining Keys and Using Mattes.”
Transform and Cropping
DaVinci Resolve is a resolution-independent application. This means that, whatever the
resolution of your source media, it can be output at whatever other resolution you like. This also
means that you can freely mix clips of any resolution, fitting 4K, HD, and SD clips into the same
timeline, and scaling each to fit the project resolution as necessary.
Your project’s resolution can be changed at any time, allowing you to work at one resolution,
and then output at another resolution. This also makes it easy to output multiple versions of a
program at different resolutions, for example, outputting both HD and SD sized versions of the
same program.
DaVinci Resolve has a powerful tool set for making geometric transforms, using advanced
algorithms for optical-quality sizing operations. Within the Edit page, each clip has a set of
transform parameters, principally for use in storing sizing data imported from AAF or XML when
you turn on the “Use sizing information” checkbox. This has the advantage of keeping these
imported Edit Transform settings separate from the Input Sizing parameters found on the Color
page, which are typically used by the colorist to make Pan and Scan adjustments of
various kinds.
Of course, you can also use these controls to create your own adjustments while working in the
Timeline, zooming into clips, repositioning them to improve the composition, etcetera.
Whilethere is some overlap between these parameters and those in the sizing palette of the
Color page, they’re both separate sets of parameters, so you can keep each set of
adjustmentsseparate.
When the time comes to output your program, the final resolution of each clip is calculated
taking into account the original resolution of the source media, the timeline resolution, image
scaling settings, Edit page transforms, and Color page transforms, so that the final resolution
correctly uses the cleanest geometric transformation based on the maximum resolution
available to each source clip.
532
Compositing and Transforms in the Timeline Part 4 – 29
Transform
The Edit page transform group includes the following parameters, which are also editable in the
Edit Sizing mode of the Sizing palette in the Color page:
Zoom X and Y: Allows you to blow the image up or shrink it down. The X and Y
parameters can be linked to lock the aspect ratio of the image, or released to stretch or
squeeze the image in one direction only.
Position X and Y: Moves the image within the frame, allowing pan and scan
adjustments to be made. X moves the image left or right, and Y moves the image
up or down.
Rotation Angle: Rotates the image around the anchor point.
Anchor Point X and Y: Defines the coordinate on that clip about which all transforms
are centered.
Pitch: Rotates the image toward or away from the camera along an axis running through
the center of the image, from left to right. Positive values push the top of the image
away and bring the bottom of the image forward. Negative values bring the top of the
image forward and push the bottom of the image away. Higher values stretch the image
more extremely.
Yaw: Rotates the image toward or away from the camera along an axis running through
the center of the image from top to bottom. Positive values bring the left of the image
forward and push the right of the image away. Negative values push the left of the
image away and push the right of the image forward. Higher values stretch the image
more extremely.
Flip Image: Two buttons let you flip the image in different dimensions.
Flip Horizontal control: Reverses the image along the X axis, left to right.
Flip Vertical control: Reverses the clip along the Y axis, turning it upside down.
Cropping
The Edit page has an additional set of cropping parameters:
Crop Left, Right, Top, and Bottom: Lets you cut off, in pixels, the four sides of
the image. Cropping a clip creates transparency, so that whatever is underneath
shows through.
Softness: Lets you blur the edges of a crop. Setting this to a negative value softens the
edges inside of the crop box, while setting this to a positive value softens the edges
outside of the crop box.
Dynamic Zoom
The Dynamic Zoom controls, which are off by default, make it fast and easy to do pan and scan
effects to zoom into or out of a clip. Also, if you import a project from Final Cut Pro X with clips
that use the Ken Burns effect, then those clip’s effects will populate the Dynamic Zoom
parameters in DaVinci Resolve. Turning the Dynamic Zoom group on activates two controls in
the Inspector that work hand-in-hand with the Dynamic Zoom on-screen adjustment controls
you can expose in the Timeline Viewer (described below):
Dynamic Zoom Center: Lets you choose how the motion created by these controls
accelerates. You can choose from Linear, Ease In, Ease Out, and Ease In and Out.
Swap: This button reverses the start and end transforms that create the dynamic
zoom effect.
533
Compositing and Transforms in the Timeline Part 4 – 29
Retime and Scaling
The Retime and Scaling group has one parameter that affects clip scale, and another that
affects retiming quality:
Retime Process: Lets you choose a default method of processing clips in mixed frame
rate timelines and those with speed effects (fast forward or slow motion) applied to
them, on a clip by clip basis. The default setting is “Project Settings,” so that all speed
effected clips are treated the same way. There are three options: Nearest, Frame
Blend, and Optical Flow, which are explained in more detail in the Frame Interpolation
section of Chapter 3, “Project Settings and Preferences.”
Scaling: Lets you choose how clips that don’t match the current project resolution
are handled on a clip by clip basis. The default setting is “Project Settings,” so that all
mismatched clips use the same method of being automatically resized. However, you
can also choose an individual method of automatic scaling for any clip. The options
are Crop, Fit, Fill, and Stretch, which are explained in more detail in the 2D Transforms
section of Chapter 58, “Sizing and Image Stabilization.”
Resize Filter: For clips that are being resized in any way, this setting lets you choose
the filter method used to interpolate image pixels when resizing clips. Different settings
work better for different kinds of resizing. There are four options:
Sharper: Usually provides the best quality in projects using clips that must be scaled up
to fill a larger frame size, or scaled down to HD resolutions.
Smoother: May provide higher quality for projects using clips that must be scaled down
to fit an SD resolution frame size.
Bicubic: While the Sharper and Smoother options are slightly higher quality, Bicubic is
still an exceptionally good resizing filter and is less processor intensive than either of
those options.
Bilinear: A lower quality setting that is less processor intensive. Useful for previewing
your work on a low-performance computer before rendering, when you can switch to
one of the higher quality options.
Lens Correction
The Lens Correction group (only available in Resolve Studio) has two controls that let you
correct for lens distortion in the image, or add lens distortion of your own.
Analyze: Automatically analyzes the frame in the Timeline at the position of the
playhead for edges that are being distorted by wide angle lens. Clicking the Analyze
button moves the Distortion slider to provide an automatic correction. If you’re
analyzing a particularly challenging clip, a progress bar will appear to let you know how
long this will take.
Distortion: Dragging this slider to the right lets you manually apply a warp to the image
that lets you straighten the bent areas of the picture that can be caused by wide angle
lenses. If you clicked the Analyze button and the result was an overcorrection, then
dragging this slider to the left lets you back off of the automatic adjustment until the
image looks correct.
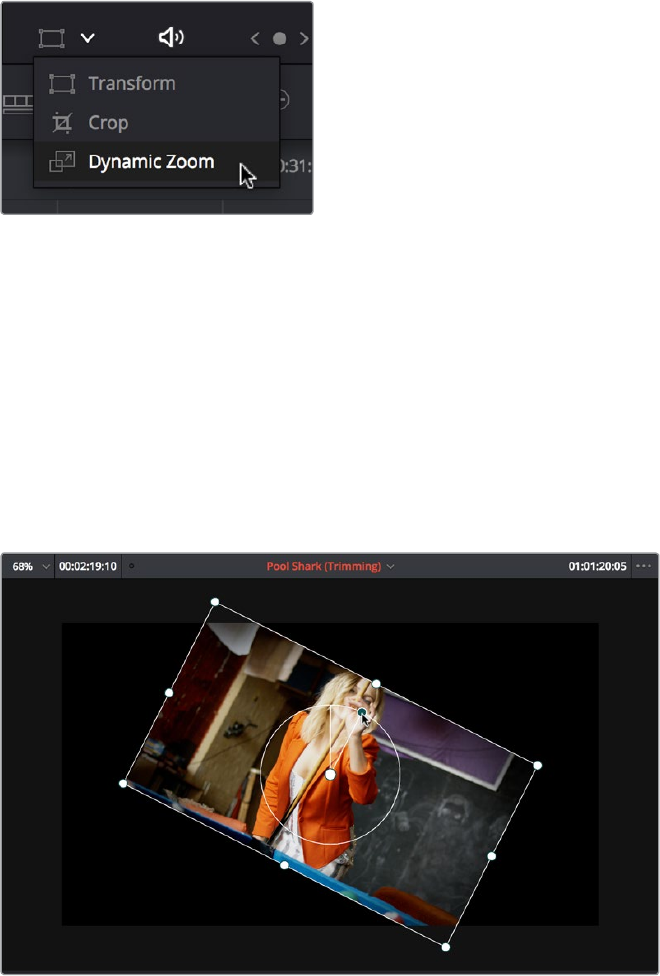
534
Compositing and Transforms in the Timeline Part 4 – 29
On-screen Controls for Transform,
Crop, and Dynamic Zoom
You also have the option of transforming, cropping, or adding dynamic zoom effects to clips
using the Transform/Crop/Dynamic Zoom button at the bottom left of the Timeline Viewer.
Transform controls in the Timeline Viewer
To transform a clip using graphical controls in the Timeline Viewer:
1 Click the the Transform/Crop button at the bottom left of the Timeline Viewer to turn it
on; white is enabled, gray is disabled.
2 Do one of the following:
a. Choose the Transform mode from the pop-up menu, if necessary, to change modes.
The appropriate on-screen controls appear to let you manipulate the clip with the
mouse. When in Transform mode, you can drag anywhere within the clip’s bounding
box to adjust pan and tilt, drag any diagonal corner to proportionally resize, drag any
side to squeeze or stretch just width or height, or drag the center handle to rotate.
Onscreen controls for transforming in the Timeline Viewer
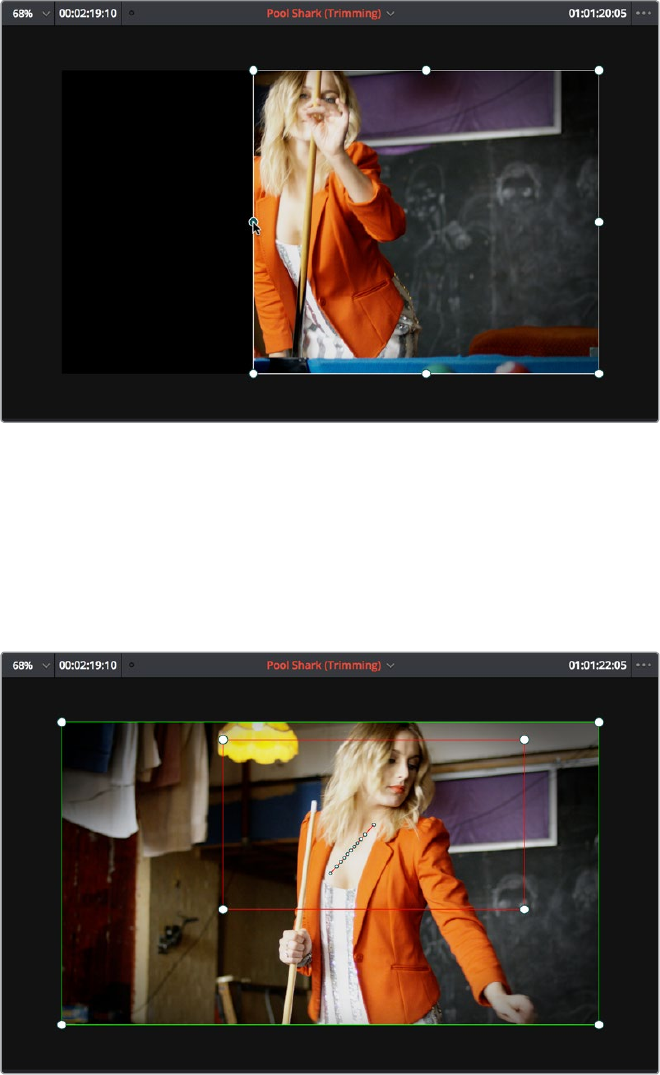
535
Compositing and Transforms in the Timeline Part 4 – 29
b. Choose the Cropping mode from the pop-up menu. In this mode, each side has a
handle for cropping.
Onscreen controls for cropping in the Timeline Viewer
c. Choose the Dynamic Zoom mode from the pop-up menu. In this mode, the green box
shows the starting size and position of the animated transform, while the red box shows
the ending size and position of the animated transform. Drag anywhere within either
bounding box to adjust pan and tilt for either the start or the end of the animated effect,
and drag any of the corners to adjust the size. A motion path appears to show the
motion that’s being created.
Onscreen controls for transforming and cropping in the Timeline Viewer
3 If necessary, choose a smaller viewing percentage from the Timeline Viewer scale pop-
up to better see the on-screen controls if you’re rescaling the image, or use the scroll
control of your mouse, trackpad, or tablet to zoom out of the image.
4 When you’re finished, turn the Transform/Crop/Dynamic Zoom button off.
537
Edit Page Effects Part 4 – 30
Edit Page Effects
You can import both linear and nonlinear speed changes from other applications, or you can
create these effects from scratch in order to speed up or slow down clips in your programs.
DaVinci Resolve has a comprehensive set of controls for creating these kinds of effects using
dedicated Retime controls, curves, and specific edit types. Once created, DaVinci Resolve
also provides different ways of processing these effects to create the smoothest
possible playback.
This chapter covers the following topics:
Speed Effects and Retiming 538
Creating Freeze Frames 538
Creating Simple Linear Speed Effects 539
Clip Retiming Controls 540
Retiming An Entire Clip 540
Rippling or Overwriting the Timeline When Using Retime 541
Reading Clip Speed Arrows 541
Creating Variable Speed Eects Using the Retime Controls 541
Closing Retime Controls 543
Using Retime Curves 544
Speed Effect Processing 547

538
Edit Page Effects Part 4 – 30
Speed Effects and Retiming
Speed effects describe any effect that speeds up, slows down, or otherwise changes the
playback speed of clips in the Timeline. There are four basic ways you can create speed effects
in DaVinci Resolve.
Importing speed effects: DaVinci Resolve is capable of reading linear speed effects
from imported EDL, AAF, and XML projects, and nonlinear speed effects from XML and
AAF project files. When speed effects are present, DaVinci Resolve plays clips at the
specified speed. You can also create speed effects of your own using controls in the
Edit page. There are three methods of adjusting clip speed: using the Inspector, using
the Change Speed dialog, and using the Retiming effect in the Timeline.
Creating speed effects using Fit to Fill edits: You can also change a clip’s speed in the
Timeline by editing it using the Fit to Fill command, which retimes the clip to fit into an
arbitrary duration in the Timeline of your choosing. For more information on using Fit to
Fill, see Chapter 19, “Three and Four Point Editing.”
Creating freeze frames: You can use the freeze frame command to turn an entire clip
into a freeze frame of a frame intersecting the playhead.
Creating simple linear speed effects: You can create simple fast or slow-motion
speed effects by using the Change Clip Speed command, or by using the left and right
handles of the Retime controls in the Timeline. Both of these methods are described in
this section.
Creating variable speed effects: You can create much more complex variable speed
effects, where the same clip speeds up or slows down multiple times by different
amounts, using either the Retime controls, or one of the two different speed curves that
are available. These methods are also covered later in this section.
Creating Freeze Frames
There are a few ways you can create a freeze frame, but the fastest is to position the playhead
over the frame you want to be the freeze frame, and choose Clip > Freeze Frame, or press
Shift-R. The entire clip becomes a freeze frame of the frame you parked the playhead over.
If you want to disable the freeze frame effect, you can select the clip and use the Remove
Attributes dialog to remove the speed effect, or you can simply open the Change Clip Speed
dialog and turn the Freeze Frame checkbox off.
Speed Effects and Audio
Any of the methods of creating linear speed effects that are available in DaVinci
Resolve, including the Change Clip Speed command, the Retime controls, and the Fit
to Fill edit, will retime a clip’s audio, without pitch correction on Linux and Windows,
and with pitch correction on Mac OS X (Yosemite and above), along with its video.
However, audio that accompanies variable speed effects will be muted.
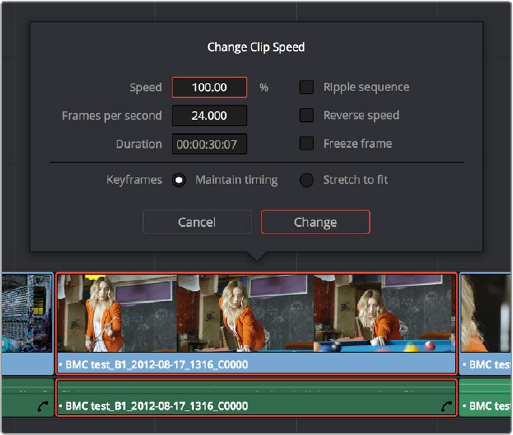
539
Edit Page Effects Part 4 – 30
Creating Simple Linear Speed Effects
If all you need to do is to make a clip play in slow motion, speed it up, reverse the clip, or create
a freeze frame, you can apply a simple speed effect using either the browser or the Change
Speed dialog.
To change a clip’s speed, do one of the following:
Select a clip, choose Clip > Change Clip Speed, and use the controls of the Edit Speed
Change dialog.
Right-click a clip in the Timeline, choose Change Clip Speed, and use the controls of
the Edit Speed Change dialog.
Speed Clip Change operations have the following options:
Change Speed To parameters: Changes the speed of the selected clip by whatever
percentage, frame rate, or duration you like.
Ripple Sequence checkbox: If you want the speed change you’re about to make
to ripple the Timeline, pushing or pulling all clips following the current one to
accommodate the clip’s new size, then turn on the checkbox.
Speed effect parameters shown in the Speed dialog
Reverse Speed button: Clicking this button sets the current speed to a negative value,
reversing the motion of the clip.
Freeze Current Frame checkbox: Changes the entire clip to a freeze frame of
whichever frame is at the current position of the playhead.
Maintain Timing/Stretch to fit radio buttons: Choosing Maintain Timing leaves any
keyframes within the clip locked at their original position, while choosing Stretch
Keyframes results in all Composite, Transform, and Cropping keyframes being
compressed or stretched by the same percentage as the clip during a speed change.

540
Edit Page Effects Part 4 – 30
Clip Retiming Controls
Another method of altering clip speed in the Timeline is to apply the Retime effect. This method
of clip retiming provides a convenient control overlay that you can use to adjust clip speed
directly in the Timeline, and it also provides the controls that are needed for creating variable-
speed effects.
To expose the Retime controls on a clip:
Select a clip, and choose Clip > Retime Clip (Command-R).
Right-click a clip and choose Retime Clip from the contextual menu.
The Retime controls appear over that clip in the Timeline. They consist of a Retime control track
running along the top of the clip with arrows that indicate the speed and direction of playback
(the default blue right-facing arrows indicate normal 100% playback) and a Clip Speed pop-up
menu at the bottom center of the clip, which also shows the current speed of the clip.
The Speed Effect controls in the Timeline
Retiming An Entire Clip
The simplest way of using the Retiming effect is to change the playback speed of the entire clip,
in the process rippling the rest of the Timeline to the right of the retimed clip as you increase its
duration by stretching or compressing its duration.
To retime a clip by dragging:
Move the pointer to the left or right edge of the Speed Change name bar on top of the
clip, and when it turns into a Retime cursor, drag either side to stretch or squeeze the
clip to retime it.
To retime a clip by specific amounts:
1 Select a clip and press Command-R.
2 Click the pop-up next to the speed percentage text at the bottom of the clip.
3 Do one of the following:
Choose a new playback speed from the Change Speed submenu.
Choose reverse segment to make the clip play in reverse. Reverse speed is shown in
the Retime control track as arrows facing left, instead of right.
To return a clip to its original speed:
Click the pop-up next to the speed percentage text at the bottom of the clip, and
choose Reset to 100%.
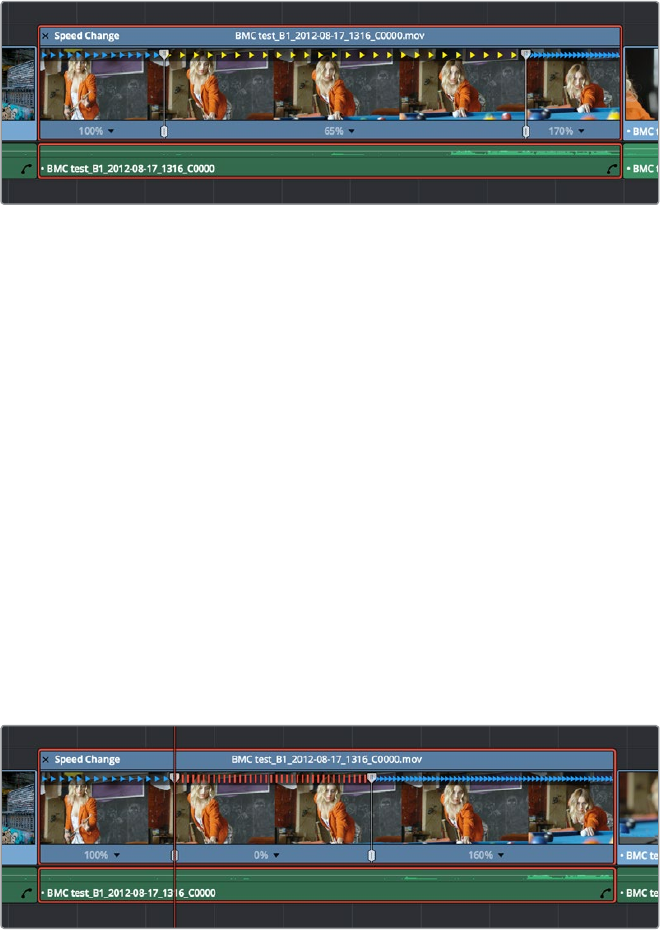
541
Edit Page Effects Part 4 – 30
Rippling or Overwriting the Timeline When Using Retime
Whether or not clips to the right in the the Timeline will ripple to accommodate the change in
duration resulting in speed changes you make with the Retime controls depends on whether
you’re using the Selection tool/mode (in which case the Timeline won’t ripple), or the Trim tool/
mode (in which case the Timeline will).
Reading Clip Speed Arrows
When you retime a clip, the Clip Speed pop-up menu displays the current speed of the entire
clip. Additionally, the arrows in the Retime control track show you the speed and direction of
playback. When clip speed is slowed down below 100%, the Retime control track shows yellow
playback triangles that are spaced farther apart. When clip speed is sped up above 100%, the
Retime control track shows blue triangles that are bunched closer together. At 100% normal
speed, the Retime control track shows blue, evenly spaced triangles, while left-facing blue
arrows indicates reverse playback.
Three clips set to different speeds. From left to right, 100% speed,
slow motion, and fast forward are indicated by the yellow arrows.
Creating Variable Speed Effects Using the Retime Controls
You can also use the Retime controls to insert freeze frames within the middle of a clip, and
create other custom variable speed effects using speed points. Additional variable speed
options include rewind and speed ramp effects, which automatically place speed points to
create preset effects.
To create a freeze frame at a particular moment in time:
1 With the Retime controls exposed, move the playhead to the frame you want to freeze,
within that clip. Ideally, this will be for an effect where you want a character in motion to
suddenly stop at a particular frame.
2 Open the Clip Speed pop-up menu (the pop-up next to the speed percentage text at
the bottom of the clip), and choose Freeze Frame. Two new speed points are added to
the clip, defining a range within which the clip is frozen at that frame. This can be seen
by the vertical red bars in the Retime control track. Past the second speed point, the
clip resumes playback from the next frame forward.
Speed effect controls set to insert a momentary freeze frame within the clip

542
Edit Page Effects Part 4 – 30
3 Drag the second speed point forward or back to define the duration of the freeze
frame. The result is that the clip plays normally up until the first speed point, then
freezes on that frame until the second speed point, at which playback resumes.
To create variable-speed effects:
1 With the Retime controls exposed, move the playhead to the frame at which you want
to change the speed of the clip, and choose Add Speed Point from the Clip Speed
pop-up menu.
2 Move the playhead forward to the next frame at which you want the clip speed to
change again, and add another speed point. It takes a minimum of two speed points to
create a speed effect.
3 To alter the speed of the clip segment appearing between these two speed points, do
one of the following:
Using the pointer, drag the top handle of the second speed point to the right to slow
down clip playback, or to the left to speed up clip playback within just that segment.
Doing this either shortens or lengthens the clip, and either overwrites or ripples
neighboring clips depending on whether you’re using the Selection or Trim modes.
Also using the pointer, you can drag the bottom handle of any speed point to widen
the range of the clip that plays at that particular speed. Doing this reallocates frames
from before and after the speed segment being adjusted to keep all speed segments
playing at the same speed, and this also shortens or lengthens the clip, but by a
different amount.
Using the Clip Speed pop-up menu, choose a new speed for that segment from the
Change Speed pop-up menu. You can also set any segment to play in reverse by
choosing Reverse Segment.
4 To clear a speed point and eliminate that particular clip’s speed segment from the
effect, choose Clear Speed Point from any Clip Speed pop-up menu to eliminate
whichever speed point appears to its left.
When you create variable-speed effects, the arrows in the Retime control track can help you
keep track of what you’re doing, and each segment’s speed pop-up shows you the actual
numeric speed. The change in speed from each speed segment to the next is automatically
eased, for a smooth transition from one speed to another.
Speed controls set to ramp among three different playback
speeds; arrow spacing shows the timing
There are two additional sets of commands for creating preset speed effects that use multiple
speed points.
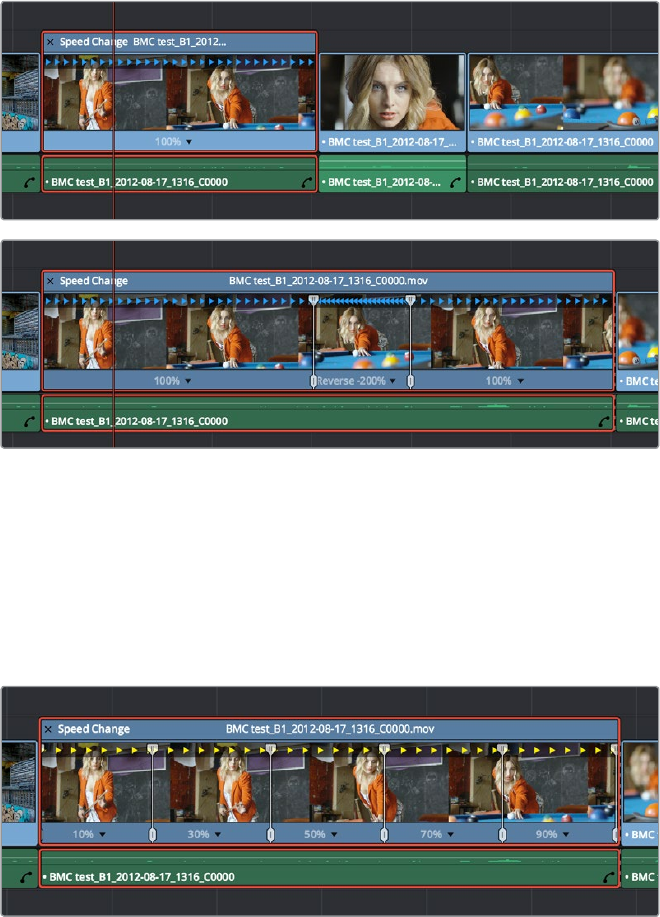
543
Edit Page Effects Part 4 – 30
To add a rewind effect:
With a clip’s retime controls exposed, open any Clip Speed pop-up menu and choose a preset
percentage from the Rewind submenu. This results in two additional speed points being added
after the rightmost speed point in the current segment, which creates the effect of the current
segment playing in fast reverse for the chosen percentage, and then playing a second time
from the beginning.
Speed effect controls before and after creating a “rewind” effect
To add a speed ramp:
With a clip’s retime controls exposed, open any Clip Speed pop-up menu and choose one of
the two options from the Speed Ramp submenu to replace the current speed effect with a
series of five speed segments that start at 10% and increase progressively to 30%, 50%, 70%,
and then 90%. Once created, you can drag the speed points to customize this effect to create
whatever durations you require.
Speed effect controls set to create a gradual ramp from 0 to 100 percent playback speed
Closing Retime Controls
When you’re finished creating your Retime effect, you can close the Retime controls so that clip
assumes a normal appearance again. Closing the Retime controls has no effect on the timing of
the clip, it just ensures you cannot accidentally modify the speed of the clip with the mouse.
544
Edit Page Effects Part 4 – 30
To close the Retiming controls in the Timeline:
Click the X button at the upper left-hand corner of the Retime control box.
Select the retimed clip, and either choose Clip > Retime Controls, or press Command-R.
When a retimed clip has its Retiming controls hidden, a Retime badge appears to the left of that
clip’s name in the Timeline. You can reopen the Retiming controls whenever you need to make
further changes.
The Speed Effect badge that
shows a clip is being retimed
To reopen the Retiming controls in the Timeline:
Select the retimed clip, and either choose Clip > Retime Controls, or press Command-R.
Once you’ve retimed a clip using the Retime effect, you can use that clip’s Retime Process
parameter in the Inspector to define how that clip’s retiming is processed, using the low quality
Nearest option, using Frame Blending, or using Optical Flow.
Using Retime Curves
You can also optionally use curves to retime clips, either in conjunction with the Retime
controls, or by themselves. For example, you can use the simpler retiming controls first to create
the overall speed effect you need, and then use either of the available Retime Curves to create
further refinements by adjusting bezier curve handles to adjust the transition of one speed to
another, or you can expose either of the Retime Curves first and use it to create your speed
effect from scratch by adding and adjusting control points and curve segments.
The Retime Curves let you adjust the transition from one speed to another using handles
No matter how you like to work, the control points of each of the speed curves have a
1:1 correspondence to the speed points that are exposed in the Retime Controls, and
curve segment modifications are mirrored by speed point adjustments in the Retime
Controls if you have both exposed at the same time. This means that, when creating
complex variable retiming effects, it’s easy to drag whichever control most easily
adjusts the quality of speed you require.
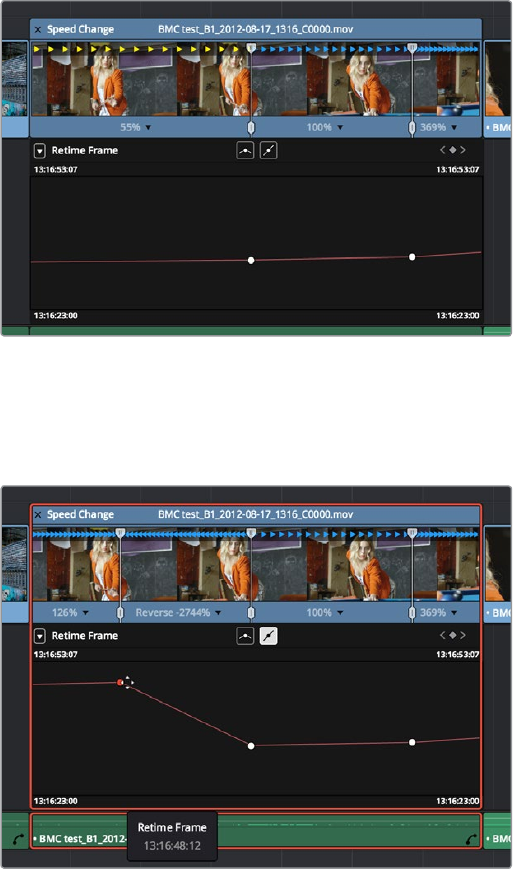
545
Edit Page Effects Part 4 – 30
In addition, there are two kinds of Retime Curves you can use for maximum flexibility.
Which is best depends on what you’re more comfortable with, and on which will handle
the type of motion you want to create more easily:
The Retime Frame curve exposes a diagonal line that represents a time graph. This is a
type of curve found in many other postproduction applications, in which the vertical
axis represents each frame of that clip’s source media, and the horizontal axis
represents each frame of playback in the Timeline. With the default diagonal graph,
there is a one to one correspondence between each frame of source media and each
frame of timeline playback; this represents 100% speed. However, adding control points
lets you alter how source frames are mapped to the Timeline. For any two control
points on the Retime Frame curve, so long as the control point at the left is lower than
the control point at the right of a curve segment, there will be forward motion, with
longer shallow curve segments creating slower motion, and steeper shorter curve
segments creating faster motion in the clip.
A diagonal Retime Frame curve with two segments: a long shallow segment to the left that
creates slow motion, and a short steep segment to the right that creates fast motion
If a curve segment has a left control point that’s higher than the right control point, then
the motion will be reversed and that segment will play backwards.
A Retime Frame curve with an inverted curve that creates reverse motion
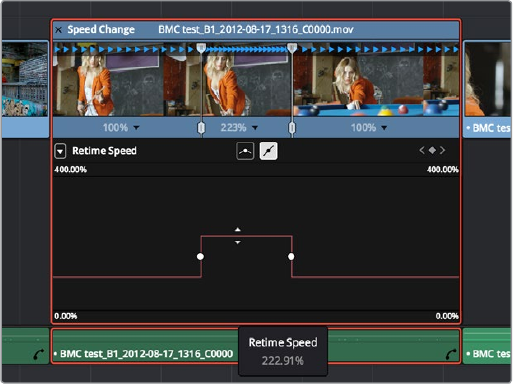
546
Edit Page Effects Part 4 – 30
The Retime Speed curve (seen below) exposes a flat line that represents 100% speed.
Adding pairs of control points and dragging each segment to raise or lower it alters
speed; you must drag the segments, not the control points themselves. Raising a curve
segment shortens that segment and speeds up that portion of the clip, while lowering a
curve segment lengthens that segment and slows down that portion of the clip. As you
adjust each curve segment, a tooltip shows you the exact speed percentage that
segment represents. You should note that it’s impossible to create reverse motion using
the Retime Position curve; you need to use either the Retime controls or the Retime
Speed curve described above.
A Retime Speed curve with two segments: a shorter one that creates
fast motion, and a longer segment that creates slow motion
Methods of working with speed curves:
To expose speed curves for a clip in the Timeline: Right-click a clip in the Timeline,
and choose Retime Curve. The Curve Editor is exposed for that clip, and you can edit it
as you would any other curve, adding moving, and deleting control points.
To switch between editing Retime Speed and Retime Frame curves: Use the Curve
pop-up at the upper left-hand corner of the Curve Editor to check or uncheck the
curves you want to be visible. Clicking on a curve within the editor makes that curve the
currently edited one.
To close a speed curve: Clicking the Curve button at the right-hand side of the clip’s
title bar in the Timeline toggles the curve open and closed.
As far as adding, removing, and smoothing control points on speed curves and adjusting curve
segments, they work identically to any other curve in the Timeline. For more information, see
“Keyframing in the Timeline and Curve Editor” in Chapter 31, “Keyframing.”
547
Edit Page Effects Part 4 – 30
Speed Effect Processing
Once you’ve retimed a clip, you have the additional ability to change how the retimed clip is
processed in order to improve its visual playback quality, especially in the case of clips that are
slowed down. There are two ways you can set this. First, there’s a project-wide setting available
in the Master Settings of the Project Settings. Secondly, you can change how clips are retimed
via a per-clip setting available in the Inspector.
To change the Retime Process setting of an entire project:
1 Open the Project Settings and click to open the Master Settings panel.
2 Choose an option from the Retime Process pop-up menu.
To change an individual clip’s Retime Process setting:
Select a clip, then open the Inspector and choose an option from the Retime Process pop-up in
the Retime and Scaling group.
There are three options to choose from; here are the differences:
Nearest: The most processor efficient and least sophisticated method of processing;
frames are either dropped for fast motion, or duplicated for slow motion.
Frame Blend: Also processor efficient, but can produce smoother results; adjacent
duplicated frames are dissolved together to smooth out slow or fast motion effects.
This option can provide better results when Optical Flow displays unwanted artifacts.
Optical Flow: The most processor intensive but highest quality method of speed effect
processing. Using motion estimation, new frames are generated from the original
source frames to create slow or fast motion effects. The result can be exceptionally
smooth when motion in a clip is linear. However, two moving elements crossing in
different directions or unpredictable camera movement can cause unwanted artifacts.
549
Keyframing Effects in the Edit Page Part 4 – 31
Keyframing Effects in the Edit Page
The Edit page also provides controls for keyframing effects that you add to your timeline, as
well as a curve editor to fine-tuning the motion effects you create right in the Editing Timeline.
Keyframing Effects in the Edit Page 550
Keyframing in the Inspector 552
Keyframing Motion Paths inthe Timeline Viewer 553
Keyframing in the Timeline and Curve Editor 555
The Keyframe Editor 555
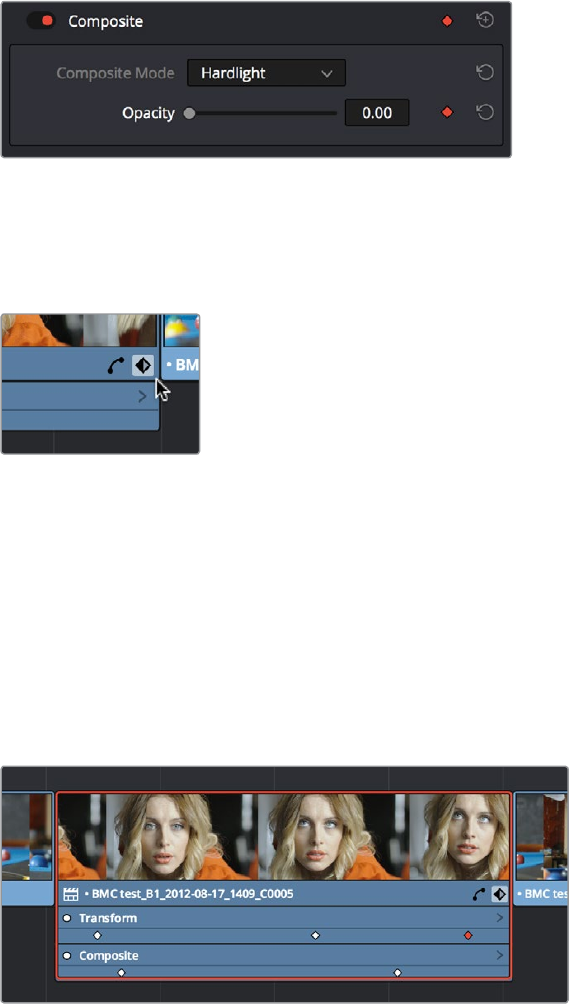
550
Keyframing Effects in the Edit Page Part 4 – 31
Keyframing Effects in the Edit Page
Most parameters in the Inspector of the Edit page can be keyframed, in order to create
animated effects such as zooming in via the Zoom parameter, fading out via the Opacity
parameter, or cropping from one side to reveal a clip underneath via the Cropping parameters.
Additionally, if you import a project from an NLE that has keyframed sizing settings, those
keyframes will be imported and exposed within the Edit page of DaVinci Resolve.
The primary controls for keyframing are within the Inspector. Any parameter that can be
keyframed has a gray keyframe button to the right of its slider. If the playhead is on a keyframe,
this button turns orange and small navigation arrows appear to its right and left, otherwise it
stays gray.
Orange Keyframe buttons in the Inspector show there’s a keyframe at that frame
Once you’ve keyframed one or more parameters within a particular group in the Inspector,
thatclip displays a pair of small buttons at the far right of its name bar in the Timeline, a Curve
button and a Keyframe button. Only keyframed clips have these buttons.
The Keyframe track button in the Timeline
appearing on a keyframed clip
To expose a clip’s keyframe tracks, do one of the following:
Click the Keyframe button for that clip, at the bottom right corner of the clip.
Choose Clip > Show Keyframe Editor (Shift-Command-C)
Each group of parameters in the Inspector reveals a single, aggregated keyframe track, that
holds all the keyframes of all the parameters within that group, and makes it easy to move,
delete, cut, copy, and paste keyframes for each clip. For example, the Pan, Tilt, Zoom, Rotation
Angle, and Anchor Point keyframes all appear within the Transform track.
A keyframe track for all of the Transform group parameters
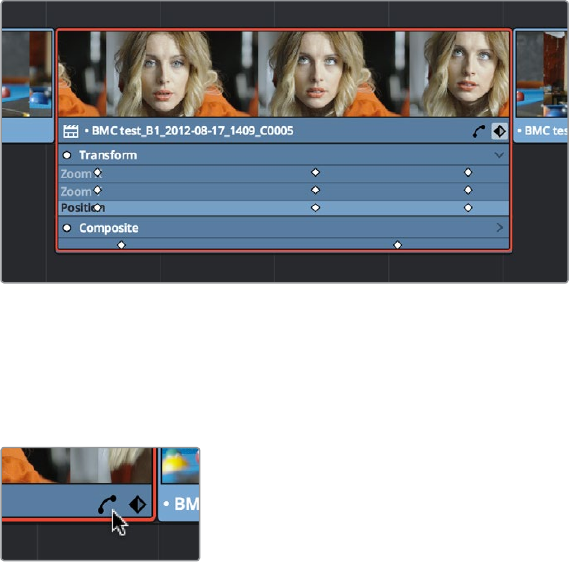
551
Keyframing Effects in the Edit Page Part 4 – 31
If you want to edit each parameter independently, a small disclosure control at the right of each
keyframe track lets you open up an aggregated keyframe track into individual keyframe tracks,
one for each parameter that’s been keyframed within that group of Inspector controls.
Clicking a keyframe track’s disclosure control reveals individual
keyframe tracks for each keyframed parameter in the Inspector
Additionally, each keyframed clip has a Curve button that, when clicked, exposes that
parameter within a Curve Editor that’s attached to the clip in the Timeline.
A clip’s Curve Editor button, used to open
theCurve Editor for that particular clip
To expose a clip’s Curve Editor:
Click a clip’s Curve button, at the bottom right corner of the clip.
Choose Clip > Show Curve Editor (Shift-C).
Multiple parameters can be opened within the Curve Editor at the same time, and you can
choose which curve to work on by clicking it in the Curve Editor, or clicking one of that
parameter’s keyframes in the keyframe track above. Selected control points can be moved, and
their bezier interpolation changed using one of the four buttons located at the top of the
Curve Editor.
552
Keyframing Effects in the Edit Page Part 4 – 31
Keyframing in the Inspector
Keyframing in the Edit page works slightly differently than when using the Keyframe Editor in
the Color page. Most simple keyframing tasks can be performed in the Inspector using three
buttons that appear to the right of any parameter that’s capable of being keyframed.
The three keyframe controls that appear in the
Inspector, from left to right: Previous keyframe,
Create/Delete keyframe, Next keyframe
Methods of keyframing parameters in the Inspector:
To add a keyframe: Select a clip, open the Inspector, then move the Timeline playhead
to the frame where you want to place a keyframe, and click the Keyframe button next
to the parameter of the Inspector you want to animate. Once you’ve added at least
one keyframe to a parameter, all other adjustments you make to parameters in the
Inspector, or using the on-screen Transform/Crop controls in the Timeline Viewer add
new keyframes automatically if the playhead is at another frame.
To move the playhead to the next or previous keyframe: Right-Bracket ( [ ) and
Left-Bracket ( ] ). You can also click the small left- or right-hand arrow to either side of a
parameter’s keyframe control to jump the playhead to the next or previous keyframe.
To edit an existing keyframe of a parameter: Move the playhead to be on top of the
keyframe you want to edit, and then change that parameter, either in the Inspector,
orusing the on-screen controls of the Timeline Viewer.
To delete a single keyframe: Open the Inspector, move the Timeline playhead to
a frame with a keyframe, and click the orange Keyframe button in the Inspector to
delete it.
To delete all keyframes for one parameter: Click the reset button to the right of a
parameter’s keyframe control in the Inspector.
To delete all keyframes in a group of parameters in the Inspector: Click the reset
button to the right of a parameter group’s title bar in the Inspector.
To disable or enable a single parameter’s keyframed effect: In the Timeline, click the
toggle control at the left of a parameter’s keyframe track. Orange means that track’s
enabled. Gray is disabled..
To disable or enable a group of parameters in the Inspector: Click the toggle control
at the left of a parameter group’s title bar in the Inspector. Orange means that group is
enabled. Gray is disabled.
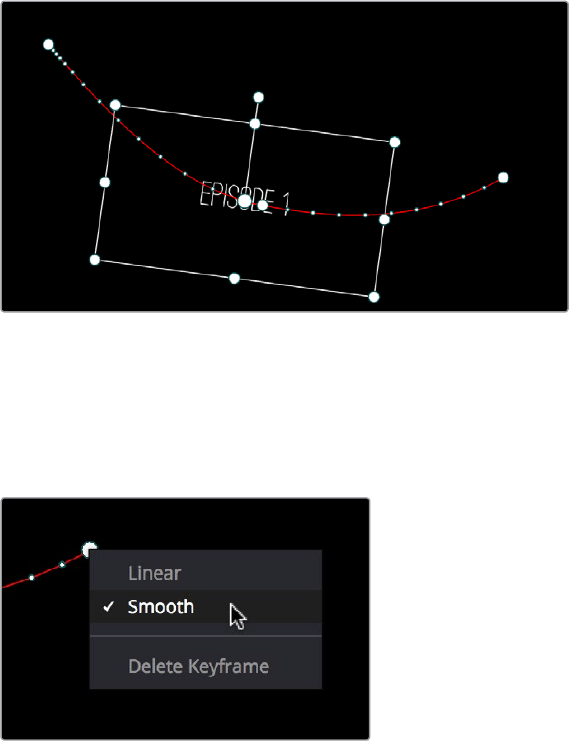
553
Keyframing Effects in the Edit Page Part 4 – 31
Keyframing Motion Paths
inthe Timeline Viewer
If you’re keyframing a clip’s transform controls to create motion, a motion path appears when
you turn on the onscreen transform controls using the button to the left of the
transport controls.
A visible motion path resulting from animated Position X and Y parameters
Each keyframed change to the Position X and Y parameters creates a control point on the
surface of the motion path, which is linear by default, creating a sharp edge. However, you can
right-click any control point and choose Smooth from the contextual menu to add bezier
handles to that control point, which let you change the sharp angle to an adjustable curve.
Changing the linear control point into a bezier curve
The control points making up any motion path can be dragged around at will to change the
path the selected clip will travel. Dots on the surface of the motion path indicate the velocity of
motion; dots that are closer together indicate slower motion, while dots that are farther apart
indicate faster motion. Dragging a motion path control point farther away from another one will
speed up the animation between both points, while dragging it closer will slow the animation
down, as you’re setting up the selected clip to travel a longer or shorter distance within the
same keyframed time.
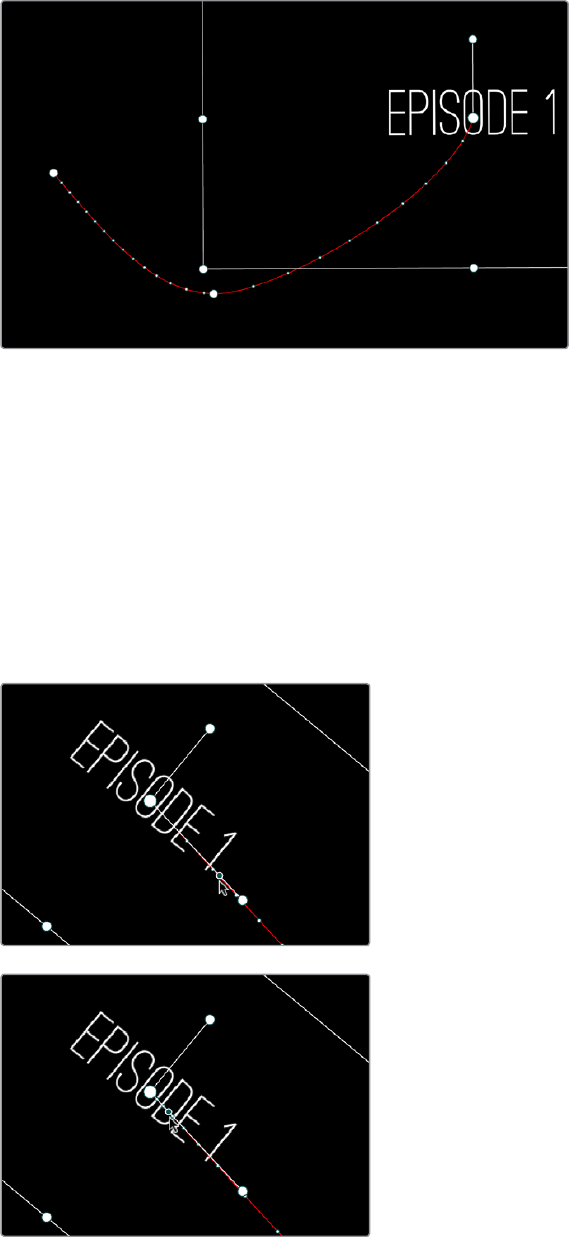
554
Keyframing Effects in the Edit Page Part 4 – 31
Dots on the motion path show that the left half has slow motion,
while the right half has faster motion
You can also adjust the shape of any control point’s curve by clicking to select that control
point, which exposes its bezier handles, and then dragging the handles to adjust its curve.
Once handles have been exposed, there are a variety of methods you can use to adjust them
and manipulate the motion path.
Finally, you can adjust the acceleration of motion by adjusting the Acceleration handle on the
stem of any Bezier curve. Dragging an acceleration handle towards a control point creates an
eased keyframe, where motion slows to a stop, or begins from a stop. Dragging an acceleration
handle away from a control point creates more linear motion, where the object moves
continuously through that control point.
An acceleration handle on the Bezier handle of a
curve lets you create eased motion by dragging it
in towards the control point being adjusted
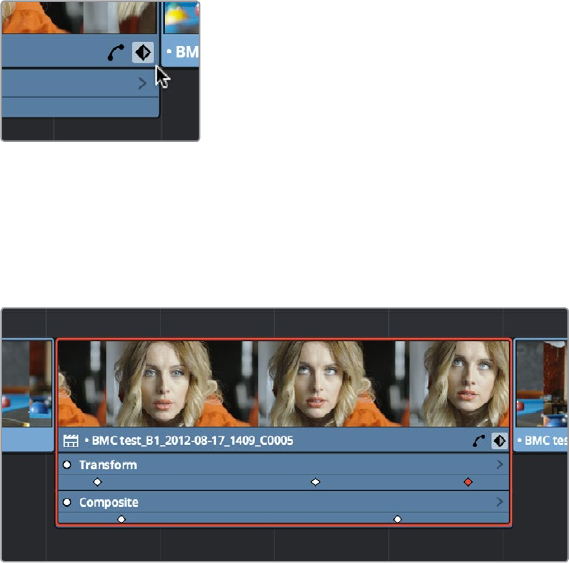
555
Keyframing Effects in the Edit Page Part 4 – 31
Methods of adjusting the bezier handles of motion paths:
Drag any control point to reshape the motion path.
Drag any bezier handle to change the shape of the curve.
Command-drag any bezier handle to break the tangent between it and the opposite
bezier handle. When you release the Command key, the two bezier handles become
locked together again at whatever angle you created.
To eliminate a control point on a motion path, along with its keyframe:
Right-click any control point and choose Delete Keyframe.
To switch a control point between sharp and curved angles:
Right click any control point and choose Linear (for a sharp angle) or Smooth
(for a curve).
Keyframing in the Timeline
and Curve Editor
If you need to do more complicated keyframing than the relatively simple controls of the
Inspector allow, you can use the Keyframe tracks and Curve Editor found in the Timeline.
The Keyframe Editor
When one or more clip parameters are keyframed, two small buttons appear at the far right of a
clip’s name bar in the Timeline, a Curve button and a Keyframe button. Clicking the Keyframe
button opens the Keyframe Editor, exposing one keyframe track for each group of parameters
that’s keyframed. For example, the Composite parameters, Transform parameters, and
Cropping parameters are all encapsulated by group tracks.
The Keyframe track button in the Timeline
appearing on a keyframed clip
For example, if you’d added keyframes to the Zoom and Position parameters, these keyframes
all appear within a single keyframe track labeled Transform, while Opacity adjustments appear
on a second keyframe track for Composite.
Group keyframe tracks open in the Timeline
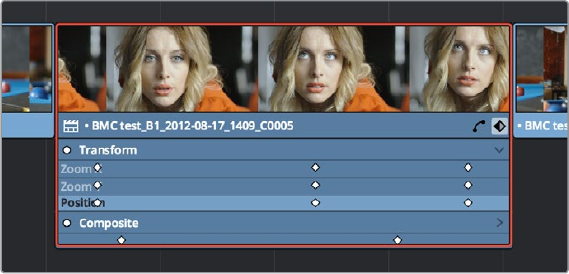
556
Keyframing Effects in the Edit Page Part 4 – 31
However, each group keyframe track has a disclosure button that lets you show or hide each
individual parameter that’s keyframed within that group. For example, clicking the Transform
keyframe track’s disclosure button shows the Zoom and Position tracks, so you can adjust
those individual keyframes.
Individual parameter keyframe tracks open in the Timeline
These keyframe tracks let you edit keyframes in context of the actual clip durations in the
Timeline. Click the small Keyframe button at the bottom right of the clip’s name bar to close the
keyframe tracks when you’re finished.
Methods of adjusting keyframes in the Keyframe Editor of the Edit Page:
To add new keyframes to the Keyframe Editor: Option-click anywhere on a track of
the Keyframe Editor to add a new keyframe, which defaults to whatever the current
value is for that parameter at that frame.
To select one or more keyframes in the Keyframe Editor: Click a single keyframe to
select it, or drag a bounding-box around multiple keyframes to select them all at once.
To move one or more control points: Select one or more control points and drag left or
right. While you drag keyframes, a tooltip appears showing you the offset in frames of
your adjustment from the beginning of that clip’s source media. If you’re only dragging
one keyframe, the tooltip also shows you the name of the parameter you’re modifying.
To nudge selected keyframes one frame at a time: Select one or more keyframes and
press Command-Left Arrow or Command-Right arrow to nudge them back and forth, for
precision editing.
To delete one or more control points: Select the keyframe(s) you want to delete and
press Backspace.
To disable or re-enable an entire track of keyframes: Click the toggle control at
the far left of each keyframe track’s name. Orange means that track’s enabled. Gray
is disabled.
To cut, copy, and paste one or more keyframes: Make a selection of keyframes,
and use the Cut (Command-X) or Copy (Command-C) key shortcuts. Then, move the
playhead to where you want the first of the pasted keyframes to start, and press Paste
(Command-V).
To duplicate one or more keyframes: Make a selection of keyframes, then hold the
Option key down and drag the selected keyframes to duplicate them and move the
duplicates to a new position.
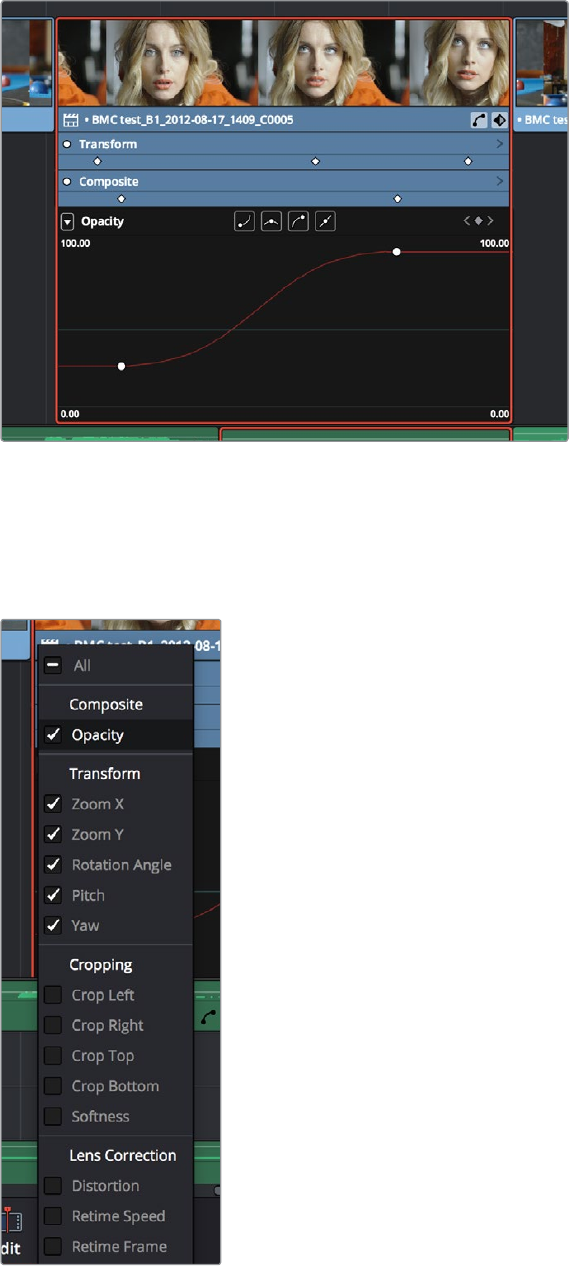
557
Keyframing Effects in the Edit Page Part 4 – 31
If you want to work with keyframes in even more detail, you can click the small Curve Editor
button at the far right of a clip’s name bar. The Curve Editor can be opened in addition to the
Keyframe Editor, or it can be opened in isolation.
The Curve Editor open in the Timeline
You can open multiple parameters into the Curve Editor using the curve pop-up menu at the
upper left-hand corner of the Curve Editor that lets you choose which parameters are exposed
via checkboxes. This menu also lets you choose which curve is selected by clicking the name
of the parameter you want to edit.
Choosing which parameters to
display in the Curve Editor
558
Keyframing Effects in the Edit Page Part 4 – 31
While you can only work on one curve at a time, you can choose which curve is selected to
edit. Using the control points exposed by each curve, you can edit parameters, alter keyframe
timing, and change each control point’s interpolation to create custom easing effects affecting
the acceleration of change from one keyframe to the next.
Methods of adding and editing control points in the Curve Editor of the Edit page:
To change which curve you’re editing: If the Keyframe Editor is open at the same
time as the Curve Editor, you can click the keyframe track you want to edit and the
corresponding curve will be highlighted. Otherwise, click the Curve menu at the upper
left-hand corner of the Curve Editor, and choose which curves you want to expose to
work on. If multiple curves are open in the Curve Editor, click the curve you want to edit
to highlight it for editing. If the clip you’re editing is too narrow, then the Curve menu
may be hidden; zooming into the Timeline will show the Curve menu again.
To select one or more keyframes: Click a single keyframe to select it, Command-
click multiple keyframes to select them one at a time, or drag a bounding-box around
multiple keyframes to select them all at once.
To select all keyframes: If the Keyframe Editor is open and it has focus (by clicking
anywhere within it), then pressing Command-A will select all keyframes within that
Keyframe Editor
To drag one or more control points freely on a curve: Select one or more control
points and drag left or right to retime them, and up or down to change their value.
To drag one or more control points on a curve in only one direction: Select one
or more control points, then hold the Shift key while dragging either vertically or
horizontally to constrain keyframe adjustment within that single direction.
To nudge selected keyframes one value or frame at a time: Select one or more
keyframes and Command-Left Arrow and Command-Right Arrow to nudge them in
time, or Command-Up Arrow and Command-Down Arrow to nudge their value, for
precision keyframe adjustments.
To add a new control point to a curve: Option-click anywhere on a curve to add a new
control point.
To delete one or more control points from a curve: Select the keyframe(s) you want to
delete and press Backspace.
To cut, copy, and paste one or more keyframes: Make a selection of keyframes,
and use the Cut (Command-X) or Copy (Command-C) key shortcuts. Then, move the
playhead to where you want the first of the pasted keyframes to start, and press Paste
(Command-V).
To change the interpolation of a single control point: Click the control point you want
to edit to select it, and then click one of the four bezier interpolation buttons in the
Curve Editor title bar.
To change the interpolation of multiple control points: Select multiple control points
by Command-clicking or dragging a bounding box, and then click one of the four
bezier interpolation buttons in the Curve Editor title bar to simultaneously change the
interpolation of all of them.
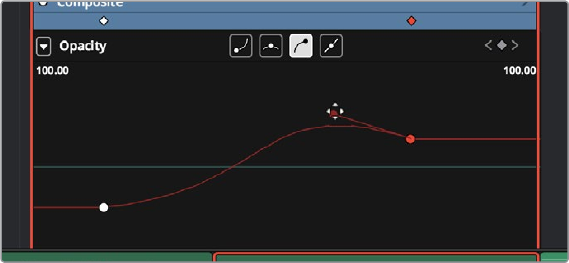
559
Keyframing Effects in the Edit Page Part 4 – 31
To adjust a bezier handle: Drag the bezier handle in any direction to alter the curve.
The Curve Editor with bezier interpolated keyframes
When you’re finished working with the Curve Editor:
Click the Curve Editor button at the bottom right of the clip’s name bar to close the
Curve Editor.
561
Fusion Connect Part 4 – 32
Fusion Connect
For instances where the various effects in the Edit and Color page aren’t enough to achieve the
effect you require, you can use the Fusion Connect features of DaVinci Resolve to send one or
more clips from the Edit page timeline to Blackmagic Fusion, in order to do more robust
compositing and effects work there. You can use this workflow in the Mac OS, Windows, and
Linux versions of DaVinci Resolve, since Fusion works on all three platforms. This is a simple
round-trip operation that lets you send clips from the DaVinci Resolve Timeline to Fusion, add
effects, and then render a finished effect out of Fusion that will automatically appear back in
your timeline.
This chapter covers the following topics:
Using Fusion Connect 562
How Clips are translated into Node Trees 565
Altering Fusion Connect Clips 565
Creating Multiple Versions of Fusion Clips 565
Switching Versions of Fusion Connect Clips in DaVinci Resolve 566
Sending a Fusion Connect Directory to Another Machine 567
Creating Multiple Versions of FusionClips on Another Machine 567
Updating Fusion Connect Clips UsingRender Media and Refresh 568
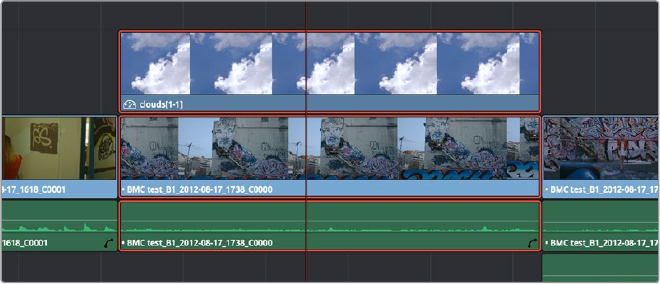
562
Fusion Connect Part 4 – 32
Using Fusion Connect
Sending one or more clips to Fusion is simple.
To send clips to Fusion:
1 Select one or more clips in the Timeline that you want to send to Fusion. In this
example, two superimposed clips are selected.
Selecting two clips to send to Fusion
2 Right-click one of the selected clips and choose New Fusion Connect Clip from the
contextual menu.
3 In the New Fusion Connect Clip dialog, choose the following options:
a. Enter a name.
b. Choose a video format (for rendering media to send to Fusion).
c. Choose a codec, based on the format you selected.
d. If you want to send Alpha channels to Fusion, turn the Export Alpha checkbox on. This
exports alpha channels that are embedded in a clip, as well as alpha channels that are
being created in DaVinci Resolve.
e. If you want to save the Fusion Connect Clip that you’re creating, along with its directory
and media, to a specific location, turn on the Custom Location checkbox, then click the
Browse button and choose a location. Otherwise, the directory containing the Fusion
Connect clip and any source media rendered along with it is placed in the same
directory as the scratch disk.
f. If you want to immediately open Fusion, turn on the “Open clip in Fusion” checkbox. If
you do this, then DaVinci Resolve by default renders each of the video clips you
selected, along with every speed effect, transform, and Color page operation that’s
been applied to each clip, using the Timeline Color Space. However, if you click Cancel
when the Render Composition Media dialog appears, then the Fusion project that
opens references the source media on disk, rather than rendered media that’s
generated by DaVinci Resolve.
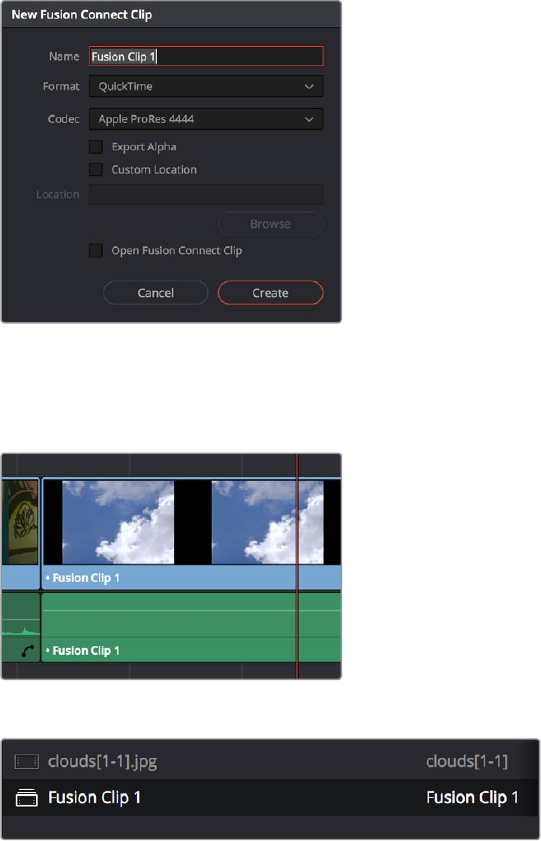
563
Fusion Connect Part 4 – 32
The New Fusion Connect Clip dialog
4 When you’re finished, click Create. DaVinci Resolve creates a Fusion Connect clip,
which appears in the Timeline as a single clip, and in the Media Pool.
Fusion Connect clips in the Timeline
Fusion Connect clips in the Timeline in the Media Pool
5 Opening the Fusion Connect clip in Fusion can be done in one of two ways:
If you turned on “Open clip in Fusion,” then Fusion automatically opens and the clips
you selected appear as Loader nodes within Fusion.
If you didn’t, then you can right-click the Fusion Connect clip in the Media Pool, and
choose Fusion Connect > Open Fusion from the contextual menu.
At this point, new media is rendered (by default), Fusion opens, and the clips you sent
are converted into a Fusion node tree, explained in greater detail in the
following section.
6 In Fusion, use the available tools to create the required effect.
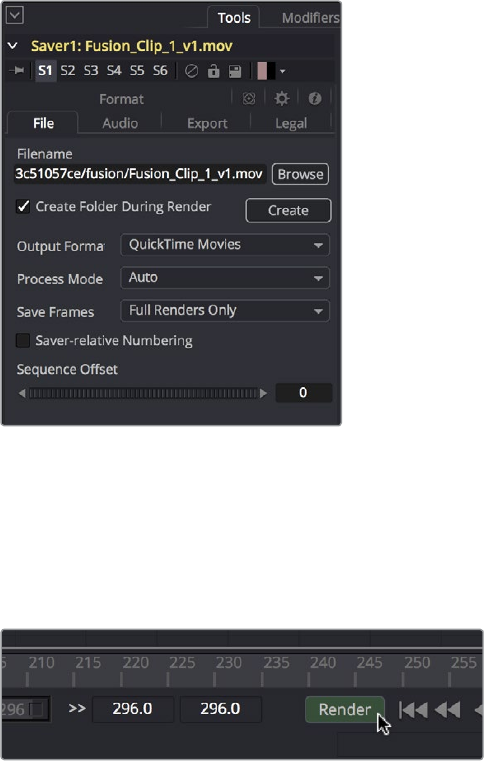
564
Fusion Connect Part 4 – 32
7 Optionally, before you render, if you want to change the Output Format, click the
Output node, and choose a new format from the Output Format popup in the Tools
tab. If you don’t do this, the Fusion composite will be rendered using the format you
selected when you sent the Fusion Connect clip in the first place.
The Tools panel where you can change the file
information governing the rendered output
8 When you’re finished creating your effect in Fusion, click the Render button to open
the Render Settings, check to make sure that the settings are correct, and click Start
Render. This renders the Fusion composition to the disk location and using the name
that you chose in step 3.
Selecting two clips to send to Fusion
9 A Render Settings dialog appear, which lets you choose how you want to render the
output, with options including the Quality, Frame Range, and Size of the media being
output. If the default settings are good, click Start Render. A progress bar indicates how
long the render will take. For more information, consult the Fusion User Manual.
10 Once rendering has finished, save your Fusion Project, reopen DaVinci Resolve, and
you should see that the Fusion Connect clip in the Timeline has updated to show the
new effect you created in Fusion.
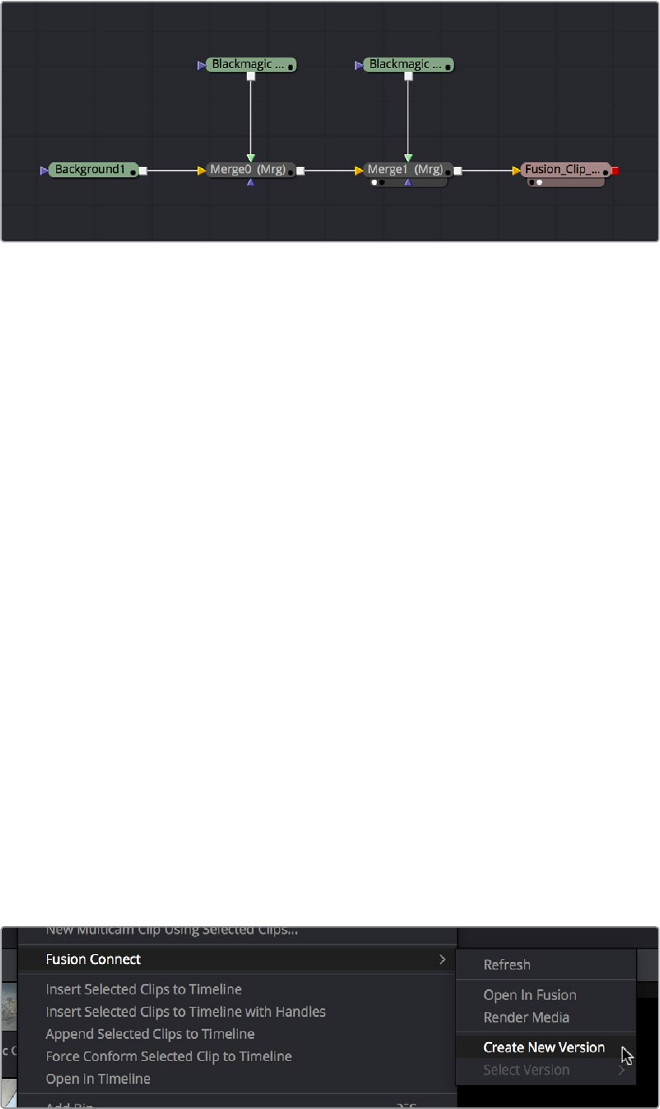
565
Fusion Connect Part 4 – 32
How Clips are translated into Node Trees
In Fusion, each clip that you send appears as a Loader node that is linked to that clip’s media on
disk. If you selected multiple clips, each clip is superimposed over the one just below it using a
Merge node, which lets you merge two images at a time with an Over operator by default.
Two superimposed clips sent to Fusion as represented in the Fusion node tree
With this as your starting point, you can add nodes (called Tools in Fusion) to apply operations
of your own, in order to create more sophisticated effects and composites. For more information
about using Fusion, see the Fusion User Manual, available from the Support page at the
Blackmagic Design web site.
Altering Fusion Connect Clips
If, at any point, you want to modify the Fusion composition, you can reopen the project in
Fusion, or right-click the Fusion Connect clip in the DaVinci Resolve Media Pool and choose
Fusion Connect > Open in Fusion. Once in Fusion, make whatever changes you want to, and
then re-render the clip to overwrite the previously rendered media. When you create new
versions in this way, each version’s Fusion project file and rendered output is maintained and
preserved, so you can always go back and forth.
When you return to DaVinci Resolve, you may need to right-click the Fusion Connect clip you
just opened, and choose Fusion Connect > Refresh to make sure that DaVinci Resolve correctly
sees the re-rendered media from Fusion.
Creating Multiple Versions of Fusion Clips
If you want to render a new version, but you want to keep the previous version, then you can
right-click the Fusion Connect clip in the Resolve Media Pool and choose Fusion Connect >
Create New Version.
Creating a new version of a Fusion Connect composite
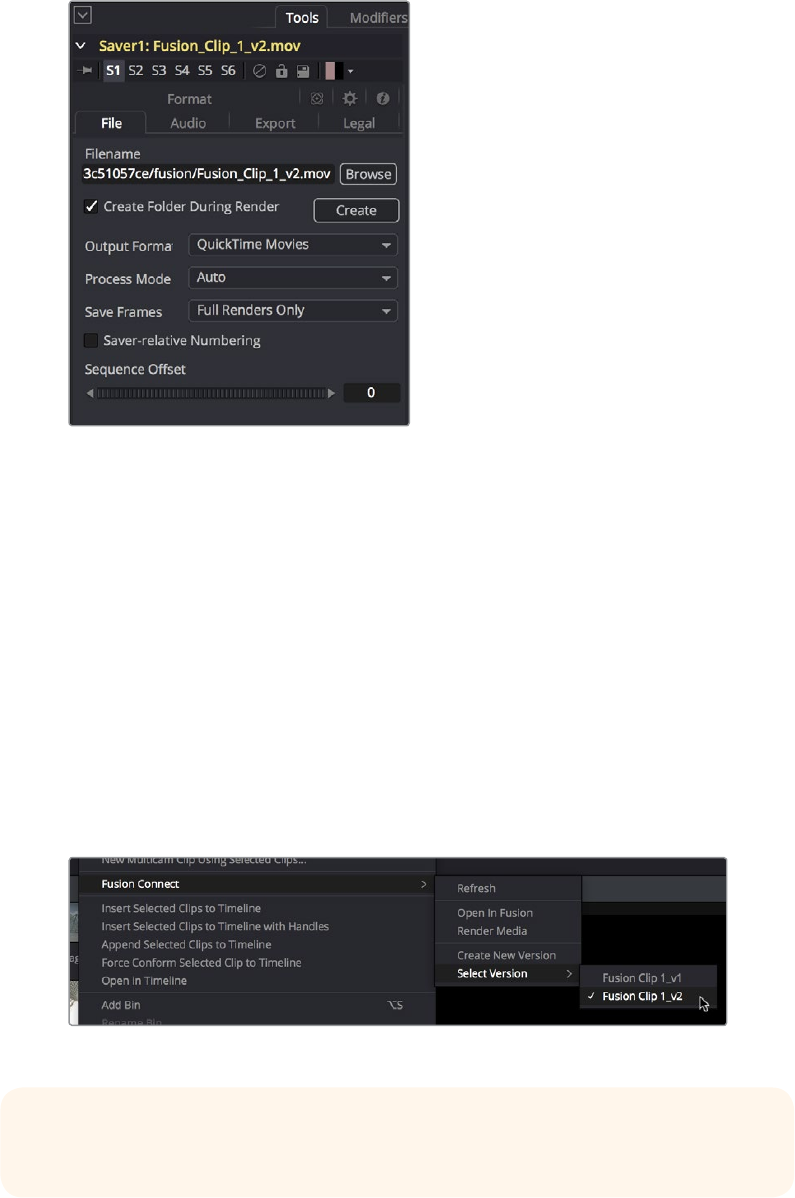
566
Fusion Connect Part 4 – 32
This creates a duplicate of the composite in Fusion, with the “_v1” part of the file name
incremented so it doesn’t overwrite the previous version of that composite.
Once in Fusion, make whatever changes you need to the composite, then re-render the clip to
generate an additional piece of media for that version. The Filename of the Saver node for the
new media you’re rendering is also automatically incremented with the “_v1” segment of the
filename changed to the next version number, such as “_v2” if it’s version two of the effect.
The Tools panel shows the Saver node’s updated
Filename for the new version’s rendered output
When you’re finished, you’ll end up with a Fusion Project file and a corresponding rendered
media file that share the same version number. When you return to DaVinci Resolve, Resolve
will automatically detect that there are multiple versions in the Fusion Connect directory, and
will make each version available via a Choose Version submenu for Fusion Connect clips in the
Media Pool.
Switching Versions of Fusion Connect Clips
in DaVinci Resolve
Once you’ve created multiple versions of a Fusion Connect clip, you can switch which version is
used for that clip in DaVinci Resolve by right-clicking the Fusion Connect clip in the Media Pool,
and choosing the version from the Fusion Connect > Select Version submenu of the
contextual menu.
Choosing which version to use from the Fusion Connect > Select Version submenu
TIP: If you want to switch versions for a Fusion Connect clip in a timeline, you can
right-click that clip and choose Find in Media Pool.
567
Fusion Connect Part 4 – 32
Sending a Fusion Connect
Directory to Another Machine
If you’re going to hand off a Fusion Connect directory to someone else using a different
workstation, it’s a good idea to render self-contained media for the Fusion composition to make
it easy to hand off everything the compositing artist will need. Otherwise, you’ll need to
manually find and provide the associated media files yourself. There are two ways of rendering
self-contained media for Fusion:
If you check “Open Fusion Connect Clip” in the New Fusion Connect Clip dialog, then
DaVinci Resolve by default renders each of the video clips you selected, along with
every speed effect, transform, and Color page operation that’s been applied to each
clip, using the Timeline Color Space.
If you haven’t opened the Fusion Connect clip in Fusion yet, you can also right-click any
Fusion Connect clip in the Media Pool, and choose Fusion Connect > Render Media
from the contextual menu.
Once that’s done, there are two ways you can locate the actual Fusion Connect directory’s
location, in order to copy it for whomever is going to be doing the compositing work for you.
You can turn on the Custom Location checkbox in the New Fusion Connect Clip dialog,
then click the Browse button and choose a location where the resulting directory is
easily copied.
You can also right-click on any Fusion Connect clip in the Media Pool, and choose
Reveal in Finder to open that Fusion Connect clip’s directory.
Since your DaVinci Resolve project keeps track of the location of the Fusion Connect directory
from the moment it’s created, you don’t want to move it, since DaVinci Resolve is counting on it
being where it thinks it is. Once your colleague has completed the compositing work in Fusion,
all they need to do is send you back the Fusion Composition file (just so you can keep
everything together), and the media they rendered, both of which you need only copy to the
top level of the corresponding Fusion Connect directory. Once you do that, DaVinci Resolve
should automatically see the rendered media and refresh those Fusion Connect clips on
your timeline.
Creating Multiple Versions of
FusionClips on Another Machine
If you’ve handed off the directory created by the Fusion connect process to someone off site,
they can still create multiple versions of the composite that can be managed by
DaVinci Resolve.
Use the Save As command in Fusion to save a duplicate of the Fusion project with the “_v1”
segment of the filename incremented to the next version number, such as “_v2” if it’s version
two of the composite. Make sure you save this duplicate Fusion project into the same directory
as the original, so DaVinci Resolve can find it. Once created, you can change this duplicate
project file any way you need.
568
Fusion Connect Part 4 – 32
When you’re finished, select the Saver node (at the very end of the Fusion node tree), and
change the Filename by incrementing the V1 part of the Filename field. For example, if your clip
is being named Output_V1.mov, then change the Filename to Output_V2.mov in the Tools tab,
and render. If you’re rendering a DPX image sequence, then you’ll want to change the name of
the folder that encloses the frames, so change the Filename from “.../fusion/OutputDirectory_V1/
Output_00000000.dpx” to “.../fusion/OutputDirectory_V2/ Output_00000000.dpx” to obtain a
correctly named second version.
Updating Fusion Connect Clips
UsingRender Media and Refresh
If you change a grade or effect that’s applied to a clip inside of a Fusion Connect clip, you’ll
need to right-click that clip and choose Fusion Connect > Render Media to re-render updated
media files for the Fusion project.
If you re-render a Fusion composite and overwrite media that’s already referenced by a Fusion
Connect clip in an open DaVinci Resolve project, you may need to refresh that media reference
in DaVinci Resolve. The easy way to do this is to right-click any Fusion Connect clip in the Media
Pool, and choose Fusion Connect > Refresh.

PART 5
571
Preparing Timelines for DaVinci Resolve Import Part 5 – 33
Preparing Timelines for
DaVinci Resolve Import
Generally speaking, “conforming” a project describes the process of importing a project
exchange file from another post-production application, and automatically relinking each clip in
the imported timeline to the high-quality media files each clip corresponds to.
If you need to continue editing, color correct, or finish a project that was put together in another
application, you can import via the EDL, AAF, or XML project exchange formats. When you go
through the process of conforming a project, you use the imported project data to arrange the
clips in the Media Pool into a timeline that constitutes the program that’s about to be graded.
This chapter walks you through the process of preparing timelines in other applications prior to
moving them into DaVinci Resolve and covers which effects have counterparts in the
DaVinciResolve timeline. It ends with instructions on how to set up to compare a reference
movie to the Timeline.
Preparing to Move Your Project to Resolve 572
Move Clips to the Lowest Video Track 572
Organize Unsupported Media Files 572
Creating an Oine Reference Movie 572
Mixed Frame Sizes and Mixed Codecs 573
Mixed Frame Rates 573
Importing Effects when Conforming Edits 574
About Supported Color Corrections 575
About Supported Transitions 575
Transition Names 576
About Supported Opacity, Position, Scale, and Rotation Settings 577
About Flip and Flop Support 577
Pitch and Yaw 577
About “Ken Burns Eect” and Dynamic Zoom 577
About Speed Eects 577
About Nested Sequences and Compound Clips 578
About Supported Composite Modes 578
About Supported Still Image Formats 579
About Supported Alpha Channels 579
About Imported Text Eects 579
About Imported Audio in AAF Projects 579
Verifying Imported Projects With Offline Reference Clips 580
Setting Up an Oine Reference/Timeline Comparison 581
572
Preparing Timelines for DaVinci Resolve Import Part 5 – 33
Preparing to Move Your
Project to Resolve
When you’re preparing to move a project from another NLE to DaVinci Resolve, there are a few
steps you can take to make your work more organized.
Move Clips to the Lowest Video Track
Editors often use the multiple tracks NLEs offer for simple clip organization in the edit of a
scene. While this is convenient for offline editorial, it is less convenient when you’re trying to
conform, grade, finish, and render the media used by a project as quickly and efficiently
as possible.
For this reason, it’s a good idea to move all clips that are not stacked or superimposed as part
of a compositing operation down to track V1 of the Timeline in your NLE. This produces a
simplified edit that has many advantages. The project becomes smaller to move because
there’s less media in the Timeline, and consequently becomes faster to render. Furthermore,
the colorist is spared confusion because this eliminates “hidden” media that is nonetheless
connected to other clips that can be seen.
It’s also helpful, once you’ve reorganized the Timeline, to eliminate any empty tracks that are
left. This can be done from within DaVinci Resolve, but doing it in your NLE further simplifies the
project import process.
Organize Unsupported Media Files
Depending on your workflow and on the NLE you’re working with, there may be clips using
formats that are unsupported in DaVinci Resolve. Unsupported generators, media formats, and
other effects constructs may simply not be seen in Resolve, and will consequently appear as
unlinked clips.
If you know this in advance, you can move all such clips into dedicated tracks where they can
be isolated, and the track can be turned off to hide the unsupported clips, simplifying timeline
navigation. This also saves the colorist from the need to worry about why there are offline clips
in the Timeline at 3 o’clock in the morning, immediately before starting a render.
Creating an Offline Reference Movie
Even though the colorist in any given workflow is likely to be building new grades from scratch,
it can be valuable to have a reference movie showing any color corrections, filters, or effects
that the offline editor applied during the editing process. This offline reference can be imported
into a Resolve project, and used as a split-screen reference whenever there’s some question
about a look or effect from the offline edit.
Offline reference movies also serve as a useful tool when conforming a project in the Edit page.
After project conform, you can compare the project as seen in the Record Viewer with the
synchronized offline movie as seen in the Source Viewer set to Offline mode. This makes it
easy to scrub through a project to make sure that each clip has imported correctly and
is in sync.
More information about using Offline Reference Movies appears later in this chapter.
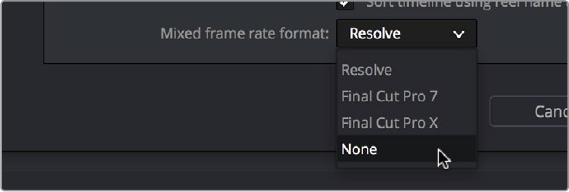
573
Preparing Timelines for DaVinci Resolve Import Part 5 – 33
Mixed Frame Sizes and Mixed Codecs
Most NLEs can freely mix media using different frame sizes, different codecs, and different
frame rates. DaVinci Resolve deals with these combinations in different ways, depending on
what settings you’ve selected in the Project Settings.
Mixing Frame Sizes: Mixed frame sizes are easily handled. The Set Timeline Resolution
To parameter in the Master Project Settings panel of the Project Settings dictates the
current resolution of the project. Any clips with a frame size that doesn’t match the
project is resized according to the option selected in the Image Scaling panel of the
Project Settings. You can, of course, always manually readjust the sizing of any clip if
you want to make a specific adjustment. All resizing is done using the optical-quality
resizing algorithms in DaVinci Resolve. For more information, see Chapter 58, “Sizing
and Image Stabilization.”
Mixing Codecs: Mixed codecs are also not a problem, as long as the different codecs
used by the media in the project you’re importing are compatible with the list of codecs
and formats that DaVinci Resolve supports. For more information about the currently
supported list of codecs and formats, check the Blackmagic Design support page for
DaVinci Resolve. This list is updated often with newly supported formats.
Mixed Frame Rates
DaVinci Resolve also supports mixed frame rates, although there is a setting you must choose
to ensure the best results for the NLE you’re importing from. By default, mixed clip frame rate
support is enabled via the “Mixed frame rate format” pop-up menu that appears either in the
Master Project Settings, or in the Import AAF or XML dialog.
The different options available in the “Mixed frame rate format” pop-up are available to let you
conform projects using the method of mixed frame rate calculation used by the NLE a project
was originally edited in; different NLEs have different ways of mixing frame rates, and that used
by Final Cut Pro 7 is different from that used by Final Cut Pro X or Avid Media Composer. If you
need to change this setting, you must do so before you import any media into the Media Pool;
once the Media Pool is populated, this setting can no longer be changed.
Mixed frame rate format selection
This Mixed frame rate format pop-up menu is also found in the Load AAF and Load XML
dialogs. Resolve automatically chooses a setting from the “Mixed frame rate format” pop-up
menu that corresponds to the project file you’re importing, but in some cases you can override
this setting if necessary. For projects sent from Final Cut Pro, you can choose either “Final Cut
Pro 7” or “Final Cut Pro X” to match the type of project you’re importing. On the other hand, you
should choose “Resolve” for projects imported from Premiere Pro, Smoke, Media Composer, or
other NLEs.

574
Preparing Timelines for DaVinci Resolve Import Part 5 – 33
When “Mixed frame rate format” is set to anything but None, DaVinci Resolve conforms and
processes all clips in the Timeline to play at the frame rate that’s selected in the “Calculate
Timecode At” pop-up menu. For example, 23.98, 29.97, 30, 50, 59.94 and 60 fps clips will all
play at 24 fps if that’s what “Timeline frame rate” is set to in the Master Project Settings. Clips
with different source frame rates will be retimed to match the Timeline conform frame rate.
The Retime process that’s used to render clips with differing frame rates can be changed for
individual clips via the Retime Process parameter in the Edit Page Inspector, or it can be
changed project-wide using the Retime Process parameter found in the Editing panel of the
Project Settings. For more information on how each of the three available options work, see the
“Frame Interpolation” section of Chapter 3, “Project Settings and Preferences.”
If you choose “None,” then clips with frame rates that aren’t equal to the Timeline frame rate will
ignore their original frame rate and will play at the Timeline rate, resulting in either faster or
slower motion, depending on the difference between the original and Timeline frame rates.
How clips in mixed frame rate timelines are rendered depends on whether the Render Settings
are set to render individual source clips or one single clip. When you render the Timeline as
”Individual Source Clips,” then all clips are rendered individually at their original frame rate. If
you select ”Single Clip,” then all clips are converted to the “Timeline frame rate” frame rate
setting, and rendered as a single media file.
Importing Effects when
Conforming Edits
DaVinci Resolve is capable of translating a subset of the effects exported within XML, AAF, and
EDL project files into their Resolve equivalents. The following chart illustrates which effects are
supported, and for which project import formats.
Unsupported effects are neither imported nor displayed in Resolve. However, the majority of
unsupported effects are preserved internally, and are reinserted into exported XML or AAF files
so that those effects will reappear in your NLE once the project is reimported.
EDL FCP 7 XML FCP X XML AAF
Color Corrections No No Yes No
Composite Modes No Yes Yes Overlay only
Multiple Tracks No Yes Yes Yes
Video Transitions Yes Yes Yes Yes
Audio Transitions No No No Yes
Opacity Settings No Yes Yes Yes, via 3D Warp
orSuperimpose
NOTE: Because DPX files often either lack or have incorrect frame rate information in
the header data, you may need to select None when conforming a project using image
sequences to make sure your media is not incorrectly interpreted.

575
Preparing Timelines for DaVinci Resolve Import Part 5 – 33
EDL FCP 7 XML FCP X XML AAF
Position, Scale, Rotation No Yes Yes Yes, via 3D Warp
Flip and Flop No No No Yes
Pitch and Yaw No No No Yes, via 3D Warp
Linear Speed Effects Yes Yes Yes Yes
Variable Speed Effects No Yes Yes Yes
Still Image Clips No .tif, .jpg, .bmp,
.dpx, .dng, .psd
.tif, .jpg, .bmp,
.dpx, .dng, .psd
.tif, .jpg, .bmp, .dpx,
.dng, .psd
Freeze Frames No No No Yes
Nested Sequences No Yes Yes No
Linked Clip Audio Yes Yes Yes Yes
Mixed Frame Rates No Yes Yes Yes
Text Generators No Yes Yes No
Effects supported with imported AAF, XML and EDL
About Supported Color Corrections
At the time of this writing, only Final Cut Pro X XML projects are capable of exporting color
correction data that can be imported as primary grades in DaVinci Resolve. For obvious
reasons, color correction import is a one-way street, and imported color corrections cannot be
output back to Final Cut Pro. Imported Final Cut Pro X color adjustments appear in the Color
page as primary corrections.
Other workflows for importing color correction information from other applications are available
using ColorTrace to import grade data from CDLs (Color Decision Lists). For more information,
see the “Copying Grades Using ColorTrace” section in Chapter 54, “Copying and Importing
Grades Using ColorTrace.”
About Supported Transitions
EDLs are the most restrictive when it comes to transition support in Resolve, as only Cross
Dissolves will be read. Any other transitions appearing in an EDL will be automatically
converted to a Cross Dissolve of the same duration when it’s imported into DaVinci Resolve.
On the other hand, Resolve supports the import of ten different transitions when importing XML
project files from Final Cut Pro X and legacy Final Cut Pro 7, or nine different transitions when
importing AAF files from Avid Media Composer or Symphony.
576
Preparing Timelines for DaVinci Resolve Import Part 5 – 33
EDL FCP XML AAF
Clock Wipe No Yes Yes
Center Wipe No Yes Yes
Cross Dissolve Yes Yes Yes
Additive Dissolve No Yes No
Dip to Color Dissolve No Yes Yes
Edge Wipe No Yes Yes
Venetian Blind Wipe No Yes Yes
Cross Iris No Yes Yes
Diamond Iris No Yes Yes
Oval Iris No Yes Yes
Supported transitions for imported EDL, XML and AAF
Transition Names
To help you prepare projects for export, note that the names of transitions vary between XML
and AAF project files. Here are the supported transitions as they appear in Avid Media
Composer and Symphony.
Dip to Color Dissolve Dip to Color effect in the Blend category
Edge Wipe Horizontal/Vertical/Lower Left/Lower Right/Upper Left/Upper Right
Diagonal effects in the Edge Wipe category
Center Wipe Horizontal Open and Vertical Open effects in the Edge Wipe category
Clock Wipe Clock effect in the Shape Wipe category
Venetian Blind Wipe Vertical Blinds and Horizontal Blinds effects in the Shape Wipe category
Cross Iris 4 Corners effect in the Shape Wipe category
Diamond Iris Diamond effect in the Shape Wipe category
Oval Iris Circle effect in the Shape Wipe category

577
Preparing Timelines for DaVinci Resolve Import Part 5 – 33
About Supported Opacity, Position,
Scale, and Rotation Settings
When importing XML project files from Final Cut Pro X, Premiere Pro, or legacy Final Cut Pro 7,
DaVinci Resolve supports the import of Opacity, Position, Scale, and Rotation settings. Imported
Composite and Transform settings for any given clip appear in the Inspector of the Edit page, or
in the Edit Sizing mode of the Sizing palette in the Color page. If these settings have been
keyframed, the animation will appear in DaVinci Resolve.
When importing AAF files from Media Composer or Symphony, DaVinci Resolve supports the
import of Opacity, Resize and 3D Warp effects, which are converted into Pan, Tilt, Zoom, and
Rotate settings in Resolve, located in the Edit page Inspector or the Edit Sizing mode of the
Sizing palette in the Color page.
About Flip and Flop Support
When importing AAF project files from Media Composer or Symphony, Flip, Flop, and Flip-Flop
effects are converted into the equivalent horizontal and vertical Flip toggles in DaVinci Resolve,
located in the Edit page Inspector or the Edit Sizing mode of the Sizing palette in the Color page.
Pitch and Yaw
When importing AAF files from Media Composer or Symphony, DaVinci Resolve supports the
import of Pitch and Yaw 3D Warp effects, which are converted into equivalent Pitch and Yaw
settings in DaVinci Resolve, located in the Edit page Inspector or the Edit Sizing mode of the
Sizing palette in the Color page.
About “Ken Burns Effect” and Dynamic Zoom
If you import a project from Final Cut Pro X with clips that use the Ken Burns effect for creating
pan and scan animation, then the Dynamic Zoom parameters (found in the Edit page Inspector
when a clip is selected) for each affected clip will be populated with an equivalent
animated effect.
About Speed Effects
DaVinci Resolve supports the import of Speed Effects from different applications, but different
project formats have different Speed Effect support.
EDL: Resolve only supports the import of linear Speed Effects when importing EDLs.
XML: Resolve supports the import of both linear and variable Speed Effects when
importing XML project files from Premiere Pro, Final Cut Pro 7 and Final Cut Pro X. As
of Resolve version 11.1, XML from Final Cut Pro X can also provide information about
whether frame blending or optical flow is used, as well as information about the Bezier
curve transitions of speed effects.
AAF: Resolve supports the import of both linear and variable Speed Effects when
importing AAF files from Media Composer or Symphony that use Timewarp effects.
NOTE: Resolve 11.1 introduced improved support for Bezier and cubic interpolated
keyframes in AAF files.

578
Preparing Timelines for DaVinci Resolve Import Part 5 – 33
DaVinci Resolve has high-fidelity conversion of variable-speed Speed Effect data from other
applications, accomplished by creating one speed keyframe per frame for each affected clip.
However, you may see small variations between the resulting Speed Effect in DaVinci Resolve
and an offline reference movie exported from the original NLE if you haven’t set the Retime
Process setting to the same type of speed interpolation that the original NLE was using.
In other words, if you created a Timewarp speed effect in Media Composer that uses
FluidMotion to create smooth slow motion effects, then you’ll want to make sure to change
either the project-wide or clip-specific Retime Process setting to Optical Flow so that the speed
effects in DaVinci Resolve best match those in Media Composer. For more information on
Speed Effects in DaVinci Resolve, see Chapter 30, “Speed Effects.”
About Nested Sequences and Compound Clips
DaVinci Resolve supports the import of compound clips from Final Cut Pro X and of nested
sequences from legacy Final Cut Pro 7. Both appear within Resolve as compound clips, in both
the Timeline and the Media Pool. As of Resolve version 11.1, compound clips with mixed frame
rates are supported, as well as multi-cam and a/v synchronized clips from Final Cut Pro X, which
are represented in Resolve as compound clips. For more information about creating and using
compound clips in Resolve, see the “Compound Clips” section of Chapter 22, “Take Selectors,
Compound Clips, and Nested Timelines.”
About Supported Composite Modes
When importing XML project files from Final Cut Pro 7, Premiere Pro, and Final Cut Pro X,
DaVinci Resolve supports the import of eight different Composite modes. When importing AAF
files from Media Composer, the Overlay composite mode is supported when the source AAF
file has a Superimpose effect applied to it.
FCP 7/X XML AAF
Add Yes No
Subtract Yes No
Difference Yes No
Multiply Yes No
Screen Yes No
Overlay Yes Yes
Lighten Yes No
Hardlight Yes No
Softlight Yes No
Darken Yes No
Supported composite modes with imported XML and AAF

579
Preparing Timelines for DaVinci Resolve Import Part 5 – 33
About Supported Still Image Formats
DaVinci Resolve supports the import of greater-than-one-frame-in-duration TIF, JPG, PNG, DPX,
and DNG still image files that appear in Final Cut Pro X, Final Cut Pro 7, and Premiere Pro XML
files, and AAF files exported from Media Composer. These clips appear as ordinary clips in the
DaVinci Resolve Timeline. Export of still images is limited to Final Cut Pro 7 and Final Cut Pro X
XML formats.
About Supported Alpha Channels
Media with embedded alpha channels is supported for any project as long as it’s in a media
format that DaVinci Resolve supports; this includes TIFF, OpenEXR image sequence formats,
and four-channel QuickTime formats such as ProRes 4444, DNxHR 444, and QuickTime
Animation. Alpha channels are automatically enabled, and can be used for compositing directly
within the DaVinci Resolve Timeline.
Starting in DaVinci Resolve 12.5, alpha channels can be exported in round-trip workflows when
rendering individual source clips. However, when rendering a program as a single clip, all
composited effects are rendered together to produce a single output media file. For more
information on rendering clips with alpha channels, see Chapter 74, “Delivery Effects
Processing.”
About Imported Text Effects
DaVinci Resolve supports the import of text generators when importing XML project files from
both Final Cut Pro X and Final Cut Pro 7. All imported text effects appear in the DaVinci Resolve
Timeline as Basic text generators. Some, but not all, formatting parameters are imported,
depending on the project file format being imported.
About Imported Audio in AAF Projects
Starting with Resolve 12.5, any combination of audio track types, channel map order, MXF and
QuickTime files, and rendered or unrendered clips should import without problems.
Preparing Unsupported Clips and Eects You Want to Grade
If there is an unsupported effect within your NLE of choice that you want to move into DaVinci
Resolve for grading (for example, clips with effects filters that are native to a particular NLE),
here’s a simple workflow to follow.
To “bake” an effect into a clip you’re sending to DaVinci Resolve:
1 Export that clip as a self-contained media file using whatever Resolve-compatible
mastering codec you prefer.
2 Reimport the resulting media file into your project.
3 Edit it into your project’s timeline to replace the original effects clip.
4 Export a version of the resulting sequence for use in Resolve.
NOTE: When exporting an AAF project, Resolve is capable of writing mono media in
stereo tracks.

580
Preparing Timelines for DaVinci Resolve Import Part 5 – 33
This is a good way of prepping the titles and effects of projects that you want to finish in
DaVinci Resolve. If you create self-contained media files for all title clips and effects, then these
elements will import cleanly and easily, and you can export a complete, texted version of your
program out of Resolve.
Additionally, if a composited clip is using unsupported effects (for example, a filtered still image
with animated position that’s superimposed using the Overlay composite mode and set to 70%
opacity), an ideal way to prep this clip for XML export to Resolve is to set the composite mode
to Normal, set Opacity to 100%, and then export the resulting clip as a self-contained QuickTime
movie. Reimport the result, edit it back into the Timeline to replace the original superimposed
clip, and then set its composite mode to Overlay and its Opacity to 70% to match the original
settings. Now the unsupported effects are “baked” into the clip, but the effects that Resolve
does support are still live, and can be readjusted in context while grading.
Verifying Imported Projects
With Offline Reference Clips
When you set the Left Viewer in the Edit page to Offline mode, you’re able to compare an
Offline Reference Clip to a timeline with both playheads ganged together. As you play the
Timeline, the Offline Reference Clip file plays as well.
An Offline Reference Clip must be added to the Media Pool specifically as an “offline” clip, and
is associated with a particular timeline by right-clicking that timeline in the Media Pool and
choosing it from the Link Offline Video submenu.
The idea is that if your client exports a flattened version of their edited sequence at the same
time as they export the EDL, AAF, or XML project file they want graded, then you can compare
the project data that’s imported into DaVinci Resolve to the actual video of the offline edit.
There are two reasons for comparing an Offline Reference Clip to a timeline:
Verifying the clip order: If you’re unsure whether or not you’ve properly resolved reel
conflicts or other problems that occurred while you were conforming a timeline, you
can compare each edit to the offline version of the program to spot problems and
identify the proper media that should correspond to any clip.
Recreating effects: If there are offline effects, such as temporary grades made in the
NLE, or pan and scan transforms that you want to check, the Offline reference mode
lets you split-screen your current grade against the Offline Reference Clip in the
Color page.
Filling holes in timelines with missing or unlinked clips: Two options found in the
Master Project Settings panel of the Project Settings, “Show offline clips through
conform gaps,” and “Show offline clips through missing clips,” let you set DaVinci
Resolve to display Offline Reference Clip media to fill gaps in the Timeline or replace
the contents of unlinked clips. This is typically done to resolve emergency situations
when you need to proceed with a screening or review session despite the fact that
you’re missing media for whatever reason. For more information, see Chapter 3,
“Project Settings and Preferences.”
NOTE: Typically, the flattened version of the program you’re given uses a low-quality
codec, and contains effects and color correction that’s not final, which is why it’s
called an Offline Reference Clip
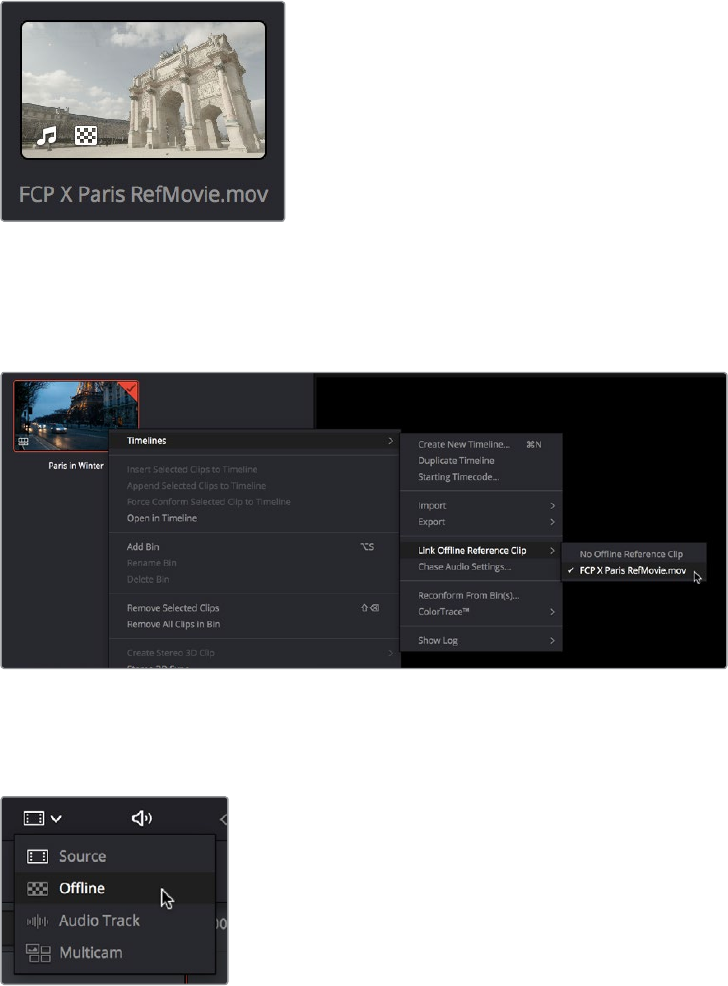
581
Preparing Timelines for DaVinci Resolve Import Part 5 – 33
Setting Up an Offline Reference/Timeline Comparison
Here’s how to compare Offline Reference Clips to a timeline.
Important: You need to make sure that the media you’ve imported as an Offline Reference Clip
has a valid timecode track, otherwise this procedure won’t work.
To compare a timeline with an Offline Reference Clip:
1 Open the Media page, and use the Media Storage browser to find the flattened Offline
Reference Clip that you want to use for comparison.
2 Right-click the Offline Reference Clip file and choose Add as Offline Reference Clip.
3 That clip appears with a small checkerboard badge in its icon in the Media Pool.
Checkerboard indicating an Offline video
4 Open the Edit page, right-click the timeline you want to review against the Offline
Reference Clip, and choose the offline clip you imported from the Timelines >
LinkOffline Reference Clip submenu.
Selecting the Offline video to link to the current Timeline
5 Open the Source pop-up menu and choose the checkerboard icon indicating
OfflineReference.
Selecting the Offline video in
the Source Viewer
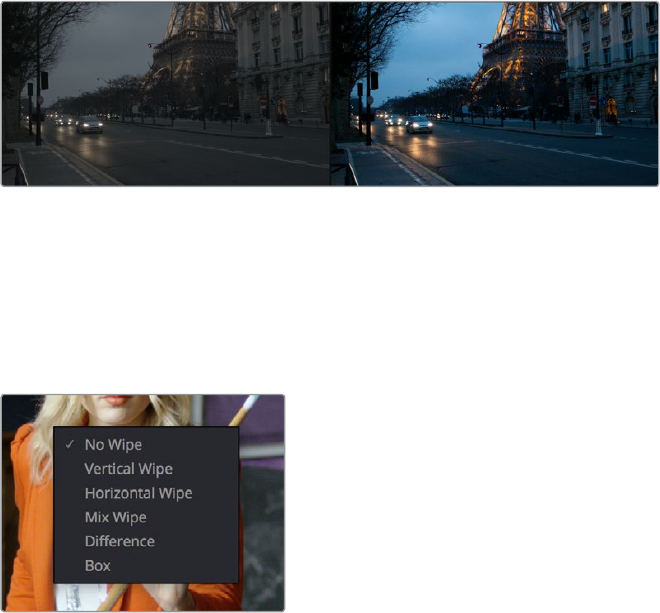
582
Preparing Timelines for DaVinci Resolve Import Part 5 – 33
The Offline Reference Clip now appears within the Offline Viewer, and plays back in
sync with the Timeline. If your clips are graded, you can see a side by side comparison
between the state of each clip in the Offline Reference Clip, and the graded
Timeline clip.
The Edit page in Offline/Timeline mode
6 If you like, you can optionally choose other ways of comparing clips, by right-clicking
anywhere within the Timeline Viewer and choosing Vertical Wipe, Horizontal Wipe, Mix
Wipe, Difference, or Box (wipe). These modes offer you different ways of quickly and
directly comparing the content, sizing, color, and alignment of the Offline Reference
Movie to the clips in your timeline.
Different viewing options for comparing the
Offline Reference Movie to the Timeline are
available in the Timeline Viewer contextual menu
If you choose a wipe or difference comparison, that comparison will also be visible on
the display connected to your video output interface, and dragging anywhere within
the Timeline Viewer will adjust the ratio of the wipe in the case of the Vertical,
Horizontal, Mix, and Box wipes.
7 To turn a Vertical or Horizontal Wipe, Mix Wipe, Difference, or Box comparison off,
simply right-click the Timeline Viewer again and choose No Wipe.
584
Conforming aand Relinking Clips Part 5 – 34
Conforming and Relinking Clips
Whether you import a DaVinci Resolve project or a project exchange file from another
application, you’ll need to deal with the need to relink media files in the Media Pool and
reconform timelines to either the same or compatible media files that may either be in the
Media Pool or that may need to be imported from disk.
This chapter discusses the rules with which DaVinci Resolve conforms clips to match timelines,
and describes the numerous methods with which you can control clip linking, timeline conform,
as well as how you can deal with problems that arise using the numerous problem-solving
techniques that DaVinci Resolve makes available.
Conforming and Relinking Media 585
Conforming and Relinking During Project Import 585
Conforming and Relinking Existing Timelines and Clips 585
The Difference Between Unlinked and Missing Clips 586
Duplicate Clips are Considered Separate Media 587
Summary of Methods for Conforming and Relinking 587
Unlinking Clips 589
Conforming Clips During XML and AAF Import 589
Importing Clips Before Importing anEDL, AAF, or XML 591
Essential Clip Metadata for Easy Conforming and Relinking 592
Defining Clip Metadata When Adding Media to the Media Pool 592
How Reel Names are Identified 593
Conform Missing Clips by Importing Their Source Media 596
Using the Import Additional ClipsCommand 597
Using Conform Lock As a Command 598
Relinking Clips to Media Files on Disk 598
Using “Change Source Folder” to Relink Clips 599
Using the “Reconform From Bins” Command 599
Using Reconform From Media Storage 603
Understanding, Fixing, and Using Reel Conflicts 606
Using Clip Conflicts as a Conform Tool 607
Resolving Clip Conflicts 607
Re-editing Media Directly to the Timeline 608
How Grades are Linked to Multiple Timelines 608

585
Conforming aand Relinking Clips Part 5 – 34
Conforming and Relinking Media
DaVinci Resolve provides a wealth of tools to help you deal with managing the relationship
between clips in the Media Pool and clips in timelines, and with the links between each clip and
its corresponding media file on disk. You can use these tools to manage different project
workflows, or to deal with problems that can occur when importing project files in any format
from a variety of sources.
This section describes every method available in DaVinci Resolve for conforming clips and
relinking media. More information on the clip metadata that’s used to determine the
correspondences between clips and media is found later in this chapter.
Conforming and Relinking During Project Import
When you import an AAF or XML file, you have the ability to relink the clips that are imported
into the Media Pool to the corresponding source media files on disk as part of the process. As
an automatic result, the imported timeline is conformed to the clips in the Media Pool, and you
end up with a Media Pool full of clips, and an arrangement of those clips in the imported
timeline. Because it all usually happens at the same time, it’s easy to confuse the distinction
between a timeline’s relationship to the clips in the Media Pool, and each clip’s relationship to
their corresponding source media file on disk.
The workflow for importing an EDL makes this process more explicit, since you must first import
all of the clips you need into the Media Pool, making sure that they have the correct reel names
and timecode. This creates the link between the Media Pool clips and the source media on disk.
You then import the EDL in a second step, which creates a timeline that attempts to reconform
itself to the clips in the Media Pool using reel name and timecode information.
Conforming and Relinking Existing Timelines and Clips
There are many reasons why you might want to reconform or relink media long after you’ve
started editing or grading a project, so Resolve provides additional tools to facilitate these
workflows as well. For example, you may have started a project using placeholder VFX or stock
footage clips, but you later need to replace these with final versions of the same shots. Or, you
may have decided to edit a project using transcoded versions of the camera raw media files
you were given, only to decide later that you want to switch one or all of the clips in the timeline
to use the original camera media instead for grading and finishing. Resolve has a wide variety
of tools to support these workflows and more.
The Dierence Between Conforming and Relinking
While these two terms are often used synonymously, conforming typically refers to the
process of matching clips in a timeline to the appropriate source clips in the Media
Pool, while relinking typically refers to the process of matching a source clip in the
Media Pool to its corresponding media file on disk. This is a recent change
necessitated by an expansion of relinking and reconforming options, so the author
offers his apologies if this usage is not always consistent.

586
Conforming aand Relinking Clips Part 5 – 34
The Difference Between
Unlinked and Missing Clips
While it may seem pedantic, there’s an important difference between clips that are unlinked,
and clips that are missing when it comes to the relationship between clips in the Media Pool
and clips in a Timeline. First off, both of these “offline” clip states look different in the timeline,
but these differences aren’t just cosmetic.
A missing clip in the Timeline (left) compared to an unlinked clip in the Timeline (right))
An unlinked clip is a clip that exists in the Media Pool, but has lost the link to its corresponding
media file on disk. However, unlinked clips still contain metadata, they still have a relationship to
instances of that clip that have been edited into timelines in your project, and they can be easily
relinked to media files with matching file names and timecode using the Relink command
(described later), or reconformed to previously or newly imported clips in specific bins of the
Media Pool with the Reconform From Bins command (also described later).
Missing clips do not exist in the Media Pool at all, although clips flagged as missing can still
appear in the timelines of your project. However, since missing timeline clips have no
corresponding source clips in the Media Pool, the clip in the timeline has no metadata that can
be seen in the Metadata editor, and it will have lost any remote grades that are associated with
that source clip (for more information about remote grades, see Chapter 48, “Grade
Management.” You can fix missing clips in a timeline in one of two ways:
If the “Auto conform clips with media added into Media Pool” setting is enabled in the
General Options panel of the Project Settings, then simply reimport the corresponding
source clips into the Media Pool and they will be automatically conformed to missing
clips with matching timecode and file names in the timeline (this only happens at the
time of import, it doesn’t work for matching clips that are already in the Media Pool).
Please note, this setting must be disabled if you use collaborative workflow.
If the “Auto conform clips with media added into Media Pool” setting is disabled in the
General Options panel of the Project Settings, then you’ll have to import the missing
clips and either manually reconform them one at a time to the missing timeline clips
using the Conform Lock with Media Pool Clip command, or use the Reconform From
Bin(s) command to try reconforming them all at once.
However you choose to reconform the missing clips, you won’t get the original remote grades
or manually edited metadata back unless you had previously exported the appropriate
metadata and grades, in which case you can reimport and apply these in separate steps.
587
Conforming aand Relinking Clips Part 5 – 34
Duplicate Clips are
Considered Separate Media
Another thing that’s good to understand is that in Resolve, duplicate clips are considered to
becompletely separate from the original Media Pool or Timeline clips you duplicated them
from. For example, if you import five clips into Media Pool Bin 1, then edit them into a timeline,
and then drag the five clips you edited into Media Pool Bin 2, the clips in Bin 1 are not
intrinsically linked to the clips in Bin 2.
This means, if you select the clips you originally imported in Bin 1 and choose Unlink Selected
Clips, the instances of those clips that you edited into the timeline will also be unlinked, but the
duplicate clips you created when you dragged the timeline clips into Bin 2 are completely
unaffected.
Summary of Methods for
Conforming and Relinking
As a result of timelines and clips being managed separately, there are several ways you can
reconform clips in a timeline to clips in the Media Pool, and clips in general to a project’s
corresponding source media on disk. Which methods will be most valuable depend entirely on
the workflow you’re using.
Conforming Clips During XML and AAF Import: When you import a project via AAF or
XML, you’re given the option of using the embedded file paths in the AAF or XML file to
import all referenced media into the Media Pool for automatic reconforming to the clips
in the imported timeline. If the media has been moved so that the file paths are invalid,
then you’ll be asked to find the location of the media as part of the import process. You
also have the option to ignore the AAF or XML file’s embedded file paths and instead
import another set of media files in a different location (and perhaps in a different media
format altogether) that have the same file names and timecode as the clips in the AAF
or XML file you’re importing.
Importing clips before importing an EDL, AAF, or XML: In EDL workflows, you must
import the media an EDL will be conformed to into the Media Pool before you import
the EDL. However, you can do this for AAF and XML import workflows as well. When
you import clips into the Media Pool before importing an AAF or XML, Resolve is able
to automatically reconform the clips in the imported timeline to those in the Media Pool
first, before next looking for media on disk for clips that could not be found in the Media
Pool. This behavior depends on what options you’ve selected in the Import AAF/EDL/
XML dialog.
Conform missing clips by importing their source media into the Media Pool: As long
as the “Auto conform clips with media added into Media Pool” setting is enabled in
the General Options panel of the Project Settings, DaVinci Resolve automatically tries
to update the conformed relationship between clips you’re adding to the Media Pool
and any missing clips in the various timelines of your project. This behavior is triggered
whenever you add clips to the Media Pool by importing clips, copying and pasting,
or creating duplicates of clips. For example, if a timeline clip is missing because there
is no corresponding clip in the Media Pool, the simple act of importing a clip with a
matching file name and timecode into the Media Pool will automatically reconform the
missing timeline clip without you needing to do anything else. Please note, the “Auto
conform clips with media added into Media Pool” setting must be disabled if you use
collaborative workflow.
588
Conforming aand Relinking Clips Part 5 – 34
Using the Import Additional Clips commands: The process of importing media just for
missing clips in a timeline can be automated by right-clicking that timeline in the Media
Pool and using the Timelines > Import > Additional Clips With Loose (or Tight) Filename
Match contextual menu commands, which automatically search the selected directory
tree of your file system for media that matches all of the offline clips in that timeline.
The “Loose Filename Match” command ignores file extensions (letting you conform
to alternate media formats), while the “Tight Filename Match” command requires file
extensions to match.
Reconform online clips by importing new media into the Media Pool: As long as
the “Auto conform clips with media added into Media Pool” setting is enabled in the
General Options panel of the Project Settings, DaVinci Resolve automatically tries to
update the conformed relationship between clips you’re adding to the Media Pool and
any clips in the various timelines of your project that have their Conform Lock Enabled
setting turned off. This behavior is triggered whenever you add clips to the Media Pool
by importing clips, copying and pasting clips, or creating duplicates of clips.
By default, each clip that’s part of an imported timeline, or that you’ve edited into a
brand new timeline, has Conform Lock Enabled turned on by default (unless the source
media goes missing). Conform Lock Enabled simply means that a particular clip in a
timeline is set to only consider the source clip in the Media Pool to which it’s currently
conformed as the correct match; all other clips in the Media Pool are ignored, even if
there are multiple clips with the same file name and overlapping timecode that would
make them also a valid match (such as when you have multiple copies of the same clip
that in different formats, or multiple versions of VFX clips with the same name and
timecode).
If you right-click a clip with multiple potential matches in the Media Pool in the timeline
and turn Conform Lock Enabled off, that clip will display a “clip conflict” error, with an
attention badge to the left of its name in the timeline. Double-clicking that badge
reveals a dialog showing you every clip in the Media Pool with a matching file name or
reel name and overlapping timecode, so that you can choose which Media Pool clip
you want to conform that timeline clip to.
Please note, the “Auto conform clips with media added into Media Pool” setting must
be disabled if you use collaborative workflow.
Using Conform Lock commands to force a timeline clip to conform itself to a clip
in the Media Pool: A manual command for conforming a selected clip in the timeline
with a selected clip in the Media Pool. Useful when none of the automated methods of
conforming work, for whatever reason.
Using the Relink command on clips or bins in the Media Pool: If you have a Resolve
project in which there are unlinked clips in the Media Pool, that means the relationship
between those clips and their corresponding source media files on disk have been
lost. In this case, you can use the Relink Selected Clips or Relink Clips in Selected Bins
commands to relink clips to the corresponding source media on whatever storage
volume it’s on. In the process, you’ll automatically relink any instances of those clips in
all timelines in which they appear in that project. You can relink only unlinked clips by
selecting them specifically, but you can also relink clips that are already linked if you
want to force relink them to different media files (Relink Clips in Selected Bins relinks
both unlinked and linked clips at once). The Relink command automatically searches all
subdirectories within the currently selected directory, which is useful if you’re relinking
to media that’s been moved to another location, and that may have a different directory
structure as a result. However, a warning about searching large SAN volumes – you
probably don’t want to use this command to choose a starting directory that’s too high
up the file path, as the resulting search times may be unexpectedly long.
589
Conforming aand Relinking Clips Part 5 – 34
Using the Change Source Folder command: You also have the option to relink offline
clips in the Media Pool using the Change Source Folder command, which changes
the directory structure of each selected clip’s file path into a new file path based on a
parent directory you select. This is mainly useful if you’re relinking clips to media that
you’ve moved to another location, but that uses the same subdirectory structure as
when the media was originally imported. For this reason, it’s a safe and fast command
to use when relinking to a structured collection of media on a SAN volume.
Using the Reconform From Bin(s) command: If you’ve imported multiple versions
of the same clips, with identical file names, overlapping timecode, or other matching
criteria into separate bins of the Media Pool, you can turn off Conform Lock Enabled
for every clip in a timeline you want to reconform, and then use the Reconform From
Bin(s) command to reconform those timeline clips to Media Pool clips in one or more
specific bins of your choosing. Reconform From Bin(s) also lets you choose the specific
conform criteria you want to use to match clips in the timeline with clips in the selected
bins. A key feature of this command is that DaVinci Resolve will only reconform timeline
clips that are able to be matched to media in the bins you’ve selected; timeline clips for
which no match can be found are are left as they were before you used this command.
Using the Reconform From Media Storage command: This command lets you
reconform timeline clips to clips in a selected directory in your file system that hasn’t
been imported into the Media Pool first, and also lets you choose the specific conform
criteria you want to use to match clips in the timeline with clips in the selected bins. A
key feature of this command is that Resolve will only reconform timeline clips that are
able to be matched to media within the directory structure you’ve selected; timeline clips
for which no match can be found are left as they were before you used this command.
Overwriting clips on disk that are linked to in a Resolve project: Last, but certainly not
least, Resolve is smart enough to automatically relink clips in the Media Pool that have
been overwritten on disk by another version of the same file, so long as the file name,
timecode, and reel name (if used) in the new version of the file still match.
The following sections illustrate each of these methods of conforming and relinking media in
more detail.
Unlinking Clips
You can also choose to unlink clips in the Media Pool. To do so, select the clip or clips you want
to unlink, right-click one of the selected clips, and choose Unlink Selected Clips from the
contextual menu.
Conforming Clips During
XML and AAF Import
For workflows where you’re importing AAF or XML projects, and relinking the resulting clips in
DaVinci Resolve to media files that are either on disk, or conforming them to clips that are in the
Media Pool already, the rules for how clip metadata is defined for reconforming depend on two
settings in the Load AAF or XML dialog: “Automatically Import source clips into media pool,” and
“Ignore file extensions when matching.”

590
Conforming aand Relinking Clips Part 5 – 34
The most important settings for conforming media in the Load dialog
The ways in which these two checkboxes interact to let you choose how media is conformed to
an imported AAF or XML file are complex, but here are the rules.
When Importing Clips With File Extensions
Matching Those in the AAF or XML File
Turn “Automatically Import” on and “Ignore file extensions” off.
This is the default setting, and is most useful when the AAF or XML file you’re importing
contains references to media you want to add to the Media Pool and use.
First, if there are already clips in the Media Pool, DaVinci Resolve tries to conform as
many of these clips as possible by matching the file paths in the AAF or XML file to the
stored file paths of each clip in the Media Pool.
Second, for all remaining clips not found, DaVinci Resolve imports as many clips as
possible into the Media Pool from any storage volumes that are visible to DaVinci
Resolve, using the file paths from the XML or AAF.
Third, for all remaining clips not found, DaVinci Resolvetries a clip namematch of clips
that are already in the Media Pool.
Fourth, for all remaining clips not found, DaVinci Resolve tries a timecode match (along
with a reel name match if this is enabled) of clips that are already in the Media Pool.
Finally, for all remaining clips not found, the user is prompted to manually choose
another folder to search.
When Importing Clips with Dierent File Extensions
Turn “Automatically Import” on and “Ignore file extensions” on.
Turning both of these options on is useful in situations where the sequence you’re importing
was originally edited using offline quality media, and you want to conform to high-quality online
media in a completely different format, possibly in the Media Pool, possibly on another disk.
One example of this is as when the edit was done using QuickTime or Avid DNxHD media, but
you’re reconforming to CinemaDNG files on another disk in order to grade the camera original
raw media. Leaving “Automatically Import source clips into media pool” on, in this case.
First, if there are already clips in the Media Pool, DaVinci Resolve tries to conform as
many of these clips as possible by matching clip names.
Second, for all remaining clips not found, the user is prompted to choose another folder
to search, and DaVinci Resolve imports as many clips as possible by matching clip
names, ignoring file extensions.
Third, for all remaining clips not found, DaVinci Resolve tries a timecode match (and reel
name match if this is enabled in the General Options panel of the Project Settings) of
clips that are already within the Media Pool.
Fourth, for all remaining clips not found, the user is prompted to manually choose
another folder to search.

591
Conforming aand Relinking Clips Part 5 – 34
Turn “Automatically Import” on and “Link to source camera files” on.
The “Link to source camera files” checkbox only appears when you import AAF files. Turning
this option on when automatically importing media relinks the imported project to the original
camera source files that are kept track of by Media Composer/Symphony via the “Source
Name” metadata within the AAF file.
When You’re Only Relinking to Clips Already In the Media Pool
Turn “Automatically Import” off.
Turning “Automatically Import source clips into media pool” off is useful in situations where you
only want to conform the imported AAF or XML to clips in the Media Pool. This is most useful in
situations where you’ve imported all of the camera original media into the Media Pool first, for
example when creating the dailies that were then edited, and you want to conform the imported
AAF or XML to the media that’s already there.
First, if there are already clips in the Media Pool, DaVinci Resolve tries to conform as
many of these clips as possible by matching the file paths in the XML or AAF to the file
paths stored for each clip in the Media Pool.
Second, for all remaining clips not found, DaVinci Resolve tries a clip name match of
clips that are already in the Media Pool.
Third, for all remaining clips not found, DaVinci Resolve tries a timecode match (and
reel name match if this is enabled) of clips that are already within the Media Pool. In this
case, the file name is not used.
Importing Clips Before Importing
anEDL, AAF, or XML
When you import media prior to importing an EDL, DaVinci Resolve follows a specific set of
rules to determine which Media Pool clips correspond to clips in the resulting timeline.
Theserules also apply to situations where you’ve imported media prior to importing an AAF or
XMLfile, in situations where you want to prioritize specific media over the file paths embedded
in those imported timeline formats.
The following sections go into detail on what these rules are, and how to use them to
youradvantage.
Beware When Choosing a Volume or Folder to Search
When prompted to choose a folder to search, you can optionally choose an entire
volume; DaVinci Resolve always searches through all subdirectories, and eventually all
media on that volume will be found. However, depending on the size and number of
files on the selected volume, this operation could take an unexpectedly long time,
especially on a SAN volume.
592
Conforming aand Relinking Clips Part 5 – 34
Essential Clip Metadata for Easy
Conforming and Relinking
When conforming projects in DaVinci Resolve, the accuracy and integrity of clip metadata is
critical for a successful result. Keep the following three criteria in mind when you’re preparing
media to use in DaVinci Resolve.
Accurate timecode: Essential for every clip. First off, each clip should have a valid
timecode track, and it should go without saying that the timecode should match the
same timecode used by all other instances of that media file in a particular project.
If there are problems with a clip’s timecode, DaVinci Resolve has tools you can use
to edit or offset timecode to account for known inconsistencies. By default, the
“UseTimecode” project setting is set to “Embedded in the Source Clip,” so that
timecode is read from the embedded timecode track within a QuickTime or MXF file,
or from the header data of a DPX frame file. However, you can also choose the “From
the source clip frame count” option which enables timecode to be read from the Source
clip’s frame count for image sequences.
File names: When “Assist using Reel Names” in the General Options panel of the
Project Settings is off (the default setting), this forces DaVinci Resolve to conform clips
using file names when importing XML and AAF projects. File names can only be only
used when conforming XML or AAF files, or when importing a DaVinci project; file
names are never used when conforming EDLs.
Reel Name: Only used for conforming if “Assist using Reel Names” is on in the
General Options panel of the Project Settings. Assigning reel names to your media
is not essential, but recommended, and can make media management easier for
certain operations, especially in EDL workflows. However, if you experience problems
conforming clips with “Assist using Reel Names” turned on, you should try turning it off
as one possible troubleshooting step.
How DaVinci Resolve matches media files to clips in an imported project depends on how
you’re importing the project.
Defining Clip Metadata When
Adding Media to the Media Pool
For workflows where you’re manually adding media files to the Media Pool when you’re editing
from scratch in DaVinci Resolve, preparing to process dailies, or as a separate step before
importing EDL, XML, or AAF project files and reconforming them to a higher-quality set of
media than what was originally used to edit with, the rules for how clip metadata is defined in
preparation for conforming are a bit different.
Timecode: Calculated using the “Timeline Frame Rate” setting in the Master Project
Settings panel of the Project Settings.
Reel Names: Determined depending on whether the “Assist using Reel Names from
the” checkbox is on or off in the General Options panel of the Project Settings, and on
which option you’ve selected. Reel names can be extracted dynamically, so any time
you change this setting the reel names in the Media Pool update to reflect the change,
or they can be defined manually, in which case you can set different clips to use
different methods of reel name extraction.
Clip Names: Read and stored, used for AAF and XML imports, but not used for
imported EDLs.
593
Conforming aand Relinking Clips Part 5 – 34
How Reel Names are Identified
The “Assist using Reel Names” checkbox in the General Options panel of the Project Settings is
an extremely important setting for controlling how the conform process works. By default, it’s
turned off, and Reel Names are left blank. This is fine for conform workflows where all you need
is the file path or file name and source timecode to successfully identify which media files
correspond to what clips. However, if you need more information than that to reconform the
clips in your project, you can turn on the “Assist using Reel Names” checkbox to enable DaVinci
Resolve to use one of four different methods to automatically define reel names for every clip in
the Media Pool.
Automatically Defining Reel Names
When you use the “Assist using Reel Names” options in the General Options panel of the
Project Settings, reel names are extracted dynamically. This means that any time you change
the method of reel name extraction in the Project Settings, the reel names of all clips in the
Media Pool automatically update to reflect the change. This can be seen in the Reel Name
column that’s visible if you put the Media Pool into List view. For example, were you to change
the “Assist using reel names” options from “Source clip file pathname” to “ “Mediapool folder
name,” the contents of the Reel Name column would visibly change. This is useful when you’re
importing a project for which all clips use the same method of determining their reel name.
Manually Choosing Reel Name Definitions For Individual Clips
You also have the option of manually choosing the criteria for how one or more selected clips in
the Media Pool have their Reel Names defined, using the Clip Attributes dialog. This is useful
when there are certain clips in a project that need to use a different method of reel name
extraction, or manually entered reel names.
To manually define Reel Names for one or more clips:
1 Select one or more clips in the Media Pool.
2 Right click one of the selected clips, and choose Clip Attributes from the
contextual menu.
3 Open the Reel Name panel of the Clip Attributes dialog, choose a new option,
and click OK.
Once you’ve used Clip Attributes to change the Reel Names of clips, those clips no longer
automatically update when you change the “Assist using Reel Names” options in the General
Options panel of the Project Settings. For more information on using Clip Attributes, see
Chapter 9, “Using Clip Metadata.”
Methods of Defining Reel Names
There are five options that are available for automatically determining how reel names are
extracted from the source media when “Assist using Reel Names” is turned on, and one option
in the Clip Attributes Reel Name panel for manually defining reel names. The use of reel names
is critical in EDL and AAF workflows, but isn’t necessarily as important in XML-centric workflows.
Source clip file pathname: Obtains the reel name by extracting it from each media
file’s path. This makes it possible to extract a reel name from all or part of the file name,
or from all or part of the name of any folder in the path that encloses that file. This
extraction is defined using the Pattern field.
Pattern: A code that defines how a reel name should be extracted from the source clip
pathname. More information about creating patters appears later in this chapter.

594
Conforming aand Relinking Clips Part 5 – 34
Media Pool folder name: The reel name is obtained from the name of the bin in the
Media Pool that encloses that clip. For example, in a stereoscopic workflow you might
want to export offline stereo media with the “Left” and “Right” bin names in which
they’re organized as reel names. Another example would be organizing VFX being
incrementally processed in individually named bins, such as “VFX_Tuesday_10-12.”
Embedding in Source clip file: Useful for file formats where the reel name is
embedded within the media file itself. CinemaDNG and other digital cinema cameras,
QuickTime files created by Final Cut Pro, and DPX frame files are formats that can
contain reel name header data.
Source clip filename: If there is no defined reel number, often it’s easy to just use the
Source clip filename.
User Defined: This option is only available when you manually alter the Reel Name for
one or more selected clips in the Media Pool using the Clip Attributes dialog. Choosing
User Defined lets you type any string of text you like to use as the reel name.
An additional checkbox is available, “Extract reel names from EDL comments,” which is
primarily useful for legacy workflows in which you conform an EDL exported from Final
Cut Pro 7 to camera original R3D media.
Extract reel names from EDL comments: Some media file formats, such as R3D, have
reel names, obtained from the file names, that are longer than the eight characters
that are allowable in a standard EDL. This option allows DaVinci Resolve to extract reel
names from appropriately formatted EDL comments, such as those output from Final
Cut Pro 7.
Using the Pattern Field
If you’re using the Pattern option to extract the reel name from a clip’s source file pathname, you
have the option to create your own search pattern, enabling you to have DaVinci Resolve
extract the reel name in highly specific ways to accommodate more exotic workflows.
Extraction patterns are interpreted from right to left, deciphering each clip’s file path element by
element starting with the file name, and then considering each enclosing directory’s name to
the left. Each extraction pattern consists of a series of text characters and “wild card” operators
in unique combinations corresponding to the length and names used in the file path.
Here are a series of search characters that may be used.
Extraction Pattern Operators
?
Looks for matches of any single character. Add as many question marks as there are
characters you want to match. ?? matches two characters such as 02, ???? matches
four characters such as 0002.
*A wildcard that creates matches for any sequence of zero or more characters.
%R Specifies the reel name’s actual location. Reel names may contain any character,
butshould not contain a directory separator (forward slash).
%_R Extracts the reel name and strips out the R3D file name underscores found in EDLs
from Final Cut Pro 7 or earlier.
%D Matches any directory name or file name. When this is the last operator in a pattern,
donot add a forward slash.
/Used to separate any two operators
If you’re trying to create a new extraction pattern for a unique workflow, there’s a test dialog
you can use to try different patterns out before applying them to your project.
595
Conforming aand Relinking Clips Part 5 – 34
To test the extraction path:
1 Turn on “Assist using reel names from the” and click the Test button next to the
current Pattern in the General Options panel of the Project Settings. The “Specify Reel
Extraction Pattern” dialog opens.
2 Type the extraction patten you want to test into the Pattern field.
3 Using whatever method you prefer, find the file path of the media file that you want to
test the extraction pattern on, and copy or type it into the Sample Path field.
4 Click TEST.
5 If the reel name that appears below is correct, then click Apply to copy the extraction
pattern into the Pattern field of the General Options panel of the Project Settings. If the
reel name that appears is not correct, modify the extraction pattern and try again.
Examples of Reel Name Extraction Patterns
To better understand how this process works, below are several examples showing the various
methods of reel name extractions. The / is used as the separator between control parameters.
Example 1:
This example shows the reel name stored within the parent folder name of the clip.
Pattern: */%R/%D
File path: vol0/MyMovie/Scans/004B/Frame[1000-2000].dpx
Reel Name: 004B
Parsing takes place from right to left so to analyze this pattern start at the right end. In
this case the %D matches to the file name “FrameNNNN.dpx” where NNNN is the frame
number in each file of the clip. Moving left of the file name, the /%R/ section of the
string is next. This specifies that the reel name will be the entire name of the parent
directory immediately above the file. Then the * at the beginning of the string says
match any pathname in front of the directory name that has the reel name. This string
would find the parent directory regardless of how many levels deep it is nested on the
directory path.
Example 2:
Here we see the reel name stored in the parent folder name of the clip and prefixed
with the reel name.
Pattern: */????%R/%D or alternatively */Reel%R/%D
File path: /vol0/MyMovie/Scans/Reel1234/Frame[1000-2000].dpx
Reel Name: 1234
In this example both of these extraction patterns produce the same result. They are
also similar to the first example. The reel name is still in the parent directory name but
in this case it will have the fixed characters “Reel” prefixed in front of the reel name.
The first pattern with ???? would actually match with any 4 character in front of the reel
name. The second pattern is more specific and would only match the word “Reel” in the
directory name.
Example 3:
This example shows the reel name stored within the parent folder name two directory
levels up.
Pattern: */%R/%D/%D
File path: /vol0/MyMovie/Scans/004B/134500-135000/Frame[1000-2000].dpx
Reel Name: 004B
596
Conforming aand Relinking Clips Part 5 – 34
This example is again similar to Example 1. The difference is that in Example 3, the reel
name is the directory name two levels above the clip. In Example 1, the reel name was
in the directory name only one level up.
Example 4:
Finally, we see the reel name that is embedded within the clip name of the material.
Pattern: */Reel%R_*
File path: /vol0/MyMovie/Scans/Reel004B_[1000-2000].dpx
Reel Name: 004B
This example shows a method for extracting the reel name from the file name of the clip. Again,
starting at the right the two pattern characters “_*” match any series of characters up to the first
underscore character. In this case it will pick up the file extension (.dpx) and the frame number
portion of the file name. Next, the “/Reel%R” characters indicate the reel name is the characters
between the ‘/Reel” and _ character. The * at the beginning of the pattern will match a file path
any number of directories deep in front of the file name.
Conform Missing Clips by
Importing Their Source Media
If you have a timeline with one or more missing clips, that means that the relationship between
that clip in the timeline and the Media Pool has been lost because there is no corresponding
clip in the Media Pool. If you decide to manually import clips into the Media Pool that
correspond to missing clips, the “Auto conform clips with media added into Media Pool”
checkbox in the General Options panel of the Project Settings determines what happens.
Please note, the “Auto conform clips with media added into Media Pool” setting must be
disabled if you use collaborative workflow
As long as the “Auto conform clips with media added into Media Pool” setting is enabled in the
General Options panel of the Project Settings, DaVinci Resolve automatically updates the
conformed relationship between clips that you add to the Media Pool and missing clips in the
various timelines of your project. DaVinci Resolve also updates the conform relationship of all
other timeline clips that have Conform Lock Enabled turned off at this time as well. All of this is
done at the time you import the clips.
However, if “Auto conform clips with media added into Media Pool” is turned off when you
import additional clips into the Media Pool, then DaVinci Resolve will not attempt to reconform
anything automatically, instead relying on you to reconform offline or missing clips manually
using one of the many methods of manual reconforming that are available such as Reconform
From Bins or Conform Lock With Media Pool Clip.
For more information about manually adding clips to the Media Pool, see Chapter 8, “Adding
and Organizing Media with the Media Pool.”
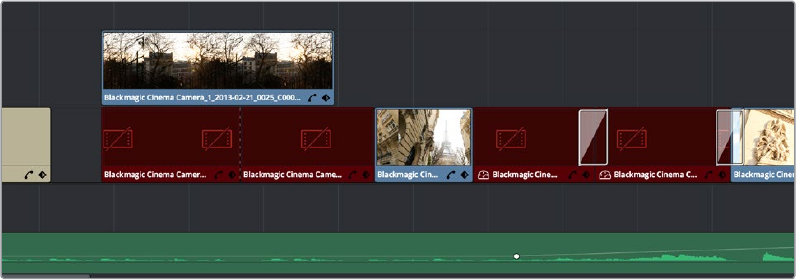
597
Conforming aand Relinking Clips Part 5 – 34
Using the Import Additional
ClipsCommand
If you find that there are a lot of missing clips in a timeline that have no corresponding Media
Pool clips, there’s an easy way to fix this, that automates the process of gathering a list of what’s
missing so as to import all missing clips and conform them at once. This only works for missing
clips, it does not work for unlinked clips (for which you should use the Relink command in the
Media Pool).
Conformed Timeline showing missing clips
To import missing clips and reconform them to the Timeline:
1 In the Edit page, right-click a timeline in the Media Pool that has missing clips, and
choose one of the following commands from the Timelines > Import submenu:
Timelines > Import > Additional Clips With Loose Filename Match: Searches the
Timeline for all missing clips, and prompts you to specify a directory of media with
which to attempt to conform them, adding only the media that’s necessary to the
Media Pool. The “Loose Filename Match” command ignores file extensions, which
lets you replace offline media with online media in a different format.
Timelines > Import > Additional Clips With Tight Filename Match: Searches the
Timeline for all missing clips, and prompts you to specify a directory of media with
which to attempt to conform them, adding only the media that’s necessary to the
Media Pool. The “Tight Filename Match” command searches only for media with
identical file extensions.
2 Choose the directory with the remaining media to be conformed in the dialog that
appears, and click OK.
If the conditions are met for matching the media files in the directory you selected to
the missing clips in the current Timeline, then the necessary clips are automatically
added to the Media Pool and conformed to the timeline.

598
Conforming aand Relinking Clips Part 5 – 34
Using Conform Lock As a Command
If, for whatever reason, an unlinked clip in a timeline simply won’t conform to a clip in the Media
Pool, even when you know it’s there, you can use one of two “Conform Lock” commands to
force a clip in the Timeline to conform to a clip in the Media Pool of your choosing. The two
commands are “Conform Lock with Media Pool Clip” and “Conform Lock To Selected Clip In
Timeline.” Which one appears depends on whether you right-click a clip in the Timeline or in
the Media Pool, but they both do exactly the same thing.
These commands automatically suspend the Conform Lock Enabled setting of a target clip, and
ignore file names and reel names in favor of conforming the target clip to another clip that
you’ve manually selected, while timecode is still used to align the clip being conformed with the
clip that was in the timeline originally.
To conform lock a clip in the Timeline to another clip in the Media Pool:
1 Select a clip in the Media Pool. The clip you select in the Media Pool must be equal in
length or longer than the clip you select in the Timeline for Force Reconform to work.
2 Right-click an unconformed clip in the Timeline, and choose “Conform Lock with Media
Pool Clip” from the contextual menu. The selected clip in the Timeline is conformed to
the clip you selected in the Media Pool in one of two ways:
If the selected Media Pool clip has timecode matching the selected Timeline clip:
The new clip is perfectly conformed to match the original clip.
If the selected Media Pool clip doesn’t have timecode matching the selected
Timeline clip: The new clip is conformed such that the first frame of the Media
Pool clip is aligned with the first frame of the reconformed clip in the Timeline, and
occupies the same duration.
3 If you right-click that clip again, you’ll see that Conform Lock Enabled is enabled,
showing you that the clip has been conform locked to media for which it wasn’t
originally a match.
Relinking Clips to Media Files on Disk
The easiest and best known method of relinking clips in your project that have either gone
offline or are not linked to the correct set of media files on disk is to use the appropriately
named “Relink selected clips” command. Note, the Relink command will only work for clips that
are unlinked, it will not work for clips that are missing and so have no corresponding clips in the
Media Pool.
The Relink command is the most flexible method of relinking clips in the Media Pool of your
project with clips in a file system directory of your choice, using file name and timecode as the
primary criteria for re-creating the correspondence between each clip and its corresponding
media file on disk. This is a good command to use to relink media that’s been moved to another
location or reorganized using another file structure on disk.
TIP: You can also select an unconformed clip in the Timeline and then right-click a clip
in the Media Pool and choose “Conform Lock To Selected Clip In Timeline” from the
contextual menu to do the same thing.
599
Conforming aand Relinking Clips Part 5 – 34
To relink selected clips:
1 Select one or more offline clips to relink, or select a bin in the Media Pool bin list
that contains clips you want to relink, then right-click one of the selected clips or the
selected bin, and choose “Relink Selected Clips” from the contextual menu.
2 When the Relink File dialog opens, choose a directory in which to look for the files
you want to relink to, and click OK. DaVinci Resolve attempts to find every clip with a
matching file name in the subdirectories of the directory you chose, using the original
file paths of the clips being relinked to do this as quickly as possible. By first looking for
the clips in the directories they were originally in, relinking can be quite fast.
3 If there are any clips that couldn’t be found using the method in step 2, you’re prompted
with the option to do a “deep search” by a second dialog. If you click Yes, then DaVinci
Resolve will look for each clip inside every subdirectory of the directory you selected in
step 2. This may take significantly longer, but should be completely successful so long
as the media that’s required is within the selected directory structure.
4 If there are still other clips that couldn’t be found, you’re prompted to either choose
another directory altogether to continue searching, or quit.
Using “Change Source Folder”
to Relink Clips
If you’ve used your file system to move media that’s associated with a DaVinci Resolve project,
but you haven’t changed the directory structure with which it’s organized, you can use the
“Change Source Folder” command to quickly relink selected clips in the Media Pool to the new
file path of the media on disk, using the original file paths as a guide. This is a good relinking
method to use, if possible, for projects on a SAN where you don’t want to risk the excessively
long search times that could result from using the Relink command to examine a nested
hierarchy of folders in a more flexible way.
To relink your Media Pool clips to a new location:
1 Select one or more clips in the Media Pool, then right-click one of the selected clips,
and choose “Change Source Folder” from the contextual menu. The Relink Media
window appears displaying the original path for the material, with controls for choosing
a new directory.
2 Click the “…” button to the right of the “Change To” field, and then use the file
navigation dialog to find the new location of the media file, select it, and click Open.
3 If you succeeded in finding the appropriate media file, click Change. Otherwise,
click Cancel.
Using the “Reconform From Bins”
Command
The “Reconform From Bins” command gives you a way of reconforming multiple clips in a
timeline at once to a specific bin (or bins) of clips with matching metadata. To use this command,
you must first select the clips you want to reconform in a timeline (you can choose all of them or
just a subset) and turn off Conform Lock Enabled, and then, using the Reconform From Bin
command, you can manually choose another bin of clips in the Media Pool that you want to
reconform to.
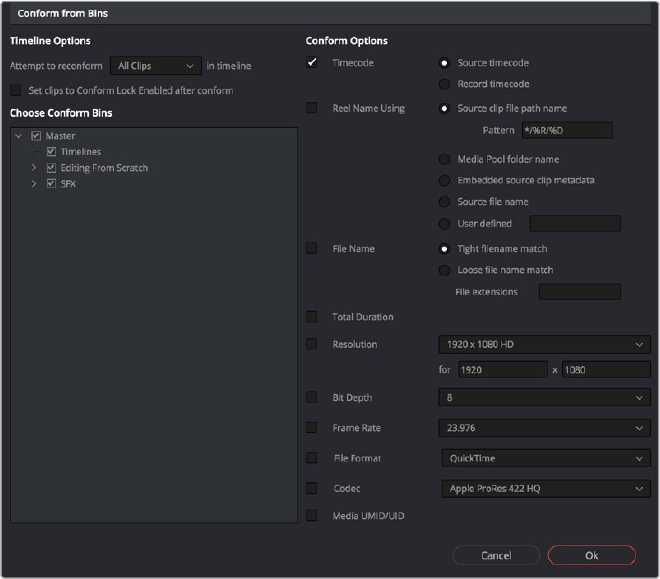
600
Conforming aand Relinking Clips Part 5 – 34
An important aspect of the Reconform From Bins command is that DaVinci Resolve only
reconforms timeline clips that can be matched to source clips in selected Media Pool bins. All
timeline clips that cannot be matched are left alone. This makes Reconform From Bins an ideal
command to use when you’ve imported a subset of clips to the Media Pool that you need to
reconform to clips found throughout an existing timeline.
For example, you could use this method to:
Replace transcoded versions of clips in a timeline with the original camera raw clips.
Replace the previous versions of VFX clips in a timeline with new versions.
Replace the offline-quality media you’ve been working with so far with online-
quality media.
Replace the temp clips you were originally given with rescanned or recaptured
stock footage.
To use Reconform From Bins, it’s important to organize the clips you’re adding to the Media
Pool sensibly, in a self-contained bin or bins separate from the other media used by that
timeline. It can be a sub-bin, but it must be separate.
Here’s a simple example. If the media you edited or originally imported is in Bin 1, then import
the updated versions of all clips that need to be reconformed into Bin 2. Using Reconform From
Bins, you can then decide whether the clips in your timeline should be conformed to Bin 1, or
Bin 2 when possible, because only timeline clips for which there is a valid match are
reconformed, while all other timeline clips are ignored.
DaVinci Resolve 14 introduces the ability to choose custom conform options to control what
metadata is used to match timeline clips to source clips in the Media Pool. This means that
you’re not restricted to only using Timecode, Reel Name, and File Name, you could also use any
combination of Total Duration, Resolution, Bit Depth, Frame Rate, File Format, Codec, and/or
Media UMID/UID to control how clips are conformed, depending on your needs and the
problem you have to solve.
The Reconform from Bins dialog
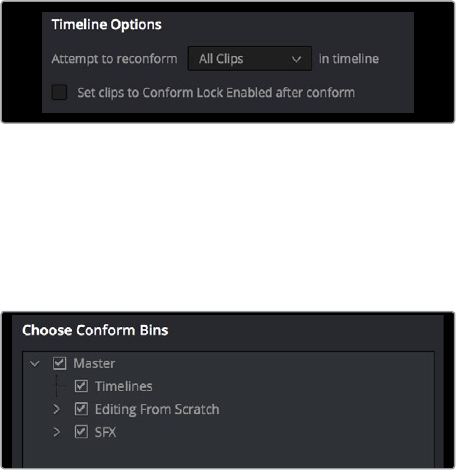
601
Conforming aand Relinking Clips Part 5 – 34
However, if the criteria you’ve selected to control the conform doesn’t match, the Reconform
From Bins operation will fail, and you’ll need to either try again with other conform criteria, or
manually replace the necessary clips in the Timeline.
Here’s a step by step workflow.
To reconform a timeline to clips within a specific Media Pool bin:
1 Double-click the Timeline you want to reconform to open it.
2 Either select the specific clips you want to reconform, or press Command-A to select
every clip in the Timeline if you want to reconform clips throughout the entire timeline
without having to make individual selections.
3 Right-click one of the selected clips, and choose “Conform Lock Enabled” to disable
Conform Lock Enabled for the clips you want to reconform. This frees DaVinci Resolve
to consider all possible conform matches for those clips in cases where there may be
multiple clips with overlapping timecode in the Media Pool.
4 Right-click the current Timeline in the Media Pool, and choose Timelines > Reconform
From Bins. The Conform Options dialog appears, with Timeline Options and Choose
Conform Bins list to the left, and the Conform Options panel to the right.
5 From the Timeline Options section, choose whether you want to conform to All Clips
or just to Selected Clips. Then, choose whether you want to “Set clips to Conform Lock
Enabled” after conform.
Choosing which clips in the Timeline to attempt to reconform
6 In the Choose Conform Bins section, click the disclosure triangle to the left of the
Master bin to reveal the sub-bins contained within.
7 Turn on the checkboxes for the bins with media you want to conform the Timeline to,
and turn off the checkboxes for bins with media that you want to ignore.
Selecting folders for reconform
8 Next, choose the conform options you want to be considered when matching timeline
clips to Media Pool clips in the selected bins. By default, Timecode is enabled.
Choose additional criteria to be even more selective about how you want clips to be
reconformed, or choose different criteria if you need to use other metadata to get
better results for clips you’re having a hard time conforming.
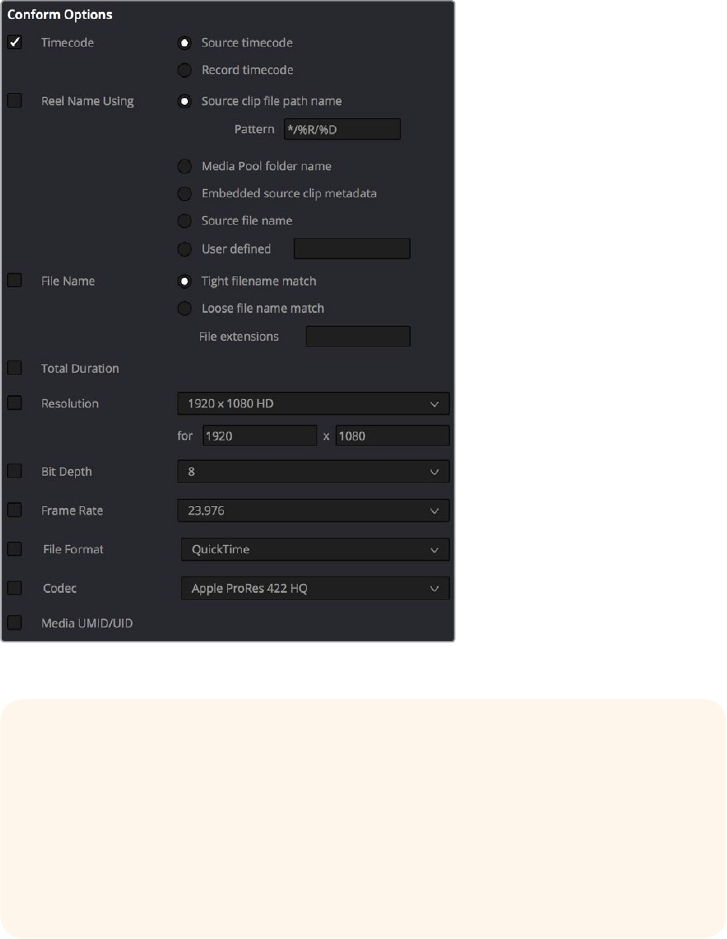
602
Conforming aand Relinking Clips Part 5 – 34
Selecting criteria to guide the reconform
9 Click OK. Where possible, the Timeline is automatically updated to conform to the
media contained within the bins you checked.
10 After you’ve used “Reconform From Bins,” any timeline clips that have been
reconformed and that now have timecode and reel names/file names that match two
or more source clips in the Media Pool will display a clip conflict badge in the Timeline.
To eliminate this badge, you can select either just the clips that were conformed, or all
clips in the Timeline, right-click them, and choose Conform Lock Enabled to eliminate
these warnings.
TIP: Choosing Custom from the top of the pop-up menu for File Extensions,
File Format, and Codec displays editable fields into which you can enter
multiple options, separated by commas, in order to list multiple possibilities for
a successful match. The order in which you enter these is important, as
DaVinci Resolve will attempt to conform clips starting with the first format/
codec at the left, moving to try the next format/codec to the right if no match is
found, until every entry in your list has been tried.
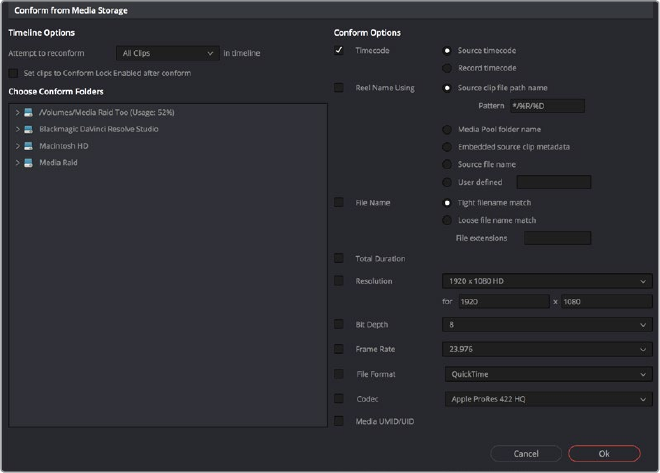
603
Conforming aand Relinking Clips Part 5 – 34
Using Reconform From Media Storage
DaVinci Resolve 14 introduces another reconform method, that lets you conform clips in a
timeline to clips in a specific File System directory (including all subdirectories) using the
“Reconform From Media Storage Folders” command. This allows you to reconform multiple clips
in a timeline, all at once, to matching source media files on disk without having to import those
clips to the Media Pool first; all clips that can be conformed according to the specified conform
criteria will be automatically imported as necessary.
An important aspect of the Reconform From Media Storage command is that DaVinci Resolve
will reconform all timeline clips that can be matched to source media files on disk in the
selected Media Storage directories, but all Timeline clips that cannot be matched are left alone.
This makes Reconform From Media Storage an ideal command to use in the following situations:
When you need to reconform clips that are found throughout an existing timeline to a
smaller subset of media in a specific directory on disk, such as updated VFX or Motion
Graphics from a third-party application.
When you need to quickly reconform missing timeline clips throughout an imported
timeline, and especially when you need to use custom conform criteria to successfully
reconform those clips. (Unlinked clips can only be reconformed this command if you
select them and turn off Conform Lock Enabled first.)
Similar to the Reconform From Bins command, you can specify exactly what combination of
conform criteria you want to use to match clips in the timeline with clips in the Media Pool. This
means that you’re not restricted to only using Timecode, Reel Name, and File Name, you could
also use any combination of Total Duration, Resolution, Bit Depth, Frame Rate, File Format,
Codec, and/or Media UMID/UID to control how clips are conformed, depending on your needs
and the problem you have to solve.
The Reconform From Media Storage dialog
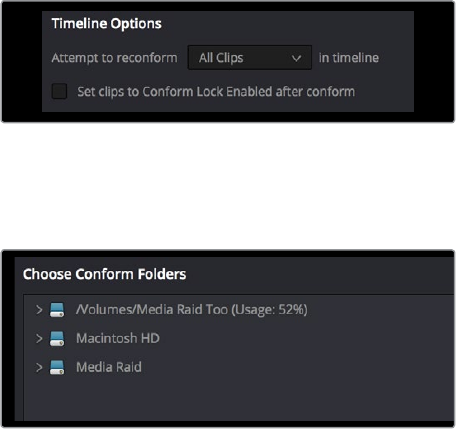
604
Conforming aand Relinking Clips Part 5 – 34
This method of timeline conform is ideal when the only way you can conform a timeline to the
media you require is using a very specific combination of metadata that’s different from the
rules that DaVinci Resolve defaults to. For example, you have a jumbled mix of 8 and 10-bit
versions of the same clips on your hard drive, but you only want to conform a given timeline to
the 10-bit media in preparation for finishing. Using “Reconform from media storage folders” lets
you be this specific with what media to use.
To use Reconform from media storage folders to reconform a timeline:
1 Double-click the Timeline you want to reconform to open it.
2 Either select the specific clips you want to reconform, or press Command-A to select
every clip in the Timeline if you want to reconform clips throughout the entire timeline
without having to make individual selections.
3 Right-click one of the selected clips, and choose “Conform Lock Enabled” to disable
Conform Lock Enabled for the clips you want to reconform. This frees DaVinci Resolve
to consider all possible conform matches for those clips in cases where there may be
multiple clips with overlapping timecode in the Media Pool.
4 Right-click the timeline you want to reconform, and choose Timelines > Reconform from
media storage folders. The Import From dialog appears, with a File System browser to
the left, and an Options panel to the right.
5 From the Timeline Options section, choose whether you want to conform to All Clips
or just to Selected Clips. Then, choose whether you want to “Set clips to Conform Lock
Enabled” after conform.
Choosing which clips in the Timeline to attempt to reconform
6 From the Conform Folders section, choose a directory that contains media you want to
reconform to.
Selecting a directory that has media you want to conform to
7 Next, choose the conform options you want to be considered when matching
timeline clips to source media files in the selected directory. By default, Timecode is
enabled. Choose additional criteria to be even more selective about which clips will
be reconformed, or choose different criteria if you need to use other metadata to get
better results.

605
Conforming aand Relinking Clips Part 5 – 34
Selecting criteria to guide the reconform
8 Click OK. Where possible, the Timeline is automatically updated to conform to the
media in the directory you selected, and all source media files that were conformed
have been imported into the Media Pool.
9 After you’ve used “Reconform From Media Storage Folders,” any timeline clips that
have been reconformed and that now have timecode and reel names/file names that
match two or more source clips in the Media Pool will display a clip conflict badge in
the Timeline. To eliminate this badge, you can select either just the clips that were
conformed, or all clips in the Timeline, right-click them, and choose Conform Lock
Enabled to eliminate these warnings..
TIP: Choosing Custom from the top of the pop-up menu for File Extensions,
File Format, and Codec displays editable fields into which you can enter
multiple options, separated by commas, in order to list multiple possibilities for
a successful match. The order in which you enter these is important, as
DaVinci Resolve will attempt to conform clips starting with the first format/
codec at the left, moving to try the next format/codec to the right if no match is
found, until every entry in your list has been tried.
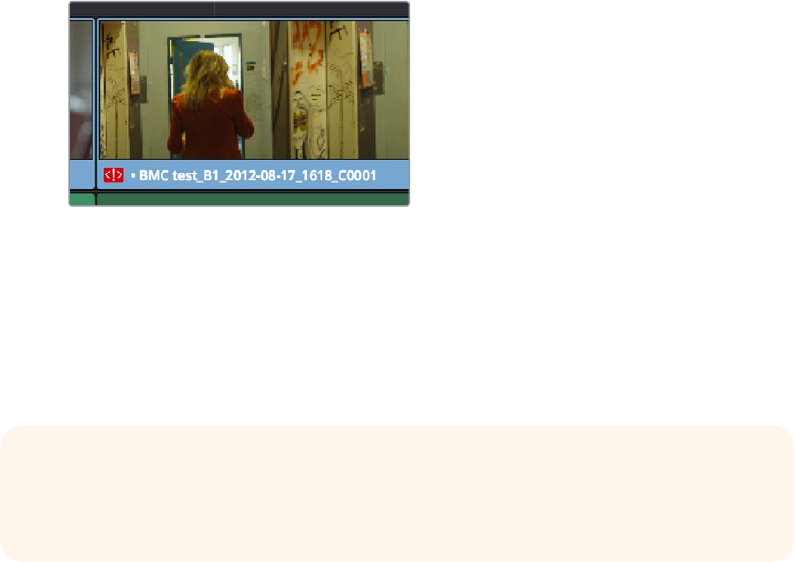
606
Conforming aand Relinking Clips Part 5 – 34
Understanding, Fixing, and
Using Reel Conflicts
As long as the “Auto conform clips with media added into Media Pool” setting is enabled in the
General Options panel of the Project Settings, the same dynamic relationship between clips in
the Media Pool and those in a timeline are maintained whether clips are linked or unlinked, it
makes no difference. However, this does mean that if you have two different versions of the
same clip in the Media Pool, or even two completely different clips that share the same file
name (or reel name) and the same overlapping timecode, then DaVinci Resolve is capable of
automatically conforming to either clip.
A good example of this is if you have both the camera raw version of a clip, and a ProRes or
MXF transcoded version imported into the Media Pool at the same time. Both clips have the
same content, the same file name, and the same range of frames. This poses the potential for
what DaVinci Resolve refers to as a “clip conflict.”
You won’t necessarily notice this at first because, by default, all clips that are imported with a
timeline, or that you’ve edited into a brand new timeline, have a Conform Lock Enabled setting
enabled by default. All clips in a timeline with Conform Lock Enabled turned on only consider
the current clip in the Media Pool to which they’re conformed as the valid clip; all other clips with
file names and overlapping timecode that would otherwise make them an otherwise valid
match are ignored.
However, if you right-click such a clip in the Timeline and turn Conform Lock Enabled off, that
clip will display a “clip conflict” error, with an “attention” badge to the left of its name in
the Timeline.
Conflict icon indicating at least two clips have
matching conform parameters
Clip conflicts are typically considered to be an error, but not always. They can be a problem if
the media you’ve imported along with an imported project from another application has media
that was added with timecode but no reel identifier (for example, when shots from multiple
unidentified reels that all start at 0 hour). The thing is, you may not immediately notice such clip
conflicts, until you turn Conform Lock Enabled off.
TIP: Overlapping timecode often occurs in the normal course of work, but should be
managed by altering each clip’s embedded reel name, or by organizing media in
different bins.
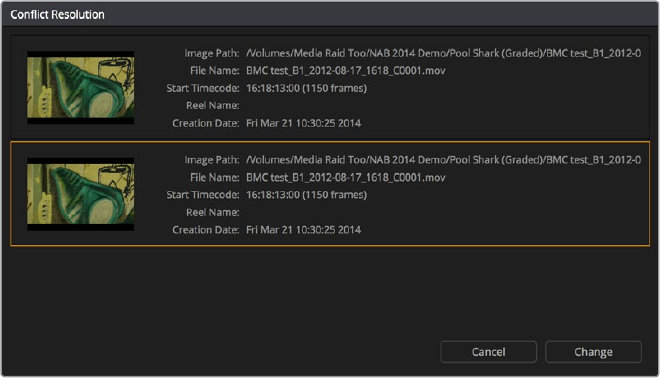
607
Conforming aand Relinking Clips Part 5 – 34
Using Clip Conflicts as a Conform Tool
On the other hand, clip conflicts can often be desirable solutions to workflows where you need
to switch among different versions of a particular clip. To take the example of an edited timeline
consisting of transcoded QuickTime versions of camera raw original media, if you only had the
transcoded clips in the Media Pool, then all is well.
However, suppose in the course of working that you decide you need the resolution or
additional color latitude of the camera raw version of a particular clip. If you import the camera
raw version of that one clip, you should notice nothing different. However, if you then right-click
that clip in the Timeline and choose Conform Lock Enabled to uncheck the setting and turn it
off, you should then see the attention badge to the left of the clip name in the Timeline. This lets
you know that this clip in the Timeline is correctly seeing the relationship between it and the
now two simultaneously named clips with timecode overlap in the Media Pool.
The current relationship between this timeline clip and the one to which it is conformed doesn’t
change; this badge is only letting you know that now there is a second clip in the Media Pool to
which you could potentially conform this clip in the Timeline. Now, you need only choose which
one by double-clicking the clip conflict badge, and following the procedure below.
Resolving Clip Conflicts
Once you have a clip conflict, whether intentional or not, it’s really easy to resolve it. In fact, this
feature is the very basis for the name of the software.
To resolve a reel conflict by relinking a clip’s media:
1 Double-click the “attention” badge of any clip in the Timeline, displayed to the left of
that clip’s name.
The Conflict Resolution window appears, showing a list of all files in the Media Pool, of
any format, that have identical file names (or reel names) and timecode that overlaps
with the clip you right-clicked. Each item in this list shows a thumbnail of the clip, the file
path of the media on disk, the file name, starting timecode, reel name (if any), and
creation date, to help you determine which of the clips in that list is the one you
want to use.
Conflict Resolution window showing what other clips have overlapping timecode and reel information
2 Click the entry in the list that you want to conform to, and click Apply. The clip in the
Timeline changes to reflect the media you selected, and the “attention” icon is replaced
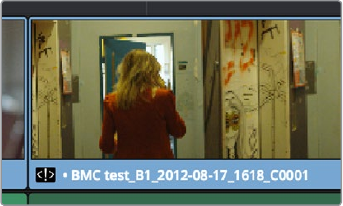
608
Conforming aand Relinking Clips Part 5 – 34
with a “resolved” badge indicating that the conflict has been resolved. Keep in mind
that you can always double-click the “resolved” badge to change which Media Pool clip
you want to conform to. It remains a dynamic relationship.
A clip badge showing that the conflict was resolved
Re-editing Media Directly to the Timeline
If, for whatever reason, none of the above methods of relinking or reconforming have worked,
sometimes the only thing left to do is to replace the problem clip in your timeline with a different
clip. For example, you may need to replace an old version of an effects shot with a newer one,
or or you need to replace an offline version of a stock footage shot with a higher quality one,
and the problem is that you’ve got a mismatched filename and/or timecode, no reel name, and
the files are completely different formats, frame sizes, and durations.
In this case, it’s a good thing that DaVinci Resolve has such good editing tools. For more
information on editing, see Chapters 14 through 26. When fixing conform problems via manual
editing, the Replace edit is your special friend. For example, you could use a replace edit to
match a new incoming clip’s timing to the old one. Or you could use a three-point edit, a
place-on-top edit, or even a simple drag and drop edit to put the new clip into the Timeline to
take the place of the old one. For specific information on the different edit types in DaVinci
Resolve, see Chapter 17, “Editing Basics.”
How Grades are Linked
to Multiple Timelines
If you’ve set your project up to use Remote versions, then any clips that refer to the same file in
the Media Pool are linked and share the same Remote versions of grades that are applied to
them. For example, two clips that are close-ups from the same take refer to the same media file,
so they’re both automatically linked to one another and share the same remote grades.
Clips using Remote versions also exhibit this behavior when they appear in multiple timelines.
Clips using Remote versions that are located in different timelines, but that refer to the same file
in the Media Pool, are linked and share the same remote versions of grades. This is why you
can grade one timeline, and then import a re-edited version via EDL, AAF, or XML, and have the
new timeline automatically inherit all grades from the previous timeline.
However, you can override this behavior to have one timeline that’s independently graded from
the others. Simply select that timeline, open the Color page, right-click any clip in the Thumbnail
timeline, and choose Copy Remote Grades to Local from the contextual menu. All grades are
copied to Local versions, and from that point on all changes you make to grades in that timeline
have no effect on the other timelines in your project.
For more information about Local and Remote versions, see Chapter 48, “Grade Management.”
610
Creating Digital Dailies for Round Trip Workflows Part 5 – 35
Creating Digital Dailies for
Round Trip Workflows
DaVinci Resolve can be used to create media for editors to use in other applications in
situations where those applications are unable to import a given project format but DaVinci
Resolve can. In the process, you can use DaVinci Resolve’s many organizational, effects, and
grading capabilities to create media that’s a pleasure to edit with, normalizing log-encoded
media, syncing dual-source audio in a variety of ways, and doing some fast (or not-so-fast)
grading to make sure that the media being edited looks its best.
Furthermore, once you’ve created a project to accomplish these tasks, you’ve also given
yourself a jump-start on reconforming the project should your workflow be to move the edited
project back into DaVinci Resolve for editing and finishing. This chapter covers a workflow for
importing, preparing, and outputting media for these situations.
Step 1—Ingest Media and Add/Edit Metadata 611
Step 2—Sync Audio to the Dailies 612
Step 3—Do Whatever Grading is Necessary 613
Step 4—Export Media Suitable for Editing 615
Step 5—Reconform Media to an EDL, AAF, or XML Project File 616
Step 6—Output Final Media for Finishing 616
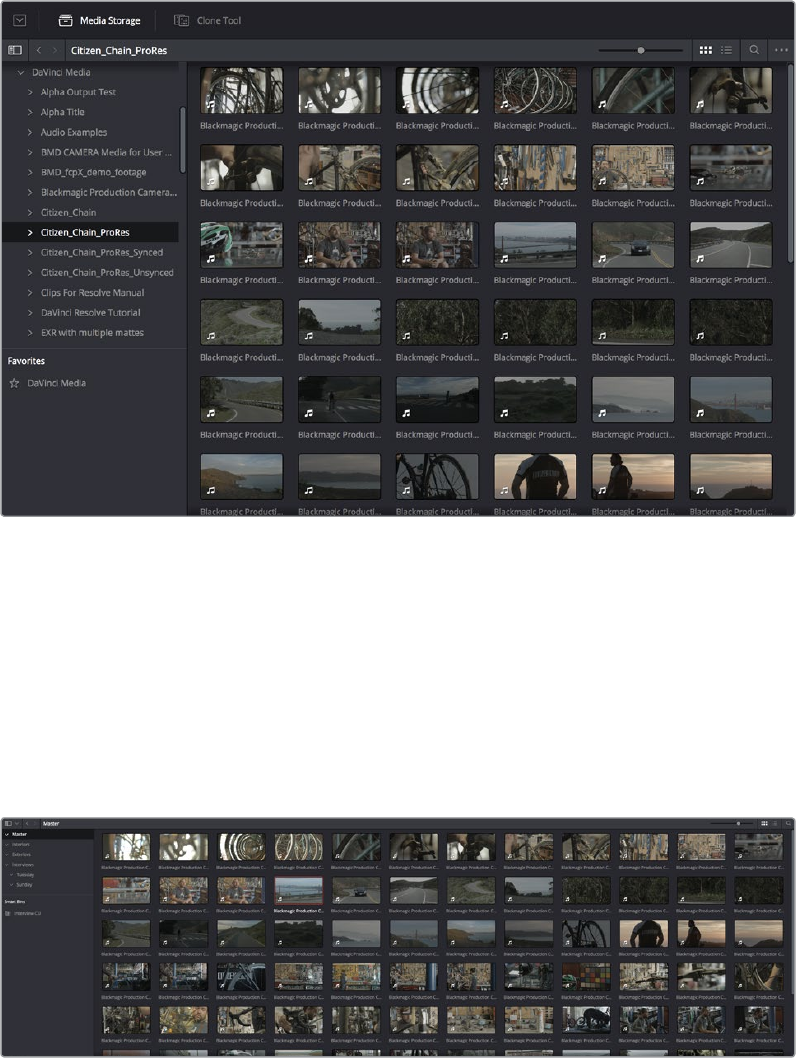
611
Creating Digital Dailies for Round Trip Workflows Part 5 – 35
Step 1—Ingest Media and Add/Edit Metadata
It’s not necessary to have a project file exported from an NLE to start working in Resolve. Using
the Media Storage browser on the Media page, you can access any volume that’s currently
available to the system, and import any compatible media format into the Media Pool.
Media Storage browser with scrubbable clip thumbnails
The Media Pool is DaVinci Resolve’s internal database of available media for the currently open
project. If you like, clips in the Media Pool can be organized into multiple bins. Once media has
been added to the Media Pool, you can access a variety of descriptive metadata using the
Metadata Editor, adding descriptions, notes, scene and take information, flags, day and date
information, program and episode information, etcetera. This data can populate metadata tags
when exporting ALE lists to move the metadata to a compatible NLE.
For more information on ingesting media in the Media page, see Chapter 8, “Adding and
Organizing Media with the Media Pool.”
The Media Pool

612
Creating Digital Dailies for Round Trip Workflows Part 5 – 35
Step 2—Sync Audio to the Dailies
If your video format has embedded audio, Resolve can simply pass that audio through when
outputting media from the Deliver page. However, if the program you’re working on employs
dual-system audio recording, there are a variety of methods available for syncing it in the Media
page. You can also import timecoded Broadcast WAVE files into the same bin as the
accompanying video clips (you can place them into a sub-bin if you like), in preparation for
syncing the dailies in Resolve. Once you’ve imported the video and audio media you want to
sync into the Media Pool of the Media page, you can right-click the enclosing folder and choose
“Auto-Sync Audio Based on Timecode” which automatically syncs every timecode-matched pair
of audio and video media clips within the same folder, all at once. Alternately, you can choose
“Auto-Sync Audio Based on Timecode and Append Tracks” to add the synced audio tracks to
any audio tracks already present in the video clips.
If you don’t have synced timecode, but your video clips have separately recorded audio (usually
via an on-camera microphone) that matches the dual-system audio recordings, you can use
waveform syncing to quickly sync each video clip with its matching audio clip. Import your
separately recorded audio files into the same bin as the accompanying video clips (you can
place them into a sub-bin if you like), in preparation for syncing. Once imported, you can
right-click the enclosing folder and choose “Auto-Sync Audio Based on Waveform” which
automatically syncs every timecode-matched pair of audio and video media clips within the
same folder, all at once. Alternately, you can choose “Auto-Sync Audio Based on Waveform and
Append Tracks” to add the synced audio tracks to any audio tracks already present in the
video clips.
Finally, if all you have in the way of sync reference is a humble clap-board, you can manually
sync video and audio clips by selecting a video clip to open into the Media page viewer, and
then clicking the Waveform button in the Audio panel and clicking the corresponding audio clip
to show its waveform in the audio panel. In this way, you can drag the Viewer and Audio Panel’s
playheads to the video and audio sync points, and click the Audio panel’s link button to lock the
A/V sync of that clip.
For more information on syncing audio and video in the Edit page, see Chapter 10, “Modifying
Clips and Clip Attributes.”
TIP: For the best results, consider using different folders for each day’s audio and
video clips.
TIP: With waveform syncing, for the best and fastest results, consider using different
folders for each day’s audio and video clips, or even different folders for each scene,
to reduce the number of waveforms that need to be compared at one time.
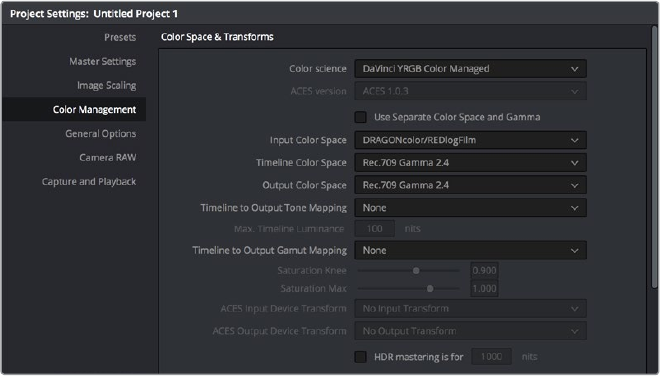
613
Creating Digital Dailies for Round Trip Workflows Part 5 – 35
Step 3—Do Whatever Grading is Necessary
Many productions that decide not to record camera raw media instead elect to record a
log-encoded or “flat” image to ProRes or DNxHD media files in order to preserve the most
image data for grading without clipping highlights or shadows. This can be accomplished using
in-camera settings that record log-encoded QuickTime or MXF media, or via external video
recorders such as the Blackmagic Video Assist. Depending on the camera you’re shooting with,
the recorded media will use one of a variety of log-encoded gamma curves such as Log-C,
S-Log, S-Log2, S-Log3, BMD Film, CanonLog, Panasonic VLog, or REDlog Film, among others.
In other workflows, raw video formats are recorded and later debayered as log-encoded clips
in order to preserve the maximum amount of debayered data for grading, or in preparation for
transcoding.
If you’re outputting high-quality media files meant to be used themselves for later finishing, then
you may want to simply pass the source image data through unaltered. However, if you’re
creating offline media for editors, directors, and producers to watch for the next three months,
you can grade this data in a variety of ways to provide more pleasing output that’s been
“normalized” in order to look closer to what was monitored on-set during the shoot.
There are many ways of normalizing log-encoded media in DaVinci Resolve. If you’re working
with one or more raw formats, you can choose to debayer all clips straight to Rec.709 in the
Camera Raw panel of the Project Settings. However, if you’re working with log-encoded ProRes
or DNxHD media, you need to normalize these clips using other methods.
An easy and powerful way to do so is to use DaVinci Resolve Color Management. To do so, set
the “Color science” setting within the Color Management panel of the Project Settings to
“DaVinci YRGB Color Managed.” Then, right-click each clip or group of clips in the Media Pool,
and choose the appropriate setting for each type of media from the Input Color Space submenu
(you can define the Input Color Space of multiple selected clips at once). For more information
on using DaVinci color management, see Chapter 6, “Data Levels, Color Management,
ACES, and HDR.”
Enabling DaVinci Resolve Color Management
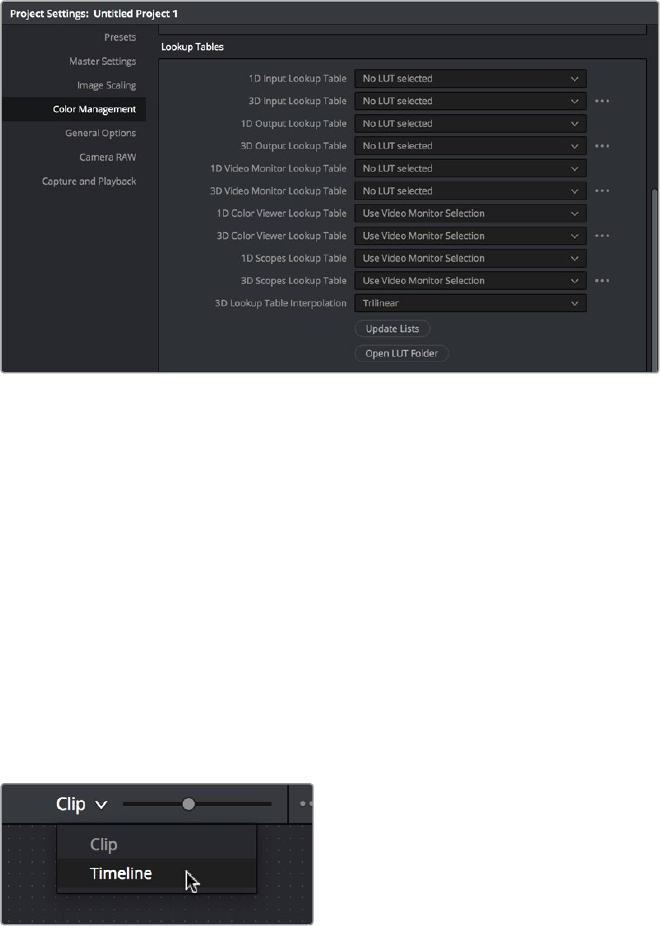
614
Creating Digital Dailies for Round Trip Workflows Part 5 – 35
If you don’t want to use DaVinci color management, you can also use one or more LUTs (Look
Up Tables) to normalize Log-encoded media. You can apply a LUT to the entire project to
normalize the particular log characteristics of the media you’re processing. Project-wide LUTs
can be applied in the Color Management panel of the Project Settings. For more information,
see Chapter 3, “Project Settings and Preferences.”
Project-wide LUT table settings on the Look Up Tables panel of the Project Settings
In the case of LUT-managed shooting workflows where a variety of LUTs have been custom-
designed to monitor different scenes, you can manually apply individual LUTs to one or more
selected clips from each scene using the Media Pool’s contextual menu.
You can also edit each scene’s clips into timelines, and apply separate LUTs to each clip in the
Clip mode of the Node Editor of the Color page, or apply a single LUT to an entire timeline
using the Timeline mode of the Node Editor. For more information on using LUTs as part of
grades, see Chapter 49, “Node Editing Basics.”
Alternately, if on-set color correction from the shoot been provided via a CDL-compliant EDL
exported from one of several on-set grading solutions that are available, you can use the
ColorTrace™ from CDL command to batch import grading information from another application.
For more information on CDL Import workflows, see Chapter 54, “Copying and Importing
Grades Using ColorTrace.”
Selecting Timeline in the Node Editor
If your project’s workflow requires that you start out with even higher-quality dailies, you can go
ahead and manually grade individual clips as you would with any project. However, if you want
to create a fast “one-light” adjustment for every clip in the Master Timeline at once, you can use
the Timeline grade mode of the Node Editor in the Color page to apply a single correction
simultaneously to every clip in the current Timeline. This is particularly useful as you can
readjust the Timeline grade as much as you like, and the changes are automatically applied to
every clip in the Timeline. For more information, see Chapter 49, “Node Editing Basics.”
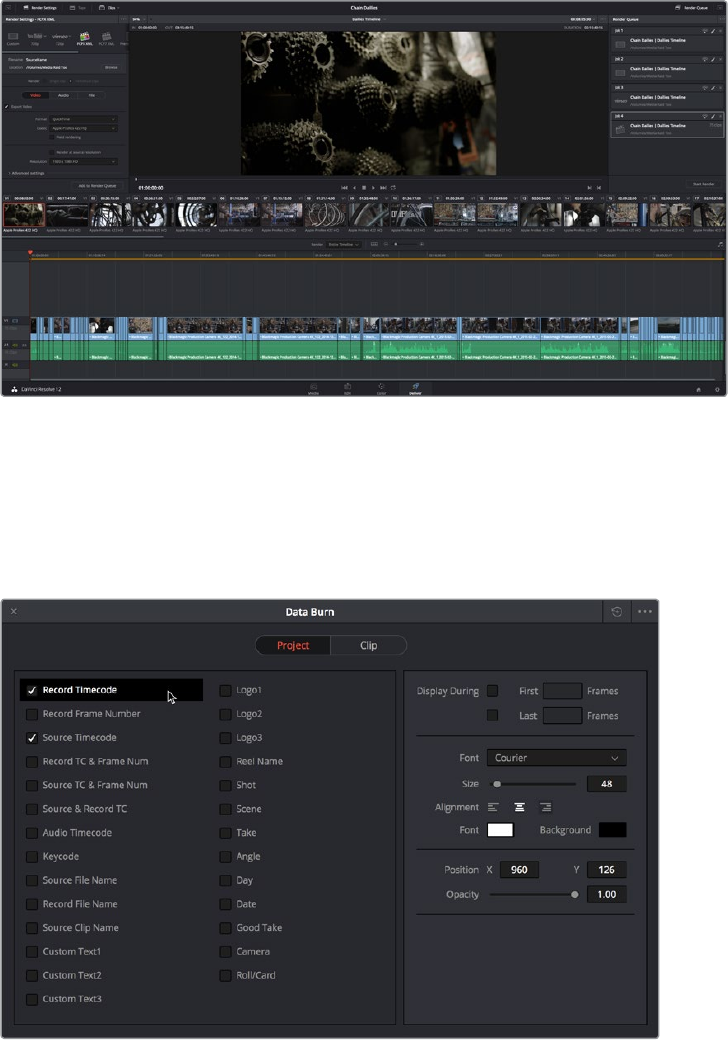
615
Creating Digital Dailies for Round Trip Workflows Part 5 – 35
Step 4—Export Media Suitable for Editing
Once you’ve organized your clips, synced the dailies, and applied whatever grading is
necessary for the purpose at hand, you’ll use the Deliver page to set up the format, file naming
convention, and organization of the media you’re outputting for editing or finishing.
Deliver page with several jobs set up for rendering
Furthermore, if you need to apply a window burn, watermark, or logo to the media you’re
processing, that can be accomplished using the Project panel of the Data Burn-In window,
available by choosing Workspace > Data Burn-In. Window burns can be formatted with a lot of
flexibility, and are written out to media that’s either rendered or output to tape. For more
information, see Chapter 61, “Data Burn.”
Choosing metadata to display onscreen in the Data Burn-in window
Once you’ve selected the appropriate Render settings and Window Burn options, you can
output one or several versions of the media, to accommodate jobs where you need to provide
several media deliverables. For more information on setting up and using the Deliver page, see
Chapter 75, “Delivering Media.”
616
Creating Digital Dailies for Round Trip Workflows Part 5 – 35
Step 5—Reconform Media to an EDL,
AAF, or XML Project File
Once the offline media you’ve delivered has been edited in whichever NLE is used for the
project, it’s simple to reimport the edited project via an AAF, XML, or EDL file, depending on
which is most suitable to your application. This edit data can be used to reconform the original
media that you imported into the Media Pool, so that you immediately have access to whatever
graded adjustments you made to create the offline media, as applied to the source media.
Importing AAF, XML, or EDL files in the Edit page creates new timelines, and you can import
multiple subsequent Timelines to accommodate changes that have been made to the edit, if
you find yourself grading a project that is in progress editorially. In fact, depending on how you
set up your grades, you can use Remote Versions which will automatically ripple to follow each
clip when you import a re-edited version of the program as a new timeline, saving you from
having to recreate your work. For more information on using Remote Versions, see Chapter 48,
“Grade Management.”
Step 6—Output Final Media for Finishing
Once you’re finished with your final grade, you’ll again use the controls of the Deliver page to
render the program’s final media, either as individual clips for a round-trip workflow, or as a
single media file or image sequence for delivery as a digital master.
618
Confoarming XML Files Part 5 – 36
Conforming XML Files
XML and AAF import is one of the most straightforward methods of bringing edits with as many
video tracks as you need from different NLEs into DaVinci Resolve. XML import has the added
benefit of allowing a variety of supported effects to be imported along with the edit data, as
well as multiple tracks of video data. This chapter covers the relatively simple procedure used
to import XML projects into DaVinci Resolve. The same command is used for AAF import,
although the procedure is somewhat different.
For more information, see Chapter 37, “Conforming AAF Files.”
More About Conforming XML Files 619
Importing XML Project Files 619

619
Confoarming XML Files Part 5 – 36
More About Conforming XML Files
DaVinci Resolve can import projects that were exported to the Final Cut Pro 7 or Final Cut Pro X
XML formats. Adobe’s Premiere Pro and Autodesk Smoke and Flame Premium are also capable
of using the Final Cut Pro XML project exchange format to accommodate round-trip workflows.
However, for the best results you need to make sure that you’re exporting XML from Premiere
Pro version 5.5.1 or newer; ideally you want to export from the latest version of Premiere Pro
that’s available.
In general, exporting XML for use by DaVinci Resolve is straightforward, and there really aren’t
any settings you need to manage when exporting an XML file other than the version of XML
you want to export. For this reason, it’s best to do whatever timeline and/or media management
you need to before XML export.
Importing XML Project Files
This section covers the Import AAF/EDL/XML dialog in much more detail. One procedure lets
you accomplish any of the following workflows:
Importing an XML or AAF file and automatically conforming to and importing the
media it’s linked to.
Importing an XML or AAF file and manually choosing another set of media,
presumably in a different format or resolution, with identical metadata, to conform
to instead.
Importing an XML or AAF file that’s linked to offline media derived from a camera
original format, and automatically conforming it to and importing the camera
original media.
Each of these workflows is possible by choosing the correct combination of options, each of
which is described in the following procedure.
To load an XML or AAF file and automatically link to its referenced media:
1 Do one of the following:
From any page, choose File > Import AAF, EDL, XML (Shift-Command-I).
Open the Edit page, right-click anywhere in the Media Pool, and choose Timelines >
Import > AAF/EDL/XML.
2 Using the file dialog that appears, find the project file you want to import, and Clip
Open. The Load AAF or Load XML window appears, depending on your selection.
Manage Your Media Before Exporting an XML
In workflows using imported XML or AAF projects (or even EDLs), it’s easiest to relink
and conform to the accompanying media files if they’re all located in a single directory
path. Having media sorted into multiple directories is fine as long as they’re all within a
single main directory that you can select at the appropriate stage of project import.
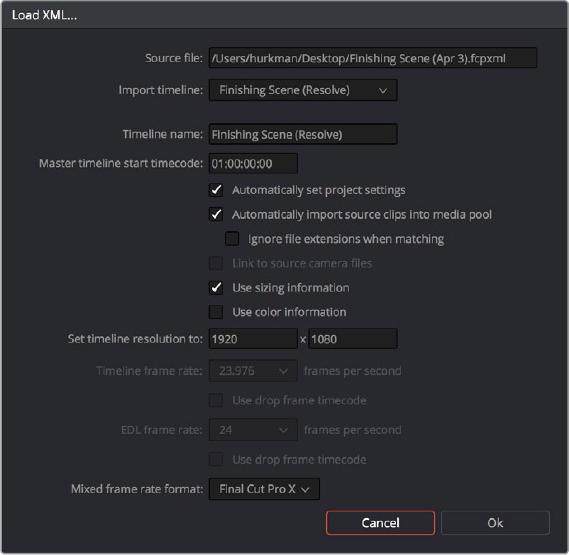
620
Confoarming XML Files Part 5 – 36
Options when importing an XML
3 Choose the options that are applicable to your particular project. By default, these
options are based on metadata within the file you selected.
Source File: The file you selected in the previous step.
Import Timeline: If there are multiple sequences within the selected XML or AAF
source file, this pop-up menu lets you choose which sequence to import as a DaVinci
Resolve timeline.
Timeline name: The name of the Timeline you’re about to create. This defaults to the
name of the sequence that was exported, but you can change it if you like.
Master timeline start timecode: The timecode at which the imported timeline will
start. This automatically matches the start timecode of the selected Import Timeline.
Automatically set project settings: Leave this option on to automatically change the
frame size and frame rate settings in the Project tab of the Config page with those
in this window. If you’re importing an XML or AAF file into a project that already has
media in the Media Pool, the Timeline frame rate is locked and cannot be changed.
Automatically import source clips into media pool: Leave this checkbox on to
automatically import the media referenced by the XML or AAF project file you
selected into the Media Pool based on the embedded file paths. If the media files are
not automatically found at these locations, you will be prompted to manually select a
directory where the clips are located.
Ignore file extensions when matching: Turn this checkbox on if you want to manually
choose a different directory of media to link to, for example if the XML you’re
importing links to ProRes Proxy media, and you want to relink to another directory of
corresponding ProRes 4444 or camera raw media.
Link to source camera files: For AAF files only. Turn this checkbox on if you want to
reconform the imported project file to the camera original files that correspond to the
offline media that’s currently referenced.
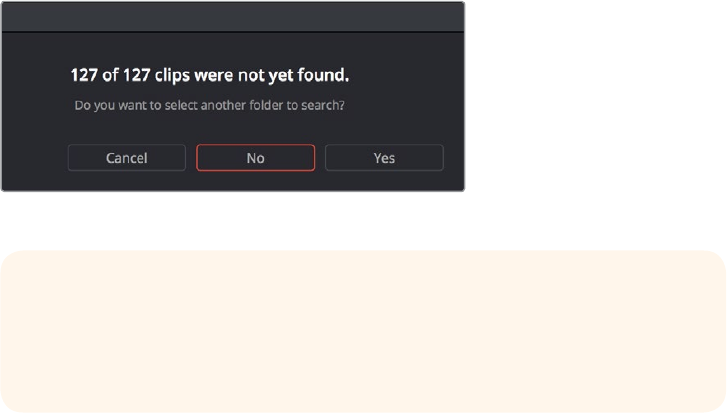
621
Confoarming XML Files Part 5 – 36
Use sizing information: Lets you import position, scale, and rotation transforms from
the originating NLE via the imported XML and AAF project files. These transforms are
stored in each clip’s settings in the Edit page Inspector.
Use color information: For Final Cut Pro X XML files only. This option lets you import
a subset of color correction data from the Final Cut Pro X color board controls.
Set timeline resolution to: Two fields let you specify the width and height of the
frame size you want to work at in Resolve. The default is whatever resolution is
specified in the XML or AAF file being imported.
Timeline framerate: By default, this is derived from the frame rate of the XML or
AAF file being imported. If you’re importing an XML or AAF file into a project that
already has media in the Media Pool, the Timeline frame rate is locked and cannot
be changed.
Use drop frame timecode: By default, this is derived from the XML or AAF file
being imported.
EDL framerate: By default, this is derived from the frame rate of the selected file.
Use drop frame timecode: By default, this is derived from the frame rate of the
selected file.
Mixed frame rate format: This pop-up menu lets you choose the method used to
conform mixed frame rates for rendering and playback. You can choose the “Final
Cut Pro 7” or “Final Cut Pro X” methods of conform, while for projects imported from
Media Composer, Premiere Pro, Smoke, or other NLEs, you should leave this set to
“Resolve.” This pop-up menu also appears in the Load AAF or XML dialogs when you
import a project.
4 After choosing all necessary settings, click OK.
5 Assuming you left “Automatically import source clips into media pool,” turned on, if the
media linked to by the XML or AAF file is not in the expected disk location, or if you
turned on the “Ignore file extensions when matching” checkbox, then another dialog
appears prompting you to choose the folder within which the media for this project is
stored. Do one of the following:
If you want to try to relink to media in another disk location: Click yes, and then
navigate to the folder containing your media (all subfolders will be automatically
traversed as well), select it, and click OK.
If you want to just import the Timeline with all offline clips: Click No.
A prompt appears if all the media was not found
IMPORTANT: It’s always possible to choose the top level of any volume to
automatically find all media in any directories located within, but if the volume
is large and full of many files, scanning every folder and document of the
volume may be an extremely time-intensive process.
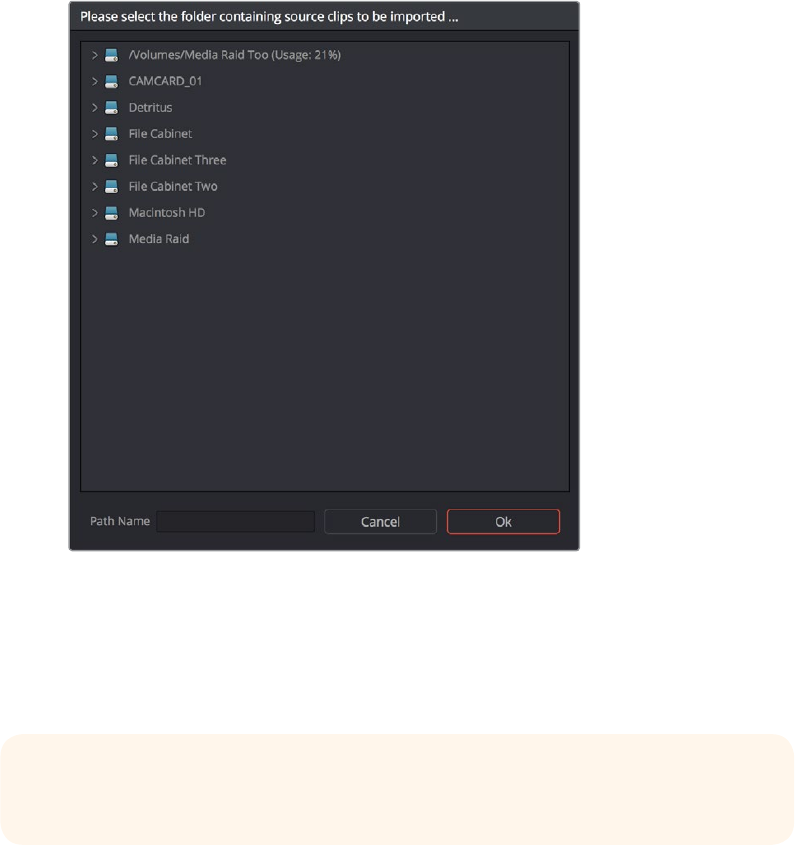
622
Confoarming XML Files Part 5 – 36
If you clicked yes to selecting another folder, then use the folder selection dialog to
navigate to another folder, and click Ok. You can cycle through this process as many
times as you need to until you’ve found all the media that timeline is linked to.
Selecting the source folder for your XML imported clips
The XML or AAF file is imported. A new timeline and the referenced media files appear in the
Media Pool, and the Timeline is opened so you can see its contents. Clips that could not be
linked to a corresponding file on disk appear red in both the Media Pool and Timeline to
indicate that they’re offline and unlinked.
TIP: You can open the Edit Index and choose Filter Offline Clips from the option menu
to see a list of all offline clips in the current Timeline.
624
Conforming AAF Files Part 5 – 37
Conforming AAF Files
AAF (Advanced Authoring Format) is a project exchange format, originally developed by the
Advanced Media Workflow Association (AMWA). Commonly used applications that export
project data in the AAF format include Avid Media Composer, Avid Symphony, Autodesk Smoke
and Flame Premium, and Adobe Premiere Pro.
This chapter describes some recommended workflows for moving projects from Media
Composer (or Symphony) to DaVinci Resolve for grading, and then returning to Avid Media
Composer for finishing.
Supported Media Types in AAF Round Trips 625
Transcoding to DNxHD Always Works 625
Fast Imported Media 625
Logged Errors When Importing AAF 626
Performing an AAF Avid Round Trip 627
Step 1—Create a Project in Media Composer 627
Step 2—Exporting an AAF for DaVinci Resolve 628
Step 3—Conforming Your AAF in Resolve 629
Step 4—Continue Editing, Grading, andFinishing the Project 630
Step 5—Render Graded Media and Export a New AAF 631
Step 6—Copy the Graded Media to Avid MediaFiles 632
Step 7—Import the Graded AAF 632
Relinking Transcoded Media to AMA Media 632
Step 1—Relink Your Transcoded Media to AMA-Linked Source 632
Step 2—Export an AAF File 633
Step 3—Import the AAF, Grade, Render, and Export 633
Step 4—Reimport the AAF into Media Composer/Symphony 633
625
Conforming AAF Files Part 5 – 37
Supported Media Types in
AAF Round Trips
Media Composer provides several methods of ingesting and managing compatible media
formats. Ultimately, which formats are suitable for a Media Composer to Resolve round trip
depends on whether they’re compatible with Resolve.
There’s one other thing to keep in mind as you’re managing media in Media Composer; not all
formats are compatible with all media management operations. This combination of format
compatibility and operational compatibility requires you to carefully tailor your workflow around
which media files you’ll be using.
Transcoding to DNxHD Always Works
Since DNxHD was developed as Media Composer’s core codec, workflows where you
transcode other media formats to MXF-wrapped DNxHD before editing will always work, and
are the simplest when round tripping between Media Composer and DaVinci Resolve. Resolve
supports both MXF-wrapped and QuickTime-wrapped DNxHD media.
Linking to Media Using AMA and Consolidating
Avid Media Access (AMA) is a means of directly linking clips to media files in Media Composer
without needing to either transcode them to DNxHD MXF files, or copy them to an Avid
MediaFiles directory. While convenient, workflows involving media that’s linked using AMA
require a bit more forethought.
Not all AMA-compatible media formats can be consolidated in Media Composer, which limits
your ability to create a smaller, more portable collection of media to move into DaVinci Resolve.
Whether or not an AMA-linked clip can be consolidated depends on its media format; Media
Composer can only consolidate formats that it can write. For example, since Media Composer
cannot write R3D media, then R3D media cannot be consolidated.
Furthermore, not all AMA-compatible media formats are compatible with DaVinci Resolve.
Simply being able to edit a media format in a Media Composer timeline doesn’t guarantee you
can use it in Resolve. The following table lists which media formats can be AMA-linked in Media
Composer, which formats can be consolidated, and which are compatible for use in
DaVinci Resolve.
If you’re prepping a sequence that uses a mix of media formats, some of which can be
consolidated, and some of which can’t, you should transcode all clips that aren’t compatible
with consolidation to an Avid native codec before beginning the process of consolidating media
and exporting an AAF to DaVinci Resolve.
Fast Imported Media
Another wrinkle is that Media Composer supports a media ingest method called “Fast Import,”
where imported media is quickly copied to the Avid MediaFiles directory by inserting the
original image data using the original codec into an MXF wrapper. This is an extremely fast and
efficient way to bring media into Media Composer projects, but the resulting files are not
typically compatible with DaVinci Resolve.
On the other hand, keep in mind that any media format that can be Fast Imported can also be
consolidated. If you’re planning to round trip a sequence that uses Fast Imported media, it’s
recommended that you either transcode the Fast Imported clips to DNxHD prior to AAF export,
or conform your exported AAF project to the camera original media in Resolve instead.

626
Conforming AAF Files Part 5 – 37
Can be Natively
AMA-Linked
Can Be
Consolidated
DaVinci Resolve
Compatible
ARRI ALEXA Raw Yes Yes Yes
AVCHD Non-native support No No
Canon XF (C300) Yes Yes Yes
CinemaDNG No No Yes
GFCAM MXF (Ikegami) Yes Yes No
P2 Yes Yes No
QuickTime (ProRes) Yes Yes Yes
R3D (RED) Non-native support No Yes
Sony F65 Raw Yes No Yes
Sony HDCAM SR (SStP) Non-native support No Yes
Sony XDCAM Yes Yes Yes
Compatible AMA linked formats
Logged Errors When Importing AAF
If you turn on the “Import log messages as markers” checkbox in the Load AAF… dialog, certain
error messages that alert you to issues with the AAF import you’re trying to do will be added as
markers with notes to the Timeline. You have an option, via a pop-up embedded within the text
of this checkbox, of choosing the color of the markers used to store this information.
The following messages will create markers:
Nested edits are not supported in this release. A black clip placeholder will be inserted.
Transition type ‘XXXX’ is not supported in this release. A Cross Dissolve will
be inserted.
Effect type ‘XXXX’ is not supported in this release. Plain clips will be imported.
Nested layer editing is not supported in this release. The first source clip will be used.
SMPTE Wipe Transition type ‘XXXX’ is not supported in this release. A Cross Dissolve
will be inserted.
Interpolation type ‘XXXX’ is not supported in this release. Linear interpolation
will be used.
TIP: Whenever you use a combination of media in your project that includes formats
that aren’t compatible with DaVinci Resolve, you can use the “Transcode Video To”
checkbox in the options of the Export As dialog when exporting an AAF project. This
option lets you to transcode all media that isn’t a compatible format into a format that
iscompatible.

627
Conforming AAF Files Part 5 – 37
The clip ‘XXXX’ failed to link because the timecode extents do not match any clip in
the Media Pool.
Mismatch between specified target timecodes ‘XXXX’ and located file
timecodes ‘YYYY.’
No overlap between specified target timecodes ‘XXXX’ and located file
timecodes ‘YYYY.’
Clip ‘XXXX’ in track ‘XXX’ at timecode ‘UNKNOWN’, with reel name ‘XXXX’ and
filename ‘XXXX.’
Clip ‘XXXX’ in track ‘XXX’ at timecode ‘UNKNOWN’, with reel name ‘XXXX’ and
filename ‘XXXX.’
File not found in search directories.
As of the time of this writing, this feature is only available when importing AAF files.
Performing an AAF Avid Round Trip
This section outlines a comprehensive workflow for creating projects in Media Composer that
will be compatible with DaVinci Resolve, moving projects from Media Composer to DaVinci
Resolve, then grading, rendering, and sending the final graded project back to Media
Composer. The following steps include procedures covering the following tasks:
Ingesting all media as high quality MXF-wrapped DNxHD, then round tripping from
Media Composer to DaVinci Resolve.
Importing and editing Resolve-compatible AMA-linked media formats, then round
tripping from Media Composer to DaVInci Resolve.
Transcoding AMA-linked media files into offline-quality DNxHD clips for editing, then
exporting an AAF file and reconforming it in Resolve to high quality camera-original
media as part of the round trip.
Because there are so many variations in the way that Media Composer can ingest media and
output AAF projects, you should familiarize yourself with the following procedures before
continuing with your own project.
Step 1—Create a Project in Media Composer
1 When creating a project in Media Composer, take note of the image format details, as
these should be matched in DaVinci Resolve. In particular, set the image format (e.g.,
1080p/24) and raster dimensions (e.g., 1920x1080) to match your desired mastering
format. Also, color space should be set to RGB 709 if you’re planning to send ingested/
transcoded media from Media Composer to DaVinci Resolve for grading.
2 Open your project, and ingest all necessary media into a new Bin using one or both of
the following methods:
Transcode media for editing: The simplest workflow for AAF import and round-trip
workflows is to ingest transcoded, native MXF-wrapped DNxHD media using the
Import command.
NOTE: This information can also be found in the Avid Project Format tab.
628
Conforming AAF Files Part 5 – 37
Import AMA-linked clips: You can also import AMA-linked clips, so long as all AMA-
linked files are in a format that’s compatible with Resolve. Keep in mind that not
all AMA-compatible formats can be consolidated in Media Composer. In this case,
import AMA-linked media into a new Bin using the Link to AMA File(s) command, and
edit as usual.
Once you’ve ingested all necessary media, you can edit your project as you would
any other, keeping in mind which effects are compatible with DaVinci Resolve. For
more information on effects in Media Composer to DaVinci Resolve round trips, see
Chapter 33, “Preparing Timelines For DaVinci Resolve Import.”
Step 2—Exporting an AAF for DaVinci Resolve
When you’re finished editing, you need to export an AAF that will conform the .mxf media you
used in Media Composer into a DaVinci Resolve timeline. Two export configuration options are
available, depending on whether DaVinci Resolve and Media Composer are on the
same system.
1 Select the sequence you want to export, and choose File > Export AAF, XML (Shift-
Command-O).
2 In the Export As dialog, type a name for the AAF file you’ll be exporting.
3 Choose a location to save the AAF. You can save it anywhere you like, but if you’re
moving the project to another workstation, you may want to save it to a specific
folder on a removable hard drive where you store your AAF and XML files. The
location you choose can also be used as the location of the media that’s exported to
accompany the AAF.
4 Click the Options button to open a more detailed window of export settings.
5 Turn on the AAF Edit Protocol checkbox. This option forces Media Composer to export
a simplified AAF file that’s more compatible with the project exchange workflows of
different applications.
6 Choose the appropriate option from the Export Method pop-up menu to configure
how the AAF and its accompanying media will be exported. The option you choose
depends on the following:
If Media Composer and Resolve Are on the Same System: Choose “Link to (Don’t
Export) Media” to export an AAF file that links to the existing media in its current
location. Click the Audio Details tab and choose “Link to (Don’t Export) Media” from
the Export Method pop-up menu.
If Media Composer and Resolve Are on Different Systems: Choose one of the two
following export methods:
Copy All Media: For each source clip used, the entire corresponding media file is
copied. This can be useful when you want to preserve the original relationship of
each clip to the source media file it came from. However, be aware that you’ll
potentially be exporting a lot of media when you use this option.
Consolidate Media: This is a more efficient media management workflow for finished
projects, since unused media will not be copied. You can specify additional handles
to add to the beginning and end of each exported media file, in frames, in the Handle
Length field. Should any media file and its handles overlap another media file and its
handles, both will be combined into a single exported media file.
7 (Optional) If you’re using a combination of media in your project that includes formats
that aren’t compatible with DaVinci Resolve, you can optionally turn on the “Transcode
Video To” checkbox and choose a media format from the pop-up menu to the right.
This option automatically transcodes all media in your sequence that doesn’t match the
format specified in the pop-up to match that format.
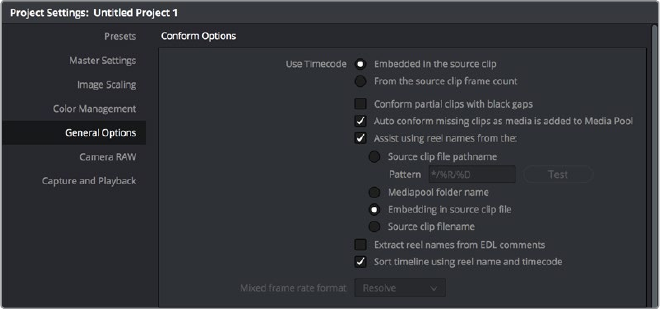
629
Conforming AAF Files Part 5 – 37
8 If you’re copying or consolidating media to another drive, choose “Folder” from the
Media Destinations Video/Data pop-up menu. Turn on the “Use Same Folder As
AAF File” checkbox to save the exported media to the same folder you selected in
step 3. If you leave this checkbox turned off, you can click Select Folder to choose
another location.
9 Click Save, and when you return to the Export As dialog, click Save again.
Once export is complete, you’ll see a duplicate sequence and duplicate media populating your
Media Composer bin, with the suffix “.Exported” appended to the sequence, and “.new”
appended to each media clip. In the file system, the resulting folder contains an AAF file, and an
Avid MediaFiles folder that contains the exported media.
Step 3—Conforming Your AAF in Resolve
1 Open DaVinci Resolve and create a new project.
2 Before you do anything else, you need to set DaVinci Resolve to properly read the
timecode and reel number information from the AAF files that Media Composer
creates. Click the gear button at the lower right-hand side of the DaVinci Resolve
window to open the Project Settings window, click General Options to reveal the
Conform Options, and do the following:
Make sure that “Use Timecode” is set to “Embedded in the source clip.”
Turn the “Assist using reel name from the” checkbox on, and choose “Embedding in
source clip file.”
Conform assistance with reel names embedded in the source clip
3 Click Save.
4 Do one of the following:
From any page, choose File > Import AAF, EDL, XML (Shift-Command-I).
Open the Edit page, right-click anywhere in the Media Pool, and choose Timelines >
Import > AAF/EDL/XML.
5 When the File Selection window opens, select the AAF file you exported from Media
Composer, and click Open.

630
Conforming AAF Files Part 5 – 37
6 When the Load AAF dialog appears, the settings you choose determine which media
files the AAF will be conformed to:
Import AAF window conform options
To conform to the transcoded or AMA-linked media files you edited: Leave the
“Automatically import source clips into media pool” checkbox turned on.
To conform to a different set of camera-original media files: Turn on both the
“Automatically import source clips into media pool” and “Link to source camera files”
checkboxes, which references the Source Name metadata that Media Composer/
Symphony embeds in exported AAF files to track the correspondence in file naming
between transcoded and camera original media.
To conform to a directory of media of your choosing: Turn on both the
“Automatically import source clips into media pool” and “Ignore file extensions when
matching” checkboxes.
To conform to media that’s already in the Media Pool: Turn off the “Automatically
import source clips into media pool” checkbox. There must be clips in the Media Pool
for this to work.
7 Additionally, make sure that the “Automatically set project settings” checkbox is on.
8 Optionally, you can turn on the “Use Sizing Information” checkbox if you want to import
position, scale, and rotate transform data from the originating Media Composer project
into Resolve.
9 Click OK.
As long as the media remains where it was when you exported it from Media
Composer, the timeline and all its media should now import. However, if the location of
the media files you’re conforming to has changed, then you may need to identify the
location of the media via an additional dialog. For example, if you’ve copied the media
from the portable hard drive it was originally conformed to, to a faster storage volume,
then a file dialog appears, requesting that you choose the folder containing the media
used by your project. If prompted, do so and click OK.
Once import is complete, the Media Pool fills with the source media used by the
imported project, and the edit appears as the current Timeline in the Edit page.
Step 4—Continue Editing, Grading,
andFinishing the Project
Edit the Timeline in the Edit page and grade each clip in the Color page as you would any other.
However, you should be aware that if you use the tools found in the Edit page to make any
editorial changes to the timeline you’ve imported, your export options will change later on:
If you don’t make editing changes: Then you have the option to have DaVinci Resolve use the
Avid AAF file that you originally imported to generate an updated one. This preserves audio
and all other unsupported effects from the original AAF file, so that they reappear when you
export a new AAF back to Media Composer. If you use this option, you need to make sure the
original AAF file you import remains in the same location.

631
Conforming AAF Files Part 5 – 37
If you do make editing changes: Then you need to use the “Generate New AAF” command to
export an AAF of the re-edited Timeline from Resolve back to Media Composer. This newly
generated AAF file will not include audio, nor will it include any effects that are not supported
by Resolve.
Step 5—Render Graded Media and Export a New AAF
1 When you’re ready to send a graded project back to Media Composer, select the
Timeline you graded and open the Deliver page.
2 Choose “Avid AAF” from the Presets at the top of the Render Settings to load
its settings.
Selecting the Avid AAF setup for round-trip
3 In the Format section, choose the MXF codec you want to render to.
4 In the File section, choose the appropriate file destination path for the rendered media.
The location you choose depends on whether Media Composer and Resolve are on
the same computer or not.
If Media Composer and Resolve are on the same computer: Create a new folder
within your Avid MediaFiles folder (Avid MediaFiles/MXF/) named with a number. Make
sure you choose a previously unused number.
If Resolve is on a different computer using different storage: Select any directory on
the portable hard drive you’ll be using to bring the media back to the Media Composer
workstation from which it came.
5 If you require handles for your rendered output, you can click the “More options” at the
bottom of the File section, and scroll down to the “Add X Frame handles” field. When
making any changes to the File render settings, make sure to leave the “Render Clip
with Unique Filename” checkbox turned on to ensure that each clip rendered has a
different file name as multiple clips in the edited sequence may originate from the same
source clip.
6 In the Timeline, click Select All Clips to select the entire Timeline for delivery, and then
click Add to Render Queue at the bottom of the Render Settings to add the job you’ve
set up to the Render Queue.
7 Click Start Render at the bottom of the Render Queue to initiate rendering.
The project renders, and an AAF is automatically exported to the same directory as the
media you’ve rendered.
632
Conforming AAF Files Part 5 – 37
Step 6—Copy the Graded Media to Avid MediaFiles
1 For workflows where Resolve and Media Composer are on separate workstations,
locate the media directory containing the media files that were rendered out of Resolve
on the portable hard drive being used to transport the project back to your Avid
workstation, and copy it into the Avid MediaFiles/MXF/ directory.
2 Rename the directory to be a number. Make sure you choose an unused number.
Step 7—Import the Graded AAF
1 Reopen the original project in Media Composer. If the media in the new directory of the
Avid MediaFiles folder is in a compatible format, it will automatically be added to the
internal database of media.
2 Create a new bin to contain the graded sequence you’re about to import.
3 Open the new bin, then choose File > Import AAF, XML (Shift-Command-O), select the
graded AAF file that you exported from DaVinci Resolve, and click Open.
As long as the media is available in the Avid MediaFiles directory, the new bin you’ve
created should automatically fill up with the clips that were rendered out of DaVinci
Resolve, and a new sequence should appear.
4 Double click the sequence you’ve imported to open it into the Record monitor and
Timeline, fully conformed with the color corrected clips from DaVinci Resolve. This
sequence is now ready for finishing in either Media Composer or Symphony.
Relinking Transcoded
Media to AMA Media
This next workflow is useful when you’ve been editing transcoded, offline versions of
processor- or bandwidth-intensive media, but you want to send the original high-quality source
media (such as ALEXA or RED raw files) to Resolve for grading. In certain situations, it may be
better to reconform your sequence to the original AMA-linked media files in Media Composer
before you round trip from Media Composer to DaVinci Resolve.
Step 1—Relink Your Transcoded Media
to AMA-Linked Source
1 Edit a sequence using media that you’ve transcoded within Media Composer.
2 When you’re finished, open the bin that contains your project’s camera original media,
and select the AMA-linked clips that correspond to the transcoded clips you’ve
been editing.
3 Right-click the edited sequence in its bin, and choose Relink from the contextual menu.
4 When the Relink dialog appears, turn on “Select items in ALL open bins,” and leave the
“Create new sequence” checkbox turned on.
A new sequence is created that is now linked to the AMA-linked camera originals.
633
Conforming AAF Files Part 5 – 37
Step 2—Export an AAF File
1 Select the new sequence that was created, and choose File > Export AAF, XML
(Shift-Command-O).
2 Type a new name, choose a location for the file, and click Options.
3 Choose AAF from the Export As pop-up menu, and choose “Link to (Don’t Export)
Media” from the Export Method pop-up menu.
4 Click Audio Details, and choose “Link to (Don’t Export) Media” from the Export Method
pop-up menu.
5 Click Save to exit the Export Settings dialog, and then click Save again to
export the file.
Step 3—Import the AAF, Grade, Render, and Export
1 Open DaVinci Resolve, and import the AAF file you exported into the Edit page. You’ll
need to manually select the media in a second dialog.
2 Grade the project as you would any other.
3 When you’re done grading, use the AAF Round Trip option in the Deliver page to
render the graded media into a new (numbered) directory in the Avid MediaFiles
directory.
4 Open the Edit page, select the original AAF timeline you imported, right-click it, and
choose Export AAF/XML. Pick a location for the file and click Save.
Step 4—Reimport the AAF into Media Composer/Symphony
Open Media Composer, and import the AAF you exported from DaVinci Resolve. Your graded
sequence is now ready for finishing.
635
Conforming EDL Files Part 5 – 38
Conforming EDL Files
The edit decision list (EDL) is the lowest common denominator project exchange format there is,
and most professional postproduction applications are capable of exporting and importing
projects in this format, including Media Composer, Autodesk Smoke and Flame Premium, and
the legacy Final Cut Pro 7. This chapter covers all workflows that let you import and conform
timelines using the EDL format.
Conforming EDL Files 636
EDL Export of a Project and Its Media 637
Conforming EDLs to Individual Media Files 637
Preconforming “Flat” Media Files to EDLs 638
Conforming “Flat” Media Files Using Split and Add 639
Importing an EDL to a New Track 640

636
Conforming EDL Files Part 5 – 38
Conforming EDL Files
DaVinci Resolve supports the CMX 3600 format for EDL import and export. The edit decision list
(EDL) is the lowest common denominator project exchange format there is, and most professional
postproduction applications are capable of exporting and importing projects in this format,
including Media Composer, Autodesk Smoke and Flame Premium, and the legacy Final Cut Pro 7.
The universality of EDLs is due, in part, to their longevity; different EDL formats have been
inuse for decades. It’s also due to their simplicity. At least as used by DaVinci Resolve, EDLs
describe a very narrow range of editorial information, including clip arrangement, clip name
(viaembedded comments), video transitions (cuts or dissolves), and linear speed settings
(percentage of fast forward or slow motion).
Another limitation is that EDLs only support a sequence of shots on a single video track. If you
need to move projects with multiple tracks of audio and video, then you can export each track
as a separate EDL from the originating application, and then right-click the timeline you want to
import them into in the Media Pool and use the Timelines > Import > EDL to New Track
contextual menu command to import each separate EDL to a new track of a single timeline in
DaVinci Resolve. This is described later in this chapter.
If you’re not familiar with the EDL format, each edit appears as a numbered event that contains
the reel number, edit type, source timecode (In and Out points), and record timecode (In and
Out points). Here’s a sample of a simple four event EDL:
TITLE: Pool Shark Edit
FCM: NON-DROP FRAME
001 R EEL _ONE A A/V C 10:59:23:01 10:59:28:16 01:00:00:00 01:00:05:15
002 REEL_ONE AA/V C 11:39:48:15 11:39:51:13 01:00:05:15 01:00:08:13
003 REEL_ONE AA/V C 13:16:30:21 13:16:34:19 01:00:08:13 01:00:12:11
004 REEL_ONE AA/V C 14:09:43:16 14:09:44:20 01:00:12:11 01:00:13:15
Since DaVinci Resolve was originally designed to work by importing and exporting EDLs, there
are several methods you can use to import projects using EDLs. In all cases, you must first add
the media referenced by that EDL to the Media Pool before you can import its EDL.
The three primary workflows are:
Conforming EDLs to individual media files: Importing an EDL that references a
collection of discrete media files that have already been imported into DaVinci Resolve.
Preconforming, or “notching,” a “Flattened” master media file using an EDL:
Importing an EDL that references a “flattened” master media file. Flattened master
media files are created when an entire sequence is exported from an NLE as a single
self-contained media file.
Importing an EDL Directly to a New Track of an Existing Edit: If you’re importing
a multi-track video project, and the only means of doing so is using EDLs, you can
export each track of the source project as an individual EDL, and then import each
EDL into Resolve directly into additional tracks of the same Timeline. This is also useful
for workflows where effects clips are being managed on a separate track assembled
elsewhere, that you can then import directly into a graded timeline to place many new
effects clips all at once.
This description covers the different ways that EDLs can be used in DaVinci Resolve.
NOTE: While the EDL format supports a variety of SMPTE-defined video transition
codes, all EDL transitions are turned into cross dissolves of identical duration in Resolve.

637
Conforming EDL Files Part 5 – 38
EDL Export of a Project and Its Media
When using EDL workflows, it’s important to make sure that every clip in your edited sequence,
and every source media file it’s linked to, has an appropriate reel number/reel name, and true
timecode written into that file. When conforming EDLs, Resolve requires reel names and accurate
timecode to successfully conform the imported EDL timeline to media in the Media Pool.
To export an EDL that can be easily conformed by Resolve, each NLE has particular settings
that you should use. The primary supported format is CMX 3600, although Resolve also
supports the DEDL format exported by both Smoke and Flame. Also, most editing applications
let you choose which video and audio tracks you want to export, and how to handle the start
timecode for the selected sequence of clips you’re exporting. In general, it’s a good idea to
make sure that the exported start timecode matches that of your sequence timeline.
There are other details, however, that vary by application. For example, when exporting an EDL
from Media Composer using Output > List Tool, you need to make sure that the Active Setting is
set to Default EDL, and that the Output Format is set to CMX_3600. When exporting an EDL
from Premiere Pro, you have the option of enabling Use Source File Name and Include
Transitions. When exporting an EDL from the legacy Final Cut Pro 7, you need to make sure you
set Reel Conflicts to Generic Edits, and turn on the File Names checkbox. Most applications
provide other settings that are are optional, including EDL notes of various kinds, but for a
cleaner, easier to read EDL, you can turn these off if you like.
Conforming EDLs to
Individual Media Files
The advantage of working with discrete media files is that they are the “purest” version of the
media, without any effects (such as dissolves or superimpositions) “baked” into the visuals that
might create complications when you’re grading.
1 Before you import any media, make sure that the “Timeline frame rate” pop-up menu
in the Master Settings panel of the Project Settings is set to a frame rate that matches
your project and media. Otherwise, the EDL’s timecode will be misinterpreted.
2 Open the Media page, use the Media Storage browser to locate the media you want to
add to the project, and add it to the Media Pool by right-clicking the enclosing directory
and choosing one of the following commands:
Add Folder into Media Pool: Adds all compatible media files within that folder to the
Media Pool. Subfolders are not traversed.
Add Folder and SubFolders into Media Pool: Adds all compatible media files from
that folder, and all subfolders within that folder, to the Media Pool.
Add Folder Based on EDLs into Media Pool: Prompts you to choose an EDL.
Onlymedia referenced by that EDL is imported, and only the selected folder is
searched for that media.
Add Folder and SubFolders Based on EDLs into Media Pool: Prompts you to choose
an EDL. Only media referenced by that EDL is imported, and the selected folder and
all subfolders are searched for that media.
TIP: The “Add Folder...Based on EDLs” commands are useful for efficiently
adding just the media you need to the Media Pool in instances where there
might be many terabytes of unmanaged source media, most of which is unused.
638
Conforming EDL Files Part 5 – 38
3 Do one of the following:
From any page, choose File > Import AAF, EDL, XML (Command-Shift-I).
Right-click anywhere in the background of the Media Pool, and choose Timelines >
Import > AAF/EDL/XML.
A window appears prompting you to “Select a file to import.”
4 Navigate to the EDL file you want to use, select it, and click Open. The Load EDL
window appears.
5 Choose the options that are applicable to your particular project. All greyed out options
are not editable, either because they’re not applicable, or are not defined by the
Project Settings that are currently applied. The options you can set include:
Source File: The file you selected in the previous step.
Timeline name: The name of the Timeline you’re about to create. This defaults to the
name of the EDL file you selected, but you can change this if you like, for example, to
add the import date if this is a new version of the edit.
Automatically set project settings checkbox: Turn this option on if you want to
overwrite the frame size setting in the Master Project Settings panel of the Project
Settings. You cannot overwrite the Timeline frame rate when importing an EDL.
Set timeline resolution to: Two fields let you specify the width and height of the
frame size you want to work at in Resolve. This defaults to your Project settings, but
can be overridden by turning on the “Automatically set project settings” checkbox.
EDL framerate: Choose the frame rate of the sequence that you exported as an
EDL. You can use this option to convert the EDL frame rate from 30 to 24 frames per
second if you set the Timeline frame rate to 24 fps and if the EDL frame rate is set
to 30 fps; this is useful when an offline edit is done at 30 fps with media using 3:2
pulldown. Note that 25 fps to 24 fps conversion is not supported.
Use drop frame timecode checkbox: Only enabled if the EDL frame rate pop-up
menu is set to 30 fps. Turn this on if your EDL uses drop-frame timecode.
6 When you’re finished choosing options, click OK.
The EDL is imported, a new timeline appears highlighted in the Media Pool, and its
corresponding sequence of clips appears in the Timeline Editor if you’re in the Edit
page. Clips that could not be linked to a corresponding file in the Media Pool appear
with a red thumbnail to indicate that they’re unconformed.
Preconforming “Flat”
Media Files to EDLs
Preparing an edited sequence for grading, along with each individual clip of media, can be time
consuming for effects-intensive projects, or it may be an unnecessary step for a project with no
effects whatsoever.
In these cases, it can be simpler and quicker to export a flattened master media file that can be
split back apart into its individual clips in DaVinci Resolve. This workflow is similar to a more
traditional tape-to-tape workflow, except that you’re working from a digital master, rather then a
tape-based master.
The easiest way to do this is to use the Preconform button in the Edit page to split a single
master file that you’ve imported into the Media Pool back into individual clips in a new timeline.
639
Conforming EDL Files Part 5 – 38
To preconform a flattened master media file to an EDL:
1 Open the Media page, use the Media Storage browser to navigate to the flattened
master media file that you exported containing the entire program, and double-click to
add it to the Media Pool.
2 Right-click anywhere in the background of the Media Pool, and choose Timelines >
Import > Preconformed EDL.
3 In the “Select an EDL file” dialog that appears, navigate to the EDL that matches the
flattened master media file you had exported, select it, and click Open.
4 In the “Parse preconform options” dialog that appears, give the new Timeline a name,
and click OK
A new Timeline appears in the Media Pool list, and opening it in the Edit page shows the
flattened media file with edits added to its video track that correspond to those from the
selected EDL, ready for further editing and grading. The audio is left uncut, on the premise that
you’re probably focused on grading the visuals in this workflow, and not on re-editing the audio.
Conforming “Flat” Media
Files Using Split and Add
The second method of conforming an EDL to a flattened file is to use the “Split and Add”
command in the Media page to split one or more master media files into individual clips that
match those of an EDL, then importing the EDL itself in the Edit page in a second step.
This method is useful if there are clips in different folders or volumes that you want to conform
to a single EDL. For example, the majority of the first reel of a program may have been exported
as a single flattened file, but the corresponding EDL may require that an additional folder of
effects clips be added to the Media Pool to be fully conformed.
To split a flat media file in the Media page and import its EDL in the Edit page:
1 Before you import any media, make sure that the “Timeline frame rate” pop-up menu
in the Master Settings panel of the Project Settings is set to a frame rate that matches
your project.
2 Open the Media page, use the Media Storage browser to navigate to the flattened
master media file that contains the entire program.
3 Select the flattened media file, right-click it, and choose “Split and Add into
Media Pool.”
4 In the “Select EDL files for splitting clips” dialog that appears, navigate to the EDL that
matches the flattened master media file, select it, and click Open.
5 Select the frame rate of the project from the File Conform Frame Rate dialog that
appears. This frame rate should be identical to the “Timeline frame rate” pop-up you
set in step 1.
6 Choose the appropriate options in the “Enter handle size for splitting” dialog
that appears:
Handle size in number of frames: Enter a number of frames to be added as handles
to the first and last frame of the clip. This is useful when you’re using the “Split and
Add into Media Pool” command to import only the referenced sections of a directory
of individual media files.
Split Unreferred Clips: Useful when the referenced media files include segments
that aren’t “referred to” by any events within the EDL used to split them. Turning this
checkbox on adds all such unreferred clip segments to the Media Pool as separate
clips, for possible later use.
640
Conforming EDL Files Part 5 – 38
7 Click Split & Add. The Media Pool fills up with individual segments of the flattened
master media file, each of which matches an event in the EDL you used to split it.
8 To import the corresponding EDL to create a timeline with this media, do one of the
following:
From any page, choose File > Import AAF, EDL, XML (Shift-Command-I).
Right-click anywhere in the background of the Media Pool, and choose Timelines >
Import > AAF/EDL/XML.
9 In the “Choose a file to import” dialog that appears, navigate to the EDL that matches
the flattened master media file, select it, and click Open.
10 Choose whatever options are necessary from the Load EDL dialog that appears
(thedefault settings should work fine), and click OK.
The Master Timeline and the timeline you just imported appear in the Media Pool,
theConform EDL list updates with the events from the imported EDL, and the Timeline
editor shows the edited clips, ready for grading. Clips that could not be linked to a
corresponding file in the Media Pool appear with a red x to indicate that
they’reunconformed.
Importing an EDL to a New Track
This last procedure describes how to add an EDL, not as an individual new Timeline, but as an
additional video track to an existing Timeline. There are many reasons you might want to do this.
For example, if you need to move a multi-track project to DaVinci Resolve from an application
that can’t export either AAF or XML project exchange files that Resolve understands, you can
use multiple EDLs. Simply export each track of the source project as an individual EDL, and then
import each EDL into Resolve as additional tracks of the same Timeline.
This is also useful for workflows where effects clips are being managed on a separate track
assembled elsewhere, that you can then import directly into a graded Timeline to place many
new effects clips all at once.
To import an EDL to a new track of an existing timeline:
1 In this procedure, you have the option of adding whatever media is required by the EDL
you’re about to import to the Media Pool first, or you can add the media after the EDL
has been imported. It’s your choice.
2 Open the Edit page, select a timeline in the Media Pool, then right-click it and choose
Timelines > Import > EDL to New Track. A window appears prompting you to “Choose a
file to import.”
3 Navigate to the EDL file you want to use, select it, and click Open.
A new video track is created above any previously existing tracks, and events from the
selected EDL are immediately loaded into it according to their record timecode
positions. If you loaded the media needed by the new clips at the beginning of this
procedure, that media should be conformed. Otherwise, you’ll need to track down the
media files needed by the new unconformed clips and add it to the Media Pool now.

PART 6
643
Introduction to Color Grading Part 6 – 39
Introduction to Color Grading
For over thirty years, DaVinci has pioneered the development of color correction hardware and
software designed to enhance visual images acquired from film and video. DaVinci Resolve 14
possesses our newest and most evolved professional color correction tools yet. However, for
all its technological sophistication, DaVinci Resolve is merely a tool that requires the hands of a
skilled artist to realize its full potential.
Subsequent chapters of this user manual cover the DaVinci Resolve grading tools in the Color
page in great detail, but before getting into the specifics of color balancing and contrast
adjustment, Power Windows and Custom Curves, it’s important to step back and consider what
these tools are for, and why you’re learning to use this application in the first place.
This introduction is for those of you who are new to this process we call color correction, or
color grading. If you’re a veteran colorist then you might want to skip ahead, but if you’re just
starting out, the following sections are intended to describe the many goals of color correction,
and how the DaVinci Resolve toolset has been designed to address them; making it fast and
efficient to alter images in innumerable ways as we elevate raw footage to cinematic art.
The Goals of Color Correction 644
Maximizing the Look of Your Media 644
Emphasizing What’s Important 647
Audience Expectations 648
Balancing Scenes 650
Adding Style 651
Quality Control 654
Never Stop Experimenting 655
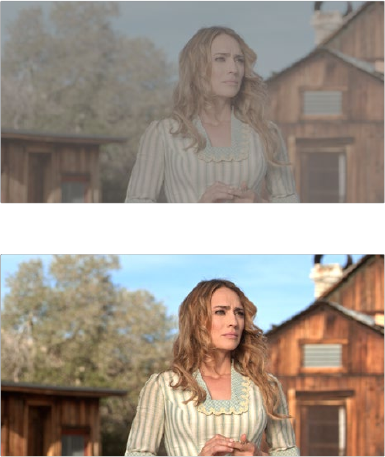
644
Introduction to Color Grading Part 6 – 39
The Goals of Color Correction
If reality is a fire hose of visual information, then digital cinema and broadcast would be
represented by a garden hose. Color correction, therefore, could be considered the
process of choosing which parts of the fire hose of raw image data to fit into the garden
hose of our displays in order to create a pleasing image for the viewer.
Maximizing the Look of Your Media
Clearly, the most fundamental aspect of the color correction process is that of making every clip
look its best. While the job of the cinematographer is to light and expose the image with an
artistic intent, your job is to realize this intent by making adjustments to the color and contrast of
the image, so that the final result is as close to what the director and cinematographer had in
mind as is humanly possible. In the process, you have the opportunity to overcome
inconsistencies with exposure and white balance that were, for various reasons, unavoidable.
Furthermore, you can make subtle adjustments to add warmth or contrast that was not available
during the shoot, but that the cinematographer would have liked.
Increasingly, color correction is seen as a critical stage in the postproduction process.
Forexample, the newer generation of digital cinema cameras are capable of shooting raw
colorspace image data, or RGB image data with a log exposure, in order to preserve the
maximum amount of image data for manipulation during the color correction process.
However,when you acquire image data this way, it must be transformed into a viewable image
via color correction in the same way that film negative must first be developed and printed to
positive film.
Log encoded source
Normalized and corrected
Source footage courtesy of Gianluca Bertone DP, www.bertonevisuals.com
Of course, there are also situations in which you may find it necessary to attempt to fix source
media with far more substantial problems in color and exposure. In these cases, the tools exist
to make far more involved adjustments to the image; however, the quality of your results will
depend heavily on the data quality and “latitude” of your source media.
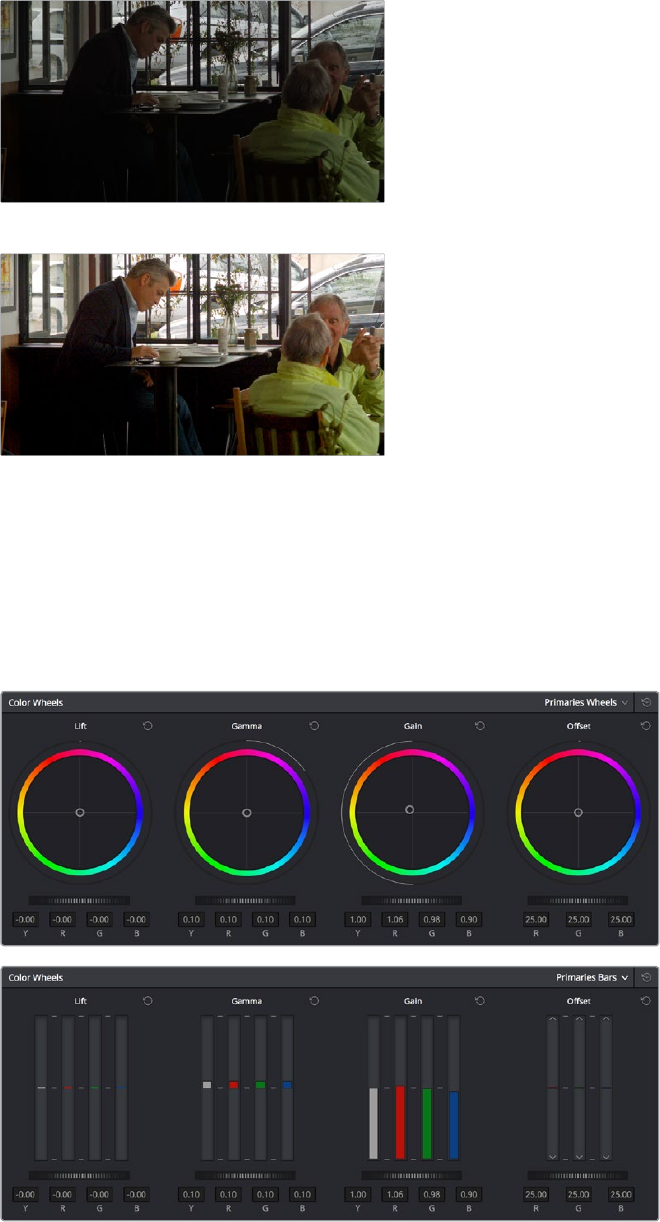
645
Introduction to Color Grading Part 6 – 39
For example, Blackmagic URSA, ARRI ALEXA and RED DRAGON cameras record quite a bit of
image data, making extreme corrections far more possible than more heavily compressed
camera formats such as the Canon 5D. However, in either case, DaVinci Resolve provides the
tools to process images in many different ways to adjust the image for a better look.
Under exposed source
Balanced and gain corrected
Whether clips need changes large or small, the primary DaVinci Resolve toolset adjusts the
characteristics of hue, saturation, and contrast in a variety of ways. In the Color Wheels palette,
Color balance wheels let you adjust all three color channels at once, altering the color
temperature of the scene at specific ranges of tonal detail referred to as lift, gamma, and gain.
Alternately, the slider-based Primaries Bars mode lets you make the same kinds of controls via
independently adjustable red, green, and blue lift, gamma, and gain controls.
Primary correction wheels, Primary correction bars
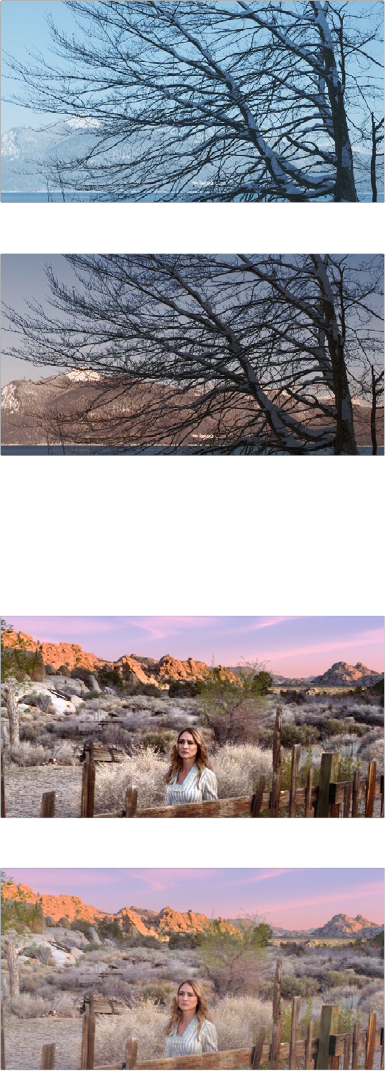
646
Introduction to Color Grading Part 6 – 39
All of these controls let you adjust the color tone of the shadows independently from that found
in the brightest highlights of an image.
Cool look
Warm look
Meanwhile, Master Lift wheels work together to let you alter image contrast in different
ways: deepening shadows, lightening highlights, and brightening or darkening the
midtones in between to create whatever image tonality you prefer for a given scene.
High Contrast
Low Contrast
Source footage courtesy of Gianluca Bertone DP, www.bertonevisuals.com
Separate saturation controls let you increase or decrease color intensity throughout the
scene, while the Sat vs. Lum and Sat vs. Sat give you the ability to fine-tune saturation
very specifically.

647
Introduction to Color Grading Part 6 – 39
High Saturation
Low Saturation
For more information on these controls, which are essential to the color correction process, see
Chapter 42, “Primary Grading Controls.”
Emphasizing What’s Important
Another important aspect of the color correction process is the ability to make adjustments to
emphasize or de-emphasize specific elements within the frame. It’s similar in concept to
equalization in audio mixing, in that you’re choosing which color values to boost or suppress
using a variety of techniques.
This can be done to direct the viewer’s gaze, for example by surrounding a specific part of the
image with a Power Window, which lets you restrict specific adjustments made to the inside and
outside of the Window’s shape.
Drawing a window to isolate a region of the picture to highlight
Lightening the area that’s been isolated with the window

648
Introduction to Color Grading Part 6 – 39
Specific alterations can also be made to prevent audience distraction. For example, a low-
saturation monochromatic tint may be a pleasing look overall, but in the soft wash of color, the
viewer might lose track of the watch that’s preoccupying the protagonist. Using tools such as
the Hue Curves and HSL Qualifier, you can quickly and easily tune the color of the woman’s
hands and of the watch to guide the viewer’s eye, and bring some needed depth to the scene.
Source image
Curves and HSL qualification used to distinguish
hands and highlight watch
For more information on Power Windows, see Chapter 45, “Secondary Windows.” For more
information on Hue Curves, see Chapter 43, “Curves.”
Audience Expectations
There is another family of tools, the HSL, RGB, and Luma Qualifiers, that provide even more
specific control, and they’re useful for adjusting ranges of color to either play into or against the
audience expectations for color in a scene. Substantial research into what has been termed
“memory color” shows that people have finely tuned expectations for the hues of particular
subjects, such as flesh tone, foliage greens, and sky blues. Deviation from these expectations
can create a sense of something being not quite right, which can be either detrimental or
beneficial, depending on your goals for a particular scene.
HSL Qualification is effectively a chroma keyer that lets you sample the image to create a key
that’s used to define where to apply a specific correction. For example, if you’re happy with the
rest of the image, but the skin tone of the actor has an unhealthy green tinge to it as a result,
you can isolate the color of that actor’s skin and adjust it to a healthier hue.
Source Image

649
Introduction to Color Grading Part 6 – 39
HSL qualification on the skin
Skin now has warmer grade
Another common example is the adjustment of skies. If you’re aiming for a gorgeous
summer day, a washed out sky in the source media can be a bit of a bummer. However,
using qualification it’s easy to isolate that wedge of blue, then push and pull it into just
the right amount of summertime joy.
Originally graded scene
HSL qualification of the sk
Corrected and sky enhanced
For more information on using Qualifiers, see Chapter 44, “Secondary Qualifiers.”
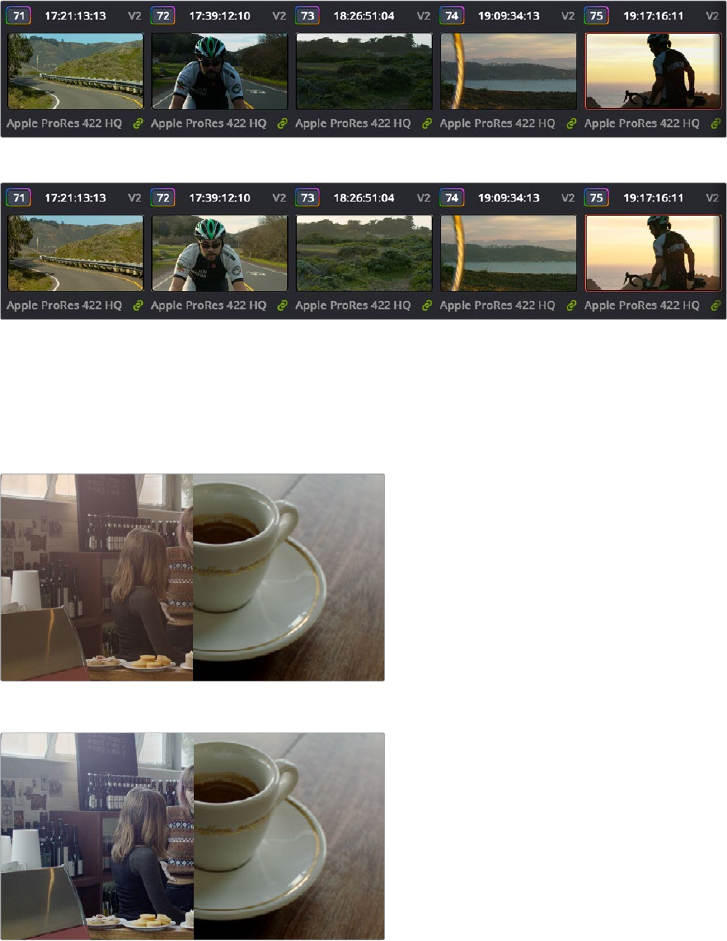
650
Introduction to Color Grading Part 6 – 39
Balancing Scenes
It’s rare when the uncorrected shots of a scene match one another perfectly. Even the most
carefully exposed angles of coverage can have small variances that need to be evened out.
Onthe other end of the spectrum, run-and-gun programs using available light often result in
edited scenes with huge changes in lighting and color as each shot cuts away to the next.
Small or large, unintended variations from one shot to the next can call undue attention to the
editing, and jar the audience’s attention in ways that throw them out of the program. Evening
out these differences and balancing the clips in each scene to match is another of the
fundamental tasks of the colorist. You know you’re finished when the color in the scene flows
unnoticeably from one clip to the next.
DaVinci Resolve has a variety of tools that you can use to help you compare images with one
another, the most important of which is the Gallery, in which you can save still images of clips
that you can then compare to other clips using an adjustable split screen.
Timeline thumbnail view of unbalanced clips
Thumbnail view of balanced clips
By using the Gallery to play stills, either split or whole (flipping back and forth between
the clip you’re adjusting and the still), it becomes easier to use the extensive DaVinci
Resolve toolset to match the color and exposure of every clip in a scene.
Split screen of two shots
Left image corrected to match right
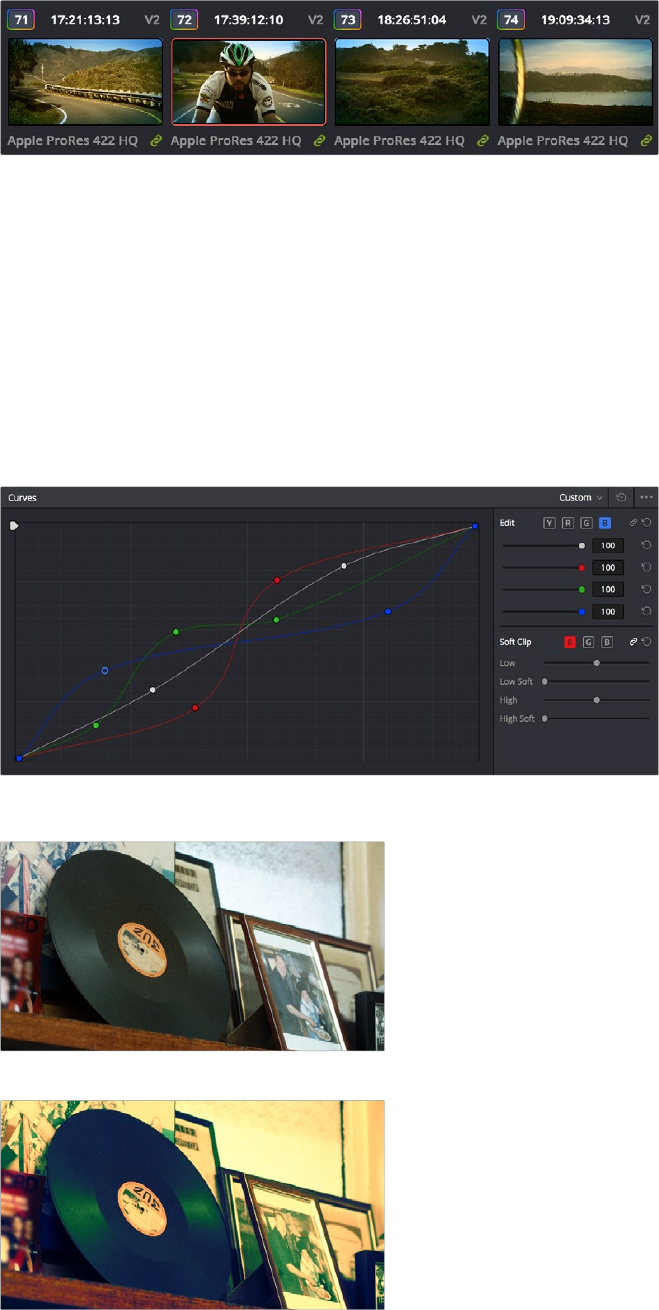
651
Introduction to Color Grading Part 6 – 39
An additional set of features let you manage grades by copying them from clip to clip,
or by linking similar clips, either automatically, or manually using groups.
Link icon indicates clips are grouped for grading
For more information on using the Still Store, see Chapter 40, “Using the Color Page.”
For more information on grade management, see Chapter 48, “Grade Management.”
Adding Style
Of course, it’s not all about subtlety and correction. It’s often appropriate, when grading music
videos and commercials, for instance, to add some radical style to a piece. Here, too, DaVinci
Resolve provides an abundance of features for manipulating unexpected aspects of the image;
for example, by abusing the Custom Curves to create the illusion of chemical cross-processing.
Custom Curves controls
Original Image
Image enhanced with Curves
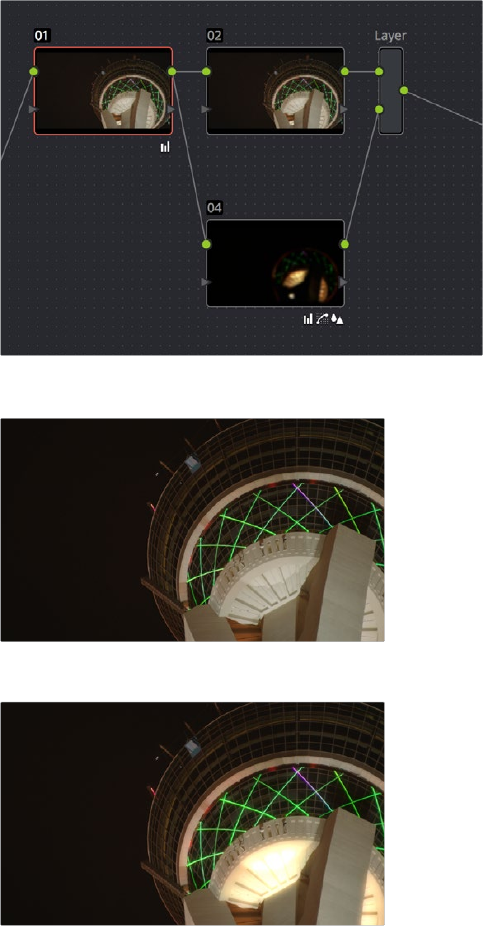
652
Introduction to Color Grading Part 6 – 39
DaVinci Resolve’s node-based image processing makes it possible to use more exotic
node structures to create effects using composite modes, such as a colored glow
generated by adding two differently graded versions of the same image together using
a Layer node.
Node tree adding two different treatments together
Original Image
Enhanced and balanced final
You can also create complex node trees to build specific mattes, to use for isolating
specific elements of the image. For example, if you wanted to isolate an actor in color
against a background turned monochromatic, you can create multiple keys (pulled via
HSL Qualification) and combine them using a Key Mixer node to build that effect.
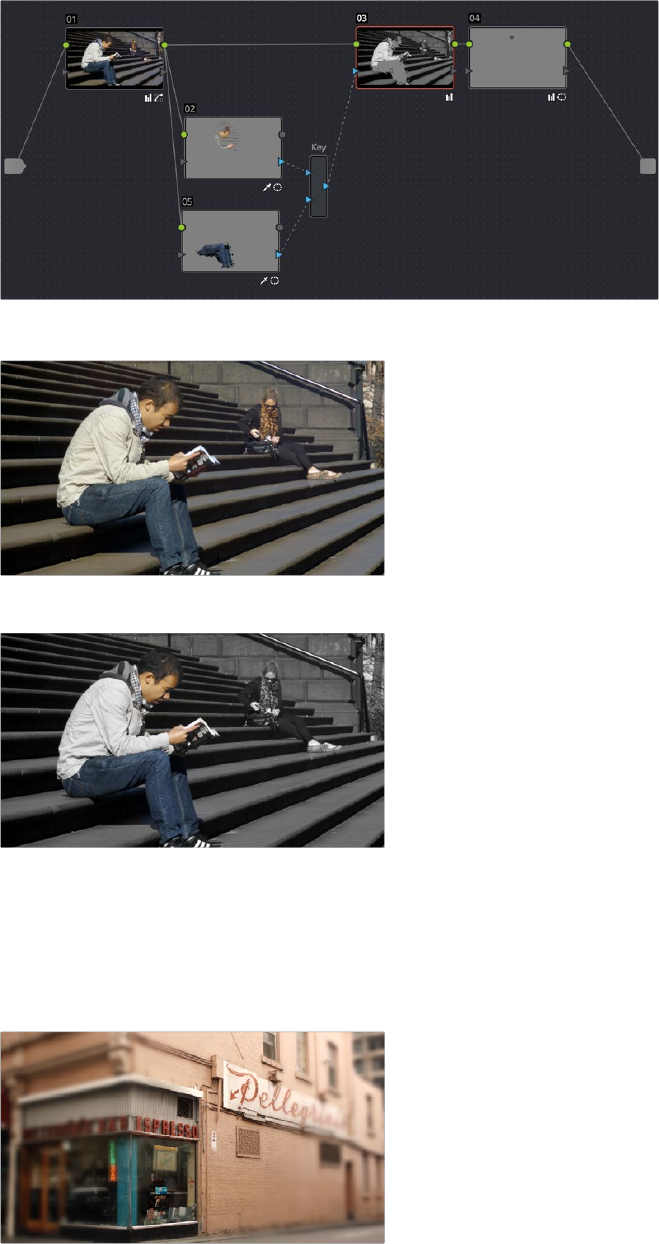
653
Introduction to Color Grading Part 6 – 39
Node tree to isolate the man’s face and clothes
Original image
The final effect, desaturating everything except for the man
Finally, DaVinci Resolve doesn’t just have tools governing color and contrast. A Blur
palette provides controls over blurring, sharpening, or adding mist to all or part of
theimage. When combined with the other tools that are available for isolation and color
adjustment, these are powerful additions to your creative arsenal.
Defocus effect created in real time
For more information on all of these features, see Chapters 24 through 32 of
this manual.

654
Introduction to Color Grading Part 6 – 39
Quality Control
Lastly, it’s important to keep in mind that, for all the creative possibilities that DaVinci Resolve
affords, it’s still important that the final deliverables that you give to your client has appropriate
signal levels relative to their requirements. In particular, programs destined for broadcast have
specific outer boundaries of luma and chroma that you must not exceed, or you’ll risk having a
show rejected for QC (quality control) violations.
However, even if you’re not delivering a show for broadcast, it’s important to be aware of the
mathematical limitations of a digital video signal to make sure you’re not clipping or crushing
image detail through overzealous adjustments that you may, in fact, want to preserve.
For example, if you take a look at the next two images, you can see the perils of overzealous
adjustments when compared to a clip that, while graded creatively, has been adjusted with
respect to the mathematical boundaries of image data.
Image graded to preserve detail in highlights
Image graded with highlight detail blown out
Here, too, DaVinci Resolve provides tools designed to help you exercise control over
the fine-tuning of the image. A Video Scopes window provides the standard Waveform,
Parade, Vectorscope, and Histograms that are used to analyze your image data. These
scopes let you see the boundaries of what’s possible, and make it easy to spot subtle
problems, and compare the characteristics of one image to another.
Video Scopes
655
Introduction to Color Grading Part 6 – 39
When the time comes that you want to start clipping data in the highlights and shadows, as part
of a creative look, the Soft Clip controls let you introduce a subtle or large roll-off, compressing
the extremes of the signal so that what clipping you do is softer and more pleasing.
For more information about the Video Scopes and the Soft Clip controls, see Chapter 40,
“Using the Color Page,” and Chapter 43, “Curves.”
Never Stop Experimenting
So now that you’ve gotten an extremely brief overview of the grading process as seen through
the toolset of DaVinci Resolve, we invite you to use this manual to explore DaVinci Resolve
more thoroughly. You may discover that, the more you work with the different features that are
available, the more unexpected uses you’ll find for different controls that you thought you
knew well.
Have fun.
657
Using the Color Page Part 6 – 40
Using the Color Page
Given the origin of DaVinci Resolve as a professional grading application, the Color page is at
the heart of the DaVinci Resolve experience. Within the Color page are all of the controls
available for manipulating color and contrast, reducing noise, creating limited secondary color
corrections, building image effects of different kinds, adjusting clip geometry, and making many
other corrective and stylistic adjustments.
In this chapter, you’ll learn how to understand the Color page interface, how to customize it, and
how to work within it to play through and navigate your project’s timeline. You’ll also learn how
to analyze and compare clips in preparation for grading using stills, playheads, and DaVinci
Resolve’s own internal video scopes.
The Color Page Interface 659
The Interface Toolbar 659
Viewer 659
Gallery 661
Node Editor 662
Timeline 663
Left Palettes 664
Center Palettes 664
Keyframe Editor, Video Scopes, and Information 664
Dual Monitor Layout 665
Customizing the Color Page 666
Using the Viewer 666
On-Screen Controls and External Displays 667
The On-Screen Control (OSC) Menu 668
The Viewer Toolbar 669
Zooming into the Viewer 669
Using the Scrubber Bar and Transport Controls 670
Controlling Playback Using the Spacebar and JKL Keys 670
Navigating Using Timecode 670
Navigating Using the DaVinci Control Panel 671
Viewer and Transport Timecode Displays 671
Enhanced Viewing, Full Viewing, and Cinema Viewing 672
Safe Area Overlays in the Viewer 674
Use Gray Background 674
Monitor Calibration 675
Viewing Broadcast Safe Exceptions 676
658
Using the Color Page Part 6 – 40
Comparing Clips in the Viewer 677
Saving and Wiping Stills in the Gallery 677
Dierent Viewer Reference Modes 678
Using Split Screen Modes 679
Using Video Scopes 681
Video Scope Measurement and Performance 683
Customizing the Video Scopes 683
Navigating Using the Color Page Timeline 685
Show Current Clip With Handles 686
Thumbnail Info 686
Sorting and Filtering Clips in the Thumbnail Timeline 688
Changing Timelines 688
A and C Mode Sorting 688
Flags and Markers 690
Timeline Filtering 690
Using the Lightbox 694
The Info Palette and Clip Information 696
Clip Info 696
System Info 697
Clip Details 697
About Undo and Redo 698
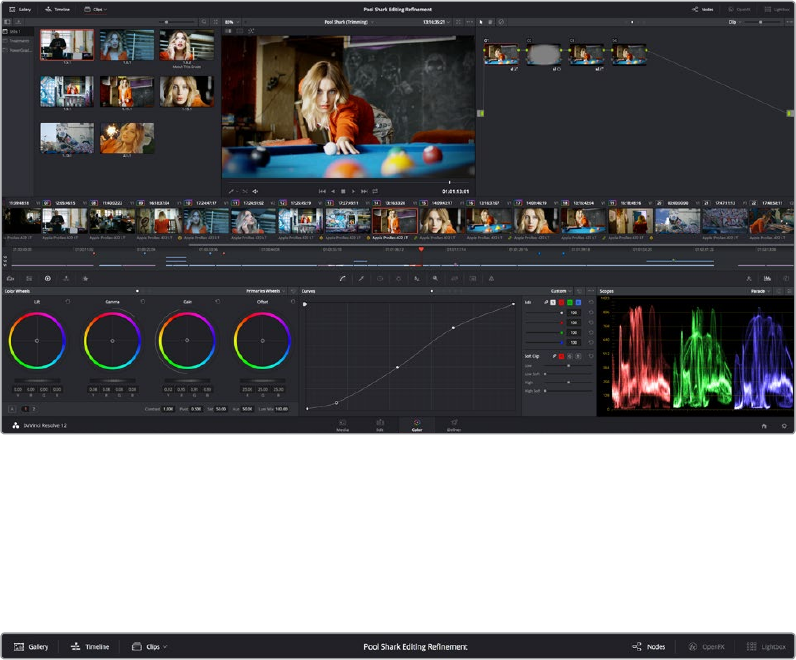
659
Using the Color Page Part 6 – 40
The Color Page Interface
The Color page is divided into seven main areas that work together to let you build a grade.
This section provides an overview of what these areas are and how they function.
The default layout of the Color Page
The Interface Toolbar
At the very top of the Color page is a toolbar with buttons that let you show and hide different
parts of the user interface. These buttons are as follows, from left to right:
The interface toolbar
Gallery: Opens and closes the Gallery panel.
Timeline: Opens and closes the Mini-Timeline.
Clips: Opens and closes the Thumbnail timeline. To the right is a pop-up menu that lets
you choose a timeline filtering option for the Thumbnail timeline.
Nodes: Opens and closes the Node Editor
OpenFX: Opens and closes the OpenFX panel.
Lightbox: Opens and closes the Lightbox.
Viewer
The Viewer shows the frame at the current position of the playhead in the Timeline. At the top
of the Viewer is a header that displays the Project and Timeline names, as well as a Viewer
Timecode display that shows the source timecode of each clip by default. The Timeline name is
also a pop-up display that lets you switch to any other timeline in the project. A scrubber bar
underneath the image lets you drag the playhead across the entire duration of the clip, while
transport controls underneath that let you control playback. A toolbar at the top provides
controls governing Image Wipes, Split-Screen controls, and Highlight display. Additional
controls let you loop playback, switch Unmix mode on and off, turn audio playback on and off,
and choose which on-screen controls are currently displayed.
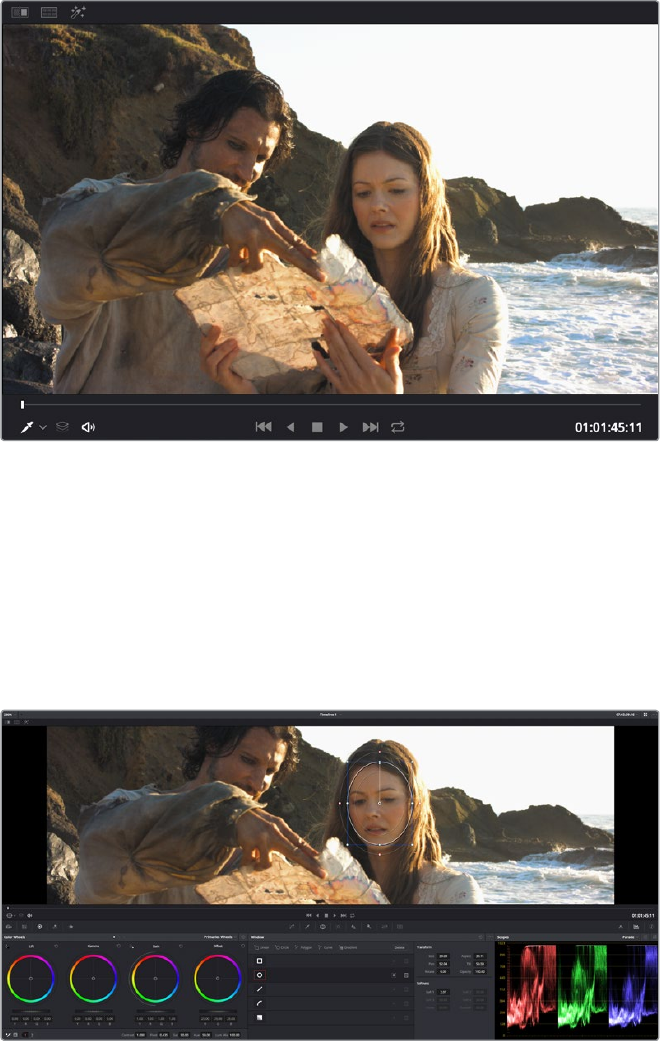
660
Using the Color Page Part 6 – 40
More information about using the Viewer appears later in this chapter.
The default Viewer with transport controls
You can also put the Viewer into one of three alternate modes to be able to see a
larger image as you work. All three of these modes are available from the Workspace >
Viewer Mode submenu.
Enhanced Viewer (Option-F to toggle this on and off) hides everything to the left and
right of the Viewer, giving you a large working area for tasks such as window
positioning and rotoscoping, while keeping the palettes and their controls visible
as you work.
The default Viewer with transport controls
Full Screen Viewer (Shift-F to toggle this on and off), are available to provide more
working area for tasks such as window positioning and rotoscoping. Full Screen Viewer
also lets you display the OpenFX panel at full height, and you can turn the Node Editor
on and off to access different effects controls while you work.
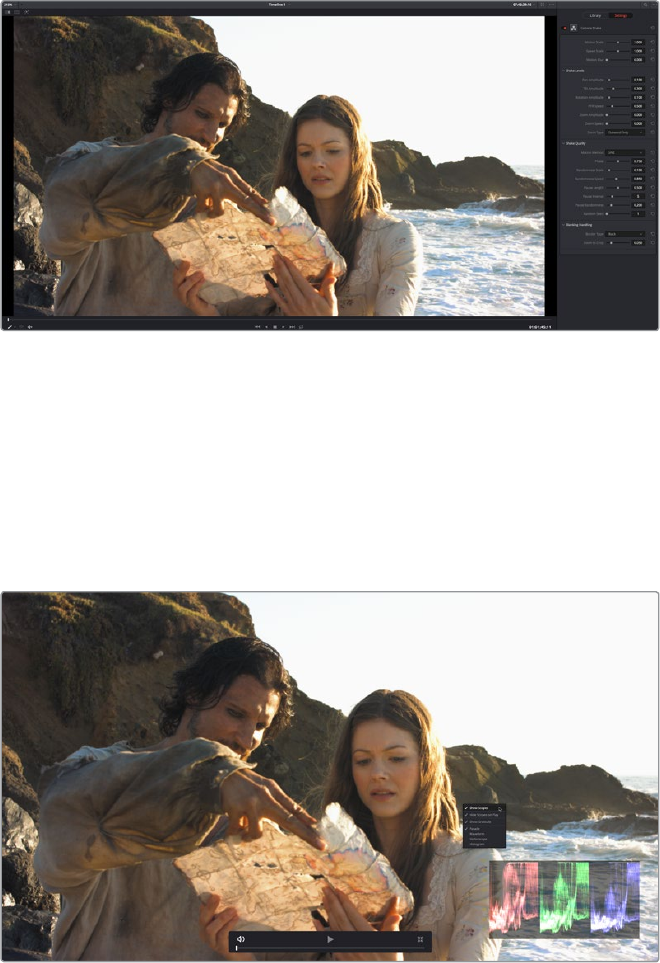
661
Using the Color Page Part 6 – 40
The default Viewer with transport controls
Cinema Viewer (Command-F to toggle this on and off) expands the Viewer to fill your
workstation’s entire monitor. This is useful if you want to play the current Timeline
without any distractions. When you move the pointer over the image, transport controls
and a jog bar appear to let you control playback. For DITs, a contextual menu is
available by right-clicking anywhere on the image with which you can turn on and
customize a video scope overlay (which can be dragged to different locations on
the Viewer).
The default Viewer with transport controls
Gallery
The Gallery is used for storing still frames to use as reference, and grades you might like to
copy; stills and grades are stored together. A button lets you open up the Album browser, used
for organizing your stills. At the bottom of the Gallery, Memories let you store grade information
that you can apply using a control panel or keyboard shortcuts. The Gallery on the Color page
mirrors the contents of the Gallery page. For more information on the Gallery page, see Chapter
47, “Using the Gallery.”
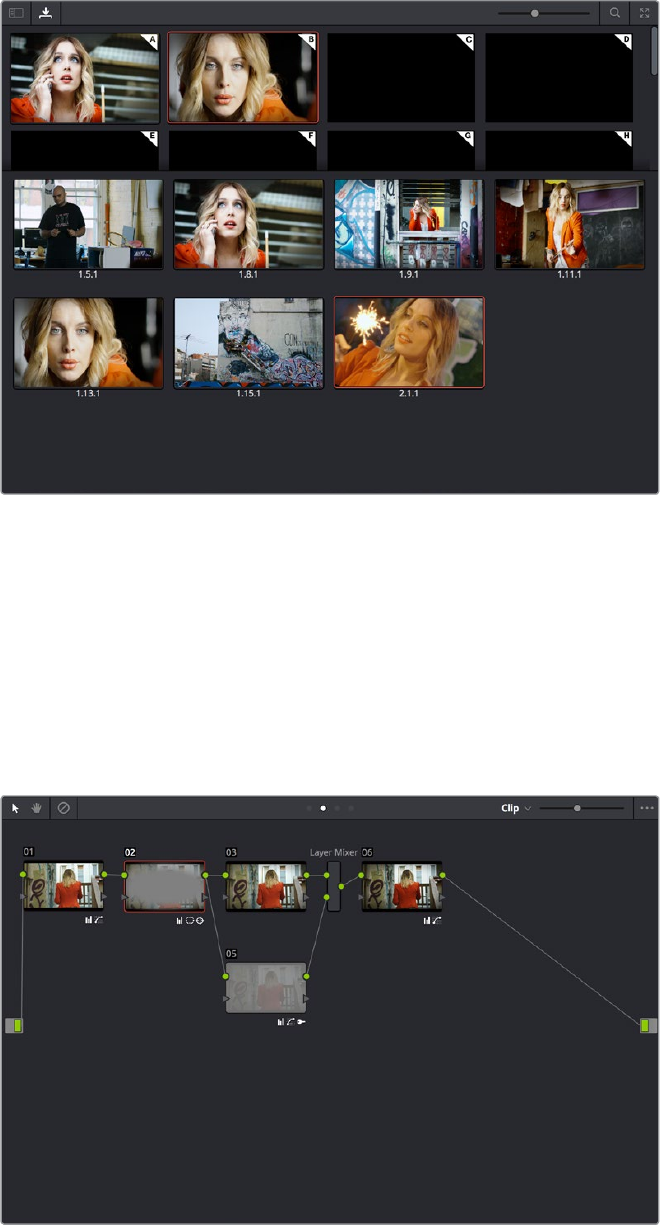
662
Using the Color Page Part 6 – 40
The Gallery has Memories, stills saved in Albums and your PowerGrades
Node Editor
The Node Editor is where you assemble one or more individual corrections (nodes) together
into a complete multi-correction grade (node tree). This is a powerful way of assembling grades,
since different types of nodes let you create different combinations of corrections and very
specific adjustments by reordering operations, combining keys, or changing the layer order of
different adjustments. For more information about the Node Editor, see the “Node Editor
Basics” section of Chapter 49, “Node Editing Basics.”
Node Editor to construct your grade processing signal flow
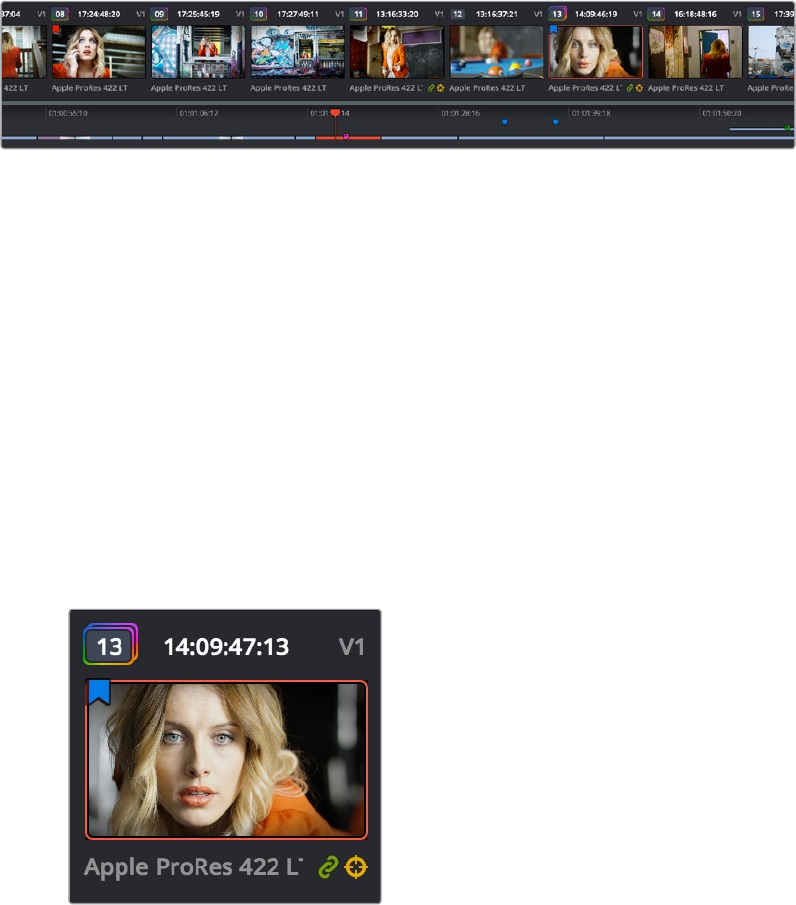
663
Using the Color Page Part 6 – 40
Timeline
The Timeline provides several ways of navigating the clips in your project, as well as keeping
track of what has been done to which clips. The Timeline is divided into two parts, each of
which shows different information and provides differing controls, and each of which can be
opened or closed separately via buttons on the Interface Toolbar.
At the top is the Thumbnail timeline, in which each clip is represented by a single frame. The
currently selected clip is outlined in orange.
The Thumbnail timeline with a Mini-Timeline below
A Timeline Ruler in the middle lets you scrub the playhead across multiple clips, and can be
zoomed out enough to show every clip in your entire program. Underneath, the Mini-Timeline
shows a small representation of the Timeline in the Edit page wherein each clip is as long as its
actual duration.
The currently selected clip is orange, and you can click any clip to select it. A scroll bar at the
bottom lets you navigate to the left and right, while using the scroll wheel of your mouse zooms
in and out. The Mini-Timeline shows at most six tracks of video. If your project has more tracks
than that, you can scroll up and down to reveal the hidden tracks. Any markers that were placed
on clips or the Timeline in the Edit page appear here, and you can click any marker to reveal
and edit its color and notes.
Much valuable information appears above and below each thumbnail such as each clip’s clip
number, source timecode, track number, whether it’s been flagged, its codec or version name
(you can double-click to switch), whether it’s automatically linked or part of a group, whether it’s
been tracked, etcetera.
A Clip Thumbnail in the Mini-Timeline
As seen above, a colored outline appears around the clip number of shots that have been
graded, and this outline is doubled if there are additional versions applied to that clip.
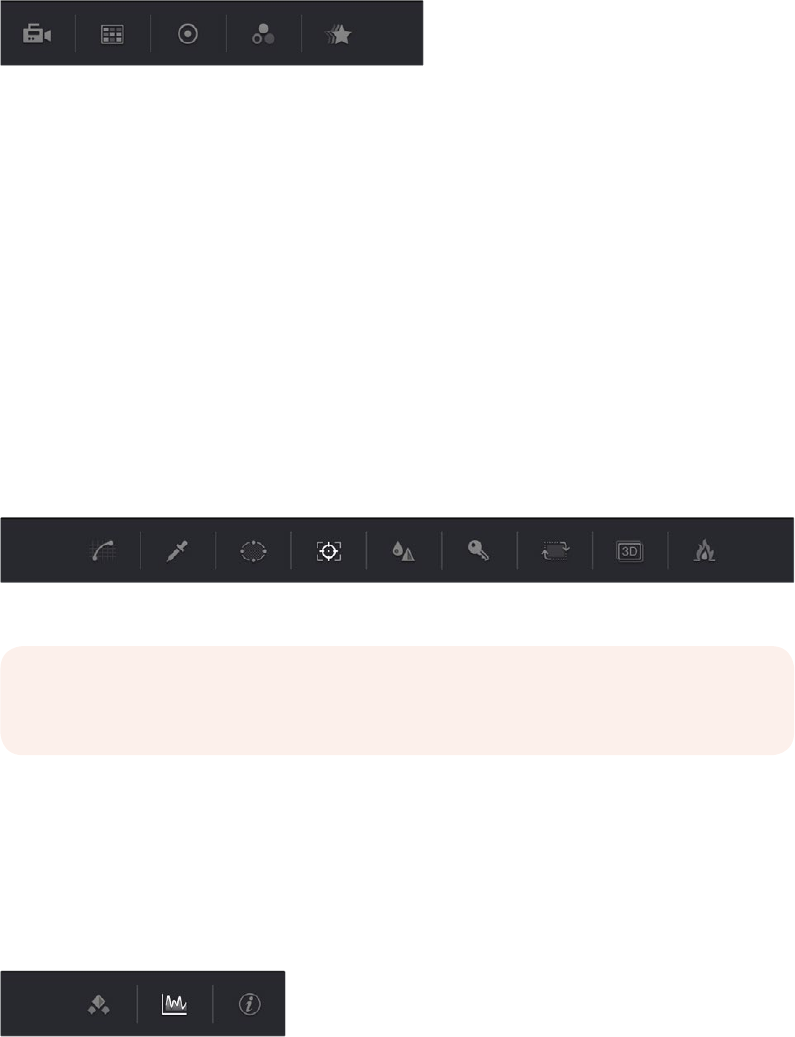
664
Using the Color Page Part 6 – 40
Left Palettes
A series of palettes at the bottom left of the Color page provide access to different sets of grading
tools, used principally for manipulating color, contrast, and raw media format settings. Each
individual palette is opened by clicking the corresponding icon at the top of the Palette panel.
Left palette selection buttons
The six available palettes are the Camera Raw palette (for making metadata adjustments to raw
media formats), the Color Match palette (automatic grading based using test charts), the Color
Wheels (graphical color balance controls and master wheels, along with a Slider mode for
adjusting YRGB Lift/Gamma/Gain), the RGB Mixer (for mixing color channels into one another),
and the Motion Effects palette (with controls for noise reduction and artificial motion blur).
These palettes can be used individually or together depending on what you’re trying to
accomplish. For more information on most of these palettes, see Chapter 42, “Primary Grading
Controls.” For more information on the Motion Effects palette, see Chapter 59, “The Motion
Effects and Blur Palettes.”
Center Palettes
At 1920x1080 resolution or higher, a second set of palettes is organized at the bottom center of
the Color page. These palettes span a wide range of functionality, and the adjustments you
make with them can be combined with those made using the Color palettes.
Center palette selection buttons
The nine available Center palettes include the Curves palette, the Qualifiers palette, the
PowerWindows palette, the Tracker palette, the Blur palette, the Key palette, and the Sizing
and Stereoscopic 3D palettes.
Keyframe Editor, Video Scopes, and Information
The bottom right of the Color page can be switched between one of three things:
The three controls for displaying the Keyframe
Editor, Video Scopes, or Information palette
Keyframe Editor: provides an interface for animating Color, Sizing, and Stereo Format
adjustments over time. Each node in the Node Editor corresponds to a track in the
Keyframe Editor, which lets you animate each node’s adjustments independently.
NOTE: At lower resolutions, the Left and Center palettes are merged to fit the DaVinci
Resolve interface into a smaller area.
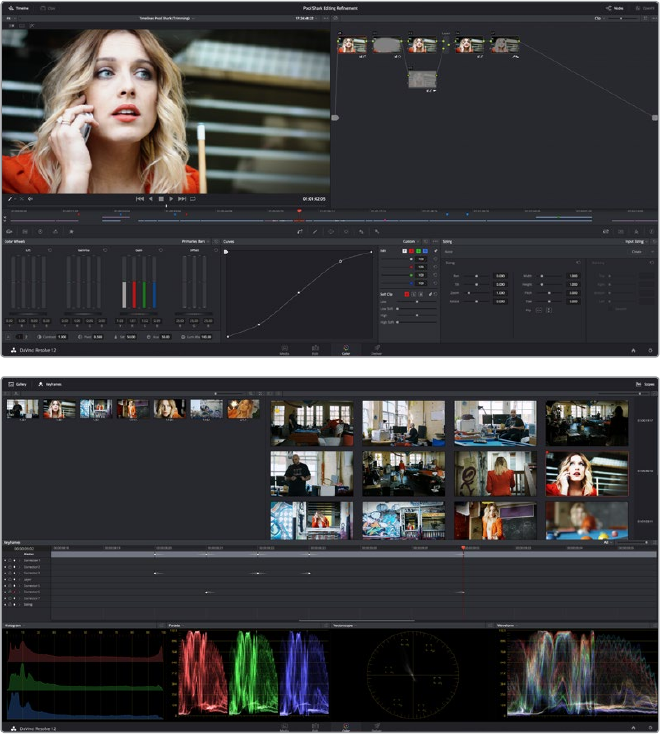
665
Using the Color Page Part 6 – 40
Furthermore, each node’s track can be opened up to reveal Parameter Groups, so
that you can animate subsets of an individual node’s functions independently of
other functions within the same node. For more information about keyframing, see
Chapter53, “Keyframing in the Color Page.”
Video Scopes: Provides a docked area where you can expose one video scope at
a time for reference while you work. You can also “undock” the video scopes into
a stand-alone window, in which you can show four different scopes at a time. More
information about using the video scopes appears later in this chapter.
Information: Provides a way of seeing clip and system information while you work.
Dual Monitor Layout
The Color page has a dual monitor layout that provides maximum space for the Viewer, Node
Editor, and Control palettes on the primary monitor, and a simultaneously displayed Gallery,
Lightbox, Keyframe Editor, Metadata Editor, and Video Scope panel on the secondary monitor.
To enter dual screen mode:
Choose Workspace > Layout > Dual Screen > On.
The Color page in dual screen mode
To switch which UI elements appear on which monitors:
Choose Workspace > Layout > Primary Display > Display 1 or Display 2, which reverses the
contents of both monitors in dual screen mode.
666
Using the Color Page Part 6 – 40
Customizing the Color Page
The various sections of the Color page can be resized, hidden, and rearranged as needed to
accommodate different working styles. This section covers all of the methods that are available
for Color page customization.
You can easily resize the Viewer, Gallery, and Nodes Editor relative to one another to make the
Viewer larger, expand the width of the Node Editor to have more workspace, or to create more
or less room for stills in the Gallery.
To resize the Viewer, Gallery, and Node Editor:
Move the pointer over the vertical divider between any two areas. When the resize icon
appears, drag the divider to the left or right to make one area larger while making the
other smaller.
You can also fully expand the Gallery, the Memories, the Node Editor, and the Keyframe
Editor to replace completely whichever interface area is adjacent.
To expand the Keyframe Editor:
Click the Expand control at the bottom left of whichever interface area you want to
expand. Once expanded, clicking the Expand control again will collapse that interface
area back to its original size, revealing whatever was hidden.
In Display mode, you can completely hide the Viewer, pushing the Gallery all the way
to the right side of the DaVinci Resolve window, and expanding the Node Editor to take
the rest of the space.
To toggle Display mode, do one of the following:
Right-click in the empty area of the Node Editor, and choose Toggle Display Mode from
the contextual menu. Do this again to toggle Display Mode off and return the interface
to the way it was.
Press SHIFT UP and DISPLAY/CURSOR, above the fourth trackball of the Center panel
of the DaVinci control panel.
To show and hide the Mini-Timeline:
Click the Timeline button at the right of the palette button bar.
To show and hide the Color page Viewer upper toolbar:
Click the Viewer option menu and choose Show Viewer Options to uncheck it.
To return all pages to their default layout:
Choose Workspace > Reset UI Layout.
Using the Viewer
The Viewer is your window into the Timeline. The clip and frame at the current position of the
playhead appears in the Viewer. The Viewer also provides a workspace for picking colors,
adjusting Power Windows, using split-screen stills for reference, and many other display-
oriented tasks. If you have a video out interface connected to a broadcast display or projector,
then the contents of the Viewer are typically mirrored by the video output.

667
Using the Color Page Part 6 – 40
On-Screen Controls and External Displays
DaVinci Resolve has been designed for use with calibrated external displays connected to
video output interfaces, and for most colorists working on broadcast or theatrical programs, this
is the recommended way to work for color critical evaluation.
Because of this, many of the on-screen controls associated with tasks such as color sampling,
window adjustment, and key manipulation are mirrored to your video output, making it possible
to hide the Viewer on your computer’s monitor and work with only an external display.
To choose whether on-screen controls are mirrored to video out, or disabled:
Choose an option from the View > Window Outline submenu. There are three options:
Off: Hides the window outline on both the external display and the Viewer.
On: The default, shows the window outline on both the external display and the Viewer.
Only UI: Hides the window outline on your external display, but leaves it in the Viewer.
To show or hide window on-screen controls using the DaVinci control panel:
Press SHIFT UP and then DISPLAY/CURSOR, above the fourth trackball on the Center panel.
This command is a three-way toggle. The first use of this command hides the window outline on
your external display, but leaves it in the Viewer. The second use of this command hides the
window outline on both the external display and Viewer. The third use of this command shows
the window outline on both the external display and Viewer.
Limitations When Grading With the Viewer on a Computer Display
Most computer displays do not operate at the color critical tolerances or specifications
required for broadcast or theatrical delivery. An additional issue, however, is that the
Viewer does not necessarily display each clip’s image data as it is displayed by the
calibration that your operating system applies to your computer display, depending on
which OS you’re running DaVinci Resolve on. This makes your computer display
potentially unsuitable for monitoring projects destined for the sRGB standard of the
web in its default state. For example, if you grade a project using the Color page
Viewer on your computer display, the resulting clip may not look the same in the
QuickTime player, or in other post-production applications.
You can address this in one of two ways:
If you’re using DaVinci Resolve on Mac OS X, you can turn on “Use Mac Display
Color Profile for viewers” in the Hardware Configuration panel of the System
Settings. This lets DaVinci Resolve use one of the preexisting profiles in the
Color tab of the Displays panel in the macOS System Preferences, thereby taking
advantage of ColorSync on macOS to let DaVinci Resolve display color the way
your computer monitor does. Be aware that custom calibrated .icc profiles are not
supported at this time.
Alternately, you can apply a dedicated Color Viewer LUT for calibration, using
the 1D/3D Color Viewer Lookup Table pop-up menu that’s found in the Color
Management panel of the Project Settings. This lets you analyze your computer
display for calibration in the same way you would calibrate an external display,
using a probe and color management software, and apply the resulting calibration
LUT in DaVinci Resolve. Keep in mind that monitor calibration can only make a
high-quality display standards-compliant, it cannot make up for a display gamut
that’s too small. For more information, see the “Look Up Tables” section of
Chapter3, “Project Settings and Preferences.”
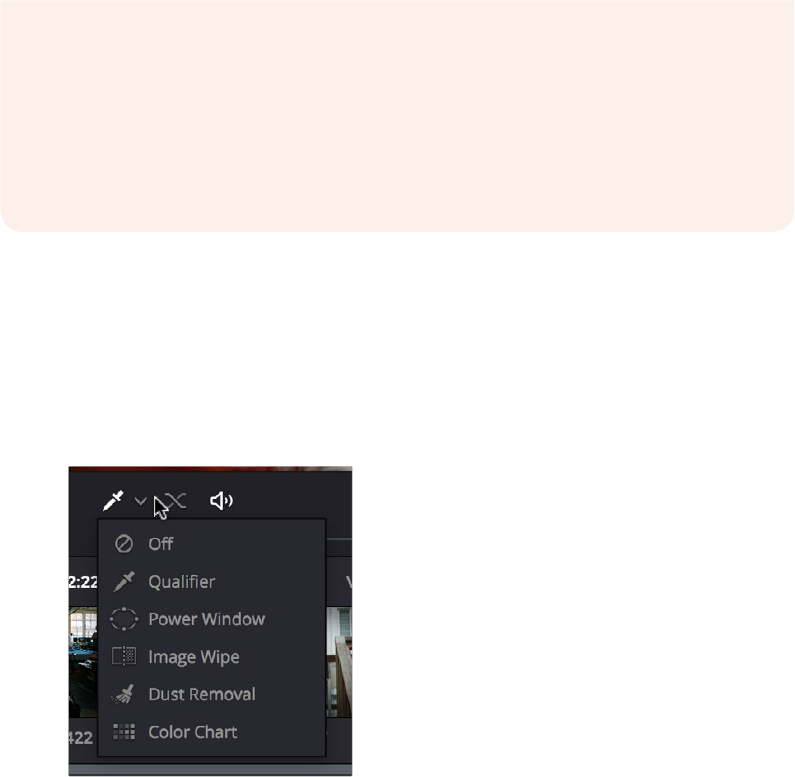
668
Using the Color Page Part 6 – 40
The On-Screen Control (OSC) Menu
The On-Screen Control pop-up menu lets you choose which on-screen controls you want to
display and adjust in the Viewer. Some palettes automatically enable corresponding on-screen
controls when you open them. For example, opening the Window palette displays the Power
Window on-screen controls, and opening the Qualifier palette displays up the Qualifier on-
screen controls.
The on-screen control menu for the Viewer
There are a variety of choices, each corresponding to different adjustments you can make:
Off: All on-screen controls are hidden from view, giving you an unimpeded display of
the image in the Viewer.
Qualifier: Turns on the Color Sample cursor, which lets you choose a color using
the fourth trackball of the DaVinci control panel. For more about using Color Sample
controls, see “Secondary Qualifiers.”
Power Window: Turns the Power Windows on-screen control on and off. For more
about adjusting windows in the Viewer, see “Power Windows.”
Image Wipe: Toggles mouse control of dragging the split screen directly on the
Viewer on and off. For more about working with split screens, see “Comparing clips in
the Viewer.”
Dust Removal Tool: Activates the interactive Dirt and Dust tool. For more information,
see Chapter 60, “Dust Removal.”
OpenFX: Only appears if a ResolveFX or OpenFX filter is applied to the current clip.
Shows and hides whatever on-screen controls are exposed by an OpenFX plug-in in
the currently selected node.
Color Chart: Shows and hides the color chart overlay that lets you identify a color
chart in the picture that you want to use with the Color Match palette to create an
automatic grade.
Strictly speaking, if you’re doing professional work, you should restrict your grading to
a calibrated, 10- or 12-bit class-A external broadcast display of some type, connected
via a Blackmagic Design video interface. Assuming everything is running properly, an
image output to video from DaVinci Resolve should match an image output to video
from any other post-production application you’re using, and this should be your basis
for comparison when examining the output of two different applications.
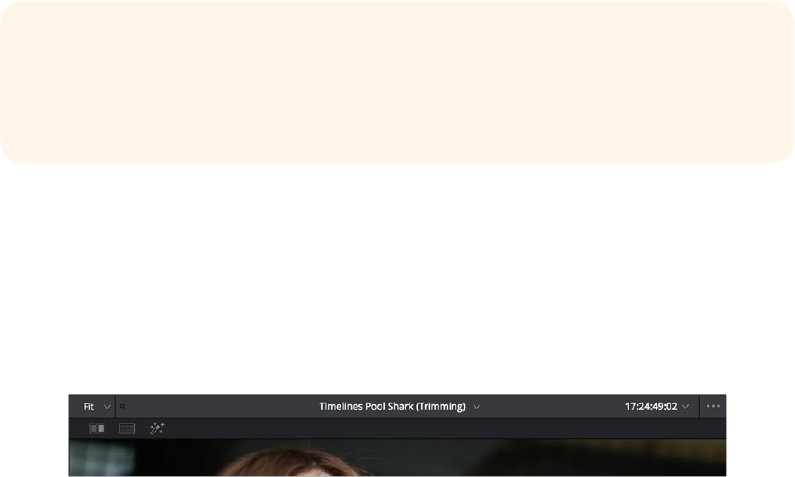
669
Using the Color Page Part 6 – 40
The Viewer Toolbar
The Color page has a toolbar at the top of the Viewer (underneath the title bar) that makes it
easy to enable and disable Image Wipe, Split-Screen, and Highlight viewing by clicking one of
these three buttons. In the process, these buttons provide an easy reference for when a
comparison mode is enabled. In each of these Viewer modes, the appropriate controls for
customizing that view appear to the right of the Viewer toolbar.
The Color page Viewer toolbar
This toolbar can be hidden by clicking the Viewer option menu and unchecking Show
Viewer Options.
Zooming into the Viewer
When using the Viewer to sample tricky colors or draw a detailed PowerCurve, it can be
advantageous to zoom into the image.
To zoom into or out of the Viewer, do one of the following:
Make sure that View > Zoom > Allow Mouse Zoom is on, then move the pointer to within
the Viewer, and then roll the scroll wheel to zoom in or out of the image.
Press Command-Equal to zoom in, or Command-Minus to zoom out.
To pan around the Viewer:
Move the pointer to within the Viewer, then middle-click and drag to pan around
the image.
To reset the size of the Viewer image:
Choose View > Viewer Actual Size (Option-Shift-Z)
Choose View > Zoom > Zoom to Fit (Shift-Z)
Right-click anywhere within the Viewer, and then choose one of the following options
from the contextual menu:
Actual Size: Zooms to the native resolution of the clip. If the clip is larger than the
Viewer, it will be cut off around the edges.
Zoom to Fit: Zooms so that the entire image fits within the Viewer.
TIP: As you work, you may find you want to temporarily hide or show the on-screen
controls so you can get an uncluttered look at the image you’re adjusting. You can
toggle any set of on-screen controls off and on without selecting Off in the menu by
pressing Shift-` (tilde).
670
Using the Color Page Part 6 – 40
Using the Scrubber Bar and Transport Controls
One of the principal uses of the Viewer is to control playback. The scrubber bar, directly
underneath the image in the Viewer, contains a playhead that you can drag to the left and right
to navigate quickly through the currently selected clip as fast as you can move the pointer. The
playhead in the scrubber bar is locked to the playheads found in the Timeline and Keyframe
Editor. Moving one playhead moves all three.
How much of the Timeline the scrubber bar navigates depends on whether the Node Editor is
set to Clip or Track mode. In Clip mode, the scrubber bar width equals the duration of the
currently selected clip. In Track mode, the scrubber bar width equals the total duration of the
entire Timeline.
A row of transport controls below the scrubber bar provides more specific control over
timeline playback.
Previous clip: Moves the playhead to the first frame of the previous clip.
Reverse: Initiates 100% playback in reverse.
Stop: Stops playback.
Play: Initiates 100% playback.
Next clip: Moves the playhead to the first frame of the next clip.
Loop: Lets you restrict playback to the current clip, looping to the first frame if you’re
playing forward to the end of a clip, or looping to the last frame if you’re playing in
reverse to the beginning of a clip.
Two other buttons let you control audio playback and clip display in the Viewer:
Unmix: Turning on Unmix disables all transitions, composited superimpositions, and
effects that mix two or more clips together. Unmix allows you to judge the appearance
of a clip without distraction whenever you need to make an adjustment based on how
the clip looks on its own, or whenever you need to make changes based on frames
that would otherwise be hidden underneath a transition such as a dissolve or fade from
black. When you’re ready to see how your grades work in context with transitions and
composites again, turn Unmix off.
Mute: Lets you turn audio playback off and on if you’ve loaded an Audio Chase Track
for the current edit.
Controlling Playback Using the Spacebar and JKL Keys
You can also use the spacebar to start and stop playback, or the JKL keyboard shortcut
convention for controlling playback, where J plays in reverse, K stops playback, and L plays
forward. There are many additional uses of of these keyboard shortcuts, for more information see
“Using JKL to Control Playback” in Chapter 16, “Preparing Clips for Editing and Viewer Playback.”
Navigating Using Timecode
You can also use absolute or relative timecode entry to move the playhead in both the Source
and Timeline viewers. When entering timecode, type each pair of hour, minute, second, and
frame values consecutively, with a period representing a pair of zeros for fast entry. The last pair
of timecode values (or period) you enter is always assumed to be the frame number, with any
untyped values assumed to be zero. It’s not necessary to enter colons or semicolons. For more
information, see “Moving the Playhead Using Timecode” in Chapter 16, “Preparing Clips for
Editing and Viewer Playback.”

671
Using the Color Page Part 6 – 40
Navigating Using the DaVinci Control Panel
It’s also possible to navigate the Timeline using the DaVinci control panel. A set of buttons on
the Transport panel include:
PREV/NEXT SCENE: Moves the playhead among the first frame of each clip.
STEP REV/FWD: Moves the playhead from frame to frame.
FIRST FRAME/LAST FRAME: Jumps the playhead to the first and last frame of any
given clip.
RWD/FFWD: Moves the playhead in rewind of fast forward.
REV/STOP/FWD: The standard play reverse, stop, and play forward commands.
Another set of navigation controls is available by pressing the MODE button above the fourth
trackball on the Center panel, and then pressing the CUE MODE soft key.
You can also use the jog wheel and shuttle control on the Transport panel. The jog wheel lets
you scrub frame by frame, while the shuttle control moves among preset rewind and fast
forward speeds.
Finally, there are two additional methods of navigating using the DaVinci control panel that
make it easy to jump to a specific clip or timecode value.
To move the playhead to the first frame of a specifically numbered clip:
On the Transport panel, enter a clip number using the number pad, then press
TAKE ENTER.
To move the playhead relative to its current position:
1 Press + or – on the number pad.
2 Enter either a number of frames, or a timecode value using colons to divide each pair of
digits (for example +01:00:23:12).
3 Press TAKE ENTER.
To move the playhead to an exact timecode value:
1 Using the number pad, enter a timecode value, using colons to divide each pair of
digits (for example 01:00:23:12).
2 Press TAKE ENTER.
Viewer and Transport Timecode Displays
The Viewer has two timecode displays, each of which defaults to a different timecode setting.
A timecode display at the top, the Header Timecode Display, shows the Source timecode by
default. The timecode display at the bottom, the Transport Timecode Display, shows the Record
timecode by default.
The bottom timecode display can be changed to show one of four different options, which are
similar to those found in the Data Burn In palette.
NOTE: If a Gallery still is turned on for split screen comparison, the shuttle control will
adjust the split screen center, and not the playhead position. Turning Reference Wipe
off again frees up the shuttle control to affect playback again.
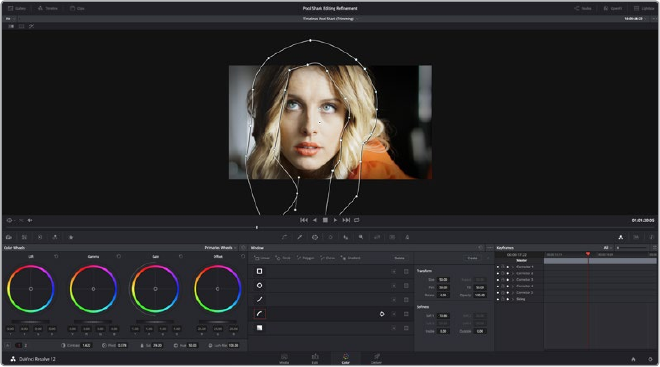
672
Using the Color Page Part 6 – 40
To change a timecode display to a different setting:
The top Timecode display is a pop-up menu that can be changed to whatever timecode, frame
number, or keykode you want to display. The bottom Timecode display can also be changed by
right-clicking on it and choosing the type of value to show from the contextual menu
that appears.
Timeline Timecode: The timecode corresponding to the playhead’s position in the
overall Timeline.
Source Timecode: The timecode corresponding to the playhead’s position relative to
the currently selected clip.
Timeline Frame Number: The frame count corresponding to the playhead’s position in
the overall Timeline.
Source Frame Number: The frame count corresponding to the playhead’s position
relative to the currently selected clip.
KeyKode: The KeyKode number corresponding to the media’s KeyKode track, if
there is one.
Show Timecode at 30 FPS: Displays 24 fps timecode, via 3:2 pulldown, as 29.97 fps
timecode. Has no effect on video playback.
In the same way, the top timecode display can alternately be changed to show keykode, if it’s
available, within a DPX media file’s header.
Enhanced Viewing, Full Viewing, and Cinema Viewing
You can expand the Viewer into Enhanced Viewing mode by choosing Workspace > Viewer
Mode > Enhanced Viewer mode (Option-F), or by pressing CURRENT/VIEWER on the T-bar
panel of the DaVinci control panel.
In Enhanced Viewing mode, the Viewer works exactly as it does at its regular size, but it
expands to fill up the entire area of the screen above the palettes and Keyframe Editor. To exit
Enhanced Viewing mode, click the lower right-hand corner button again.
This can be useful if you need a closer view of the image for purposes of making detailed
corrections, examining noise patterns up close, making a tricky color selection, or drawing a
complicated PowerCurve.
Color page in Enhanced Viewer mode
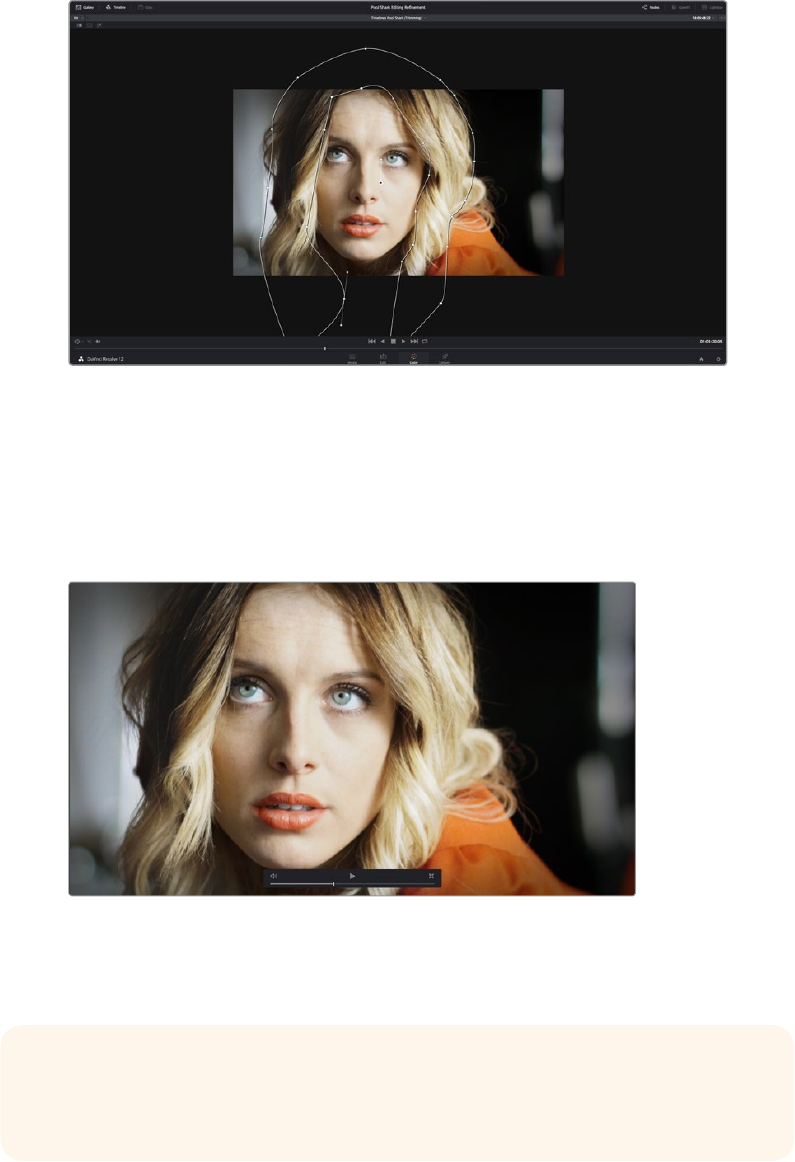
673
Using the Color Page Part 6 – 40
In Full Viewing mode (available by choosing Workspace > Viewer Mode > Full Screen
Viewer, pressing Shift-F, or Option-clicking the Enhanced Viewing mode button), the
Viewer takes up even more room by hiding the palette controls, but leaves room for the
transport controls, the On-screen Control pop-up menu, the timecode display, and the
page buttons along the bottom of the DaVinci Resolve UI. This mode is useful when
you need an even closer look at the image, but you still want access to a minimal set of
on-screen controls.
Color page in Full Viewer mode
Another option, Cinema mode, allows for full-screen viewing. Cinema mode is available
by choosing Workspace > Viewer Mode > Cinema Mode (Command-F). In Cinema
mode, the menu bar is hidden, and the image is presented full screen without any of
the ordinary on-screen controls. Moving the pointer over the screen reveals a set of
hidden on-screen controls that include a play button, scrubber bar, mute button, and
exit button (which lets you turn off Cinema mode).
Color page in Cinema mode
Cinema mode is useful for doing detailed reviews of media in on-set and digital dailies
workflows when working remotely without a secondary video display.
TIP: If you’d like to superimpose timecode over the image in Cinema mode for
reference, you can use the controls within the Data Burn-In window (Workspace > Data
Burn-In) to set up whatever information you’d like to display during playback.

674
Using the Color Page Part 6 – 40
Safe Area Overlays in the Viewer
You can show or hide a series of safe area overlays in the Viewer. All safe area overlay options
are found in the View > Safe Area menu. Each safe area overlay option can be individually
enabled or disabled from this menu.
Viewer displaying extents, center, safe, action and title area overlays
On/Off: Turns all currently selected safe area marker options on or off at once.
Extents: An outline showing the exact outer edge of the frame. Especially useful when
the safe markers are set to an aspect ratio other than that currently used by the Viewer.
Action: An outline showing the outer 90% action safe area of the frame.
Title: An outline showing the outer 80% title safe area of the frame.
Center: A crosshairs showing the center of the frame.
Aspect: Enables use of the View > Select Aspect Ratio submenu to change the aspect
ratio of the safe area markers. You can choose among the following aspect ratios: 1.33
(a.k.a. 4:3), 1.66, 1.77 (a.k.a. 16:9), 1.85, and 2.35.
You can also access these options directly using the DaVinci control panel.
To customize safe area markers using the DaVinci control panel:
1 Press MODES, above the fourth trackball on the Center panel.
2 Press the SAFE AREA soft key. The Center panel soft keys are remapped with all of the
available safe area options.
3 When you’re finished, press EXIT.
Use Gray Background
Choosing View > Show Gray Backgrounds in Viewer sets the empty area of the Viewer
(ifthereis any) to a lighter gray, making it easier to see which parts of the Viewer are black
because of blanking, and which parts are simply empty because of the way the image is
zoomed or panned.
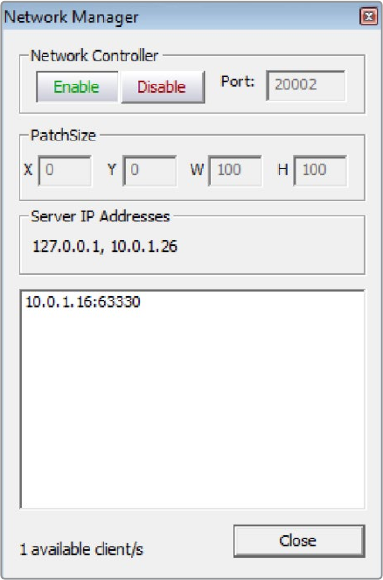
675
Using the Color Page Part 6 – 40
Monitor Calibration
If you use Light Illusion’s LightSpace CMS or SpectraCal’s Calman for display calibration, you
can now use DaVinci Resolve as a sync-able pattern generator. This means you can use
DaVinci Resolve to output color patches, synchronized by LightSpace, to your display through
whichever video interface is connected to your computer. These synchronized color patches
will be analyzed by a monitor probe that’s also controlled by LightSpace, which stores the
probe data and compares it to the original color values of the output color values in order to
characterize that display.
To use this feature, you must first have a licensed copy of LightSpace CMS, which is a Windows
application. Synchronization depends on a wired or wireless LAN being available to connect
the LightSpace application with DaVinci Resolve.
To synchronize LightSpace CMS to DaVinci Resolve as a pattern generator client:
1 Open LightSpace on the Windows computer that’s running it.
2 When LightSpace is open, click the Network Manager button. A window appears
displaying the two network IP addresses used by LightSpace. Note these, and click the
Enable button.
The Network Manager dialog in LightSpace CMS
3 In DaVinci Resolve, choose Workspace > Monitor Calibration > LightSpace.
4 When the LightSpace dialog opens, enter the second of the two network IP addresses
LightSpace lists into the Remote Machine field, and make sure the Port number
matches. Then click the Connect button.
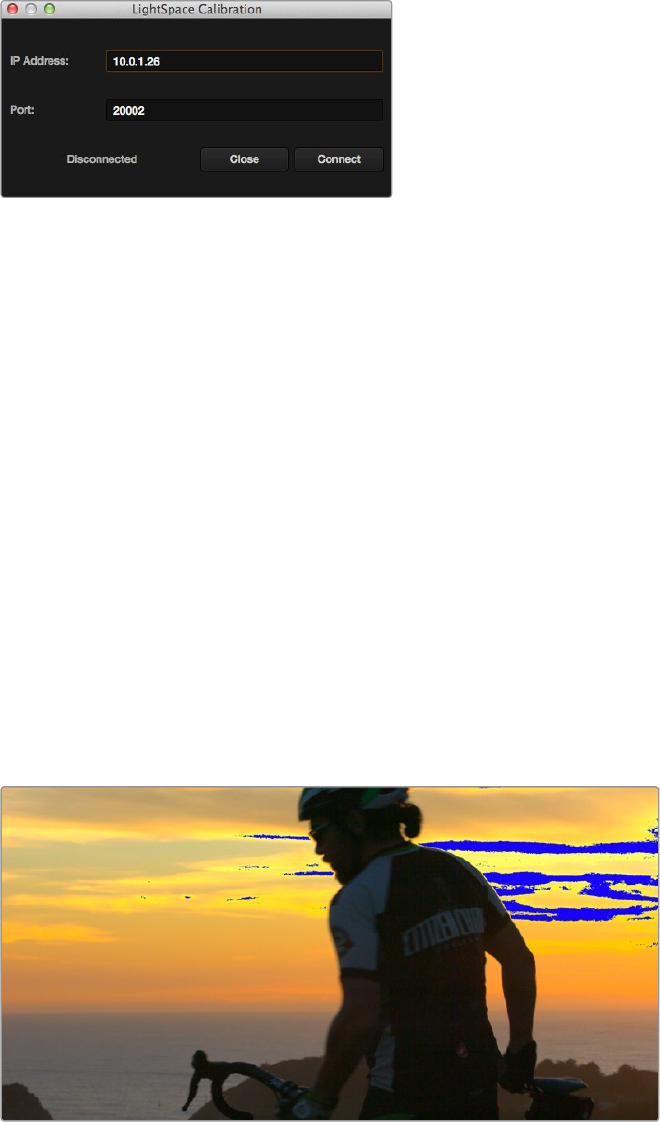
676
Using the Color Page Part 6 – 40
The Calibration dialog in DaVinci Resolve, connected
to LightSpace CMS via WiFi
If everything is working correctly, the LightSpace dialog in DaVinci Resolve should
show the word “Connected,” and the Network Manager dialog in LightSpace should
show that there is “1 available client/s.”
You can now close the Network Manager dialog in LightSpace and follow the
procedures outlined in the LightSpace CMS documentation for characterizing your
display and building and exporting a display LUT (in the .cube format) that you can use
as a display LUT in DaVinci Resolve. Alternately, you can export a display LUT from
LightSpace that can be loaded onto an outboard video processing device connected
between your video
5 When you’re finished, click Disconnect in the LightSpace dialog, and then click Cancel
to close the window.
Viewing Broadcast Safe Exceptions
Choosing View > Display Broadcast Safe Exceptions sets the Color Page Viewer to show a
false-color overlay that indicates regions of the picture that violate the currently selected
broadcast safe level in the Color Management panel of the Project Settings in blue.
Areas of the image that violate broadcast safe are highlighted in blue
More information about Broadcast Safe limiting in the Color Management panel of the Project
Settings appears in Chapter 41, “Automatic Grading Commands and Imported Grades.”
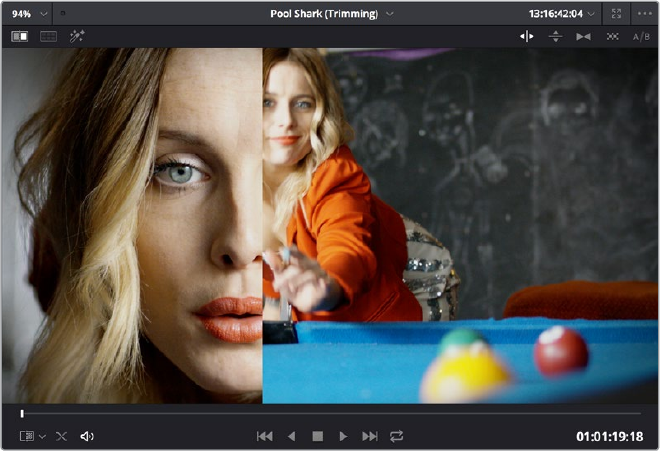
677
Using the Color Page Part 6 – 40
Comparing Clips in the Viewer
The ability to compare different clips to one another is an important part of the color correction
process. DaVinci Resolve provides three different ways of doing so. You can use the Gallery to
display two clips for split-screen comparison. You can also use different reference modes to see
a timeline clip or reference movie directly as part of a split-screen comparison. Finally, you can
use the Split Screen controls to display multi-frame arrangements in the Viewer.
Saving and Wiping Stills in the Gallery
The Gallery on the Color page provides fast access to stills that you’ve saved from various clips
in the Timeline. While the dedicated Gallery page provides a more comprehensive interface for
browsing pre-saved “Looks,” as well as for importing stills from other projects, you can save,
organize, and browse stills directly within the Gallery of the Color page.
Stills are saved in the DPX file format. Once you’ve saved one or more stills, you can set up
split-screen wipes in the Viewer, which will be mirrored to your external display.
Stills from the Gallery can be compared to the current shot making it easier to match grades
This section provides an abbreviated summary of still store and split-screen functionality to get
you started quickly.
To save a still, do one of the following:
Choose View > Stills > Grab Still (Option-Command-G).
Right-click on the Viewer and choose Grab Still.
Press GRAB STILL on the Transport Panel of the DaVinci control panel.
To wipe a still, do one of the following:
Select a still in the Gallery, and click the Image Wipe button on the top Viewer toolbar.
Choose View > Stills > Play Still (Command-W), or right-click in the Viewer and choose
Toggle Wipe.
Double-click a still in the Gallery.
Press PREV STILL or NEXT STILL on the Transport Panel of the DaVinci control panel to
select a still, then press PLAY STILL.
678
Using the Color Page Part 6 – 40
To adjust a wipe in the Viewer, do one of the following:
Drag the pointer within the Viewer to move the wipe.
Push the T-bar control up and down on the T-bar panel of the DaVinci control panel.
To customize a wipe in the Viewer:
Click one of the Wipe mode buttons in the Viewer toolbar.
Choose one of the following from either the View menu or the Viewer contextual menu:
Wipe Style: Cycles among the Horizontal, Vertical, Mix, Alpha, Difference, and
Box modes.
Invert Wipe: Reverses each half of the wipe.
Copying Grades from Stills in the Gallery
Stills also store the grade from the clip they came from, and can be used to copy grades from
one clip to another, or to store grades that you might want to use later.
To copy a grade from a still to a clip, do one of the following:
Select one or more clips in the Timeline, then right-click a still in the Gallery and choose
Add Correction.
Select one or more clips in the Timeline, then middle-click a still in the Gallery.
When you copy a still in this way, the saved grade completely overwrites the grade in the target
clip, unless you’ve used the “Preserve number of nodes” option, found in the contextual menu
of the Gallery. For more detailed information on using the Gallery, including options for
organizing the Gallery browser, instructions for using Albums, Power Grades, and Memories, as
well as other methods of copying grades and performing advanced grade management tasks,
see Chapter 47, “Using the Gallery” and Chapter 48, “Grade Management.”
Different Viewer Reference Modes
While it’s common to use the Gallery to wipe against reference stills, by changing the reference
mode you can create a wipe against a clip in the Timeline, or against an offline video, if one has
been assigned to the current Timeline.
To change the Viewer reference mode, do one of the following:
Choose an option from the View > Reference Wipe Mode submenu.
Right-click the Viewer and choose an option from the Reference Mode submenu of the
contextual menu.
On the T-bar panel of the DaVinci control panel, press REF ON/OFF to toggle the
reference mode immediately to Offline mode and back again, in order to split screen
the current clip against an offline video.
There are three Reference Modes:
Gallery: The default reference mode. Lets you wipe the current clip against a
Gallery still.
Timeline: Lets you wipe the current clip against another clip in the Timeline using the
Wipe Timeline Clip command (see below).
Offline: Lets you wipe the current clip against an offline video that’s been assigned to
the current Timeline.
If you want to wipe the current clip against another clip in the Timeline without saving a still to
the Gallery first, there’s a special procedure you can follow.
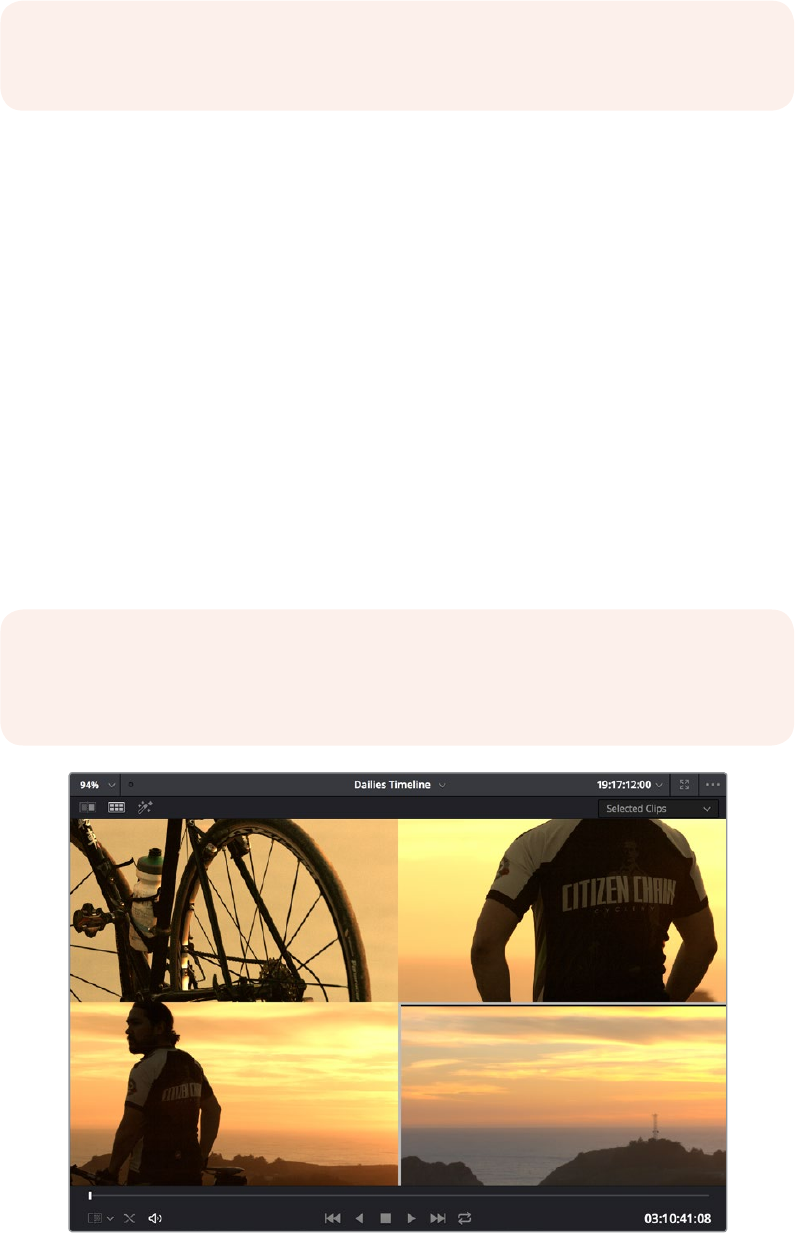
679
Using the Color Page Part 6 – 40
To wipe between two clips using the Timeline reference mode:
1 Click the thumbnail of the first clip you want to compare.
2 Right-click the thumbnail of the second clip you want to compare against, and choose
Wipe Timeline Clip from the contextual menu.
Both clips appear split screened against one another.
Using Split Screen Modes
A set of Split Screen modes provides additional ways of comparing multiple images in the
Viewer at the same time. These provide side-by-side and grid comparisons of multiple shots
and multiple versions, all of which are output to video for monitoring on your external video
display. For example, you can use the Split Screen Versions mode to display every single
version that’s applied to the current clip in a grid, for easy evaluation. The currently selected clip
in the Timeline is highlighted in gray, so you can keep track of what you’re doing.
To enable a split screen mode, do one of the following:
Click the Split Screen button on the top Viewer toolbar, and choose a split screen
method from the pop-up menu that appears in the Viewer toolbar at the right.
Choose an option from the View > Split Screen submenu.
Press Option-Command-W to turn Split Screen on and off, using the last
selected option.
Right-click the Viewer and choose an option from the Split Screen submenu in the
contextual menu.
Four shots shown in a grid using the Split Screen > Selected Clips mode
NOTE: Wipe Timeline Clip only appears in the contextual menu if you right-click on a
thumbnail in the Timeline that has not been selected.
NOTE: When any of the split screen modes are selected, you cannot see any other
on-screen controls in the Viewer, such as Power Window shapes, until you first disable
Split Screen
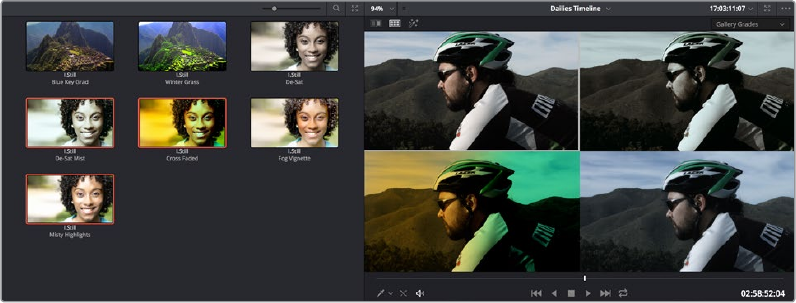
680
Using the Color Page Part 6 – 40
Viewing and Choosing the Current Selection
In any of the split screen modes, the current selection is indicated by a gray outline. This outline
can be disabled for a more direct comparison by choosing View > Split Screen > Show Outline
to toggle the outline off and on.
In certain modes, you can also double-click a particular frame of the split screen view to change
the current clip, choose the active version, or apply a gallery grade.
Available Split Screen Modes
You can choose from among the following split screen modes:
Versions: Shows up to sixteen versions for the current clip, all at once, making it easy
to evaluate a series of different versions in relation to one another. If you have more
then sixteen versions, you deserve some manner of award. Double-clicking a version
changes the active version.
Versions and Original: Shows up to the first fifteen versions for the current clip, along
with the original ungraded clip at the upper left-hand corner. Double-clicking a version
changes the active version, but you cannot double-click to select the original.
Groups: Shows up to sixteen clips that share the same group as the current clip.
Double-clicking a frame does nothing in this mode.
Selected Clips: Shows all currently selected clips in the Timeline, up to sixteen at one
time. Clicking a clip moves the playhead to the first frame of that clip.
Neighbor Clips: Shows four clips that immediately surround the current clip.
Theprevious two clips appear as the upper left- and right-hand clips, the current
clip appears at the lower left-hand corner, and the next clip appears at the lower
right. Double-clicking a frame does nothing in this mode. The “Neighboring Clips
inSplitScreen” parameter in the Color panel of the User Preferences lets you
customize how many neighboring clips appear in this mode.
Gallery Grades: When you choose this option, the act of selecting stills in the Gallery
of the Color page shows each of the grades associated with those stills as they appear
applied to the current clip, in a split screen arrangement. Double-clicking a frame
applies that gallery grade to the current clip.
Previewing four gallery grades using the Split Screen > Gallery Grades mode
Highlight Modes: Shows a four-up display that lets you simultaneously see (clockwise) the clip’s
RGB image, the gray matte, the the high contrast matte, and a difference matte generated by
the node’s input compared against its output. Double-clicking a frame does nothing in
this mode.
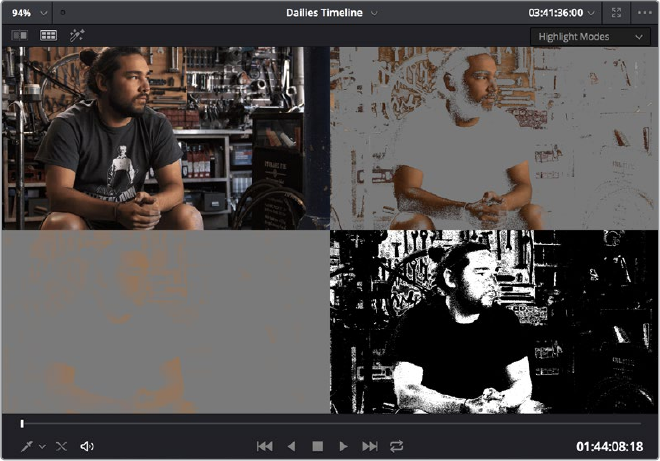
681
Using the Color Page Part 6 – 40
Viewing a key using the Split Screen > Highlight Modes
Using Video Scopes
DaVinci Resolve has a set of four real-time video scopes that you can use to monitor the internal
data levels of clips in your project as you work. Each scope provides an unambiguous graphical
analysis of the various characteristics of the video signal, showing you the relative strength and
range of individual color components including luma, chroma, saturation, hue, and the red,
green, and blue channels that, together, comprise the color and contrast of the images in
your program.
The available video scopes include:
WFM (waveform monitor): Overlays the red, green and blue channels over one another
so that you can see how they align. What the relative heights of the red, green, and
blue graphs indicate is identical to the description seen for the Parade scope below.
One thing to keep in mind, with color enabled so that the red, green, and blue graphs
are tinted with the color they represent, it’s easy to see where all three graphs align, by
looking for where parts of the waveform monitor appear in white, which is the result of
the red, green, and blue graphs lining up and adding their color together.
Parade (RGB parade scope): Shows separate waveforms analyzing the strength of the
R, G, and B components of the video signal. By showing a comparison of the intensity
of the red, green, and blue channels, the parade scope makes it possible to detect
and compare imbalances by comparing the relative heights of the RGB graphs in the
highlights (the top of the R, G, and B graphs), shadows (the bottom of the R, G, and
B graphs), and midtones (the middle of the R, G, and B graphs) for the purposes of
identifying color casts and performing scene-by-scene correction. Taken altogether,
the bottom of all three graphs indicates the black point of the image, while the tops of
all three graphs indicate the white point. It then follows that the difference between
the height of the bottom and top of all three graphs indicates the overall contrast ratio
of the image you’re evaluating. Tall parade graphs indicate a wide contrast ratio, while
short parade graphs indicate a narrow contrast ratio.
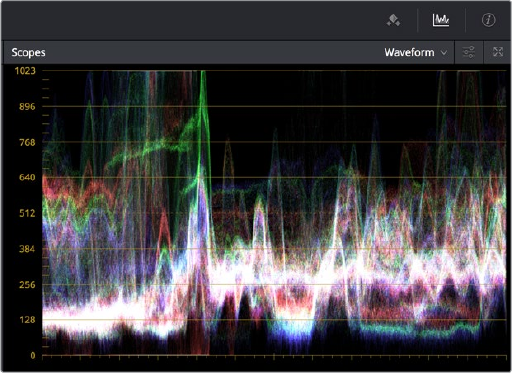
682
Using the Color Page Part 6 – 40
Vectorscope: Measures the overall range of hue and saturation within an image.
Measurements are relative to a centered graticule that you can enable that’s overlaid
on the scope, which provides a frame of reference via crosshairs. DaVinci Resolve has
a traditional vectorscope, the graph of which emulates a trace-drawn graph, with 75
percent color bar targets indicating the angle of each of the primary and secondary
colors around the edge of the graph, and an optional skin tone reference graticule
(otherwise known as the In-phase reference). More saturated colors in the frame stretch
those parts of the graph farther toward the edge, while less saturated colors remain
closer to the center of the Vectorscope, which represents 0 saturation. By judging
how many parts of the vectorscope graph stick out at different angles, you can see
how many hues there are in the image, with the specific angle of each part of the
graph showing you which hues they are. Furthermore, by judging how well centered
the middle of the vectorscope graph is relative to the crosshairs, you can get an idea
of whether there’s a color imbalance in the image. If the Vectorscope graph is off-
centered, the direction in which it leans lets you know that there’s a color cast (tint) in
the image.
Histogram (RGB parade histogram): Displays a statistical analysis of how many pixels
of each color channel lie at each percentage of tonality, plotted along a digital scale
from 0 percent (black) to 100 percent (white). Comparing the left, middle, and right
parts of the R, G, and B graphs let you evaluate the color balance in the shadows,
midtones, and highlights of the image. Taken altogether, the left of all three graphs
indicates the black point of the image, while the right of all three graphs indicate the
white point. It then follows that the difference between the width of the left and right of
all three graphs indicates the overall contrast ratio of the image you’re evaluating. Wide
histogram graphs indicate a wide contrast ratio, while narrow histogram graphs indicate
a narrow contrast ratio.
By default, you can view any one of these scopes at a time at the bottom left corner of the Color
page, by clicking the Video Scope button in the palette button bar.
The Video Scope, docked next to the other palettes at the
bottom of the Color page
Optionally, you can click the expand button at the top left of the video scope to open the video
scopes into a floating window, within which you can display all four video scopes together, or
individually, on any monitor connected to your workstation.
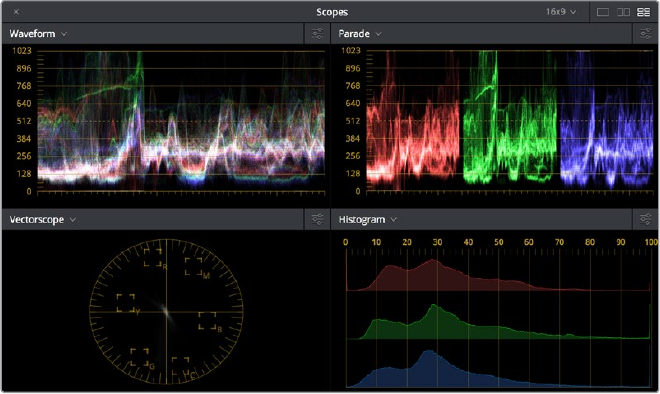
683
Using the Color Page Part 6 – 40
Video scopes in a floating window
Additionally, the video scopes are available in many of the dual-screen layouts available in
DaVinci Resolve. The video scopes aren’t just available in the Color page. They’re also available
in the Media and Deliver pages for whenever you need to evaluate the video signal more
objectively, such as when you’re setting up to capture from tape or scan from film, or when
you’re setting up for output.
To open video scopes from the Media, Color, or Deliver pages, do one of the following:
Choose Workspace > Video Scopes > On/Off (Command-Shift-W) to open video
scopes into a floating window.
Choose Workspace > Dual Screen > On to open video scopes as part of a dual
screen layout.
Video Scope Measurement and Performance
Because you’re evaluating the internal state of the image data, the scales of the WFM and
Parade scopes always reflect 10-bit full range data from 0-1023, regardless of the Video/Data
Level setting you’ve selected in the Master Settings panel of the Project Settings. This gives
you a window into how the image is being processed by DaVinci Resolve prior to being output
via your computer’s video I/O interface.
One word about performance. Because the internal video scopes analyze every line of the
image, the video scopes require a certain amount of video processing power to operate.
Whenever you open any of the video scopes, you may notice your real time processing
capabilities ever-so-slightly diminish. Closing the video scopes frees up all processing for color
correction and effects. On high-powered workstations, you probably won’t notice the
difference, but on less powerful computers, closing the scopes might make a small difference.
Customizing the Video Scopes
Once you’ve opened the video scopes, there are a variety of ways you can customize how the
scopes look, and expose additional on-screen graticule information to help you measure
what you need.
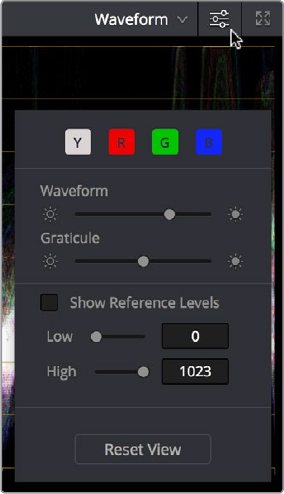
684
Using the Color Page Part 6 – 40
Methods of customizing the Scopes window:
To change the aspect ratio of the Scopes window: Click either the 16:9 or 4:3 buttons
at the upper left-hand corner of the window.
To change the size of the Scopes window: Drag the lower right-hand corner to resize
the Scopes window to the desired size.
To change how many scopes are displayed at once: Click one of the buttons in the
upper right-hand corner of the Scopes window to set 1, 2, or 4 up arrangements of the
video scopes. You can also choose how many scopes are simultaneously displayed by
choosing View > Video Scopes > 1-Up, 2-Up, or 4-Up.
To change which scopes appear in which pane: Click the Name pop-up at the upper
left corner of each Scope’s pane, and choose a different scope.
Once open, you can resize the Scopes window to make it as large or small as you require,
positioning on a second display if you want to make it even larger. Additionally, each video
scope has different display options.
1 Click the Option pop-up menu at the upper right-hand corner of any Scope pane, and
choose Option to open that scope’s Custom Controls window.
Adjust the waveform and graticule
brightness independently
2 Click anywhere outside of the Custom Controls window to make it disappear.
Video Scope customization controls include:
Color/Monochrome button(s): Toggles color on and off for that scope either altogether,
or a channel at a time. Color can make it easier to understand what the scopes are
showing you, but if you find it a distraction it’s easily disabled.
Waveform/Parade/Vectorscope/Histogram slider: Makes that scope’s graph brighter
or dimmer. Brighter graphs make it easier to see fine detail, but harder to see which
parts of the graph are stronger and weaker.
Graticule slider: Makes that scope’s scale brighter or dimmer, making it more or less
visible (or distracting) relative to the graph.

685
Using the Color Page Part 6 – 40
Show Reference Levels: (Waveform, Parade, and Histogram only) You can set low and
high reference level markers for any scope but the Vectorscope by setting the Low and
High values to something other than their defaults.
Show 2X Zoom: (Vectorscope Only) zooms the vectorscope graph by 200%, making it
easier to see fine detail, and use the Vectorscope with charts.
Show Skin Tone Indicator checkbox: (Vectorscope Only) Shows a line at the traditional
Inphase angle that is useful as a general guidepost for average skin tone hue.
Show Graticule checkbox: (Vectorscope Only) Lets you show or hide the circular
degrees indicator surrounding the outer edge, and the cross hairs that indicate the
center of the Vectorscope.
Navigating Using the Color Page Timeline
The Timeline in the Color page is primarily used for navigating the current arrangement of clips,
and for keeping track of clip properties such as whether they’re graded and ungraded, whether
they use tracking, which version they’re using, and so on. It can also be used for quickly
copying grades from one clip to another, for creating groups, and for comparing clips in
the Viewer.
The Color Page Timeline
The Timeline consists of three parts.
Thumbnail Timeline: Provides a concise visual representation of your project where
each clip is a single thumbnail, regardless of its duration. Clicking a thumbnail moves
the playhead to the first frame of that clip. Whichever clip is at the current position of
the playhead appears with its thumbnail outlined in orange. Each thumbnail displays a
variety of information above and below it, and differently colored outlines indicate clip
groups, where existent.
Timeline Ruler: Contains the playhead, displays the record timecode of the current
edit, and acts as a scrubber bar that spans multiple clips. The scroll wheel of your
mouse lets you zoom in and out of your edit, and if you zoom all the way out you can
fit every clip in the Mini-Timeline into the available width of the ruler, letting you scrub
through every clip in the Timeline quickly. Clicking anywhere within the ruler instantly
jumps the playhead to that frame.
Mini-Timeline: Shows a miniature representation of the Timeline in the Edit page,
where each clip’s width is proportional to its duration. The Mini-Timeline can show a
maximum of six video tracks; if your edit uses more, a scroll bar lets you change which
tracks are displayed. If a track has been disabled in the Edit page, it will appear grayed
out in the Mini-Timeline. Clicking a clip in the Mini-Timeline both selects it and moves
the playhead to its first frame. The scroll bar for the Mini-Timeline is independent
of the scroll bar for the Thumbnail timeline, and both can be set to show different
ranges of clips.
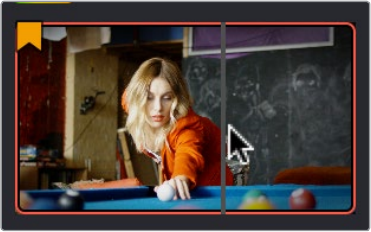
686
Using the Color Page Part 6 – 40
Show Current Clip With Handles
If you’re working on a project that’s part of a round-trip workflow, and you know you’ll be
rendering handles for each clip, it can be useful to temporarily expose these handles while you
grade, so that you can apply tracking or keyframing effects to the full frame range of each clip.
To show or hide clip handles in the Mini-Timeline of the Color page:
Choose View > Show Current Clip With Handles.
While this mode is enabled, Unmix is turned on and cannot be disabled, in order to let you view
the overlapping handles of each clip clearly. The duration of handles that are exposed is
defined by the Default Handles Length parameter of the Editing panel in the User Preferences.
Clip Handles can be shown or hidden at any time.
Thumbnail Info
The thumbnails make it easy to find the clips you’re looking for visually, and they always show
the media as it’s currently graded. The most obvious piece of information is the frame that’s
used for each clip’s thumbnail. If you feel that a particular clip’s thumbnail isn’t representative of
its content, you can change it.
To change the current thumbnail:
Move the pointer over a thumbnail, drag to the left or right to scrub through the clip, and
stop when you find a frame you want to use as the new thumbnail.
Dragging a thumbnail to change the representative image
If media is replaced in the middle of a color correction timeline, or if you copy or ripple a grade
to a range of clips, the thumbnails may not immediately update to accurately represent the
current state of each clip. In this case, you can manually refresh the thumbnails.
To refresh all thumbnails in the Timeline:
Right-click anywhere in the Thumbnail timeline and choose Update All Thumbnails.
You can also choose to display the codec used by each clip in the Timeline.
To switch the Thumbnail timeline between showing clip names and codecs:
Double-click the thumbnail clip name of any clip to display each clip’s codec, and
vice versa.
Additional information appears above and below each thumbnail, providing a way of keeping
track of which clips have been graded, which clips are using different versions, which clips have
been cached, and so on.
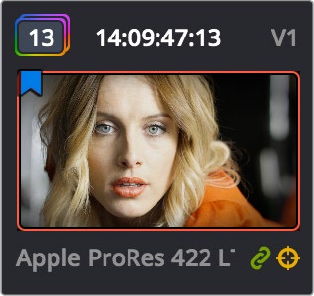
687
Using the Color Page Part 6 – 40
Each clip thumbnail has a number of valuable indications
permitting quick comparison to other shots.
The following list explains each piece of information that can appear above, within, or below the
thumbnails in the Timeline.
Clip number: Each clip’s number appears at the top left above its thumbnail. Clips are
numbered in ascending order according to the position of their first frame, from left to
right, regardless of the video track in which they appear.
Grade indicator: If a clip has been graded, a thin rainbow indicator surrounds the
clip name.
Flag icon: If a clip has been flagged, a flag icon of the appropriate color appears at the
upper-left of its thumbnail. If a clip has multiple flags, they’ll appear along the left of the
thumbnail.
Source Timecode: The source timecode from the first frame of each clip appears on
top of each thumbnail.
Linked media or group icon: If clips are set to use remote versions, and if multiple clips
share the same source media file, then by default their remote version 1 grade will be
automatically linked. If the current clip is linked, a small link icon appears at the bottom
right of the thumbnail of every clip in the Timeline that’s also linked to that clip. When
you select another clip that’s not linked, the linked clip icons disappear.
Tracker icon: If any node within a particular clip’s grade has been tracked, a small
crosshairs tracker icon appears at the bottom right of the thumbnail.
Cache indication: Any clip that’s marked for caching, whether automatically via the
Smart cache, or manually, has its timecode turn red to indicate that it will be cached.
After it’s been cached, the timecode turns blue.
Track number: The video track in which a clip is edited appears to the right of the
timecode.
Version name/Source format: If you create a version for a clip, the version name
appears to the left, below its thumbnail. The version name provides information about
whether a clip is using a remote version, or a local version, indicated by an (L). If you’ve
given the current version a name, it appears; otherwise the version will be labeled
“Version” with its number. Double-click the version name to toggle between displaying
version names and the source format of that clip.
3D indicator: All stereo 3D clips in the Timeline appear with this icon. Its color indicates
which eye you’re monitoring; red indicates the left eye, while blue indicates the
right eye.
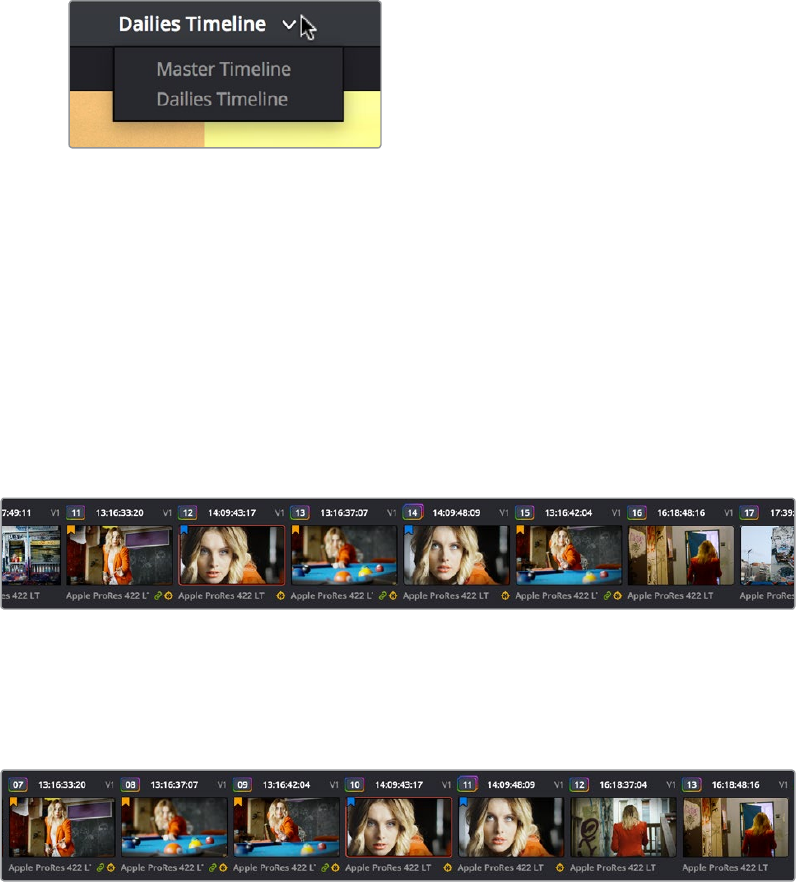
688
Using the Color Page Part 6 – 40
Sorting and Filtering Clips
in the Thumbnail Timeline
By default, the Thumbnail Timeline displays every clip of the currently selected edit in the Edit
page, sorted in A mode (the record order of your edit). However, the sort order and contents of
the Timeline can be changed and filtered to make it easier for you to find specific groups of
clips for grading.
Changing Timelines
If you’re working on a project that has more then one timeline, you can switch timelines right
from within the Color page.
To switch timelines in the Color page:
Choose another timeline from the Timelines pop-up menu at the top of the Viewer.
Timeline selection at the top center of the Viewer
To switch among timelines using the DaVinci control panel:
Press the MODES button above the fourth trackball on the Center panel, then press the
SWITCH TIMELINE soft key. Press MODES to return to the main page of controls when
you’re done.
A and C Mode Sorting
By default, the Timeline is set to Record mode sorting, otherwise known as A mode sorting. In
this mode, clips appear in the Timeline according to the order in which they were edited. This
lets you see the order of clips as they’ll appear in the final program.
A Mode sorting, i.e., record order
However, you can change the sort order of the clips in the Timeline to Source mode, or C mode
sorting. In C mode sorting, all clips are rearranged in ascending order from left to right
according to their source timecode, and their record timecode is temporarily ignored.
C Mode sorting, i.e., source clip order
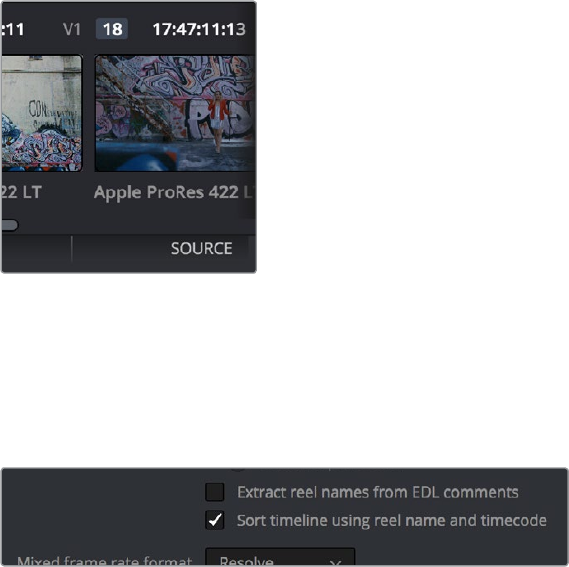
689
Using the Color Page Part 6 – 40
Sorting by C mode makes it easy to identify a range of similar clips. For example, if you’re
working on a narrative project, clips from each angle of coverage in the scene will naturally
cluster together. In another example, sorting by C mode in a documentary will arrange all of a
particular subject’s head shots from a specific interview contiguously, one after another, since
they all come from the same range of timecode on the same source tape. In both examples, the
close proximity of similar clips to one another that C mode creates makes it easy to copy grades
among them, ripple changes, or group them.
When you’re finished, you can switch the Timeline back to A sort mode, and all of the clips will
go back to being arranged in the order in which they were edited.
To toggle between A and C mode sorting, do one of the following:
Choose an option from the View > Timeline Thumbnail Mode submenu.
Press Command-Page Down to toggle to C mode sorting.
Press A/C MODE on the T-bar panel of the DaVinci control panel.
While in C mode, the word “SOURCE” appears at the right in the Timeline Ruler of the
Mini-Timeline.
Source mode indicated at the right of the Timeline ruler
A checkbox in the Conform Options group in the General Options panel of the Project Settings
lets you change the behavior of C mode sorting. Opening the Settings window and clicking the
General Options panel of the Project Settings reveals the Sort Timeline Using Reel Name and
Timecode checkbox.
General Options panel of the Project Settings
With this checkbox turned on (the default), all clips in the Timeline are sorted by reel number
first, and then by source timecode. This way, clips with similar timecode from the same reel will
appear next to one another in C mode.
If you turn this checkbox off, reel number is ignored, and all clips in the Timeline are sorted only
by source timecode. This may result in clips from multiple sources being mixed together, but it is
useful in specific situations.
For example, when grading dailies from a three camera shoot, you may want to see consecutive
clips from all three cameras lined up one after the other on the Timeline, so that Cam1_Shot1,
Cam2_Shot1, and Cam3_Shot1 appear first, followed by Cam1_Shot2, Cam2_Shot2, and
Cam3_Shot2, and so on. In this situation, you don’t want clips from cameras 2 and 3 to be
placed at the end of the Timeline simply because of their reel number.
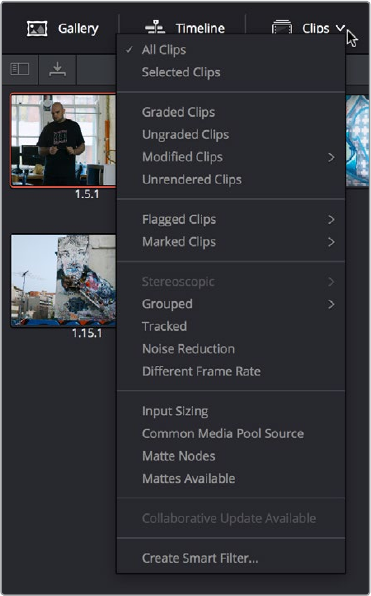
690
Using the Color Page Part 6 – 40
Flags and Markers
You have the option of flagging or marking clips in the Color page just like you can in the Edit
page, in order to keep track of specific media or frames that you may need to do something to
later. For example, you could flag every closeup of a particular actor with a blemish that you
want to spend some time fixing with a green flag.
Methods of flagging and marking clips clips in the Color page:
To flag a clip: Right-click any clip’s thumbnail, and choose a flag color from the Flags
submenu. Flags are not frame-specific, so flagging one clip will result in flags also
being placed on all other clips that share the same source media in the Media Pool.
To remove all of a clip’s flags: Move the playhead to a clip, and choose Mark >
Clear Flags, or right-click a clip’s thumbnail and choose Clear All option from the
Flags submenu.
To mark a frame of a clip: Move the playhead to the frame of a clip you want to mark,
then choose Mark > Add Marker (M), or right-click a clip’s thumbnail and choose a
marker color from the Marker submenu.
To remove a single marker: Move the playhead to the frame with the marker you want
to remove, and choose Mark > Delete Marker (Option-M). Alternately, you can select the
marker in the Mini-Timeline, and press the Delete key.
To remove all of a clip’s markers: Right-click that clip and choose Clear All from the
Markers submenu.
Timeline Filtering
A pop-up button to the right of the Clips button at the top left of the Color page Interface Toolbar
presents preset options for dynamically filtering which clips are shown in the Timeline. This allows
you hide all the other clips in the Timeline except for the subset on which you want to focus.
Timeline filtering options
691
Using the Color Page Part 6 – 40
For example, once you’ve added flags or markers to clips, it’s easy to hide every other clip in
the Timeline that doesn’t fit the criteria; for example, hiding clips that don’t have a green flag.
This does nothing to alter the original edit, and you can return the Timeline to its original state
at any time.
To filter the Timeline:
Click the Timeline Filtering pop-up button to the right of the Clips button at the top left
of the DaVinci Resolve UI, and choose an available option. While the timeline is filtered,
an orange line appears underneath the Clips button in the UI Toolbar at the top
of the page.
To return the Timeline to normal:
Click the Timeline Filtering pop-up button, and choose All Clips.
You can use timeline filtering in conjunction with A or C mode sorting to arrange clips in
whatever way is best for the task you’re trying to accomplish. Clip filtering can also be used in
the Lightbox, and a currently selected clip filtering method will simultaneously isolate clips in
the Timeline and Lightbox as you switch back and forth.
Preset Timeline Filters
DaVinci Resolve comes with several preset criteria by which you can filter the Timeline, which
cover many common organizational workflows:
All Clips: No clips are filtered, and every clip in the current edit is shown.
Selected Clips: Filters all currently selected clips.
Graded Clips: Filters all clips that have been graded.
Ungraded clips: Filters all clips that have not yet been graded.
Modified clips: Submenu, filters all clips that have been modified within a
specified time.
Unrendered clips: Filters all clips that have not yet been rendered.
Flagged Clips: Filters all clips that have a particular flag, a submenu presents each color.
Marked Clips: Filters all clips that have a particular mark, a submenu presents
each color.
Stereoscopic: Filters stereo 3D clips, a submenu presents options for filtering All
Stereo Clips, or just Stereo clips that have been Autoaligned, those with Convergence
adjustments, those with Floating Windows adjustments, or stereoscopic clips with
swapped media for the left and right eyes.
Grouped: Filters all clips belonging to a particular group, a submenu shows the
available groups.
Tracked: Filters all clips with motion tracking.
Noise Reduction: Filters all clips using noise reduction.
OpenFX: Filters all clips using OpenFX.
Different Frame Rate: Filters all clips with frame rates that don’t match that of the project.
Input Sizing: Filters all clips that have had any Input Sizing parameters adjusted.
Common Media Pool Source: Filters all clips sharing the same source in the Media
Pool as the current clip.
Matte Nodes: Filters all clips with an exposed Matte node in the Node Editor.
Mattes Available: Filters all clips with a matte assigned to them, whether they’re
used or not.
Collaborative Update Available: Filters all clips that have been flagged as having been
updated during a collaborative workflow.

692
Using the Color Page Part 6 – 40
Creating and Using Smart Filters
If none of the preset filters does what you need, you can create your own custom Smart Filter in
order to sift out clips based on any of the intrinsic or user-entered metadata that’s available in
the Metadata Editor, Media Pool, and Color page timeline. Smart Filters work much the same
way as Smart Bins, and they’re created and edited using the same procedures. For more
information on Smart Bins, see Chapter 8, “Adding and Organizing Media with the Media Pool.”
In fact, Smart Filters can be very sophisticated, allowing you to filter the contents of the
Thumbnail timeline by multiple criteria, and using multiple groups of multiple criteria for
situations where you need to find clips that match all of one set of criteria, but only one of a
second set of criteria. In this way, you can create Smart Filters to solve a wide variety of
workflow needs as you work in the Color page.
It’s important to point out, however, that as much intrinsic metadata is available to every clip in
DaVinci Resolve (clip properties including frame rate, frame size, codec, file name, et cetera),
the more time you take entering extra metadata in the Metadata Editor to prepare your project
for work for editing and grading (for example, entering scene and take information, and
keywords for things like character names, day and night, interior and exterior, framing, et
cetera), the more powerful Smart Filters can be in helping you to sift and sort through the
contents of a program you’re grading.
Imagine being able to filter out all the closeups associated with a particular person in a
program, or finding all the establishing shots corresponding to a particular location. If you or an
assistant can take the time to enter metadata for the source material in a project that identifies
these characteristics, you’ll be able to work even more quickly to match shots together and find
the clips you need for any given situation.
To create a Smart Filter:
1 Click the Timeline Filtering pop-up button to the right of the Clips button at the top left
of the DaVinci Resolve UI, and choose Create Smart Filter.
2 In the Create Smart Filter dialog, enter a name for the filter, and use the following controls
to create one or more filter criteria (you can have as many filter criteria as you like):
The Create Smart Filter dialog
Match options: For multi-criteria filtering, choosing All ensures that every single criteria
you specify is met for a clip to be filtered. Any means that if only one out of several
criteria is met, that clip will be filtered.
Filter criteria enable checkbox: Lets you enable or disable any criteria without having
to delete it.
Metadata category pop-up: Lets you choose which category of metadata you want to
select a criteria from. Each category of metadata that’s available in the Metadata Editor
is available from this pop-up menu. Additionally, Color Timeline Properties (containing
many properties unique to the Color page timeline) and Media Pool Properties
(containing every column in the Media Pool) provide access to additional metadata you
can use for filtering.
Metadata type pop-up: For choosing which exact type of metadata to use, of the
options available in the selected metadata category.
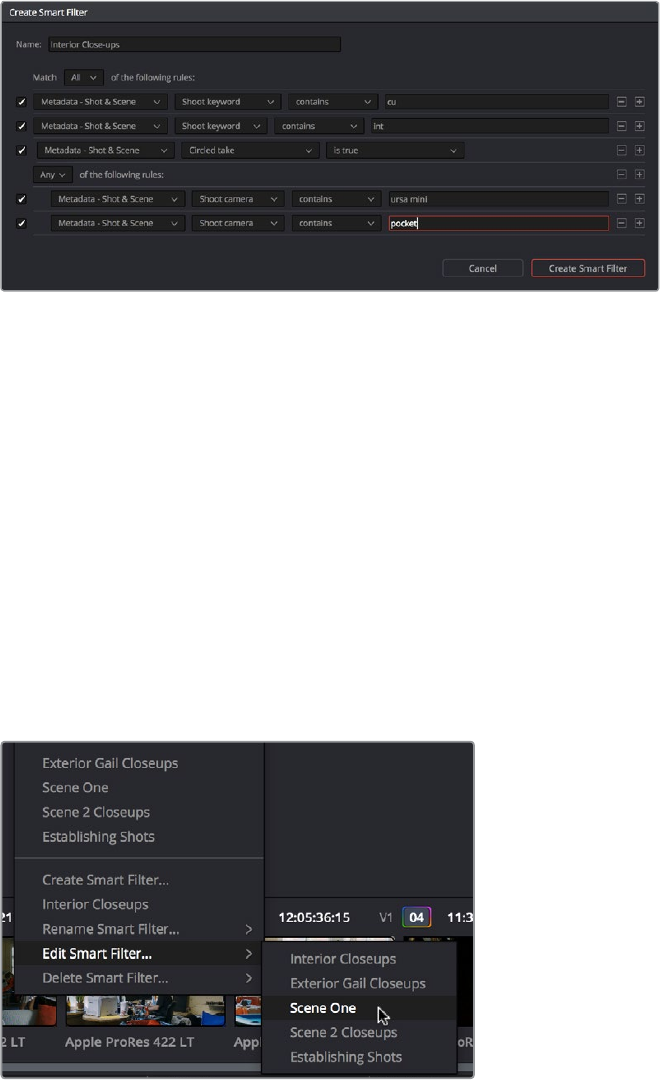
693
Using the Color Page Part 6 – 40
Metadata criteria pop-up: Lets you choose the criteria by which to filter, depending on
the metadata you’ve selected. Options include “true/false,” integer ranges, date ranges,
string searches, flag and marker colors, et cetera.
Add filter criteria button: Lets you add additional criteria to create multi-criteria filters.
You could use multiple criteria to, for example, find all clips from Scene 2, that also
contain the keyword “Diana,” that also have the keyword “CU” in order to find all the
Scene 2 close-ups of Diana. Additionally, if you Option-click this button, you can add a
nested match option in order to create even more sophisticated filters, where the filter
must match all of one set of criteria, and any of another set of criteria.
A complicated Smart Filter with multiple criteria and a second match option setting
As you’re editing the filter criteria, the Thumbnail timeline automatically updates to
show you how the Smart Filter you’re creating is working.
3 When you’re done editing the filter criteria, click Create Smart Filter. The resulting Smart
Filter appears at the bottom of the Filter pop-up menu, and is turned on by default.
Methods of modifying existing Smart Filters:
To rename a Smart Filter: Click the Timeline Filtering pop-up and choose the Smart
Filter you want to rename from the Rename Smart Filter submenu, then change the
name in the Smart Filter Name dialog, and click OK.
To edit a Smart Filter: Click the Timeline Filtering pop-up and choose the Smart
Filter you want to edit from the Edit Smart Filter submenu, then edit the filter criteria,
and click OK.
To delete a Smart Filter: Click the Timeline Filtering pop-up and choose the Smart
Filter you want to delete from the Delete Smart Filter submenu. It’s immediately deleted.
Submenus available for modifying Smart Filters
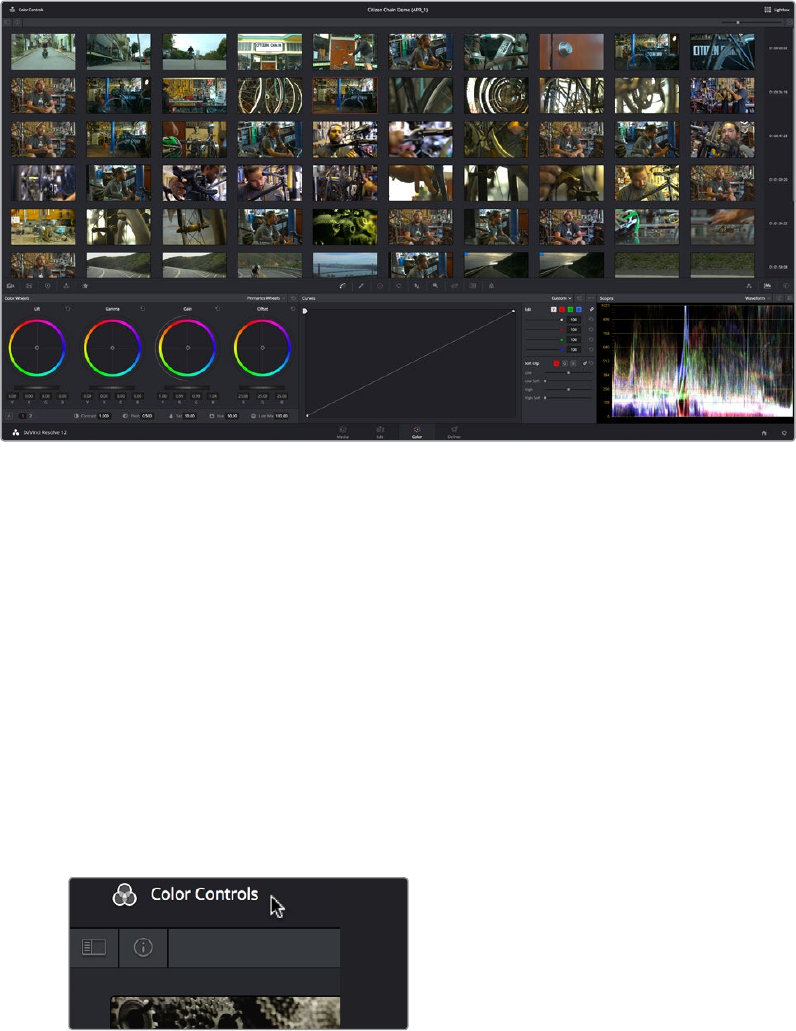
694
Using the Color Page Part 6 – 40
Using the Lightbox
The Lightbox shows you all clips in the Timeline as a grid of thumbnails, arranged in rows from
left to right and top to bottom. This lets you quickly evaluate, compare, and search for clips you
want to use when making selections, creating groups, flagging clips, or when scanning for a
particular scene or looking for an individual clip.
The Color page Lightbox displays all the clips in the Timeline
At the right of the Lightbox is a vertically oriented Timeline Ruler letting you know the timecode
value at the beginning of each row of clips. At the bottom right is a Zoom slider that lets you
change the size of the thumbnails.
Selecting a clip in the Lightbox is the same as selecting a clip in the Timeline, and right-clicking
a clip in the Lightbox shows the same contextual menu items you’d see if you right-clicked a clip
in the Timeline. Furthermore, you can also grade the current clip in the Lightbox using a control
panel, or by exposing the color controls to grade the current clip using a mouse or other
input device.
Methods of using the Lightbox:
To show or hide the Lightbox: Click the Lightbox button in the toolbar, or at the bottom
right of the Lightbox if the color controls are hidden.
To show color controls in the Lightbox: Click the Show Color Controls button in the UI
control bar above the Lightbox.
The Color Controls button, with the sidebar
and Thumbnail Info buttons below
To show thumbnail info in the Lightbox: Click the Clip Info button, which is the second
control at the upper left-hand corner of the Lightbox, to turn each clip’s thumbnail Info
off and on.
695
Using the Color Page Part 6 – 40
To resize clips in the Lightbox: Drag the Zoom slider to the right to increase thumbnail
size, or to the left to decrease thumbnail size.
The Lightbox button, Zoom slider,
and Monitor Output buttons
The contents of the Lightbox can be filtered using the same options that are available for
filtering the Thumbnail timeline.
To filter the Lightbox:
1 Click the Show sidebar button at the upper left-hand corner of the Lightbox. This
reveals all of the filtering options that are available in the Lightbox, including custom
Smart Filters you’ve created.
The Lightbox sidebar, with controls for filtering the Lightbox
2 Click one of the options appearing in the sidebar. The Lightbox should immediately
update to show just those clips that match the selected criteria.
3 To go back to seeing every clip in the Timeline, click All Clips.
The Lightbox can also be output to video, in order to see its contents on a broadcast display or
projector.
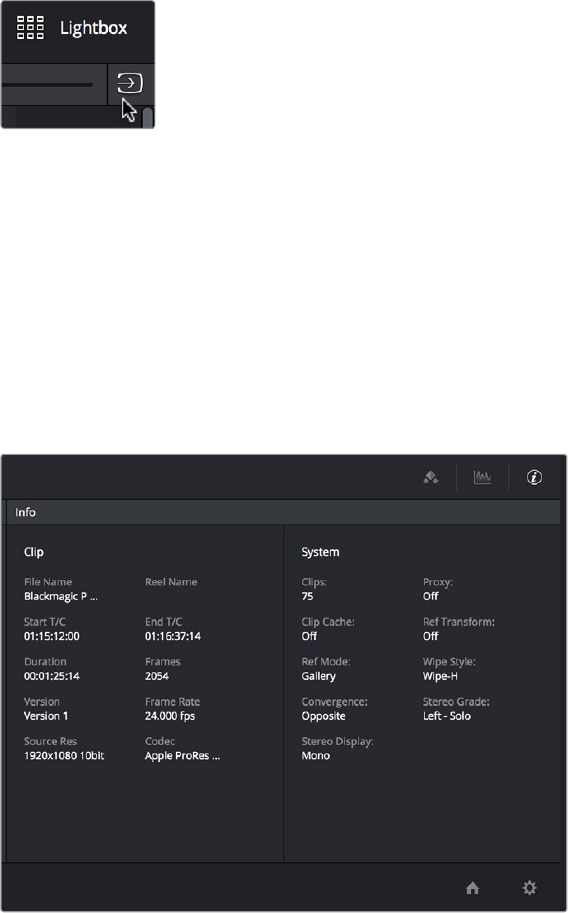
696
Using the Color Page Part 6 – 40
To output the contents of the Lightbox to video:
Click the Output Lightbox to Video button at the upper right-hand corner of
the Lightbox.
The button for outputting the Lightbox to video
For more information about clip selections, groups, and grade management, see Chapter 48,
“Grade Management.”
The Info Palette and Clip Information
The Info palette is hidden by default. Clicking the Info palette button at the far right of the
toolbar reveals it at the right of the Timeline. The Info palette has two tabs that display different
information. There are no user-editable controls in the Info palette.
Info palette displaying Clip Info and System Status
Clip Info
The first tab displays information about whichever clip is currently selected in the Timeline.
Thisinformation is not editable, but is provided for reference, and includes:
File Name: The name of the media file on disk.
Reel Name: The reel name of that clip, if one is being read properly.
Start T/C: The source timecode value of the first frame in the clip.
End T/C: The source timecode value of the last frame in the clip.
Duration: The duration of the clip, in timecode.
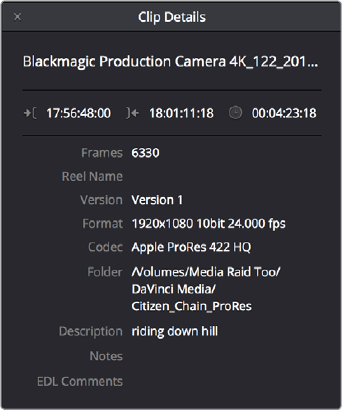
697
Using the Color Page Part 6 – 40
Frames: The duration of the clip, in frames.
Version: The name of the remote or local version used by that clip.
Frame Rate: The frame rate used by that clip.
Source Res: The native resolution of the source clip.
Codec: The codec or format used by the source clip.
System Info
The second tab displays information about operational modes currently in use by DaVinci
Resolve. It’s meant to provide the status of different DaVinci Resolve features that can be
enabled, disabled, or cycled among various options. This information includes:
Clips: The total number of clips in the Timeline.
Proxy: The status of Proxy mode (On or Off).
Clip Cache: The status of the Clip Cache mode (Off, All, Dissolves, User, User & D).
Ref Transform: The status of Reference Still reposition.
Ref Mode: The status of the Reference mode (Gallery, Timeline, Offline).
Wipe Style: The currently selected Wipe Style for split screens (Wipe-H, Wipe-V,
Wipe-M, Wipe-A).
Convergence: The current Convergence setting (Linked Zoom, Opposite)
Stereo Grade: The currently displayed Eye and Gang mode (Left or Right -
Gang or Solo).
Stereo Display: The current Stereo Display mode (Mono or Stereo).
Clip Details
You can right-click the currently selected clip in the Thumbnail Timeline and choose View Clip
Details to show a small window with all of that clip’s information available at a glance. You can
drag this window anywhere you like, even to another display.
The Clip Details window
698
Using the Color Page Part 6 – 40
This information is not editable, but is provided for easy reference, and includes:
File Name: The name of the media file on disk appears at top.
Start Timecode: The source timecode value of the first frame in the clip.
End Timecode: The source timecode value of the last frame in the clip.
Duration: The duration of the clip, in timecode.
Frames: The duration of the clip, in frames.
Reel Name: The reel name of that clip, if one is being read properly.
Version: The name of the remote or local version used by that clip.
Format: The format used by the source clip, along with the frame size and bitdepth.
Codec: The codec used by the source clip.
Folder: Which directory on disk the source media resides in.
Description: The description field of the Metadata editor.
Notes: The notes field of the Metadata editor.
EDL Comments: EDL comments for that event, if any exist.
About Undo and Redo
The Undo and Redo commands in DaVinci Resolve work differently depending on which page
is currently open. In the Edit and Fairlight pages, Undo and Redo affect edits made to the
Timeline (covered in more detail in Chapter 14 and Chapter 62). In the Color page, Undo and
Redo affect color adjustment operations made to individual clips.
Every time you adjust a control or a parameter in the Color page, a memory of that state of the
grade is saved to an internal list for that clip. Each clip has its own memory stack, which means
that Undo and Redo will undo different operations depending on which clip is the current clip.
Each clip’s undo stack is unlimited, however the memory stack of every clip in a project is
cleared when you quit DaVinci Resolve, and every time you start DaVinci Resolve each clip is a
clean slate.
To Undo and Redo, do one of the following:
Choose Edit > Undo (Command-Z).
Choose Edit > Redo (Shift-Command-Z)
On the DaVinci control panel, press the UNDO and REDO buttons on the T-bar panel.
If you have the DaVinci control panel, there is one other control that lets you control the Undo
stack more directly when using the trackballs, rings, and pots. Pressing RESTORE POINT
manually adds a memory of the current state of the grade to the Undo stack. Since discrete
undo states are difficult to predict when you’re making ongoing adjustments with the trackball
and ring controls, pressing RESTORE POINT lets you set predictable states of the grade that
you can fall back on.
700
Automated Grading Commands and Imported Grades Part 6 – 41
Automated Grading Commands
and Imported Grades
While DaVinci Resolve has a wide variety of manual grading controls that afford you control
over just about every component of digital imagery, DaVinci has spent a lot of time investigating
ways of increasing colorist efficiency by creating automated grading tools. Furthermore, with
integrated editing bringing professional editors into the world of editing, grading, and finishing
in DaVinci Resolve, the same automated tools being developed to help colorists go home
earlier can also be used to give non-colorists a hand in taking care of simple grading tasks.
Color Match Palette 701
Tips for Properly Shooting a Color Chart 702
How to Use Color Match 703
Configuration Controls 705
Reset Controls 705
Automatic Adjustments in the Color Wheels Palette 705
White Balance Eyedropper 705
Pick Black Point and Pick White Point 706
Auto Color 707
Auto Color Using the DaVinci Control Panel 708
Shot Match 708
Shot Match Guidelines 709
How to Use Shot Match 709
Suggestions for Using Shot Match 710
Broadcast Safe 711
Black Sun Highlight Correction 712
Using CDL Grades 713
Using ARRI Looks 713
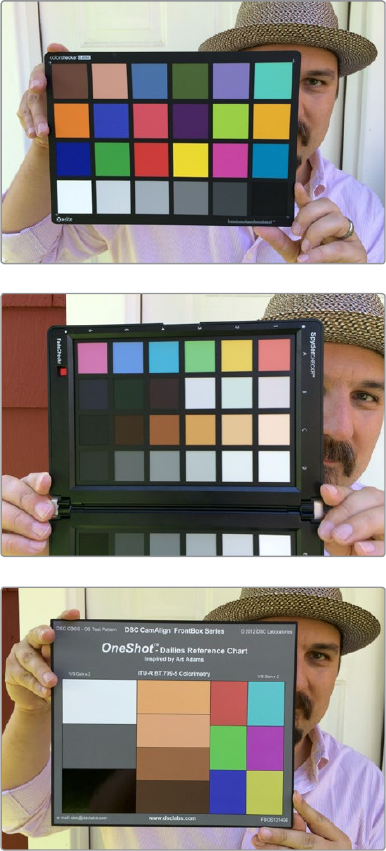
701
Automated Grading Commands and Imported Grades Part 6 – 41
Color Match Palette
If the camera and lighting departments had the foresight to shoot a color test chart for each of
the major lighting setups in the project you’re grading, DaVinci Resolve lets you superimpose a
sampling grid over a chart in a clip and mathematically analyze the sampled colors to generate
an automatic correction. Using controls in the Color Match palette, you can specify the Source
Gamma, Target Gamma, and Target Color Space to make sure that the resulting correction is
correct for the camera you used, and the project you’ve set up.
The Color Match palette works with several standardized color charts:
Datacolor SpyderCheckr 24
DSC Labs ChromaDumonde 24+4
DSC Labs SMPTE OneShot
X-Rite ColorChecker Classic
X-Rite ColorChecker Video
X-Rite ColorChecker Passport Video
The X-Rite ColorChecker, Datacolor SpyderCheckr, and
DSC Labs SMPTE OneShot charts compared, of of which
are supported by the Color Match palette
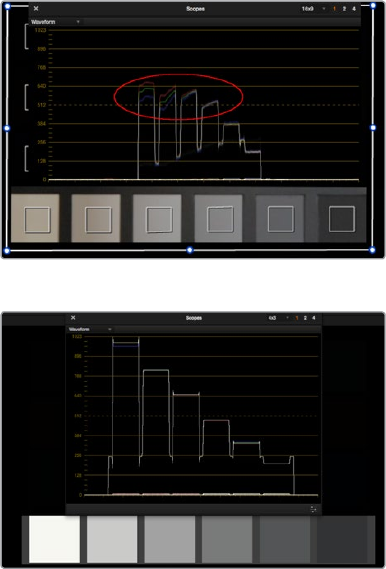
702
Automated Grading Commands and Imported Grades Part 6 – 41
The result is analyzed to generate an automatic color correction to use to create a neutral
grade for the image, to use as a starting point for the rest of your grade.
Tips for Properly Shooting a Color Chart
The results you get using Color Match are completely dependent on how the charts were shot
in the field. If the charts were properly shot, you’ll get great results. If the charts were improperly
shot, the results will be unpredictable.
To get the best results using Color Match, adhere to the following guidelines:
The chart must be lit evenly such that the lighting on each patch is the same intensity
(level) and color. Any shadows or changes in lighting color across the chart will result
in Color Match trying to compensate for these changes, and an inaccurate match will
result. When viewing a chart being lit prior to a shoot shooting via a waveform monitor,
the top of each individual patch as seen on the scope should appear as a rectangle
with a “flat top.”
Poorly lit chart with irregularly topped waveforms
Well lit chart with flat-topped waveforms
No patches on the chart should be clipped in any of the RGB color channels. A clipped
channel will force Color Match to use incorrect RGB values, and the resulting match will
be inaccurate.
The white patch on the recorded chart should be captured between 70-95 IRE. Correct
exposure is essential to getting a good result, and while Color Match does allow for
some adjustment via the White Level option, this will only give accurate results if the
original chart is shot so that the white patch sits within the 70 – 95 IRE range when
viewed on a waveform monitor. It is not recommended that a white patch be shot with
a signal level above 95 IRE, since this usually means that one of the RGB channels is
close to or actually clipping which will cause an inaccurate match.
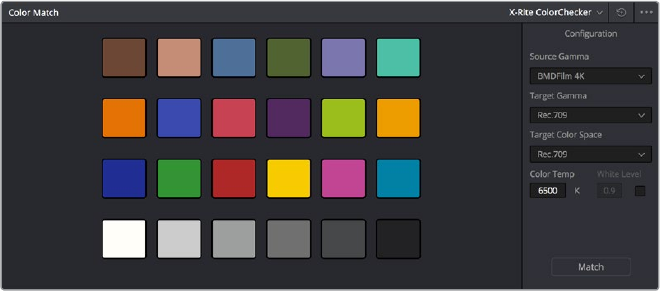
703
Automated Grading Commands and Imported Grades Part 6 – 41
The Source Gamma setting must be set to match the encoded OETF (opto-electrical
transfer function, or gamma) of the recorded image. To be able to create an accurate
adjustment, the Color Match function requires image data that is scene linear (linear
to light). Most captured or recorded image data is encoded with a tone curve (gamma
curve) to maximize the efficiency of the bit depth being used, and different cameras use
different gamma curves to maximize the image data from different sensors. Since the
Color Match algorithm converts image data into a scene linear space before creating
an adjustment, it needs to undo the gamma curve created by the camera or debayering
process. If the wrong Source Gamma setting is selected in the Match Color palette,
then the data will not be linearized correctly and the resulting match will be inaccurate.
Lighting in the scene with an unusual spectral response or a strong color cast can
cause an inaccurate match. Scenes lit with lights that have an unusual spectral
response (such as cheap fluorescent bulbs, or mercury vapor fixtures that exhibit a
very narrow or spiky spectral power distribution) can cause metameric errors in both
the camera’s response and the Color Match function, resulting in the creation of an
inaccurate adjustment. The most accurate results are obtained when the scene uses
lighting with a chromaticity that is close to the black body locus (with a highly correlated
color temperature) and a relatively smooth spectral power distribution. In other words,
use high-quality lighting that doesn’t have spikes in specific parts of the spectrum.
Large differences between the color temperature of the lighting shining directly on the
chart and ambient lighting elsewhere in the scene can cause perceptual errors. Often
the problem is one of perception and not an incorrect color adjustment. For example,
outdoor scenes being artificially lit with instruments shining extremely warm light (low
color temperatures of 3200K or less) but that have cooler ambient lighting may appear
overly blue if matched with a Target Color Temp of 6500K. This happens because the
chart under direct lighting is lit at the lower (yellower) color temperature, but areas of
the scene in shadow are much cooler because of the ambient “blue” light from the sky;
the result is an automatic color adjustment that’s correct for the chart, but exaggerated
in the background.
How to Use Color Match
The following procedure shows how to use the Color Match palette and overlay to create a
color correction.
The Color Match palette
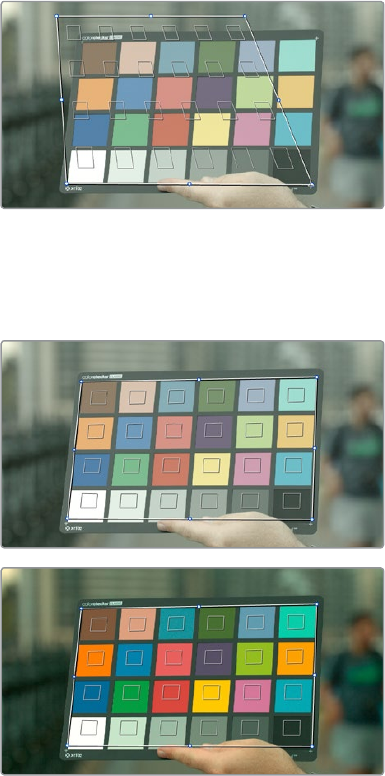
704
Automated Grading Commands and Imported Grades Part 6 – 41
To sample a color chart to make an automatic correction:
1 Select the clip with a chart you want to sample. If necessary, you can use the View >
Show Current Clip With Handles option to show additional frames at the beginning of
the current clip to reveal a color chart in the leader of your media.
2 If necessary, choose an option from the Source Gamma pop-up menu that corresponds
to the gamma with which the media was recorded.
3 Then, choose a target gamma and color space that corresponds to the format you want
this clip to be matched to.
4 Click the Viewer tool pop-up, choose the Color Chart overlay, and use its corner-
pinning controls to line the sampling boxes up with the color patches of the chart.
Aligning the Color Match target with the chart in the video
5 When you’re finished, click the Match button, and the clip will be automatically
corrected.
A clip before and after automatic color matching
Keep in mind that not every shot needs to have a chart. If the lighting of the location used in a
scene is consistent, you really only need a single chart analysis to generate a correction that
you can copy to all other clips in the same scene. Of course, if you are using multiple cameras in
a scene, you should have a chart analysis for each separate camera if you want to try and match
them more closely together.
705
Automated Grading Commands and Imported Grades Part 6 – 41
Configuration Controls
Here’s a more detailed explanation of each of the parameters found in the Color Match palette.
Source Gamma: Defines the source gamma the media was recorded with. You must
select the correct gamma or the results will not be as accurate.
Target Gamma: Lets you select a target gamma that you want the corrected clip to
use. While this will most likely be the gamma you’re outputting the finished program at,
you can choose other target gamma values for specialized workflows.
Target Color Space: The color space you’ll be outputting the finished program with.
Color Temp: An adjustable color temperature control that lets you manually adjust the
target color balance of the resulting correction to be warmer (lower values) or cooler
(higher values).
White Level: A checkbox that’s disabled by default, which lets you manually choose
the target white point that the automatic correction should use. Raising or lowering this
value will stretch or compress the contrast of the final correction.
Match button: Once you’ve chosen the appropriate settings, and aligned the color
match target with the chart that was recorded, click to execute the match. The
default is 6500K.
Chart type pop-up menu: You can choose from among the supported chart types in
this pop-up. At the time of this writing, these include the Datacolor SpyderCheckr24,
theChromaDuMonde 24+4, the DSC Labs SMPTE OneShot, the X-Rite ColorChecker
Classic, the X-Rite ColorChecker Video, and the X-Rite ColorChecker Passport Video.
Reset All button: Resets all controls and adjustments in this palette.
Reset Controls
The Color Match option menu has a variety of commands you can use to reset your work in the
Color Match palette.
Reset Match Configuration: Resets the Configuration parameters described above.
Reset Match: Resets the matching operation without resetting the
Configuration controls.
Automatic Adjustments in
the Color Wheels Palette
There are four controls found in the Color Wheels palette that can be used for automatically
making different color adjustments, in order to give you a head start whenever you’re trying to
neutralize a color cast in the image or choose better black and white points for exposure.
White Balance Eyedropper
The White Balance eyedropper, found at the bottom-left corner of the Color Wheels palette
next to the Automatic Correction button, provides an automated way of neutralizing a color cast
in your image that you can guide by manually selecting a feature in the image that is supposed
to be white.

706
Automated Grading Commands and Imported Grades Part 6 – 41
To auto white balance an image with an undesirable color cast or tint:
1 Click the White Balance eyedropper button. The pointer turns into the White Balance
eyedropper.
The White Balance eyedropper
2 In the Viewer, click on any feature that is supposed to be white such as a white wall,
white trim around a window, white blinds, a white shirt, etcetera. As you drag the
eyedropper around, the RGB values appear as a tooltip to give you a better idea of
what the color is of the feature you’re about to click on. Make sure the feature you click
on is (a) supposed to be white, and not off-white, and (b) that it corresponds to an image
detail that’s not clipped, because that can make parts of the image seem white that
aren’t really.
As a result, the white balance of the image should appear much more neutral than
before. Note that this adjustment is not applied via any of the controls in the Color
Wheels palette; it’s an invisible, self-contained adjustment.
Pick Black Point and Pick White Point
The Pick Black Point and Pick White Point eyedropper controls, found at the upper left-hand
corner of the Lift and Gain controls of each mode of the Color Wheels palette, let you both
adjust contrast by lowering the black point or raising the white point of the image, and also
corrects for unwanted color casts in the shadows or highlights of the image.
Note: It’s easy, using the Pick Black and White Point controls, to inadvertently boost the
highlights or lower the shadows so much that you end up clipping part of the image. To give
these controls the best chance of succeeding, it’s advisable to find the absolute brightest or
darkest parts of the image to sample, according to the following instructions.
To automatically adjust the black point of an image:
1 Click the Pick Black Point control. The pointer turns into the Black Point tool.
The Auto Pick Black Point control
2 In the Viewer, click on any feature that is supposed to be black such as the deepest
part of a shadow in the background or within a fold of clothing, black fabric, or
something painted black. As you drag the Black Point tool around, the RGB values
appear as a tooltip to give you a better idea of what the color is of the feature you’re
about to click on. Make sure the feature you click on is (a) supposed to be black, and
not some very dark hue, and (b) that it corresponds to an image detail that’s not clipped,
because that can make parts of the image seem black that aren’t really.
As a result, the darkest parts of the image should appear much darker than before, and
any color imbalance in the shadows should be neutralized. Unlike the White Balance
eyedropper, this adjustment is applied via the Lift controls in the Color Wheels palette,
which should appear with some manner of adjustment as a result.

707
Automated Grading Commands and Imported Grades Part 6 – 41
To automatically adjust the white point of an image:
1 Click the White Point control. The pointer turns into the White Point tool.
The Auto Pick White Point control
2 In the Viewer, click on any feature that is supposed to be white such as a white wall,
white trim around a window, white blinds, a white shirt, etcetera. As you drag the White
Point tool around, the RGB values appear as a tooltip to give you a better idea of what
the color is of the feature you’re about to click on. Make sure the feature you click on
is (a) supposed to be white, and not off-white, and (b) that it corresponds to an image
detail that’s not clipped, because that can make parts of the image seem white that
aren’t really.
As a result, the lightest parts of the image should appear much lighter than before, and
any color imbalance in the highlights should be neutralized. Unlike the White Balance
eyedropper, this adjustment is applied via the Gain controls in the Color Wheels
palette, which should appear with some manner of adjustment as a result.
Auto Color
The Auto Color command provides a quick way to automatically balance the blacks and whites
of a clip based on the current frame at the position of the playhead. DaVinci Resolve looks for
the darkest levels in the image to neutralize the RGB color balance in the blacks, and the
brightest levels to neutralize the RGB color balance in the highlights. Furthermore, Master Lift
and Master Gain are adjusted to maximize image contrast at the outer boundaries of 0 and 100
percent. Using this control with the Primaries Bars mode open makes it easier to see what’s
been changed after these automatic adjustments are made.
The advantage of Auto Grade is that it gives you an immediate result for any clip without the
requirement for sampling the image or having a specific test pattern to analyze, but the
disadvantage is that this lack of guidance makes the usefulness of this command somewhat
hit-or-miss. When it works, it can work very well to give you a neutral starting point for further
grading. When it fails, you’re better off resetting the resulting adjustment and grading the old
fashioned way.
To make an automatic correction:
Open the Color Wheels palette to any mode, and click the A button in the lower left-
hand corner.
Choose Color > Auto Color (Option-A)
Press the AUTO COLOR button on the T-bar panel.
The Auto Color button
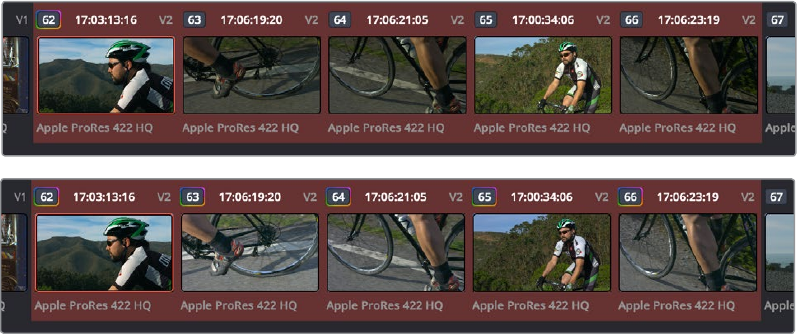
708
Automated Grading Commands and Imported Grades Part 6 – 41
Auto Color Using the
DaVinci Control Panel
If you crave a bit more control over how the automatic color adjustment is made, and you have
a DaVinci control panel, you can use the cursor to choose which color values to sample when
making an automatic color balancing and contrast adjustment. It’s like a cross between the Auto
Color control and the White and Black Point controls found in the GUI. This additional bit of
guidance can make the results a lot more predictable.
To use Auto Grade to sample a feature using the DaVinci Control Panel:
1 Press the CURSOR button, on the trackball panel.
2 Use the fourth trackball to move the cursor to a feature you want to use to define the
automatic correction. Whichever color you move the cursor over will be sampled to
form the basis of the resulting color and contrast adjustment. Ideally, you should place
the cursor over a feature that’s supposed to be neutral, such as a black shadow, grey
wall, or white T-shirt. Don’t place the cursor over a feature that actually consists of
saturated color, or that’s overexposed, as DaVinci Resolve will overcompensate and
you’ll get poor results.
3 With the cursor placed over the desired neutral feature, press AUTO COLOR on the
T-bar panel.
DaVinci Resolve calculates an appropriate correction, which is applied to the
selected node.
Shot Match
The previously available automated color correction commands, Auto Color and Color Match,
are both useful for adjusting a selected clip to give it a clean, neutral starting point when you’re
either in a hurry, or if you’re having trouble manually working out a solution. However, this is
only the first step in grading a scene.
After you make a general adjustment to improve the color of a clip in a scene, one of the other
principal tasks of the colorist is to adjust all of the clips in that scene so that they match the clip
you started with, such that they all look like they were shot at the same time and in the same
place. This is called scene-to-scene color correction, scene balancing, or shot matching. While
there are abundant tools in DaVinci Resolve to ease the process of doing this manually,
wouldn’t it be nice if you could just select a series of clips that you want to match, and have the
software do the work?
(Top) Original scene, (Bottom) After using shot match to match all selected clips to clip 62
709
Automated Grading Commands and Imported Grades Part 6 – 41
That’s exactly what Shot Match has been designed to do. Whether you’re a colorist in a hurry,
trying to blast through a low-budget feature with an absurd schedule, a DIT making best light
dailies who just wants to make them match a little more closely before sending media off to
editorial, or an editor who isn’t fast at color correction who needs to give a rough cut a quick
color balance before showing the project to the client for the first time, the Shot Match feature
of DaVinci Resolve has been created to quickly make different clips in a timeline match one
another more closely, with a minimum of steps.
Shot Match Guidelines
Keep in mind that Shot Match isn’t supposed to make your clips look good, it’s supposed to
make them look the same as the clip you choose to match to, or to at least get as close as
possible without creating a color correction that will do harm to the image. The purpose of Shot
Match is to make it easier for you to match a scene’s worth of clips together so you have a
starting point for building the rest of the look you want for that scene, on top of this initial match.
The clip you choose to match to may have a correction applied to it, but for the best results, you
should limit yourself to simple Lift/Gamma/Gain primary adjustments. If you make Custom curve
or secondary adjustments to the image, it will be much more difficult for Shot Match to give you
a good result.
Shot Match works best with normalized clips. If you’ve got a timeline edited with log-encoded
clips, you may want to use DaVinci Color Management to normalize all the clips in the Timeline
before you use Shot Match, to get the most accurate results. It’s certainly possible to use Shot
Match with log-encoded media, but the flat color signal of log-encoded media may make it
harder to get good results, depending on the scene.
Furthermore, Shot Match is not the right tool to use to try and match un-normalized log-
encoded clips that use different types of log encoding, such as LogC and RedLogCine, or to try
and match normalized and un-normalized clips. Because log-encoding is similar to a set of red,
green, and blue curve operations, Shot Match is not equipped to achieve a successful result in
this situation.
Shot Match is not designed to apply corrections to clips that already have node adjustments.
The results will be unpredictable, and probably won’t match. While the clip you’re matching to
may have simple primary adjustments applied to it, the other selected clips that are being
matched should be completely ungraded.
Lastly, Shot Match has been designed to do no harm to the image. This means if you use Shot
Match to try and match an underexposed interior shot to an exterior shot exposed at high noon
on a sunlit day, the Shot Match algorithm will do its best to “split the difference” in order to make
the difference between these two clips less jarring, while at the same time taking care not to
stretch the color and contrast adjustments being made to the underexposed clips to the point
where the image falls apart.
How to Use Shot Match
There’s no way to easily describe what Shot Match does. It’s a complex algorithm designed to
try and deal with an impossibly varied number of different situations. As a result, Shot Match
doesn’t apply adjustments to any of the user-editable controls in the Color page. Instead, the
image adjustment created by Shot Match is applied invisibly, as the very last adjustment to the
node that was selected when Shot Match was used, similar to a LUT.
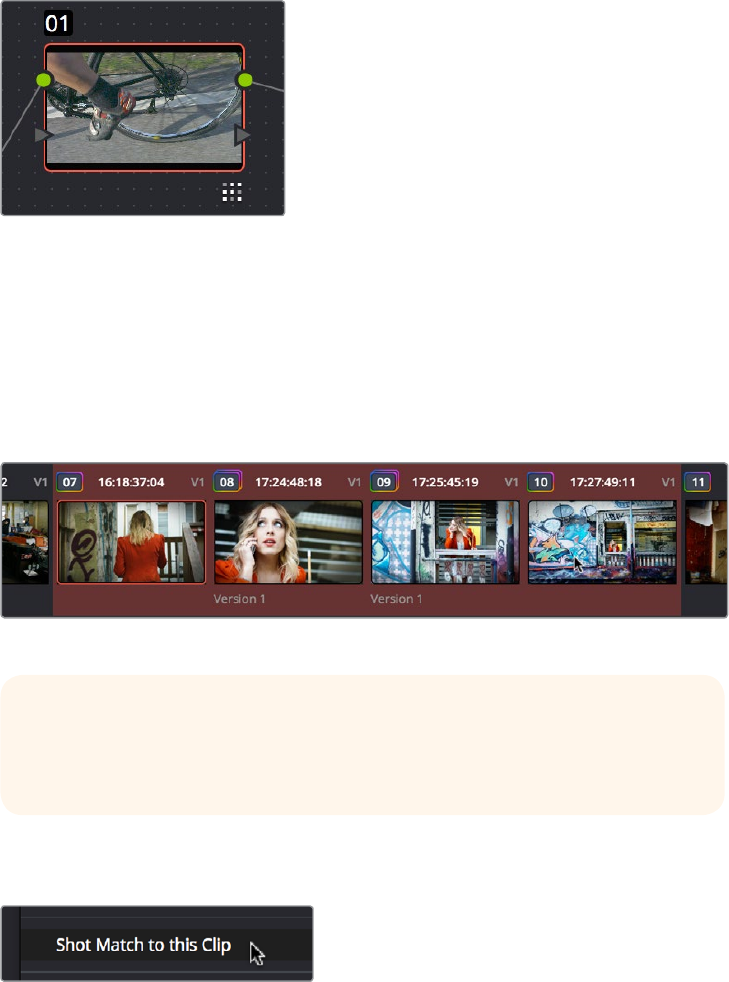
710
Automated Grading Commands and Imported Grades Part 6 – 41
A Shot Match adjustment applied to a clip
The procedure for using Shot Match is deceptively simple. However, getting a good result
requires some careful thought in terms of choosing which clips to match to one another.
To match one or more selected clips to a specific clip:
1 Following the guidelines presented in this section, Command-click or Shift-click one or
more clips that you want to be matched. The clip you want to match to may or may not
be part of the selection. You may select as few as one clip, or as many as you like.
Selecting clips you want to be matched
2 Next, right-click the clip you want to match all of the selected clips to, and choose Shot
Match to This Clip.
Shot Match command used on the clip you
want to match the other selected clips to
If the resulting automated match looks good and plays well, then congratulations, you’ve got an
excellent starting point for additional grading. However, keep in mind that even if the resulting
match isn’t perfect, it may have taken care of enough inconsistencies between the clip you’re
matching to and the clips that are being matched, that you need only make smaller, easier-to-
spot adjustments in order to nail the final match between the shots in a scene. Either way, you
can save time.
Suggestions for Using Shot Match
It’s certainly possible to select every clip in a scene and use Shot Match, and the results may be
wonderful depending on what kind of visuals are in the scene. However, for other scenes, this
may not always get you the best results.
TIP: If you want to make it easier to notice the before and after, you can turn
on Split Screen, and choose Selected Clips from the mode pop-up in the
Viewer Options. This lets you see all the clips you’re about to match in a grid.
711
Automated Grading Commands and Imported Grades Part 6 – 41
Be strategic about which clips you select to match to one another. Don’t use Shot Match on
shots that you know already have the same lighting, as you’ll risk having Shot Match make a
minor adjustment that may actually make the shots match less well. Think of Shot Match as a
tool for matching clips that look different.
It can also help to use Shot Match an angle at a time, and to do a small test before committing
yourself to matching a bunch of clips. For example, suppose you have a scene consisting of
angle A (an over of character 1), angle B (an over of character 2), and angle C (a master shot),
and you want to match the scene entire scene to angle C since it has the best lighting. First,
match one shot from angle B to your favorite shot from angle C, and see how you like the result.
If it’s good, then go ahead and select every angle B clip and match them to angle C, before
moving on to test one shot from angle A. This way, if there’s ever an angle that doesn’t work
well using Shot Match, you can try matching it to one of the other angles in the scene that
you’ve already matched to see if you get a better result.
Beware of clips with large areas of color in the background that don’t match any of the other
angles in a scene, such as a shot-reverse-shot sequence that cuts between someone standing
in a back yard and someone standing against a purple wall. You can try it to see what happens,
but this kind of color distribution can often throw Shot Match results off.
Broadcast Safe
If you regularly deliver to restrictive QC standards, then you can enable Broadcast Safe in the
Color Management panel of the Project Settings while you grade to limit both the luma and
chroma of the video signal to one of three levels of acceptable overshoots and undershoots.
The Broadcast Safe parameters in the Color Management panel of the Project Settings
Broadcast safe IRE (mV) levels: A pop-up menu for choosing one of three levels of
aggressiveness when limiting the signal. Choose the range that corresponds to your
QC requirements. The options are “–20 - 120” (permissive), “–10 - 110” (conservative),
“0- 100” (very conservative).
Make Broadcast Safe: A checkbox that turns broadcast safe limiting on and off.
NOTE: IKeep in mind that, since each clip in the Timeline has its own undo stack, you
cannot undo a shot match operation applied to multiple clips all at once.
NOTE: The clipping imposed by Broadcast Safe itself does not have an inherently soft
roll-off. For best results, Broadcast Safe should be used in conjunction with the Soft
Clip controls in the Color page, or a Soft Clip LUT (for more information see Chapter 3,
“Project Settings and Preferences”).
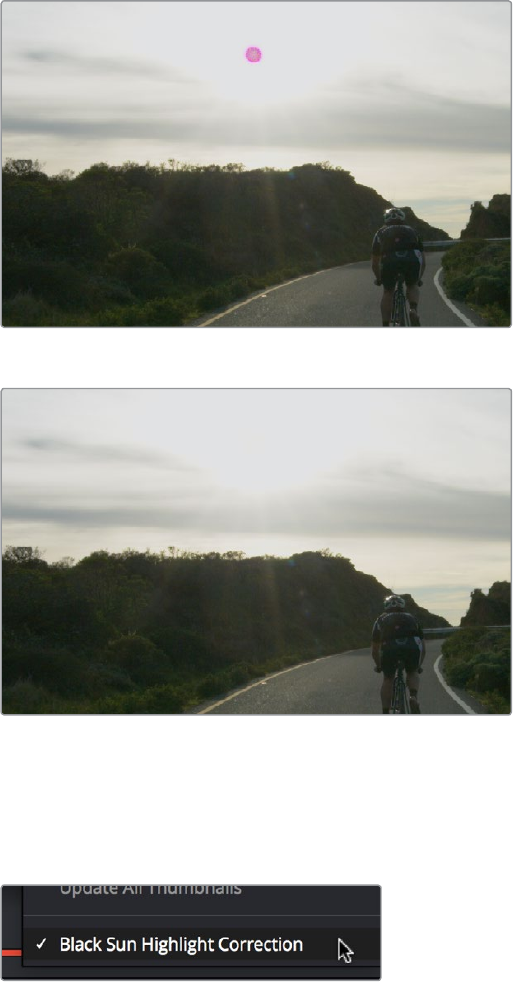
712
Automated Grading Commands and Imported Grades Part 6 – 41
Black Sun Highlight Correction
If your project uses media shot with one of the Blackmagic Cinema, Production, Pocket, or Ursa
cameras, and you have clips that exhibit so-called “black sun” artifacts, where bright on-screen
highlights appear with a dark magenta spot, a command exists to quickly and easily remove
these artifacts.
Black Sun artifact seen in image;
Artifact removed using Black Sun Highlight Correction
To remove black sun artifacts from Blackmagic camera footage:
Right-click the affected clip’s thumbnail in the Thumbnail timeline of the Color page, and choose
Black Sun Highlight Correction from the contextual menu.
The command for removing black sun artifacts
713
Automated Grading Commands and Imported Grades Part 6 – 41
Using CDL Grades
Only available in DaVinci Resolve Studio.
There are two instances where primary grading adjustments may be applied to a clip outside of
adjustments that you make within the Node Editor of the Color page. If you import a CDL
(ColorDecision List), then the CDL adjustment for each clip is made available to you via a
contextual menu command in the Thumbnail timeline of the Color page.
For more information, see Chapter 54, “Copying and Importing Grades Using ColorTrace.”
Using ARRI Looks
Only available in DaVinci Resolve Studio.
If you’ve ingested ARRI raw media or Amira SXT QuickTime media, with embedded ARRI Look
metadata (CDL + LUT), the embedded look can be copied to the currently selected node in the
Color page.
To copy an ARRI look from the source media to the current node:
1 Select a node in the Node Editor to which you want to apply the look data.
2 Right-click that clip’s thumbnail and choose Apply ARRI CDL and LUT. A LUT and Color
Wheels adjustment will be applied to the selected node.
Using the Apply ARRI CDL and LUT
command copies a look from the source
media to a node in the Node Editor
715
Primary Grading Controls Part 6 – 42
Primary Grading Controls
This chapter focuses on the core color adjustments that you’ll be making to create “primary”
corrections that alter the overall color and contrast of the image. These include clip-specific
Camera Raw adjustments and the Lift/Gamma/Gain/Offset adjustments available in the Color
Wheels palette, as well as more esoteric adjustments such as mixing colors between channels
using the RGB Mixer.
Color Controls Covered in this Chapter 716
Camera Raw 716
Copying, Versioning, and Protecting Camera Raw Settings 717
Making Changes to Clip Camera Raw Settings 717
Clip Decoder Settings 718
Resetting Camera Raw Settings 719
Color Wheels Palette 720
Opening the Color Wheels Palette Using the DaVinci Control Panel 720
HDR Grading Using Color Wheels Palette Controls 721
How to Use Color Balance Controls and Master Wheels 721
Understanding the Primaries Wheels Controls 722
Shared Adjustment Controls 725
The Log Mode of the Color Wheels Palette 727
The Primaries Bars Mode of the Color Wheels Palette 732
RGB Lift/Gamma/Gain Sliders 732
Oset Sliders, Oset Wheel, and Printer Points 733
RGB Mixer Palette 736
Preserve Luminance 736
Resetting the RGB Mixer 737
Swap Channels Buttons 737
Using the RGB Mixer in Monochrome Mode 737
RGB Mixer Controls on the DaVinci Control Surface 739
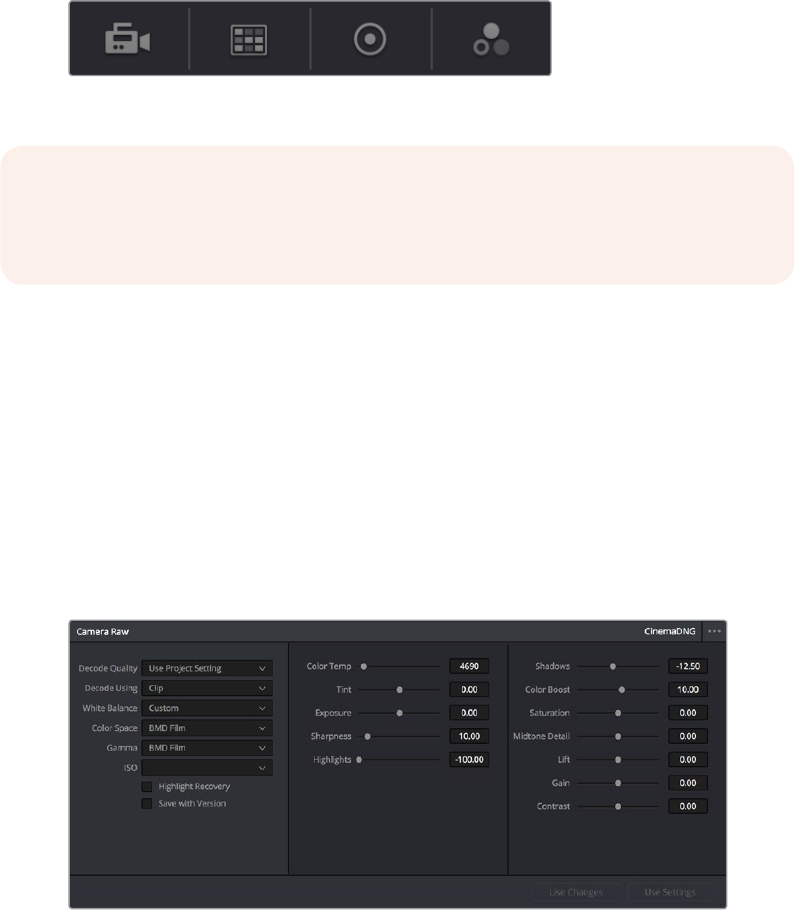
716
Primary Grading Controls Part 6 – 42
Color Controls Covered in this Chapter
The Left Palette panel contains four palettes that relate to color and contrast adjustments in
different ways. The controls found within these palettes provide the foundation for any grade,
and this chapter covers how you use the Camera Raw, Color Wheels, and RGB Mixer palettes.
For more information on the Motion Effects palette, see Chapter 59, “The Motion Effects and
Blur Palettes.”
Primary color adjustment palettes in the Left Palette panel
Camera Raw
When a timeline uses clips that are linked to camera raw source media recorded from cameras
from Blackmagic Design, RED, ARRI, Sony, and Vision Research, all clips in raw media formats
are initially debayered using the settings found in the Camera RAW panel of the
Project Settings.
However, if there are individual clips that you want to apply different raw settings to, for example
altering the ISO to pull more detail out of the highlights or shadows, then you can use the
controls found in the Camera RAW palette to individually alter the parameters found within.
The Camera Raw palette showing the available parameters for CinemaDNG media.
The Camera Raw palette is automatically set to the mode (seen within the Mode pop-up menu)
that is appropriate to the clip that’s currently selected. If the current clip is not in a raw format,
then the parameters within the Camera Raw palette are disabled.
All settings that currently populate the Camera Raw palette are also accessible from the DaVinci
control panel.
NOTE: If you’re using DaVinci Resolve with a computer monitor that’s smaller than
1920x1080, then the Left and Center Palette panels are consolidated into a single
panel, and all the buttons in the Palette toolbar appear together.
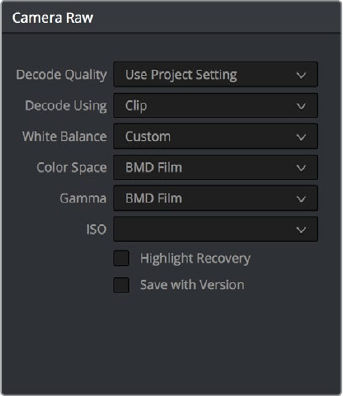
717
Primary Grading Controls Part 6 – 42
To access camera raw settings on the DaVinci control panel:
1 Press the CAMERA RAW soft key on the Center panel.
2 Use the Center panel knobs to make camera raw parameter adjustments.
3 When you’re finished, press the MAIN soft key to return to the main page of controls.
This section covers general use of the Camera Raw palette. For in-depth documentation about
specific Camera Raw parameters, see Chapter 4, “Camera Raw Settings.”
Copying, Versioning, and Protecting Camera Raw Settings
Ordinarily, a clip’s camera raw settings are copied along with its grade, or saved inside stills
grabbed from that clip, when you use the various grade management techniques covered in
Chapter 48, “Grade Management.”
When you create new versions, you have the option to save individual camera raw settings for
each version, so long as the Save with Version checkbox is turned on in the Camera
Raw palette.
Camera Raw master settings
This means that you can have different versions with different camera raw settings, if, for
example, you wanted to compare the results of two different camera raw adjustments on the
same clip.
If you’re copying and rippling grades among multiple clips, you can also protect each clip’s
camera raw settings from being overwritten using the “Copy Grade: Preserve Source Settings”
option found in the contextual menu of the Gallery. For more information on the Copy Grade
settings, see Chapter 48, “Grade Management.”
Making Changes to Clip Camera Raw Settings
If you want to make individual adjustments to a particular clip’s camera raw settings, choose
“Clip” from the Decode Using pop-up menu in the Camera Raw palette. This makes all the
parameters in the Camera Raw palette editable, and changes you make override the project-
wide camera raw settings.
Changes to the parameters in the Camera Raw palette can also be rippled across multiple
clips at once.
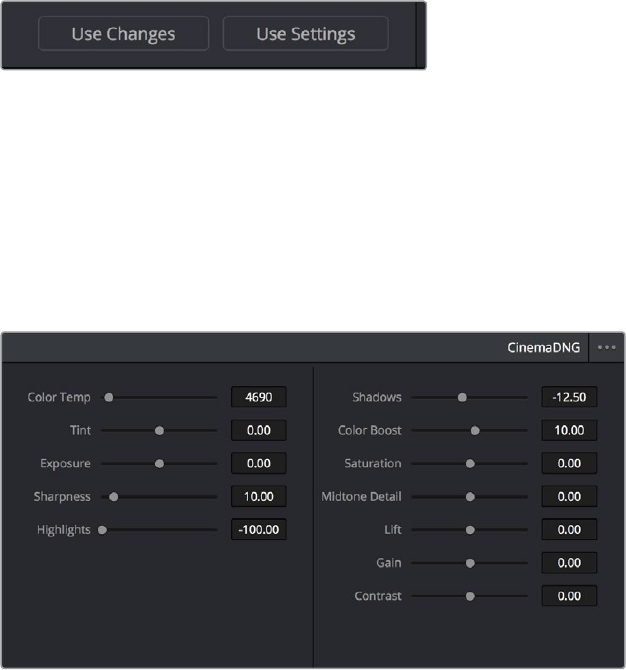
718
Primary Grading Controls Part 6 – 42
To ripple camera raw adjustments across multiple clips:
1 First, you must select a range of clips in the Color page timeline.
2 Open the Camera Raw palette, and make whatever adjustments are necessary to the
current clip. The name of each parameter you adjust changes to amber, showing you
which parameters have been modified, and which have not.
3 To ripple your changes, do one of the following:
Click the Use Changes button to ripple only the altered parameters (in amber) to the
other clips you’ve selected in the Timeline. This preserves differences between clips
in the parameters you haven’t adjusted (in gray).
Click the Use Settings button to ripple every parameter of the current clip to the other
clips you’ve selected, overwriting all the camera raw settings at once.
The Use Changes and Use Settings buttons in the Camera Raw palette
Clip Decoder Settings
There’s much more information on the various format-specific Master settings, as well as the
occasionally format-specific Clip Decoder settings, in Chapter 4, “Camera Raw Settings.”
However, with the exception of the RED Clip Decoder settings that appear for R3D clips, most
other formats share a set of DaVinci Resolve-specific controls that provide wide-latitude access
to the raw image data for purposes of making different kinds of adjustments.
Camera Raw Clip Decoder settings
These controls include:
Color Temp: Designed to alter the “warmth” of the image. Adjustable in degrees
Kelvin. Lower values correct for “warmer” lighting, while higher values correct for “cool”
lighting. +6500 is unity. The range is +2000 to +50,000.
Tint: Color balance correction for images with a green or magenta color cast, such as
fluorescent or sodium vapor bulbs. 0 is unity. The range is –150 to +150.
Exposure: Increases or lowers image lightness in units relative to ƒ-stops. If your
intended exposure adjustment lifts image data above the maximum white level, don’t
worry; all image data is preserved and can be retrieved in subsequent adjustments. 0 is
unity. The range is –4 to +4.
719
Primary Grading Controls Part 6 – 42
Sharpness: A debayer-specific sharpness filter applied to provide the appearance of
enhanced image detail. 20 is unity. The range is 0 to 100.
Highlights: Makes it easy to selectively retrieve blown-out highlight detail in high-
dynamic-range media by lowering this parameter, and achieves a smooth blend
between the retrieved highlights and the unadjusted mid tones for a naturalistic result.
0 is unity. The range is –100 through +100.
Shadows: Lets you selectively lighten or darken shadow detail. Raising this value
retrieves shadow detail recorded below 0 percent, while leaving the midtones alone. 0
is unity. The range is –100 through +100.
Color Boost: Lets you naturalistically raise the saturation of regions of low saturation,
sometimes referred to as a vibrance operation. Can be used also to lower the
saturation of regions of low saturation. 0 is unity. The range is –100 through +100.
Saturation: Adjusts the color intensity of the image. 0 is unity. The range is –100
through +100.
Midtone Detail: When this parameter is raised, the contrast of regions of the image with
high edge detail is raised to increase the perception of image sharpness, sometimes
referred to as definition. When this parameter is lowered to a negative value, regions
of the image with low amounts of detail are softened while areas of high-detail are left
alone. 0 is unity. The range is –100 through +100.
Lift: Adjusts the black point of the media, raising it or lowering it while scaling all
midtone values between it and the white point. Regardless of how you adjust this
control, all image data is preserved and can be retrieved in subsequent adjustments.
The range is –100 to +100.
Gain: Adjusts the white point of the media, raising or lowing it while scaling all midtone
values between it and the black point. Regardless of how you adjust this control, all
image data is preserved and can be retrieved in subsequent adjustments. 0 is unity.
The range is –100 to +100.
Contrast: Raising contrast reduces shadows and raises highlights, while leaving
midtones at 50 percent unaffected. Regardless of how you adjust this control, all image
data is preserved and can be retrieved in subsequent adjustments. 0 is unity. The
range is –100 to +100.
Resetting Camera Raw Settings
If you’ve made changes to the parameters of the Camera Raw palette and you decide you need
to reset them, there are two options, found in the Options menu.
Reset: Resets all parameters in the Camera Raw palette to their default settings.
Revert: Similar to the “Original Memory” command, Revert changes all camera raw
parameters back to the state they were at when you first selected the current clip.
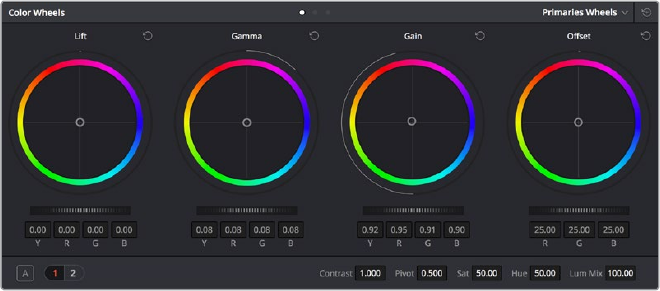
720
Primary Grading Controls Part 6 – 42
Color Wheels Palette
If you’ve had any exposure to color correction tools in any application, the controls found within
the Color Wheels palette should look familiar. These controls correspond to the most basic
color correction functionality available in DaVinci Resolve, and are designed to let users without
control panels have easy access to color balance and YRGB contrast manipulation using a
mouse, tablet, or trackpad.
Color Wheels for primary grading, in Primaries mode
The Color Wheels palette has three distinct modes of operation:
Primaries Wheels mode contains the traditional DaVinci Lift/Gamma/Gain/Offset
controls that allow tonally specific yet widely overlapping regions of adjustment.
Primaries Bars mode affects the same Lift/Gamma/Gain/Offset controls as the Primaries
Wheels mode, but the bars interface lets you make vertical slider-driven adjustments to
YRGB lift, YRGB gamma, and YRGB gain, as well as providing a slider-driven interface
for Offset.
Log mode contains Shadow/Midtone/Highlight/Offset controls that offer more
restrictive yet customizable regions of adjustment intended for making adjustments to
log-encoded image data.
Which mode you use depend entirely on what kinds of adjustments you need to make.
Opening the Color Wheels Palette
Using the DaVinci Control Panel
You can open any mode of the Color Wheels palette by doing one of the following:
To open the Primaries Bars: Press SHIFT DOWN and then PRIMARY.
To open the Color Wheels: Press SHIFT UP and then PRIMARY.
To open the Log controls: Press SHIFT DOWN and then PRIMARY. Alternately, you can
open any of the other Color Wheels palette modes, and then press the LOG soft key on
the Center panel of the DaVinci control panel. Press the MAIN soft key to return to the
more traditional Lift/Gamma/Gain mode of adjustment.
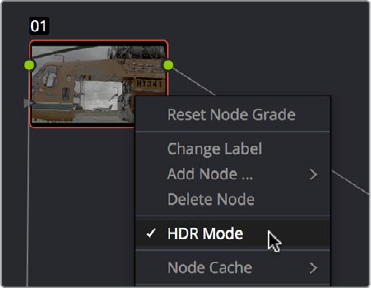
721
Primary Grading Controls Part 6 – 42
HDR Grading Using Color Wheels Palette Controls
When using various grading controls in the Color page to grade wide-latitude images for HDR
output, you may find it useful to enable theHDR Mode of the node you’re working on by
right-clicking that node in the Node Editor and choosing HDR Mode from the contextual menu
(only available in Resolve Studio).
Using a node’s contextual menu to put
that node into HDR mode
This settingadaptsthat node’scontrols to work within an expanded HDR range. Practically
speaking, this makes it easier to work with wide-latitude signals using controls that operate by
letting you make adjustments at different tonal ranges such as Lift/Gamma/Gain, Custom
Curves, Soft Clip, etcetera.
How to Use Color Balance Controls and Master Wheels
Each of the modes in the Color Wheels palette use the same controls, albeit in different ways.
This section explains, in a generic way, how to use these controls to make adjustments.
Color Balance controls provide a way to adjust all three color channels simultaneously with a
single move of the pointer, according to the mode that’s currently selected. These controls
correspond to the trackballs found on the DaVinci control panel, but there are a variety of
keyboard modifiers that let you make specific adjustments via the GUI.
To make adjustments using the Color Balance controls:
Click and drag anywhere within the color ring: Moves the Color Balance indicator
relative to its previous position, and rebalances the three color channels in whatever
range of image tonality is governed by that control. You don’t need to drag the Color
Balance indicator itself. This simulates the kind of relative control you get when using
a trackball to manipulate these parameters. As the Color Balance indicator moves,
the RGB parameters underneath change independently to reflect the independent
adjustments being made to each channel.
Shift-click and drag within the color ring: Jumps the Color Balance indicator to the
absolute position of the pointer, letting you make faster, more extreme adjustments to
the color balance governed by that control.
Double-click within the color ring: Resets the color adjustment without resetting the
corresponding contrast adjustment for that control.
Command-click and drag within the color ring: Adjusts YRGB contrast identically as if
you were dragging that control’s master ring.
Click the reset control at the upper-right of a color ring: Resets both the Color
Balance control and its corresponding master ring.
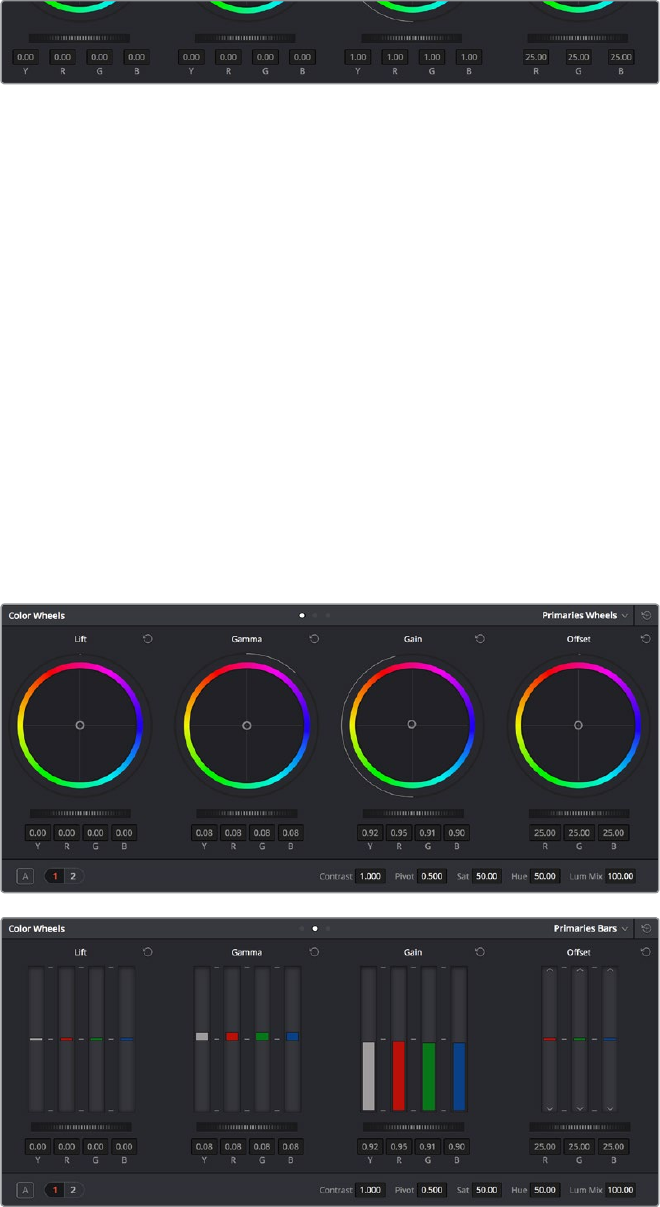
722
Primary Grading Controls Part 6 – 42
The Master Wheels, located below the Color Balance controls, let you adjust the YRGB
channels together to adjust Lift, Gamma, and Gain by individually adjusting the black point, the
white point, anddistribution ofmidtones that fall in-between. This has the practical effect of
letting you adjust image contrast when you manipulate any two of these wheels together.
Lift, Gamma and Gain master wheels to balance the grades
The Master Wheels correspond to the rings surrounding the trackballs on the DaVinci control
panel, which let you modify image contrast via YRGB adjustment (as opposed to modifying
image contrast via Y-only adjustment, covered later in this chapter).
To adjust a Master Wheel:
Dragging a Master Wheel to the left makes the corresponding tonal region of the image
darker, and dragging it to the right makes that tonal region of the image lighter. The
effect will vary according to the Color Wheels mode you’re in. As you make an
adjustment, the YRGB parameters located underneath all change together to reflect
the simultaneous adjustment you’re making to all channels.
Understanding the Primaries Wheels Controls
The Color Wheel palette’s Primaries Wheels mode lets you rebalance color and adjust contrast
via the traditional DaVinci controls, which govern three overlapping tonal ranges referred to as
Lift, Gamma, and Gain. The Lift/Gamma/Gain color balance and Master Wheel controls are tied
to the YRGB Lift/Gamma/Gain sliders found in the Primaries palette; adjustments made to one
set of controls are mirrored in the other.
Though they may look different, the Primaries Wheels and Primaries Bars
actually adjust the same components, but in differentways.
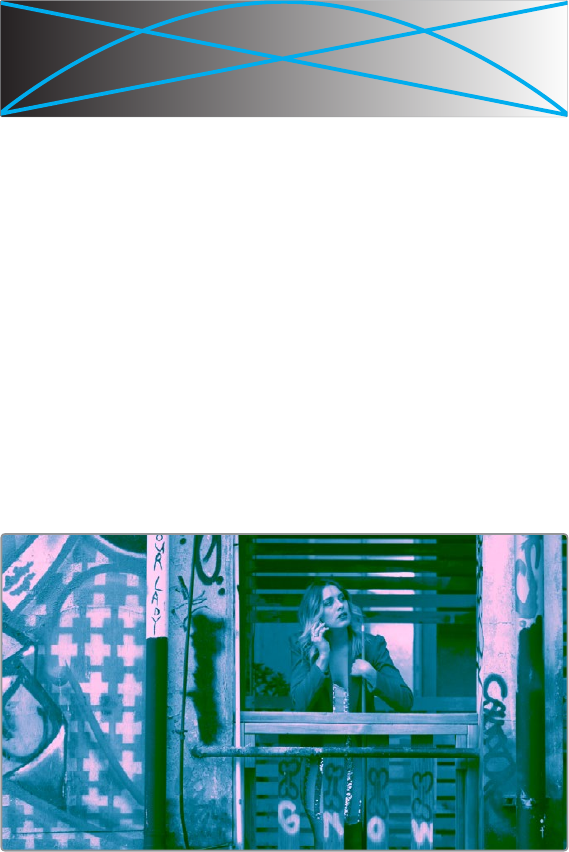
723
Primary Grading Controls Part 6 – 42
These tonal ranges are defined by image lightness, on a scale where 0 is absolute black and
1023 is absolute white. The following illustration shows an approximation of how the Lift,
Gamma, and Gain tonal zones broadly overlap, and how each zone’s influence falls off towards
the opposing extremes of image tonality.
Graphic displays the relationship of the Lift, Gamma and Gain
controls over the image brightness range that they control
The Lift color balance control region of influence starts at black, and then falls off through the
middle grays to diminish to no influence at white. Meanwhile, the Gamma color balance control
has its greatest influence over the image in the middle grays, and its influence diminishes
towards black and white. Lastly, the Gain control is the inverse of Lift, having its greatest effect
on the image at white, with its influence falling off to diminish at black.
Because these tonal ranges overlap so broadly, you can make very soft, subtle, naturalistic
adjustments using these controls. Furthermore, you can capitalize on their overlap by moving
an adjacent color balance control toward a color that’s complementary to an adjustment you’ve
just made to restrict further how much of the image is affected.
The following image shows the interaction of extreme corrections made to a grayscale image
using all three Color Balance controls. Lift has been pushed toward green, Gamma has been
pushed toward blue, and Gain has been pushed toward red.
Extreme adjustments showing the overlap of the Lift, Gamma, and
Gain color balance controls
Notice how, even though these corrections are extreme, the colors blend smoothly. This is the
reason for the broad overlap among all three controls, and why Lift, Gamma, and Gain are so
effective in making corrections to the ambient color temperature of a scene to account for
inconsistencies in lighting or camera settings.
Lift Gamma Gain
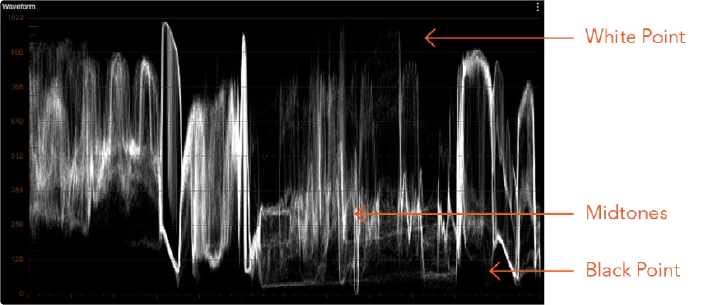
724
Primary Grading Controls Part 6 – 42
3-Way Master Wheel Adjustments
The Master Wheels located below the Color Balance controls let you precisely modify image
contrast by YRGB adjustments, which individually alter the black point, the white point, and
distribution of midtones that fall in-between.
These controls correspond to the rings surrounding the trackballs on the DaVinci
control surface.
Lift: Lets you adjust the perceived shadow density of the image by altering the black
point of the image. Dragging the Lift master wheel to the left makes the darkest values
in the image darker, increasing the distance between the black and white points of
the image, and stretching all the midtone values in-between. Dragging the Lift master
wheel to the right makes the darkest values in the image lighter, reducing contrast and
squeezing all the midtone values between the black and white points.
Gamma: Lets you adjust the overall perceived lightness of the image by altering the
distribution of midtones that fall between the Lift and Gain master wheel settings.
Dragging the Gamma master wheel to the left darkens the overall image, while
dragging it to the right brightens it. Most Gamma contrast adjustments have a minimal
effect on the black and white point of the image, but large adjustments may push
either boundary of image lightness farther out. This interaction is described in more
detail below.
Gain: Lets you adjust the lightness of the highlights by altering the white point of the
image. Dragging the Gain master wheel to the left makes the lightest values of the
image darker, squeezing the midtones between the white and black points of the
image. Dragging Gain to the right makes the lightest values even lighter, eventually
clipping at maximum white.
Waveform display shows the clips contrast range
These contrast adjustments are not limited by one another. For example, raising or lowering the
Gamma master wheel by a large amount may push the highlights of the image higher or the
shadows of the image lower, regardless of the current Lift or Gain contrast setting.
As a result, these controls are somewhat interactive, and you may find yourself going back and
forth between controls as you make your final contrast adjustments. This is one of the reasons a
control surface is valuable, as it allows you to adjust all three settings simultaneously.

725
Primary Grading Controls Part 6 – 42
Oset Color and Master Controls
The fourth set of Color Balance and Master Wheel controls is actually shared with the Log
controls and with the Offset sliders in the Primaries palette. These are the Offset controls, which
let you make linear adjustments to rebalance the entire tonal range of the RGB channels.
The Offset color balance control: Works as a simultaneous adjustment to all three
Offset sliders located in the Primaries palette; adjustments made to the Offset color
balance control also alter the Offset sliders. Used subtly, this makes it easy to neutralize
color imbalances in the darkest part of the image, while simultaneously rebalancing
every other part of the image. Used more dramatically, this control makes it easy to add
a color wash throughout the entire image.
The Offset master wheel: Acts as a global adjustment to image lightness, an operation
sometimes referred to as setup, raising or lowering all YRGB channels together.
When using a DaVinci control surface, the Offset color balance control is adjusted in either Lift/
Gamma/Gain or Log modes via the fourth trackball, while the Offset wheel is adjusted via the
ring surrounding the fourth trackball.
Shared Adjustment Controls
The three modes of the Color Wheels palette all share two pages of controls for making more
specific adjustments to different aspects of the image such as Contrast, Saturation, Hue,
Highlight retrieval, Color boost, et cetera.
Page 1 Adjustment Controls
The shared Contrast, Pivot, Saturation, Hue, and Lum Mix controls are located in a set of
“Page1” controls found at the bottom of the Color Wheels palette.
The Page 1 adjustment controls
The Contrast parameters let you quickly narrow or widen image contrast about a user-definable
pivot point. Regardless of which mode you’re in, these parameters are identical. Contrast and
pivot can also be adjusted using the DaVinci control surface via the CONTRAST and PIVOT
knobs on the Center panel’s default page, regardless of whether you’re in Lift/Gamma/Gain or
Log mode.
Contrast: This one parameter lets you increase or reduce the distance between the
darkest and lightest values of an image, raising or lowering image contrast. The effect
is similar to using the Lift and Gain master controls to make simultaneous opposing
adjustments. Bright and dark parts of the image are pushed apart or brought together
about a center point defined by the Pivot parameter. The “Use S-curve for contrast”
setting in the General Options panel of the Project Settings (on by default) sets
the contrast control to apply an “S-curve” to the image, such that the shadows and
highlights of a signal will not be clipped when you increase the value. If you would
prefer for these contrast adjustments to be made linearly, and for the signal to be
allowed to clip when you reach the upper and lower boundaries of the video signal, you
can turn this checkbox off.
Pivot: Changes the center of tonality about which dark and bright parts of the image
are stretched or narrowed during a contrast adjustment. Darker images may require
a lower Pivot value to avoid crushing the shadows too much when stretching image
contrast, while lighter images may benefit from a higher Pivot value to increase shadow
density adequately.

726
Primary Grading Controls Part 6 – 42
The Saturation, Hue, and Lum Mix parameters mirror the three knobs found at the right of the
Center panel of the DaVinci control surface.
Saturation: Increases or decreases overall image saturation. At higher values, colors
appear more intense, while at lower values, color intensity diminishes until, at 0, all
color is gone, leaving you with a grayscale image.
Hue: Rotates all hues of the image around the full perimeter of the color wheel. The
default setting of 50 shows the original distribution of hues. Raising or lowering this
value rotates all hues forward or backward along the hue distribution as seen on a
color wheel.
Lum Mix: Lets you control the balance between YRGB contrast adjustments you’ve
made using the Master Wheels or ganged Custom curves, and Y-only adjustments to
contrast made using the Y channel Lift/Gamma/Gain controls of the Primaries palette
or the unganged Luma curve. At the default of 100, YRGB and Y-only adjustments to
contrast contribute equally. Reducing this value diminishes the effect of Y-only contrast
adjustments until, at 0, Y-only contrast adjustments are turned off.
Additionally, you’ll notice that at a Lum Mix setting of 100, individual adjustments to R, G,
or B using the RGB sliders or unganged Custom curves result in automatic adjustments
being made to the other two color channels in order to maintain constant Luma levels.
At a Lum Mix setting of 0, individual color channel adjustments have no effect on the
other color channels.
Like most parameters in DaVinci Resolve, clicking and dragging a parameter’s name or value to
the left or right lowers and raises that parameter with a virtual slider, while double-clicking that
parameter’s number lets you edit it numerically, and double-clicking that parameter’s name
resets the parameter to its default position.
Page 2 Adjustments Controls
The “Page 2” section of the Color Wheels palette has the same kind of highlight and shadow
recovery, Color Boost, and Midtone Detail controls that are found on the Camera Raw palette. If
you’re grading a camera raw format, then these controls on the Camera Raw palette will give
you greater latitude for adjustment. However, the identically named controls in the Color
Wheels palette can be used for any media format you like.
The Page 2 adjustment controls
Even though you won’t have the kind of wide latitude that you do when using these controls
with raw clips, you can still accomplish quite a lot, depending on the format you’re adjusting.
Temperature: A specifically-constrained Gain color balance adjustment that lets
you adjust the image along a warm/orange to cool/blue axis corresponding to the
naturalistic spectrum of color temperatures used for lighting. Raising this parameter
performs a Gain color balance adjustment toward orange, while lowering this parameter
to a negative value performs a Gain color balance adjustment toward a blue/cyan split.
0 is unity. The range is –4000 to +4000.
Tint: A specifically-constrained Gain color balance adjustment that lets you adjust the
image along a magenta to green axis corresponding to the unnatural spectrum of color
temperatures found in artificial lighting sources such as fluorescent and sodium vapor
lighting fixtures. Raising this parameter performs a Gain color balance adjustment
toward magenta (sometimes referred to as “minus green” to correct for fluorescent
lighting), while lowering this parameter to a negative value performs a Gain color
balance adjustment toward green (“plus green” to correct for other kinds of lighting). 0
is unity. The range is –4000 to +4000.
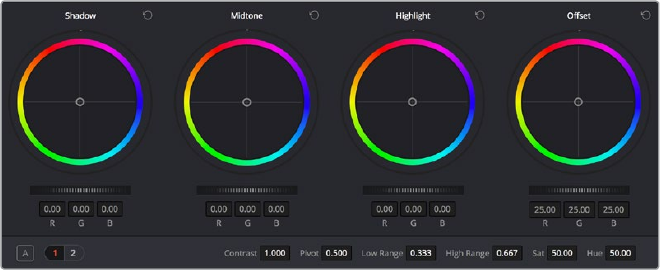
727
Primary Grading Controls Part 6 – 42
Midtone Detail (MD): When this parameter is raised, the contrast of regions of the
image with high edge detail is raised to increase the perception of image sharpness,
sometimes referred to as definition. When this parameter is lowered to a negative
value, regions of the image with low amounts of detail are softened while areas of high-
detail are left alone. 0 is unity. The range is –100 through +100.
Color Boost: Lets you naturalistically raise the saturation of regions of low saturation,
sometimes referred to as a vibrance operation. Can be used also to lower the
saturation of regions of low saturation. 0 is unity. The range is –100 through +100.
Shadows: Lets you selectively lighten or darken shadow detail. Raising this value
retrieves shadow detail recorded below 0 percent, while leaving the midtones alone. 0
is unity. The range is –100 through +100.
Highlights: Makes it easy to selectively retrieve blown-out highlight detail in high-
dynamic-range media by lowering this parameter, and achieves a smooth blend
between the retrieved highlights and the unadjusted mid tones for a naturalistic result.
0 is unity. The range is –100 through +100.
Auto Correction in the Primaries Mode Controls
The Auto Color button provides a quick way to automatically balance the blacks and whites of a
clip based on the current frame at the position of the playhead. DaVinci Resolve looks for the
darkest levels in the image to neutralize the RGB color balance in the blacks, and the brightest
levels to neutralize the RGB color balance in the highlights. Furthermore, Master Lift and Master
Gain are adjusted to maximize image contrast at the outer boundaries of 0 and 100 percent.
Using this control with the Primaries Bars mode open makes it easier to see what’s been
changed after these automatic adjustments are made.
The Log Mode of the Color Wheels Palette
The Shadow/Midtone/Highlight color balance and Master Wheel controls operate
independently of the Lift/Gamma/Gain color balance and Master Wheel controls found in the
Primaries mode. While the Log mode uses the same types of controls as the Primaries mode,
the way each control affects the image is very different.
To switch between the Primaries and Log modes of the Color Wheels:
Choose an option from the mode pop-up, click the right mode button, or press Option-Z.
Log color wheels, with behavior that is very different from the Primaries mode color wheels
There are two ways of using the Log mode controls. The first takes advantage of the way these
controls work to make fast, filmic adjustments to log-encoded media while it’s normalized by
LUTs or manual adjustments added after it in the image processing pipeline.
The other way of using the Log controls is to take advantage of the more restrictive, but
adjustable tonal range of the Shadow/Midtone/Highlight controls to stylize normalized clips by
tinting specific regions of the image.
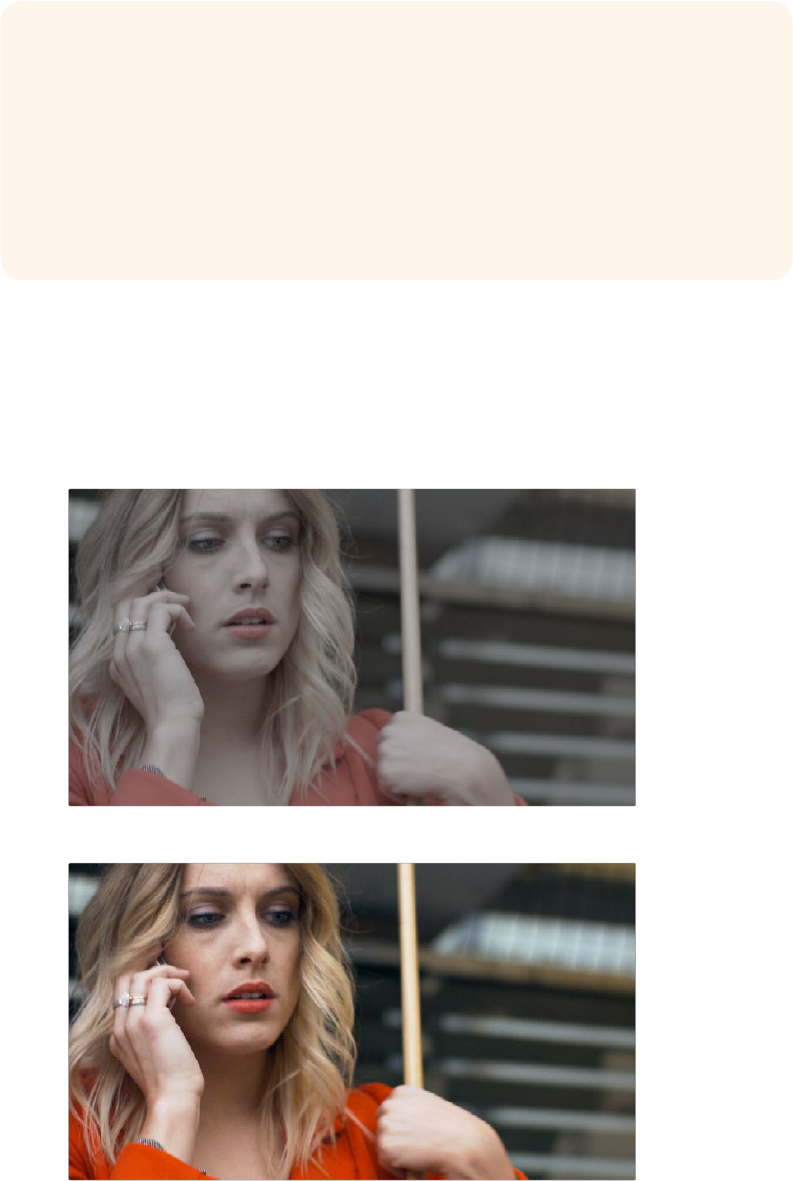
728
Primary Grading Controls Part 6 – 42
Using the Log Mode Controls to Grade Log-Encoded Media
The Log controls are so named because they’re designed to work specifically with media with
Log-C or similar gamma and color encoding, derived from the Cineon Log gamma curve,
developed by Kodak to digitally store flat-contrast, wide-gamut image data that preserves
image detail with a wide latitude for adjustment.
An example of a log-encoded clip
The same clip after being normalized
You can debayer most raw formats to a log-encoded image in order to derive the maximum
amount of image data and adjustable latitude from that source (For more information, see
Chapter 4, “Camera Raw Settings,”). However, the resulting image needs to be normalized to
occupy the final range of color and contrast that you intend for the final result.
Whether or Not to Use Legacy Log Grading Ranges and Curve
DaVinci Resolve 12.5 introduced a modification to the Log grading controls that
provides smoother, more pleasing results using the same controls. To maintain
backward compatibility with older projects, a “Use legacy Log grading ranges and
curve” checkbox in the General Options panel of the Project Settings lets you switch
your project between the older Log control behavior and the newer one. Older
projects that are opened in DaVinci Resolve have this checkbox turned off by default,
while new projects have this turned on by default.
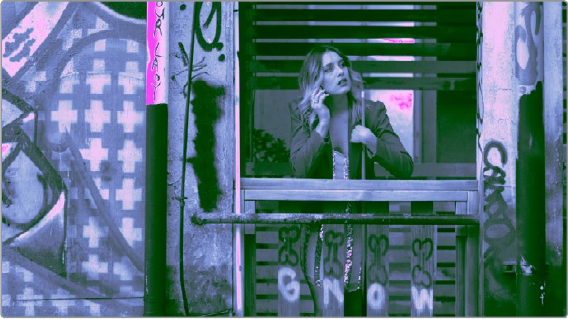
729
Primary Grading Controls Part 6 – 42
You can do this one of two ways:
You can make a very careful curves adjustment in a second node to stretch the log-
encoded out to fit the contrast profile you want. By making this adjustment in Node 2,
you make room for a customizing adjustment made using the Log controls in Node 1,
prior to the normalization adjustment. This is key.
You can also apply a 1D Output or 3D LUT to the first node of a clip to normalize the
image. This is a faster, if less flexible operation, but a smooth tonal range may be easier
to obtain. Since a LUT applied within a node is always the last adjustment within that
node’s order of operations, you can also use Node 1’s Log controls to customize the
look of the footage.
In either case, it’s important that the normalizing adjustment happens after your Log control
adjustments, for the Log control adjustments to work as they should. With your node tree set up
in this way, you’ll be monitoring an ordinary-looking image, but taking advantage of the Log
mode controls’ unique tonal ranges to manipulate the log-encoded image data with great
specificity.
When using the Log mode controls, here’s a workflow to consider as you learn how they work:
First, use the Offset master wheel to set the black point, and use the Contrast and Pivot
parameters to stretch or compress contrast as necessary to achieve the tonal range
you require.
Second, use the Offset color balance control to adjust the overall color balance of the
image to your liking.
Third, use the Shadow/Midtone/Highlight color balance and Master Wheel controls
to make specific, targeted adjustments to the color and contrast of the image in tonal
ranges that match where that data is in the log-encoded image.
Working in this way, you’ll find that adjustments made with the Offset color balance and Master
Wheel controls and Contrast controls control the log-encoded image very nicely to create an
overall adjustment, while the Shadow, Midtone, and Highlight controls allow you to fix specific
issues, such as shadow balance and density, after your main adjustment has been set.
The following illustration shows an approximation of how the default ranges of the Shadow,
Midtone, and Highlight controls divide the tonal range of a log-encoded image.
This graphic shows the tonal range of each of the Log controls
when used with a log-encoded image
As you can see, when used with a log-encoded image the color interactions between each
adjustment overlap very softly, while still allowing more specific adjustments than those made
by the Lift/Gamma/Gain controls.
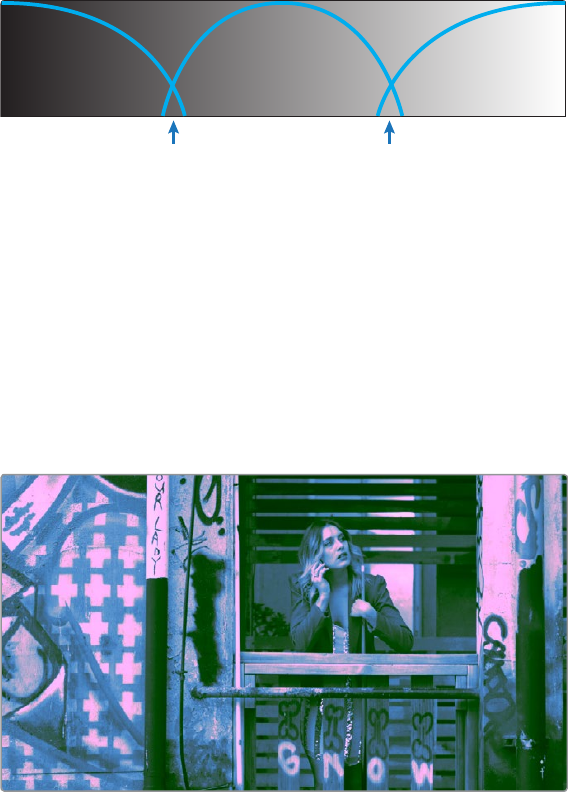
730
Primary Grading Controls Part 6 – 42
Furthermore, the boundaries of the Shadows, Midtones, and Highlights Log controls can be
customized using the Low and High Range parameters. This gives you added flexibility to apply
more specific contrast and color adjustments.
Once you’ve made an adjustment using Log mode controls along with a normalizing LUT or
curve adjustment, you can always apply additional nodes and use the Primaries mode of the
Color Wheels palette to make further alterations to the now normalized image, working as you
normally would with any of the other tools in DaVinci Resolve.
Using the Log Mode Controls to Stylize Normalized Media
You can also use the Log mode controls on normalized images. Although the results you get
will be somewhat different, this can be a fast way to create interesting stylizations. Whereas the
broadly overlapping tonal ranges of the Lift, Gamma, and Gain color balance controls allow
subtle adjustments to be made very easily, the Log palette’s color balance controls affect much
more restrictive tonal zones that overlap much less when used on normalized images.
The following illustration shows an approximation of how the Shadows, Midtones, and
Highlights, by default, divide the tonal range of the image into non-overlapping thirds. As you
saw in the previous section, these divisions were originally intended to map to log-encoded
media. However, with normalized media these divisions provide a different, and potentially
useful, set of ranges from the Primaries mode controls.
This graphic shows the tonal range of each of the Log controls with the
additional low and high range to expand or contract the range
With normalized media, the Shadows really do only affect the darkest shadows, falling off at
approximately the bottom third of image tonality. The Midtones affect only the middle third of
grays, and the Highlights affect the brightest top third of image values. However, these default
ranges of image tonality can be adjusted using the Low Range and High Range controls, which
are described in more detail later.
The following image shows the default interaction of extreme corrections made to a grayscale
image using the Log mode controls. The Shadows have been pushed toward green, the
Midtones have been pushed toward blue, and the Highlights have been pushed toward red.
Extreme adjustments showing the overlap of the Shadow,
Midtone, and Highlight color balance controls
Shadows Midtones Highlights
High RangeLow Range

731
Primary Grading Controls Part 6 – 42
As you can see, with normalized media the color interaction between each adjustment is very
subtle. The darkest shadows end up bright green, the midtone values are vivid blue, and the
highlights are almost pure red. This restrictiveness is useful when you want to limit a correction
to a specific tonal range within the image without needing to use a Luma qualifier. It’s also quite
useful for making bold, stylistic color adjustments when creating a non-naturalistic look.
Adjusting Tone Ranges In Log Mode
Two parameters let you modify the range of Shadows and Highlights that each Color Balance
control affects, in turn narrowing and widening the range of Midtones. Keep in mind that while
the ranges can be customized, the amount of overlap between each range cannot.
Low Range: Moves the border where the Shadows and Midtones meet. Lowering
this parameter widens the range affected by the Midtones, and narrows the range
affected by the Shadows. Raising this parameter narrows the Midtones and widens
the Shadows.
High Range: Moves the border where the Midtones and Highlights meet. Lowering the
High Range parameter narrows the range affected by the Midtones, and widens the
range affected by the Highlights. Raising this parameter narrows the Highlights and
widens the Midtones.
There are also Saturation and Hue parameters which mimic these settings found within other
palettes and modes.
Adjusting Contrast in Log Mode
When using the Log mode controls, your primary tools for adjusting image contrast will usually
be the Offset master wheel and Contrast and Pivot parameters. Using these three controls, you
can set a black point and adjust the overall contrast very quickly.
The Shadow, Midtone, and Highlight master wheels let you adjust image lightness within the
same restrictive ranges of image tonality that are defined by the Low Range, High Range, and
Pivot parameters. These adjustments should appear smooth, if somewhat narrower then the
Lift/Gamma/Gain controls, when used with log-encoded media. However, when used with
normalized images, severe adjustments made with one master wheel may not always make a
smooth transition to the next adjacent range of image lightness.
Log Oset Color and Master Controls
The Log controls also share the same Offset color balance and Master Wheel controls that
appear in the Lift/Gamma/Gain mode of the Color Wheels palette (which are tied to the Offset
controls of the Primaries palette).
The Offset color balance control: Works as a simultaneous adjustment to all three
Offset sliders located in the Primaries palette; adjustments made to the Offset color
balance control also alter the Offset sliders. Used subtly, this makes it easy to neutralize
color imbalances in the darkest part of the image, while simultaneously rebalancing
every other part of the image. Used more dramatically, this control makes it easy to add
a color wash throughout the entire image.
The Offset wheel: Acts as a global adjustment to image lightness, an operation
sometimes referred to as setup, raising or lowering all YRGB channels together.
NOTE: Because these controls are so restrictive when used with normalized images,
it’s easy to create solarization effects by raising the shadows to be higher than the
Midtones, or lowering the Highlights to fall below the Midtones, to give two examples.
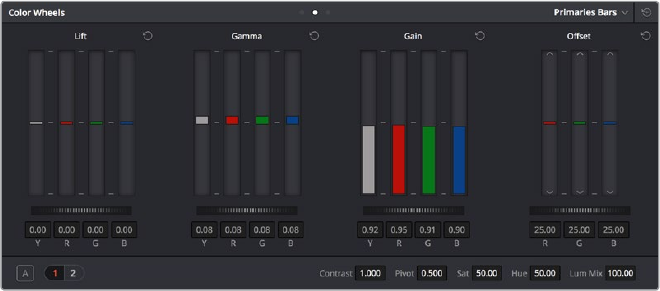
732
Primary Grading Controls Part 6 – 42
Switching to Log Mode Using the DaVinci Control Surface
You can switch to the Log grading mode of the currently selected node by doing one of the
following:
Press SHIFT DOWN and then PRIMARY.
Press the LOG soft key on the Center panel of the DaVinci control surface. Press the
MAIN soft key to return to the more traditional Lift/Gamma/Gain mode of adjustment.
The Primaries Bars Mode of the Color Wheels Palette
The Primaries Bars palette contains the original set of DaVinci Resolve color adjustment sliders.
These sliders serve two uses. First, they’re highly visible indicators of the individual YRGB
channel adjustments that are made using the trackballs, rings, and knobs of a control surface.
Second, they provide control of individual YRGB Lift/Gamma/Gain parameters using a mouse,
tablet, or trackpad.
Primary grading controls
RGB Lift/Gamma/Gain Sliders
The main controls of the Primaries Bars mode are the individual Luma (or Y), Red, Green, and
Blue sliders, four each for Lift, Gamma, and Gain. These sliders correspond to a set of knobs on
the POTS page of the DaVinci control surface, and provide precise Lift/Gamma/Gain style
control over each of the YRGB channels of the image. When used in conjunction with a Parade
Scope video analysis of the image, these controls can enable you to fix irregular color
imbalances in specific channels quickly.
Additionally, the Luma (Y) Lift/Gamma/Gain sliders correspond to the three knobs arranged
vertically to the left of the Center panel of the DaVinci control surface. These three controls
allow easy Y-only adjustments to contrast, where an increase in contrast results in perceptually
diminished color saturation.
Making Y-only adjustments to contrast is a great way to increase contrast when you’re going for
muted saturation or a gritty look. This kind of adjustment is also useful in situations where you’re
trying to increase shadow density without increasing image colorfulness.
Four Master Wheel controls appear underneath each group of Lift/Gamma/Gain sliders.
Thefirst three of these controls are identical to the Lift/Gamma/Gain master wheels in the
Primaries mode of the Color Wheel palette, and control YRGB contrast, while the fourth is
identical to the Offset master wheel found in the Log mode of the Color Wheel palette.
Finally, each group of Lift/Gamma/Gain sliders has its own reset button. To reset individual
channels, double-click the single-letter label underneath that slider.
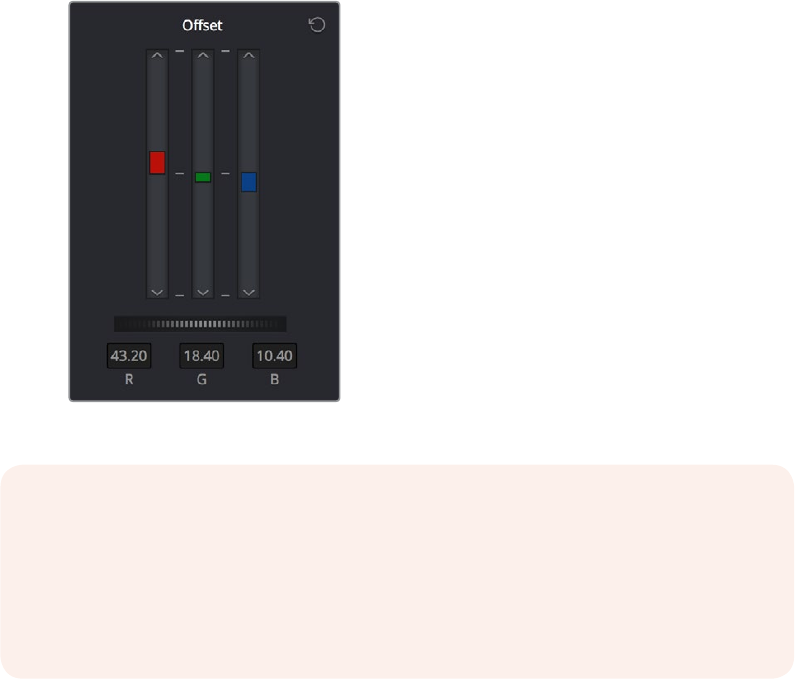
733
Primary Grading Controls Part 6 – 42
To adjust RGB Lift/Gamma/Gain using the DaVinci control surface:
1 Press the POTS soft key on the main page of the Center panel.
2 Use the variously identified LUM/RED/GREEN/BLUE and OFFSET/BLACK/GAMMA/
GAIN knobs to make the required adjustments.
3 Press the MAIN soft key to return to the Center panel’s main page.
Offset Sliders, Offset Wheel, and Printer Points
These vertical sliders mirror the settings of the Offset color balance controls in the Color Wheel
palette, except that they provide individual control over the Red, Green, and Blue color
channels. When you drag one of the Offset sliders up or down, you raise or lower that color
channel in its entirety, which can be useful for adjusting color channels that are particularly
problematic, or for imposing the kind of traditional linear color adjustments that color timers of
film have employed for decades. In fact, many colorists consider the simplicity of these controls
a virtue, and embrace the slight shadow or highlight contamination that can result from color
balancing in this linear way as a hallmark of traditional cinema color adjustment.
Offset RGB and master controls
Adjusting Printer Points in the Primaries Bars Palette
Each Offset slider also has a pair of arrow buttons, one at the top and one at the bottom.
Thesebuttons provide “Printer Point” adjustment of these values, which let you adjust each
Offset channel in discrete increments. Printer Points can be useful for projects that have tight
integration with a film lab, and are designed to emulate color adjustments made using
optical printers.
NOTE: Unlike the other Color Wheels control adjustments described in this chapter,
the Offset controls do not use the Lum Mix parameter to control whether individual
adjustments to the R, G, or B channels result in automatic adjustments being made to
the other two color channels in order to maintain constant Luma levels. All Offset and
printer points adjustments made to a specific color channel affect only that
color channel.
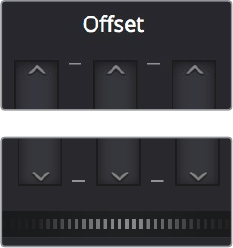
734
Primary Grading Controls Part 6 – 42
The “plus” and “minus” red,
green,and blue buttons for
making printer point adjustments
The Offset wheel control underneath the Offset sliders lets you adjust all three sliders at once,
performing a setup adjustment. The Offset sliders, Printer Point buttons, and Offset wheel can
be adjusted using the DaVinci control surface.
Adjusting Printer Points Using the DaVinci Control Panel
The DaVinci Resolve Advanced and Mini color grading panels have support for adjusting printer
points using rotary controls for the Red, Green, and Blue channels, as well as All
channels together.
To adjust the Offset sliders individually using the DaVinci Resolve Advanced or Mini panels:
Use the MASTER OFFSET, RED OFFSET, GREEN OFFSET, and BLUE OFFSET knobs on
the main page of the Center panel.
If you have the DaVinci Resolve Advanced panel, there are dedicated printer points buttons
you can use.
To adjust Offset Printer Points using the DaVinci control surface:
1 Press the PRINTER LITES soft key on the main page of the Center panel to display the
Printer Points controls page on the Transport panel.
2 Use the + and – MASTER, RED, GREEN, and BLUE buttons that appear on the
Transport panel.
3 Press PRINTER LITES again to return the Transport panel controls to their
previous state.
There’s also a special set of keyboard shortcuts, mapped to the numeric keypad of an
extended keyboard, that lets you make Printer Point adjustments in discrete
increments, adding or subtracting a point at a time.
Adjusting Printer Points Via Keyboard Shortcuts
One of the best ways of using printer points if you don’t have a color control panel that supports
them is to enable the numeric keypad to use dedicated keyboard shortcuts just for
printer points.
To use the Printer Lights Hotkeys:
Choose Color > Printer Lights Hotkeys, or press Option-Command-Grave Accent (`)
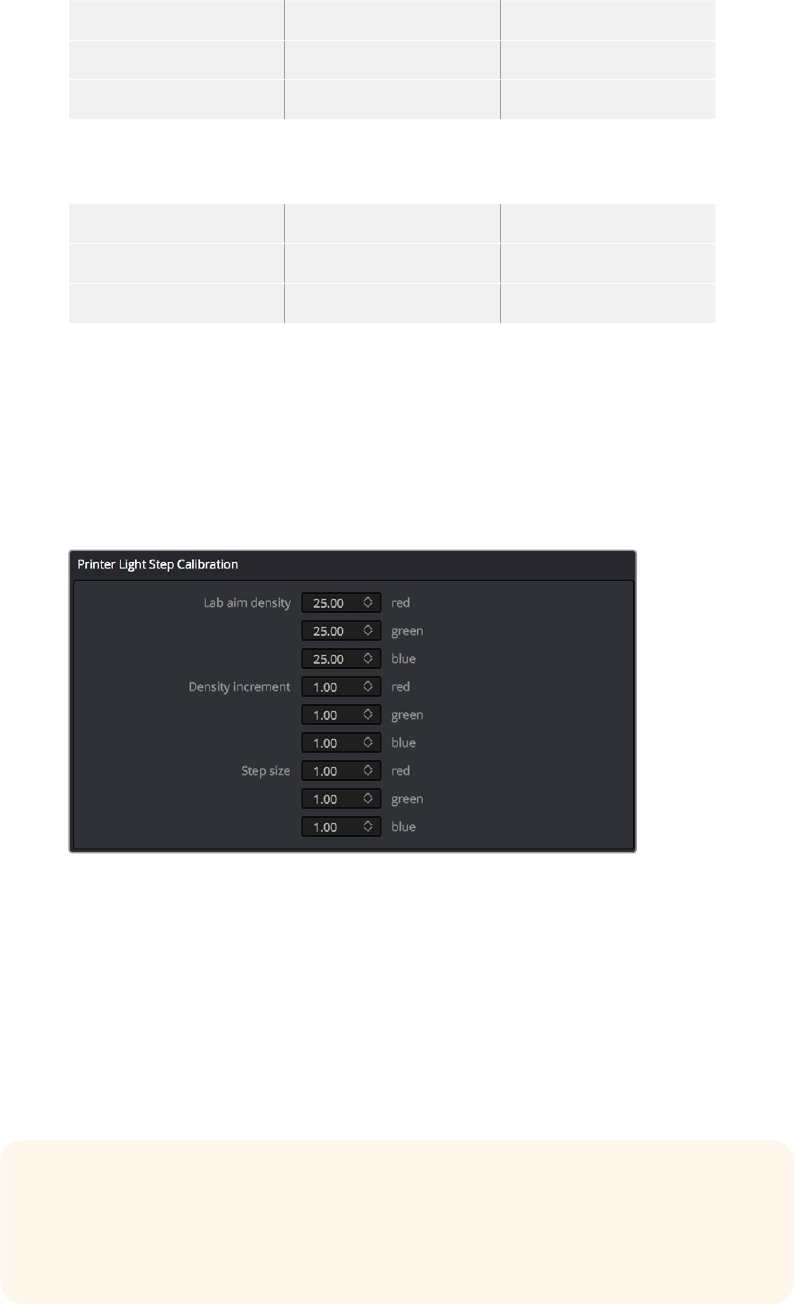
735
Primary Grading Controls Part 6 – 42
When you enable Printer Lights Hotkeys, there are two sets of shortcuts you can use to
manipulate printer points. First, if you want to directly manipulate RGB, there’s one set for that.
Red Green Blue
7 - Plus Red 8 - Plus Green 9 - Plus Blue
4 - Minus Red 5 - Minus Green 6 - Minus Blue
However, if you want to work in the classic way by manipulating cyan, magenta, and yellow,
there’s another set of shortcuts for that, using the remaining keys on the numeric keypad.
Cyan Magenta Yellow
1 - Plus Cyan 2 - Plus Magenta 3 - Plus Yellow
Minus (–) - Minus Cyan 0 - Minus Magenta Period (.) - Minus Yellow
The increments used by the Printer Point buttons are defined by the Printer Light Step
Calibration parameters, found in the Color panel of the User Preferences. The default settings
are designed to emulate traditional film printer adjustments, but these settings can be
customized to align DaVinci Resolve’s printer points adjustments with those of a particular film
lab’s equipment. However, if you’re not working with a lab, you can change the Step and
Density settings to alter how much of an adjustment each printer point makes. For more
information, see Chapter 3, “Project Settings and Preferences.”
Controls in the Color panel of the UserPreferences to
adjustPrinter Point functionality
There are also a pair of keyboard modifiers that gives you finer control over printer points
adjustments made with these special keyboard shortcuts, while retaining the coarser default
adjustments that let you make bigger changes more quickly:
Hold down Command while using these key shortcuts to adjust printer points in
half-increments.
Hold down Shift-Command while using these key shortcuts to adjust printer points in
quarter increments.
TIP: If you’re feeling left out because all the cool kids are using printer points and
you’re unfamiliar with them, making the Parade scope visible is a great way to learn
how these adjustments work while seeing their specific effects on the red, green, and
blue channels of the video signal.
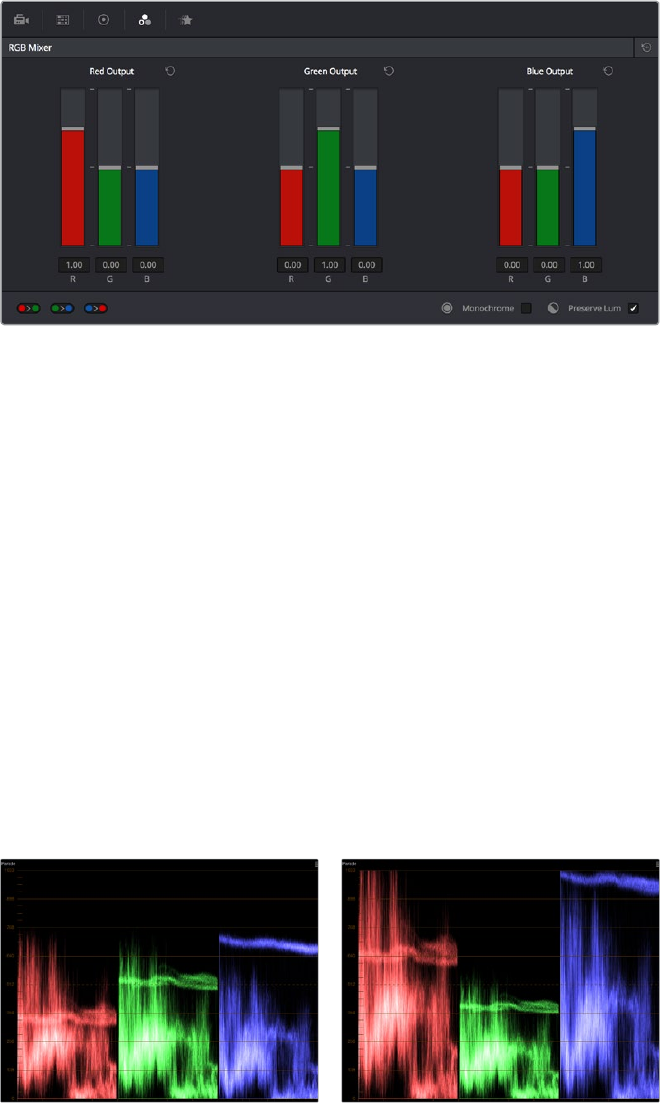
736
Primary Grading Controls Part 6 – 42
RGB Mixer Palette
The RGB Mixer palette lets you remix different amounts of image data from one channel to
another, and has a wide variety of creative and utilitarian uses. Furthermore, the RGB Mixer can
be used either to remix the color channels, or to add different proportions of each color channel
into a monochrome image.
RGB Mixer palette
By default, the RGB Mixer palette is set to mix any amount of the Red, Green, and Blue color
channels into any of the other channels. Each color channel has a dedicated control group of
Red, Green, and Blue sliders that you use to do the mixing, and the default values of these can
be seen in the screenshot above.
Each slider has an overall range of -2.00 to +2.00. This means that you also have the option of
subtracting any combination of color channel values from a particular channel. For example, you
can lower the Red control group’s Green slider to -.24 to subtract 24 percent of the Green
channel from the Red channel.
Preserve Luminance
With the “Preserve Luminance” checkbox turned on, any channel adjustment you make is
prevented from altering the luma of the image by automatically raising or lowering the other two
channels to compensate. In the following example, you can see that when “Preserve
Luminance” is turned on, lowering the Green control group’s Green slider results in the Red and
Blue channels being raised by the same amount (as seen in the Parade scope). Conversely,
raising a color channel’s slider ends up lowering the other two channels by the same amount to
keep overall image luminosity the same.
The result of an RGB Mixer adjustment with “With luminance level preserved” turnedon.
You can see that lowering the green channel slider also raises red and blue.
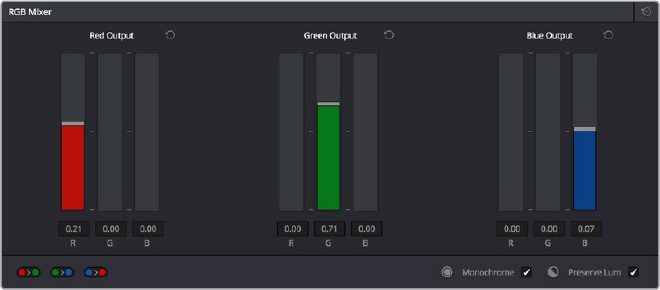
737
Primary Grading Controls Part 6 – 42
Resetting the RGB Mixer
Clicking the Reset button at the top right-hand corner of the RGB Mixer resets each slider to its
default position, where Red = 1.00 for Red output, Green = 1.00 for Green output, Blue = 1.00 for
Blue output, and all other sliders = 0.
Swap Channels Buttons
A set of three buttons at the bottom of the RGB Mixer lets you easily swap two channels with
one another. This can be useful as part of a creative look, or corrective in instances where two
channels are accidentally reversed.
Swap Red and Green: Swaps these two color channels.
Swap Green and Blue: Swaps these two color channels.
Swap Red and Blue: Swaps these two color channels.
Using the RGB Mixer in Monochrome Mode
When you turn on the Monochrome checkbox, two of the sliders within each Output group are
disabled. This leaves the Red > Red slider, the Green > Green slider, and the Blue > Blue slider
as the only available controls.
Sliders at their default values when “To monochrome” is enabled
Keeping in mind that each of the color channels that makes up an image is itself a grayscale
channel, the RGB sliders in Monochrome mode let you add different proportions of the Red,
Green, and Blue color channels together to create custom grayscale versions of a shot.
To understand why this is useful, let’s consider the default values of the Red, Green, and Blue
sliders. To emulate the human eye’s sensitivity to the wavelengths of light, the Rec. 709 video
standard defines an isolated Luma (Y’) component as consisting of 0.2126 of the Red channel,
0.7152 of the Green channel, and 0.0722 of the Blue channels added together. This can be
seen in the default values (rounded to the nearest integer percentage) of 21, 71, and 7.
This is the standard method of deriving a black and white version of a color image, and in fact
produces identical results to those obtained by setting the Saturation parameter to 0.
However, there have traditionally been other ways of mixing the colors of life into different
grayscale interpretations. For example, photographers often use colored filters in conjunction
with black & white film stocks, such as a yellow/green filter to emphasize pleasing skin tone for
lightly-complexioned people. A much older example is the use of black & white film stocks with
different sensitivities (old orthochromatic stocks were not sensitive to red wavelengths,
recording only blue and green to create an image).
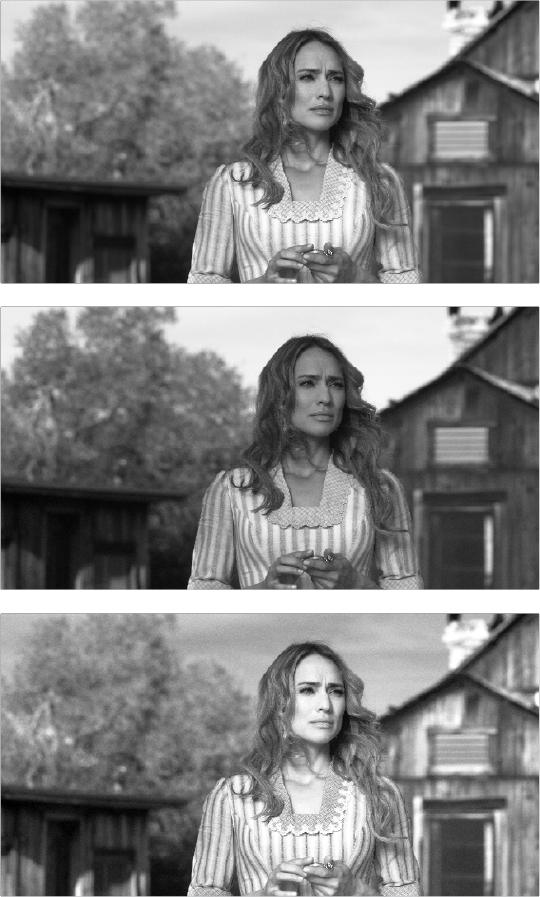
738
Primary Grading Controls Part 6 – 42
Using the RGB Mixer with “To monochrome” turned on gives you the ability to mix your own
custom blends of all three color channels to emphasize the creative characteristics you require.
For instance, increasing the mix of blue and decreasing red and green can give skin tones a
darker, metallic sheen. The following screenshots show multiple versions of the same image
with different monochrome mixes.
Three monochrome mixes of the same image. The top
image is the result of setting saturation to 0.
Like the parameters in Color mode, you can use the RGB Mixer’s Monochrome mode to
subtract one color channel from the others, for even more creative effects.
739
Primary Grading Controls Part 6 – 42
RGB Mixer Controls on the DaVinci Control Surface
All of the RGB Mixer palette controls are available from the DaVinci Resolve control surface.
To open the RGB Mixer curve controls on the DaVinci Resolve control surface:
Press the CURVES soft key on the main page of the Center panel.
To exit the RGB Mixer curve controls:
Press the MAIN soft key on the Center panel.
To adjust the principle color regions using knobs:
Adjust one of the four groups of knobs on the Center panel. All are labeled to
identify which RED/GREEN/BLUE source channels are paired with RED/GREEN/BLUE
destination channels. For example GREEN->BLUE adds or subtracts an amount of the
Green color channel from the Blue color channel.
Press the PRESERVE LUM soft key to turn on the “With luminance level
preserved” checkbox.
Press MONO to turn on the “To monochrome” checkbox.
Press COLOR to turn off the “To monochrome” checkbox.
741
Curves Part 6 – 43
Curves
The Color page has a powerful curves interface that provides controls for adjusting color and
contrast with the Custom Curves, as well as a variety of “Hue” or “HSL” curves that let you make
more targeted adjustments to hue, saturation, and luminance in a variety of ways.
Introduction to Curves 742
Adjusting Curves Using the Mouse 742
Sampling Images to Place Control Points on Curves 744
Showing Picker RGB Values 744
Custom Curves 745
Editing the Top and Bottom Control Points of Curves 746
HDR Grading Using Curves 747
Enabling Editable Splines in the Custom Curves 747
Adding Default Anchors to the Custom Curves 748
Ganging and Unganging Custom Curves 748
Copying Custom Curves From One Color Channel to Another 749
Curve Intensity Sliders 749
YSFX Sliders 750
Adjusting Custom Curves with the DaVinci Control Panel 750
Soft Clip 752
Ganging and Unganging Soft Clip Controls 753
Soft Clip Controls 754
Using Soft Clipping Controls with the DaVinci Control Panel 757
The HSL Curves 757
Image Sampling for Hue and Sat Curves 759
Additional Controls in the Hue and Sat Curves 759
Hue vs. Hue 759
Hue vs. Sat 760
Hue vs. Lum 760
Lum vs. Sat 761
Sat vs. Sat 761
Using HSL Curves with the DaVinci Control Panel 762
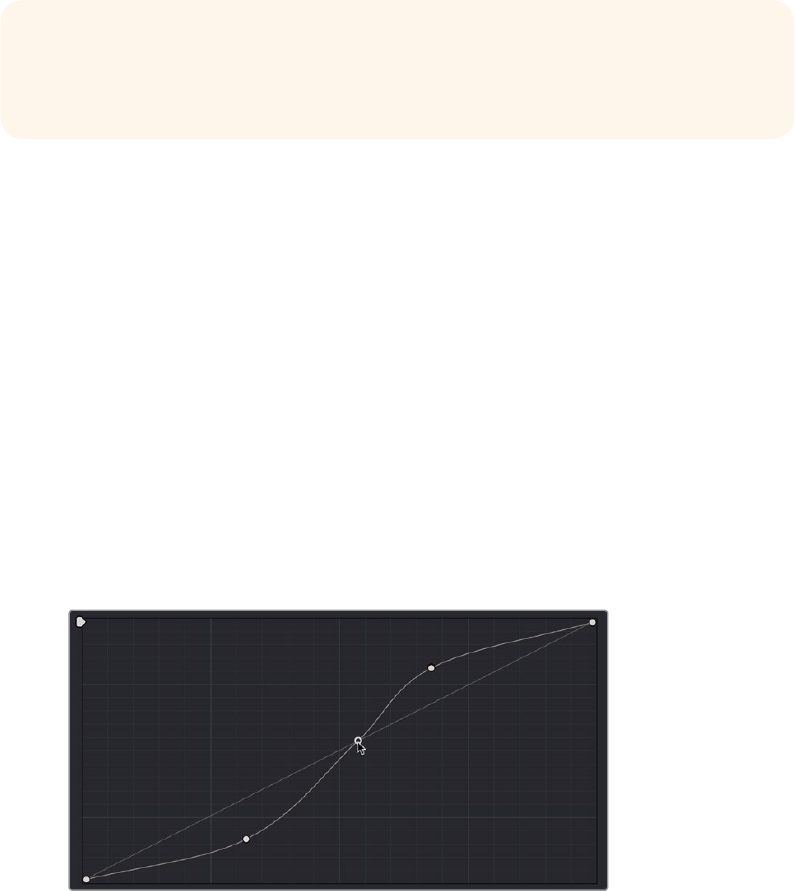
742
Curves Part 6 – 43
Introduction to Curves
The Curves palette, selectable via one of the toolbar buttons above the Center Palette panel of
the Color page, has six modes that provide different curve-based methods of manipulating the
color and contrast of an image. Each curve lets you adjust a customizable region of the image
based either on image tonality (zones of lightness or darkness), hue (specific colors), or
saturation (intensity of color). All curves can be adjusted using either the pointer, or knobs on
the DaVinci control panel.
Adjusting Curves Using the Mouse
All Color curves in DaVinci Resolve use the following controls for basic on-screen adjustment
using the pointer, controlled either with your mouse, pen, or other input device of choice.
Methods of adjusting curves using the on-screen interface:
To add a control point: Click anywhere on or around a curve. A control point is added
at the position of the mouse where you clicked, and the curve is altered, if necessary, to
match the new control point’s position.
To add a control point without altering the curve: Hold the Shift key down, and click
anywhere on or around a curve. A control point is added to the curve at the position of
the pointer where you clicked, but the curve is not altered.
To snap a control point to the neutral diagonal of the curve: (Custom curve only) Hold
the Option key down while dragging any control point on the curve. A diagonal line
appears indicating the neutral state of the image, and the control point will snap to it.
When you release the Option key, the diagonal guide line disappears.
Snapping a curve’s control point back to its neutral position by
holding down the Option key
To remove a control point: Right-click any control point to make it disappear.
To reset a single color channel curve to a completely neutral setting: Click the reset
button to the right of that color channel’s intensity slider.
To reset all color channel curves: Click the Reset Custom Curve button at the upper
right-hand corner of the Curves palette.
TIP: All curves in DaVinci Resolve can be used to affect the overall image, or limited to
affect only a specific portion of the image as a part of a secondary operation using
Qualifiers, Windows, Imported Mattes, or any combination of the three.
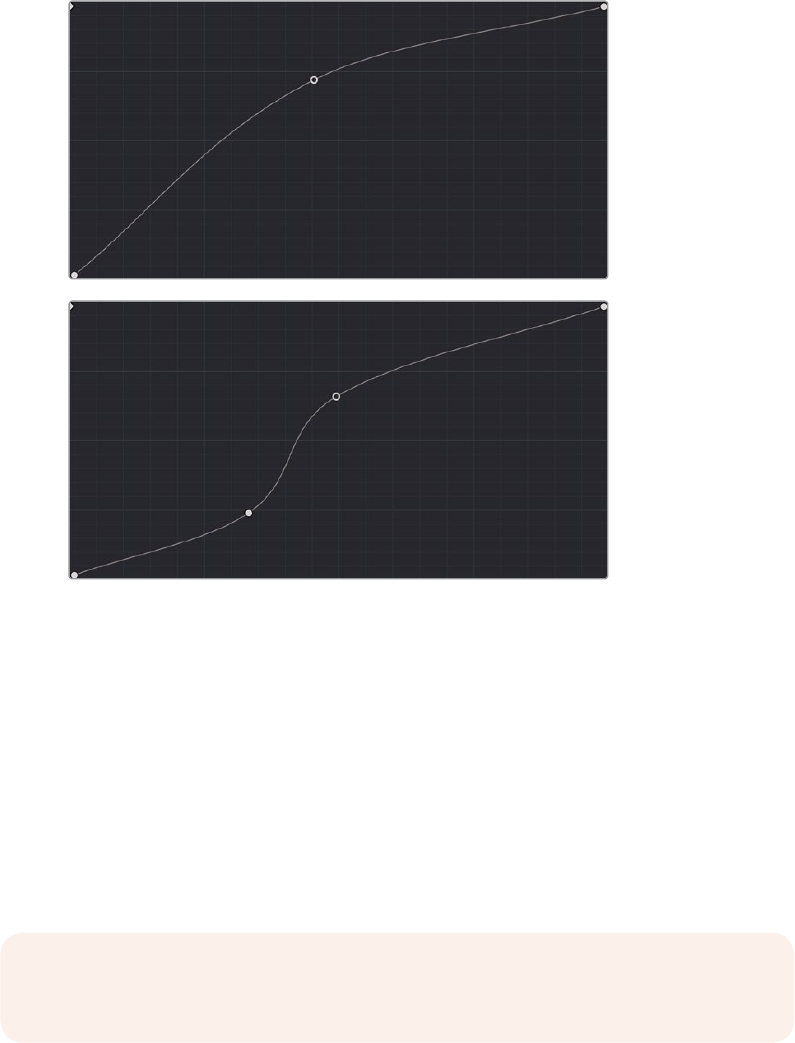
743
Curves Part 6 – 43
By default, a control point influences the portion of each curve that falls between its
neighboring two control points.
Control point adjustments affect the entire portion of a curve
between adjacent control points.
In the screenshot to the left, you can see that the control point at the position of the pointer is
affecting the larger part of the curve that falls between the lower left-hand control point (which
is there by default), and a user-created control point placed up within the highlights of the curve.
In the screenshot to the right, an additional control point to the left of the one being adjusted
limits the area of the curve that is adjusted. By careful placement of additional control points,
you can make extremely targeted adjustments to images using the Custom curves.
This example highlights the importance of using control points to “lock off” portions of a curve
at a neutral or nearly neutral position to prevent changes to specific portions of an image, even
while using other control points to make changes.
NOTE: The HSL curves also have an optional adjustment mode using Bezier curves
that will be covered in those sections.

744
Curves Part 6 – 43
Sampling Images to Place Control Points on Curves
Another way you can add control points to curves is to move the pointer to the Viewer, and click
to sample a color value and place a control point at the position on the currently open curve
that corresponds to that value. This works with Custom, Hue, and HSL curves.
Clicking on a feature of the image
Creates a control point on the currently open curve
Showing Picker RGB Values
While you’re dragging the pointer over the Viewer and looking for a feature to sample, you can
enable a tooltip that shows you the RGB Value of the pixel under the pointer by right-clicking
the Viewer and choosing Show Picker RGB Value to toggle this feature on and off. When you
turn this feature on, the View > Show RGB Picker Values In submenu has options for displaying
either 8- or 10-bit tristimulus values.
The color picker tooltip that appears when you
turn on show RGB Picker Values
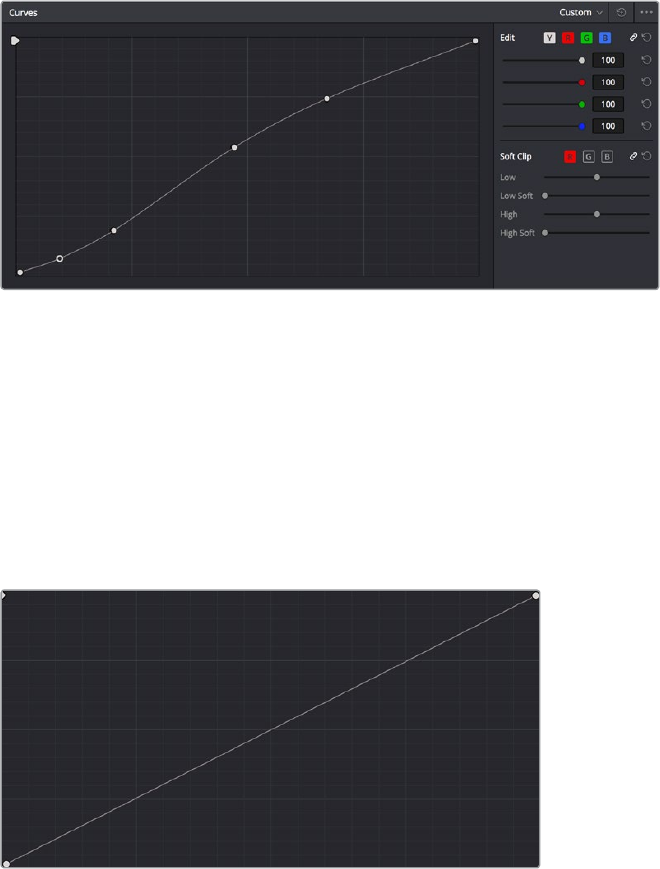
745
Curves Part 6 – 43
Custom Curves
DaVinci’s Custom curves provide smooth adjustment of each clip’s Y, R, G, and B channels.
TheCustom curve mode of the Curves palette is divided into two areas, the Curve Editor to the
left, and the Curve controls to the right. The editor contains the actual Curve controls you use to
adjust the image. The controls at the right let you choose which curves you’re adjusting, and
adjust their intensity.
The Custom curves seen used to create a gentle “S” curve adjustment
with four additional control points added; the middle point is selected
The Custom curves are useful for making more tonally specific, channel-by-channel
adjustments to an image than can be accomplished using the Color Balance controls.
They’realso useful for making strange and wonderful stylistic adjustments through unusual
alterations to different combinations of color channels.
Although the ganged Custom curves appear to be a single curve control, starting in version 12
the Custom curve editor is presented as a series of overlaid curves, and the YRGB curves all
appear within a single editor. The default, neutral position of the Custom curves is a diagonal
line that runs from the lower-left black point of the image through the upper-right white point.
The neutral diagonal position of the curve at which no adjustment is made
The horizontal axis represents the range of image tonality in the original image, from black (at
the left) to white (at the right), while the vertical axis represents the range of alteration you can
make. By adding control points to the surface of the curve and raising or lowering it at different
regions, you are actually remapping the original horizontal “input” value of a color channel to an
“output” value of your choosing.
Additional controls appear to the right of the curve editor itself. A top row of buttons let you
select the curve corresponding to an individual color channel for isolated adjustment, while a
vertical stack of four sliders let you adjust the intensity of each color channel’s curve.
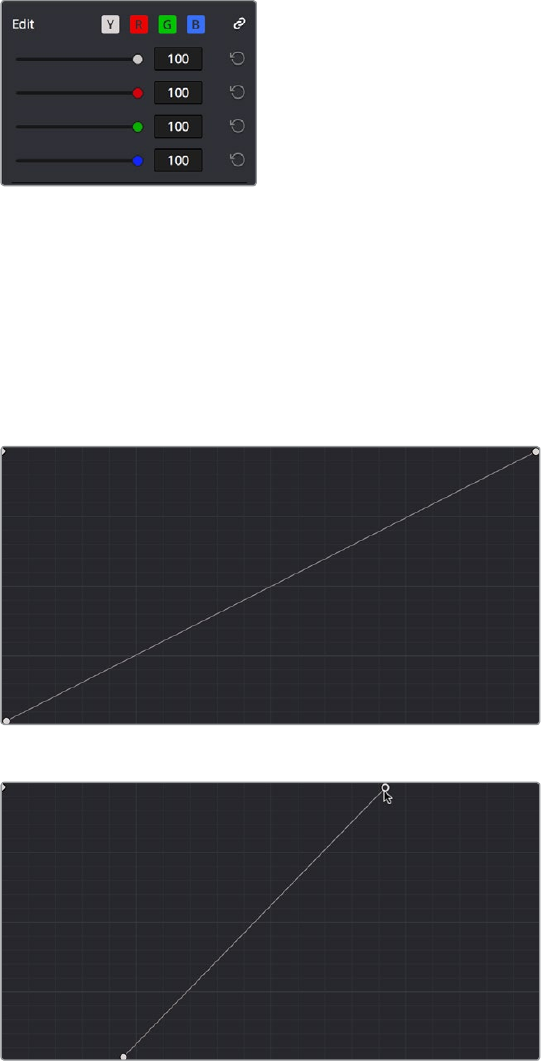
746
Curves Part 6 – 43
The channel-editing buttons and curve intensity
sliders appear to the right of the curve editor
Editing the Top and Bottom Control Points of Curves
You can also edit curves using the default two control points that the curve control starts out
with in the Curve Editor. The Black Point control (at the lower-left) and the White Point control (at
the upper-right) let you expand and compress the video signal similarly to using the Lift and
Gain Master Wheel controls in the Color Wheels palette.
The Curve control a t its original state,
The Black and White Point controls dragged to the right
and left to expand the signal
You can use the Black and White point controls in the following ways:
Using the Black Point control: Dragging this control up makes a lift adjustment to raise
the black point of the signal. Dragging this control to the right makes a lift adjustment to
lower the black point of the signal.
Using the White Point control: Dragging this control down makes a gain adjustment
to lower the white point of the signal. Dragging this control to the left makes a gain
adjustment to raise the white point of the signal.
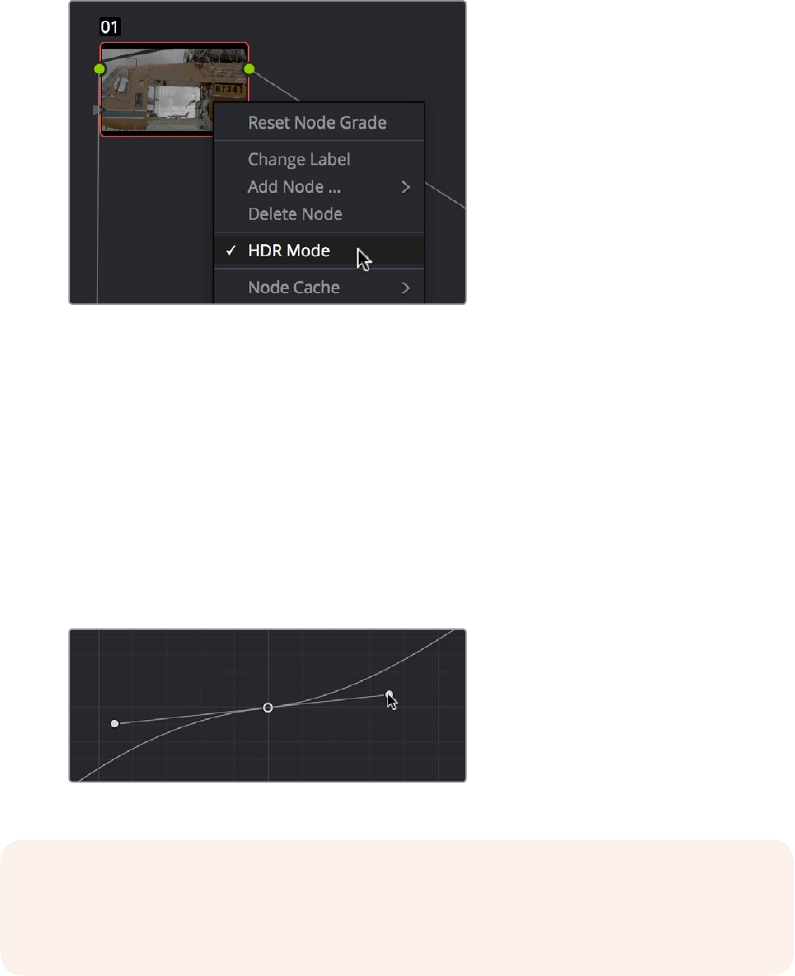
747
Curves Part 6 – 43
HDR Grading Using Curves
When using various grading controls in the Color page to grade wide-latitude images for HDR
output, you may find it useful to enable theHDR Mode of the node you’re working on by
right-clicking that node in the Node Editor and choosing HDR Mode from the contextual menu
(only available in Resolve Studio).
Using a node’s contextual menu to put that node into HDR mode
This settingadaptsthat node’scontrols to work within an expanded HDR range. Practically
speaking, this makes it easier to work with wide-latitude signals using controls that operate by
letting you make adjustments at different tonal ranges such as Lift/Gamma/Gain, Custom
Curves, Soft Clip, etcetera.
Enabling Editable Splines in the Custom Curves
When the Curve palette is in Custom mode, you can choose Editable Splines from the option
menu to expose Bezier spline handles on any selected control point, which let you make more
precise curve adjustments whenever necessary.
Custom Curve with editable splines enabled
NOTE: Beware of making curve adjustments that are too sharp, or with control points
that are too close together, as they can introduce unwanted contouring within the
image, causing flattening or solarization in parts of the image that you may not want.
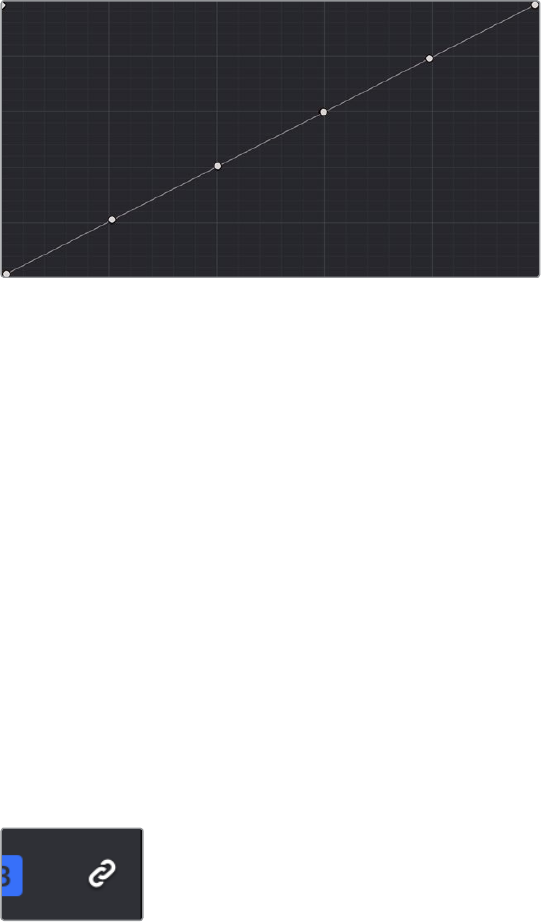
748
Curves Part 6 – 43
Adding Default Anchors to the Custom Curves
You can also choose Default Anchors from the option menu of the Curve palette in Custom
mode to place three additional control points on the curve, dividing the curve into five
segments that affect the shadows, low midtones, medium midtones, high midtones, and
highlights of the image.
Custom curve with Default Anchors exposed
Ganging and Unganging Custom Curves
By default, the Custom curves are ganged, so that curve adjustments affect a clip’s YRGB
channels all together, resulting in an adjustment to image contrast that’s similar to using the
Master Wheels in the Color Wheels palette, or the ring controls of the DaVinci control panel.
When making this type of adjustment, increasing contrast also increases image saturation, while
reducing contrast also reduces image saturation. Since curves can be manipulated with greater
specificity than the three Master Wheels, you can make much finer contrast adjustments using
the YRGB curves than when using the Master Wheels only.
Turning ganging off lets you use the full power of Custom curves to alter the image. Unlike the
Color Balance controls, each of which adjust all three color channels simultaneously, the Curve
controls let you adjust each channel individually when Gang Custom Curves is turned off.
To disable Custom curve ganging:
Click the Curve Edit button that corresponds to the curve channel you want to edit.
Clicking any Curve Edit button highlights that curve to make it easy for editing when
curves overlap one another. Once one or more curves is offset from the others, you
can freely edit any curve by dragging its control points.
Custom Curve Edit buttons are to the left,
the Gang button is to the right
To re-enable Custom curve ganging:
Click the Gang button to the right of the Curve Edit buttons.
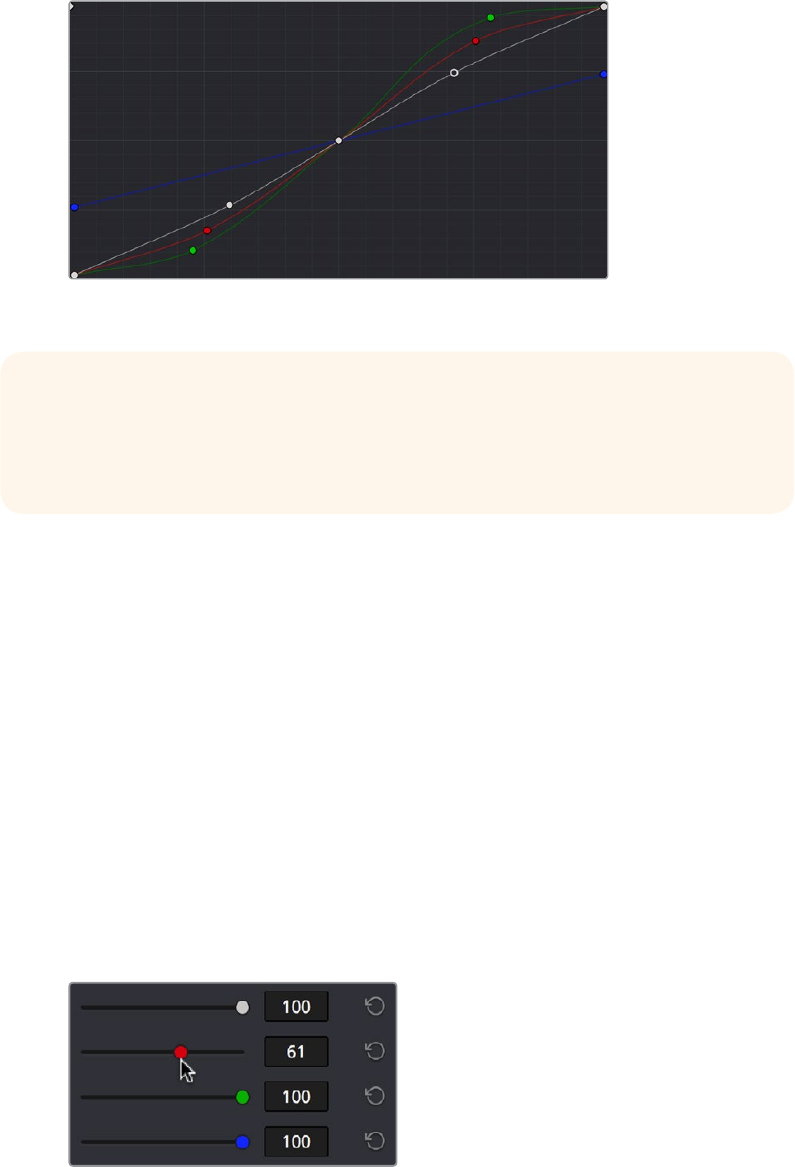
749
Curves Part 6 – 43
Editing color channels via individual curve adjustments lets you make smooth color-channel
specific corrections, or you can make radically individual adjustments to create a wide number
of creative effects.
Turning off curve ganging lets you independently adjust each curve
Copying Custom Curves From
One Color Channel to Another
Even if you’ve unganged the Custom curves, you can still mirror one curve’s adjustments to
another by copying it using the “Copy to Red/Green/Blue” commands in the Curve palette’s
option menu.
Curve Intensity Sliders
Four Curve Intensity sliders to the right of the Curve Editor, one for each channel, let you mix
between the current curve’s effect on the clip, and the original state of the image before you
altered the curve. The default Intensity of 100 results in that curve exerting its full effect on the
image, while an intensity of 0 results in that curve having no effect on the image. The Intensity
sliders provide an easy way to “split the difference” between a curve adjustment and the
previous state of the image.
Lowering the Curve Mix slider
reduces the effect of that curve’s
adjustment on the image.
TIP: When curve ganging is disabled, the Luma curve allows you to adjust the Y
channel by itself, which is similar to using the Y-only Lift/Gamma/Gain knobs of the
DaVinci control panel. When making this type of adjustment, increasing luma contrast
results in a perceptual decrease of image saturation.
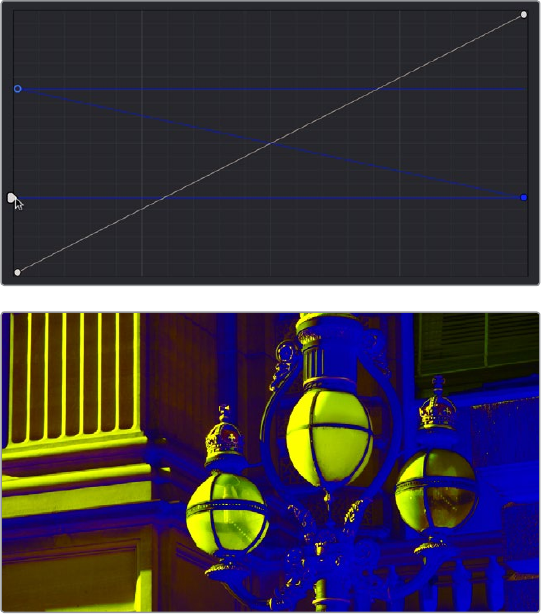
750
Curves Part 6 – 43
YSFX Sliders
Each of the Custom curves (Y’, R, G, and B) has a vertical YSFX slider at the upper left-hand
corner of the Curve Editor that lets you invert any or all color channels by any amount you want,
to create different types of stylized effects.
Image with the Luma channel modified using the vertical YSFX slider
As with all other adjustments in the Color page, YSFX may be combined with Power Windows
or HSL qualification to limit channel inversions to specific portions of the image for
creative purposes.
Adjusting Custom Curves with
the DaVinci Control Panel
The controls that correspond to the Custom curves on the DaVinci control panel are available
by default when you first open DaVinci Resolve (the rotary knobs on the Center panel will be
labeled PRIMARIES). If these buttons are not visible, you need to switch to the Primaries
controls using the soft keys.
To open the Primary Curve controls of the DaVinci Resolve control panel:
Press the PRIMARIES soft key on the Center panel.
If the Center panel is currently in CURVES mode, then press the MAIN soft key on the
Center panel.
The rotary knobs on the Center panel update to show the CHANNEL OFFSET/CUSTOM
CURVES and YSFX controls.
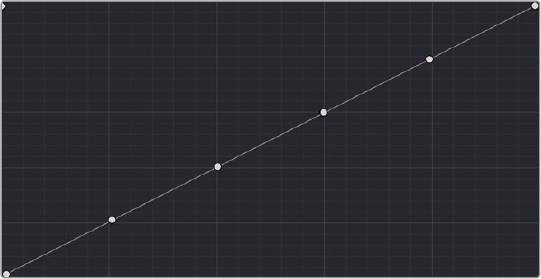
751
Curves Part 6 – 43
To make curve adjustments:
Adjust the 0% LUM, 20% LUM, 40% LUM, 60% LUM, 80% LUM, or 100% LUM
rotary knobs.
By default, all adjustments you make using these controls are ganged across all four YRGB
curve controls. However, if you turn Custom curve ganging off, then these controls only affect
the Luminance curve.
These controls correspond to the following default control point positions on the
Curve controls.
Each rotary curve control on the DaVinci control surface
corresponds to one of these six default control point positions
You also have the option of using the fourth trackball from the left to adjust individual control
points on curves to any position you like. This works for all curves in DaVinci Resolve that have
control surface mappings.
Methods of selecting and adjusting individual control points
using the master trackball of the Center panel:
To select a control point to adjust: Spin the fourth ring control to the left or right to
select the next control point in that direction (it takes about half of a turn to select
another control point).
Selected control points are highlighted in cyan.
To move a selected control point: Adjust the fourth trackball to move the control point
up, down, left, or right. Selected control points are constrained between whichever
control points are to the left and right.
Another set of rotary knobs let you adjust Curve Mix and YSFX parameters.
To adjust the Curve Intensity sliders:
Adjust the LUM CURVE, RED CURVE, GREEN CURVE, or BLUE CURVE rotary knobs.
To make YSFX adjustments:
Adjust the LUM YSFX, RED YSFX, GREEN YSFX, or BLUE YSFX rotary knobs.
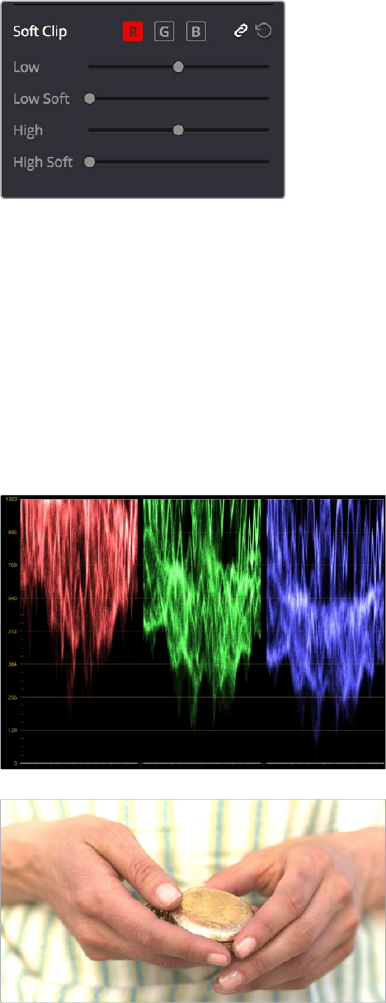
752
Curves Part 6 – 43
Soft Clip
The Soft Clip controls consist of four sliders underneath the Curve controls of the Custom
curves, and give you an interface for adjusting highlight and shadow soft clipping either overall,
with Ganging enabled, or on a per-channel basis. The Soft Clip controls are intended to provide
clip-by-clip adjustment, as opposed to the Generate Soft Clip LUT settings, which let you set
one soft-clipping setting for the entire program. For more information on the Soft Clip LUT
setting, see Chapter 3, “Project Settings and Preferences.”
High and Low Soft Clip controls within the Curves palette
Soft clipping lets you apply a “knee” to any clipping that occurs at the upper or lower extremes
of the image, and can be used to quickly ease off any unpleasantly harsh loss of detail that
occurs as a result of blowing out the highlights or crushing the shadows too aggressively.
In the following example, the screenshot at top has had the highlights deliberately blown out by
excessively boosting the highlight contrast. As you can see, the edges of the clipped area lack
detail. The screenshot at bottom shows the same image with soft clipping increased for all three
color channels. The result retrieves detail, compressing the highlights to bring the tops of each
color channel back within the allowable range.
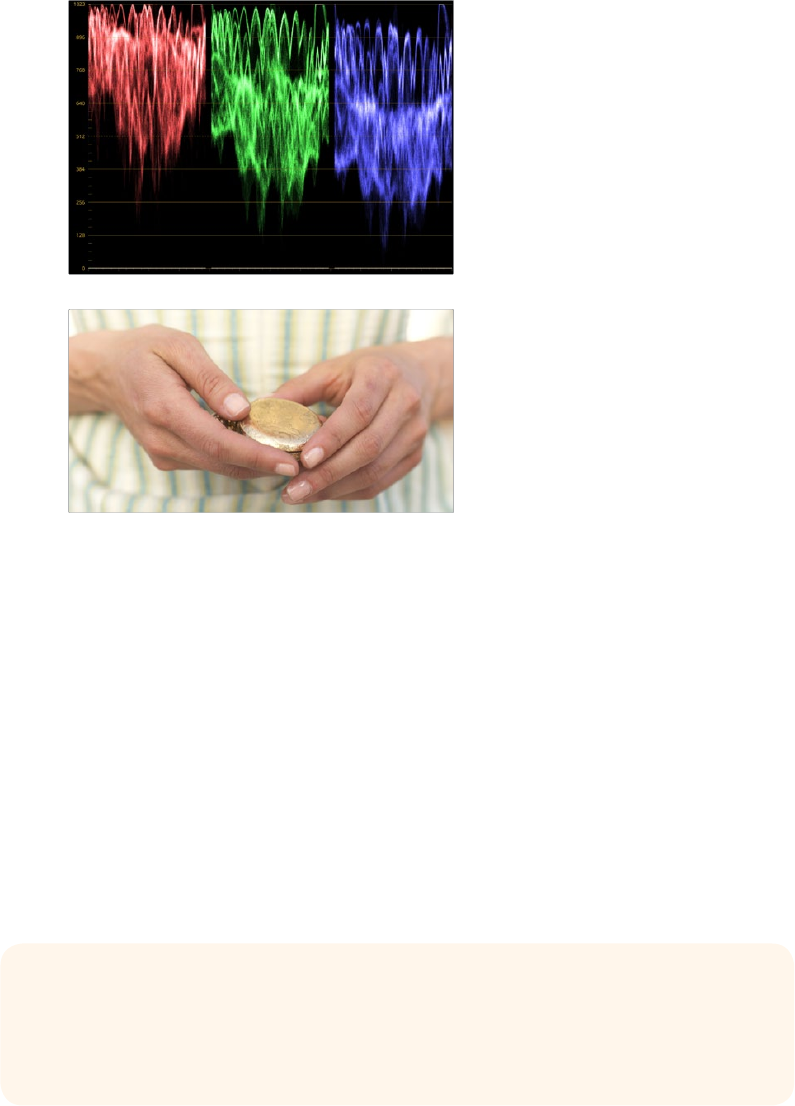
753
Curves Part 6 – 43
Using High Soft Clip to pull highlight details into the viewable range
Ganging and Unganging Soft Clip Controls
Soft clipping can be simultaneously applied to all three color channels by enabling the Ganging
control (on by default), or you can disable Soft Clip ganging to individually adjust each channel.
For example, using soft clipping on individual channels can be useful for legalizing RGB
out-of-gamut errors for channels that over or undershoot your QC standards.
To disable Soft Clip ganging and edit soft clipping for individual color channels:
Click the channel control button corresponding to the color channel you want to edit,
and then drag the sliders to create the desired adjustment.
To re-enable Soft Clip ganging:
Click the Ganging control to the right of the Soft Clip channel controls.
TIP: Applying too much soft clipping to individual color channels may add an
unwanted color tint to the corresponding highlights or shadows of an image. To avoid
this, use the soft clipping parameters with ganging enabled to clip all three color
channels equally.
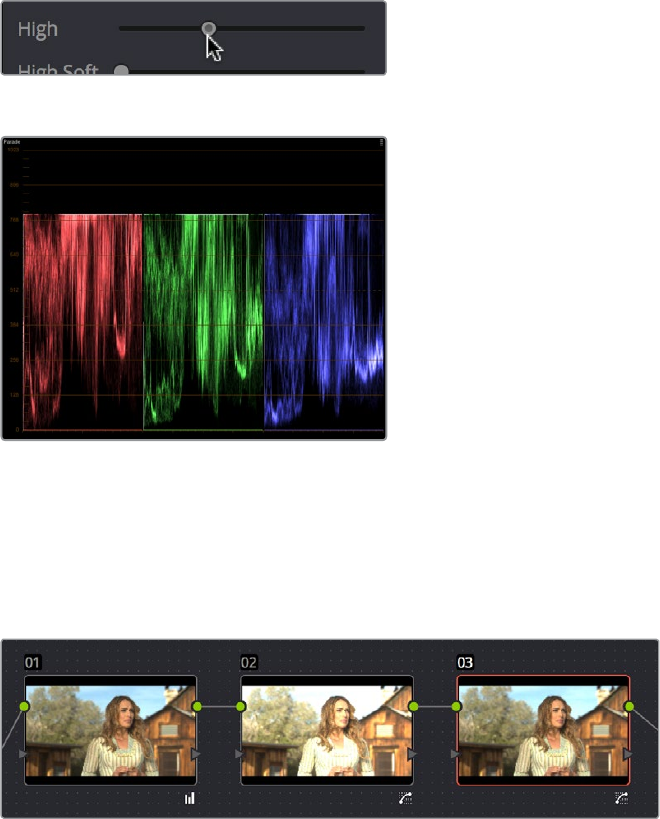
754
Curves Part 6 – 43
Soft Clip Controls
Whether all channels are ganged or not, soft clipping is controlled via two sliders and two
additional parameters for each color channel.
High
The High Clipping Point slider lets you adjust the maximum signal level above which the signal
is clipped. Any pixels above the clipping level are made equal to the clipping level.
The High Clipping Point defaults to a digital level of 1023 relative to the DaVinci Resolve internal
video scopes. Dragging this slider to the left causes the highlights of the image to clip at a
lower level, resulting in lower, dimmer maximum levels.
Selecting and adjusting the high clip
RGB Parade displays the clipped image
At the default position, no clipping occurs and image data that you push above 1023 on the
internal scopes is preserved and passed through the image processing pipeline to subsequent
nodes. For example, in the following two screenshots, the highlights in the screenshot at top
are blown out raising the gain dramatically in Node 1. In the screenshot at bottom, a subsequent
adjustment in Node 2 lowers the gain and retrieves all the previously clipped values.
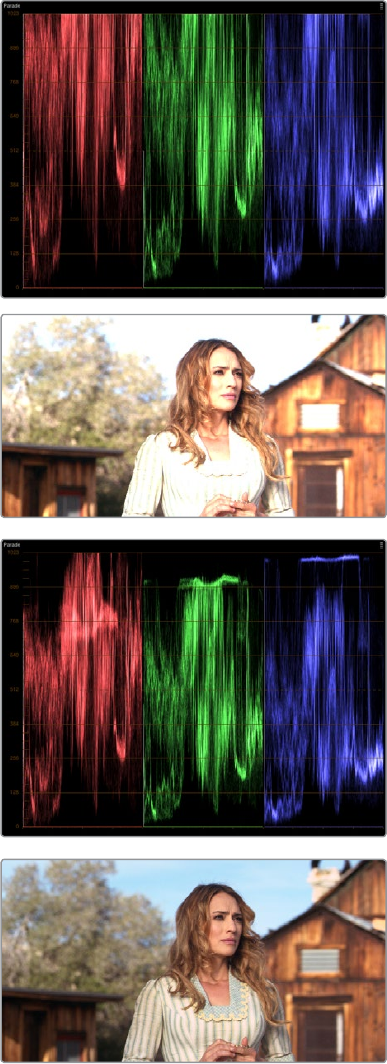
755
Curves Part 6 – 43
Middle–the image is clipped using the Gain control in Node 2;
Bottom–image data that was clipped in Node 1 is retrieved in Node 3 by lowering
the Gain control. Thisillustrates the preservation of deliberately clipped data.
However, if at any point in a node tree you drag the High Clip slider to the left, even by a single
digit, all image data above the new clipping threshold is discarded from that node forward. In
the following example, the High Clip slider in Node 1 is lowered. The result is that all clipped
image data is discarded. As a result, when Node 2 lowers the gain, there is no image detail left
to retrieve, and all three channels exhibit flattening.
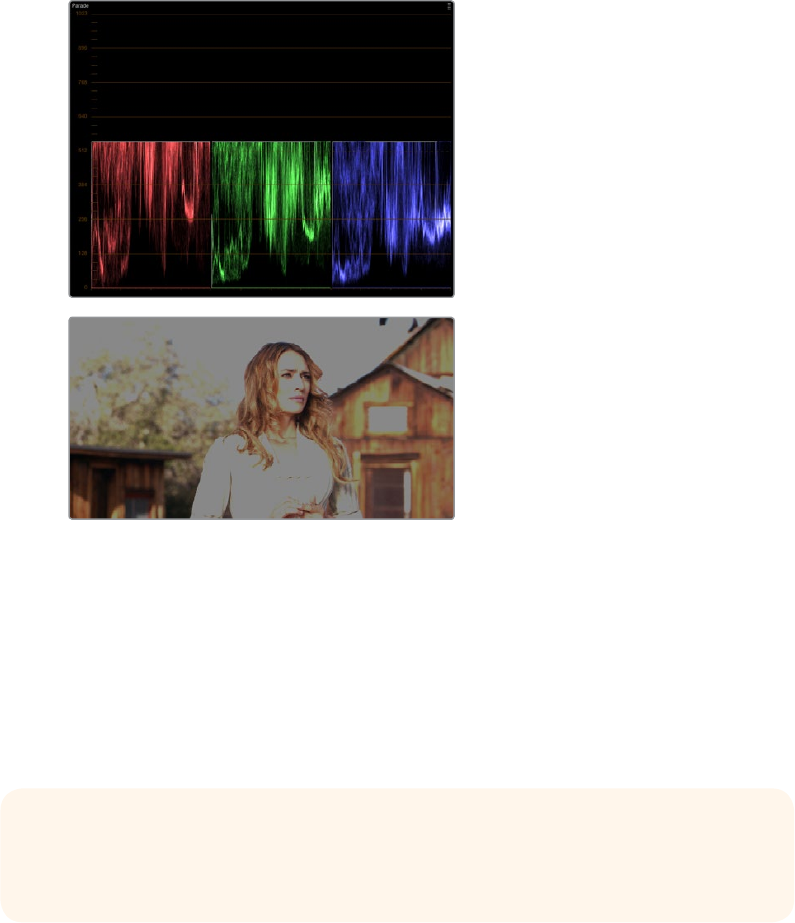
756
Curves Part 6 – 43
Lowering the High Clip slider in Node 1 forces all image data
above the new High Clip threshold to be irretrievably discarded.
Clipped data cannot be brought back by subsequent nodes.
High Soft
The High Soft slider sets the threshold, below the clipping point, at which highlights begin to
compress before hard clipping. At 0, no soft clipping occurs. As you raise this value, more and
more of the clipped highlight values are compressed, rather than clipped, resulting in softer,
more pleasant “glowing” highlights.
Low
The Low Soft Clipping Point slider lets you adjust the minimum signal level at which the signal
clips. This defaults to a digital level of 0 relative to the DaVinci Resolve internal video scopes.
Dragging this slider to the right causes the shadows of the image to clip at a higher level,
resulting in lighter minimum levels, and a lower-contrast image with lighter (possibly
milky) shadows.
Low Soft
The Low Soft slider sets the threshold, above the minimum clipping point, at which shadows
begin to compress before hard clipping. At 0, no soft clipping occurs. As you drag this slider to
the right, more and more of the clipped shadow values are compressed, rather than clipped,
resulting in a softer, more pleasant rolloff in the shadows.
IMPORTANT: Image data that was clipped “in camera” is not necessarily retrievable
using the Soft Clip controls, although there may be some preserved overhead in the
super-white highlights of Y’CbCr-encoded video data.
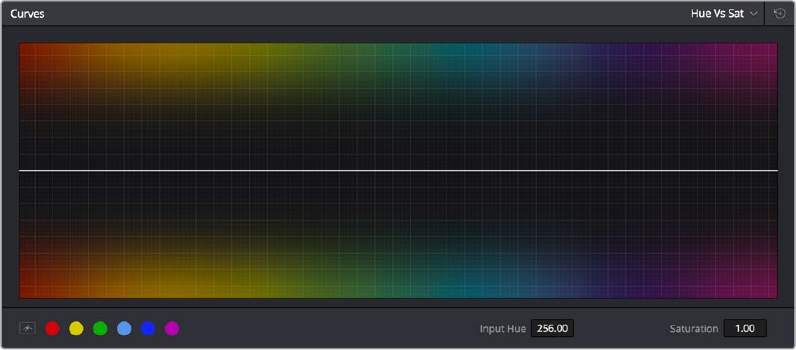
757
Curves Part 6 – 43
Using Soft Clipping Controls
with the DaVinci Control Panel
The soft clipping controls can also be manipulated using the DaVinci control panel, which
provides separate controls for ganged and individual color channels.
To open the soft clipping control on the DaVinci Resolve control panel:
Press the CLIPS soft key on the Center panel.
To exit the soft clipping controls:
Press the MAIN soft key on the Center panel.
To make a ganged soft clipping adjustment:
Adjust the MASTER CLIP or MASTER SOFT rotary knobs of the SCENE WHITE CLIPS
orSCENE BLACK CLIPS control groups (there are 4 individual knobs).
These controls adjust all four corresponding YRGB High Soft, High Clip, Low Soft,
orLow Clip parameters simultaneously.
To adjust soft clipping for individual color channels:
Adjust the RED/GREEN/BLUE CLIP or RED/GREEN/BLUE SOFT rotary knobs
of the SCENE WHITE CLIPS or SCENE BLACK CLIPS control groups (there are
12individual knobs).
Each control adjusts an individual YRGB color channel.
The HSL Curves
Three sets of Hue curves, and one additional Lum vs. Sat curve, let you make different types of
curve-based alterations to the image. Whereas the Custom curves let you make adjustments to
the color channels of an image based on tonality (for example, boosting the Red channel in the
highlights while lowering it in the shadows), the Hue curves let you make adjustments to the
hue, saturation, or luma of elements in an image based on their hue.
Curves controls including six-vector selection and bezier handle button
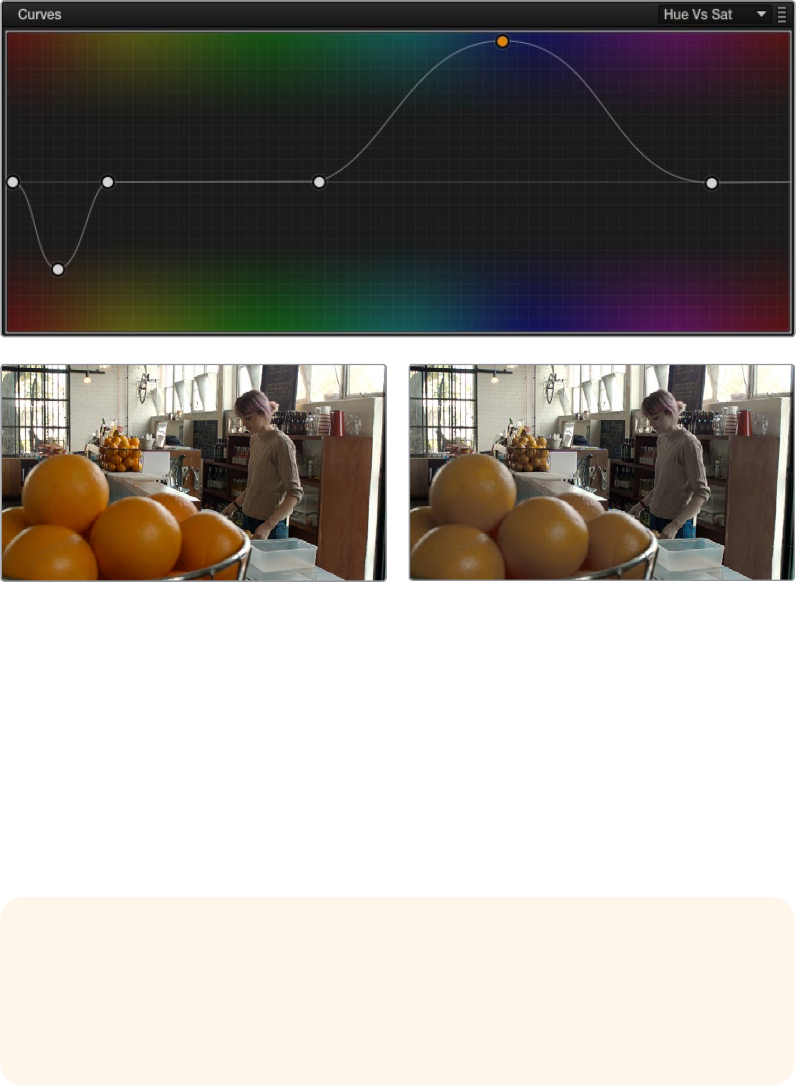
758
Curves Part 6 – 43
For example, you could use the Hue vs. Sat curve to selectively lower the saturation of
everything that’s blue, while raising the saturation of everything that’s red.
You can use these curves to make adjustments similar to those made using HSL qualification,
but with one critical difference. Curve adjustments are mathematically smoother than the
matte-limited adjustments of HSL qualifiers, so it can sometimes be easier to make specific
alterations that blend smoothly with the rest of the image, without the potential for artifacts at
the edges of qualified keys that can sometimes defeat a seamless result.
On the other hand, it is often easier to define more distinct boundaries between separate
elements using HSL qualification. Only time and experience will help you determine which tools
are best for which situations.
Right–Original image. Left–The image as altered by the Huevs. Sat curve shown in previous page
Unlike the Custom curves, which default to a diagonal position where lower left represents the
black point and upper right represents the white point, Hue and Sat curves are flat. In the case
of the Hue vs. Hue/Sat/Lum curves, the horizontal range of the curve from left to right
represents the overall range of possible hues, from red through green through blue and then
cycling back to red.
Because the range of hues cycle smoothly from the left to the right edge, changes that affect
the curve near the left boundary of these curves loop smoothly around to the right boundary,
and vice versa, such that the left and right sides of the curve always move together (as you can
see in the above screenshot).
IMPORTANT: When using Hue curves, the range of hue that you isolate with control
points is always relative to the RGB input connected to that node. That means if you
change the hue of a shirt from blue to red using Hue vs. Hue and you then want to
raise the same shirt’s saturation with the Hue vs. Sat curve within the same node, you
need to add control points to the same range of blue for both curves.

759
Curves Part 6 – 43
Image Sampling for Hue and Sat Curves
There’s an additional way to use Hue curves in DaVinci Resolve. Whenever one of the Hue vs.
Hue, Hue vs. Sat, Hue vs. Lum, and Lum vs. Sat curve tabs are open, clicking or clicking and
dragging over any range of pixels within the Viewer area samples the hues and/or image
tonality of that region of the picture, and automatically places three control points on the
currently open curve that correspond to the range of color and contrast you sampled. This also
works if you use the cursor from the DaVinci control panel with the fourth trackball to sample a
range of color.
Additional Controls in the Hue and Sat Curves
While the Hue vs. Hue, Hue vs. Sat, Hue vs. Lum, and Lum vs. Sat curves can be adjusted
similarly to the Custom curves, they have additional controls running underneath the curve graph.
Enable Bezier button: Turning this button on forces a curve to use Bezier control
handles, rather than the default DaVinci Resolve Curve Control points, to manipulate
each control point on the curve. With Bezier handles enabled, click any control point to
reveal its two Bezier handles. Drag either handle to alter the shape of the curve at that
control point.
Six-Vector Color Patches: The Hue curves each have six buttons for automatically
adding control points to manipulate the red/yellow/green/cyan/blue/magenta ranges
of hue. Clicking any of these buttons adds three control points; two to define the outer
range of hue to be adjusted, and a middle control point that you use to make the
adjustment.
Input and Output (Hue Rotate/Saturation/Lum) fields: These two numeric fields
correspond to the horizontal and vertical adjustment values for the currently selected
control point. Click any control point on a curve to view or alter these values. The label
of the second field depends on the curve that’s selected.
The following sections describe each available curve in more detail.
Hue vs. Hue
The Hue vs. Hue curve lets you change any hue to any other hue. In the following example, the
image at top is the unadjusted original. The image at bottom has had the magenta jacket shifted
to an olive green via a set of three control points.
Changing the hue of the woman’s jacket using the Hue vs. Huecurve;
Right–original image, Left–altered image
One excellent use of the Hue vs. Hue curve is to quickly and subtly alter elements that require
only minor adjustments. For example, a sky that appears a bit too cyan can be made into a
richer shade of blue with a small adjustment.
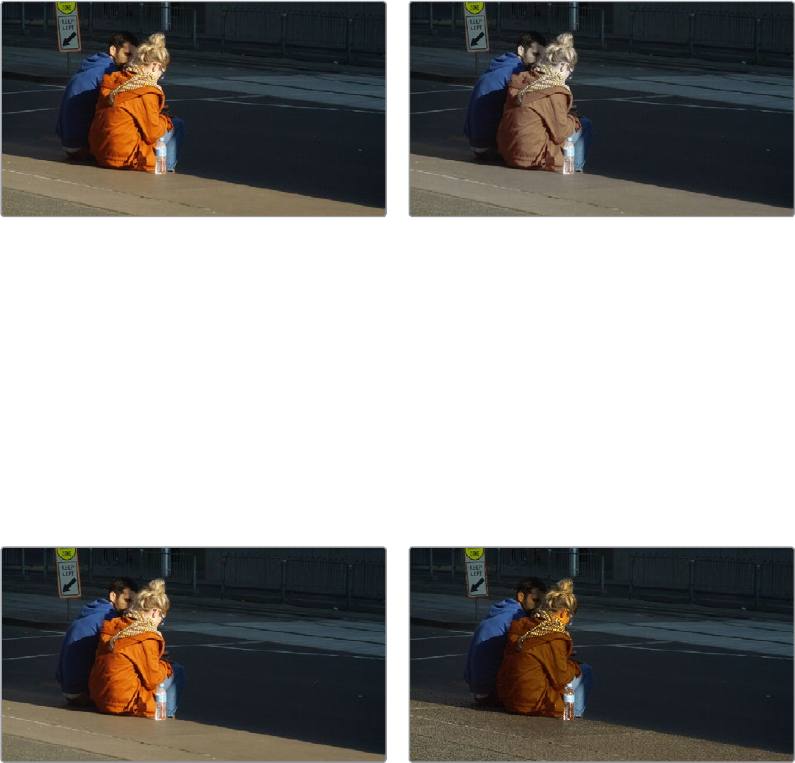
760
Curves Part 6 – 43
Hue vs. Hue is also useful for making more radical changes to elements that might be too noisy
to key successfully using the HSL qualifier controls. For example, red autumnal foliage blowing
in the wind might result in a chattery matte, but you can use the Hue vs. Hue curve to change
reds to greens, without having to worry about aliased matte edges giving your correction away.
Hue vs. Sat
The Hue vs. Sat curve lets you selectively alter the saturation of any hue within the image.
Thisis a terrific tool for creative effect, allowing you to quickly and easily boost the saturation of
elements you want to catch the viewer’s eye, while reducing the saturation of elements you’d
prefer the audience not dwell upon.
This can be extremely useful for legalizing over-saturated overshoots or undershoots during a
QC pass. For example, desaturating reds that are off the charts while leaving everything
else alone.
Lowering the saturation of the woman’s jacket using the Hue vs. Sat curve;
Right–original image, Left–altered image
The Hue vs. Sat curve can also be a powerful tool for increasing the color contrast of images
that seem lackluster and flat. By boosting the saturation of colorful elements that are distinct
from the dominant palette of a scene, you can add variety to an otherwise
monochromatic image.
Hue vs. Lum
The Hue vs. Lum curve lets you increase or decrease the lightness of elements of
specific colors.
Darkening the woman’s jacket using the Hue vs. Lum curve;
Right–original image, Left–altered image
This is a tricky curve to use with highly compressed footage, as it can quickly reveal artifacts in
the image if you aren’t careful. However, if you’re working with very high-quality footage, this
can be a great tool to darken specific hues to add richness and depth, or to lighten colorful
elements to which you want to draw attention.
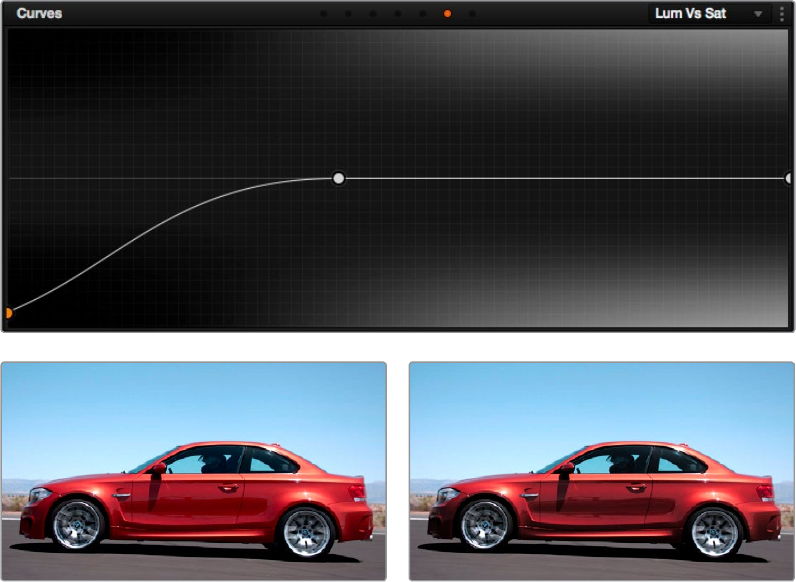
761
Curves Part 6 – 43
Lum vs. Sat
The Lum vs. Sat curve is similar to the Custom curves in that alterations to the saturation of an
image are based on user-definable ranges of image tonality, rather than hue. In the following
example, the Lum vs. Sat curve is being used to decrease selectively the saturation of
everything falling into the highlights and shadows of the image, while increasing the saturation
of everything within the midtones.
In the following example, a vividly saturated treatment results in shadows that seem artificially
colorful. Using the Lum vs. Sat curve, it’s easy to gradually desaturate everything below a
certain range, with a nice smooth falloff.
This is an outstanding curve to use for creative effect, for example, slightly boosting saturation
within the midtones while reducing saturation in the shadows to increase the depth of the
darkest portions of the image. It’s also a great curve to use to solve QC violations. For example,
if you have illegal saturation in the highlights of an image, you can use the Lum vs. Sat curve
cleanly and smoothly to lower the specific values that are causing problems.
Selective desaturation in the shadows and highlights using the Lum vs. Sat curve;
Right–original image, Left–altered image
Sat vs. Sat
The Saturation vs. Saturation curve lets you selectively manipulate image saturation within
specific regions defined by the image’s original image saturation. Control points added to the
left of this curve affect areas of progressively lower saturation, effectively letting you increase
or decrease the saturation of lower-saturated features. Control points added to the right affect
areas of progressively higher saturation, letting you increase or decrease the most saturated
features of an image.
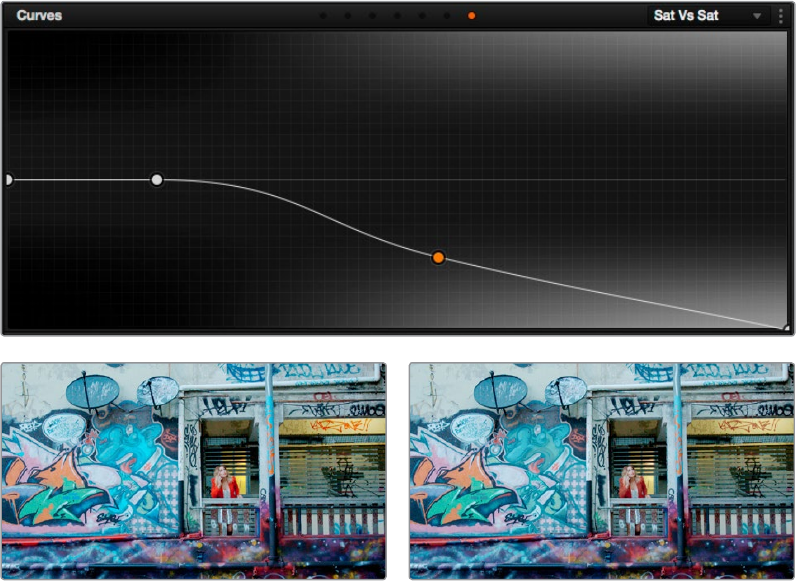
762
Curves Part 6 – 43
Like all curves, this operation is extremely useful for stylizing the image. You can create custom
vibrance operations, where you selectively increase the saturation of low-saturated regions of
the image in different ways to give the picture more “pop.” It’s also an excellent tool for taking
care of over-saturated areas of the picture when adhering to conservative QC requirements.
You can specifically desaturate only the most over-saturated parts of the picture, without
affecting similar hues at lower levels of saturation.
In the following example, you can see that the portion of the image with the highest saturation
has been desaturated, while the rest of the image has been left alone.
Desaturating only the highest saturated elements in the picture by lower
control points at the right of the Sat vs. Sat curve
Using HSL Curves with
the DaVinci Control Panel
Using these curves with the DaVinci control panel unlocks their speed, letting you make fast,
controlled adjustments to specific elements within each scene.
To open the Hue and Sat curve controls on the DaVinci Resolve control panel:
Press the CURVES soft key on the Center panel.
To exit the Hue and Sat curve controls:
Press the MAIN soft key on the Center panel.
763
Curves Part 6 – 43
To adjust the principle color regions using knobs:
Adjust one of the 18 knobs in the PRIMARIES CURVE GRADE control groups
corresponding to the RED/YELLOW/GREEN/CYAN/BLUE/MAGENTA colors paired with
HUE/SAT/LUM.
To sample a region of a shot to place curve control points:
1 Press the soft key corresponding to the curve you want to adjust (HUE - HUE, HUE -
SAT, HUE - LUM, LUM - SAT).
2 Press the CURSOR button (located above the fourth trackball).
3 Use the fourth trackball to move the on-screen cursor to the pixel you want to sample.
4 Press the first of the three buttons underneath the fourth trackball to sample the color
at the position of the cursor.
Three control points appear on the currently selected curve. The outer two control
points define region of the curve you’re adjusting, and the center control point
(selected by default) lets you make the actual adjustment.
5 To hide the cursor when you’re finished sampling, press the CURSOR button again.
To select and adjust control points using the fourth trackball of the Center panel:
To select a control point to adjust: Spin the fourth ring control to the right or left to
select the next control point in that direction (it takes about half of a turn to select
another control point). Selected control points are highlighted in cyan.
To move a selected control point: Adjust the fourth trackball to move the control point
up, down, left, or right. Selected control points are constrained between whichever
control points are to the left and right.
765
Secondary Qualifiers Part 6 – 44
Secondary Qualifiers
Secondary correction describes isolating a specific part of the image, or a specific subject,
using a key. Keys in DaVinci Resolve are grayscale images that define which areas of the
picture you want to alter (in white) and which parts of the picture you want to leave alone
(inblack). Keys can be generated either using the controls in the Qualifier palette, by using a
Power Window, or by importing an externalmatte (for more information on how to use external
mattes, see Chapter 51, “Combining Keys and Using Mattes”). This chapter focuses on how you
can use qualifiers to key a range of color values (similarly to doing a green screen key) in order
to create a matte with which to do this kind of isolated adjustment.
Secondary Qualifiers 766
Adding a Secondary Operation to the Node Editor 767
The Qualifier Interfaces 768
Which Qualifier Do I Use? 769
Basic Qualification Using the 3D Keyer 770
Basic Qualification Using the HSL Keyer 774
HSL Qualifier Presets 777
Using Highlight to See What You’re Isolating 778
Using Highlight to Solo Nodes 779
Showing Picker RGB Values 779
Qualifier Parameters 780
HSL Qualification Controls 780
RGB Qualification Controls 781
Luma Qualification Controls 782
3D Keyer Controls 783
Matte Finesse Controls 784
Black Clip 784
White Clip 784
Clean Black 784
Clean White 785
Blur Radius 785
In/Out Ratio 786
The Many Ways to Invert a Key 786
Combining Qualifiers and Windows 787
Manipulating Keys Using Additional Nodes 788
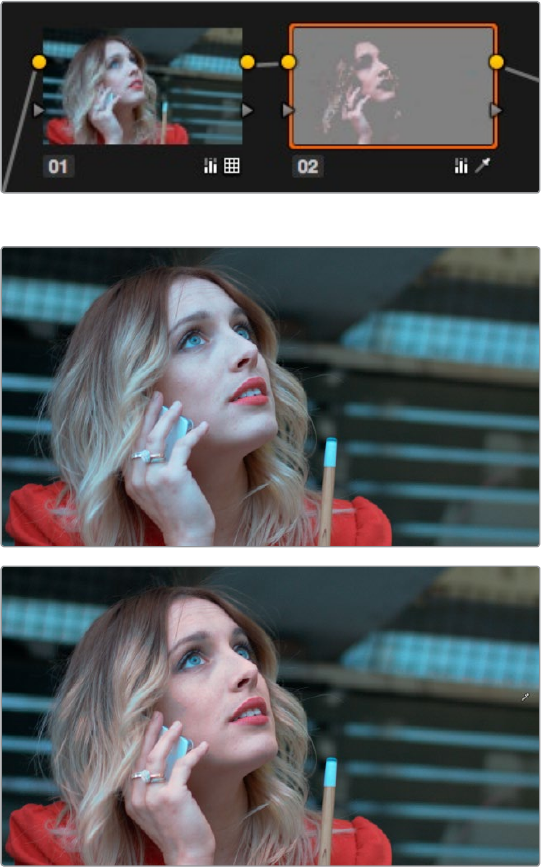
766
Secondary Qualifiers Part 6 – 44
Secondary Qualifiers
This section covers the use of the Qualifier palette, which lets you pull a 3D, HSL, RGB, or Luma
key, with which to isolate the correction you need. The Qualifier controls are fast and flexible
when you need to isolate an irregularly shaped subject with a distinct range of color or
lightness. Since you’re generating a key by sampling the image, there’s no need for tracking or
keyframing, so in the right situation Qualifiers can be your fastest solution. In the following
example, the client likes the slightly cool treatment overall, but wishes that the skin tones were
a little more vibrant. This is exactly the sort of situation where Qualifiers can help out. Adding a
second node, and using the 3D or HSL Qualifier to isolate the face makes it relatively simple to
add color exactly where you want it.
Adding a second node and using HSL Qualification to isolate the skin tones
Top–The image with a simple primary correction.
Bottom–The final adjusted image.
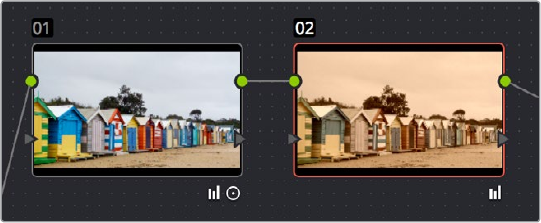
767
Secondary Qualifiers Part 6 – 44
Just about every control in the Color page can be limited using of the the Qualifier modes
available in DaVinci Resolve. This makes the Qualifier palette a jack-of-all-trades tool with 101
uses. A few practical examples include keying a red element that’s too intense for broadcast, in
order to darken it or desaturate it; keying a range of green foliage, so you can shift its hue to a
more attractive color; keying an actor’s skin tone in a commercial, to apply some selective
softening to it; or keying a range of sky, in which to to add blue.
Adding a Secondary Operation to the Node Editor
Any node can be switched between functioning as a primary correction, where the adjustments
you make affect the entire image, and a secondary correction, where you’re adjusting a specific
element in the scene. The only difference is that nodes being used for secondary corrections
are limited using a Qualifier, Power Windows, or an external matte.
If you’re planning to add a secondary operation to the current grade, you’ll need to first add
another node in the Node Editor. When pulling a key to qualify part of the image, it’s important
to understand that you’ll be sampling the YRGB values being fed to that node from any previous
nodes in the tree. That means that the state of the image being fed to a node you’re qualifying
affects the key you’re pulling.
For example, if the image coming out of Node 1 is well saturated and has a neutral color balance
with a wide range of colors, but the image coming out of Node 2 applies a low saturation,
monochromatically orange color wash, you may find it more difficult to pull a detailed key from
Node 2 than you would from Node 1.
Choosing your battles–the image coming out of Node 1 will be
easier to key than the highly stylized image coming out of Node 2
This is important because you have the flexibility of determining from what image you want to
try pulling a qualified key. By connecting the node that’s outputting the best YRGB image for
the key you’re trying to create to the node you’re qualifying, you can control what you’re keying.
For more information about choosing which node to use for setting up a qualifier, see
Chapter51, “Combining Keys and Using Mattes.”
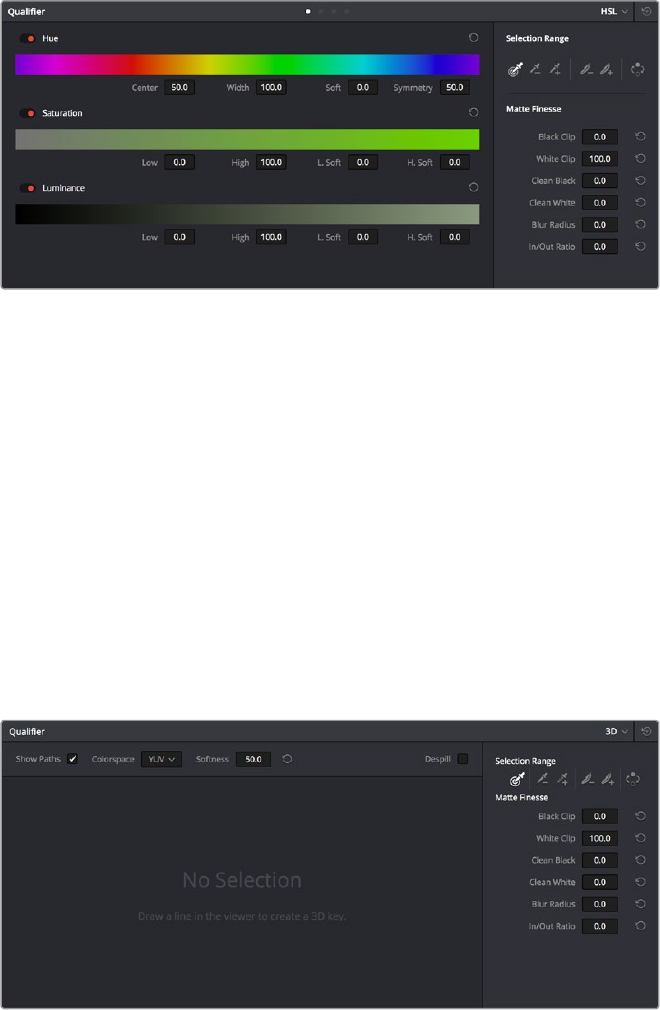
768
Secondary Qualifiers Part 6 – 44
The Qualifier Interfaces
The DaVinci Resolve Qualifier palette interface is straightforward. To the left, graphical controls
above numeric parameters let you manually adjust what ranges of each color component
contributes to the key you’re creating. To the right, Selection Range tools below lets you define
a key by sampling pixels of the image, either using the pointer, or by using the fourth trackball
of a DaVinci control panel, while below a set of Matte Finesse parameters let you alter the
shape of the key that’s been pulled.
Qualifier palette with HSL controls selected
The default qualification mode is the HSL Qualifier, which uses three color components, hue,
saturation, and luma, to define a key. However, you can also use the RGB or LUM (Luma)
qualification modes to pull keys using other combinations of color components. The LUM
qualifier mode, in particular, lets you make targeted adjustments to specific ranges of image
lightness. This is a technique employed by many colorists to alter color temperature within a
specific range of image highlights or shadows.
Alternately, you can use the 3D qualifier introduced in DaVinci Resolve 12 to quickly and easily
pull well-refined keys by drawing lines to sample colors from the image that correspond to
volumes of color within a three-dimensional gamut. While the underlying technology is
sophisticated, all you have to do is to draw blue lines to sample colors you want to isolate, or
red lines to sample colors you want to subtract from the isolation you’re creating, all of which
automatically generate a high-quality key. Each line you draw adds a sample to the selection
list; you can turn each sample off and on to evaluate its contribution to the resulting key, or
delete samples that don’t make a positive contribution.
The 3D qualifier
769
Secondary Qualifiers Part 6 – 44
No matter which qualifier mode you use, the Matte Finesse controls make it easy to refine the
resulting key to be even cleaner and more usable. In some instances, you can even take a
marginal key that would otherwise be unusable, and squeeze it into something useful using the
Clean Black, Clean White, and Blur Radius controls.
Which Qualifier Do I Use?
The Qualifier palette’s four modes offer you the flexibility to use the best keyer for the job when
it comes to isolating a range of color or brightness values. In some cases, keys that are difficult
to pull using some modes are easier to pull using others. Here’s a brief summary:
3D: The 3D keyer is a good one to start with if you’re trying to isolate a range of color
such as a blue shirt, a cyan sky, a performer’s skin tone, or the orange leaves of a tree
in autumn. Its interface of drawing lines over the part of the image you want to isolate,
coupled with its high quality and extreme specificity, make it a fast and accurate tool
to use in a variety of circumstances. However, the 3D keyer always samples every
color component of the image; it’s not useful when you want to isolate specific color
components, such as luma only, or hue and saturation without luma. The 3D keyer’s
greatest strength, the speed with which you can sample areas of the picture to include
(or exclude) from the final key, is also occasionally a weakness with images where your
initial samples aren’t giving you satisfactory results, because there aren’t many ways to
fine tune the key as it’s being generated (although you can manipulate the result). On
the other hand, for most images you would want to qualify, two or three samples is all
you need, in conjunction with using the Matte Finesse controls to adjust the resulting
key. If you need to do some compositing in the Color page, the 3D keyer also does an
excellent job doing blue and green screen keying to create transparency, and has a
built-in Despill control as well.
HSL: In many instances, the HSL keyer is not as immediately accurate as the 3D keyer,
and will include a broader portion of the image for any given sample. On the other
hand, if the 3D keyer is not giving you satisfactory results for a particular shot, the HSL
keyer can sometimes do a better job. Because of its interface, the HSL keyer makes it
easier to “fine-tune” the range and softness of each individual color component that’s
sampled, in order to improve the result. The HSL keyer also gives you the option of
disabling color components that you don’t want to contribute to the final key, so that
you can pull a saturation-only key, or a hue-only key, for instances where that may solve
the issue at hand.
RGB: The RGB keyer shares many of the limitations and advantages of the HSL keyer,
but since you’re sampling and adjusting red, green, and blue color components, the
specificity with which you can fine-tune the resulting key works much differently.
LUM: The LUM keyer works specifically to isolate parts of the image based on image
tonality, lightness or darkness. This is the perfect tool when you’re trying to isolate
highlights or shadows in the image, which let you solve a multitude of different creative
and technical issues. The LUM keyer is identical to using the HSL keyer with the Hue
and Saturation qualifier controls turned off.
The following two sections provide an overview of how to use the 3D and HSL keyer modes in
DaVinci Resolve.
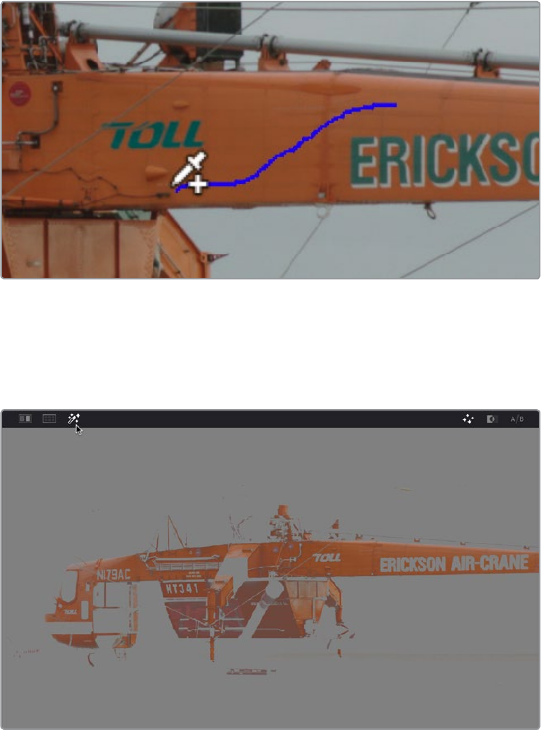
770
Secondary Qualifiers Part 6 – 44
Basic Qualification Using the 3D Keyer
The 3D qualifier mode offers a fast, simple way of pulling a key to isolate a range of color in the
image, by drawing lines over the parts of the image you want to key. Each line you draw over
the image adds to or subtracts from the cloud of values you’re carving out of a three-
dimensional representation of all available colors; you don’t see this representation, but this
“under the hood” functionality is what gives the 3D keyer its name.
The 3D keyer is a general-purpose keyer, letting you isolate any color you like. However, the 3D
keyer is not good at pulling luma-only keys. If you’re looking to isolate a range of luma values in
the image, you should use the LUM mode.
To use the 3D mode to isolate a subject in the Viewer:
1 Open the Qualifier palette, choose 3D from the mode pop-up, and click the
eyedropper.
2 Click and drag across the part of the image you want to isolate to draw a line. Lines that
add to the key are colored blue.
Drawing a line to create a key using the 3D qualifier
3 To see the key you’re creating as you work, click the Highlight button in the Viewer
Options toolbar at the top of the Viewer.
Viewing the key using the Highlight button
With the Highlight turned on, the lines you draw become invisible. They’ll reappear
whenever you turn the Highlight off.
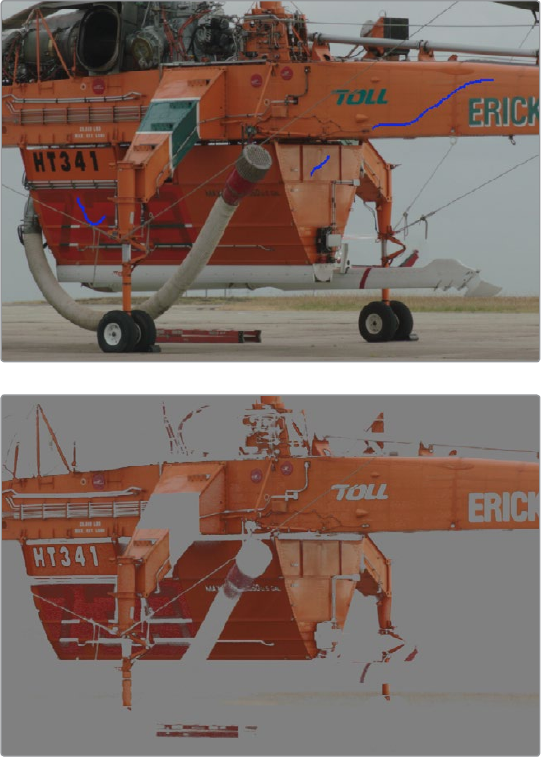
771
Secondary Qualifiers Part 6 – 44
4 If necessary, draw additional lines to add more of the image to the key you’re creating.
Ordinarily, it’s a good idea to not to draw more then two or three lines to sample the
part of the image you’re trying to isolate. Ideally, you want the key you’re pulling to
have a somewhat soft edge, which makes it easier to use the Matte Finesse controls
to fine-tune your result later on. If you draw too many lines to sample the image, the
result can be a key with hard, jagged edges that can sometimes be more difficult to
adjust later on.
A hard-edged key created with three samples
5 Alternately, if there are parts of the image that are included in the key that you want to
omit, hold the Option key down and draw a line over these areas. When you turn the
Highlight button off, you can see that Option-drawn lines are red, and these subtract
areas from the key you’re creating. Again, try not to overdo drawing subtractive red
lines, as you can end up with an overly hard-edged key that’s difficult to adjust using
other controls in the next few steps.
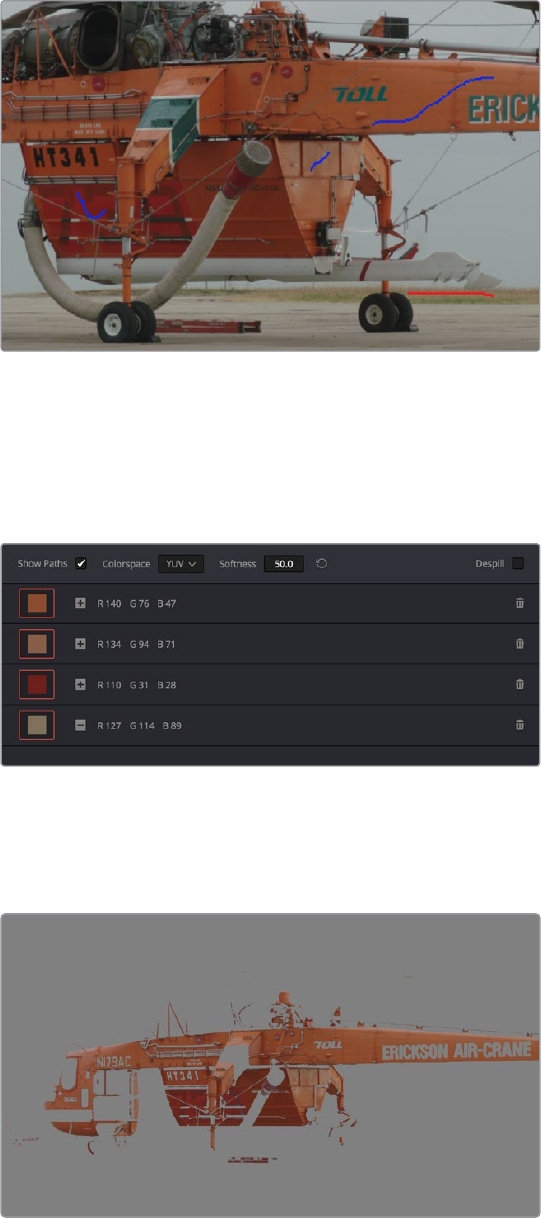
772
Secondary Qualifiers Part 6 – 44
Blue lines add to the key, a red lines subtracts the grass
from the key, as seen with the highlight turned off
6 If you find yourself wondering whether a particular sample in the list at left is doing
any good, you can click the color patch at the left of any entry in the list to toggle that
sample off and on. If you decide you don’t need a particular sample, click the trash can
button at the right to delete it.
Controls for toggling samples off and on, and deleting them from the list
7 When you’re satisfied that the key is good enough to start fine-tuning, stop drawing
lines. It’s all right if there’s a bit of noise, speckling, or if there are small holes in the key
you’re creating, because you can take care of these using the Matte Finesse controls.
A sampled key that’s ready for further refinement
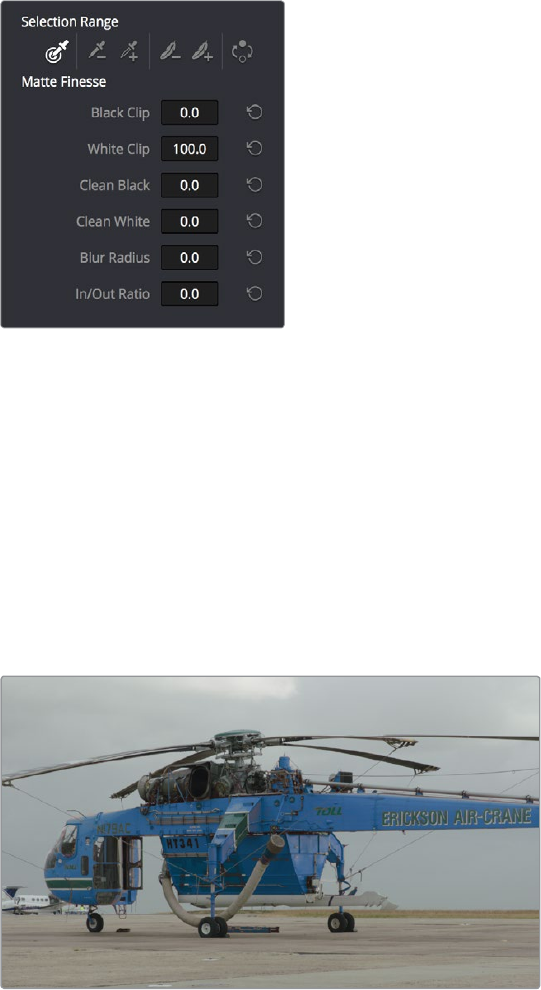
773
Secondary Qualifiers Part 6 – 44
Nearly every key you pull will benefit from some further “post-key” refinement. What
this means is that, once you’ve created the best key you can procedurally through
sampling the image, you can now adjust the resulting key itself, which is just a gray-
scale image, to improve the isolated result. This is what the Matte Finesse
controls are for.
Matte Finesse controls
8 The three most common methods of key refinement using the Matte Finesse controls
are to increase Clean Black to fill in “holes” in the parts of the image you’re omitting
(the background), increase Clean White to close holes in the part of the image you’re
isolating (the foreground), and then use Blur Radius and In/Out Ratio controls to blur the
edge of the key and push it in and out. Using these controls, you can vastly improve
nearly any key without the need to endlessly readjust the Qualifier controls.
More information about using the Matte Finesse controls appears later in this chapter.
9 When you’re finished, click the Highlight control to turn the highlight off, and make
whatever adjustment you need. In this example, the orange of the helicopter will be
adjusted using the Hue control to make it blue instead.
Adjusting the orange color of the helicopter to be Blue instead
774
Secondary Qualifiers Part 6 – 44
Basic Qualification Using the HSL Keyer
The HSL qualifier is one of the most flexible tools in DaVinci Resolve. Using any combination of
sampled hue, saturation, and luma, you can isolate different ranges of color and contrast for
specific adjustment. HSL is a general-purpose keyer, meaning you can key any color you like;
it’s not restricted to blue or green.
The most straightforward way to use any qualifier is to sample the image in the Viewer. A set of
four controls let you sample pixels within the image in different ways. When you sample one or
more pixels, the Hue, Saturation, and Luma values are analyzed, and set different ranges in
each of the Hue, Saturation, and Luma qualifier controls. There are a number of different
eyedropper controls available to control how you sample color in the image.
Sample Eyedropper: The first control you use whenever sampling the image. It defines
the initial range of the qualification; you must use this tool before any of the others.
Clicking once with this tool selects a single pixel value, while clicking and dragging
selects a range of image values that add together.
Color Picker button
Add/Subtract Color Range: These two controls let you add areas of the image to,
or subtract them from, the currently selected inner range of values that define the
core of the key. As with the eyedropper, you can click on single pixels, or drag over a
range of color.
Add and Subtract color buttons
Add/Subtract Softness: These two controls let you redefine the softness that
transitions from the inner range of the key, falling off towards the outer edge of the key.
Just like the other controls, you can click on single pixels, or drag over a range of color.
Add and Subtract qualifier softness
NOTE: When you select one of the sampling controls, it remains selected until you
select another sampling control. If you select another clip in the Timeline, then click in
the Viewer to sample a key and nothing happens, make sure that you select the
Eyedropper control in the Qualifier palette.
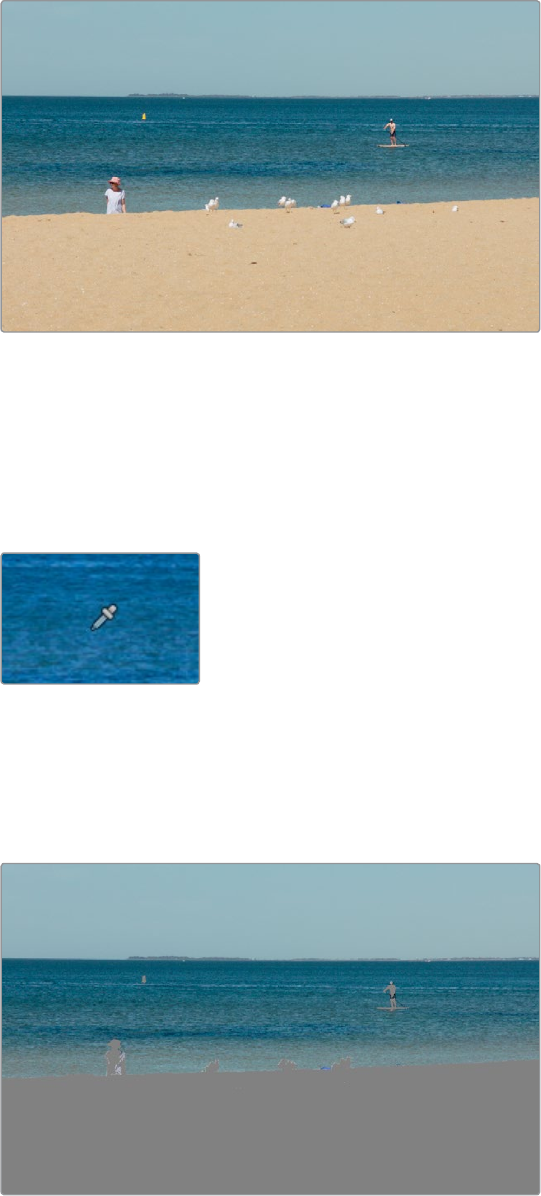
775
Secondary Qualifiers Part 6 – 44
If you’re working with the DaVinci Resolve on-screen interface, the easiest way to qualify a
subject is to use the pointer in conjunction with the sampling controls.
Example image to qualify
To use the HSL Qualifier mode to isolate a subject in the Viewer:
1 Open the Qualifier palette, choose HSL from the mode pop-up, and click the
eyedropper.
2 Either click a pixel of the part of the image you want to isolate, or click and drag across
a range of pixels within that subject.
Picking to qualify the ocean
3 To see the key you’re creating as you work, click the Highlight button in the Viewer
Options toolbar at the top of the Viewer.
By default, the area of the image you’re isolating appears in color, while the area of the
image being excluded appears solidgray.
Viewer image with highlight turned on, isolated region
appears in color, omitted region appears gray
Even though the highlight obscures the rest of the image, this doesn’t prevent you from
using the sampling tools to select pixels you can’t see.
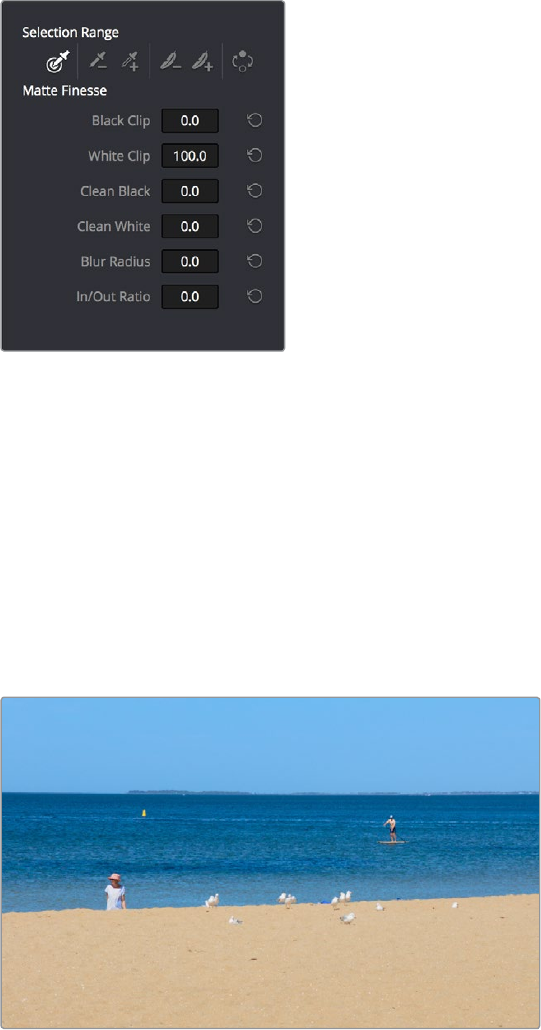
776
Secondary Qualifiers Part 6 – 44
4 To subtract from the inner range of the key you’re creating, click the minus Color
Range control, and click or drag across the portion of the keyed image that you’d like
to exclude.
5 To add softness to the outer range of the key you’re creating, click the plus Softness
control and then click or drag across the portion of the image you’d like to include as a
soft edge.
Once you’ve finished using the range and softness sampling controls to refine the key
you’re using to isolate the subject, nearly every key you pull will benefit from some
further “post-key” refinement. What this means is that, once you’ve created the best
key you can procedurally through sampling the image, you can now adjust the resulting
key itself, which is just a gray-scale image, to improve the isolated result. This is what
the Matte Finesse controls are for.
Matte Finesse controls
6 The three most common methods of key refinement using the Matte Finesse controls
are to increase Clean Black to fill in “holes” in the parts of the image you’re omitting
(the background), increase Clean White to close holes in the part of the image you’re
isolating (the foreground), and then use Blur Radius and In/Out Ratio controls to blur the
edge of the key and push it in and out. Using these controls, you can vastly improve
nearly any key without the need to endlessly readjust the Qualifier controls.
More information about using the Matte Finesse controls appears later in this chapter.
7 When you’re finished, click the Highlight control to turn the highlight off, and make
whatever adjustment you need. In this example, the saturation has been raised and the
color balance changed to make the adjustment obvious.
Altered color balance of the ocean and sky
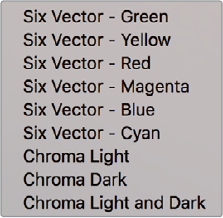
777
Secondary Qualifiers Part 6 – 44
If you have a DaVinci control panel, you can use the fourth trackball to sample the image,
referring to either the Viewer or the display connected to the video output of your DaVinci
workstation.
To sample a subject using the DaVinci control panel:
1 Press VECTORS on the T-bar panel to open the Qualifier palette, which defaults to the
HSL Qualifier controls.
2 Press CURSOR (the third button above the fourth trackball) on the Center panel, to
display the small cursor crosshairs in both the Viewer and the video output display.
3 Use the fourth trackball to position the cursor over the subject you want to sample, and
press the leftmost of the three buttons appearing underneath the fourth trackball to
sample the image.
4 Press HILITE on the Transport panel to turn on the highlight so you can see the key
you’re creating, and then use the knobs at the top of the Center panel to adjust the
range and softness parameters to obtain the most accurate key for your purposes.
HSL Qualifier Presets
There is a set of HSL Qualifier presets, or Six Vector presets, that you can use to isolate
automatically a predefined wedge of color (green, blue, red, magenta, yellow, or cyan) or
chroma intensity (chroma light, chroma dark, or both). These presets are available either from
the Color > Presets menu, or from the DaVinci control panel.
The Color > Presets submenu
Selecting one of these presets automatically sets the HSL Qualifier to the corresponding range
or color or lightness. Afterwards you can continue modifying the HSL Qualifier to suit
your purpose.
To choose a Six Vector preset from the DaVinci control panel:
1 Press the PRESETS soft key on the Center panel. The Center panel’s soft keys update
with all the available lightness and color presets.
2 Press the soft key corresponding to the preset you want to use. The HSL Qualifier
updates with the new settings, and the Center panel goes back to the main page of
soft key controls.
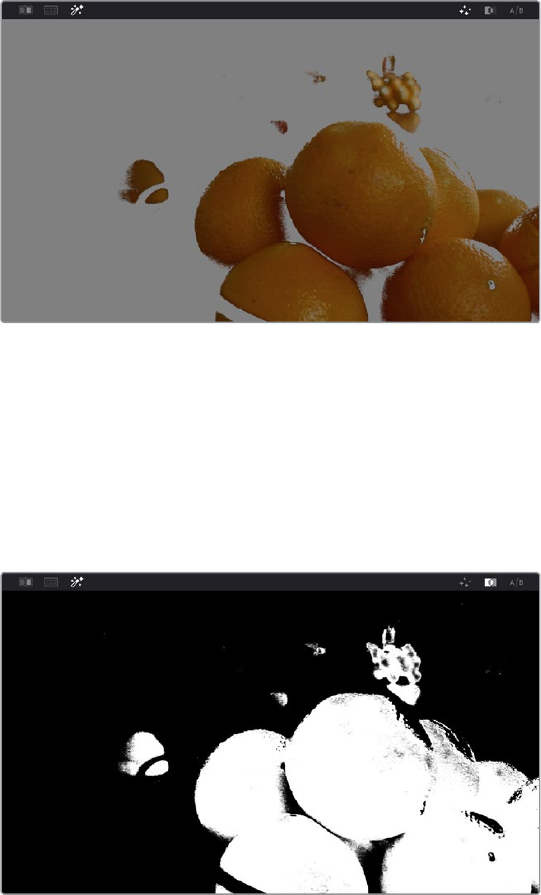
778
Secondary Qualifiers Part 6 – 44
Using Highlight to See
What You’re Isolating
The Highlight control at the top of the Viewer (revealed by turning on Viewer Options in the
Viewer’s Option menu) lets you overlay a representation of the key you’re creating over the
current image in the Viewer. Overlays are also mirrored to your video output, so they’ll show up
on an external display as well, in the event that you’re hiding the on-screen Viewer.
There are two types of highlights with which you can evaluate a qualification you’re creating.
Each is useful for different tasks.
Flat-Gray: The default highlight that DaVinci Resolve uses shows the selected portion
of the image with the original colors, and the unselected portion of the image with a
flat gray. It is useful for seeing the subject you’re isolating even while you’re adjusting
the Qualifier controls, which lets you also see the color or contrast adjustments you’re
applying at the same time.
Oranges qualified and highlighted
High-Contrast: Pressing Option-Shift-H, you can show what’s called a “high-contrast”
highlight, which should be familiar to you if you’ve used other color correction
applications and plug-ins; it’s a more typical display wherein the selected portion of
the image is white, and the unselected portion of the image is black. The high-contrast
highlight is useful in situations where you need to eliminate holes in a key, or evaluate
how “chattery” a key is since irregularities are easier to spot when divorced from the
original image.
Hi-Contrast B&W highlighting
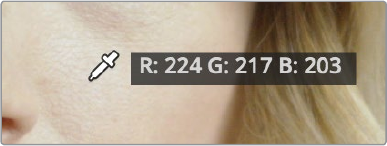
779
Secondary Qualifiers Part 6 – 44
To enable or disable a highlight, do one of the following:
In the Viewer Options toolbar at the top of the Viewer, click the Highlight control, and
choose the type of highlight you want from the buttons that appear at the right.
Choose an option from the View > Highlight submenu; a regular Highlight is Shift-H.
On the T-bar Panel of the DaVinci control panel, press HILITE.
To enable or disable a high-contrast highlight, do one of the following:
Choose View > Highlight > Highlight BW (Option-Shift-H).
On the T-bar panel of the DaVinci control panel, press SHIFT DOWN and then
press HILITE.
To make high-contrast black and white the default highlight:
1 Open the Settings window.
2 Open the General Options and turn on “Mattes display high contrast black and white.”
3 Click Save.
The next time you click the Highlight control in the Qualifier palette, or press HILITE on
the DaVinci control panel, the high-contrast highlight will display.
Using Highlight to Solo Nodes
There’s one other use of the Highlight control, and that’s to solo individual nodes in the Viewer
and video out, rather then outputting the sum of the entire node tree. For example, if you’re
trying to adjust a stack of nodes attached to a Parallel or Layer Mixer node, it’s difficult to see
what you’re doing while adjusting one of the stack of nodes, because only the final result is
being output.
However, if you turn on Highlight while you’re selecting a node with no key, then only the
currently selected node is output, making it easy to view just one node as you adjust it. Just
make sure you turn Highlight off before moving on, or you may confuse yourself.
Showing Picker RGB Values
While you’re dragging the pointer over the Viewer and looking for a feature to sample, you can
enable a tooltip that shows you the RGB Value of the pixel under the pointer by right-clicking
the Viewer and choosing Show Picker RGB Value to toggle this feature on and off. When you
turn this feature on, the View > Show RGB Picker Values In submenu has options for displaying
either 8- or 10-bit tristimulus values.
The Color Picker tooltip that appears when you
turn on show RGB Picker Values
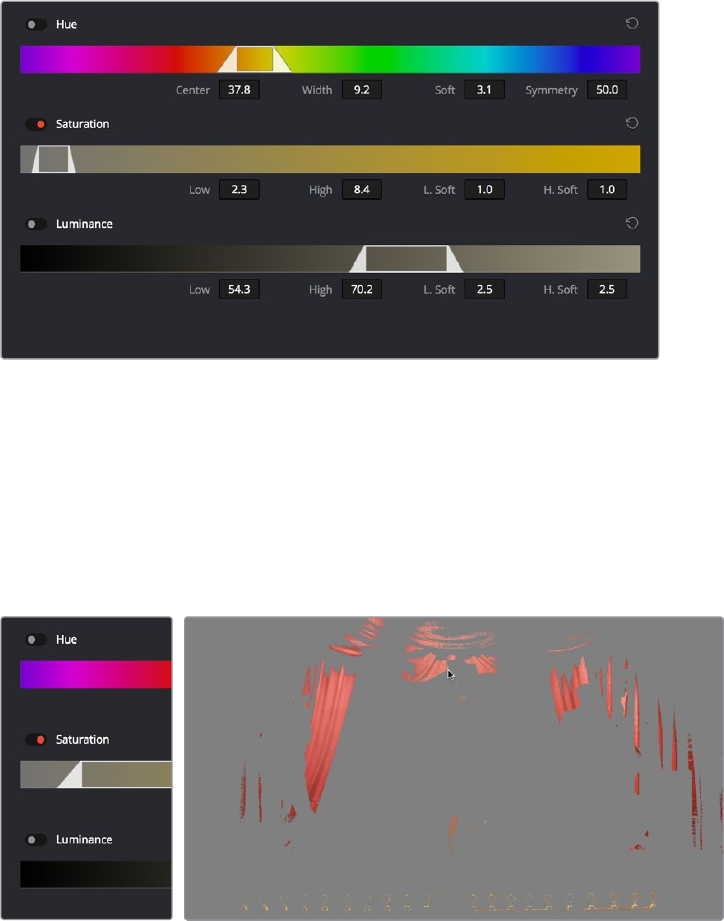
780
Secondary Qualifiers Part 6 – 44
Qualifier Parameters
Each of the Qualifier modes has parameters that correspond to the relevant color components
for that mode, with which you can identify a range and softness, similar to using the sample
tools. These parameters can be edited as virtual sliders using the pointer, or you can modify
them using the knobs of the DaVinci control panel.
HSL Qualification Controls
The HSL Qualifier is by far the most versatile mode of the Qualifier palette. It’s also the qualifier
that’s easiest to understand, and the easiest to adjust by hand if you don’t feel the need to
sample the image. By selecting range and softness for each of three different color
components, hue, saturation, and luma, you can isolate a wide variety of colorful subjects, or
ranges of image lightness and saturation.
The HSL Qualifier controls in close up
One of the HSL Qualifier’s key strengths, and one of its most underutilized features, is that you
can enable or disable each of the three HSL components using the Hue, Sat, and Lum buttons,
using toggle controls found at the left of each Qualifier range control’s name. This lets you
ignore specific color components, while focusing on others that are more important.
Forexample, if you’re trying to isolate the saturated parts of an image, regardless of the hue or
brightness, you can turn off the Hue and Lum qualifiers so that only Sat is used to sample
theimage.
Qualification with saturation only to isolate the most saturated portion of the picture
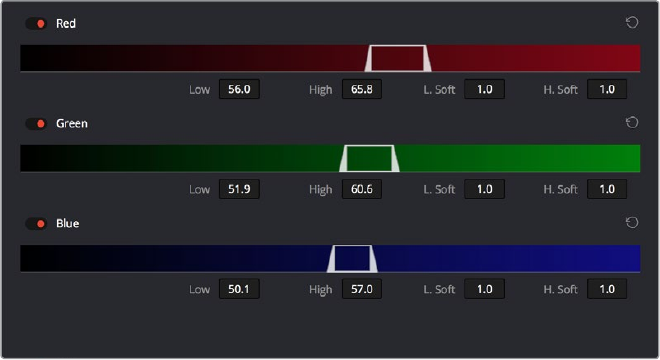
781
Secondary Qualifiers Part 6 – 44
The HSL parameters include:
Hue Center: Defines the center of the range of Hue being isolated.
Hue Width: Defines the width of the range of hue being isolated. Widening or
narrowing this parameter widens and narrows the range of hue about the current
Hue Center.
Hue Soft: Widens or narrows the falloff at both sides of the currently selected
range of hue.
Hue Symmetry: Lets you selectively alter the angle of Hue Soft falloff at either the right
or left side. Lowering this parameter makes the softness to the right of the hue range
grow steeper. Raising this parameter makes the softness to the left of the hue range
grow steeper.
Sat Low/High: Two parameters let you define the upper and lower range of saturation
being isolated.
Sat Low Soft/High Soft: Two parameters let you define the upper and lower softness
falling off outside the current range of saturation.
Lum Low/High: Two parameters let you define the upper and lower range of luma
being isolated.
Lum Low Soft/High Soft: Two parameters let you define the upper and lower softness
falling off outside the current range of luma.
RGB Qualification Controls
The RGB Qualifier mode lets you isolate range and softness in the Red, Green, and Blue
channels of an image. While this is not necessarily an intuitive way of manually creating a
qualification from scratch, it can provide a different way of isolating potentially trickier ranges of
the RGB color space.
If you start by sampling the image, then you can widen and narrow each color channel’s isolated
range of values. In some cases, you may find it’s faster to isolate a specific range of continuous
color by adjusting these controls.
RGB qualification controls
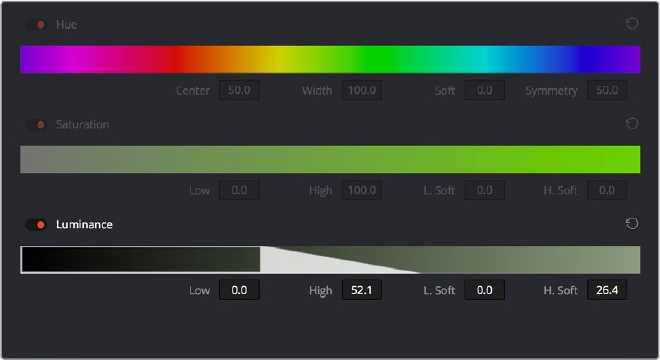
782
Secondary Qualifiers Part 6 – 44
The RGB parameters include:
Red Low/High: Two parameters let you define the upper and lower range of the Red
channel being isolated.
Red Low Soft/High Soft: Two parameters let you define the upper and lower softness
falling off outside the current range of red.
Blue Low/High: Two parameters let you define the upper and lower range of the Blue
channel being isolated.
Blue Low Soft/High Soft: Two parameters let you define the upper and lower softness
falling off outside the current range of blue.
Green Low/High: Two parameters let you define the upper and lower range of the
Green channel being isolated.
Green Low Soft/High Soft: Two parameters let you define the upper and lower
softness falling off outside the current range of green.
Luma Qualification Controls
The Luma Qualifier mode simply pulls a key from the Luma channel all by itself. It’s identical to
the HSL qualifier with H and S turned off. This single-component keyer is more useful than you
might think; it’s a common technique to isolate a range of highlights, midtones, or shadows
throughout the image to alter the color temperature selectively.
The Luma Keyer mode automatically disables the Hue and Saturation controls
Also, keep in mind that the luma component is the sharpest keyable component when you’re
working with heavily compressed video. Keys that are noisy or chunky with HSL qualification
may be sharper if you just use the Luma Qualifier, although you won’t be able to be
chromatically specific.
The Luma Qualifier has four parameters:
Lum Low/High: Two parameters let you define the upper and lower range of the luma
component being isolated.
Lum Low Soft/High Soft: Two parameters let you define the upper and lower softness
falling off outside the current range of luma.
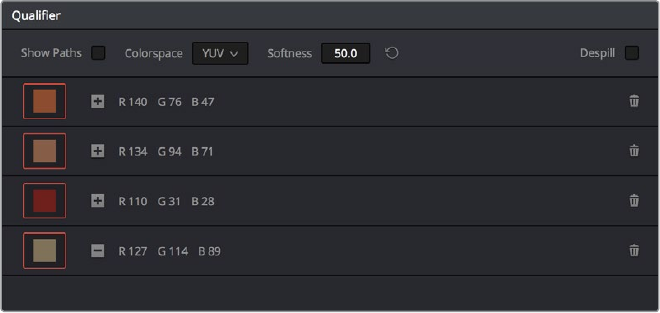
783
Secondary Qualifiers Part 6 – 44
3D Keyer Controls
As discussed earlier in this chapter, the 3D Keyer works much differently than the other
qualifiers in DaVinci Resolve. In this mode, drawing lines over parts of the image you want to
isolate adds samples to the Sample list, some of which add to the key (when you drag with the
pointer) and some of which subtract from the key (when you Option-drag with the pointer).
While this functionality is very simple to use, there are other controls that are available.
The 3D Qualifier mode
The 3D parameters include:
Show Paths: A checkbox that lets you turn the visibility of the lines you’re drawing to
sample the image on and off. Turning lines off does not affect the key in any way.
Colorspace: A pop-up menu that lets you choose whether you’re sampling colors in
YUV colorspace or HSL colorspace. YUV is the default, but if you find you’re not getting
satisfactory results, you can reset the Qualifier palette and switch to HSL to see if that
works any better.
Softness: A single parameter lets you adjust the overall softness of the key you’re
creating. The default value is 50. Raising this value increases key softness, lowering it
decreases key softness.
Despill: If you’re using the 3D keyer to pull a blue or green screen key to create
transparency in conjunction with the optional Alpha Output in the Node Editor, this
checkbox lets you turn on an automatic color correction that eliminates blue or green
spill from the image, while retaining the image’s original color.
Sample list: A list shows each line you drew as a sampled entry. A color patch at the
left shows you the average color you sampled, clicking the color patch turns lets you
temporarily turn any color sample off to evaluate its contribution to the overall key.
Aplus or minus icon shows you whether that patch is adding to or subtracting from the
key. The average red, green, and blue color values are shown next, and a trash can
icon at the right lets you delete any sample from the list.
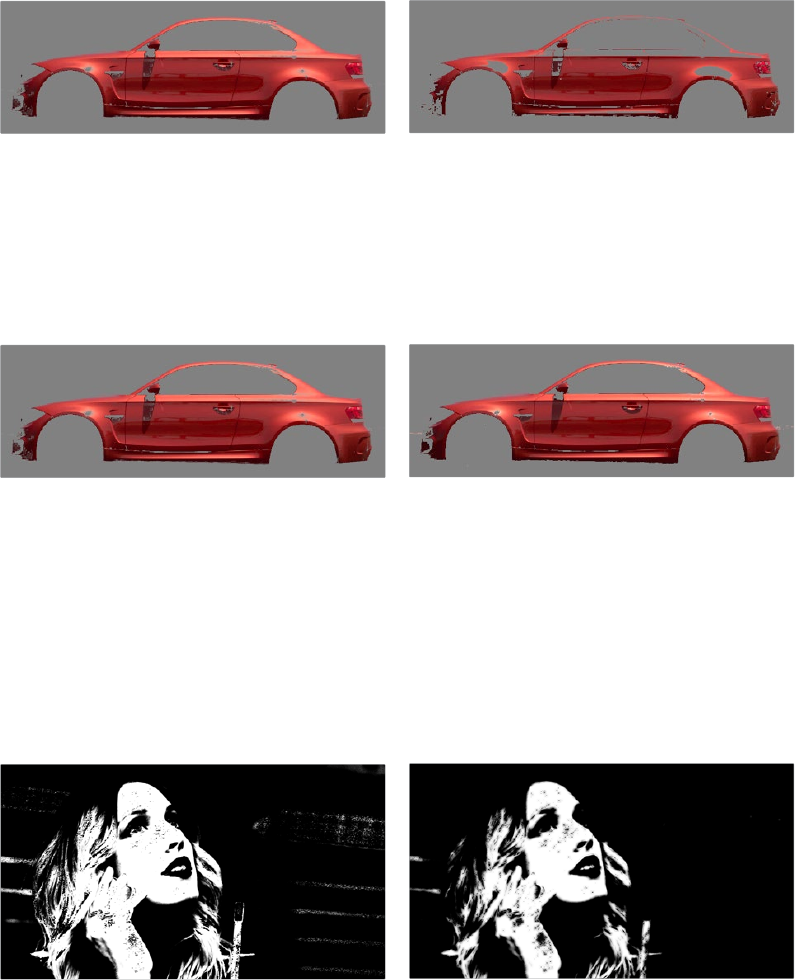
784
Secondary Qualifiers Part 6 – 44
Matte Finesse Controls
After you’ve used the sample controls and Qualifier parameters to create the most useful key
for your purposes, you may find that it has problems that cannot be overcome easily by the
available adjustments. Issues such as chattery edges, holes, or noisy bits can sometimes be
easily fixed using the Matte Finesse controls. These controls filter the output of the Qualifier
controls and are adjustments that are made to the matte itself, so they may work well in some
instances, and poorly in others, depending on what you’re trying to do.
Black Clip
Raising Black Clip applies a “lift” adjustment such that translucent areas of the matte (gray areas
when viewing a high-contrast highlight) are pushed towards black. The range is 0 to 100, with 0
being the default setting.
Before/After raising Black Clip
White Clip
Lowering White Clip applies a “gain” adjustment such that translucent areas of the matte (gray
areas when viewing a high-contrast highlight) are pushed towards white. The range is 0 to 100,
with 100 being the default setting.
Before/After lowering White Clip
Clean Black
Clean Black is a specialized operation that eliminates noise (seen as white speckling when
viewing a high-contrast highlight) in the black area of a key that omits the regions of the image
you don’t want to isolate, and shrinks the key by making the dark parts of a key darker the
higher you raise this parameter, pushing dark gray areas of the key towards black. The practical
result is that raising Clean Black lets you “fill holes” in the background portion of a key, and
erode translucent edges.
Before/After raising Clean Black, viewing the high contrast matte
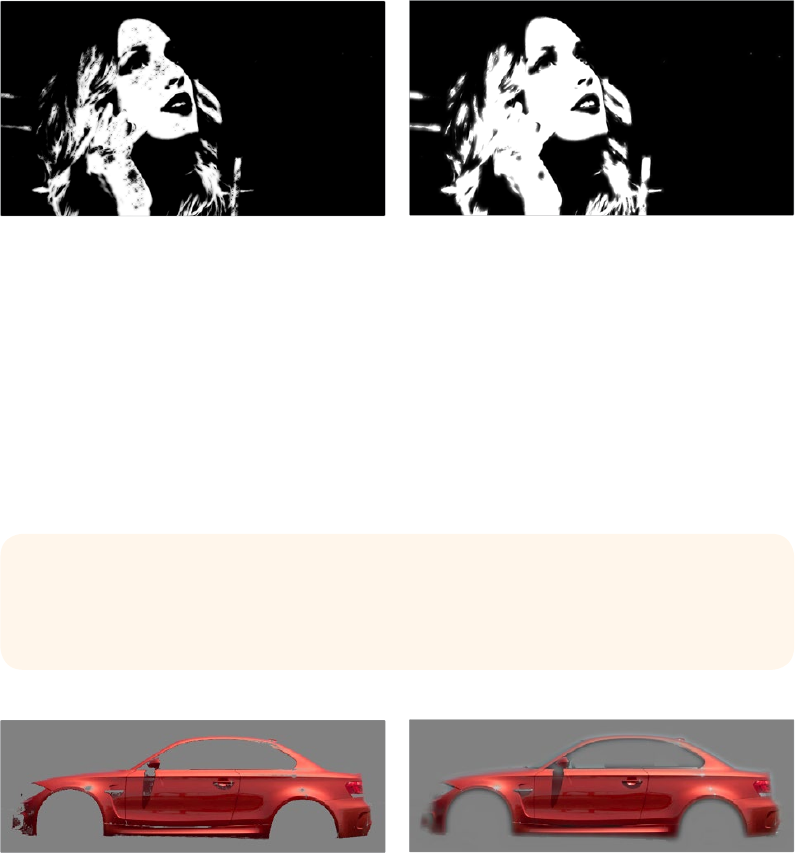
785
Secondary Qualifiers Part 6 – 44
Clean White
Clean White is another specialized operation that eliminates noise (seen as black speckling
when viewing a high-contrast highlight) in the white portion of a key that include areas of the
image you’re isolating, and expands the key by making light parts of a key lighter the higher you
raise this parameter, pushing light gray areas of the key towards white. The practical result is
that raising Clean White lets you “fill holes” in the foreground portion of a key, and grow
translucent edges.
Before/After raising Clean White, viewing the high-contrast matte
Blur Radius
In small amounts, blurring a key does well to take the edge off problem edges. However,
blurring a key can also feather the edges of a key past the border of the subject you’re keying,
with the result being a visible “halo” around your subject depending on the adjustment you’re
making. The range is 0 to 2000, with 0 being the default. With such a large maximum blur
radius, combined with the capabilities that the In/Out Ratio provides in customizing the direction
of spread, you can turn some pretty precarious mattes into surprisingly smooth and
useful results.
Using the blur parameters to soften the edges of a key
TIP: If haloing is a problem, you can try adjusting the In/Out Ratio parameter, or you
may want to consider using the Qualifier Softness parameters to feather the edges of
the key, instead.
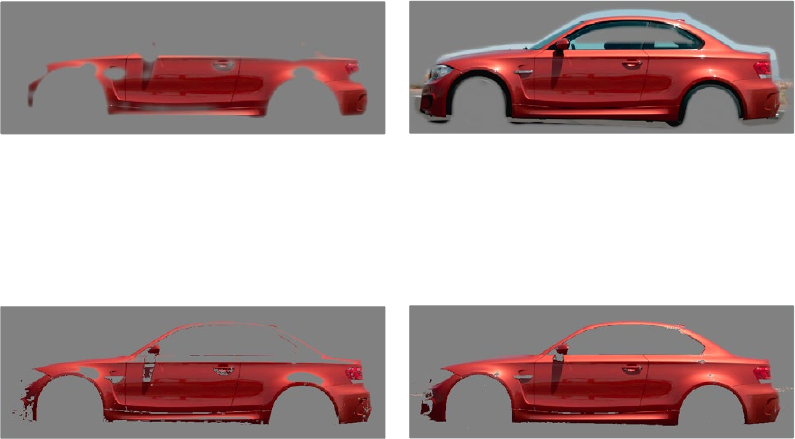
786
Secondary Qualifiers Part 6 – 44
In/Out Ratio
Controls whether the “Blur Radius” is applied equally to the inside and outside of the edge of
the matte (zero), applied only within the matte (negative values), or applied only outside the
matte (positive values). Using In/Out Ratio can help eliminate fringing when using the Blur
Radius parameter.
Left–In/Out Ratio lowered so blurring ends at the edge of the matte and feathers inward,
Right–In/Out Ratio raised so that blurring starts at the edge of the matte and feathers outward
However, you can also use In/Out Ratio even in situations where no Blur Radius is applied at all.
Raising In/Out Ratio will fill in small black holes in the matte, while lowering In/Out Ratio below 0
will eliminate speckling by pushing small white bits of the matte towards black.
Left–In/Out Ratio controls lowered to expand holes in the Matte,
Right–In/Out Ratio controls raised to fill in small black holes in the matte
The Many Ways to Invert a Key
Sometimes, you’ll need to isolate a subject or range of values in an image, and then make a
change to everything else. One way to do this is to add an Outside node after the node in
which you’ve created the key. This lets you make one set of adjustments to what you’ve keyed,
and another set of adjustments to everything outside the key.
If you just need to make a simple adjustment, you can invert the key from within the Qualifier
palette. However, there are three other ways to invert a key.
The Qualifier Invert button: Clicking this control simply inverts the key being
generated by all of the controls within the Qualifier palette.
Key Palette Qualifier Invert: The Qualifier Invert control within the Key palette
provides another control with which you can invert the key that’s generated by the
Qualifier palette.
Key Palette Output Invert: The Output Invert control within the Key palette is notable
because it inverts the sum of all keys applied within that node. For example, if you’re
using a Qualifier in conjunction with a Window, the two invert controls mentioned
previously will only invert the Qualifier key; the Window key remains unaffected.
However, using the Output Invert control inverts the overall combination of the Qualifier
key and the Window, all together.
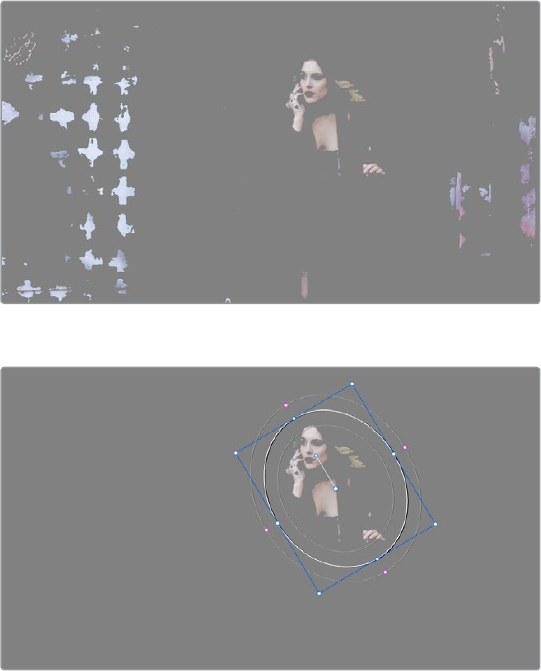
787
Secondary Qualifiers Part 6 – 44
Combining Qualifiers and Windows
This is covered in more detail in a subsequent section, but if you create a key using one of the
Qualifier modes, and you then add a Window, the final key that’s output by that node is limited
to the intersection of the Qualifier key and the Window. This makes it easy to use a Window to
“garbage matte” out bits of a key that you don’t want, that can’t be eliminated by further
adjustment of the Qualifier controls.
The woman’s skin tone is too close to other elements in the scene.
A Circular Power Window is used to further isolate the woman being isolated
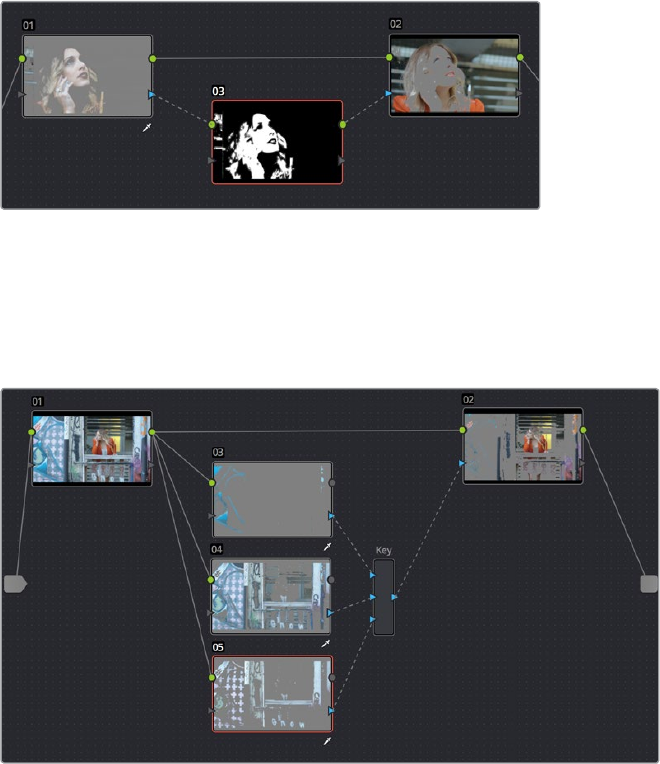
788
Secondary Qualifiers Part 6 – 44
Manipulating Keys Using
Additional Nodes
If you need to make more adjustments to a qualified key than the Matte Finesse controls will
allow, you can use the Node Editor to feed the KEY output of one node to the RGB input of
another, at which point you can use all of the second node’s color adjustment controls to
manipulate the grayscale image that constitutes that key, to improve it.
Connecting a KEY output to an RGB input, and then connecting
the RGB output back to the next node’s KEY input again
You can also use the Key Mixer node to combine multiple keys in several different ways, adding
keys together, or subtracting them from one another, in order to create exactly the key
you need.
Adding multiple keys together using a Key Mixer
For more information about these techniques, see Chapter 51, “Combining Keys and
Using Mattes.”
790
Secondary Windows and Tracking Part 6 – 45
Secondary Windows and Tracking
Secondary correction describes isolating a specific part of the image, or a specific subject,
using a key. Keys in DaVinci Resolve are grayscale images that define which areas of the
picture you want to alter (in white) and which parts of the picture you want to leave alone
(inblack). Keys are generated either using the controls in the Qualifier palette, by using a
PowerWindow, or by importing an externalmatte (for more information on how to use external
mattes, see Chapter 51, “Combining Keys and using Mattes”). This chapter shows you how to
use Power Windows to create shapes with which you can isolate parts of the image in different
ways in order to do these kinds of targeted corrections.
Power Windows 791
Adding Nodes with Windows 792
The Window Palette Interface 793
Managing Windows 795
Showing and Hiding On-Screen Window Controls 795
Using the High-Visibility Power Window Outline Option 796
Window Transform Controls 797
Window Softness 799
Drawing a PowerCurve 799
Converting Linear, Circular, and Polygon Windows into Bezier PowerCurves 801
Resetting the Window Palette 801
Combining Power Windows with the Mask Control 802
Copying and Pasting Windows 804
Saving Window Presets 804
Using Windows and Qualifiers Together 805
Manipulating Windows Using a Control Panel 806
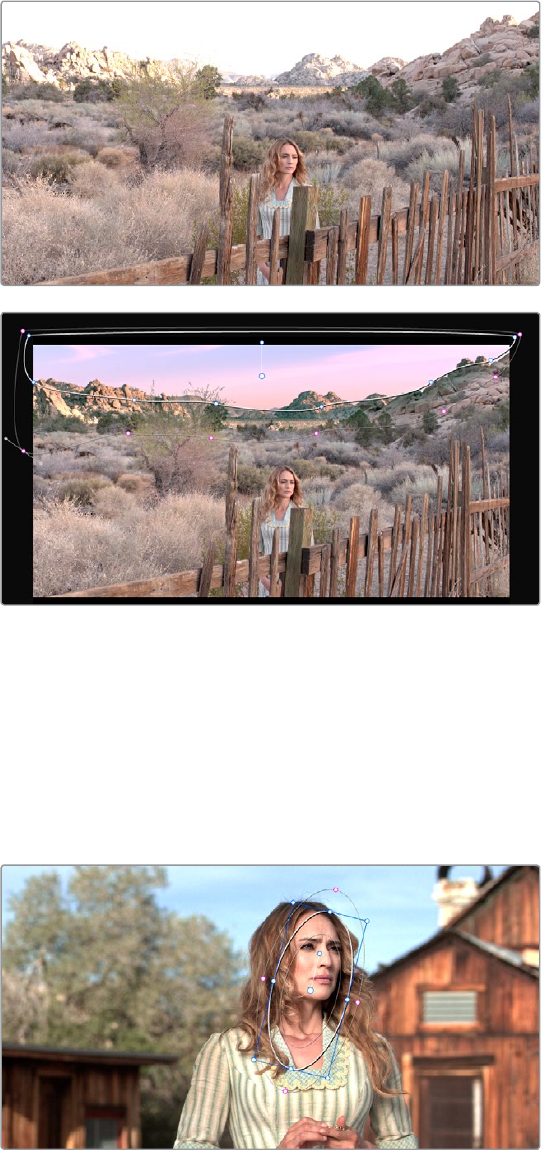
791
Secondary Windows and Tracking Part 6 – 45
Power Windows
Power Windows are another way of making secondary correction, being essentially shapes you
can use to isolate regions of the image. Different controls let you use oval, rectangular,
polygonal, or custom curved shapes. Because you can isolate regions of the image by drawing,
Power Windows produce exceptionally clean results, with edges that can be precisely
positioned and feathered to achieve a variety of effects.
Before/After PowerCurve Power Window isolates the sky area for a targeted correction
Power Windows (also referred to as simply “windows”) are excellent when what you need to
adjust can be encompassed within a clearly defined geometrical area. For example, the oval of
a person’s face, the front of a car, or a wide expanse of sky are all good candidates for
windowed adjustments. A drawback of windows can be that they must be animated to follow
whatever subject they’re isolating. Fortunately, this is where DaVinci Resolve’s powerful tracker
comes in, making it easy to track Power Windows quickly and accurately to follow along with
the subject being isolated.
Circular Power Window to focus attention to the skin
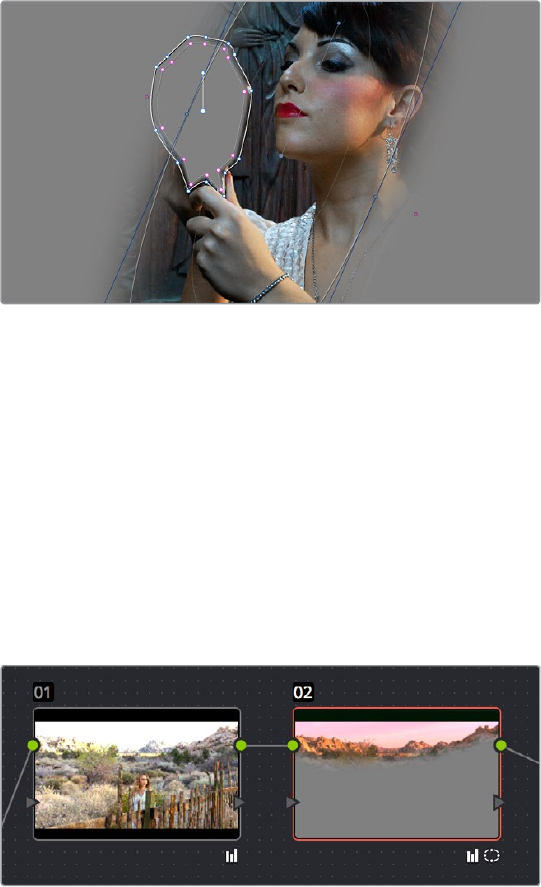
792
Secondary Windows and Tracking Part 6 – 45
DaVinci Resolve makes it easy to combine multiple Power Windows in different ways, to
intersect with one another and create even more sophisticated shapes. For example, multiple
windows can be added together, or one window can be used to cut out part of another window,
which saves you from the need to make complicated keyframing operations to animate that
window’s shape.
Multiple Windows combined to isolate and mask the image
This section covers the use of Power Windows, how to create and modify them, as well as how
to combine multiple windows, and combine windows and qualifiers to create highly specific
isolations.
Adding Nodes with Windows
As with qualifiers, you must first add a node to a grade’s node tree before you begin windowing
a correction. This is because all of the windows within a particular node work together to limit
that node’s grade. As a reminder, any node can be changed from a primary operation that
affects the entire image, to a more targeted secondary operation, simply by turning on a
window, using a qualifier, or enabling an external matte.
Serial nodes showing the window on Node 2
If you don’t create a new node before creating a window, you’ll discover you’ve inappropriately
changed a primary correction into a secondary correction. If you create a new serial node, you’ll
then need to use the controls found within the Window palette to turn on a window to customize
for your purposes. However, there are also a set of commands you can use to add serial nodes
with a window already turned on, saving you a few clicks or button presses in the process.
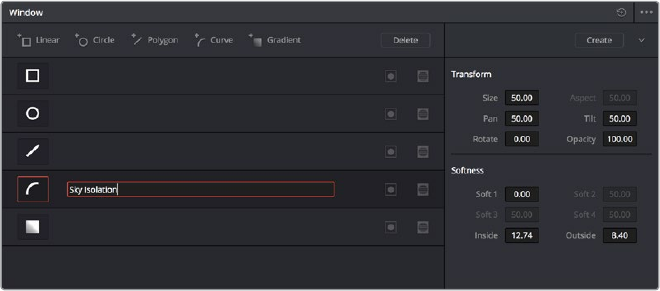
793
Secondary Windows and Tracking Part 6 – 45
To add a new node with a window already turned on:
Choose Nodes > Node + CPW (Option-C), or press the button of the same name
on the T-bar panel of the DaVinci control panel to create a new serial node with a
circular window.
Choose Nodes > Node + LPW (Option-Q), or press the button of the same name
on the T-bar panel of the DaVinci control panel to create a new serial node with a
linear window.
Choose Nodes > Node + PPW (Option-G), or press the button of the same name
on the T-bar panel of the DaVinci control panel to create a new serial node with a
polygonal window.
Choose Nodes > Node + PCW (Option-B), or press the button of the same name
on the T-bar panel of the DaVinci control panel to create a new serial node with a
PowerCurve window.
When you add a node with a Power Window, the Window palette automatically opens up, ready
for editing.
The Window Palette
The Window palette is divided into three sets of controls: the Window list, the Presets, and the
Transform and Softness controls.
The Window Palette Interface
Once you’ve created a node with which to apply a Power Window correction, you need to open
the Window palette if it hasn’t been opened already.
To open the Window palette:
Click the Window palette button.
Press the WNDWS button on the T-bar panel of the DaVinci control panel.
The majority of the Window palette is occupied by the Window List, within which you can create
as many windows as you need for the task at hand. There are five types of windows you can
create, each of which has a different geometry. You can use these windows individually, or you
can combine them to create even more complex shapes and interactions. The Window palette
has four groups of controls that let you use these windows in different ways.
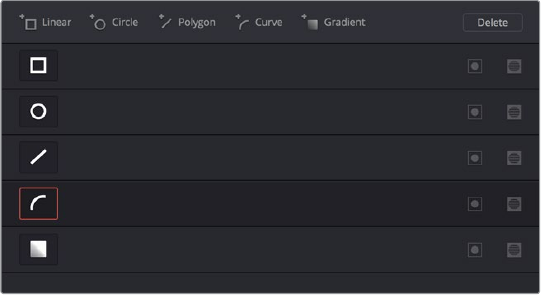
794
Secondary Windows and Tracking Part 6 – 45
The Window palette with the Window list
Window List: A row of buttons at the top of this list lets you add new windows, which
you can then customize as necessary. Each window in the list exposes an On/Off
button that shows the shape type, a Layer Name field you can use to identify what
each window is for, an Invert button, and a Mask button that governs how that window
interacts with the other windows that are currently enabled (adding to other windows
by default, or subtracting from other windows in Mask mode).
Transform parameters: Controls the overall size, aspect ratio, position, and rotation of
the currently selected window.
Softness parameters: Controls the edge softness of the currently selected window.
Different window shapes have different softness options.
Window Preset browser: A browser to which you can save presets of individual or
multiple windows for easy recall later.
Option pop-up menu: The Option pop-up menu has commands for resetting windows,
deleting windows, saving and managing window presets, and copying and pasting
track data.
Using buttons along the top of the Window palette, there are five types of windows you
can create:
Linear: A four-point shape that can be edited into any kind of rectangle or trapezoid
you might need. In addition to the center and corner controls, you can also drag any of
the four sides to change the shape.
Circular: An oval that can be shaped, sized, and feathered to solve an amazing number
of problems.
Polygonal: A four-point shape that can be expanded with additional control points to
create complex sharp-cornered polygonal shapes.
PowerCurve: A Bezier drawing tool that you can use to create any kind of shape,
curved, polygonal, or mixed, that you require.
Gradient: A simple two-handled control for dividing the screen into two halves,
with options for the center, angle, and feathering of the shape. Good for fast sky
adjustments.
795
Secondary Windows and Tracking Part 6 – 45
Managing Windows
To manipulate a window, first you need to create the type of window you want to use, or if
you’ve got a group of windows created already, you need to select the window you want
to work on.
Methods of creating and selecting windows:
To create a new window: Click the Create Window button (at the bottom of the
Windowlist) that corresponds to the window you want.
To create a new window using the DaVinci Control Panel: Press WNDOWS on the
T-bar panel, then use the UP and DOWN buttons on the Trackball panel to select the
window type you want to apply, and press ADD.
To select a window using the on-screen controls: Click anywhere within a window to
select it in the Viewer.
To select a window from the Window list: Click the Shape icon button corresponding
to the window you want to select.
To delete a window you no longer want:
Select a window, then choose Delete Selected Window from the Option pop-up.
To reset one or all windows:
To reset one window to its default shape: Select a window, then choose Reset
Selected Window from the Option pop-up.
To reset all windows: Choose Reset All Windows from the Options pop-up.
Showing and Hiding On-Screen Window Controls
When you open the Window palette, the Viewer goes into Power Window mode. Enabling a
window makes that window’s on-screen controls appear within the Viewer, and are mirrored to
video out so you can see the window controls on your external display. If you like, you can
change how and where the on-screen controls appear.
To choose whether on-screen controls are mirrored to video out, or disabled,
do one of the following:
Choose an option from the View > Window Outline submenu.
There are three options:
Off: Hides the window outline on both the external display and the Viewer.
On: The default, shows the window outline on both the external display and the Viewer.
Only UI: Hides the window outline on your external display, but leaves it in the Viewer.
Press Option-H to toggle among all three of the above modes.
To show or hide window on-screen controls using the DaVinci control panel:
Press SHIFT UP and then DISPLAY/CURSOR, above the fourth trackball on the
Center panel.
This command is a three-way toggle. The first use of this command hides the window outline on
your external display, but leaves it in the Viewer. The second use of this command hides the
window outline on both the external display and Viewer. The third use of this command shows
the window outline on both the external display and Viewer.
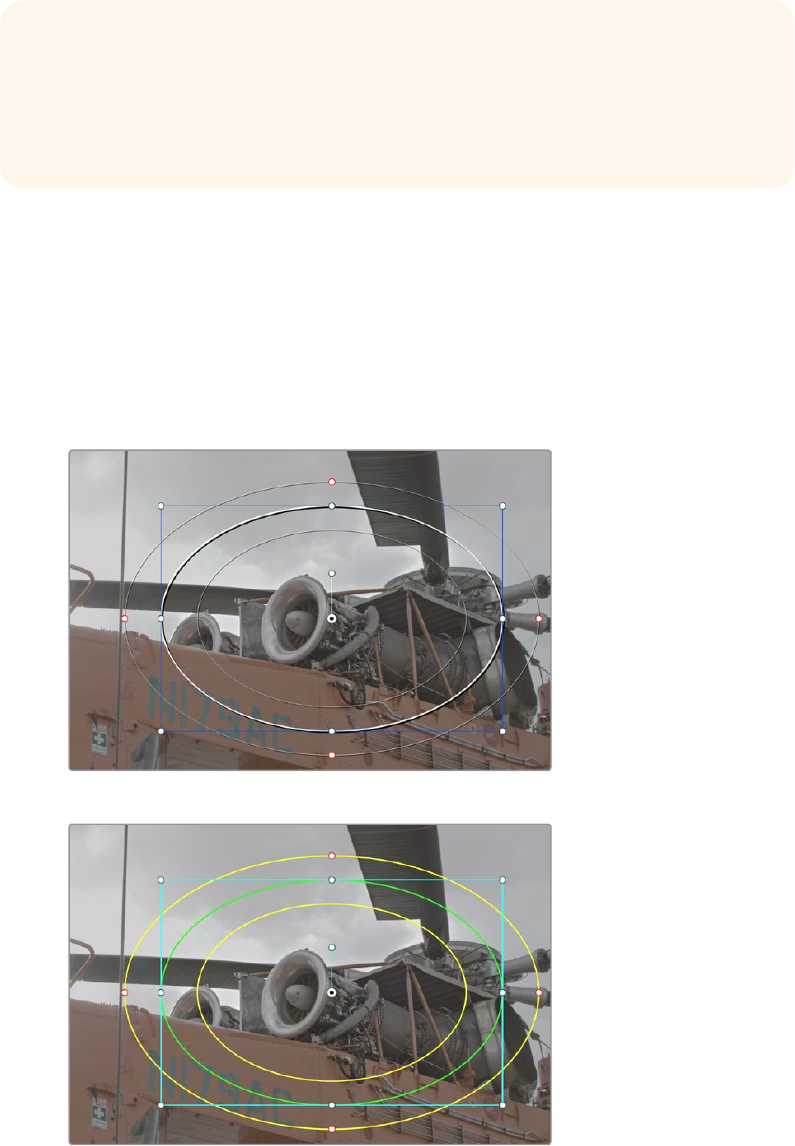
796
Secondary Windows and Tracking Part 6 – 45
Using the High-Visibility Power Window Outline Option
Ordinarily, Power Window outlines are white (for the center shape) and gray (for the softness
shapes). However, sometimes this color scheme can be difficult to see, so the Color panel of
the User Preferences has an option in the General Settings section called “High visibility Power
Window outlines.” Turning this on sets power window outlines to be drawn as green (for the
center shape) and yellow (for the softness shapes), to make these windows easier to see in
certain circumstances.
Default window outlines
High Visibility window outlines enabled in the Color panel of the User Preferences
TIP: If you leave the on-screen controls visible in the Viewer, you may find that as you
work you want to temporarily hide or show the on-screen controls in the Viewer so you
can get an uncluttered look at the image you’re adjusting. You can quickly toggle any
set of on-screen controls off and on without selecting Off in the menu by pressing
Shift-` (tilde).
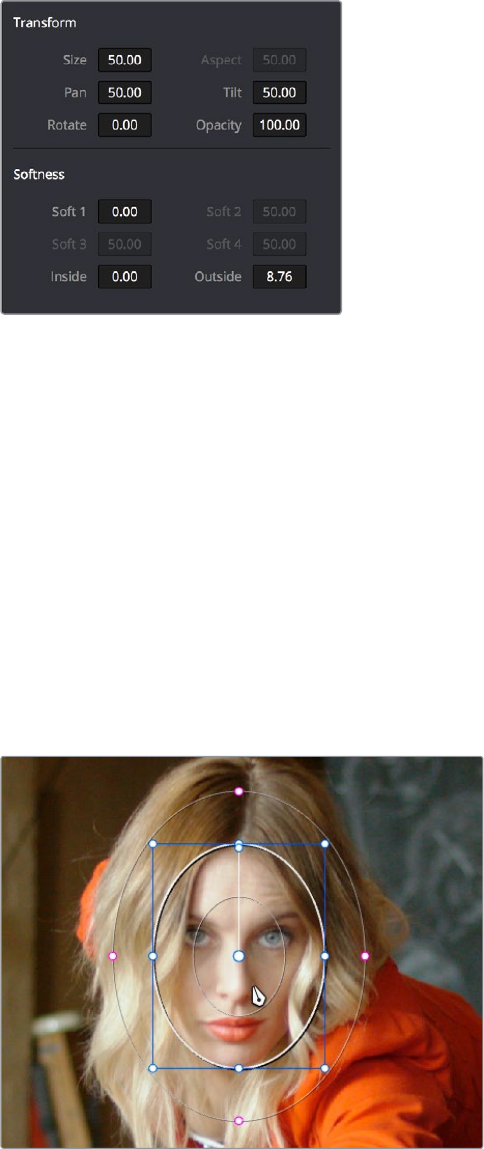
797
Secondary Windows and Tracking Part 6 – 45
Window Transform Controls
Windows have transform parameters that are similar to those found in the Sizing palette. These
parameters let you alter the window, affecting all of its control points together.
Window transform controls
Size: Scales the entire window up or down. 50.00 is the default size.
Aspect: Alters the aspect ratio of the window. 50.00 is the default value, larger values
make the window wider, and smaller values make the window taller.
Pan: Repositions the window along the X axis. 50.00 is the default position, larger
values move the window to the right, smaller values move the window to the left.
Tilt: Repositions the window along the Y axis. 50.00 is the default position, larger
values move the window up, smaller values move the window down.
Rotate: The default value is 0. Increasing this parameter rotates the shape clockwise,
decreasing this parameter rotates the shape counterclockwise.
Opacity: Lets you vary the transparency of an individual window’s contribution to a
node’s key.
The transform parameters also correspond to onscreen controls found in the Viewer, which can
be manipulated directly using the pointer.
Manipulating the window position on the Viewer

798
Secondary Windows and Tracking Part 6 – 45
While many of the on-screen controls correspond to parameters within the Window palette,
some on-screen controls, such as the control points that govern reshaping linear, polygonal,
and PowerCurve windows, are only adjustable via the pointer.
On-screen controls for window transforms:
To select any window: Click on one of an arrangement of many windows to select it,
making that window’s controls active.
To reposition any window: Drag anywhere within the window’s onscreen control.
Window position corresponds to the Window palette’s Pan and Tilt parameters. For a
Gradient window, drag the center control point.
To resize a Circular window while locking its aspect ratio: Drag one of the four blue
corner points out to enlarge, or inwards to shrink. This corresponds to the Window
palette’s Size parameter.
To squish or stretch a Circular window, altering its aspect ratio: Drag one of the blue
top, bottom, left, or right control points. These adjustments correspond to the Window
palette’s Aspect parameter.
To rotate a window: Drag the top inner blue rotate handle, in the middle of the window.
For a gradient, drag the bottom arrow handle.
To alter window softness: Drag any one of the magenta softness handles. Different
window shapes have different sets of handles, which correspond to the Softness
parameters.
To reshape a linear window: Drag any of the green corner handles to corner pin the
window, or drag one of the green top, bottom, or side handles to move an entire side
segment of the window around.
To reshape a polygonal window: Turning on a polygonal window reveals a simple
green rectangle with four corner control points. Click anywhere on the surface of the
rectangle to add additional control points with which to reshape the polygon, and drag
any green control point to alter its shape. Polygonal windows are limited to a maximum
of 128 control points.
To change the size and aspect of a PowerCurve: Shift-drag a bounding box around
the control points you want to transform, and then adjust the corners of the box to
resize the points while maintaining the aspect ratio of the shape, or adjust the top,
bottom, left, or right points to squish or stretch the shape.
To remove control points from polygonal or PowerCurve windows: Middle-click the
control point you want to remove.
NOTE: Removing a control point from a Polygonal window that’s already been
animated using the Keyframe Editor results in that point abruptly popping on and off at
the keyframes creating the animation.

799
Secondary Windows and Tracking Part 6 – 45
Window Softness
Each type of window has different Softness parameters, depending on how adjustable that
window is.
Circular: A single parameter, Soft 1, lets you adjust the uniform softness of the
oval’s edge.
Linear: Four parameters, Soft 1-4, let you adjust the softness of each of the four sides of
the linear window independently. Magenta softness control points on the top, bottom,
left, and right let you adjust the softness of each side of the linear shape independently.
Polygon: Two parameters, Inside Softness and Outside Softness, let you adjust the
overall softness of a polygonal window. There are no on-screen softness control points.
PowerCurve: Two parameters, Inside Softness and Outside Softness, let you adjust
the overall softness of a PowerCurve. Using the on-screen controls, you can adjust
the magenta inside and outside softness control points independently, creating any
softness shape you need.
Gradient: A single parameter, Soft 1, lets you adjust the uniform softness of the gradient
window’s edge.
Drawing a PowerCurve
The PowerCurve window is the only window that doesn’t display any on-screen controls when
it’s first turned on. Instead, you must click within the Viewer to add control points, drawing your
own custom shape to isolate whatever region you want.
PowerCurve window to isolate a car
To draw a PowerCurve:
1 Turn on the PowerCurve window style control.
2 Click anywhere in the Viewer to start adding control points and drawing the shape
you need.
3 Click and drag to add and shape Bezier curves, or just click and release to add a
hard angle.
4 To finish drawing and close the shape, click the first control point you created to
create a corner, or click-and-drag on the first control point you created to create a
Bezier curve.
TIP: Turning on the Viewer’s full-screen mode can make it easier to draw detailed
shapes. You can also zoom into and out of the Viewer while you’re drawing, using
either the scroll wheel of a mouse or by pressing Command-Plus or Command-Minus.
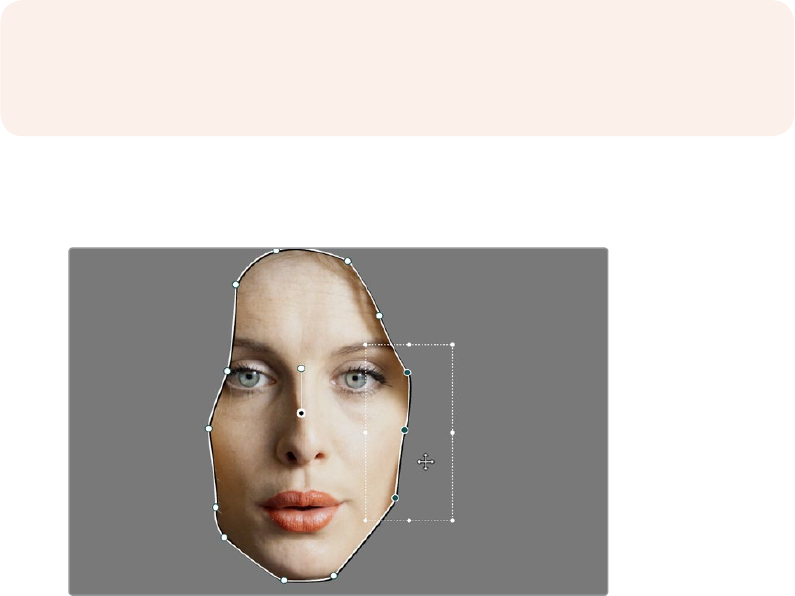
800
Secondary Windows and Tracking Part 6 – 45
Once you’ve drawn a PowerCurve, there are many ways of manipulating it.
Simple methods of modifying a PowerCurve:
To add points: Click anywhere on a PowerCurve to add control points.
To reshape a PowerCurve: Drag any control point to a new location.
To move a PowerCurve: Drag anywhere within or just outside a PowerCurve to move it.
To symmetrically alter a Bezier curve: Drag any Bezier handle. The opposite handle
automatically moves in the other direction.
To asymmetrically alter a Bezier curve: Option-drag any Bezier handle. The opposite
handle stays in place while you drag the current handle. Once you’ve created an
asymmetric pair of Bezier handles, they move together as one if you simply drag a
handle. You need to Option-drag to change the angle.
To change a curve into a corner: Option-double-click any Bezier curve control point to
change it to a sharp-angled corner point.
To change a corner into a curve: Option-click any corner point and drag to pull out a
Bezier handle, changing it to a curve.
To remove points: Middle-click the control point you want to remove.
You can also shift-drag a bounding box to select multiple control points on a PowerCurve to
move, delete, or transform them all at once.
You can Shift-drag a bounding box over multiple control
points to manipulate them all at once
To select multiple control points on a PowerCurve:
1 Hold the Shift key down and drag a bounding box around the control points you want
to manipulate or delete. All included control points will become highlighted.
2 Do one of the following:
NOTE: Removing a control point from a Polygonal window that’s already been
animated using the Keyframe Editor results in that point abruptly popping on and off at
the keyframes creating the animation.
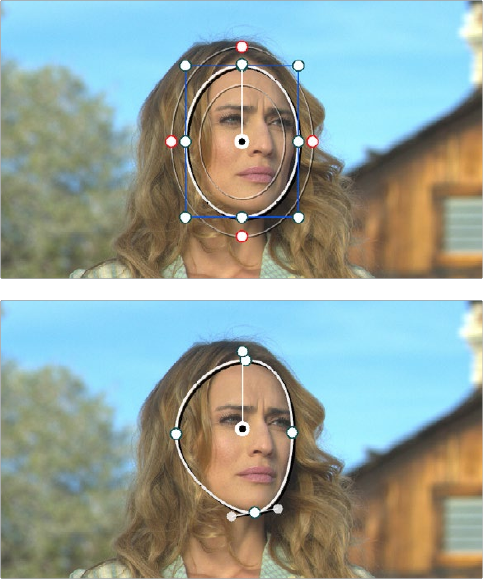
801
Secondary Windows and Tracking Part 6 – 45
To move the control points: Drag anywhere within the bounding box.
To transform the control points: Drag one of the outer corners to resize all control
points symmetrically, drag the top, bottom, or side handles to squish or stretch the
control points relative to one another, or move the pointer to one of the corners until
the rotate cursor appears, and then drag to rotate the control points.
To delete the control points: Press the Backspace key.
3 When you’re finished, press the Escape key to deselect the control points.
Converting Linear, Circular, and Polygon
Windows into Bezier PowerCurves
If you start out isolating a subject using one of the simple Linear, Circular, or Polygon shape
windows and you realize that you need a more complex shape to accomplish the task at hand,
you can easily convert them to a more complex Bezier PowerCurve by choosing Convert to
Bezier from the Window palette Option menu.
Before and after converting a Circular window to a Bezier PowerCurve
andadjusting the result, before adding softness to the edge
Once you’ve converted a simple shape to a Bezier window, you can add control points and
manipulate the shape in any way you need to make it better conform to the subject, just as you
would with any PowerCurve.
Resetting the Window Palette
The entire Window palette can be reset using the Option menu’s Reset command.
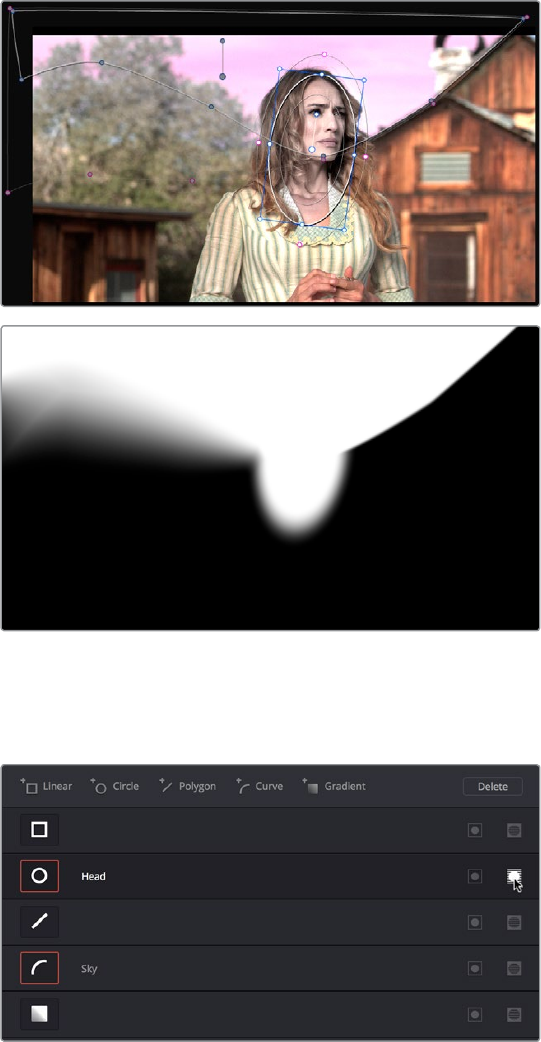
802
Secondary Windows and Tracking Part 6 – 45
Combining Power Windows
with the Mask Control
Adding multiple windows to a single node is an easy way to create composite keys. When
combining windows, the Mask control defines whether one window adds to another window, or
subtracts from that window.
In the following example, Circular and PowerCurve windows have both been created, and each
window’s Mask control is also turned on (by default), resulting in both masks being added
together so that the sunset look correction affects both the sky and the woman’s face.
The two images show the combination of the key mattes
By turning the Mask control of the Circular window off, the Circular window is
subtracted from the PowerCurve.
Turning off the Mask control of the Circular window
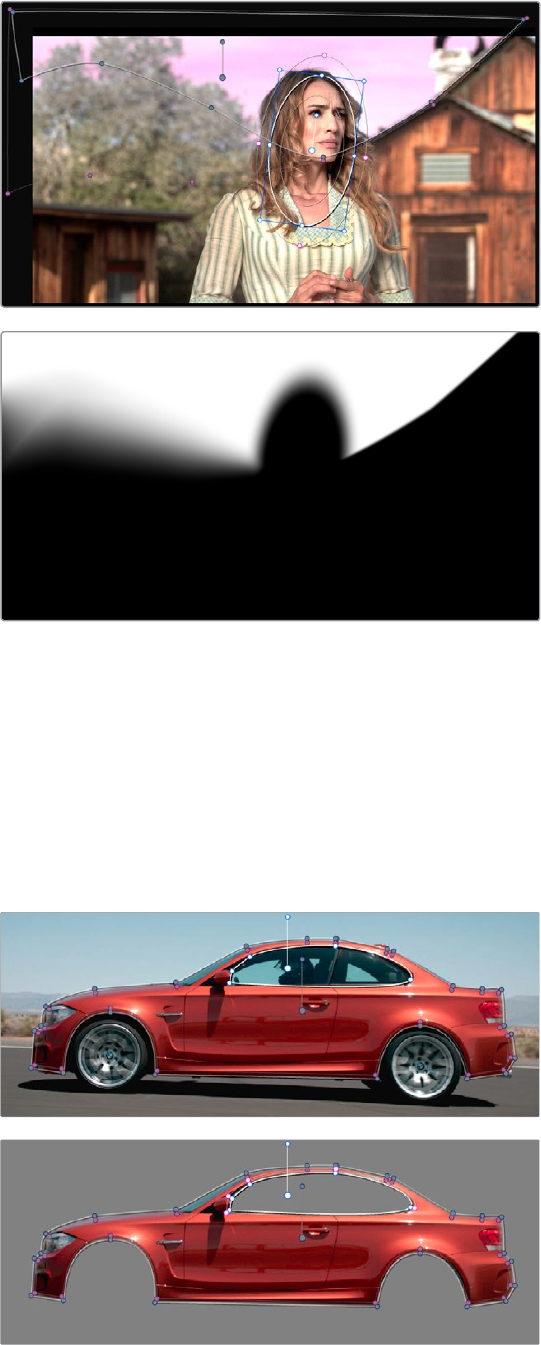
803
Secondary Windows and Tracking Part 6 – 45
Now, the woman’s face is being protected from the aggressive sky treatment.
The two images show the result of subtracting the circular window
Since windows can be individually tracked and keyframed, you can quickly set up
complex interactions of windows to solve common problems you’ll encounter. For
example, when you’re tracking a window to follow a moving subject that moves behind
something in the frame, you can use a second window with Mask turned off to cover
the object in front. Now, when the tracked window intersects the subtractive window,
the correction will disappear along with the subject.
You can also use the Mask control to create more complex shapes than you can with a
single window.
Mattes and mask used together to make complex shapes
804
Secondary Windows and Tracking Part 6 – 45
Furthermore, once you reach the limits of what shapes you can create using the four available
windows, you can combine multiple nodes containing multiple shapes and qualifiers using the
Key Mixer.
Copying and Pasting Windows
If there’s a particular window you’ve created that you want to either duplicate within the current
node, or apply to another node, you can copy and paste an individual window’s shape from one
item in the Window list to another.
Methods of copying and pasting Windows:
To copy a Window: Click any enabled Window in the Window list, then click the
Window palette option menu and choose Copy Window.
To duplicate a Window: After copying a window, create another window of the same
type that you copied, and then click the Window palette option menu and choose
Paste Window.
To paste a Window to another node: Double-click or otherwise select another node,
open the Window palette, choose the same type of window that you copied in the
Window list, and then click the Window palette option menu and choose Paste Window.
Saving Window Presets
If you find there’s a particular window shape or combination of windows that you use frequently,
you can save one or more windows as a preset for easy recall whenever needed. For example,
if you’re working on a documentary within which you find you need to do a lot of face
brightening, you can create preset face ovals for close-up, medium, and wide shots, to save you
from having to customize a stock circular window for every single new shot. You can also save
groups of windows together as a single preset, in order to reuse complicated multi-
window shapes.
Window presets are available from a group of Presets controls in the upper right-hand corner of
the Window palette.
Controls for saving, applying, and deleting window presets
Methods of working with Power Window presets:
To save a window preset: Once you’ve created one or more windows you want to
save, click the Create button, type a name into the resulting dialog, and click OK. That
preset is now available in the Preset pop-up.
To recall a window preset: Click to open the Shape Preset Browser, choose a preset
from the list, and click Load. Loaded window presets overwrite whatever other windows
were set up in that node.
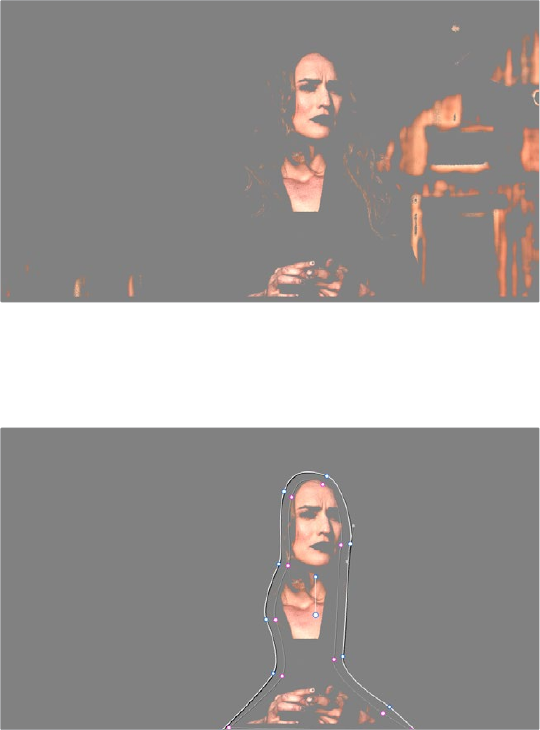
805
Secondary Windows and Tracking Part 6 – 45
To update an already saved preset: Recall a preset, change the resulting window(s),
then click to open the Window Preset Browser, and click the Save button overwrite the
current preset with the altered window arrangement.
To delete a window preset: Click to open the Shape Preset Browser, choose a preset
from the list, and click the x button to the left the the preset you want to delete.
Once recalled, windows created by presets can be modified and tracked just like any
other window.
Using Windows and Qualifiers Together
Another use of windows is to act as a “garbage matte” when used together with a qualifier. By
default, when you use a window and qualifier together, a key is only output where both the
window and qualifier intersect. This makes it easy to exclude unwanted parts of a key that are
too difficult to eliminate by further refinement of the qualifier controls.
For example, the following qualification is intended to isolate the woman’s face, but some of the
similarly colored wood and sky in the background is also included.
Instead of driving yourself crazy trying to eliminate the unwanted parts of the key by modifying
the current qualification, which is doing a great job of isolating the skin tones, you could instead
use a window to isolate her face, excluding everything outside the window, and simplifying your
job considerably.
A qualified image with highlight on
If she moves, then you can simply track the window to follow. Simple tracking is covered in
Chapter 46, “Motion Tracking Windows.”
Now with additional Power Window isolation
806
Secondary Windows and Tracking Part 6 – 45
Furthermore, you can use the window’s Invert control to do the reverse, excluding all qualified
portions of the key inside the window, and including all qualified portions of the key outside
the window.
If you need to build more complex qualifier/window combinations than this, you can add more
windows, or you can use multiple qualifiers and windows with the Key Mixer node, which is
discussed in Chapter 51, “Combining Keys and Using Mattes.”
Manipulating Windows
Using a Control Panel
Window shape and position can also be manipulated using the DaVinci control panel.
AllWindows controls are located on the T-bar panel, except for the ADJ WINDOW button above
the fourth trackball of the Center panel.
To enable, mask, or disable a window:
1 Press WNDWS on the T-bar panel. The Window palette should appear.
2 Press the soft key that corresponds to the type of window you want to turn on, CPW
(Circular Power Window), LPW (Linear Power Window), PPW (Polygonal Power Window),
or PCW (PowerCurve window). The appropriate window controls should appear with an
orange highlight.
3 Press the MATTE/MASK soft key to toggle among turning the window on, turning Mask
on, and turning the window off.
To reposition a window using the Pan and Tilt knobs:
1 Press the unlabeled soft key at the bottom-right of the T-bar panel to toggle between
the current knob mappings on the T-bar panel, and the PAN and TILT mappings.
2 Use the Pan and Tilt knobs to adjust the window’s position.
To reposition a window using the fourth trackball:
1 If necessary, press WNDWS on the T-bar panel to open the Window palette.
2 Press ADJ WNDW, above the fourth trackball on the Center panel.
3 Use the fourth trackball to reposition the window.
4 When you’re finished, press ADJ WNDW again to exit adjust window mode.
To alter a window’s Zoom, Aspect, or Rotation:
Use the ZOOM, ASPECT, and ROTATE knobs on the T-bar panel.
To alter a window’s softness, do one of the following:
For Circular and Linear windows: use the SOFTNESS knob on the T-bar panel.
For Polygonal and PowerCurve windows: press the unlabeled soft key at the bottom-
right of the T-bar panel to toggle between the current knob mappings, and the PAN,
TILT, INSIDE SOFT and OUTSIDE SOFT knob mappings.
To invert a window:
Press the INVERT soft key on the T-bar panel.
808
Motion Tracking Windows Part 6 – 46
Motion Tracking Windows
While Power Windows can be manually keyframed to follow a moving subject you want to
isolate, this chapter shows how you can use the powerful cloud and point-based motion
tracking controls in DaVinci Resolve to make Power Windows follow along with the motion
ofsubjects and the camera in the fastest, easiest way possible. Then, numerous techniques are
presented for dealing with complicated tracking scenarios and common problems that arise for
subjects that are difficult to track.
Motion Tracking Windows 809
Simple Tracking Using the Tracker Menu 809
Tracking Windows When You’ll BeExporting Media With Handles 811
Simple Ways of Working With Existing Tracking Data 811
Tips For Better Tracking 811
Tracking One Frame at a Time 811
Copying and Pasting Tracking 812
Tracker Palette Controls in More Detail 812
Controls in the Window Tracker Palette 812
Cloud Tracker Workflows 817
Using Interactive Mode to Manually Choose Tracking Features 817
Dealing With Occlusions When Tracking 820
Point Tracker Workflows 823
Tracking a Window Using the Point Tracker 823
Removing Trackers 825
Using Frame Mode to Oset Track 826
Rotoscoping Window Shapes After Tracking 828
Rotoscoping Controls 829
Keyframing in Frame Mode 829
A Rotoscoping Workflow 830
Viewing a Window’s Motion Path 833
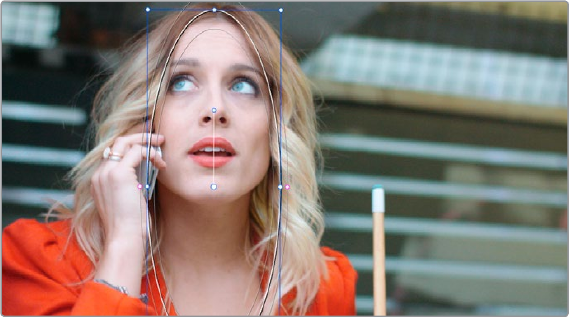
809
Motion Tracking Windows Part 6 – 46
Motion Tracking Windows
The Tracker palette has three modes, available from the Palette menu.
In Window mode, the tracking controls let you match the motion of a window to that of a
moving feature in the frame.
In Stabilizer mode, the same underlying technology is used to smooth or stabilize the
motion within the entireframe.
In FX mode a Point Tracker can be used to animate ResolveFX or OFX plug-ins with
positioning controls (For more information about the FX and Stabilizer modes, see
Chapter 57, ”ResolveFX” and Chapter 58, “Sizing and Image Stabilization.”
DaVinci Resolve has an incredibly simple, yet powerful, 3D cloud tracker that allows you to track
quickly and accurately any Power Window (Circular, Linear, Polygonal, PowerCurve or Gradient)
to follow any moving feature. This avoids the need to use dynamic keyframes to manually
animate a window’s position.
In particular, you can use the tracker to match a window’s position, size, rotation, and its pitch
and yaw in 3D space to either foreground or background elements that move within the frame.
A Power Window tracking a woman’s face; the motion path
resulting from the track is shown as the wiggly white line
Simple Tracking Using the Tracker Menu
The simplest way to track a feature using a Power Window is to use the commands found in the
Playback menu. These commands include:
Track Forward (Command-T): Tracks a window to a feature from the current position of
the playhead forward, ending at the last frame of a clip.
Track Reverse (Option-T): Tracks a window to a feature from the current position of the
playhead backward, ending at the first frame of a clip.
Track Stop (Command-Option-T): Interrupts any track. This is useful for letting
you cancel a long track that goes wrong (the Stop button of a control panel stops
tracking as well).
Most window tracks are easy to accomplish using these three commands.
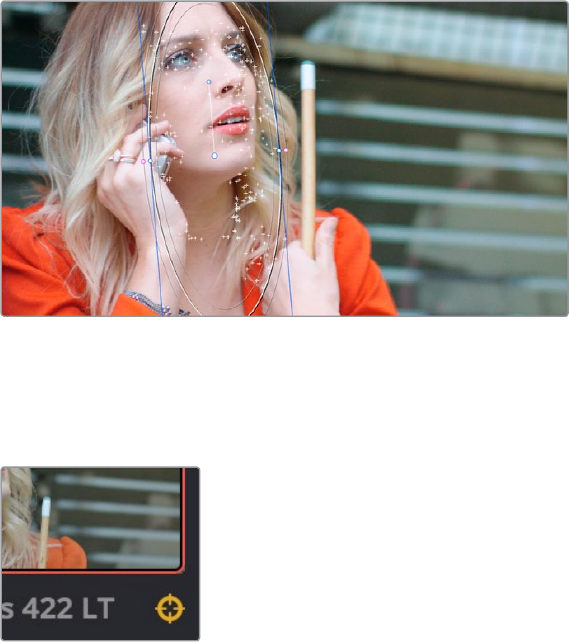
810
Motion Tracking Windows Part 6 – 46
To track any Power Window to match a moving feature within the frame:
1 Move the playhead to the frame of the current shot where you want to begin (you don’t
have to start tracking at the first frame of a shot).
2 Turn on any window, and adjust it to surround the feature you want to track.
Typically, you’ll have done this anyway, for example, framing someone’s moving face
with a Circular Window to lighten their highlights.
3 To initiate tracking, do one of the following:
Choose Color > Track Forward (press T)
Choose Color >Track Reverse (Option-T)
On the T-bar panel of the DaVinci control panel, press OBJECT TRACK MODE, and
then press either the TRACK FWD or TRACK REV soft keys on the Center panel.
DaVinci Resolve automatically opens the Viewer page, places a series of tracking points within
the window you’ve created, and performs the track from the current frame; forward to the last
frame or backward to the first frame.
DaVinci Resolve analyzes a cloud of tracking points that follow the vectors of every trackable
group of pixels within the window you’ve created, and the results are fast and accurate. After
tracking, the window you’ve placed automatically moves, resizes, rotates, and skews to match
the motion of the feature you’re tracking.
Object tracking in progress. Tracking points are automatically
placed over trackable features of the image
Once a clip has tracking data applied to one of its windows, a small tracking icon appears within
that clip’s icon in the Thumbnail timeline.
A tracking icon in the top left corner of the Thumbnail
timeline shows that clip has been tracked
If the track you’ve performed is unsuitable, you can reposition the window to cover a different
area of the subject you’re trying to track, and initiate tracking again. New tracking data
overwrites any previous tracking data applied to that window.
811
Motion Tracking Windows Part 6 – 46
Once you’re satisfied with your track, you can continue to resize, reposition, or reshape the
window being tracked. Tracking data is separate from the window transform parameters (which
can be keyframed), so changes you make to a window offset it from the originally tracked path.
Tracking Windows When You’ll
BeExporting Media With Handles
When you track windows to match moving features in a clip, the windows are only transformed
on frames with tracking data. In Round Trip workflows where you add handles to the graded
clips you render for editorial flexibility in the footage you deliver, you need to make sure that
you track all windows from the beginning to the end of these handles to make sure that, if an
editor actually trims any of the clips you give them to use the handles, all windows are doing
what they should.
An easy way to do this is to choose View > Show Current Clips With Handles to display each
clip you select in the Timeline with handles defined by the “Default handles length” setting in
the Editing panel of the User Preferences. Make sure that the “Default handles length” is equal
to the handles you export using the “Add X Frame handles” option in the Render Settings list of
the Deliver page. With each clip’s handles made visible in this way, you can easily track
windows along every frame you’ll be rendering.
Simple Ways of Working With Existing Tracking Data
If there’s a portion of a shot that you haven’t tracked (for example, you started tracking at a later
frame, or you ended tracking before the end of the shot), then the window you’re tracking
remains wherever it was at the first or last frame that was tracked. If you want to fill in these
gaps, you can always move the playhead to the first or last frame that was tracked, and then
use the Track Backward or Track Forward command to track the rest of the frames in that shot.
Tips For Better Tracking
In situations where a feature changes shape in such a way as to confuse the tracker, you can try
tracking a smaller part of the feature by using a smaller window. Once you’ve achieved a
successful track, you can resize the window as necessary, and it will have no effect on the track
that’s already been made.
Also, if you’re tracking a feature that moves behind something onscreen and disappears for the
rest of the shot, there’s an easy way to avoid having an awkward window sitting in the middle of
the scene. You can use dynamic keyframes to animate the Key Output Gain parameter (in the
Key tab of the Color page) to fade from the correction’s full strength of 1.0 down to 0, the value
at which the correction disappears, along with the window itself.
Tracking One Frame at a Time
You can click the “track one frame forward” or “track one frame backward” buttons in the
Tracker palette to track a moving feature one frame at a time, making it easier to make
adjustments to follow a difficult track when you’ve set tracking to Frame mode (by clicking the
Frame button).
In Frame mode, you can keyframe window transformations to more faithfully conform to
troublesome motion as you’re moving one frame at a time through the track; manual changes to
a window’s position will be keyframed to create frame-specific transformations, rather than
used to offset the entire tracked motion path as in Clip mode. When you add multiple keyframes
in the Tracker graph, animation will be automatically interpolated from keyframe to keyframe.
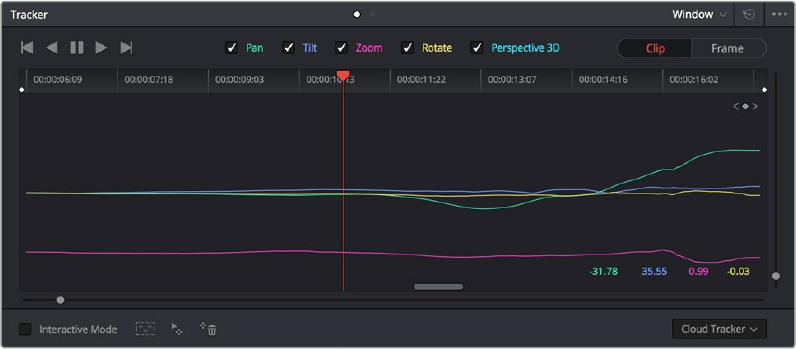
812
Motion Tracking Windows Part 6 – 46
Copying and Pasting Tracking
There will be plenty of times you’ll apply multiple windows to a single moving subject, such as a
car, when you can use a single motion track for all the windows. Commands in the Option menu
let you copy and paste track data from one window to another within the same node, saving
time when you want several windows tracking together as one.
To copy track data from one window to another:
1 Open the Window palette, then select a window that has tracking applied to it
(indicated by a tracking badge in the corner of the shape icon), and choose Copy Track
Data from the Option pop-up.
2 Select another window, and choose Paste Track Data from the Option pop-up. Once
you’ve copied track data from one window, you can paste it to as many other windows
as you like.
You can also copy tracking from the FX mode of the Tracker palette and paste it to a Window, in
case you want to use the same tracking data for both an effect and a window.
To copy track data from an FX track to a Window:
1 Open the Tracker palette, choose the FX mode that contains the tracking data you
want to copy, and choose Copy Track Data from the Option pop-up.
2 Open the Window palette, select a window, and choose Paste Track Data from the
Option pop-up. Once you’ve copied track data from one window, you can paste it to as
many other windows as you like.
Tracker Palette Controls in More Detail
You can easily combine object tracking and keyframing to animate windows. For example, you’ll
typically use object tracking to make a window follow the position and orientation of a moving
feature, but you can add dynamic marks to the window track of the correction in the Color page
with which to alter its size and shape to better conform to a feature’s changing form.
Controls in the Window Tracker Palette
Occasionally, you’ll run into a shot that doesn’t quite track well enough using the Tracker menu’s
simple controls. In these cases, the Viewer page provides the complete set of object tracking
controls that can be used to modify tracking operations in different situations.
The Tracker palette
The Object Tracking Controls are divided into seven groups.
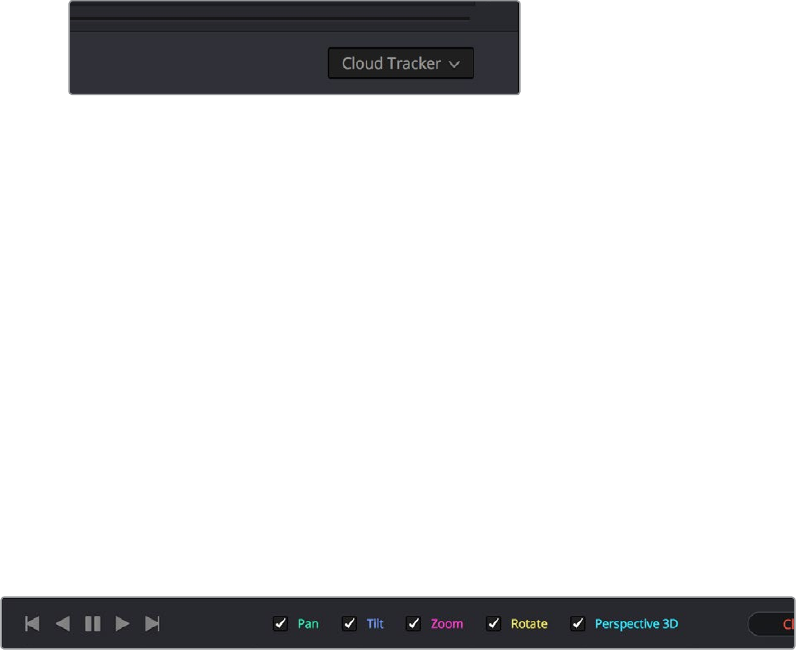
813
Motion Tracking Windows Part 6 – 46
Tracker Palette Modes
The Tracker palette’s Option pop-up menu lets you choose between Window mode (for
matching a window to the motion of a feature in the frame), and Stabilizer mode (for subduing
unwanted camera motion. For more information on Stabilizer mode, see Chapter 58, “Sizing and
Image Stabilization.”
Types of Tracking
A pop-up menu below the Tracker graph lets you choose whether to use the Cloud Tracker or
the Point Tracker.
The tracker type pop-up
There are two options:
The Cloud Tracker automatically analyzes all parts of the image for trackable points,
and uses these to automatically figure out the motion in the shot that you want to use to
move a Power Window or stabilize a shot. This tracker type is great for quickly tracking
a window to match the movement of almost any feature, with a minimum of work.
The Point Tracker lets you create one or more tracker crosshairs that you can manually
position in order to track specific features in the shot. The more crosshairs you create
and position, the more accurate the track can be. The Point Tracker is incredibly useful
in situations where you need to follow the motion of a very specific feature in the
frame. It can also be useful in cases where you want to stabilize a shot that has many
subjects moving in different directions, and it’s difficult to obtain a good result with the
Cloud Tracker.
Object Tracking
The Object Tracking controls provide the most basic tracking functions, some of which are
mirrored within the Tracker menu.
Choose which type of transform you want to track before tracking
A series of five checkboxes let you turn on and off which transforms you’d like motion tracking
to apply automatically to the window. These checkboxes must be selected before you perform
a track in order to restrict the transforms that are used.
Pan and Tilt: Enables tracking of horizontal and vertical position, when you want to
transform a window to follow the location of a tracked subject.
Zoom: Enables tracking of size, when you want to transform a window to resize to follow
a tracked subject.
Rotate: Enables tracking of orientation, when you want to transform a window to rotate
with a tracked subject.
Perspective 3D: Enables tracking of pitch and yaw in 3D space, when you want a
window to skew to follow the orientation of a tracked subject within the scene. Good
when you want the window to “stick” to a surface.
814
Motion Tracking Windows Part 6 – 46
After you’ve defined the transforms you want to use for the track, the analyze controls let you
proceed with the analysis of the subject being tracked.
Track One Frame Reverse button: Motion tracks a single frame in reverse. Useful for
slow tracking of difficult subjects that may require frequent correction.
Track Reverse button: Initiates tracking from the current frame backward, ending at
the first frame of the clip. Good for tracking backwards when your best starting point is
somewhere within the middle of the shot.
Pause button: Stops tracking (if you’re fast enough to click this button before tracking is
finished).
Track Forward button: Initiates tracking from the current frame forward, ending at the
last frame of the clip.
Track One Frame Forward button: Motion tracks a single frame forward. Useful for
slow tracking of difficult subjects that may require frequent correction.
Clip/Frame Controls
Two buttons let you set how manual adjustments to the position of tracked windows affect the
overall track.
Selecting clip or frame to apply adjustments
Clip: The default mode, in which changes you make to the position of a window are
globally applied to the entire track. For example, if you track a feature, and then move
the window, the window moves along a motion path that’s consistently offset from the
original track for the duration of the clip. Use this mode if you’re happy with the track,
but you want to modify the window’s overall shape and position relative to the motion
path it’s following.
Frame: In this mode, changes you make to the position or shape of a window create
a keyframe at the frame at the position of the playhead. Multiple keyframes are
interpolated to create animation with which you can manually transform a window to
solve a variety of problems. This mode is useful for rotoscoping the shape and position
of windows to match a subject that’s tough to automatically track. Frame mode is also
useful for making corrections to individual frames that were badly tracked, for animating
windows to go all the way out of frame along with a subject, or for making manual,
frame-by-frame adjustments to window position to cover untrackable sections.
NOTE: Once tracking or stabilization has been done, disabling these checkboxes
does nothing to alter the result. To make changes, you need to enable or disable the
necessary checkboxes first, and then reanalyze the clip.
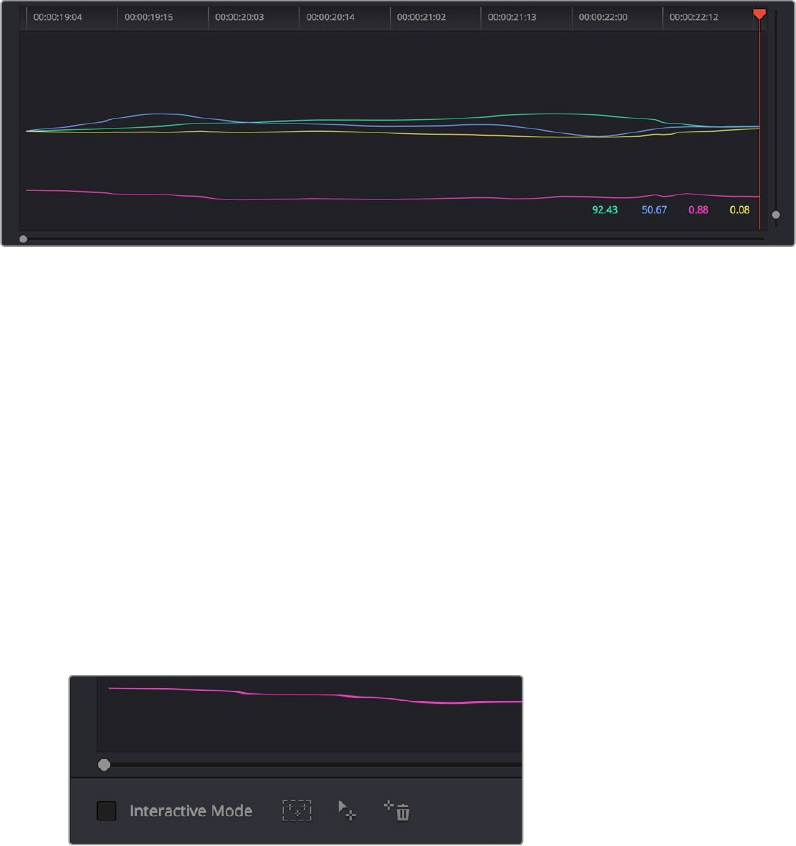
815
Motion Tracking Windows Part 6 – 46
The Tracker Graph
The Tracker Graph provides a visual display of the tracking data that’s being analyzed. Each of
the transform controls that can be tracked has an individual curve, which lets you evaluate each
tracked parameter on its own, and each curve is color-coded to match the corresponding label
of the tracking transforms listed above.
Add keyframe and Interpolate between
A vertical slider to the right of the Tracker graph lets you scale the height of the curve data
within to make it easier to see it all within the graph. Above the Tracker graph, a Timeline ruler
contains a playhead that’s locked to the playheads in the Viewer and Keyframe Editor.
You can draw a bounding box in the Tracker graph with which to select a portion of one or more
curves to delete sections of low-quality tracking data using the Clear Selected Keyframes
command found in the Palette Options menu. To eliminate the current bounding box from the
Tracker graph, click once anywhere within the graph.
Interactive Mode Controls
The Interactive controls, at the bottom-left of the Tracker palette, let you make manual changes
to the automatically generated tracking point cloud that DaVinci Resolve creates when you’re
tracking with the Cloud Tracker, so you can try different ways of obtaining better tracking results
in challenging situations.
Interactive mode controls
Interactive Mode checkbox: Turns the Interactive tracking mode on and off. When you
enter Interactive mode, you can manually alter the point cloud that DaVinci Resolve
uses to track the feature within the current window. You’ll then make your track while in
Interactive mode.
Insert: Lets you add tracking points to whatever trackable features exist within
a bounding box that you’ve drawn in the Viewer. Inserted tracking points are
automatically placed based on trackable pixels in the image.

816
Motion Tracking Windows Part 6 – 46
Set Point: Lets you use the cursor (using the DaVinci Resolve control panel), to
manually place individual tracking points, one by one, with which to track a feature.
If there is no trackable pixel group at the coordinates where you placed the cursor, a
tracking point will be placed at the nearest trackable pixel group.
You must place at least two tracking points at different pixel groups to track rotation,
and at least three to track zoom.
Delete: Eliminates all tracking points within a bounding box that you’ve drawn in
the Viewer.
For more information, see “Using the Interactive Tracking Controls” later in this section.
Point Tracker Controls
If you’re using the Point Tracker, then the Interactive Mode controls disappear, replaced by the
two controls of the Point Tracker.
Point Tracker controls
Add Tracker: Click to create a new tracker that’s automatically positioned in the center
of the frame. Once created, you can drag it using the pointer to line up with the feature
you want to track. You can create as many trackers as you like. Multiple trackers are all
tracked at once.
Delete Tracker: Select any tracker (selected trackers are red, de-selected trackers are
blue), and click this button to remove it.
Additional Commands in the Tracker Palette Options Menu
There are some additional commands located in the Palette Options pop-up menu.
Reset Track Data on Active Window: Lets you delete the tracking data corresponding
to the currently selected window.
Clear Selected Track Data: When you drag a bounding box over parts of one or more
curves in the Tracker graph, this command lets you delete that part of the graph. This is
useful when you want to eliminate sections of low-quality track data. Portions of curves
that are cleared in this way have linear interpolation automatically applied to them,
similar to if you used the Keyframes Interpolation controls.
Delete Keyframe: Deletes tracker graph keyframes at the current position of
the playhead.
Clear All Tracking Points: Clears the tracking points in the Power Window at the frame
you are on.
Show Track: Turn this checkbox on to show the motion path produced by the tracking
you’ve done.
Copy Track Data: Lets you copy track data from the currently selected window.
Windows can be selected directly in the Viewer while the Tracker palette is open.
Paste Track Data: Pastes copied track data to the currently selected window. Windows
can be selected directly in the Viewer while the Tracker palette is open.
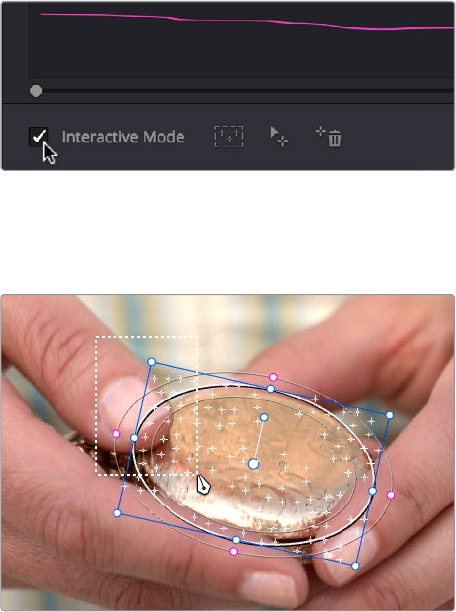
817
Motion Tracking Windows Part 6 – 46
Cloud Tracker Workflows
The next few examples illustrate how to use the Tracker palette’s controls in practical situations.
In many circumstances, objects passing in front of a tracked subject, known as “occlusions,” can
cause problems. While the tracker in DaVinci Resolve is highly occlusion-resistant, the following
sections show a variety of techniques you can use when an occlusion prevents you from
getting a useful track.
Using Interactive Mode to Manually
Choose Tracking Features
Interactive Mode lets you manually remove or add tracking points to improve tracking
performance in situations where the automatic image analysis in DaVinci Resolve provides
unsatisfactory results.
For example, you can delete tracking points within a window that correspond to overlapping
features you don’t want to track. Suppose a car that you’re tracking drives by a sign that partially
obscures the car. Without intervention, the PowerCurve that’s isolating the car will deform
improperly when the car moves along and then away from the sign.
Using Interactive Mode, you can delete the tracking points that will overlap the sign you don’t
want to track, improving the result.
To eliminate specific, unwanted tracking points from a track:
1 Open the Tracker palette.
2 Turn on the Interactive Mode checkbox.
Selecting Interactive Mode
3 In the Viewer, drag a box around the tracking points you want to eliminate within the
window, and click the Delete button. The points within the selection area are deleted.
Dragging a box around tracking points that need to be deleted
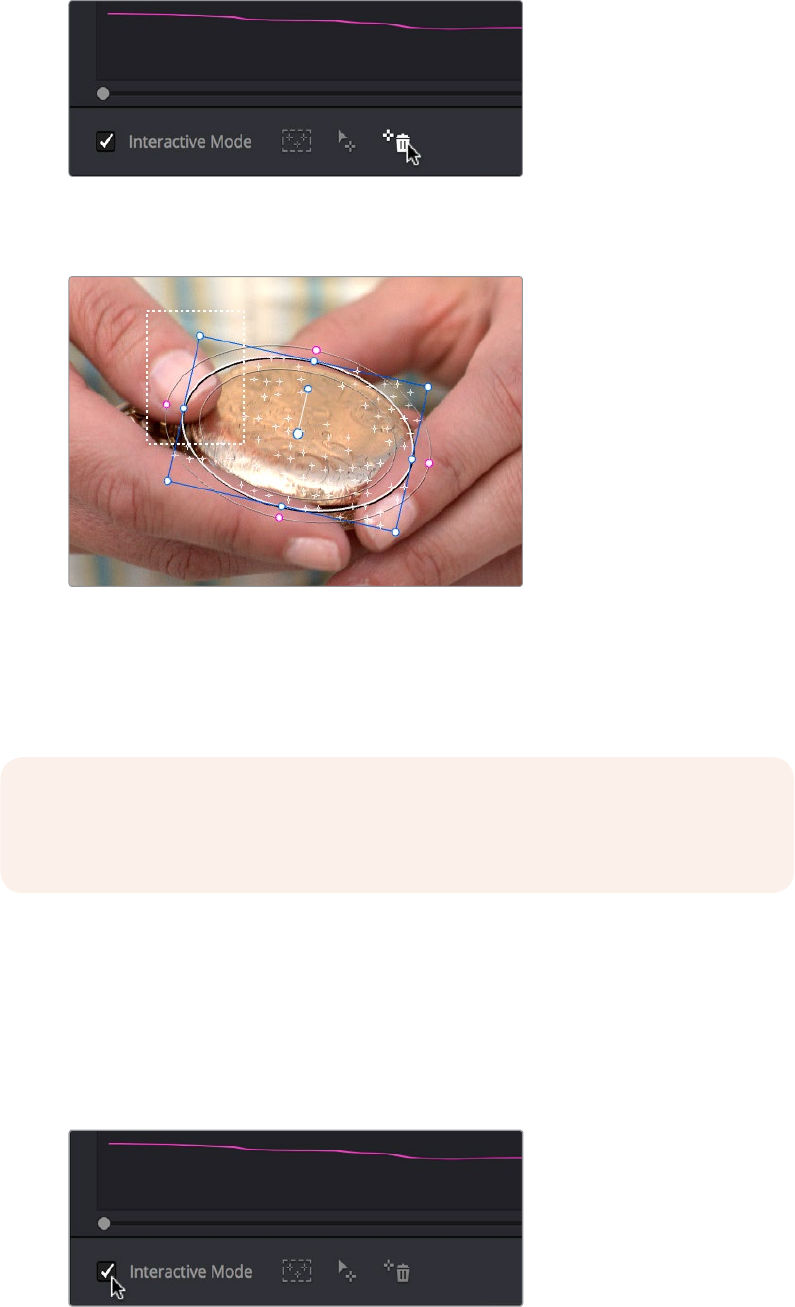
818
Motion Tracking Windows Part 6 – 46
4 Click the Delete button.
Deleting tracking points
The points within the selection area are deleted.
Remaining tracking points ready to be used
5 While Interactive Mode is still on, click Track Forward or Track Reverse to track the
subject using the remaining tracking points.
6 When you’re finished tracking, click the Exit Interactive button.
In another interactive tracking example, you may sometimes run into situations where you want
to eliminate all automatically placed tracking points altogether, placing your own in specific
regions of the image.
To eliminate automatic tracking points, adding your own instead:
1 Open the Tracker palette.
2 Turn on the Interactive Mode checkbox.
ISelecting Interactive Mode
NOTE: If you delete tracking points and then disable Interactive Mode without
performing a new track first, DaVinci Resolve goes back to using automatically placed
tracking points.
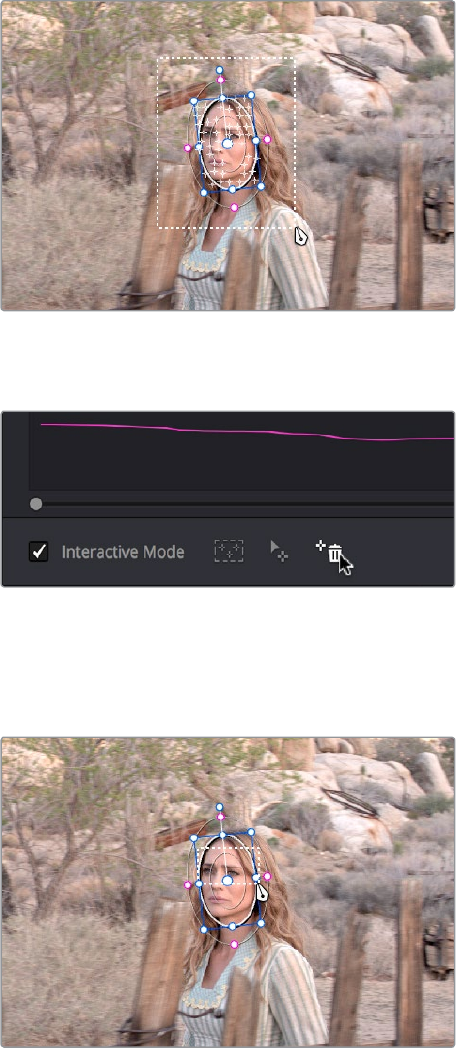
819
Motion Tracking Windows Part 6 – 46
3 In the Viewer, drag a box around all the tracking points in the window, and click the
Delete button to eliminate all tracking points from the image.
Selection box surrounding all tracking points
4 Click the Delete button to eliminate all tracking points from the image.
Deleting tracking points
5 Drag a box around the specific area where you’d like to add new tracking points. In this
case, you only want to track the top half of the woman’s face, since the bottom half is
cut off by the fence posts.
Placing the selection box over the top of the window
6 Now, click the Insert Track Points button.
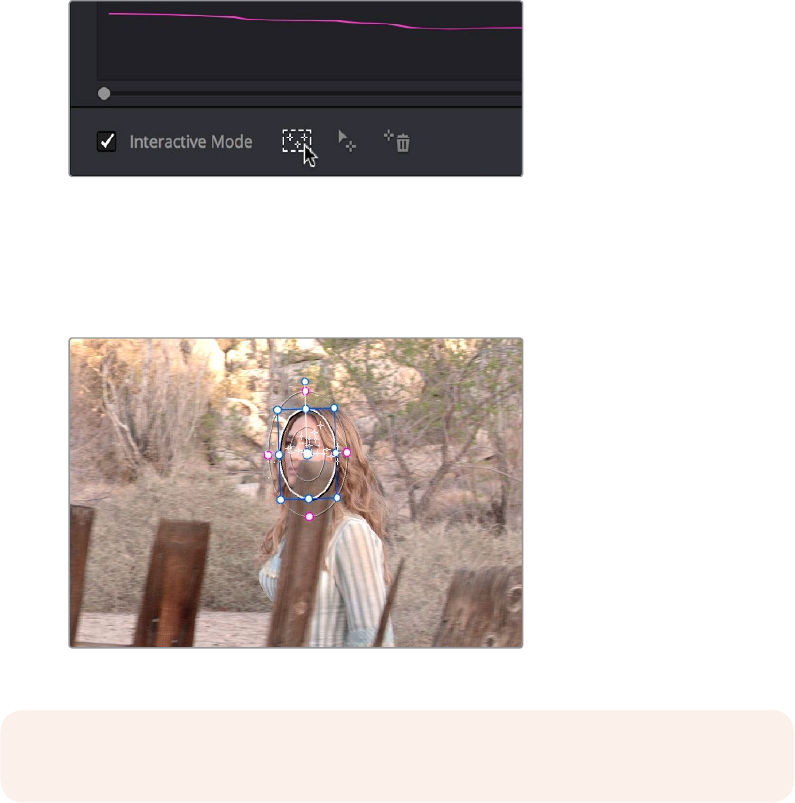
820
Motion Tracking Windows Part 6 – 46
The Insert button of Interactive Mode automatically adds tracking
points within the current bounding box.
New tracking points are automatically added to whichever features are appropriate for tracking
within the box you’ve drawn.
Tracking with the remaining tracking points
While in Interactive Object Tracking mode you may also choose to add tracking points
one by one.
To add a single tracking point:
1 Open the Tracker palette.
2 Turn on the Interactive Mode checkbox.
3 Using the DaVinci control panel, press the CURSOR button above the fourth trackball
of the Center panel, and move the onscreen cursor to the detail of the image that you
want to add a tracking point to.
4 Click the Set Point button, within the Interactive Mode controls of the Tracker palette.
This adds a tracking point corresponding to the feature of the image that you clicked,
and you’re ready to start tracking.
Dealing With Occlusions When Tracking
Sometimes you’ll find that you need to deal with a gap in the useful tracking data. For example,
objects in the frame that pass in front of the feature you’re trying to track cause gaps in the
tracking information for a clip.
NOTE: If no appropriate tracking features can be found, no points will be added.
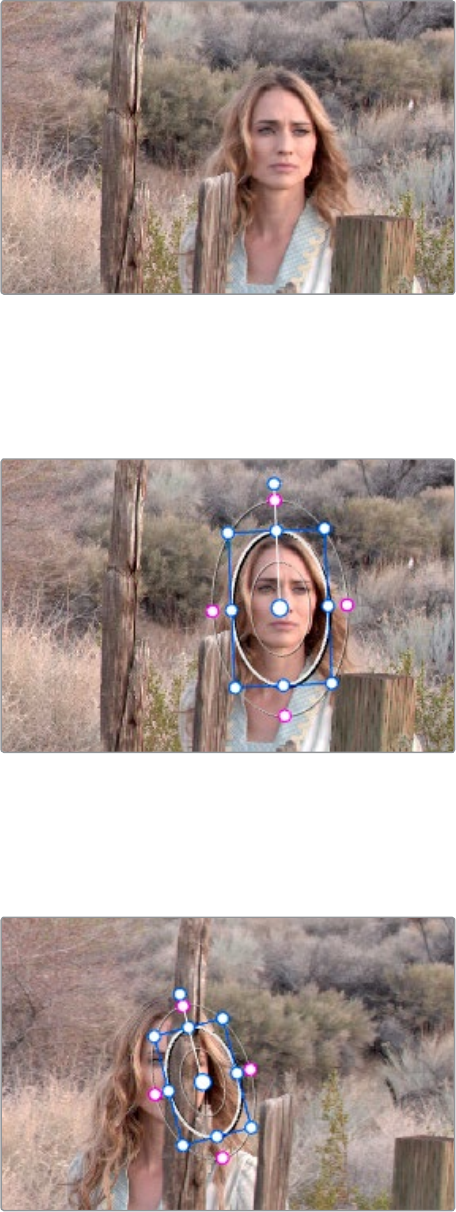
821
Motion Tracking Windows Part 6 – 46
In situations where a subject being tracked becomes totally occluded by another object in the
frame, there’s an easy method of interpolating to cover holes in the available tracking data. In
the following example, the woman walks behind another fence post, this time one that’s taller
then she is. The window tracking her face will become completely lost at this point, but
interpolation will help to salvage this shot.
Original clip
Interpolating between two sets of tracking data to track past an occlusion:
1 Move the playhead to the first trackable frame of the moving feature you’re correcting,
and create a Power Window that surrounds it.
Adding the Power Window
2 Use Track Forward to track the feature as far as you can before it becomes obscured
behind something else in the frame.
3 When the Power Window stops tracking the feature reliably, stop the track.
The Power Window is obscured by the post
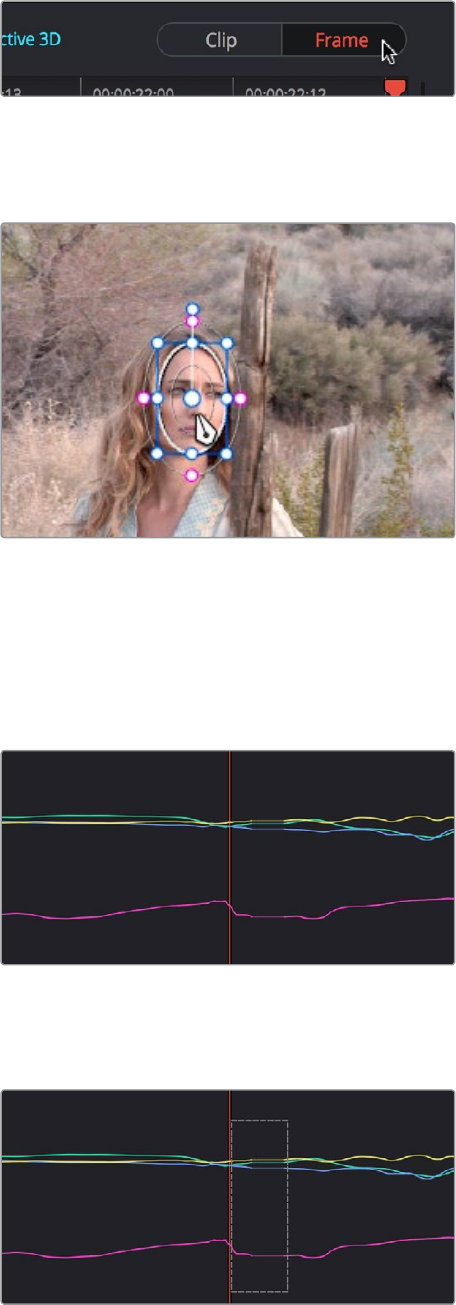
822
Motion Tracking Windows Part 6 – 46
4 Open the Tracker palette.
5 Click the Frame radio button to put the Tracker controls into frame-by-frame adjustment
mode. This is an important step.
Selecting Frame mode
6 Move the playhead to the frame where the feature you’re tracking reappears from
behind the occlusion, then drag the window so that it again overlaps the feature.
Moving the playhead and position the window
7 Use Track Forward to continue tracking the feature until the end of the clip. Alternately,
you could have started from the end of the clip and used Track Reverse to track the
feature as far as possible, if that’s easier.
Now that you’ve identified the gap in reliable tracking data for this clip, it’s time to set
up the interpolation.
Notice the gap in the tracking data where the window was behind the post
8 Drag a bounding box over the portion of the curves in the Tracker graph that fall
between the good tracking data at the beginning and end of the shot.
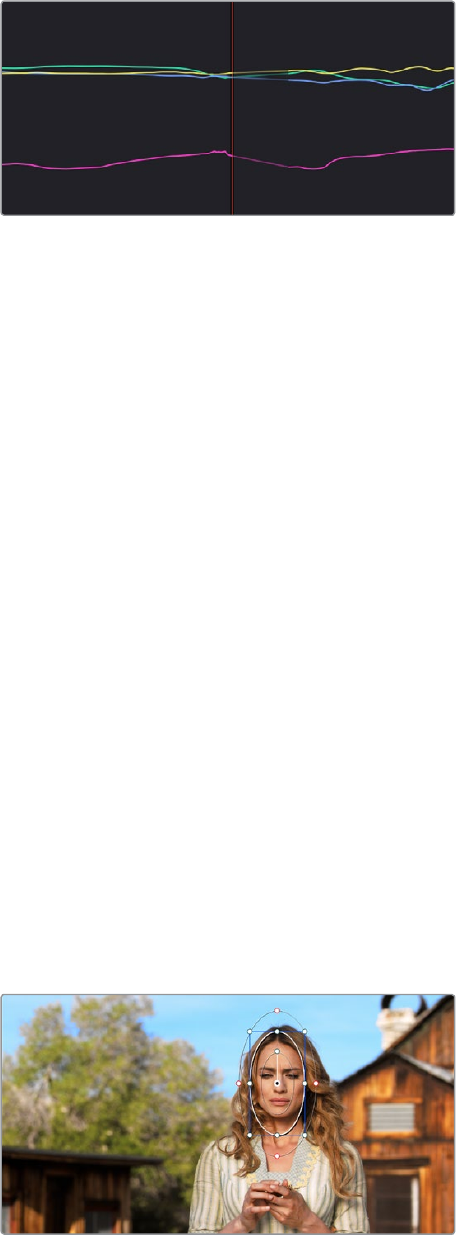
823
Motion Tracking Windows Part 6 – 46
9 Click the Tracker palette option pop-up menu, and choose Clear Selected Track Data.
The portions of curves that you selected are deleted, and have linear interpolation
automatically applied to them so that there’s no hole in the track data or the motion of
the window, which now moves smoothly from the last outgoing frame of reliable
tracking data to the first incoming frame of new reliable tracking data.
Point Tracker Workflows
As advanced as the Cloud Tracking that is the default in DaVinci Resolve is, there are times
when it may be simpler to track using good old-fashioned crosshairs. The Point Tracker,
introduced in DaVinci Resolve 12.5, makes it easy to track very specific features of a subject
with motion you need to follow. Unlike the Cloud Tracker, which automatically looks for all
trackable points within a region of the image that you identify using a window, the Point Tracker
lets you create one or more crosshairs that you must manually position to overlap with whatever
high-contrast features you want to track. This section covers the three main workflows you
need to know to use the Point Tracker.
Tracking a Window Using the Point Tracker
The following procedure describes, in a general way, how to use the Point Tracker to track a
moving subject and apply that motion to a Power Window.
1 Move the playhead to the frame of the current shot where you want to begin (you don’t
have to start tracking at the first frame of a shot, since you can always track backwards).
2 Turn on any window, and adjust it to surround the feature you want to track. Typically,
you’ll have done this anyway, for example, framing someone’s moving face with a
Circular Window to lighten their highlights. You want to make sure that the window
you want to apply the tracked motion to is selected before you begin tracking. In this
example, we’ll be tracking a circular window to follow the woman’s face.
Setting up to track a window over a woman’s face
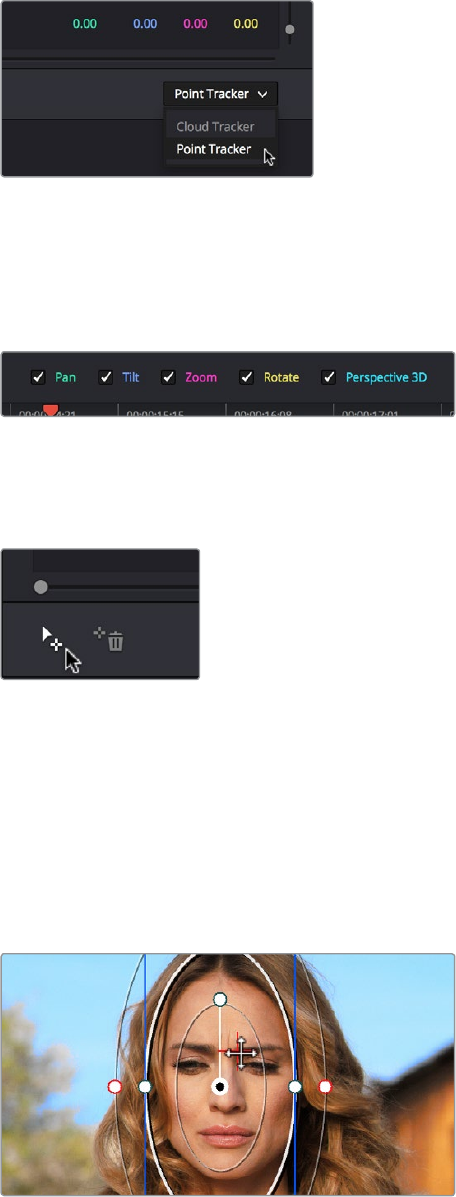
824
Motion Tracking Windows Part 6 – 46
3 Open the Tracker palette, and choose Point Tracker from the bottom right pop-up.
Choosing the Point Tracker
4 Before you start tracking, choose what types of motion you want to track and apply to
the window you’re working on. You can choose from among Pan, Tilt, Zoom, Rotate or
Perspective 3D. Which methods of transformation can be applied depend on how many
points you add to track.
Choosing what type of motion to analyze
5 Click the Add Tracker button. A new tracker crosshairs appears in the Viewer in the
center of the frame.
Clicking the Add Tracker button
6 Move the pointer directly over the tracker crosshairs, and when it turns into the move
cursor, click and drag to move the crosshairs to line up on top of the feature you want
to track. For the best results, this should be a high-contrast detail such as a corner, the
end of a line, a small shape like a pebble, or a jagged detail. Unlike other point trackers,
there is no inside or outside region to separately adjust, there’s only the one crosshairs
that you need to align. In this example, this first crosshairs is placed at the inside of her
stage left eyebrow (the corner of her eye would introduce too much jitter as the tracker
will pick up her blinks).
Lining up the tracker crosshairs with the feature you need to track
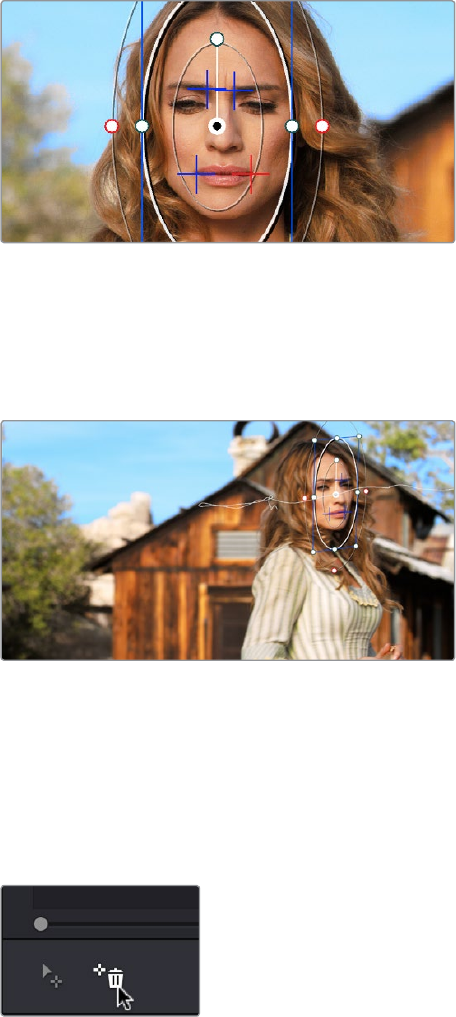
825
Motion Tracking Windows Part 6 – 46
7 If you want to improve the accuracy of your track, you can create more tracker
crosshairs and position them on top of other details within the subject you’re tracking.
For the best results, make sure that all crosshairs are placed onto details that are in the
same plane of motion. In other words, don’t put some crosshairs on a person’s face in
the foreground, and other crosshairs on a tree that’s far in the background, since both
these features will have very different vectors of motion. In this example, trackers are
placed at her inside eyebrows and at the corner of her lips.
Setting up four trackers to follow the corners of her eyebrows and mouth
8 When you’re done placing crosshairs, click the Track Forward or Track Backward
buttons to initiate tracking. The clip will be analyzed, and the Tracker graph will update
with the tracking data, and the window you had selected automatically moves to match
the motion of the feature you’re tracking.
The final track, accomplished with four point
trackers, with the track path turned on
Removing Trackers
If you find that a particular tracker is causing problems, you can remove it by selecting it in the
Viewer, and clicking the Delete Tracker button, before retracking the subject.
Clicking the Delete Tracker button
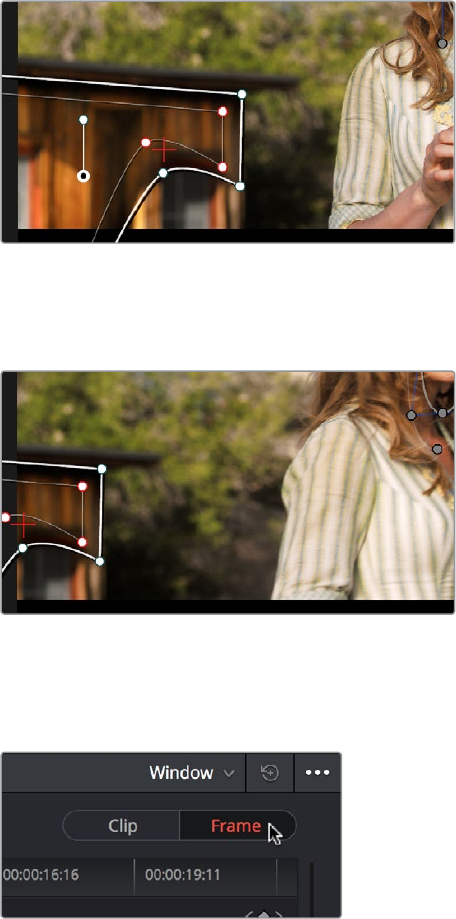
826
Motion Tracking Windows Part 6 – 46
Using Frame Mode to Offset Track
A common issue when point tracking is how to deal with occlusions and times when the tracked
feature moves off screen. In DaVinci Resolve, the solution is to use the Tracker Palette’s Frame
mode to move the tracker crosshairs onto another feature to track, while offsetting the resulting
motion so that it continues to follow the original motion path.
1 In this example, a point tracker crosshairs has been positioned at a corner of a window
of a building that’s being separately adjusted using a Power Window. The window is
being used because, as the woman turns to leave, she covers up most of the other
trackable outer edges of the building, which would ruin the track.
Setting up to track a building moving off screen
2 As the camera pans, the feature being tracked is about to go off frame, which is about
to ruin the track. As this happens, click the Stop Track button.
Stopping the track on the last good frame of the track, before the tracker goes off screen
3 Move the playhead back to the last good frame of tracking, and then click the Frame
button in the Tracker palette to go into Frame mode.
Turning on Frame mode, to prepare to offset the track
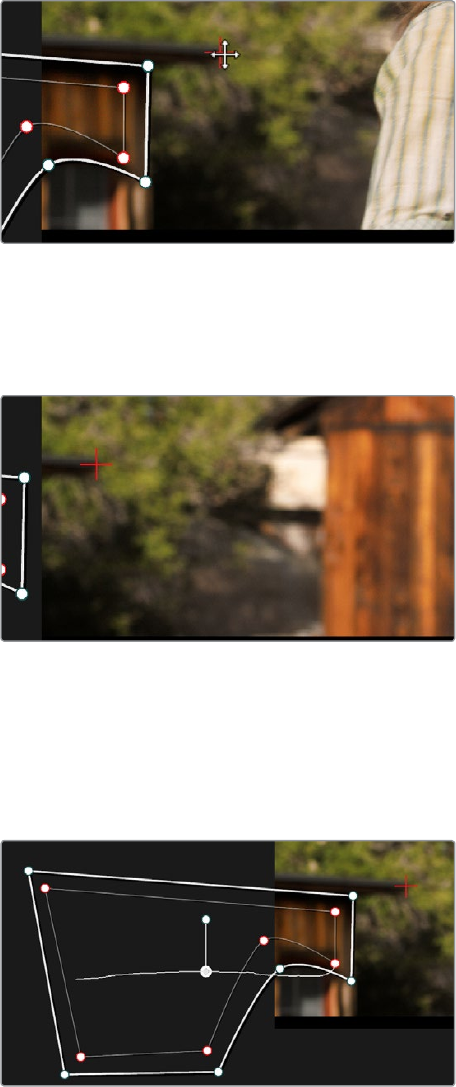
827
Motion Tracking Windows Part 6 – 46
4 In Frame mode, you can now drag the tracker to another feature of the building, this
time the outer edge of the roof, that will be better to follow as the building goes out of
frame to the left, since the Power Window will go out of frame before the right-most
corner of the building’s roof does.
Dragging the tracker to another feature that’s better to track
5 Now, click the Track Forward button again, and the crosshairs will begin tracking the
new feature, but the motion will be offset, so the movement of the Power Window
continues to follow the original motion path.
Tracking an offset feature lets the window go all the way off screen
6 If you turn on the track path (in the Tracker palette Option menu), and move the
playhead to the frame where you moved the tracker, you can see that the motion
before you moved the tracker and the motion after continues smoothly along the same
path, with no sudden breaks. When you’re finished, click the Clip button to get out of
Frame mode.
The tracker path before and after moving the tracker
crosshairs in Frame mode is smooth and continuous
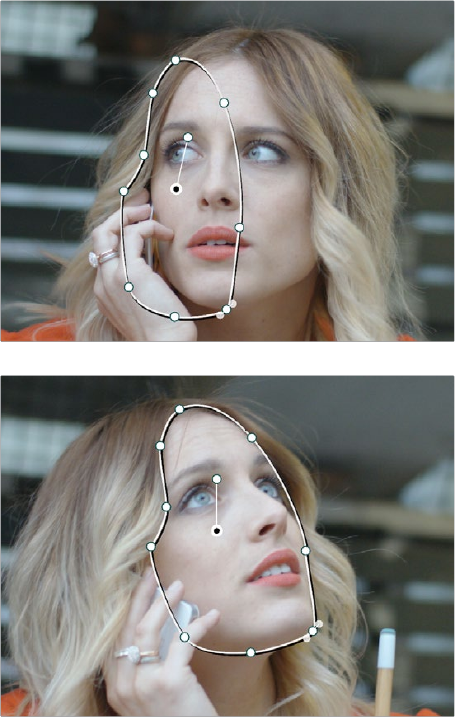
828
Motion Tracking Windows Part 6 – 46
Rotoscoping Window
Shapes After Tracking
While the DaVinci Resolve trackers are pretty miraculous when it comes to making a window
follow moving subjects, or elements within a moving scene, there will be plenty of times when
the final track isn’t quite perfect. For example, if you’re trying to isolate someone’s face with a
very specific window, and the person turns their head, then the resulting change of shape is
almost certainly going to require you to make animated adjustments to the window in order to
continue making such a specific isolation.
Before and after a window tracking a turning
head, the window doesn’t quite follow the
edge of the woman’s face as her head turns
Fortunately, the Tracker palette’s Frame mode makes it easy to animate shape changes you
make to windows in order to better follow a moving subject, a task often referred to as
rotoscoping. By following the motion of a moving subject, and making a series of automatically
keyframed adjustments to the window at every point the subject changes speed or direction,
you can make a window isolate a moving target with surprising precision.
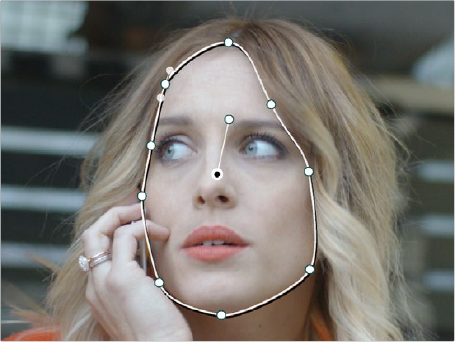
829
Motion Tracking Windows Part 6 – 46
Using Frame mode to rotoscope the window to better
follow the edges of her face and the contours of the jaw
Furthermore, you can also use Frame mode to repair imprecise tracks where the window is
veering off course because of quickly or irregularly moving features. In these cases, you have
the option of manually tracking the window in Frame mode to fit the trajectory of the feature,
frame by frame.
Lastly, you don’t even have to have performed a track to use the Tracker graph in Frame mode
to keyframe animated changes to a window. In fact, using the Tracker graph in Frame mode can
sometimes be more convenient than using the Keyframe Editor in Auto Keyframe mode,
depending on what you’re doing.
Rotoscoping Controls
The Clip/Frame buttons determine whether or not you’re rotoscoping a shape.
In Clip mode: Any changes you make to a window transform it over the entire duration
of that clip. In other words, you can track a window to a moving feature, and in Clip
mode any changes you make to the size, rotation, position, or shape of the window
occur equally from the beginning to the end of that clip.
In Frame mode: Changes you make to a window automatically create a keyframe at
the bottom of the ruler in the Tracker graph. Making two or more changes to a window
in Frame mode results in automatically interpolated animation from one keyframed
window transformation to the next.
You can freely move back and forth between Clip to Frame modes to make changes to a
window. Even if you’ve keyframed a window to change shape, you can turn on Clip mode and
make an overall change to the window, enlarging it for example, that results in the window
being equally enlarged at every keyframe.
Keyframing in Frame Mode
Once you’ve added keyframes to the Tracker palette, there are a number of ways you can
edit them.
Methods of working with keyframes in the Tracker graph:
To add a keyframe: Click the Add Keyframe button at the upper right-hand corner
of the Tracker graph. It looks similar to the keyframe buttons found in the Edit page
Inspector. This is useful for adding a keyframe to a frame where the window fits the
subject well, prior to moving forward a few frames and making an alteration to the
window to follow the subject that will generate another keyframe.
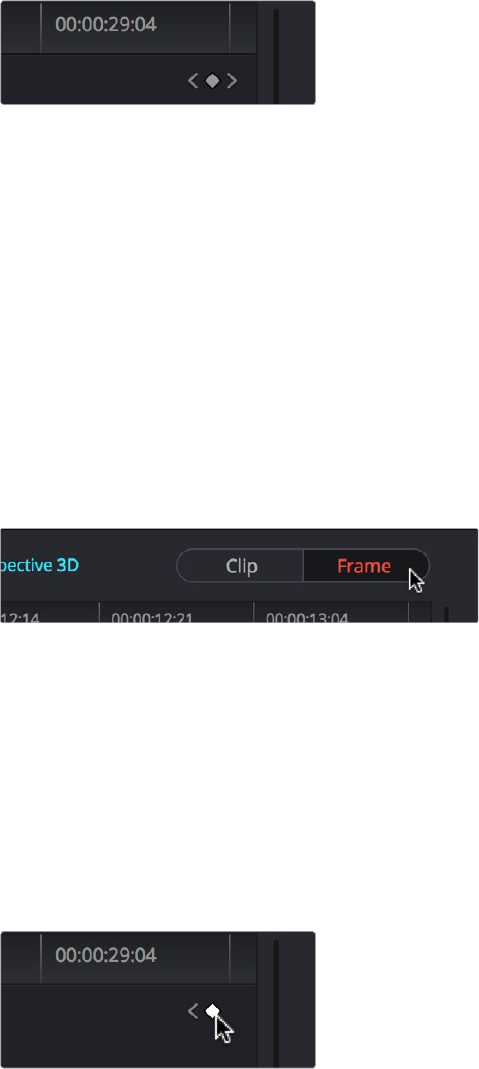
830
Motion Tracking Windows Part 6 – 46
To move the playhead from one keyframe to another: Click the Previous Keyframe
and Next Keyframe buttons at the upper right-hand corner of the Tracker graph. These
controls look similar to those found in the Edit page Inspector.
To delete a keyframe: With the playhead on the same frame as the keyframe you want
to delete, open the Tracker graph option menu, and choose Delete Keyframe.
The Previous Keyframe, New Keyframe, and Next
Keyframe buttons in the Tracker graph
A Rotoscoping Workflow
The following procedure demonstrates how to use a window to rotoscope an on-screen feature
that you want to isolate. In the process, it shows how to set up a window for rotoscoping using
the Tracker palette, and discusses some best practices for rotoscoping efficiently.
To rotoscope or manually track a window using automatic keyframing:
1 Create a window to isolate the feature you’re wanting to adjust, and use the tracker to
make it follow the motion of the subject. If the window doesn’t follow the contours of
the subject as precisely as you require, then you can begin manually keyframing its
shape on top of the tracking you’ve done to rotoscope the subject.
2 With the Tracker palette open, click Frame to change the tracking mode.
Clicking the Frame button to begin keyframing your shape
The best way to use Frame mode for tracking is to either start at the last successfully
tracked frame and work your way forward, or start at the first successfully tracked frame
and work your way backward. This takes the best advantage of the automatic
keyframing and interpolation between keyframes to animate the window you’re
transforming smoothly.
3 With the playhead at either the first or last frame where the window fits the subject
you’re isolating, you can either click the Add Keyframe button at the upper right-hand
corner of the Tracker graph, or wiggle any control point by a pixel or two, to add a
keyframe at that frame.
Clicking the Add Keyframe button
in the Tracker graph
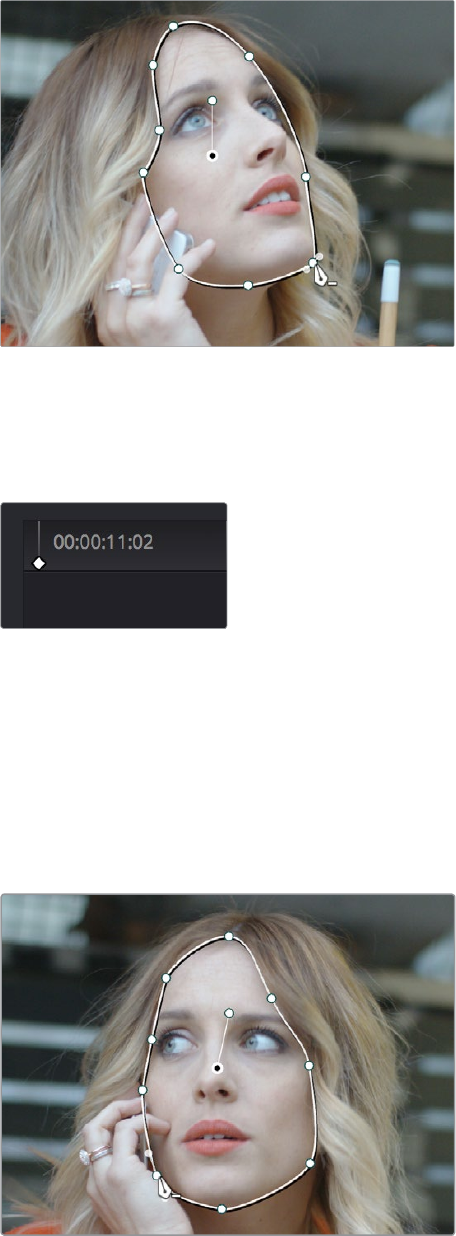
831
Motion Tracking Windows Part 6 – 46
Adding a keyframe at the last frame where the window follows the subject’s motion well
means that any future animated changes you make interpolate from this frame forward,
rather then from previous frames where there’s no need for alterations.
Adjusting the Window in Frame mode adds a keyframe
While you’re in Frame mode, the changes you make to the window automatically
generate a keyframe in the Tracker palette, which appears at the bottom of the Tracker
graph’s timeline.
Keyframes appear in the Tracker graph ruler
It’s frequently essential to add a keyframe at the last frame where a window conforms
well to the subject you’re trying to isolate, in order to limit window animation from that
frame to the next keyframed transformation, rather than accidentally animating from the
beginning of the clip, or from the next or previous keyframe in the Tracker graph.
4 Next, move the playhead to the next frame where the window requires adjustment to
better fit the moving subject, and adjust the position of the window, the control points
of the window, or both to isolate the subject as necessary.
Readjusting the Window in Frame mode to follow
the subject’s motion
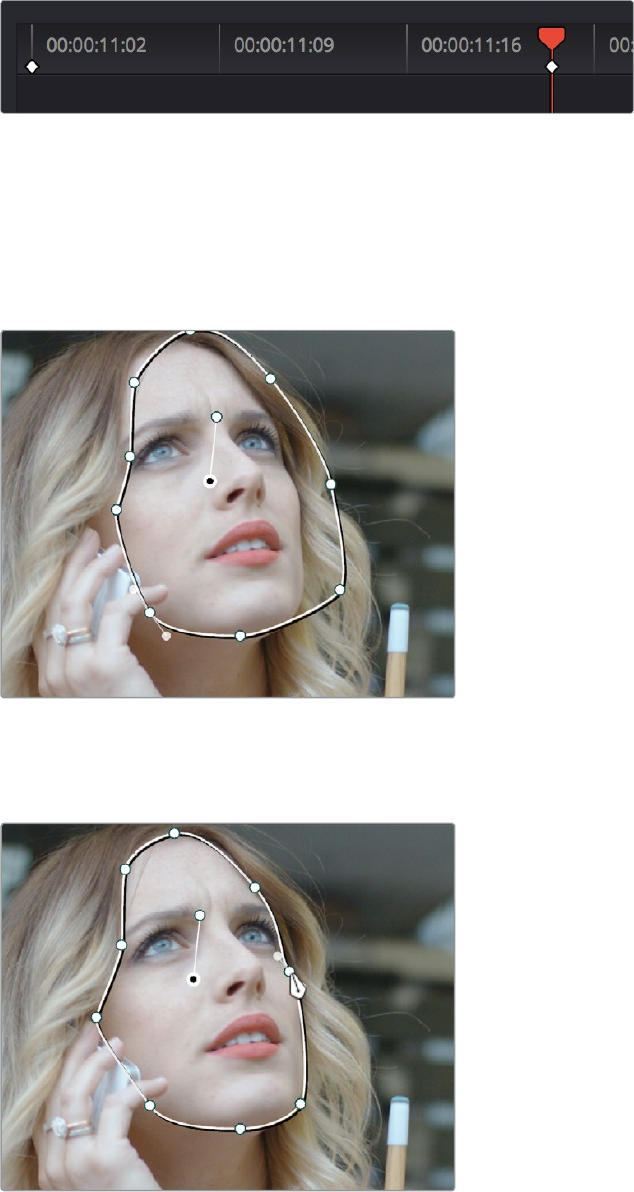
832
Motion Tracking Windows Part 6 – 46
This results in a second keyframe being placed in the ruler of the Tracker graph.
Two keyframes creating rotoscoped animation in
addition to any motion tracking that’s applied
5 With your first two keyframes placed, scrub the playhead back and forth between them
to evaluate how well the window’s animation is automatically interpolating to fit the
motion of the subject you’re isolating. If the window doesn’t follow the motion of your
subject well enough, move the playhead to the frame where the window divergence is
the most pronounced and make another adjustment to correct the shape.
A frame between the two keyframes you’ve
rotoscoped that needs further adjustment
This creates create another keyframe.
After adjusting the in-between frame

833
Motion Tracking Windows Part 6 – 46
6 When you’re finished making adjustments between your first two keyframes, move the
playhead farther along and add keyframes as necessary to make the window follow the
motion of your subject.
In general, look for the frames where your subject’s motion starts, stops, speeds up,
slows down, or changes direction. As you work, it’s good to try and add the fewest
number of keyframes you can to ensure smooth motion from one to another. Too many
keyframed adjustments made too close together for a smoothly moving subject risks
adding jerky motion if you’re not careful. On the other hand, if you have an erratically
moving subject, you may have to add more keyframes, possibly frame by frame, to
achieve the desired result.
7 When you’re finished rotoscoping the window, be sure to click the Clip button to switch
back to Clip mode, so you can trim the Window’s shape across every keyframe you’ve
just created, if necessary. This will also prevent you from accidentally adding more
keyframes if you select other shapes.
This technique requires a bit more work then simply using the Tracker, but it’ll let you
quickly adjust the animation of a window to more tightly conform to a moving subject
when you need an adjustment to be specific to that subject alone. You can also use this
technique to reposition specific motion path points in the middle of an otherwise
successful track to make them fit better, or to add keyframes to the beginning or end of
a track when the subject moves offscreen but the window does not.
Viewing a Window’s Motion Path
You can turn on the motion path of the window you’re tracking by choosing Show Motion Track
from the Tracker palette’s Option menu, or by pressing the SHOW TRACK soft key on the
Center panel of the DaVinci control panel when you’re in OBJECT TRACK MODE.
TIP: If you’re isolating a subject with a complex shape that moves quite a lot,
you might consider using multiple simple overlapping shapes to track and
rotoscope it, rather then a single complicated one, to make the task easier.
835
Using the Gallery Part 6 – 47
Using the Gallery
The Gallery provides a way to save, browse, and use saved still frames from different clips in a
program. Each project is saved with its own individual set of stills, and each still you save
consists of a DPX image of the saved frame, and the grade metadata. You can use saved stills
for reference when matching one clip to another, or you can use them to copy grades to other
clips, or other timelines.
There are two ways to work with the contents of the Gallery. The Color page has a small
Gallery, to the left of the Viewer, that provides quick access to saved stills and grades as you
work. The Gallery window, which can be opened via a button at the bottom of the Gallery,
provides a dedicated interface for organizing your grades, copying grades and memories
between projects, and for accessing a dedicated collection of DaVinci Resolve Looks.
This chapter covers the following topics:
Using the Gallery 836
Saving and Deleting Stills 836
Where Are Stills Saved? 837
Playing Stills and Setting Up Image Wipes 838
Labeling and Searching for Stills 838
Gallery Options 839
Organizing Stills Using Albums 840
The Gallery Window 842
What’s Available in the Stills Navigator 843
Importing and Exporting Stills 844
Using and Organizing Memories 845
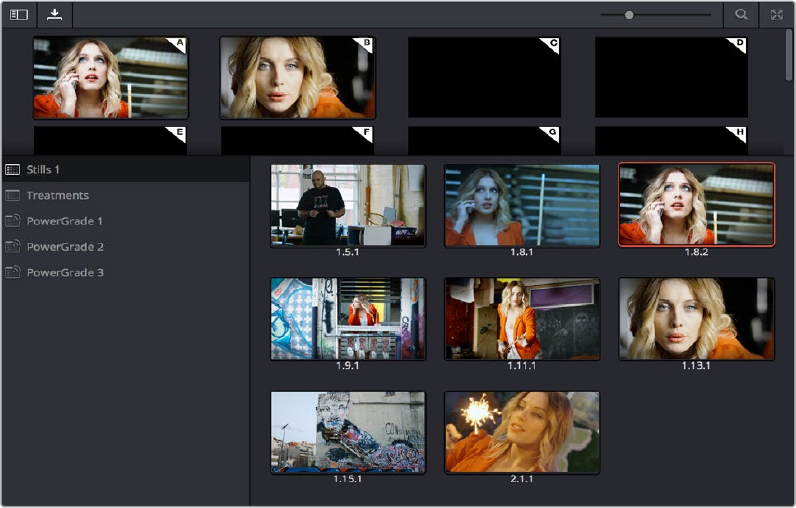
836
Using the Gallery Part 6 – 47
Using the Gallery
The Gallery in the Color page and the expanded Gallery window environment share many of
the same commands for organizing stills. However, the commands for saving stills and
customizing split-screen views are restricted to the Color page.
Color page Viewer and Gallery with Video Scopes
Saving and Deleting Stills
One of the most common operations is to save a clip as a still for future reference.
To save an individual still in the Color page, do one of the following:
Choose View > Stills > Grab Still (Option-Command-G).
Right-click on the Viewer and choose Grab Still.
Press GRAB STILL on the Transport panel of the DaVinci control panel.
It’s also possible to save stills automatically for every clip in the entire Timeline. This can be
useful if you’re planning to export a set of grades to hand off to another colorist, or if you need
to apply a series of grades manually from one project to another when ColorTrace™ won’t work.
To save a still for every clip in the current project, right-click the Viewer, and choose one of
the following:
Grab All Stills > From First Frame: The first frame of each clip in the current Timeline is
saved to the Gallery.
Grab All Stills > From Middle Frame: The middle frame of each clip in the current
Timeline is saved to the Gallery.
Grab Missing Stills > From First Frame: Only the first frame of clips with no stills in the
Gallery already are saved to the Gallery.
Grab Missing Stills > From Middle Frame: Only the middle frame of clips with no stills
in the Gallery already are saved to the Gallery.
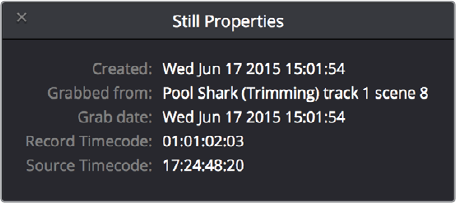
837
Using the Gallery Part 6 – 47
Once the Gallery is filled with many stills, it may be necessary to make multiple selections for
operations such as reorganizing, deleting, or exporting stills.
To select a range of stills, do one of the following:
Click one still, then Shift-click another to select a contiguous range of stills.
Command-click any stills you like to make a discontiguous selection.
Right-click any still, and choose one of the following commands:
Select All: Selects every clip in the Gallery
Select Current to Last: Selects every still from the one you’ve clicked through the
last still in the Gallery.
Select First to Current: Selects every still from the one you’ve clicked through the
first still in the Gallery.
If you need to remove one or more stills, this can only be done using the Gallery’s
contextual menu.
To delete one or more stills, do one of the following:
1 Select one or more stills in the Gallery.
2 Right-click one of the selected stills and choose Delete Selected.
Each still is also saved with a variety of metadata that is used by DaVinci Resolve to manage the
contents of the Gallery in different ways. This metadata can also be used for searching and
sorting, and is viewable by opening the Still Properties window.
To display a still’s properties:
Right-click a still in the Gallery and choose Properties.
A floating translucent window appears displaying the date the still was created, what clip it was
grabbed from, when it was grabbed, and the source and record timecode values of the frame it
came from.
Right-click on a still to choose Still Properties
Where Are Stills Saved?
By default, all stills you save are saved in the DPX format, and are placed in the directory path
defined in the “Gallery stills stored at” field in the Working Folders section of the Master
Settings panel of the Project Settings. This path defaults to a hidden “.gallery” directory that’s
created at the location of the first Media Storage Volume you specify in the Media Storage
panel of the System Preferences window.
838
Using the Gallery Part 6 – 47
Playing Stills and Setting Up Image Wipes
There are many ways to play a still in the Color page, making it visible as an image wipe in the
Viewer and on the external display connected to your video interface.
To play a still, displaying it as an image wipe or full screen, do one of the following:
Double-click a still in the Gallery.
Select a still in the Gallery, and click the Image Wipe button on the top Viewer toolbar.
Click a still in the Gallery, then right-click in the Viewer and choose Toggle Wipe.
From the View menu, choose Next Still (Option-Command-N) or Previous Still
(Option-Command-P) to select a still in the Gallery, and then choose Wipe On/Off
(Command-W) to play it.
Press PREV STILL or NEXT STILL on the Transport panel of the DaVinci control panel to
select a still, then press PLAY STILL. Press PLAY STILL again to dismiss the still.
Whenever you play a still, the Viewer mode’s pop-up menu changes to Split mode.
Once displayed, the wipe between the current clip and the still being referenced can be moved
and reoriented in different ways. If you want a full-screen view so you can flip back and forth
between the still and the current clip, simply adjust the split until the still fills the entire Viewer.
To adjust a wipe in the Viewer, do one of the following:
Drag the pointer within the Color page’s Viewer to move the wipe.
Push the T-bar lever up and down on the T-bar panel of the DaVinci control panel.
To customize the type of image wipe that’s displayed in the Viewer, do one of the following:
Click any of the controls at the top right of the Viewer toolbar to choose Horizontal,
Vertical, Mix, Alpha, and Difference types of wipe.
Choose Gallery, Timeline, or Offline from the View > Reference Wipe Mode submenu,
or the Viewer contextual menu.
Choose Horizontal, Vertical, Mix, Alpha, and Difference from either the View > Wipe
Style submenu, or the Viewer contextual menu.
Choose View > Invert Wipe, or right-click the Source Viewer and choose Invert Wipe
from the contextual menu to reverse each half of the wipe.
Labeling and Searching for Stills
By default, all stills are identified by a three number code. The first number is the video track
the clip is on, the second number is the clip’s position number in the current Timeline, and the
third number is the version number.
All stills are numbered
839
Using the Gallery Part 6 – 47
If you’ve saved many stills, it can help to label the important ones with whatever text you like
(it’s best to avoid using the forward slash character). Once labeled, you can search for stills by
label using the search field, at the upper right-hand corner of the Gallery.
To label a still:
1 Right-click a still in the Gallery and choose Change Label.
2 Type a name into the Change Still Label dialog, and click OK.
The new label appears underneath the still number.
You can also label stills for easier identification
To search for a still by label:
Click the Magnifying Glass button to open the Search field, click to place the cursor
within, and then type the name or description you are searching for.
As soon as you start typing, DaVinci Resolve automatically begins to filter the results of the
currently selected album in the Gallery to match what’s been typed.
Gallery Options
When you right-click the gray area of the Gallery, behind the Still icons, you can open a
contextual menu that provides a variety of additional options for controlling how many stills are
saved, how they’re displayed, and how they’re arranged in the Gallery. There are the
following options:
Switch Wipe Mode: Switches the Reference mode between showing a “Gallery” still, a
“Timeline” clip, or an “Offline” reference movie.
Trace Timeline: When enabled, selecting a clip in the Timeline also automatically
selects the first still that was saved from that clip to the Gallery.
One Still Per Scene: When enabled, restricts the Gallery to save only a single still for
each clip in the Timeline. If multiple stills have already been saved before turning this
option on, those stills will remain in the Gallery until you save another still from the
same clip, at which time all other stills from that clip will disappear.
Apply Display LUT: If you have a Display LUT selected in the Look Up Tables panel of
the Color Management panel of the Project Settings, it’s applied to the video output via
a connected video interface, and also to the Viewer. Ordinarily, you don’t also want the
display LUT applied to stills you’re saving since it’s meant to be temporary. Accordingly,
stills are saved with a LUT-free image. However, in instances where you may also want
to save a reference to the currently used Display LUT, turning on “Apply Display LUT”
saves the Display LUT along with the still, and applies that LUT when that still is used for
split-screen reference. Keep in mind that the internally saved Display LUT is only used
when playing that still in the Viewer; the DPX image that’s saved remains unaffected.
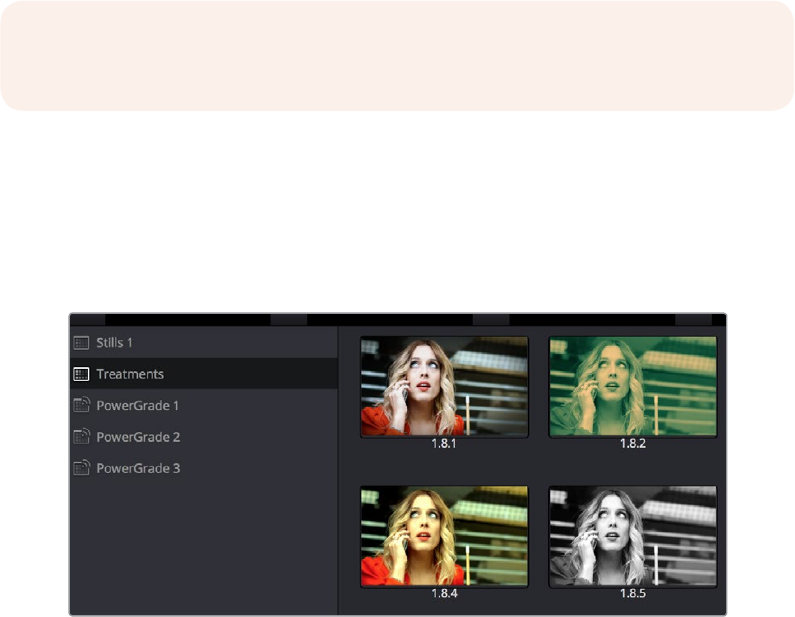
840
Using the Gallery Part 6 – 47
Sort Stills By: Choosing an option from this submenu changes the sort order of all clips
in the Gallery. The options are:
Record Timecode: Sorts all stills by their position in the program.
Source Timecode: Sorts all stills by the timecode of the source clip they came from.
Create Time: Sorts stills based on when you saved each still.
Clip and Create Time: A two-level sort; stills are sorted primarily based on the ID
number of the clips they came from, and secondarily based on the time they
were created.
Apply Grades Using: This submenu contains three options for how to apply the
keyframes that are automatically saved within each saved grade.
No Keyframes: No keyframes are copied. The state of the grade at the frame used to
save the still is what is applied to the target clip or clips.
Keyframes aligning Source Timecode: Keyframes are copied aligning the source
timecode of the saved grade with the source timecode of the target clip. This is the
ideal setting when you’re copying a grade back to the clip it came from originally, or to
a duplicate of that clip elsewhere in the Timeline, and you want the keyframes to align
with the same frames as before. If there is no source timecode overlap, keyframes will
be pasted aligning with the start frame of the edit, the same as the third option (below).
Keyframes aligning start frame of edits: Keyframes are copied aligning the start frame
of the clip that still was saved from with the start frame of the target clip. This is the
ideal setting when you’re copying a grade with keyframes from one clip to a completely
different clip, with different timecode.
Show All Stills: This command shows all available stills in the current album if any have
been hidden, for example by searching or by using the Show Current Timeline
Only command.
Show Current Timeline Only: Choosing this option restricts the Gallery to only showing
the stills that were saved from the currently selected Timeline. All other stills from other
Timelines are hidden until you switch to that Timeline.
Organizing Stills Using Albums
All stills you save are always placed into the currently open album of the Gallery, which defaults
for new projects to “Album 1.” However, you can create additional albums with which to organize
your stills into whatever categories you require. Albums can be shown, created, and removed
using the Gallery in either the Color page or Gallery windows.
Use Albums to organize your stills
NOTE: There are a variety of other commands available in this contextual menu that
are covered elsewhere in this chapter.
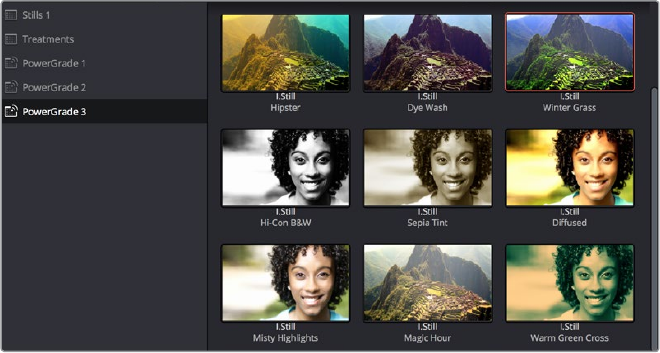
841
Using the Gallery Part 6 – 47
To show or hide the Albums list:
Click the Album button, at the top left of the Gallery .
If hidden, the Albums list appears, to the left of the Gallery, containing all albums that are
currently available in the project that’s open, as well as the PowerGrade album at the bottom. If
the Albums list is already visible, then it becomes hidden, making more room for still thumbnails
in the Gallery.
Once you’ve displayed the Albums list, there are a variety of ways you can quickly and easily
work with albums.
Methods of working with albums:
To add a new album: Right-click the Albums list, and choose Add Still Album from the
contextual menu. A new album is created, numbered incrementally.
To add a new PowerGrade album: Right-click the Albums list, and choose Add
PowerGrade Album from the contextual menu. A new album is created, numbered
incrementally.
To rename an album: Double-click any album in the list, and when it is selected, type a
new name and press Return.
To navigate albums: Click any album to make it the current album. Using the
DaVincicontrol panel, you can use the PG UP/GALLERY/PG DOWN button; press
SHIFTUP and GALLERY to move to the next album up the list, or press SHIFT DOWN
and GALLERY to move to the next album down the list.
To move clips from one album to another: Drag and drop a still from the Gallery to an album.
To remove an album: Right-click any album, choose Remove Current Album, and click Delete at
the prompt. All clips inside that album will be deleted along with the album, so use this carefully.
PowerGrade Albums
PowerGrade albums are meant to be repositories for grades you want to reuse frequently, or for
stills that you need to reference from multiple projects, such as when grading a series that
shares common looks from episode to episode.
PowerGrades are associated with your user login
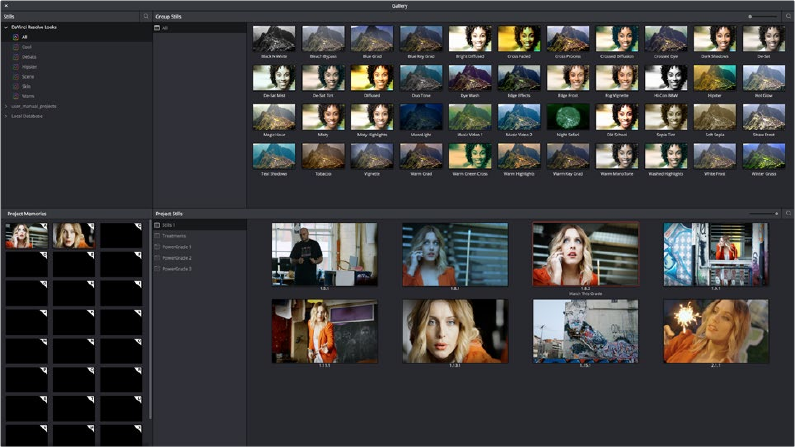
842
Using the Gallery Part 6 – 47
Unlike stills saved to the other albums in the list, which are ordinarily available only to the
project in which they were saved, stills saved to a PowerGrade album are shared among all
projects that have been stored within a particular database. Each database has its own unique
PowerGrade album.
Creating a new database creates a new PowerGrade album, which starts out as a clean slate.
However, you can always use the Gallery window to copy PowerGrade stills from other projects
and databases to the current one, and you can create as many PowerGrade albums as you
need to organize your grades. For more information about project management and databases,
see Chapter 2, “Managing Projects and Databases.”
Functionally, PowerGrade albums are identical to any other album, and you can save, organize,
and use stills in PowerGrade albums as you would with other albums. Since PowerGrade
albums are special in that they’re maintained by DaVinci Resolve, the last PowerGrade album
cannot be deleted.
The Gallery Window
While you can do quite a lot of stills management using the Gallery as it appears in the Color
page, the Gallery window provides additional functionality for copying stills among different
projects and databases, for organizing your stills and memories, and for accessing the DaVinci
Resolve Looks that accompany the application.
Gallery window
To open the Gallery window:
Click the Open Gallery button at the upper right-hand corner of the Gallery.
The Gallery opens into a floating window, divided into four areas:
Stills navigator: Lets you navigate the contents of other projects and databases that
are available. Independent projects, as well as database > user > project relationships,
appear in this hierarchical list. Click the disclosure triangle next to any item on this list
to reveal its contents. Click any project in the list to reveal its albums and stills in the
Group Stills browser.
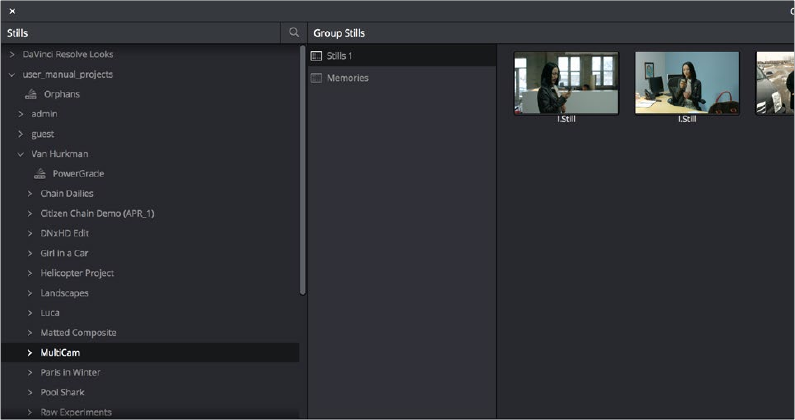
843
Using the Gallery Part 6 – 47
Group Stills browser: Displays the contents of the currently selected item in the Stills
navigator. One or more selected stills can be copied to the current project by selecting
an album in the Project Stills browser, and dragging and dropping the selected stills to
the Project Stills browsing area.
Project Stills browser: Contains the same Album list and Project Stills browser that’s
visible in the Color page Gallery.
Project Memories: Provides a larger view of the project memories that are visible in the
Color page Gallery.
To resize different areas of the Gallery window:
Move the pointer to the border between any areas of the Gallery. When the pointer
changes to the resize cursor, drag the border to resize the adjacent interface areas to
whatever size you need. Dragging all the way to the edge of the screen hides that
interface area completely.
What’s Available in the Stills Navigator
The Stills Navigator accesses a variety of content via a hierarchical list. Disclosure triangles to
the left of each item in the Stills browser let you access the contents of each item, and many
items have several nested levels of content within, each accessed by its own
disclosure triangle.
The Gallery Stills database show all projects connected so you can import those stills
DaVinci Resolve Looks: A collection of predefined grades, categorized by type,
thatprovides excellent examples of different looks available in DaVinci Resolve.
Thesegrades are installed with DaVinci Resolve and cannot be altered.
Databases: Each database that’s available appears within this list. Each database
has a nested series of Users, Projects, and Timelines within, as well as one nested
PowerGrade item for each user, which provides access to the saved stills within.
Orphans: Stills are saved to a separate directory which is defined in the Master
Settings panel of the Project Settings. Whenever you delete a database, the stills
that corresponded to that database become orphaned. All orphaned stills that
lack a connection to any current database appear within the Orphan item in the
StillsNavigator.
844
Using the Gallery Part 6 – 47
Importing and Exporting Stills
It’s possible to import still images in different graphics formats into the Gallery, which can be
particularly useful when a client provides reference images to which they’d like you to refer. It’s
also possible to export stills from the Gallery, which is good for sending a series of reference
stills for approval to a remote client. In both cases, you can choose whether to import or export
images with an accompanying LUT.
For both import and export, DaVinci Resolve supports the following file formats: DPX, CIN, TIFF,
JPEG, PNG, PPM, BMP and XPM.
To import one or more still images:
1 Right-click anywhere on the gray background of the Gallery.
2 Choose one of the following commands:
Import: Imports image files, along with a matching DRX file, if one is present in the
selected directory.
Import With Output LUT: Imports an image and DRX file, along with a matching LUT
file, if one is present in the selected directory.
3 When the Import Stills dialog appears, choose the type of files you want to import from
the “Files of type” pop-up menu, then navigate to the files you want to import, select
them, and click Import.
To export one or more still images:
1 Select one or more stills in the Gallery.
2 Right-click one of the selected stills, and choose one of the following commands:
Export: Two files are saved for each still you selected. An image file in the format of
your choice, and a DRX (DaVinci Resolve eXchange) file that contains the grading
metadata that was saved with that Gallery still.
Export With Display LUT: If you have a Video Monitor Lookup Table specified for the
current project in the Color Management panel of the Project Settings, this command
will output the image as it is processed by the specified LUT. A DRX file is also output
containing the grading metadata that was saved with that Gallery still.
3 When the Export Stills dialog appears, choose a file format to export to from the “Files
of type” pop-up menu, then choose a location, type a name into the Save As field, and
click Save.
Each of the selected stills is exported with all accompanying files. Each file uses as its
prefix the name you typed into the Export Stills dialog, followed by an underscore, the
still ID number of the selected still, and the three letter file extension.
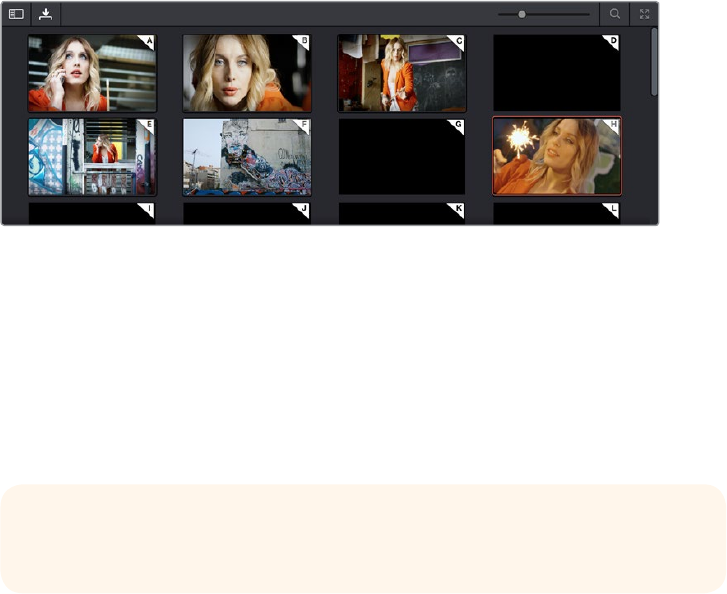
845
Using the Gallery Part 6 – 47
Using and Organizing Memories
Stills and memories contain identical information, and can be split screened, copied, appended,
exported, and can display their node graph just like any other still. However, stills that are
assigned as a memory make them easier to access via keyboard shortcuts, and from dedicated
buttons on the DaVinci control panel.
Memories are hidden by default, but you can reveal them by clicking the Memories button, to
the right of the Gallery list button at the top-left of the Gallery.
Place grades you will use often in Memories for faster recall
The Memories thumbnail display makes it easy to keep track of which stills have been assigned
to which memories in situations where you’re using multiple memories to copy grades
throughout a program.
To copy stills and memories back and forth, do one of the following:
Drag a still onto a memory bank.
Drag a memory into the Gallery.
To save the current clip’s grade to a memory for future use, do one of the following:
Choose Color > Memories > Save Memory A–H (Option-1 through 8)
Using the DaVinci control panel, press CRNT on the Transport or T-bar panel, then
press the letter of the memory bank you want to save to. Use the SHIFT UP button to
save to another memory sharing the same button.
If you save a grade to a memory that already contains something, the previous memory
is overwritten.
To apply a memory to the current clip in a timeline, do one of the following:
Right-click a memory and choose Apply Grade.
Choose Color > Memories > Load Memory A–H (Command-1–8)
Using the DaVinci control panel, press the letter of the memory bank you want to apply.
Use the SHIFT UP button to apply a memory that shares the same button.
To clear a memory:
Right-click a memory, then choose Clear.
TIP: In this way, memories can be used to copy stills from one album
to another.
847
Grade Management Part 6 – 48
Grade Management
The Color page offers numerous ways of saving grades, copying grades, creating and altering
groups of clips to share grades, rippling grades and adjustments, and managing multiple
versions of grades. All of these procedures enable you to work faster by leveraging work you’ve
already done to apply to other clips that can benefit from the same adjustments, or by applying
changes across multiple clips all at once.
This chapter covers the following topics:
Using Versions to Manage Grades 848
Choosing to Copy Grades Manually or Automatically Using Versions 848
Using Local Versions by Default 849
Using Remote Versions to Enable Automatic Linking 849
Working with Versions 855
The Importance of “Version 1” 857
Deleting Unused Versions 857
Rendering Versions 858
Copying Grades 858
Protecting Adjustments with the Copy Grade Options 858
Clip Grades and Timeline Grades in Saved Stills 859
Choosing Which Aspect of a Grade to Copy With All/Color/Sizing 859
Choosing How to Copy Keyframes 859
Copying Grades Using the Mouse 860
Copy Forward Commands 861
Copying Using Memories 861
Copying Using Preview Memory 862
Copying from Stills in the Gallery 862
Append Node Graph 863
Aligning Keyframes to a Specific Frame While Copying Grades 864
Copying Individual Nodes and Settings 865
Copying and Pasting All Settings From One Node to Another 865
Copying From the Node Graph of Other Clips or Gallery Stills 865
Rippling Adjustments AmongMultipleClips 868
Appending A Node to Multiple Clips 869
Scroll Copy Grades Using theDaVinciControl Panel 870
Rippling Changes Using theDaVinciControl Panel 871
Using Groups 873
Creating and Managing Groups 874
Using Group Modes to Control which Grades Ripple and which Don’t 875
Collapse Group Grades 878
Exporting Grades and LUTs 880
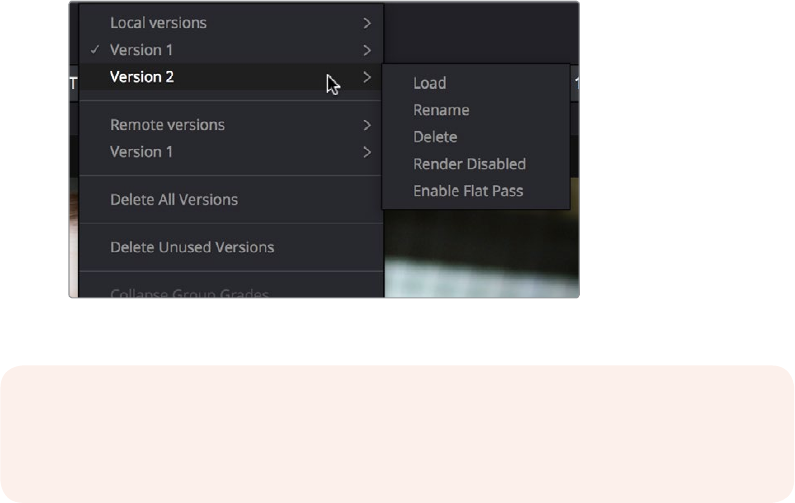
848
Grade Management Part 6 – 48
Using Versions to Manage Grades
Working quickly requires a mastery of the numerous grade management features built into
DaVinci Resolve. These features are designed to help you copy and ripple grades to individual
clips, among manually defined groups of clips via the Node Editor’s Clip mode, or among
automatically linked clips that share the same source clip in the Media Pool (when using Remote
versions). Multiple versions of grades are supported for every clip, as are various options for
previewing, overwriting, and appending these versions.
Choosing to Copy Grades Manually
or Automatically Using Versions
Each grade you apply to a clip is a version. Each clip can have multiple versions, although only
one version can be applied at a time. By default, the first grade applied to every clip in a
timeline is a local version named “Version 1.” A clip’s version name and/or number appears
underneath the clip thumbnail, to the right. You can also see the version name, along with a list
of all the other versions that are currently available to that clip, by right-clicking a clip in the
Timeline and looking for the version names that appear underneath the Local
Versions submenu.
Selecting versions of grades from the Timeline thumbnails
There are two different types of versions in DaVinci Resolve, each of which provides a different
method of grade management and linking among the clips and timelines of a project.
Local Versions: The default mode of grade management. Clips using local versions are
unlinked, so each clip has its own grade which is not shared with any other clips in any
other timelines. Changing the grade of a clip using a local version has no effect on any
other clip in that project.
Remote Versions: An alternate mode of grade management that you can enable.
All clips using remote versions that share the same source clip in the Media Pool are
automatically linked, in all timelines, and share the same set of grades.
NOTE: Double-clicking the version name underneath a clip’s thumbnail in the Timeline
toggles the version names to the codec used by each clip. Double-click again to
toggle back.
849
Grade Management Part 6 – 48
If you use local versions to grade all your clips, you don’t have to worry about one clip’s grade
being accidentally copied to other clips that happen to come from the same file in the Media
Pool, which can make it easier to work. On the other hand, you need to manually copy every
grade that you want to duplicate, even among clips that clearly come from the same take or
angle. You can always create a group to share a grade among clips using local versions, but
that’s an extra step.
Switching to use remote versions, instead, puts you into a mode where clips using remote
versions that share the same media file are automatically linked together. This gives you a
convenient shortcut for grading your program, since a grade that’s applied to one linked clip is
automatically copied to every other clip it’s linked to, which can be convenient when grading a
series of headshots appearing throughout a program that come from the same interview take.
Another use of remote versions is when you’re importing a new edit of an already graded
timeline. Using remote versions, you can set your project up so that new incoming timelines are
automatically relinked to the previous timeline’s grades.
The only disadvantage to using remote versions is that when you find you need to make
individual adjustments to clips that are linked, it’s an extra step to either create another version,
or switch that clip to use a local version, in order to keep its adjustment separate. This will be
discussed in more detail later in this chapter.
Mixing Versions
Each clip is capable of having multiple local and remote versions at the same time; you get to
choose which to apply. Which type of versioning is best depends on the type of project you’re
working on, the way in which the media was shot, and how you like to work. The following
sections explain the differences in workflow.
Using Local Versions by Default
Since local versions are the default method of grading when you first create a new project
(unless you’ve edited your settings presets), you don’t need to do anything to enable this mode
at first. As the name implies, local versions are local to the Timeline in which they appear, so
local versions are not rippled to linked clips, and they’re not shared among different timelines.
This makes it easy to avoid accidentally having grades copied when you don’t want them to be,
but you lose the conveniences that automatic linking can provide.
However, you can always switch the clips in a timeline to use Remote versions if you change
your mind, either individually, or all together.
Using Remote Versions to Enable Automatic Linking
Remote versions let all clips from the same source media file in the Media Pool share their
grades automatically, either within a single timeline, or across multiple timelines in the same
project. However, to enable the convenience of remote grades, you need to put DaVinci
Resolve into this mode of working using the Settings Window.
To enable remote grades to be used:
Open the Project Settings, open the General Options panel, and turn off “Use local
version for new clips in timeline” in the Color section.
Turning this option off only affects clips that are added to Timelines from that point onward.
Youcan keep track of which clips use remote versions by the (R) that appears when you
double-click the area underneath the thumbnail to hide the codec name in the
Thumbnail timeline.
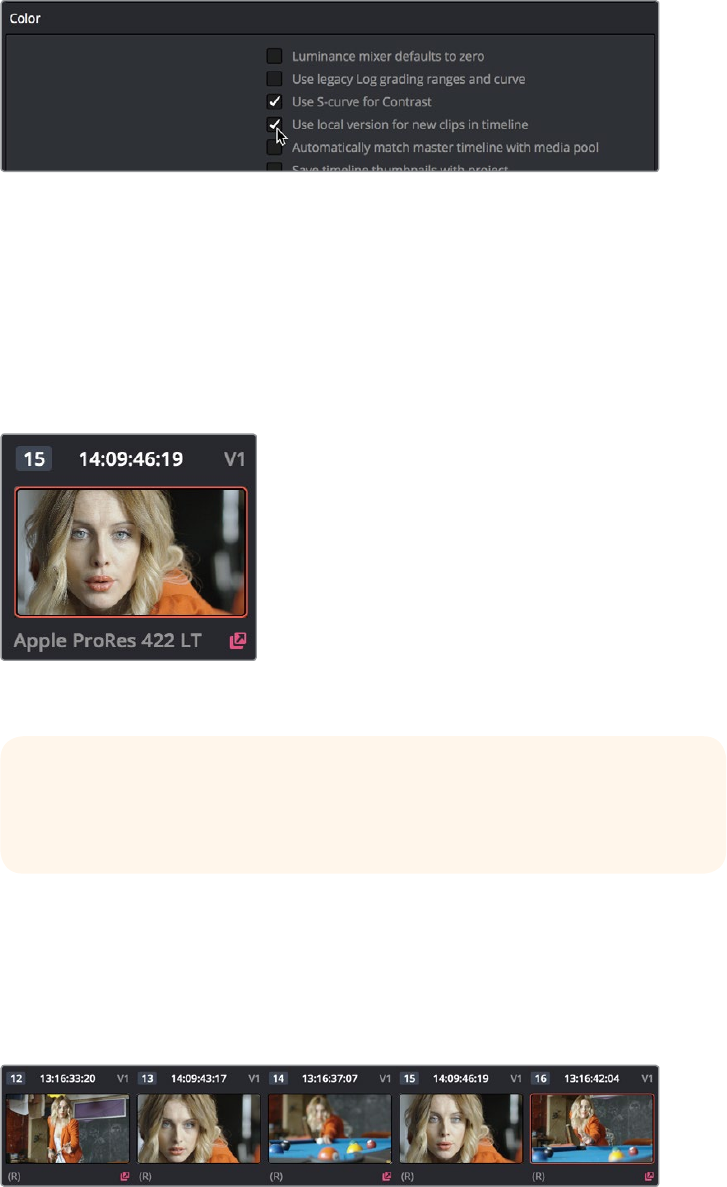
850
Grade Management Part 6 – 48
Turning off “Use local version for new clips in timeline” to
enable remote grades to be used by default
How Automatic Linking Works
When clips using remote versions have been added to a timeline, any other clips in any timeline
that (a) use remote versions also, and (b) refer to the same file in the Media Pool are linked.
Selecting a clip using a remote grade in the Color page that is automatically linked to one or
more clips displays a small “linked” badge at the left of that clip’s timecode in the
Thumbnail timeline.
The linking arrow shows this clip has the same
source as the oneselected on the Timeline
Adjustments that you apply to a remote version of one linked clip are automatically rippled to
every other clip it’s linked to, which can save you an enormous amount of time when you’re
getting started with a new program. For example, if every reverse angle from the same take in a
particular angle of coverage is automatically linked using remote versions, then the grade you
apply to one reverse angle clip will ripple to every other reverse angle clip throughout
the Timeline.
Timeline with three automatically linked clips shown, and codec names
hidden to reveal the (R) that shows these clips are using remote grades
So long as remote versions are enabled, there are other ways that linked clip relationships are
formed. If, after conforming an AAF, XML, or EDL, you used the Split Clips button in the Color
page to split one conformed clip into many, each of the clips you split would be linked, since
they too would share the same source media in the Media Pool.
TIP: The Timeline Filtering pop-up in the Color Page toolbar has an option
named “Common Media Pool Clips” that only shows clips in the Timeline that
are linked to the currently selected clip.

851
Grade Management Part 6 – 48
Finally, automated linking also occurs for clips that appear in multiple timelines that also use
remote versions. As a result, the grade you apply to one linked clip is automatically rippled to
every other clip it’s linked to.
Creating a Master Timeline
DaVinci Resolve version 9 and earlier would automatically create a Master Timeline whenever
you added clips to the Media Pool. This changed in versions 10 and later, which by default have
no Master Timeline. However, if you want to create a Master Timeline in order to use it as you
would have before, this is easy to do.
If you want a Master Timeline to have a single timeline that always contains all clips currently in
the Media Pool, there’s a way you can create one. However, you need to do it immediately upon
creating a new project, before adding any media to the Media Pool. Once you’ve added one or
more clips to the Media Pool, the option you need to do so will be disabled.
To create a new Master Timeline:
1 Create a new project, open the General Options panel of the Project Settings, and turn
on the “Automatically match master timeline with media pool” checkbox in the Color
section. If you also want all clips to use Remote versions as you grade by default as
in previous versions of DaVinci Resolve, you can turn off the “Store grade with local
version by default.”
2 Click Save.
3 Open the Edit page, and choose File > New Timeline (Command-N).
4 When the New Timeline Properties window appears, turn the Empty Timeline checkbox
off, and click Create New Timeline.
5 Now, in addition to the new Timeline, a Master Timeline appears in the Timeline list.
NOTE: Media management or media consolidation operations that split large source
media files into many individual media files will defeat automatic linking within the
same timeline, since each clip will be conformed to its own individual media file.
Starting With Remote Versions, Then Switching to Local Versions
It’s possible to combine the best aspects of remote and local versions into a single
workflow, taking advantage of your ability to freely switch from one to the other. Since
remote versions make it easy to copy grades among clips that are similar, you can
switch to using remote versions first, and then grade your way though the Timeline
until you get to the point where you need to start making much more specific changes
to individual clips. Then, it’s easy to either switch each linked clip that needs individual
adjustment to use a local version, or to use the Copy Remote Grades To Local
command (described later) to copy the current remote version of each and every clip
to a local version, at which point you can make all the specific tweaks you need to
without worrying about changes being accidentally copied.
852
Grade Management Part 6 – 48
Once created, the Master Timeline contains every clip in the Media Pool of the current project.
If you color correct the clips in the Master Timeline, you’ll find there’s only one set of versions
available, found underneath the Local submenu of the Color Page timeline’s contextual menu.
It’s important to understand that local versions within the Master Timeline are in fact the remote
versions found in every other timeline of that project.
In fact, it would be fair to say that the remote versions found in other timelines are actually the
Master Timeline’s versions. When you grade a clip in the Master Timeline, those grades ripple
out to every other instance of that clip, in every other timeline within that project, via
remote versions.
Sharing of remote versions among the Master Timeline and newly conformed timelines is why
you can grade a collection of clips that you import into DaVinci Resolve without any editorial
structure, grade and output offline media, and then reimport a project file that relinks to the
original clips along with their grades. It’s also why you can grade clips in one timeline, and then
import additional re-edited timelines via AAF, XML, or EDL, which automatically inherit all
remote versions of grades that were created in previous timelines.
Dierentiating Clips with Individual Versions
If you’ve enabled DaVinci Resolve to add clips with remote versions, there are times when you
may want to suspend automatic linking. As convenient as automatic grade rippling among
linked remote versions is, there are many instances where you may need to stop it. For
example, if the Media Pool contains a source media file with the entire content of an interview,
then every clip that has been conformed to that source media will be linked, which is ordinarily
good since you’d expect they’d all share the same grade. However, if the DP fiddled with the
exposure of the camera in the middle of the interview, such that some clips are lighter and
others are darker, you may find yourself needing to make different adjustments to clips from
different parts of the interview.
One way of doing this, which can be useful in timelines where you only need to make a few of
these kinds of changes, is to create a new remote version for every clip to which you need to
make an individual adjustment. Since each version is its own grade, and differently named
versions don’t link to one another, this is a simple solution.
To suspend linking by creating a new remote version:
1 Move the playhead to the clip you need to alter individually.
2 Do one of the following:
Choose Color > Add Version (Command-Y).
Right-click the thumbnail in the Timeline, and choose Remote Versions > Create
New Version.
Using the DaVinci control panel, press ADD VERSION on the T-bar panel.
3 Grade the new version that’s appeared.
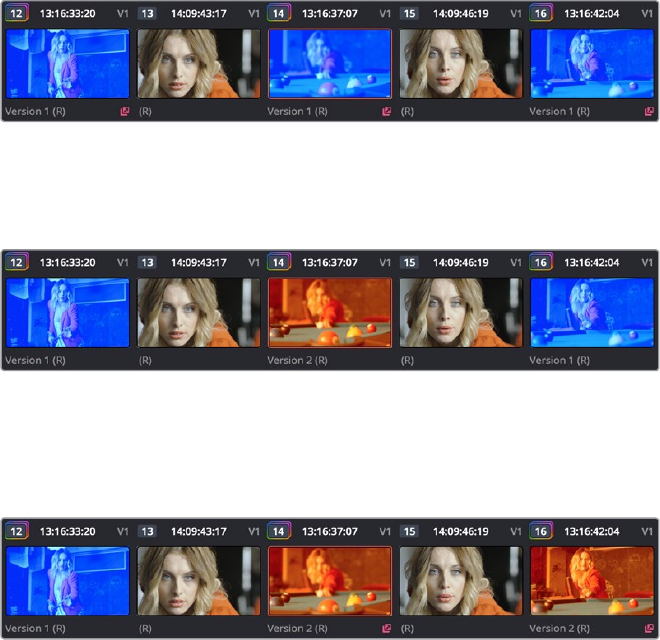
853
Grade Management Part 6 – 48
While this method works well, keep in mind that multiple linked clips using the same version
number will always be linked with one another. In other words, suppose Clip 12, Clip 14, and Clip
16 are linked using the default Version 1, which has a strong blue grade applied.
Three clips automatically linked, sharing a blue grade
Then, you set Clip 14 to use Version 2 with a different grade, tinted red. Clip 14 is now unlinked
from Clips 12 and 16.
Setting the second of the three clips to use another
version with a different remote grade sets it apart
However, switching Clip 16 to also use the red-tinted Version 2 means that Clip 14 and Clip 16
are now linked together, but Clip 12 is no longer linked.
Setting the third of these clips to share the same remote version as the
second clip now links those two together, omitting the first clip
Every new remote version you create, and every change you make, becomes available to all
other clips in all other timelines that comes from the same source Media Pool clip as the shot
you’re working on. However, any clip can use any version, and which version is used by a linked
clip is not rippled.
For example, Timeline 1 contains a clip named “Max CU,” which has three remote versions.
Timeline 5 also contains “Max CU,” which is currently set to use “Version 2.” If you open
Timeline 1 and add one more remote version to “Max CU,” that new version will also be
available to “Max CU” in Timeline 5, but it will still be set to use “Version 2.”
Switching Clips Between Local and Remote Versions
You can also suspend remote version grade linking by switching individual clips to use local
versions. This makes it easy to create a situation where some clips are linked, and other clips
are not. Keep in mind that each clip has both local and remote versions, so you can switch from
one to the other without losing anything.
To suspend linking by setting individual clips to use a local version:
Right-click a clip thumbnail, choose the submenu of the corresponding remote version
you want to copy, and choose Copy to Local. The remote version is copied to a local
version, which now appears as the current version that’s used, with an (L) appearing at
the end of the name.
854
Grade Management Part 6 – 48
You can also set every clip in the entire timeline to use local versions. If you switch an entire
timeline to local versions, then no clip in that timeline will be linked to any other unless you
create a group (covered later in this chapter). This is the default state, but it’s useful even when
you’ve switched to using remote versions when you want to grade one timeline differently from
the others in a project, for example when doing a trim pass for another video or stereo 3D
format, or when grading another cut, such as a trailer, that uses the same media but requires a
different look.
To suspend linking by switching from remote versions to local versions:
Right-click any clip thumbnail, and choose one of the following commands:
Use Local Grades: Switches all clips to their local versions. If there are already local
versions defined for each clip, those will appear. If there are no local versions yet
defined, each clip will be ungraded.
Copy Remote Grades to Local: Copies the currently assigned remote version of each
clip to a local version.
Because Undo is used only for individual clip operations, the Use Local Grades and Copy
Remote Grades To Local commands cannot be undone. However, switching a timeline from
remote to local versions is not a one-way trip. You can select Use Remote Grades to switch
every clip in a timeline back to the remote versions at any time.
To switch a timeline back to using remote versions:
Right-click any clip thumbnail, and choose Use Remote Grades.
Furthermore, you can also copy the local grades you made to be remote grades, for instances
where you started grading with local grades, and you want to switch to remote grading using
your local grades as a starting point. Be aware that when you do this in a timeline with many
clips that share the same source media, the grade of the very last shared clip in the Timeline will
be the only remote grade that’s used for those auto-linked clips.
To copy every clip’s local grade to a remote grade:
Right-click any clip thumbnail, and choose Copy Local Grades to Remote.
If you’re switching back and forth between local and remote versions, keep the following
rules in mind:
If you select Use Remote Grades, change your remote grades, and then Copy Remote
Grades To Local on that timeline again, you’ll overwrite all of your previously graded
local versions. This is a good workflow if you don’t like what you’ve done with your local
versions, and you want to start over by recopying the remote versions.
If you select Use Remote Grades, change your remote grades, and then select Use
Local Grades, you’ll return to your previously graded local versions, as they were
before you selected Use Remote Grades. This is a good workflow if you just want to
switch back to your remote versions in order to copy the remote versions of specific
clips to local versions.

855
Grade Management Part 6 – 48
Working with Versions
Each clip can have as many local and remote versions as you like. There are commands for
creating, renaming, and deleting the versions that are available to each clip when using the
pointer, keyboard shortcuts, or the DaVinci control panel. When using the DaVinci control panel,
the buttons affect whichever type of version (remote or local) is currently applied to the
current clip.
To create a new local or remote version quickly, do one of the following:
Choose Color > Add Version (Command-Y).
Using the DaVinci control panel, press ADD VERSION on the T-bar panel.
A new version is created, identical to the type of version that was previously selected (remote
or local), named “Version x” where x is the number of the versions that have been created. All
keyframes and motion tracking are copied from the previously selected version to the new one.
To create a new version, with a name, and a choice of whether to copy keyframes:
1 Right-click a clip thumbnail, and choose one of the following:
Local Versions > Create New Version
Remote Versions > Create New Version
2 Type a name for the version in the dialog that appears, and choose either “Copy all
marks” or “Copy the first mark only,” depending on whether or not you want to copy all
the keyframes into the new version.
3 Optionally, you can choose one of the preset version names from the pop-up list.
These names are defined in the Versions section of the General Options panel of
theProject Settings.
4 Click OK.
To delete a specific version:
Right-click a clip thumbnail, choose the submenu of the remote version you want to
delete (it can’t be the currently selected version), and choose Delete.
To delete all versions:
Right-click a clip thumbnail, and choose one of the following commands from the
contextual menu corresponding to the scope of the versions you want to delete:
Local Versions > Delete All Versions
Remote Versions > Delete All Versions
Delete All Versions
All versions are deleted as specified, except for the currently selected version, which is now the
only one remaining.
To load a particular remote or local version, do one of the following:
Right-click a clip thumbnail, choose the submenu of the corresponding remote version
you want to copy, and choose Load.
NOTE: Motion tracking will be copied regardless of whether “Copy all marks”
is selected or not.
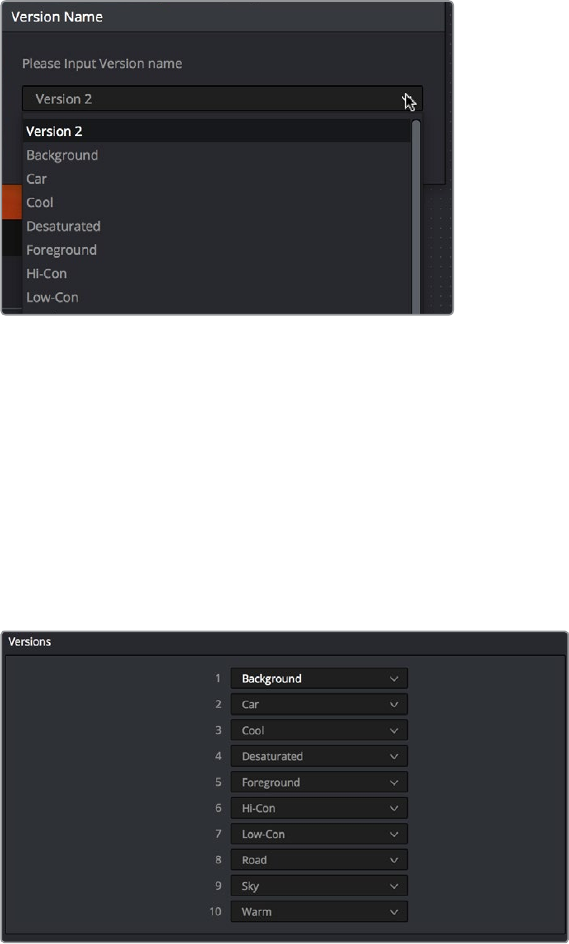
856
Grade Management Part 6 – 48
To rename a version:
1 Right-click a clip thumbnail, choose the submenu of the corresponding remote version
you want to copy, and choose Rename.
2 In the Version Name dialog, type a name into the text field. Optionally, you can choose
one of the preset version names from the pop-up list. These names are defined in the
Versions section of the General Options panel of the Project Settings.
Selecting a Version name from the dropdown list, the names on
the list come from assignments made using the Versions section
of the General Options panel of the Project Settings
3 Click OK.
That name now appears underneath the clip thumbnail in the Timeline.
If you’re going to use pre-defined names for versions, you need to define these in the Versions
group of the General Options panel of the Project Settings. Ten pop-up menus let you choose
from preset version names, or enter your own. These names will appear in the pop-up menu of
the Version Name dialog..
The Version section of the Project Settings
857
Grade Management Part 6 – 48
The Importance of “Version 1”
There are specific operations in DaVinci Resolve where “Version 1,” otherwise known as “the
default version,” is the only version that’s used, regardless of how many other versions are
available, or which version was previously selected. The default version can be named anything
you want, but whatever its name, the default version is the first version in the list, and it’s
important.
Here are some examples:
Importing additional timelines that use the same clips: In this case, if you’re importing
timelines and ”Use local version for new clips in timeline” is disabled in the Color
section of the General Options panel of the Project Settings, then only the default
version of each clip is relinked.
Whenever you switch a timeline between local and remote versions: In this case,
every clip in the Timeline will be switched to the default version, regardless of what you
had selected previously.
Consequently, if you plan to reconform your clips to a newer version of the edit that you’re
importing, or pursue other workflows that are off the beaten path, it’s a good idea to make sure,
no matter how many versions you end up creating, that the most important grade is always
copied back to the default version.
To copy any version quickly to the default version:
1 Choose Color > Memories > Save Memory A (Option-1). You can use any memory you
want, but Memory A is convenient for this example.
2 Choose Color > Default Version (Command-U).
3 Choose Color > Memories > Load Memory A (Command-1) to apply the saved memory
to the default version.
To copy any version quickly to the default version using the DaVinci Control Panel:
1 Press CRNT and then press A (or any memory button you like). These controls are
available on either the Transport or T-bar panel.
2 Press DEFAULT VERSION on the T-bar panel.
3 Press A (or whichever Memory button you used) to apply the saved memory.
To jump immediately to the default version, do one of the following:
Choose Color > Default Version (Command-U).
Press DEFAULT VERSION on the T-bar panel.
Deleting Unused Versions
In cases where you want to make absolutely sure there’s no alternative to the grade you want a
clip to have, there’s an easy way to delete all versions except for the version that’s currently in
use, thereby making it the default version.
To eliminate either local or remote versions except for the current version:
1 Choose the local or remote version you want a clip to use.
2 Right-click the thumbnail of the clip you want to eliminate extra versions from, and
choose Delete Unused Versions from the contextual menu.
If you selected a local version, all unused local versions will be deleted, but remote
versions will be left alone. Similarly, if you selected a remote version, all unused remote
versions will be deleted, but local versions will be left alone.
858
Grade Management Part 6 – 48
To eliminate all other local and remote versions except for the current version:
1 Choose the version you want a clip to use.
2 Right-click the thumbnail of the clip you want to eliminate extra versions from, and
choose Delete All Versions from the contextual menu.
Regardless of whether you selected a local or remote version, all other local and
remote versions not in use will be deleted.
Rendering Versions
When the time comes to render your clips in the Deliver page, each clip’s currently selected
version will be rendered. If you need to render a different version for a given clip, you can either
make sure it’s selected in the Color Page timeline before you open the Deliver page, or use the
Versions submenu in the Color mode of the Deliver page Thumbnail timeline. This contextual
menu also provides access to the Stereo 3D commands, the Edit PAR (Pixel Aspect Ratio)
command, and a command for updating the Render Window Timeline thumbnails to reflect any
changes you’ve made in case the they haven’t updated automatically.
Additionally, the Commercial Workflow output option, located in the Deliver page, provides a
method of rendering multiple versions for each clip when outputting your project in Source
Order (as individual media files). There are two additional options in the Version submenus of
each clip in the Thumbnail timeline contextual menu that let you control which versions are
rendered when you use Commercial Workflow.
Render Disabled: Turning this option on excludes that version from being rendered
when Commercial Workflow is enabled.
Render Flat Pass: Turning this option on forces the selected version to render with the
grade turned off, essentially outputting the original media.
For more information on rendering versions using the Commercial Workflow option, see
Chapter 75, “Delivering Media.”
Copying Grades
There are various methods you can use to copy grades from one clip to another. Which is
appropriate to your need depends on your style of working with DaVinci Resolve.
Protecting Adjustments with the Copy Grade Options
Before going into the myriad of ways that grades can be copied from one clip to another, you
should know of a series of options, available from the contextual menu of the Gallery (right-click
anywhere in the gray area of the Gallery), that let you carefully specify grading, sizing, and
stereo data to be preserved when overwriting grades in clips you’re copying to. There are
three options:
Copy Grade: Preserve number of nodes: Lets you choose 0–10 nodes to be protected
when applying a grade. When set to 1, the first node of the copied grade is ignored, but
all other nodes are copied. When set to 5, the first five nodes of a copied grade are
ignored, as long as there are at least five nodes in the grade of the clip you’re copying
to. This option is useful for colorists who routinely use the first few nodes for shot
matching and scene balancing, with additional nodes applying individual or stylistic
adjustments.
Copy Grade: Preserve Camera Raw Settings: When enabled, the camera raw Source
settings of the current clip are preserved, letting you apply stylistic grades from
unrelated clips without overwriting clip-specific source settings.

859
Grade Management Part 6 – 48
Copy Grade: Preserve Input Sizing: When enabled, Input Sizing adjustments are not
overwritten by those of the copied grade.
Copy Grade: Preserve Convergence: When enabled, Convergence adjustments in the
Stereo 3D palette are not overwritten by those of the copied grade.
Copy Grade: Preserve Floating Windows: When enabled, Floating Windows
adjustments in the Stereo 3D palette are not overwritten by those of the copied grade.
Copy Grade: Preserve Auto Align: When enabled, Auto Alignment adjustments in the
Stereo 3D palette are not overwritten by those of the copied grade.
Copy Grade: Preserve Dolby Vision™ Analysis Metadata: When enabled, Dolby Vision
Analysis Metadata is not overwritten by that of the copied grade. Only available if
you’re set up to do Dolby Vision grading. For more information, see Chapter 6, “Data
Levels, Color Management, ACES, and HDR.”
Copy Grade: Preserve Dolby Vision™ Trim Metadata: When enabled, Dolby Vision Trim
Metadata in the Dolby Vision palette is not overwritten by that of the copied grade.
Only available if you’re set up to do Dolby Vision grading. For more information, see
Chapter 6, “Data Levels, Color Management, ACES, and HDR.”
Clip Grades and Timeline Grades in Saved Stills
Every time you save a still into the Gallery or a memory, it contains both the Clip Grade, and the
Timeline Grade, if one is applied. Which grade is applied when you copy from a still depends on
which mode you’re in, which is selectable from the pop-up menu in the upper right-hand corner
of the Node Editor.
Node Editor Clip and Track selector
If you’re in Clip mode, you’ll only copy the saved clip grade. If you’re in Timeline mode, you’ll
only copy the saved timeline grade.
Choosing Which Aspect of a Grade to
Copy With All/Color/Sizing
When copying grades using the techniques described in this section, you can use the All/Color/
Sizing setting that are available via the Keyframe Timeline Mode submenu of the Mark menu,
the pop-up menu that’s visible at the upper-right of the Keyframes Editor, or your control panel.
When copying a grade in conjunction with the settings in this menu, the following rules apply:
All: When All is selected, both the grade and the sizing are copied.
Color: Only the grade is copied, the target clip retains its original Input Sizing settings.
Sizing: Only the Input Sizing is copied, the target clip retains its original grade.
Choosing How to Copy Keyframes
When working with saved grades that have keyframes, you can choose how these keyframes
are copied via a setting in the Gallery contextual menu. There are three options:
No Keyframes: No keyframes are copied. The state of the grade at the frame used to
save the still is what is applied to the target clip or clips.

860
Grade Management Part 6 – 48
Keyframes aligning Source Timecode: Keyframes are copied aligning the source
timecode of the saved grade with the source timecode of the target clip. This is the
ideal setting when you’re copying a grade back to the clip it came from originally, or to
a duplicate of that clip elsewhere in the Timeline, and you want the keyframes to align
with the same frames as before. If there is no source timecode overlap, keyframes will
be pasted aligning with the start frame of the edit, the same as the third option (below).
Keyframes aligning start frame of edits: Keyframes are copied aligning the start frame
of the clip that still was saved from with the start frame of the target clip. This is the
ideal setting when you’re copying a grade with keyframes from one clip to a completely
different clip, with different timecode.
To control how keyframes are copied when you’re copying grades:
Right-click anywhere in the gray background area of the Gallery, and choose one of
these options from the Apply Grades Using submenu.
From that point on, keyframes, should they exist, will be copied using the selected method
whenever you copy a grade using any of the previously described methods.
Copying Grades Using the Mouse
An incredibly easy way of copying a grade from one clip to another, or from a still or memory in
the Gallery to a clip, is by using the third button of your mouse, usually mapped as the “middle-
click” of the mouse scroll wheel.
To copy a grade from a clip or still to one or more clips using the pointer:
1 Select the clip thumbnail you want to copy the grade to in the Timeline; a single
selected clip appears highlighted orange. If you want to copy a grade to several clips,
you can either Command-click multiple non-adjacent clips, or Shift-click a continuous
range of clips; multiple selected clips appear highlighted red.
2 Middle-click the clip thumbnail, Gallery still, or memory you want to copy the
grade from.
The grade of the clip you middle-clicked is copied to the previously selected
clip or clips.
If you don’t have access to a middle-click on the pointing device you’re using, there’s another
way of doing this using a contextual menu command.
To copy a grade from a clip or still to one or more clips using the Apply Grade command:
1 Select the clip thumbnail you want to copy the grade to in the Timeline; a single
selected clip appears highlighted orange. If you want to copy a grade to several clips,
you can either Command-click multiple non-adjacent clips, or Shift-click a continuous
range of clips; multiple selected clips appear highlighted red.
2 Right-click the clip thumbnail, Gallery still, or memory you want to copy the grade from,
and choose Apply Grade from the contextual menu.
The grade of the clip you middle-clicked is copied to the previously selected
clip or clips.
TIP: If you’re using a trackpad, third party software may allow you to define a “three-
finger-click” that works the same as mouse button 3. If you’re a pen and tablet or
trackball user, you may be able to define a stylus or other button to perform the same
button-3 action.
861
Grade Management Part 6 – 48
Copy Forward Commands
Another simple way of copying grades is to use the equals (=) and minus (–) keys on the
keyboard to copy grades forward from one or two clips behind the currently selected clip. This
is a great way to copy grades in scenes with a shot-reverse-shot structure, where you’re cutting
between two angles of coverage, each of which uses the same grade.
To copy grades forward:
To copy a grade from one clip back: Choose Color > Apply Grade From One Clip Prior,
or press Equals (=)
To copy a grade from two clips back: Choose Color > Apply Grade From Two Clips
Prior, or press minus (–)
To copy grades forward using the DaVinci Control Panel:
To copy a grade from one clip back: Press comma (,)
To copy a grade from two clips back: Press colon (:)
Copying Using Memories
Memories are virtually identical to stills, except that they’re labeled with a letter (A–Z) for easy
access via keyboard shortcuts or DaVinci control panel buttons. A memory bank above the
Gallery browser provides a visual reference of which saved grade is assigned to which letter.
This makes it easy to keep track of multiple saved memories in instances where you’re copying
them to several different clips throughout a scene or program.
For example, you might save a memory for each angle of coverage in a complicated scene,
making it easy to copy grades forward. In another example, you might save a memory for the
grade applied to each interview subject’s headshot in a documentary, so you can copy that
grade forward as you work through the documentary.
To save the current clip’s grade to a memory for future use, do one of the following:
Choose Color > Memories > Save Memory A–H (Option-1–8)
Using the DaVinci control panel, press CRNT on the Transport or T-bar panel, then
press the letter of the memory bank you want to save to. Use the SHIFT UP button to
save to another memory sharing the same button.
If you save a grade to a memory that already contains something, the previous memory is
overwritten.
To apply a memory to one or more clips in a timeline, do one of the following:
1 Choose one or more clips in the Thumbnail timeline to copy to. This can be the current
clip, or it can be a range of clips that you select by Command-Clicking or Shift-Clicking.
2 Do one of the following to copy a grade to the selected clips:
Right-click a memory and choose Apply Grade.
Choose Color > Memories > Load Memory A–H (Command-1–8)
Using the DaVinci control panel, press the letter of the memory bank you want to
apply. Use the SHIFT UP button to apply a memory that shares the same button.
To clear a memory:
Right-click a memory, then choose Clear.

862
Grade Management Part 6 – 48
Copying Using Preview Memory
You can also preview the effect of a memory or saved grade on the current clip, with the option
to either keep it if it works, or go back to the previous grade if it doesn’t.
To Preview Memory:
1 Move the playhead to a clip for which you want to preview a memory.
2 Choose Color > Preview Memory (Option-Shift-P).
3 Do one of the following:
Right-click any saved still in the Gallery and choose Apply Grade.
Choose Memories > Load > Memory A–H (Command-1–8).
The selected grade or memory is now being previewed.
4 Now, do one of the following to either accept or reject the memory:
If you like the effect, then you can leave it be and move on to another clip.
If you don’t like the effect, then choosing Color > Preview Memory (Option-Shift-P)
again reverts the clip to the original grade.
To Preview Memory using the DaVinci Control Panel:
1 Move the playhead to a clip on which you want to preview a memory. You can use the
PREV SCENE and NEXT SCENE buttons to move quickly.
2 Press PVW MEM on the T-bar panel, and then press the letter of the memory bank
you want to preview. Use the SHIFT UP button to apply a memory that shares the
same button.
3 Do one of the following:
If you like the grade you’re previewing, there’s no need to do anything else. Simply
move to another clip and continue working.
If you don’t like the grade you’re previewing, press PVW MEM again and the clip’s
grade will revert to its original state. Pressing PVW MEM repeatedly toggles the
current clip between its original and the previewed grade.
Copying from Stills in the Gallery
As mentioned previously, each still you store in the Gallery contains the grading information as
well as the image of the frame it was saved from. This saved grade can be applied to any clip in
the Timeline.
To apply a grade from a still to one or more selected clips in a timeline, do one of the following:
1 Choose one or more clips in the Thumbnail timeline to copy to. This can be the current
clip, or it can be a range of clips that you select by Command-Clicking or Shift-Clicking.
2 Do one of the following to copy a grade to the selected clips:
Right-click a still in the Gallery and choose Apply Grade.
Middle-click a still in the Gallery.
Double-click a still to wipe it in the Viewer against the current clip in the Timeline,
then right-click the Viewer and choose one of the options from the Apply
Grade submenu.
IMPORTANT: Copied grades overwrite any previously existing grades on the clip or
clips you copy to.
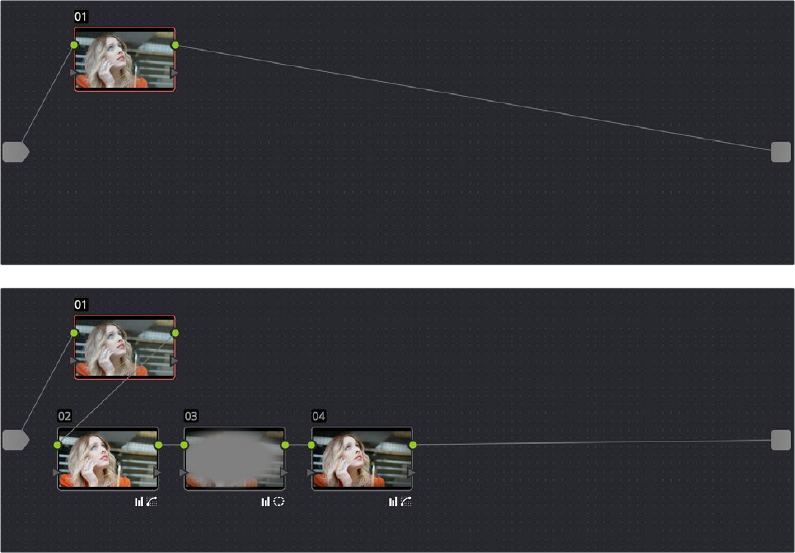
863
Grade Management Part 6 – 48
To apply a grade from a still to the current clip using the DaVinci Control Panel:
1 Select the clip you want to copy a grade to using the PREV SCENE or NEXT SCENE
buttons of the Jog/Shuttle panel.
2 Press NEXT STILL or PREV STILL to select the still with a grade that you want
copy from.
3 Press PLAY STILL to wipe the selected still against the current clip.
4 Press SHIFT UP and then press PLAY STILL to copy the grade from the selected still to
the current clip.
Append Node Graph
You can also append a saved grade to any clip in a timeline. This adds the entire node graph of
the saved still to the end of the node tree of the current clip. In other words, the current clip’s
grade isn’t overwritten, the applied grade is added to the end of it.
By planning ahead, you can save fragmentary grades that create specific effects or adjustments
using only a few nodes. You can then use these fragmentary grades as a toolkit that you can
add to other grades in order to mix and match different adjustments and effects.
For example, you could create a three-node glow effect, save it, and then apply that effect at
the end of a completely different clip’s grade.
Appending grades places them after the original nodes
To append a saved grade or memory as individual nodes, do one of the following:
Drag a still or memory from the Gallery onto a connection line in the Node Editor; when
the plus icon appears, drop it and its nodes will be appended within the node tree
starting at that connection.
Right-click a still or memory in the Gallery, and choose Append Node Graph.

864
Grade Management Part 6 – 48
Ordinarily, when you append the node graph from a memory or still to another node graph, you
end up adding a whole shedload of new nodes. This may be exactly what you need, but in
situations where you want to keep things a bit tidier, you also have the option of appending
node graphs as compound nodes.
To append a saved grade or memory as a compound node:
Command-drag a still or memory from the Gallery onto a connection line in the Node
Editor; when the plus icon appears, drop it and its nodes will be appended to the node
tree as a single compound node.
To append a saved grade or memory using the DaVinci Control Panel:
1 Select the clip you want to append a grade to using the PREV SCENE or NEXT SCENE
buttons of the Jog/Shuttle panel.
2 Press NEXT STILL or PREV STILL to select the still with a grade that you want
to append.
3 Press PLAY STILL to wipe the selected still against the current clip.
4 Press SHIFT UP and then press NEXT STILL to append the nodes of the grade from the
selected still to the current clip.
Once you’ve appended a compound node, you can open it up to access and modify its
contents as you would any other compound node. For more information on compound nodes,
see Chapter 49, “Node Editing Basics.”
Aligning Keyframes to a Specific Frame
While Copying Grades
If you need to copy a grade with keyframes so that the start keyframe of the copied grade
aligns with a specific frame of the Timeline, you can do so using the following procedure:
To copy a grade and align its keyframes to a specific frame of the Timeline:
1 Save a grade with keyframes as a Gallery still by right-clicking the Viewer and choosing
Grab Still.
2 Choose the clip you want to copy the saved grade to in the Thumbnail timeline.
3 Double-click the Gallery still to wipe it against the current clip in the Viewer.
4 Move the playhead to the frame of this clip you want the first keyframe of the saved
grade to be aligned with.
5 Right-click the Viewer and choose Apply Grade > Align Keyframes to Current Frame.
NOTE: When you append the nodes from a gallery still to a grade, how
keyframes are applied depends on the “Apply Grades Using” setting of the
Gallery. For more information, see Chapter 47, Using the Gallery.
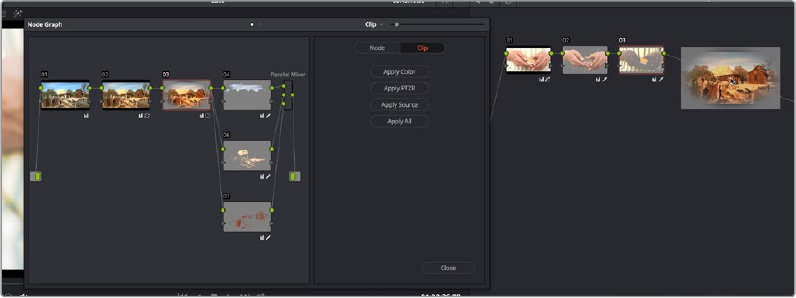
865
Grade Management Part 6 – 48
Copying Individual Nodes and Settings
Copying grades from clip to clip copies everything except for keyframes and motion tracking.
However, there is one way you can copy the motion tracking from one clip to another, and that’s
by copying and pasting individual node settings. This can save time when you’re assembling
complicated node trees by recycling specific nodes or node settings from previous grades.
Copying and Pasting All Settings From One Node to Another
The simplest thing you can do is to copy all of a node’s settings, and paste them into another
node. This makes it easy to duplicate things like windows, qualifier settings, keyframing, or
motion tracking that you want to re-use in another node as the basis for another operation. This
is also a quick way to manually ripple a change you make in a node to that same node in
another clip’s grade.
To copy a node’s settings from one clip to another, do one of the following:
Option-drag one node onto another. When you drop it, the settings of the node you
dragged overwrite those of the node you dropped onto.
Select a node with settings you want to copy and choose Edit > Copy (Command-C).
Then, select a node you want to paste these settings to either in the current grade or in
the grade of another clip, or create a new node, and choose Edit > Paste (Command-V)
to paste the settings you copied. These pasted node settings overwrite any other
settings that node previously used.
Copying From the Node Graph of Other Clips or Gallery Stills
When constructing new grades, you may sometimes find it convenient to copy existing nodes
or node settings from the grade of another clip or gallery still. This can be easily accomplished
by exposing the node tree of any still that’s saved in the Gallery, or any clip in the Thumbnail
timeline, and using the controls found in the floating node graph to copy individual nodes or
node adjustments to the current clip’s grade shown in the Node Editor.
Dragging a node from another clip’s node graph to the currently selected clip’s grade in the Node Editor
The floating Node Graph window has four sets of controls you can use to choose how to copy
nodes and adjustments:
Clip Node Graph: By default, the Clip node graph is displayed at the left. You can drag
any node from the floating node graph to the current grade shown in the Node Editor,
and drop it onto an existing node to overwrite that node’s settings or onto a connection
line to insert it as a new node.
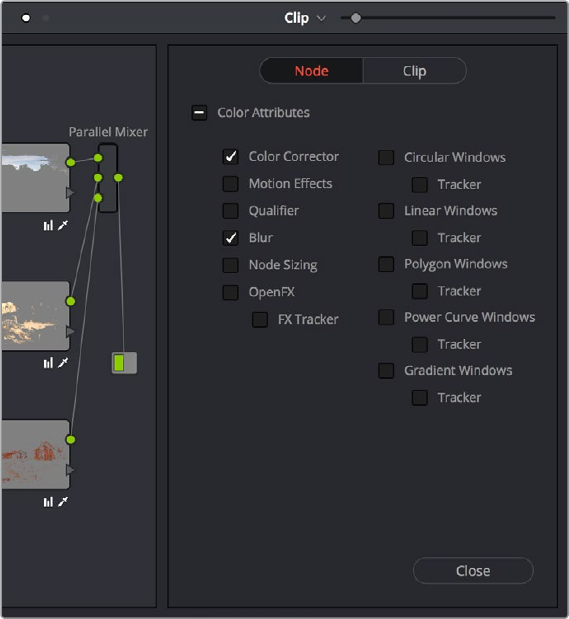
866
Grade Management Part 6 – 48
Timeline Node Graph: (Only available if there is a Timeline grade) You can switch to the
Timeline grade, if there is one, by either clicking the second button in the Node Graph
title bar, or by choosing Timeline from the pop-up menu at the upper right-hand corner
of the floating Node Graph window.,
Apply Color/PTZR/Source/All buttons: With the Clip panel selected, four buttons let you
selectively copy the entire grade, the sizing, the source settings, or all settings at once
to the current clip.
Node Settings: Switching to the Node panel displays all of the available Color Attributes
found within each node. Using this panel, you can selectively choose which node
adjustments get copied and which do not. After you’ve checked the settings you want
to selectively copy, dragging nodes to the Node Editor to copy or append them only
copies or appends the selected attributes. For Windows and OpenFX, you also have
the option of copying any motion tracking that’s available.
The Node panel open with the Color Corrector
andBlur attributes selected for copying
The following procedures describe how to open the floating node graph in different situations.
To copy individual nodes or settings from any still in the Gallery:
1 Right-click a still in the Gallery, and choose Display Node Graph. A floating Node Graph
window appears displaying that still’s node tree.
2 While the Gallery Node Graph window is open, you can select any other still, and this
window will update to show the currently selected still’s node graph, ready for you to
copy from.

867
Grade Management Part 6 – 48
3 Do one of the following to copy nodes or settings to the Node Editor.
You can drag any node from the floating node graph to the current grade shown in
the Node Editor, and drop it onto an existing node to overwrite that node’s settings. If
you open the Node panel and choose specific attributes, only those attributes will be
copied to the node you drag onto.
Drag any node from the floating node graph to the current grade shown in the Node
Editor, and drop it onto a connection line to insert it as a new node. If you open the
Node panel and choose specific attributes, only those attributes will be copied to the
new node that’s created.
Click Apply Color to copy the entire grade from the floating node graph to overwrite
the current grade in the Node Editor.
Click Apply PTZR to copy the sizing from the floating node graph to overwrite that of
the current clip.
Click Apply Source to copy the source settings from the floating node graph to
overwrite those of the current clip.
Click Apply All to copy every setting from the floating node graph to the current clip.
4 While the floating Node Graph window is open, you can also select any clip in the
Thumbnail timeline to change the grade that’s displayed in the Node Editor, ready for
you to copy to.
5 Click Close when you’re finished.
To copy individual nodes or settings from any clip in the Timeline:
1 Click the thumbnail in the Timeline of the clip to which you want to copy nodes. Its node
graph will appear in the Node Editor.
2 Right-click the thumbnail of another clip you want to copy nodes from, and choose
Display Node Graph.
3 Use any of the controls in the floating Node Graph window to copy nodes or settings
to the Node Editor.
You can drag any node from the floating node graph to the current grade shown in
the Node Editor, and drop it onto an existing node to overwrite that node’s settings. If
you open the Node panel and choose specific attributes, only those attributes will be
copied to the node you drag onto.
Drag any node from the floating node graph to the current grade shown in the Node
Editor, and drop it onto a connection line to insert it as a new node. If you open the
Node panel and choose specific attributes, only those attributes will be copied to the
new node that’s created.
Click Apply Color to copy the entire grade from the floating node graph to overwrite
the current grade in the Node Editor.
Click Apply PTZR to copy the sizing from the floating node graph to overwrite that of
the current clip.
Click Apply Source to copy the source settings from the floating node graph to
overwrite those of the current clip.
Click Apply All to copy every setting from the floating node graph to the current clip.
NOTE: The Display Node Graph command only appears in the contextual
menu of a clip in the Thumbnail timeline that is not currently selected.

868
Grade Management Part 6 – 48
4 While the floating Node Graph window is open, you can also select any clip in the
Thumbnail timeline to change the grade that’s displayed in the Node Editor, ready for
you to copy to.
5 Click Close when you’re finished.
Rippling Adjustments
AmongMultipleClips
If you’ve graded a sequence of clips and find yourself needing to make a quick change to
several clips all at once, you can use the Color > Ripple Node Changes to Selected Clips/
Current Group commands to quickly copy changes made to one clip to several others.
However, these commands require that you follow certain rules in order to get the
results you want.
Node rippling uses the number of each node to determine what changes should ripple to which
nodes. In other words, changes made to Node 3 will ripple to Node 3 of every other selected
clip, or to Node 3 of every other clip in the current group (depending on which command
you use).
Rippling changes from one clip to several others requires that all clips share the same number
of nodes, at least for the nodes you’re rippling. If you try to ripple a change to one or more clips
that don’t have a node with the same number as the one you’re rippling, then no change will be
rippled to those clips.
To ripple a change in one node to several selected clips:
1 Select the clip you want to use to make the change so that it’s the current clip, outlined
in orange.
2 Now, Command-click or Shift-click to select the range of clips you want to ripple your
change to, so that they’re all selected red.
The orange outlined clip is the current clip you’re modifying, and the clips
highlighted in red are the ones you’re rippling this change to
You don’t have to select the clips you’re going to ripple your change to prior to making
the change, but it may be easier to keep track of what you’re doing if you set everything
up in advance. The clip you’re changing should be outlined in orange, and the clips
you’re rippling the change to should be highlighted in red.
3 Select a node to modify. Ideally, every selected clip should have a node sharing the
same number as the one you’re modifying. If some clips don’t, then those clips won’t
inherit the change you’re going to be rippling.
4 Make whatever changes you need to, adjusting any of the palette controls in the
Color page you need to, except for Camera Raw, Sizing, and Data Burn, which aren’t
node-specific.
869
Grade Management Part 6 – 48
5 When you’re happy with the change you’ve made, choose Color > Ripple Node
Changes to Selected Clips.
The change you’ve made should ripple to every other selected clip with a node of the
same number, and in a few moments the thumbnails of those clips should update to
show the change.
If you’ve created a group, it’s even easier to ripple node adjustments to the other clips in
the group.
To ripple a change in one node to the current group:
1 Select the clip you want to use to make the change so that it’s the current clip, outlined
in orange. It must be part of a group for this to work.
2 Select a node to modify. Ideally, every selected clip should have a node sharing the
same number as the one you’re modifying. If some clips don’t, then those clips won’t
inherit the change you’re going to be rippling.
3 Make whatever changes you need to, adjusting any of the palette controls in the
Color page you need to, except for Camera Raw, Sizing, and Data Burn, which aren’t
node-specific.
4 When you’re happy with the change you’ve made, choose Color > Ripple Node
Changes to Selected Clips.
The change you’ve made should ripple to every other clip in the current group that has
a node of the same number, and in a few moments the thumbnails of those clips should
update to show the change.
Appending A Node to Multiple Clips
If you’ve made an adjustment to a node in one clip that you’d like to apply to several other clips,
you can quickly do that using the Color > Append Node to Selected Clips command. You can
do this as a prelude to using one of the Ripple Node Change commands, as it’s a quick way to
make sure several previously ungraded clips have the same nodes, but you can also do this as
a quick way to apply the same node change to several clips, regardless of whether they have
matching node trees.
To append a node to other selected clips:
1 Select the clip you want to use to make the change so that it’s the current clip, outlined
in orange.
2 Select the node you want to append to other clips.
3 Now, Command-click or Shift-click to select the range of clips you want to ripple your
change to, so that they’re all selected red.
The clip you’re changing should be outlined in orange, and the clips you’re rippling the
change to should be highlighted in red.
4 Choose Color > Ripple Node Changes to Selected Clips.
The selected node should be appended to the end of the node tree of each selected
clip, and in a few moments the thumbnails of those clips should update to show
the change.
870
Grade Management Part 6 – 48
Scroll Copy Grades Using
theDaVinciControl Panel
Scroll mode lets you quickly preview the effects of many different grades applied to clips in
the Timeline on the currently selected clip, with the option to either accept or reject the
previewed grade to which you’ve “scrolled.” This can be useful for checking to see if any of
the previous grades you’ve created in a scene will work for the currently selected clip.
To use Scroll mode:
1 Move the playhead to the clip to which you potentially want to copy a new grade.
Youcan use the PREV SCENE and NEXT SCENE buttons to move quickly.
2 Do one of the following to enter Scroll mode:
Press SCROLL on the Transport panel.
Press MODES, above the fourth trackball on the Center panel, then press the
SCROLL MODE soft key.
3 Now, do one of the following to preview different grades from other clips:
Press the PREVIOUS SCENE and NEXT SCENE soft keys to move from clip to clip
in the Timeline, previewing each grade to the current clip.
Turn the SCROLL SCENES knob to scroll smoothly along multiple clips in
the Timeline.
Turn the SCROLL FRAMES knob to scroll along different frames of any clip,
previewing the effects of keyframed grades at different points in time.
Press the TOGGLE DECK KEYS soft key to use the transport controls on the
Transport panel to play through the Timeline, previewing grades as you go.
Press a number on the keypad of the Transport panel, and then the SCENE
NUMBER soft key, to jump to a clip and preview its grade.
A
s you scroll from clip to clip, a red outline indicates the clip with the grade being
previewed, and an orange outline indicates the current clip to which you’re
previewing each scrolled grade.
4 When you’re finished, do one of the following to either accept or reject a
scrolled grade:
Press EXIT AS WAS if none of the grades you scrolled through was suitable. This
exits Scroll mode and leaves the clip as it was previously.
Press EXIT AS IS if you’ve found a grade that works for the current clip. This exits
Scroll mode and copies the scrolled grade.
When you press the TOGGLE DECK KEYS soft key in Scroll mode, each of the Transport
Control buttons on the Transport panel functions as a means of previewing the grades of
other clips in the Timeline.
STEP FWD: Move to the next clip and preview its grade.
STEP REV: Move to the previous clip and preview its grade.
FWD: Plays (scrolls) forward at 1 scene per second, previewing each new grade as
it appears.
871
Grade Management Part 6 – 48
REV: Play (scrolls) the clips in reverse at 1 scene per second, previewing each new
grade as it appears.
FFWD: Shuttles (scrolls) forward through the Timeline at 4 scenes per second,
previewing each new grade as it appears.
RWD: Shuttles (scrolls) reverse through the Timeline at 4 scenes per second,
previewing each new grade as it appears.
Rippling Changes Using
theDaVinciControl Panel
DaVinci Resolve has a mechanism for rippling specific changes made to one clip to a range of
other clips in the Timeline. This is only possible using the controls of the DaVinci control panel.
The general idea of the ripple function is that you select a clip, make a change, and then ripple
that change to a range of other clips. This rippled change can be applied to the same node in
each clip, or the change can be added as an appended node within each rippled clip.
The Ripple mode that’s used when you press the RIPPLE VALUE button can be changed in the
Color panel of the User Preferences. There are four options.
Exact values changed: Changes made to the current clip are rippled to the specified
clips using the exact parameters that were changed. For example, if Lift in the current
clip is changed to 0.75 of its range, each clip you ripple will have a Master Gain
setting of 0.75. Only parameters you adjust are rippled.
Percent value changed: Changes made to the current clip are rippled to the
specified clips by the percentage of change you made to the altered parameters. For
example, if the current clip has a Lift level of 1.00 and is changed to 0.90 units, then
the Lift setting of each clip you ripple will have a relative reduction of 10% relative to
its previous value.
Unit value changed: Changes made to the current clip are rippled to the specified
clips by the same delta of change, using whichever units make sense for the effected
parameter. For example, if the current clip had a Lift of 0.80 and you increased it to
0.90, each rippled scene’s master gain level increases by 0.10.
All values are copied: The current clip’s grade is rippled to the specified clips in its
entirety. No comparison is made with the original clip’s parameters, and all memory
parameters are rippled.
The following procedure describes in detail how you can use the DaVinci control panel to ripple
a change to a range of other clips. While this procedure may appear complicated, it’s just that
there are several options. Once you learn the sequence of commands, this process is actually
quite fast.
To ripple a change using the Ripple Mode soft key commands:
1 (Optional) Press MODES, then press RIPPLE MODES. Four commands appear mapped
to the middle soft keys of the Center panel, which can be used later to execute different
types of ripple operations.
2 Move the playhead to the clip you want to adjust.
3 Adjust the current clip that you want to ripple to other clips in the Timeline.
872
Grade Management Part 6 – 48
4 Define the range of clips you want to ripple to using the number pad on the Transport
panel. The following combinations will work:
An absolute range of clips is defined by entering two clip numbers separated by a
comma. For example, if you want to ripple the current change to clips 10 through 15,
you’d press “10 , 15”
To specify every clip from the beginning of the Timeline, use the Minus (–) key. For
example, to specify a range of clips from the beginning to clip 20, you’d press “– , 20”
To specify every clip to the end of the Timeline, use the Plus (+) key. For example, to
specify a range of clips from the clip 50 to the end, you’d press “50 , +”
To specify every clip in the whole Timeline, press “– , +”
5 (Optional) You can control whether the rippled change is applied in an appended node,
or an existing node, in every rippled clip:
If you want to apply the rippled change as a new node that’s appended to the end of
every rippled clip’s grade, press SHIFT DOWN.
Otherwise, the rippled change will be applied to the same node in every rippled clip
that you made your adjustment to in the current clip. In other words, if you made a
change to Node 2, it would be rippled to Node 2 of all the clips you specified. If one
of the rippled clips doesn’t have the same number of nodes, you may get an error.
6 To execute the ripple, do one of the following:
Press RIPPLE VALUE on the Transport panel to ripple a change using the currently
selected Ripple Mode in the User Preferences.
Press one of the Center panel soft keys corresponding to the ripple function you
want to perform.
There are four soft keys:
STATIC RIPPLE: Changes made to the current clip are rippled to the specified clips
using the exact parameters that were changed. For example, if Lift in the current clip
is changed to 0.75 of its range, each clip you ripple will have a Master Gain setting of
0.75. Only parameters you adjust are rippled. Identical to the “Exact values changed”
ripple setting.
RELATIVE RIPPLE: Changes made to the current clip are rippled to the specified
clips by the percentage of change you made to the altered parameters. For example,
if the current clip has a Lift level of 1.00 and is changed to 0.90 units, then the Lift
setting of each clip you ripple will have a relative reduction of 10% relative to its
previous value. Identical to the “Percent value changed” ripple setting.
ABSOLUTE RIPPLE: Changes made to the current clip are rippled to the specified
clips by the same delta of change, using whichever units make sense for the affected
parameter. For example, if the current clip had a Lift of 0.80 and you increased it to
0.90, each rippled scene’s master gain level increases by 0.10. Identical to the “Unit
value changed” ripple setting.
FORCED RIPPLE: The current clip’s grade is rippled to the specified clips in its
entirety, overwriting all previous nodes and parameters in the rippled clips.
The adjustment you made in Step 4 is applied to the designated range of clips.
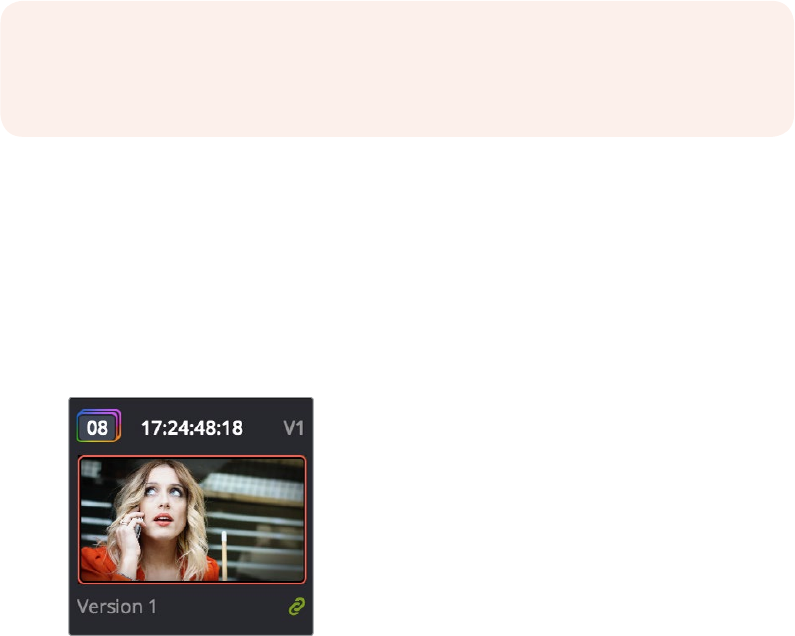
873
Grade Management Part 6 – 48
Admittedly, that was a long and detailed procedure, but the actual button sequences are
straightforward once you put them together. Here are some examples of button sequences that
ripple an adjustment you’ve just made in different ways:
“10 , 15” then SHIFT DOWN then RIPPLE VALUE: Copies the change you’ve made to
the current clip, and applies it as a new node that’s appended to the end of clips ten
through fifteen.
MODES then RIPPLE MODES then “34 , 45” then FORCED RIPPLE: Copies the
entire grade of the current clip, using it to overwrite the grade of clips 34 through 45.
MODES then RIPPLE MODES then “– , +” then SHIFT DOWN then RELATIVE
RIPPLE: Copies the change you’ve made to the current clip as a relative percentage,
and applies it as a new node appended to the end of every single clip in the
entire Timeline.
Using Groups
Grouping is one of DaVinci Resolve’s most powerful features for organizing grades amongst
multiple clips. Groups are manually created collections of clips with automatic linking
relationships that make it easy for you to control the rippling of grades among sets of clips that
you define. When clips have been grouped together, selecting one member of the group
reveals a group “linked” badge at the top-right of each clip’s thumbnail belonging to the group.
The green link icon indicates this
clip is in a group
You can create as many groups within a single project as you need. You can add or remove
shots from the current group, and the current group is defined by the last shot you’ve selected
(if it belongs to a group, that’s the new current group).
As introduced in DaVinci Resolve 11, the grading of grouped clips is easier than it has ever been.
Once grouped, you can choose from one of four Node Editor modes to grade the current clip.
Which mode you choose determines whether that grade will automatically ripple to every other
member of that group, or whether the grade will only affect that one clip. In this way, you can
combine multiple node trees, some which will ripple, and one which won’t, to create the final
look of each clip in that group.
WARNING: Once you ripple a change in this manner, there is no going back. Since
Undo is a per-clip operation, there is no global undo for changes made to the entire
Timeline. Proceed with caution
874
Grade Management Part 6 – 48
For example, you might group together every clip from the same angle of coverage in a scene.
You might also group together every clip from a particular section of b-roll that will be graded
with the same treatment. This way, whenever you make a change or otherwise update one
member of the group using one of the rippled Node Editor modes, every clip in the group will
be changed together.
This section discusses how to create and manage groups, how best to use them, and what
issues you need to be aware of to use groups to best advantage.
Creating and Managing Groups
The following procedures describe how to create, load, modify, and delete groups.
To create a new group:
1 Select one or more clip thumbnails in the Timeline. You can select a contiguous
range of clips by clicking one and then Shift-clicking another, or you can make a
discontiguous selection by Command-clicking individual clip thumbnails anywhere in
the Timeline.
2 Right-click one of the selected clip thumbnails, and choose Add Into New Group.
3 Type a name into the field of the Group Name dialog, and click OK.
The new group is created, and the clips you had selected now appear with the “linked”
group badge above the thumbnails.
To load a different group, do one of the following:
Move the playhead to another clip that’s a member of that group.
Right-click any clip belonging to any group, and choose Group > “Name of
group” > Load.
The selected group now becomes the current group. Using the Add Into Current Group
command will add a clip to the newly loaded group.
To add one or more clips to an existing group:
1 Load the group you want to add clips to.
2 Select one or more clip thumbnails in the Timeline. You can select a contiguous
range of clips by clicking one and then Shift-clicking another, or you can make a
discontiguous selection by Command-clicking individual clip thumbnails anywhere in
the Timeline.
3 Right-click one of the selected clip thumbnails, and choose Group > “Name of group” >
Assign to Group.
The selected clips now appear with the “linked” group badge above the thumbnails.
To remove one or more clips from an existing group:
1 Select one or more clip thumbnails in the Timeline that you want to remove from a
group. You can select a contiguous range of clips by clicking one and then Shift-
clicking another, or you can make a discontiguous selection by Command-clicking
individual clip thumbnails anywhere in the Timeline.
2 Right-click one of the selected clip thumbnails, and choose Remove From Group.
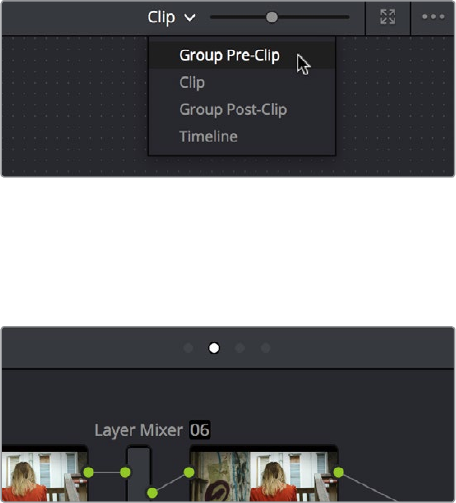
875
Grade Management Part 6 – 48
To rename a group:
1 Right-click any clip belonging to any group, and choose Group > “Name of
group” > Rename.
2 Type a new name into the field of the Group Name dialog, and click OK.
The group is renamed. The new name appears as a new submenu of the Timeline
contextual menu.
To delete a group:
Right-click a clip belonging the group you want to delete, and choose Group >
“Nameof group” > Delete.
This clears the group, while preserving the last applied grade within each clip.
Using Group Modes to Control which
Grades Ripple and which Don’t
When you create a group and then select any clip that is a member of that group, additional
Node Editor modes become available that let you apply multiple levels of grades to the clips in
that group.
Available options in the Node Editor modes pop-up
For clips that aren’t grouped, two dots at the top of the Node Editor let you switch between Clip
and Timeline modes via a single click. If you’re working on a clip that’s part of a group, four dots
will be displayed to allow fast access to the Pre-Clip and Post-Clip Group modes as well.
Four dots at the top of the Node Editor let you
choose which mode you’re working on
Node trees you create using the Group Pre-Clip and Group Post-Clip modes
automatically ripple changes to every member of a group. Node trees created with the
Clip mode are specific to each clip. Node trees created with the Timeline grade affect
the entire Timeline, all at once. Combining node trees made using these different
modes makes it easy combine clip-specific changes with group-wide changes that
make grading faster.
876
Grade Management Part 6 – 48
Group Pre-Clip: Node trees assembled in this mode affect every clip in the group
simultaneously. Pre-Clip adjustments are useful for creating an overall grade that you
want to use as a starting point for the scene, such as when you need to normalize a
group of log-encoded clips in a specific way, or when you want to create a base grade
that generally improves every clip in a scene.
Clip: The Clip grade corresponds to the local or remote version associated with
that clip. Node trees assembled in the Clip mode only affect the specific clip that’s
selected. All Local and Remote versions you create are in Clip mode. Clip adjustments
are useful for matching clips to one another in a scene, doing clip-specific secondary
adjustments, or making any other sort of adjustment that you only want applied to the
current clip, rather then to the group as a whole. Clip adjustments are applied after Pre-
Clip adjustments.
Group Post-Clip: Node trees assembled in this mode also affect every clip in the group
simultaneously, but these adjustments are applied after the Clip adjustments. Post-Clip
adjustments can be useful for applying a creative look to an overall scene, so that later
revisions to a scene’s look can be accomplished with a single set of adjustments that
automatically affect the entire group.
Timeline: Node trees assembled in this mode affect every single clip in the entire
Timeline. Timeline adjustments are useful when you have a single change that you
want to apply to every single clip at once.
The image processing of each Node Editor mode is sequential, making it easy to keep track of
the order of operations affecting a particular clip.
An Example of Grading a Group of Clips
This section shows an example of how you might approach grading a group of clips using the
different Node Editor modes that are available. Keep in mind that this is only one of many
possible approaches you could take to the use of groups, and was chosen because it exercises
everything you can do to a single grade.
To get started, select a series of clips that you want to group, and right-click one of them and
choose Create New Group to group them together, entering a name and clicking OK when
prompted. One convenient advantage of simply creating groups from a selection is that you’re
not limited to selecting a continuous range of clips in the Timeline. Another advantage is that
you can use the View > Timeline Thumbnail Mode > Source (C-mode) command, or Timeline
filtering, to isolate the range of clips you want to use for creating a group.
There are different ways you might choose to group clips together:
All clips within a particular scene
All clips recorded from a specific camera
All headshots of a particular person
All clips from a particular angle of coverage
All exteriors of a particular location
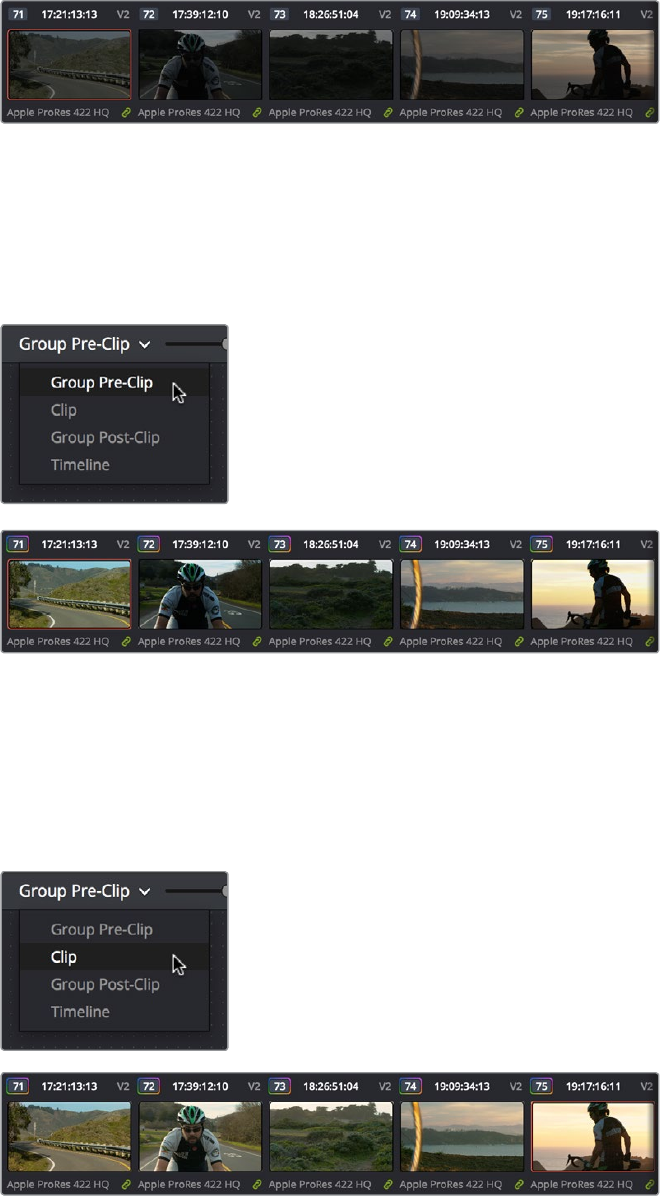
877
Grade Management Part 6 – 48
The list could go on and on, but you get the idea. You can group any selection of clips together
that have reason to share a common grade. In this example, a series of shots from an exterior
scene are selected and made into a group.
Clips made into a group
Once you’ve created a group, choose Group Pre-Clip from the Node Editor mode pop-up. This
is the first grade that’s applied, as the underlying grade that affects the entire group. Using this
node tree, adding a LUT to normalize the clips, a Color Wheel adjustment, and some Curve
adjustments to tune the color provide a primary grade that now affects every single clip in
the group.
A primary adjustment applied to the Group Pre-Clip mode
With this accomplished, you can see there’s some variation among the clips in the scene that
needs to be corrected in order for every clip to match. Choose Clip from the Node Editor mode
pop-up. Grades that you make in Clip mode only affect the clip to which they’re applied, so now
you can work clip by clip using the Image Wipe and Split-Screen controls to compare clips and
make whatever adjustments are necessary to make each one match the main look for
the scene.
Scene balancing adjustments made using the Clip mode
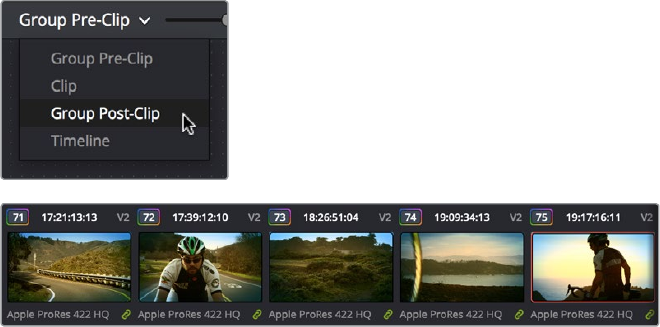
878
Grade Management Part 6 – 48
Once all the clips are balanced with one another, you can choose Post-Clip Group from the
Node Editor mode pop-up. This lets you add one more grade on top of the Pre-Clip and Clip
grades that you’ve already applied, that you can use for any number of things. In this example, a
single stylistic adjustment is applied that now affects all of the clips at once. If a client wants to
see something different, you can easily make the necessary changes to one clip, and all other
clips in that group will immediately be altered as well.
A stylistic adjustment applied to the Group Post-Clip mode
At this point, the scene is graded via a well organized set of corrections. If the client later wants
a change affecting the underlying primary grade that everything is built on, you can adjust the
Pre-Clip grade. If you spot an inconsistency with your shot matching at any point, you can make
a fast tweak to the relevant Clip grade. And if the client wants a stylistic change, you can make
any necessary adjustments to the Post-Clip grade to change the overall look of the whole
scene. In each case, groups give you total control over which adjustments will ripple across the
whole group, and which adjustments will be clip-specific.
Using Undo in Groups
Each Node Editor mode has a separate undo stack, meaning that separate multiple-level undo
is saved for Group Pre-Clip, Clip, and Group Post-Clip.
Saving Stills and Grades in Groups
When you save a still for a clip that’s part of a group, the result is that the still reflects the look of
the combined Pre-Clip, Clip, and Post-Clip node trees, but the grade that’s saved within
depends on the Node Editor mode you had selected when saving the still. For example, if the
Node Editor is set to Group Pre-Clip, then you’ll only save the Pre-Clip grade; the Clip, Group
Post-Clip, and Track grades will be ignored. Copying a saved grade to a clip in a group results
in that grade being copied to the node tree of whichever Node Editor mode is currently open.
Collapse Group Grades
If you want to take a clip out of a group, but you want its grade to continue incorporating all
adjustments made in the Pre-Group and Post-Group Node Editor modes, you can use the
Collapse Group Grades command to copy all nodes in the Pre-Group and Post-Group grades to
the Clip grade. When you do this, Pre-Group nodes are added before any pre-existing nodes in
the Clip grade, and all Post-Group nodes are added after, in order to maintain the correct order
of operations.
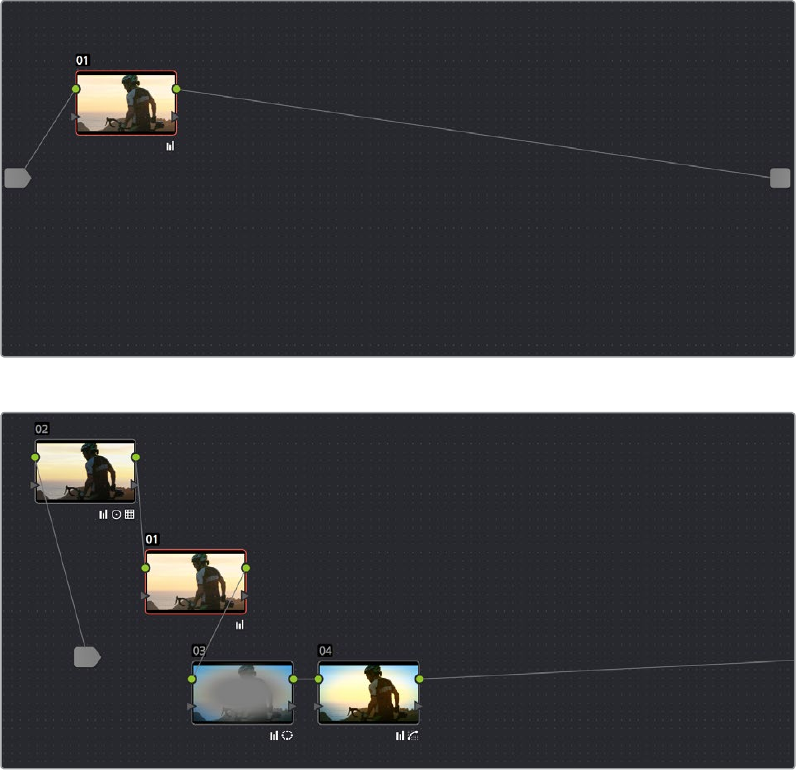
879
Grade Management Part 6 – 48
The Clip node tree
After using the Collapse Group Grades command to flatten the
Pre-Group and Post-Group nodes into the Clip node tree
To flatten all group grades into a single Clip mode node tree:
Right click a clip’s thumbnail in the Thumbnail timeline, and choose Collapse Group
Grades from the contextual menu.
Using Collapse Group Grades on a clip always removes that clip from whatever group it was
previously a member of. This can also be an easy way of creating a single flat node tree in
preparation for saving a grade to the Gallery for applying to other clips that aren’t themselves
in groups.
Groups and Versions
Local or Remote versions you create relate only to the Clip grade. Group Pre-Clip and Group
Post-Clip grades cannot be versioned.
880
Grade Management Part 6 – 48
Exporting Grades and LUTs
If you find it necessary to exchange grades with other workstations, there are two ways you can
do so directly: by exporting grades, or LUTs.
To export a grade:
1 Save the grade you want to export as a still in the Gallery.
2 Right-click the saved still in the Gallery, and choose Export.
3 Choose a location for the resulting still image and saved grade files, type a name into
the Save As field, and click Save.
Two files are saved. A DPX formatted file contains the still image of the frame that was
stored. A DRX (DaVinci Resolve eXchange) file contains all the grading information.
To Import a grade:
1 Right-click anywhere in the gray area of the Gallery, and choose Import.
2 Choose the DPX file that was exported from your DaVinci Resolve workstation, or
someone else’s. The accompanying DRX file must be in the same location, although
you can’t select it directly.
The still you imported appears in the Gallery, containing the grading information you
wanted to import.
When exporting a LUT, any nodes that use Windows or OpenFX will be ignored along with all
corrections made within these nodes. All other nodes with Primaries palette and Custom
Curves palette adjustments that can be translated into a LUT will have their combined result
translated into a LUT. For any nodes that mix supported and unsupported adjustments for LUT
export (such as sharpening or blur filtering operations), the unsupported adjustments will simply
be ignored.
To export a LUT:
1 Right-click a clip thumbnail in the Timeline of the Color page, and choose one of the
following commands corresponding to the type of LUT you want to export:
Generate 3D LUT (CUBE): A DaVinci-developed LUT format (no relation to the Iridas
SpeedGrade .cube format).
Generate 3D LUT (Panasonic VLUT): A LUT format associated with Panasonic
VariCam cameras.
2 Choose a location for the resulting LUT file in the file dialog. The default file path
depends on your operating system; saving it here will make it available to DaVinci
Resolve for future use.
On OS X: Library/Application Support/Blackmagic Design/DaVinci Resolve/LUT/
On Windows: C:\ProgramData\Blackmagic Design\DaVinci Resolve\Support\LUT
On Linux: /home/resolve/LUT
If you like, you can create a new folder in which to save your custom LUTs.
3 Enter a name into the Save As field, and click Save. A LUT file is saved.

881
Grade Management Part 6 – 48
Once created, you can use an exported LUT from within DaVinci Resolve, applying it to a clip or
node directly, or applying it to the entire project using the settings found in the Color
Management panel of the Project Settings. You can also copy the LUT to a memory stick to give
to someone for monitoring or previewing in an onset workflow, or to someone using another
grading application that can read this LUT format.
What’s the Dierence Between a LUT and a Shaper LUT?
DaVinci Resolve is capable of importing and using LUTs within its 32-bit floating point
image processing pipeline. The .cube format can be used as either a simple 33x33x33
3D LUT, or as a shaper LUT, which is actually a method of using two LUTs, a 1D LUT
and a 3D LUT together, that addresses signal processing issues that 3D LUT
can’t handle.
For processor efficiency, 3D LUTs are designed with reasonable lower and upper
limits for the data they will handle. It’s well known that when a 3D LUT is fed values
that are outside of the range that LUT is designed to handle, the out-of-range data will
be clipped. Since many LUTs are designed with digital cinema workflows in mind, the
practical result is that feeding a video signal with super-white in it to a 3D LUT that’s
designed for full-range data (0–1) will clip the super-white part of the signal.
Shaper LUTs handle this issue by first using a 1D LUT to process video signals with
out-of-range data, fitting the signal into a range that the 3D LUT won’t clamp. The
output of the 3D LUT includes the reverse transformation, to effectively zero out the 1D
LUTs transform, while retaining whatever processing the 3D LUT was meant to apply.
Shaper LUTs are also useful for dealing with extremely large data sets, such as
OpenEXR files that can theoretically handle an image data range of –infinity to
+infinity. Using a Shaper LUT, you can remap the incoming data to fit more precision in
the 0–1 range, leaving less important data outside the range.
883
Node Editing Basics Part 6 – 49
Node Editing Basics
This chapter covers the basics of using the Node Editor in DaVinci Resolve to manage all of the
adjustments you decide to apply to a clip, as well as the fundamental procedures for editing
and organizing nodes within a tree that are the basis for creating more sophisticated effects.
This chapter has the following topics:
Node Editor Basics 884
The Node Editor Interface 885
The Components of a Node Tree 885
Node Badges and Labels 887
Selecting Nodes 888
Disabling Nodes 889
Bypass All Grades 889
Resetting Nodes 889
Caching Specific Nodes to Improve Performance 890
Editing Node Trees 890
Adding Nodes 890
Adding Nodes with Windows Turned On 891
Deleting Nodes 892
Connecting and Disconnecting Nodes 892
Extracting a Node 892
Inserting a Node 893
Rearranging Node Order 893
Copying and Pasting All Settings From One Node to Another 893
Keeping Node Trees Organized 894
Using Compound Nodes 895
Adding Inputs and Outputs to Compound Nodes 896
Nesting Compound Nodes 896
Grading Compound Nodes 896
Identifying Nodes 896
Grading Order of Operations 897
Putting Nodes into HDR Mode 898
Applying a LUT Within a Node 898
Clip vs. Timeline Grading 899
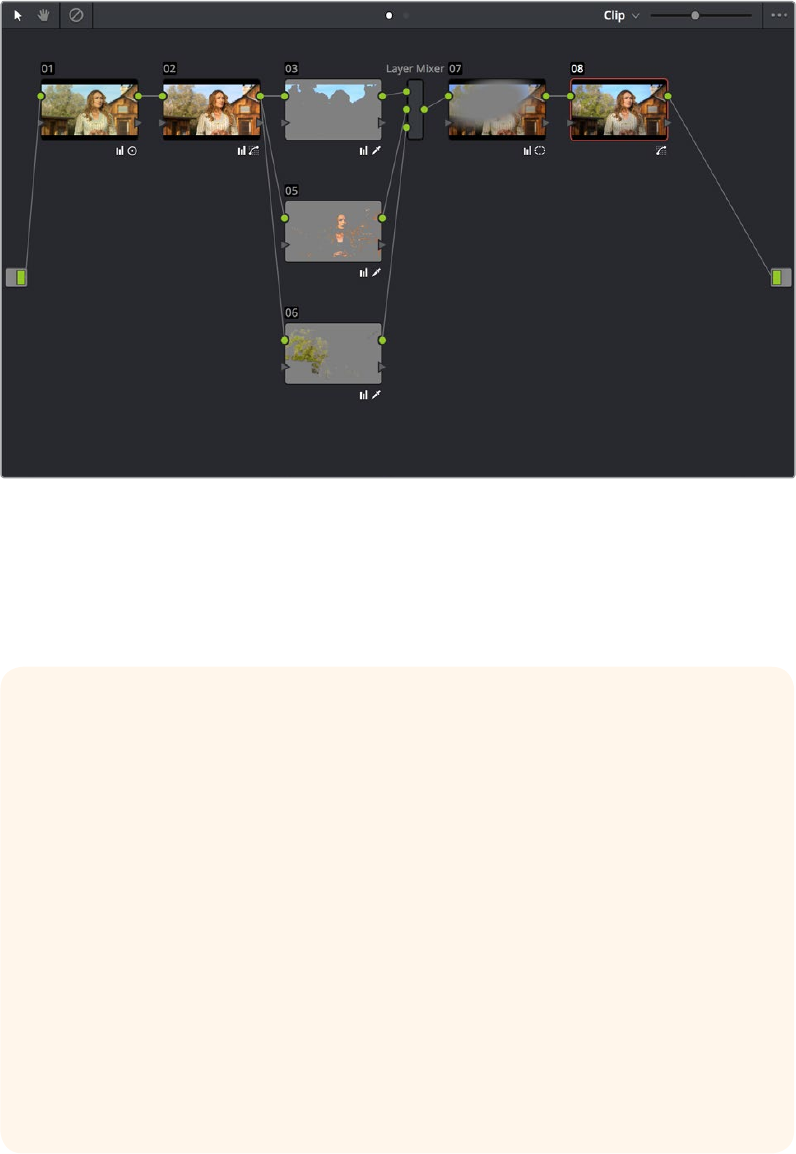
884
Node Editing Basics Part 6 – 49
Node Editor Basics
By default, every clip has one node in the Node Editor that contains the first corrections you
make. However, you also have the option of creating multiple nodes, where each node contains
one or more corrections that affect the image.
The Node Editor showing a reasonably full-featured grade
The specific arrangement of nodes you create lets you exert precise control over the order of
operations performed by your grade, which provides many advantages. This section covers
different ways of creating, editing, and arranging node trees to harness the full power of
DaVinciResolve.
How Many Nodes Do I Need to Use?
In this chapter and the ones that follow, you’ll learn many different techniques for
combining adjustments and nodes in different ways to achieve highly specific effects.
Consequently, new DaVinci Resolve users often wonder, how far do I go? There is no
right answer, but suffice it to say that some of the world’s leading colorists achieve
stunning results in as few as three or four nodes, while others routinely build carefully
organized hierarchies of ten to twenty nodes, or more. The number of nodes you use
is often dependent on the quality of media you’ve been given to work with, as well-lit
footage usually requires less work than material shot run-and-gun with available light,
that typically needs many more adjustments to achieve an acceptable result.
Furthermore, the number of nodes you may use can also depend on what kind of
program you’re working on, with commercial spots affording the colorist enough time
in the schedule to build truly massive grades that adjust every little detail, and
narrative features and television shows requiring you to work faster and do more
within fewer adjustments in order to stay on track. The real answer? Each grade
requires as many nodes as are necessary. No more, no less.
885
Node Editing Basics Part 6 – 49
The Node Editor Interface
As you work within the Node Editor, you may find the need to zoom into or out of it to get a
better look at the node tree, and to pan around the working area to deal with large
collections of nodes.
To expand the size of the Node Editor’s working area:
Drag the border between the Node Editor and the Gallery to the left or right to make it
wider or narrower.
Right-click anywhere within the Node Editor (except on a node) and choose Toggle
Display Mode, which hides the Viewer and moves the Node Editor to the right of the
Gallery, enlarging it considerably. Right-click and choose Toggle Display Node again to
return to the default layout.
You can toggle Display mode using the DaVinci control panel by pressing SHIFT UP
and the DISPLAY/CURSOR button above the fourth trackball on the Center panel.
To zoom and pan within the Node Editor, do one of the following:
Use the Node Editor’s zoom slider to shrink or enlarge the nodes in the Node Editor.
Click the Pan tool (the hand icon) at the upper left-hand corner of the Node Editor, and
drag anywhere within the gray area of the Node Editor to pan around.
Press the H key to toggle between selection and pan modes in the Node Editor.
Middle-click and drag anywhere within the Node Editor to pan around.
Right-click and choose Zoom In or Zoom Out.
Right-click and choose Zoom to Window to fit the node tree to the current size of the
node graph.
Right-click and choose Original Size to return the node graph to the default size.
The Node Editor’s Pan (Hand) tool
The Components of a Node Tree
Ambitious grades may require trees of multiple nodes to create the necessary effect. This
section covers the mechanics of putting nodes together into the structures that are described
in more detail later in this chapter.
Every node you add is a “Corrector” node, which is capable of either primary or secondary
correction, depending on whether or not you enable the Qualifier/Window/Matte controls. Even
“Serial” and “Parallel” nodes are simply Corrector nodes that are added in series or in parallel to
the previous node in the node tree; the names are a consequence of how they’re added.
Each Corrector node has two inputs and two outputs, which lets you separately manage the
RGB image-processing channel, and the Key channel that defines areas of isolation for image
processing operations, or transparency for compositing. RGB inputs and outputs are light green
and round, located at the top left and right of each node. KEY inputs and outputs are blue and
triangular, located at the bottom left and right of each node. These inputs and outputs let you
control the flow of image and isolation channels coming into and going out of each node
in the tree.
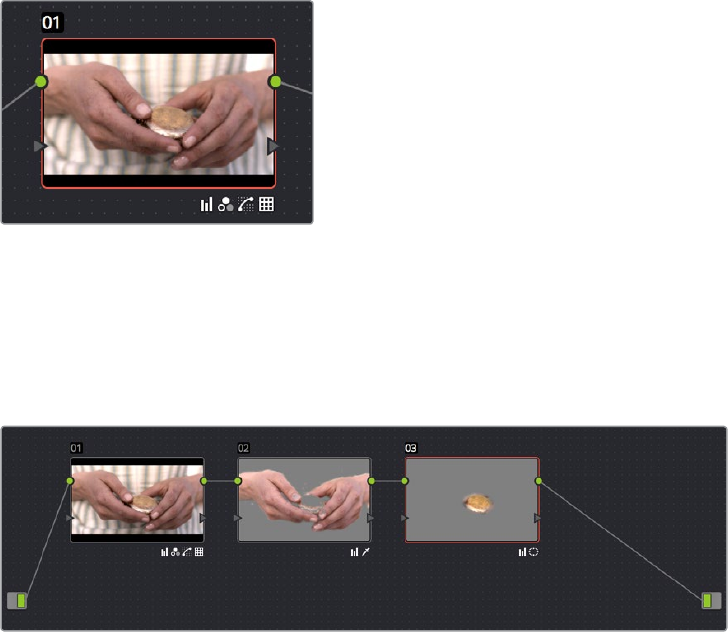
886
Node Editing Basics Part 6 – 49
A single node, the round RGB and triangular
KEYinputs and outputs are clearly visible
Nodes are attached to one another via “connections,” seen as lines that connect one node to
another. Image data flows from left to right, starting with the Source input all the way at the left
of the Node Editor, through each node in the tree, and ending at the Node Tree output at the
right of the NodeEditor.
A simple serial arrangement of corrections
Here’s an explanation of the different components of a basic node tree where all nodes are
connected in serial, one after the other, and how they work together:
Source Input: The green source node to the far left is the clip’s image data as
processed by the Sizing and Source decode settings, ungraded. The Source input
feeds RGB data to the grade, and is connected to the RGB input of the first node in
your tree. If necessary, you can connect the Source input to more than one Corrector
node, creating multiple simultaneous streams of image processing emerging from the
original source state of the image that you can eventually recombine in different ways
using the Parallel or Layer Mixer nodes.
Nodes: Each node in the node graph represents a collection of image processing
operations that can be enabled or disabled separately from any other node in the
graph. By separating operations into multiple nodes, you’re able to precisely control the
order of all image processing operations in DaVinci Resolve to create many different
corrections and effects. The round green RGB inputs and outputs are used to connect
these nodes together. Each node’s thumbnail image shows how the clip looks at that
particular stage of the grade, giving you a visual indication of what each node is doing,
and small badges below each node show you which specific operations are being
applied by that node.
RGB Inputs and Outputs: The round green inputs and outputs at the upper right and
left of each node are used to connect the RGB image that’s output from one node
to the RGB input of the next node. For a Corrector node to have an effect, you must
connect both its RGB input and its RGB output to neighboring nodes in the tree.
Furthermore, every single node in the Node Editor must be connected for a grade to
be enabled; having any disconnected node in the node tree disables that grade until
it’s fully connected.

887
Node Editing Basics Part 6 – 49
Key Inputs and Outputs: The blue triangles at the bottom right and left of each node
are used to route the key channel generated by a node’s Qualifier or Window controls,
or imported via a Matte clip that you previously associated with a clip in the Media
page. When you connect the Key output of one node to the Key input of another, you
basically copy the first node’s key to the second node. You can also combine the Key
outputs of multiple nodes in various ways using the Key Mixer node.
Node Tree Output: The RGB output of the last node in a tree must be connected to the
green Node Tree output node, which “completes the circuit” of image processing, and
passes that correction on to the next stage in the DaVinci Resolve image processing
pipeline. If the output is not connected, the node tree is disabled and has no effect on
the clip. You can only connect one RGB output at a time to the Node Tree output.
Second Source Input (for HDR): You can access the alternate highlight exposure of
RED HDRx media by exposing this optional second Source input. For more information,
see“Mulit-Channel RED HDRx Support” in Chapter 52, “Channel Splitting and Image
Compositing.”
Alpha Output: It’s possible to create regions of transparency for compositing directly
in DaVinci Resolve by connecting a Key output to an optional Alpha output. For more
information, see Chapter 51, “Combining Keys and Using Mattes.”
Node Badges and Labels
Nodes appear with various labels and badges to help you identify what each node is
contributing to the overall grade. How long a label and how many badges appear depends on
the size of each node, as set by the Node Editor’s Zoom slider.
Nodes showing the kinds of labeling and badges that are available
for identifying what operations each node is performing
Node number: Nodes are numbered in the order in which they appear in the node
graph, making it possible for you to select specific nodes by number via the DaVinci
control panel. If you insert new nodes or rearrange existing nodes, the node numbering
will change to reflect each node’s new order.
Adjustment badges: As you apply various operations within a node, small badges
appear at the lower right-hand corner underneath the node. How many badges will
appear depends on how far in or out you’re zoomed in the Node Editor, and whether
or not there’s a Color Space label; at larger sizes, more badges can appear at once.
Each palette in the Color page has a unique badge. If you apply more operations than a
node has area to display, a single “downward arrow” badge appears.
Color Space labels: If you switch a node to use a color space other than RGB, that color
space’s three letter label appears at the lower left-hand corner of the node.
Labeling Nodes
Nodes can be labeled to identify a particular node’s function in your grade. This can make it
easier to revise a grade months later. Node labels are also saved when you save a still, so
labels can also make it easier to decipher a saved grade down the road. At each node’s default
size in the Node Editor, nodes can appear with up to 12 characters of text, although larger
nodes can accommodate more text.
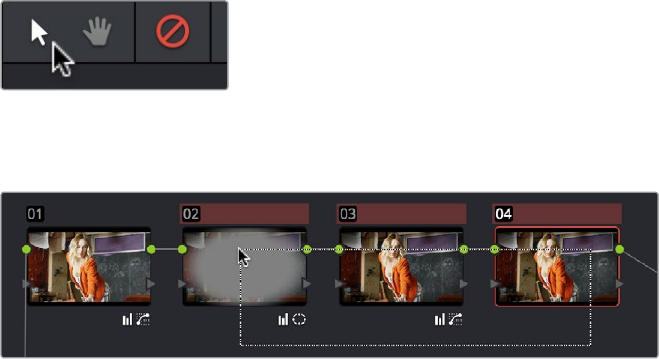
888
Node Editing Basics Part 6 – 49
To label a node:
1 Right-click a node and choose Change Label.
2 Type a label above the node and press Return.
The label you entered appears above the node in the Node Editor. Once a node has a
label, you can change the label at any time by double-clicking it.
Selecting Nodes
The node that’s currently selected in the Node Editor is highlighted in orange, and is referred to
as the current node. When you adjust any of the parameters or settings in the Color page,
you’re adjusting parameters within the current node. You can only select one node at a time.
To select a node, making it the current node, do one of the following:
Double-click any node in the node graph.
Choose Nodes > Previous Node (Option-Shift-;) or Nodes > Next Node (Option-Shift-‘).
When you do this, the last node loops around to the first one, and vice versa.
Using the Transport panel of the DaVinci control panel, press the PREV NODE or
NEXTNODE buttons. When you do this, the last node loops around to the first one, and
vice versa.
Using the Transport panel of the DaVinci control panel, enter the number of the node
you want to select using the keypad, and then press the SELECT NODE button.
The selected node appears highlighted in orange. You also have the ability to select multiple
nodes, in preparation for doing things like moving them or creating compound nodes (covered
later in this chapter).
To select multiple nodes:
Command-click each of the nodes you want to simultaneously select.
With the Node Editor Selection tool chosen (at the upper left-hand corner of the Node
Editor) simply drag to select multiple nodes using a bounding box.
The Node Editor’s Selection tool
When you select multiple nodes, each one appears with a red highlight above it.
Selecting three nodes by dragging a bounding box
When you select another clip in the Timeline, the default behavior is that the last node that was
selected when you worked on that clip is the one that’s selected when you move to that clip
again. However, a setting in the Color panel of the User Preferences called “Switching clips,”
lets you change this behavior. For more information on this option, see Chapter 3, “Project
Settings and Preferences.”

889
Node Editing Basics Part 6 – 49
Disabling Nodes
In the process of creating a node tree, it’s often useful to turn nodes off to disable their effect
on your grade. It’s also useful to turn the entire node tree off and on in order to see “before and
after” views of the current clip. Disabled nodes are not processed during rendering, and they
remain disabled when you save that grade along with a still in the Gallery and then apply that
grade to another shot.
To toggle individual nodes off and on:
Click the number of any node in the node graph to disable that node by itself.
Select a node, and choose Nodes > Enable/Disable Current Node (Command-D).
On the DaVinci control panel, press the DISABLE CURRENT button (on the T-bar panel).
To turn every node off and on at once:
Choose Nodes > Enable/Disable All Nodes (Option-D) to toggle all nodes off and on.
On the DaVinci control panel, press SHIFT-DOWN and then the DISABLE CURRENT
button (on the T-bar panel).
Bypass All Grades
You can also use a separate command to disable grading altogether. This is useful if you’ve
toggled specific nodes off in the node tree, and you want a before and after look at the node
tree with those nodes turned off. When Bypass All Grades is enabled, grading is disabled for all
clips in the entire Timeline until you disable it.
To toggle grading off and on, do one of the following:
Click the Disable Grading button at the upper left-hand corner of the Node Editor.
Choose View > Bypass All Grades (Shift-D)
Resetting Nodes
If you’re dissatisfied with your current operations and want to start over, there are three ways
you can reset nodes in the Node Editor. These are available as items in the Color menu, and
buttons on the DaVinci control panel’s T-bar panel.
Reset Selected Node Grade: Resets the currently selected node, eliminating all
keyframes, to the default parameter settings.
Reset Grades and Keep Nodes: Resets every node in the current node tree, without
affecting the node tree’s structure; all nodes remain where they were. However, each
node has been reset to the default parameter settings.
Reset All grades and Nodes: Deletes every node and keyframe, and restores a single
node set to the default parameter settings.
You can also reset nodes using the mouse, which can be a quick thing to do if you’re already
working in the Node Editor to accomplish other things.
IMPORTANT: When you turn every node off and then on again, every node is
re-enabled, even nodes that had previously been individually disabled.
890
Node Editing Basics Part 6 – 49
Methods of resetting nodes with the mouse:
To reset a selected node: Right-click that node and choose Reset Node Grade from
the contextual menu.
To reset all grades and nodes: Right-click anywhere in the background of the Node
Editor, and choose Reset All Grades and Nodes from the contextual menu.
Previewing and Restoring Node Trees
There are two other methods of quickly dealing with unwanted changes you’ve made to node
trees, without needing to use undo.
Preview Memory: Lets you preview the effect of any saved grade on the current clip.
To preview, choose Color > Preview Memory (Option-Shift-P), and then right-click any
saved still in the Gallery (or Memory) and choose Add Correction. In fact, you can use
Add Correction to try out as many stills as you like. If you like any still’s effect, then you
can leave it be. If you don’t like any of the stills you previewed, then choosing Color >
Preview Memory again reverts the clip to the original grade.
Original Memory: This command lets you quickly revert a clip’s grade to its original
state when you first selected that clip. This is useful for getting immediately back to a
clip’s original grade if you’ve made a series of changes that you then regret. Selecting
another clip in the Timeline and then reselecting the clip you made changes to resets
what is considered to be the current grade.
Caching Specific Nodes to Improve Performance
You can flag specific nodes to be cached, along with all nodes appearing upstream in that node
tree. By caching nodes using processor-intensive effects, you free up real time capability for the
remaining downstream nodes in a grade. Choosing Playback > Render Cache > User only
caches nodes that you’ve flagged for caching.
When you choose Playback > Render Cache > Smart mode, DaVinci Resolve automatically
caches any nodes that use Motion Blur, Noise Reduction, or OFX plug-ins, without you needing
to do anything.
To flag a node and all corrections made in upstream nodes for caching:
Right-click any node and choose Node Cache > On from the contextual menu.
Editing Node Trees
There is no limit to the number of nodes you can create and connect to one another, and you
can make as many or as few parameter adjustments as you like within each node. The following
procedures describe the ways you can add nodes to the node graph as you build each grade’s
node tree.
Adding Nodes
The simplest thing you can do to add to the complexity of a node tree is to add additional
nodes, in order to add more adjustments to the current grade. You can add nodes so that
they’re automatically attached to nodes that are already in the node tree, for immediate
adjustment, or you can add unattached nodes to empty areas of the node tree in preparation
for assembling a particularly complicated and specific node tree to accomplish a difficult task.
891
Node Editing Basics Part 6 – 49
Methods of adding nodes to the tree using a mouse, tablet, or trackpad:
To add any kind of node to the node graph using the mouse: Right-click any node
in the node tree, and choose the type of node you want to add from the Add Node
submenu of the contextual menu.
To add a disconnected node to the node graph: Right-click anywhere within the node
graph’s background, then choose Add Node > Corrector from the contextual menu.
Disconnected nodes have no effect on a node tree until they’re connected.
Methods of adding nodes to a currently selected node in the
tree using the keyboard or control panel:
To add a serial node after the currently selected node: Press Option-S key, choose
Nodes > Add Serial from the menu, or press the ADD SERIAL button on the T-bar panel
of the DaVinci Resolve control panel.
To append a serial node to the very end of the node tree: Press Option-K, choose
Nodes > Append Node from the menu, or press the APPEND NODE button on the
T-bar panel of the DaVinci Resolve control panel.
To add a serial node before the currently selected node: Press Option-S, or choose
Nodes > Add Before Current, or press SHIFT DOWN and then ADD SERIAL on the
T-bar panel of the DaVinci Resolve control panel.
To add nodes in parallel to the currently selected node: Press Option-P, choose
Nodes > Add Parallel from the menu, or press the ADD PARALLEL button on the T-bar
panel of the DaVinci Resolve control panel.
To layer nodes with the currently selected node: Press Option-L, choose Nodes > Add
Layer from the menu, or press the ADD LAYER button on the T-bar panel of the DaVinci
control panel.
To add an outside node to the currently selected node: Press Option-O, choose
Nodes > Add Outside Node from the menu, or press the ADD OUTSIDE button on the
T-bar panel of the DaVinci control panel.
Adding Nodes with Windows Turned On
There are also dedicated commands for adding serial nodes with Circular/Linear/Polygon/Curve
windows automatically turned on, for convenience.
To add a node to the tree with a Window automatically enabled:
Choose an item from the Nodes menu, or press the button on the T-bar panel of the DaVinci
Resolve control panel that corresponds to the following:
Node + CPW: Circular Power Window (Shift-C)
Node + LPW: Linear Power Window (Shift-Q)
Node + PPW: Polygonal Power Window (Shift-G)
Node + PCW: PowerCurve Window (Shift-B)
Whenever you add a node to a tree, it’s numbered consecutively to come after the next most
recent node you’d added, regardless of the order in which it appears in the node tree. For
example, if you’ve already added three nodes, and then you decide to add another node in
between Nodes 1 and 2, the new node will be Node 4, and the order of the nodes will be 1,
4, 2, and 3.
892
Node Editing Basics Part 6 – 49
Deleting Nodes
If there’s a node that you no longer need, you can choose to remove it completely from the
node tree to remove its effect permanently.
To delete a node, do one of the following:
Select a node, then press the Forward-Delete key.
Right-click a node, and choose Delete Node.
Using the DaVinci Resolve control panel, select any node, and press the DEL-CURRENT
button (on the T-bar panel).
After you’ve deleted a node, the node to the left and right of the node you deleted are
automatically connected so that the node tree is unbroken. Also, all the nodes in a tree are
renumbered after the deletion of any node, so there’s no discontinuity in node order. For
example, if you have three consecutively numbered nodes in a tree and you delete the second
one, the node that was formerly number 3 is renumbered to be 2.
Connecting and Disconnecting Nodes
For a node tree to work, every node in the Node Editor must be connected into a working node
tree, from the Source input, through each node in the tree, to the Node Tree output. Any
disconnected node will result in that clip’s grade being disabled. However, you may find the
need to disconnect some parts of a node tree in order to reconnect them in different ways.
To connect two disconnected nodes:
Click-and-drag a connection from the RGB or Key output of one node to the
corresponding RGB or Key input of another, and when the line highlights, release the
mouse button.
To disconnect two nodes:
Click a link to select it (selected links turn orange), and then press the Delete or
Forward-Delete key.
Right-click a link and choose Delete Link.
To overwrite a node’s previous connection:
You can drag a connection to a node input or output that’s already connected, which
will overwrite the previous connection with the new one you’re dragging. When you do
this, the connection that’s about to be overwritten appears highlighted in orange.
You can connect any node’s RGB or Key output to as many inputs as you want, but you can only
have one connection going to a node’s input. The exception to this is a node with multiple
inputs, designed to combine the output of multiple nodes. These include the Parallel, Mixer, and
Key Mixer nodes.
Extracting a Node
Sometimes you need to remove a node from its current position in the node tree, such that the
nodes to the left and right of it automatically reconnect to one another, saving you from having
to reconnect them manually. This is called extracting a node.
To extract a node, do one of the following:
Select a node, and choose Nodes > Extract Current Node.
Select a node, and press E.
Keep in mind that disconnected nodes in the node tree suspend grading altogether, so you’ll
want to either reconnect that node to another part of the node tree, or delete it; you cannot
leave it disconnected in the Node Editor.
893
Node Editing Basics Part 6 – 49
Inserting a Node
If there’s a disconnected node in the Node Editor, there’s a simple way you can insert it into the
node tree between any two other nodes. This also works for nodes that you’re dragging into a
node tree from another source, for example, from the exposed node tree of a still in the Gallery.
To insert a disconnected node between two other nodes:
Drag a disconnected node, or a node from another node tree, onto the connection
between any two other nodes in a node tree; when a plus icon appears over the node
you’re dragging, drop it to insert the node.
Rearranging Node Order
The order in which nodes are connected in your tree affects the result of a grade. For example,
if you boost the highlights in the first node, and then you try to isolate a portion of the picture in
a second node that you now realize has been clipped, you may to need to change your order of
operations to optimize your corrections.
To swap the contents of two nodes:
Command-drag any node and drop it onto another node to swap the operations within
each node. The nodes won’t appear to have moved, but you should be able to tell from
the node badges underneath that the operations have been reversed.
To move a node to any other position in the node tree:
1 Double-click any node in the node tree and press E to extract it, removing it from the
tree so that it becomes unattached.
2 Drag the now-unattached node to the connection line between any two other nodes in
the tree, and when a small plus icon appears, drop it to automatically connect that node
at that position in the node tree.
Copying and Pasting All Settings
From One Node to Another
The simplest thing you can do is to copy all of a node’s settings and paste them into another
node. This makes it easy to duplicate things like windows, qualifier settings, keyframing, or
motion tracking that you want to re-use in another node as the basis for another operation. This
is also a quick way to manually ripple a change you make in a node to that same node in
another clip’s grade.
To copy a node’s settings from one clip to another, do one of the following:
Option-drag one node onto another. When you drop it, the settings of the node you
dragged overwrite those of the node you dropped onto.
Select a node with settings you want to copy and choose Edit > Copy (Command-C).
Then, select a node you want to paste these settings to either in the current grade or in
the grade of another clip, or create a new node, and choose Edit > Paste (Command-V)
to paste the settings you copied. These pasted node settings overwrite any other
settings that node previously used.
Note: There are additional methods of copying nodes and individual node settings. For more
information, see Chapter 48, “Grade Management.”
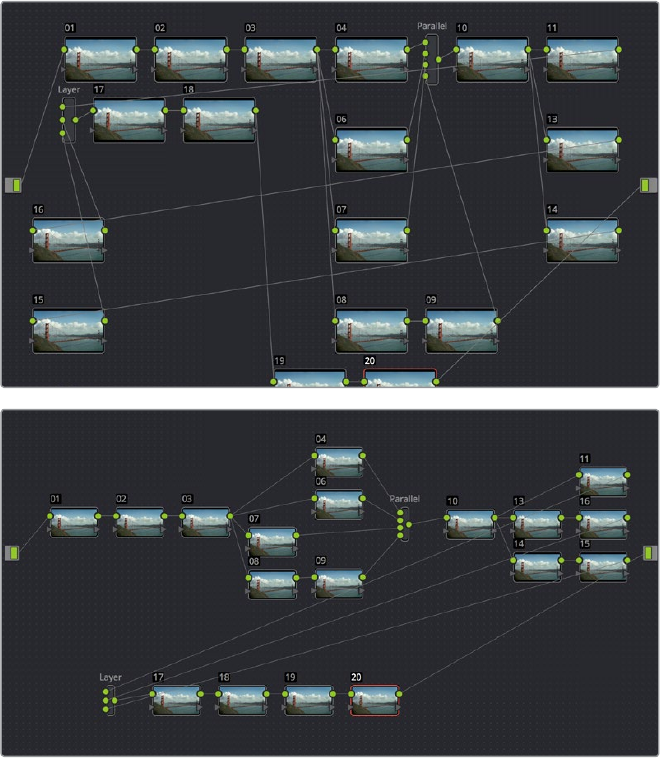
894
Node Editing Basics Part 6 – 49
Keeping Node Trees Organized
It’s a good idea to keep the arrangement of your nodes in the node graph clean and neat. It’ll
make it easier to read your tree if you need to revisit a grade later on, and it will also make it
easier for other colorists working on the same project to figure out what you’re doing. The
following procedures describe how to rearrange the nodes in your tree, and the node tree
working area, to help you keep on top of your grades.
To move nodes within the Node Editor:
Drag any node to a new position.
Command-click or drag a bounding box around multiple nodes that you want to move,
and drag them all to a new position.
Of course, it’s easy to get carried away. If you’ve been working furiously on a complex grade
and you find yourself staring at a riot of disorganized nodes, it’s easy to quickly reorganize your
node graph using a pair of commands in the Node Editor contextual menu.
To clean up the node graph, right-click the Node Editor and choose one of the
followingcommands:
Cleanup node graph with curves: Moves all nodes in the node graph so they appear
in an evenly spaced grid. Connection lines are curved around nodes to minimize clutter.
Cleanup node graph without curves: Moves all nodes in the node graph so they
appear in an evenly spaced grid. Connection lines cut across nodes as necessary.
Before/After using “Cleanup node graph with curves”
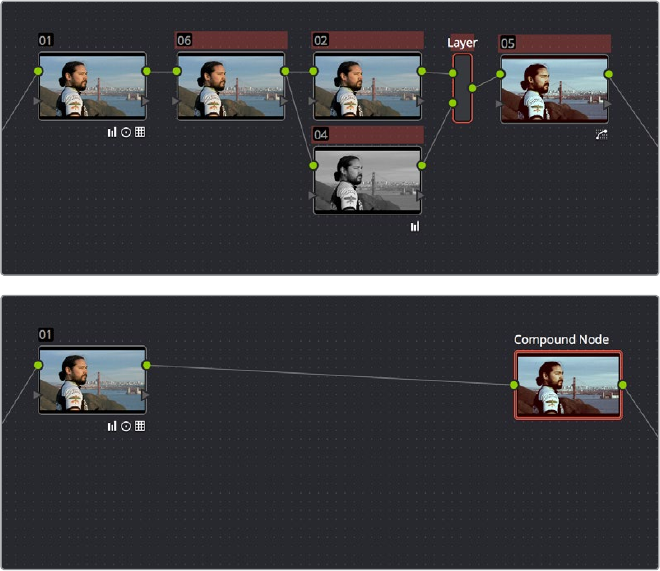
895
Node Editing Basics Part 6 – 49
Using Compound Nodes
Another node structure you can use to keep complex node trees organized is the compound
node. You can Command-click to select any number of nodes in the node tree (selected nodes
are highlighted red), and then use the “Create Compound Node” command to nest all selected
nodes inside of a single node.
Before/After creating a compound node
The resulting compound node that’s created has as many inputs and outputs as are necessary
to accommodate the connection lines that attached the nodes you selected to the rest of the
node tree.
You can use compound nodes to organize complicated node trees by nesting sets of nodes
that work together to do a specific thing within a single node. You can also turn a set of nodes
that you’re using to create a specific effect into a compound node in preparation for saving to
the Gallery. Creating a library of effects in this way makes it easy to reuse them via the Append
Grade command, without the undue burden of adding lots more nodes to your grade later on.
Methods for creating and working with compound nodes:
To create a compound node: Command-click each node you want to nest inside of
a compound node to select them with a red highlight. Then, right-click one of the
selected nodes, and choose Create Compound Node from the contextual menu.
To edit a compound node: Either hold the Command key down while double-clicking
the compound node you want to open, or right-click any compound node and choose
Show Compound Node from the contextual menu. The contents of that node appear in
the Node Editor, taking the place of the overall node tree.
To exit a compound node you’re editing: To return to the top level node tree, click the
left-most item in the path control at the bottom of the Node Editor.
To label a compound node: Right-click a compound node, choose Change Label from
the contextual menu, and type a new label for that node. Press the return key when
you’re finished.
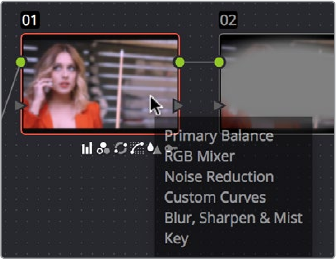
896
Node Editing Basics Part 6 – 49
To decompose a compound node: Right-click the compound node you want to
decompose, and choose “Decompose Compound Node” from the contextual menu.
The compound node disappears, replaced by the original nodes within. Please note,
if you had applied an adjustment to the compound node itself, that adjustment is lost
when you decompose it back into its constituent nodes. If you want to preserve the
compound node adjustment itself, you can copy it, then decompose the node, and then
create a new node and paste the adjustment you’d copied.
Adding Inputs and Outputs to Compound Nodes
When you open the contents of a compound node using the Show Compound Node command,
you can make whatever adjustments you like to the node tree within, but you also have the
option of right-clicking within the Node Editor and choosing Add Source to add an input to the
compound node, or Add Output to add an output. Adding more inputs and outputs lets you set
up the node to connect to the rest of your node tree in more complicated ways. Disconnected
inputs and outputs have no effect on your grade.
Furthermore, you can also use the Add Alpha Source and Add Alpha Output contextual menu
commands to add KEY inputs and outputs to a compound node, making it easy to route key or
alpha channel data to other connections in the enclosing node tree.
Nesting Compound Nodes
Compound nodes can also be nested within other compound nodes, if necessary.
Grading Compound Nodes
After you’ve created a compound node, you can select it to make one or more adjustments
using the compound node itself, which effectively adds those adjustments after all other
adjustments that take place via the nodes that are inside of the compound node. This gives you
the opportunity to “trim” the effect that compound node is having on your grade, or to limit it
using a Qualifier or Window.
To adjust the individual nodes nested within a compound node, you need to first open the
compound node. Then, you can select and adjust any node as you ordinarily would.
Identifying Nodes
As you make various adjustments to nodes, small badges appear underneath that indicate what
that node is actually doing. Since nodes are capable of holding multiple adjustments, any given
node may have multiple badges; how many badges a node can show depends on the zoom
level of the Node Editor. Larger nodes will show more badges, whereas smaller nodes will show
fewer badges, hiding whichever badges don’t fit.
Badges underneath each node indicate
which adjustments it contains
897
Node Editing Basics Part 6 – 49
Another nice organizational feature of the Node Editor is an automatic tooltip that appears
whenever you hover the pointer over a particular node, that shows you a concise list of all the
operations applied to that particular node.
Grading Order of Operations
As you construct grades more carefully in the Color page, it may help you to know what the
precise order of operations are in the image processing pipeline of DaVinci Resolve. While you
can control the order of operations for node-specific adjustments by being careful about what
you do in which nodes, the order of Pre-Grade, non-node specific, and Post-Grade operations
are all fixed.
The following illustration shows DaVinci Resolve’s order of operations:
The order of image processing operations in DaVinci Resolve
Operations that take place after nodes
Operations that take place before nodes
Operations that take place within nodes
Camera Raw
Resolve Color Management Input to
Timeline Color Space Conversion
or ACES IDT
Input LUT Edit
Sizing
Input
Sizing
Deliver Page
Output
Output
LUT
Output
Sizing
Resolve Colour Management to
Output Color Space Conversion
or ACES RRT to ODT
Motion
Blur
Noise
Reduction
OpenFX
Color
Match
Stereo
Color
Match
Shot
Match
Hue/
Saturation
Shadow/
Midtone/
Highlight
Custom
Curves
Contrast/
Pivot
Lift/
Gamma/
Gain
Color
Boost
1D or 3D
LUT
HSL
Curves
Channel
Mix
Color Page
Display LUT
Soft ClipDefocus
Node
Sizing
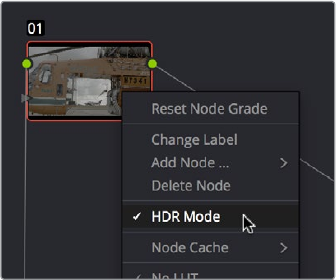
898
Node Editing Basics Part 6 – 49
Putting Nodes into HDR Mode
When using various grading controls in the Color page to grade wide-latitude images for HDR
output, you may find it useful to enable theHDR Mode of the node you’re working on by
right-clicking that node in the Node Editor and choosing HDR mode from the contextual menu.
Using a node’s contextual menu to put
that node into HDR mode
This settingadaptsthat node’scontrols to work within an expanded HDR range. Practically
speaking, this makes it easier to work with wide-latitude signals using controls that operate by
letting you make adjustments at different tonal ranges such as Lift/Gamma/Gain, Custom
Curves, Soft Clip, etcetera.
Applying a LUT Within a Node
Look up tables (LUTs) are frequently used to create a starting point adjustment for media
acquired with some sort of logarithmic (log) exposure. DPX log film scans, digital media using
the ARRI ALEXA’s Log-C encoding, Sony’s S-Log exposure setting, or RED R3D media that is
debayered using the REDFilmLog setting are all examples of media using a logarithmic
exposure curve, designed to protect as much detail in the highlights and shadows of a digitally
encoded image as possible. While log-encoded media retains a lot of image data, the picture is
initially flat and unsuitable for use without grading. The exposure and color must be adjusted to
“linearize” the media, making it look the way it’s supposed to, in order to start grading. You can
do this manually, or, as a shortcut, you can use a LUT that’s tailored to your type of media and
the exposures you’re using.
LUTs are also commonly used in onset workflows where dailies are managed with
corresponding LUTs. These LUTs were used to monitor the media as it was being recorded, and
define a baseline reference for how each scene is meant to look, at least so far as field
monitoring is concerned.
In either instance, LUTs, when used in this way, are adjustments that are applied to affect the
look of a clip, in much the same way as you’d make adjustments using any of the contrast or
color controls in the Color page. While there’s an entire group of LUT controls in the Color
Management panel of the Project Settings, those are designed to apply LUTs, in different parts
of the image processing pipeline, to the entire Timeline. This is useful when you want to apply a
single color and contrast transformation to the entire program at once, but less so if you want to
apply different LUTs on a per clip basis. (For more information on using the Look Up Table
settings, see Chapter 3, “Project Settings and Preferences.”)
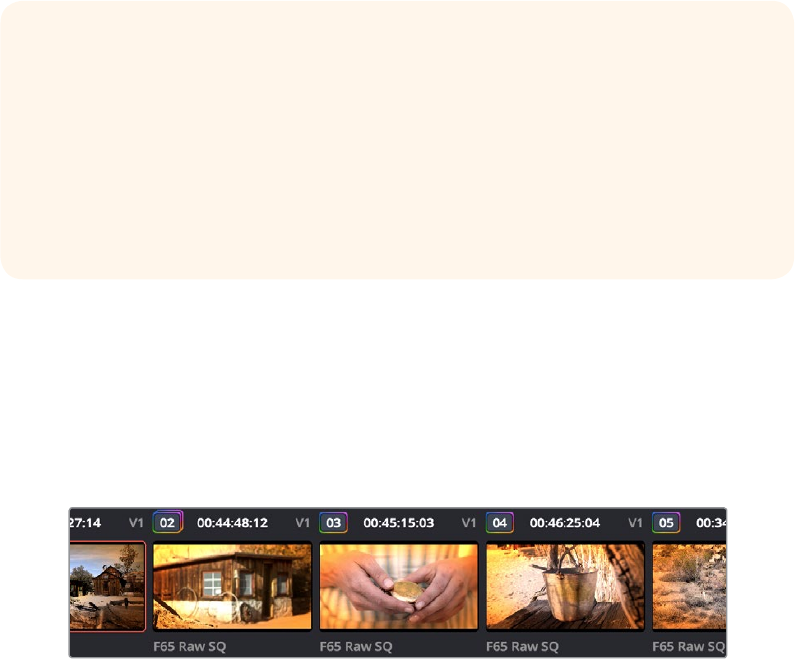
899
Node Editing Basics Part 6 – 49
DaVinci Resolve lets you apply LUTs within a grade by connecting a LUT to a particular node in
the Node Editor.
To apply a LUT within a node:
Right-click any node, and choose a LUT from the 1D Input LUT, 1D Output LUT,
3D LUT, DCTL, or CLF (common LUT format) submenus.
LUTs that you apply using one of these submenus impose their transformation after all other
Color page adjustments applied by that node. This means that you can use Color and Contrast
controls to trim whatever effect the selected node’s LUT is having on the image. For example,
ifthe contrast adjustment made by an applied LUT clips the highlights of the image too much,
you can use that node’s Contrast controls to lower the highlights, restoring detail to the image.
The LUT submenus list whichever LUTs have been installed on your workstation. For more
information on installing LUTs, see Chapter 3, “Project Settings and Preferences.”
Clip vs. Timeline Grading
Ordinarily, the Node Editor has two modes. The default Clip mode lets you create individual
grades for each clip or group in the Timeline. However, the Timeline grade mode lets you apply
a single grade simultaneously to every clip in the Timeline, as seen in the Thumbnail timeline in
the following screenshot.
A paragon of sophisticated grading, the author applies a red edge vignette to
every clip in the project simultaneously using the Timeline grade.
There are a variety of reasons you might want to do this. For example, if you’re working on a
commercial spot, you might elect to use Clip grades to do general correcting and scene-to-
scene balancing, and then use the Timeline grade to apply a single stylistic grade to the entire
spot simultaneously. That way, any changes the client wants made to the style of the grade can
be instantly applied to the whole spot.
Another example would be using the Timeline grade to apply corrections meant to address QC
issues running throughout a program, desaturating highlights or selectively darkening a specific
shade of red wherever it appears.
What LUTs are supported by DaVinci Resolve?
DaVinci Resolve uses both 1D and 3D LUTs. 3D LUTs that are created by DaVinci
Resolve are in the .cube format, configured as 33x33x33 cubes with 32-bit floating
point processing. However, DaVinci Resolve is also compatible with the newer CLF
(common LUT format) type of LUT and can also read and use LUTs in the Shaperlut
format. Finally, DaVinci Resolve can use the DCTL format of color transformation
scripts in the same way as LUTs. For more information on DCTL, see Chapter 82,
“Creating DTCL LUTs.”
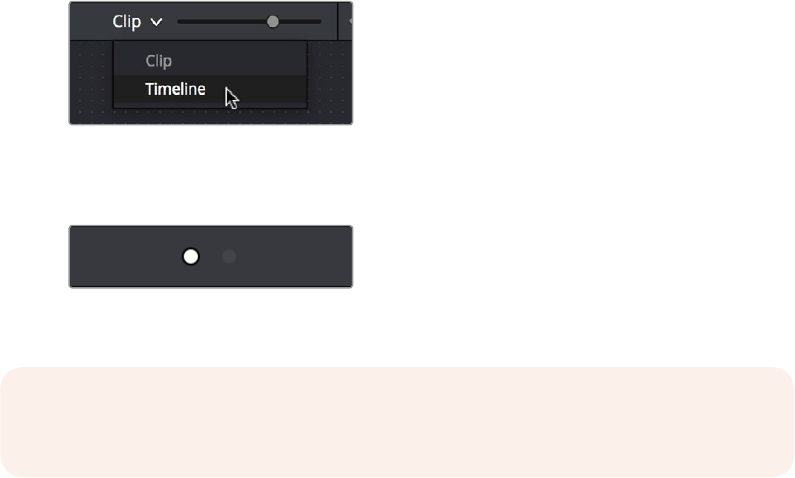
900
Node Editing Basics Part 6 – 49
To switch between Clip and Timeline grading modes:
Choose the mode from the pop-up menu at the top right of the Node Editor.
Selecting Track mode in the Node Editor
Click the dot in the Node Editor toolbar that corresponds to the Clip or Timeline mode
Two dots show whether you’re in Clip or Timeline
mode; these can be clicked to switch
Two dots at the top of the Node Editor let you switch between Clip and Timeline modes via a
single click. If you’re working on a clip that’s part of a group, four dots will be displayed to allow
fast access to the Pre-Clip and Post-Clip Group modes as well. For more information about
group grading, see Chapter 48, “Grade Management.”
Timeline Grades and Saved Stills
When you save a Gallery still, the Clip and Timeline grades are both saved. However, when you
apply a grade from that still, you only apply either the Clip grade, or the Timeline grade,
depending on which mode the Node Editor is in. For more information on saving and applying
grades, see Chapter 48, “Grade Management.”
NOTE: When you reset the Timeline grade using the Color > Reset All Grades and
Nodes command, the Output Sizing parameters are reset as well.
902
Serial, Parallel, and Layer Nodes Part 6 – 50
Serial, Parallel, and Layer Nodes
This chapter covers the four fundamental node structures you can use to combine Color page
adjustments in even more detailed ways. These methods let you control your order of
operations and re-combine multiple versions of the graded image in much more specific ways.
This chapter has the following topics:
Serial, Parallel, and Layer Node Tree Structures 903
Serial Node Structures 903
Controlling What Feeds a Node’s RGB Input 903
Parallel Node Structures 904
Layer Mixer Node Structures 906
Layer Mixer Prioritization 906
Using Composite Modes With the Layer Mixer 908
Adjusting Layer Node Strength Using Key Output Gain 909
Converting Layer Mixers to Parallel Mixers 909
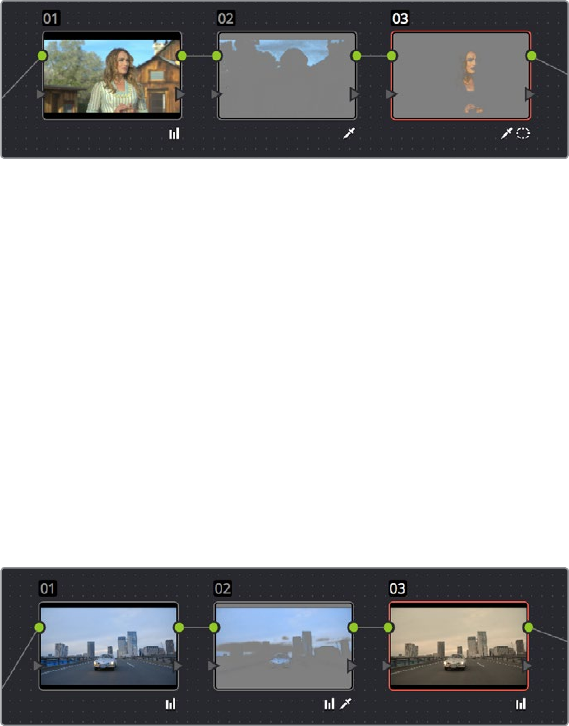
903
Serial, Parallel, and Layer Nodes Part 6 – 50
Serial, Parallel, and Layer
Node Tree Structures
There are several ways you can organize nodes in a tree. Each method lets you control a group
of image processing operations in different ways to achieve specific results. This section covers
how to use Serial nodes, Parallel nodes, and Layer nodes, as well as how to use LUTs, work
with HDR media that lets you combine two different exposures using two different Source
inputs, and apply additional project-wide adjustments using the Timeline grade.
Serial Node Structures
The simplest, and most common node structure is a serial cascade of nodes, where a linear
series of nodes is connected, one after another.
Serial nodes, the output of one node goes into the next
Much of the time, this method of constructing a tree of multiple operations is all you need to do.
It’s a simple and intuitive way of organizing your adjustments, similar in principle to the stacks of
layers used in other grading and compositing applications to apply multiple operations to a clip.
Controlling What Feeds a Node’s RGB Input
When you create a grade using serially arranged nodes, each node’s output is used as the next
node’s input, so the order in which the nodes are arranged determines the order of image
processing operations.
In the following screenshot, the node tree shows a series of three operations that are applied to
a log-exposed, low-contrast clip. The first node expands clip contrast and increases saturation.
The second node isolates the sky to intensify its color. The third desaturates and warms the
image. At right, you can see the result of this node tree.
Node two pulls a clean key from the image data fed it by node one
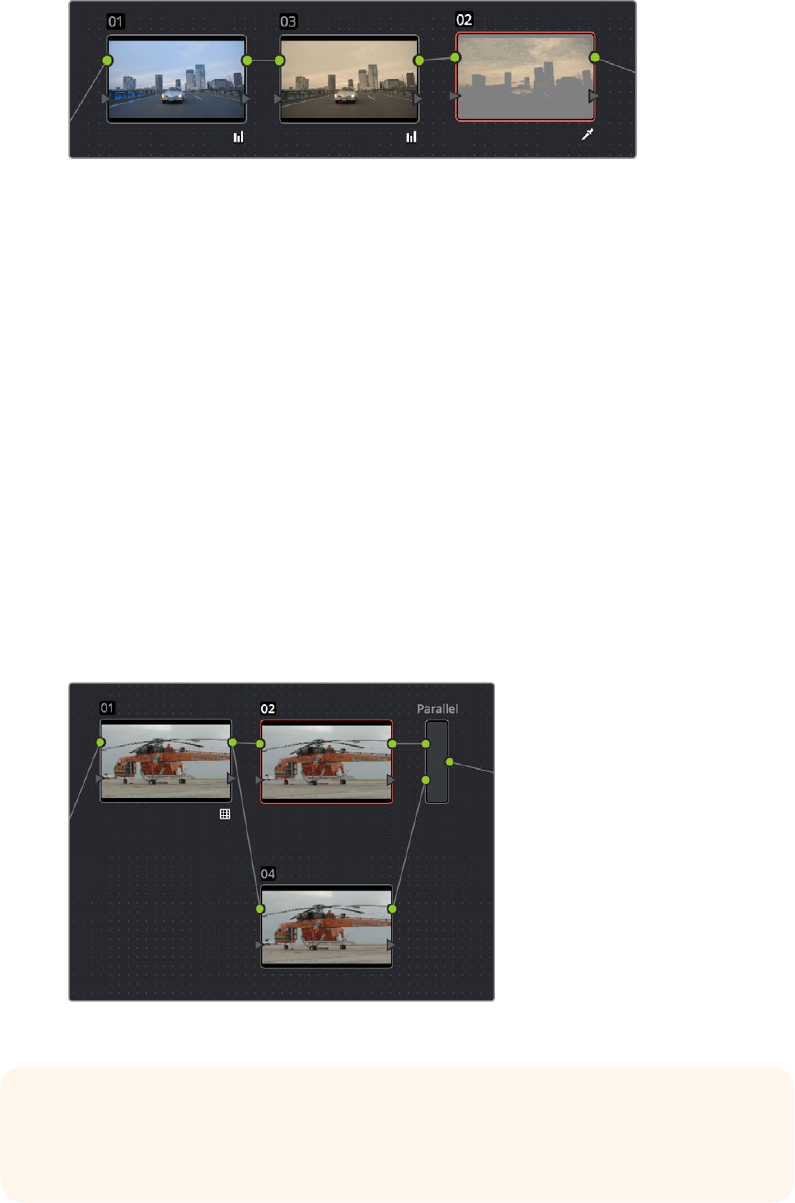
904
Serial, Parallel, and Layer Nodes Part 6 – 50
If, instead, we reversed the order of Nodes 2 and 3, the result will be a less effective key.
By comparison, node three pulls a less then optimal key
from the image data fed it by node two
Because the secondary operation is sampling the desaturated image, rather than the source,
the HSL Qualifier’s key has less image data to work with, and thus you get an inferior result.
Parallel Node Structures
Another way to organize your corrections is to use a Parallel node structure, which lets you
apply two or more overlapping adjustments at a single stage of a node tree. You can use the
Parallel node structure for organizational reasons when there is a group of secondary
corrections that you want to apply all at once. You can also use this structure for the unique way
it blends overlapping image adjustments.
The Parallel Mixer node that makes this possible has multiple RGB inputs and a single RGB
output. This lets the Parallel Mixer mix together multiple Corrector nodes, outputting a single
image as a result.
When you add a Parallel node to an existing node, DaVinci Resolve automatically adds one
Corrector node below the current node, and adds a Parallel Mixer node to its output.
Adding a Parallel node to Node 2 automatically adds the Parallel Mixer
If you’re manually connecting another node to a Parallel Mixer node, you must first create an
additional input to connect it to.
TIP: If you want to create a series of Parallel nodes that connect to the output
ofthecurrently selected node, create a Serial node before you create your first
Parallel node.
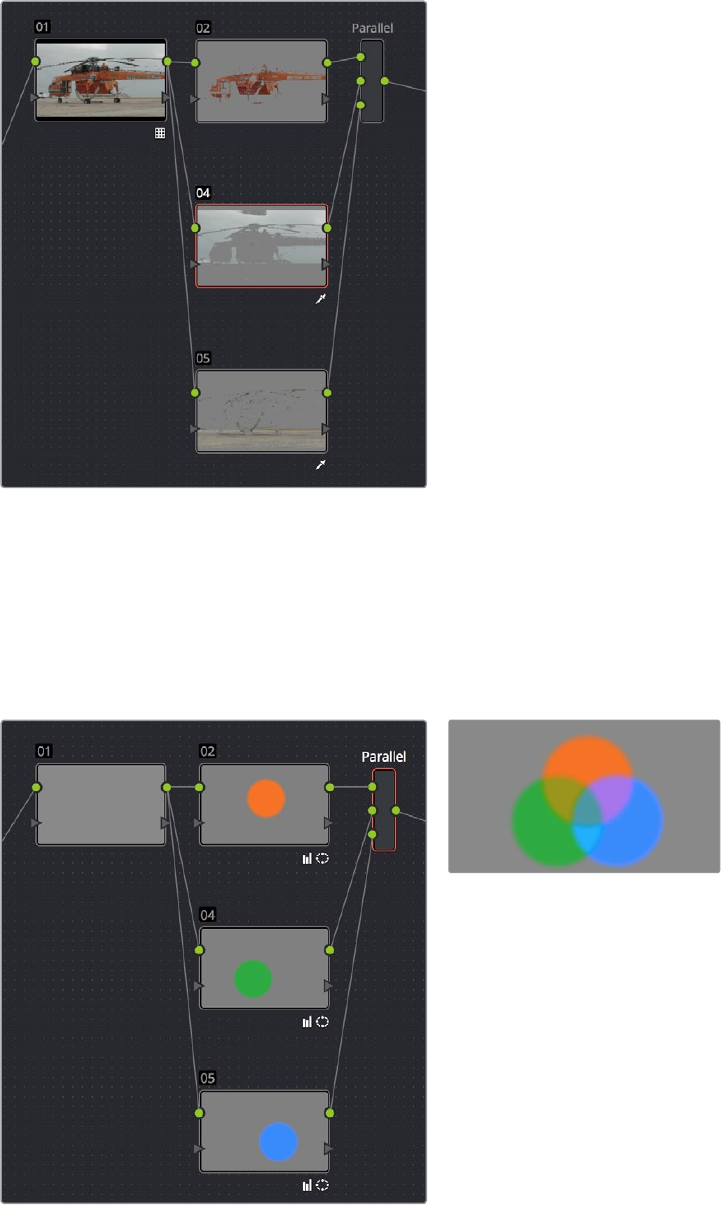
905
Serial, Parallel, and Layer Nodes Part 6 – 50
To create an additional, unconnected input on a Parallel Mixer node:
Right-click a Parallel Mixer node and choose Add One Input.
Ordinarily, the RGB input of every Corrector node that’s connected to a Parallel node is
connected to the output of the same node. This results in a stack of nodes that take the same
state of the image as their input. This makes it easy to apply multiple secondary operations
without worrying about whether or not a change to one will affect the keys of the others.
Further Parallel nodes can be added as you wish
with each using a common source
If you add another node in parallel, the Parallel Mixer automatically adds another input. You can
have as many nodes in parallel as you need.
The adjustments made by all nodes that are connected to a Parallel Mixer are combined
equally, regardless of which nodes are highest. In the following example, a separate
overlapping Window is applied by each of three nodes in parallel.
The Parallel Mixer blends all input nodes together
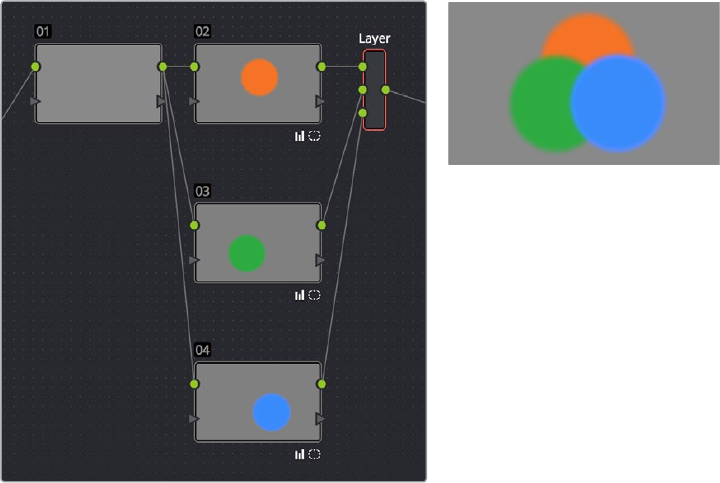
906
Serial, Parallel, and Layer Nodes Part 6 – 50
As you can see in the image at right, the three tints created by the overlapping Windows are all
mixed together equally; the colors blend with one another as if they are optically mixed. Most of
the time, this is exactly what you want when you’re blending overlapping naturalistic color
adjustments.
Converting Parallel Mixers to Layer Mixers
On the other hand, if you need your overlapping color adjustments to have priority over one
another, or if you want to combine multiple adjustments using composite modes, then you may
want to use the Layer Mixer node instead. If you’ve created a Parallel Mixer structure and you
want to convert it to a Layer Mixer, you can.
To change a Parallel Mixer node into a Layer Mixer node:
Right-click a Parallel Mixer node and choose Morph Into Layer Mixer Node.
Layer Mixer Node Structures
The Layer Mixer is structurally quite similar to the layout used by the Parallel Mixer. However,
there are two key differences. First, the Layer Mixer node combines multiple adjustments with
priority given to the image adjustment in the lowest overlapping node input. Second, you have
the option of combining all of the Corrector nodes that are connected to a Layer Mixer using
one of several different composite modes, to create a wide variety of visual effects.
Because of their similarities, layering nodes with the Layer Mixer works in much the same way
as creating a Parallel node structure.
Layer Mixer Prioritization
In the following example, the same node structure from the Parallel Mixer example is shown,
this time with the three overlapping color adjustments mixed together using the Layer Mixer.
The Layer Mixer prioritizes nodes connected to lower inputs such
that each node’s output completely obscures whatever is behind it

907
Serial, Parallel, and Layer Nodes Part 6 – 50
Now, instead of the three adjusted color tints being blended, you can see that the blue tint,
which is connected to the lowest input of the Layer Mixer, is dominant and covers the
overlapping regions of the two other adjustments. Meanwhile, the green tint, which is
connected to the middle input of the Layer Mixer, covers the overlapping portion of the orange
tint, which is connected to the highest input of the Layer Mixer.
Rearranging which connections are attached to which Layer Mixer inputs changes each node’s
priority, and like the Parallel Mixer, you can add more inputs if you need to connect more
nodes manually.
The Layer Mixer’s prioritization is most useful when you have an overlapping adjustment that
you need to override any other adjustments happening on that stack. In the following example,
two nodes are connected to the Layer Mixer node. Node 2 is applying a high-contrast, cool
look to the entire clip. Node 3 isolates the skin tone, which is unflattering with the background
stylization, and applies a different, more naturalistic adjustment.
Using the layer mixer, grades on Node 4 will have a greater priority
over Node 2, so the final grade combines the high contrast from
Node 2 with the adjusted skin tone from Node 4
Because of the Layer Mixer’s prioritization, the adjustment made to the woman’s skin tone
completely covers the adjustment made to the node that comes above it, providing the best of
both worlds with one simple adjustment.
TIP: If you want to “solo” overlapping nodes that are connected to the Layer Mixer to
see their individual adjustment, turn on Highlight (Shift-H, or the HILITE button on the
Transport panel of the DaVinci control panel). This lets you view just that node’s effect,
regardless of what other nodes adjustments are overlapping.
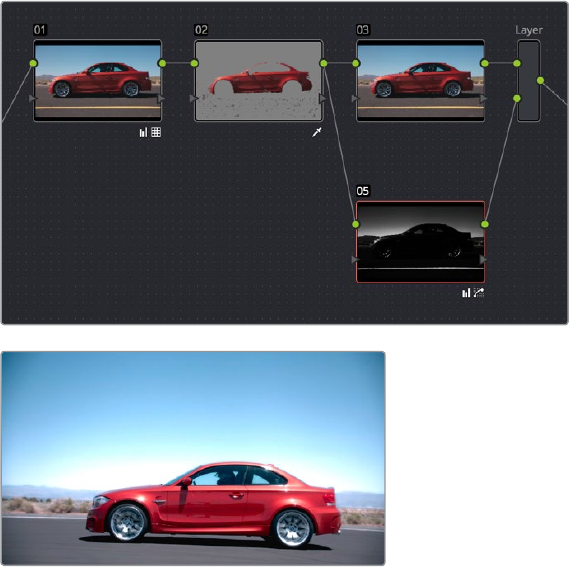
908
Serial, Parallel, and Layer Nodes Part 6 – 50
Using Composite Modes With the Layer Mixer
You have the option of combining the adjustments made by all nodes connected to a Layer
Mixer node using the same Composite modes that are available when compositing clips in the
Timeline. This lets you combine different overlapping image adjustments using compositing
math to achieve creative effects or utilitarian fixes.
The following simple example shows two overlapping Corrector nodes connected to a Layer
Mixer node that’s set to the Add composite mode. Node 3 has no adjustment, but Node 5 has
an extremely high-contrast curve adjustment applied, along with a blur, that effectively isolates
the highlights of the image and feathers them out.
Combining two nodes using the Layer Mixer
set to Add to create a glowing effect
By adding both treatments together, a hot glow has been created, blowing out the highlights of
the image. Many, many other effects are possible using the different composite modes that are
available. For more information on composite modes, see Chapter 29, “Compositing and
Transforms in the Timeline.”
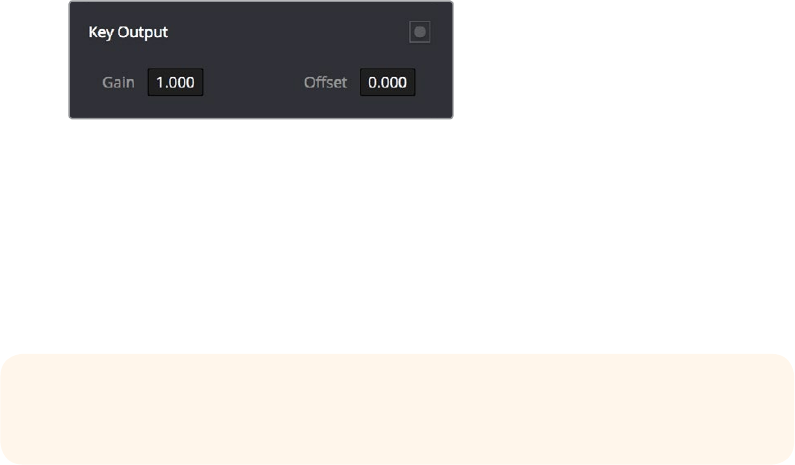
909
Serial, Parallel, and Layer Nodes Part 6 – 50
Adjusting Layer Node Strength Using Key Output Gain
Whether you’re combining overlapping corrections, or mixing different adjustments using
Composite modes, you’ll run into situations where you want to reduce the influence of one
overlapping adjustment relative to the other nodes that are connected to the Layer Mixer node.
This can be accomplished using each overlapping node’s Key Output Gain parameter, located
in the Key palette.
Using the Output Gain parameter in the Key palette
Key Output Gain defaults to 1.00, but lowering this value reduces the strength of that node’s
contribution to the Layer Mixer. Using the previous example, selecting Node 4 (the
high-contrast image used to create the glow), opening the Key palette, and reducing the Key
Output Gain parameter to 0.50 reduces the intensity of the Glow effect by half.
You can use Key Output Gain to mix the proportion of any number of overlapping adjustments
in order to create the perfect combination for your purposes.
Converting Layer Mixers to Parallel Mixers
You can easily convert a Layer Mixer to a Parallel Mixer should you discover that you need to
mix your overlapping corrections evenly rather then combine them with priority. Keep in mind
that you’ll lose the ability to use Composite modes.
To change a Layer Mixer node into a Parallel Mixer node:
Right-click a Parallel Mixer node and choose Morph Into Parallel Node.
TIP: You can also use the Key Output Gain parameter to mix the proportion of
adjustments being combined using the Parallel Mixer node.
911
Combining Keys and Using Mattes Part 6 – 51
Combining Keys and Using Mattes
A “Key” is the actual image channel that’s generated by different secondary operations to
isolate specific portions of images to work on. This chapter covers different ways you can
manipulate and combine keys from multiple nodes, or propagate keys among nodes. It also
shows different ways you can use mattes that are imported from other applications, as well as
how to use the Key Palette to further manipulate keys in different ways.
This chapter has the following topics:
Introduction to Manipulating andCombining Keys 912
Outside Nodes 912
Feeding Keys from OneNode to Another 913
Connecting KEY Outputs to RGB Inputs, and Vice Versa 916
Using External Mattes 917
External Mattes to Limit Adjustments 918
Extracting External Mattes from OpenEXR Layers 920
Using External Mattes to Add Texture 921
Using External Mattes to Create Transparency 922
Key Palette Controls for the External Matte Node 923
Using the Key Mixer 924
Adding Two Keys Together 924
Subtracting One Key from Another 925
Adding Inputs to Key Mixer Nodes 928
Using the Key Palette 928
Using the Key Palette to Adjust Key Mixer Controls 930
The Many Uses of Key Output Gain 931
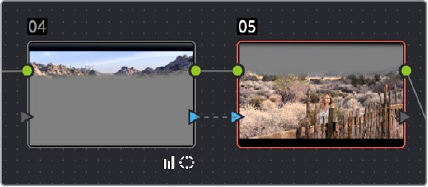
912
Combining Keys and Using Mattes Part 6 – 51
Introduction to Manipulating
andCombining Keys
Each node’s key input and key output makes it possible to route key channel data from one
node to another so you can apply isolated corrections. Furthermore, the Key Mixer lets you
combine a variety of keys from different nodes to create more detailed keys with which to
tackle complex operations. This section covers all the ways you can recombine key data, as
well as how keys can be used in conjunction with the Alpha Output to create regions of
transparency in a clip for compositing right within DaVinci Resolve.
Outside Nodes
Whenever you use a Power Window or HSL Qualifier to limit a correction within one node, a
special node structure lets you automatically create a second node, called an Outside node, to
apply additional adjustments to the inverse of the region you isolated in the previous node.
Outside nodes make it easy to apply separate corrections to an isolated subject and its
surroundings.
In the following example, the sky has been isolated using a Power Window, and an Outside
node has been added to make an additional correction to everything else within the shot.
The Outside node automatically has its key input inverted
To add an Outside node to a node, creating a secondary correction:
1 Select a node that has been limited using a Power Window or HSL Qualifier.
2 Do one of the following:
Choose Nodes > Add Outside (Option-O).
Right-click a node choose Add Outside Node.
Press the ADD OUTSIDE button on the T-bar panel of the DaVinci control panel.
A new node is created immediately after the selected node, with the RGB and key
outputs of the first node automatically connected to those of the new node.
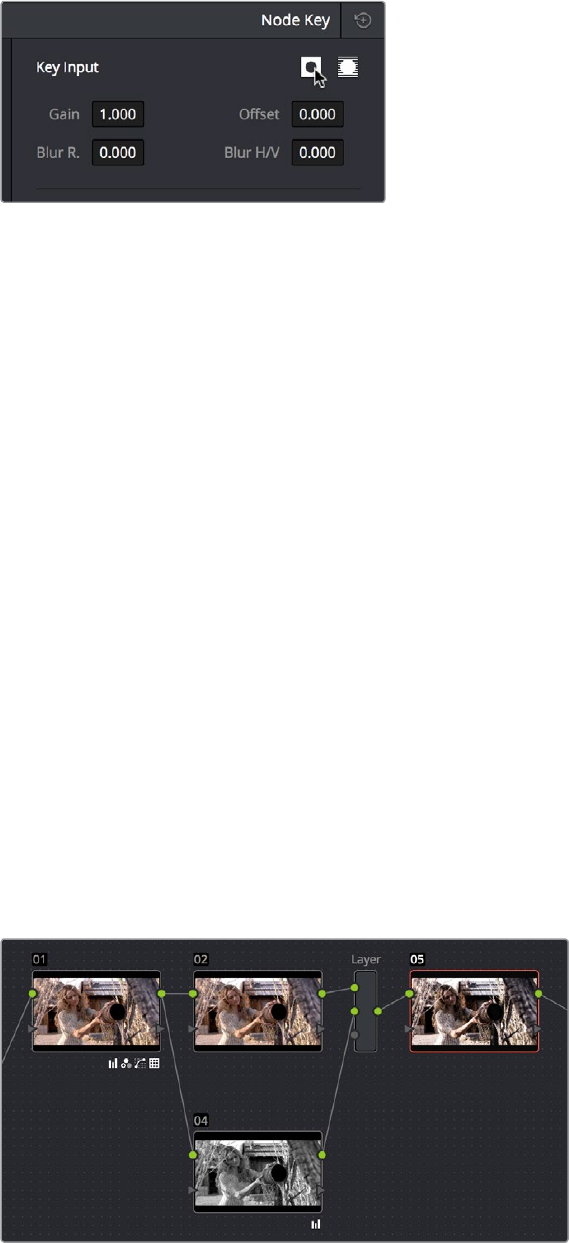
913
Combining Keys and Using Mattes Part 6 – 51
When selecting the new node and opening the Key palette, you can see that the Key Input’s
Invert control is on by default, which is what inverts the key from the previous node.
The Key Input’s Invert control is on by default for each node
If, instead of inverting the incoming key, you want to copy the existing key in order to perform
another operation to the same isolated region, you can disable the key input’s Invert control.
Feeding Keys from
OneNode to Another
One of the most powerful aspects of the Node Editor is the ability to create keys based on a
specific part of the node tree, and feed the result into a completely different correction
somewhere else in the node tree. This is one of the reasons for the separate key input and
output on every Corrector node.
The key that’s created whenever you use the HSL Qualifier, create one or more Windows, or
use an external matte can be output from one node’s key output and fed to the key input of any
other node in a tree. There are many reasons to do this, but the following example shows a
common problem you can solve with this technique.
Using a key from one node to make an adjustment with a different node:
1 Use Node 1 to apply a basic primary correction, increasing contrast and balancing the
color to achieve a pleasing ambient color temperature.
2 Add a Serial node (Node 2), followed by a Layer Mixer node which also adds Node 4
(as seen in the following screenshots). Then, completely desaturate Node 4 and add
contrast make it super-high contrast black and white, desaturate Node 2 just a bit,
and right-click the Layer Mixer node to choose the Overlay blend mode with which to
combine these two layers.
Serial nodes to create a stylized image
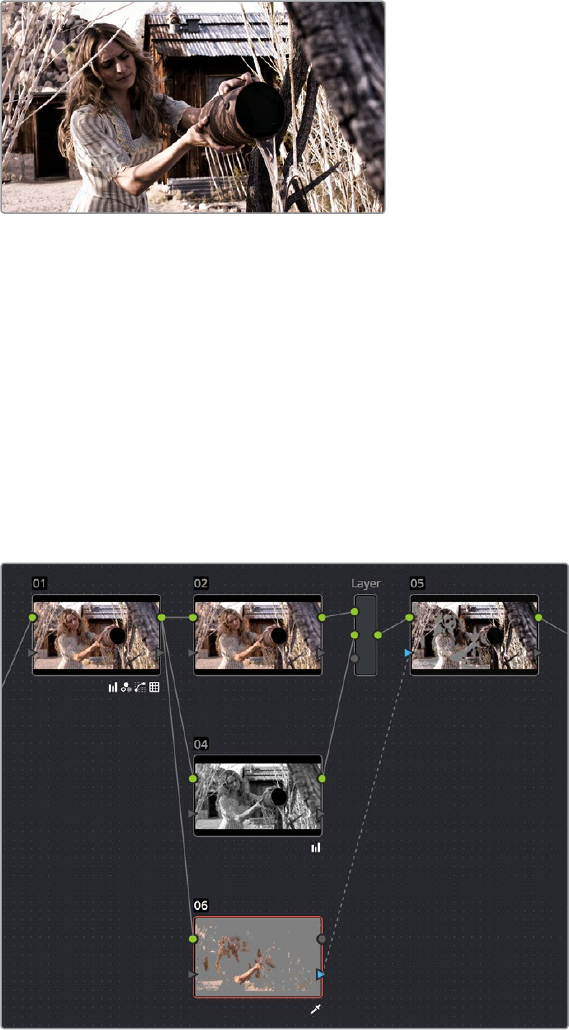
914
Combining Keys and Using Mattes Part 6 – 51
The result is a highly stylized image, but the skin tone on the actor’s face and hands in
the resulting image are too monochromatic, and you want to give them some
differentiation. Simply adding another node after the Layer Mixer and keying the skin
tone may not work well because the low level of saturation will make a key
difficult to pull.
The resulting stylized image may be difficult to key accurately
3 Add another node after the Layer Mixer (Node 5 in the screenshot), and then right-click
in the gray background area of the Node Editor, and choose Add Node > Corrector to
create an unattached node, (Node 6).
4 Connect the RGB output of Node 1 to the RGB input of Node 6, and then connect the
Key output of Node 6 to the Key input of Node 5. Now you’re ready to pull a high-
quality key from the very first correction in Node 1, skipping all the complication coming
afterwards.
5 Use the HSL Qualifier in Node 6 to pull a good strong skin tone key based on the
primary image. Given the way the node tree is now set up, that key is fed to Node 5,
and will limit whatever adjustments you make there.
Using Node 6 to pull a key from the image output by Node 1, and
feeding that key to Node 5
So now things are almost ready for an adjustment to be made to the actor’s skin tone,
however the same automatic setting that makes it easy to create Outside nodes is
inverting the key that Node 6 is feeding to Node 4, which is isolating everything except
for the skin tone. This is the opposite of what is needed.
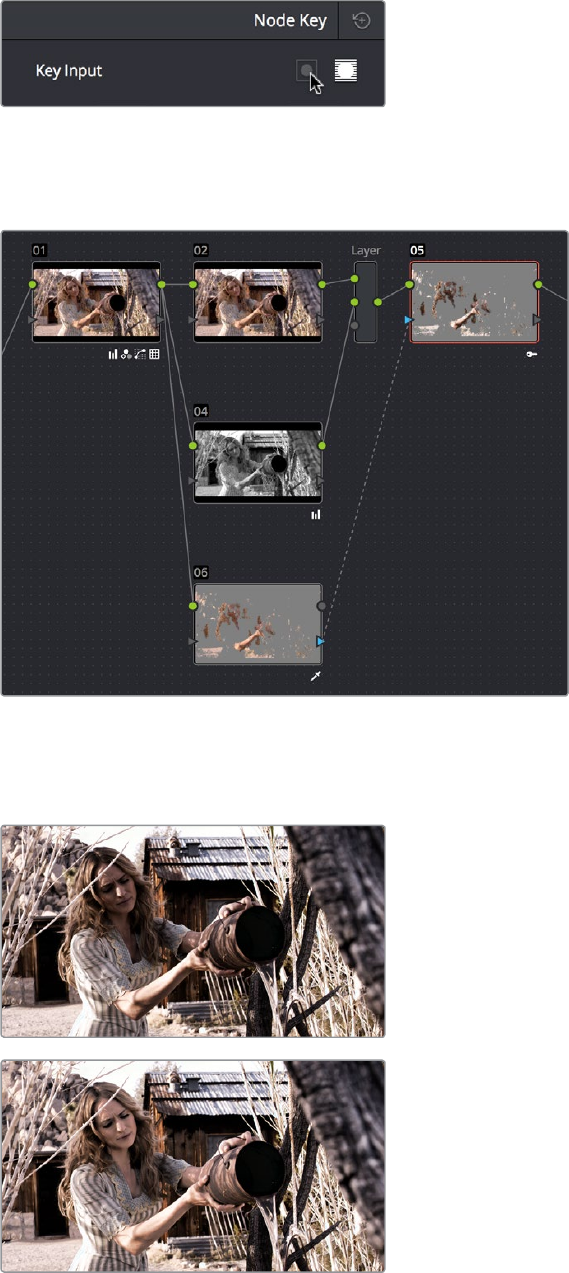
915
Combining Keys and Using Mattes Part 6 – 51
6 Double-click Node 5 to select it, open the Key palette, and click the Key Input Invert
control so that Node 5’s key is identical to Node 6’s key.
Using the Key palette to control the key levels
7 Now, you can make your adjustment to Node 6’s grade, to lower the contrast, brighten,
and increase the saturation of the actor’s skin tone.
Inverting the key being input into Node 5, to make an adjustment to the actor’s skin tone
As a result of this operation, the background remains desaturated and contrasty, while
the actor’s skin tone has the brighter quality we need for the shot.
Before/After Selective adjustment of skin tone
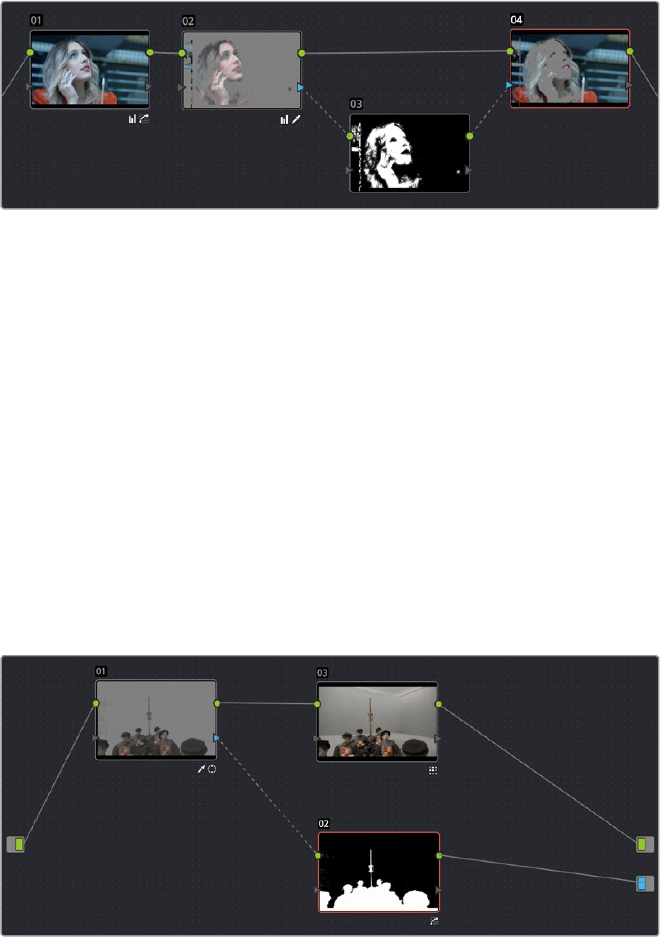
916
Combining Keys and Using Mattes Part 6 – 51
This example could have been handled in a variety of different ways, but the point is that you
can add nodes that connect to the state of the image at any part of a node tree, and use them
to generate keys to feed to any other node, regardless of what’s happening to the picture
in between.
Connecting KEY Outputs to
RGB Inputs, and Vice Versa
There’s another way you can manipulate a key from one node using another in the Node Editor,
and that’s to connect the KEY output from one node to the RGB input of another node. When
you do this, you can use any of the controls of the second node to manipulate the key, and you
can then use the result by connecting the RGB output of the second node to the KEY input of a
third node.
Connecting a KEY output to an RGB input to adjust a key with a second node’s controls
In the node tree shown above, Node 2 pulls a key, Node 3 manipulates the key, and Node 4
uses the key to make a color adjustment.
Keep in mind that a key is just a grayscale image. Setting up this kind of node structure lets you
use any of the second node’s controls, such as the Custom Curves, Noise Reduction or Motion
Blur controls, Sharpen, Midtone Contrast, Lift/Gamma/Gain, Contrast, or Log controls, to
manipulate the key in ways you couldn’t do using only the Matte Finesse controls.
While this technique may not be necessary for conventional color isolations, it can come in very
handy when making tricky isolations with hard to key subjects, or when using one of the
Qualifier modes to pull a key to create transparency for compositing using the Node Editor’s
Alpha output. In this instance, you can connect the RGB output of a node used for key
manipulation directly to the Alpha output. In the example, Node 1 pulls a key, and the RGB is
connected to Node 2 which is used to color correct the foreground image. The KEY from Node
1 is connected to the RGB of Node 3, which manipulates the key to clean it up prior to
connecting it to the Alpha Output block at the bottom right of the Node Editor.
Connecting a KEY output to an RGB input to adjust a key
used to create transparency via the Alpha output
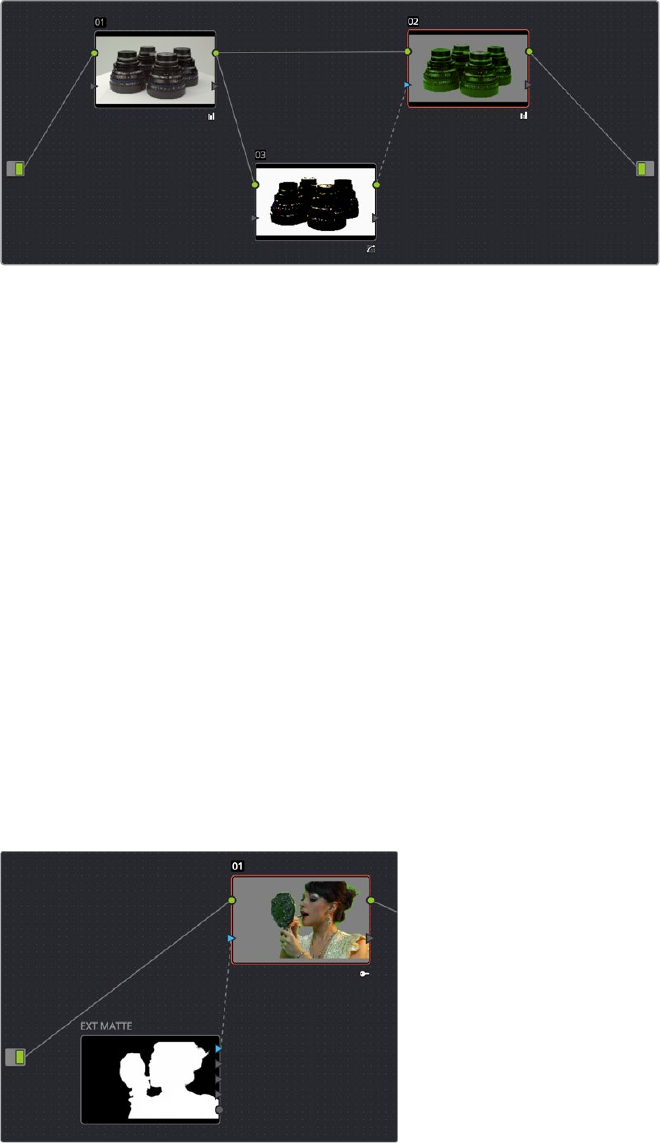
917
Combining Keys and Using Mattes Part 6 – 51
Furthermore, this capability also lets you create keys in other ways besides using the Qualifier
palette controls. In the following example, the Contrast and Custom Curve controls in Node 3
create a high-contrast matte of the windows which is blurred. The RGB output of Node 3 is then
connected to the KEY input of Node 2, where the resulting key can be used for a variety of
adjustments; in this case, to tint the product within the image green. Alternately, this technique
could be also be used to create transparency via the Alpha Output.
Using a high contrast color correction as a key
Interconnecting KEY and RGB inputs and outputs is a powerful capability that lets you create
many kinds of workarounds for uncommon situations.
Using External Mattes
The External Matte node has evolved over the years. What was once purely a means for
importing matte channels for defining opacity and limiting adjustments has expanded to
become a way to import the RGB channels of a media file to be used for overlaying grain,
texture, and stylized distress onto an image, and even as a way to use the channels of a clip
itself as a matte.
Matte clips are added to your project in the Media page. You can add them by attaching them
to a clip, so a particular matte is only available to a particular clip as part of a Clip Grade, or you
can add unattached mattes that stand alone in the Media Pool, which are then available to any
Track Grade. For more information about adding Matte clips in the Media page, see “Adding
and Removing External Mattes” in Chapter 8, “Adding and Organizing Media with the
Media Pool.”
Whether attached or unattached, mattes operate within a grade using EXT MATTE (external
matte) nodes. EXT MATTE nodes have the following outputs:
An external matte connected to the first node of a grade
918
Combining Keys and Using Mattes Part 6 – 51
EXT MATTE Outputs: Four blue triangular key outputs let you output the channels
contained within the EXT MATTE node, but which channels are available affects what
is output. If the EXT MATTE node’s source clip has RGBA channels, then these are
available as Alpha, Red, Green, and Blue key outputs that you can attach to any other
node’s key input. On the other hand, if the EXT MATTE node’s source clip only has RGB
channels, then the key outputs that are made available are Y (luma), Red, Green, and
Blue, and a “Use Lum for Alpha Output” setting in the Node Editor contextual menu lets
you use the Y channel as a matte.
An interesting aspect of these four outputs is that each one is dedicated to individual A,
R, G, and B color channels. Ordinarily, External Matte clips are written with matte data
written simultaneously to all three RGB channels. However, you could also render
separate pure primary-colored mattes to each color channel (a so-called “disco” matte),
so that the Red channel has one matte, the Green channel another, and the Blue
channels still another, thereby exporting three separate mattes within a single media
file, for convenience. If you add another matte to the Alpha channel, you can even
export four mattes within a single file. You can then use each one of these mattes
individually by connecting the correct output of the ExtMattenode. (Note: For
backward compatibility, projects from versions of DaVinci Resolve previous to 12.5
continue to output RGBY from the triangular outputs, not YRGB.)
RGB Output: A round orange RGB output lets you connect the RGB image data of a
matte clip to any other clip’s RGB input. This is especially useful when you’re combining
a matte clip with the current clip using a Layer Mixer node, to create a textured
composite of some kind.
External Mattes to Limit Adjustments
Going back to the External Matte node’s original use, mattes are typically grayscale media files
that represent image opacity, and are meant to be used either as alpha channels for creating
opacity within a corresponding RGB clip, or as a matte for limiting effects.
An example of a matte channel would be the key created by a green screen keyer. If you output
just the key, that would be an external matte. If you receive an external matte along with an
effects clip, you can attach the matte to its corresponding RGB clip in the Media page. Then,
you can access that matte via an External Matte node in the Node Editor, so you can use the
key it outputs to limit different kinds of corrections you want to apply.
In the following example, the keyed matte of a green screen composite clip is used to apply
different corrections to the inside and outside of a keyed composite, in order to make the
subject match the background more convincingly.
A matte attached to clip Makeup_composite.mov,
as seen in the Media Pool
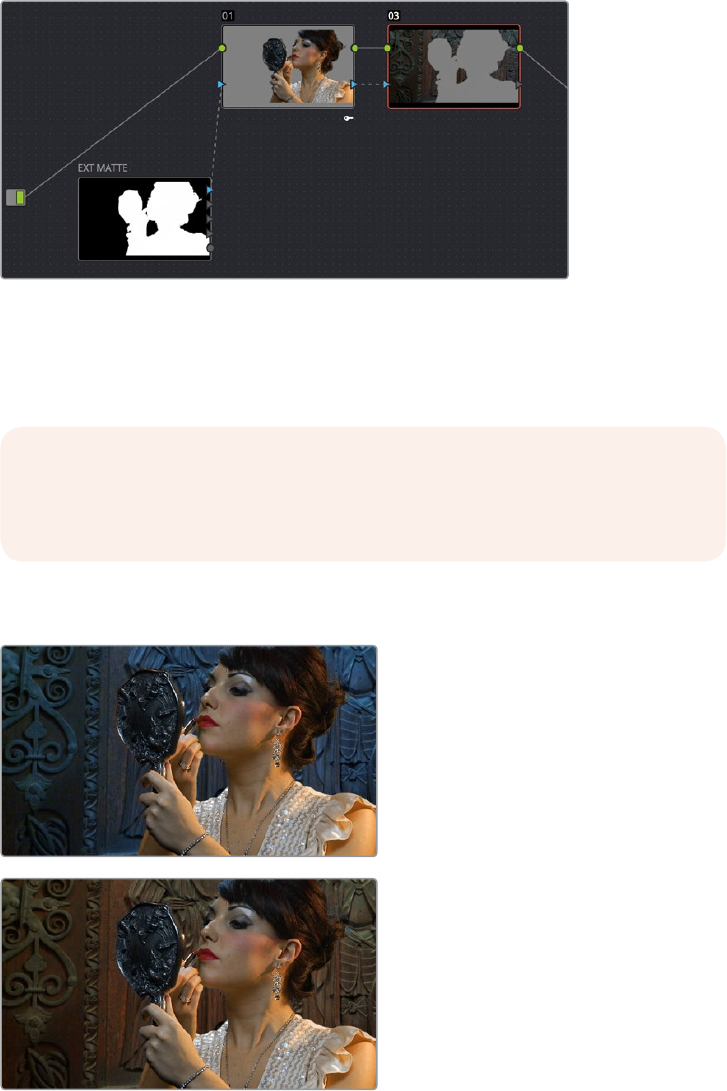
919
Combining Keys and Using Mattes Part 6 – 51
To use an attached matte to limit an adjustment within a Clip Grade:
1 Right-click any node, and choose the attached matte you want to use from the Add
Matte submenu of the contextual menu.
By default, the EXT MATTE node that appears has its first output connected to the
Connect one of the EXT MATTE node’s triangular key outputs to the key input of a
node you want it to limit.
2 Select the node to which the EXT MATTE node is attached, and add an Outside node
to make it possible to add adjustments on either side of the matte.
Node Editor displaying the influence of the external matte
on multiple nodes when the keys are linked
3 If necessary, select Node 1, and use the Key palette controls to modify the incoming
key, inverting or blurring it as necessary to create the isolation you need.
At this point, you can add adjustments to the inside and the outside of this composited
shot to improve the composite.
Before/After: An external matte is used to apply separate grades
to the foreground and background of a previously composited clip
NOTE: Don’t select the EXT MATTE node, because it exposes different
controls in the Key palette for transforming, flipping, looping, and freezing
the matte.
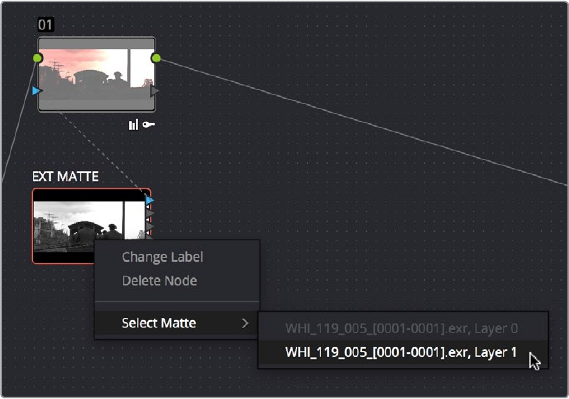
920
Combining Keys and Using Mattes Part 6 – 51
Ideally, external mattes are exported so that they match the size and duration of the RGB clip
they’re supposed to accompany. If they don’t match or if you’re using some other grayscale clip
as an external matte to create some sort of effect, then there are parameters in the Key palette
that you can use to retime or transform a matte so it works better in your grade.
To slip the sync of a matte relative to the clip it’s attached to:
1 Select the Ext Matte node you want to slip.
2 Open the Key palette, and raise or lower the Offset parameter until the matte is
perfectly aligned with the clip it’s supposed to match.
To transform a matte:
1 Select the Ext Matte you want to transform.
2 Open the Key palette, and turn off the Lock Matte checkbox.
3 Use the Pan, Tilt, Zoom, Rotate, Width, Height, HFlip, or VFlip parameters to adjust the
matte so it has the correct geometry.
It’s worth mentioning that you can attach as many external mattes to a single clip in DaVinci
Resolve as you like. For example, if a CGI shot has been delivered with a set of isolation mattes
for each of three characters in the scene, you can import all three mattes and use them to
isolate adjustments that you want to make in the Node Editor.
Extracting External Mattes from OpenEXR Layers
OpenEXR media is capable of containing multiple layers and multiple alpha channels, which can
also be accessed from EXT MATTE nodes. As a result, DaVinci Resolve uses a slightly different
but related procedure for accessing these mattes.
To extract OpenEXR layers as external matte nodes:
1 Right-click any node, and choose the .exr clip name from the Add Matte submenu of
the contextual menu.
By default, the EXT MATTE node that appears has its first output connected to the
Connect one of the EXT MATTE node’s triangular key outputs to the key input of a
node you want it to limit.
2 Double-click the EXT MATTE node to select it, then right-click it and choose which
layer you want to use from the Select Matte submenu.
Right-clicking an OpenEXR file’s EXT MATTE node to choose which layer to use
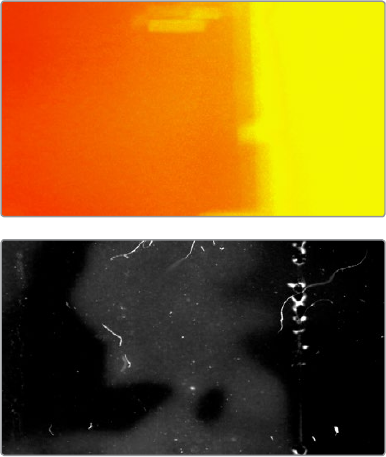
921
Combining Keys and Using Mattes Part 6 – 51
OpenEXR files with multiple RGBA layers (or passes) embedded within them (RGBA + RGBA +
RGBA etcetera) or OpenEXR files with multiple alpha channels (RGBA + A + A) expose multiple
entries in this submenu. Whichever one you choose is the layer that will be used as a matte by
that EXT MATTE node.
Once you’ve extracted an OpenEXR layer, you can use it as you would any other EXT MATTE
node described in this section, to limit adjustments (as seen above), or to add texture or
transparency (as seen in the following sections).
Using External Mattes to Add Texture
You can also use external mattes as creative tools, to add grain and texture. For example, you
might use a more abstract animated matte, or a grayscale film scan of dirt and dust, to apply
correction for effect.
Light leak and dirt and dust images From Warren
Eagles’ Scratch FX collection (FXPHD), designed
to add texture to your grades
Once attached to a clip, external mattes can be exposed in the Node Editor, and their key
output can be used just like any other key in a node tree.
To use an attached matte to create texture a Clip or Track Grade:
1 When applying a matte as part of a Clip or Timeline grade, right-click any node
and choose the attached or unattached matte you want to use from the Add Matte
submenu of the contextual menu. Unattached mattes appear in the Add Matte > Track
Mattes submenu.
2 Disconnect the EXT MATTE node’s Key output connection to the Key input of the node
it’s connected to by default.
3 Add a Layer Mixer to the end of the node tree.
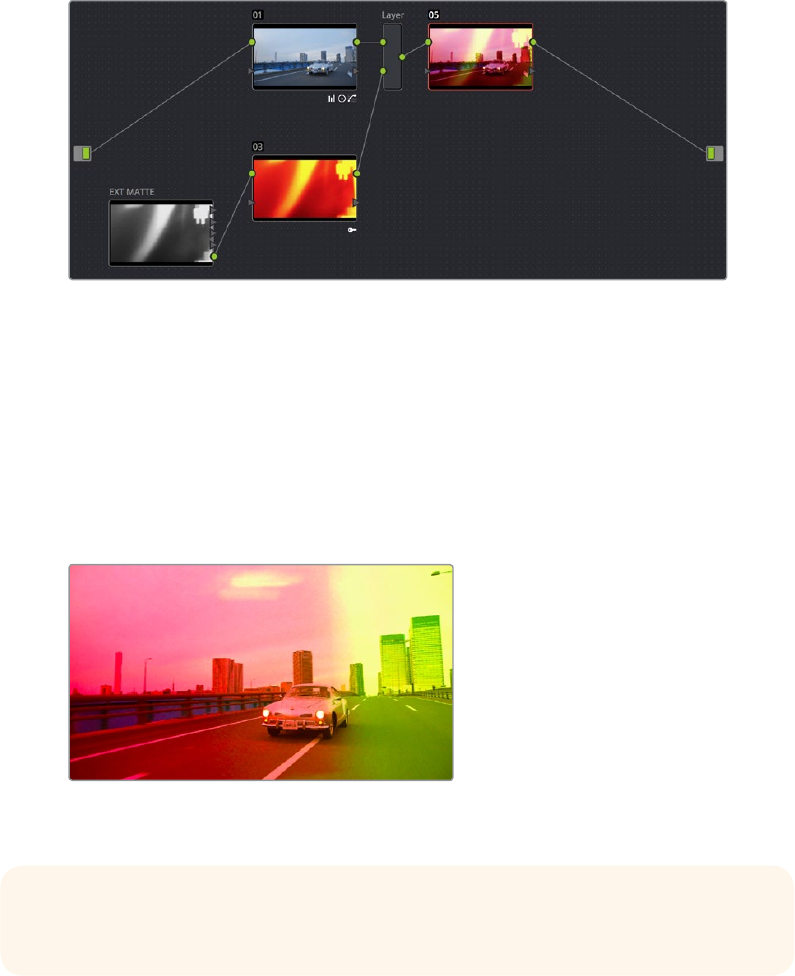
922
Combining Keys and Using Mattes Part 6 – 51
4 Disconnect the bottom Corrector node’s RGB input, and then connect it to the EXT
MATTE node’s round RGB output.
A node tree set up to feed an EXT MATTE node’s RGB output to the input of a node
connected to a Layer Mixer, in order to blend it with the grade using composite modes
5 Right-click the Layer Mixer node, and choose Overlay from the Composite Mode
submenu to blend the Ext Matte node most effectively with the grade.
6 If necessary, you can use the grading controls of the Corrector node to which you’ve
attached the EXT MATTE node to change the characteristics of the texture clip,
desaturating it for instance. You can also select the EXT MATTE node itself, open the
Key palette, and use the Transform, Offset, Loop, or Freeze controls described later to
change how the matte appears.
The resulting texture effect, blended with the
grade using the Overlay composite mode
Using External Mattes to Create Transparency
You can also use an EXT MATTE node to create transparency in a clip, for compositing with
clips underneath it on the Timeline.
To use an attached matte to create transparency in a clip:
1 Right-click any node, and choose the attached matte you want to use from the Add
Matte submenu of the contextual menu.
Adding an EXT MATTE node to a Clip Grade applies the effect to only that clip,
whereas adding an EXT MATTE node to a Track Grade applies the effect to the
entire Timeline.
TIP: If you want the texture you create to be unaffected by blur or sharpening
operations within the grade, be sure to add it to the very end of the node tree.
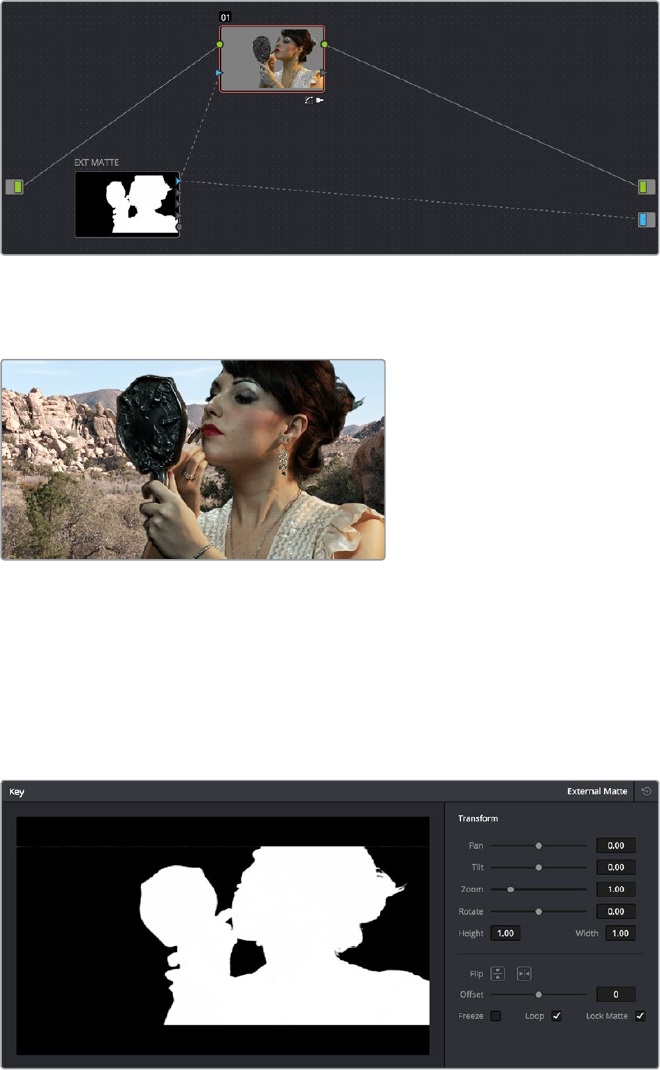
923
Combining Keys and Using Mattes Part 6 – 51
2 Right-click any empty area of the Node Editor, and choose Add Alpha Output to reveal
the Node Tree output on the right that lets you assign a key to be used to define clip
transparency.
3 Connect one of the EXT MATTE node’s triangular key outputs to the Alpha output at
the right of the Node Editor.
The node setup for using an external matte to composite two layer
The areas of the matte defined by the key are now rendered transparent.
The final composite created using the external matte node
Key Palette Controls for the External Matte Node
When you select an EXT MATTE node, the Key palette displays different parameters only for
mattes. Be aware that you must turn off the Lock Matte checkbox before you can make
adjustments to transform the matte.
The Key Palette showing a texture layer added as an EXT MATTE node
Transform: Standard Pan, Tilt, Zoom, Rotate, Width, and Height parameters let you
transform a matte to fit the image better.
Flip Image: Two buttons let you flip the matte clip horizontally or vertically.
Offset: Adjust this parameter to offset the start point of a matte clip.
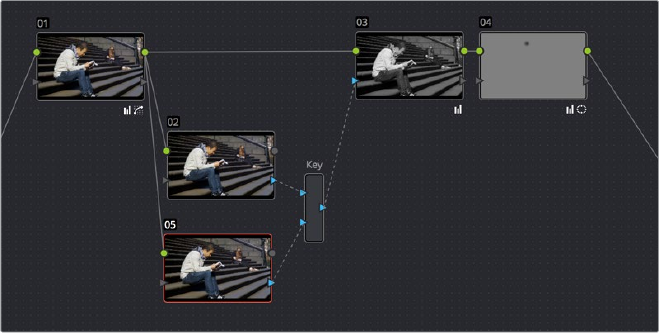
924
Combining Keys and Using Mattes Part 6 – 51
Freeze: Turning on this checkbox freezes the matte clip on a single frame. Adjust the
Offset parameter to choose which frame to freeze on.
Loop: Turning on this checkbox enables matte clips to loop endlessly, which lets
shorter matte clips cover longer durations.
Lock Matte: When turned on, locks the sizing of a matte to whatever changes are made
to the Input Sizing of that clip, so the matte transforms to follow the clip.
You can also use external mattes as creative tools. For example, you might use a more abstract
animated matte, or a grayscale film scan of dirt and dust, to apply correction for effect.
Using the Key Mixer
The Key Mixer node lets you mix keys output from multiple Corrector nodes, combining them in
different ways to create a single key output. This makes it possible to build much more intricate
keys than you can with a single Qualifier or set of four Windows. In particular, the Key Mixer
node is the only way to combine multiple keys made using Qualifiers and Windows, adding,
subtracting, or intersecting them to create a highly specific result.
Adding Two Keys Together
In the following example, you’ll learn how to set up a Key Mixer to combine the keys output by
two Corrector nodes in a node tree. Then you’ll learn how to change the way the input keys are
combined using the Key palette.
To combine two or more keys using the Key Mixer:
1 Right-click anywhere on the gray area of the Node Editor, and choose Add Node >
Key Mixer.
2 Create two Corrector nodes, then attach their RGB inputs to the RGB output from an
appropriate node in the main part of the tree, and attach their key outputs to the key
inputs of the Key Mixer.
3 Next, attach the key output of the Key Mixer node to the key input of the node you
want to use to make the correction. Remember, the objective is to use the key that’s
output by the Key Mixer to limit the adjustment being made using another node, in this
case Node 3.
Setting up the node tree you’ll need to combine two keys together
Keep in mind, especially since this is a significant reordering of nodes in the Node
Editor, that every node needs to be connected properly for the overall grade to work.
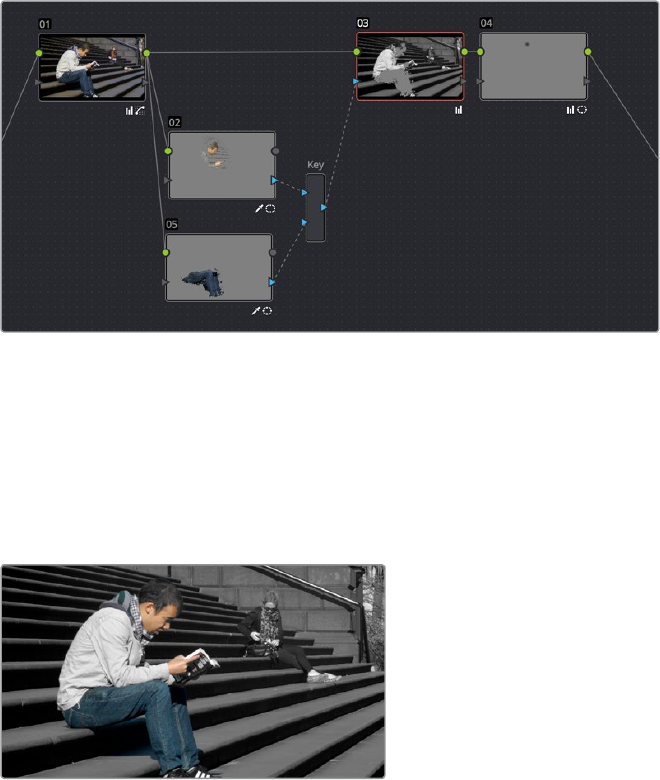
925
Combining Keys and Using Mattes Part 6 – 51
4 Now that the node structure is fully connected, use Windows, Qualifiers, or both
to create keys in each of the nodes that you connected to the Key Mixer. In this
example, Node 2 is isolating the main skin tone, and Node 5 is isolating the blue of his
jeans and hood.
By default, all keys connected to the Key Mixer are added together, as you can see in
the Key Mixer’s thumbnail.
Combining multiple keys with the Key Mixer
If you wanted, you can use the controls in the Key palette to change this, in order to
isolate the intersection of two keys, or to subtract one key from another. This is covered
in the next section.
5 Continuing with the previous setup where both keys are added together by default,
selecting Node 3 and dropping the saturation to be very faint stylizes the entire
background, while leaving the various hues of the man we’ve isolated alone.
Final grade, the talent in color with a B&W background
Subtracting One Key from Another
The way multiple keys are combined within the Key Mixer depends on a pair of Key Input
buttons you can toggle using the Key palette. In the following example, a partial green tint is
washed throughout the midtones of the image using a qualifier, but you want to exclude the
man’s skin tone from this operation. Using the Key Mixer, you can subtract one key from another
to accomplish this with ease.
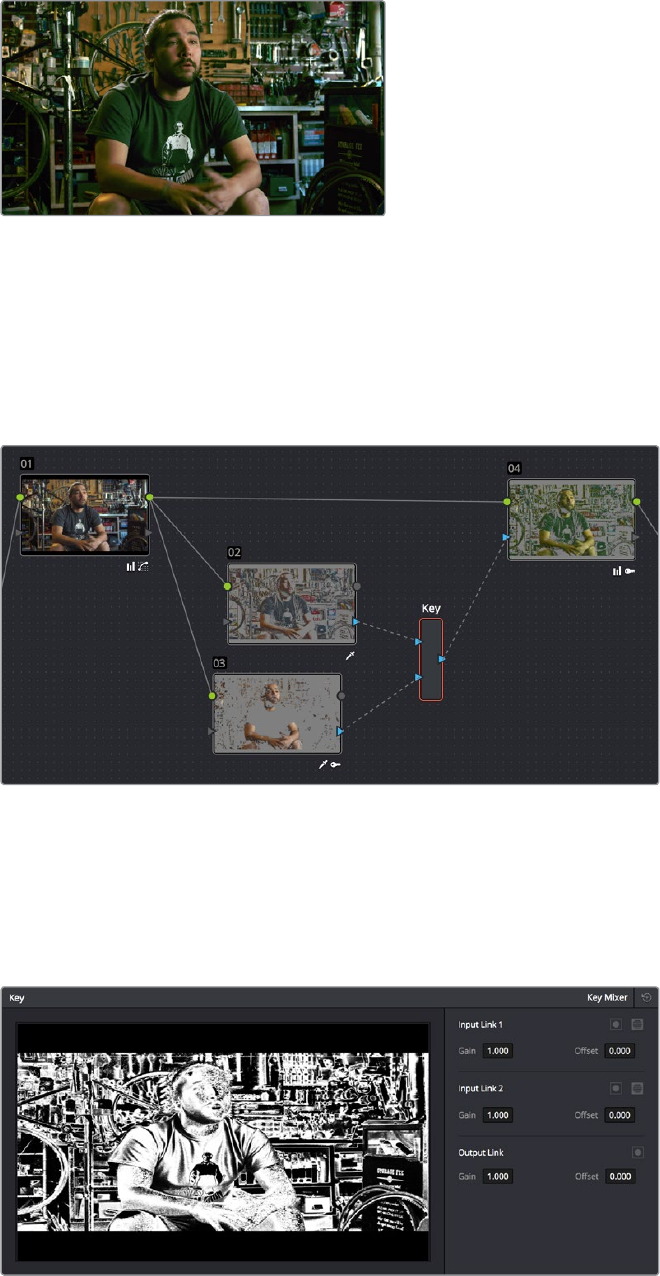
926
Combining Keys and Using Mattes Part 6 – 51
A selective blue tint added to the midtones of the
image includes the red sign
To change the Key Input settings for a node connected to a Key Mixer:
1 In this example, Node 2 is isolating part of the midtones of the image, and feeding
its key through the Key Mixer to Node 4, which is using it to apply a partial blue tint.
However, in preparation for subtracting the skin tone from this operation, Node 3 is
isolating the man’s skin tone.
A node setup in preparation of subtracting the Bar sign from the
midtone isolation being used to add a partial blue tint
2 To reveal the controls you’ll use to change how the key from Node 3 interacts with the
key from Node 2, double-click the Key Mixer node to select it.
3 Open the Key palette; a list of all input links that are connected to the Key Mixer
appears at the right.
The Input List of the Key Mixer node

927
Combining Keys and Using Mattes Part 6 – 51
4 Within each list entry is the input name (Input Link 1, Input Link 2, etc.), a Matte control, a
Mask control, a gain parameter, and an offset parameter.
To subtract Node 3’s key from that of Node 2: Turn on both the Key Input Matte button
and the Key Input Invert button for Input Link 2
Turning on Matte and Invert for Input Link 2 to
Output Node 3 subtracted from Node 2
To subtract Node 2’s key from that of Node 3: Turn on both the Key Input Matte button
and the Key Input Invert button for Input Link 1.
Turning on Matte and Invert for Input Link 1 to
Output Node 2 subtracted from Node 3
To limit the output to the intersection of both keys: Turn on the Key Input Matte button
for either Input Link 1 or Input Link 2.
Turning on Matte for Input Link 1 to output the
intersection of two mattes
To invert the resulting matte you’ve created: Turn on the Output Link Invert button.
When you’re finished, if you choose to subtract Node 3’s key from that of Node 2, the
result should resemble the following screenshot.
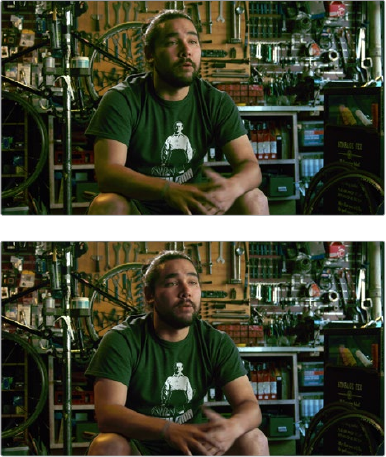
928
Combining Keys and Using Mattes Part 6 – 51
The result of subtracting a key of the man’s face from a key of the overall
midtones of the image, and using that to add a selective green tint
Adding Inputs to Key Mixer Nodes
New Key Mixer nodes have two key inputs by default. If necessary, additional inputs can be
added in order to combine even more keys with one another.
To add inputs to the Key Mixer:
Right-click a Key Mixer node, and choose Add One Input.
When combining three or more keys, the interaction of keys using the Key palette controls
becomes even more complex, but the rules outlined above still apply.
Using the Key Palette
The Key palette contains parameters and controls that you can use to modify key channel data
being fed into or routed out of the currently selected node.
For example, the Key Input Invert control is always enabled, which is why the Outside node
works automatically. Clicking this control results in keys that are fed into that node exactly
mirroring the original key.
The controls that are available in the Key palette vary depending on what kind of node you
have selected:
Corrector Nodes: Have three sets of parameters. Key Input parameters let you make
adjustments to keys being fed through a node’s Key Input connection. Qualifier
parameters let you make adjustments to the internal key created with the HSL Qualifier
or Window controls. Finally, the Key Output parameters let you make adjustments to the
key data being output by a node’s Key Output connection, and includes the incredibly
powerful Offset Gain parameter that governs the strength of that node’s contribution to
the overall grade. This functionality is covered more extensively in the next section.
Ext Mattes: Have two sets of parameters. Transform parameters let you make
geometric transformations to a matte so it fits the clip it’s being applied to better. An
Offset control lets you slip the sync between an external matte and the clip to which it’s
applied. This functionality is covered in the section on External Mattes.
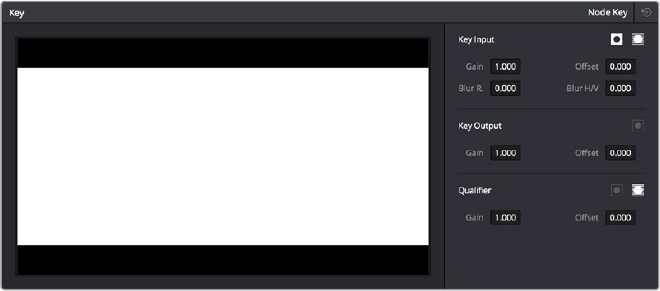
929
Combining Keys and Using Mattes Part 6 – 51
Key Mixer Nodes: Have two sets of parameters that are dependent on which of the
connections attached to a Key Mixer’s key inputs is selected. Input parameters let you
adjust how much of a contribution a key makes to the total key mix, and whether the
contribution is additive or subtractive.
The Output parameters let you adjust the inversion and strength of the key that’s output by the
Key Mixer. This functionality is described more extensively in the Key Mixer section.
Layer Mixer and Parallel Mixer nodes have no adjustable controls in the Key palette.
Using the Key Palette to Affect Corrector Nodes
When you open the Key palette for a selected Corrector node, you can adjust the following
parameters:
Key palette showing controls when a Node is selected
Key Input Controls
Input Invert: Inverts the key being fed into the key input. This control is on by default,
which is why Outside nodes work to automatically adjust everything outside of the
secondary operation taking place in the node before.
Input Matte: Lets you switch the key input between Matte and Mask modes. In Matte
mode (on by default) the key input combines via intersection with keys generated
internally using the Qualifier or Windows palette. In Mask mode, the key input is added
to the internal key instead.
Gain: Controls the strength of the key connected to the key input.
Offset: Controls the contrast of the key connected to the key input.
Blur Radius: Blurs the key connected to the key input
Blur H/V Ratio: Alters the horizontal/vertical ratio of the blur that’s being applied to the
key input.
Key Output Controls
Output invert: Inverts the overall key.
Gain: Using the key output, this parameter governs the strength of that node’s
contribution to the overall grade. Setting Gain to 0 results in that node having no effect
at all, while the default setting of 1.00 applies the full strength of any adjustments
made with that node. The maximum setting of 2.00 increases the intensity of any part
of the key output that’s less than 100 percent white. You can also use this parameter
to keyframe the key output to fade that node’s contribution in or out with one set of
keyframes.
Offset: Lets you adjust the contrast of the Output key. This has no effect if the entire
key is 100 percent white (a solid key).
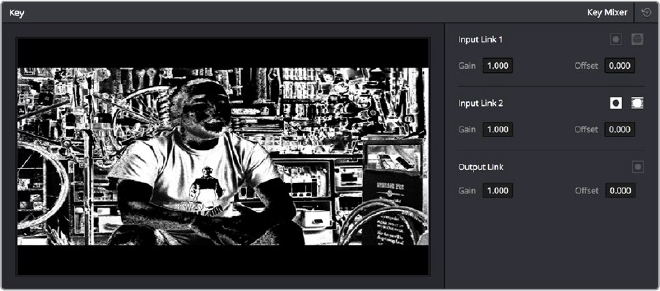
930
Combining Keys and Using Mattes Part 6 – 51
Qualifier Controls
Qualifier invert: Inverts the key created by that node’s Qualifier palette.
Qualifier matte: Lets you switch the interaction of the keys generated by the Qualifier
and Window palettes between Matte and Mask modes. In Matte mode (the default), the
Qualifier and Windows palettes combine via intersection. In Mask mode, they’re added
together instead.
Gain: Lets you raise or lower the strength of the key generated by the Qualifier palette.
Offset: Lets you adjust the contrast of the key generated by the Qualifier palette.
Using the Key Palette to Adjust Key Mixer Controls
When you open the Key palette for a selected Key Mixer node, you can adjust the
following controls:
Key palette showing controls when a Key Mixer is selected
Input List: A list of every input that’s connected to the Key Mixer. Each entry on the list
has the following controls:
Input name: The name of each node connection attached to that key mixer, such as
Input Link 1, Input Link 2, etcetera.
Input Invert: Inverts the key being fed into this particular input. Off by default.
Input Mask: Lets you switch the key input between Matte and Mask modes. In Matte
mode (on) the key input combines via intersection with other inputs connected to the
Key mixer. In Mask mode (off by default), the key input is added to the other key inputs
connected to the Key mixer.
Gain parameter: Decreases or increases the intensity of that input matte’s contribution
to the resulting output matte.
Offset parameter: Adjusts the contrast of that input matte’s contribution to the resulting
output matte.
Output invert: Inverts the overall result of the various Input Link interactions.
Gain: This parameter increases or reduces the strength of the resulting output key.
Setting Gain to 0 results in all inputs being set to black, while the default setting of 1.00
outputs the combined mattes at full strength. The maximum setting of 2.00 increases
the intensity of any part of the key output that’s less than 100 percent white, which
can have the practical effect of “growing” soft edges. You can also use this parameter
to keyframe the key output to fade that node’s contribution in or out with one set of
keyframes.
Offset: Lets you adjust the contrast of the Output key.
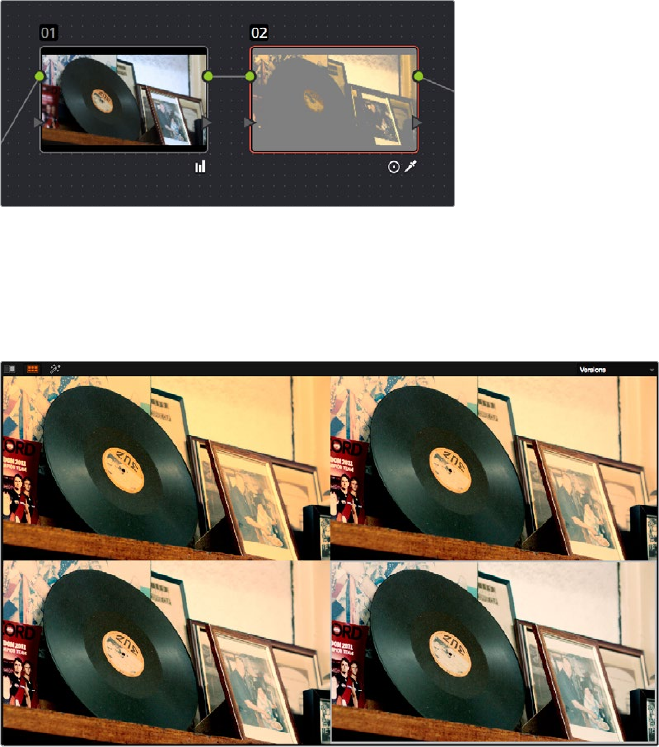
931
Combining Keys and Using Mattes Part 6 – 51
The Many Uses of Key Output Gain
Several of the techniques discussed in here and in “Secondary Qualifiers,” can be further
customized using the Key Output Gain parameter, which makes it easy to control the strength of
a node’s effect on your grade with a single adjustment. In the following example, two simple
Serial nodes are applied to a clip, with the first one expanding image contrast, and the second
one using a variety of controls to add some extreme warmth to the highlights.
A tint applied only to the highlights of the image
If you decided that you want to reduce the amount of warmth added by the second node
without readjusting the controls you used to create the effect, you could open the Key palette
and lower the Key Output Gain parameter to fade the effect with a single adjustment.
Four versions of this grade shown using the Versions option of the Split
Screen controls, with Output Gain set to 1, .75, .5, and.25 for comparison
This principle also works for controlling the strength of individual nodes that are being
combined in parallel, that are combined using the Layer node, or for simply fading out the effect
of any node in the node tree you want to “turn down” a bit.
933
Channel Splitting and Image Compositing Part 6 – 52
Channel Splitting and
ImageCompositing
This chapter begins by showing node structures you can use to isolate, split apart, convert, and
recombine the image channels of clip in different ways. This includes ways of using the
additional image channels that are provided in some types of media.
The second part of the chapter shows ways that you can do image compositing right in the
Color page, with techniques for using external mattes for compositing, and using qualifier keys
to do green- and blue-screen compositing against other layers in the Timeline.
This chapter has the following topics:
Isolating, Splitting, and Converting Color Channels 934
Enabling, Disabling, and Converting Node Channels 934
Splitting Channels With the Splitter/Combiner Nodes 936
Multi-Channel RED HDRx Support 938
Introduction to Compositing Using the Alpha Output 941
Using a Qualifier Key to CreateTransparency 941
Using a Matte to Create Transparency 944
Use an OFX Plug-in to Create Transparency 945
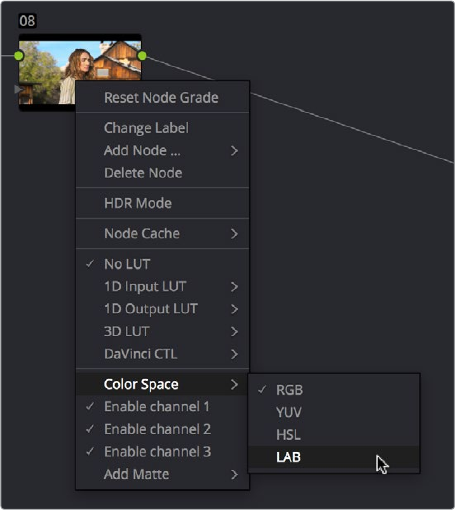
934
Channel Splitting and Image Compositing Part 6 – 52
Isolating, Splitting, and
Converting Color Channels
DaVinci Resolve provides two different methods of making channel-specific adjustments,
depending on whether you need to apply an adjustment to just one channel within a single
node, or apply separate adjustments to all three channels across several nodes.
Enabling, Disabling, and
Converting Node Channels
Within the contextual menu of each node in the Node Editor is a series of four options:
Disabling channels and switching color spaces
A Color Space submenu that lets you change the color space that node works
in between RGB (the default red/green/blue), YUV (actually Y’/Cb/Cr), HSL (Hue/
Saturation/Lightness), and LAB (Luminosity/A/B).
Three checked Enable Channel 1-3 options let you turn individual channels off or on,
limiting which channels operations within that node will affect.
In combination, these controls let you choose a color space for a node to work within, and then
choose which channels of that color space you want to affect with that node’s adjustments. In
the following example, you’ll see how to use these features to selectively sharpen just the Y’
(luma) of an image without affecting the chroma, which can be a more subtle effect than simply
sharpening the entire image.
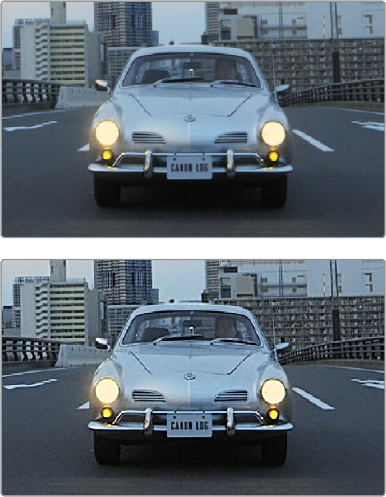
935
Channel Splitting and Image Compositing Part 6 – 52
To use channel disabling and color space conversion to sharpen luma only:
1 Add a node with which to apply the sharpening you want to the current clip.
2 Right-click the new node, and choose YUV from the Color Space submenu of the
contextual menu.
3 Apply sharpening by doing one of the following:
Using that node’s contextual menu, uncheck Enable Channel 2 and Enable Channel
3, which correspond to the U (Cb) and V (Cr) channels, leaving only Channel 2 (Y)
enabled. Then, open the Blur palette, and drag the ganged Radius sliders down to
sharpen the Y channel.
You can also just open the Blur palette, ungang the Radius sliders, and drag the
red slider down to sharpen the Y channel, since any control with three gangable
sliders will automatically assign those sliders to whichever channels are used by the
currently selected Color Space.
Before - The original image, After - Sharpening
applied to only the Y’ channel of the image
As you can see, while the Blur palette ordinarily provides separate R, G, and B controls that can
be unganged from one another, the Color Space submenu lets you apply sharpening to the
channel definitions of other colorspaces, providing many other corrective and creative
possibilities with the same controls.
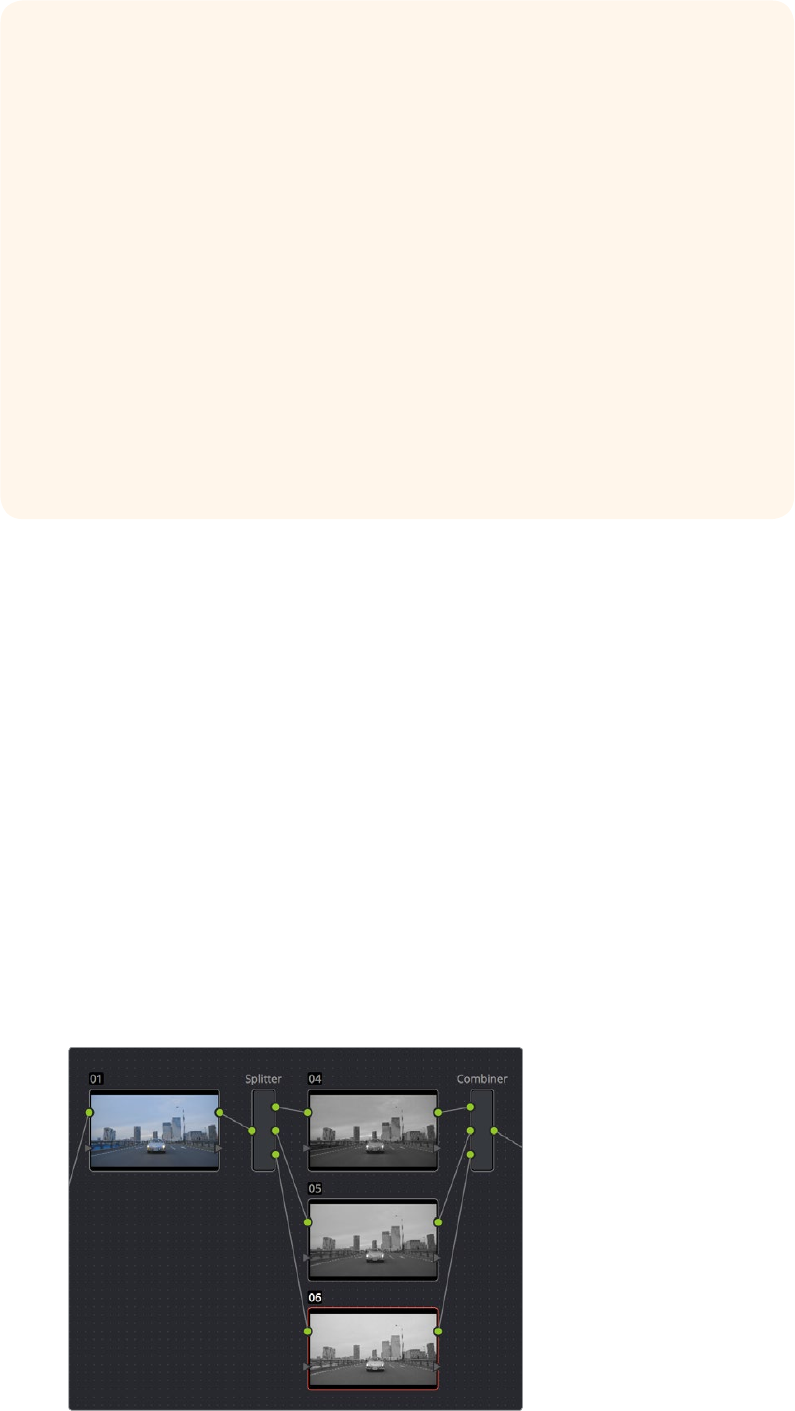
936
Channel Splitting and Image Compositing Part 6 – 52
Splitting Channels With the
Splitter/Combiner Nodes
Another method of applying corrections to individual color channels is using the Splitter/
Combiner nodes, which break the Red, Green, and Blue channels apart into separate node
tree branches, each capable of accepting multiple serial and parallel nodes of image
adjustment. There are two ways you can create a Splitter/Combiner node structure.
Methods of adding Splitter/Combiner nodes:
To add a pre-made Splitter/Combiner node structure: Choose Nodes > Add Splitter/
Combiner Nodes (Option-Y). A Splitter and Combiner node appear already connected
to three Corrector nodes, one for each color channel.
To manually construct a Splitter/Combiner node structure: Right-click in any empty
area of the Node Editor, and choose from the Add Node submenu to create a Splitter
node, a Combiner node, and three Corrector nodes, wiring them together as necessary
to create the desired effect.
The Splitter Combiner node structure
Supported Color Spaces for Conversion
The Colorspace submenu available when you right-click a node in the Node Editor
supports four different color spaces that you can set each node to work within. When
you choose a color space other than RGB, all channel-specific controls (the Custom
curves, Soft curves, RGB Lift/Gamma/Gain sliders, and RGB mixer) operate on the
particular channels of that color space, rather than the default YRGB channels. By
switching color spaces, you can achieve very different kinds of adjustments by
swinging values among mathematically different axes.
YUV converts the image into Y’, Cb, and Cr channels. The Y’ channel governs
luminance, while the Cb and Cr are color difference channels that work within the
broadcast model of color.
HSL converts the image into Hue, Saturation, and Lightness channels. Lightness is
identical to Luminance, while Hue and Saturation are exactly as described.
LAB operates on the L, A, and B channels. The L channel governs luminance, while the
A and B channels are color difference channels; A adjusts color on an axis from
magenta to green, B adjusts color on an axis from yellow to blue
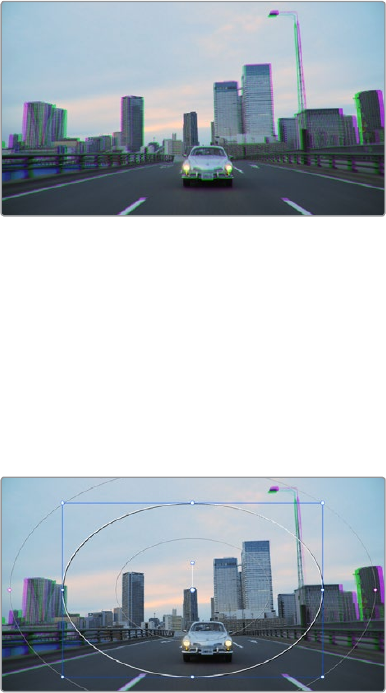
937
Channel Splitting and Image Compositing Part 6 – 52
The Splitter node takes an incoming image and provides individual outputs for each color
channel (top/red, middle/green, bottom/blue). When you connect each of these output to a
Corrector node, that color channel automatically connects to all three internal channels of that
node, so that the default three nodes in a Splitter/Combiner structure are internally processing
red/red/red, green/green/green, blue/blue/blue. The Combiner then pulls the Red, Green, and
Blue channels out of each node connected to its three inputs, and reassembles them into a
single RGB image again. Of course, what happens in between the Splitter and Combiner is
entirely up to you.
One of the simplest ways of showing the possibilities of this node structure is to combine it with
Node Sizing in the Sizing palette. Using Node Sizing, you can correct for misaligned channels in
older archived video, or create channel misalignments for creative looks. In the following
example, a simple Node Sizing adjustment to a split Blue channel will create an interesting
“prism vignette” effect.
To use Node Sizing on individually split channels:
1 Choose Nodes > Add Splitter/Combiner Node (or press Option-Y) to add a pre-made
Splitter/Combiner node structure to the Node Editor.
2 Select the middle of the three Corrector nodes appearing in between the Splitter and
Combiner nodes (Node 5 in the following screenshot).
3 Open the Sizing palette, choose Node Sizing from the Mode pop-up, and then raise the
zoom parameter by a small amount; this example uses 1.014.
Zooming just one color channel using the Splitter/Combiner nodes
As you can see in the screenshot, just the Green channel has been zoomed in on
across the entire image. This is only possible using Node Sizing. This is cool, but not
quite what you need.
4 Open the Window palette, add a Circular window, turn on its Invert control, and
transform it to be a very soft, horizontally aligned vignette. This limits the individual
scaling done to the Green channel to just the outer edge of the image, similar to a lens
with excessive chromatic aberration.
The resulting channel split effect
You could easily keep going, applying varying amounts of zoom with different window
shapes to each of the other color channels, and perhaps adding some blur to enhance
the effect, but this example should show the creative potential available when using
this technique.
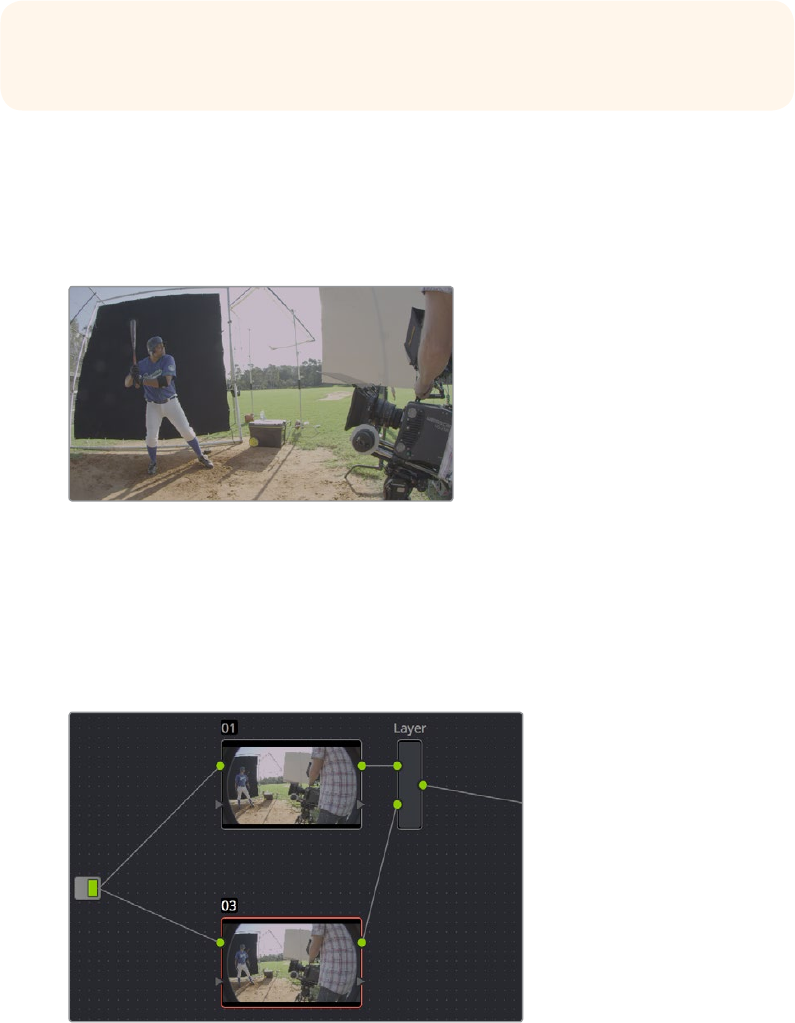
938
Channel Splitting and Image Compositing Part 6 – 52
Multi-Channel RED HDRx Support
The RED EPIC, SCARLET, DRAGON, and WEAPON cameras are all capable of shooting in an
HDR mode that effectively “brackets” two different exposures of each frame. The resulting
image data stores two channels of image data: the regular exposure, and a “highlight exposure”
that’s underexposed by a user-selectable margin (+3, +4, +5, or +6 ƒ-stops difference).
By default, the Input bar in the node graph feeds the regular exposure to your grade’s node
tree. To take advantage of the additional “highlight” exposure, you can add an additional
Source input to the node graph that feeds a second stream of image data that you can mix with
the regular exposure in different ways.
To set up a node tree combining the normal and highlight HDR versions:
1 Using the first default node (Node 1), grade the image to see if you even need to use
the alternate exposure that’s available. We’ll assume for this example that you do. In this
example, the sky of the default exposure is pretty blown out, but there may be detail
that can be retrieved using the highlight exposure.
Using HDRx images with the Layer Mixer
2 Create a Layer Mixer node by choosing Nodes > Add Layer (Option-L), or press the
ADD LAYER button of your control panel.
Two nodes are created, a Layer Mixer node that’s added after Node 1, and a third node
(Node3) that’s connected to a second RGB input of the Layer Mixer node in parallel
to Node 1.
The Source currently supplies two input, but you can add a second source, which is the
short exposure in the HDR image
NOTE: You can also take advantage of the highlight exposure of RED HDRx media by
enabling and adjusting the Magic Motion controls in the Camera Raw palette.
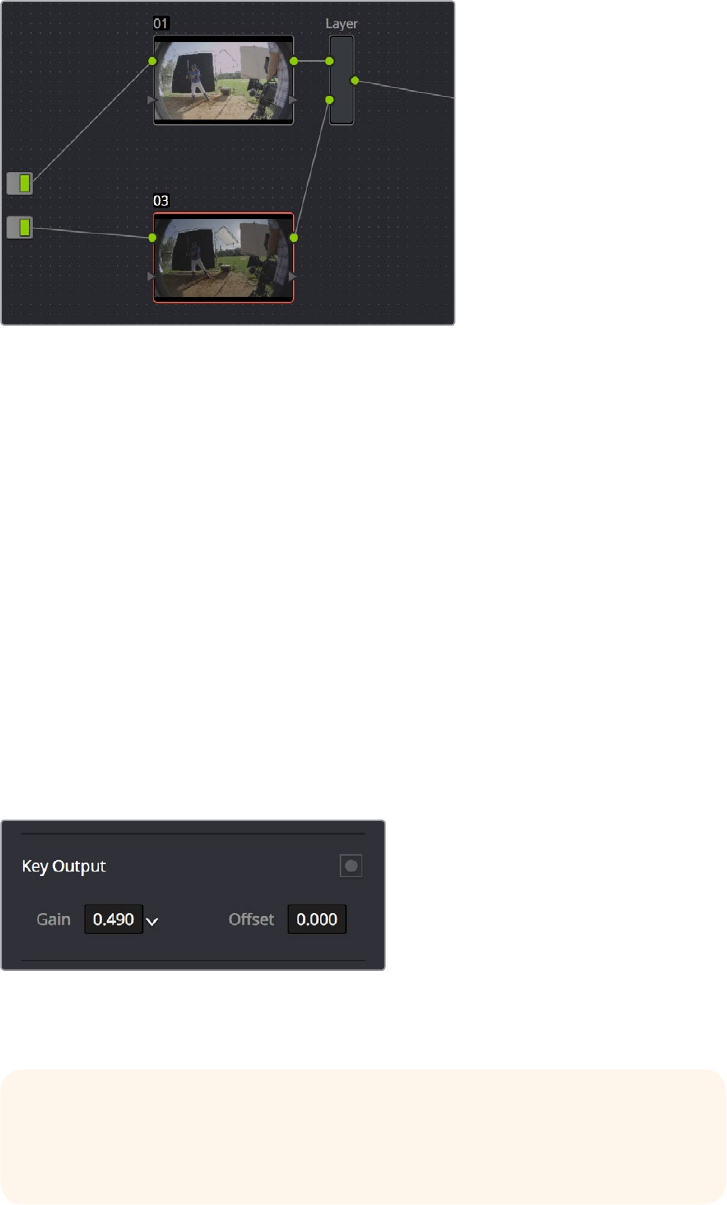
939
Channel Splitting and Image Compositing Part 6 – 52
3 Right-click anywhere within the node graph (except on a node) and choose Add Source
from the contextual menu.
A second Source input appears underneath the first, which outputs the highlight
exposure of the image as a separate image stream.
A node tree that uses a Layer Mixer node to mix two Corrector
nodes, each connected to separate outputs for the regular and
highlight exposures.
4 Delete the connection between the top Source input and Node 3, and then connect
the bottom Source input to the RGB input of Node 3.
Immediately, the image in the node thumbnail and Viewer updates to show the darker,
underexposed version of the HDR image. This is because, by default, the Layer Mixer is
mixing 100% of Node 3 over Node 1.
5 Select Node 3 and use one of the following two procedures to create a useful
combination of the two exposures:
To create a mix of the two exposures, open the Key tab, and drag the Key Output Gain
slider to lower the contribution of Node 3 to the overall image (you can also do this
using the DaVinci control panel by pressing the KEY MODE soft button, and then using
the Post Mix Gain rotary control). Using dynamics (keyframing), this is a good way to
animate a dissolve from the regular exposure to the highlight exposure if you’re going
from a dark environment to a bright environment in the same take and you want to
create a smooth transition between both exposures.
Dissolving between the regular and highlight exposures
of RED HDRx media using the Key Output Gain slider of a
Corrector node connected to a Layer Mixer node.
TIP: You can also use the Blend Type and Blend Bias parameters in the
Camera Raw palette to blend the two exposures without building a dedicated
node tree.
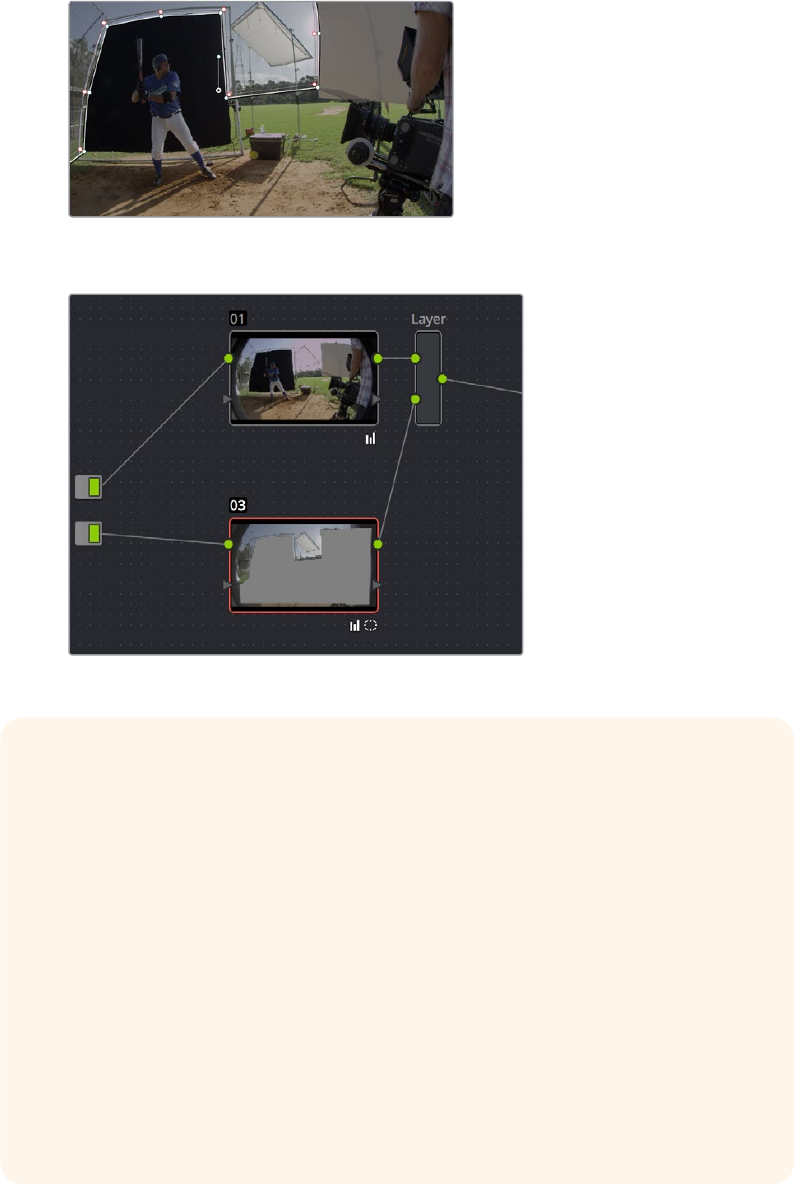
940
Channel Splitting and Image Compositing Part 6 – 52
To use the highlight exposure to selectively put detail back into the image (for example,
to retrieve blown-out windows), use a Power Window, HSL Qualification, or a
combination of the two to isolate the region you want to retrieve in Node 3. (Be careful
if you’re using HSL Qualification to combine both exposures, as keyed edges can be
tricky to blend.)
Isolating a region of the image to replace using the
highlight exposure image of a RED HDRx clip
Final node display with isolations
A Note About RED HDRx Media and Performance
Since RED HDRx media records two complete streams of image data, DaVinci Resolve
must simultaneously decode two separate tracks whenever you add a second Source
input. (If you don’t add the second Source input, only the first stream is decoded.)
Because of this, whether you’re relying on your computer’s CPU to decode RED
media, or you’re using a single RED ROCKET card, you’ll get half the performance
when using the highlight stream of an HDR clip.
To improve performance, you can set any RED HDRx clip’s Render Cache Mode to
“User” by choosing Playback > Render Cache > User, pressing Option-R, or pressing
the CACHE MODE button on the T-bar panel of your control panel repeatedly until you
toggle to User mode. DaVinci Resolve renders all cached clips in the background, so
the next time you play a cached clip, it will play at full speed.
If you regularly use RED HDRx media, two RED ROCKET cards are recommended for
optimal decoding performance.
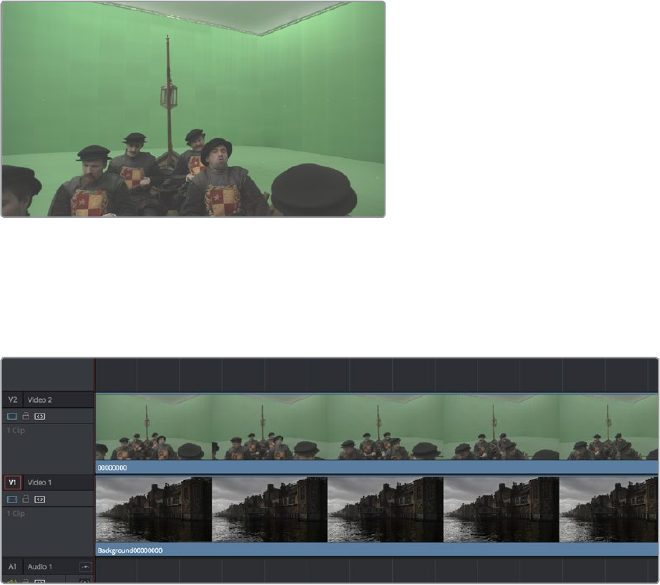
941
Channel Splitting and Image Compositing Part 6 – 52
Introduction to Compositing
Using the Alpha Output
While DaVinci Resolve can use the alpha channel of imported media for compositing, the
Alphaoutput in the Node Editor is an optional output that you can turn on to create clip
transparency using operations inside DaVinci Resolve to create composites against other clips
on lower video tracks. There are many ways of using the Alpha output, but this section will
focus on three examples.
Using a Qualifier Key to
CreateTransparency
In this first example, the Alpha output will be used to composite a green screen clip with a
background plate.
A green screen clip, ready for compositing
In preparation for this composite, the background plate is on track V1 of the Timeline, and the
green screen clip has been superimposed on track V2.
A superimposed green screen clip on track V2 of the Timeline,
above a background plate on track V1, ready for compositing.
To create a chroma-key composite in the Color page:
1 Right-click anywhere within the gray area of the Node Editor and choose Add Alpha
Output to add the Alpha output at the left of the node graph.
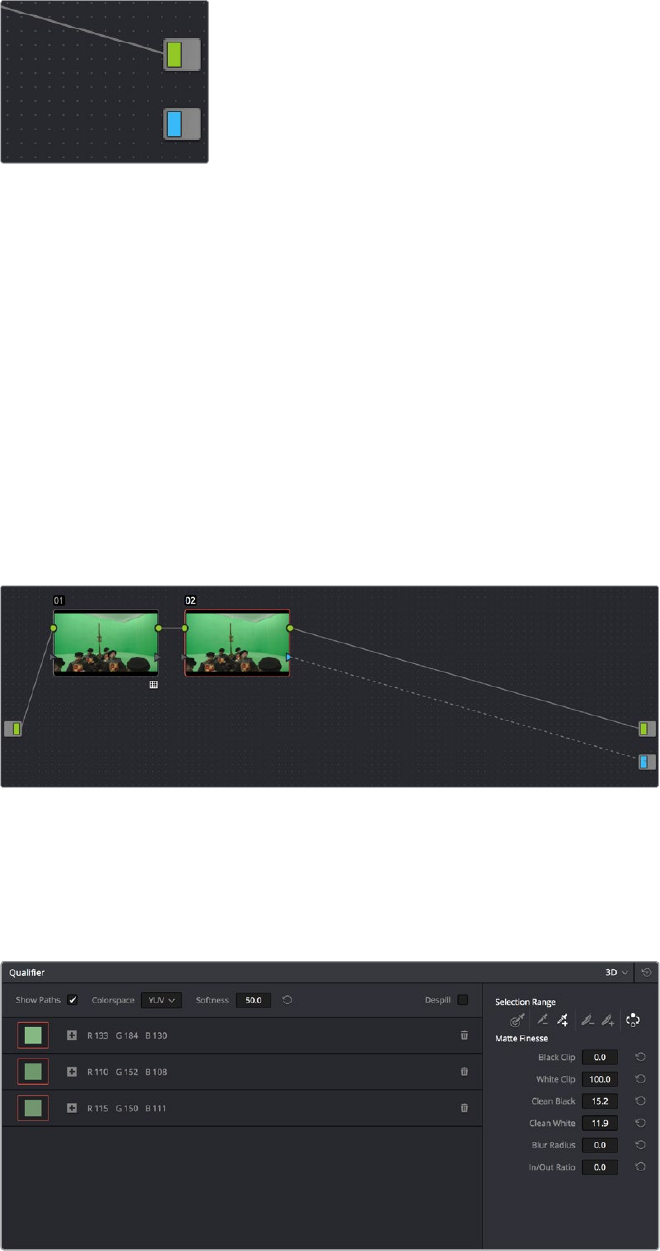
942
Channel Splitting and Image Compositing Part 6 – 52
An Alpha output appears underneath the Node Tree output at the right of the
Node Editor.
The image Node Tree output with Alpha output below
2 You’ll want to use Node 1 to color correct the image to optimize it for keying. In
this example, the foreground plate is log-encoded, so a LUT is added to Node 1 to
normalize it.
3 Add a Serial node after Node 1 and connect its key output to the Alpha output. This is a
fast way to build this composite if you’re confident that the corrections you’ve made in
Node 1 won’t adversely affect the key (or if you know they’ll improve it by expanding the
contrast of a flat-contrast source clip).
Alternately, you could create a second processing branch by adding a disconnected
node (Node 2), connecting the Source node to its RGB input, and then connecting its
key output to the Alpha output you just added. Creating a second image processing
branch from which to pull your key lets you key directly from the source (assuming the
source is fit to key without adjustment), avoiding any problems that grading the first
node could introduce to the key.
Node 1 grades the clip, expanding contrast to improve both the image, and its ability to be keyed.
Node 2 uses Qualifier controls to pull the key.
4 Use the Qualifier controls of Node 2 to key out the green background, and then turn on
the Invert checkbox to create the proper composite. In this example, we’re using the 3D
Qualifier mode to pull a high-quality key.
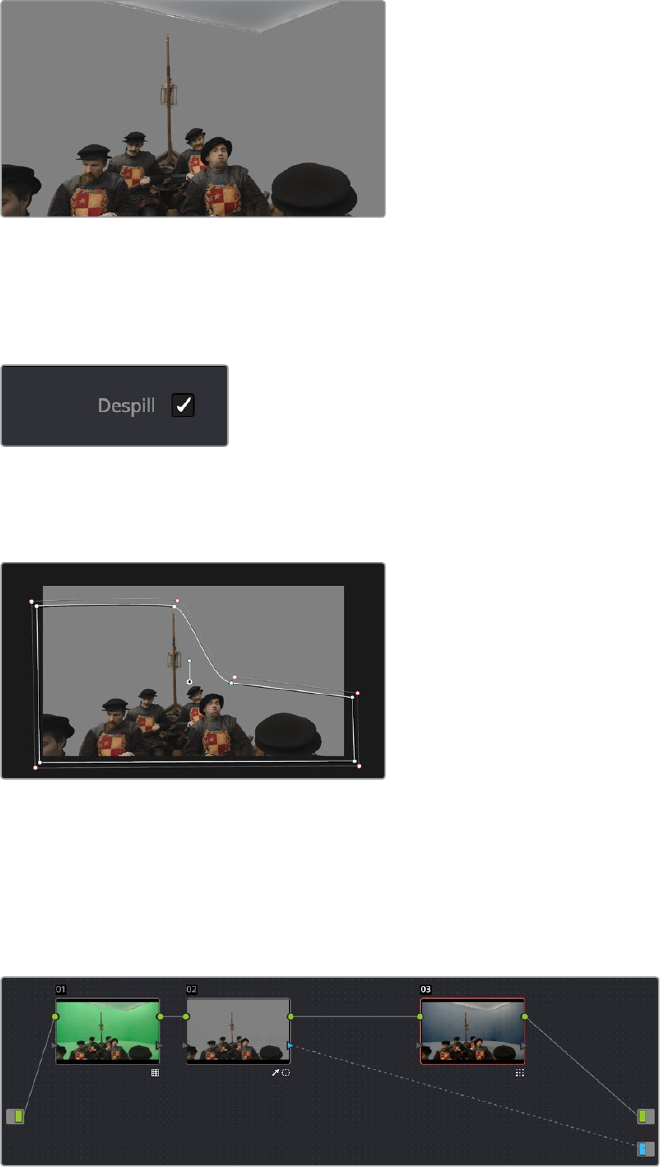
943
Channel Splitting and Image Compositing Part 6 – 52
An HSL Qualification to key the green feeding the
Alpha Output to create transparency
5 If there’s green spill in the composite (or blue in cases where you’re keying a
bluescreen) you can turn on the Despill checkbox to eliminate it.
6 You can also use a Power Window to garbage matte out any elements you don’t want
intruding into the shot, using the Tracker palette if necessary to make the window
follow the motion of the foreground subject.
A Power Curve used to garbage matte out unkeyable lighting fixtures
7 If necessary, you can add another node to the output of Node 2 to make whatever
corrections are necessary to the background plate clip to make the composite blend
more seamlessly. For example, with this additional node selected, you could right-click
the background clip and choose “Shot Match to This Clip” to use the automatic shot
matching in DaVinci Resolve to adjust the foreground to match the background.
Adding more color adjustments to a node added after the Qualifier
With all this set up, you end up with a nice green screen composite that’s visible in both
the Color and Edit pages.
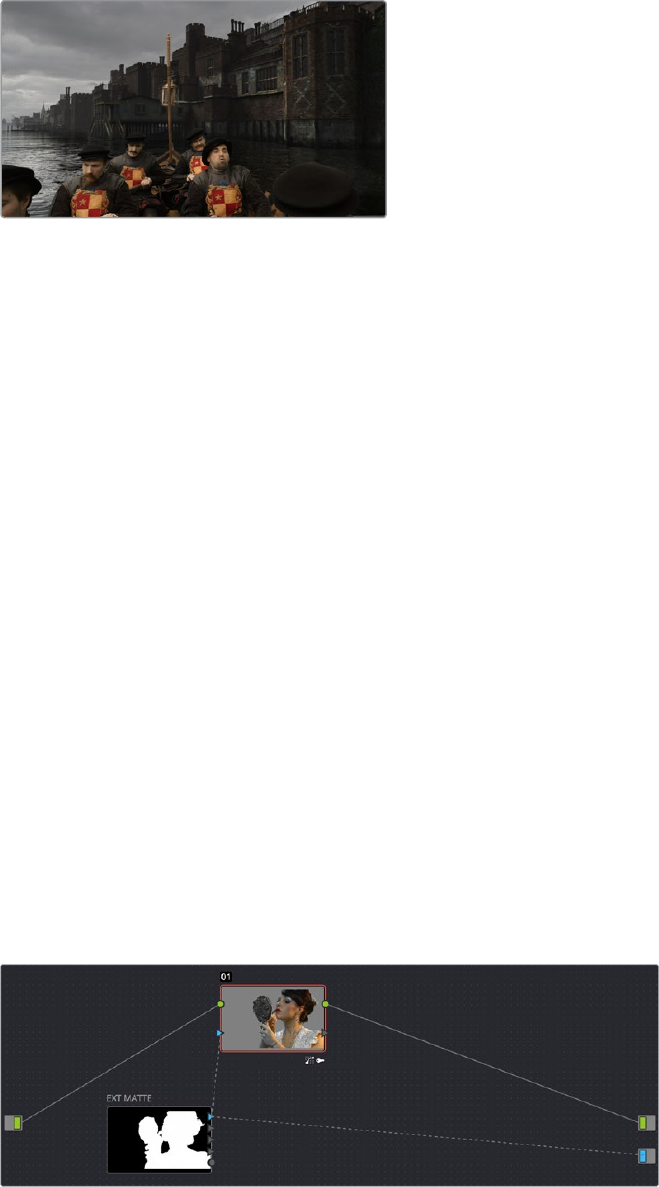
944
Channel Splitting and Image Compositing Part 6 – 52
The result, with a window garbage matte cropping out the
equipment, ready for further refinement
Using a Matte to Create Transparency
If you’ve been provided with a separate Matte clip for defining clip transparency, you can use
that Matte clip within the node tree of a superimposed clip to create a composite using the
Alpha Output.
To create a composite using an external matte:
1 To associate an external matte with a clip, open the Media page, select the clip you
want to add a matte to in the Media Pool, navigate to the matte file using the Library
browser, and then right-click the matte file and choose Add as Matte. For more
information on importing mattes, see Chapter 51, “Combining Keys and Using Mattes.”
2 Open the Color page and select the foreground clip in the Thumbnail timeline, then
right-click Node 1 in the Node Editor and choose the matte you added from the Add
Matte submenu.
An EXT MATTE node appears underneath Node 1, with the first of its four key outputs
connected to Node 1’s key input. (Working with external mattes is covered in more
detail in a prior section of this chapter.)
3 Now, right-click anywhere within the node graph (other than on a node) and choose
Add Alpha Output from the contextual menu.
An Alpha output appears underneath the Node Tree output.
4 Drag a connection line from the second key output of the EXT MATTE node to the
Alpha output.
Using an external matte in the grade and to the Alpha output
You should now see a successful composite, with the external matte creating a region
of transparency in the foreground clip though which the background clip
shows through.
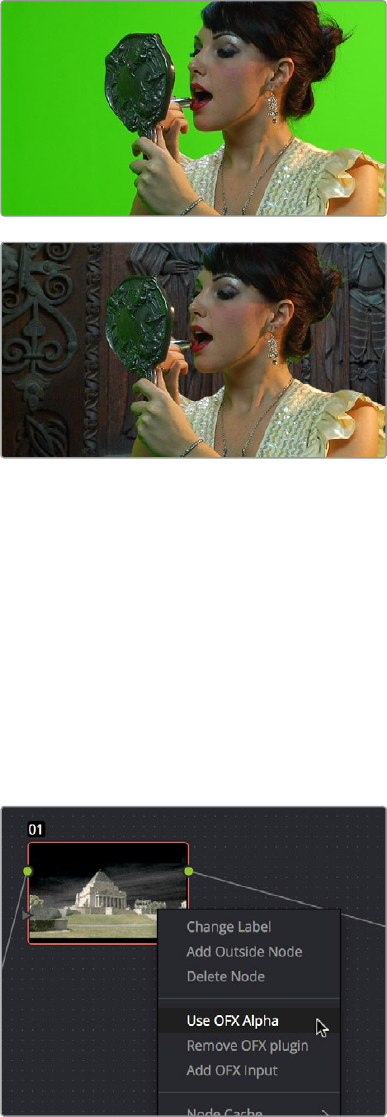
945
Channel Splitting and Image Compositing Part 6 – 52
Before and after the final composite, created by connecting an
ExtMatte node to the Alpha Output in the node graph
Use an OFX Plug-in to Create
Transparency
If you’ve installed an OFX plugin capable of keying, you can right-click the node you’ve
appliedit to and choose Use OFX Alpha to route the key created by the plug-in out the KEY
output of that node. When Use OFX Alpha is enabled, the HSL Qualifier and Window palette
output is ignored, the only key that’s output is from the OFX plug-in.
Choosing Use OFX Alpha in the Node Editor
Once Use OFX Alpha is enabled, and you’ve created a key using your OFX plug-in of choice,
you can right-click anywhere within the node graph (other than on a node) and choose Add
Alpha Output from the contextual menu to make the Alpha output appear, and you can then
connect the KEY output from the node with the OFX plugin to the Alpha output to use it to
create transparency.
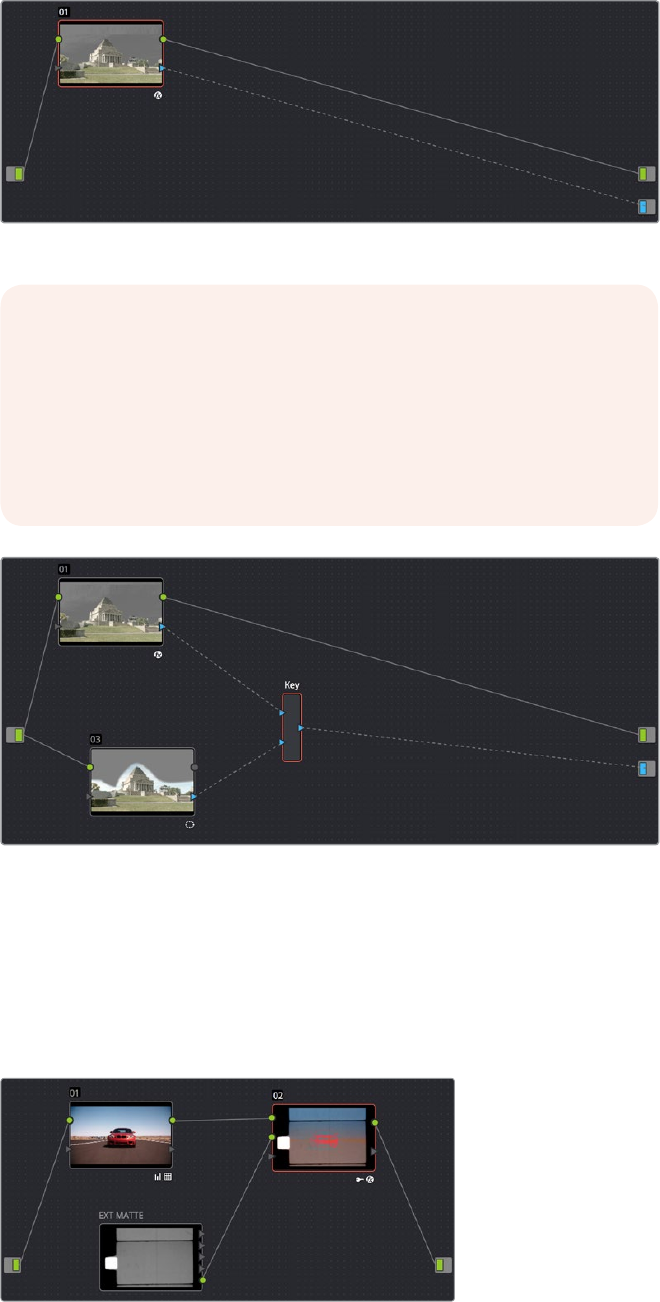
946
Channel Splitting and Image Compositing Part 6 – 52
Setting up a composite using an OFX plugin
Combining an OFX key with a Window using a Key Mixer to add a Garbage matte
Compositing Entirely Within an OFX Plug-In
Certain OFX plug-ins that are capable of combining two image streams to create a composite
can be used as of DaVinci Resolve version 11.1 by exposing a “second layer input” on the node
to which that plug-in has been applied. This makes it possible to composite the image you’re
grading with the RGB output from an EXT MATTE node.
Combining a clip with an EXT MATTE image using the second
layer input of a node with an OFX plug-in applied to it
NOTE: When Use OFX Alpha is enabled for a node, you cannot use a
window to create a garbage matte within that node as you would
when keying with the HSL Qualifier. To create a garbage matte with
which to exclude unwanted and unkeyable elements from the edges
of the picture, you’ll need to combine the key from a window in
another node with the key output by the OFX plugin using a Layer
Mixer node.
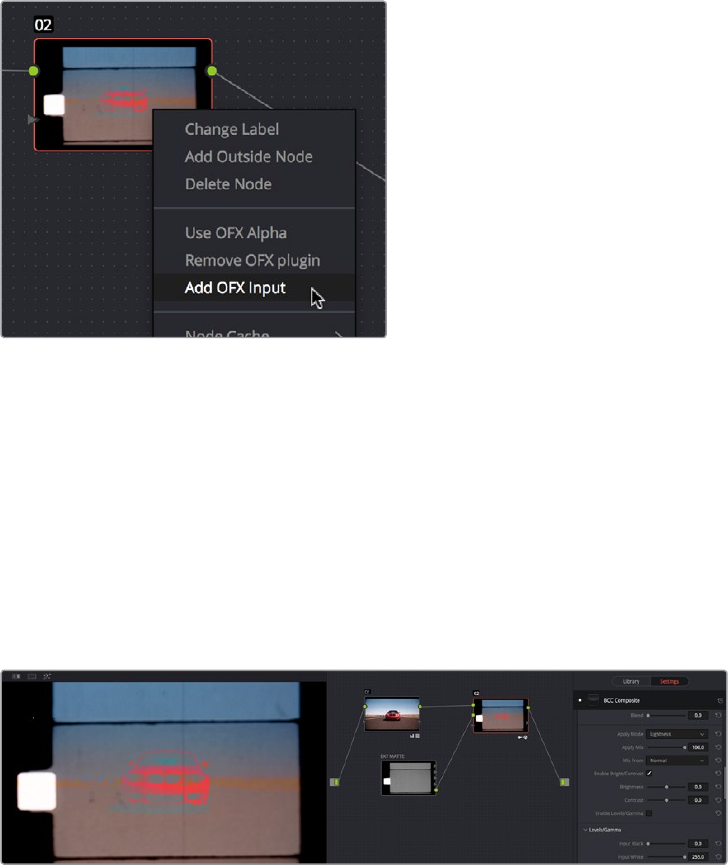
947
Channel Splitting and Image Compositing Part 6 – 52
To create a composite using an OFX plug-in:
1 Open the OpenFX Panel, use the Library to find the OFX compositing plug-in that you
want to use, and drag it onto the appropriate node to apply it. The above example
shows the Boris Effects plug-in “BCC Composite,” which mathematically combines two
image streams using one of a long list of blending modes.
2 Right-click the node with the OpenFX plug-in applied to it, and choose Second Layer
Input from the contextual menu. A second RGB input should appear on the left of the
node, underneath the first.
Adding the second layer input of a node with an
OFX plug-in applied to it
3 Open the Media page, locate the clip you want to composite in the Library, and import it
as an unassigned matte.
4 Open the Color page again, right-click the node with the OpenFX plug-in applied to it,
and choose Add Matte > Track Mattes > “name of matte imported in step 3” from the
contextual menu.
5 By default, the EXT MATTE node that appears is connected via one of its key outputs.
Delete the key connection, and drag a new connection line from the EXT MATTE
node’s RGB output to the second RGB input of the node with the OpenFX plug-in.
The composited image, node tree, and OFX parameters shown side by side
6 At this point, the node tree is wired up to composite the clip with the EXT MATTE
image, and you need only adjust the parameters of the OpenFX plug-in to achieve the
result you desire.
949
Keyframing in the Color Page Part 6 – 53
Keyframing in the Color Page
The Color page has a dedicated Keyframe Editor, found at the right of the palette area, that you
can use to animate grading changes from one frame to another. Because grading is a
fundamentally different task than editing, the Color page Keyframe Editor operates somewhat
differently from the Cure Editor in the Edit page.
This chapter has the following topics:
Introduction to Keyframing 950
The Keyframe Editor Interface 950
All/Color/Sizing 952
Keyframing Methods 953
Dynamic Keyframes (Dynamics) 953
Static Keyframes (Marks) 954
Mixing and Converting Dynamic and Static Keyframes 954
Using Specific Keyframing Tracks 955
The Corrector Keyframing Tracks 956
The Sizing Keyframing Tracks 957
The Ext Matte Node’s Freeform Isolation Track 957
Automatic Keyframing 957
Modifying Keyframes 958
Navigating Among Keyframes 958
Moving Keyframes 958
Changing Keyframe Values 958
Changing Dynamic Attributes 959
Deleting Keyframes 960
Copying Keyframes 960
Keyframes and Saved Stills 961
Adding EDL Marks 961
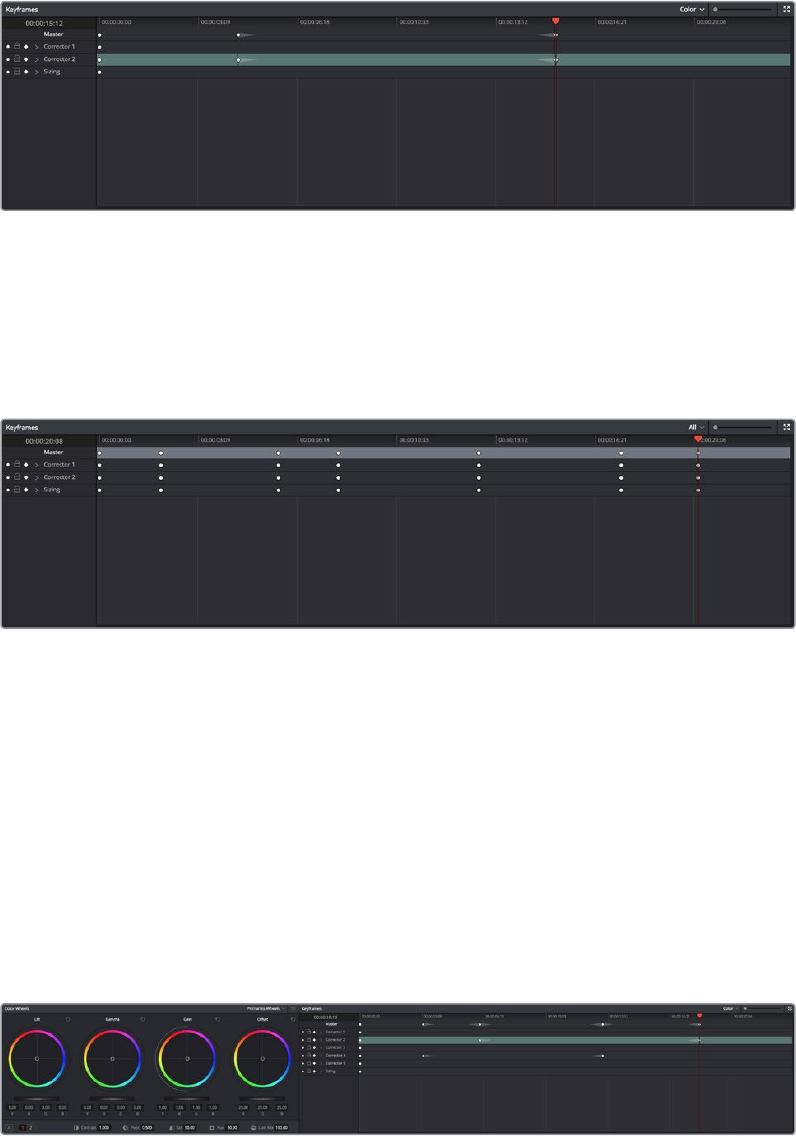
950
Keyframing in the Color Page Part 6 – 53
Introduction to Keyframing
Whether it’s referred to as keyframing, dynamics, or marks, DaVinci Resolve provides an
interface for automatically interpolating color adjustment parameters in various ways from one
setting to another. For example, if you have a clip with varying exposure settings, you can
animate a series of contrast adjustments using Dynamic keyframes to make the changes in
exposure less distracting.
The Keyframe Editor with dynamic keyframes animating the parameters of Node 2
In another example, suppose you’re grading a documentary, and an archival clip that’s edited in
the middle of the Timeline actually consists of six different shots from a program in the eighties.
If you’re in a hurry, you can insert Static keyframes (marks) at the cut points of each of these
shots, creating one-frame transitions between different sets of adjustments, which allows you to
create individual adjustments for each shot.
Round static keyframes added to all parameters, enabling individual
adjustment of shots merged together within a single clip
In both cases, you use the Keyframe Editor to create a series of keyframes with which to
change parameters from one value to another. In this section, you’ll learn how to work with the
Keyframe Editor to set up these kinds of animated changes.
The Keyframe Editor Interface
The Keyframe Editor has all the controls necessary to create and modify keyframes for the
currently selected clip. If necessary, you can even make it wider in a single screen layout by
clicking its expand button (at the top right of the Keyframe Editor), or use the Color page’s Dual
Screen layout to place the keyframe editor on a second screen, for even more room.
The Node Editor shown in wide mode, pushing all other palettes to the left
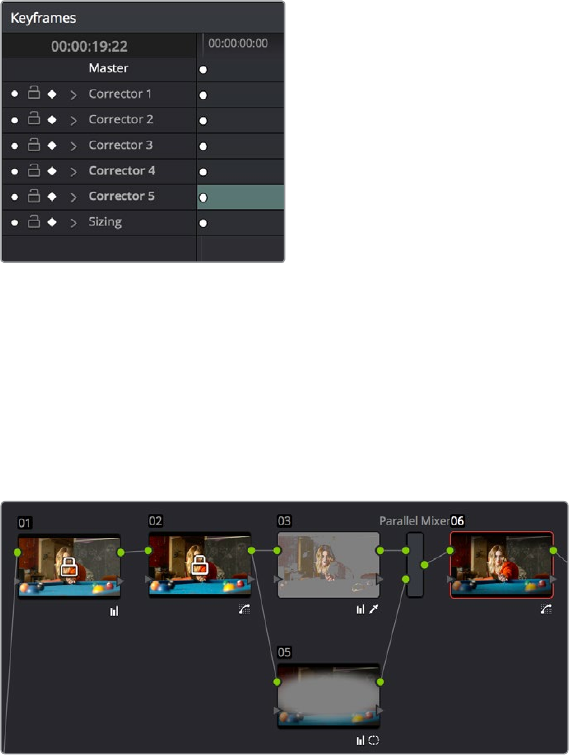
951
Keyframing in the Color Page Part 6 – 53
The Keyframe Editor consists of the following components:
The Timeline Ruler: Mirrors the record timecode of the currently selected clip; dragging
within the Timeline Ruler moves the playhead, and a timecode display to the left shows
the current frame.
The Keyframe Track Header: Each node in the current grade has a corresponding
keyframe track, and the header contains controls you can use to manage the
keyframing.
The Keyframe Track Header
Track Disclosure Triangle: Exposes individually keyframable groups of parameters
underneath the main keyframe track.
Enable/Disable Button: A round orange button lets you enable or disable that track’s
corresponding node.
Lock Button: Lets you prevent any changes from being made to that track’s
corresponding node. Nodes that have been locked show a lock icon.
Nodes 1 and 2 have been locked in the Keyframe Editor of the Color page
Auto-Keyframe Button: Turn this button on to automatically create a Dynamic keyframe
every time you adjust any parameter within that node.
Keyframe Tracks: To the right of the track header, the keyframe tracks are where you
create and edit the keyframes that animate parameter changes. A topmost “master
keyframe track” shows every keyframe applied on every keyframe track in the
Keyframe Editor, even keyframes applied to a keyframing track hidden inside a track
with a closed disclosure triangle.
Keyframes: Each keyframe appears as a small diamond for a Dynamic keyframe or as
a circle for a Static keyframe. Dynamic keyframes are associated with dissolves while
Static keyframes (marks) act instantly. Grades are linked to the preceding keyframe,
which may be a default one on the first frame of the master clip. Keyframes can be
selected by clicking on them, or moved by dragging them to another position in the
keyframe track.
952
Keyframing in the Color Page Part 6 – 53
Sizing track: The Pan, Tilt, Zoom, Rotate, and Convergence (in Stereo 3D projects)
parameter have an entirely separate track for creating animated pan and scan
adjustments.
Track Selection Bar: A colored bar shows the currently selected scope of keyframing:
all tracks at once, just the current correction node, or the Sizing settings, as defined by
the Keyframe Timeline mode discussed in the next section.
Ordinarily, the Keyframe Editor takes up the rightmost bottom third of the Color page. However,
you can make it wider to have more room to work if you have a scene requiring complex
keyframing.
To expand and collapse the Keyframe Editor:
Click the Expand/Collapse button at the lower left-hand corner of the Keyframe Editor.
The Keyframe Editor widens or narrows accordingly.
To zoom into and out of the Keyframe Tracks:
Use the Zoom slider to zoom into or out of the Keyframe Editor.
Right-click any keyframe track and choose Maximum Zoom to zoom all the way in.
Right-click any keyframe track and choose Reset Zoom to fit the entire clip into the
available width of the Keyframe Editor.
All/Color/Sizing
Perhaps the most important control for keyframing, the Keyframe Timeline mode, lets you
switch the scope of what tracks get keyframed when you use the Start Dynamic or Add Static
Keyframe commands, either from the keyboard or via the buttons of your control panel. This
command alternates among three modes:
All: The default mode. Adds keyframes to every track in the Keyframe Editor,
keyframing every parameter in every node all at once, including the Sizing settings. In
this mode, an orange bar appears highlighting the topmost “master keyframe track.”
Color: Only adds keyframes to the node currently selected in the Node Editor. In this
mode, a green bar appears highlighting the keyframe track corresponding to the node
currently selected.
Sizing: Only adds keyframes to the Sizing track, which is useful when you’re keyframing
“pan and scan” style transforms. In this mode, a blue bar appears highlighting the
Sizing track.
EXT MATTE: Only appears if there’s an External Matte node in the node tree. Lets you
keyframe External Matte-specific parameters in the Key palette.
Even though All is the default setting, it may be to your advantage to switch to the Color or
Sizing keyframing modes to avoid creating a lot of unnecessary keyframes. Even though
keyframing everything all at once is a fast way to work, the extra keyframes may slow you down
when you later need to make adjustments to nodes that didn’t need to be keyframed in the
first place.
To change the keyframing mode, do one of the following:
Choose an option from the Keyframe Mode pop-up at the top right of the
Keyframe Editor.
Choose an option from the Mark > Keyframe Timeline Mode submenu.
Press the ALL/COLOR/Sizing button on the Transport panel of the DaVinci control panel
repeatedly until you’ve chosen the mode you need.

953
Keyframing in the Color Page Part 6 – 53
Keyframing Methods
There are two different types of keyframes used by DaVinci Resolve to create automated
changes. Each type of keyframe interpolates parameters differently.
Dynamic Keyframes (Dynamics)
Dynamic keyframes are the most conventional type of keyframe you’ll use, and are the type of
keyframe used for creating animated changes from one state to another. For example, if you
need a grade to become brighter over time to compensate for a change in lighting conditions,
you’ll use Dynamic keyframes.
Nearly every parameter and control in the Color page can be keyframed, but it’s important to
understand that the Interface controls do not animate to match whatever dynamically
keyframed changes are taking place. Instead, visible Interface controls that correspond to
keyframed changes will jump from their initial position at one keyframe to their final position
when the playhead reaches the next keyframe.
This can be most confusing with Curves, which can be interpolated using Dynamic keyframes
just like any other control or parameter. Just keep in mind that the actual settings are animating,
even though the controls are not.
To animate a node using Dynamic keyframes:
1 Move the playhead in the Keyframe Editor’s Timeline ruler to the frame where you want
to begin a change.
2 Do one of the following to place a Dynamic keyframe at that frame:
Choose Mark > Add Keyframe (Command-[).
Press the START DYNAMIC button on either the T-bar or Transport panels of the
DaVinci control panel.
Turn on the Auto Keyframe button for the track you want to animate in the
Keyframe Editor.
Dynamic keyframes are diamond-shaped.
3 If necessary, adjust your clip at this first position of your animated change. If you’re
using Auto Keyframe, then you have to make an adjustment for a keyframe to
be created.
4 Now, move the playhead to the frame that is at the second position of the animated
change you’re making, and create another Dynamic keyframe if you’re creating
keyframes manually, or make another adjustment if Auto Keyframe is on.
5 After you’ve created this second keyframe, make whatever adjustments are necessary
to the clip to create the final look you need.
At this point, playing from the first keyframe to the second keyframe should show a
smoothly animated change from the first adjustment to the second. When you’re
finished, make sure you turn Auto Keyframe off if it was enabled.
TIP: This control has one other function. Choosing a mode also affects what is copied
when you use the various grade management tools in DaVinci Resolve. For example, if
you choose Color, then you can copy a clip’s color grade without copying its sizing.
Ifyou choose Sizing, then you can copy the sizing without copying the color grade.
Formore information, see “Copying Grades” in Chapter 48, “Grade Management.”
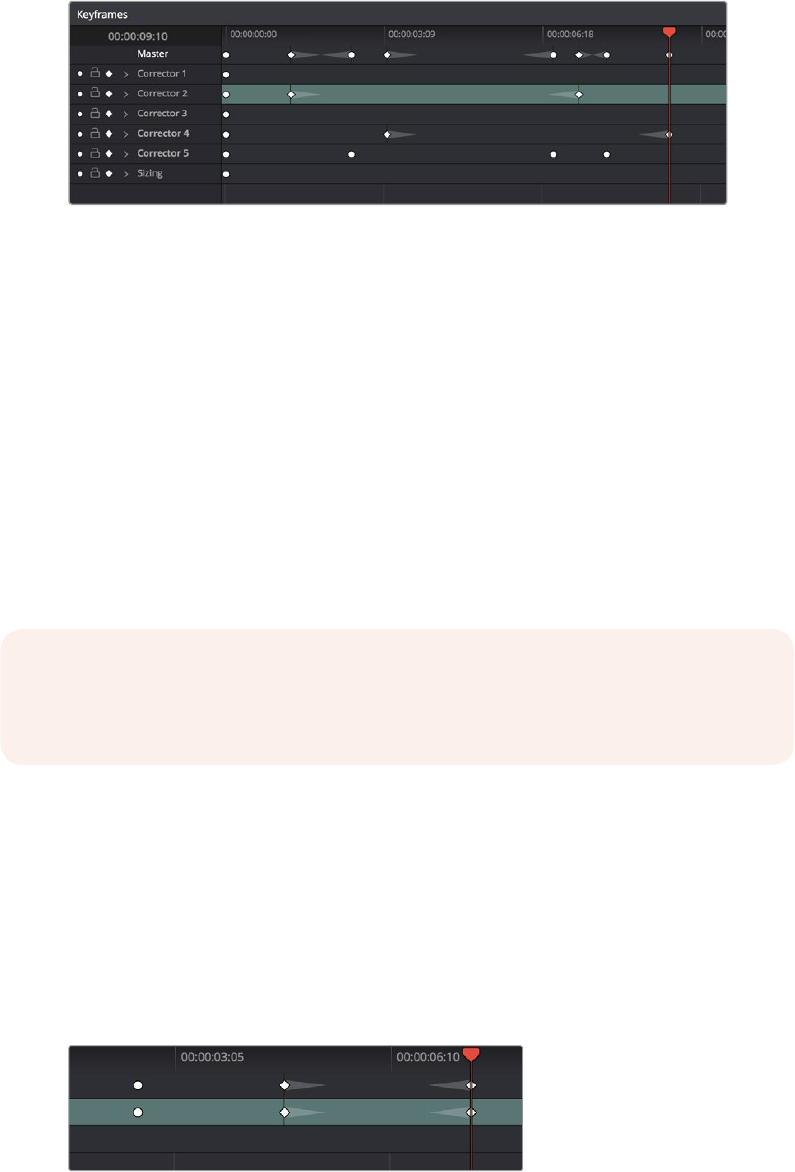
954
Keyframing in the Color Page Part 6 – 53
Static Keyframes (Marks)
Static keyframes, or marks, are keyframes that are used to create abrupt, one frame changes
from one state to another. They’re typically used to mark edit points separating one shot from
another when multiple shots appear within a single clip. However, Static keyframes are also
useful in any situation where you need a sudden change from one setting to another, such as
when creating a lightning effect.
Static keyframes are round
To automate a node using Static keyframes:
1 Find the frame at which you want the abrupt change to take place, and place a
keyframe at that frame by doing one of the following:
Choose Mark > Make Static Keyframe (Command-]).
Press the MARK button on either the T-bar or Transport panels of the DaVinci
control panel.
Static keyframes (marks) are round.
2 Move the playhead to any frame before the keyframe to make changes to the entire
segment of the clip leading up to the keyframe, or move the playhead to any frame
after the keyframe to make changes to the entire segment of the clip appearing after
the keyframe. The playhead does not need to be on top of the keyframe, but if it is,
you’ll be adjusting the second portion of the clip.
Mixing and Converting Dynamic and Static Keyframes
Typically, if you’re creating multiple animated changes within a clip, you’ll want to use all
Dynamic keyframes. Similarly, if you’re creating a series of abrupt changes, you’ll use all Static
keyframes. However, you can mix Dynamic and Static keyframes together, so long as you keep
in mind the following rules:
If you add a Dynamic keyframe to the right of a Static keyframe: There will be no interpolation
from the Static keyframe to the Dynamic keyframe. However, if you add a Static keyframe to the
right of a Dynamic keyframe, there will be interpolation.
No dynamic interpolation following the static keyframe
NOTE: If you’re using Static keyframes to automate grading changes between multiple
shots appearing within a single clip, keep in mind that you can’t add nodes from one
keyframe to the next as you would if you had split the clip in the Edit page.
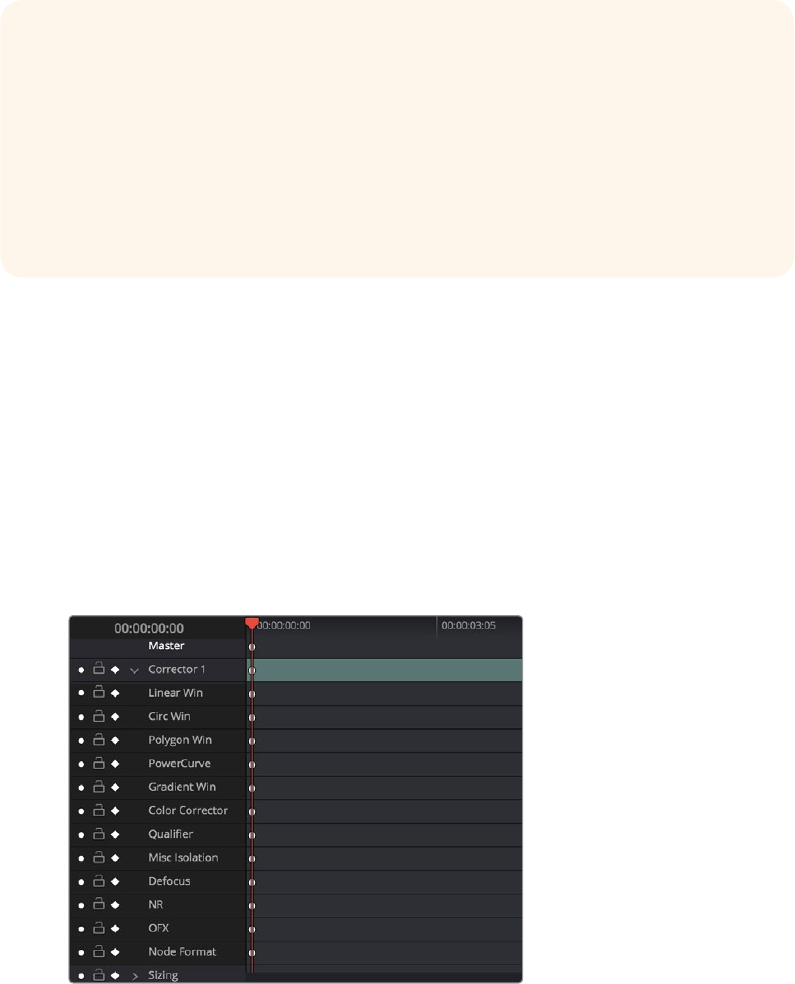
955
Keyframing in the Color Page Part 6 – 53
If you accidentally create the wrong kind of keyframe, it’s easy to convert it into the type of
keyframe you need.
To change one kind of keyframe into another:
1 Click the keyframe you want to convert to select it.
2 Right-click the selected keyframe, and choose either Change to Dynamic Keyframe or
Change to Static Keyframe.
Using Specific Keyframing Tracks
If you’re simply using the Color mode of the All/Color/Sizing command to do keyframing, then
you’ll be adding keyframes to every parameter of the currently selected node whenever you
apply a single keyframe. However, often that’s overkill in situations where you only need to
keyframe a single setting or group of settings.
For example, you may find that you need to keyframe a color adjustment in order to change the
color temperature and brightness when the camera pans across a window, but you don’t want
to keyframe the Windows palette controls because you want to adjust them independently. This
can be done by opening a Corrector track to expose the keyframing tracks within.
Individual keyframing tracks within a Color Corrector node
Keyframing tracks let you keyframe different sets of similarly functioning parameters separately
from one another. For example, there’s one keyframing track for all the color adjustment
parameters, and another keyframing track governing the parameters found within the
Qualifier palette.
Try Creating Keyframed Changes in a Separate Node
One tip to keep in mind is that you don’t have to create keyframed changes within the
same nodes you’re using to create other adjustments. If you want to create some
automated changes without altering the nodes you’ve already adjusted, you can
simply create a new node in which to make your keyframed changes. That way, if you
don’t like the result, or you somehow find yourself hopelessly tangled up in a
needlessly complicated set of keyframes, its easy to reset either just the keyframes or
the entire node without affecting the rest of your grade.
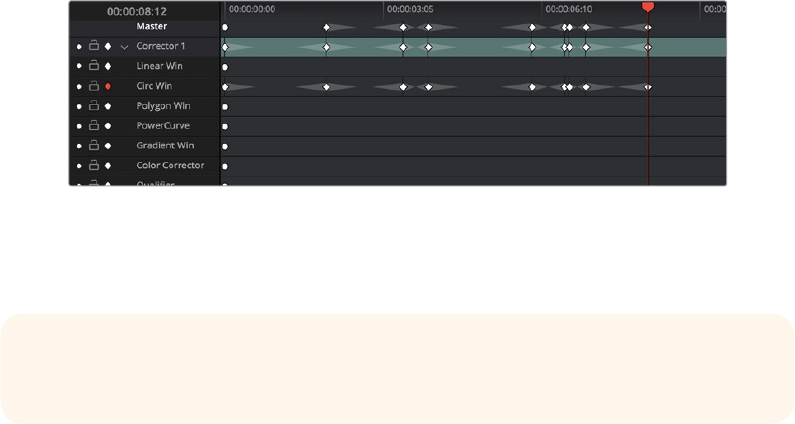
956
Keyframing in the Color Page Part 6 – 53
To reveal a node’s keyframing tracks:
Click the disclosure triangle next to the number of the node you’re keyframing.
To keyframe an individual keyframing track manually:
1 Make whatever adjustments you need to the currently selected node, and click its
disclosure triangle to reveal its keyframing tracks.
2 Move the playhead in the Keyframe Editor to where you want to add the first keyframe,
then right-click within the keyframing track you want to animate, and choose Add Static
Keyframe or Add Dynamic Keyframe (this example shows a Dynamic keyframe).
A keyframe appears at the position of the playhead in that keyframing track.
3 Move the playhead in the Keyframe Editor to where you want to add the next keyframe,
then right-click within the keyframing track and again choose either Add Static
Keyframe or Add Dynamic Keyframe (this example shows a Dynamic keyframe).
Keyframing just the Circular Power Window using its individual keyframe track
Now, you can make whatever changes you need to the controls governed by the keyframing
track you keyframed, in order to create the necessary animated effect.
The Corrector Keyframing Tracks
All of the parameters governing the adjustment of color and contrast controls, as well as various
effects, Power Windows, and other adjustments are sorted into various sub-tracks within the
Corrector track.
Linear Win: Controls parameters corresponding to the Linear Window.
Circ Win: Controls parameters corresponding to the Circular Window.
Polygon Win: Controls parameters corresponding to the Polygon Window.
PowerCurve: Controls parameters corresponding to the PowerCurve Window.
Gradient Win: Controls parameters corresponding to the Gradient Window.
Color Corrector: Controls all parameters found in the Camera Raw, Color Wheels,
Primary Controls, RGB Mixer, and Curves palettes.
Qualifier: Controls all parameters in the Qualifier palette.
Defocus: Controls all parameters in the Blur and Key palettes.
NR: Controls the Spatial and Temporal Noise Reduction and Motion Blur parameters
found in the Motion Effects palette.
OFX: Controls all parameters of whichever OFX plugin is applied to the current node.
Node Format: Controls all parameters of the node sizing mode of the Sizing palette for
the current node.
TIP: You can also animate individual keyframing tracks using automatic keyframing,
explained in more detail later in this chapter.
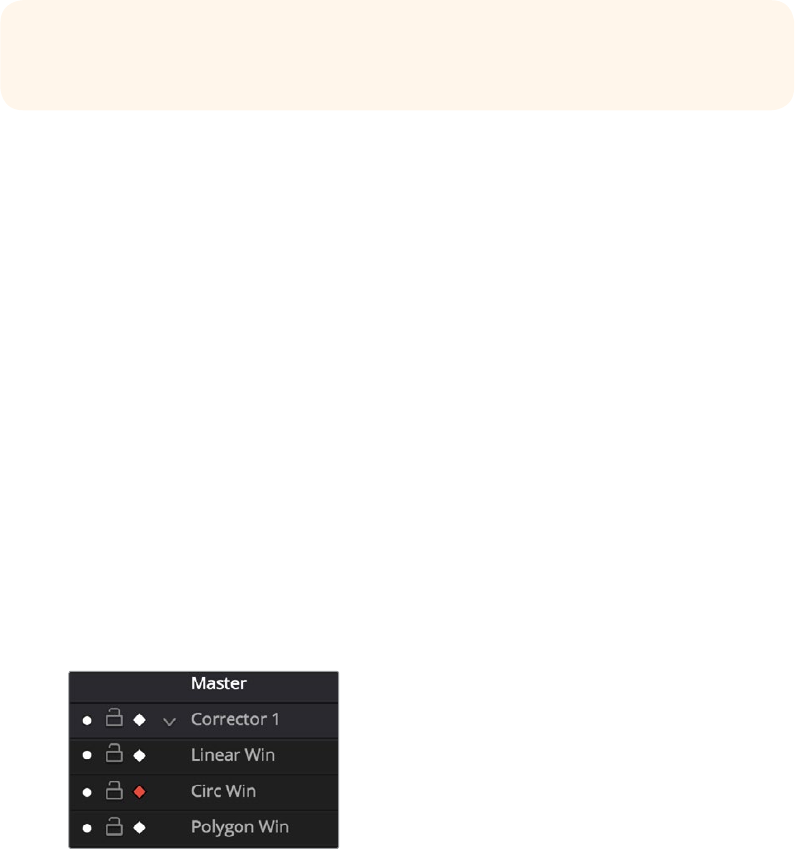
957
Keyframing in the Color Page Part 6 – 53
The Sizing Keyframing Tracks
The Sizing keyframing tracks govern sizing transforms and stereoscopic adjustments separately
from the color controls.
Input Sizing: Controls the Input Sizing parameters found within the Sizing palette.
Convergence: Controls the Convergence parameter in the Stereo 3D palette.
Float Window: Controls the Left, Right, Top, and Bottom Position/Rotate/Softness
Floating Windows parameters.
Auto Align: Controls the Pitch and Yaw parameters in the Stereo 3D palette.
The Ext Matte Node’s Freeform Isolation Track
If your node tree has an External Matte, the EXT MATTE node exposes a Freeform Isolation
track in the Keyframe Editor. This is useful for time offsets or Sizing repositioning of the Ext
Matte image.
Automatic Keyframing
Every track in the Keyframe Editor has an Auto-Keyframing button that can be turned on or off.
When auto-keyframing is enabled for a particular track, every change made to a parameter or
control associated with that keyframe track automatically generates a keyframe.
Used with a keyframing track, auto-keyframing makes it simple to set up animated changes to
specific adjustments within a node. This is a lot easier than manually placing keyframes
one byone.
On the other hand, turning on auto-keyframing for the Corrector track correspondingly enables
auto-keyframing for every keyframing track belonging to that node. In this case, keyframes will
automatically be placed on whatever keyframing track corresponds to the parameters or
controls you adjust.
Auto-keyframing selected for Circular
Window on Node 1
When auto-keyframing is disabled, changes you make alter existing keyframes. How this
alteration works depends on the location of the playhead, and the type of keyframes in the
Keyframe Editor. For more information, see the next section.
TIP: Output Sizing can only be keyframed when you choose Track mode in the
Node Editor.
958
Keyframing in the Color Page Part 6 – 53
Modifying Keyframes
Once you’ve started adding keyframes to animate changes to a grade, there are a variety of
methods available to navigate and edit these keyframes to further customize these effects.
Thissection covers the different ways you can navigate among, alter, and remove keyframes.
Navigating Among Keyframes
For many operations, it’s necessary to move the playhead directly on top of the keyframe you
want to modify. While you can always use the transport controls or pointer to move the
playhead, there are also commands for jumping to a specific keyframe.
To move the playhead among a series of keyframes, do one of the following:
Choose Playback > Next Keyframe (the right bracket key) or Playback > Previous
Keyframe (the left bracket key).
On the Transport panel of the DaVinci control panel, press SHIFT then STEP REV
to move the playhead to the previous keyframe, or press SHIFT then STEP FWD to
move the playhead to the next keyframe.
Moving Keyframes
If you need to change the timing of a series of keyframes, you can move the position of any
keyframe, along with whatever values that keyframe contains.
To move a single keyframe using the on-screen interface:
Use the pointer to drag any keyframe to another location.
Drag keyframes in a top-level Corrector or Sizing track to simultaneously move all
other keyframes on the same frame within that corrector.
To move a single keyframe using the DaVinci control panel LIFT MARK button:
1 Move the playhead to the keyframe you want to move. This procedure works for either
Dynamic and Static keyframes.
2 Press LIFT MARK on either the T-bar or Transport panels.
3 Move the playhead to the frame you want to move that playhead to.
4 Press MARK on either the T-bar or Transport panels.
To move multiple keyframes at the same time:
If necessary, open the keyframe track with the keyframes you want to move.
Drag a bounding box around the keyframes you want to move. Selected keyframes
appear highlighted in red.
Drag any of the selected keyframes to move them to the left or right.
Changing Keyframe Values
Unlike many other applications, DaVinci Resolve lets you alter keyframe values when the
playhead isn’t directly on an existing keyframe. How this works depends on the location of the
playhead relative to the keyframes that are in the Keyframe Editor, and what kind of keyframes
you’re editing.
If the playhead is to the left or on the first Dynamic keyframe: The Dynamic
keyframe at or to the right of the playhead updates with the new adjusted values.
If the playhead is to the left or on the last Dynamic keyframe: The Dynamic
keyframe at or to the left of the playhead updates with the new adjusted values.
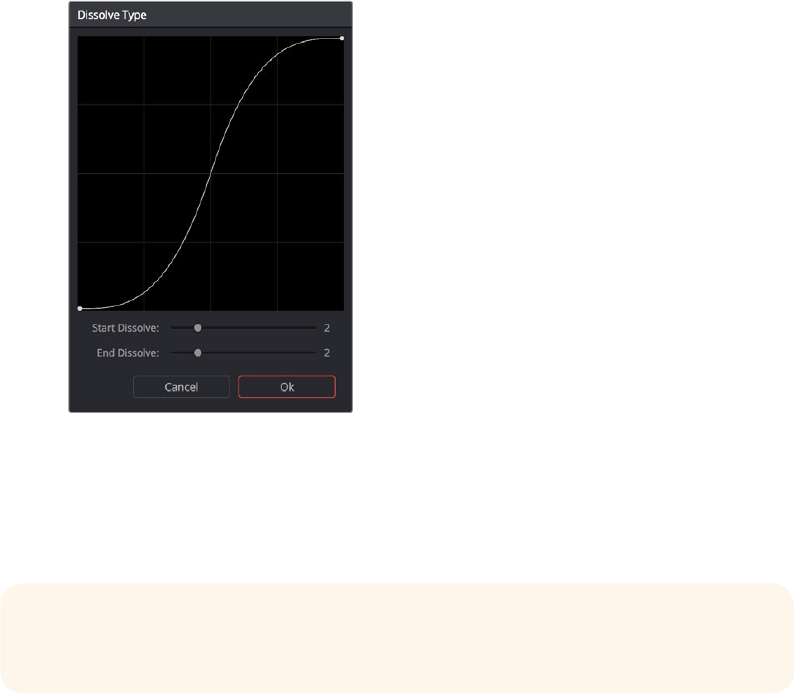
959
Keyframing in the Color Page Part 6 – 53
If the playhead is between two Dynamic keyframes: The Dynamic keyframe to the
left of the playhead updates with the new adjusted values, but the Dynamic keyframe
to the right is unaffected.
If the playhead is between two Static keyframes (marks): Adjustments made
between two Static keyframes always affect the keyframe to the left of the
playhead. The entire segment of the clip between that keyframe and the next is
affected equally.
Changing Dynamic Attributes
By default, the transition from one Dynamic keyframe to the next is linear. However, if you need
to alter the acceleration of value interpolation from one Dynamic keyframe to the next, then you
can change that keyframe’s Dynamic Attributes.
To change a keyframe’s Dynamic Attributes:
1 Right-click a keyframe in the Keyframe Editor, and choose Change Dynamic Attributes.
2 When the Dynamic Attributes window appears, do one or both of the following:
Choose a new outgoing acceleration curve using the Start slider, affecting the
interpolation occurring to the right of that keyframe.
Choose a new incoming acceleration curve using the End slider, affecting the
interpolation occurring to the left of that keyframe.
As you choose different acceleration curves, the display to the right shows the
resulting curve graph.
Changing the dissolve profile
3 When you’re happy with the curve, click OK.
By using different Start and End values, you can make animated adjustments “ease in” or “ease
out” of a particular keyframe, to create a more gradual or abrupt transition.
TIP: The default dynamic profile start and end of each new keyframe can be set via
the Dynamics Profile values in the General Options panel of the Project Settings.

960
Keyframing in the Color Page Part 6 – 53
Deleting Keyframes
You have the option to delete individual keyframes, or to delete all the keyframes within a
particular grade at once.
To delete individual keyframes, do one of the following:
Move the playhead on top of the keyframe you want to delete, then choose Mark >
Delete Keyframe (Option-]). Every keyframe at the position of the playhead is deleted.
Using the DaVinci control panel, press DELETE on either the T-bar or Transport
panels. Every keyframe at the position of the playhead is deleted.
Using the pointer, click a keyframe in the Keyframe Editor to select it, then right-click
that keyframe and choose Delete Selected Keyframe. Only the selected keyframe
is deleted.
To delete every keyframe for the current clip:
Choose Mark > Delete All Keyframes.
Copying Keyframes
It’s possible to copy a set of keyframes from one node to another, either within the current
grade, or in another clip entirely. It’s also possible to copy an entire grade with keyframes from
one clip to another.
To copy a set of keyframes from one node to another:
1 Select a node to copy keyframes from, and choose Edit > Copy (Command-C).
2 Select another node to paste keyframes to, and choose Edit > Paste (Command-V).
To copy an entire grade with keyframes from one clip to another:
1 Click the thumbnail of the clip you want to copy to in the Thumbnail timeline.
2 Right-click the thumbnail of the clip you want to copy from, and choose Add Correction
With Keyframes from the contextual menu.
TIP: This procedure also works for tracking data that you want to copy from one node
to another, either in the current clip, or another clip altogether.
NOTE: When copying a grade with keyframes from one clip to another, the keyframes
will automatically be placed at matching frames that correspond to the source
timecode of the originating clip. This makes it easy to copy a grade with keyframes to
the same clip elsewhere in the Timeline, but it may not provide the desired results if
you’re applying a grade with keyframes from one clip to a completely different one.
961
Keyframing in the Color Page Part 6 – 53
Keyframes and Saved Stills
If you save a still from a clip using keyframes within the grade, by default keyframes are not
saved. However, the still and grade that are saved reflect whatever parameter values are
contained by the next keyframe to the left of the position of the playhead. For example, if a clip
has a dynamically keyframed transition from a saturation of 50 to a saturation of 0, and you
place the playhead right in the middle of both keyframes when you save a still, the grade and
still that are saved have a saturation of 50.
However, if you right-click the Gallery and turn on Use Timeline Keyframes in the contextual
menu, then grades saved within a still are saved with the keyframes, which reference the
source timecode of the original clips. This means that if you apply a saved grade with keyframes
to a clip, the keyframes will automatically be placed at matching frames that correspond to the
source timecode of the original clip. This makes it easy to copy a grade with keyframes to the
same clip elsewhere in the Timeline, but it may not provide the desired results if you’re applying
a grade with keyframes from one clip to a completely different one.
Adding EDL Marks
Just as clip grades are separate from the track grade that can be applied to the entire Timeline,
so clip keyframes are separate from track keyframes. Keyframes you apply to the track grade
work exactly the same as clip keyframes. However, there is one extra option you have when
keyframing the track grade.
If you find yourself wanting to adjust a track grade individually to take into account variations
from one clip to the next, you can use the Add EDL Marks on Tracks command to add a Static
keyframe (mark) to the Keyframe Editor at the position of every edit point in the entire Timeline.
To add EDL Marks:
1 Choose Track from the Node Editor’s mode pop-up menu.
2 If you want to keyframe a grade, then create whatever grade you need to apply to
the entire Timeline. If you want to keyframe Sizing settings, you don’t need to do
anything else.
3 Right-click the Corrector track or the Sizing track in the Keyframe Editor, and choose
Add EDL Marks on Tracks.
Marks appear at the frame of every edit point in the Timeline. You may want to widen
the Keyframe Editor to make it easier to work with all these keyframes.
After you’ve added EDL marks, you can delete them if you decide you don’t want
them any more.
To delete EDL marks:
Right-click the Corrector track in the Keyframe Editor, and choose Delete EDL Marks
on Tracks.
If you’ve added your own keyframes in addition to the EDL marks, then the Delete EDL Marks
on Tracks command only eliminates the EDL marks. Your custom marks are left alone.
963
Copying and Importing Grades Using ColorTrace Part 6 – 54
Copying and Importing
Grades Using ColorTrace
ColorTrace is a key feature of DaVinci Resolve, which lets you copy grades quickly and easily
from the clips of one timeline to those within another, based on the source timecode of each
clip (or using clip names when in Automatic mode). You can even use ColorTrace to copy grades
between timelines within the same project, and ColorTrace one stereo timeline to another.
This chapter covers the following topics:
Copying Grades Using ColorTrace 964
Using ColorTrace in Automatic Mode 965
Using ColorTrace in Manual Mode 968
Importing CDL Data Using ColorTrace 970
Using CDL Adjustments 972
Calculating CDL Functions 972
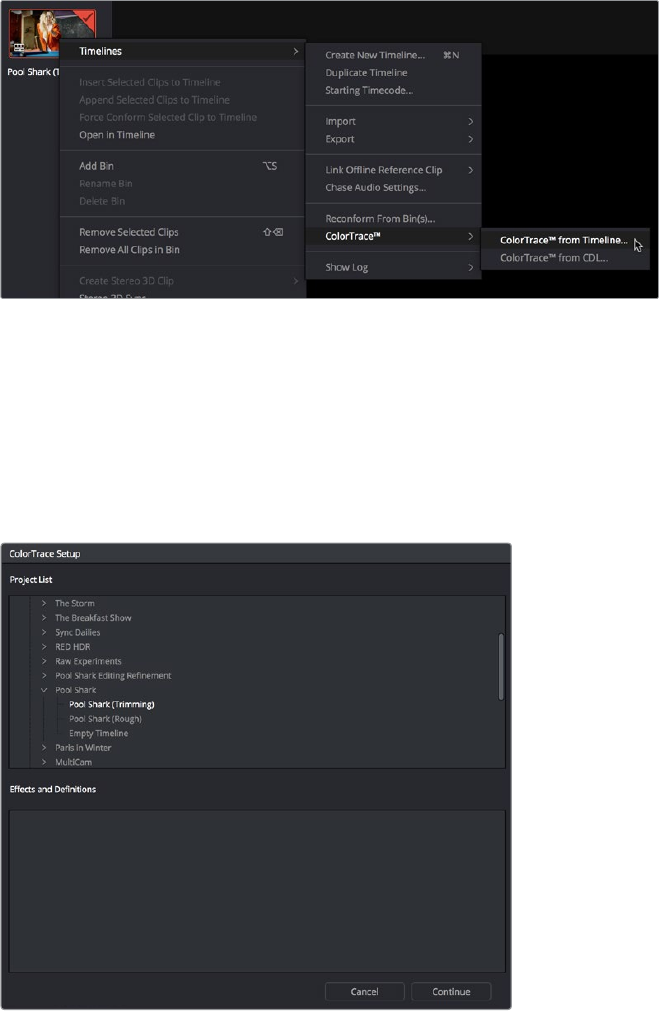
964
Copying and Importing Grades Using ColorTrace Part 6 – 54
Copying Grades Using ColorTrace
Users familiar with previous versions of DaVinci Resolve will be happy to know that as of
DaVinci Resolve version 11, ColorTrace copies whichever version of a clip’s grade was applied in
the Source timeline you’re copying from, either local or remote, depending on which grades
each clip in the Source timeline is set to use. Furthermore, in DaVinci Resolve version 11.1,
ColorTrace gained support for copying Group Pre-Clip and Group Post-Clip grades. These
improvements make this an extremely reliable tool for copying grades from one timeline to
another in a wide variety of situations.
To use ColorTrace:
1 Open the Edit page and select the Timeline you want to use ColorTrace with from
the Media Pool, then open it and choose Timelines > ColorTrace > ColorTrace
From Timeline.
Choosing ColorTrace for a selected Timeline
The ColorTrace Setup window appears, which shows every database, user, project, and
timeline within a single hierarchical list.
2 Using the Project List browser, select the specific Timeline you want to copy
grades from.
You’ll need to click the disclosure triangle to the left of the database, user name, and
project that contains that Timeline in order to select it.
ColorTrace project and Timeline selection window

965
Copying and Importing Grades Using ColorTrace Part 6 – 54
3 (Optional) If you’re using ColorTrace with a project that has numerous VFX clips in a
workflow where all VFX clips have specific reel names that identify them, you can enter
these names (with asterisks (*) used as wildcards that indicate text in each Reel Name
that can vary) in the “Effects Shot Definitions” field. This speeds automatic ColorTrace
operations by enabling DaVinci Resolve to use fuzzy string matching when a clip’s reel
number qualifies it as a VFX shot so that the best match is displayed first on the list.
You can enter multiple VFX reel names with wildcards, one per line, for simultaneous
string matching. You can use whatever Reel Name text makes sense for your workflow,
some examples of VFX reel names are as follows:
*_COMP_*
VFX*
EFFECTS*
4 Click Continue.
The ColorTrace window appears with two tabs that let you choose how to work.
5 Choose which mode to work in by clicking the Automatic or Manual tab:
In Automatic mode, ColorTrace automatically searches for matching clips between
the selected Timeline and the current Timeline. Each clip is color coded depending
on the correspondence that’s been identified.
In Manual mode, you copy grades yourself, using the Copy and Paste procedures, or
by dragging and dropping using your mouse.
The ColorTrace window is complex; details about the operation of each mode are
covered separately in the following sections.
6 When you’re finished using ColorTrace, click Close.
Using ColorTrace in Automatic Mode
In Automatic mode, ColorTrace automatically finds the correspondences between clips in the
selected Timeline that you want to copy grades from (the Source timeline), and those in the
current Timeline that you want to copy grades to (the Target timeline).
Selecting the Automatic or Manual ColorTrace
Each clip in the Target Timeline Thumbnail timeline is outlined with a color that indicates
its status.
Red: No match was found at all. Generally true for clips in the current Timeline that
weren’t used in the Timeline you’re ColorTrace matching to.
Blue: Due to overlapping timecode and reel names, multiple correspondences have
been found (similar to a reel conflict), and you must select the correct one for each
clip. This often happens with VFX and motion graphics clips that you’ve imported with
timecode starting at 00:00:00:00.
Green: A match has been found.
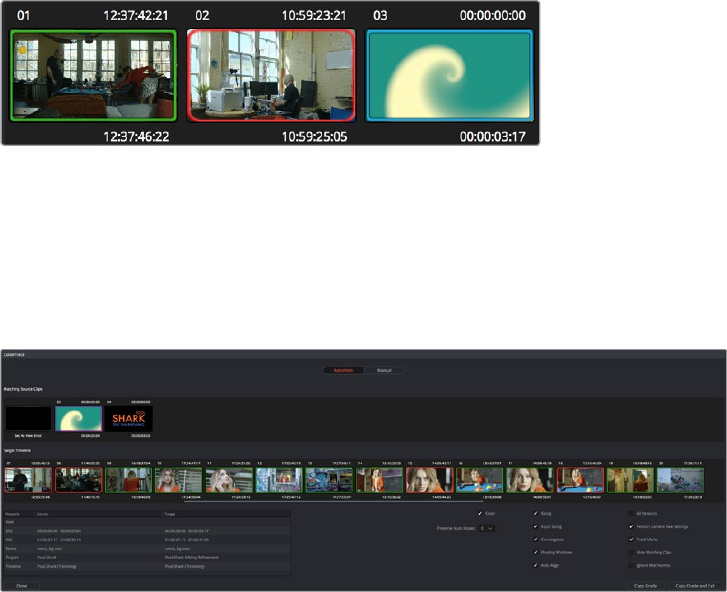
966
Copying and Importing Grades Using ColorTrace Part 6 – 54
ColorTrace Thumbnail outlines indicate matching, overlapping and non matching clips
In Automatic mode the correspondence between each clip in the Source timeline and
each clip in the Target timeline should be automatically made. However, overlapping
timecode and reel names can cause problems. The other controls in the ColorTrace
window help you deal with the subset of clips that can’t be automatically matched, or
are matched in error. These controls are:
The ColorTrace window shown in Automatic mode
Matching Source Clips list: Shows a scrollable collection of thumbnails that might
correspond to the selected clip in the Target timeline.
Target Timeline: Shows each clip in the Timeline you want to copy grades to, color
coded according to how good a match it is.
Clip Info pane: Displays two columns of properties for the source clip and the target
clips that you’ve selected. These properties include the reel, source timecode,
record timecode, clip name, project names, and timeline names of each clip, for easy
comparison.
Attributes and options checkboxes: A series of checkboxes lets you specify which clip
attributes are copied as part of the ColorTrace operation.
Color: Enables the copying of grades.
Preserve Num Nodes: When copying grades, lets you prevent the first X nodes of the
target clip grades from being overwritten by the first X nodes of the source clip grades.
Sizing: Enables the copying of Edit sizing attributes.
Input Sizing: Enables the copying of Input Sizing attributes.
Convergence: Enables the copying of Convergence for Stereo 3D projects.
Floating Windows: Enables the copying of Floating Windows for Stereo 3D projects.
Auto Align: Enables the copying of Auto Align settings for Stereo 3D projects.
All Versions: Copies all versions, rather then just the current version, from the source to
the target clips. The currently selected version of each source clip is always
correctly copied.
Version Camera Raw Settings: Enables the copying of versioned Raw settings, rather
than just the current Raw setting.
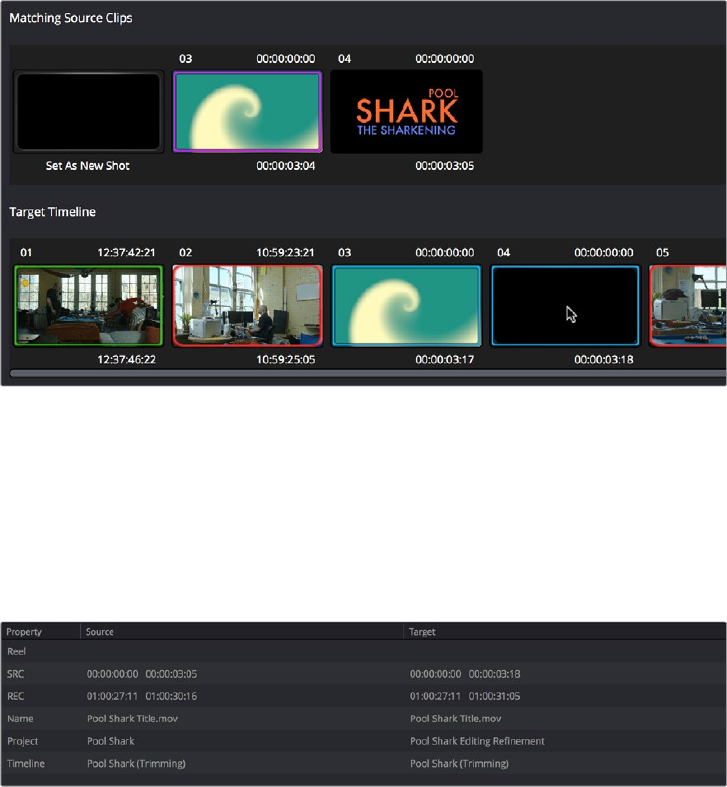
967
Copying and Importing Grades Using ColorTrace Part 6 – 54
Track Marks: Enables the copying of keyframes.
Flags and Markers: Enables copying of all flags and markers.
Hide Matching Clips: Hides all clips which have been successfully matched, and only
show the clips with multiple or no matches. This lets you focus on the subset of problem
clips within a potentially long timeline.
Ignore Reel Names: If you believe the reel names are in error, you can turn this
checkbox on to ignore them, matching all source and target clips by timecode alone.
Copy Grades: Copies the matched source grades to each green and purple target clip.
Copy Grades & Exit: Once you’ve finished making all the grade matches you can, click
this button to copy the matched source grades to each green and purple target clip,
and close the ColorTrace window.
Here’s how to use these controls to sort out which source clips to copy from for each blue and
red target clip in the Target timeline.
To manually choose which source grades should be copied to which target clips:
1 Click any blue clip thumbnail in the Target timeline.
Revealing a number of different possible correspondences in the Matching Source Clips timeline
A collection of clips with overlapping timecode and reel names appears. If you want to
ignore the reel names because you believe they might be in error, turn on the Ignore
Reel Names checkbox.
2 If a comparison of the Source and Target thumbnails doesn’t make the choice obvious,
then click any of the clips in the Matching Source Clips timeline to view its metadata for
comparison in the source/target columns below.
Source and Target clip metadata for comparison
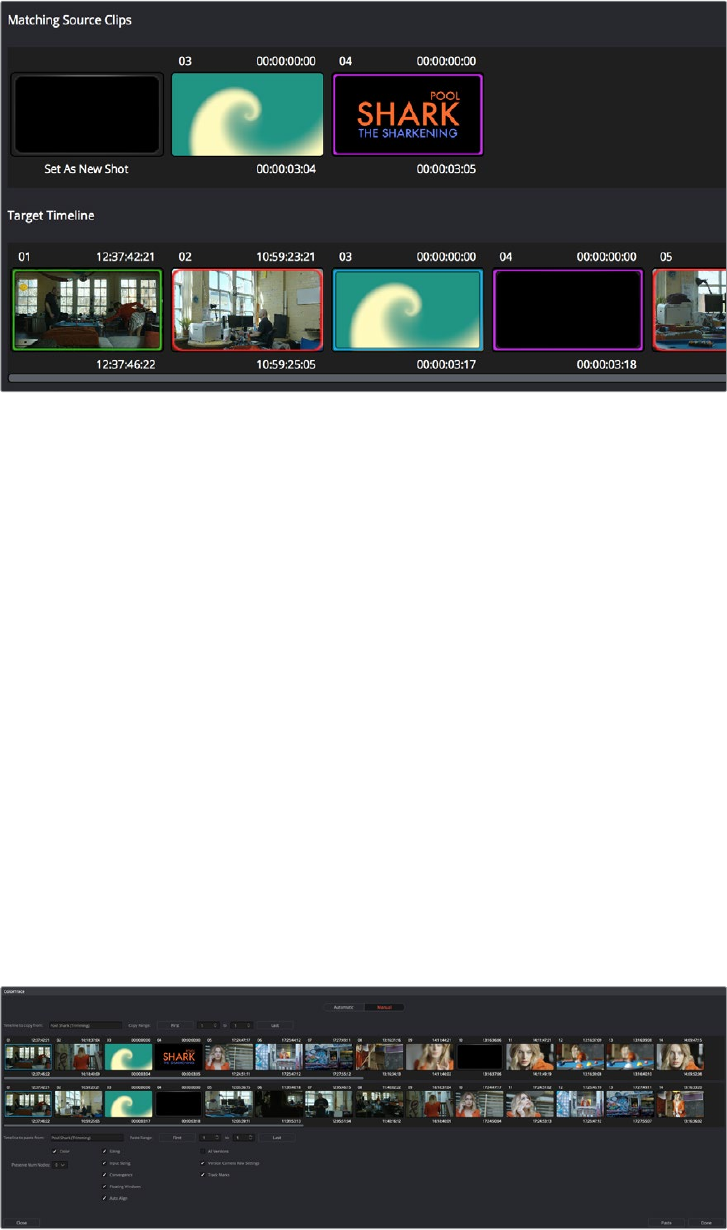
968
Copying and Importing Grades Using ColorTrace Part 6 – 54
3 Once you’ve decided on a clip correspondence, double-click the Matching Source Clip
thumbnail you want to copy from. If no clip in the Matching Source Clip pane is a good
match, double-click the “Set As New Shot” box.
The Source and Target thumbnails both turn purple, to show that you’ve created a
correspondence.
The matching Source and Target clips now both marked with purple outline
Continue working your way through every thumbnail with Blue and Red Xs until you’ve
found matches for every clip in the Timeline for which it’s possible.
4 When you’re finished, click Copy Grades & Exit.
Using ColorTrace in Manual Mode
Manual mode is ideal for situations where you want to copy grades between programs with
clips that have no timecode or reel name correspondence at all. The Manual ColorTrace
interface is designed to let you move through two different timelines, either a clip at a time, or in
matching multiples of clips, copying grades from the Source timeline to the Target timeline.
For example, if you’re trying to copy grades from a timeline that was conformed from individual
media files, to another timeline that was conformed from a flattened master media file, you can
use the ColorTrace Manual mode to accomplish this.
The manual interface consists of two sets of controls that correspond to the Source timeline
(labeled “Timeline to copy from”), and the Target timeline (labeled “Timeline to paste to”). The
general idea is that you move through both sets of timelines one clip at a time, or in matching
multiples of clips at a time, and copy grades from the “Copy from” timeline to the “Paste
to” timeline.
ColorTrace Manual window
969
Copying and Importing Grades Using ColorTrace Part 6 – 54
Manual mode has the following controls:
Source timeline: Shows all clips in the Source timeline you selected; the clips you’re
copying grades from. Click any one clip thumbnail to select it, or click a thumbnail,
and then shift-click another thumbnail to select a contiguous range of clips. You
cannot select a noncontiguous range of clips.
Copy Range controls: Two fields show the range of clips in the current selection
that you’ll be copying from, referred to by their numeric position in the Source
timeline. You can change the range numerically by either entering new numbers in
the fields, or by using the up/down arrow buttons to alter the value by one. The First
button automatically adds all clips from the first one in the Timeline into the current
selection. The Last button automatically adds every clip going to the last one in the
Timeline to the current selection.
Target timeline: Shows all clips in the Target timeline you selected; the clips you’re
pasting grades to. Selecting clips works identically as with the Source timeline.
Paste Range controls: Two fields show the range of clips in the current selection that
you’ll be pasting to, referred to by their numeric position in the Source timeline. All
controls work identically to the Copy Range controls.
Attributes and options checkboxes: Turn off the checkboxes of any clip
characteristics that you don’t want to copy as part of the ColorTrace operation. A
more complete description of these options appears in the section on the Automatic
ColorTrace mode.
Paste button: Once you’ve selected one or more source clips and a matching
number of target clips, clicking Paste copies the grades, PTZR settings, and marks
(depending on the corresponding checkboxes).
Undo Last: Lets you undo the most recent paste action.
Undo All: Lets you undo all paste actions in Manual mode.
Done: Finishes the operation and closes the ColorTrace window.
If you’re cherry picking individual grades from one timeline to paste into shots in another, you
can copy grades one at a time.
To copy one source grade to one target clip:
Click a thumbnail in the Source timeline (on top) to copy from, then click a thumbnail in
the Target timeline (on the bottom), and click Paste.
You can also simultaneously copy the grades of entire scenes of clips from one timeline to
another. For example, if you’re copying grades from an originally graded timeline to a re-edited
version of the same program, you can copy every grade from a 10-clip scene in the Source
timeline to the same 10 clips in the Target timeline which have been pushed back later in
the Timeline.
To copy a group of source grades to a group of target clips:
1 Choose a continuous range of source clips by doing one of the following:
Click the first clip in the range, and then Shift-click the last clip in the range.
Enter the clip number of the first clip in the left “Copy Range” field, and then enter the
clip number of the last clip in the right field.
Click a clip, and then click First to select every clip from that one to the first clip in
the Timeline.
Click a clip, and then click Last to select every clip from that one to the last clip in
the Timeline.
2 Choose a continuous range of Target clips by using the same procedures as in the
previous step, but using the “Paste Range” controls.
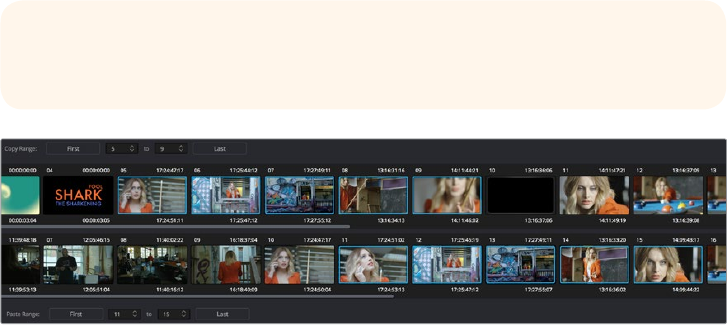
970
Copying and Importing Grades Using ColorTrace Part 6 – 54
Group copy and paste of grades
3 When you’ve made your selections, click Paste.
The grade settings from the source clips are pasted to the destination clips, in order. In
other words, if you copy from clips 5 through 9 to clips 11 through 15, then grade 5 is
copied to shot 11, grade 6 is copied to shot 12, grade 7 is copied to shot 13, etcetera.
Importing CDL Data Using ColorTrace
The ColorTrace CDL command lets you import ASC CDL file formats from other applications into
DaVinci Resolve. DaVinci Resolve version 11.1 also added the ability to read DRX filenames from
CDL files, allowing a CDL to load exported DaVinci Resolve grades.
There are three supported file formats:
CMX EDL: An EDL with comments referring to CCC/CDL XML files, or even Slope,
Offset, and Power (SOP) data within the comment area.
CCC and CDL XML: A file format that contains various color correction looks, and
even references.
To import CDL data into DaVinci Resolve:
1 If you’re importing CCC/CDL XML correction looks:
Open the Gallery page, right-click anywhere within the Stills tab, and choose “Import”
from the contextual menu.
When the Import Stills dialog appears, open the CDL/CCC files. When these are
finished importing into the Gallery, an ASC logo will appear along with them.
2 Open the Edit page and select the Timeline you want to use ColorTrace with in the
Timeline list.
3 Right-click anywhere within the Timeline, and choose ColorTrace from CDL.
4 Select an EDL using the Select EDL dialog, and click Open.
5 Select its corresponding CDL and CCC files using the Select CDL Files dialog. If there
are no CDL or CCC files (which is the case if there are inline SOP comments within the
EDL), you should click cancel.
6 Using the ColorTrace With CDL window, copy the source grades from the CMX EDL/
CCC & CDL XML files to the Target timeline.
At this point, the ColorTrace window works identically as previously described.
IMPORTANT: You must select the same number of target clips as you did
source clips for the Paste button to become enabled.
971
Copying and Importing Grades Using ColorTrace Part 6 – 54
For formatting reference, here are some examples of CMX, CCC and CDL files.
Example CMX EDL File
TITLE: Final EDL FCM: NON-DROP FRAME 010 001 V C 01:19:28:16
01:19:28:16 01:00:41:18 01:00:42:18 *ASC_CC_XML test_cc.102 011 001 V C
00:00:00:00 01:19:28:16 01:00:42:18 01:00:43:18 *ASC _SOP (0.9 1.2 0.5)(0.4
-0.5 0.6)(1.0 0.8 1.5)
Example CCC File
<ColorCorrectionCollection xmlns:”urn:ASC:CDL:v0.5” >
<InputDescription> test corrections for ref_input_image.1920
</InputDescription> <ViewingDescription>
for mathematical analysis only </ViewingDescription>
<ColorCorrection id=”test_cc.100”> <SOPNode>
<Description> for ref_output_image.0100 </Description> <Slope> 1.0
1.0 1.0 </Slope> <Offset> 0.0 0.0 0.0 </Offset> <Power> 1.0 1.0
1.0 </Po w er>
</SOPNode> </ColorCorrection>
<ColorCorrection id=”test_cc.101”> <SOPNode>
<Description> for ref_output_image.0101 </Description> <Slope> 1.0
1.5 0.6 </Slope> <Offset> 0.0 -0.1 0.01 </Offset> <Power> 1.0 1.5
0.5 </Po we r>
</SOPNode> </ColorCorrection>
</ColorCorrectionCollection>
Example CDL File
<ColorDecisionList xmlns=<94>urn:ASC:CDL:v0.5<94> >
<InputDescription> GeneralProducts M1 std thru GP M1 LUT4 </
InputDescription> <ViewingDescription> GP P1, DCI P3, Pathe color
emul </ViewingDescription> <ColorDecision>
<MediaRef ref=<94>/some/Project/frame%250900-0954%5B.dpx<94>/>
<ColorCorrection id=”cc03340”>
<SOPNode> <Description>change +1 red, contrast boost</Description>
<Slope>1.2 1.3 1.4</Slope> <Offset>0.3 0.0 0.0</Offset> <Power>1.0 1.0
1.0</P ow er>
</SOPNode> </ColorCorrection>
</ColorDecision> </ColorDecisionList>
972
Copying and Importing Grades Using ColorTrace Part 6 – 54
Using CDL Adjustments
Once you’ve imported a CDL (Color Decision List), then the CDL adjustment for each clip is
made available to you via a contextual menu command in the Thumbnail timeline of the
Color page.
Calculating CDL Functions
To turn the SOP values into a primary correction, the following math is used by DaVinci Resolve:
Output = (Input * Slope + Offset)Power
Output refers to the final grade. Input is the value of each pixel within each color channel (on a
scale from 0-1). The detente value for Slope is 1. The detente value for Offset is 0. The detente
value for Power is 1.
974
DaVincia Resolve Control Panels Part 6 – 55
DaVinci Resolve Control Panels
The DaVinci Resolve Control Panels make it easier to make more adjustments in the same
amount of time than using a mouse, pen, or trackpad with the on-screen interface. Additionally,
using a DaVinci Resolve Control Panel to control the Color page provides vastly superior
ergonomic comfort to clutching a mouse or pen all day, which is important when you’re
potentially grading a thousand shots per day.
This chapter covers details about the three DaVinci Resolve Control Panels that are available,
and how they work with DaVinci Resolve.
About The DaVinci Resolve Control Panels 975
DaVinci Resolve Micro Control Panel 976
Trackballs 976
Control Knobs 977
Control Buttons 978
DaVinci Resolve Mini Control Panel 979
Palette Selection Buttons 979
Quick Selection Buttons 981
DaVinci Resolve Advanced Control Panel 982
Menus, Soft Keys and Soft Knob Controls 983
Trackball Panel 983
T-bar Panel 985
Transport Panel 990
Copying Grades Using the Advanced Control Panel 994
Copy Forward Keys 994
Scroll 994
Rippling Changes Using the AdvancedControlPanel 995
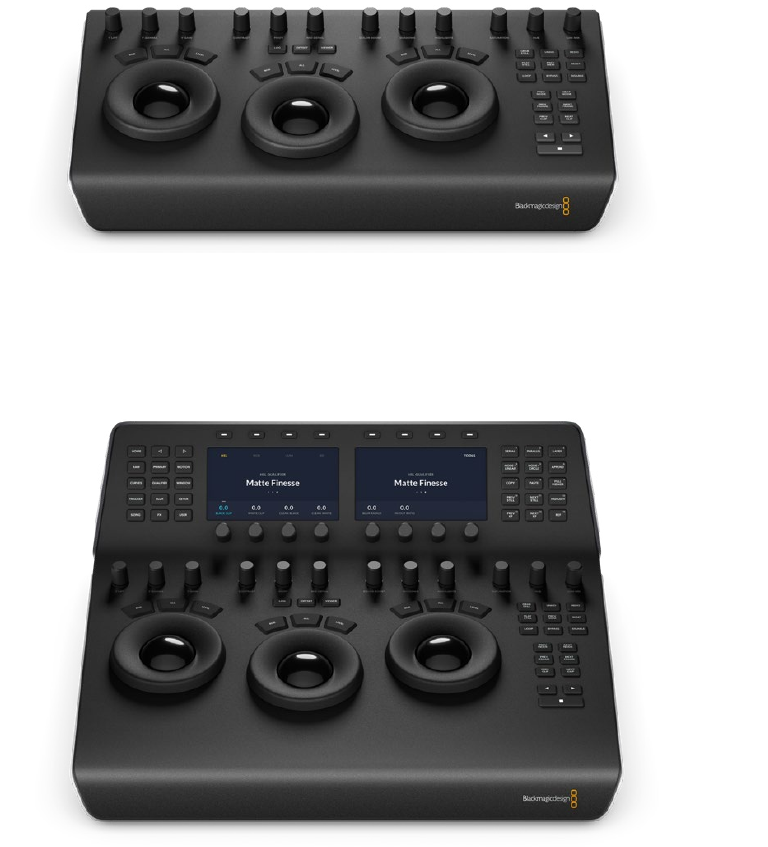
975
DaVincia Resolve Control Panels Part 6 – 55
About The DaVinci Resolve
Control Panels
There are three DaVinci Resolve Control Panel options available and each are designed to
meet modern workflow ergonomics and ease of use so colorists can quickly and accurately
construct both simple and complex creative grades with minimal fatigue.
This chapter provides details of the each of the panel functions and should be read in
conjunction the previous grading chapters to get the best from your panel.
The DaVinci Resolve Micro Control Panel is ideal for edit suites that need a professional grading
panel for occasional grades or quick adjustments to shots. You will also find it on set where its
small size, portability and low power needs are ideal for those on the move.
DaVinci Resolve Micro Control Panel
For many facilities the DaVinci Resolve Mini Control Panel is an elegant, compact yet powerful
full featured grading panel. The direct selection palette keys, soft knobs and menus offer
considerably more flexibility than the Micro panel and a better grading experience as a result.
DaVinci Resolve Mini Control Panel
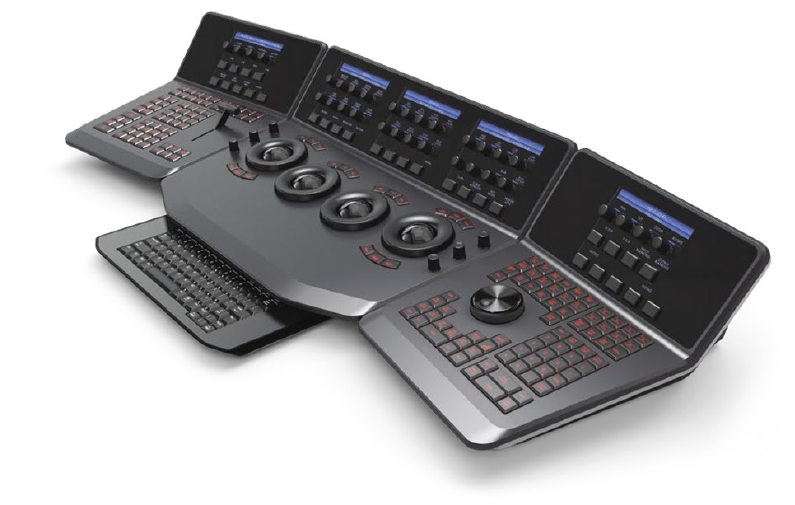
976
DaVincia Resolve Control Panels Part 6 – 55
For the ultimate grading panel to make an impact on your clients and give you the speed for long
and complex grading sessions the DaVinci Resolve Advanced Control Panels features dozens of
keys and menu driven soft knobs so grading operations are just a keystroke or two away. With
high resolution liquid crystal displays (LCD) and backlit hard keys to accommodate adarkened
grading environment. The color and intensity of the keys and the LCD panel brightness are user
programmable, so each colorist can set up his/her personal panel configuration.
DaVinci Resolve Advanced Control Panels
DaVinci Resolve Micro Control Panel
The Micro control panel features a row of direct control knobs at the top of the panel, three
trackballs with rings for color grading and to the right, transport and commonly used keys to
speed up your grading session. Above the trackballs are reset buttons and also mode selection
buttons for Log, Offset and the Viewer selector. When selecting the Viewer mode the full
display will switch to the Cinema Viewer which is ideal for playback and review of clips. The Log
and Offset selections are described below.
Trackballs
The three trackballs, from left to right, are in the traditional DaVinci format of Lift, Gamma, and
Gain when Resolve is set for Primary grading. This is the default mode for the panels but you
can quickly toggle to Log mode using the LOG key just above the center trackball. When in Log
grading the trackballs control the Lowlights, Mid-tones, and Highlights.
You can also select the OFFSET button whether in PRIMARY or LOG modes. This is a toggle
operation and when selected the left hand side ring surrounding the trackball controls the color
temperature of the image, the center trackball ring the color tint and the right hand side
trackball controls the image offset balance and master exposure with the ring.
By rotating the trackball the colorist can alter the balance between the red, green and blue
levels of the image. Using the vectorscope as a rough guide, moving the trackball towards the
three thirty clock position adds more blue while reducing the red and green.
977
DaVincia Resolve Control Panels Part 6 – 55
The control ring surrounding these trackballs provides a master amplitude control of the
associated trackball.
Above the three trackballs you will see three buttons for resetting the grade:
RGB: This key only resets the RGB balance to default detent.
All: Select All to reset both RGB and level.
Level: Select the Level key to reset the level while maintaining RGB differential.
Log, Offset, Viewer and Trackball reset buttons
Control Knobs
The top of the panel features 12 high resolution endless turn optical encoder control knobs with
detent resets. These are spaced in groups of three for fast operation in dark suites. From left to
right the knobs control:
Y Lift: This black level adjustment primarily influences the darker areas. The mid tone
and to a lesser amount the brighter areas of an image will also change.
Y Gamma: Use the gamma knob for primarily midtone contrast changes with some
influence on the darker and brighter sections.
Y Gain: The Y Gain control will influence the brighter parts of the image at a greater
extent to the mid and darker portions.
Contrast: This one parameter lets you increase or reduce the distance between the
darkest and lightest values of an image, raising or lowering image contrast. The effect
is similar to using the Lift and Gain master controls to make simultaneous opposing
adjustments.
Pivot: Changes the center of tonality about which dark and bright parts of the image
are stretched or narrowed during a contrast adjustment.
Midtone Detail: When this parameter is raised, the contrast of regions of the image with
high edge detail is raised to increase the perception of image sharpness, sometimes
referred to as definition. When lowered to a negative value, regions of the image with
low amounts of detail are softened while areas of high-detail are left alone.
Color Boost: Lets you naturalistically raise the saturation of regions of low saturation,
sometimes referred to as a vibrance operation. Can be used also to lower the
saturation of regions of low saturation.
Shadow: Lets you selectively lighten or darken shadow detail. Raising this value
retrieves shadow detail while leaving the midtones alone. 0 is unity.
Highlight: Makes it easy to selectively retrieve blown-out highlight detail in
high-dynamic range media by lowering this parameter, and achieves a smooth blend
between the retrieved highlights and the unadjusted mid tones for a naturalistic result.
LOOP BYPASS DISABLE
PLAY
STILL
PREV
MEM RESET
GRAB
STILL UNDO REDO
PREV
NODE
NEXT
NODE
PREV
FRAME
NEXT
FRAME
PREV
CLIP
NEXT
CLIP
ALL
RGB
LEVEL
OFFSETLOG VIEWER
CONTRAST PIVOT MID DETAIL COLORBOOST SHADOWS HIGHLIGHTS SATURATION HUE LUM MIXY LIFT Y GAMMA Y GAIN
ALL
RGB
LEVEL
ALL
RGB
LEVEL
978
DaVincia Resolve Control Panels Part 6 – 55
Saturation: Increases or decreases overall image saturation. At higher values, colors
appear more intense, while at lower values, color intensity diminishes until, at 0,
allcolor is gone, leaving you with a grayscale image.
Hue Rotation: Rotates all hues of the image around the full perimeter of the color
wheel. The default setting of 50 shows the original distribution of hues.
Luminance Mix: Lets you control the balance between YRGB contrast adjustments
you’ve made using the Master Wheels or ganged Custom curves, and Y-only
adjustments to contrast made using the Y channel Lift/Gamma/Gain controls of the
Primaries palette or the unganged Luma curve.
Additional detail can be found in the color page basics chapter and each of these operations
can be seen on the Primary palette of the user interface.
Control Buttons
On the right hand side of the trackballs there are three groups of control buttons.
Control Buttons
The top group includes
Grab Still: At any time when you are grading, selecting the Grab Still key will
automatically grab a full resolution frame from the Timeline and attach the node graph
metadata for later display and use.
Undo: Undo is one of the favorite keys of colorists. Try any grade, and if you don’t like
it, simply Undo. There are multiple steps of undo available within the page.
LOOP BYPASS DISABLE
PLAY
STILL
PREV
MEM RESET
GRAB
STILL UNDO REDO
PREV
NODE
NEXT
NODE
PREV
FRAME
NEXT
FRAME
PREV
CLIP
NEXT
CLIP
ALL
RGB
LEVEL
OFFSETLOG VIEWER
CONTRAST PIVOT MID DETAIL COLORBOOST SHADOWS HIGHLIGHTS SATURATION HUE LUM MIXY LIFT Y GAMMA Y GAIN
ALL
RGB
LEVEL
ALL
RGB
LEVEL
Top group
Middle group
Bottom group
979
DaVincia Resolve Control Panels Part 6 – 55
Redo: Sometimes you hit Undo once too many times. Redo will put back into effect the
last item you undid. As with Undo, there are multiple levels of Redo.
Play Still: Using Play Still, DaVinci Resolve will automatically display a wipe on the
Viewer between the current scene and the current still. You can use your mouse on
the viewer to move the wipe position. Selecting Play Still a second time will toggle
this mode off.
Prev Mem: Each clip, by default, has a memory of its grade, sizing, etc. which is saved in
reference to the source timecode. If you are grading a clip and move from it to another
clip, the grade is saved automatically in a memory for that clip. If you come back to the
clip and make a change to the grade, then decide you don’t like the change, select
Prev Mem to return to the previous grade status you found when selecting the clip.
Reset: This key resets the grades and clears the keyframes for the current node.
Loop: You may wish to repeat a review of a grade of a clip, or a selection of clips on the
Timeline; this Loop toggle key selects or deselects the Loop operation.
Bypass: This toggle selects the node graph bypass mode.
Disable: This toggle enables or disables the current node.
The middle group of buttons include:
Prev Node: Within the Node Editor on the Color page you are likely to have a number
of nodes. These are numbered based on the order that you added them. DaVinci
Resolve node graphs are completely user configurable, so you can add nodes
anywhere and in any order you like. Thus, the Previous Node key will select the node
one lower in numerical order.
Next Node: Similar to the Previous Node key, this selects the node adjacent to the
current node, in this case the next higher numerical position.
Prev Frame: To step the viewer one frame in reverse along the Timeline.
Next Frame: A single frame step forward for each key press.
Prev Clip: Selects the first frame of the previous clip.
Next Clip: Selects the first frame of the next clip.
The bottom group includes the timeline transport buttons for reverse play, stop and play.
Left Arrow: Select this key to play the clip/timeline in reverse.
Stop: You guessed it. This stops the playback.
Right Arrow: The forward key will play the clip/timeline forward.
DaVinci Resolve Mini Control Panel
The Mini control panel has an identical feature set and controls as the Micro panel for the lower
trackball deck. In addition the panel has an upper sloped desk with dual high resolution LCD
displays with four soft knobs and keys that are menu driven. There are also two banks of control
buttons, on the left hand side for palette selection and on the right hand side for commonly
used operations.
Please refer to the Micro Panel details above for the lower deck features.
Palette Selection Buttons
On the left hand side of the top deck you will find 15 palette selection buttons. To quickly select
the main palette toolsets in DaVinci Resolve simply select the appropiate button and the menus
on the LDC screens will update to the correct display.
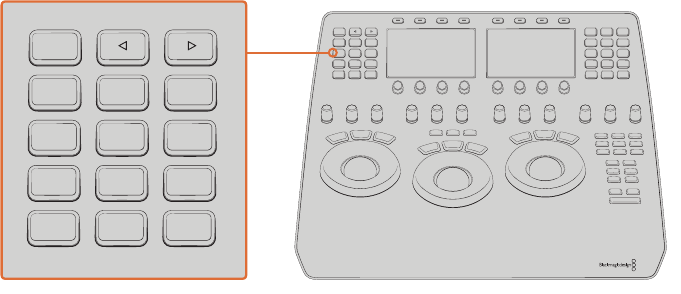
980
DaVincia Resolve Control Panels Part 6 – 55
Palette selection buttons
Home: This key is used for the inital setup of the panel and also selects the top most
menu. Additional palettes in DaVinci Resolve without their own direct access button will
be available here in future releases.
Left Arrow: A number of menus have multiple pages as indicated by the small dots in
the centre of the LCD displays. The left arrow will move the menu display left.
Right Arrow: The right arrow moves the menu display right.
Raw: This palette contains groups of parameters that correspond to every camera raw
media format that’s supported by DaVinci Resolve.
Primary: The first grade for every clip will be likely be a primary. This is where you
balance the clip and correct for offsets in the black and white balance. Selecting
Primary switches DaVinci Resolve from other grading modes and automatically selects
the Primary menus for the LCD displays.
Vectors: When you select and isolate a particular color, and change that color, you are
making a secondary correction. The Vectors key updates the menus to provide all the
Secondary controls, including the hue selection and control.
Sizing: The input and output image resizing engines are controlled using the menus
selected by Sizing.
Windows: The Windows key opens the menus for Circular, Linear, Polygon,
PowerCurve and Gradient windows that can be used as a matte or mask for primary
and secondary grades.
Motion: The Motion Effects palette (only available in the Studio version) contains two
sets of controls for applying optical-flow-calculated effects to clips in your program.
These include enhanced Spatial and Temporal noise reduction, and motion-estimated
artificial motion blur.
Curves: The Curves palette has six modes that provide different curve-based methods
of manipulating the color and contrast of an image. Each curve lets you adjust a
customizable region of the image based either on image tonality (zones of lightness or
darkness), hue (specific colors), or saturation (intensity of color).
Qualifier: When you select and isolate a particular color, and change that color, you are
making a secondary correction. The qualifier key updates the menus to provide all the
Secondary controls, including the 3D, HSL, RGB, or Luma key, with which to isolate the
correction you need.
Window: Power Windows are another way of making secondary correction, being
essentially shapes you can use to isolate regions of the image. Different controls let
you use oval, rectangular, polygonal, or custom curved shapes. Because you can
isolate regions of the image by drawing, Power Windows produce exceptionally clean
results, with edges that can be precisely positioned and feathered to achieve a variety
of effects.
OFFSET
MID DETAIL COLOR BOOST SHADOWS HIGHLIGHTS SATURATION HUE LUM MIXPIVOTCONTRASTY GAINY GAMMAY LIFT
ALL
LEVEL
LOG
RGB
VIEWER
UNDO
GRAB
STILL REDO
PREV
MEM
PLAY
STILL RESET
BYPASSLOOP DISABLE
PREV
NODE
NEXT
NODE
PREV
FRAME
NEXT
FRAME
PREV
CLIP
NEXT
CLIP
ALL
LEVEL
RGB
ALL
LEVEL
RGB
BLUR KEYERTRACKER
QUALIFIER WINDOWCURVES
PRIMARY MOTIONRAW
v w
HOME
FX USERSIZING
PARALLEL LAYERSERIAL
2 31
NODE +
CIRCLE APPEND
NODE +
LINEAR
5 64
NEXT
KF REF
PREV
KF
14 1513
NEXT
STILL
HIGHLIGHT
PREV
STILL
11 1210
PASTE FULL
VIEWER
COPY
8 97
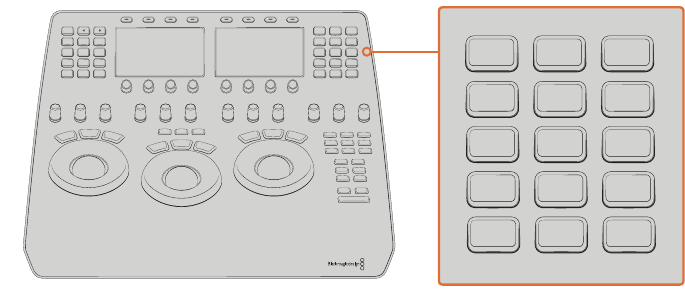
981
DaVincia Resolve Control Panels Part 6 – 55
Tracker: The Tracker palette has three modes, available from the Palette menu. In
Window mode, the tracking controls let you match the motion of a window to that of
a moving feature in the frame. In Stabilizer mode, the same underlying technology is
used to smooth or stabilize the motion within the entire frame, while in FX mode a point
tracker can be used to animate ResolveFX or OFX plugins with positioning controls
Blur: With the Blur palette controls you can apply an exceptionally high-quality
Gaussian blur, or another equally high-quality sharpening operation to your image.
Keyer: Each color correction node’s key input and key output makes it possible to route
key channel data from one node to another so you can apply isolated corrections.
These key levels are controlled in the Keyer palette.
Sizing: DaVinci Resolve has a powerful tool set for making geometric transforms,
using advanced algorithms for optical-quality sizing operations and they are found in
this palette.
Fx: Control of the Resolve FX plug-ins from this palette will be available here in
future releases.
User: User configured menus will be available here in future releases.
Quick Selection Buttons
On the right hand side of the top deck you will find 15 quick selection buttons. These are for
very commonly used selections that a colorist might use many time for each clip.
Quick selection buttons
Serial: The most common node to use on the node graph is a Serial node. A Serial
node is a full-featured color correction processor offering primaries, secondaries,
windows, tracking, image stabilization, sharpening and blur, matte blur, etc. Serial
nodes are added one after the other in a cascade mode, similar to adding one layer of
correction on top of the last. All grades in a preceding node(s) will impact the source
image and therefore the grades in following nodes.
Parallel: Unlike adding a Serial node, adding a Parallel node first actually adds two
nodes. One behaves like a Serial node with full color correction capabilities. The
second is a Parallel Mixer node. This mixer accepts the image from the original Serial
node and from the new Serial node and the output is a mix of these two. If the current
node is one of the Serial nodes immediately preceding the Parallel Mixer node and
you select Add Parallel again, another input to the mixer will be created as will another
preceding Serial node. In each case, the input to these Serial nodes will be common,
effectively making them in parallel to each other. The key advantage is that the source
image is available to many nodes, whereas in a straight Serial node graph, each time
you restrict a color in a node the following nodes have little ability or limited range to
use that color.
OFFSET
MID DETAIL COLOR BOOST SHADOWS HIGHLIGHTS SATURATION HUE LUM MIXPIVOTCONTRASTY GAINY GAMMAY LIFT
ALL
LEVEL
LOG
RGB
VIEWER
UNDO
GRAB
STILL REDO
PREV
MEM
PLAY
STILL RESET
BYPASSLOOP DISABLE
PREV
NODE
NEXT
NODE
PREV
FRAME
NEXT
FRAME
PREV
CLIP
NEXT
CLIP
ALL
LEVEL
RGB
ALL
LEVEL
RGB
BLUR KEYERTRACKER
QUALIFIER WINDOWCURVES
PRIMARY MOTIONRAW
v w
HOME
FX USERSIZING
PARALLEL LAYERSERIAL
2 31
NODE +
CIRCLE APPEND
NODE +
LINEAR
5 64
NEXT
KF REF
PREV
KF
14 1513
NEXT
STILL
HIGHLIGHT
PREV
STILL
11 1210
PASTE FULL
VIEWER
COPY
8 97
982
DaVincia Resolve Control Panels Part 6 – 55
Layer: The Layer node is similar to the Parallel node in that it accepts the image inputs
from more than one node. The key difference to a Parallel node is that the mixing of
the inputs in a Layer node is prioritized towards the latest additions to the input list.
For example, select Add Layer and DaVinci Resolve will add a node in parallel to the
current node and link the output of the current and the newly made Parallel node to
the two inputs of the Layer Mixer node. The previous current node will have the lowest
priority in the mix, and the newly made Parallel node the highest priority. Add one more
Layer node, a third input node will be created with a higher mix priority than the first
two nodes.
Node + Linear: Adds a Serial node after the current node on the node graph and
simultaneously add a Linear Power Window, thus reducing the number of keystrokes.
Node + Circle: Adds a node after the current node on the node graph and
simultaneously adds a Circular Power Window.
Append: Often when navigating around the Node editor and making correction trims,
the colorist decides he/she needs an additional node for more correction. Using the
Append Node key will always add a Serial node to the very end of the node graph,
regardless of which node in the graph is the current node.
Copy: Used to copy a selected nodes grade to another node.
Paste: Use this key to complete the copy/paste of node grade.
Full Viewer: The Full Viewer display shows an enlarged viewer and this includes
transport controls at the bottom, timecodes and the selections for reference still
modes, spilt screens, highlight modes.
Prev Still: If you have a still selected the Previous Still key will select the one preceding.
Next Still: The next still is selected if this key is used.
Highlight: When in the Qualifier menus making secondary qualifiers, it’s common to
select the Highlight key to show a high contrast separation of the qualified color and all
other parts of the image. Toggle this key to turn off.
Prev KF: This key steps backward one keyframe on the Clip/Track Timeline display.
Next KF: For keyframe steps forward on the Clip/Track Timeline display.
Ref: This toggle key will change the reference wipe mode between Gallery, Timeline
and Offline sources.
DaVinci Resolve Advanced Control Panel
There are three panels in the Advanced Control Panel set. The center Trackball panel is where
the majority of controls and feedback for the colorist are found and it includes a slide-
out keyboard.
On either side of the Trackball panel are two interchangeable panels, the position of which is
determined by operator preference. The T-bar panel, shown above on the left, has a T-bar Mix/
Wipe control and a number of menu and function keys. The Transport panel, shown above on
the right, has the Timeline Transport controls and a Jog/Shuttle control as well as a numerical
keypad and associated function keys.
All panels have soft keys and variable control knobs within the LCD panel, which provide an
accurate visual reference to the control without the risk of parallax errors.
A key feature of the panel design is real-time feedback, provided to the colorist via the full color
LCD panels where you can see, at a glance, the relative settings of the controls and a highlight
of the last control touched. For example, if a control is out of its default reset, the panels show
this with a selectable color highlight.
983
DaVincia Resolve Control Panels Part 6 – 55
Menus, Soft Keys and Soft Knob Controls
The soft menu structure is designed to offer simultaneous control over multiple functions and a
fast, logical and efficient way to move between the menus. These soft menus, the soft keys,
and the operation of these in conjunction with the variable knobs are covered in the preceding
chapters of this manual as their state changes depending on the operation being performed.
You will find the LCD on each of the panels has a two-line title description of the menu’s main
function and there are two lines of text above each pot or switch describing the control. The
T-bar and Transport panels also have a “more” key to the bottom right of the LCD which will
select a second layer of menus.
The T-bar and Transport panels have quite independent controls compared to the Trackball
panel. For example, the T-bar panel’s default menu is for Windows adjustment while the default
menu for the Transport panel is Sizing. This allows users to control windows or sizing at any
time, regardless of the Trackball panel mode and eliminates the need to change the work
surface to adjust window position or input sizing.
While the menus change with the UI, the hard keys, trackballs, T-bar and shuttle control remain
relatively constant, so the majority of this chapter describes groups and individual key functions.
At the end of this chapter are details on copying forward, scrolling and rippling changes using
the Advanced Control Panel.
Shift Key Convention
Before describing the hard key operation, it is important to understand two keys on the left and
right panels. These shift keys, Shift Up and Shift Down, provide access to potentially two more
functions on each of the next key selected.
For example, on the T-bar panel, next to the Shift Up key is the Base Mem key. The term ‘Base
Mem’ is a legacy DaVinci colorist description to revert to the default memory, so there is no
grade or sizing on that node. (There is an exception discussed later in this chapter.)
If you select Shift Up and then ‘Base Mem’, the “All” operation is to “Base Mem All” or reset the
current color correction of every node in the node graph for the current clip, leaving the nodes
in place. To “Reset” the selected node graph or “Reset Grades and Nodes,” first select Shift
Down, then Base Mem.
To permit a fast and single-handed operation, this function does not require you to hold the
Shift Up or Shift Down key while selecting the second key; just select them sequentially, first
the Shift key, then the function.
Trackball Panel
The center panel has the traditional four trackballs, each with a surrounding control ring and no
end stop in either direction. Three variable knob controls are on each side of the panel, three
keys above the trackballs, three below the leftmost and rightmost trackballs. On the LCD panel,
three LCD displays, each with eight knob controls and four keys. The LCD screens are menu
driven and thus the knobs, soft keys and the display itself depends on the application’s current
operation. The center panel also offers a slide-out keyboard for naming files, stills and nodes,
as well as for a number of other operations.
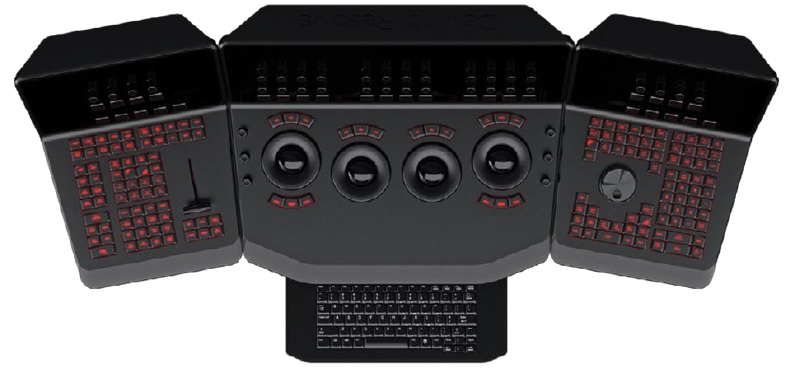
984
DaVincia Resolve Control Panels Part 6 – 55
The Trackball panel includes a slide-out keyboard
The three trackballs, from left to right, are in the traditional DaVinci format of Lift, Gamma, and
Gain when DaVinci Resolve is set for Primary grading; when in Log grading they are Lowlights,
Mid-tones, and Highlights.
By rotating the trackballl the colorist can alter the balance between the red, green and blue
levels of the image. Using the vectorscope as a rough guide, moving the trackball towards the
three thirty clock position adds more blue while reducing the red and green.
The control ring surrounding these trackballs provides a master amplitude control of the
associated trackball.
Above the three leftmost trackballs you will see three buttons for resetting the grade:
RGB: This key only resets the RGB balance to default detent.
All: Select All to reset both RGB and level.
Level: Select the Level key to reset the level while maintaining RGB differential.
The rightmost (fourth) trackball has a number of modes. It operates similar to a mouse for
moving the on-screen cursors, Color curve control point position, Power Windows position and
can also act as a primary grade Offset control.
Under the leftmost and rightmost trackballs there are three unmarked buttons.
On the left hand side of the panel, the right most of the three unlabelled buttons below the
trackball toggles the right hand side (fourth) trackball in and out of offset adjust mode.
The keys under the right-hand side trackball provide left, center, and right mouse buttons.
Above the rightmost trackball, the three keys have two modes.
When used in conjunction with the shift down button, the three buttons above the trackball
function as resets, as per the buttons above the other trackballs.
Shift Down Adjust Window: Only resets the RGB balance to default detent.
Shift Down Modes: To reset both RGB and level.
Shift Down Cursor: To reset the level while maintaining RGB differential.
In their normal operation they select:
Adjust Window: Selection turns on the Viewer Shape cursors for the current node and
allows the trackball to position the current window.
Modes: This key allows access to a number of menus and acts as an on/off toggle.
985
DaVincia Resolve Control Panels Part 6 – 55
Display (Shift Up Cursor): This shift function changes the cursor views on the main
monitor. The user can select the cursor display, including: Windows, Off, On the UI but
not the main SDI monitor, or displayed on both.
Cursor: The Cursor is used for the color picker when in Curves and Vector/Secondary
modes. This key also controls the Window display.
On the left side of the panel are three luminance knobs. From top to bottom they are Luminance
Gain, Gamma and Lift.
On the right side there are three more controls, from top to bottom: Saturation, Hue (has the
effect of hue rotation), and Luminance Mix.
T-bar Panel
The T-bar panel, typically located on the left for a right-handed colorist, has an LCD display with
four variable controls and nine soft keys. The lower section of the panel houses the T-bar and
six groups of hard keys. Each group and their keys are described below.
Mode Control Group
The Mode Control group provides navigation to a number of the GUI pages and a few
commonly used functions.
Config: This key opens the Project Setting window where you will set up DaVinci
Resolve for each project. Select again to close the window without saving.
Browse: Select Browse to call the Media page where you can review files on attached
storage and review the Media Pool.
VSR (Shift Down Browse): This selection is reserved for future use.
Conform: Selects the Lightbox display on the Color page.
Shift Up Conform: Toggles the display of the Lightbox on the SDI output.
Deck (Shift Up Revival): The Deck key selects the Capture mode for importing a batch
list from an EDL.
Revival: This key opens the Revival Dirt and Dust-busting window.
Scene (Shift Down Revival): To select the Scene Cut Detection window, select the Shift
Down key followed by the Revival key.
Current ~ Viewer: This key toggles between the color page and the Enhanced
Viewer page.
Object Track Mode: This key selects the Tracking menus.
Clip/Track/Unmix: This is a toggle key between the Clip/Timeline modes of the node
graph and the Unmix mode.
User (Shift Up Cache Mode): This will mark a clip for render cache of the clip output.
Cache: This key is a toggle function to turn the render cache on or off.
Editor: Selects the Edit page where you can edit the Timeline, import AAF, EDL or
XMLs and apply speed changes, Composite and Dissolve/Wipe effects, etc.
Proxy On/Off: This key toggles the proxy mode on and off.
Auto Color: This is a popular key. Using this key, DaVinci Resolve will automatically
make a basic primary color correction to balance the blacks and whites of your image.
Page Up (Shift Up Gallery): In larger projects you may have a number of gallery albums
holding stills. This key will change the Gallery page to the next higher album on the list.
Gallery: Used to select the Gallery UI page where you can manage, import and export
your stills.
986
DaVincia Resolve Control Panels Part 6 – 55
Page Down (Shift Down Gallery): The inverse of the Shift Up Gallery function, this
selects the Gallery album one lower than the current.
A/C Mode: This toggle key will display the clips in the Timeline in the order of the EDL
(the record order, often referred to as C Mode), or the ascending order of the source
clip timecode, called A Mode.
Handles Mode: This selection exposes the handles of the selected clip to allow
tracking and grading outside the I/O selections of the current edit.
Timeline Management Group
When grading clips, colorists often try different looks. This group of keys offers a quick way to
navigate through these versions and to split and join clips on the Timeline.
Split (Shift Up Undo): This key will split the clip at the position of the cursor on
the Timeline.
Undo: Undo is one of the favorite keys of colorists. Try any grade, and if you don’t like
it, simply Undo. There are multiple steps of undo available within the page.
Join (Shift Up Redo): The reverse of split. Place the Timeline cursor at the junction of
two clips that have sequential timecode and select Join to make just one clip.
Redo: Sometimes you hit Undo once too many times. Redo will put back into effect the
last item you undid. As with Undo, there are multiple levels of Redo.
Restore Point: This selection is reserved for future use.
Save: Remember this key; it’s your friend. Save often, and also consider the autosave
options found in the User Preferences.
Add Version: When you make a grade on any clip, DaVinci Resolve stores the
parameters for that clip. If you want to try different grades, don’t lose your good grades,
just use the Add Version feature. This key will make a second, third, or more version of
the grade for that clip.
Default Version: If you have multiple versions of grades for a clip, this key is used to
select the Default version, regardless of which version is currently displayed.
Previous Version: This will select the grade one version lower in order. For example,
if you are on version three, select Previous Version to get to version two. Once
the Default version is reached, selecting Previous Version again will select the
highest version.
Next Version: Use this key to select the next higher version of the grade. Once
the top version is reached, selecting Next Version again will select the Default
Keyframing Group.
Keyframing Group
On the bottom right of the Color page is the Keyframe timeline for the current clip. The
Keyframing group of keys is used in association with the Keyframe timeline and controls the
selection of marks for the start and end of dynamic transitions of the grade.
Start Dynamic: Use Start Dynamic to select the first keyframe in a transition. The
transition may be a grade change, resizing, the addition of a matte, or any number
of 100 variables, all of which are associated with the node graph and the Clip or
Track timeline.
Ripple Value: If you have a grade or effect, or just an adjustment, and you would
like to ripple this effect over another effect or over a large number of other clips, use
Ripple Value.
Delete: This key deletes the selected keyframe.
Lift Mark: If you place a keyframe in the wrong spot, put your cursor on the keyframe
and use Lift Mark to remove it.
987
DaVincia Resolve Control Panels Part 6 – 55
Trim: This key is used with the numerical keypad to trim a keyframe’s position.
Mark: Like the Start Dynamic key, Mark is a major key. It places a Static keyframe on the
Keyframe timeline.
Scene (Shift Down Mark): This selection opens the Scene Cut Detector.
Memory Access Group
DaVinci Resolve has a number of hot keys, called Mems, where you can store a grade for quick
reference. In fact, every time you make a grade for a clip, a memory of the grade is kept. While
you could save a still for each clip, having thousands of stills to scroll through would take time,
so there are 26 quick and easy memory locations to store a grade, called A-Z Mems.
Every clip has its own metadata for the grade that is stored by DaVinci Resolve as a memory.
There are a number of keys available to select or revert to these stored metadata memories, or
to clear the metadata to revert to a base grade or no grade state.
All (Shift Up Base Mem): This is used to reset the current color correction of every
node in the node graph for the current clip, leaving the nodes in place.
Base Mem: Used to reset the grade of the current node.
Reset (Shift Down Base Mem): Used to reset the grades of the current clip.
Please note that there is an exception to the rule to clear the Base Mem. It is possible,
in fact very helpful sometimes, to have a clip preset that is not cleared when you select
Base Mem. For example, when a film is over scanned and the frame edges are shown
as well as the image. Instead of making an input resize adjustment for every clip to
remove the framing, a preset resize can be made and stored, with a label, and this
preset is not deleted when using Base Mem.
Preview Mem: To preview one of the Memory grades on any clip, select the clip on the
Timeline, select Preview Mem and then the Memory letter. This key is a toggle so if you
do not like the grade on the memory for that clip, select Preview Mem again and the
grade will revert to the original.
Original Mem: Each clip by default has a memory of its grade and sizing, etc. If you
are grading a clip and move from it to another clip, the grade for the first clip is saved
automatically in a memory for that clip. If you come back to that clip and make a change
to the grade, then decide you don’t like the change, select Original Mem to return to
the grade status you found originally.
Scroll: When you select Scroll you can navigate up and down the Timeline to find and
select a clip and its grade to recall to the current clip.
View (Shift Up Current): The Color page has two display modes. The normal mode
includes the viewer, stills and node graph on the top of the page. Selecting View
toggles to the alternate page with a wide Node Graph view and stills but no viewer.
Select View again to toggle back to the normal mode.
Crnt: Select Current before selecting a Mem key (A, B, C to Z) and the current grade on
the active timeline clip will be stored in the memory selected.
Shift Up: The Shift Up key permits the operator to select the upper secondary function
of keys on the control panel. This operation does not require you to hold the Shift Up
key, just select it prior to the second key.
Shift Down: The Shift Down key permits the operator to select the lower secondary
function of keys on the control panel. This operation does not require you to hold the
Shift Down key, just select it prior to the second key.
Macro: This key displays the Split Screen controls on the T-bar panel LCD display.
Memory Keys: The A, B, C to Z keys, selected directly or with the appropriate Shift Up
or Shift Down preselection will recall the grade stored in this memory and will apply it
automatically to the clip that is active on the Timeline.

988
DaVincia Resolve Control Panels Part 6 – 55
Menu Navigation and Node Control Group
DaVinci Resolve is a nodal-based color enhancement system. Grades are not stored in layers,
but in nodes. In operation they can appear to be in layers if you select the Serial nodes, but
greater grading flexibility is available by using the Parallel and Layer nodes.
This group also gives you quick access to the main menus to control primaries, secondaries
(known here as Vectors), image sizing and Windows. It also offers a quick way to add and
manage nodes.
All three panels have LCD panels which display the menus
Primary: The first grade for every clip will be likely be a primary. This is where you
balance the clip and correct for offsets in the black and white balance. Selecting
Primary switches DaVinci Resolve from other grading modes and automatically selects
the Primary and Custom Curve menus for the LCD displays.
Vectors: When you select and isolate a particular color, and change that color, you are
making a secondary correction. The Vectors key updates the menus to provide all the
Secondary controls, including the hue selection and control.
Sizing: The input and output image resizing engines are controlled using the menus
selected by Sizing.
Windows: The Windows key opens the menus for Circular, Linear, Polygon,
PowerCurve and Gradient windows that can be used as a matte or mask for primary
and secondary grades.
Outside Node: Selecting the Outside Node key will add another node after the current
node and automatically link both image and key paths. If the original node has a grade
within the matte shape the new Outside node would control the grade in the inverse
(i.e., outside the matte).
Add Matte: By selecting this key the Matte node will be displayed on the node graph
for the selected node and the default matte selected.
Disable Current: This key is a toggle key and it disables or enables the grade on the
current node.
Delete Current: To delete the current node. Remember to use Undo if you had the
wrong node selected.
Bypass (Shift Up Disable Current): This toggle selects the bypass mode.
Enable/Disable All (Shift Down Disable Current): This toggle enables or disables
all nodes.
Node + CPW: Adding a Serial node is a one button selection, Add Serial, however to
also add a window requires a number of extra key selections. The Node + CPW key
adds a node after the current node on the node graph and simultaneously adds a
Circular Power Window, thus reducing the number of keystrokes.
Node + LPW: As above, adds a Serial node after the current node with a Linear
Power Window.
Node + PPW: A Polygon Power Window is also selected when adding a Serial node.
989
DaVincia Resolve Control Panels Part 6 – 55
Node + PCW: This key, like the others above, adds a Serial node after the current node,
but also sets up the PowerCurve Window to permit the marking of freeform shape
points and Bezier spline curves on the viewer to construct a freeform window.
Add Serial: The most common node to use on the node graph is a Serial node. A Serial
node is a full-featured color correction processor offering primaries, secondaries,
windows, tracking, image stabilization, sharpening and blur, matte blur, etc. Serial
nodes are added one after the other in a cascade mode, similar to adding one layer of
correction on top of the last. All grades in a preceding node(s) will impact the source
image and therefore the grades in following nodes.
Shift Down Add Serial (Add Serial Before): This adds a serial node before the
current node.
Add Parallel: Unlike adding a Serial node, adding a Parallel node first actually adds
two nodes. One behaves like a Serial node with full color correction capabilities. The
second is a Parallel Mixer node. This mixer accepts the image from the original Serial
node and from the new Serial node and the output is a mix of these two. If the current
node is one of the Serial nodes immediately preceding the Parallel Mixer node and
you select Add Parallel again, another input to the mixer will be created as will another
preceding Serial node. In each case, the input to these Serial nodes will be common,
effectively making them in parallel to each other. The key advantage is that the source
image is available to many nodes, whereas in a straight Serial node graph, each time
you restrict a color in a node the following nodes have little ability or limited range to
use that color.
Add Layer: The Layer node is similar to the Parallel node in that it accepts the image
inputs from more than one node. The key difference to a Parallel node is that the mixing
of the inputs in a Layer node is prioritized towards the latest additions to the input list.
For example, select Add Layer and DaVinci Resolve will add a node in parallel to the
current node and link the output of the current and the newly made Parallel node to
the two inputs of the Layer Mixer node. The previous current node will have the lowest
priority in the mix, and the newly made Parallel node the highest priority. Add one more
Layer node, a third input node will be created with a higher mix priority than the first
two nodes.
Append Node: Often when navigating around the Node editor and making correction
trims, the colorist decides he/she needs an additional node for more correction. Using
the Append Node key will always add a Serial node to the very end of the node graph,
regardless of which node in the graph is the current node.
Reference Configuration Group
This area of the T-bar panel includes six keys and the fader T-bar. It is primarily used for control
of stills display with and without reference wipes. The fader bar controls the mix or wipe
position when the appropriate mode is active.
Key: This key adds and Alpha output on the node graph.
Circle: This key is not yet implemented.
Wipe: The Wipe key selects a wipe for reference comparison with the current image.
H/V: This key toggles the wipe between horizontal and vertical.
Box: This key is not yet implemented.
Mix: Select this key to mix in preference to wipe.
Still: The Still key permits comparison of the current clip with the selected still.
Memory: Use this key to compare the current clip with a memory.
Highlight: When in the Qualifier (Vector) menus making secondary qualifiers, it’s
common to select the Highlight key to show a high contrast separation of the qualified
color and all other parts of the image. Toggle this key to turn off. Highlight is used so
often it’s also on the T-bar panel and, when in Vectors mode, on the Trackball panel.
990
DaVincia Resolve Control Panels Part 6 – 55
Mode (ShiftDownHighlight): Used to toggle the Highlight mode from gray to
high contrast.
Timeline: Select the Timeline key when you want to compare the current to the
Timeline image.
Offline: Select the Offline key when you want to compare the current to the
Offline image.
Reference On/Off: This toggle key will turn the reference view on or off. When on, you
can see the current clip in comparison to a reference.
Transport Panel
The Transport panel, typically located on the right for a right-handed colorist, has an LCD
display with four variable controls and nine soft keys. The lower section of the panel houses the
Jog/Shuttle knob and six groups of hard keys. Each group and their keys are described below.
Reference Configuration Group
Located at the top left-hand side of the Transport panel are the Deck and Still selection keys.
These are all related to controlling the tape deck and to grabbing and selecting stills. There is
also an Undo and Redo key, a Shift Up and a Save key.
Split (Shift Up In): DaVinci Resolve associates grading information based on source
timecode so it’s important to have each source clip identified as a different clip from
the others. The Split key will split one clip into two on the frame selected. Each can
therefore have its own grade. This is a quick, accurate and easy way to split a long
image sequence into multiple clips.
In: When marking an In point you can use the UI, a keyboard shortcut, or this key.
Join (Shift Up Out): Join is the reverse of the Split key. If you have clips with contiguous
timecode, place the playhead on the first frame of a clip and select Join to merge the
preceding clip.
Out: The Out key is used to select an Out point on the Timeline or deck.
Duration: To define a duration, first select the time using the numerical keypad (the
colon separates the hours, minutes, seconds and frames), and then select Duration.
Gang: This key is not implemented.
Undo: The colorist’s friend. DaVinci Resolve has virtually unlimited Undo steps available
within the page you are working in.
Redo: If you want to redo a step, use Redo. Ideal when used with Undo to compare two
grades quickly.
Source (L): This key is not implemented.
Place (Shift Up A ( R )): This key is not implemented.
A ( R )): This key is not implemented.
F: This key is not implemented.
Place (Shift Up B): This key is not implemented.
B: This key is not implemented.
G: This key is not implemented.
Place (Shift Up C): This key is not implemented.
C: This key is not implemented..
H: This key is not implemented.
D: This key is not implemented.
991
DaVincia Resolve Control Panels Part 6 – 55
I: This key is not implemented.
E: This key is not implemented.
J: This key is not implemented.
Shift Up: Use the Shift Up key as a pre-selector for the keys with an upper option.
Select the keys sequentially and do not hold the Shift Up key while selecting the
second key.
Preroll: The Preroll key is used in conjunction with the numerical keypad to select a
preroll time for tape operations.
Cue: Selecting Cue will force the transport to the preroll position.
Previous Still: If you have a still selected the Previous Still key will select the one
preceding.
Next Still: The next still is selected if this key is used.
Play Still: Using Play Still, DaVinci Resolve will automatically display a wipe on the
Viewer between the current scene and the current still. You can use the fader T-bar
to move the wipe position and in the Reference Wipe menus change the reference
image as required by moving or resizing. Selecting Play Still a second time will toggle
this mode off.
Save: The most important key on the panel. Besides using the auto-save feature, you
can and should consistently save your project with this key. It only takes a few seconds
and can save you hours.
Grab Still: At any time when you are grading, selecting the Grab Still key will
automatically grab a full resolution frame from the Timeline and attach the node graph
metadata for later display and use.
Transport Control Keys Group
Most colorists will use the Transport Control keys every minute of every grade, so they are
located for quick and easy access. While not technically within this key group, the Jog/Shuttle
knob is directly above these keys.
Jog: Rotate the Jog control to step forward or backward a few frames at a time.
Shuttle: On the outside of the Jog rotary control is the Shuttle knob. This knob has
a detent at the null position and is turned clockwise or counter clockwise to shuttle
the Transport/ Timeline forward or reverse at the rate selected by the rotation of the
Shuttle knob.
Loop: You may wish to repeat a review of a grade of a clip, or a selection of clips on the
Timeline; this Loop toggle key selects or deselects the Loop operation.
Render: Once you have finished your grade, the Render key selects the Deliver page
used for configuring the render parameters for your project and starting the render.
Rec: (Shift Down Render) This key is not yet implemented.
Previous Node: Within the Node Editor on the Color page you are likely to have a
number of nodes. These are numbered based on the order that you added them.
DaVinci Resolve node graphs are completely user configurable, so you can add nodes
anywhere and in any order you like. Thus, the Previous Node key will select the node
one lower in numerical order.
Next Node: Similar to the Previous Node key, this selects the node adjacent to the
current node, in this case the next higher numerical position.
Highlight: When in the Qualifier palette making secondary qualifiers, it’s common to
select the Highlight key to show a high contrast separation of the qualified color and all
other parts of the image. Toggle this key to turn on or off. Highlight is used so often it’s
also on the T-bar panel.

992
DaVincia Resolve Control Panels Part 6 – 55
Mode: (Shift Down Highlight) Used to toggle the Highlight mode from gray to
high contrast.
Shift Down: This is the preselection key for functions indicated on the lower portion of
the second keys legend.
First Frame: Selects the first frame of the current clip.
Last Frame: Selects the last frame of the current clip.
Step Reverse: To step the viewer one frame in reverse along the Timeline.
Step Reverse Keyframe: (Shift Down Step Reverse) This key steps backward one
keyframe on the Clip/Track Timeline display.
Step Forward: A single frame step forward for each key press.
Step Forward Keyframe: (Shift Down Step Forward) For keyframe steps forward on the
Clip/Track Timeline display.
Previous Scene: Selects the first frame of the previous scene.
Next Scene: Selects the first frame of the next scene.
Rewind: Places the Transport, or Timeline, in rewind.
Reverse: Select this key to play the Clip/Timeline in reverse.
Stop: You guessed it. This stops the current transport operation.
Forward: The Forward key will play the Clip/Timeline forward.
Fast Forward: The inverse of the Rewind key; fast forward shuttles along the Timeline/
Transpor t.
Memory Access Keys Group
For fast and direct access to A to Z Memories, or Mems, use this section of the Transport panel.
This is an extremely powerful feature. With any clip selected on the Timeline, with a single key
press, for example “A,” the grading parameters stored in memory A, including the node
structure, sizing, etc., will be automatically applied to the current clip.
O (Shift Up A): Selects memory O
A: Selects memory A
I (Shift Down A): Selects Memory I
R (Shift Up B): Selects memory R
B: Selects memory B
J (Shift Down B): Selects Memory J And so forth.
All (Shift Up Base Mem): This function will return all grades for all nodes on the clip to
the default grade/settings and will clear dynamic keyframes.
Base Mem: The Base Mem key clears the current node of all its grades and keyframes.
Again, with the preset exception noted above.
Reset (Shift Down Base Mem Crnt): This key deletes all nodes in the clip except for the
first node and resets the grades to default and clears the keyframes.
Preview Mem: To preview one of the memory grades on any clip, select the clip on the
Timeline, select Preview Memory and then the memory. This key is a toggle, so if you
do not like the grade on the memory for that clip, select Preview Mem again and the
clip’s grade will revert to the original.
NOTE: There is an exception to the rule. If a Preset Size has been set for the
clip, the Base Mem sizing will default to this preset size.
993
DaVincia Resolve Control Panels Part 6 – 55
Original Mem: Each clip, by default, has a memory of its grade, sizing, etc. which is
saved in reference to the source timecode. If you are grading a clip and move from
it to another clip, the grade is saved automatically in a memory for that clip. If you
come back to the clip and make a change to the grade, then decide you don’t like the
change, select Original Mem to return to the previous grade status you found when
selecting the clip.
Scroll: The Scroll key selects a soft menu on the Trackball panel so clips or frames can
be scrolled via the rotary control in the soft menu.
Numerical Entry Key Group
On the center right-hand side of the Transport panel is the Numerical Entry key group. Here you
will find numbers 0 to 9 and associated keys for entering timecode and clip numbers. You will
notice the numbers you type are displayed in a scratchpad area at the bottom of the
Keyframe palette.
Current: To store a new grade in any memory, first select the Current key and then the
memory of your choice.
All Color PTZR: This key is a toggle that selects the parameters that will be copied
when updating a grade. Generally, all aspects of the grade are copied, including the
pan, tilt, zoom and rotation sizing transforms, but on occasion you may wish to copy
only the grade and not the sizing parameters. In this case, use the All/Color/PTZR to
select the mode you need. You can see the Keyframe Timeline toggle between the
master or the node selected and the input PTZR parameters.
Select Node: Use this key in conjunction with the numerical keys to select any node
on the current node graph. First, select the node number, and then Select Node. The
current node will change to the selected node.
Backspace: The Backspace key moves you one item left in the numerical scratch pad
display. This permits correction of your numerical entries.
0 to 9: You guessed it. These are the numbers!
>, (Comma): The comma is used just before the frame count if you wish to indicate a
drop frame timecode.
: (Colon): When typing in timecode, the convention is to type the hours followed by a
colon, then the minutes, a colon, the seconds, a colon, and finally the frames. DaVinci
Resolve does not need to have leading numbers entered where they offer no value
and the default value is 0, so to type one hour, three minutes, zero seconds and sixteen
frames, you do not need to type 01:03:00:16. Simply type 1:3::16 and then press Enter.
This speeds timecode entry.
Clear: Will clear the scratchpad number.
- (Minus): Select the Minus key prior to the number to reduce the number.
+ (Plus): Select the Plus key prior to a number to increase the number.
Take/Enter: Select the Take/Enter key to accept or enter any input.
Keyframing Group
The Keyframe keys are on the bottom right-hand side of the Transport panel. The functions are
replicated on the T-bar panel. On the bottom right of the Color page is the Keyframe timeline for
the current clip in the Timeline. The Keyframe group of keys is used in association with the
Keyframe timeline and controls the selection of keyframes for the start and end of dynamic
transitions of the grade.
Start Dynamic: This key is used to select the first point in a transition, a Dynamic
keyframe. The transition may be a grade change, a sizing or reposition, or the addition
of a matte or any number of 100 variables, all of which are associated with the Node
Editor and the Clip or Track Keyframe timeline.
994
DaVincia Resolve Control Panels Part 6 – 55
Ripple Value: If you have a grade or effect, or just an adjustment and you would like to
ripple this effect over another effect or a large number of other clips, use Ripple Value.
Delete: This key deletes the keyframe.
Lift Mark: If you place a keyframe in the wrong spot, put your cursor on the keyframe
and use Lift Mark to remove it.
Trim: This key is used with the numerical keypad to trim a keyframe position.
Mark: Like the Start Dynamic key, Mark is a major key. It places a Static keyframe on the
Clip Timeline.
Scene (Shift Down Mark): This selection is reserved for future use.
Copying Grades Using the
Advanced Control Panel
There are a number of methods of copying grades that are exclusive to the Advanced
Control Panel.
Copy Forward Keys
The simplest way of copying grades using the control panel is to use the comma and colon
keys on the keypad of the Transport panel to copy grades from one or two clips behind the
currently selected clip. This is a great way to copy grades in scenes with a shot-reverse-shot
structure, where you’re cutting between two angles of coverage, each of which uses the
same grade.
To copy a grade from one clip back: Press comma (,)
To copy a grade from two clips back: Press colon (:)
Scroll
Scroll mode lets you quickly preview the effects of many different grades applied to clips in the
Timeline on the currently selected clip, with the option to either accept or reject the previewed
grade to which you’ve “scrolled.” This can be useful for checking to see if any of the previous
grades you’ve created in a scene will work for the currently selected clip.
To use Scroll mode:
1 Move the playhead to the clip to which you potentially want to copy a new grade. You
can use the PREV SCENE and NEXT SCENE buttons to move quickly.
2 Do one of the following to enter Scroll mode:
Press SCROLL on the Transport panel.
Press MODES, above the fourth trackball on the Center panel, then press the
SCROLL MODE soft key.
3 Now, do one of the following to preview different grades from other clips:
Press the PREVIOUS SCENE and NEXT SCENE soft keys to move from clip to clip in
the Timeline, previewing each grade to the current clip.
Turn the SCROLL SCENES knob to scroll smoothly along multiple clips in
the Timeline.
Turn the SCROLL FRAMES knob to scroll along different frames of any clip,
previewing the effects of keyframed grades at different points in time.
995
DaVincia Resolve Control Panels Part 6 – 55
Press the TOGGLE DECK KEYS soft key to use the transport controls on the
Transport panel to play through the Timeline, previewing grades as you go.
Press a number on the keypad of the Transport panel, and then the SCENE NUMBER
soft key, to jump to a clip and preview its grade.
As you scroll from clip to clip, a red outline indicates the clip with the grade
being previewed, and an orange outline indicates the current clip to which you’re
previewing each scrolled grade.
4 When you’re finished, do one of the following to either accept or reject a
scrolled grade:
Press EXIT AS WAS if none of the grades you scrolled through was suitable. This
exits Scroll mode and leaves the clip as it was previously.
Press EXIT AS IS if you’ve found a grade that works for the current clip. This exits
Scroll mode and copies the scrolled grade.
When you press the TOGGLE DECK KEYS soft key in Scroll mode, each of the
Transport Control buttons on the Transport panel functions as a means of previewing
the grades of other clips in the Timeline.
STEP FWD: Move to the next clip and preview its grade.
STEP REV: Move to the previous clip and preview its grade.
FWD: Plays (scrolls) forward at 1 scene per second, previewing each new grade as
it appears.
REV: Play (scrolls) the clips in reverse at 1 scene per second, previewing each new
grade as it appears.
FFWD: Shuttles (scrolls) forward through the Timeline at 4 scenes per second,
previewing each new grade as it appears.
RWD: Shuttles (scrolls) reverse through the Timeline at 4 scenes per second,
previewing each new grade as it appears.
Rippling Changes Using the
AdvancedControlPanel
DaVinci Resolve has a mechanism for rippling specific changes made to one clip to a range of
other clips in the Timeline. This is only possible using the controls of the DaVinci Resolve
Advanced Control Panel.
The general idea of the ripple function is that you select a clip, make a change, and then ripple
that change to a range of other clips. This rippled change can be applied to the same node in
each clip, or the change can be added as an appended node within each rippled clip.
The Ripple mode that’s used when you press the RIPPLE VALUE button can be changed in the
Color panel of the User Preferences. There are four options.
Exact values changed: Changes made to the current clip are rippled to the specified
clips using the exact parameters that were changed. For example, if Lift in the current
clip is changed to 0.75 of its range, each clip you ripple will have a Master Gain
setting of 0.75. Only parameters you adjust are rippled.
Percent value changed: Changes made to the current clip are rippled to the
specified clips by the percentage of change you made to the altered parameters. For
example, if the current clip has a Lift level of 1.00 and is changed to 0.90 units, then
the Lift setting of each clip you ripple will have a relative reduction of 10% relative to
its previous value.
996
DaVincia Resolve Control Panels Part 6 – 55
Unit value changed: Changes made to the current clip are rippled to the specified
clips by the same delta of change, using whichever units make sense for the effected
parameter. For example, if the current clip had a Lift of 0.80 and you increased it to
0.90, each rippled scene’s master gain level increases by 0.10.
All values are copied: The current clip’s grade is rippled to the specified clips in its
entirety. No comparison is made with the original clip’s parameters, and all memory
parameters are rippled.
The following procedure describes in detail how you can use the control panel to ripple a
change to a range of other clips. While this procedure may appear complicated, it’s just that
there are several options. Once you learn the sequence of commands, this process is actually
quite fast.
To ripple a change using the Ripple Mode soft key commands:
1 (Optional) Press MODES, then press RIPPLE MODES. Four commands appear mapped
to the middle soft keys of the Center panel, which can be used later to execute different
types of ripple operations.
2 Move the playhead to the clip you want to adjust.
3 Adjust the current clip that you want to ripple to other clips in the Timeline.
4 Define the range of clips you want to ripple to using the number pad on the Transport
panel. The following combinations will work:
An absolute range of clips is defined by entering two clip numbers separated by a
comma. For example, if you want to ripple the current change to clips 10 through 15,
you’d press “10, 15”
To specify every clip from the beginning of the Timeline, use the Minus (–) key.
Forexample, to specify a range of clips from the beginning to clip 20, you’d
press “–, 20”
To specify every clip to the end of the timeline, use the Plus (+) key. For example, to
specify a range of clips from the clip 50 to the end, you’d press “50, +”
To specify every clip in the whole Timeline, press “–, +”
5 (Optional) You can control whether the rippled change is applied in an appended node,
or an existing node, in every rippled clip:
If you want to apply the rippled change as a new node that’s appended to the end of
every rippled clip’s grade, press SHIFT DOWN.
Otherwise, the rippled change will be applied to the same node in every rippled clip
that you made your adjustment to in the current clip. In other words, if you made a
change to Node 2, it would be rippled to Node 2 of all the clips you specified. If one of
the rippled clips doesn’t have the same number of nodes, you may get an error.
6 To execute the ripple, do one of the following:
Press RIPPLE VALUE on the Transport panel to ripple a change using the currently
selected Ripple Mode in the Color panel of the User Preferences.
Press one of the Center panel soft keys corresponding to the ripple function you want
to perform. There are four soft keys:
Static Ripple: Changes made to the current clip are rippled to the specified clips
using the exact parameters that were changed. For example, if Lift in the current clip
is changed to 0.75 of its range, each clip you ripple will have a Master Gain setting of
0.75. Only parameters you adjust are rippled. Identical to the “Exact values changed”
ripple setting.

997
DaVincia Resolve Control Panels Part 6 – 55
Relative Ripple: Changes made to the current clip are rippled to the specified clips
by the percentage of change you made to the altered parameters. For example, if the
current clip has a Lift level of 1.00 and is changed to 0.90 units, then the Lift setting of
each clip you ripple will have a relative reduction of 10% relative to its previous value.
Identical to the “Percent value changed” ripple setting.
Absolute Ripple: Changes made to the current clip are rippled to the specified clips
by the same delta of change, using whichever units make sense for the affected
parameter. For example, if the current clip had a Lift of 0.80 and you increased it to
0.90, each rippled scene’s master gain level increases by 0.10. Identical to the “Unit
value changed” ripple setting.
Forced Ripple: The current clip’s grade is rippled to the specified clips in its entirety,
overwriting all previous nodes and parameters in the rippled clips.
The adjustment you made in step 4 is applied to the designated range of clips.
Admittedly, that was a long and detailed procedure, but the actual button sequences are
straightforward once you put them together. Here are some examples of button sequences that
ripple an adjustment you’ve just made in different ways:
“10, 15” then SHIFT DOWN then RIPPLE VALUE: Copies the change you’ve made to
the current clip, and applies it as a new node that’s appended to the end of clips ten
through fifteen.
MODES then RIPPLE MODES then “34, 45” then FORCED RIPPLE: Copies the
entire grade of the current clip, using it to overwrite the grade of clips 34 through 45.
MODES then RIPPLE MODES then “–, +” then SHIFT DOWN then RELATIVE
RIPPLE: Copies the change you’ve made to the current clip as a relative percentage,
and applies it as a new node appended to the end of every single clip in the
entire Timeline.
WARNING: Once you ripple a change in this manner, there is no going back. Since
Undo is a per-clip operation, there is no global undo for changes made to the entire
Timeline. Proceed with caution.

PART 7
1000
Using OpenFX and ResolveFX Part 7 – 56
Using OpenFX and ResolveFX
This chapter covers the use of ResolveFX and OpenFX plug-ins, that allow you to use the
built-in filters that come with DaVinci Resolve, as well as third party filters from a variety of
companies, to create complex effects and adjustments that aren’t possible using the ordinary
palette tools in the Color page.
ResolveFX 1001
OpenFX 1001
OpenFX Plug-ins Can Be Processor Intensive 1002
Browsing the OpenFX Library 1002
OpenFX Library Favorites 1003
Using ResolveFX and OpenFX in the Color Page 1004
Applying ResolveFX and OpenFX Plug-Ins 1005
Adding a Plug-In to a Corrector Node 1005
Adding a Plug-In As a Stand-Alone OFX Node 1005
ResolveFX and OpenFX Settings 1006
Editing Eects Using the Full Screen Viewer 1007
ResolveFX and OpenFX On-Screen Controls 1007
Motion Tracking ResolveFX and Compatible OFX Plug-ins 1008
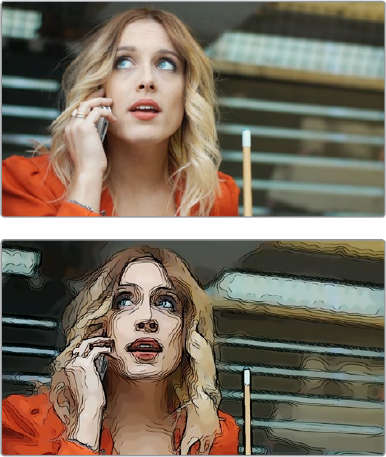
1001
Using OpenFX and ResolveFX Part 7 – 56
ResolveFX
ResolveFX are the built-in plug-ins that come with DaVinci Resolve. These plug-ins span the
gamut from blurs and complex color adjustments to stylized image treatments and lighting
effects to sharpen and repair operations that are too complex to accomplish using the palette
controls of the Color page.
An image Before/After using the Abstraction ResolveFX filter
Most ResolveFX plug-ins have been optimized for real-time playback, making it possible to
apply complex effects such as Lens Flares, Light Rays, Film Grain, or Warping, and make
adjustments while getting immediate, high-quality feedback, and enabling you to play each
variation of your effect as you work without the need to wait for rendering or caching to happen
first. Of course, if you’re working with extremely high-resolution or raw source media, if your
workstation is particularly old, or if you’re applying many ResolveFX all at once, your
performance may slow, necessitating the use of the Smart Cache.
OpenFX
OpenFX (OFX) is an open plug-in standard intended to enable easier development of cross-
platform visual effects plug-ins for a variety of applications. Popular plug-in packages include
the GenArts Sapphire plug-ins, Boris Continuum Complete, Red Giant Universe, and NewBlue
TotalFX, all of which are ubiquitous tools for feature and broadcast work. The available OpenFX
plug-in packages are also growing every year as this format becomes more widely adopted
among developers.
With OpenFX support, you can use plug-ins to do many stylized operations that would be
difficult or impossible to do using the other tools in DaVinci Resolve. Everything from lens flares,
optical blurs and prism effects, lens warp correction, film and video grain and damage effects,
dead-pixel corrections and more can be accomplished with the right plug-in collection.
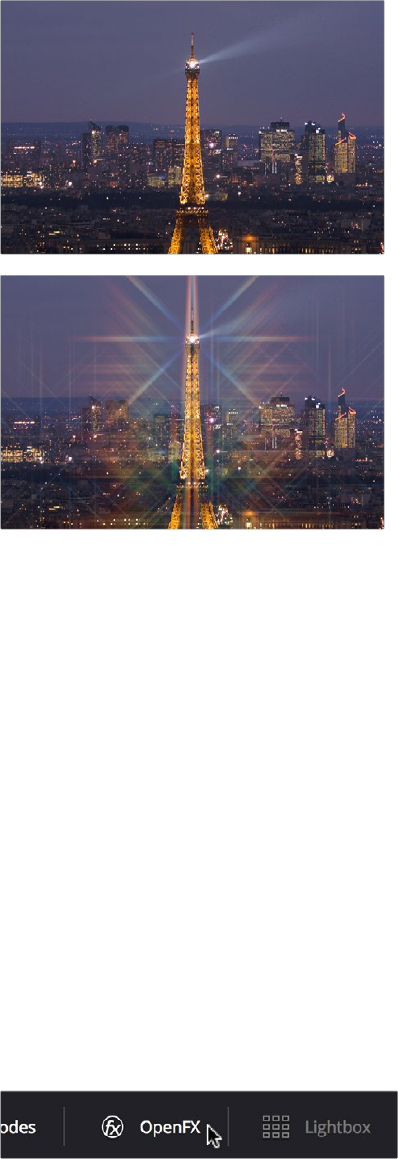
1002
Using OpenFX and ResolveFX Part 7 – 56
One of the many Sapphire OFX plug-ins from GenArts
The installation and licensing of OpenFX plug-ins is handled by a vendor’s own installer. Once
installed, OpenFX plug-ins appear within the Library of the Open FX Panel, which can be
opened by clicking the FX button at the top right of the Color page Interface Toolbar.
OpenFX Plug-ins Can Be Processor Intensive
Because they create such a wide variety of effects, some third-party OpenFX plug-ins can be
extremely processor intensive, all the more if you add multiple plug-ins to a single grade. If you
find your playback performance dropping because of a particularly expensive effects
operation, you can use the Smart Cache to automatically cache nodes and clips that have
OpenFX plug-ins applied to them. Once fully cached, you can play these clips back in real time,
at least until you change that clip’s grade again. For more information on caching an on
improving performance in DaVinci Resolve overall, see Chapter 5, “Improving Performance,
Proxies, and the Render Cache.”
Browsing the OpenFX Library
All of these built-in plug-ins appear within categories at the top of the OpenFX Library.
Click the FX button to open the OpenFX Library
When you click the FX button, the Open FX Panel opens out of the right side of the Node Editor
to show the Library, resizing the Viewer, Gallery, and Node Editor to make room. The OpenFX
Library is organized hierarchically. Each vendor’s plug-ins appear under a header with the name
of that plug-in collection, and possibly organized into categories, separated by headers with
Open or Close buttons that appear when you hover the pointer over them, which let show or
hide the contents so that you can make the Hierarchy as compact or spread out as you like.
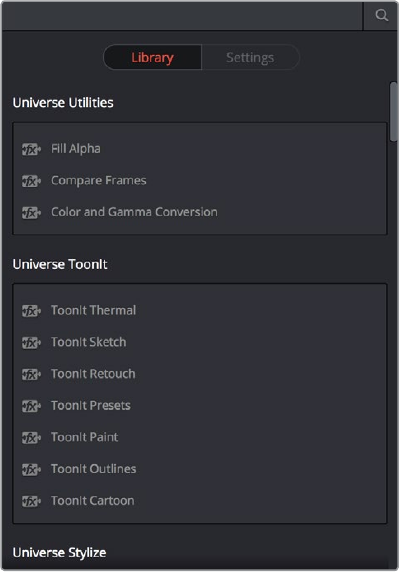
1003
Using OpenFX and ResolveFX Part 7 – 56
To open and close OpenFX categories, do one of the following:
Move the pointer over the header you want to open or close, and click the Close or
Open button that appears.
To open or close all headers at once, Option-click the Open or Close button
that appears.
The Library in the Open FX Panel showing third party
plug-ins from Red Giant
Since many OpenFX plug-in collections are quite large, an optional Search field can be opened
at the top of the Library that lets you quickly find plug-ins by name or partial name.
To search for an OpenFX filter by name:
1 Click the magnifying glass button at the upper right-hand corner of the OpenFX panel.
2 Type your search string into the Search field that appears. A few letters should be
enough to isolate only those plug-ins that have that character string within their name.
OpenFX Library Favorites
You can click on the far right of any ResolveFX or OFX filter to flag it with a star as a favorite
filter. When you do so, choosing Favorites from the Effects Library option menu filters out all
clips that are not favorites, letting you see only effects you most commonly use. To “de-favorite”
any effect, click its star to turn it off.
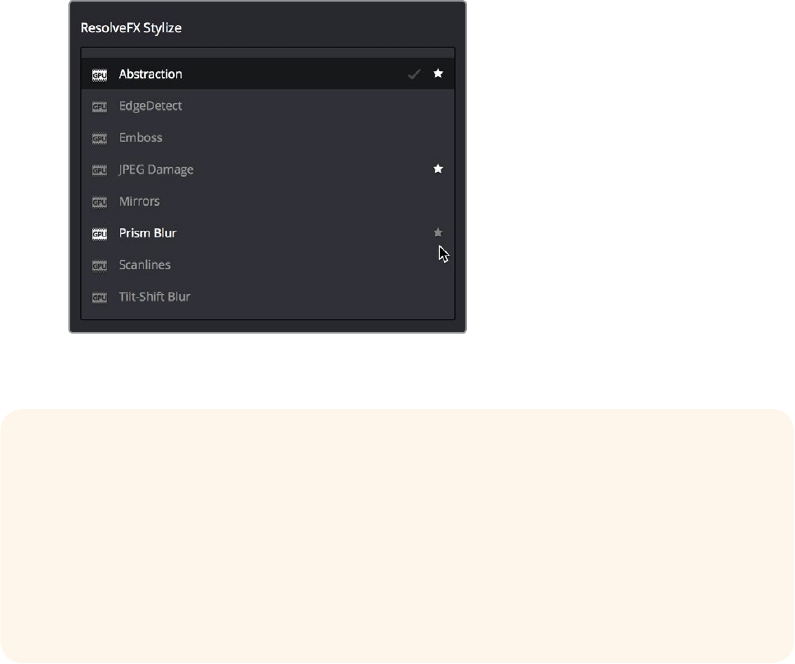
1004
Using OpenFX and ResolveFX Part 7 – 56
Stars indicate a flagged favorite effect
Using ResolveFX and
OpenFX in the Color Page
This section provides an overview of procedures that describe how you can work with OpenFX
plug-ins within the Color page.
Methods of working with OpenFX:
To add an OpenFX plug-in to a node: Drag a plug-in from the OpenFX Library onto a
node. If you drag a plug-in onto a node that already has a plug-in, the previous plug-in
will be overwritten.
To remove an OpenFX plug-in from a node: Right-click a node showing the FX badge,
and choose Remove OFX Plug-in from the contextual menu.
To add an OpenFX plug-in as a separate node: Drag a plug-in from the OpenFX
Library onto a connection line in the Node Editor. A new node is created, with a badge
at the upper-left-hand corner labeling it as an OFX node.
To edit the parameters of an OpenFX plug-in: Select any node with an FX badge,
and open the Open FX Panel to show the Settings list. You can switch to the Library by
clicking the Library button.
OFX Random Frame Access
Previous to DaVinci Resolve 12.5, third party OpenFX plug-ins could only access a
limited range of media at a time, which stopped certain types of plugins from being
able to do the multi-frame temporal analyses of clips they required to function. DaVinci
Resolve Studio 12.5 and later enables third-party OpenFX multi-frame random access,
so a wider variety of plug-ins and effects will work in DaVinci Resolve. This feature is
not available in the non-studio version of DaVinci Resolve.
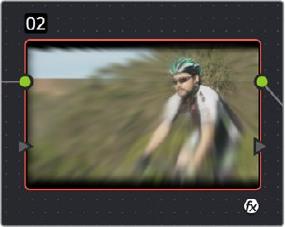
1005
Using OpenFX and ResolveFX Part 7 – 56
To sample a color parameter within an OpenFX plug-in: Some OFX plug-ins have a
color swatch parameter, which exposes an eyedropper button in the Settings. Clicking
the eyedropper turns the pointer into an eyedropper you can use to sample the
contents of the Viewer.
To use OpenFX on-screen controls in the Viewer: Select any node with an FX badge,
and the on-screen controls, if there are any, should appear in the Viewer. If not, make
sure the Viewer mode pop-up is set to FX.
Applying ResolveFX and
OpenFX Plug-Ins
Once you’ve found an OpenFX plug-in you want to use in the Library, there are two ways of
applying it within the Node Editor of the Color page. Which method you use depends on how
you want to use that plug-in.
Adding a Plug-In to a Corrector Node
If you want to combine an OpenFX plug-in with a grade within a single node, simply drag and
drop it onto a new corrector node to apply that plug-in’s effect to that node. Nodes with an
OpenFX plug-in applied have an FX badge in the upper right-hand corner.
A node with an OpenFX plug-in applied
You can only apply one OpenFX plug-in to a node at a time, but by using multiple nodes you
can add as many OpenFX plug-ins to your grade as you need.
When added to a corrector node, OpenFX are applied after Motion Blur and Noise Reduction,
but before anything else. This means you can use Motion Blur and Noise Reduction to pre-
process the image before it’s handed off to the OpenFX plug-in. This also means that all other
adjustments you make within that node are applied to the OpenFX plug-in’s output.
However, the principal advantage of adding plug-ins to corrector nodes is that you can use
secondary operations such as a window, a qualifier, or a key to limit that plug-in’s effect, much
as you would limit any other kind of adjustment you’d make with a corrector node.
Adding a Plug-In As a Stand-Alone OFX Node
If you want to add an OpenFX plug-in to your grade as a stand-alone effect, you can simply
drag any plug-in from the OpenFX Library onto a connection line of your grade, and an OpenFX
node will be created.
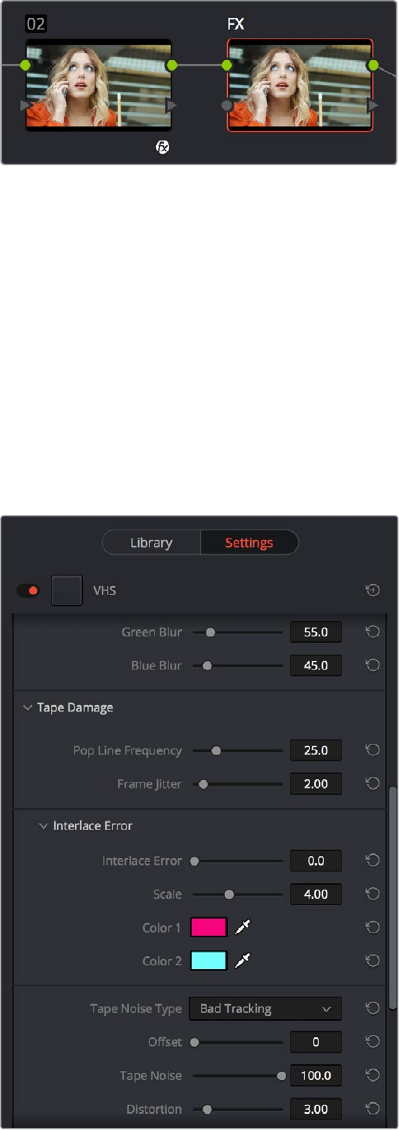
1006
Using OpenFX and ResolveFX Part 7 – 56
(Left) A node with an OFX filter applied to it,
(Right) A stand-alone OpenFX node
The advantage of this is that it’s fast to apply plug-ins in this way, and this can be an easier way
for you to add plug-ins that are more complicated, such as those having multiple inputs for
creating compositing effects.
ResolveFX and OpenFX Settings
When you select a node with a ResolveFX or OpenFX plug-in applied to it, the Open FX Panel
switches to the Settings, which show you every single parameter associated with that plug-in,
ready for customization
The parameters of the VHS plug-in from Red Giant Universe
Adjust any of the standard controls to manipulate that plug-in’s effect on the image.
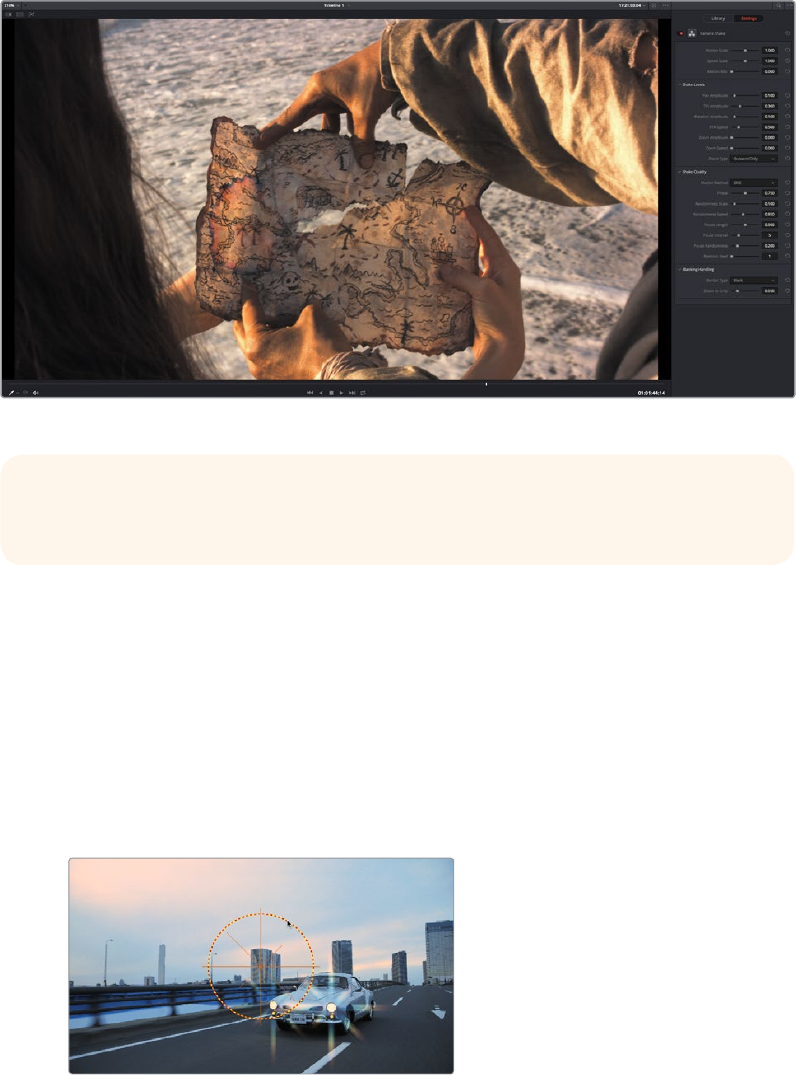
1007
Using OpenFX and ResolveFX Part 7 – 56
Editing Effects Using the Full Screen Viewer
Because the OpenFX panel can often be too short to present the full controls of more
complicated filters, it remains visible when you switch to the Full Screen Viewer mode in the
Color page. You can do so by choosing Workspace > Viewer Mode > Full Screen Viewer
(Shift-F). This makes it considerably easier to do detailed work within the larger Viewer, while
having all of your effects controls available in a taller panel off to the side.
The Full Screen Viewer mode of the Color page lets you keep the Settings panel open as you work
ResolveFX and OpenFX
On-Screen Controls
When you select a node with an OpenFX plug-in applied to it that has on-screen controls, the
Viewer Mode pop-up automatically changes to OpenFX Overlay mode, and the available
controls appear within the Viewer. Different plug-ins expose different custom controls, letting
you control the effect or manipulate the image, depending on that plug-in’s function.
Adjusting the on-screen controls exposed by the
GenArts Sapphire Glint Rainbow plug-in
TIP: You can also open and close the Node Editor while in Full Screen Viewer mode, if
you need to switch nodes while doing effects work.
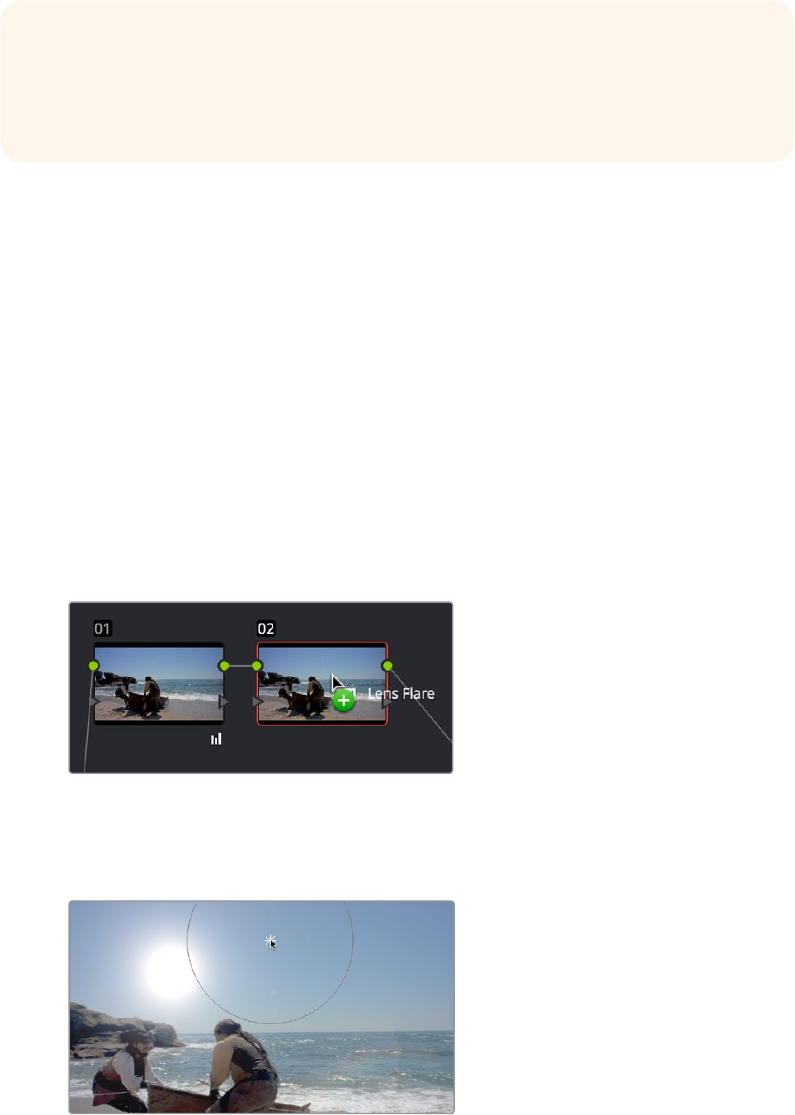
1008
Using OpenFX and ResolveFX Part 7 – 56
If for whatever reason you switch the Viewer to another on-screen control mode (for example,
showing the Window or Image Wipe controls), you can always switch back to the OpenFX
controls by choosing the OpenFX Overlay mode from the onscreen control pop-up menu
underneath the Viewer.
Motion Tracking ResolveFX and
Compatible OFX Plug-ins
ResolveFX that have position parameters, including Dent, Lens Flare, Light Rays (when “From a
Location” is selected), Mirrors, Radial Blur, Ripples, Vortex, and Zoom Blur can all be motion
tracked to follow the position of a moving subject in the frame using the point-based tracking in
the FX mode of the Tracker palette.
To match move ResolveFX to a feature using the FX tracker:
1 Create a new node, and drag the ResolveFX filter you want to apply onto that node to
apply the effect. In this example, we’re adding a Lens Flare effect, that has the position
parameters necessary to be match moved to follow the motion of the shot, and we’re
choosing the MIR-I 2.8/37 preset, which looks like a sun.
Applying a Lens Flare to the shot
2 If necessary, use the on-screen controls in the Viewer or the X Position and Y Position
sliders to move the ResolveFX effect to where you want it.
Moving the Lens Flare using the on-screen controls
TIP: You may find that as you work you want to temporarily hide or show the on-screen
controls in the Viewer so you can get an uncluttered look at the image you’re
adjusting. You can quickly toggle any set of on-screen controls off and on without
selecting Off in the menu by pressing Shift-` (tilde).
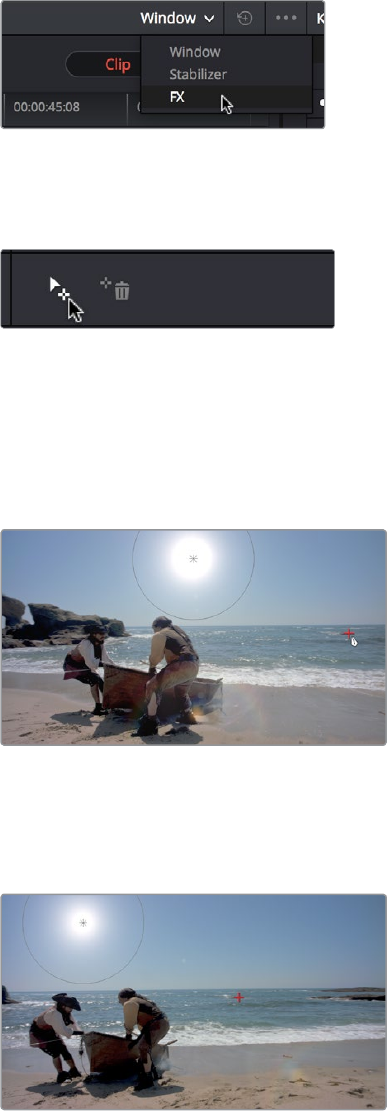
1009
Using OpenFX and ResolveFX Part 7 – 56
3 Next, open the Tracker Palette and choose FX from the mode pop-up.
Opening the FX tracker mode of the Tracker palette
4 Click the Add Tracker Point button, at the bottom left-hand side of the Tracker palette,
to add tracker crosshairs to the center the Viewer.
Adding a point tracker
5 Drag the crosshairs to a high-contrast detail (such as a small object or corner), and click
the track forward button. In this example, there’s a rock out at sea that will make a good
plane of motion for tracking a far-away sun. There is no inner or outer box to position
or resize while you do this; you just need to drag the crosshairs to center on the feature
you want to track.
Positioning the point tracker on a feature you want to track
6 Now, click the track forward button, and DaVinci Resolve will track the feature. The
ResolveFX applied to that node will simultaneously move to follow the track, and when
the tracking is done, you’re finished.
A successful track
After you’ve finished tracking, you can freely reposition the ResolveFX to offset it from
the track.
For more information about single-point tracking, see the “Point Tracker Workflows” section of
Chapter 46, “Motion Tracking Windows.”
1011
ResolveFX Part 7 – 57
ResolveFX
This chapter provides detailed explanations for each ResolveFX filter that’s available on the Edit
and Color pages. For more information on how to apply and adjust ResolveFX on the Edit page,
see Chapter 27, ”Editing, Adding, and Copying Effects and Filters.” For more information on how
to apply and adjust ResolveFX on the Color page, see Chapter 56, “Using OFX and
ResolveFX.”
Catalogue of ResolveFX Filters 1013
ResolveFX Blur 1014
Box Blur 1014
Directional Blur 1014
Gaussian Blur 1014
Lens Blur (Studio Version Only) 1014
Mosaic Blur 1014
Radial Blur 1015
Zoom Blur 1015
ResolveFX Color 1015
Color Compressor (Studio Version Only) 1015
Color Palette (Studio Version Only) 1016
Color Space Transform 1016
Color Stabilizer (Studio Version Only) 1017
Contrast Pop (Studio Version Only) 1019
Dehaze (Studio Version Only) 1019
Gamut Mapping (Studio Version Only) 1019
ResolveFX Generate 1020
Color Generator 1020
Grid 1020
ResolveFX Light 1021
Glow 1021
Lens Flare (Studio Version Only) 1021
Light Rays 1023
ResolveFX Refine 1023
Alpha Matte Shrink and Grow (Studio Version Only) 1023
Face Refinement (Studio Version Only) 1024
ResolveFX Repair 1028
Dead Pixel Removal (Studio Version Only) 1028
Deband (Studio Version Only) 1028
Time Lapse Deflicker (Studio Version Only) 1030
1012
ResolveFX Part 7 – 57
ResolveFX Sharpen 1031
Sharpen (Studio Version Only) 1031
Sharpen Edges (Studio Version Only) 1032
Soften and Sharpen (Studio Version Only) 1032
ResolveFX Stylize 1033
Abstraction (Studio Version Only) 1033
Edge Detect 1034
Emboss 1034
JPEG Damage 1034
Mirrors 1035
Prism Blur 1035
Scanlines 1035
Tilt-Shift Blur 1036
Watercolor (Studio Version Only) 1036
ResolveFX Texture 1036
Film Grain (Studio Version Only) 1036
ResolveFX Transform 1037
Camera Shake (Studio Version Only) 1037
Match Move (Studio Version Only) 1038
ResolveFX Warp 1046
Dent 1046
Lens Distortion 1046
Ripples 1046
Vortex 1047
Warper (Studio Version Only) 1047
Waviness 1050
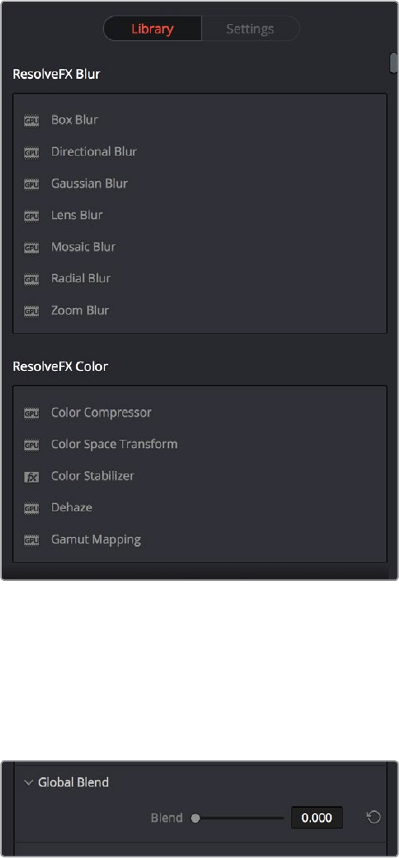
1013
ResolveFX Part 7 – 57
Catalogue of ResolveFX Filters
DaVinci Resolve comes with a set of ResolveFX filters, many of which have been optimized for
real time playback. These are located within their own category in the Effects Library of the Edit
page, and in the OpenFX browser of the Color page. These effects (or filters) work just like any
other OpenFX plug-in.
ResolveFX come in two types. Some are CPU-based, while most are GPU-accelerated,
depending on which type of processing is faster for a particular effect. Each ResolveFX filter’s
icon shows you which it is.
Icons show which ResolveFX filters are GPU-accelerated,
versus those that are optimized for CPU processing
In addition to the different parameters built into each filter, every single ResolveFX filter has a
Blend parameter that mixes that filter’s effect against the original image. Each filter’s Blend
parameter appears at the bottom of that filter’s settings.
The Blend slider found in the parameters of
every ResolveFX filter
1014
ResolveFX Part 7 – 57
ResolveFX Blur
The plugins in this category offer a wider variety of different blur methods than those found in
the Blur palette.
Box Blur
A variable quality blur that ranges from very low quality to very soft.
The Number of Iterations controls how smooth the resulting blur is, with 1 being the lowest and
most “boxy” level of quality, and 6 being the highest and smoothest level of quality. Horizontal
and Vertical Strength sliders let you adjust the width and height of blur, while a gang checkbox
lets you adjust these parameters together or separately. Border Type lets you choose how the
edges of the image are affected by this blur, options include Vignette 1, Vignette 2, Reflection,
and Wrap Around.
Directional Blur
A blur that’s constrained to a single angle.
Parameters include Blur Strength and Blur Angle. Border Type lets you choose how the edges
of the image are affected by this blur, options include Vignette 1, Vignette 2, Reflection, and
Wrap Around.
Gaussian Blur
What the name says.
Two sliders let you adjust the Horizontal and Vertical Strength independently, while a checkbox
lets you gang them together. Border Type lets you choose how the edges of the image are
affected by this blur, options include Vignette 1, Vignette 2, Reflection, and Wrap Around.
Lens Blur (Studio Version Only)
A high-quality simulation of optical lens blurring. Adjustable parameters let you achieve
different kinds of “bokeh” effects, which are similar to those produced by different combinations
of aperture design and lens spherical aberration corrections that affect the “circle of confusion”
that creates visible shapes in areas of the picture with pinpoint highlights.
Iris Shape lets you choose from a Triangle, Square, Pentagon, Hexagon, Heptagon, or Octagon
shaped iris, which influences the shape of the bokeh effect. Blur Strength adjusts the overall
amount of blur. Blade Curvature lets you round off the edges of the Iris Shape you selected,
while Rotation lets you adjust the angle the shape appears at. Anamorphism lets you adjust the
aspect ratio of this effect in order to match the lens blur created by anamorphic lenses. Chroma
Shift lets you simulate chromatic aberration within the blur effect. Highlights lets you adjust how
the highlights of the image affect the blur, dilating or eroding the image more or less depending
on how high Smooth Strength is.
Mosaic Blur
A simple, pixelated blur suitable for hiding the face of anonymous witnesses.
Pixel Frequency lets you adjust the size of each pixel, thus determining the density and
resolution of the resulting grid of pixels. Smooth Strength lets you blur the edges of adjacent
pixels. Border Type lets you choose how the edges of the image are affected by this blur;
options include Vignette 1, Vignette 2, Reflection, and Wrap Around.
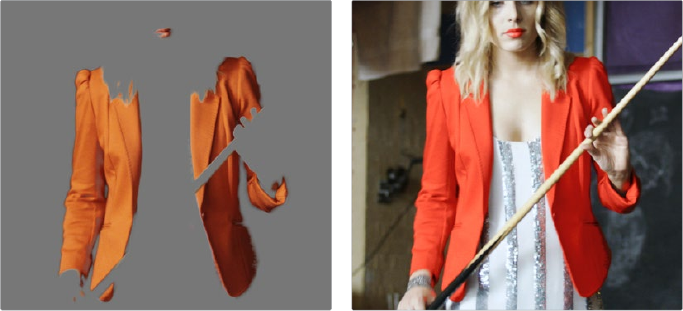
1015
ResolveFX Part 7 – 57
Radial Blur
A blur effect that simulates the motion blur that would occur were the image spinning around its
center point.
Smooth Strength adjusts how much blurring is applied. X and Y Position let you move the center
of the blur. Border Type lets you choose how the edges of the image are affected by this blur;
options include Vignette 1, Vignette 2, Reflection, and Wrap Around.
Zoom Blur
A blur effect that simulates the motion blur that would occur were a camera moving toward the
image. Smooth Strength adjusts how much blurring is applied. X and Y Position let you move
the center of the blur. Border Type lets you choose how the edges of the image are affected by
this blur; options include Vignette 1, Vignette 2, Reflection, and Wrap Around.
ResolveFX Color
These plugins provide color processing methods that aren’t available in any of the Color
Page palettes.
Color Compressor (Studio Version Only)
This filter lets you compress a range of colors towards single target color. It works best when
applied to similarly colored regions that have been isolated with a secondary qualifier or
window. For example, if you’re adjusting an irregularly lit product such as a soda can or a dress
that must have a very specific hue, you can isolate that item, and use this filter to push the
range of Hue, Saturation, and Luminance closer to the ideal color that’s identified using the
color picker.
(Before/After) Using the Even filter to compress oritinal range of hues of
the jacket into a narrow “target” range within a secondary operation
The Target Color control lets you choose a single set of Hue/Saturation/Luminance values you
want to push all other colors towards. The Compress Hue, Compress Saturation, and Compress
Luminance sliders then let you individually compress the range of colors you’re adjusting in the
image to more and more closely match the image. At 0, no compression is applied, at 0.500 the
original range of colors in the image have been adjusted to be halfway between their original
values and the values of the Target Color, and at 1.000 the original range of colors has been set
to be identical to the Target Color.
1016
ResolveFX Part 7 – 57
Color Palette (Studio Version Only)
More of an analysis tool than a creative effect, this plug-in offers four Display Modes from the
pop-up menu at top, Color Palette, Shadow Region, Midtone Region, and Highlight Region.
When Display Mode is set to Color Palette, by default the eight most dominant colors in the
image are displayed as rectangular swatches along the bottom, and the eight most dominant
colors in each of the three main zones of image tonality (shadow, midtone, highlight) are
displayed as smaller rectangular patches just above. This lets you see, at a glance, the color
palette of any given shot, and this can be output for intrepid art directors who find this useful.
The number of isolated colors can be adjusted via the Number Colors slider, which can be set
to display anywhere from 8 to 24 patches. The definition of where shadows, midtones, and
highlights end and begin is controlled by the Shadow and Highlight Threshold sliders.
However, you can also set Display Mode to Shadow Region, Midtone Region, or Highlight
Region to see a visual preview of which parts of the image fall into which regions (as currently
defined by the Shadow and Highlight Threshold sliders). These previews are displayed with the
current tonal region appearing saturated, and all other parts of the image appearing black.
Color Space Transform
Lets you perform the kind of color transforms that LUTs do, but instead of using lookup tables,
this plug-in uses the same math used by Resolve Color Management (RCM) in order to do
extremely clean color transforms without clipping.
Color Space Transform
Exposes four pop-up menus that let you set an Input Colorspace, Input Gamma, Output
Colorspace, and Output Gamma, in order to do controlled transforms from the Input settings to
the Output settings, right within a grade. Resolve Color Management does not have to be
enabled to use this filter.
Gamut Mapping
Starting with DaVinci Resolve 14, the Color Space Transform plug-in provides Gamut Mapping
controls to accommodate workflows where you need to transform one color space into another
that has a dramatically larger or smaller gamut. These controls are similar to those found in the
Color Management panel of the Project Settings.
Tone Mapping Method lets you enable tone mapping to accommodate workflows where you
need to transform one color space into another with a dramatically larger or smaller dynamic
range by automating an expansion or contraction of image contrast in such a way as to give a
pleasing result with no clipping. There are three options, None, Simple, and
Luminance Mapping.
Choosing “Simple“ uses a simple curve to perform this transformation, compressing
or expanding the highlights and/or shadows of the timeline dynamic range to better fit
the output dynamic range. Note that the “Simple” option maps between approximately
5500 nits and 100 nits, so if you’re mapping from an HDR source with more than
5500nits to an SDR destination there may still be some clipping of the highlights above
5500 nits.
Choosing “Luminance Mapping” lets you use a customized curve operation to
remap the gamma of the image and enables the Max. Input Luminance, Max. Output
Luminance, and Avg. Input Luminance sliders.

1017
ResolveFX Part 7 – 57
The Max. Input (nits) checkbox and slider lets you set the reference maximum
Luminance value (in nits) that you want to remap to the value set by the Max. Output
(nits) checkbox and slider, which governs the maximum luminance level of the Output
color space (in nits). Using these two sliders together, you can set which value from the
Input Gamma is mapped to which value of the Output Gamma.
The Adaptation slider is designed to compensate for large differences in the viewer’s
state of visual adaptation when viewing a bright image on an HDR display versus
seeing that same image an SDR display. For most “average” images this setting works
best set between 0-10. However, when you’re converting very bright images (for
example, a snow scene at noon), then using a higher value will yield more image detail
within the highlights.
Gamut Mapping Method accommodates workflows where you need to transform one color
space into another with a dramatically larger or smaller gamut by helping to automate an
expansion or contraction of image saturation in such a way as to give a pleasing and naturalistic
result with no clipping. Choosing Saturation Mapping from this menu enables saturation
mapping to fit the range of saturation values from the Input Color Space and Gamma into the
Output Color Space and Gamma. It enables the Saturation Knee and Saturation Max. controls.
The Saturation Knee slider sets the image level at which saturation mapping begins.
Below this level, no remapping is applied. All saturation values from this level on up are
remapped according to the Saturation Max. slider. A value of 1.0 is maximum saturation
in the currently selected output color space.
The Saturation Max slider sets the new maximum level to which you want to either raise
or lower all saturation values that are above the Saturation Knee setting. A value of 1.0
is maximum saturation in the currently selected output color space.
Color Stabilizer (Studio Version Only)
Designed to deal with clips that have inconsistencies in exposure and color, caused by manual
changes to a lens’ iris setting or by a camera’s auto exposure settings causing unwanted
changes to color and brightness in the middle of a shot. The Color Stabilizer plug-in analyzes a
frame of the clip that represents the desired exposure and color, and automatically adjusts
every other frame of the current clip to match the analyzed levels.
There are two ways of using the Color Stabilizer:
The easiest way is to choose Entire Frame from the Region For Analysis pop-up menu.
Then, move the playhead in the Viewer to the frame that represents the contrast and
color you want the entire clip to have, and click the Analyze This Frame. Now, if you
play through the clip, changes in contrast and color should be gone. This method
works best for clips where the inconsistency you’re trying to eliminate is fairly uniform,
affecting the entire picture.
Another way is to choose Overlay Rectangle from the Region For Analysis pop-up
menu. This causes an on-screen rectangle to appear that you can resize and position
over a specific region you want to sample for the duration of the clip. If the selected
feature you’re analyzing is moving, then you can use the FX Tracker to track the subject
Important: The Color Stabilizer gives you the best results with clips that don’t have
clipped highlights. When used in the Color page, it’s recommended to grade the
image to bring all the highlights you want somewhere at or under a value of 1023, and
then apply the Color Stabilizer to a node after this adjustment.
1018
ResolveFX Part 7 – 57
so the selection box follows it (this is important for a consistent result). Once this is
set up, move the playhead in the Viewer to the frame that represents the contrast
and color you want the entire clip to have, and click the Analyze This Frame. Now, if
you play through the clip, changes in contrast and color should be gone. This method
works best for clips where there are parts of the picture that are supposed to have
a change in brightness or color, such as when something moves into the frame, or a
reflected highlight comes and goes because of the lighting scheme, at the same time
as an otherwise undesirable change in contrast or color. You can use the selection box
to specifically analyze the part of the frame that has the unwanted exposure change,
while ignoring the desirable exposure change.
Depending on what option you choose from the Region for Analysis pop-up menu, different
additional options appear.
Analysis Region
If you choose “Entire Frame” from the Region For Analysis pop-up, these controls don’t appear.
A set of Source X/Y Position and Source Width/Height parameters let you transform the
selection box that defines which part of the image is being analyzed.
Channels to Stabilize
Once you’ve analyzed the frame that represents the best contrast and color for that clip, the
Channels to Stabilize controls let you choose how you want to handle making the correction.
the What to Stabilize pop-up menu lets you choose between stabilizing White Balance and
Brightness, or R, G, B Channels Separately.
If you choose White Balance and Brightness, two checkboxes let you choose
whether or not you want to include Stabilize White Balance and Stabilize Brightness
independently from one another.
If you choose R, G, B, channels separately, three checkboxes appear letting for
Stabilize Red, Green, and Blue Channel, so you can pick which particular channels you
want to correct.
The “Stabilize Levels How” pop-up lets you choose how to make the correction, with options to
Match Levels and Contrast, Lift to Consistent Level, Gain to Consistent Level, each of which
uses a subtly different method to make the necessary correction, so if one method doesn’t
work for the particular problem your clip is exhibiting, you can try the other methods to try and
get a better result.
Captured Analysis Values
Once you’ve analyzed the frame, another set of parameters appear showing the captured
analysis values upon which the automated correction is based, so that you can make manual
adjustments if necessary to improve the result. The parameters that are shown depend on the
option you chose from the What to Stabilize pop-up menu.
If you chose White Balance and Brightness, then you’ll have a Normalized White
Balance color control, and Low Level and High Level sliders.
If you chose R, G, B Channels Separately, then you’ll have Red, Green, and Blue High
and Low Level sliders.
1019
ResolveFX Part 7 – 57
Contrast Pop (Studio Version Only)
A more extreme and selective version of the Midtone Detail control found in the Color Wheels
palette, designed to add either sharp high-contrast looks, or soft low-contrast looks to a
selective portion of the tonal range of the image.
Detail Amount lets you choose how much of this effect to apply. At 0, no effect is applied.
Atpositive values progressively sharper contrast is added, while at negative values
progressively softer low-contrast is applied. Detail size lets you choose which structures of the
image are affected by this localized contrast adjustment, from smaller to larger.
The Low and High Threshold values let you define what range of image tonality is affected by
this filter, allowing you to omit either shadows or highlights from this operation. Softness lets
you soften the transition between the affected and unaffected areas of the image.
Dehaze (Studio Version Only)
Designed to let you make fast, selective adjustments to color and contrast to reduce the visible
effects of smog, airlight, and haze in an image.
The Dehaze Strength slider applies a simultaneous color and contrast adjustment. Raising
Dehaze Strength subtly increases contrast (especially in the shadows) while rebalancing color
towards the complement of the currently selected Haze Color and selectively intensifying
saturation. Lowering Dehaze Strength decreases contrast and rebalances color towards the
selected Haze Color itself while selectively lowering saturation. The Shadow slider raises or
lowers the shadows of the image, while the Highlight slider lets you raise or lower the
highlights, as you probably expected.
Gamut Mapping (Studio Version Only)
The Color Space Transform plug-in provides Gamut Mapping controls to accommodate
workflows where you need to transform one color space into another that has a dramatically
larger or smaller gamut. These controls are identical to those found in the Color Space
Transform plug-in’s Gamut Mapping group and are similar to those found in the Color
Management panel of the Project Settings.
The Gamma pop-up menu lets you specify what type of gamma the clip is supposed to have, so
set this to whatever matches that image (this may match the timeline color space, but it depends
on how you’re working).
Tone Mapping Method lets you enable tone mapping, to accommodate workflows where you
need to transform one color space into another with a dramatically larger or smaller dynamic
range by automating an expansion or contraction of image contrast in such a way as to give a
pleasing result with no clipping. There are three options, None, Simple, and
Luminance Mapping.
Choosing “Simple“ uses a simple curve to perform this transformation, compressing
or expanding the highlights and/or shadows of the timeline dynamic range to better fit
the output dynamic range. Note that the “Simple” option maps between approximately
5500 nits and 100 nits, so if you’re mapping from an HDR source with more than 5500
nits to an SDR destination there may still be some clipping of the highlights above
5500 nits.
Choosing “Luminance Mapping” lets you use a customized curve operation to
remap the gamma of the image and enables the Max. Input Luminance, Max. Output
Luminance, and Avg. Input Luminance sliders.
1020
ResolveFX Part 7 – 57
The Max. Input Luminance slider lets you set the reference maximum Luminance
value (in nits) that you want to remap to the value set by the Max. Output Luminance
slider, which governs the maximum luminance level of the Output color space (in nits).
Using these two sliders together, you can set which value from the Input Gamma is
mapped to which value of the Output Gamma.
The Avg. Input Luminance slider is designed to compensate for large differences
in the viewer’s state of visual adaptation when viewing a bright image on an HDR
display versus seeing that same image on an SDR display. For most “average” images
this setting works best set between 0-10. However, when you’re converting very
bright images (for example, a snow scene at noon), then using a higher value will
yield more image detail within the highlights.
Gamut Mapping Method accommodates workflows where you need to transform one color
space into another with a dramatically larger or smaller gamut by helping to automate an
expansion or contraction of image saturation in such a way as to give a pleasing and naturalistic
result with no clipping. Choosing Saturation Mapping lets you remap the saturation values of the
image. It enables the Saturation Knee and Saturation Max. controls.
The Saturation Knee slider sets the image level at which saturation mapping begins.
Below this level, no remapping is applied. All saturation values from this level on up are
remapped according to the Saturation Max. slider. A value of 1.0 is maximum saturation
in the currently selected output color space.
The Saturation Max slider sets the new maximum level to which you want to either raise
or lower all saturation values that are above the Saturation Knee setting. A value of 1.0
is maximum saturation in the currently selected output color space.
ResolveFX Generate
These plug-ins generate imagery that can be used within grades and composites in
different ways.
Color Generator
Generates a single color using a color picker control. Useful in conjunction with a layer node’s
ability to mix a color with an image using different composite modes.
Click the color picker and use the resulting color controls to choose a color to be generated.
You can also click the eyedropper to sample a color from the image in the Viewer; the
eyedropper always samples the image from the input of the current node, regardless of how
the current image looks.
Grid
As the name implies, generates a grid with two sets of properties.
General
The Row Cells and Column Cells sliders let you choose how many cells to divide the grid into,
both vertically and horizontally.
The Pan, Tilt, Zoom, Rotate, Width, Height, ShearX, ShearY, Pitch, and Yaw controls let you
transform the grid to serve whatever purpose is necessary.
1021
ResolveFX Part 7 – 57
Line Properties
The Line Color control and accompanying eyedropper lets you choose a color with which to
draw the grid. Individual Hor. Line Width and Ver. Line Width sliders let you adjust the thickness
of all horizontal or all vertical lines. The Major Line Spacing slider lets you set every nth line to
be thicker, while the Major Line Width control lets you choose how thick to make these
major lines.
ResolveFX Light
The plugins in this category all replicate different optical and lighting effects. While most have
been designed to quickly give you realistic results, all can be pushed harder to provide many
artistic effects.
Glow
A sophisticated, soft glow effect that’s highly customizable.
Select Output lets you preview the image with different stages of the glow effect applied,
viewing the Shiny Regions, Glow Alone, or the Glowing Image. Shine Threshold defines the
luminance level at which shine appears on the image. Spread defines how far out shine extends
from areas of the picture that trigger it. H/V Ratio lets you adjust the proportion of horizontal to
vertical spread, allowing you to create “streaky” shine that extends farther in a particular
dimension.
Relative Spread Red/Green/Glue lets you adjust the spread within each color channel by a
different amount. Brightness adjusts the intensity of the glow effect. Colorize lets you tint the
glow. Glow framing lets you choose what happens when shine hits the edge of the frame,
whether it’s amplified by “Reflect in Camera” or whether it’s moderated by a “Vignette” effect.
Composite Type lets you choose a composite mode to use to blend the glow effect with the
image. Opacity lets you adjust the transparency of the effect.
Lens Flare (Studio Version Only)
Simulates different kinds of lens flares resulting from the interplay of light bouncing within
layered optical elements in a lens. Lens Flares are procedurally generated, so their resolution
will be as high as that required by your project. Four groups of controls give you a lot of ways to
customize the presets to create your own effect:
Lens Flare Preset
You can choose a type of flare from the Lens Flare Preset pop-up. If you manipulate the controls
to create your own effect, this pop-up switches to Custom.
Select Output
The Select Output pop-up lets you switch between viewing the Final Image (showing the lens
flare composited against the current clip), Flare Elements Alone (showing you the isolated flare,
making it easier to adjust), and Source Mask or Magnified Source Mask (which let you see the
mask created by the Light Source Masking controls below).
1022
ResolveFX Part 7 – 57
Light Source Masking
These controls let you create a quick and dirty luma key to create a mask that you can use for
occluding the lens flare effect with foreground elements in the scene. For example, if you’re
using lens flare to simulate the sun in the sky, these controls let you mask trees in the
foreground so that the lens flare appears to be behind the trees, as the sun would be.
Turning on Enable Light Source Masking enables the Mask Threshold and Virtual Light Source
Size sliders. You can then choose either Source Mask or Magnified Source Mask to see the
mask that’s created by raising the Mask Threshold slider.
Raising the Mask Threshold slider pulls a fast Luma Key that limits the flare to areas of the
picture where the light source of the flaring can “shine through.” The Light Source Size slider
then determines how quickly the center of a flare will disappear behind the luma-keyed mask
you’ve created; higher values (simulating bigger light sources) will disappear more slowly when
passing “behind” a feature of the image being keyed by the Mask Threshold slider.
Position
Position parameters let you adjust the X and Y Position of the light source causing the flare. You
can motion track elements within the scene using the FX mode of the Tracker palette.
Global Corrections
The Global Corrections group have parameters that let you quickly adjust the overall quality of
the flare effect.
Global Scaling lets you make every element larger and smaller. Anamorphism lets you deform
the flare elements to simulate an anamorphic lens’ stretching effect. Lens Center X and Y
position lets you offset the center of the simulated lens that’s causing the flaring, about which
the various elements of the flare pivot. Global Defocus lets you blur the flaring. Global
Brightness lets you raise and lower the level of the flaring. Global Saturation lets you adjust the
color intensity of the flaring. Colorise Result, and Colorization Color let you tint the overall
flaring effect; Colorise Result lets you choose how much to tint the flare, and the Colorization
color picker lets you choose which color to use with either a color control or eyedropper to
sample color from the source RGB image of the current node.
Aperture
The Aperture parameters let you adjust how many blades make up the iris (you can choose
from 5 to 16), and the angle of the resulting Aperture shape. This shape affects the look of
aperture-shaped “ghosts” and the starburst element of each flare.
Elements
The Elements pop-up lets you expose the customization controls for each of the layers and
elements that create the simulated lens flare. Up to ten levels of elements can contribute to a
lens flare effect.
Available elements in this pop-up menu include Full-Screen Glare (an overall glare effect
covering the entire screen), Flare Spot (the central glow), Starburst (rays of light stretching out
from the center of the flare), and seven layers of Ghost elements (different optional shapes for
each lens element you want to simulate).
Each of the Ghost element layers can use one of five types of shapes that it can generate,
including Aperture Shape (a shape identical to the aperture), Anamorphic Streak (a wide
horizontal artifact typical of anamorphic lenses), Disc Shape (a ring artifact), Bubble Shape (an
oval with haze within), or Corona Rays (a ring of streaks pointing outward). Each element and
ghost shape has a different set of parameters unique to that type of element.
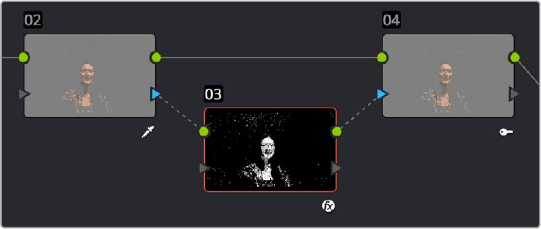
1023
ResolveFX Part 7 – 57
Light Rays
A “rays of light” effect that simulates volumetric lighting emerging from light sources defined by
a threshold you define. The effect mimics what are sometimes called “god rays” in the sky, or
other highly directional glow effects.
Main Controls
Select Output lets you preview the image with different stages of the Lightray effect applied,
viewing the Final Image, Lightrays Alone, and Source Regions. Source of Rays lets you choose
the emitter of the rays, using Bright Regions or Edges. Source Threshold is a slider that lets you
choose the limit at which light areas of the image emit rays.
Position
Position parameters include the Ray Directions pop-up menu that lets you choose either From a
Location, which lets you choose an X or Y position to define a point of origin that defines the
angle of the light beams, or At an Angle, which lets you choose an overall orientation for
the rays.
Appearance
Appearance parameters include Ray Dropoff with options for Default (soft), Keep Shape of
Source, CCD Bloom Harsh, and CCD Bloom Soft, as well as Length, Detail, Brightness, and
Color of the rays.
ResolveFX Refine
These plugins let you make different kinds of targeted improvements.
Alpha Matte Shrink and Grow (Studio Version Only)
This filter lets you refine the edges of alpha and key mattes in a variety of ways, shrinking and
growing the edges, and opening and closing holes that appear within a matte. In the Color
page, this filter can be applied to Qualifier or Window keys that have been routed to the RGB
input of a corrector node, for adjustment and refinement, before connecting the result to the
KEY input of a subsequent node for use isolating an adjustment.
AlphaMatteShrinkGrowCorrectorNode
Applying the Alpha Matte Shrink and Grow filter to a key matte that’s fed to the RGB input of a
separate node
The Operation pop-up menu lets you choose how you want to modify the alpha channel/key.
You can choose Shrink or Grow to dilate or erode the edges of the matte with great accuracy.
Or, you can choose Opening or Closing to plug or expand holes within the key to clean up a
ragged matte.
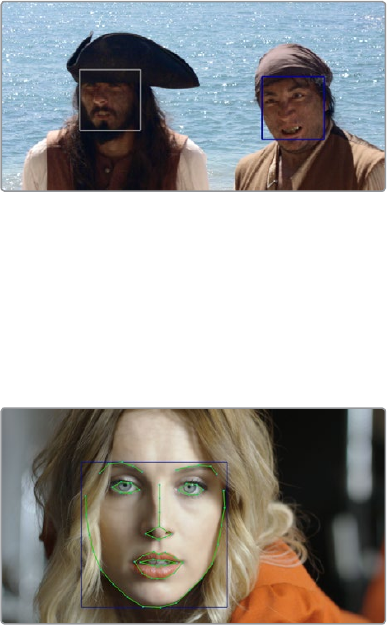
1024
ResolveFX Part 7 – 57
The Operator Shape pop-up menu lets you choose how corners and angles in the edges of the
key are handled when you grow or shrink it. Circle is the default, and results in even expansion
around the surface of the key that eventually averages all angles into a circular shape if you use
extreme Radius settings. Square averages all angles into a more rectangular shape if you use
extreme Radius settings. Diamond averages all angles into a diamond shape if you use extreme
Radius settings.
The Operator Radius slider adjusts how much to Shrink, Grow, Open, or Close the key, while the
Repeat Operation slider alters the effect of the Operator Radius setting to create more extreme
adjustments.
Face Refinement (Studio Version Only)
Face Refinement is an incredibly sophisticated yet easy-to-use filter that lets you quickly make
very targeted adjustments to people’s complexions. When you apply this filter, imaging
techniques are used to automatically detect a face, which is automatically tracked so long as it’s
somewhat turned towards the camera.
If multiple faces are present in the frame at the position of the playhead, boxes will be drawn
over each detectable face. Click any of these boxes to choose which face you want to refine,
and that box will be highlighted in blue.
When multiple faces are detected, you can click a
box to choose which one to work on
If only one face is present, no boxes appear and this step is not necessary. After you’ve
selected which face to track (if necessary), you need only click the Analyze button at the top of
the Face Refinement controls to “auto-magically” track the face through the trackable range of
motion that this plug-in is capable of, and an outline of the face’s major features appears to let
you follow its progress.
The Face Refinement filter automatically detecting
a performer’s face
Once the face has been tracked, you’re ready to work. This plug-in divides the tracked face into
different zones for common operations colorists often perform to quickly eliminate blemishes,
adjust the hue and saturation of complexions in regionally appropriate ways, modify lighting,
sharpen desirable detail, and refine makeup. Because all adjustments are fit to the proportions
of the face that’s been detected and tracked, all you need to do is make the adjustments you
need and DaVinci Resolve takes care of the rest.
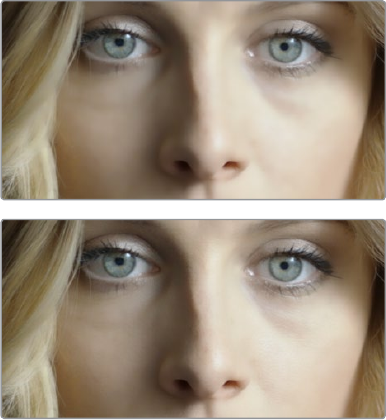
1025
ResolveFX Part 7 – 57
Main Controls
The Analyze button initiates the process of using the facial detection of the Face Refinement
plug-in to detect the face you want to make adjustments for, and track its motion throughout the
range of the clip. You only need to do this once, and the data will be stored
The Smoothing slider removes detail from the areas isolated by the Skin Mask controls,
smoothing the complexion. You can then use the Details size and Detail sliders to selectively
put subtle skin details back into the image; Detail size determines the maximum size of details
you want to put back into the face, and Detail is a sharpening operation that lets you adjust how
visible these small details are. By combining smoothing and subtle preservation of small details,
you can get a much more naturalistic result than were you to simply leave the entire face
unnaturally smooth.
(Top) Smoothing complexion, (Bottom) Using Detail Size and
Detail to put natural texture back into the smoothed result
The Contrast slider lets you lighten the face in a natural way by keeping the shadows dark even
while you brighten the face, making it easy to bring actors out of the background.
Skin Mask
The Use mask checkbox enables DaVinci Resolve to sample the dominant skin tone values
within the face to create a complexion-focused key to isolate the skin tones of the image.
However, since it’s still possible to have blonde hair, wood panelling, or other skin-colored
features in the frame that inadvertently get included in this key. Turning on the Use face mask
checkbox places a circular garbage mask that follows the face to eliminate these accidental
inclusions, and the Face mask size and Face mask softness sliders let you adjust this mask to
better fit the face you’re working on, if necessary.
The Refine mask slider lets you adjust the mask to smooth or eliminate gaps in the key, which
can be made visible by turning on the Show mask checkbox. Finally, to impress your clients and
see how well Face Detection is tracking the face you’re working on, you can turn on the Show
overlay checkbox, which turns on the wireframe tracking that shows you which facial details are
being detected.

1026
ResolveFX Part 7 – 57
Limiting the key with the face mask
Color Grading
The Midtone slider lets you add a more luminous quality to the skin tone, while Color boost
specifically boosts saturation in the lowest saturated parts of the face. Tint provides a limited
range of naturalistic hues emphasizing orange through red (but extending to green and
magenta) with which to tweak complexion. If you find these adjustments are making the
shadows too colorful, the Desaturation shadow slider lets you selectively desaturate the
darkest shadows on the face to keep things looking natural, or to desaturate more aggressively
in order to stylize the face in a different way. Shine Removal is an inverse contrast adjustment
designed to
Eye Retouching
The Sharpening slider lets you selectively add sharpening just to the eyes and eyelashes,
which lets you instantly add focus to any performer. The Brightening slider lets you whiten the
eyeballs, while the Eye Light slider lets you brighten the region of the face around the eyes
that’s often thrown into shadow by the subject’s forehead in situations with imprudent lighting.
The Eyebag Removal slider uses a variety of techniques to smooth, color-adjust, and brighten
the area under the eyes most susceptible to eye bags with tired talent.
(Top) Eyes with no special adjustment,
(Bottom) Eyes with adjustment
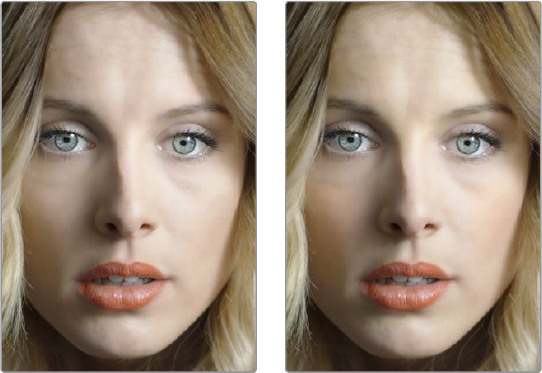
1027
ResolveFX Part 7 – 57
Lip Retouching
The Hue slider lets you adjust the color of a subject’s lips or lipstick, while the Saturation slider
lets you adjust the intensity of lip color. Upper Lip Smooth lets you smooth out fine age lines
that can appear above lips.
Blush Retouching
The Hue slider in this group lets you modify the hue of the blush region of a subject’s cheek,
letting you correct an unwise makeup choice, or push a subject’s blush color around to add
makeup that wasn’t there. The Saturation slider then lets you intensify or remove blush color.
About Forehead, Cheek, and Chin Retouching
The next three groups of controls borrow a technique from portrait painters, who’ve long taken
advantage of the “traffic light” approach to rendering skin hues, that observes that foreheads
are often a bit yellow, the middle of the face is usually a bit red, and chins can be a bit green.
Acombination of unequal sun exposure, capillary distribution, and follicle growth account for
this, but the bottom line is that faces are seldom a single unified hue. This means that there may
be a region of the face that would benefit from individual adjustment (cheeks that have gotten
too much sun, for example). But it also means that when you allow a bit of hue variation into your
face grade, you can achieve a more naturalistic result.
(Left) A face graded with a single hue, (Right) A face graded with
slight variation in the forehead, blush area, and chin
Forehead Retouching
The Hue and Saturation sliders let you adjust forehead color, while the Smooth slider lets you
apply a specific smoothing operation to the forehead to ameliorate wrinkles and worry-lines.
Cheek Retouching
The Hue and Saturation sliders let you adjust the color of the cheek, eye, and nose area.
Chin Retouching
The Hue and Saturation sliders let you adjust the color of the chin, running up alongside the
sides of the face (the beard area).
1028
ResolveFX Part 7 – 57
ResolveFX Repair
This category consists of plugins that let you fix common technical problems that
bedevil programs.
Dead Pixel Removal (Studio Version Only)
If you have clips that were shot on a camera with one or more “dead” or “stuck” pixels in the
sensor, you may have black or white spots that are fixed in place in the image. This filter is
designed to let you place crosshairs on each dead or stuck pixel, identifying them so you can
use different methods of fixing the problem.
To fix dead or stuck pixels, apply the Dead Pixel Fixer filter, make sure the OFX on-screen
controls are enabled in the viewer, and then click on each pixel you need to fix with the mouse
to place crosshairs on it. You can click anywhere on the image to place as many crosshairs as
you like, there’s no limit. You can also Option-click to delete crosshairs you no longer need. To
move any crosshairs, simply drag it to another location.
Multiple dead pixel removal targets
When you place multiple crosshairs, you can click to select whichever crosshairs you want to
adjust the controls for. Each crosshairs can have different control settings, or you can select
multiple crosshairs by Command-clicking all the ones you want to adjust.
Remover-Patch Properties
The “Fill-in Method” pop-up menu provides two methods of fixing problem pixels, “Blend from
surround” and “Clone from Elsewhere.” Blend from surround is the default, which automatically
blends surrounding pixels to eliminate the problem. Clone from Elsewhere exposes a second
sample control that you can drag onto an adjacent part of the picture to clone pixels to fix
the problem.
To further customize the result, the Remover size slider lets you change the size of the region
you’re fixing, and the Soften slider lets you switch between a hard (value of 0) or soft (value
of 3) edge.
Deband (Studio Version Only)
Low bit-depth media that has areas with shallow gradients of color, such as a sky or a wall, often
exhibit color banding, seen as visible stripes, because there aren’t enough color values to
smoothly represent the gradiation from light blue to darker blue in the sky.
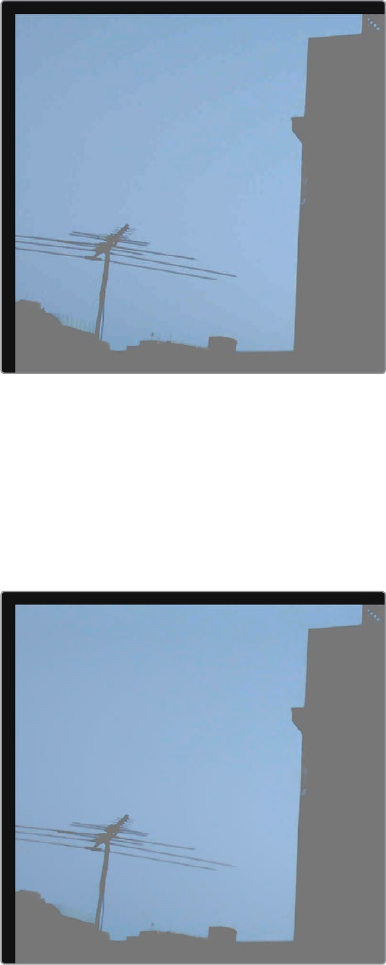
1029
ResolveFX Part 7 – 57
An example of banding in the sky of an image
This filter is designed to isolate the edges of color banding and minimize them by dithering
pixels from either side to soften the transition. This filter works best when applied to regions of
the image that have been isolated with a secondary qualifier or window, otherwise you risk all
edges within your image being dithered and thus softened (although this can be an interesting
stylistic effect).
Minimizing banding using the Deband filter
Edge Threshold adjusts how well-defined an edge needs to be to be affected by this filter;
lowering this excludes fainter edges, while raising this includes them. Radius lowers or raises
the intensity of dithering in areas that will be affected. Post Refine narrows (by lowering) or
widens (by raising) the areas affected by dithering. Display Edge is a checkbox that shows you a
black and white high-contrast preview of which edges are being detected for dithering, which
can help you fine tune your results.

1030
ResolveFX Part 7 – 57
Time Lapse Deflicker (Studio Version Only)
Similar to the Color Stabilizer filter, the Time Lapse Deflicker filter has been designed to deal
with clips that have inconsistencies in exposure and color on a frame by frame basis, such as
when you shoot time lapse videos where each frame may be, for example, an hour apart with
different lighting conditions. The Time Lapse Deflicker plug-in averages the contrast and color
of a range of frames surrounding each frame, and automatically creates an adjustment that
minimizes undesirable flickering.
There are two ways of using Time Lapse Deflicker:
The easiest way is to choose Entire Frame from the Region For Analysis pop-up menu.
Then, move the playhead in the Viewer to the frame that represents the contrast and
color you want the entire clip to have, and click the Analyze This Frame. Now, if you
play through the clip, flickering should be minimized. This method works best for clips
where flickering is fairly uniform, affecting the entire picture.
Another way is to choose Overlay Rectangle from the Region For Analysis pop-up
menu. This causes an on-screen rectangle to appear that you can resize and position
over a specific region you want to sample for the duration of the clip. If the selected
feature you’re analyzing is moving, then you can use the FX Tracker to track the subject
so the selection box follows it (this is important for a consistent result). Once this is set
up, move the playhead in the Viewer to the frame that represents the contrast and color
you want the entire clip to have, and click Analyze This Frame. Now, if you play through
the clip, flickering should be minimized. This method works best for clips where there
are parts of the picture that are supposed to have a change in brightness or color, such
as when something moves into the frame. You can use the selection box to specifically
analyze the part of the frame that has unwanted flickering, while ignoring the desirable
changes in the picture.
Depending on what option you choose from the Region for Analysis pop-up menu, different
additional options appear.
Analysis Region
If you choose “Entire Frame” from the Region For Analysis pop-up, these controls don’t appear.
A set of Source X/Y Position and Source Width/Height parameters let you transform the
selection box that defines which part of the image is being analyzed.
Channels to Stabilize
Once you’ve analyzed the frame that represents the best contrast and color for that clip, the
Channels to Stabilize controls let you choose how you want to handle making the correction.
the What to Stabilize pop-up menu lets you choose between stabilizing White Balance and
Brightness, or R, G, B Channels Separately.
If you choose White Balance and Brightness, two checkboxes let you choose whether or not
you want to include Stabilize White Balance and Stabilize Brightness independently from
one another.
IMPORTANT: The Time Lapse Deflicker filter gives you the best results with clips that
don’t have clipped highlights. When used in the Color page, it’s recommended to
grade the image to bring all the highlights you want somewhere at or under a value of
1023, and then apply the Color Stabilizer to a node after this adjustment.
1031
ResolveFX Part 7 – 57
If you choose R, G, B, channels separately, three checkboxes appear letting for Stabilize Red,
Green, and Blue Channel, so you can pick which particular channels you want to correct.
The “Stabilize Levels How” pop-up lets you choose how to make the correction, with options to
Match Levels and Contrast, Lift to Consistent Level, Gain to Consistent Level, each of which
uses a subtly different method to make the necessary correction, so if one method doesn’t
work to minimize your clip’s flickering, you can try the other methods to try and get a
better result.
ResolveFX Sharpen
These plugins offer a newer and more detailed method of sharpening specific details in images
than the sharpen operation found in the Blur palette. Three different plugins offer different ways
of using the same fundamental algorithm to perform different tasks.
Sharpen (Studio Version Only)
The Sharpen filter functions by separating the image into four levels of detail, the underlying
structure, the fine scale details, the medium scale details, and the large scale details, each of
which encompasses differently sized structures that comprise the overall image. In this way, the
Sharpen filter lets you apply different amounts of sharpening to each of the fine, medium, and
large structures of the image, giving you enormous control over how these different structures
of image detail are affected.
Main Controls
Sharpen Amount is the primary global control that lets you add sharpening to the image. To
refine the result, use the controls in Detail Levels to choose how much sharpness to apply to
each size of structure this plug-in can operate upon. 1.800 is the default value. 0 is no
sharpening, 5.000 is maximum sharpening.
Detail Levels
The Fine Detail Size slider adjusts the threshold of what is considered to be a fine detail,
although this also alters which image structures are affected by the Medium and Large Details
sliders as well. Lowering this slider omits larger structures of the image from sharpening. The
default is 0.050.
With Fine Detail Size at its default setting, the Fine Details slider governs the sharpness of
extremely fine detail such as skin pores and strands of hair, or small speckles on textured
surfaces. Lower settings apply less sharpening to these structures, while higher settings apply
more sharpening.
The Medium Details slider governs the sharpness of coarser detail such as freckles, wrinkles,
clusters of hair, and surface details with greater edge definition. Lower settings apply less
sharpening to these structures, while higher settings apply more sharpening.
The Large Details slider governs the sharpness of the largest details in the image, such as
eyelids, the shadows at the edges of lips and noses, and the edges where hair meets the face,
and the most contrasty edge details throughout the image. Lower settings apply less
sharpening to these structures, while higher settings apply more sharpening.
Chroma
Sharpen Chroma selectively sharpens the chroma of the image while leaving the luma (Y) alone.
1032
ResolveFX Part 7 – 57
Sharpen Edges (Studio Version Only)
A variation of the Sharpen filter that’s streamlined for detecting edges to create a key used to
limit sharpening to the selected edge details of an image. This is a good filter to use when
attempting to make mildly soft-focus clips less objectionable.
Main Controls
Sharpen Amount is the primary global control for adding sharpening to the edges detected by
this filter. Sharpen Radius controls the granularity of the detail that’s added using
Sharpen Amount.
Edge Detection Controls
The Edge Detection controls let you adjust which edges of the image have sharpening applied
to them, by adjusting the key that’s used to limit which parts of the image are sharpened.
Display Edges checkbox lets you see a grayscale preview of the edges that are being detected
for sharpening while you use the other controls in this group. If you turn this checkbox on, you
can see precisely the effect that the four other controls in this section have on the key that
determines which parts of the image are sharpened.
The Pre Denoise slider smooths the matte to remove individual pixels of noise. Reducing Pre
Denoise lets you minimize edges from the key that you don’t want to sharpen, and soften edges
that are jagged because of excessive noise. Raising Pre Denoise adds more edges to the
sharpening operation, and strengthens the edges that are already there.
The Edge Detect Threshold slider lets you adjust how strong edge detail needs to be to be
included in the key. Reducing this parameter includes more edges in the operation, while
raising it excludes edges from the operation.
The Edge Mask Strength slider lets you increase the intensity of the edges in the key. Reducing
Edge Mask Strength diminishes the edges and reduces the intensity of sharpening in those
areas. Raising Edge Mask Strength intensifies the edges and adds more of the image within the
region of each detected edge to the sharpening operation.
The Edge Blur slider lets you control the softness of the edges in the key. Reducing Edge Blur
sharpens the key, and narrows the edges that are affected by sharpening. Increasing Edge Blur
softens the key, and potentially includes a wider area of image detail in the sharpening
operation.
Soften and Sharpen (Studio Version Only)
A variation of the Sharpen filter that’s streamlined for letting you both smooth some details and
add sharpness to other details of the image based on the size of the structures. It can be used
with any image for which you want to smooth some features while sharpening others, but this is
an operation that’s often used for minimizing unwanted blemishes, wrinkles, or scarring when
used within a window or qualifier that’s isolating the skin.
The advantage of using Soft Sharpen Skin is that you can use the Small Skin Texture slider to
leave a bit of natural skin detail intact, such as pores and other small naturalistic details, while
you use the Medium and Large Skin Texture controls to smooth out unwanted details in
whatever proportion gives you a naturalistic result.

1033
ResolveFX Part 7 – 57
Main Controls
Each of the Small, Medium, and Large Skin Texture sliders can be moved into both negative
and positive values. A value of 0 means no change is made to the corresponding details of the
image. Negative values remove the corresponding details from the image, eventually leaving
only the underlying smooth structure of the image at –1.000. Positive values add sharpness to
the corresponding details of the image, to a maximum value of 1.000.
Keep in mind that what’s identifiable as a small, medium, or large structure depends in large
part on how a person is framed in the shot. These structures differ depending on whether
you’re grading a person in a long shot vs. someone in closeup. Small Skin Texture affects
extremely fine detail such as skin pores and strands of hair. Medium Skin Texture affects
coarser detail such as freckles, wrinkles, and clusters of hair. Large Skin Texture affects the
largest details in the image such as eyelids, eyebrows, the edges of lips and noses, and the
edges where hair meets the face.
Adjust Small Skin Texture Granularity
Small Skin Texture Size defines the threshold that differentiates Small Skin Texture from
Medium and Large Skin Texture, to help you fine-tune the Small Skin Texture that you want to
preserve. Raising this value includes more of the image as small details, while lowering this
value excludes more of the image from small details.
ResolveFX Stylize
The plugins found in this category all enable different ways of creating artistic modifications to
the image.
Abstraction (Studio Version Only)
A deceptively powerful filter that lets you create a wide range of cartoon-like renders by
simplifying an image into adjustable pools of similar color with optional outlines.
Main Controls
These controls create the foundation of this effect. Pre Blur simplifies the image by blurring
unwanted details prior to this filter taking effect. The Abstraction Strength and Iteration No.
parameters work together to then smooth the image, creating pools of simplified color within
the details of the image; Abstraction Strength must be higher than 0 for the Iteration No.
parameter to have an effect. Higher Abstraction Strength simplifies image detail even more by
averaging adjacent regions of color together, while Iteration No. reduces the amount of small
detail in the image even further by “widening” adjacent areas of similar color to blend
together as one.
TIP: The best way to achieve a more natural result is to leave Small Skin Texture at 0
or just above, while reducing Medium Skin Texture just enough to minimize whatever
details merit minimizing, and reducing Large Skin Texture by somewhat less to
minimize larger blemishes while leaving overall face detail intact. This is the logic
behind the default values of Small 0.000, Medium –0.800, and Large –0.300.
1034
ResolveFX Part 7 – 57
Quantization Controls
These controls simplify the pools of color even more aggressively by quantizing the bit depth
used to stylize the image. The result is an even sharper flattening of each region of color. The
Quantization checkbox turns this function on, while raising the Bins slider lets you subdivide
each region of color into a greater number of separate regions. Softness lets you blur the
border between each level of color.
Draw Edge Controls
Adds an edge to the regions of color created by this effect. The Draw Edge checkbox enables
edge drawing. Raising Edge Strength results in thicker and better-defined edges. Raising Edge
Detection Threshold restricts edges to only the boldest edge details in the picture.
Edge Detect
An edge detection effect with options for customizing which edges create outlines.
Mode lets you choose between RGB and Grayscale edges. Edge color (only available if Mode
is set to Grayscale) lets you colorize the edge outlines that are generated. Threshold
determines the lightness level that’s used for edge creation, while Smooth lets you soften these
edges, and Brightness lets you adjust edge intensity. Denoise Type can be switched between
Soften and Sharpen, to preprocess the image via the Denoise Strength slider in order to further
customize which edges result in outlines. The Edge Overlay checkbox lets you superimpose
the edges created with this filter over the RGB image via a multiply operation.
Emboss
An emboss effect with several options to create different kinds of outline and emboss effects.
Main Controls
The Emboss Style pop-up lets you choose from among Relief, Emboss Over, Sobel, and
Laplacian types of embossing. Power lets you adjust how pronounced the emboss effect is.
Angle lets you choose the apparent angle at which the emboss effect is rendered.
Channels
Three checkboxes let you choose to use the Red, Green, and Blue channels to create
this effect.
JPEG Damage
Simulates the kinds of minor or major artifacts you get when doing JPEG compression; useful
for simulating compression damage.
Quality lets you lower the bit depth of the image. Resolution lets you increase the size of
macroblocking artifacts that appear, while Block Aspect Ratio lets you adjust the macroblocks
to be more square or rectangular. Frequency Scale sharpens the effect, while Scale
Component lets you base this effect on All Frequencies, the X-Frequency, or the Y-Frequency.
1035
ResolveFX Part 7 – 57
Mirrors
An effect that lets you reflect part of the image in any direction you like. Multiple reflections can
be set up, to create Kaleidoscope patterns in the image.
Main Controls
Mirror Placement lets you choose different types of mirror effects including Individual, Rosette,
and Kaleidoscope. Reflect at Borders lets you add another reflection of the image whenever
the angle and position of your reflection would result in offscreen black coming into the frame.
Mirror Controls
Additionally, a series of six sets of Mirror parameters lets you add mirrored edges; by default
only one is on, but you can turn more edges on to create more complicated mirror effects. Each
group of Mirror parameters has Enable Mirror, X and Y Position, Angle, and Flip controls.
Prism Blur
Simulates flat chromatic aberration and a vignetted lens.
Blur Strength lets you apply a blur to the primary image. X and Y Position let you change the
center of the effect within the frame about which chromatic aberration is created. Aberration
Distance adjusts how far the aberration effect appears from the source image, while Aberration
Strength intensifies the zoom blur used to create the chromatic aberration effect to intensify it.
Vignette Size lets you add edge vignetting to the image; setting this to 0 removes the vignette,
while 1 is the maximum size of a vignette using this filter. Vignette Sharpness lets you adjust the
feathering of the vignette effect; lowering this value softens the edge, while raising this value
sharpens, but never fully eliminates the softness from this edge. The Vignette effect is designed
to fall off in a way that simulates how a lens would exhibit vignetting.
Scanlines
Simulates television scanlines, or any effect where you want alternating lines to darken the
image. A variety of parameters makes this an extremely flexible effect that can be applied in
numerous ways.
Main Controls
Line Frequency lets you choose how many or few lines are superimposed on the image; fewer
lines automatically space themselves to be thicker as they’re uniformly distributed across the
image. Line Sharpness lets you blur the border between each line, softening the effect. Line
Angle lets you rotate the lines to appear at any angle, the default is 0 which results in horizontal
lines. Line Shift lets you offset the lines. Shift Red, Green, and Blue let you offset individual
channels. Color 1 and Color 2 are color picker controls that let you tint each alternating set of
lines (eyedroppers let you sample a color from the RGB image being input into the current
node). Composite Type lets you choose which composite mode is used to blend the scanline
effect into the image. The Scanlines Only checkbox lets you see just the scanlines in isolation
while you adjust them.
Global Adjustment
In the Global Adjustment controls, the Shadows and Highlights controls let you adjust the
strength of the finally composited image.
1036
ResolveFX Part 7 – 57
Tilt-Shift Blur
Simulates depth-of-field effects using a progressive blur that’s applied with a generated
Z-depth map. The default settings create a “miniaturization” illusion, where the image appears
to be tiny due to the top and bottom depth-of-field settings used.
Main Controls
You can choose the Blur Type (Lens Blur is the default) and Blur Strength.
Lens Iris
Additional Lens Iris settings let you choose the Shape, Blade Curvature, Rotation, Anamorphism,
and Highlights of the lens blur effect being created.
Depth of Field
Additional Depth of Field settings let you adjust the depth map being used to create the
depth-of-field effect. The Depth Map Preview checkbox lets you see the grayscale depth map
directly while making these adjustments. Center X, Center Y, and Angle let you transform the
depth map, while In Focus Range expands or contracts the black center of the depth map, and
Near Blur Range and Far Blur Range let you individually adjust the falloff of the white bottom
and top of the depth map.
Watercolor (Studio Version Only)
A variation on the Abstraction filter, this filter reduces images into simplified washes of softly
blended colors, in a very painterly fashion.
The Channels pop-up menu lets you choose whether to use Luminance or RGB to derive the
smoothed color from. The Show Gradient checkbox lets you see the boundaries that define
each area of smooth color, based on the value you choose from the Smoothness slider below.
Low smoothness values result in more detail in the smoothed result, while higher values result
in larger pools of lower detail yet smoother color.
ResolveFX Texture
These plugins are designed to add texture to images, to replicate both naturalistic and
other effects.
Film Grain (Studio Version Only)
Composites a procedurally generated layer of simulated “film grain” over the image.
Main Controls
Selections from the Film Grain Presets pop-up lets you quickly choose from among different
8mm, 16mm, and 35mm film grain effects. Opacity lets you fade the Film Grain effect against the
original image. The Grain Only checkbox lets you see just the grain layer that you’re creating, so
you can evaluate its look prior to it being composited into the image.
Grain Params
The Grain Params group lets you adjust the Texture of the simulated grain layer, the Grain Size,
and the Grain Strength, while Softness lets you blur the grain layer, and Saturation lets you
make it more or less colorful.
1037
ResolveFX Part 7 – 57
Advanced Controls
In the Advanced Controls, the Shadow, Midtone, and Highlight Gain controls let you adjust the
amount of grain that’s composited into each of these tonal regions of the image.
ResolveFX Transform
The plugins in this category allow different types of animated and non-animated transforms
than are possible in the Sizing palette or Clip Transform controls of the Inspector.
Camera Shake (Studio Version Only)
This effect replicates random camera motion for Horizontal and Vertical position, Rotation, and
Zoom. A variety of parameters are provided to let you customize the quality of motion, from
slow meandering drift to abrupt, jagged jerks and pops.
Main Controls
The Motion Scale and Speed Scale sliders let you adjust the overall amplitude and speed of
camera shake that’s introduced to the image.
The Motion Blur slider lets you add simulated motion blur to the image being shaken, which can
add a more realistic look to the motion. Motion blur is more visible on fast-moving motion, as
DaVinci Resolve is simulating the effect of a motion picture camera’s shutter speed on exposed
subjects in motion.
Shake Levels
The Pan Amplitude slider lets you set how much horizontal motion you want, while the Tilt
Amplitude slider lets you choose how much vertical motion you want. These sliders are
completely independent of one another. The Rotation Amplitude slider lets you introduce
rotational motion to the camera shake, as well. The PTR Speed slider lets you choose how fast
the Pan, Tilt, and Rotation camera shake is.
The Zoom Amplitude slider lets you add zooming to the camera motion being created, while the
Zoom Speed slider lets you choose how fast this random zooming should occur. The Zoom
Type pop-up menu lets you choose how to add zooming; you can choose Outward Only, Inward
Only, or Outward and Inward. If you choose Inward Only, you don’t have to worry about
blanking appearing around the edges of the frame.
Shake Quality
The Motion Method pop-up menu lets you choose from different ways of generating the motion
this plug-in introduces. You can choose from SINE, Rectified SINE, Rectified SINE (Invert), and
Square Wave (good for popping or flickering motion).
The Phase slider lets you set the starting point of the camera shake you’re creating, based on
the Motion Method and Amplitude settings you’ve chosen.
The Randomness Scale slider lets you introduce irregularity to the Horizontal, Vertical, and
Rotational motion of the camera shake. The greater this value, the more irregularity will be
introduced. The Randomness Speed slider lets you choose between smoothly erratic motion
(atlower values) or more jagged motion (at higher values).
The Pause Length slider lets you adjust the frequency of intermittent pauses that break up the
random motion added by this filter. The Pause Interval slider lets you adjust the duration of
intermittent pauses that break up the random motion added by this filter. The Pause
Randomness lets you add a degree of randomness to the intervals that happen.
1038
ResolveFX Part 7 – 57
The Random Seed slider lets you alter the value that sets what random values are being
produced. Identical values result in identical randomness.
Blanking Handling
The Border Type pop-up menu lets you choose how you want to fill the empty spaces at the
edge that appear if the camera shake you create pushes the image out of the current frame size
of your project. Four options let you choose to Replicate, Reflect, or Wrap-Around the image to
fill the gap. The Crop Border slider lets you zoom into the image to crop out any blanking that
might appear around the edges.
The Zoom to Crop slider lets you zoom in on the image to crop out unwanted blanking being
introduced by the Camera Shake effect.
Match Move (Studio Version Only)
The Match Move filter is a patch-based tracker that follows a pattern region defined by a tracker
control. You can place as many trackers as you like by applying this filter to a node and clicking
on a feature you want to track in the Viewer. Ideal features for tracking are high contrast details
that have sharp angles that are clearly defined.
Each tracker control consists of (a) a center point that indicates where the tracked motion path
will be centered, (b) an inner box that identifies the patch of image you’re tracking (that can be
resized), (c) an outer box that defines the search region for the track (that can also be resized),
and (d) a patch window that shows you a zoomed in closeup of the patch you’re tracking. Patch
windows can be resized, and the other tracking controls hidden or shown, using controls in the
Display Options section of the Match Move controls.
A tracker control in the Match Move filter
If you’ve accidentally placed a tracker control somewhere you don’t want one, you can either
drag anywhere within the inner box to move it to another location, or you can Option-click it to
delete that tracker.
Once placed, you can choose how much image detail is considered for analysis by resizing that
tracker control . To resize a tracker, move the pointer over the edge of the inner box, and
dragging to shrink or enlarge it.
This plug-in will automatically derive as much motion data as
the number of trackers you’ve placed allows:
One tracker tracks horizontal and vertical position (pan and tilt).
Two or more trackers also track rotation.
Four or more trackers also track perspective.
If you place six or more trackers than the Match Move filter is capable of automatically
choosing the best tracker data from the overall collection to give you the most accurate
track that’s possible.
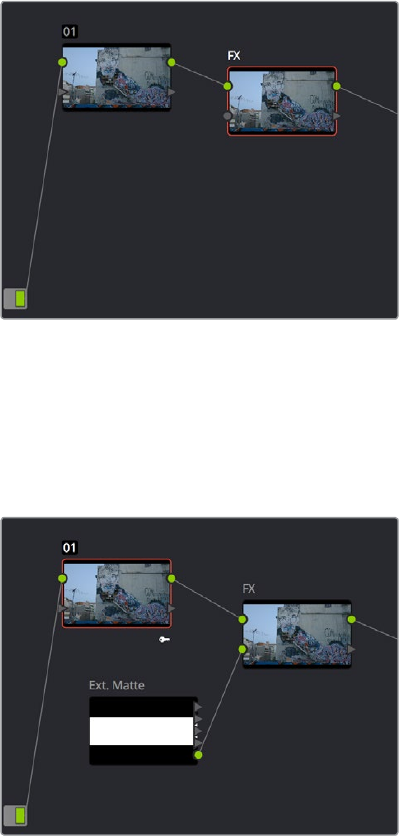
1039
ResolveFX Part 7 – 57
A Match Move Workflow
The following example shows the simplest complete workflow for importing a foreground clip to
composite with a match move to follow a background clip that’s already in the timeline. This
workflow is suitable for such operations as placing a graphic as a sign on a side of a building, or
into the display of a phone.
To Match Move:
1 Open the Media Pool in the Edit page, right-click a clip you want to match move to a clip
in the Timeline, and choose “Add as Matte For Color Page Clip” to add it to the Color
page Node Editor of the currently selected clip as a Timeline Matte. This is currently the
only way you can match move and composite a foreground clip against a background
clip in the Color page.
2 Open the Color page, make sure the background clip you want to match move to is
selected, then open the OpenFX library and drag the Match Move plug-in directly
onto the connection from the last node in the tree to the Output, to add it as a stand-
alone FX node.
Adding the Match Move filter as a stand-alone FX node
3 Right-click any corrector node in the node tree (node 01 in this example) and choose
the clip you added in Step 1 in the Add Matte > Timeline Mattes submenu of the
contextual menu to expose that clip as an Ext. Matte node. Delete the connection
between the new Ext. Matte node and the node it’s connected to, and then reconnect
its RGB output to the second input of the FX node.
Connecting the foreground image to the second input of the FX node
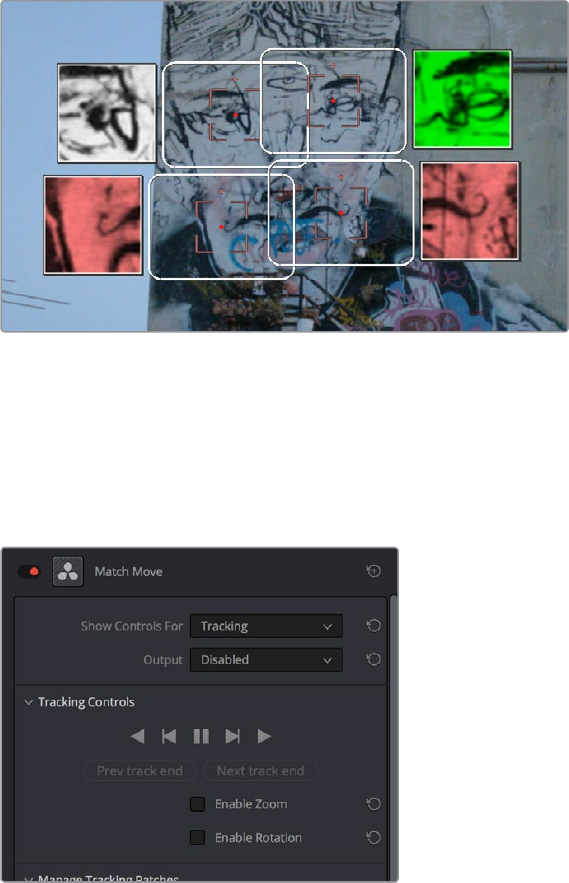
1040
ResolveFX Part 7 – 57
4 Select the FX node, make sure the OpenFX on-screen controls are enabled, choose
whether you want to start at the first or last frames of the clip to begin the tracking
process, and then click within the Viewer to place tracker controls on the surface of the
image you’re going to attach the foreground image to. If you want to do a perspective
track, place at least four tracker patches in areas you know won’t be occluded by other
things in the frame. Choose features that are high contrast and angular for the best
results, and try to make sure the features you track won’t go offscreen or be occluded
by other features within the frame. As you place tracking controls, their patch window
will be tinted the color of the channel that DaVinci Resolve automatically determines will
provide the best tracking result.
Adding tracker controls to the feature you need to Match Move to
5 (Optional) If necessary, you can delete trackers you don’t want by Option-clicking them.
6 Now that you’re tracker controls are all set up, you’re ready to begin the tracking
analysis. If the playhead is at the beginning of the clip, click Track Forwards, otherwise
click Track Backwards. DaVinci Resolve will automatically analyze all tracker controls
within the clip until the last frame of the clip is reached.
Using the Tracking controls
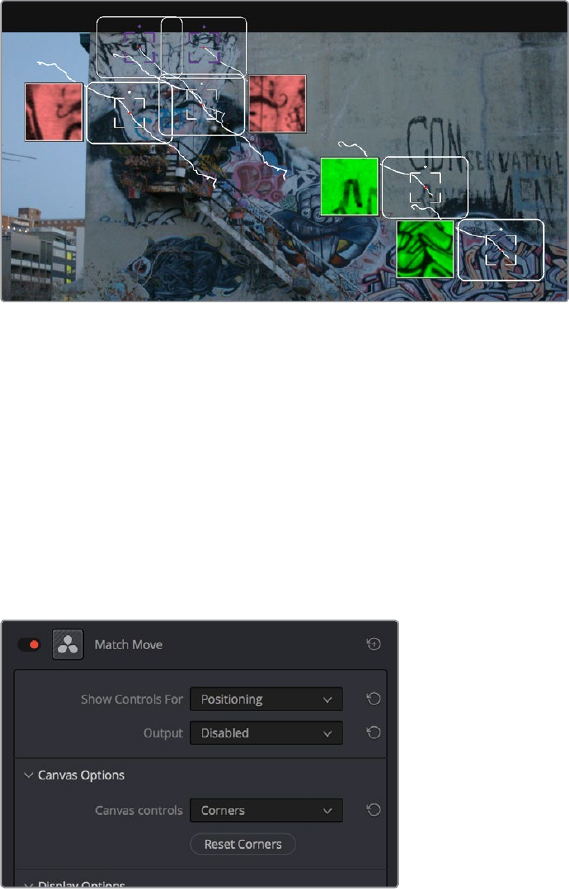
1041
ResolveFX Part 7 – 57
7 (Optional) If anything occludes a patch that’s being tracked, or if the tracked feature
starts going off the edge of the frame, that tracker control may veer off course, and
will eventually turn off. If this happens, there’s a way to continue the track that’s
surprisingly easy:
a Click the Track Forward or Track Backwards button again to stop the analysis.
b Move the playhead back to the last good frame of tracking data, then click the inner
box of each tracker control that went wrong to make sure they’re turned on (you
know it’s on if the patch window is displayed), and then click “Clear tracking
forwards” or “Clear tracking backwards” as necessary to delete the incorrect
tracking data. When you’re done, click the inner box of each tracker that went wrong
to turn it back off again, so it doesn’t continue trying to track incorrectly (you know
it’s off if the patch window is hidden).
c Now, place additional trackers on different features of the same surface to replace
the trackers that you had to turn off.
Placing more tracking controls to cover for tracking controls that turn themselves
off when going offscreen or being occluded by other moving features in the image
d Click “Track forwards” again to continue the track, and DaVinci Resolve will
automatically use those additional features to continue the analysis.
e When the analysis is complete, turn the trackers you disabled back on again. All
trackers that are turned on contribute data to the match move, for whichever ranges
of frames they contain valid tracking data.
8 When DaVinci Resolve finishes its analysis, move the playhead back to the first frame
of the track, and choose Positioning from the “Show controls for” pop-up menu. This
takes you to the next stage in the Match Moving process.
Choosing the Positioning controls
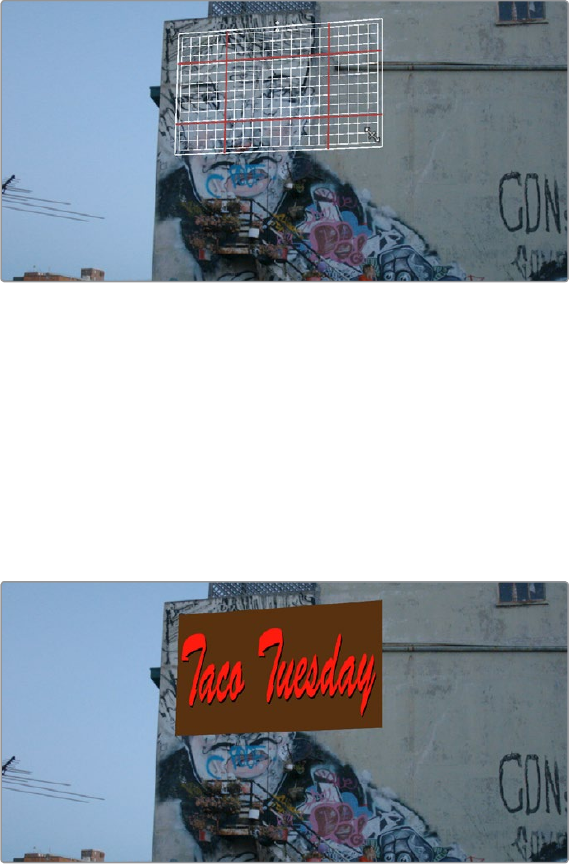
1042
ResolveFX Part 7 – 57
9 A grid appears, covering the Viewer. This is the positioning canvas, and it lets you
corner-pin the area in which the foreground image you connected in Step 3 will be
composited and tracked. You can corner-pin and resize it by dragging it by the corners,
and you can move it by dragging the center.
Resizing the canvas to fit the foreground image into the background
10 Once you’ve positioned the grid, scrub back and forth to verify that it tracks correctly
and looks right once it’s in motion.
11 Choose Compositing from the “Show controls for” pop-up menu to expose the
compositing controls.
12 Set the Output pop-up menu to “Composite” to output the final match-moved
composite. If necessary, you can use the Composite Type and Plate Cropping controls
to choose how the foreground image is blended with the background, and whether you
need to crop unwanted parts of the image from the edges.
The final match moved composite
At this point, you’ve finished the match move.
Main Controls
The “Show controls for” pop-up menu lets you choose one of four pages of controls that take
you through the match moving workflow. The Output pop-up menu lets you choose what you
want to output, with choices for Disabled, Positioning Reference, and Composite.
Tracking Controls
The Tracking Controls govern the first stage of the match moving process, and this page of
controls provides everything you need for setting up, executing, and refining multi-patch
motion tracks.
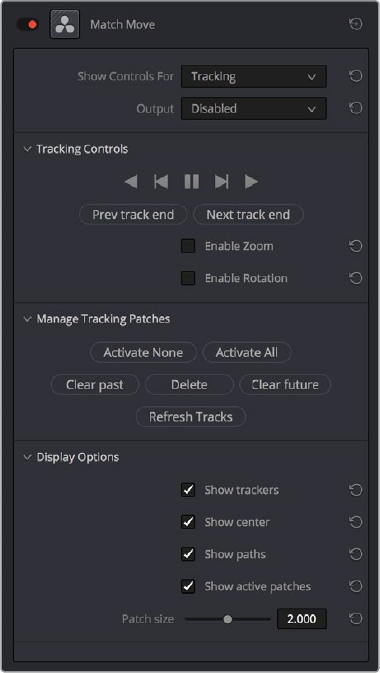
1043
ResolveFX Part 7 – 57
The controls that are exposed when Main Controls
is set to Tracking Controls
The Tracking Controls group
The primary controls used to initiate tracking. These consist of the tracking buttons that
let you execute tracks either automatically using the outer Track Forwards or Track
Backwards buttons, or manually using the inner Track Next or Track Previous buttons.
The middle button lets you pause tracking.
The Next Track End and Previous Track End let you jump to previous and subsequent
tracked sections of frames; in cases where there may be gaps in your tracking data,
these controls let you jump to different segments of contiguous tracking data.
Two checkboxes let you choose whether you want to track and analyze Zoom and/or
Rotation. These must be set before you begin tracking.
The Manage Tracking Patches group
The two buttons at the top let you choose which tracking patches are enabled to
contribute to the overall match moving result, or disabled. Activate None and
Deactivate All let you turn all patches on or off at once.
Clear Past and Clear Future let you clear bad tracking data forward or back in time from
the playhead’s current position, for enabled tracker controls. Delete Tracking lets you
delete the tracking data at the current frame only for enabled tracker controls.
Refresh Tracks updates a tracker control’s patch when the feature it’s tracking changes
shape, color, or lighting enough to interrupt the track. Select one or more trackers and
click Place New Patch in Track to update the tracked feature at that frame.
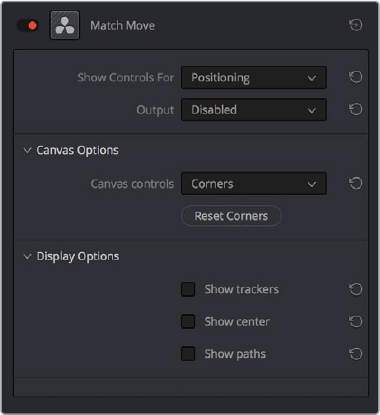
1044
ResolveFX Part 7 – 57
The Display Options group
This group lets you turn the visibility of different on-screen controls off and on.
Checkboxes let you Show Trackers, Show Center (the red tracking center point), Show
Paths (the tracked motion paths), and Show Active Patches. A slider lets you adjust the
size of each patch window.
Show Comp Result lets you see the composited foreground layer against the
background layer.
Positioning
The Positioning controls govern the second stage of the match moving process. They provide
everything you need to transform the foreground image to fit against the background by
moving, corner-pinning, and resizing.
The controls that are exposed when MainControls
is set to Positioning
Canvas Options
The Canvas Controls pop-up menu lets you switch between corner-pin controls, where
dragging the four corners lets you corner-pin, dragging the center lets you reposition,
and dragging the top, bottom, and sides lets you resize vertically or horizontally.
A Reset Corners button lets you reset the grid to full screen, if you need to scrap what
you’re doing and try again.
The Display Options group
This group lets you turn the visibility of different on-screen controls off and on.
Checkboxes let you Show Trackers, Show Center (the red tracking center point), and
Show Paths (the tracked motion paths).
Show Comp Result lets you see the composited foreground layer against the
background layer.
Compositing
The Compositing controls govern the third stage of the match moving process, to use when
fitting the foreground image against the background image to make a seamless composite.
Note, if you need to color correct the foreground image to match the background, you’ll need to
add a corrector node between the Ext. Matte that’s routing in the foreground image into the
Color page, and the FX node that’s doing the compositing.
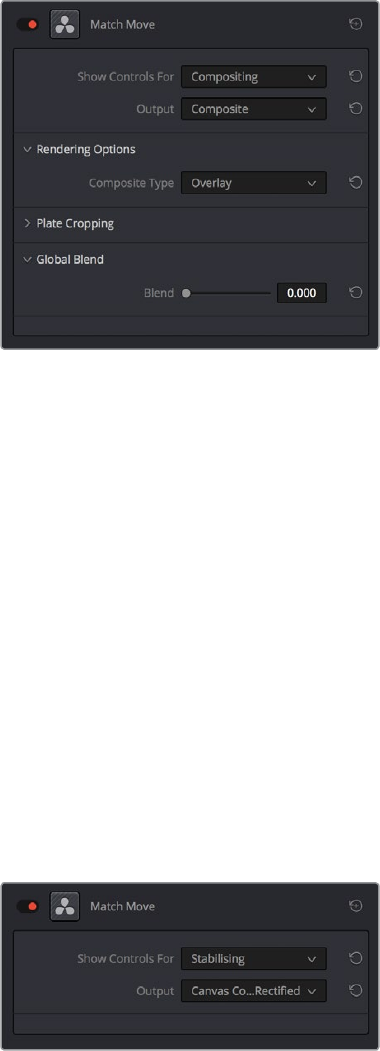
1045
ResolveFX Part 7 – 57
The controls that are exposed when Main Controls
is set to Compositing
Rendering Options
The Composite Type pop-up menu lets you choose whether the composite that’s being
output is an overlay of the Ext. Matte over the background, or the background
Plate only.
Plate Cropping
Four sliders let you crop the Left, Right, Top, and Bottom of the image, if necessary.
Global Blend
The Blend slider, present in every ResolveFX plug-in in DaVinci Resolve, lets you adjust
the opacity of the effect, effectively controlling the opacity of the foreground layer.
Stabilizing
The Stabilizing controls actually have nothing to do with match moving, but instead allow you to
use the motion tracking accomplished with the Tracking Controls to stabilize the image. An
Edge Behavior pop-up menu lets you choose how to handle blanking around the edges as a
result of the background image being transformed to keep the subject of the frame in place.
The controls that are exposed when Main Controls
is set to Stabilizing
1046
ResolveFX Part 7 – 57
ResolveFX Warp
The filters in this category let you warp the image in different ways, creating procedural or
custom distortion effects, some of which can be automatically animated. The Warper plug-in is
a point-based free-form warp tool.
Dent
A warp effect that creates different types of circular bowing and folding effects.
DentType lets you choose from six different types of “dent” warping effects. X and Y position
sliders let you offset the center of the warp. Size lets you adjust the diameter of the warp.
Strength lets you adjust the extent and direction of the warp, lowering this below zero “pulls”
the image into the center of the effect, while raising this above zero “pushes” the image
outward to buckle according to the DentType you’ve chosen. The Edge Behavior eliminates any
blanking caused by negative distortion by filling black areas in one of several user-defined
ways, options include Black (do nothing and leave the blanking), Reflected, Wrap-Around, and
Replicate.
Lens Distortion
Lets you add convex or concave lens distortion to an image, to make it warp by bulging outward
or bulging inward, similar to a poorly made lens. This filter could also be used in a corrective
manner, to compensate for images exhibiting barrel distortion. Additionally, the amount of
distortion applied to each color channel can be varied, in order to create the effect of chromatic
aberration using the curvature of the distortion you’re adding for a more accurate effect.
The Red, Green, and Blue Distortion sliders are ordinarily locked together by the Gang
checkbox. When adjusted as ganged, moving these sliders to the left (negative values)
increases “fisheye” distortion, while moving these sliders to the right (positive values) creates
an inverted “fisheye” effect that bows the image inward rather than outward. Turning Gang off
lets you set the Red, Green, and Blue Distortion sliders to different values, introducing more
accurately simulated chromatic aberration to the image. The Fine Adjustment checkbox results
in the distortion sliders operating within a much smaller range, enabling more precise
adjustments. Edge Behavior eliminates any blanking caused by negative distortion by filling
black areas in one of several user-defined ways, options include Black (do nothing and leave
the blanking), Reflected, Wrap-Around, and Replicate. X and Y Position sliders let you change
the center of the distortion effect.
Tip: To resize a clip with an extreme distortion effect that introduces blanking around the edges
of the frame, you’ll need to use the Zoom control found in the Node Sizing mode of the Sizing
palette. Edit and Input sizing will only zoom the image within the border created by blanking.
Ripples
A warp effect that creates different types of ripples.
Main Controls
Ripple Shape lets you choose from Circular, Square, Horizontal, Vertical, Exponential, Star, and
Radial ripples. Wave Shape lets you choose from Sinusoidal, Triangular, Fresnel In, Fresnel Out,
and Natural waves. A set of Shine parameters lets you overlay a simulated shine on top of these
ripples. A checkbox lets you turn this shine on and off. Shine Direction, Vertical Shine Height,
Shine Size, and Shine Strength lets you adjust the overall appearance of the shine, while an
Animate checkbox, if checked, reveals a Speed slider that lets you set how quickly the ripple
effect auto-animates without the need to use keyframes.
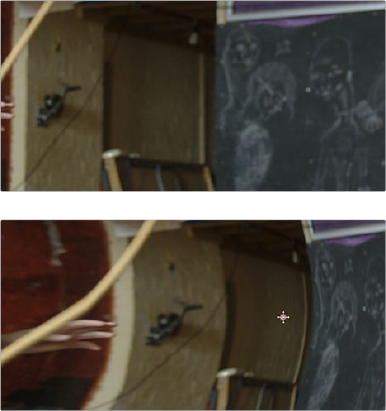
1047
ResolveFX Part 7 – 57
Ripple Controls
A separate set of Ripple parameters lets you enable up to five overlapping ripples, adjusting the
X and Y Position, Amplitude, Frequency, Decay, and Phase of each ripple effect you enable.
If you want to animate a ripple simply, you can also choose to keyframe the Phase parameter to
create the same effect created by the Animate checkbox above.
Vortex
Vortex begins as an S shaped warp effect, but you can adjust the parameters to create many
types of warping effects.
X and Y position sliders let you offset the center of the warp. Size lets you adjust the diameter
of the warp. Angle lets you adjust the direction and intensity of the warp effect; setting Angle
below 0 twists the image to the left, while raising Angle over 0 twists the image to the right.
Power rotates the area that’s effected to create a harder border between what is warped and
what isn’t. Swirl intensifies the effect, twisting the image into an even tighter swirling effect.
Warper (Studio Version Only)
The Warper is a free-form image warper that uses points, rather than a mesh or splines, to push
and stretch features in an image as if they were on a sheet of rubber. While the Warper has a lot
of options and settings, getting started is really easy.
To warp a feature of the image, just click on it to add a warp point, and drag to push that part of
the image in the direction you want it to go. By default, warp points influence the entire image,
which is pinned down at the corners. This system makes it simple to warp large regions of the
image, such as when you want to warp an edge of the image to get rid of a boom dip. Warp
points are gray unless they’re selected, in which case they’re white.
(Top) The original image,
(Bottom) The image warped with two control points
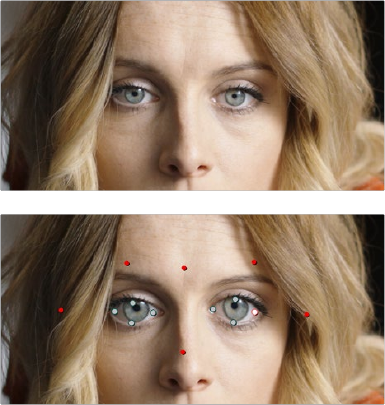
1048
ResolveFX Part 7 – 57
To “pin down” parts of the image you don’t want to warp, Shift-click to place limiter points (which
are red, pink if they’re selected). By combining warp points with limiter points, you can quickly
create extremely specific warp effects to squish and stretch features in an image in any
way you want.
(Top) The original image,
(Bottom) The image warped with control (white) and limiter (red) points
As you work, you can Option-click any unwanted warp or limiter point to delete it. To start from
scratch, you can click the Warper plug-in’s master reset control in the OpenFX Inspector.
Additionally, you can use the FX mode of the Tracker palette to motion track the feature you’re
warping. Then, by setting the Tracking pop-up menu to FXTracker, every warp and limiter point
you’ve placed will move along with the feature you’re tracking, meaning you can create warp
effects that move along with someone’s face, with a car driving on the road, or with something
in a shot with camera motion.
Eect Options
The Warp Limits pop-up menu lets you choose how to treat the edges of the image when you’re
warping it.
There are three modes:
Corners (the default) lock the four corners of the image in place, but allow the sides to
bulge in or out as you warp and allowing blanking to creep in.
Edges locks the full width and height of all four edges in place as you warp, preventing
blanking. Distance locks parts of the image that are n pixels away, but the default
setting is very permissive.
Manual allows the entire image to be warped without locking any part of it, allowing for
extreme warps all along an entire edge of the image, but requiring you to place at least
one limiter point prior to adding a warp point.
The Warp Sharpness pop-up menu lets you choose one of three methods of interpolating how
the image bends around a Warp point, Sharp, Rubber-Sheet (the default), and Rounded. Sharp
produces the “most pointy” warps, while Rounded produces the most gently curved warps.
Rubber-Sheet strikes a balance between the two extremes.
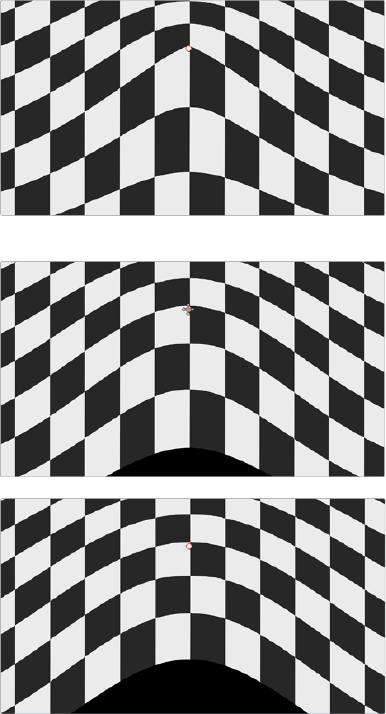
1049
ResolveFX Part 7 – 57
(Top) Sharp, (Middle) Rubber-Sheet, (Bottom) Rounded
The Edge Behavior pop-up menu eliminates any blanking caused by warping that affects the
edge of the image by filling black areas in one of several user-defined ways, options include
Black (do nothing and leave the blanking), Reflected, Wrap-Around, and Replicate.
The Quality pop-up menu lets you choose from among three methods of calculating the
warping effect you’re creating; Faster, Default, and Better. Each choice is an obvious trade-off
between image smoothness and performance.
The Warp Scale slider lets you scale the overall warp effect you’re creating. Setting this to
0.000 reduces the warp effect to nothing, while raising it to the maximum value of 2.000
doubles the warp effect.
On-Screen Controls
The second set of controls lets you customize of the Warper’s on-screen controls appear, with
different options that make it easier to see certain things in various situations.
The “Render a reference grid” checkbox superimposes a reference grid over the image to make
it easier to see what kind of warping you’re applying.
The Show Warp Boundaries pop-up menu has three choices for letting you see which areas of
the image will be locked off by limiter points you place in the image. None hides this
information, and is the default setting. As Border shows a red line at the boundary where
warping becomes locked off. As Mask dims the area that’s protected from warping by
limiter points.
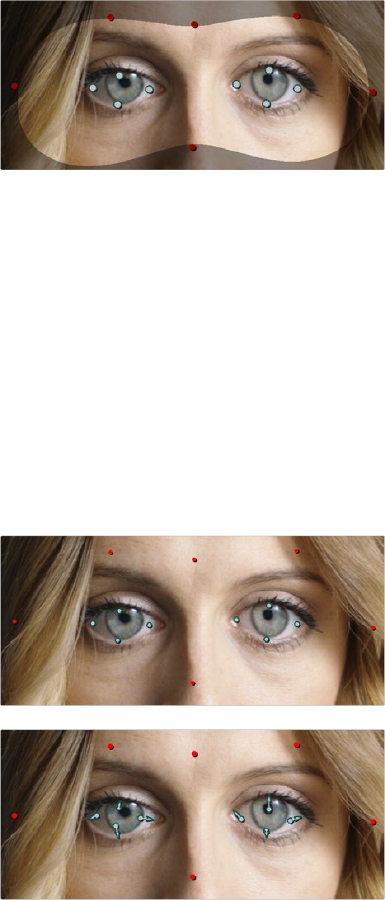
1050
ResolveFX Part 7 – 57
Show Warp Boundaries set to As Mask
The Control Visibility pop-up menu lets you choose whether the warp and limiter points you
create are visible as you work. Show (the default) leaves all control points visible all the time.
Auto Hide hides all control points whenever you’re dragging one, letting you see the image as
you adjust it without having control points in the way. Hide makes all control points invisible.
You can add new control points, but you can’t see existing control points to edit them.
The Show pop-up menu lets you choose how to represent warp points, and there are two
options. Warp Points (the default) simply shows warp points as gray dots. Warp Vectors display
pairs of controls connected by a line; a round dot shows the anchor, or the part of the image the
warped portion of the image came from, and an arrow shows the destination, where you’ve
warped that part of the image to. Seeing the anchor and destination of each warp operation can
sometimes be useful when you’re doing something complex.
(Top) Warp points, (Bottom) Warp Vectors
The Scale Controls slider lets you shrink or grow the control points or warp vector handles to
the most convenient size for the task at hand.
Waviness
A wavy distortion effect.
Waviness Type lets you choose Vertical or Horizontal waviness. Scale lets you choose the size
of the waves, while Strength lets you adjust the amplitude. Phase lets you “move” the wave, and
is a good parameter to keyframe if you’re animating this effect manually. However, an Animate
checkbox, if checked, reveals a Speed slider that lets you set how quickly the Waviness effect
auto-animates without the need to use keyframes.
1052
Sizing and Image Stabilization Part 7 – 58
Sizing and Image Stabilization
DaVinci Resolve has a powerful tool set for making geometric transforms, using advanced
algorithms for optical-quality sizing operations. This section covers the nuts and bolts of
resolution independence in DaVinci Resolve, and how to use the Sizing palette. This chapter
also covers how to use the Stabilizer mode of the Tracker palette to subdue unwanted
camera wiggle.
Resolution Independence in DaVinciResolve Explained 1053
Using High Resolution Media in Lower Resolution Projects 1053
Timeline Resolution 1053
Pixel Aspect Ratio (PAR) 1053
Image Scaling 1054
Output Image Scaling 1055
Edit Page Transform Parameters and Imported Sizing Information 1056
Edit, Input, Output, and Node Sizing on the Color Page 1056
The Five Color Page Sizing Modes 1057
Sizing Order of Processing on the Color Page 1057
Sizing Controls 1057
Sizing OSC 1059
Blanking Controls 1059
Resetting the Sizing Palette 1060
Input and Output Sizing Presets 1060
Sizing Controls with the DaVinci Control Panel 1060
Using Node Sizing for Channel and Paint Effects 1061
Image Stabilization in the Tracker Palette 1063
Using the Stabilizer 1064
Using the Classic Stabilizer 1065
Using Stabilization to Create a Match Move 1070
Tracking and Stabilizing with the DaVinci Control Panel 1072
1053
Sizing and Image Stabilization Part 7 – 58
Resolution Independence in
DaVinciResolve Explained
DaVinci Resolve is a resolution-independent application. This means that, whatever the
resolution of your source media, it can be output at whatever other resolution you like. This also
means that you can freely mix clips of any resolution, fitting 4K, HD, and SD clips into the same
timeline, and scaling each to fit the project resolution as necessary.
Your project’s resolution can be changed at any time, allowing you to work at one resolution,
and then output at another resolution. This also makes it easy to output multiple versions of a
program at different resolutions, for example, outputting both HD and SD sized versions of the
same program.
Finally, the controls found in the Sizing palette let you transform clips individually, either to push
into a clip for creative intent, or to pan and scan media of one format to fit better into a different
output format.
Using High Resolution Media in Lower Resolution Projects
Every set of transform and sizing parameters and settings that resize clips is combined
intelligently, so that the highest resolution media is always used as the source for any transform.
For example, if you’re using 4K media within a 1920x1080 project, and you need to enlarge a
clip using the Input Sizing palette’s Zoom parameter, the image is scaled relative to the native
4K resolution of the source, and the result is fit into the current timeline resolution. This
automatically guarantees the highest quality for any image transform you make.
Timeline Resolution
This is one of the most fundamental settings in your project, defining its frame size. You can
choose a predefined resolution from the “Set timeline resolution to” pop-up menu, or you can
type a custom resolution into the X and Y fields below.
Media used in a project does not have to match the timeline resolution, in fact it’s common to
mix resolutions within the same timeline. Clips that don’t match the current resolution will be
automatically resized according to the currently selected Image Scaling setting
(described below).
As mentioned earlier, you can change the timeline resolution at any time. When you do so, all
Power Windows, Sizing palette adjustments, tracking, keyframing, and other geometric
operations are automatically and accurately scaled to fit the new resolution.
Pixel Aspect Ratio (PAR)
The Timeline Format settings, found in the Master Settings of the Project Settings, let you
specify a Pixel Aspect Ratio in addition to the frame size. Defaulting to Square Pixel, which is
appropriate for high definition projects, there are also options for 16:9 anamorphic, 4:3 standard
definition, or Cinemascope. Which options are available depends on what timeline resolution
you’ve selected.
In addition, each clip has individually adjustable PAR settings, for situations where you’re mixing
multiple types of media within a single project. For example, if you’re mixing SD clips with
non-square pixels and HD clips with square pixels, you can sort out all of the SD clips in the
Media Pool and assign them the appropriate NTSC or PAL non-square pixel ratio PAR setting.
For more information, see Chapter 10, “Modifying Clips and Clip Attributes.”

1054
Sizing and Image Stabilization Part 7 – 58
Image Scaling
If a clip’s native resolution doesn’t match the timeline resolution, then the currently selected
Input Scaling Preset in the Image Scaling panel of the Project Settings dictates how mismatched
clips will be handled project-wide. The default setting is “Scale entire image to fit,” which
shrinks or enlarges the image to fit, in the best way possible, the current dimensions of the
frame, adding letterboxing or pillarboxing as necessary.
There’s an additional set of Scaling and Resize Filter settings that provide the same options as
those found in the Project Settings window, except that they let you choose settings that will be
specific to that clip. And there are two sets of parameters that let you set the quality and
method used for these automatic transforms.
Resize filters lets you choose the filter method used to interpolate image pixels when
resizing clips:
Uses sharper filter: Usually provides the best quality for most projects, using an optical
quality processing technique that’s unique to DaVinci Resolve.
Uses smoother filter: May provide a more pleasing result for projects using clips that
must be scaled down to standard definition, as this filter exhibits fewer sharp edges at
SD resolutions.
Bicubic: While the Sharper and Smoother options are slightly higher quality, Bicubic is
still an exceptionally good resizing filter and is less processor intensive than either of
those options.
Uses bilinear filter: A lower quality setting that is less processor intensive. Useful for
previewing your work on a low-performance computer before rendering, when you can
switch to one of the higher quality options.
Input scaling preset: Checking this box lets you choose an Input Sizing preset to apply
to the project.
Output scaling preset: Checking this box lets you choose an Output Sizing preset to
apply to the project.
Input Image Scaling or Scaling options let you choose how clips that don’t match the current
project resolution are handled. The illustrated examples below show an SD clip being fit into an
HD project using each of the different options.
Center crop with no resizing: Clips of differing resolution are not scaled at all. Clips that
are smaller than the current frame size are surrounded by blanking, and clips that are
larger than the current frame size are cropped.

1055
Sizing and Image Stabilization Part 7 – 58
Scale full frame with crop: Clips of differing resolution are scaled so that the clip fills
the frame with no blanking. Excess pixels are cropped.
Scale entire image to fit: The default setting. Clips of differing resolution are scaled
so that each clip fills the frame without cropping. The dimension that falls short has
blanking inserted (letterboxing or pillarboxing).
Stretch frame to all corners: Useful for projects using anamorphic media. Clips of
differing resolutions are squished or stretched to match the frame size in all dimensions.
This way, anamorphic media can be stretched to match full raster, or full raster media
can be squished to fit into an anamorphic frame. An added benefit of this setting is that
it makes it easy to mix anamorphic and non-anamorphic clips in the same project.
Output Image Scaling
Another group of settings found in the Image Scaling panel of the Project Settings lets you
optionally choose a different resolution to be output via your video output interface, for
monitoring, outputting to tape, or rendering.
If you set the resolution in the Render Settings list of the Deliver page to something other than
the timeline resolution, these settings are used to make the change. This can be used in
situations where you’re working on a high resolution 4K project, but you want to monitor using
an HD display, and output HD resolution media for approval.
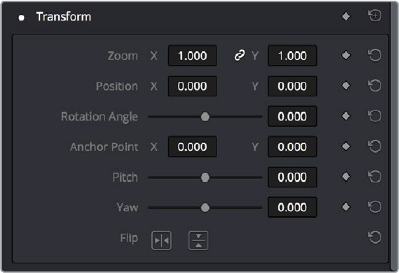
1056
Sizing and Image Stabilization Part 7 – 58
Lock to timeline format: Turned on by default, so that these settings mirror the Image
Scaling and Input Image Scaling settings described above. Turning this checkbox off
lets you choose different settings for monitoring, outputting to tape, or rendering, using
the other settings in this group.
Set output resolution to: Lets you choose an alternate resolution.
For “X x Y” processing: Lets you specify a different custom alternate resolution.
Pixel aspect ratio is: Lets you specify an alternate pixel aspect ratio to match the
alternate timeline format.
Mismatched resolution files: Lets you choose an alternate way of handling mismatched
resolution files given the alternate resolution you’ve chosen. These options work
identically to those of the “Input Image Scaling” group. For example, for an HD or
UHD resolution project you may have the Image Input Scaling set to “Scale Full Frame
With Crop,” so that all Standard Definition resolution files are center-cut to eliminate
blanking. However, if you’re using Output Image Scaling to create a Standard Definition
master, you may want to set the Output Image Scaling > Mismatched resolution files
setting to “Scale entire image to fit” in order to letterbox all HD or UHD resolution clips,
while preserving the original aspect ratio of the SD clips.
Edit Page Transform Parameters and
Imported Sizing Information
A set of Transform parameters corresponding to each clip in the Timeline is available from the
Inspector. These parameters operate independently of the Sizing controls found in the Color
page, and exist primarily to store incoming transform data from imported AAF and XML projects
coming from other applications.
The transform parameters in the Inspector of the Edit page
If, when importing an AAF or XML project file, you turned on the “Use sizing information”
checkbox, then every clip that had position, scale, rotation, or crop settings applied in the
originating NLE will have those adjustments applied to these transform parameters.
The transformation applied by these parameters is combined with whatever Input and Output
Sizing adjustments are being made to output the final geometric result.
Edit, Input, Output, and Node Sizing on the Color Page
The Sizing palette on the Color page has another dedicated set of keyframable transform
parameters that work with the DaVinci control panel to let the colorist apply pan and scan
adjustments while working through a project. These parameters work independently of the
Editpage Transform parameters, allowing you to keep imported transform settings separate
from other transform settings that you apply. However, for convenience the Edit sizing controls
are available in the Color page as well.
1057
Sizing and Image Stabilization Part 7 – 58
Format Resolution on the Delivery Page
By default, the Format Resolution setting in the Render Settings of the Deliver page matches
the timeline resolution when “Match timeline settings” is enabled in the Output Scaling Preset in
the Image Scaling panel of the Project Settings.
Choosing a new resolution from the “Set Resolution to” pop-up menu lets you override the
current Format Resolution setting before rendering. Using this control, you can queue up
multiple jobs, each set to a different resolution, to output multiple formats during a single render
session. For more information on rendering and setting up jobs for the Render Queue, see
Chapter 73, “Using the Deliver Page.”
The Five Color Page Sizing Modes
The Sizing Palette on the Color page can be put into one of five modes, each of which
accomplishes a different task.
Edit Sizing: These controls mirror those found in the Inspector of the Edit page.
Input Sizing: These controls let you make sizing adjustments to individual clips that
affect their overall geometry (pan, tilt, zoom, and rotation). These controls are useful for
doing clip by clip pan and scan adjustments.
Output Sizing: These controls are nearly identical, except that they affect every
clip in the entire timeline, all at once. Output sizing is useful for making a formatting
adjustment to an entire timeline, such as changing an HD timeline to an SD timeline
with simple adjustments to crop and pan the resulting framing.
Node Sizing: Lets you add targeted sizing adjustments at any point within the node
tree. Like Input Sizing, Node Sizing is specific to a particular clip. Unlike Input Sizing,
Node Sizing is affected by operations that split color channels (such as the splitter/
combiner nodes) and limit the image (such as qualifiers and windows). You can also add
as many node sizing adjustments to a clip’s grade as you need.
Reference Sizing: A set of sizing controls that lets you reposition the still when a wipe
comparison is being made. Using these controls, you can move the still image to better
compare it to the clip you’re wiping it against. The Reference Sizing controls only work
when you have a wipe enabled.
Sizing Order of Processing on the Color Page
Input Sizing adjustments are applied before all image processing that takes place in the node
graph, including Node Sizing, while Output Sizing adjustments are applied after image
processing in the node graph.
Sizing Controls
Input, Node, and Output Sizing share many of the same controls. When the Sizing palette is set
to Input Sizing mode, the controls transform each clip individually. If you’re simply pushing in on
one or two clips, or making individual pan & scan adjustments to account for a change in format,
these are the controls you want to use.
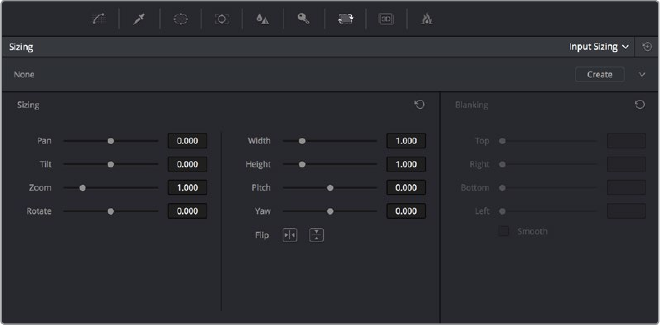
1058
Sizing and Image Stabilization Part 7 – 58
The Sizing palette
Pan: Moves the clip along the horizontal, X axis. Positive values move the clip right,
negative values move the clip left.
Tilt: Moves the clip along the vertical, Y axis. Positive values move the clip up, negative
values move the clip down.
Zoom: Positive values enlarge the clip, negative values shrink the clip.
Rotate: Positive values rotate the clip clockwise. Negative values rotate the clip
counter-clockwise.
Width: Positive values stretch the image wider, negative values squish the
image narrower.
Height: Positive values stretch the image taller, negative values squish the
image shorter.
Pitch: Rotates the image toward or away from the camera along an axis running through
the center of the image, from left to right. Positive values push the top of the image
away and bring the bottom of the image forward. Negative values bring the top of the
image forward and push the bottom of the image away. Higher values stretch the image
more extremely.
Yaw: Rotates the image toward or away from the camera along an axis running through
the center of the image from top to bottom. Positive values bring the left of the image
forward and push the right of the image away. Negative values push the left of the
image away and push the right of the image forward. Higher values stretch the image
more extremely.
Key Lock: (Node Sizing only) Lets you choose how regions of the image that are
isolated by one or more windows will be transformed. There are two options:
Off: While off, the transform controls will move the windowed region to another area of
the frame, effectively duplicating the windowed area.
On: While on, the transform controls will move other areas of the frame into the
windowed regions, effectively covering up the windowed area with another portion of
the picture.
Flip Image: Two buttons let you flip the image in different dimensions.
Flip Horizontal control: Reverses the image along the X axis, left to right.
Flip Vertical control: Reverses the clip along the Y axis, turning it upside down.

1059
Sizing and Image Stabilization Part 7 – 58
Lens Correction: (Edit Sizing only) Two controls let you correct for lens distortion in the
image, or add lens distortion of your own (only available in the Studio version).
Analyze: Automatically analyzes the frame in the Timeline at the position of the
playhead for edges that are being distorted by wide angle lens. Clicking the Analyze
button modifies the effect of the Distortion slider so that it gives a more accurate result,
but it doesn’t perform a correction.
Distortion: Dragging this slider to the right applies a warp to the image that lets you
straighten the bent areas of the picture that can be caused by wide angle lenses. It’s
not necessary to click the Analyze button prior to using this slider, but using the
Analyze button can improve the accuracy of the result.
Sizing OSC
An onscreen control currently mirrors the sizing parameters, showing you a preview of the
transformed image, shown by an orange outline, relative to the size of the frame, shown in gray.
Zoom and reset controls make it easier to see the full display.
Blanking Controls
Output Sizing mode also has a set of Blanking controls that you can use to add custom blanking
to a clip or project.
For example, you can use these controls to add nonstandard letterboxing or pillarboxing to an
image. Along with all other Output Sizing adjustments, blanking is added last in the image
processing pipeline, so it’s not affected by any of the color or contrast adjustments youmake.
Top: Adjusts the top letterbox.
Right: Adjusts the right pillarbox.
Bottom: Adjusts the bottom letterbox.
Left: Adjusts the left pillarbox.
Smooth: A checkbox that lets you turn on edge anti-aliasing for source blanking.
Overrides the Anti-alias Edges pop-up menu found in the Image Scaling panel of the
Project Settings.
Blanking presets are also available by choosing from the Timeline > Output Blanking submenu.
Choosing one of these options automatically sets the Blanking parameters of the Sizing
palette’s Output Sizing mode. The following presets are available:
1.33: SD or 4:3
1.66: European theatrical
1.77: HD or 16:9
1.85: Theatrical flat aspect ratio
2.35: Original anamorphic (scope) theatrical wide-screen
2.39: Current 35mm anamorphic (scope) theatrical wide-screen
2.40: Current 35mm anamorphic (scope) theatrical wide-screen (rounded up
for Blu-Ray)
Reset: Restores the clip to its original aspect ratio.
NOTE: It might be necessary to turn anti-aliasing off if you notice black blurring
at the edges of blanking being applied to an image.
1060
Sizing and Image Stabilization Part 7 – 58
Anti-aliasing at the edges of blanking is handled by a setting in the Image Scaling panel of the
Project Settings. For more information, see Chapter 3, “Project Settings and Preferences.”
Resetting the Sizing Palette
You can reset every control within the Sizing palette at any time by choosing Reset from the
Palette Options pop-up menu, or by clicking the reset button in the upper left-hand corner of
the palette.
Input and Output Sizing Presets
If there are Input or Output Sizing settings that you find yourself using repeatedly, you can save
them as presets for easy recall. For example, if there’s a group of input settings that you use to
resize a clip of a particular format to match the current project, you can save it as a preset that
you can use whenever.
Preset pop-up menu: Provides access to all the currently saved presets in the
current database.
Delete preset: To delete a preset, select it from the pop-up menu, click the trash can
button, then click OK.
Add preset: To add a preset, make whatever settings adjustments you need, then click
the plus button. When the Format Preset dialog appears, enter a name, check that the
settings are correct, then click Save.
Change preset: To change a preset, load the preset you want to change, make
whatever changes you need, then click the check button.
The Input and Output Sizing modes save different presets. Each of these sets of presets is
available from the “Override input scaling” and “Override output scaling” pop-up menus in the
Image Scaling panel of the Project Settings.
Sizing Controls with the
DaVinci Control Panel
There are two sets of DaVinci control panel mappings for the sizing controls. The most obvious
controls can be seen permanently mapped to the knobs and soft keys of the Transport panel.
This makes these controls easy to access for projects where you’re panning & scanning nearly
every shot of a film-scanned program.
To adjust PTZR settings:
1 Press the OUTPUT or INPUT soft key to switch between Output Sizing and Input
Sizing modes.
2 Use the PAN, TILT, ZOOM, and ROTATE knobs of the Transport panel, and the H FLIP
and V FLIP soft keys.
To adjust Input and Output Blanking:
1 Press the INPUT BLANKING or OUTPUT BLANKING soft key on the Transport panel.
2 Use the knobs labeled LEFT, RIGHT, TOP, and BOTTOM to make a blanking adjustment.
3 Press SIZING when you’re finished.

1061
Sizing and Image Stabilization Part 7 – 58
Another set of DaVinci control panel mappings appears when you press the SIZING button of
the T-bar panel. In this case, the Center panel knobs and soft keys update to a page showing
the following:
Ref Wipe Sizing Adjustments: These controls, on the middle screen of the Center
panel, let you reposition a still from the Gallery that’s being displayed in a split screen.
This can make it easier to compare features that would otherwise be obscured by the
still’s position on screen.
Input Sizing Adjustments: The Input Sizing controls are displayed on the right screen
of the Center panel. These are similar to the mappings on the Transport panel, but the
Center panel’s second row of knobs also exposes PITCH, YAW, H SIZE, and V SIZE
controls, and there’s an additional MODIFY PAR button that lets you change the pixel
aspect ratio of aclip.
Output Sizing Adjustments: If you press OUTPUT soft key on the Center panel, the
knobs and soft keys change to show the Output Sizing controls. Press BLANKING to
expose all the preset aspect ratios on the Transport panel, along with the USER which
allows you to expose user definable presets.
To save and recall user definable blanking aspect ratios:
1 Press SIZING on the T-bar panel.
2 Press the OUTPUT soft key on the Center panel.
3 Press the OUTPUT BLANKING soft key on the Transport panel, and then enter the
blanking aspect ratio as a number (e.g., 2.4) using the number pad on the Transport
panel to set your customized blanking.
4 Press the BLANKING soft key on the Center panel.
5 To apply the new ratio, press the BLANKING soft key on the Center panel, then press
USER on the Transport panel, and press one of the USER 1-5 soft keys.
Using Node Sizing for
Channel and Paint Effects
Using Node Sizing, you can apply individual sizing adjustments on a per-node basis. All Node
Sizing adjustments within a grade are cumulative, and any keyframing done to Node Sizing
parameters is stored in that node’s Node Format keyframe track in the Keyframe Editor. Two
good examples of Node Sizing include realigning color channels individually in conjunction with
the Splitter/Combiner nodes, or duplicating windowed regions of an image by moving them
around the frame.
TIP: With the Input Sizing Adjustments controls exposed on the Center panel,
you can set the Transport panel to display the Output Sizing controls, for
simultaneous presentation of every sizing control that’s available
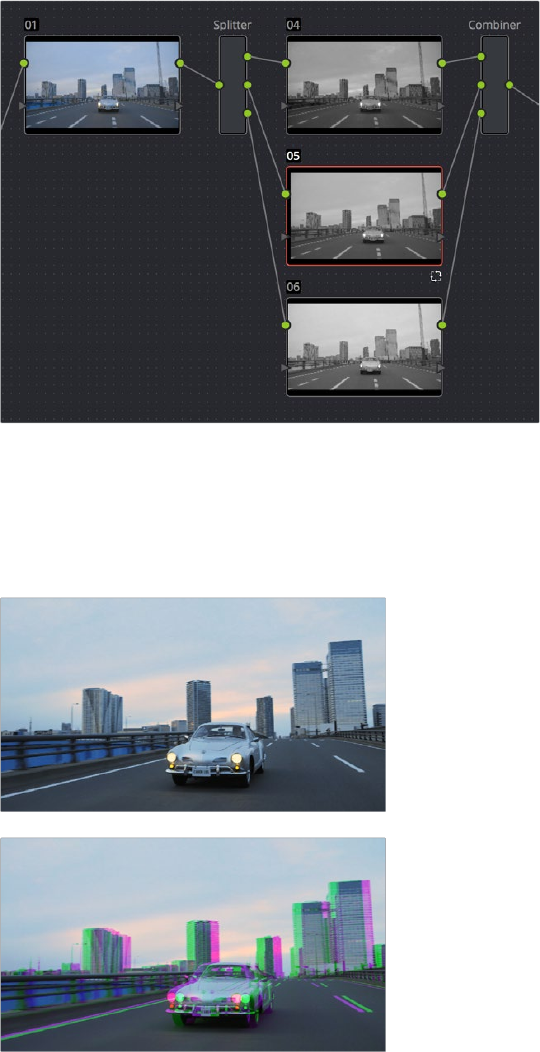
1062
Sizing and Image Stabilization Part 7 – 58
Example 1: Using node sizing on individual color channels:
1 Choose Nodes > Add Splitter/Combiner Node to add this node structure to the
current grade.
2 Select one of the three Corrector nodes connected between the Splitter and Combiner
nodes that corresponds to the color channel you want to transform.
Adding the Splitter/Combiner nodes to use Node Sizing on individual color channels
3 Open the Sizing palette, choose Node Sizing from the mode pop-up, and use the
Sizing parameters to transform that channel as necessary. For example, if you have an
old video clip with misaligned color components, you could pan a misaligned channel
to the left or right to try and improve its alignment.
Before and after panning the green channel
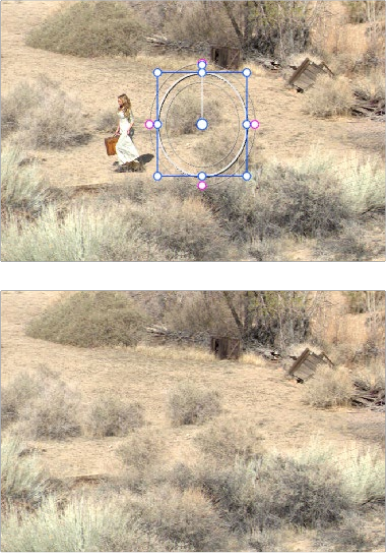
1063
Sizing and Image Stabilization Part 7 – 58
Example 2: Using Node Sizing to duplicate a windowed area of an image to cover a blemish:
1 Create a new node.
2 Open the Window palette, create a Circular window, and then shrink and reposition it to
surround a feature you want to remove.
3 Open the Tracking palette, and track the window to follow the feature to be removed.
4 After the track is complete, now move the window to an adjacent area of clean detail
that’s right next to the feature you want to remove. This is the area of the image you’re
going to duplicate and cover the unwanted feature with.
5 Now, open the Sizing palette, choose Node Sizing from the mode pop-up, and use
the Sizing parameters to move a duplicate of the windowed area to cover up the
unwanted feature.
Before/After using Node Sizing to clone an area of the image to
cover up the actor with a plant to create a clean background
When you’re done, playing through the clip should show that the duplicated area of the image is
still tracking the feature you want to remove.
Image Stabilization in the Tracker Palette
The Image Stabilization mode of the Tracker palette lets you smooth out or even steady
unwanted camera motion within a clip. The analysis is performed in such a way as to preserve
the motion of individual subjects within the frame, as well as the overall direction of desirable
camera motion, while correcting for unsteadiness.
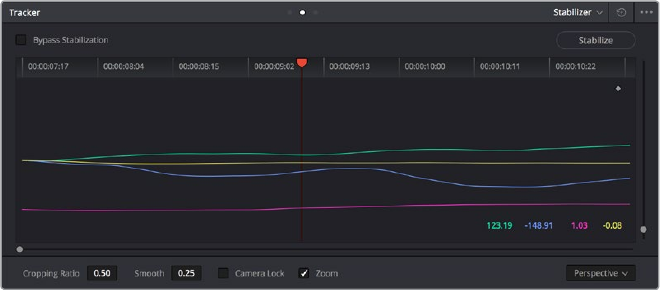
1064
Sizing and Image Stabilization Part 7 – 58
Using the Stabilizer
Starting in DaVinci Resolve 14, an advanced stabilizer that’s capable of both warping and
translation to minimize unwanted shaking in a clip replaces the classic stabilization tools that
were available previously (these tools are still available should you need specific capabilities of
the older toolset, and are covered in a later section). With a single click of the Stabilize button,
the currently selected clip is analyzed and automatically stabilized using a combination of
warping and image translations.
The default Stabilizer controls
Stabilizer Parameters and Controls
The default settings yield good results for most situations, but there are ways you can
customize stabilization in situations where unique issues arise.
A pop-up menu provides three different options that determine how the selected clip is
analyzed and transformed during stabilization. You must choose an option first, before clicking
the Stabilize button, because the option you choose changes how the image analysis is
performed. If you choose another option, you click the Stabilize button again to re-
analyze the clip.
Perspective: Enables perspective, pan, tilt, zoom, and rotation analysis and
stabilization.
Similarity: Enables pan, tilt, zoom, and rotation analysis and stabilization, for instances
where perspective analysis results in unwanted motion artifacts.
Translation: Enables pan and tilt analysis and stabilization only, for instances where
only X and Y stabilization gives you acceptable results.
The next four controls let you customize how aggressively the selected clip is stabilized.
Bypass Stabilization: This checkbox lets you turn stabilization off and on to be able to
compare the stabilized and unstabilized image.
Cropping Ratio: This value limits how hard the stabilizer tries to stabilize, by dictating
how much blanking or zooming you’re willing to accept in exchange for eliminating
unwanted motion. A value of 1.0 results in no stabilization being applied. Progressively
lower values enable more aggressive stabilization. Changing this value requires you to
click the Stabilize button again to re-analyze the clip.
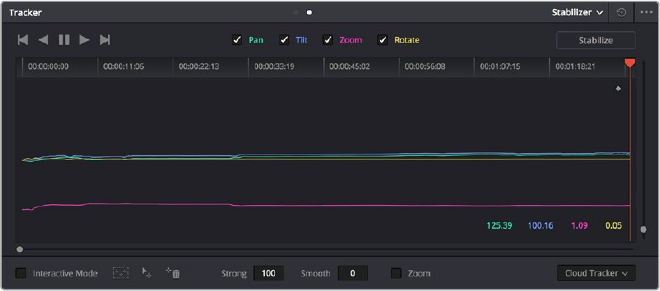
1065
Sizing and Image Stabilization Part 7 – 58
Smooth: Lets you apply mathematical smoothing to the analyzed data used to
stabilize the clip, allowing camera motion in the shot while eliminating unwanted
jittering. Lower values perform less smoothing, allowing more of the character of the
original camera motion to show through, while higher values smooth the shot more
aggressively. Changing this value requires you to click the Stabilize button again to
re-analyze the clip. Turning this on requires you to click the Stabilize button again to
re-analyze the clip.
Camera Lock: Turning on this checkbox disables Cropping Ratio and Smooth, and
enables the stabilizer to focus on eliminating all camera motion from the shot in an
effort to create a locked shot.
Zoom: When this checkbox is turned on, the image is resized by a large enough
percentage to eliminate the blanking (black edges) that is the result of warping and
transforming the image to eliminate unwanted camera motion. The lower a value
Cropping Ratio is set to, the more DaVinci Resolve will need to zoom into an image
to eliminate these blanked edges. If you turn this off, the image is not zoomed at all,
and whatever blanking intrudes into the image is output along with the image, on
the assumption that you’ll have dedicated compositing artists deal with eliminating
this blanking by filling in the missing image data in a more sophisticated manner. You
may also leave this checkbox turned off if you’re planning on animating the Input
Sizing Zoom parameter to dynamically zoom into and out of a shot being stabilized to
eliminate blanking only where it occurs, using only as much zooming as is necessary for
each region of the shot.
Using the Classic Stabilizer
The “classic” image stabilizer controls available in DaVinci Resolve version 12.5 and earlier are
still available, simply select “Classic Stabilizer” from the option menu of the Tracker Palette.
Classic image stabilization in DaVinci Resolve consists of three steps. First, you analyze the clip.
Second, you choose the Stabilization settings you want to use. Third, you click Stabilize to
calculate the result.
When analyzing the clip, you can choose to use either the default Cloud Tracker, which
automatically finds as many trackable points as possible throughout the image and calculates
stabilization based on all of them, or you can use the Point Tracker, which lets you manually
place one or more individual crosshairs on image features that you select. For more information
on using the Point Tracker for window tracking, see Chapter 46, “Motion Tracking Windows.”
The Stabilizer mode of the Tracker palette
As with Object Tracking, you can choose which aspects of motion to stabilize, but this must be
done before you do the initial image analysis.

1066
Sizing and Image Stabilization Part 7 – 58
Analyze Controls
The Analyze controls automatically scan through the entire clip, identifying trackable features
that can be used to stabilize the shot.
A series of four checkboxes let you turn on and off which axes you’d like to stabilize. These
checkboxes must be selected before you perform an analysis in order to restrict the data that’s
generated.
Pan: Enables horizontal stabilization.
Tilt: Enables vertical stabilization.
Zoom: Enables stabilization of size.
Rotate: Enables stabilization of orientation.
The next three buttons let you perform the stabilization analysis.
Track Reverse button: Initiates tracking from the current frame backward, ending at the
first frame of the clip.
Pause button: Stops tracking (if you’re fast enough to click this button before tracking is
finished).
Track Forward button: Initiates tracking from the current frame forward, ending at the
last frame of the clip.
Interactive Mode Controls
The Interactive controls let you make manual changes to the automatically generated tracking
point cloud that DaVinci Resolve creates, so you can try different ways of obtaining better
stabilization results in challenging situations.
Interactive Mode checkbox: Turns the Interactive stabilization mode on and off.
When you enter Interactive mode, you can manually alter the point cloud that DaVinci
Resolve uses to stabilize the image. You’ll then make your analysis while in Interactive
mode. When you exit Interactive mode, your manual changes to the point cloud are
eliminated, and DaVinci Resolve again uses automatically placed point clouds to do all
stabilization.
Insert: Lets you add tracking points to whatever analyzable features exist within
a bounding box that you’ve drawn in the Viewer. Inserted stabilization points are
automatically placed.
Set Point: Lets you use the cursor (using the DaVinci Resolve control panel), to
manually place individual tracking points, one by one, with which to track a feature.
If there is no trackable pixel group at the coordinates where you placed the cursor, a
tracking point will be placed at the nearest trackable pixel group. You must place at
least two tracking points at different pixel groups to track rotation, and at least three to
track zoom.
Delete: Eliminates all stabilization points within a bounding box that you’ve drawn in
the Viewer.
The procedures for using Interactive Mode for stabilization are the same as for tracking. For
more information, see Chapter 46, “Motion Tracking Windows.”
NOTE: Once stabilization has been done, disabling these checkboxes does
nothing to alter the result. To make changes, you need to enable or disable
the necessary checkboxes first, and then reanalyze the clip.

1067
Sizing and Image Stabilization Part 7 – 58
Stabilization Parameters and Controls
There are five controls in the Stabilization group:
Stabilization selections
Strong: Lets you choose how tightly you want to use the stabilization track to eliminate
motion from a shot. With a value of 100, stabilization is maximized in an effort to “lock”
the shot in place and eliminate all camera motion. This value is a multiplier. Since some
clips might look more natural with looser stabilization, choosing a number lower than
100 lets a percentage of the original camera motion show through. Zero (0) disables
stabilization altogether. Additionally, you can invert the stabilization by choosing -100,
as described in the section on performing a match move below, and you can use a
negative value either lower or higher than -100 to under or overcompensate when
inverting the stabilization, simulating the effects of parallax where foreground and
background planes move together but at different speeds.
Smooth: Lets you apply mathematical smoothing to the analyzed data used to stabilize
the clip, and is meant to be used when the Strong parameter is less than 100, allowing
camera motion in the shot while eliminating unwanted wiggling. Lower values perform
less smoothing, allowing more of the character of the original camera motion to show
through, while higher values smooth the shot more aggressively.
Zoom: When this checkbox is turned on, the image is resized by a large enough
percentage to eliminate the blanking (black edges) that is the result of repositioning the
image to eliminate unwanted camera motion. The higher a value Smooth Frames is set
to, the more DaVinci Resolve will need to zoom into an image to eliminate these blanked
edges. If you turn this off, the image is not zoomed at all, and whatever blanking intrudes
into the image is output along with the image, on the assumption that you’ll have
dedicated compositing artists deal with eliminating this blanking by filling in the missing
image data in a more sophisticated manner. You may also leave this checkbox turned
off if you’re planning on animating the Input Sizing Zoom parameter to dynamically
zoom into and out of a shot being stabilized to eliminate blanking only where it occurs,
using only as much zooming as is necessary for each region of the shot.
Tracker Type: A pop-up menu below the Tracker graph lets you choose whether to use
the Cloud Tracker or the Point Tracker. The default Cloud Tracker automatically finds
as many trackable points as possible throughout the image and calculates stabilization
based on all of them. This is fast, but can result in problems if there are too many
prominent subjects in the frame with different vectors of motion. The Point Tracker,
by contrast, lets you manually place one or more individual crosshairs on image
features that you select. This involves more steps, but has the advantage of letting you
choose exactly which features exhibit the motion you’re trying to stabilize. For more
information on using the Point Tracker for window tracking, see Chapter 46, “Motion
Tracking Windows.”
Stabilize: After you’ve tracked the clip and adjusted the previous two controls, you
need to click Stabilize to calculate the resulting effect of the Strong, Smooth, and Zoom
controls on your clip. Whenever you make changes to the Strong, Smooth, or Zoom
parameters, you need to click Stabilize to recalculate the resulting effect on your clip.
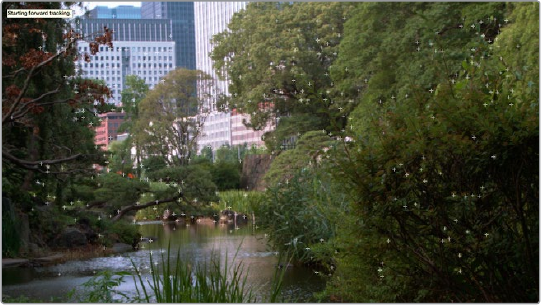
1068
Sizing and Image Stabilization Part 7 – 58
Classic Stabilization With the Cloud Tracker
Image stabilization in DaVinci Resolve is easy, but you need to follow a specific series of steps
for it to be successful.
To stabilize an image:
1 Open the Tracker palette, and choose Stabilizer from the Palette mode pop-up menu.
Make sure the Tracker Type pop-up menu at the bottom right of the Tracker palette is
set to Cloud Tracker.
2 Turn off any of the Analyze checkboxes (Pan, Tilt, Zoom, Rotate, Perspective 3D) that
correspond to transform axes you don’t want to smooth.
3 Click the Track Forward button to track the clip forward (or Track Reverse if you’d rather
start from the end of the clip and work backwards).
Multiple tracking points are automatically placed to analyze the
motion of the image for stabilization
This analyzes the clip, but no stabilization is yet applied.
4 Adjust the Strong parameter to reflect what kind of stabilization you want. If you want
to eliminate all possible motion from the shot, leave Strong set to 100. If you want to
use stabilization to smooth out the shot but leave some motion in the frame, reduce the
strong parameter to be less than 100 but greater then 0. This parameter is a multiplier,
so higher numbers reflect a higher percentage of smoothing being applied to the clip’s
range of motion, and lower numbers reflect a lower percentage of smoothing being
applied to the original range of motion.
5 If you’ve set the Strong parameter to a value less than 100 to calm the motion in the
shot, rather than lock the shot completely, you can also adjust the Smooth parameter
to mathematically smooth what motion that remains in the shot. This lets you even out
any “wobbling” that you don’t want, while retaining the camera motion that you do want.
The Strong and Smooth parameters work together, so experiment with different values
in each parameter to get the result you need.
6 Choose how you want the edges of the stabilized clip to be handled using the
Zoom checkbox:
If you want DaVinci Resolve to zoom into the image as much as is necessary to prevent
blanking (black edges) from intruding into the frame (the result of repositioning the
image to steady camera motion), then turn on the Viewer Zoom checkbox.
If you want to leave the scale of the image alone, allowing blanking (black edges) to
intrude into the frame so that you either (a) have an effects artist deal with filling in
these holes later, or (b) manually animate the Input Sizing Zoom parameter to eliminate
blanking in a dynamic way, then turn off the Viewer Zoom checkbox.
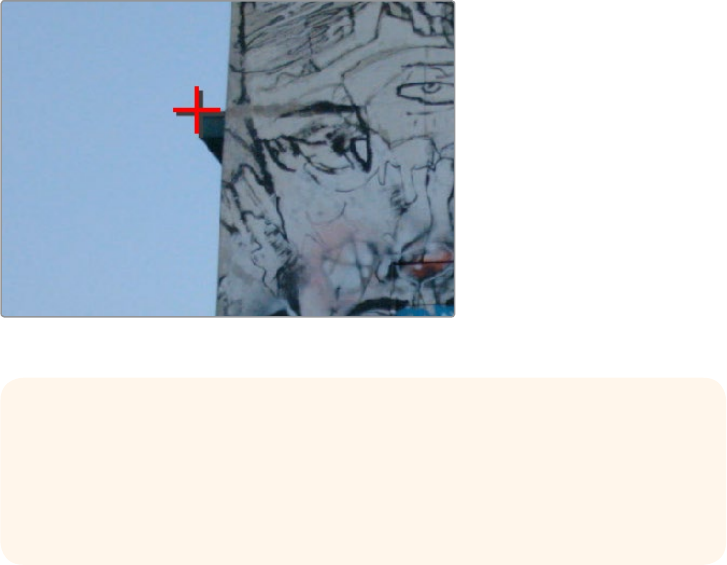
1069
Sizing and Image Stabilization Part 7 – 58
7 With all of these controls adjusted, click Stabilize. The clip is immediately transformed to
apply the amount of stabilization you selected via the Smooth Frames slider.
8 Play the clip and examine the stabilization effect. If you need to make any changes,
choose new Strong and Smooth Frames values, then click Stabilize. Any time you
change any of the Stabilization parameters, you need to click Stabilize to recalculate
the resulting transform to your clip.
Classic Stabilizing Using the Point Tracker
For clips in which there are too many moving subjects for the cloud tracker to get a solid lock,
you need to track a very specific feature in order to successfully stabilize the image. In these
cases, it’s often faster to use the Point Tracker for stabilization.
To stabilize an image using the Point Tracker:
1 Open the Tracker palette, and choose Stabilizer from the Palette mode pop-up menu.
2 Choose Point Tracker from the Tracker Type pop-up menu at the bottom right of the
Tracker palette. This changes the available controls under the tracker graph.
3 Click the Add Tracker Point button to add a crosshairs to the Viewer, and drag it to a
high-contrast, angular feature you want to track that’s indicative of the overall motion
of the clip.
Using the Point Tracker to stabilize an image
4 Click the Track Forward button to track the clip forward (or Track Reverse if you’d rather
start from the end of the clip and work backwards).
This analyzes the feature you chose to track with the crosshairs, but no stabilization is
yet applied.
TIP: You can optionally add more than one Tracker crosshairs to track multiple
features, and DaVinci Resolve will attempt to stabilize as many dimensions as
are made possible by the additional trackers. One point lets you stabilize Pan
and Tilt. Two points lets you try to stabilize Pan, Tilt, and Rotation. Four points
lets you try to stabilize Pan, Tilt, Rotation, and Zoom.
1070
Sizing and Image Stabilization Part 7 – 58
5 Adjust the Strong parameter to reflect what kind of stabilization you want. If you want
to eliminate all possible motion from the shot, leave Strong set to 100. If you want to
use stabilization to smooth out the shot but leave some motion in the frame, reduce the
strong parameter to be less than 100 but greater than 0. This parameter is a multiplier,
so higher numbers reflect a higher percentage of smoothing being applied to the clip’s
range of motion, and lower numbers reflect a lower percentage of smoothing being
applied to the original range of motion.
6 If you’ve set the Strong parameter to a value less than 100 to calm the motion in the
shot, rather than lock the shot completely, you can also adjust the Smooth parameter
to mathematically smooth what motion remains in the shot. This lets you even out any
“wobbling” that you don’t want, while retaining the camera motion that you do want.
The Strong and Smooth parameters work together, so experiment with different values
in each parameter to get the result you need.
7 Choose how you want the edges of the stabilized clip to be handled using the
Zoom checkbox:
If you want DaVinci Resolve to zoom into the image as much as is necessary
to prevent blanking (black edges) from intruding into the frame (the result of
repositioning the image to steady camera motion), then turn on the Viewer
Zoom checkbox.
If you want to leave the scale of the image alone, allowing blanking (black edges)
to intrude into the frame so that you either (a) have an effects artist deal with filling
in these holes later, or (b) manually animate the Input Sizing Zoom parameter to
eliminate blanking in a dynamic way, then turn off the Viewer Zoom checkbox.
8 With all of these controls adjusted, click Stabilize. The clip is immediately transformed to
apply the amount of stabilization you selected via the Smooth Frames slider.
9 Play the clip and examine the stabilization effect. If you need to make any changes,
choose new Strong and Smooth Frames values, then click Stabilize. Any time you
change any of the Stabilization parameters, you need to click Stabilize to recalculate
the resulting transform to your clip.
Using Stabilization to
Create a Match Move
In some circumstances, such as when you’re using the HSL Qualifier to create transparency for
a composite (using the Alpha Output described later in this chapter), you may find you need to
apply the motion from a foreground clip to the background clip so that the two clips appear to
be moving as one. This is referred to as doing a “match move,” and is a necessary step when
creating a composite for purposes of doing a sky replacement, for example. This can be done in
a simple way using the Stabilizer mode of the Tracker palette.
To match the motion of a background clip to a foreground clip:
1 First, in the Edit page, edit a foreground clip onto track V2, and a background clip with a
more interesting sky onto track V1.
2 With that done, open the Color page and follow the instructions in the section titled
“Using a Qualifier Key to Create Transparency” in Chapter 52, “Channel Splitting and
Image Compositing,” to key the sky, and use that key to create a region of transparency
in the foreground clip that lets the background sky clip in track V1 show through.
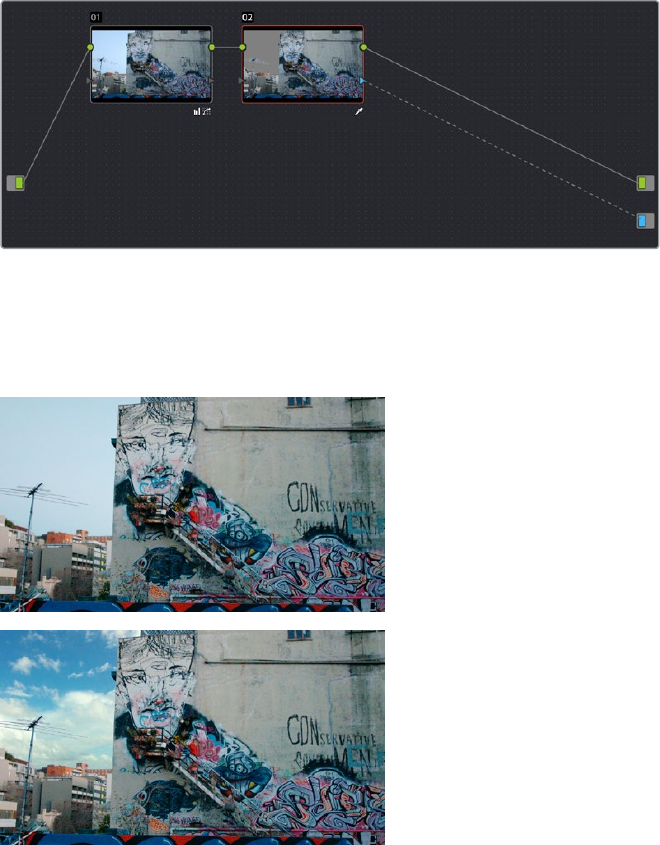
1071
Sizing and Image Stabilization Part 7 – 58
Creating transparency to replace the sky in a superimposed clip
with a sky image edited into a lower video track
In this example, the plain blue sky is being keyed so that it can be replaced with a more
interesting photo of a dramatically cloudy sky.
Before (top) and after setting up a sky replacement by connecting an HSL
qualifier of the blue in the sky to the Alpha Output to create transparency
This procedure works equally well with still images or movie clips. Also, depending on
the range of motion you’re going to be matching, you’ll probably need to use a
background image that’s somewhat larger than the region you’re keying, to make sure
you have full coverage as the layer moves to match the foreground motion. If
necessary, you can zoom into the image using the Zoom parameter in the Transform
section of the Edit page Inspector.
3 In this example, the foreground clip happens to have a camera pan, which gives the
composite away as the sky doesn’t move along with it. To move the compound clip of
the sky image to match this pan, open the Tracker pallet.
4 Choose its Stabilizer mode, and then click the Analyze Forward button to analyze the
motion of the entire clip. Then, click the Tracker palette’s Option menu, and choose
Copy Track Data.
5 Select the clip that you want to match (in this case the sky image), then open the
Tracker Palette’s Option menu and choose Paste Track Data.
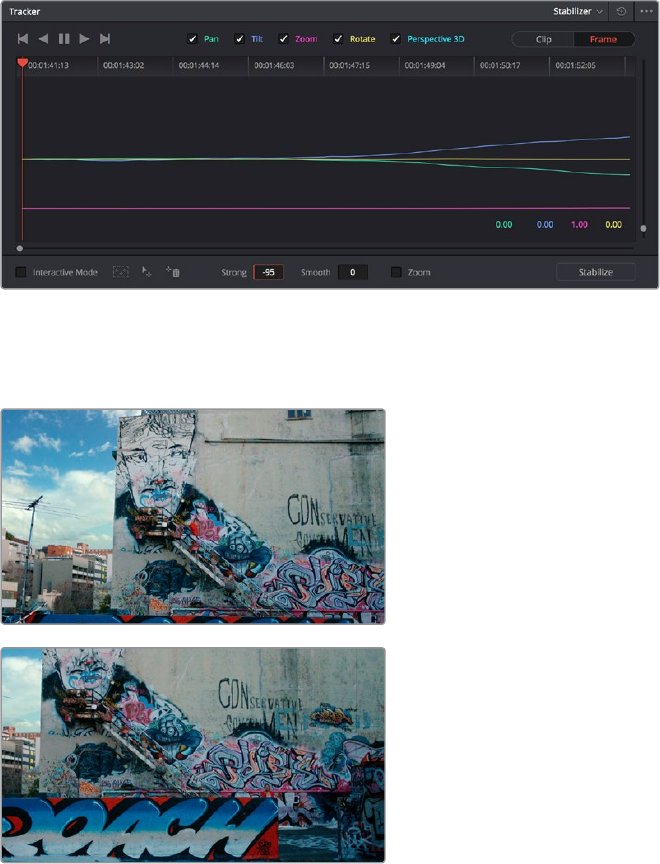
1072
Sizing and Image Stabilization Part 7 – 58
6 Now, for this to work correctly, you need to set the Strong parameter to –100, and click
the Stabilize button. Setting a negative value inverts the tracking data you copied in
step 3, which enables it to become a match move. If you’re feeling extra tricky, you can
set the Strong parameter to a little less then –100, say –94, which introduces a disparity
of foreground and background motion that simulates parallax.
Inverting the Strong parameter with a negative number to create matched motion
At this point, playing through the clip should result in a nicely matched correspondence
between the movement of the foreground and background layers.
The background sky layer after it’s been matched to the motion of the foreground layer,
the sky now follows along with the motion of the camera in the superimposed clip
Tracking and Stabilizing with
the DaVinci Control Panel
All of the tracking commands are available via the DaVinci Resolve control panel.
To open and close tracking controls:
Press OBJECT TRACK MODE at the top of the T-bar panel.
All of the tracking controls appear on the soft keys of the Center and T-bar panels.
1073
Sizing and Image Stabilization Part 7 – 58
To do simple tracking:
Use the TRACK FWD, TRACK REV, and STOP TRACK soft buttons on the left side of the
Center panel.
Press SHOW TRACK if you want to see the resulting motion path.
To turn tracking on and off for Pan, Tilt, Zoom, and Rotate:
1 Press the P/T/Z/R ENABLE soft key. The middle four soft keys of the Center panel
change to display PAN ON/OFF, TILT ON/OFF, ZOOM ON/OFF, and ROTATE ON/OFF.
2 Use these buttons to toggle any of these checkboxes on or off, then press BACK to go
back to the other tracking controls.
To interpolate between two separately tracked ranges of frames:
1 Use the transport controls to move the playhead to the first frame you want to place a
mark, and press MARK. A Viewer Mark appears on the tracking bar, identifying either
the beginning or the end of the gap in that clip’s motion tracking data.
2 If necessary, use the transport controls to move the playhead to the second frame
where you want to place a mark, and press MARK. A second Viewer Mark appears in
the tracking bar, identifying both the beginning and end of the gap in that clip’s motion
tracking data.
3 To perform the interpolation, do one of the following:
If you marked both the first and last tracked frames that surround a gap in tracking
data, press the INTRPLT BETWEEN soft key.
If you marked the last tracked frame in the first half of the clip, then use the transport
controls to move the playhead to the first tracked frame of the second half of the clip
and press the INTRPLT REV soft key.
If you marked the first tracked frame in the second half of the clip, then use the
transport controls to move the playhead to the last tracked frame of the first half of
the clip and press the INTRPLT FWD soft key.
To move the playhead to different “cue” frames:
Press the CUE START, CUE LOWER, CUE UPPER, or CUE END soft keys on the
T-bar panel.
To use Interactive mode:
1 Press the INTERACTIVE soft key at the left of the Center panel.
Additional button controls appear on the soft keys of the Transport panel, including
INSERT (POINTS), DELETE (POINTS), CLEAR (POINTS), and SET POINT.
2 Do one of the following:
To eliminate all tracking points, press the CLEAR soft key.
To add a single tracking point, press CURSOR (above the fourth trackball), use the
fourth trackball to position the on-screen cursor over the feature you’d like to add a
tracking point to, and then press the SET POINT soft key.
To eliminate a range of tracking points in order to prevent the tracking of an
undesirable feature, use the mouse to draw a bounding box around the tracking
points you want to remove, and press the DELETE soft key.
To add a range of tracking points to a specific feature, use the mouse to draw a
bounding box around the feature you want to track, and press the INSERT soft key.
3 Use the TRACK FWD, TRACK REV, and STOP TRACK soft buttons on the left side of the
Center panel to perform the necessary tracking.
4 Press the INTERACTIVE soft key again to leave Interactive mode.
1075
The Motion Effects and Blur Palettes Part 7 – 59
The Motion Effects and Blur Palettes
This chapter covers the Noise Reduction and Motion Blur effects found in the Motion Effects
palette. It also goes into detail about the Blur, Sharpen, and Mist features of the Blur Palette.
This chapter has the following topics:
Motion Effects Palette 1076
Noise Reduction Controls 1076
Motion Blur 1082
The Blur Palette 1082
Blur 1083
Sharpen 1084
Mist 1085
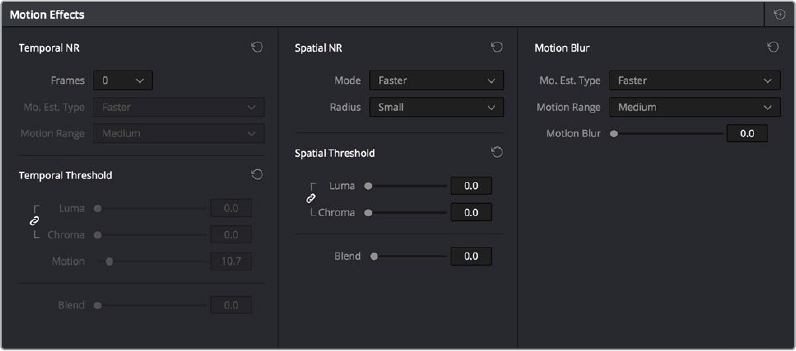
1076
The Motion Effects and Blur Palettes Part 7 – 59
Motion Effects Palette
The Motion Effects palette (only available in the Studio version) contains two sets of controls for
applying optical-flow-calculated effects to clips in your program. These include enhanced
Spatial and Temporal noise reduction, and motion-estimated artificial motion blur.
Noise Reduction Controls
Two sets of parameters let you apply GPU-accelerated Temporal and/or Spatial noise reduction
that’s designed to let you subdue noise in problematic clips, in close to real time on
workstations with appropriate processing power. Both methods of noise reduction can be used
separately or together, in varying amounts depending on the needs of the particular material
you’re working on. Furthermore, each set of controls is highly customizable, allowing for varying
amounts of noise reduction to the chroma and luma of an image, as well as numerous options
for how to apply this noise reduction.
Noise Reduction and Motion Blur controls
Temporal NR Controls
The Temporal NR controls analyze images across multiple frames in order to isolate noise from
detail. Motion estimation settings let you exclude moving subjects from this operation in order
to prevent unwanted motion artifacts.
Number of Frames: The number of frames you want DaVinci Resolve to average in
order to separate detail from the noise. You can choose between 0 and 5 frames. 0
applies no frame averaging, higher values apply more frame averaging, at the expense
of being significantly more computationally intensive the higher a value you use. Also,
a higher frame setting will yield a better analysis, but may yield unwanted artifacts if
there are fast-moving images in the frame. A value of 1 may yield better results for fast-
moving images. If you need to use higher frame values but you see artifacts, you can
also try adjusting the Motion Threshold to fix the issue.
Motion Est. Type: Picks the method DaVinci Resolve uses to detect motion in the
image. The default, Faster, is less processor intensive, but less accurate. Choosing
Better can effectively exclude motion more accurately, but is more processor
intensive. None lets you disable motion estimation altogether, with the result being the
application of Temporal NR to the entire image.
1077
The Motion Effects and Blur Palettes Part 7 – 59
Motion Range: Three settings, Small, Medium, and Large, let you set the speed of
motion that Motion Estimation should expect to exclude. A Small setting assumes
slow-moving subjects with little or no motion blur, allowing Temporal NR to affect more
of the image at a given Motion Threshold setting. A Large setting assumes fast motion
with blur occupying a larger area of the image, which excludes more of the image from
Temporal NR at the same Motion Threshold setting. Choose the setting that gives you
the best compromise between a reduction in noise and the introduction of motion
artifacts when adjusting the Motion Threshold parameter.
Luma Threshold: Lets you determine how much or how little Temporal NR to apply
to the luma component of the image. The range is 0-100, where 0 applies no noise
reduction at all, and 100 is the maximum amount. Too high a setting may eliminate fine
detail from the image.
Chroma Threshold: Lets you determine how much or how little Temporal NR to apply
to the chroma component of the image. The range is 0-100, where 0 applies no noise
reduction at all, and 100 is the maximum amount. Too high a setting may eliminate fine
color detail from the image, although you may find you can raise the Chroma Threshold
higher than the Luma Threshold with less noticeable artifacting.
Luma/Chroma Threshold ganging: Ordinarily, the Luma and Chroma Threshold
parameters are ganged together so that adjusting one adjusts both. However, you can
ungang these parameters in order to adjust different amounts of noise reduction to
each component of the image, depending on where the noise happens to be worst.
Motion Threshold: Defines the threshold separating which moving pixels are in motion
(above this threshold) versus which moving pixels are static (below this threshold).
Using Motion Estimation, Temporal Noise Reduction is not applied to regions of the
image that fall above this threshold, in order to prevent motion artifacts by not applying
frame-averaging to parts of the image that are in motion. Lower values omit more of the
image from Temporal NR by considering more subtle movements. Higher values apply
Temporal NR to more of the image by requiring faster motion for exclusion. You can
choose between 0 and 100, where 0 applies Temporal NR to no pixels, and 100 applies
Temporal NR to all pixels. The default value is 10.7, which is a suitable compromise for
many clips. Be aware that if you set too high a Motion Threshold, you may see artifacts
in moving parts of the image.
NR Blend: Lets you dissolve between the image as it’s being affected by the Temporal
NR parameters (at 0.0) and the image with no noise reduction at all (100.0). This
parameter lets you easily split the difference when using aggressive temporal noise
reduction.
Spatial NR Controls
The Spatial NR controls let you smooth out regions of high-frequency noise throughout the
image, while attempting to avoid softening by preserving detail. It’s effective for reducing noise
that Temporal NR can’t.
Mode: Added in DaVinci Resolve 12.5, the Mode pop-up lets you switch Spatial NR
between two different algorithms. Faster uses the previously available method of noise
reduction that’s good at lower settings, but may produce artifacts when applied at
higher values. Better switches the Spatial NR controls to use a higher quality algorithm
that produces vastly superior results, at the expense of being more processor intensive
to render. Both modes of operation use exactly the same controls, so you can switch
between both modes using the same settings to compare your results.
1078
The Motion Effects and Blur Palettes Part 7 – 59
Radius: Options include Large, Medium, and Small. A smaller radius offers greater real
time performance, and can provide good quality when using low Luma and Chroma
Threshold values. However, you may see more aliasing in regions of detail when using
low NR Threshold values.
Setting Radius to be progressively larger results in higher quality within areas of greater
visual detail at high Luma and Chroma Threshold values, at the expense of slower
performance. An NR Radius of Medium should provide suitable quality for most images
when using medium NR Threshold settings. As with many operations, there’s an
adjustable tradeoff between quality and speed.
Luma Threshold: Lets you determine how much or how little noise reduction to apply
to the luma component of the image. The range is 0-100, where 0 applies no noise
reduction at all, and 100 is the maximum amount. Too high a setting may eliminate fine
detail from the image.
Chroma Threshold: Lets you determine how much or how little noise reduction to apply
to the chroma component of the image by smoothing out regions of high-frequency
noise while attempting to preserve thesharpness of significant edge details. The range
is 0-100, where 0 applies no noise reduction at all, and 100 is the maximum amount.
Too high a setting may eliminate fine color detail from the image, although you may
find you can raise the Chroma Threshold higher than the Luma Threshold with less
noticeable artifacting.
Luma/Chroma Threshold ganging: Ordinarily, the Luma and Chroma Threshold
parameters are ganged together so that adjusting one adjusts both. However, you can
ungang these parameters in order to adjust different amounts of noise reduction to
each component of the image. For example, if an image softens too much at a certain
level of noise reduction, but you find there’s more color speckling than there is luma
noise, you can lower the Luma Threshold to preserve detail while raising the Chroma
Threshold to eliminate color noise.
NR Blend: Lets you dissolve between the image as it’s being affected by the Spatial NR
parameters (at 0.0) and the image with no noise reduction at all (100.0). This parameter
lets you easily split the difference when using aggressive temporal noise reduction.
Using Noise Reduction
The following procedure suggests a method of using the Noise Reduction (NR) parameters to
achieve a controlled result.
Applying noise reduction to an image:
1 Enable Temporal NR by choosing 1 to 5 frames from the Number of Frames pop-
up menu. Keep in mind that more frames dramatically increase the render time of
this effect, while it may or may not significantly improve the result, depending on
your material.
2 Choose options from the Motion Est. Type and Motion Range pop-up menus
corresponding to how much motion is in the image. If there’s a lot of motion, you may
need to choose Better and Large. If there’s not very much motion, lesser settings
may suffice.
3 With Luma and Chroma Threshold linked, slowly raise either parameter until you just
start to see a reduction in noise within the non-moving areas of the image, then make
smaller adjustments to determine the maximum amount of Temporal NR you can add
without creating motion artifacts, or overly softening image detail you want to preserve.
4 If there’s obviously more chroma than luma noise in the image, you can disable Luma/
Chroma linking at a satisfactory level of luma noise reduction, and then raise the
Chroma Threshold to apply more aggressive Temporal NR to address color speckling in
the picture.
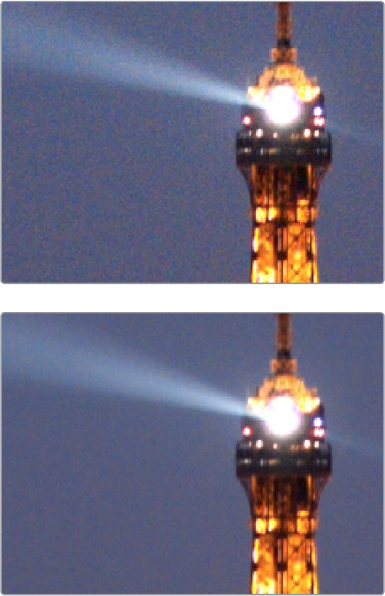
1079
The Motion Effects and Blur Palettes Part 7 – 59
5 If you’re not satisfied with the tradeoff between the maximum possible threshold
of noise reduction and the prevention of motion artifacts, you may want to adjust
the Motion Threshold setting, lowering it to omit more of the motion from the noise
reduction operation, or raising it to include more motion. If you’re still not satisfied, you
can also try better Motion Est. Type and Motion Range settings.
(Top) Before and (Bottom) After Temporal NR to reduce
noise in unmoving areas of the image
Keep in mind that the strength of Temporal NR is to reduce noise in unmoving parts of
the image. When you’ve achieve the best tradeoff between noise reduction in the still
areas and and avoidance of motion artifacts in the moving areas of the image, then it’s
time to turn to Spatial NR to further eliminate noise throughout the rest of the picture.
6 Enable Spatial NR by raising either the Luma or Chroma Threshold parameters, which
are linked by default, until you strike a suitable balance between the reduction of noise,
and an unwanted increase in image softness.
7 It’s recommended to choose the Better option from the Spatial NR mode pop-up,
as it will yield the best possible results. However, this can be processor-intensive,
so if you need better real-time performance, you can switch the mode to Faster and
compare results.
8 If there’s obviously more chroma than luma noise in the image, you can disable Luma/
Chroma linking at a satisfactory level of luma noise reduction, and then raise the
Chroma Threshold to apply more aggressive Spatial NR to address color speckling in
the picture.
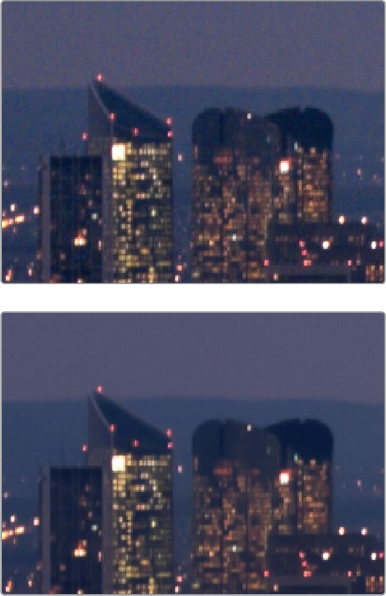
1080
The Motion Effects and Blur Palettes Part 7 – 59
(Top) Before and (Bottom) after noise
reduction improves the ‘look’
9 If you’ve had to use a high Spatial NR Luma or Chroma Threshold setting to reduce
noise visibly, and areas of detail look a bit chunky or aliased, you can choose a larger
setting from the Radius pop-up menu to enable a more detailed analysis of the scene.
This will result in higher visual quality, but larger NR Radius settings are more processor
intensive, and may reduce real time performance if you don’t have adequate GPU
resources available to your system.
10 If you’ve found suitable noise reduction settings, but the result is too aggressive and
makes the image appear too processed, you can try raising the Spatial NR and/or
Temporal NR Blend parameters to fade between the noise reduction added by each
set of controls, and the image as it was before you added noise reduction.
Try Applying Temporal NR First, then Applying Spatial NR
Because Temporal NR analyzes multiple frames for its noise isolation, it tends to be better at
preserving detail accurately in regions of the image where there’s little motion. If you try
applying Temporal NR first and get a successful result, even if only in part of the image, you
may reduce how much Spatial NR you have to apply, thus improving the overall quality of your
final result.
Keep in mind that while Temporal NR does a great job in unmoving parts of an image but is less
effective when dealing with subjects in motion, Spatial NR is able to reduce noise everywhere
in the frame falling below its threshold, even when there’s motion. Ultimately, a combination of
the two is almost always going to be a winning combination.

1081
The Motion Effects and Blur Palettes Part 7 – 59
Spatial NR Radius, How Large Should You Go?
Larger NR Radius settings can dramatically improve the quality of high-detail regions in shots
where you’re using aggressive Spatial noise reduction, but it’s not necessary to always jump to
the large Radius setting, which provides the highest precision. In many cases, when evaluating
an image that you’re applying noise reduction to, you may not actually be able to perceive the
additional quality, and you’ll waste processing time on an unnecessary level of correction.
It’s a good idea to make sure that you’re evaluating the full-frame image on a large enough
display to see the noise you’re working on within the viewing context of the intended audience.
Zooming really far into a clip while applying noise reduction may encourage you to use higher
quality settings than are necessary, because an excessively enlarged detail of an image lets
you see subtle changes that you wouldn’t notice at actual size.
Limiting Noise Reduction in Useful Ways
As with any other correction in the Color page, noise reduction can be limited using HSL
Qualification or Power Windows. This means you can focus your efforts on reducing noise in
the most problematic areas of an image (for example, in shadows and background regions),
while sparing elements that you don’t want to affect (such as faces or better-lit areas of
the image).
Furthermore, you can use Spatial NR in lieu of Blur operations to perform a subtler form of
complexion smoothing, using the HSL Qualifier or a Window to isolate an actor’s skin tone for
targeted noise reduction.
Controlling the Order of Operations for Noise Reduction
You can apply noise reduction at any point in your image processing tree using a dedicated
node. If you have an image with noise that you think might be enhanced by whatever
corrections you need to make (increasing the contrast of underexposed clips often increases
whatever noise is within an image), there are two approaches to noise reduction:
Apply noise reduction at the beginning of a node tree: This lets you pre-emptively
eliminate any noise before it becomes a problem as a result of whatever adjustments
you’re planning to make. The result can be smoother, but you may also notice that the
edge detail within the image is a bit softer.
Apply noise reduction at the end of a node tree: The alternative is to make your
adjustments first, and then apply noise reduction in a separate node afterwards. In this
case, you may find that the noise reduced regions of the image aren’t quite as smooth,
however the edge detail within the image may be visibly sharper as a result.
Apply Noise reduction to only one color channel of an image: Using the Splitter/
Combiner nodes, you can also apply noise reduction to only one color component of
an image. If you’re grading a video clip with a noisy Blue channel, this can be a way to
focus noise reduction where it’s needed.
Neither result is universally better or worse than the other. Which is preferable depends on the
image you’re working on, and the type of result you’re looking for (you might prefer some shots
to be a bit softer, while you’d like other shots to be a bit sharper). The real point is that the node-
based image processing of DaVinci Resolve lets you choose which technique works
best for you.
NOTE: If you apply noise reduction and make color adjustments within the same
node, noise reduction is processed first, followed by color adjustments.
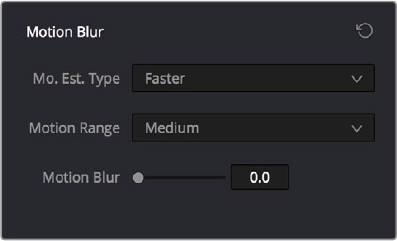
1082
The Motion Effects and Blur Palettes Part 7 – 59
Using Noise Reduction Controls with the DaVinci Control Panel
All three Noise Reduction controls are available via knobs on the PRIMARIES, NOISE
REDUCTION control group on the Center panel.
To open the Noise Reduction controls on the DaVinci control panel:
Press the PRIMARIES or MAIN soft key on the Center panel, whichever is visible
(depending on which control group is currently displayed).
Motion Blur
Motion Blur settings use optical-flow based motion estimation to add artificial motion blur to
clips that have none. This can be useful in cases where a program was shot using a fast shutter
speed, and you later decide that the resulting video has too much strobing. By analyzing the
motion within a clip, the Motion Blur settings can selectively apply blurring to the image based
on the speed and direction of each moving element within the scene.
Motion Blur controls
Three parameters let you set how much motion blur to add, and at what quality:
Motion Est. Type: A setting of Better provides more accurate pixel mapping at the
expense of being more processor intensive. Faster provides a more approximate result,
but is less processor intensive.
Motion Range: Determines what speed of motion to consider when defining regions
being blurred.
Motion Blur: Raise this parameter to add more motion blur to the image, lower it to add
less. The range is 0-100, where 0 applies no motion blur, and 100 applies maximum
motion blur.
The Blur Palette
The Blur palette has three different modes of operation—blur, sharpen, and mist. While the
functionality of the Blur and Sharpen modes somewhat overlap, each mode provides dedicated
controls that the other ones lack.
As with virtually everything else in the Color page, the operations performed in the Blur palette
can be limited as a secondary operation using HSL Qualifiers, Windows, or Imported mattes,
which makes it easy to apply these effects to specific portions of the image.
Many of the controls in the Blur palette consist of three ganged sliders, one for red, one for
green, and one for blue.
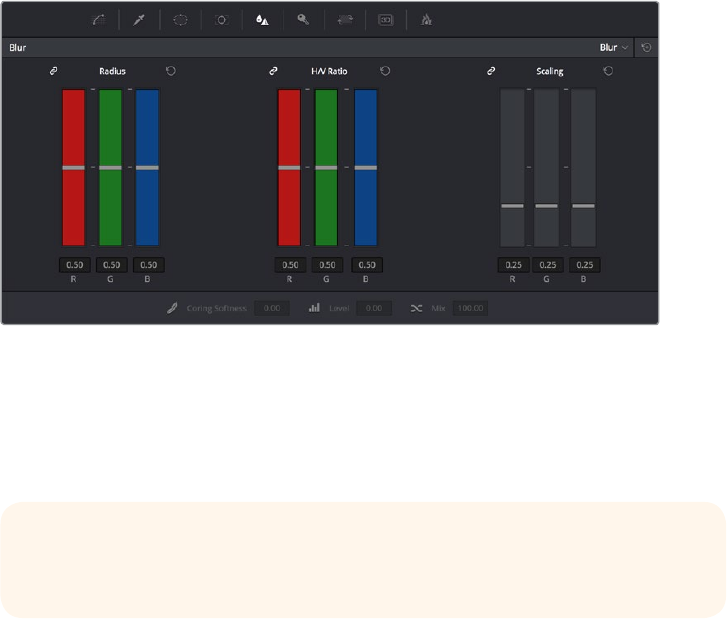
1083
The Motion Effects and Blur Palettes Part 7 – 59
By default, these ganged sliders move together as one, resulting in each color channel of the
image being equally affected. A small orange button to the left of each control’s name lets you
ungang these sliders, in order to apply degrees of adjustment to individual color channels.
Blur
The default mode, Blur lets you apply an exceptionally high-quality Gaussian blur, or another
equally high-quality sharpening operation to your image. This mode of operation has the
simplest controls.
Two sets of linked parameters let you adjust the extent and directionality of blur or sharpening.
Which is applied depends on the direction in which you adjust the Radius control.
Blur Radius controls are ganged by default, but can be unganged
Radius: This is the primary control for adding blur or sharpening. The default value of
0.50 results in no effect being applied to the image. Raising the radius slider increases
blur, to an incredibly soft maximum value of 6.00. Lowering the radius increases
sharpness, with a minimum value of 0.00 providing maximum sharpness.
H/V Ratio: Lets you add directionality to the current operation. At the default value of
0.50, the image is affected in both the horizontal and vertical directions equally. Raising
H/V Ratio makes the effect increasingly directional along the horizontal axis, while
lowering makes the effect increasingly directional along the vertical axis.
To adjust the Blur controls using the DaVinci control panel:
1 Press the VECTORS button on the T-bar panel, or the VECTORS soft key on the
Trackball’s main page.
2 Use the BLUR AMOUNT and H/V RATIO knobs to add either blur or sharpening.
3 When you’re finished, press the PRIMARIES soft key to return to the Center panel’s
main page.
TIP: If you raise the Radius slider all the way to 1.00 and the image isn’t blurred
enough, add another node and use it to add another blur operation.
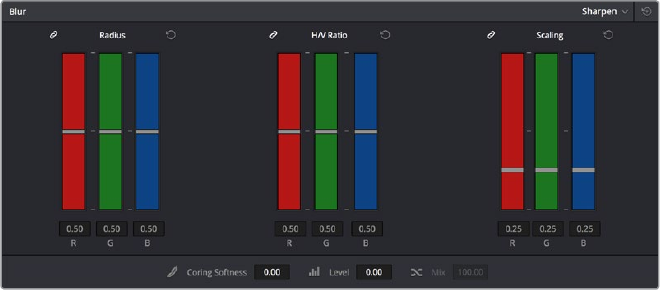
1084
The Motion Effects and Blur Palettes Part 7 – 59
Sharpen
While the Blur controls also let you apply sharpening simply by lowering rather then raising the
Radius sliders, the actual Sharpen mode provides additional controls specifically for tailoring
sharpening operations.
Sharpening with Coring Softness and Level
Radius: This is the primary control for adding blur or sharpening. The default value of
0.50 results in no effect being applied to the image. Raising the radius slider increases
blur, to a maximum value of 1.00. Lowering the radius increases sharpness, with a
minimum value of 0.00 providing maximum sharpness.
H/V Ratio: Lets you add directionality to the current operation. At the default value of
0.50, the image is affected in both the horizontal and vertical directions equally. Raising
H/V Ratio makes the effect increasingly directional along the horizontal axis, while
lowering makes the effect increasingly directional along the vertical axis.
Scaling: Multiplies the amount of scaling being applied by the Radius control for
sharpening operations. The scaling parameter has no effect if Radius is set to 0.50 or
above for blur effects.
The Coring Softness and Level parameters work together to let you limit sharpening to only the
most detailed areas of the picture that would most benefit from it, based on a threshold of
image detail that you define using the Level and Softness parameters.
Level: The first slider you should use. Raising this value sets the threshold at which
image detail is omitted from the sharpening operation. The default setting of 0 sets
the threshold low enough to sharpen the entire image. Raising Level gradually omits
low-detail areas of the image, which results in sharpening being restricted to well-
defined outlines.
Coring Softness: After you’ve set the Level slider to an appropriate amount, raising
Coring Softness blends the border between parts of the image that are sharpened and
parts of the image that are left alone.
To adjust the Sharpening controls using the DaVinci control panel:
1 Press the VECTORS button on the T-bar panel, or the VECTORS soft key on the Center
panel’s main page.
2 On the Center panel, press the IMAGE MODE soft key repeatedly to cycle to the
RESOLVE IMAGE SHARPENING controls.
3 Use the SHARP AMOUNT, SCALING, LEVELS, and SOFTNESS knobs to create the
desired sharpening effect.
4 When you’re finished, press the PRIMARIES soft key to return to the Center panel’s
main page.
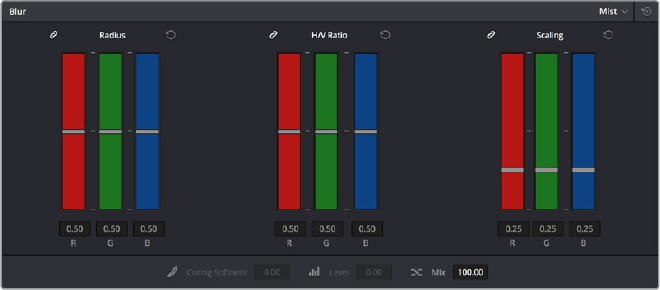
1085
The Motion Effects and Blur Palettes Part 7 – 59
Mist
The Mist mode lets you combine blur and sharpen operations in such a way as to create effects
similar to those achieved via “Vaseline on the lens” or Pro-Mist optical filters.
Mist including Mist Mix control
Unlike the Blur or Sharpen modes, where the Radius sliders provide immediate access to the
desired effect, the Mist mode requires you to lower the Radius and Mix sliders together to get a
desirable result. By varying the amounts of Radius and Mix, you can create many variations on
the mist effect.
Radius: When creating a Mist effect, you first need to lower Radius to sharpen the
image. This operations then combines with a lowering of the Mix parameter to provide
the combination of detail and blurring that results in a mist effect.
H/V Ratio: Lets you add directionality to the current operation. At the default value of
0.50, the image is affected in both the horizontal and vertical directions equally. Raising
H/V Ratio makes the effect increasingly directional along the horizontal axis, while
lowering makes the effect increasingly directional along the vertical axis.
Scaling: Multiplies the amount of scaling being applied by the Radius control, and
lets you intensify a mist effect beyond the Radius slider’s ordinary range. The scaling
parameter has no effect if Radius is set to 0.50 or above for blur effects.
Mix: After you sharpen the image using the Radius slider, decreasing the Mix parameter
adds a superimposed blur that mixes with the high-detail areas of the picture to create
the mist effect.
To adjust the Mist controls using the DaVinci control panel:
1 Press the VECTORS button on the T-bar panel, or the VECTORS soft key on the Center
panel’s main page.
2 On the Center panel, press the IMAGE MODE soft key repeatedly to cycle to the
RESOLVE MIST EFFECT controls.
3 Use the RADIUS, H/V RATIO, SCALING, and MIX knobs to create the desired
mist effect.
4 When you’re finished, press the PRIMARIES soft key to return to the Center panel’s
main page.
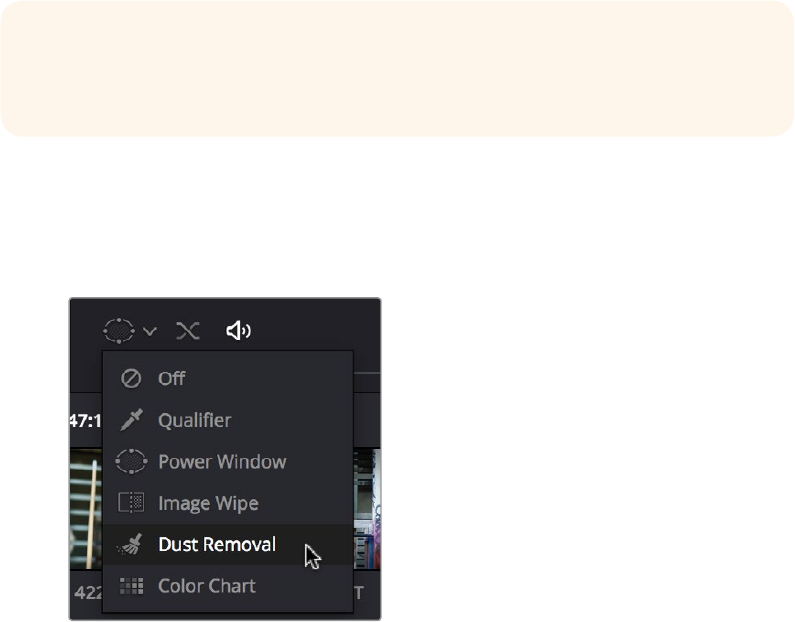
1088
Dust Removal Part 7 – 60
Introduction to Dust Removal
The interactive Dirt and Dust Removal tool provides an interface for dustbusting right from
within DaVinci Resolve. This is a raster-based effect, and results in a duplicate set of
“dustbusted” media being created within a hidden subdirectory.
If, at any point, you’re unsatisfied with the adjustment you’ve made, you need only use the
Undo command to return the clip you’re working on to its prior state.
To use the Dirt and Dust Removal tool:
Click the Onscreen Control pop-up menu at the bottom left of the Viewer, and choose
Dust Removal.
Selecting the Dirt and Dust tool in the Viewer OSD menu
To open the Dirt and Dust Removal tool setup options:
Right-click the Dirt and Dust Removal icon showing in the Onscreen Control pop-up to open the
setup window.
Dirt & ROI Settings Parameters
In the Dirt & ROI Settings window, there are a number of parameters that you can use to
optimize this tool for the particular problem you’re trying to solve.
Algorithm: The Algorithm pop-up menu lets you select the method of filtration to use
when painting out dirt or dust. Different options provide different methods for replacing
the problem pixels with image data copied from other frames in time, or from other
regions of the current frame. You’ll want to choose an option that works best for the
type of camera and subject motion happening within the clip you need to clean. For
more information on the advantages of each algorithm, see the next section.
IMPORTANT: The Dirt and Dust Removal tool only works with DPX image sequences.
Media in a raw, ProRes, or DNxHD format must first be converted to a DPX image
sequence before it can be operated on with this tool.
1089
Dust Removal Part 7 – 60
Aggression: Increase or decrease the Aggression and Blend sliders depending on the
degree of correction you want to apply.
Blend: Sets the % of the original image to be feathered at the edges of the repair.
Optimize: Turning this option on provides better-looking results, at the expense of
increased processing time.
ROI Mode: Determines whether a correction is applied with a single click, or via a paint
stroke. There are three options.
Click and Clean: Applies a correction with one click, and is fast to use on small
dust spots.
Draw and Clean: Lets you “paint” over a larger dirty area with the mouse or a pen, with
the correction being applied at the conclusion of your paint stroke.
Cnc Size: Defines the width of the “brush” that’s used to paint out dirt and dust.
Algorithms for Dirt and Dust Removal
There are six algorithms you can choose from that determine how the pixels you paint over are
automatically replaced.
Auto-temporal –/+ 1: When an ROI is drawn, the previous frame, the next frame and
the current frame will all be used for analysis. The best of these 3 will be automatically
selected and used for removing the dirt in the current frame.
Auto-temporal –/+ 2: This is the same as the above, but the frames used instead are
the current frame, previous-to-previous frame (i.e., 2 frames back), and next-to-next
frame (i.e., 2 frames forward). Therefore, if the ROI is drawn on frame 100, frame 98,
frame 100 and frame 102 will be used for analysis. The best of these 3 will be used
for removing the dirt in the current frame. The advantage of this selection is that it will
avoid the appearance of frozen grain, which may be possible in case of dirt against a
stationary background.
Temporal –/+ 1: if the ROI is drawn by dragging the mouse from left to right, the
next frame will be used for motion-compensated dirt removal. If the ROI is drawn by
dragging the mouse from right to left, the previous frame will be used.
Temporal –/+ 2: if the ROI is drawn by dragging the mouse from left to right, the next-
to-next frame will be used for motion-compensated dirt removal. If the ROI is drawn by
dragging the mouse from right to left, the previous-to previous frame will be used.
Spatial: In case of fast or blurred motion, using the previous or next frames may give
unsatisfactory results. In this case, the same frame itself can be used for removing the
dirt. This will use surrounding information in the current frame to remove the dirt.
Median: The Median filter performs a blending of the pixels, smoothing out the
region. Use this when other options do not replace the image, or when there is no
support information in which to reconstruct the original. Using small boxes will produce
better results.
1091
Data Burn Part 7 – 61
Data Burn
This chapter covers how to use the Data Burn window that’s available to every page in
DaVinci Resolve.
Data Burn 1092
Project vs. Clip Mode 1093
Setting Up Burned-In Metadata 1093
Data Burn Metadata 1094
Custom Output Options 1095
Gang Rendered Text Styles 1096
Prefix Render Text 1096
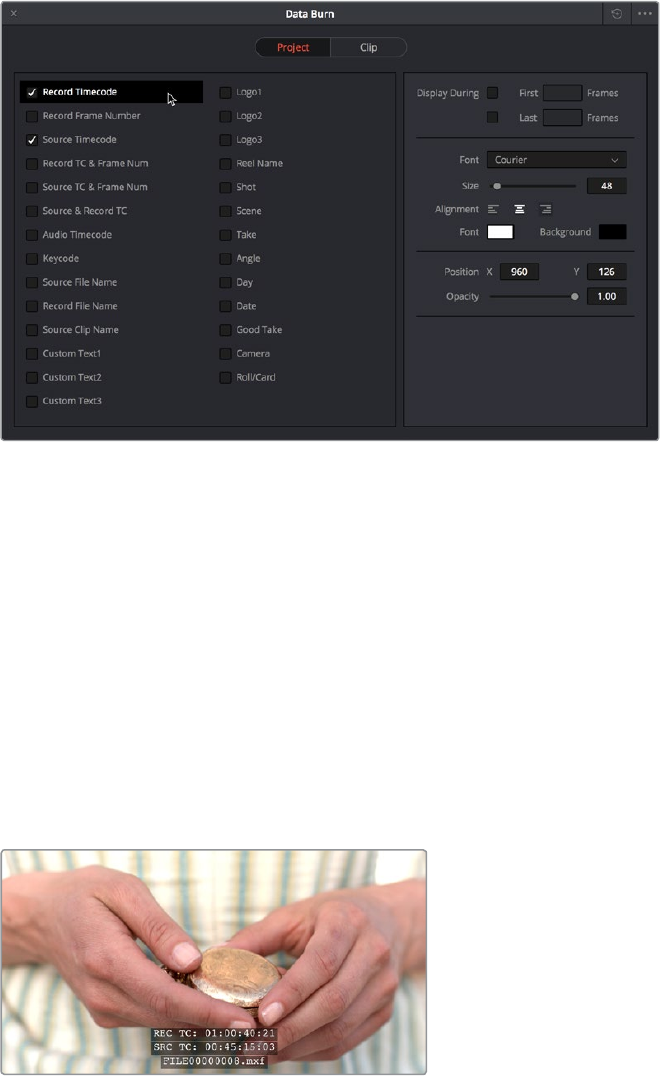
1092
Data Burn Part 7 – 61
Data Burn
The Data Burn window lets you display select metadata as a timeline-wide “window burn” that’s
superimposed over the image in the Viewer. This window burn is written into files that you
render in the Deliver page, and it’s also output to video, for viewing on your external display, or
for outputting to tape.
The Data Burn window is available by choosing Workspace > Data Burn-In.
Data Burn window
Window burns are useful as a reference when creating offline media that you need to keep
track of later. It’s also useful for watermarking review files that you don’t want to be distributed
accidentally, for adding logos or “bugs” to programs in preparation for broadcast, or for
temporarily displaying timecode or clip names to refer to on your monitor when reviewing
dailies with a client.
Traditionally, window burns are useful as a reference when creating offline media that you need
to keep track of later. However, the Data Burn window is extremely flexible. For example, it’s
also useful for watermarking review files that you don’t want to be distributed accidentally with
either custom text or graphics with alpha channels, for adding graphical logos or “bugs” to
programs in preparation for broadcast (again, optionally using graphics with alpha channels, for
superimposing custom reference guidelines of some sort over the images being monitored, or
even just for temporarily displaying timecode or clip names to refer to on your monitor while
editing, mixing, or reviewing graded dailies with a client.
Viewer displaying a logo, custom text, timecode and file path

1093
Data Burn Part 7 – 61
Project vs. Clip Mode
Two buttons at the top of the Data Burn window let you choose whether you want to edit one
set of burned-in metadata that will be displayed for the entire duration of the Timeline, or edit
burned-in metadata on a clip-by-clip basis. You can combine the two, having timeline-wide
window burn settings and separate clip-specific window burn settings for a handful of clips in
that timeline at the same time.
When rendering in the Delivery page, window burns are applied both when rendering timelines
as individual source clips and when rendering as one single clip.
Two separate panels let you adjust project-wide window
burns vs. clip-specific window burns
Setting Up Burned-In Metadata
Setting up different clip and project metadata to output as a window burn is easy.
To set up a window burn:
1 Choose Workspace > Data Burn-In.
2 Click Project or Clip at the top of the Data Burn-In window.
3 Turn on the checkboxes of whatever items of metadata you want to display in the “Add
to Video Output” column. More information about the available items appears later in
this chapter.
The first item of metadata is centered near the bottom of the frame, above Action Safe.
Each additional item of metadata you turn on for display is added above whichever
items are already displayed, regardless of their position in the “Add to Video
Output” list.
4 Click any currently enabled item of metadata from the list to highlight it in orange, and
edit that item’s Custom Output parameters at the right. More information about the
available parameters appears later in this chapter.
To reset the current window burn setup:
Click the Options pop-up menu, and choose Reset to reset the current mode of the
Data Burn window.
Saving and Loading Burn-In Presets
If there are common sets of metadata that you regularly use and switch among, you can save
each set up as a preset for future use.
To save a burn-in preset:
1 Click the Option menu and choose Save As New Preset.
2 Type a name into the Burn In Preset dialog that appears, and click OK. That preset is
added to the list of saved presets in the Option menu.

1094
Data Burn Part 7 – 61
To delete a burn-in preset:
1 Choose a preset from the Option menu.
2 Click the Option menu, and choose Delete Current Preset.
To modify a burn-in preset:
1 Choose a preset from the Option menu.
2 Edit it however you like.
3 Click the Option menu, and choose Update Current Preset.
Data Burn Metadata
The leftmost column in the Data Burn window contains a list of all the options that you can add
to the video output as a window burn. Each option has a checkbox that lets you turn it on or off.
You can also select in the Option pop-up if you would like the item name rendered as a prefix to
the burn-in data.
Record Timecode: The timecode relative to the Timeline, as set in the Conform Options
section of the General Options panel of the Project Settings.
Record Frame Number: The number of frames from the first frame of the Timeline.
Source Timecode: Each clip’s individual timecode.
Record TC & Frame Num: Both metadata options combined in one line.
Source TC & Frame Num: Both metadata options combined in one line.
Source & Record TC: Both metadata options combined in one line.
Audio Timecode: The timecode of audio that’s been synced to a clip.
Keycode: Also referred to as edge-code, the identification codes running along
the edge of film stocks that provide an absolute reference for which digital frames
correspond to which film frames.
Source File Name: The full file path, including file name, of the media file that’s linked
to the current clip.
Record File Name: The file name as defined in the Render Settings list of the
Deliver page.
Source Clip Name: The file name of the media file that’s linked to the current clip,
without the file path.
Custom Text1: A line of text that you type into the Text field of the Custom Output
parameters. You can use any characters you like. When editing any of the three
custom text fields that are available, you can use “metadata variables” that you can
add as graphical tags that let you display clip metadata. For example, you could add
the corresponding metadata variable tags %scene_%shot_%take and the custom text
would display “12_A_3” if “scene 12,” “shot A,” “take 3” were its metadata. For more
information on the use of variables, as well as a list of all variables that are available in
DaVinci Resolve, see Chapter 81, “Using Variables and Keywords.”
Custom Text2: A second line of text that you can customize.
Custom Text3: A third line of text that you can customize.
NOTE: If two clips overlap in the Timeline, the metadata that matches the currently
visible clip in the Viewer is what will be displayed in the window burn.
1095
Data Burn Part 7 – 61
Logo1: Lets you superimpose a graphic over the image in a customizable location.
Compatible graphics formats include PNG, TGA, TIF, BMP, and JPG. Alpha channels are
supported for transparency in logos.
Logo2: Lets you superimpose a second graphic.
Logo3: Lets you superimpose a third graphic.
Reel Name: The currently defined reel number for the current clip.
Shot: Shot metadata, if it’s been written to the file by a camera, or entered into the
Metadata Editor on the Media page.
Scene: Scene metadata, if it’s been written to the file by a camera, or entered into the
Metadata Editor on the Media page.
Take: Take metadata, if it’s been written to the file by a camera, or entered into the
Metadata Editor on the Media page.
Angle: Angle metadata, if it’s been written to the file by a camera, or entered into the
Metadata Editor on the Media page.
Day: Day metadata, if it’s been written to the file by a camera, or entered into the
Metadata Editor on the Media page.
Date: Date metadata, if it’s been written to the file by a camera, or entered into the
Metadata Editor on the Media page.
Circled Take: Corresponds to Good Take metadata, if it’s been written to the file by a
camera, or entered into the Metadata Editor on the Media page.
Camera: Corresponds to the Roll/Card metadata, if it’s been written to the file by a
camera, or entered into the Metadata Editor on the Media page.
Roll/Card: Corresponds to the Roll/Card metadata, if it’s been written to the file by a
camera, or entered into the Metadata Editor on the Media page.
Custom Output Options
The parameters in the Custom Output panel let you modify the look, position, and in some
cases content, of the selected metadata item. Pan and Tilt are individually customizable for
each metadata item.
First x frames: Turning on this checkbox lets you specify a number of frames during
which the current item of metadata will be displayed before dissolving away over
one second. When enabled, the current item of metadata will cut onscreen with the
beginning of each new clip, remain onscreen for the duration specified, and then
dissolve away.
Last x frames: Turning on this checkbox lets you specify a number of frames before the
end of each clip during which the current item of metadata will appear onscreen after
fading up over one second, before cutting away with the end of the clip.
Pan: Lets you change the horizontal orientation of the current item of metadata. The
default value is the center of the frame, relative to the current project’s frame size.
Tilt: Lets you change the vertical orientation of the current item of metadata. The first
item of metadata is centered near the bottom of the frame, above Action Safe. Each
subsequent item of metadata you turn on is automatically placed above the previous
item of metadata, regardless of its order in the “Add to Video Output” list.
Font: Defaults to Courier, but you can choose any font that’s installed on your system.
Size: Defaults to 48, but you can choose standard increments from 6 to 72.
Justify Text: Defaults to Center. The only other option is Left.
1096
Data Burn Part 7 – 61
Color: Defaults to white, but you can choose from a range of predefined colors in this
pop–up menu.
Background: Defaults to black, although the apparent color is influenced by the
Opacity setting. For a more garish look, you can choose from a range of predefined
colors in this pop-up menu.
Opacity: Defaults to 0.50. Lets you define the transparency of the burned-in metadata’s
background color.
Text: (only if one of the Custom Text options is checked) A text field that lets you enter
custom text to display as one of three possible custom text items.
Logo: (only if one of the Logo options is checked) A field that displays the file path of
any currently selected graphic that you’re displaying as one of the three possible Logo
graphics. Compatible graphics formats include PNG, TGA, TIF, BMP, and JPG. Alpha
channels are supported for transparency in logos.
Import File button: (only if one of the Logo options is checked) Lets you choose a
graphics file to use as a logo.
Gang Rendered Text Styles
You have the option of independently styling each item of metadata, depending on whether the
Gang Render Text Styles option is checked in the Data Burn window’s Option menu. When
turned on, all text metadata share the same font, size, color, background, justification, and
opacity. When turned off, each item of metadata can have individual settings.
Prefix Render Text
Another option in the Data Burn window’s Option menu lets you turn the prefixes, or headers,
on or off for all metadata that’s enabled to be burned in.

PART 8
1099
Using the Fairlight Page Part 8 – 62
Using the Fairlight Page
This chapter covers the basic user interface controls found on the Fairlight page, where they
are and what they do, in order to give you an overall orientation of how to work with this
integrated audio environment.
The Fairlight Page User Interface 1100
The Interface Toolbar 1100
The Audio Timeline 1101
Controls in the Audio Timeline 1101
Track Layering 1104
Switching Among Multiple Timelines 1105
Toolbar 1105
Customizing Clip Display in the Timeline 1106
Customizing the Timeline’s Display 1107
Mixer 1107
The Monitoring Panel 1110
Viewer 1111
The Media Pool 1111
Importing Media Into the Media Pool on the Fairlight Page 1112
Bins, Power Bins, and Smart Bins 1113
Showing Bins in Separate Windows 1113
Filtering Bins Using Color Tags 1113
Sorting the Bin List 1114
Filtering Clips With Audio in the Fairlight Page 1115
Searching for Content in the Media Pool 1115
Taking Advantage of the Media Pool’s Usage Column 1116
Effects Library 1116
Eects Library Favorites 1117
Index 1117
Inspector 1118
Metadata Editor 1119
Dual Monitor Layout 1119
Customizing the Fairlight Page 1120
Undo and Redo in the Fairlight Page 1120
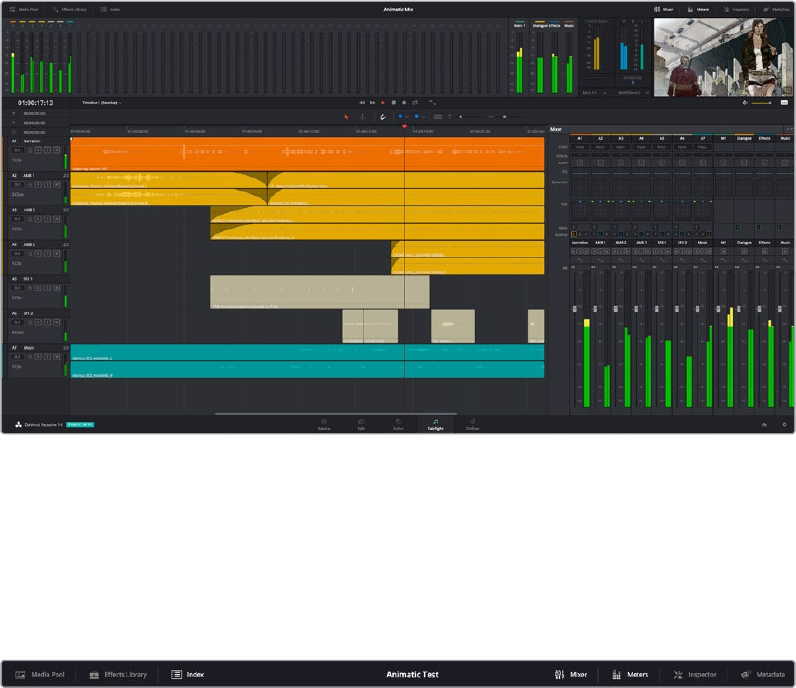
1100
Using the Fairlight Page Part 8 – 62
The Fairlight Page User Interface
In single monitor mode, the Fairlight page is an optimized look at the audio tracks of your
project, with an expanded mixer and custom monitoring controls that make it easy to evaluate
and adjust the levels of your program in order to create a smooth and harmonious mix.
Audio page
The Interface Toolbar
At the very top of the Fairlight page is a toolbar with buttons that let you show and hide different
parts of the user interface. These buttons are as follows, from left to right:
The Interface toolbar
Media Pool: Shows and hides the Media Pool, from which you can edit audio clips into
the Fairlight page timeline.
Effects Library: Opens the Audio FX panel of the Effects Library, from which you can
apply VST and other audio effects to clips in the timeline.
Index: Shows and hides the Index and its Tracks and Markers panels. The Tracks panel
lets you manage the tracks of the timeline, showing and hiding which ones you want
to work with. The Markers panel lets you see every marker in the timeline, along with
associated data, so that it’s easy to browse through your markers all at once to quickly
find the information you need.
Mixer: Shows and hides the Mixer, to the right of the timeline, that lets you adjust
various effects and levels associated with each track of the timeline in order to create a
harmonious mix.
Monitoring: Shows and hides the Monitoring audio meters and viewer at the top of the
Fairlight page.
Inspector: Show and hides the Inspector, from which you can edit different clip attributes.
Metadata: Shows and hides the clip metadata inspector, from which you can view.
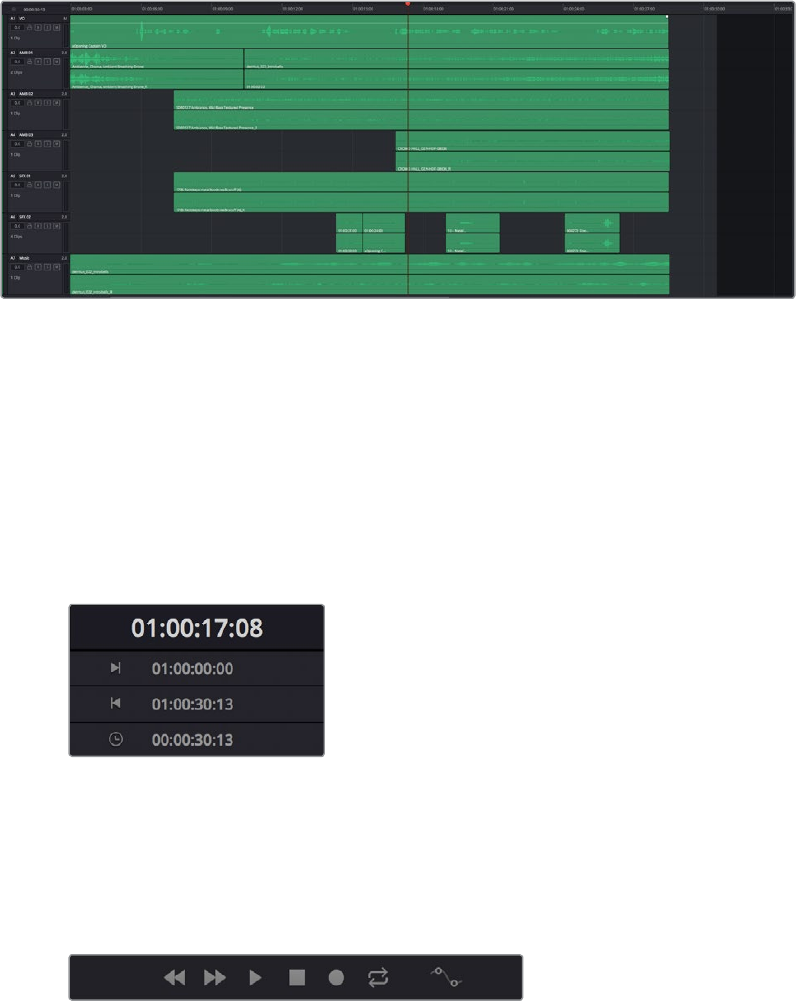
1101
Using the Fairlight Page Part 8 – 62
The Audio Timeline
The heart of the Fairlight page, the Audio Timeline presents the audio channels and tracks of
the currently selected timeline differently than the Edit page does, in a one-channel-per-track
format that’s optimized for audio mixing and sweetening. The Audio page timeline cannot
be closed.
The Audio page timeline
Controls in the Audio Timeline
The audio timeline has the following controls.
Timecode fields and Range buttons: Four timecode fields show the current timecode
value corresponding to the position of the playhead (at the very top), the Range In
point, the Range Out point, and the Range duration. Clicking the Range In and Range
Out buttons (to the left of the timecode fields) set these points and their corresponding
timecode value.
Timecode Fields and Range
Buttons in the Fairlight page
Transport Controls: The bar defining the top of the timeline contains the Fairlight
page’s audio-specific transport controls, which differ from those found on the Media,
Edit, Color, and Deliver pages due to its inclusion of recording capabilities. These
include Fast Reverse, Fast Forward, Play Forward, Stop, Record, and Loop.
Fairlight page transport controls
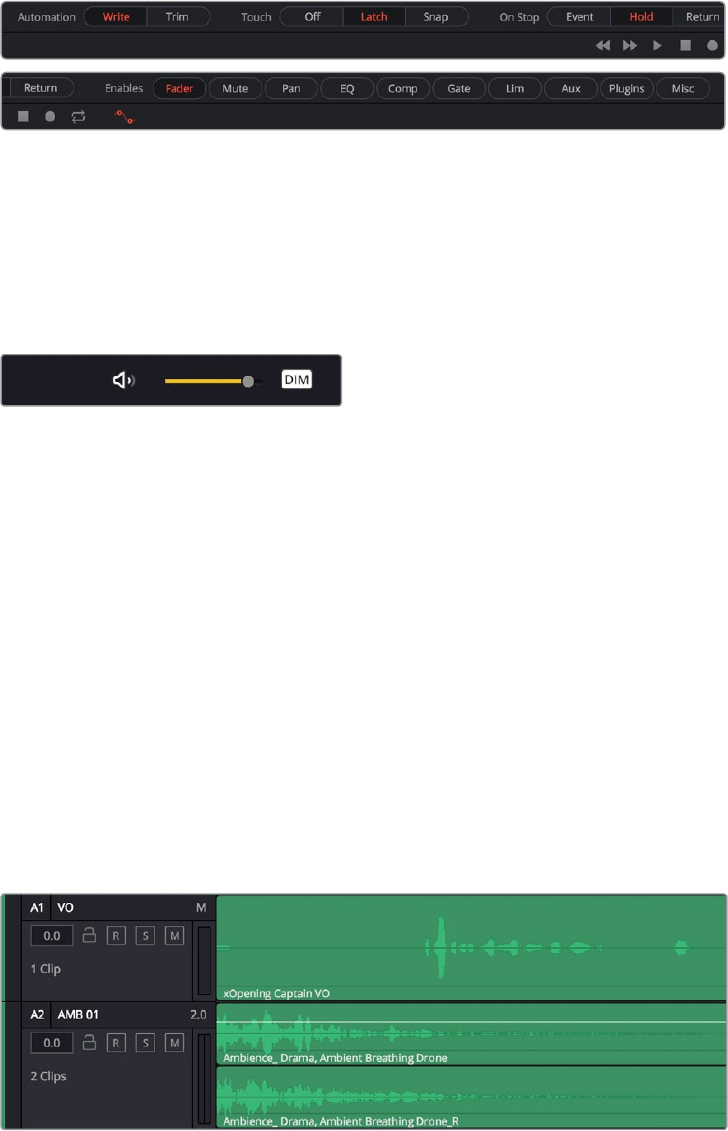
1102
Using the Fairlight Page Part 8 – 62
Automation Toolbar: Clicking this button opens a secondary toolbar with all the
controls you need to configure the recording of mixer automation.
Fairlight page automation toolbar
Monitoring Controls: At the far right of the transport controls, a set of three monitoring
controls let you quickly control the output volume of your mix. An audio Enable/Disable
button lets you turn audio playback on and off, while a slider lets you change the
volume, and a DIM button lets you temporarily duck the monitored volume being output
in order to have a quick chat with your client about sports or the state of the world while
keeping half an ear on the mix.
The monitoring controls
Timeline Ruler: The Timeline Ruler shows the program’s timecode. The playhead
indicates the current frame and sample where you’re working in the Timeline, and
the playhead has a handle that appears within the Timeline Ruler. Dragging within
the Timeline Ruler moves the playhead. When you add markers to the timeline, these
markers appear within the Timeline Ruler, as well.
Playhead: Shows the current frame and sample of playback, and provides a visual
representation of where you are while playing, shuttling, and jogging through the
timeline. Also used as a reference point for editing operations. The largest timecode
display at the upper left-hand display shows the position of the playhead.
Audio Tracks: The Fairlight page of DaVinci Resolve supports multiple audio tracks,
and each audio track may contain multiple lanes with which to accommodate the audio
channels that are contained within multi-channel audio clips using track mappings such
as stereo, 5.1, 7.1, or Adaptive (1-24 channels). All audio clips that have been edited into
the Timeline appear within each track, with the recorded channels within each clip
occupying as many lanes as that clip has available. At the left of each track is a header
area that contains a number of controls.
The Fairlight timeline is divided into tracks and lanes, track A1 has a single lane for the
mono audio within it, and track A2 has two lanes to accommodate stereo audio
1103
Using the Fairlight Page Part 8 – 62
Track Header: The Track Header contains different controls for selecting, locking/
unlocking, and soloing/muting tracks. Each track header also lists how many clips
appear on that track. The Track Header contains the following five controls, from
left to right:
The track header controls of the
Fairlight page timeline
Track Color: Each track can be color-coded with one of 16 different colors. These
colorcodes correspond to the Edit page Mixer, and to the Fairlight page Mixer and
Audio Meters. You can choose a new color for any track by right-clicking the track
header and choosing from the Change Track Color submenu. You can set multiple
tracks to the same color by Command-clicking in the track header of multiple tracks to
select them, and then right-clicking one of the selected track headers and choosing
from the Change Track Color submenu.
Track Number: Indicates the number of each track.
Track Name: Each track has a name that defaults to the track number, such as Track 1,
Track 2. However, you can click any track’s name and edit it to be whatever you like.
For example, you can rename each track with the type of audio you’re editing onto it,
such as Production, Ambience, SFX, or Music. These track names are also used to
identify each track’s channel in the Mixer, in the middle of each channel strip (each
channel strip’s track number is simultaneously displayed at the top).
Audio channel type indicator: Audio tracks also show which channel configuration that
track uses, listing the number of channels for mono, stereo, 5.1, 7.1, and adaptive.
Fader Value: A field displays the current fader setting at the position of the
playhead, in dB.
Lock Track button: Light gray when turned on, dark gray when turned off. When a track
is locked, clips can’t be replaced, moved, or otherwise edited, although clips on locked
tracks can be graded.
Arm button: This button arms recording onto that track.
Solo button: Disables all other tracks but the current one, enabling you to quickly hear
a single track in isolation. This affects rendering, so if one or more tracks are soloed,
the muted tracks won’t be output or rendered.
Mute button: Temporarily disables audio on that track so it’s neither monitored nor
output. This affects rendering, so if one or more tracks are muted, they won’t be output
or rendered.
Audio Meters: Each track has audio meters in the track header that let you see levels
during playback.
Toolbar Editing Tools: The toolbar contains both modal and command buttons to let
you work on your projects. More detail on these appears in the following section.
Vertical and horizontal scroll bars: If your project is longer than the current width of the
Timeline, or the number of audio tracks is taller than the current height of the Timeline,
these scroll bars let you drag to navigate around your program. When you scroll
horizontally, you also move the playhead. You may also scroll vertically using the scroll
wheel (or other scroll control) of your mouse or other pointing device. You may scroll
horizontally by holding the Command key down while using your scroll control.
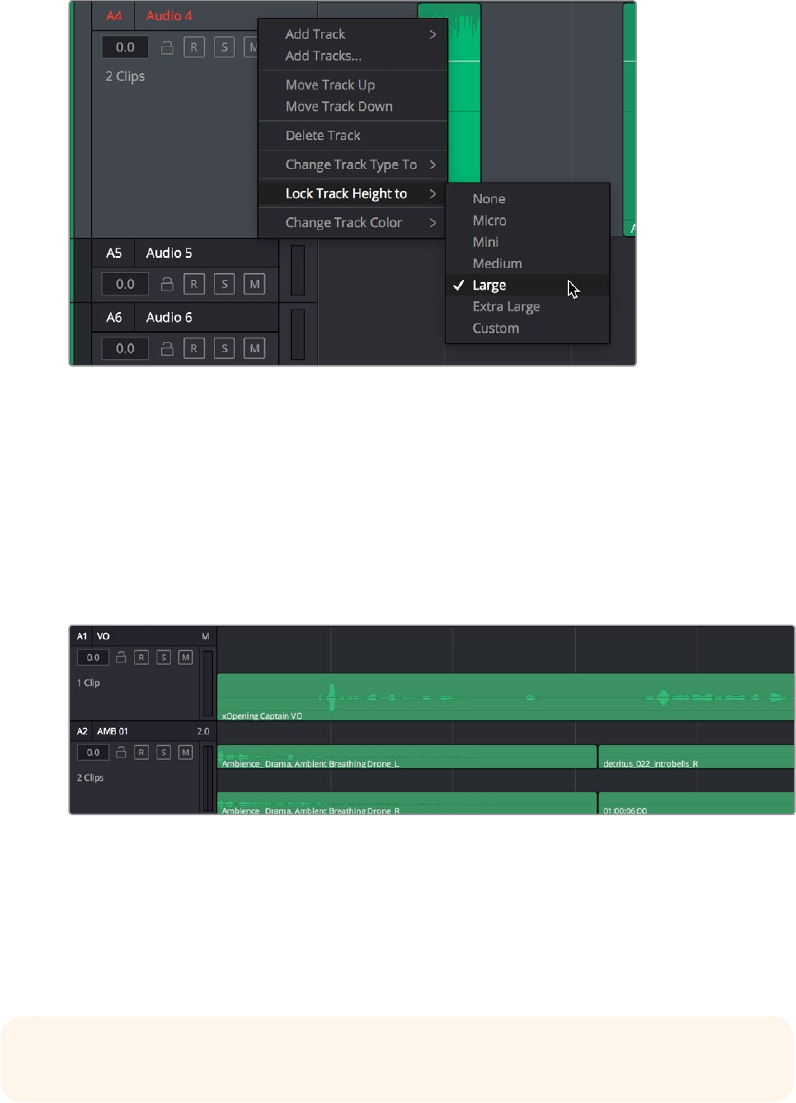
1104
Using the Fairlight Page Part 8 – 62
Individual Timeline track resizing: Any track in the Timeline can be individually resized
by right-clicking anywhere within that track’s header control area and choosing a track
height from the Lock Track Height To submenu of the contextual menu. You can choose
a fixed size including Micro, Mini, Medium, Large, and Extra Large. When you choose
a fixed track height, vertical zooming no longer affects that track until you change that
track’s Lock Track Height to option back to None.
Resizing an individual Audio timeline track using contextual menu options
Track Layering
Audio layering is a special audio editing mode that lets you superimpose multiple audio clips in
the same track, with audio clips edited into the top layers muting overlapping sections of audio
clips appearing on lower layers. With audio layering enabled, superimposed audio clips are
treated similarly to superimposed video clips that have opacity set to 100%, with clips on top
obscuring (or muting) clips underneath.
Turning on Track Layers opens up space to edit more audio into each track
Audio layering is incredibly useful for any situation where you’re combining segments of
multiple takes together to create a single voiceover, audio vocal track, or dramatic performance,
as you can choose which segments to use via their superimposed position in the stack of clips
appearing in that track, while at the same time you’re preserving the other takes underneath in
case you might want them later.
TIP: Track Layering can be enabled for audio tracks on the Edit page as well.

1105
Using the Fairlight Page Part 8 – 62
Switching Among Multiple Timelines
Timelines can be organized like any other clip in the Media Pool. To open or switch among
timelines, use the following procedures.
To switch timelines, do one of the following:
In the Edit page Media Pool, double-click a timeline.
In the Edit page Timeline Viewer, choose a timeline from the Timelines pop-up menu at
the top of the viewer.
In the Color page, choose a timeline from the Timelines pop-up menu at the top of
the viewer.
In the Fairlight page, choose a timeline from the Timelines pop-up menu to the left of
the transport controls.
Toolbar
The Toolbar has buttons that let you choose modes of functionality and other buttons that let
you execute commands such as placing markers and flags.
Buttons in the Fairlight Page Toolbar
Normal Edit Mode: The default mode in which you can move and resize clips in the
Timeline, roll edits, and do other basic editing tasks.
Region Selection Mode: Performs an insert edit to the Timeline with whatever clip is in
the Source Viewer.
Snapping: Enables or disables clip snapping. When turned on, clip In and Out points,
markers, and the playhead all snap to one another for reference while you’re editing.
Apop-up menu lets you choose how to use snapping to quantize clip position, to Bars,
Beats, Divisions, Tics, or via Smart snapping.
Flag Clip/Flag Colors pop-up menu: Flags identify clips, and indicate all clips that
correspond to the same item of media in the Media Pool. Clips can have multiple flags.
Clicking the Flag button automatically adds a flag to whichever clip is currently selected
in the Timeline. A pop-up menu to the right lets you choose differently colored flags,
and clear all flags from the currently selected clip.
Add Marker/Marker Colors pop-up menu: Markers identify specific frames of individual
clips. Clicking the Add Marker button adds a marker of the currently displayed color
to the clip at the position of the playhead in the Timeline. A pop-up menu to the right
lets you choose differently colored markers, and clear all markers from the currently
selected clip.
Customize Timeline pop-up menu: Contains a variety of controls with which to
customize the display of clips in the Timeline. Zoom View Preset buttons let you choose
from one of 7 zoom levels, and checkboxes let you show and hide flags and markers,
full waveforms, and waveform borders.

1106
Using the Fairlight Page Part 8 – 62
Selecting the Audio Timeline View options
Zoom Height slider: Lets you change the height of all tracks and clips in the Timeline
at once. You can also zoom the height of timeline tracks by pressing the Command key
while using the scroll control of your pointer, if it has such a control. The scroll wheel of
a mouse is most common.
Zoom Width slider: Lets you shrink or expand the width of the contents of the Timeline.
You can also control the width of the contents of the timeline using the scroll control of
your pointer, if it has such a control. The scroll wheel of a mouse is most common.
Customizing Clip Display in the Timeline
Choose Fairlight > View Clip Info Display to open a dialog with which you can customize what
information is shown at the bottom of each clip in the timeline. This dialog has options for
viewing the Clip name vs. the Display Name, and for choosing from among a variety of
metadata that you might want available as you work.
Selecting the Audio Clip View options

1107
Using the Fairlight Page Part 8 – 62
Customizing the Timeline’s Display
There are a variety of ways you can customize the timeline to better see what you’re
working on.
Zoom View Presets: Seven buttons let you choose one of seven zoom level presets.
Show Flags and Markers: A checkbox that lets you show or hide all flags and markers
in the Fairlight timeline.
Show Full Waveforms: Lets you increase the height of audio waveforms into the space
taken by the name bar of each clip.
Show Waveform Border: Enables a border around audio waveforms that make them
more visible.
Mixer
The Audio Mixer provides a set of graphical controls you can use to assign track channels to
output channels, adjust EQ and Dynamics, set levels and record automation, pan stereo and
surround audio, and mute and solo tracks.
The Audio Mixer exposes two sets of channel strips with controls that correspond to the tracks
in the Timeline. The left-most set of channel strips expose one set of controls for each track in
the Timeline, while the right-most set of channel strips expose another set of controls for each
Main and Sub (submix) you’ve created to bus the mixed audio tracks to whatever set of output
tracks you want to expose.
The Audio Mixer, with channel strips
corresponding to the tracks in the Timeline
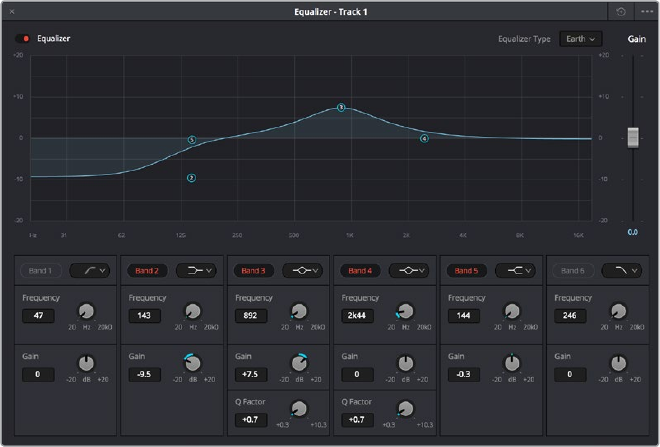
1108
Using the Fairlight Page Part 8 – 62
Track Color: Each track can be differently color-coded, to help you keep organized.
Track Number: The number of the timeline track corresponding to each channel strip
appears here.
Input: A pop-up menu that lets you patch inputs, patch buses, and configure the input
settings of audio signals routed through Blackmagic hardware interfaces.
Effects: VST and Audio Unit effects that you apply to tracks from the Effects Library
appear here, with controls for enabling/disabling each effect, opening an effect’s
custom controls, and deleting that effect.
Insert: Enables the routing of effects from Blackmagic audio interface hardware to
outboard effects boxes and back again. This button can be toggled to enable/disable
such routing.
EQ: Double-clicking exposes a four band parametric equalizer with additional Hi and
Lo Pass filters, that has both graphical and numeric controls for boosting or attenuating
different ranges of frequencies of audio on each track. You can select from among four
types of EQ filtering from the Equalizer Type pop-up menu, with options for Earth (the
default), Air, Ice, and Fire. Each band has controls for the filter type (Bell, Lo-Shelf, Hi-
Shelf, Notch), Frequency, Gain, and Q-factor (sharpness of the band), with the available
controls for each band of EQ change depending on the filter type.
The channel strip EQ window
Dynamics: Double-clicking exposes a set of dynamics controls with three sets of
controls corresponding to an Expander or Gate, a Compressor, and a Limiter that can
be used separately or in concert to manage the dynamics of the audio on that track.
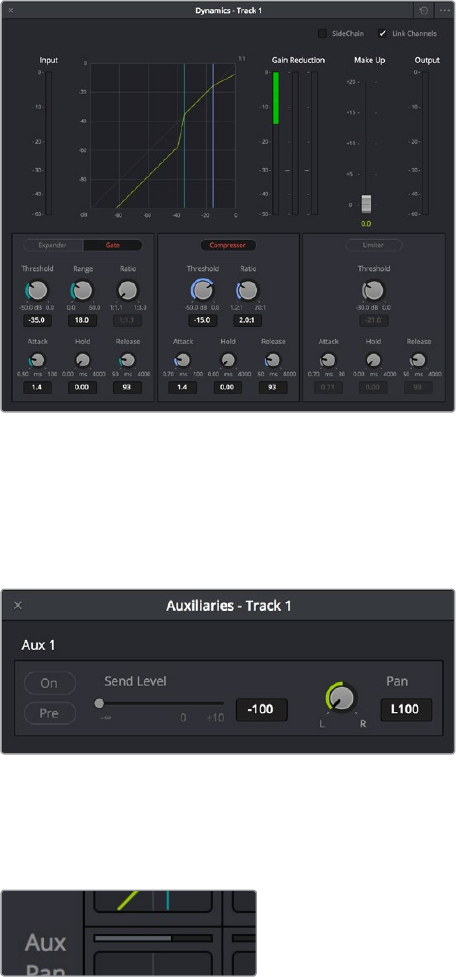
1109
Using the Fairlight Page Part 8 – 62
The channel strip Dynamics control window
Aux: Each Aux bar corresponds to a specific Aux bus that you created. Double-clicking
any of these bars opens up the Auxiliaries window, with which you can enable or
disable auxiliaries, set each one to be routed Pre the channel strip or Post the channel
strip (the default), and set each Aux buses Send level and Pan value.
The Auxiliaries control window
Whatever level you set an Aux bus will be shown in the bar that represents that Aux bus
in the Mixer’s channel strip.
The Auxiliaries levels shown in the
channel strip of the Mixer
Pan: A pan control compatible with stereo and surround panning. You can drag within
this control to adjust pan, or you can double-click to expose a pan window. What
controls are available in the pan window depend on the mapping of the audio track,
but both stereo and surround panning controls are available, with corresponding
numeric controls.
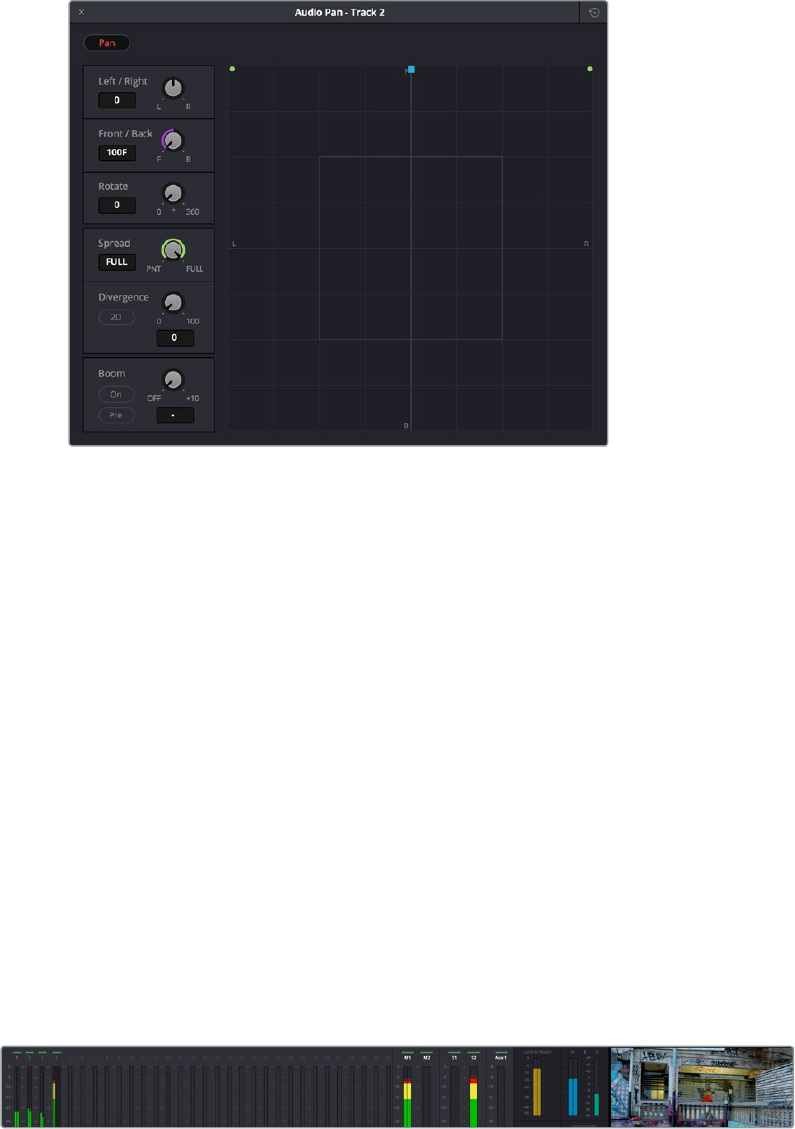
1110
Using the Fairlight Page Part 8 – 62
The Pan control window
Main: These buttons let you assign a track or Sub’s channels to one or more of the
main buses.
Submix: These buttons let you assign that track’s channels to one or more
submix buses.
Track Name: This mirrors the track name found in the header controls of the timeline. If
you customize a track’s name in the timeline, that name appears here.
dB: Shows you the volume, in decibels, that track is currently set to.
Arm, Solo, and Mute buttons: Identical to the controls found in the track header
controls of each timeline audio track. Arm lets you enable a track to be recorded onto.
Solo lets you mute all other tracks in order to play that track in isolation (along with any
other Soloed tracks). Mute disables audio playback from that track.
Fader: Each track’s vertical faders let you adjust the volume of that track, and perform
automation recording.
The Monitoring Panel
The Monitoring panel that runs along the top of the Fairlight page shows all of the audio meters
corresponding to the tracks in the timeline, as well as the Master Output meter, control room
meters, and a video viewer.
The Monitoring panel
At left, a row of audio meters corresponds to the channel strips of the Mixer, one meter for
every audio track in the timeline. Each track displays the number of meters that corresponds to
that track’s audio mapping, with mono tracks having a single audio meter, stereo tracks having
two, 5.1 tracks having six, etcetera. All of these track and bus meters (with the exception of the
Loudness meters) display both peak and RMS (root mean square) levels against a dB scale.
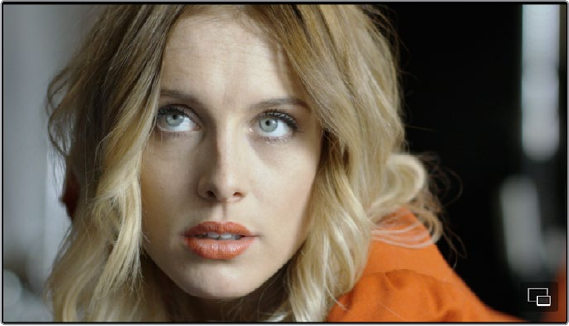
1111
Using the Fairlight Page Part 8 – 62
To the right of the Track meters are the Bus meters, in which all Mains, Subs, and Aux buses
appear, separated by type, and each displaying the number of meters that corresponds to that
track’s audio mapping. This way you can see the sum of all tracks that have been routed to a
particular bus.
The last set of meters, to the right of all others, are the Loudness meters, which consist of two
sets of meters and a numerical readout. These meters let you keep track of the integrated
loudness of the overall mix, which is the standard to which all contemporary mixing
specifications refer when describing the deliverables you’re expected to provide to the client.
Viewer
A small viewer to the left of the Monitoring panel shows the frame of video at the position of the
playhead. The only available control is a button in the lower right-hand corner that lets you
expand the Viewer into its own floating window.
The Monitoring panel.
The Media Pool
In the Fairlight page, the Media Pool serves as the repository of all audio clips in your project,
both clips that appear within the timeline, and clips that you’ve added to your project but have
not yet used. When you record audio into the timeline, the resulting clips are stored in the
Media Pool as well, for future use. The Media Pool is also mirrored on the Media and Edit pages,
and contains all of the video clips and timelines within that project.
The Bin list at the left shows a hierarchical list of bins used for organizing your media, which is
also used to organize your timelines. By default, the Media Pool consists of a single bin, named
“Master,” but you can add more bins as necessary to organize timelines and clips by right-
clicking anywhere in the empty area of the Media Pool and choosing Add Bin. You can rename
any bin by double-clicking on its name and typing a new one, or by right-clicking a bin’s name
and choosing Rename Bin. The Bin list can be hidden or shown via the button at the upper
left-hand corner of the Fairlight page toolbar.
The browser area to the right shows the contents of the currently selected bin in the bin list.
Every clip you import, every timeline you create, and every AAF, XML, or EDL file you import
appears here. You can create or import as many timelines as you need within a single project.
1112
Using the Fairlight Page Part 8 – 62
The Media Pool in Thumbnail mode showing audio clips
As elsewhere, the Media Pool can be displayed in either Icon or List view. In List view, you can
sort the contents by any one of a subset of the total metadata that’s available in the Metadata
Editor of the Media page. Of particular interest to audio editors are columns for Name, Reel
Name, different timecode streams, Description, Comments, Keyword, Shot, Scene, Take, Angle,
Circled, Start KeyKode, Flags, and Usage.
For more information on using the myriad features of the Media Pool, see Chapter 8, “Adding
and Organizing Media with the Media Pool.” In the sections that follow, some key features of the
Media Pool are summarized for your convenience.
Importing Media Into the Media Pool on the Fairlight Page
While adding clips to the Media Pool in the Media page provides the most organizational
flexibility and features, if you find yourself in the Edit or Fairlight pages and you need to quickly
import a few clips for immediate use, you can do so in a couple of different ways.
To add media by dragging one or more clips from the Finder to the Fairlight page Media Pool
(macOS only):
1 Select one or more clips in the Finder.
2 Drag those clips into the Media Pool of DaVinci Resolve, or to a bin in the Bin list.
Those clips are added to the Media Pool of your project.
To use the Import Media command in the Fairlight page Media Pool:
1 With the Fairlight page open, right-click anywhere in the Media Pool, and choose
Import Media.
2 Use the Import dialog to select one or more clips to import, and click Open.
Those clips are added to the Media Pool of your project.
1113
Using the Fairlight Page Part 8 – 62
For more information on importing media using the myriad features of the Media page, see
Chapter 8, “Adding and Organizing Media with the Media Pool.”
Bins, Power Bins, and Smart Bins
There are actually three kinds of bins in the Media Pool, and each appears in its own section of
the Bin list. The Power Bin and Smart Bin areas of the Bin list can be shown or hidden using
commands in the View menu (View > Show Smart Bins, View > Show Power Bins). Here are the
differences between the different kinds of bins:
Bins: Simple, manually populated bins. Drag and drop anything you like into a bin,
and that’s where it lives, until you decide to move it to another bin. Bins may be
hierarchically organized, so you can create a Russian dolls nest of bins if you like.
Creating new bins is as easy as right-clicking within the bin list and choosing Add Bin
from the contextual menu.
Power Bins: Hidden by default. These are also manually populated bins, but these
bins are shared among all of the projects in your current database, making them ideal
for shared title generators, graphics movies and stills, sound effects library files, music
files, and other media that you want to be able to quickly and easily access from any
project. To create a new Power Bin, show the Power Bins area of the Bin list, then right-
click within it and choose Add Bin.
Smart Bins: These are procedurally populated bins, meaning that custom rules
employing metadata are used to dynamically filter the contents of the Media Pool
whenever you select a Smart Bin. This makes Smart Bins fast ways of organizing the
contents of projects for which you (or an assistant) has taken the time to add metadata
to your clips using the Metadata Editor, adding Scene, Shot, and Take information,
keywords, comments and description text, and myriad other pieces of information to
make it faster to find what you’re looking for when you need it. To create a new Smart
Bin, show the Smart Bin area of the Bin list (if necessary), then right-click within it and
choose Add Smart Bin. A dialog appears in which you can edit the name of that bin and
the rules it uses to filter clips, and click Create Smart Bin.
Showing Bins in Separate Windows
If you right-click a bin in the Bin List, you can choose “Open As New Window” to open that bin
into its own window. Each window is its own Media Pool, complete with its own Bin List, Power
Bins and Smart Bins lists, and display controls.
This is most useful when you have two displays connected to your workstation, as you can drag
these separate bins to the second display while Resolve is in single screen mode. If you hide
the bin list, not only do you get more room for clips, but you also prevent accidentally switching
bins if you really want to only view a particular bin’s contents in that window. You can as many
additional Bin windows open as you care to, in addition to the main Media Pool that’s docked in
the primary window interface.
Filtering Bins Using Color Tags
If you’re working on a project that has a lot of bins, you can apply color tags to identify particular
bins with one of eight colors. Tagging bins is as easy as right-clicking any bin and choosing the
color you want from the Color Tag submenu.
For example, you can identify the bins that have clips you’re using most frequently with a red
tag. A bin’s color tag then appears as a colored background behind that bin’s name.

1114
Using the Fairlight Page Part 8 – 62
Using Color Tags to identify bins
Once you’ve tagged one or more Media Pool bins, you can use the Color Tag Filter pop-up
menu (the pop-up control to the right of the Bin List button) to filter out all but a single
color of bin.
Using Color Tag filtering to isolate the blue bins
To go back to seeing all available bins, choose Show All from the Color Tag Filter pop-up.
Sorting the Bin List
The Bin list (and Smart Bin list) of the Media Pool can be sorted by bin Name, Date Created, or
Date Modified, in either ascending or descending order. Simply right-click anywhere within the
Bin list and choose the options you want from the Sort by submenu of the contextual menu.

1115
Using the Fairlight Page Part 8 – 62
You can also choose User Sort from the same contextual menu, which lets you manually drag all
bins in the Bin list to be in whatever order you like. As you drag bins in this mode, an orange line
indicates the new position that bin will occupy when dropped.
Dragging a bin to a new position
in the Bin list in User Sort mode
If you use User Sort in the Bin list to rearrange your bins manually, you can switch back and forth
between any of the other sorting methods (Name, Date Created, Date Modified) and User Sort
and your manual User Sort order will be remembered, making it easy to use whatever method
of bin sorting is most useful at the time, without losing your customized bin organization.
Filtering Clips With Audio in the Fairlight Page
The Media Pool in the Fairlight page has one additional feature: the ability to filter out audio-
only clips, or clips with audio, in the currently selected bin. This makes it easy for you to find
audio clips that you’re looking for, which are hidden along with lots of video clips in the same
bin. To use this feature, click the Option menu of the Media Pool and choose Show All Clips,
Show Audio Only Clips, or Show Clips With Audio.
The Media Pool filter options in the option menu
Searching for Content in the Media Pool
An optional Search field can be opened at the top of the Media Pool that lets you quickly find
clips by name, partial name, or any of a wide variety of Media Pool metadata.

1116
Using the Fairlight Page Part 8 – 62
To search for a clip by name:
1 Select which bin or bins you want to search.
2 Click the magnifying glass button at the upper right-hand corner of the Media Pool.
3 Choose the particular column of information you want to search (or All Fields to search
all columns) using the Filter by pop-up menu. Only selected bins will be searched.
4 Type your search string into the Search field that appears. A few letters should be
enough to isolate only those clips that have that character string within their name.
Toshow all clips again, click the cancel button at the right of the search field.
Taking Advantage of the Media Pool’s Usage Column
In List view, the Usage column does not automatically update to show how many times a
particular clip has been used. However, you can manually update this metadata by right-clicking
within the Media Pool and choosing Update Usage Data from the contextual menu that
appears. Afterwards, each clip will display how many times it’s been used in this column.
Clipsthat have not been used yet display an x.
Effects Library
The Effects Library on the Fairlight page is restricted to displaying only the Audio FX that are
available on your workstation. On Mac OS X and Windows, DaVinci Resolve supports the use of
third-party VST audio plug-ins. On Mac OS X, DaVinci Resolve supports Audio Unit (AU) audio
plug-ins. Once you install these effects on your workstation, they appear in this panel of the
Effects Library. Audio plug-ins let you apply effects to audio clips or entire tracks worth of audio,
to add creative qualities such as echo or reverb, or to take care of mastering issues using noise
reduction, compression, or EQ.
TIP: Smart Bins are essentially multi-criteria search operations that scope the entire
project at once and are saved for future use.
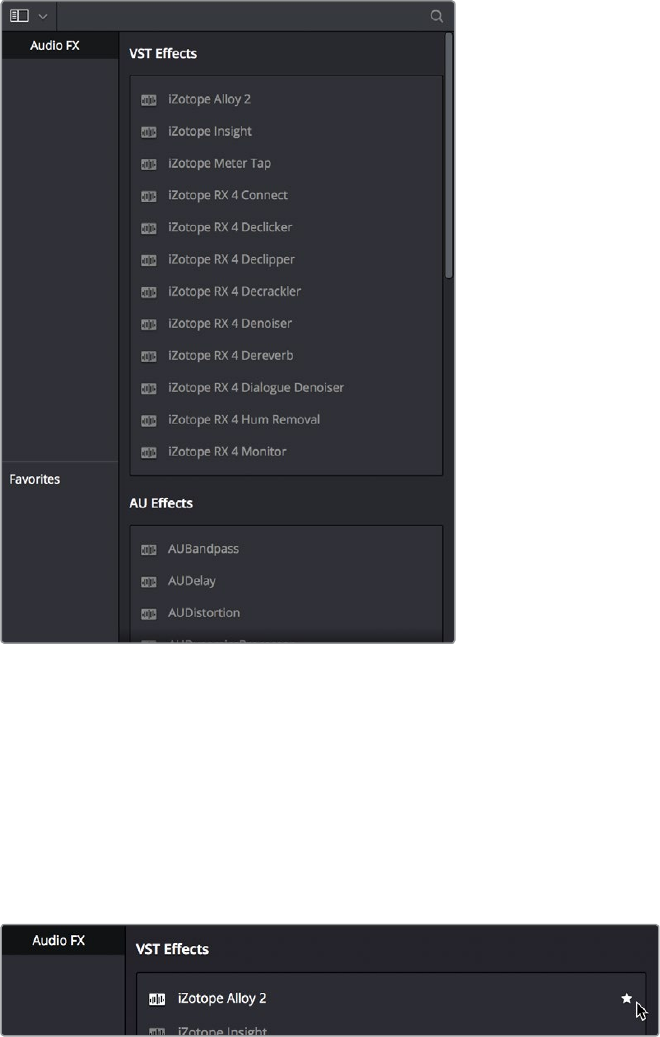
1117
Using the Fairlight Page Part 8 – 62
The Effects Library
Similar to the Media Pool, the Effects Library’s bin list can be opened or closed using a button
at the top left.
Effects Library Favorites
You can click on the far right of any transition, title, or generator to flag that effect with a star as
a favorite effect. When you do so, the favorited effects appear in a separate Favorites area at
the bottom of the Effects Library Bin List.
Stars indicate a flagged favorite effect, all favorites are currently filtered
Index
The Index provides a handy interface for listing all of the clips in the current edit, all the tracks in
the current timeline, and all the markers in the current timeline. Using these lists, multiple items
can be selected, tracks can be managed, and marker notes can be consulted with ease. Each
of these three categories of information is displayed in separate panels:
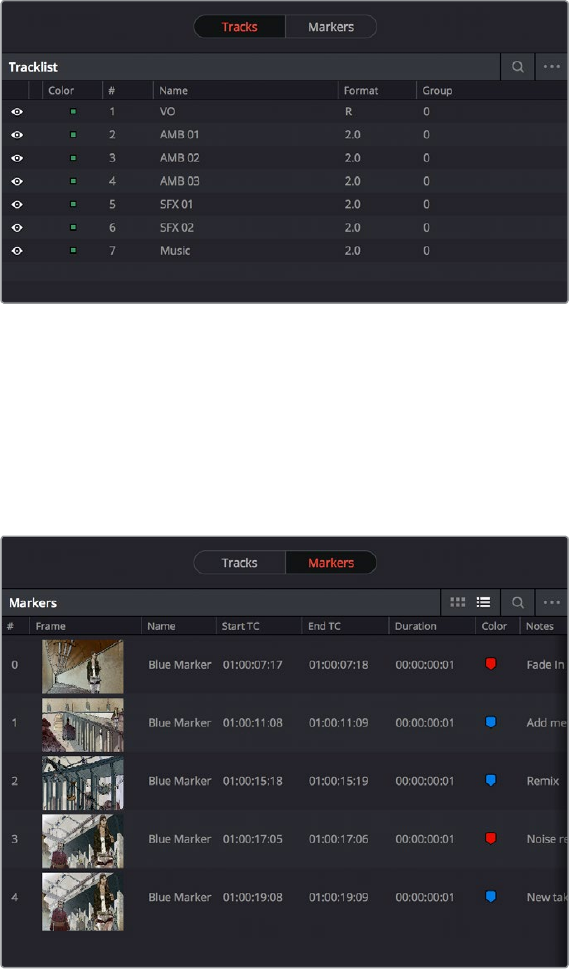
1118
Using the Fairlight Page Part 8 – 62
Tracks: Every track in the currently open timeline corresponds to a row of controls and
information in this panel. From left to right, each track has a visibility control, a color
control, a number, a name, a format, and a group that it belongs to.
The tracks panel shows a row of information for each of the tracks in the timeline
Markers: The markers panel can be displayed in either thumbnail or list mode. In
thumbnails mode, each marker in your timeline corresponds to a thumbnail displaying
the timecode of its location underneath it, and the color of the marker to the left of
the timecode location. In list view, each marker displays a row with the following
information; marker number, frame (showing a thumbnail), marker name, start timecode,
end timecode, duration, marker color, and notes.
The markers panel shows a row of information for each of the markers in the timeline
Inspector
When you add an audio effect to a clip or a track, those effects appear in the Inspector when
that clip or track is selected.
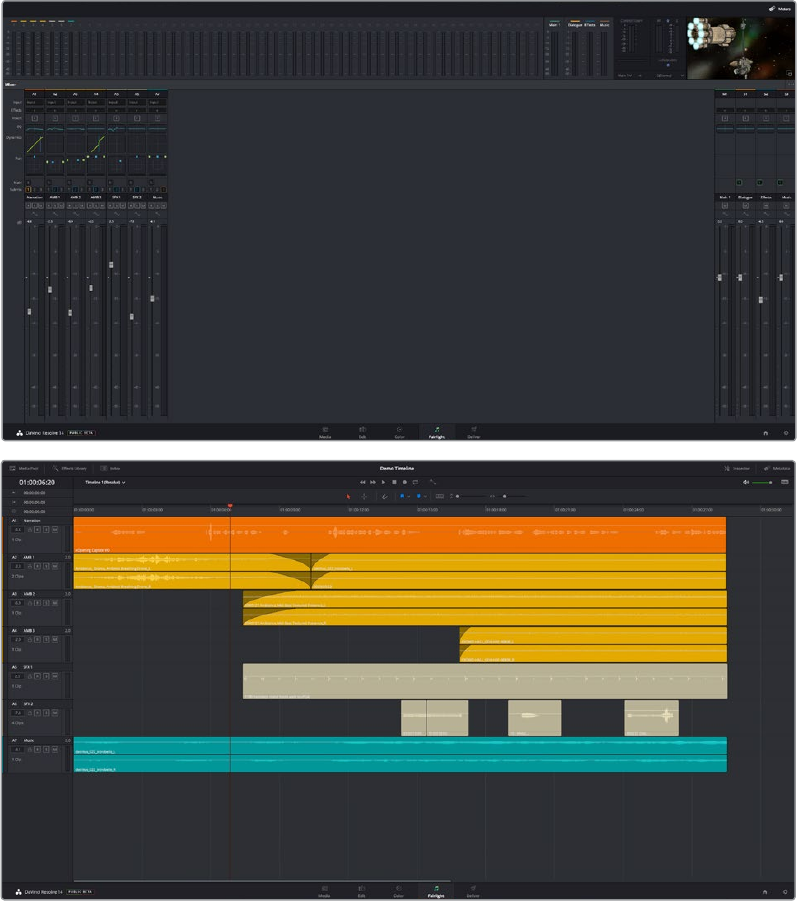
1119
Using the Fairlight Page Part 8 – 62
Metadata Editor
Lets you view and edit the metadata of selected clips in the Fairlight page.
Dual Monitor Layout
The Audio page has a dual monitor layout that provides maximum space for the mixer and
audio meters on one screen and a full-screen timeline on the other.
To enter dual screen mode:
Choose Workspace > Dual Screen > On.
The Fairlight page in dual screen mode
To switch which UI elements appear on which monitors:
Choose Workspace > Primary Display > Display 1 or Display 2, which reverses the
contents of both monitors in dual screen mode.
1120
Using the Fairlight Page Part 8 – 62
Customizing the Fairlight Page
The default layout is quite efficient for a number of tasks on most displays. You can always
return to the default layout by choosing Workspace > Reset UI Layout. However, the Fairlight
page can be customized to create more room for specific areas of the interface to
accommodate different tasks.
To resize any area of the Fairlight page:
Drag the vertical or horizontal border between any two panels to enlarge one and
shrink the other.
To resize the height of individual audio tracks:
Move the pointer to the bottom border of any audio track header, and when it becomes
a resize cursor, drag that border up or down to resize that track. Each track can have an
independent size when you do this.
To resize any column of the Index:
Move your pointer over the divider between any two columns and drag when the
horizontal resize cursor appears.
To rearrange Index columns:
Drag the header of any column to the left and right to move that column.
Undo and Redo in the Fairlight Page
The Fairlight page shares its multiple-undo stack with the Edit page. However, the Fairlight and
Edit page undo stack is entirely separate from the multiple-undo stacks maintained for each clip
in the Color page, making it easy and reliable to undo edits and other changes you make in the
Timeline without disturbing your work in the Color page. There are two ways you can undo.
To undo and redo:
Press Command-Z to Undo, and Shift-Command-Z to Redo.
To undo and redo using the Undo list:
1 Choose Edit > Undo List.
2 When the History dialog appears, click an item on the list to undo back to that point.
The most recent thing you’ve done appears at the bottom of this list.
The Undo List
3 When you’re done, close the History window.
1122
Setting Up Tracks, Buses, and Patching Part 8 – 63
Setting Up Tracks, Buses, and Patching
One of the first things you need to do when you’re setting up a new project for mixing in the
Fairlight page is to define all of the audio tracks and buses you’re going to need, including
submixes and mains that route and combine the audio being output. This chapter covers how to
create audio tracks, and how to use buses to manage your mixes in the most efficient
possible way.
Audio Tracks 1123
What is a Bus? 1124
Types of Buses 1124
Controlling Signal Flow 1125
Managing Audio Tracks 1125
Defining Timeline Audio Track Channels at Creation 1125
Creating Tracks 1125
Rearranging Tracks 1126
Changing How Many Channels an Audio Track Has 1126
Deleting Tracks 1126
Linked Group Support for Mono Tracks 1126
Creating Buses 1128
Assigning Buses 1129
Patching Signal Paths 1130
Using a Channel Strip’s Input Menu 1132
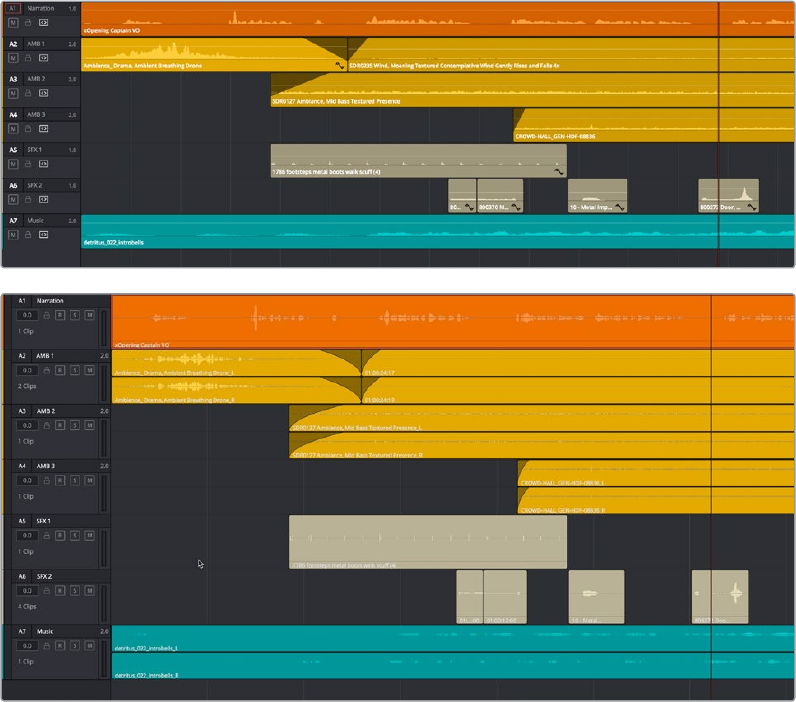
1123
Setting Up Tracks, Buses, and Patching Part 8 – 63
Audio Tracks
Each audio track in a Resolve timeline corresponds to a single channel strip on the Mixer’s left
side. Depending on how an audio track has been configured, each audio track is assigned a
specific audio format such as stereo, LCRS, 5.1 surround, or 7.1 surround, so that multiple audio
channels within the clips on that track can be correctly routed to the proper audio output for
monitoring and rendering via the lanes that can be seen within each track on the
Fairlight timeline.
Audio tracks in DaVinci Resolve have been designed to contain multiple channels of clip audio
within a single track, but how those individual audio channels are displayed depends on the
page. The Edit page hides these individual audio channels, displaying only a single clip in the
timeline to make it easier to edit multi-channel sources without needing to manage a huge
number of tracks. However, the Fairlight page has a unique Track and Lane system for
displaying audio.
The Fairlight page displays the same number of tracks as the Edit page, but each track on the
Fairlight page is divided into lanes, which expose each individual channel of clip audio for
editing and mixing.
(Top) Stereo audio in the Edit page represented by a single track (Right) The same stereo audio in the Fairlight
page shows the two lanes that correspond to each of the stereo audio tracks
Now that you understand how tracks work on the Fairlight page, the next important concept
you need to understand in order to unlock the power of the Fairlight page is the audio bus,
which lets you combine multiple audio tracks in different ways.
1124
Setting Up Tracks, Buses, and Patching Part 8 – 63
What is a Bus?
In audio postproduction, a bus is essentially a destination channel to which you can route
multiple audio feeds (typically the audio tracks in the timeline) so they are mixed together into a
single signal that can be controlled via a single channel strip.
For example, if you have five audio channels into which have been edited all of the dialog audio
clips for a particular program, you can route the output of all five dialog tracks to a Submix bus,
which combines them so that all dialog can then be mixed with a single set of controls.
There are multiple levels of busses. For example, individual tracks can be routed to Submix
busses, as described above. Additionally, multiple Submixes can be routed to one or more
Mains. For example, you could have four submix busses, one for German dialog, one for English
dialog, one for Music, and one for Effects. You could route the German, Music, and Effects
submix busses to Main 1 for the German version of the program, and route the English, Music,
and Effects submix busses to Main 2 for the English language version of the program.
Audio tracks from the timeline are routed to buses via each channel strip’s multiformat surround
panner, so buses are configured to accommodate specific audio formats such as stereo, LCRS,
5.1 surround, or 7.1 surround.
Types of Buses
There are four types of busses in DaVinci Resolve.
Mains
Main busses are typically the primary output of a program; each new project you create starts
out with a single Main called M1, to which all tracks are routed by default. You can add
additional Mains, and you can use them however you like, as either full or partial mixes of the
program you’re working on. Mains can be directly output in the deliver page.
Sub (Submix)
Sub busses are often the means by which multiple tracks of audio that belong to the same
category (dialog, music, effects, ambience, etcetera) are combined together so that everything
in that category can be mixed as a single audio signal. Multiple Sub busses can be themselves
routed to Main busses, or they can be directly output in the deliver page.
Aux (Auxillary)
Each channel strip includes twelve auxiliary bus sends, which are typically used to route audio
to software or hardware effects of some kind. To understand how Aux sends fit into the audio
processing path, auxiliary send signals are connected either immediately before or after a
channel strip’s fader. Each auxiliary bus can also be configured to accommodate specific audio
formats such as stereo, LCRS, 5.1 surround, or 7.1 surround.
Multi Track
Multitrack buses provide bus paths for combining feeds that you want to re-record to disk, or
route to other I/O.
1125
Setting Up Tracks, Buses, and Patching Part 8 – 63
Controlling Signal Flow
The process of setting yourself up for editing and mixing in the Fairlight page involves:
First, customizing the tracks of the timeline to be organized and configured as required.
Second, creating the busses you need in order to organize your signal flow.
Third, patching the tracks to Subs, and the Subs to Mains, in order to create the signal
flow you need.
Managing Audio Tracks
When you’re getting ready to record or edit audio clips into the Fairlight Timeline, you need to
make sure you’ve got enough tracks to do the job. The following procedures cover the different
methods available for adding, removing, and rearranging tracks as you work. These commands
are all available via the contextual menu that appears when you right-click anywhere in the
Timeline header area (the header of the Timeline is the area to the left where each track’s
various buttons and controls are located).
Defining Timeline Audio Track Channels at Creation
If you decide to create a new audio track, you have to choose what kind of audio track it will be.
Right-clicking in the bottom audio portion of the Timeline track header reveals a contextual sub-
menu that lets you create one of three different kinds of audio tracks.
Mono: Holds a single channel with only one lane.
Stereo: Holds stereo left and right channels, with two lanes
5.1: Holds the six channels corresponding to a 5.1 surround mix, for a total of six lanes.
For broadcast, SMPTE specifies Left, Center, Right, Left Surround, Right Surround, and
LFE. For cinema distribution these tracks are ordered Left, Right, Center, LFE, Surround
Left, Surround Right, and LFE.
7.1: Holds the eight channels corresponding to a 7.1 surround mix, for a total of eight
lanes. For broadcast, SMPTE specifies Left, Center, Right, Left Surround, Right
Surround, LFE, Back Surround Left, and Back Surround Right. For cinema distribution
these tracks are ordered Left, Right, Center, LFE, Left Surround, Right Surround, Back
Left Surround, and Back Right Surround.
Adaptive: Capable of holding up to 24 audio channels, which would display up
to 24 lanes within the track. An adaptive audio track can hold clips with different
combinations of channels, up to the maximum number of channels allowed within
that track. The number of channels allowable on a particular Adaptive track is user-
definable (1–24) at the time that track is created. If you edit a clip with more channels
into an Adaptive track that was created to hold fewer channels, the extra clip channels
are muted.
Creating Tracks
There are two commands with which to create new audio tracks, and both are in the contextual
menu found by right-clicking within any audio track’s header controls. Add Track adds a single
audio track of the type you choose from a submenu. Add Tracks lets you insert as many tracks
as you like, of a type and at a position you designate using the Add Tracks dialog.

1126
Setting Up Tracks, Buses, and Patching Part 8 – 63
Rearranging Tracks
You can rearrange tracks by right-clicking in a track’s header area and choosing either Move
Track Up or Move Track Down in the contextual menu that appears.
Changing How Many Channels an Audio Track Has
If you had set up your timeline with one kind of audio track, but you discover you actually need
a different kind, you can change any audio track’s type at any time. Just right-click anywhere in
that audio track’s timeline header, and choose an option from the Change Track Type To
submenu of the contextual menu.
Deleting Tracks
Right-click within a track’s Timeline header and choose Delete Track. If there are clips on a
track you remove, they are also deleted from the Timeline, but preserved in the Media Pool.
Linked Group Support for Mono Tracks
Linked Groups are an organizational construct that you can create using mono tracks (other
kinds of tracks such as stereo, 5.1, 7.1, or Adaptive cannot be used in a Linked Group). Unlike a
multi-channel track with lanes, a Linked Group of mono tracks functions as five independently
editable tracks in the Timeline. However, each track is mapped just like an audio channel using
one of the standard multi-channel mappings (stereo, 5.1, 7.1, Adaptive), and Linked Groups of
mono tracks are mixed using only a single channel strip.
Linked Groups are extremely useful when you’ve been given a set of six independent audio
files that need to be assembled as a single surround mix, or when you have surround channels
that need to be specifically re-edited on a channel by channel basis.
To create a Linked Group:
1 Create two or more Mono audio tracks that you want to group together. If you need
to create a Linked Group with a specific channel mapping, such as 5.1, make sure you
create enough tracks (in this case, 6).
2 Choose Fairlight > Link Group.
3 When the Link Group dialog appears, Mono audio tracks are represented by active
buttons (all other channel mapped tracks are disabled, since they can’t be linked). Click
to enable the button of every track you want to include in the group you’re about to
create. Which mappings are available to use for creating your group depends on how
many tracks you’ve selected.
Selecting six tracks to use for creating a Link Group
4 After you’ve selected all the tracks you need to, click one of the available “Link as”
buttons below. In this example, six tracks have been selected, so you could click 5.1
Film or 5.1.
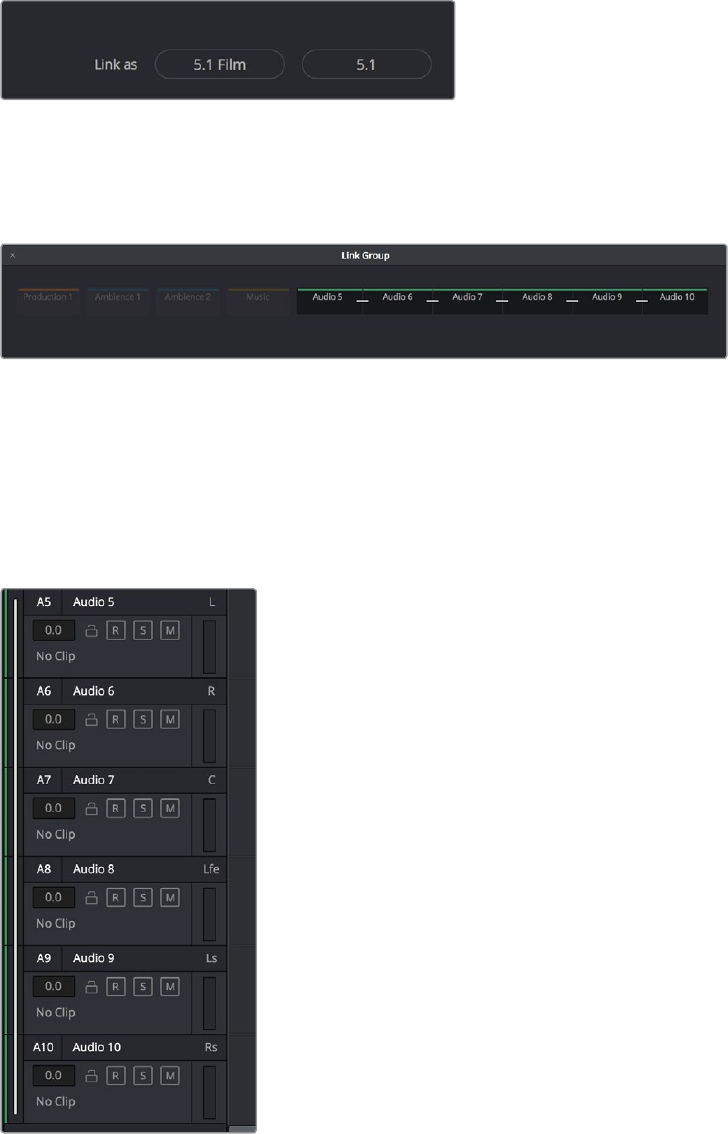
1127
Setting Up Tracks, Buses, and Patching Part 8 – 63
When you select enough tracks, you can create groups
linked as specific surround mappings
Afterwards, the tracks you selected should turn into a single block, showing they’ve
been linked.
When you select enough tracks, you can create groups linked as specific surround mappings
5 Close the Link Group window when you’re finished.
Once you’ve created a Linked Group, the mono tracks in the timeline that you linked appear
with a bar to the left in the track header that spans every track that’s linked. If the tracks are tall
enough, they’ll also be labeled to identify which track corresponds to which surround channel,
L, R, C, Lfe, Ls, Rs, etcetera.
Tracks in a linked group are labeled to identify which
track corresponds to which surround channel
If necessary, you can also unlink a linked group to turn it back into independent mono tracks.
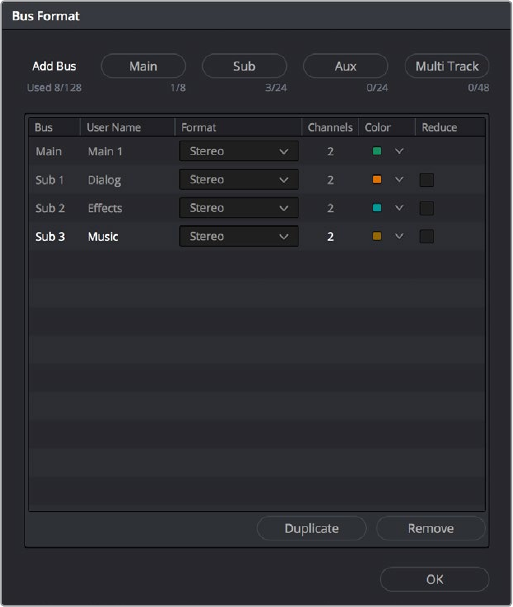
1128
Setting Up Tracks, Buses, and Patching Part 8 – 63
To unlink a linked group:
1 Choose Fairlight > Link Group.
2 When the Link Group dialog appears, select the linked group you want to unlink.
3 Click Unlink.
4 Close the Link Group window when you’re finished.
Creating Buses
Choosing Fairlight > Bus Format opens the Bus Format window, which lets you create as many
busses as you need (up to the limitations of your system) to organize the tracks and channels of
your program.
The Bus Format window lets you add busses to the mixer
Four buttons at the top of the window let you create any type of bus Fairlight supports. Creating
a new bus, whether it’s a Main, Sub, Aux, or Multi Track, adds the new bus to the list that
appears below.
The Bus list lets you rename the bus, choose the format of each bus (a pop-up menu appears in
the Format column of each entry of the list), and color-code each bus (a Color pop-up lets you
choose that bus’s color). Simply click any item on the Bus list to select it, and choose different
options from the Format and Color pop-up menus, or click on the User Name of any bus to
select it, and type a custom name.
At the bottom of the list are two additional buttons that let you Duplicate or Remove selected
Buses. When you’re done modifying the available busses, you can click OK to accept the
change and close the Bus Format window, Cancel to close the window (although any busses
you’ve made remain in place, or Bus Assign to open the Bus Assign window,.
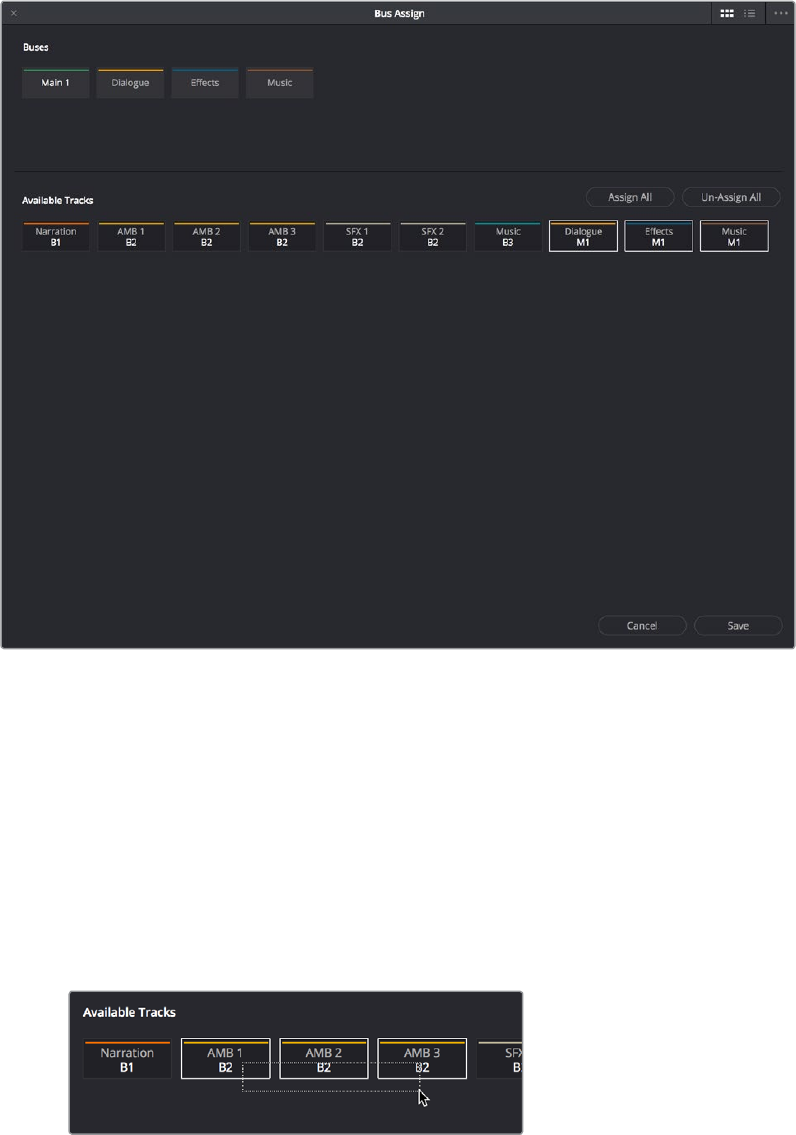
1129
Setting Up Tracks, Buses, and Patching Part 8 – 63
Assigning Buses
Once you’ve created one or more busses, you’ll want to assign different tracks to specific
busses, and different Subs to specific Mains. This is accomplished in the Bus Assign window,
which you can open by choosing Fairlight > Bus Assign, or by clicking the Bus Assign button in
the Bus Format window.
The Bus Assign window lets you choose which tracks are connected to
which busses, and which busses are connected to which mains
The top shows all of the available Main, Sub, and Multi Track busses, while the bottom shows all
available tracks, Sub busses, and Aux busses. The Bus Assign window defaults to icon view, in
which each Bus and Track is shown as a button, but it can be switched to list view, in which the
Available Tracks section is shown as a list.
Methods of making bus assignments:
To assign specific tracks to a bus: Click a button in the Buses section to select that
bus, and then either click or drag a bounding box over all the available tracks that you
want to assign to that bus. Once assigned, the Available Tracks buttons display which
Bus they’ve been assigned to.
Assigning multiple tracks to a bus by dragging a bounding box
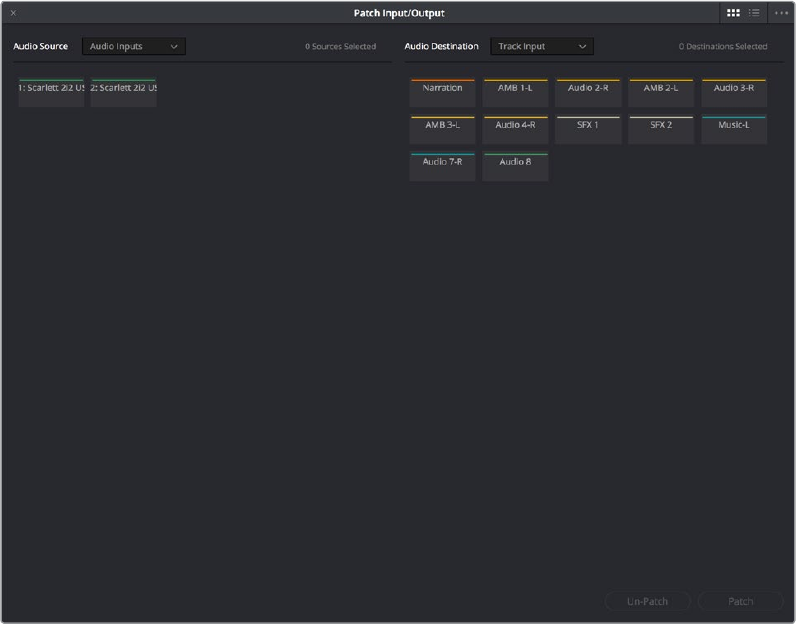
1130
Setting Up Tracks, Buses, and Patching Part 8 – 63
To assign every track, Sub, and Aux to a bus: Click a button in the Buses section to
select that bus, and then click Assign All.
To clear all track assignments from a particular bus: Click a button in the Buses
section to select that bus, and then click Un-Assign All.
When you’re done making bus assignments, click Save.
Patching Signal Paths
While bus creation and assignment is a straightforward way of creating a cascade of routing
from tracks to Subs to Mains, sometimes you need to create more specific signal paths. For
example, if you need to record audio to a track, you need to patch the audio input you want to
record from to the track you want to record to. This, and many other scenarios, are
accomplished using the Patch Input/Output window.
Using the Patch Input/Output Window
Choosing Fairlight > Patch Input/Output opens the Patch Input/Output window, which can be
displayed in either icon or list view. This window is split into two halves, with the left half
containing whichever Audio Source controls you choose, and the right half containing
whichever Audio Destinations you choose. In the following screenshot, the Audio Inputs from a
Scarlett2i2 USB audio interface are shown, while the available Track Inputs are shown to
the right.
The Patch Input/Output Window showing Audio Inputs and Track Inputs

1131
Setting Up Tracks, Buses, and Patching Part 8 – 63
Creating a Patch
By default, the Patch Input/Output window shows the available Audio Inputs as the Source, and
the Track Inputs as the Destination. This makes it easy to patch whatever audio source (such as
a microphone connected to a USB audio interface) to a specific audio track of the timeline to
prepare for recording. Patching and Un-Patching a source to a destination is straightfoward.
To patch a source to a destination:
1 Click the button or list item of the source you want to patch on the left side of the Patch
Input/Output window.
2 Click the button or list item of the destination you want to patch on the right side.
A selected Audio Source and Audio Destination pair
3 Click the Patch button at the bottom right of the window. The Source and Destination
will both display the connection they’re patched to.
To un-patch a source and destination pair:
1 Click the button or list item of a source or destination you want to un-patch.
2 Click Un-Patch.
Choosing Audio Source and Destination Controls
The Audio Source and Destination pop-up menus let you choose different categories of source
and destination controls to patch together.
The following Audio Source options are available:
Audio Inputs: The available physical audio inputs on your workstation, for example
SX-36, MADI, or system audio. Useful when patching to record audio.
Track Repro: Short for Reproduction, this is the signal from the track playback, before
any processing
Track Send: Track Insert send
Track Direct: Track Direct Out, can be pre- or post the track fader, with an offset
MT-Bus Dir: Multitrack Bus Direct Out, can be pre- or post the multitrack bus master
fader, with an offset
MT-Bus Out: Multitrack Bus Out, always post the Multitrack bus master fader
Aux-Bus Send: Aux bus master insert send
Aux-Bus Dir: Aux Bus Direct Out, can be pre- or post the Aux bus master fader,
with an offset
Aux-Bus Out: Aux Bus Out, always post the Aux bus master fader
Sub-Bus Send: Sub bus master insert send
Sub-Bus Dir: Sub Bus Direct Out, can be pre- or post the Sub bus master fader,
with an offset
1132
Setting Up Tracks, Buses, and Patching Part 8 – 63
Sub-Bus Out: Sub Bus Out, always post the Sub bus master fader
CR-Mon Dir: Monitor system Direct out. Post fold up/down matrix, pre the Monitor
VolumeLevel/Dim/Mute
CR-Mon Out: Monitor system output. Post fold up/down matrix and Monitor
VolumeLevel/Dim/Mute
Main Send: Main bus master insert send
Main Dir: Main Bus Direct Out, can be pre- or post the Main bus master fader,
with an offset
Main Out: Main Bus Out, always post the Main bus master fader
Osc: Oscillator outputs. Sine, Pink noise, White noise
Solo Out: AFL and PFL Solo Bus Out, always post the respective bus master fader
The following Audio Destination options are available:
Track Input: Input to the Record and Thru path; simply put, the available audio tracks in
the current timeline
Track Return: Track Insert Return
Aux-Bus Return: Aux Bus master insert return
Sub-Bus Return: Sub Bus master insert return
Main Return: Main Bus master insert return
CR-Mon In: Input to the Monitor system’s fold up/down matrices
Talk Back: The Talkback system, showing Comm1 and Comm2
Audio Outputs: The available physical audio outputs on your workstation, for example
SX-36, MADI, or system audio
Using a Channel Strip’s Input Menu
The Input pop-up menu at the top of each track’s channel strip in the mixer provides some
shortcuts for patching different inputs and buses to the tracks of your mix. Each option in this
menu makes the Patch Input/Output window appear with different Audio Source and Audio
Destination selections automatically set up.
Input
The Patch Input/Output window appears set up to let you patch different inputs (such as the
system audio input) to the tracks of the timeline. This makes it fast for setting up audio inputs in
preparation for recording.
Aux Bus
The Patch Input/Output window appears set up to let you patch different Aux buses to specific
submix and timeline track channels.
Sub Bus
The Patch Input/Output window appears set up to let you patch different Sub (submix) bus
channels to specific timeline track channels.
Main Bus
The Patch Input/Output window appears set up to let you patch different Main bus channels to
specific timeline track channels.
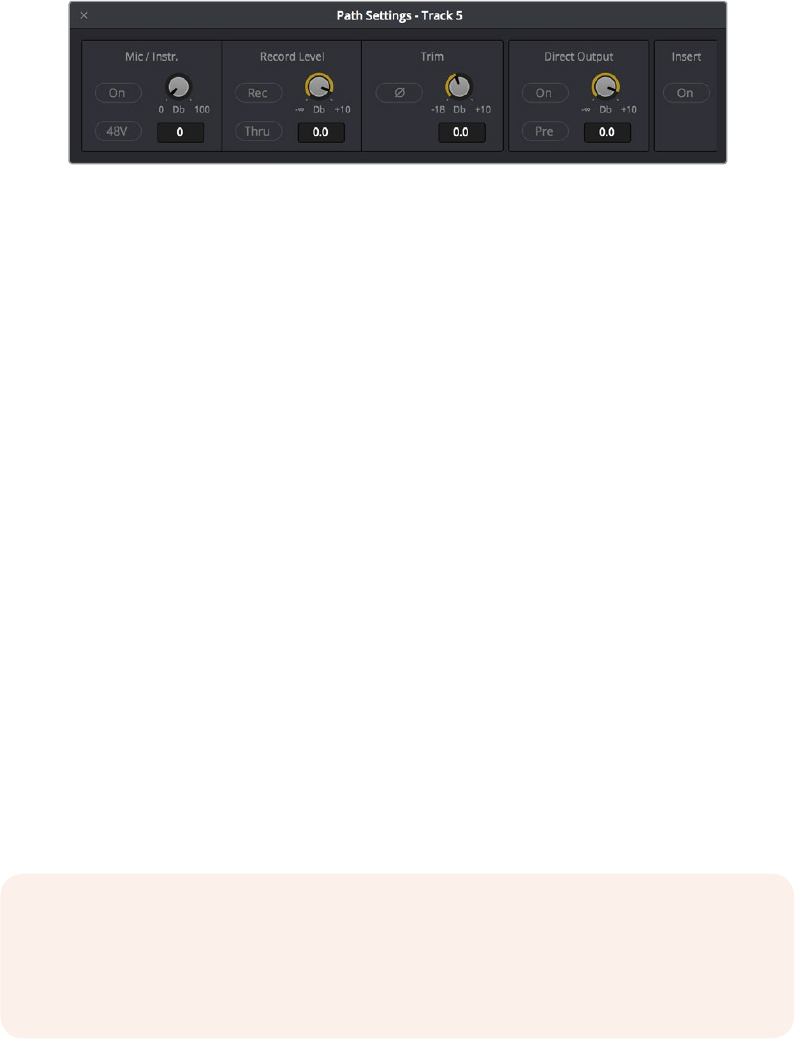
1133
Setting Up Tracks, Buses, and Patching Part 8 – 63
Input Settings
Choosing Input Settings opens the Path Settings window for that track. This window contains
controls for adjusting the input level of audio signals being input via a BMD input/output device.
The Patch Input/Output Window showing Audio Inputs and Track Inputs
These parameters control the following:
Mic/Instr.: Adjusts the Mic/Instrument level for this source, from 0 to 100 dB.
On: Enables Microphone/Instrument level for this source.
48V: Enables phantom power for that input.
Record Level: Controls the level going to the Disk before recording. It does not affect
the track when in Thru mode.
Rec: Enabling this button makes this track ready to record. Only turn this on if there is
an audio source patched to the current track.
Thru: When on, this makes the affected track into the equivalent to a Live Feed. When
enabled, this track will monitor its input, but will not respond to a record command. Only
turn this on if there is an audio source patched to the current track.
Trim: This parameter controls the level as the channel enters the mixer. For timeline
tracks, this controls the signal coming from disk, and does not affect any current levels
being recorded.
Direct Output: Controls the level going from this channel to the Direct Output.
On: Toggles direct output on and off.
Pre: Toggles the Direct Output to connect either pre or post the main channel fader.
Insert: Controls the Insert Return only. When enabled, the channel connects to its
Insert Return, otherwise the Channel connects to the straight-through path. The Insert
Send, on the other hand, is always active (though it must be patched somewhere
before it can be heard).
NOTE: Insert sends and returns are only audible if patched to physical outputs or
inputs, or to other paths. Sends can be sent to the input of any path in the system, and
returns can come from the output or send of any path. This is done in the Patch I/O
screen (press the Patch I/O button).
1135
Transport Controls, Timeline Navigation, and Markersr Part 8 – 64
Transport Controls,
TimelineNavigation, and Markers
The Fairlight page has unique transport control, zooming, and scrolling options not found in the
other pages of DaVinci Resolve that help you to work with audio more efficiently. This chapter
covers how to get around the Fairlight version of the timeline.
Transport Controls and JKL Navigation 1136
Transport Controls 1136
Using JKL to Control Playback 1136
Dragging the Playhead to Scrub 1137
Looping Playback 1137
Clip, Marker, and Track Navigation 1137
Selecting Tracks 1137
Left and Right Arrow Keys 1137
Up and Down Arrow Keys 1138
Zooming and Scrolling 1138
Setting the Zoom Level of the Timeline 1138
Scrolling Through the Timeline 1138
Using Flags 1139
Using Markers 1139
Adding Markers to Clips 1139
Adding Markers to Timelines 1140
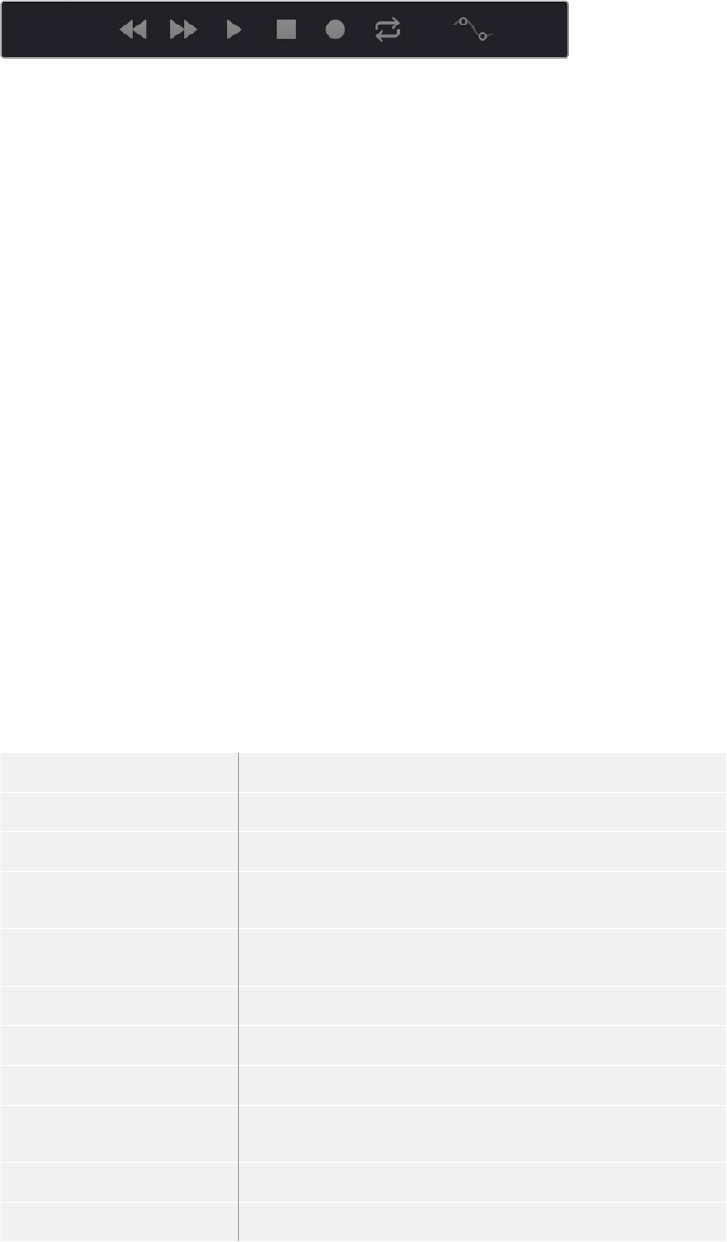
1136
Transport Controls, Timeline Navigation, and Markersr Part 8 – 64
Transport Controls and JKL Navigation
Because of the Fairlight page’s audio-focused workflow, the transport and playback controls
differ from those found in the Media, Edit, Color, and Deliver pages.
Transport Controls
Fairlight page transport controls
The Fairlight transport controls are also designed to mirror their counterparts on the Fairlight
control panels. They include the following functions:
Rewind and Fast Forward: Initiates accelerated playback through the timeline in either
direction. Pressing either of these buttons multiple times speeds up this motion, cycling
through 8x, 24x, 60x, 150x, and 360x play speeds.
Play: Plays forward. Identical to pressing the Space bar or L keys while playback
is stopped.
Stop: Stops playback. Identical to pressing the Space bar or K keys while playback
is engaged.
Record: Initiates recording if you have an audio source patched to a track, and if that
track is enabled for recording. For more information about recording, see Chapter 65,
“Recording.”
Loop: Toggles looped playback off and on. While looped playback is on, playback
will loop at the end of the Timeline, and will also loop when you use the Play In to Out
command, and will continue to loop automatically until you stop playback.
Automation Controls: This button exposes the automation toolbar. For more
information about recording automation, see Chapter 69, “Automation Recording.”
Using JKL to Control Playback
The JKL keyboard shortcuts are common to many editing applications, and experienced editors
know these to be some of the most useful controls for playback and editing there are. Here’s a
list of the many different ways you can use these three keyboard shortcuts to play through clips
and timelines as you work.
JPlays 100% backward.
KStops playback.
LPlays 100% forward
Press J repeatedly Increases backward play speed each time you press J,
for a range of fast-reverse speeds.
Press L repeatedly Increases forward play speed each time you press L,
for a range of fast-forward speeds.
Shift-J Plays in fast reverse.
Shift-L Plays in fast forward.
K+J Plays backward at slow motion (with slow motion audio playback).
K+L Plays forward at slow motion
(with pitch-corrected audio playback on OS X).
Pressing K while tapping J Moves the playhead back one frame.
Pressing K while tapping L Moves the playhead forward one frame.
1137
Transport Controls, Timeline Navigation, and Markersr Part 8 – 64
If you’re using Fairlight with the keyboard, then this will probably become one of the main ways
you move the playhead around in Resolve.
Dragging the Playhead to Scrub
You can also drag the playhead left and right to scrub through the visible area of the timeline
byclicking and dragging anywhere within the timeline ruler at the top of the timeline, directly
below the toolbar. If you’re zoomed in at a reasonable level for editing, scrubbing the playhead
using your pointer will result in smooth, tape-like slow and fast audio playback, giving you a
great deal of precision while trimming audio.
Looping Playback
Two controls govern looping on the Fairlight page, similarly to how looping works on the Edit page.
Loop: Command-Forward Slash (/). Toggles looped playback off and on. Whilelooped
playback is on, playback initiated with any of the following commands will loop
automatically until you stop playback.
Play In to Out: Option-Forward Slash (/). If you’ve marked a section of a clip or timeline
with In and Out points, this command lets you preview how it will play.
Clip, Marker, and Track Navigation
The Arrow keys are used to navigate among clips, markers, and tracks in the Fairlight page,
butthey’re used very differently than they are in the other pages of Resolve. This section
covers the basics.
Selecting Tracks
Which tracks are selected determine the behavior of the arrow keys.
In Selection mode: You can select tracks by clicking or Command-clicking (to select
multiple tracks) anywhere in the background area or on the track number of the track
headers. If you click-and-drag, you can use a bounding box to select multiple tracks.
In Range Selection mode: You can select tracks by clicking or Command-clicking
anywhere either in the background area or on the track number of the track header,
orin any unused area of the track itself in the timeline. If you click-and-drag, you can
use a bounding box to select multiple tracks.
Left and Right Arrow Keys
In general, the Left and Right Arrow keys are used to move the playhead left and right in the
timeline, navigating from clip to clip or marker to marker. How these keys function depends on
whether or not one or more tracks is selected in the timeline.
If no tracks are selected: The Left and Right Arrow keys will jump the playhead from
timeline marker to timeline marker. Clip markers will be ignored.
If one or more tracks are selected: The Left/Right Arrow keys will jump the playhead
among clip In points, clip Out points, and timeline markers.
1138
Transport Controls, Timeline Navigation, and Markersr Part 8 – 64
Up and Down Arrow Keys
The Up and Down Arrow keys are used to move selected tracks up and down in the timeline.
By changing which tracks are selected, you can alter which clip’s In and Out points are used to
jump the playhead around the timeline.
If no tracks are selected, then nothing happens.
Zooming and Scrolling
The Fairlight page has several methods of zooming into and out of the timeline, and scrolling
when you’re zoomed to the point where your edited sequence of clips extends past the left and
right edge of the visible timeline.
Setting the Zoom Level of the Timeline
Depending on how you like to work, there are several methods of zooming into and out of
the timeline.
Using the Vertical Zoom Slider: A pair of sliders at the right of the toolbar let you
zoom vertically and horizontally. The first one lets you scroll vertically in order to see
more detail in the height of your waveforms. If no tracks are selected, then zooming is
centered on the top audio track in the timeline. If one or more tracks are selected, then
zooming is centered on the topmost selected audio track.
Using the Vertical Zoom Slider: A pair of sliders at the right of the toolbar let you zoom
vertically and horizontally. The second one lets you zoom horizontally in order to see
more detail in the width of your waveforms. Zooming is always centered on the position
of the playhead.
Pressing Command = and Command – (minus): Command-Equals (also referred to
as Command-Plus) and Command-Minus let you zoom horizontally into the timeline.
Zooming is always centered on the position of the playhead.
Using scroll controls of your pointing device to scroll horizontally: Holding the Option
key down and using the scroll wheel (or scroll control) of your pointing device will zoom
horizontally into the timeline. Zooming is centered on the position of the playhead.
Using scroll controls of your pointing device to scroll vertically: Holding the Shiftkey
down and using the scroll wheel (or scroll control) lets you zoom vertically in the
timeline. In this case, if no tracks are selected, then zooming is centered on the
topaudio track in the timeline. If one or more tracks are selected, then zooming is
centered on the topmost selected audio track.
Using the Fairlight panel’s Jog/Edit Wheel: If you have a Fairlight panel, you can hold
the ZOOM button down while turning the Jog/Edit wheel to zoom into the timeline at
the position of the playhead.
Scrolling Through the Timeline
However closely you’re zoomed into the timeline, if you’re zoomed enough so that clips extend
past the visible area of the timeline, scroll bars appear below. If the playhead is offscreen, a
small orange tic mark indicates its position relative to the entire timeline, which is represented
by the total width of the scroll bar’s background.
If you drag the playhead, or otherwise use any of the transport controls or playback key
shortcuts to move through the timeline, the contents of the timeline refresh every time the
playhead hits the left or right edge of what’s visible.

1139
Transport Controls, Timeline Navigation, and Markersr Part 8 – 64
Using Flags
Flags are meant to mark an entire clip, and they also flag every other clip in the Timeline that
shares the same Media Pool source clip, making this a handy way of quickly identifying which
clips in a given timeline come from the same Media Pool source. Flags are visible in every page
of DaVinci Resolve, making them an excellent method of tracking media from page to page.
The Flag and Marker buttons and pop-ups.
You can apply multiple flags to clips, with a variety of colors to choose from. In addition to
flagging specific media files, flags can be useful for sorting by column in the Media Pool, as well
as a variety of other operations.
Methods for flagging clips in the Fairlight page:
To flag a clip: Select one or more clips, and either click the Flag button to flag that
clip with the current color, or click the Flag pop-up in the toolbar to choose a different
color and then click the Flag button. In the Edit page, flags appear in the Timeline
superimposed in the name bar of each clip.
To remove all flags from a clip: Select one or more clips with flags you want to remove,
then click the Flag pop-up in the toolbar, and choose the top “Clear All” option.
Using Markers
Markers are used to call attention to a particular frame within a specific clip. Markers can be
individually colored, and can have customized name and note text. Whenever you enter text
into a marker, that marker displays a small dot that indicates there’s more information inside of it.
Once placed, markers snap to In and Out points, edit points, the playhead, and other markers
whenever snapping is enabled, making it easy to use markers to “measure” edits and trims that
you make in the Timeline. Markers are visible in every page of DaVinci Resolve, making them an
excellent method of tracking frames in clips and specific moments in the timeline from
page to page.
You can add markers to the timeline (in the timeline ruler) or to clips. The full procedures for
placing and editing markers in the Fairlight page’s on-screen interface are identical to those for
the Edit page, so for more information, see Chapter 20, “Marking and Finding Clips in the
Timeline.” For now, here’s a summary.
Adding Markers to Clips
The following procedures describe how to add markers to clips in the timeline of the
Media Page.
1140
Transport Controls, Timeline Navigation, and Markersr Part 8 – 64
To mark a clip in the Timeline, do one of the following:
Select one or more clips you want to mark, then move the playhead to the frame of
a selected clip in the Timeline, and click the Marker button in the toolbar (or press M)
toplace a marker at that frame, using the current color (if multiple overlapping clips are
selected, you’ll add a marker to all clips).
To place a marker during playback and immediately open the marker dialog to enter
a name or note within it, select one or more clips you want to mark, play through
the selection until you want to place a mark, then press Command-M. Playback
pauses until you enter some text and close the marker dialog again, at which point
playbackcontinues.
Select one or more clips you want to mark, and then click the Marker pop-up to choose
a different color, and click the Marker button.
Adding Markers to Timelines
You can also place markers of any color into the Timeline ruler to denote specific times for
future reference, or add notes about issues you want to keep track of. You should note that all
markers placed on clips or in the Timeline also appear within the Mini-Timeline of the Color
page, making it easy to place notes to reference particular audio cues that might be valuable
when editing or grading.
To mark the Timeline itself, make sure all clips are deselected, and do one of the following:
Click the Marker button (or press M) to place a marker of the currently selected color in
the Timeline ruler.
To place a marker during playback and immediately open the marker dialog to
enter a name or note within it, select one or more clips you want to mark, then press
Command-M. Playback pauses until you enter some text and close the marker dialog
again, at which point playback continues.
Click the Marker pop-up to choose a different color, and click the Marker button.
Right-click in the Timeline ruler and choose a marker color from the Add Marker
submenu of the contextual menu.
1142
Recording Part 8 – 65
Recording
It’s possible to record to one or more tracks on the Fairlight page, accommodating workflows as
varied as editors recording scratch voice over or temp sound effects, recording engineers
recording narration, ADR, or foley as part of the audio finishing process, music studios recording
orchestras for the music score, or garage bands recording their latest magnum opus. While
DaVinci Resolve is a comprehensive postproduction environment for cinema and video, the
Fairlight page can be used for any audio recording application you might have, from
books-on-tape to live music to feature films and television.
This chapter covers the somewhat brief basics of audio recording in the Fairlight page. Keep in
mind that this is a work in progress, and that the comprehensive recording capabilities of earlier
versions of Fairlight will be migrating into DaVinci Resolve as time passes.
Setting Up to Record 1143
Patching Inputs 1143
Arming Tracks 1144
Choosing Where to Record Audio Clips To 1144
Recording Using the Onscreen Controls 1144
Recording and Editing Multiple Takes Using Layering 1145
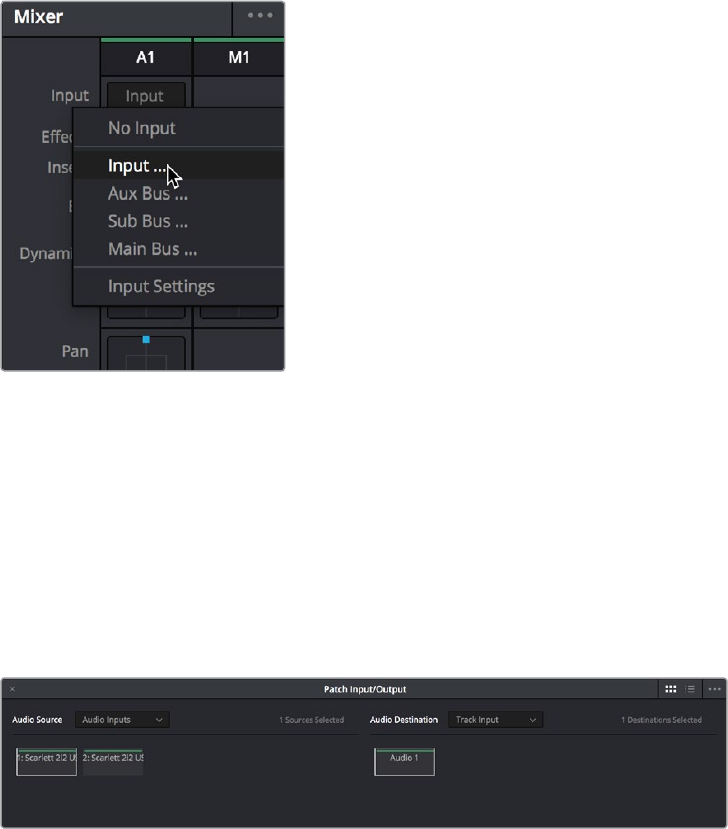
1143
Recording Part 8 – 65
Setting Up to Record
Depending on how your workstation is set up, it’s possible to simultaneously record to multiple
tracks in the Fairlight page at once. How many tracks you can record to depend entirely on
what hardware you have available. This section describes the process of recording to tracks in
the Fairlight page.
Patching Inputs
Before you can record anything, you need to use the Patch Input/Output window to patch an
available Audio Input to a track. If you’re computer has nothing else, the inputs of your
workstation are available to connect whatever audio device is set up as the default audio input
on your system to the track you want to record to.
To open the Patch Input/Output window, do one of the following:
Choose Fairlight > Patch Input/Output
Click the Input menu at the top of the channel strip of the track you want to record to,
and choose Input…
The Input pop-up menu lets you open the Patch Input/
Output window with that track selected
To patch an audio source to an audio destination:
1 Make sure that the Audio Source menu is set to Audio Inputs, and the Audio
Destination menu is set to Track Input.
2 On the right, click the audio input that you want to patch so it’s highlighted.
3 On the left, click the audio destination that you want to patch so it’s highlighted also,
if it’s not already. In this simplified example, channel 1 of the Scarlett 2i2 is being
connected to Audio 1, which is the only track in the timeline.
Selecting a source and a destination to patch
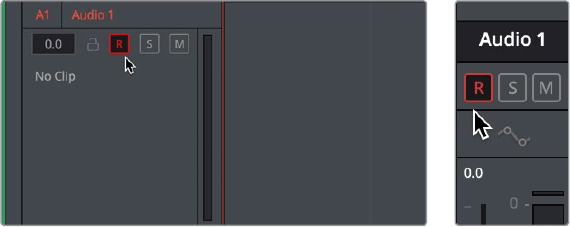
1144
Recording Part 8 – 65
4 Click the Patch button at the bottom of the window, and your recording setup will
be patched.
5 Continue steps 2 and 3 until you’ve patched all the inputs you want to record from
to all of the tracks that you want to record onto. You can patch as many inputs to as
many tracks as your system is set up to accommodate. In this example, there are two
available audio sources, but there’s only a microphone connected to the first channel,
so that’s the only one being connected.
6 When you’re finished, close the window.
Arming Tracks
To record on a track, it must be armed. You should note that it’s impossible to arm a track that
hasn’t been patched first, so make sure you’ve patched the audio source you want to record
from to the track you want to record to first. Then arming that track is as simple as clicking the R
button in the track header controls, or in the channel strip for that track in the Mixer.
(Left) The arm button turned on in the track header,
(Right) the arm button turned on in the channel strip
Once a track has been armed, you’re ready to record.
Choosing Where to Record Audio Clips To
The process of recording in the Fairlight page creates new clips and generates additional media
on disk. You can specify the location on disk you want to save these recordings by opening the
Capture and Playback panel of the Project Settings and using the Browse button, found
underneath the “Save clips to” field, to choose a new location (a folder named “Capture” on
your scratch disk is the default location).
To choose where the new clips that are created are placed in the Media Pool, simply open the
Media Pool and select any bin in the Bin List, or create a new bin and select it if you want to put
your recordings in their own location.
Recording Using the Onscreen Controls
You can record anywhere you want on the currently armed track or tracks by placing the
playhead where you want recording to begin. In this way, you can record to specific areas of
your program as you record voiceover, sound effects, foley, or other timed performances that
need to fit into a particular region of the edit.
To begin recording:
1 Position the playhead where you want recording to begin.
2 Click the Record button in the Transport Controls. Recording immediately begins, and a
red bar indicates where on the currently armed track material is being recorded.
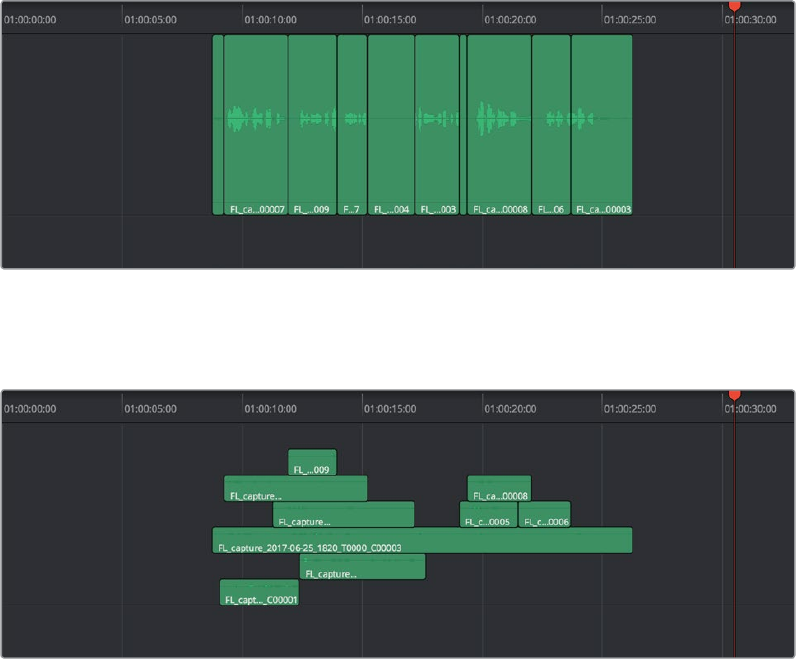
1145
Recording Part 8 – 65
To stop recording, do one of the following:
Click the Stop button in the Transport Controls
Press the Space Bar
Recording and Editing Multiple
Takes Using Layering
There are two ways you can record multiple takes. You can either record them one after the
other, sequentially, and then edit them later. However, you also have the ability to record
multiple takes to the same region of the timeline, one on top of another, while at the same time
preserving every take using track layering.
In the following screenshot, multiple takes have been recorded over the same section of the
timeline, including some partial takes to correct specific phrases in the voiceover being
recorded. When you do this, the result looks like a series of cuts and overwritten clips, with the
most recently recorded segments being the ones that play back over the previously
recorded segments.
Overlapping recordings with Audio Track Layers turned off
However, if you choose View > Audio Track Layers, you’ll see that all your recordings have
actually been preserved via a vertical stack of overlapping audio clips.
Overlapping recordings with Audio Track Layers turned on, showing layering within the same track
The layering of audio clips in DaVinci Resolve means that the topmost superimposed clips in a
layered stack like this mutes the audio of overlapping clips that are lower in the stack.
Using layering, it’s easy to edit the best segments of the best takes, while preserving all other
takes, simply by adding edits and rearranging clips in the stack so the best parts are on top.
For more information about audio layering, see Chapter 66, “Editing Basics in the
Fairlight Page.”
1147
Editing Basics in the Fairlight Page Part 8 – 66
Editing Basics in the Fairlight Page
You can use the Fairlight page to refine the editing of audio that was initially assembled in the
Edit page, or you can use the Fairlight page to both record and edit audio programs from
scratch. Because audio clips have properties that video clips do not, audio editing
encompasses additional procedures that are not available in the Edit page. This chapter takes
you through the fundamental steps of editing audio the Fairlight way.
Compatible Audio Formats 1148
Adding Audio Clips to the Timeline 1148
Overwriting vs. Layering Clips that Overlap 1148
Dragging Individual Audio Clips Into the Timeline 1148
Drag and Drop Editing of Several ClipsInto the Timeline At Once 1148
Making Audio Clip Selections in the Timeline 1149
Clip Selection 1150
Track Selection 1151
Range Selection 1152
Automatic Selections In Selection Mode With Selected Tracks 1154
Automatic Selections In Range Selection Mode With Selected Tracks 1155
Locking Audio Tracks You Don’t Want to Change 1156
Splitting and Joining Clips 1156
Trimming Clips Without Rippling the Timeline 1157
Seven Point Editing 1157
Resizing the In and Out Points of a Clip 1157
Moving (Sliding) and Overwriting Clips 1158
Slipping 1158
Disabling and Re-Enabling Clips in the Timeline 1158
Deleting Audio Clips and Regions 1159
Cut, Copy, and Paste 1159
Audio Clip Layering 1162
Fades and Crossfades 1163
Using Fades 1163
Creating Crossfades With Overlapping Fades 1164
Using Crossfades From the Edit Page 1165
Finding Clips in the Media Pool 1166
Changing Clip Color in the Timeline 1166
Sample Editing 1166
1148
Editing Basics in the Fairlight Page Part 8 – 66
Compatible Audio Formats
DaVinci Resolve is compatible with WAVE, Broadcast WAVE, AIFF, MP3, AAC (M4A), CAF
(macOS only), MTS and QuickTime containers using the AC3 audio format, and Enhanced AC-3
(macOS and Windows) at sample rates including 32, 44.1, 48, 88.2, 96, and 192 kHz.
Adding Audio Clips to the Timeline
The Fairlight page offers a complete audio editing environment that lets you either record and
assemble clips from scratch, or refine tracks full of audio clips that have been edited together in
different ways. There are four ways of adding media to the timeline in the Fairlight page,
depending on the type of work you do:
Recording new audio into one or more tracks (for more information, see Chapter 65,
“Recording”)
By dragging and dropping new audio clips from the Media Pool into the
Fairlight timeline
By editing audio clips into audio tracks on the Edit page
By importing a project with audio clips
However audio clips come to be in your timeline, the rest of this chapter covers the myriad
methods available to edit and sweeten the contents.
Overwriting vs. Layering Clips that Overlap
When you add clips to the Timeline, what happens when you add a clip that overlaps another
clip that’s already in the track you’re editing to depends on the Timeline > Layered Audio
Editing setting. By default, with Layered Audio Editing turned off, overwriting one audio clip with
another results in the overlapping part of the overwritten clip being non-destructively deleted
from the Timeline by the incoming clip.
However, if you turn Layered Audio Editing on, then incoming clips do not overwrite overlapping
clips in the Timeline; instead, they’re layered within that track, such that the incoming audio clip
takes precedence over what was previously there, but overlapping audio segments that were
previously in the Timeline are preserved, which can be seen when you choose View > Show
Audio Track Layers.
In this way, you can choose whether you want to overwrite previously edited clips, or layer
newly edited clips, as your needs require, regardless of whether or not Audio Track Layers are
visible. Audio layering can be enabled in both the Edit and Fairlight pages.
For more information about audio layering, see the section later in this chapter.
Dragging Individual Audio Clips Into the Timeline
You can show the Media Pool in the Fairlight page, and edit audio clips into the timeline in their
entirety by dragging and dropping individual clips onto whichever audio track you want them
to appear.
Drag and Drop Editing of Several
ClipsInto the Timeline At Once
If you want to edit several clips into the Timeline at once by dragging them from the Media Pool,
you’ll probably want to do a bit of preparation to make sure they’re edited in the right order.

1149
Editing Basics in the Fairlight Page Part 8 – 66
1 Change the sort order of the Media Pool’s browser area to put the clips into the order
in which you want them to appear. In Thumbnail view you can use the Sort Order
menu, but in List view you can click the header of any metadata column to sort by that
column’s data.
Using the Sort Order menu to change the
sort order of clips in the Media Pool
2 Use the Media Pool thumbnails, the Media Pool List view Filmstrip, or the Source
Viewer to set In and Out points to define the part of each clip that you want to edit into
the Timeline.
3 Select the the Media Pool clips you want to edit into the Timeline by dragging a
bounding box, Command-dragging multiple bounding boxes over different sets
of clips, by Shift-clicking a range of clips, or by Command-clicking individual non-
contiguous clips.
4 Drag any of the selected clips to the desired position in the Timeline to perform an
overwrite edit.
The clip(s) you drag overwrite whatever other clips they overlap in the Timeline.
Multiple clips dragged from the Media Pool will be edited in the order in which they’re
sorted in the Media Pool, using each clip’s In and Out points.
Making Audio Clip Selections
in the Timeline
Nearly every editing operation described in this chapter and others requires you to make a
selection to define which clips will be affected. The two main editing modes in the Fairlight
page are the Selection tool and the Range Selection tool. Which mode you choose determines
how clips and clip segments are selected in the timeline in preparation for all manner of
editorial operations.
The Selection and Range Selection
tools seen in the Toolbar
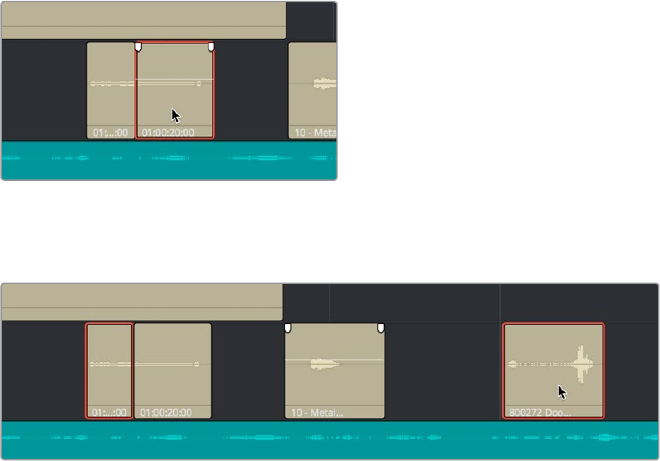
1150
Editing Basics in the Fairlight Page Part 8 – 66
In selection mode, the process of making selections and working in the Fairlight page
resembles that of the Edit page, although there are still key differences in terms of automatic
behaviors that take place when you select tracks you want to work on.
To choose Selection Mode:
Click the Selection tool (the arrow) in the toolbar
Choose Trim > Selection Mode
Press A
In Range Selection mode, the process of making selections and selecting tracks works more
similarly to traditional Fairlight editing systems. This unlocks more of the power of Fairlight
editing, enabling the easier selection of tracks and partial selection of clips for purposes of fast
audio editing. However, these operations are very different from similar operations found on the
Edit page.
To choose Range Selection Mode:
Click the Range Selection tool (the crosshairs) in the toolbar
Choose Trim > Range Selection Mode
Press R
Clip Selection
If you’re doing simple operations to entire clips, you can select clips in the timeline of the
Fairlight page in most of the same ways you select them in the Edit page.
Methods of selecting clips:
Click any clip to select it
Click a clip to select it
Command-Clicking multiple clips to select them all at once
Command-clicking multiple track headers selects those tracks
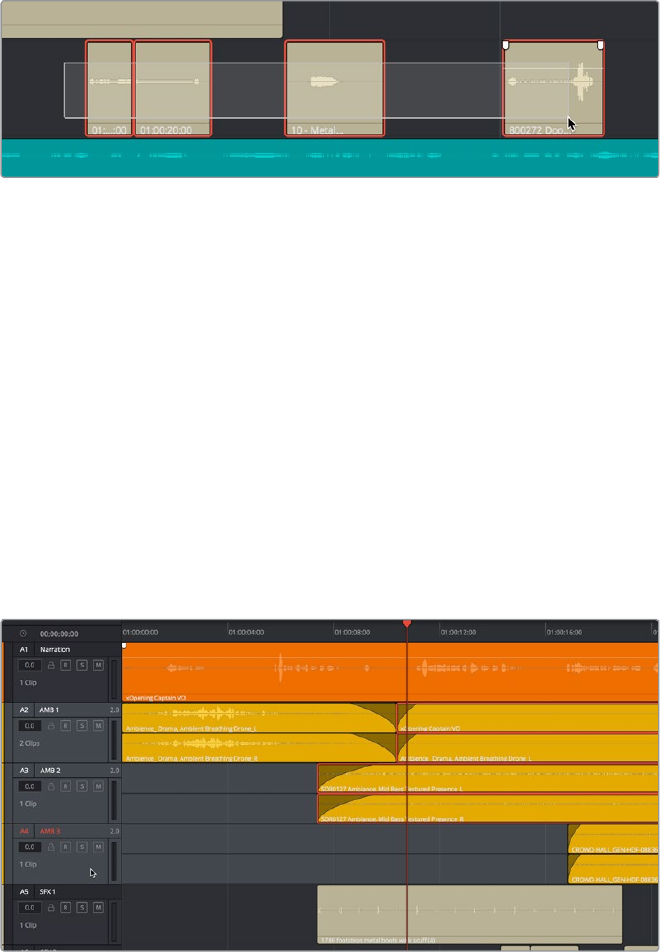
1151
Editing Basics in the Fairlight Page Part 8 – 66
Click anywhere in the background of the timeline and drag a bounding box over
multiple clips
Command-clicking multiple track headers selects those tracks
Track Selection
The timeline on the Fairlight page lets you select entire tracks, in order to simplify the process
of choosing which clips on which tracks you want to be included in a particular operation, as
well as to facilitate the automatic selection of clips that intersect the playhead for easy
operation with keyboard shortcuts and the Fairlight Editing panel.
For example, if you want to copy clips on tracks A3 and A5, then you’ll want to start by doing
one of the following things:
In Selection mode: You can select tracks by clicking or Command-clicking anywhere in
the background area or on the track number of the track headers.
In Range Selection mode: You can select tracks by clicking or Command-clicking
anywhere either in the background area or on the track number of the track header, or
in any unused area of the track itself in the timeline.
Command-clicking multiple track headers selects those tracks
Were you to select tracks A3 and A5, then moving the playhead over the two clips you want to
copy automatically selects them, and gets you ready for any operation you need to perform on
both clips together, as seen in the previous screenshot. This is analogous to the use of the Auto
Select controls on the Edit page, which define which clips and clip segments are automatically
affected whenever you set In and Out points in the Timeline.
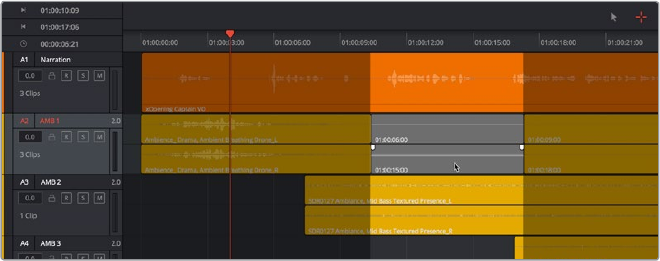
1152
Editing Basics in the Fairlight Page Part 8 – 66
Methods of selecting and de-selecting tracks in the Fairlight page timeline:
To select a single track: Click anywhere in the background or on the track number of
that track’s header (not on a button). In Range Selection mode you can also click in any
unused area of the track itself.
To de-select a single track: Click anywhere in the background or on the track number
of a previously selected track’s header (not on a button). In Range Selection mode
you can also click in any unused area of the track itself. If multiple tracks are selected,
Command-clicking one will remove just that track from the selection.
To select multiple tracks: Command-click in the track header background of every
track you want to select. In Range Selection mode you can also Command-click in any
unused area of the tracks themselves. Command-clicking an already selected track will
de-select it.
To select multiple continuous tracks: Click anywhere in the background or on the
track number of a track header, and then drag a bounding box up or down over all
other tracks you want to select. In Range Selection mode you can also drag a bounding
box over any part of the tracks themselves, while also defining a range in which you
want to work.
To move the selection to higher or lower tracks: Press the Up or Down Arrow keys
to move the selection state to the next track higher (Up Arrow) or lower (Down Arrow).
If multiple tracks are selected, then the multi-selection will be moved as a block; for
example, selecting tracks A2 and A3 and then then pressing Down Arrow will result in
tracks A3 and A4 being selected.
Range Selection
Pressing the R key enables Range Selection mode, in which you can create ranged selections
with which to perform an operation to segments of one or more clips. Using the methods shown
in this section, it’s easy to select specific segments of larger clips so that you can move, delete,
cut, copy, or paste words, phrases, musical bars, or sounds that you want to edit somehow.
For a range to act as a selection, it must also encompass the selection of one or more tracks in
addition to one or more clip segments on those tracks. Ranges can also be defined by setting
In and Out points on the timeline. If you set In and Out points on the timeline without selecting
one or more tracks, then the range you define doesn’t actually select anything; in this situation
the range can be used for other purposes such as recording, but you’ll be unable to make any
editorial changes to clips falling within this range.
Methods of selecting clips via clicking and dragging:
To select a single clip: Click any clip to select both it and the track it’s on, and define a
range in the timeline that matches the duration of that clip.
Command-clicking multiple track headers selects those tracks
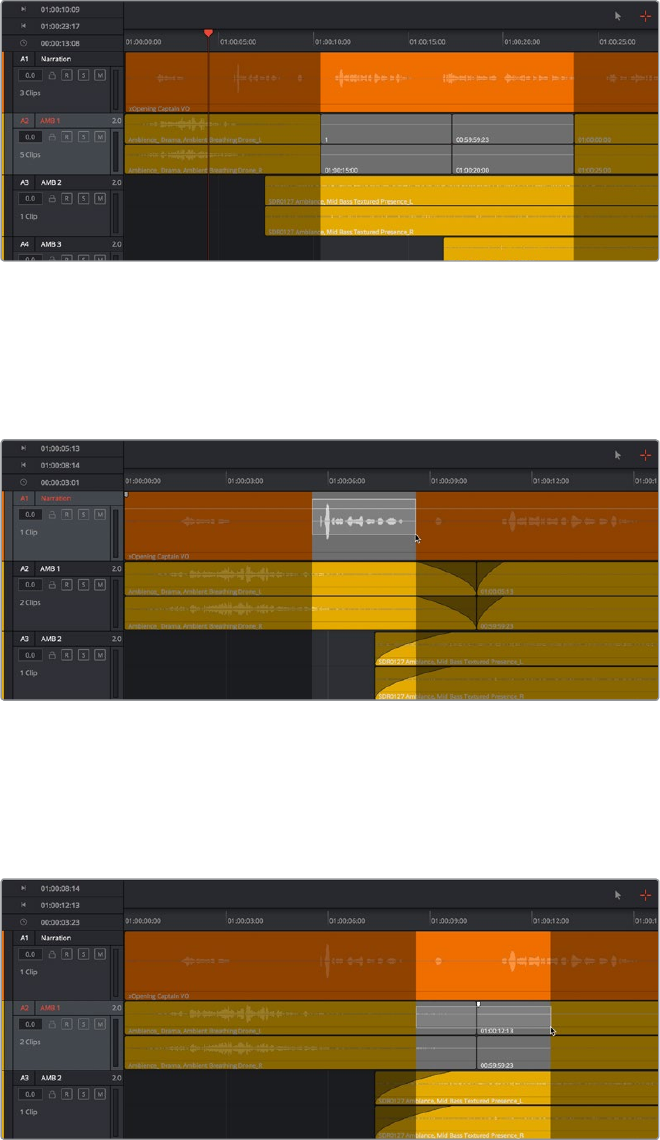
1153
Editing Basics in the Fairlight Page Part 8 – 66
To select multiple clips: Command-Clicking multiple clips to select them all at once
defines a range in the timeline that matches the total overlapping duration of all clips
in the selection, from the beginning of the first selected clip to the end of the last
selected clip.
Range selection by Command-clicking multiple clips
To drag to select a range within a single clip: With the Range Selection tool selected,
drag anywhere on top of a clip to drag a bounding box over whatever segment of that
clip (or of one or more clips) to select both that clip segment and the track it appears
on. This is a good way of selecting part of a recording you want to move or delete.
Ranged selection within a clip using a bounding box
To drag to select a range within multiple clips: Click-and-drag a bounding box over
whatever segment of one or more clips you want to select to select both those clip
segments and the tracks they appear on. Or, Command-click-and-drag anywhere on
top of any clip to drag a bounding box over whatever region of clips and tracks you like.
Ranged selection across multiple clips using a bounding box
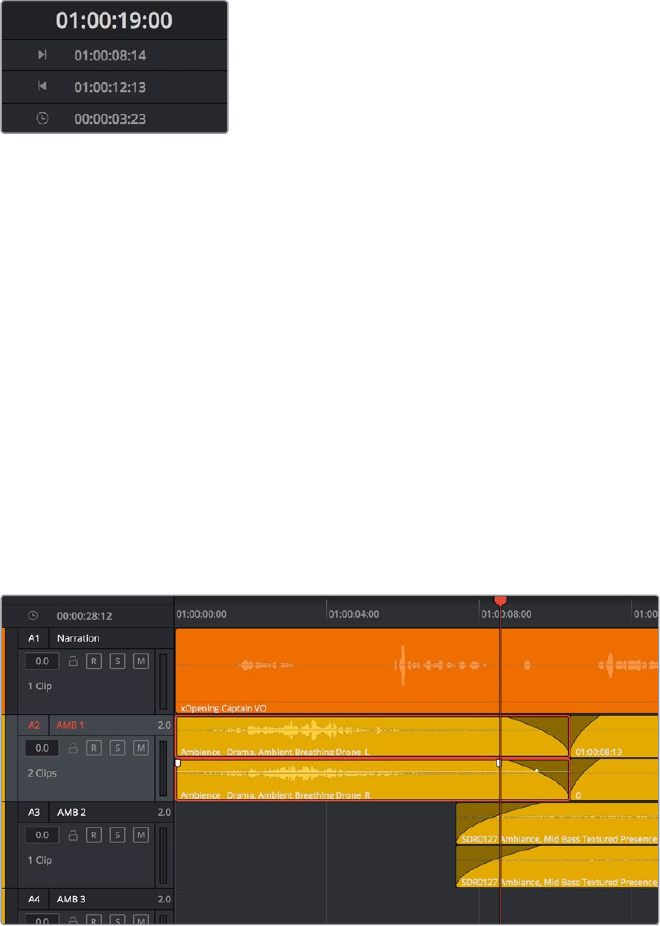
1154
Editing Basics in the Fairlight Page Part 8 – 66
In range selection mode, whenever you make a selection, the In and Out point fields update
with the range that you’ve created.
The range fields showing you the In
and Out point values that define the
current range
These ranges can be cleared if necessary.
Methods of clearing In and Out points to clear the current range:
Press Option-I to clear the current In point
Press Option-O to clear the current Out point
Press Option-X to clear both the In and Out points
Automatic Selections In Selection
Mode With Selected Tracks
In Range Selection mode (press R), all clips that intersect the playhead on selected tracks of the
timeline define a range in the timeline that matches the total overlapping duration of all clips in
the selection, from the beginning of the first selected clip to the end of the last selected clip.
Clips intersecting the playhead in selection mode are automatically selected with orange highlights
In this mode, the resulting selection allows whatever operation you perform to affect the
entirety of whichever clips intersect the playhead. For example, pressing the Delete key will
delete all selected clips in their entirety, and copying will copy the whole of each selected clip.
If you use the I (Mark In) and O (Mark Out) keys to define a range while in Selection mode, a
range will be selected, suitable for various non-editing operations such as recording, but no
clips or clips segments will be selected.
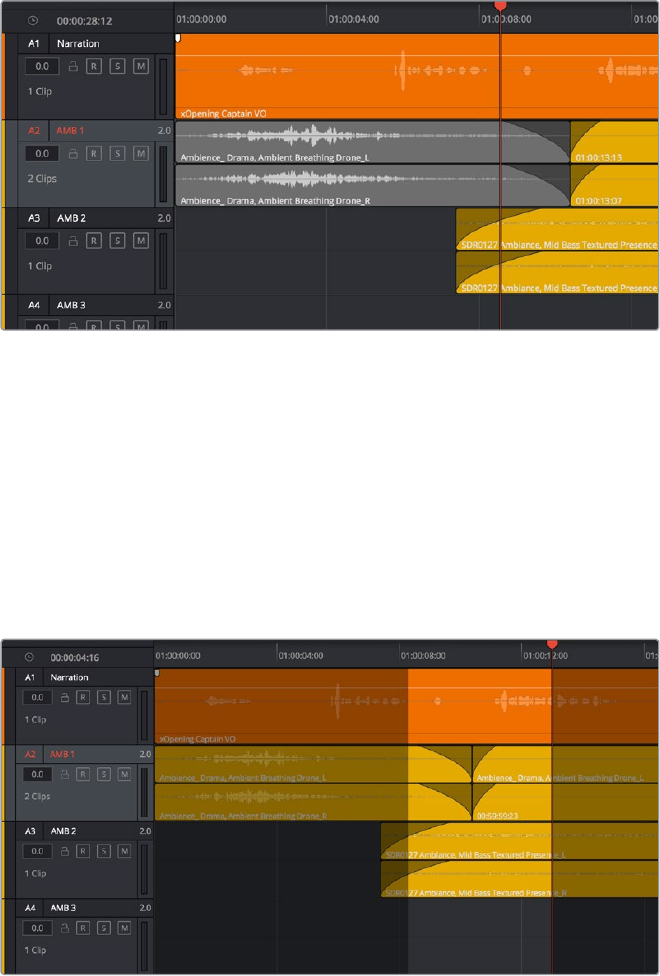
1155
Editing Basics in the Fairlight Page Part 8 – 66
Automatic Selections In Range
Selection Mode With Selected Tracks
In Range Selection mode (press R), all clips that intersect the playhead on selected tracks of the
timeline define a range in the timeline that matches the total overlapping duration of all clips in
the selection, from the beginning of the first selected clip to the end of the last selected clip Z.
Clips intersecting the playhead in selection mode are automatically selected with orange highlights
In this mode, the resulting selection allows whatever operation you perform to affect the
entirety of whichever clips intersect the playhead. For example, pressing the Delete key will
delete all selected clips in their entirety, and copying will copy the whole of each selected clip.
However, in this mode you can use the I (Mark In) and O (Mark Out) keys to define a range, and
all clip segments falling into this range on selected tracks will be selected.
To automatically select clip ranges on multiple selected tracks:
Use the I (Mark In) and O (Mark Out) keys to define a range in the Timeline, and all clip
segments falling within this range on selected tracks will be selected
Selecting a range using In and Out points in the timeline
1156
Editing Basics in the Fairlight Page Part 8 – 66
Locking Audio Tracks You
Don’t Want to Change
Another step you can take to prepare before performing any kind of editorial operation is to
lock tracks with media that you don’t want to be affected by whatever it is you’re about to do.
For example, if you have a complex set of music edits on track A3 that you don’t want to be
affected by operations that will delete media that overlaps it, you can lock track A3 so those
clips remain unaffected.
Locking an audio track
Clips on locked tracks cannot be moved, deleted, cut, or otherwise affected by editorial
operations. Furthermore, parameters of locked clips cannot be edited in the Inspector.
However, clips on locked tracks can be played back and mixed like any other audio clips.
To toggle the lock or unlock state of audio tracks in the
Fairlight page, do one of the following:
Click any track’s lock control to toggle lock on and off.
Click any track’s lock control and drag over the lock controls of other tracks in the
timeline to quickly lock or unlock several adjacent clips.
Splitting and Joining Clips
In many situations you may find yourself splitting audio clips in order to separate multiple
rolling takes.
To split one or more clips in either Selection or Range Selection mode:
1 Select each track that has a clip you want to split.
2 Move the playhead to intersect the clips you want to split at the frame where you want
the split to happen.
3 Do one of the following:
a Choose Timeline > Split Clip or press Command-\ (backslash).
b Choose Timeline > Razor or press Command-B.
When you split a clip, a through edit appears to show that you currently have an edit with
continuous timecode running from the outgoing to the incoming half. This is called a Through
Edit, and is displayed with a dotted line running along its edge so you know that it’s special.
Clips cannot be joined as of the time of this writing.

1157
Editing Basics in the Fairlight Page Part 8 – 66
Trimming Clips Without
Rippling the Timeline
Most basic adjustments in the Fairlight page only affect the selected clip or region of the
timeline. Clips to the right of the adjusted area of the timeline are generally left alone so as not
to inadvertently change sync when you don’t expect it. This section covers the most basic parts
of the Fairlight page’s “seven point editing” paradigm.
Seven Point Editing
Each clip in the timeline has seven draggable handles that affect audio editing.
In point: The left edge of the clip, used to resize the beginning of the clip.
Out point: The right edge of the clip, used to resize the end of the clip.
Fade In handle: A handle at the upper left-hand corner of the clip that only appears
when the mouse is positioned over that clip, used to fade the audio in, or as part of a
crossfade between two audio clips. Fades can be reset (eliminated) by double-clicking
the fade handle.
Fade In curve: A handle at the center of the Fade In curve that only appears when the
curve is exposed, used to adjust the power of the fade in. This handle can be dragged
vertically to change the X-Level of the fade, and horizontally to change the X-Point of
the fade. Fade curves can be reset by double-clicking the curve handle.
Fade Out handle: A handle at the upper right-hand corner of the clip that only appears
when the mouse is positioned over that clip, used to fade the audio out, or as part of a
crossfade between two audio clips. Fades can be reset (eliminated) by double-clicking
the fade handle.
Fade Out curve: A handle at the center of the Fade Out curve that only appears when
the curve is exposed, used to adjust the power of the fade out. This handle can be
dragged vertically to change the X-Level of the fade, and horizontally to change the
X-Point of the fade. Fade curves can be reset by double-clicking the curve handle.
Level: Considered an editorial characteristic, the level of any given audio clip can be
adjusted via a level overlay running across each clip. The level of any clip can be reset
to the default 0.0 dB by double-clicking the level overlay.
Resizing the In and Out Points of a Clip
Trimming the Head or Tail of a clip in the Fairlight page means to resize the In or Out point of
that clip, making it shorter or longer accordingly.
To resize the beginning or end of a clip:
To shorten or lengthen clips: Move the pointer over the beginning or end of a clip,
and when it turns into the Resize cursor, drag the In or Out point to the left or right
to change the clip’s length. As you drag the In or Out point of an audio clip in the
Fairlight page, an overlay appears showing the waveform of all available media at the
head (if you’re dragging the In point) or tail (if you’re dragging the out point) of the clip
you’re resizing.
The overlay seen when resizing the In point of an audio clip in the Fairlight page
1158
Editing Basics in the Fairlight Page Part 8 – 66
To quickly resize the beginning or end of a clip to the very beginning or end of available media:
Double-click the In point of the clip to move the In point to the very beginning of that
clip’s media.
Double-click the Out point of the clip to move the Out point to the very end of that
clip’s media.
If you resize a clip’s In or Out point to overlap one or more neighboring clips in the timeline, the
overlapping parts of the neighboring clips will be overwritten by the clip you’ve resized.
Moving (Sliding) and Overwriting Clips
Formerly called Slipping in previous versions of Fairlight, sliding refers to moving a clip to the
left or right in the Timeline, changing the timing of that clip’s position in the edit.
To move or slide clips in the timeline, do one of the following:
To move one or more selected clips in the Timeline: Drag any clip in the Timeline to
any other position. If you drag a clip to overlap another clip, the clip you’re dragging
overwrites the clip you’re moving it over.
To nudge one or more selected clips in the Timeline using the keyboard: Press the
Comma key (nudge 1 frame left) or Period key (nudge 1 frame right) to roll the selected
edit to the left or right. Shift-Comma and Shift-Period nudges by 5 frames.
To move one or more selected clips up or down to other tracks at the same time:
Hold the Shift key down while dragging clips up or down in the Timeline to lock their
position in time while moving them to other tracks. Or, you can hold the Option key
down and press Up or Down Arrow.
Slipping
Formerly called Resyncing, Slipping an audio clip keeps that clip in the same place in the
Timeline while changing the range of media that appears in that spot. Slip edits do not change
the duration of the overall Timeline, and they don’t move the clip’s position relative to the other
clips in the timeline. Slipping simply changes the range of media that clip represents.
Slipping is not available at the time of this writing.
Disabling and Re-Enabling
Clips in the Timeline
Sometimes there’s one or more audio clips in the timeline that you don’t want to play along with
the rest of the edited sequence, but you don’t want to remove from the timeline either, in case
you change your mind later. For this reason, it’s possible to Disable clips, effectively turning
them off without removing them. Previous versions of Fairlight referred to this operation as
Mute clip.
Disabled clips appear dimmed in the timeline. They don’t play back, they’re not rendered, and
they’re not output to video. However, their position is preserved in the timeline, so you can
always re-enable them at a later time if you change your mind and decide you want
to use them.
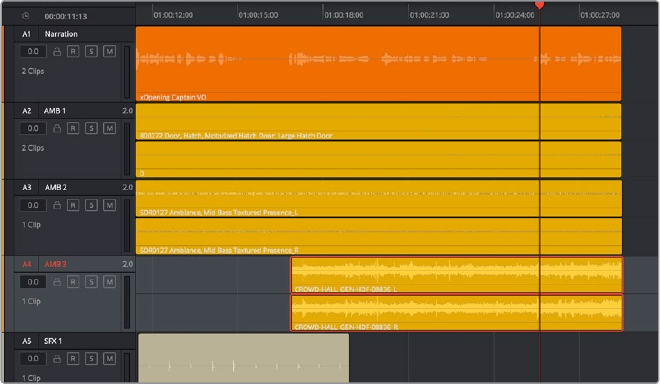
1159
Editing Basics in the Fairlight Page Part 8 – 66
To disable or re-enable one or more selected clips:
Right-click part of the selection and choose Enable Clip from the contextual menu
Choose Clip > Enable Clip
Press D
Deleting Audio Clips and Regions
You can delete any clip(s) or clip region(s) that you can select, in either Selection or Ranged
Selection modes by pressing the Delete or Forward Delete keys, or by right-clicking a clip and
choosing Delete Selected from the contextual menu. In the Fairlight page, deleting anything
leaves a gap. You can not ripple delete anything.
Cut, Copy, and Paste
The Fairlight page has a unique copy and paste methodology that takes advantage of the
“ghost” overlays that are used for the waveforms of selected audio clips. This method makes it
easy to copy and paste clips using keyboard shortcuts and the JKL keys.
To cut or copy and paste either all or part of a clip:
1 If you’re cutting or copying a while clip, then choose either the Selection (press A) or
Range Selection (press T) mode. If you’re cutting or copying part of a clip, then make
sure you’re in Range Selection mode (press T).
2 To use the playhead to make a clip selection, select the track that contains the clip you
want to copy or cut. If one or more tracks are already selected, you can use the Up and
Down Arrow keys to move the track selection state up or down to the tracks with the
clip you want to cut or copy.
Selecting the track with a clip you need to cut
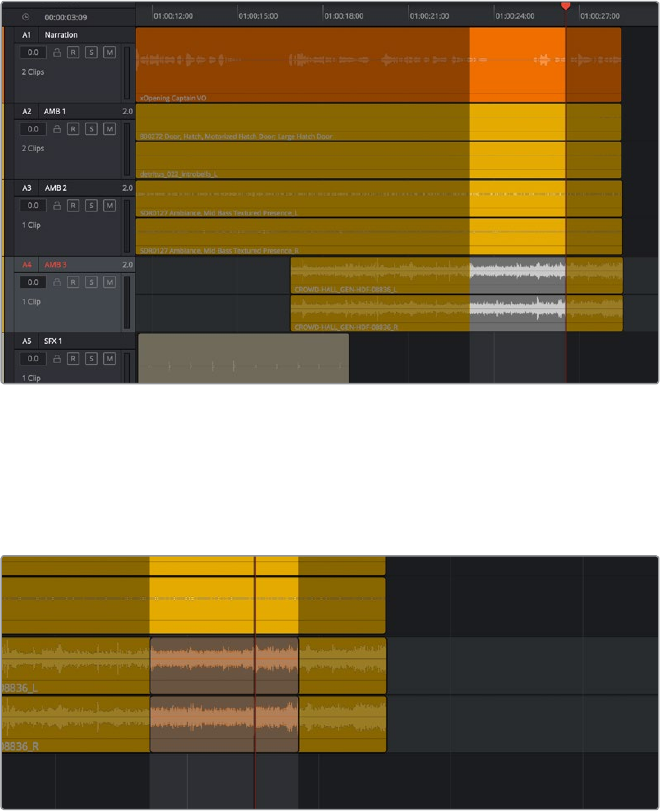
1160
Editing Basics in the Fairlight Page Part 8 – 66
3 Do one of the following:
a To cut or copy a whole clip, move the playhead so that it intersects the clip you
want to cut or copy. If the playhead intersects a clip on a selected track, that clip
should become selected. You should note that even if you use the mouse to select
a clip without selecting a track first, you should still move the playhead to intersect
the clip you’re copying or pasting, as this sets up an important reference point for
the operation.
b To cut or copy segment of a clip, move the playhead so that it intersects the clip
you want to cut or copy. If the playhead intersects a clip on a selected track, that
clip should become selected. Then, using JKL and the I (In) and O (Out) keys, mark
a range in the timeline that includes the segment of the clip you want. That
segment should appear highlighted as a result.
Cutting or copying a segment of a clip using In and Out points
4 Making sure the playhead is over the section of the waveform that you want to use as
the frame to move the clip by, press Command-X to cut or Command-C to copy that
clip (you can also right-click a clip and choose Copy or Cut). That clip will immediately
become highlighted.
Cutting or copying a clip at the position of the playhead
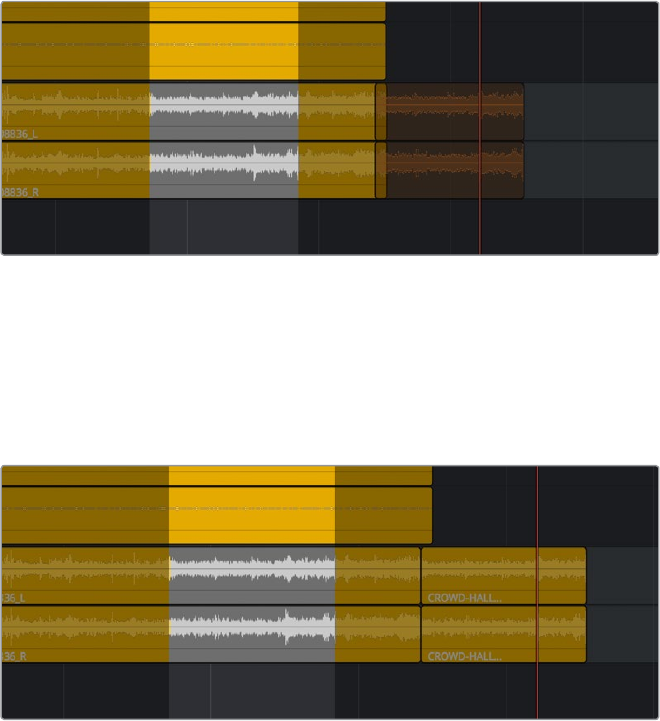
1161
Editing Basics in the Fairlight Page Part 8 – 66
5 At this point, there are two things you can do to position the cut or copied clip to the
position in the timeline at which you want to paste it:
a Moving the playhead will now also move the clip you cut or copied, shown as a
ghost clip with waveform that’s “attached” to the playhead at the frame you chose.
Whether you drag the playhead with your mouse or use JKL to move the playhead
through the timeline, the cut or copied clip will move along with it, so that moving
the playhead repositions the cut or copied clip on that track.
b If you want to move the cut or copied clip to another track, use the Up or Down
Arrow keys to change the selected track; the ghost clip will move along with
change in track selection.
Positioning the cut or copied clip before you paste it
This way, you can use the playhead to align the ghost waveform with other audio clips
surrounding it in preparation for pasting it.
6 When the clip is positioned where you want it, press Command-V to paste the clip at
the position you’ve chosen (you can also right-click a track and choose Paste from the
contextual menu). The clip becomes solid, and you’re finished.
The pasted clip
Using this method of cutting and pasting makes it quick to cut or copy clips using only
keyboard commands, with the clip’s ghost overlay making it easy to precisely align the
clip you’re pasting to fit exactly where you need it to, perfectly in sync.
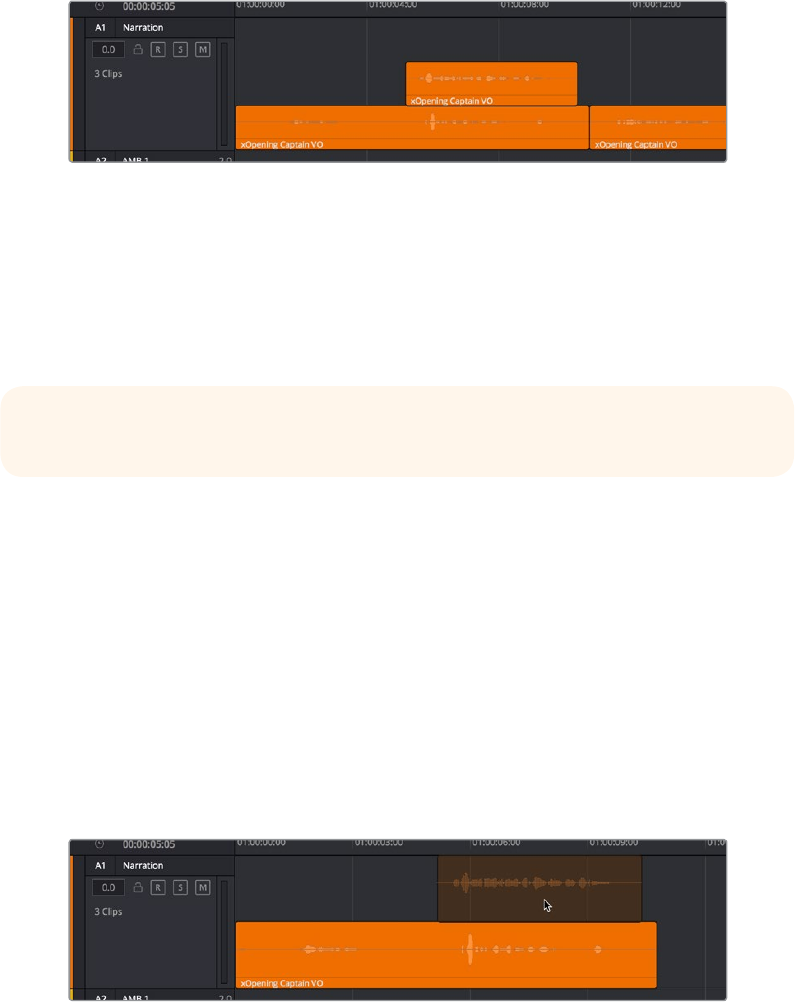
1162
Editing Basics in the Fairlight Page Part 8 – 66
Audio Clip Layering
Audio layering is a special audio editing mode that lets you superimpose multiple audio clips in
the same track, with audio clips edited into the top layers muting overlapping sections of audio
clips appearing on lower layers. With audio layering enabled, superimposed audio clips are
treated similarly to superimposed video clips that have opacity set to 100%, with clips on top
obscuring (or muting) clips underneath.
An example of multiple audio performances editing using layers, where the
top layer mute overlapping sections of audio clips in lower layers
Audio layering is incredibly useful for any situation where you’re combining segments of
multiple takes together to create a single voiceover, audio vocal track, or dramatic performance,
as you can choose which segments to use via their superimposed position in the stack of clips
appearing in that track, while at the same time you’re preserving the other takes underneath in
case you might want them later.
To enable audio layering:
Choose Timeline > Layered Audio Editing so that a check mark appears by the command. All
overlapping audio will be layered in stead of overwritten from that point forward.
To view audio layering:
1 Choose View > Show Audio Track Layers to reveal track layers for each audio track
(and each lane within a given audio track) in the timeline. When layering is on, space
appears at the top of each track in the timeline which provides a region into which you
can edit layered audio clips.
2 To edit an audio clip or segment as a layer within a particular audio track, drag it from
elsewhere in the timeline or from the Media Pool, and drop it into the empty area above
whatever audio is already in that track.
Dragging an audio clip to become layered above another clip
TIP: Track Layering can be used on the Edit page as well.
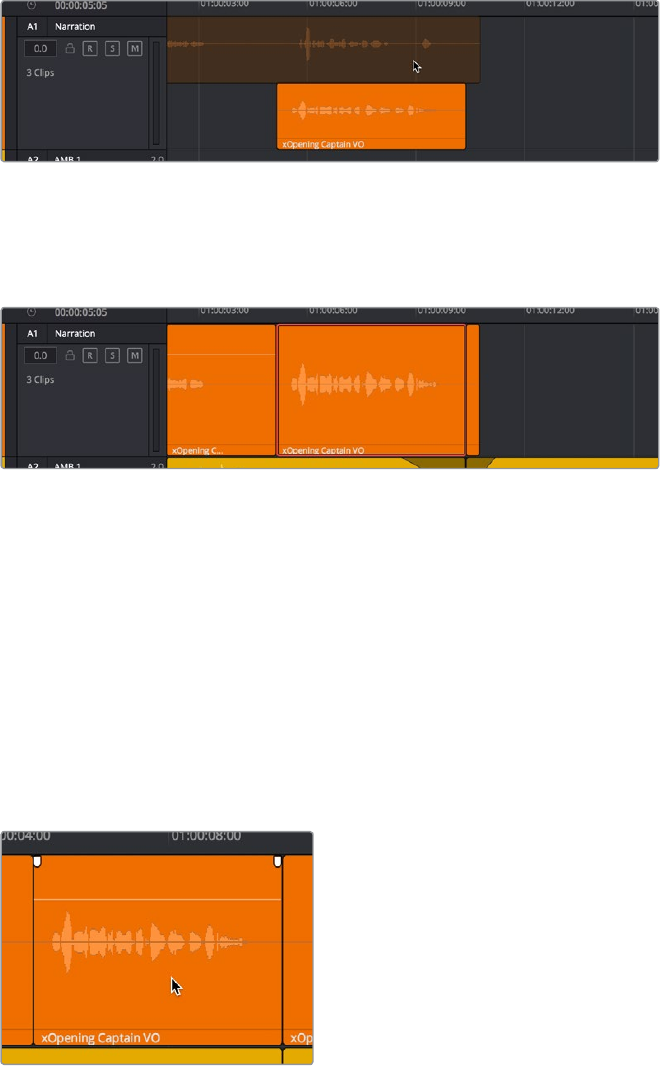
1163
Editing Basics in the Fairlight Page Part 8 – 66
3 Edit the different superimposed layers of audio such that the segments of each
take that you like are on top. Only the topmost clip segments will be audible. Audio
segments that overlap underneath are silent. To put another layer on top, drag it from
its current position to the empty area at the top of the track.
Dragging a bottom audio layer to appear on top
4 When you’re finished editing clips in track layers, choose View > Show Audio Track
Layers again to hide the individual layers, so that only the topmost clips appear as a flat
sequence in each track and lane.
Hiding layers makes all audio layers appear on a single track, as if the top clips are
overwriting what’s underneath, except the muted material underneath is preserved
Fades and Crossfades
Part of audio editing in the Fairlight page is the use of fades and crossfades. This section shows
you how to create these effects for smoothly segueing from one audio clip to another.
Using Fades
Like the Edit page, each audio clip has fader handles that appear at the upper right and left
corners of a clip you’re hovering the pointer over.
Fader handles appear when you hover the pointer over a clip
Pulling these handles out creates a fade effect with a duration equal to the length you
extended the handle.
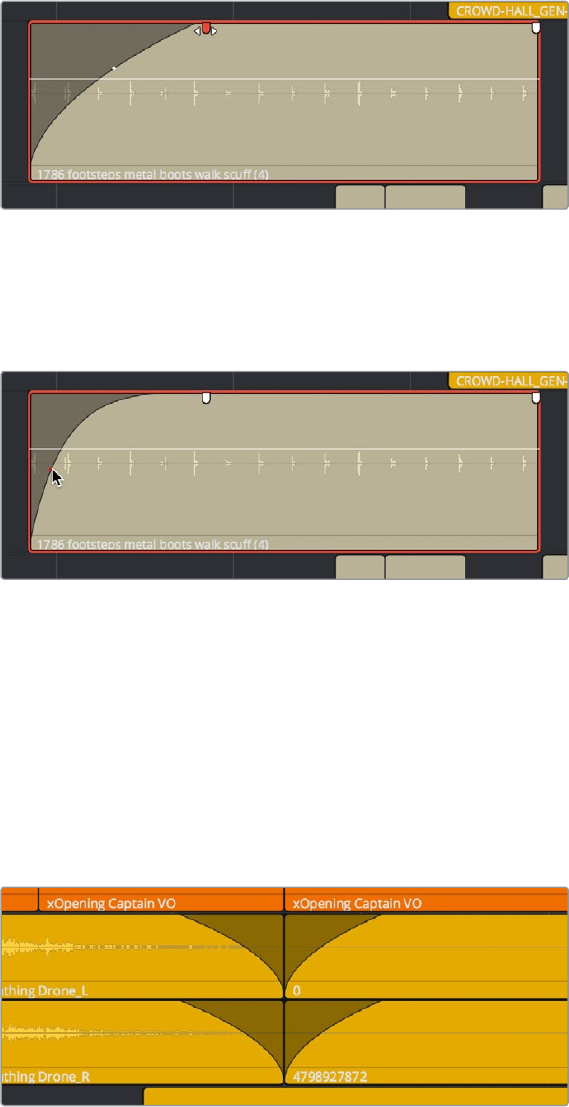
1164
Editing Basics in the Fairlight Page Part 8 – 66
Creating a fade effect by pulling out one of the fader handles
Once you’ve created a fade effect, you can adjust the curve of the fade by dragging
the handle that appears right on top of the fader curve. Dragging the handle up and
down affects the angle of the curve, and dragging the handle left and right affects the
shape of the curve. In this way, you can create all manner of fade effects.
Adjusting the curve of the fade
Creating Crossfades With Overlapping Fades
While a fade gradually fades a single track of audio up, a crossfade fades one clip up at the
same time as fading another clip down, for the aural equivalent of a cross dissolve. There are
currently two ways of creating a crossfade in the Fairlight page. Both depend on clip layering to
allow you to have overlapping fades over overlapping clips.
To create a crossfade by overlapping two clips together:
1 Add a fade out to the end of one clip, and a fade in to the beginning of another clip.
Adding fades to adjacent clips
2 Drag the first clip to overlap the second clip by the length of the fade you’ve created.
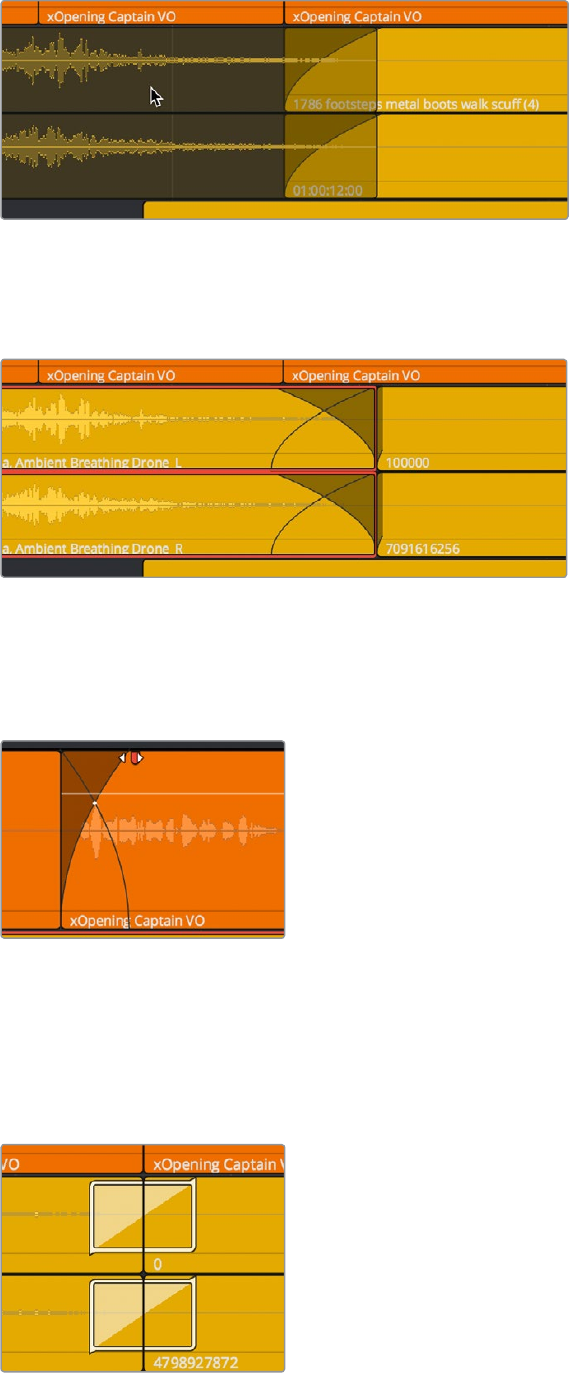
1165
Editing Basics in the Fairlight Page Part 8 – 66
Dragging the clips to overlap, the overlapping
parts will be preserved via Clip Layering
3 Drop the clip, the overlapping fades will both be preserved thanks to clip layering, and
a crossfade will appear in the timeline.
The resulting crossfade
To create a crossfade over two clips that are already layered:
Drag a fader handle at the beginning or end of a clip that’s layered, and a crossfade will
automatically appear.
Creating a crossfade by adjusting the
fader handle of a layered clip
Using Crossfades From the Edit Page
You can also add crossfades in the Edit page, but they appear in the Fairlight page as
transitions in the Edit page style.
The resulting crossfade Finding Clips in the Media Pool
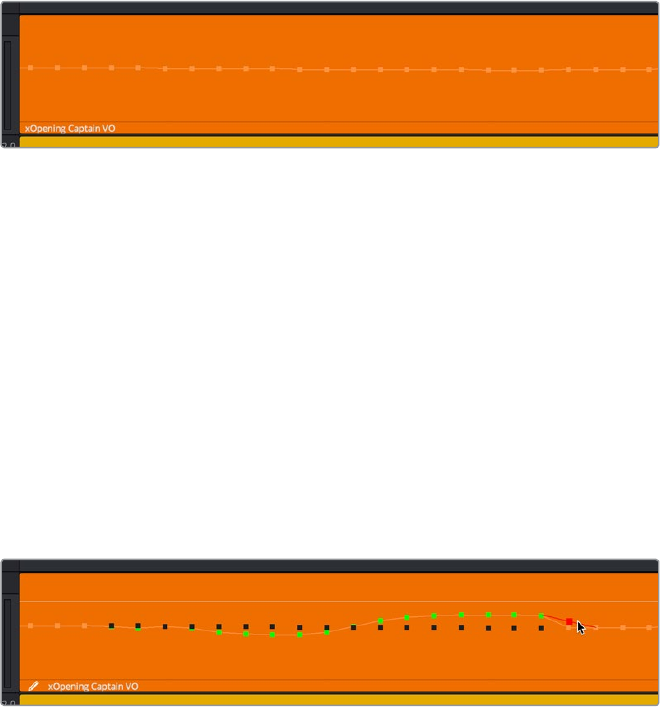
1166
Editing Basics in the Fairlight Page Part 8 – 66
Finding Clips in the Media Pool
You can right-click any clip in the Timeline and choose Find in Media Pool to automatically
select that clip in the Media Pool, for instances where you might want to edit another copy of
that clip somewhere else in the Timeline, or re-edit another segment from that clip into the
same area.
Changing Clip Color in the Timeline
You can right-click one or more clips in the Timeline to change the clip color, to be
moreorganized.
Sample Editing
You can zoom quite far into audio clips on the Fairlight page timeline, until you see the
individual samples that comprise the audio waveform of each clip. Samples are represented by
control points once you’ve zoomed in far enough.
When you zoom in far enough, you can see the individual samples
of an audio clip as control points
You can non-destructively edit these control points to eliminate clicks and pops, and to effect
other fixes to problem audio clips.
Methods of editing audio samples:
To see the editable audio samples: Zoom all the way into an audio clip until you see
the sample control points, using either Command-Plus or Command-Minus, the scroll
wheel of your pointing device, or by holding down the ZOOM button of your Fairlight
Editing Panel and turning the JOG/EDITING wheel.
To edit a single audio sample: Click and drag that audio sample up or down to change
its height.
To edit a section of samples: Click and drag horizontally left or right across the
samples you want to edit to “redraw” the waveform any way you’d like.
Black points show the previous levels when samples have been edited in a clip
Sample Editing can be undone, just like any other editing procedure, as the edited sample
points are stored non-destructively within the Resolve project.
1168
Clip Levels, Crossfades, Equalization, and Gating Part 8 – 67
Clip Levels, Crossfades,
Equalization, and Gating
Each audio clip in a track has individual settings that can be adjusted that are specific to that
clip. This makes it easy to adjust the levels of several clips to match one another, while
reserving the track level for your overall mix. This chapter describes how to use these clip-
specific controls.
Audio Settings in the Inspector 1169
Adjusting Audio in the Inspector 1169
Adjusting Audio in the Timeline 1170
How to Add and Adjust Audio Keyframes 1170
Clip EQ 1171
Master EQ Controls 1171
Graphical EQ controls 1171
Bands 1 and 4 1172
Bands 2-3 1172

1169
Clip Levels, Crossfades, Equalization, and Gating Part 8 – 67
Audio Settings in the Inspector
Each clip has some simple audio-related parameters in the Audio panel of the Inspector.
Volume: Each clip has a single volume control, that corresponds to the volume overlay
over each audio clip.
Equalizer: Each clip also has a four-band EQ, complete with low-pass, high-pass, and
parametric settings for fine tuning and problem-solving audio issues at the clip level.
Additionally, when you apply other audio plug-ins from the Audio FX panel of the Effects
Library, additional parameters and controls are exposed (covered towards the end of
this chapter).
Setting Clip Levels
Each audio clip, or audio item in the case of audio clips with linked audio on multiple tracks, has
its own Volume level. This means that audio clips with multiple channels share a common
Volume setting. There are several ways you can adjust these levels simply.
Adjusting Audio in the Inspector
Each clip has individual Level parameters that are accessible in the Audio panel of the Inspector
when one or more audio clips are selected.
The Volume and Pan parameters available for
audio clips in the Inspector
Selecting an audio clip in the Timeline and adjusting its Volume or Pan only alters that clip,
which lets you set basic levels for individual clips in your program. The Volume control affects
every channel within that clip simultaneously.
If you select multiple clips in the Timeline, then adjusting the Volume or Pan sliders or virtual
sliders for all of them simultaneously will make a relative adjustment to all of the clips,
preserving their offsets from one another. If you want to set all clips to the same level, then
making a numeric adjustment will set all selected clips to the same absolute level.
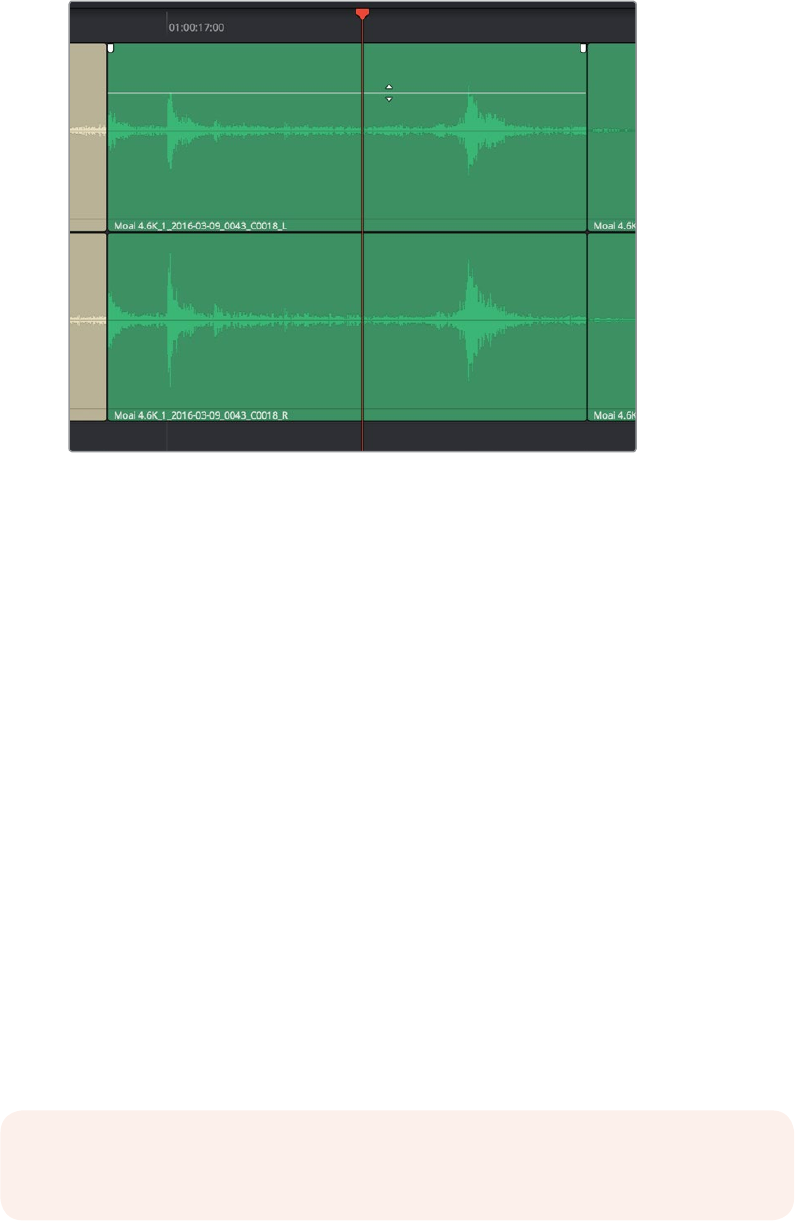
1170
Clip Levels, Crossfades, Equalization, and Gating Part 8 – 67
Adjusting Audio in the Timeline
Each clip (or item) of audio in the Timeline has a Volume overlay that lets you set that clip’s level
by simply dragging it up or down with the pointer. This overlay corresponds to the Volume
parameter in the Inspector.
Dragging a Volume overlay to adjust the clip level
Additionally, you can click any clip’s Audio Curve Editor button, at the bottom right-hand corner
of each audio clip, to open an audio-specific Curve Editor with which you can keyframe not just
Volume, but Pan, and the parameters of any audio filters you might have applied to that clip.
How to Add and Adjust Audio Keyframes
Mixing audio by adding and adjusting individual keyframes can be a fast and effective way of
balancing clip levels with one another and of fixing clip-specific dynamic level problems. When
manually editing any audio parameter curve, you can use the following procedures.
Methods of adjusting different audio curves using the pointer:
To adjust any curve segment: Position the pointer between any two keyframes,
directly on top of the curve segment you want to raise or lower, and when the move
cursor is displayed, click and drag up to raise the level, or down to reduce the level.
To add keyframes to the level curve: Hold the Option key down and click the curve
to place a keyframe at that frame. You must add at least two keyframes to create an
automated change in volume.
To adjust any keyframe: Move the pointer over a keyframe so that the four-way
cursor appears, and then click and drag in the intended direction of adjustment,
either vertically to change the volume of the clip at that frame, or horizontally to move
the keyframe to a different point in time. Once you start dragging a keyframe into
a particular direction, keyframe movement is constrained in that direction until you
release that keyframe.
NOTE: At the time of this writing, keyframes cannot be deleted, and there are no
bezier curves for clip keyframes.
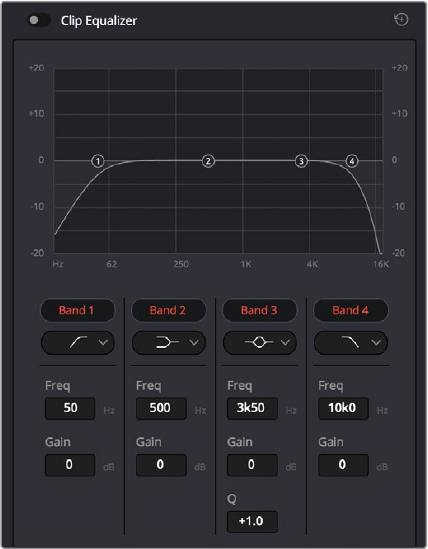
1171
Clip Levels, Crossfades, Equalization, and Gating Part 8 – 67
Clip EQ
Each audio clip in the timeline has a four band equalizer that has both graphical and numeric
controls for boosting or attenuating different ranges of frequencies within that clip, before it
even gets to the EQ built into the mixer. Each band has controls for the filter type (Bell, Lo-Shelf,
Hi-Shelf, Notch), Frequency, Gain, and Q-factor (sharpness of the band), with the available
controls for each band of EQ changing depending on the filter type.
When a channel strip’s EQ is enabled, the EQ button displays the equalization curve that’s
being applied. This indicator cannot be adjusted, you must open the EQ window to make
modifications.
The channel strip’s EQ indicator, (Left) EQ is at detente, (Right) EQ is adjusted
Master EQ Controls
The Equalizer window has the following overall controls:
Enable button: Turns the overall EQ effect off and on, without resetting the controls.
Reset button: Resets all controls of the EQ window to their defaults.
Graphical EQ controls
A graph at the top shows a curve with handles that correspond to each of the enabled
EQbands listed below. You can drag any numbered handle to boost or attenuate the range of
frequencies governed by that band, using whatever type of equalization that band has
been set to.
Dragging the numbered handles on this graph in turn modifies the parameters of the
corresponding band, and changing each bands parameters will also alter the EQ graph, which
serves the additional purpose of providing a graphical representation of the equalization being
applied to that track.
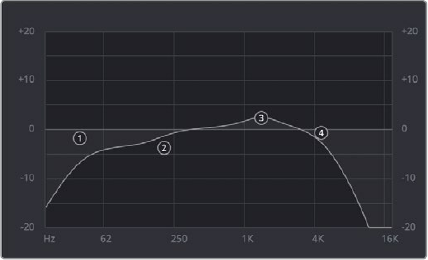
1172
Clip Levels, Crossfades, Equalization, and Gating Part 8 – 67
The EQ graph with user-draggable handles
Bands 1 and 4
The outer two sets of band controls let you make high-pass and low-pass adjustments,
ifnecessary.
Band enable button: Turns each band of EQ on and off.
Band filter type: Bands 1 and 6 can be switched among four specific filtering options
for processing the lowest or highest frequencies in the signal. These include (from top
to bottom) Hi-Shelf, Hi-Pass, Lo-Pass, and Lo-Shelf.
Freq: Adjusts the center frequency of the EQ adjustment
Gain: Adjusts the amount by which the affected frequencies are affected. Negative
values attenuate those frequencies, while positive values boost those frequencies.
Bands 2-3
The middle two sets of band controls let you make a wide variety of equalization adjustments.
Band enable button: Turns each band of EQ on and off.
Band filter type: Bands 2–5 can be switched among four different filtering options
(from top to bottom) Lo-Shelf, Bell, Notch, and Hi-Shelf
Frequency: Adjusts the center frequency of the EQ adjustment
Gain: Adjusts the amount by which the affected frequencies are affected. Negative
values attenuate those frequencies, while positive values boost those frequencies.
Q Factor: Adjusts the width of affected frequencies. Lower values include a wider
range of frequencies, higher values include a narrower range of frequencies
1174
Mixing in the Fairlight Page Part 8 – 68
Mixing in the Fairlight Page
The mixer is the spider at the center of the web that is the Fairlight page, and provides the
primary tools you’ll use to mix the various audio tracks of your program in to a harmonious
whole using EQ, Dynamics, Panning, level control, and VST and Audio Units audio effects of all
kinds, all with full automation, to hone your sound and balance each track’s elements with the
others. This chapter focuses on explaining the various functions of the mixer so you can
harness its power for yourself.
Introduction to Mixing 1175
The Mixer 1175
Tracks and Buses 1176
Customizing the Mixer Controls 1177
Showing and Hiding Channel Strips Using the Index 1178
Selecting Channel Strips and Tracks 1178
Track Organization 1179
Input 1179
Effects 1180
Insert 1180
EQ 1180
Master EQ Controls 1181
Graphical EQ controls 1182
Bands 1 and 6 1182
Bands 2-5 1183
Dynamics 1183
Master Dynamics Controls 1184
Expander/Gate 1185
Compressor 1185
Limiter 1186
Aux 1186
Pan 1187
Bus Assignment Buttons 1188
Arm, Solo, and Mute Buttons 1189
Fader Controls 1189
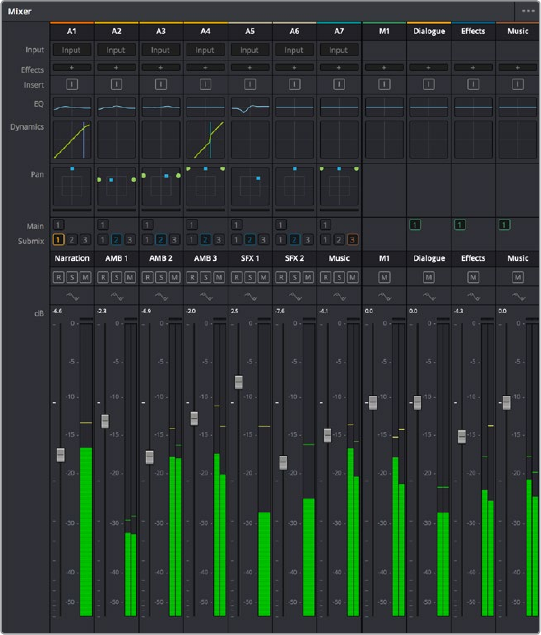
1175
Mixing in the Fairlight Page Part 8 – 68
Introduction to Mixing
This chapter describes the use of the mixer to adjust the levels and fine-tune the audio of each
track in the timeline. It’s focused on the function of the channel strip controls, with the following
exceptions:
For more information about Busing, see Chapter 63, “Setting Up Tracks, Buses, and Patching”
For more information about recording audio, see Chapter 65, “Recording”
For more information about recording automation, see Chapter 69, “Automation Recordding”
The Mixer
The Audio Mixer provides a set of graphical controls you can use to assign track channels to
output channels, adjust EQ and Dynamics, set levels and record automation, pan stereo and
surround audio, and mute and solo tracks. At its most basic, each audio track in your timeline
corresponds to an individual channel strip in the Mixer, and by default there’s a single Main bus
labeled M1 that combines all these tracks into an overall mix.
The Audio Mixer, with channel strips corresponding to the tracks in the Timeline
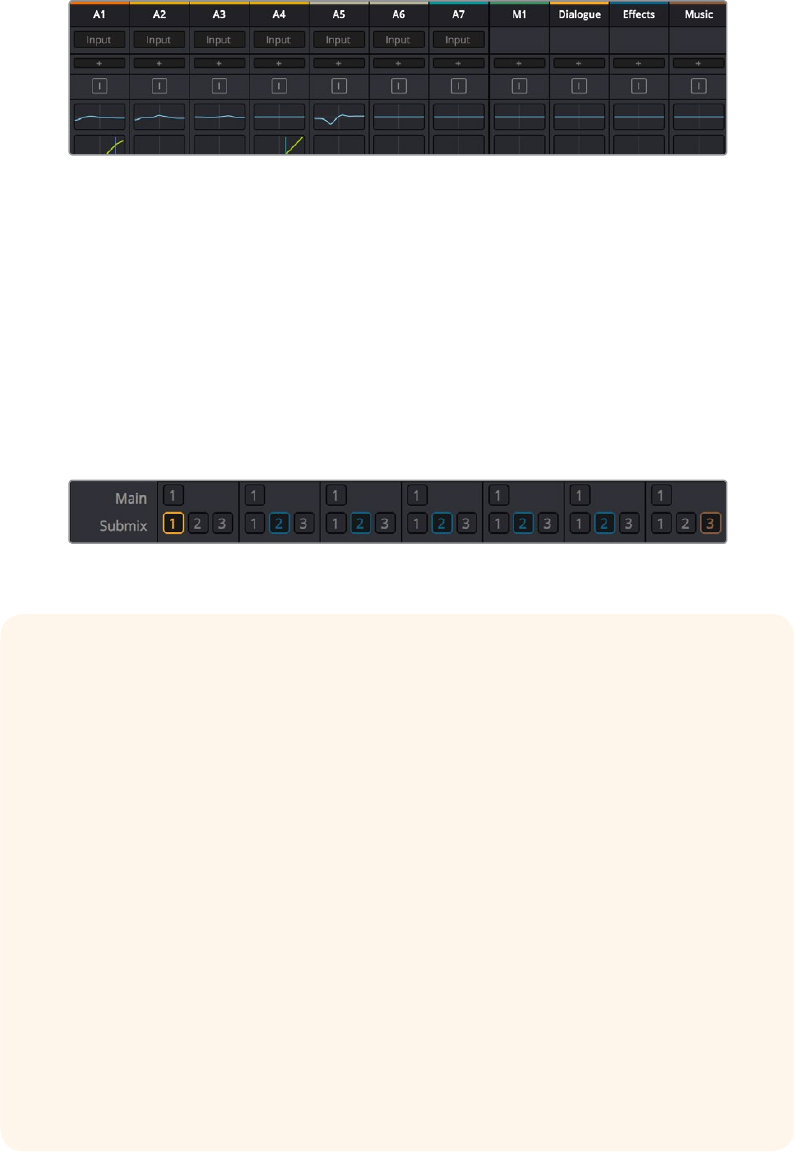
1176
Mixing in the Fairlight Page Part 8 – 68
Tracks and Buses
Once you start creating buses, the Audio Mixer exposes two sets of channel strips. The
left-most set of channel strips correspond to the audio tracks in the Timeline, while the right-
most set of channel strips expose sets of controls for each Main, Sub (submix), and Aux
(auxiliary) bus that you’ve created.
The Audio Mixer is divided into two sections, one for tracks (at left)
and one for buses (at right)
If you have more tracks and buses then can be displayed all at once given the width of your
computer display, then each half of the mixer has independent scroll bars so you can choose
which tracks and which buses you want to see next to one another.
Each audio track’s channel strip has a set of Main and Sub bus buttons that let you assign the
audio output by that channel strip to a Sub (typically used to combine different subsets of tracks
into submixes) or to a Main (typically used to output or render overall mixes). Each Sub and
Aux’s channel strip has a set of Main buttons so that different combinations of Subs can be
assigned to each Main. Main channel strips have no buttons because, from a busing
perspective, they’re the final output.
Main and Submix buttons let you assign tracks to buses, and buses to other buses
Third Party Mixing Control Panel Support
DaVinci Resolve supports HUI- and MCU-compatible third party mixing control panels
with up to 8 faders, such as the Mackie MCU Pro Control Surface, connected via USB
MIDI, and selectable in the Control Panels panel of the Resolve System Preferences.
Support at the time of this writing includes Mute, Solo, double-press for track
selection, Fader control and Level display, Rotary control, Rotary Value display, and
Rotary touch, Record, Track Name display, Channel and Bank scroll, double-press
Bank Left for Home, double-press Bank Right for Masters, Transport controls including
REW, FF, Play, double-press Play for play again, Stop, double-press Stop for Home,
Marker, Marker+Stop to set Home, Marker+FF/REW to Jump, and Jog control.
Additional controls include Master Solo clear/restore, Undo, Undo+Option to Redo,
arrows, zoom horizontal and vertical, Automation On/Off with Write/Trim/Touch/Latch
switches, Nudge, Cut, Copy, and Paste. Monitoring controls include Level control, Dim,
Mute, and Alt Speaker.
For more information on third party mixing control panel support, see the Blackmagic
Support site on the web at https://www.blackmagicdesign.com/support/family/
davinci-resolve-and-fusion.
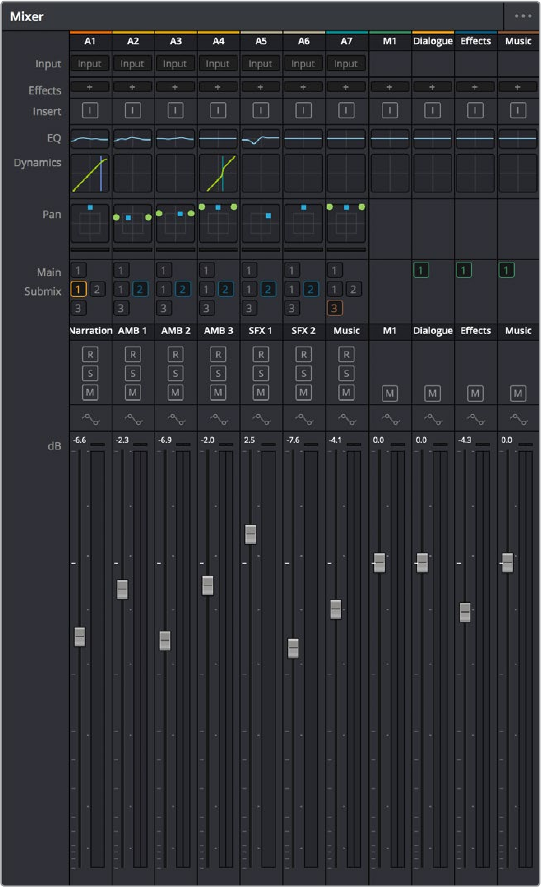
1177
Mixing in the Fairlight Page Part 8 – 68
Customizing the Mixer Controls
The Option menu at the upper right-hand corner of the Mixer provides a number of different
options for customizing the look of the Mixer, as well as which controls are shown or hidden.
First, you have the options of showing the Full Track Mixer or the Small Track Mixer. While the
Full Track Mixer provides more room for buttons and controls that are large enough you don’t
have to squint to see them, the Small Track Mixer lets you have many more channel strips
onscreen at one time, for those times where you’re doing incredibly ambitious mixes.
The Small Track Mixer view
Second, there’s an option to Show Labels, which are the control names listed in a column to the
left of the mixer channel strip area. If you’re first getting started, these Labels are useful, but
once you’ve gotten used to the layout of the Mixer, hiding these will give you a bit more room to
work with for another channel strip or two.
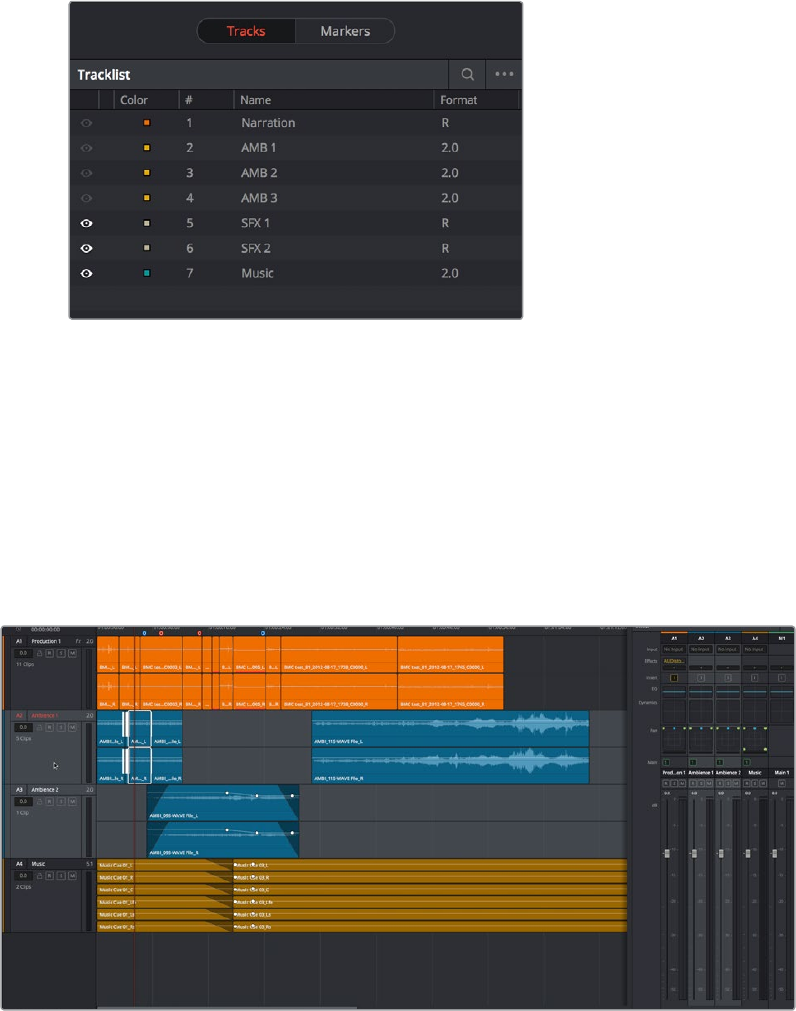
1178
Mixing in the Fairlight Page Part 8 – 68
Third, there’s a set of options that let you toggle the visibility of specific channel strip controls,
so you can hide controls you know you’re not going to be using, or that you’ve used but no
longer need to adjust or want to protect from accidental adjustment by a wandering
mouse or pen.
Showing and Hiding Channel Strips Using the Index
You can use the Tracks panel of the Index to hide tracks you don’t need to work on in order to
create more room for tracks you need to see. To quickly show or hid a number of tracks, you
can click and drag over those tracks to reverse the visibility of every track you drag over.
The Tracks panel of the Index hiding tracks 1–4 on both the
Timeline and the Mixer
Selecting Channel Strips and Tracks
When you select a track in the Timeline, you also select that track’s accompanying channel
strip, and vice versa. It’s possible to select multiple tracks in the Timeline and thereby select
multiple channel strips, but you can also Command-click to select multiple channel strips in
order to select multiple tracks.
Selecting multiple channel strips results in the selection of multiple tracks
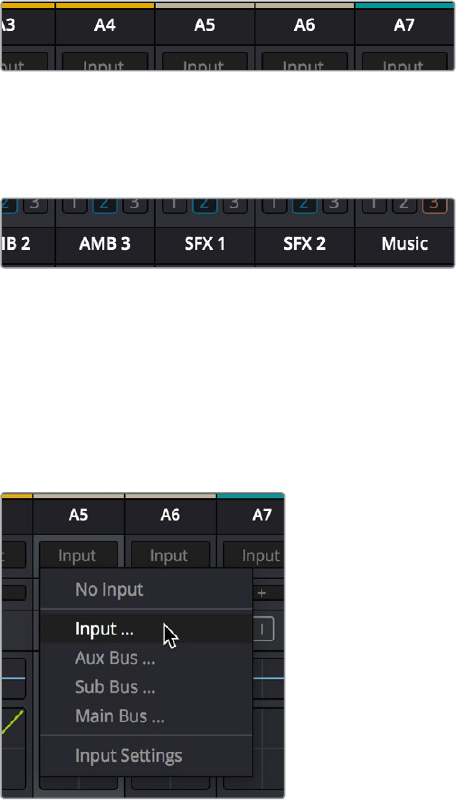
1179
Mixing in the Fairlight Page Part 8 – 68
Track Organization
Each channel strip has three organizational properties that let you keep track of which channel
strip is responsible for which part of the mix.
Track Color: Each track can be differently color-coded, to help you keep organized.
These colors appear in the timeline track header, the mixer, and the meters to help you
keep track of which track corresponds to which channel strip and meter.
Track Number: The number of the timeline audio track corresponding to each channel
strip appears here.
The track color and track number appear at the top of each channel strip
Track Name: This mirrors the track name found in the header controls of the timeline. If
you customize an audio track’s name in the timeline, that name appears here.
Each track’s name appears between the assignment buttons and the arm/solo/mute buttons
Input
A pop-up menu that lets you patch inputs, patch buses, and configure the input settings
ofaudio signals routed through Blackmagic hardware interfaces.
The Input pop-up menu provides shortcuts for patching different
buses using the Patch Input/Output window
For more information on using the options of the insert menu, see Chapter 63, “Setting Up
Tracks, Buses, and Patching.”
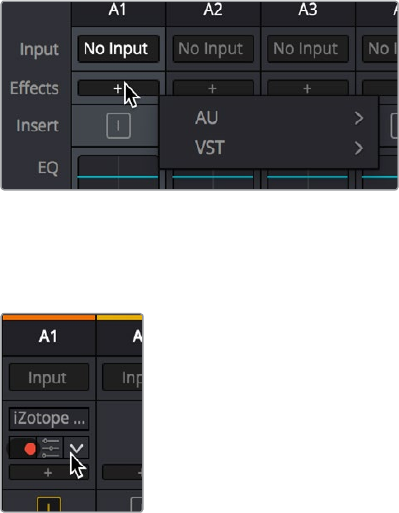
1180
Mixing in the Fairlight Page Part 8 – 68
Effects
When you apply VST or Audio Unit effects to a track from the Effects Library, those effects
appear here. Clicking the Plus button opens a pop-up menu with which you can apply any VST
or AU effects installed on your machine to that track.
Moving the pointer over the plus to add effects
Hovering the mouse over any listed effect reveals controls for enabling/disabling each effect,
opening an effect’s custom controls, and deleting that effect.
Moving the pointer over an effect
reveals controls for that effect
For more information on using audio effects, see Chapter 70, “Audio Effects.”
Insert
Enables the routing of effects from Blackmagic audio interface hardware to outboard effects
boxes and back again. This button can be toggled to enable/disable such routing.
EQ
Double-clicking exposes a four band parametric equalizer with additional Hi and Lo Pass filters,
that has both graphical and numeric controls for boosting or attenuating different ranges of
frequencies of audio on each track. You can select from among four types of EQ filtering from
the Equalizer Type pop-up menu, with options for Earth (the default), Air, Ice, and Fire. Each
band has controls for the filter type (Bell, Lo-Shelf, Hi-Shelf, Notch), Frequency, Gain, and
Q-factor (sharpness of the band), with the available controls for each band of EQ changing
depending on the filter type.
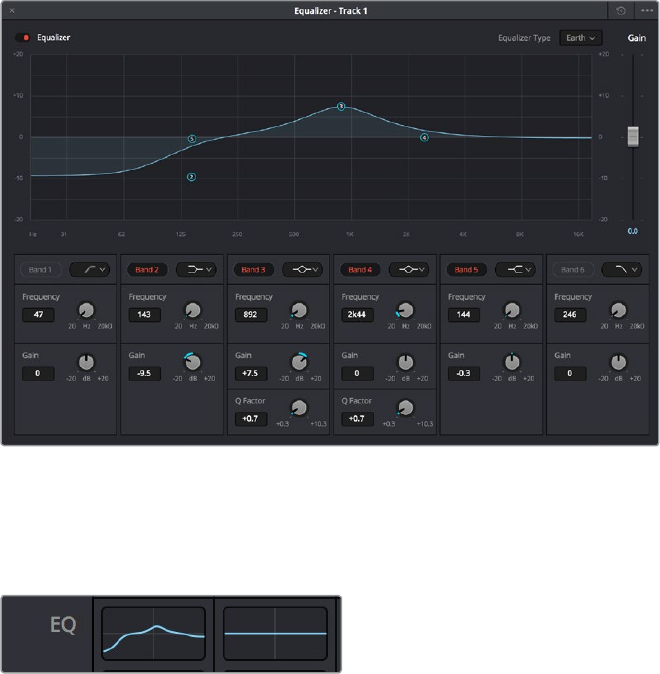
1181
Mixing in the Fairlight Page Part 8 – 68
The channel strip EQ window
When a channel strip’s EQ is enabled, the EQ button displays the equalization curve that’s
being applied. This indicator cannot be adjusted, you must open the EQ window to make
modifications.
The channel strip’s EQ indicator, (Left) EQ is adjusted, (Right) EQ is detente
Master EQ Controls
The Equalizer window has the following overall controls:
Enable button: Turns the overall EQ effect off and on, without resetting the controls.
Reset button: Resets all controls of the EQ window to their defaults.
Equalizer Type: Changes the EQ control functionality to emulate different EQ
characteristics from “classic” mixing consoles. There are four options:
Earth: (Default) Native Fairlight controls
Air: Emulates the SSL 4K
Ice: Emulates the Neve V
Fire: Emulates the Focusrite
Gain fader: A post-EQ level control that lets you boost or attenuate the signal to
compensate for the EQ adjustment you’re making raising or lowering the level.
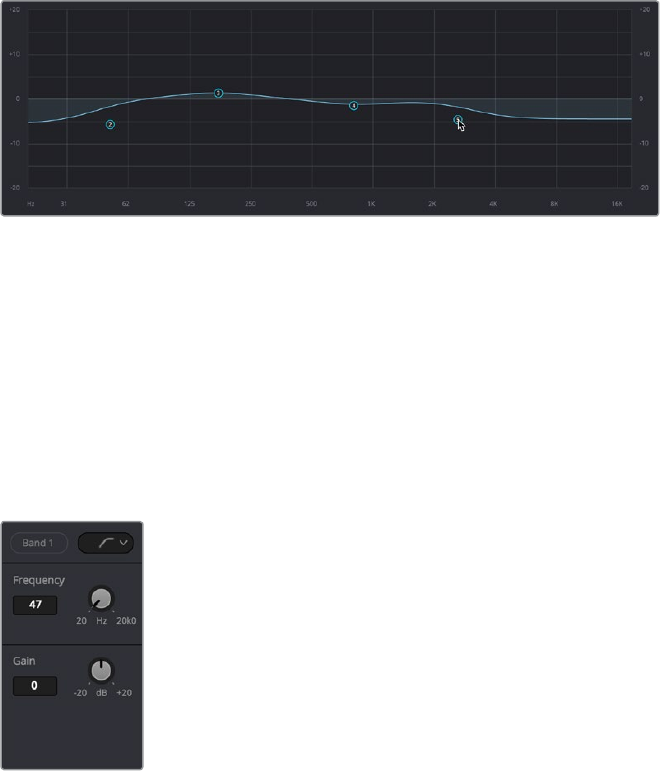
1182
Mixing in the Fairlight Page Part 8 – 68
Graphical EQ controls
A graph at the top shows a curve with handles that correspond to each of the enabled EQ
bands listed below. You can drag any numbered handle to boost or attenuate the range of
frequencies governed by that band, using whatever type of equalization that band has
been set to.
The EQ graph with user-draggable handles
Dragging the numbered handles on this graph in turn modifies the parameters of the
corresponding band, and changing each bands parameters will also alter the EQ graph, which
serves the additional purpose of providing a graphical representation of the equalization being
applied to that track.
Bands 1 and 6
The outer two sets of band controls let you make high-pass and low-pass adjustments, if
necessary. They’re off by default.
The Band 1 and 6 controls
Band enable button: Turns each band of EQ on and off.
Band filter type: Bands 1 and 6 can be switched among four specific filtering options
for processing the lowest or highest frequencies in the signal. These include (from top
to bottom) Hi-Shelf, Hi-Pass, Lo-Pass, and Lo-Shelf.
Frequency: Adjusts the center frequency of the EQ adjustment
Gain: Adjusts the amount by which the affected frequencies are affected. Negative
values attenuate those frequencies, while positive values boost those frequencies.
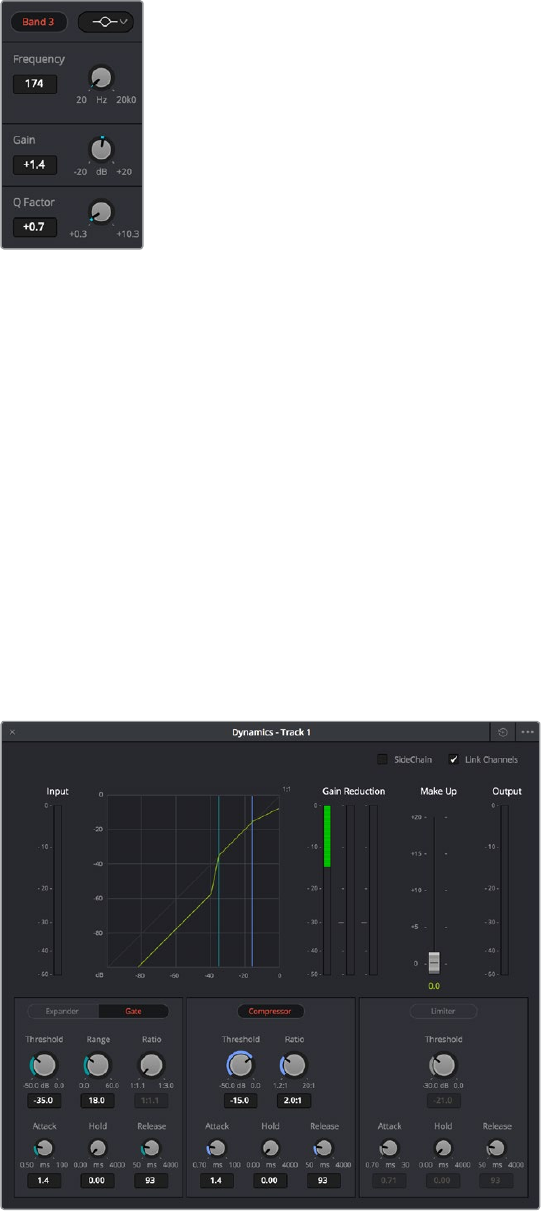
1183
Mixing in the Fairlight Page Part 8 – 68
Bands 2-5
The middle four sets of band controls let you make a wide variety of equalization adjustments.
They’re on by default, to make it easy to begin making adjustments.
The Band 1 and 6 controls
Band enable button: Turns each band of EQ on and off.
Band filter type: Bands 2–5 can be switched among four different filtering options
(from top to bottom) Lo-Shelf, Bell, Notch, and Hi-Shelf
Frequency: Adjusts the center frequency of the EQ adjustment
Gain: Adjusts the amount by which the affected frequencies are affected. Negative
values attenuate those frequencies, while positive values boost those frequencies.
Q Factor: Adjusts the width of affected frequencies. Lower values include a wider
range of frequencies, higher values include a narrower range of frequencies
Dynamics
Double-clicking exposes a set of dynamics controls with three sets of controls corresponding to
an Expander or Gate, a Compressor, and a Limiter that can be used separately or in concert to
manage the dynamics of the audio on that track.
The channel strip Dynamics control window
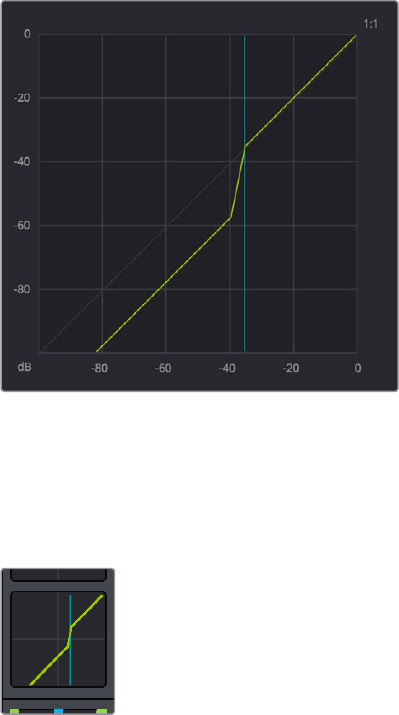
1184
Mixing in the Fairlight Page Part 8 – 68
When you enable whatever combination of dynamics controls you need for that track, the
dynamics graph updates with curves that show you how the signal is being affected by the
Expander or Gate, Compressor, and/or Limiter settings that are being applied.
The dynamics graph shows how the signal
is being affected by the current settings
With these dynamics enabled, the Dynamics button on the channel strip displays these curves,
so you know what’s happening to that channel. This indicator cannot be adjusted, you must
open the Dynamics window to make modifications.
The channel strip’s Dynamics indicator, (Left)
Dynamics at detente, (Right) Dynamics adjusted
Master Dynamics Controls
The Dynamics window contains the following overall controls at the top of the window:
Reset button: Resets all controls of the EQ window to their defaults.
Side Chain: Enabling this checkbox sets the compressor to use a separate input to
control the amount of compression that’s applied. The effect is that when there’s a loud
level in the controlling input, the level of the track is reduced.
Link Channels: When disabled, each channel is compressed independently. When
enabled, all channels are compressed based on the same controlling input used for
Side Chain compression.
Make Up fader: A post-Dynamics level control that lets you boost the signal to
compensate for dynamics settings that have lowered the level.
1185
Mixing in the Fairlight Page Part 8 – 68
Expander/Gate
The first of three sets of dynamics parameters can be switched between Expansion and Gating.
Expansion emphasizes differences in volume by lowering the level of soft parts of the signal
relative to the level of louder parts. Can be used to minimize noise while increasing the dynamic
range of a signal. Gating reduces the level or even silences parts of a signal that fall below a
certain level in order to reduce or eliminate noise in quiet parts of a recording.
Expander: A button that lets you enable these controls and switch them to perform
Expansion.
Threshold: Sets the signal level below which gain reduction occurs. Defaults to -35dB.
The range is from -50 to 0dB.
Range: Unused for expansion.
Ratio: Sets the gain reduction ratio (input to output) that’s applied to signals which fall
below the threshold level. Defaults to 1:1.1. The range is 1.0:1 to 10:1.
Attack: Adjusts how quickly the sidechain detector applies expansion when a signal
exceeds the threshold. Defaults to 1.4mS. The range is 0 to 100mS.
Hold: Keeps dynamics from being triggered again until a certain amount of time has
passed, in mS (milliseconds). Defaults to 0mS. The range is from 0 to 4000mS.
Release: Adjusts how quickly the sidechain detector stops applying dynamics when a
signal goes back below the threshold. Defaults to 93mS. The range is 0.03 to 4.03mS.
Gate: A button that lets you enable these controls and switch them to perform Gating.
Threshold: Sets the signal level below which gain reduction occurs. The range is from
-50 to 0 dB.
Range: Sets the maximum amount of gain reduction that will be applied when the
signal falls below the gate threshold. Once the signal has fallen below the level
determined by the gate threshold minus the gate range, no gain reduction is applied.
The default is 18. The range is from 0 to 60.2dB.
Ratio: Unused for gate.
Attack: Adjusts how quickly the sidechain detector applies gating when a signal
exceeds the threshold. Defaults to 1.4mS. The range is 0 to 100mS.
Hold: Keeps dynamics from being triggered again until a certain amount of time has
passed, in mS (milliseconds). Defaults to 0mS. The range is from 0 to 4000mS.
Release: Adjusts how quickly the sidechain detector stops applying dynamics when a
signal goes back below the threshold. Defaults to 93mS. The range is 0.03 to 4.03mS.
Compressor
The second set of dynamics parameters let you apply compression, which detects the
envelope of an audio signal in order to automatically change its level. Typically used to detect
and reduce the peaks of an audio signal so that the overall level can be boosted without
clipping, reducing the dynamic range of a given signal. Compression is often used to allow
voices to have more presence within a mix, and to smooth out changes in the levels of tracks
with too much dynamic range for the task at hand.
1186
Mixing in the Fairlight Page Part 8 – 68
Compressor: A button that lets you enable Compression.
Threshold: Sets the signal level above which compression is applied.The default is
-15dB. The range is -50 to 0dB.
Ratio: Adjusts the compression ratio. This sets the gain reduction ratio (input to output)
applied to signals which rise above the threshold level. The default is 2.0:1. The range is
1.0:1 to 10:1.
Attack: Adjusts how quickly the sidechain detector applies compression when a signal
exceeds the threshold. The default is 1.4mS. The range is 0 to 100mS.
Hold: Keeps dynamics from being triggered again until a certain amount of time has
passed, in mS (milliseconds). Defaults to 0mS. The range is from 0 to 4000mS.
Release: Adjusts how quickly the sidechain detector stops applying dynamics when a
signal goes back below the threshold. The default is 93mS. The range is 0.03
to 4.03mS.
Limiter
The third set of dynamics parameters let you apply limiting, which imposes a hard limit on the
maximum level allowed for a particular signal.
Limiter: A button that lets you enable Limiting.
Threshold: Sets the maximum allowable output level. The default is -21dB. The range is
from -50 to 0dB.
Attack: Adjusts the attack rate time constant of the sidechain detector. The default is
.71mS. The range is 0 to 100mS.
Hold: Keeps dynamics from being triggered again until a certain amount of time has
passed, in mS (milliseconds). Defaults to 0mS. The range is from 0 to 4000mS.
Release: Adjusts how quickly the sidechain detector stops applying dynamics when a
signal goes back below the threshold. The default is 90mS. The range is 0.03
to 4.03mS.
Aux
Lets you route that track’s channels through an Aux send bus. Each Aux bar corresponds to a
specific Aux bus that you created. Double-clicking any of these bars opens up the Auxiliaries
window, with which you can enable or disable auxiliaries, set each one to be routed Pre the
channel strip or post the channel strip (the default), and set each Aux buses send level and
pan value.
The Auxiliaries control window
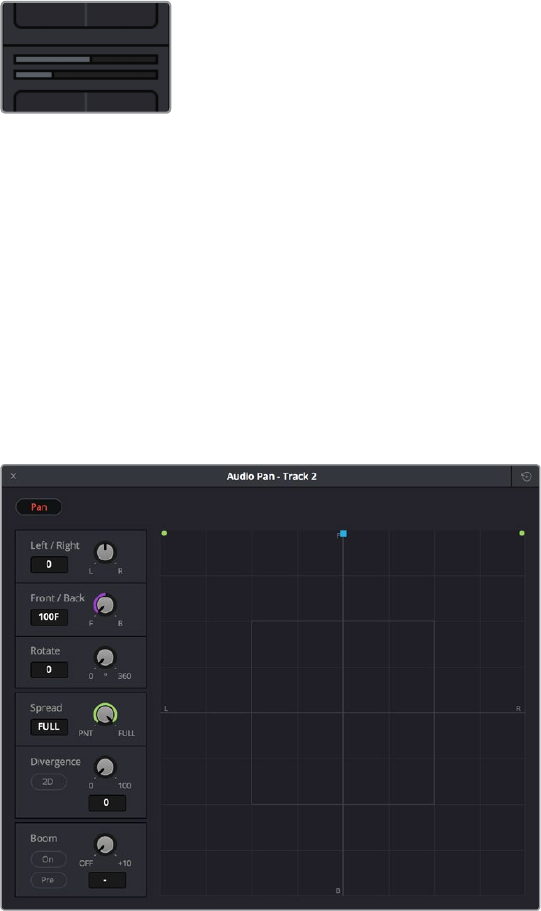
1187
Mixing in the Fairlight Page Part 8 – 68
Each Aux bus you create exposes the following controls in the Auxiliaries window:
On: Turns that Aux send on or off.
Pre: Switches aux sends to be either pre or post fader.
Send Level: Adjusts the amount of signal sent from the selected feed to the auxiliary
bus. The range is OFF to +10dB.
Pan: Provides panning across stereo aux bus destinations.
The level to which you set an Aux bus will be shown within the bar that represents that Aux bus
in the Mixer’s channel strip.
The Auxiliaries levels shown in the
channel strip of the Mixer
Pan
A Pan control compatible with stereo and surround panning. You can drag the panning handle
within this control to adjust panning for stereo or surround mixing, or you can double-click this
control to expose a large pan window. What controls are available in the pan window depend
on the mapping of the audio track, but both stereo and surround panning controls are available,
with corresponding numeric controls. You can either adjust panning using the graphical Pan
control, or you can adjust specific panner characteristics using the controls to the left.
The Pan control window
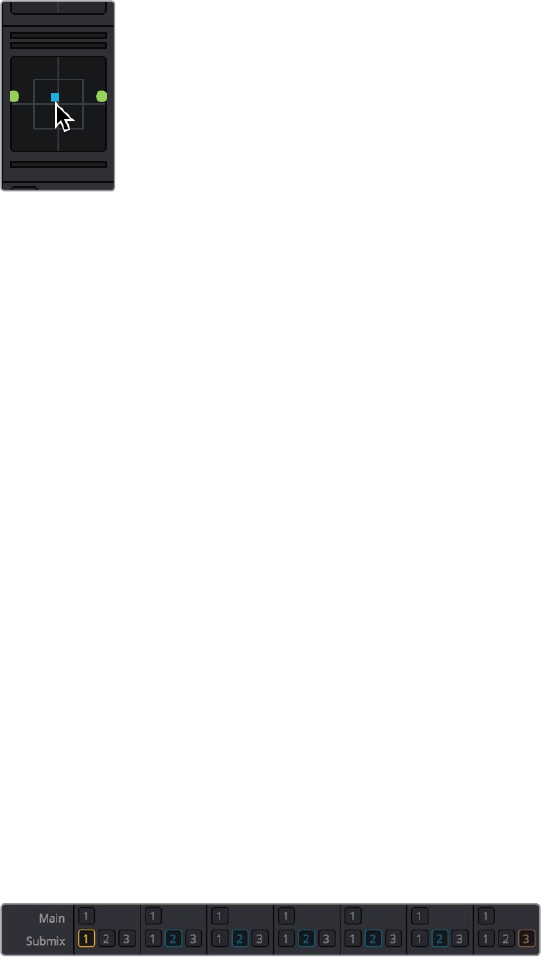
1188
Mixing in the Fairlight Page Part 8 – 68
When a channel strip’s Pan control is enabled, the Pan area displays the panning that’s being
applied. Unlike the EQ or Dynamics controls, you can adjust a channel’s panning by dragging
the handles that appear within this small area of the channel strip.
The channel strip’s Pan indicator
The Audio Pan window contains the following controls:
Left/Right: Changes the balance of signal between the left and right side speakers
you’re outputting to, depending on what speaker format you’re mixing to. At its simplest,
accommodates stereo output.
Front/Back: Changes the balance of signal between the front and back sets of
speakers you’re outputting to, depending on what speaker format you’re mixing to.
Rotate: Simultaneously adjusts the left/right and front/back pan controls in order to
rotate a surround mix about the centre of the room.
Spread: Only available when a linked group is selected (feature not available at the
time of this writing). Spread adjusts the perceived size of a surround mix.
Divergence: Spreads the signal for an individual feed across more of the adjacent
loudspeakers, making the perceived size of the sound source larger.
2D: more
Boom: The send level of that track to the LFE part of the mix.
On: Enables this functionality.
Pre: Lets you adjust the “dry” part of the signal separately from the “wet” part of the
signal when effects are applied.
Bus Assignment Buttons
Two sets of buttons let you route audio from one channel strip’s output to Sub and Main buses
that you’ve set up for your mix.
The channel strip’s bus assignment buttons
Main: These buttons let you assign a track or Sub’s channels to one or more of the
main busses.
Submix: These buttons let you assign that track’s channels to one or more
submix buses.
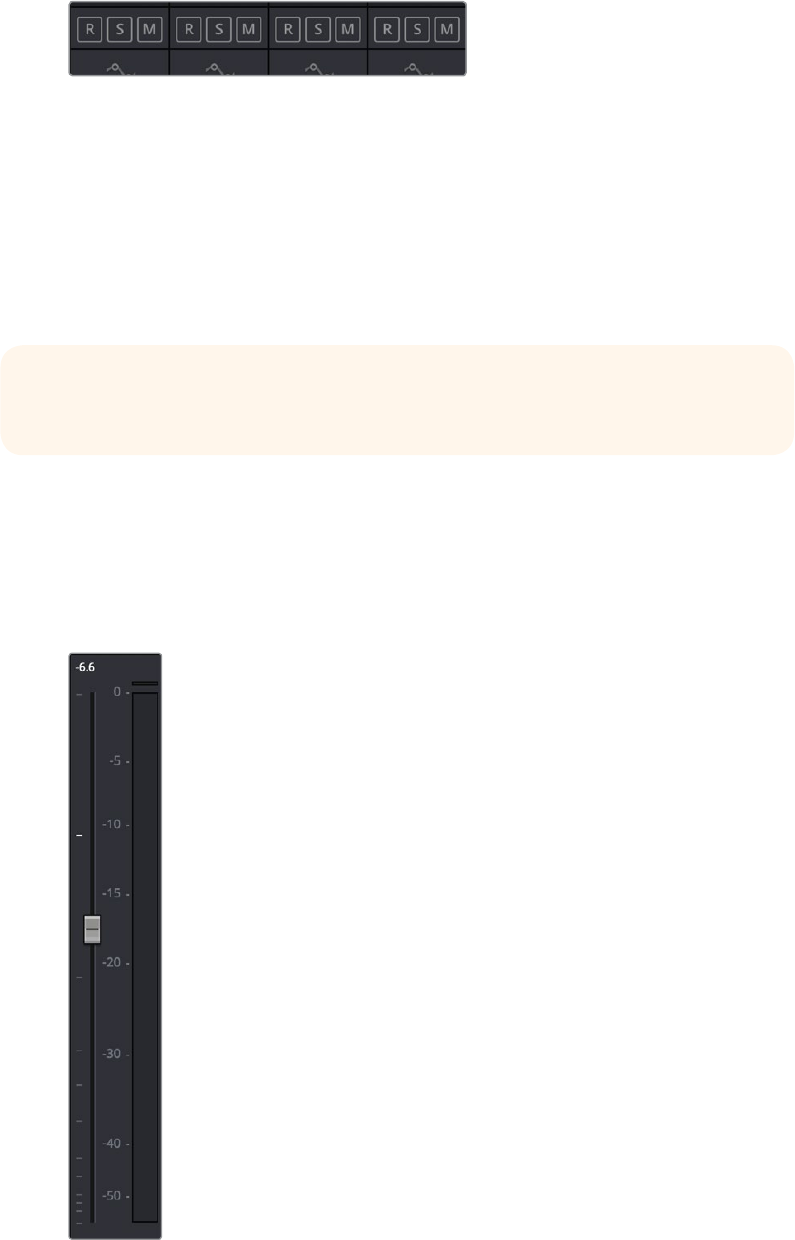
1189
Mixing in the Fairlight Page Part 8 – 68
Arm, Solo, and Mute Buttons
Identical to the controls found in the track header controls of each timeline audio track.
The channel strip’s Arm, Solo, and Mute bottons
Arm: (Labeled R) Lets you enable a track to be recorded onto.
Solo: Lets you mute all other tracks in order to play a track you need to focus on in
isolation. If solo is enabled for multiple tracks, all soloed tracks will play, and all non-
soloed tracks will be muted. This affects rendering, so if one or more tracks are soloed,
the muted tracks won’t be output or rendered.
Mute: Disables audio playback from that track. This affects rendering, so if one or more
tracks are muted, they won’t be output or rendered.
Fader Controls
Each track’s vertical fader lets you control the level that’s output by that track, either using your
mouse, or using the physical fader of your Fairlight console. If you’re working with a console,
then the onscreen faders serve as a visual reference of what levels are set.
The fader area
TIP: You can click a button and drag across multiple channel strips to turn that button
on or off for multiple tracks easily.
1190
Mixing in the Fairlight Page Part 8 – 68
dB: Shows you the volume, in decibels, that track is currently set to.
Fader: Each track’s vertical fader can be dragged with your mouse or other pointing
device to adjust the volume of that track and perform automation recording. Dragging
up increases volume, dragging down decreases volume. Fader handles turn red while
you record levels automation, and they turn green when automation has been recorded
for that track.
Methods of adjusting channel faders:
To change the level of that channel with the mouse: Click and drag any fader
up or down.
To reset the level of that channel to 0 dB: Double-click a fader’s handle. This does not
work after you’ve recorded automation for a track.
1192
Automation Recording Part 8 – 69
Automation Recording
The Fairlight page provides simple, flexible and com prehensive facilities for recording and
editing mix automation data. Once recorded, all feed and bus mix parameter automation can be
played back in perfect synchronization with the audio, including channel parameters, bus
assignments, inserts, and direct outs.
The Fairlight page is designed to allow the operator to record every static and dynamic
parameter change you make in the process of balancing the mix of tracks in the timeline. Mixer
adjustments may be recorded for one or multiple parameters or channels at a time. Additionally,
more adjustments may be added with each automation recording pass, which lets you create
complex and detailed mixes that can be frame-accurately replayed at will.
This chapter covers automation mixing using the combined controls of the onscreen mixer and
timeline. For more information on basic mixing operations, see Chapter 68, “Track Level Mixing.”
Automation Recording 1193
What Can You Automate 1193
Automation Controls 1193
How to Record Automation 1194
Recording Automation for Multiple Tracks 1194
Recording Automation for Specific Individual Tracks 1195
Viewing Automation 1196
Overwriting Automation 1196
Playing Automation 1197

1193
Automation Recording Part 8 – 69
Automation Recording
While the recording of keyframe automation is most commonly associated with either the
on-screen mixer or the Fairlight console, you can also record automation using controls found in
the Inspector, or using the controls of the EQ, Dynamics, and Pan windows, thereby enabling
you to record automation for the various audio effects that you’ve applied to a track.
Recording automation refers to creating high-fidelity data that records changes you make to
onscreen controls and/or Fairlight console controls, in real time as the Timeline plays, that will
then control how those parameters will play back. In this way, you can create a dynamic mix
where different audio level, pan, and EQ, dynamics, and other audio filter settings change over
time to fade swells of music up and down, pan the sound effect of a car driving by from the left
to the right speaker, or slowly increase the strength of a reverb effect applied to foley footsteps
as a character walks into a long, dark cavern.
What Can You Automate
You can record automation for nearly every control in the mixer for channel strips
corresponding to individual tracks, track groups, or busses, including fader . Additionally, you
can record automation for controls found in audio plugins that you use in your mix.
Automation Controls
The automation button, to the right of the transport controls, lets you show and hide the
automation toolbar.
Clicking the Automation button displays the automation toolbar
The automation toolbar has buttons for each option that’s available for preparing to record
automation in your mix.
Options found in the automation toolbar
The automation toolbar displays the following options:
Automation: Controls how automation data is recorded.
Write: Records absolute changes to control automation.
Trim: Records relative changes to control automation in order to increase or reduce
levels that have already been recorded.
Touch: Defines what happens when you first adjust an automatable control.
Off: No automation is recorded.
Latch: Automation is recorded once you begin moving a control, continues recording
after you release the control.
Snap: Automation is recorded once you begin moving a control, stops recording after
you release the control; there is a brief interpolation from the last level you set to the
prior recorded level.
1194
Automation Recording Part 8 – 69
On Stop: Defines what happens when you release an automatable control.
Event: The last recorded automation value overwrites previous levels to the start of the
next available recorded automation data (or event) in that track.
Hold: Deletes all previously recorded mixing data after what you’ve just recorded, to
hold the last recorded level for the rest of that track.
Return: The last recorded automation value is interpolated to ramp back to the
previously recorded automation values on that track.
Enables: The following buttons let you enable or disable different controls for
recordingautomation.
Fader: Automates track and bus volume.
Mute: Automates the mute button.
Pan: Automates all pan controls.
EQ: Automates all EQ controls.
Comp: Automates just the Compressor controls in the Dynamics window.
Gate: Automates just the Gate controls in the Dynamics window.
Lim: Automates just the Limiter controls in the Dynamics window.
Aux: Automates the Auxiliary controls in the Auxiliaries window.
Plugins: Automates all plugins.
Misc: Automates the parameters of VST and Audio Unit plugins.
How to Record Automation
There are two different ways you can set up the recording of automation for levels, panning, EQ,
Dynamics, and other audio controls in the mixer.
Recording Automation for Multiple Tracks
You can use the following steps to record automated changes to any audio control in any
control strip:
1 Open the Automation toolbar, and do the following three preparatory steps:
a Choose whether you’re going to Write new automation, or Trim automation that’s
already recorded. Write mode is appropriate when you’re recording automation for
thefirst time, or when you’re overwriting previous automation with brand new values.
Trim mode is appropriate when you’re making incremental changes to previously
recorded automation.
b Next, choose Touch and On Stop behaviors that are appropriate for the kind of
automation recording you need to do.
2 Move the playhead to the beginning of the section of the timeline you want to record
automation for.
3 Next, initiate playback using any method (Spacebar, L, Play button, third party or
Fairlight audio control panel), and make whatever adjustments you want to the controls
for which you’ve enabled automation recording. As you make adjustments, the affected
fader control turns red to let you know you’re recording automation.
4 When you’re finished, stop playback using any method (Spacebar, K, Stop button, third
party or Fairlight audio control panel). Automation recording stops as well.
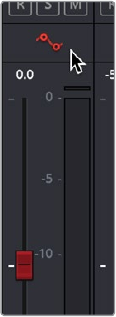
1195
Automation Recording Part 8 – 69
Once you’ve recorded automation keyframes for a particular parameter appear in an
automation graph. This graph is not available as of the time of this writing.
Recording Automation for Specific Individual Tracks
You can use the following steps to record automated changes to controls in specifically armed
control strips:
1 Open the Automation toolbar, and do the following three preparatory steps:
a. Choose whether you’re going to Write new automation, or Trim automation that’s
already recorded. Write mode is appropriate when you’re recording automation for the
first time, or when you’re overwriting previous automation with brand new values. Trim
mode is appropriate when you’re making incremental changes to previously recorded
automation.
b. Next, set Touch to Off, which disables across-the-board automation recording and
requires you to arm specific tracks that you want to automate.
2 Click the automation arm button above the fader of any Mixer track to which you want
to record automation. Even though the Touch control is set to off, moving a control on
an armed channel strip will record automation in Latch mode.
The automation arming button
above a fader in the Mixer
3 Move the playhead to the beginning of the section of the timeline you want to record
automation for.
4 Next, initiate playback using any method (Spacebar, L, Play button, third party or
Fairlight audio control panel), and make whatever adjustments you want to the controls
for which you’ve enabled automation recording. While you make adjustments, the
affected fader control turns red to let you know you’re recording automation.
5 When you’re finished, stop playback using any method (Spacebar, K, Stop button, third
party or Fairlight audio control panel). Automation recording stops as well.
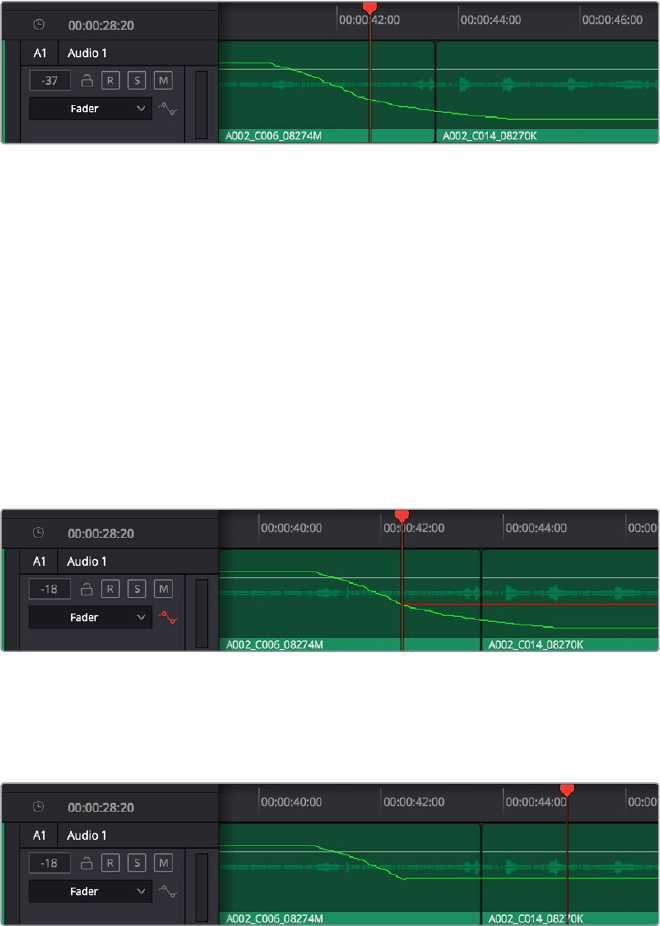
1196
Automation Recording Part 8 – 69
Viewing Automation
Once you’ve recorded automation keyframes for a particular parameter, they can be made
visible in an automation graph in the Timeline. While the automation controls are visible, an
additional pair of controls appear in the header of each audio track. A pop-up lets you choose
which automation waveform to view, with options for Fader, Mute, Pan, EQ, Compressor, limiter,
Aux, and Plugins controls.
Mixing automation for the Fader shown in the Timeline
At the time of this writing, automation data cannot be deleted, edited, copied, or pasted.
However, you can use the undo command to undo automation recording immediately after it’s
been recorded, and you can always overwrite previously written automation.
Overwriting Automation
Once you’ve recorded automation for a particular clip, you can overwrite that automation in
subsequent passes. Using either of the previously described methods of recording automation,
adjusting the levels of a track control with previously recorded automation displays a red line
that shows the new level relative to the previously recorded level.
Setting new levels to overwrite previously recorded automation displays a red line
Pressing play to actually record this new automation will overwrite the previous levels
at this new value.
Setting new levels to overwrite previously recorded automation displays a red line
1197
Automation Recording Part 8 – 69
Playing Automation
After you’ve automated a mix, playing it back is as simple as moving the playhead to an area of
the timeline prior to the recorded automation, and initiating playback. As the timeline plays, the
onscreen controls for each automated parameter are shown in green, and move and update to
show the recorded levels for those controls.
Green controls show which
ones have recorded automation
during playback
1199
Audio Effects Part 8 – 70
Audio Effects
Audio plug-ins let you apply effects to the audio clips in your mix, such as echo or reverb, noise
reduction, aural enhancement, click and pop removal, and so on. DaVinci Resolve is compatible
with a wide variety of third party VST and Audio Unit effects for audio processing, and these
can then be used either in the Edit or Fairlight pages. This chapter goes through the different
methods available for applying and customizing effects for clips and for tracks.
About Audio Plug-Ins 1200
VST and VSTi 1200
Audio Units 1200
Using Audio Filters 1201
Applying Audio Filters to Main and Sub Buses 1204
1200
Audio Effects Part 8 – 70
About Audio Plug-Ins
Single or multiple plug-ins can be applied to clips and to tracks. A total of 96 mono channels of
plug-ins can be applied (a stereo plug-in uses two of these channels, a 5.1 aware plugin six
channels, etcetera). Plugins are accessed via each track’s control strip, or via the Inspector
which provides access to both Clip and Track plugins.
VST and VSTi
VST (Virtual Studio Technology) is an audio plug-in standard created by Steinberg. The VST
standard allows third party developers to create VST plug-ins for use within VST host
applications, or to create VST host applications themselves. The VST plug-in standard is the
most widespread audio plug-in standard in use today, with thousands of available plug-ins
spanning the gamut from EQ and compression to reverb, denoising, de-essing, aural exciting,
and much more.
The Fairlight page supports VST effects from Mono to 7.1 – and beyond. These effects can be
inserted on mono channels or Link Groups. If a stereo VST Effect is inserted on a LCR, LCRS, or
5.1 Link Group, the left and right channels will be allocated to left and right Link Group channels
automatically.
As of this writing, DaVinci Resolve uses Version 2.4 of the VST SDK (Software Development Kit).
VST effects are available on macOS and Windows workstations.
VST Eects versus VST Instruments (VSTi)
A VST effect is a type of VST plug-in that is used to process audio. A VST effect might be a
Reverb, Compressor or EQ. VST Instruments are typically used to synthesize sound or play
back sampled audio. VSTis have rapidly replaced hardware synthesizers and dedicated
samplers due to their flexibility, repeatability and low cost.
Audio Units
Audio Units are an audio plugin API created by Apple. Similarly to VST, Audio Units (AU) can
either process audio, or work as instruments. Audio Units are only available on macOS
workstations.
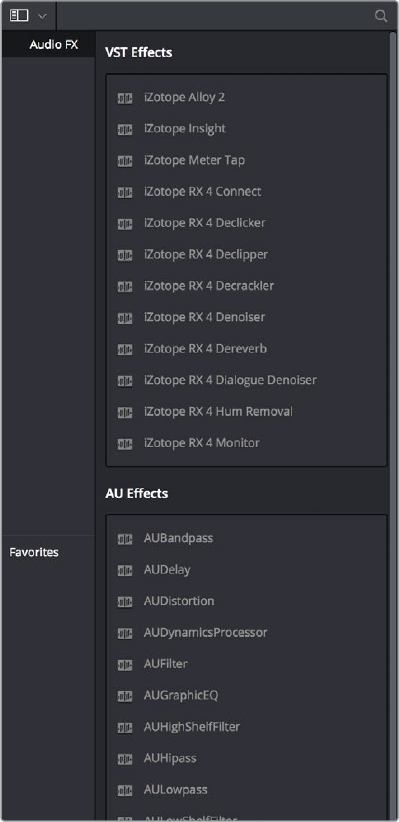
1201
Audio Effects Part 8 – 70
Using Audio Filters
Once you install VST or Audio Unit effects on your workstation, they appear in the Audio FX
panel of the Effects Library, organized in separate categories.
Audio filters in the Effects Library
Audio plug-ins let you apply effects to individual audio clips or entire tracks worth of audio, to
add creative qualities such as echo or reverb, or to take care of mastering issues using noise
reduction, compression, or EQ.
Methods of applying Audio Filters to clips on the Fairlight Page:
To apply an audio filter to a clip: Drag any filter from the Audio FX panel of the Effects
Library onto the clip in the Timeline you want to apply it to.
To apply an audio filter to multiple clips: Select all of the clips you want to apply an
audio filter to, then drag any filter from the Audio FX panel of the Effects Library onto
any of the selected clips.
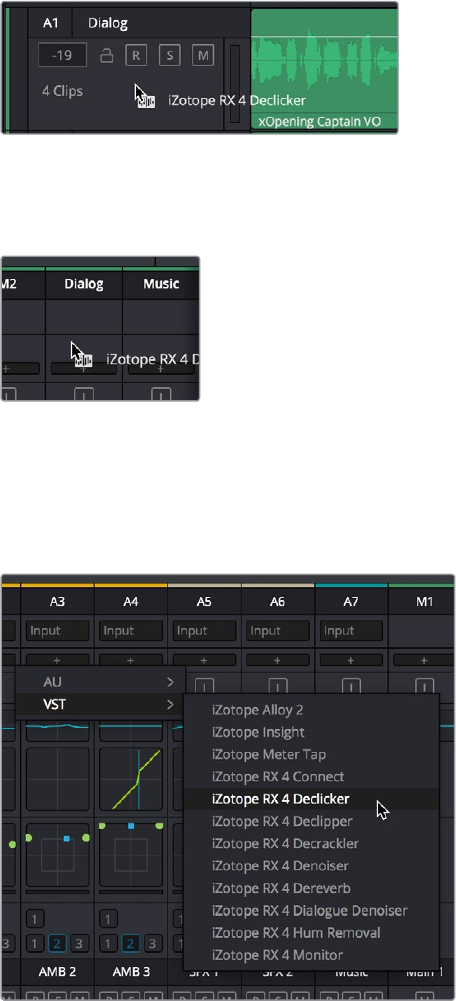
1202
Audio Effects Part 8 – 70
Methods of applying Audio Filters to tracks on the Fairlight Page:
To apply an audio filter to an entire track in the Timeline: Drag any filter from the
Effects Library onto the track header.
Applying an audio filter to a whole track via the Timeline
To apply an audio filter to a track or bus in the Mixer: Drag any filter from the Audio
FX panel of the Effects Library onto the clip in the Timeline you want to apply it to.
Applying an audio filter to a whole track
via drag and drop to the Mixer
To apply an audio filter to a track or bus using the Mixer controls: Click the plus
button in the channel strip of the track you want to apply an effect to, and then choose
a filter from the pop-up menu that appears.
Applying an audio filter to a whole track via the Mixer’s own controls
To edit a clip’s audio filters:
Select that clip and open the Inspector. All audio filters applied to that clip appear
under the volume and pan controls, with that filter’s controls appearing directly in the
inspector.
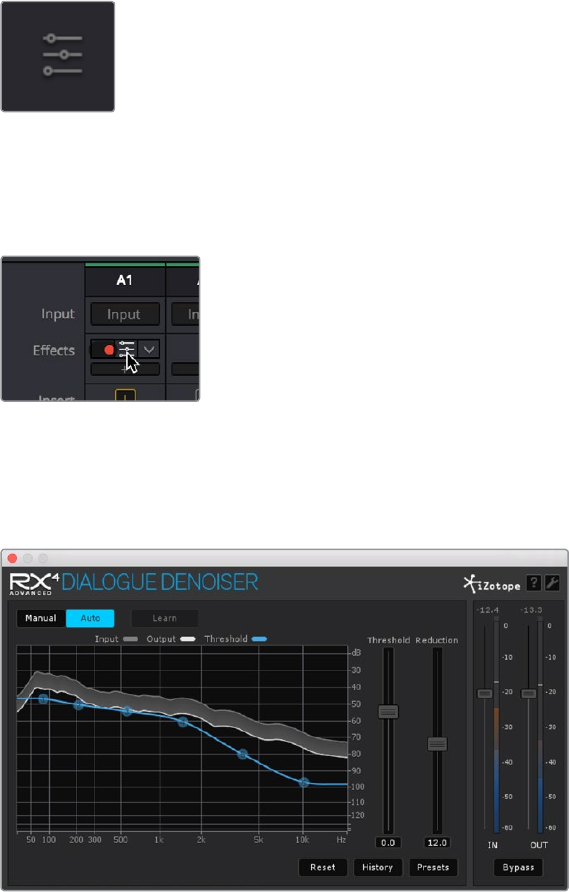
1203
Audio Effects Part 8 – 70
To edit a track’s audio filters, do one of the following:
Click in the background of the Timeline header to select that track, and then open the
Inspector. Click the custom UI button for that filter to open its controls.
The custom UI button for audio
plug-ins in the Inspector
Move the pointer over the plugin’s name in the Effects area of the Mixer, and click on
the custom UI button to open its controls.
The custom UI button for audio
plug-ins in the Mixer
Nearly all VST and Audio Unit audio filters have a custom user interface that makes it much
easier to manipulate that filter’s controls. These can be opened from within DaVinci Resolve.
The custom audio filter interface for Izotope RX4
Methods of working with audio filters in the Inspector:
To rearrange the order of multiple video filters applied to a clip: Click the move up or
move down buttons in any filter’s title bar, to the left of each filter’s Trash Can button.
To disable or re-enable a filter: Click the toggle button at the far left of each filter’s
title bar.
To remove a filter: Click the Trash Can button.
To reset a filter: Click the Reset button at the far right of the filter’s title bar.
To open or collapse a filter’s parameters: Double-click the title bar.
To open or collapse the parameters of all filters: Option-click the title bar.
1204
Audio Effects Part 8 – 70
Once applied to a clip or track, audio filters can also be keyframed or automated just like
volume and pan settings, to create dynamic audio effects that change over time.
Applying Audio Filters to
Main and Sub Buses
You can apply Audio Filters to Main and Sub Buses just like any other track, with which to apply
any audio mastering effects operations you require to individual submixes, or even to an
entire main.
1206
Audio Meters and Audio Monitoring Part 8 – 71
Audio Meters and Audio Monitoring
The Meters panel, which appears at the top of the Fairlight page when it’s enabled, provides a
visual reference of the levels of each track in your mix, along with specialized meters showing
the buses, monitoring mix, loudness, and a Viewer for seeing the video of the current project as
you work. This chapter describes the use of these meters, and provides information about the
different options that are available.
The Monitoring Panel 1207
Track Meters and Monitoring Controls 1207
Using Post Fader or Track Source Meters 1208
Bus Meters 1209
Compound Meters and Output BusSelection Menu 1209
Monitoring Menus 1210
Control Room Meters 1210
Loudness Meters 1210
What is LU? 1210
Loudness Meter Options 1211
Graphical Loudness Meters 1211
Numeric Loudness Meters 1211
Using the Loudness Meters 1212
Viewer 1212
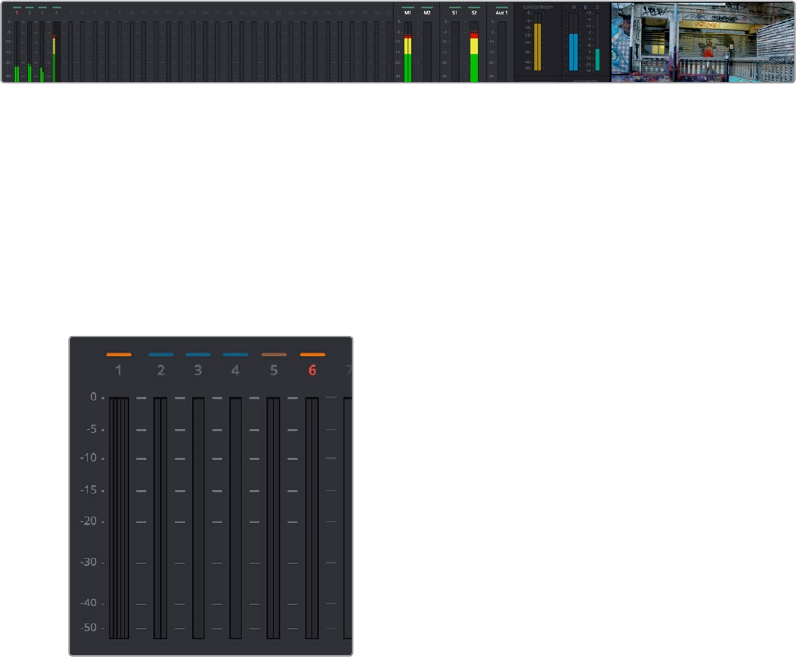
1207
Audio Meters and Audio Monitoring Part 8 – 71
The Monitoring Panel
Turning on the Meters in the UI toolbar displays the Monitoring panel that runs along the top of
the Fairlight page, which shows all of the audio meters that correspond to the tracks in the
Timeline, as well as the Bus meters that correspond to the Mains, Subs, and Aux buses of your
mix, the Control Room meters, and a video viewer.
The Monitoring panel
Track Meters and Monitoring Controls
At left, a row of audio meters corresponds to the channel strips of the Mixer, one meter for
every audio track in the timeline. Each track displays the number of meters that corresponds to
that track’s audio mapping, with mono tracks having a single audio meter, stereo tracks having
two, 5.1 tracks having six, etcetera.
Track audio meters with different numbers of meters
depending on that track’s audio mapping
Each track and bus meter (with the exception of the Loudness meters) display RMS (root mean
square) levels against a dB scale. A single line indicating the maximum value at any given
moment in time is held briefly just above the current RMS levels, which appear as a solid bar
extending from the bottom of the meter. RMS meters display a weighted “average”
representation of the audio level that’s closer to the way audio is actually perceived, although
not as accurate as the loudness meters discussed later in this section.

1208
Audio Meters and Audio Monitoring Part 8 – 71
Each meter bar is color coded to indicate two different thresholds of sound level, from low
(green) to high (yellow) to very high (red).
The peak meter at top
Each meter is identified by the track number it represents (track names are not shown over
track meters) as well as the color of that track.
Using Post Fader or Track Source Meters
The Track Meters setting in the General Options of the Project Settings lets you choose how
meters in the Fairlight page display their audio analysis. There are two options:
Post Fader: Meters always display the level of each clip’s signal after whatever fader
adjustments have taken place. Fading a track’s level down diminishes the visible level
of that audio signal in the meter. This setting is good if you prefer a visual indication
of the relative levels you’ve set your various audio tracks to, which is a very NLE-
oriented behavior.
Track Source: Meters always use the volume levels of the audio clips in that track,
even if you’ve lowered the level using the sliders. If you’ve keyframed a clip’s volume,
that change will be reflected by the audio meters, even though fader changes are not.
Viewing meters this way means you can always see how much level is available to clips
in your mix regardless of what the current fader levels are set to, in the event you want
to keep track of audio you want to bring back into the mix later on. This is a very DAW-
oriented behavior.
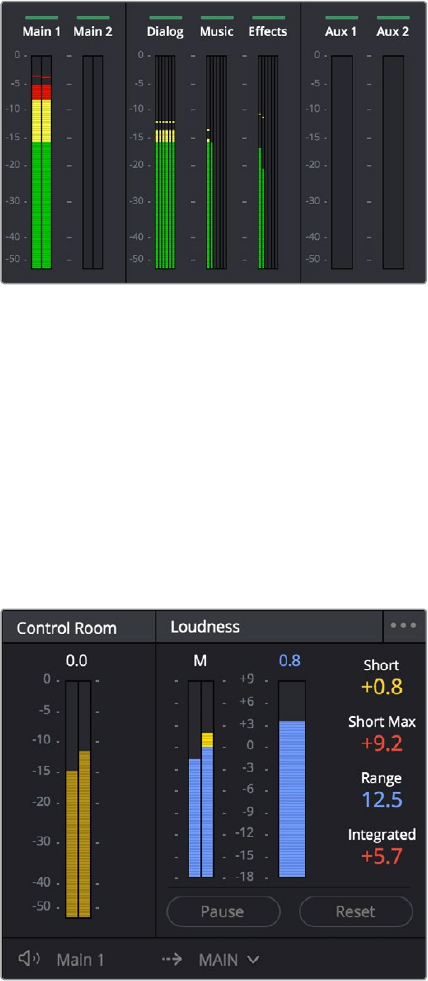
1209
Audio Meters and Audio Monitoring Part 8 – 71
Bus Meters
To the right of the Track Meters are the bus meters, in which all Mains, Subs, and Aux buses
appear, separated by type, and each displaying the number of meters that corresponds to that
track’s audio mapping. This way you can see the sum of all tracks that have been routed to a
particular bus.
Bus meters for the Mains, Subs, and Aux buses
Compound Meters and
Output BusSelection Menu
The Compound Meters, to the right of the Bus meters, consist of Control Room meters and
Loudness meters, shown side-by-side to provide a comprehensive analysis of your overall
audio mix. Below, pop-up menus let you choose which bus you want to monitor, as well as
which set of speakers you want to use to do the monitoring.
The Control Room meters (at left),and Loudness meters (at right)
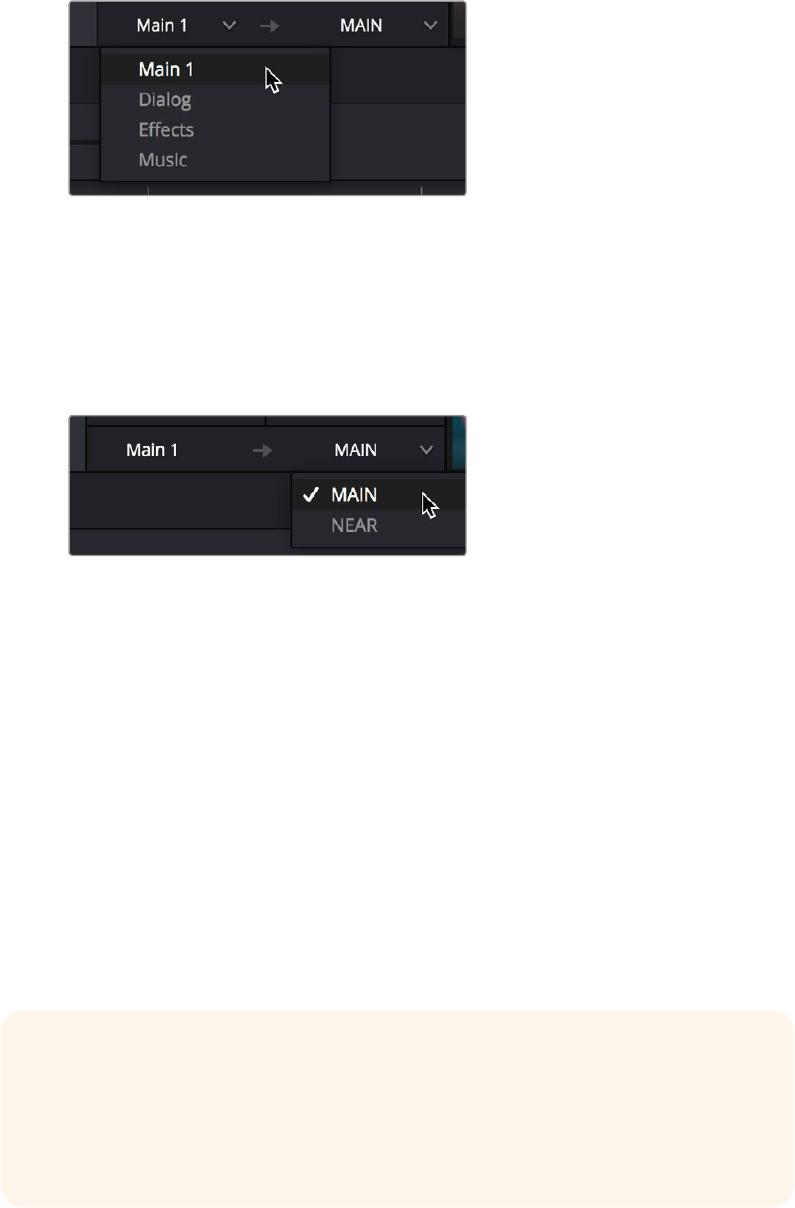
1210
Audio Meters and Audio Monitoring Part 8 – 71
Monitoring Menus
The Monitoring Menus determine which bus gets analyzed by the Compound Meters. When the
Compound Meters are displayed, the Monitoring pop-up menu that otherwise appears to the
left of the monitoring controls in the Transport toolbar instead moves to a position underneath
the Loudness meters.
The monitoring menu lets you choose which
bus you want to monitor while working
The next pop-up menu to the right lets you choose one of the available sets of speakers once
you’ve configured them in the Video and Audio I/O panel of the System Preferences. This gives
you the flexibility to quickly listen to your mix on a variety of speakers and configurations to see
how it holds up in different situations. For more information on configuring different speaker
setups, see Chapter 3, “Project Settings and Preferences.”
The monitoring menu lets you choose which bus
you want to monitor while working
Control Room Meters
The mustard colored Control Room audio meters show the sum of all audio channels that are
routed to the currently selected bus being monitored (as selected in the pop-up menu below).
These are peak meters measured in dBFS.
Loudness Meters
The set of meters all the way to the right are the Loudness meters, which consist of a set of two
graphical meters and a numerical readout. These meters let you analyze the “integrated
loudness” of the overall mix, which is the standard to which all contemporary mixing
specifications refer when describing the deliverables you’re expected to provide to the client.
Unlike the RMS audio meters found in the Timeline or mixer which measure audio in dB,
loudness meters do a different kind of analysis, measured in LU (loudness units).
What is LU?
A value of 1 LU (loudness unit) represents the smallest difference in audio levels that
humans can actually perceive. Human hearing naturally sums all channels that reach
the ear, so the summed channel meter to the right in the Compound Meters is an
analysis of the loudness you actually hear.
1211
Audio Meters and Audio Monitoring Part 8 – 71
Loudness Meter Options
Two options in the General Options of the Project Settings let you customize the
Loudness Meters.
Target Loudness level: Lets you set the LUFS value that’s used as a reference level
for loudness metering. Defaults to –23 LUFS which conveniently makes the display of
these meters scale similarly to traditional audio meters that you’re already used to.
Loudness Scale: Lets you choose which scale you want to use with which to measure
the meters. Options currently include the default of EBU +9 Scale (–18 to +9), and EBU
+18 Scale (–36 to +18).
Graphical Loudness Meters
Two separate meters give you a dynamic graphical measurement of the Loudness of the
selected bus being monitored according to the ITU-R BS.1770-3 and EBU R128 standards, which
describe how to analyze the subjective loudness of a given audio mix for purposes of
compliance with required quality control (QC) standards.
A steel-blue meter labeled M (for momentary) has as many channels as the selected
bus you’re monitoring, excluding the LFE channel(s) of surround formats, which aren’t
factored into loudness metering. This meter measures LEQ (equivalent sound level),
within a 400ms window following the playhead as measured every 100ms. This lets
you evaluate the LUFS (Loudness Units Full Scale) level of the mix at the current frame
as you play. This discrete-channel analysis is used to calculate all other values of the
loudness metering system.
A second steel-blue mono meter to the right displays the sum of all channels in the
Mmeter, displayed in LU (loudness units). The numeric value displayed at the top of
this meter is the maximum LU value that’s been analyzed during any stretch of timeline
playback. This value is held until it’s reset, either by stopping and initiating playback a
second time while Link to Playhead is enabled, or when you click the Reset button at
the bottom of the loudness meter area.
Numeric Loudness Meters
A set of values to the right of the meters give running reports on the audio level of your mix.
While the graphical meters are useful for analyzing your mix as you work, these numeric
readouts are particularly valuable for providing the strict information you need to adhere to
written QC standards. Their meaning is as follows:
Short: Measures the average LU level over a 30 second window following
the playhead.
Short Max: Shows the maximum level over the same 30 second window. This analysis
is required by EBU R128.
Range: Measures the dynamic range of the Loudness of your mix (in LU), which is the
difference between the average soft and average loud parts of your mix. Analyzes the
overall loudness over a played range of the mix, discounts the lowest 10% and highest
5%, and then gives a standardized expression of the difference between the remaining
soft and loud levels that were analyzed. The window of analysis is as long as you’ve
been playing. This analysis is required by most QC specifications.
Integrated: Measures the LUFS value of the portion of the range of the mix you’ve
played through. As you play, this integrated value accumulates. This analysis is required
by most QC specifications.
1212
Audio Meters and Audio Monitoring Part 8 – 71
Using the Loudness Meters
When using the Loudness Meters to do a structured analysis of your mix to determine QC
adherence, a group of controls let you determine when analysis begins and ends.
Lock Metering to Transport: This setting is found in the Compound Meter option menu.
When enabled, all Loudness Metering analysis is automatically reset whenever you
move the playhead to another location in the Timeline. This is useful when you’re spot-
checking different parts of your mix, or working on a particular scene.
Pause and Reset buttons: When you’re doing a formal analysis of your mix, the Reset
button lets you reset all currently accumulated analyses, and the Start button initiates
loudness value accumulation. If you need to stop playback briefly to do something else,
you can click Pause, and then click Resume when you’re ready to continue the analysis.
Viewer
A small viewer to the left of the Monitoring panel shows the frame of video at the position of the
playhead. This is the same image that’s output to the external broadcast display of your
workstation if you have one connected.
The Viewer lets you see the picture you’re mixing to
Clicking the Expand Viewer button at the bottom right-hand corner lets you open the Viewer
into a floating window, which you can then position anywhere you want.
To close the floating Viewer, click the Dock Viewer button at the upper right-hand corner of the
floating viewer window.
Click this button at the upper right-hand corner to dock the Viewer again
1214
Signal Flow Diagrams Part 8 – 72
Signal Flow Diagrams
The diagrams in this chapter describe the audio signal flow that takes place within the Fairlight
audio processing used by DaVinci Resolve. They’re intended for people who want an in-depth
understanding of how audio is processed.
Signal Flow Overview 1215
Audio Processing Path 1216
1215
Signal Flow Diagrams Part 8 – 72
Signal Flow Overview
The following simplified flow diagram describes Fairlight audio processing overall.
EXT
Number
Bus
Max Format
SOLO
2
Stereo
MULTI TRACK
24
Mono
AUX
24
24
SUB
24
24
MAIN
8
24
BUS ASSIGGNMENT – SUB TO MAIN
BUS ASSIGGNMENT – AUX TO MAIN
INSERTS
AND
PLUGINS
AUX SENDS
CHANNEL FADER,
PAN AND MUTE
EQDYNAMICS
INTERCHANGEABLE ORDER BETWEEN
EQ, DYNAMICS AND INSERTS
MAINS
SUBS
AUX
SOLO
MAINS
SUBS
AUX
SOLO
EXT
MAINS
SUBS
AUX
SOLO
DIRECT
SOLO
MULTI TRACK
OUTPUT
CONTROL ROOM
STUDIO
METER
MAIN
BUS 1–8
SUB
BUS 1–24
AUX
BUS 1–24
MULTI-TRACK
BUS 1–24
SOLO BUS
BUS
DIRECT
BUS
DIRECT
BUS
BUS
BUS
DIRECT
SOLO
SOLO
OUTPUT
OUTPUT
OUTPUT
OUTPUT
OUTPUT
EXTERNAL INPUTS
TALKBACK INPUTS
SIDE CHAIN INPUT
CHANNEL INPUT
DISK
OUTPUT
OUTPUT
OUTPUT
TO BUSES
CMYK PMS DIELINE
11 GATEWAY COURT | PORT MELBOURNE | VIC | 3207 | AUSTRALIA | PH: (03) 9682 4770
Filename
Size
Date Artist Colours
DaVinci Resolve Signal Flow Overview
DR_14 Signal Flow Overview.ai
07/09/2017
A3 420mm(W) x 297mm(H)
CMYK
Finished Artist
Tech Writer
TranslatorCreative Director Product ManagerStudio Manager
RetoucherMarketing Manager Production Manager
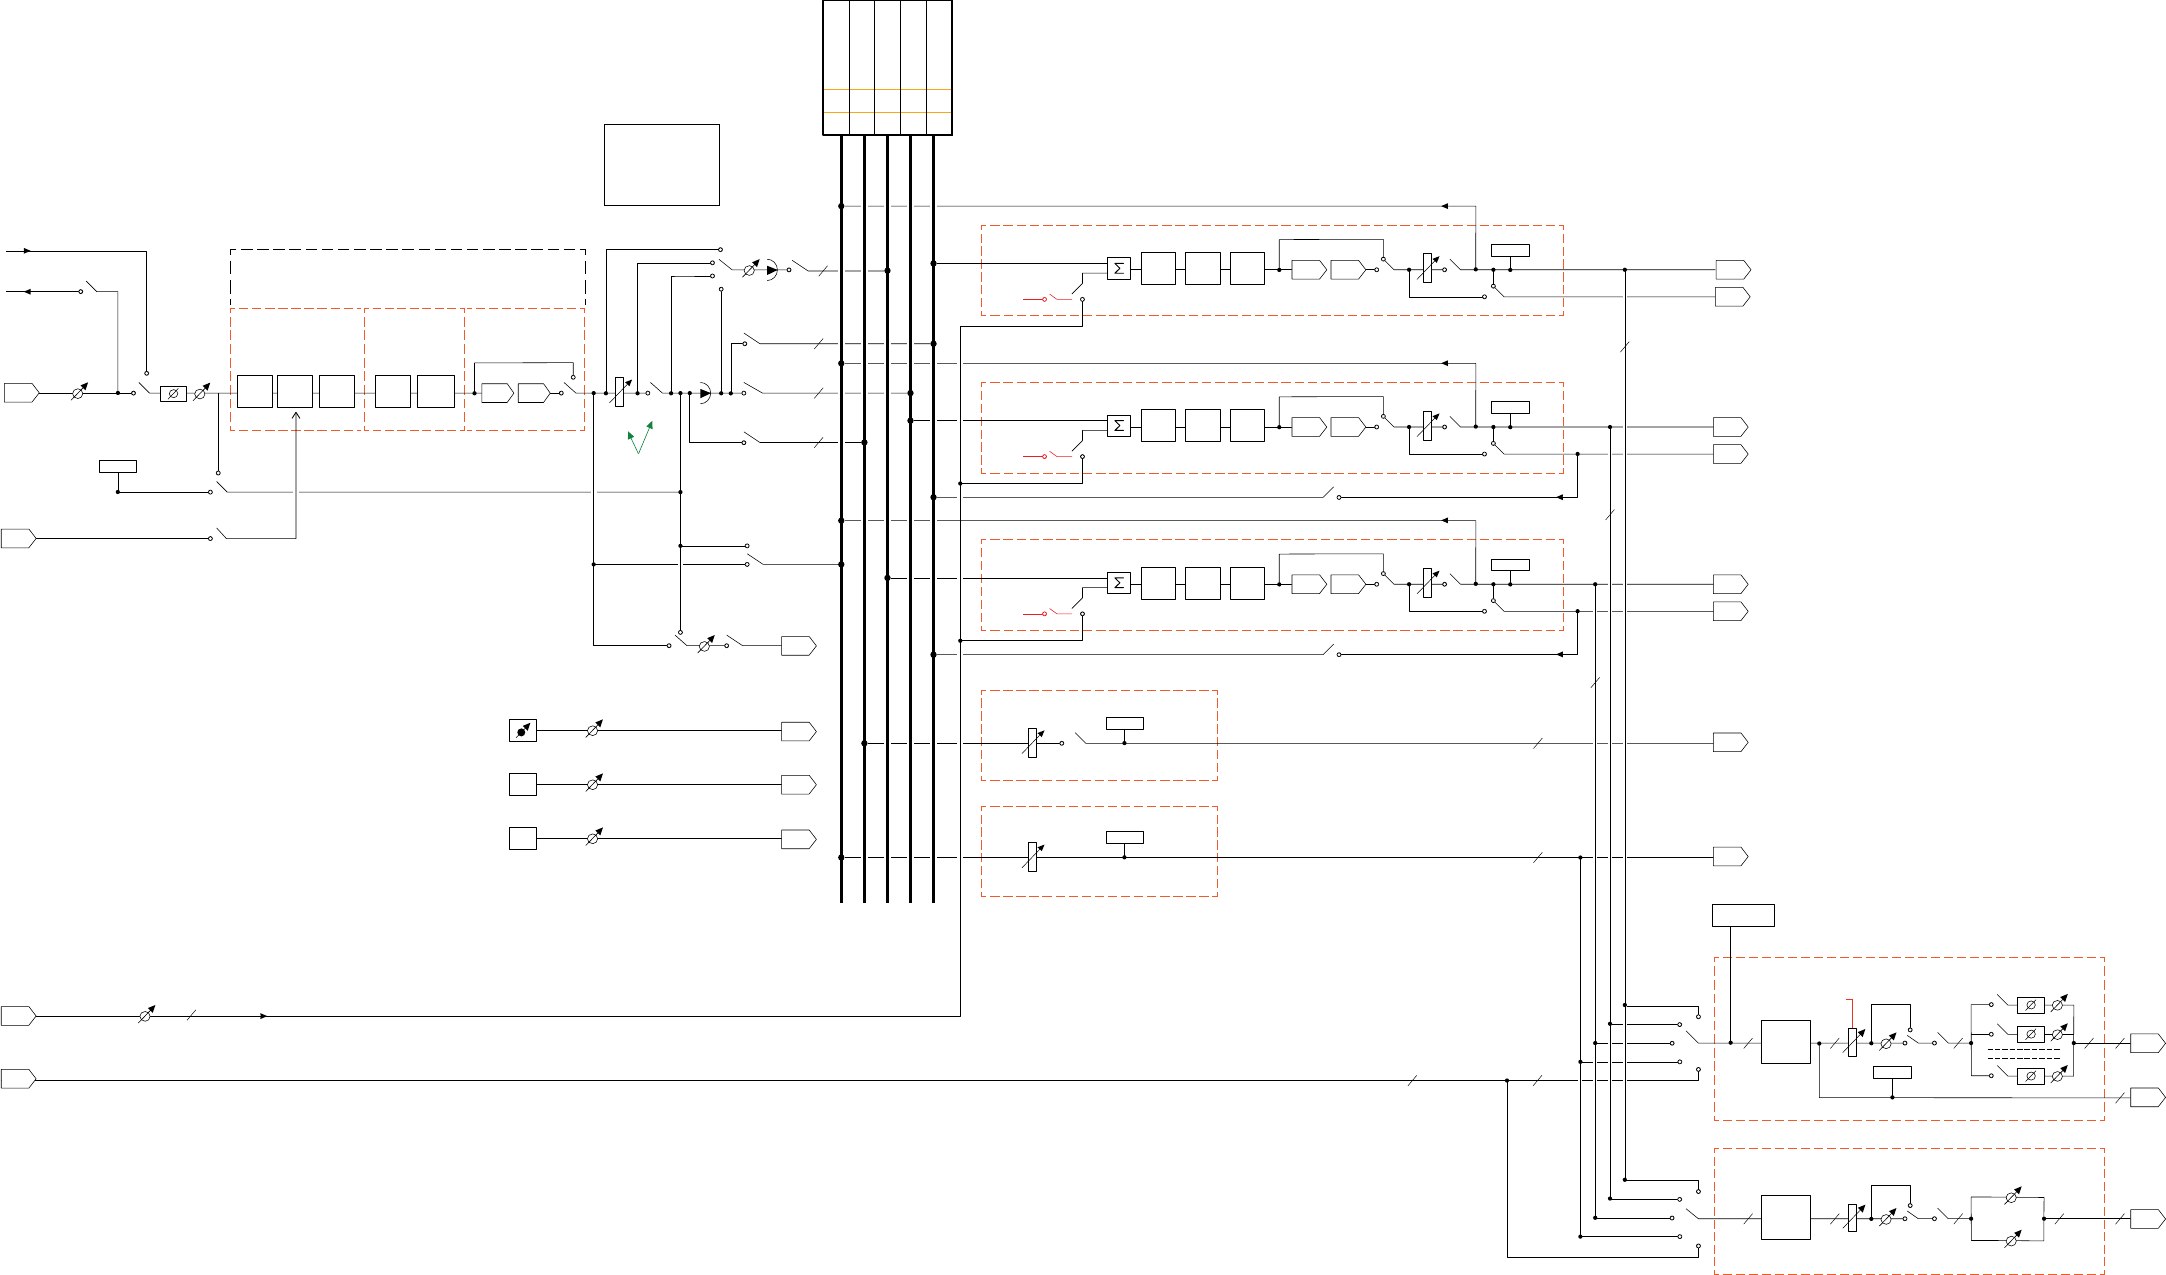
1216
Signal Flow Diagrams Part 8 – 72
Audio Processing Path
EXT
Number
Bus
Max Format
SOLO
2
Stereo
MULTI TRACK
24
Mono
AUX
24
24
SUB
24
24
MAIN
OSCILLATOR
8
8
24
24
2
1616
24
24 24
24
2
1
24 24 24
24
24
MAIN BUS 1–8
CONTROL ROOM
4
BAND
EQ
LIM
METER
INSERTS AND PLUGINS
UP TO 6 PLUGINS
SOLO
TALK
ENABLE
TALK
ENABLE
TALK
ENABLE
Post
A/B Pre
COMP
SUB BUS 1–24
4
BAND
EQ
LIM
METER
INSERTS AND PLUGINS
UP TO 6 PLUGINS
BUS ASSIGGNMENT – SUB TO MAIN
BUS ASSIGGNMENT – AUX TO MAIN
Post
A/B Pre
COMP
AUX BUS 1–24
4
BAND
EQ
FOLD
DOWN/UP
FORMAT
CHECK
LIM
METER
LOUDNESS
METER
MULTI-TRACK BUS 1–24
METER
METER
SOLO BUS
INSERTS AND PLUGINS
UP TO 6 PLUGINS
Post
A/B Pre
COMP
INSERTS AND
PLUGINS
AUX SENDS
EQ
4
BAND
EQ
2
BAND
FILTER
DYNAMICS
COMP LIMGATE
METER
UP TO 6 PLUGINS
INTERCHANGEABLE ORDER BETWEEN
EQ, DYNAMICS AND INSERTS
Post
After (Post)
Fader
VCA GROUP
1-32
AFL/PFL
Pre Fader
Pre
SOLO
SOLO
FIXED DIM MUTE
MAINS
SUBS
AUX
SOLO
MAINS
SUBS
AUX
SOLO
EXT METER
A/B
6
2
1
22 2 2
STUDIO
FOLD
DOWN/UP
FORMAT
CHECK
DIM MUTE
TO BUSES
PLAYBACK
RECORD
GAIN
RECORD GAIN
FREQUENCY
WHITE NOISE
GAIN
PINK NOISE
OSCILLATOR
DIRECT
WHITE NOISE
PINK NOISE
GAIN
FADER MUTE PAN
PAN
24
8
24
24
Aux Sends may be taken
pre or post fade,
pre or post mute,
and pre or post pan,
in any combination.
EXTERNAL INPUTS
TALKBACK INPUTS
SIDE CHAIN INPUT
CHANNEL INPUT
TO/FROM DISK BUS
DIRECT
BUS
DIRECT
BUS
DIRECT
BUS
BUS
OUTPUT
OUTPUT
OUTPUT
OUTPUT
OUTPUT
OUTPUT
OUTPUT
OUTPUT
OUTPUT
OUTPUT
OUTPUT
OUTPUT
CMYK PMS DIELINE
11 GATEWAY COURT | PORT MELBOURNE | VIC | 3207 | AUSTRALIA | PH: (03) 9682 4770
Filename
Size
Date Artist Colours
DaVinci Resolve Audio Processing Path
DR_14 Audio Processing Path-v7.ai
16/10/2017
A3 420mm(W) x 297mm(H)
CMYK
Finished Artist
Tech Writer
TranslatorCreative Director Product ManagerStudio Manager
RetoucherMarketing Manager Production Manager

PART 9
1219
Using the Deliver Page Part 9 – 73
Using the Deliver Page
Once you’ve finished grading your project, you need to either render it, or output it to tape to
deliver it to your client. This is where the Deliver page comes in. This chapter describes the
overall interface of this page, as well as providing some general information about how effects
are output from DaVinci Resolve in different situations.
The Deliver Page 1220
The Interface Toolbar 1220
Rendering Files vs. Outputting to Tape 1221
The Render Settings 1221
The Deliver Page Timeline 1222
The Viewer 1223
The Render Queue 1224
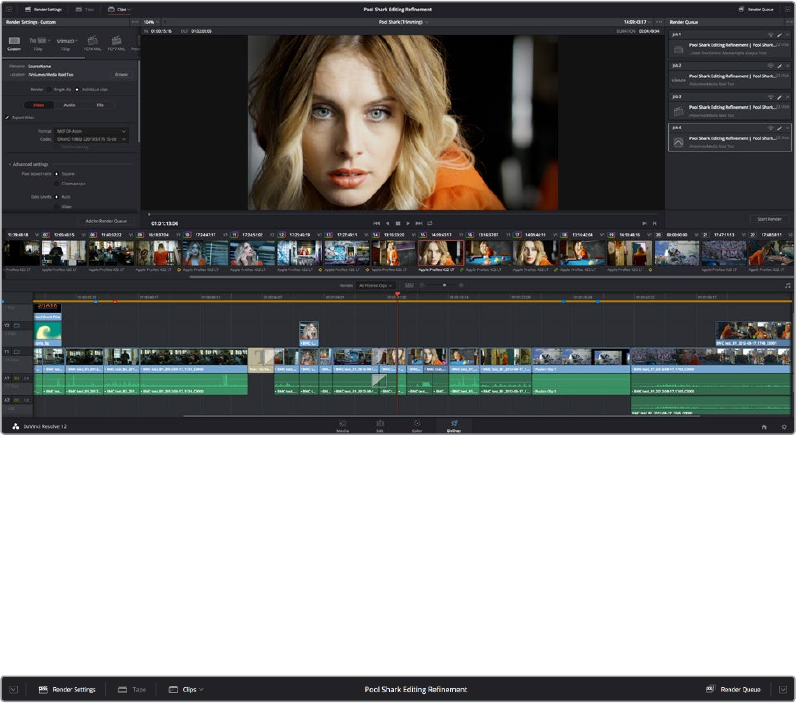
1220
Using the Deliver Page Part 9 – 73
The Deliver Page
The Deliver page is divided into five areas of functionality, each of which lets you set up a
different part of a render or output to tape.
Deliver page
The Interface Toolbar
At the very top of the Deliver page is a toolbar with buttons that let you show and hide different
parts of the user interface. These buttons are as follows, from left to right:
The Interface toolbar
Delivery full/half height button: Lets you set the Render Settings panel to take up
the full height of your display, if you need more area for browsing the various render
settings, at the expense of a narrower Timeline.
Render Settings: This panel lists all of the render settings that are available for
configuring rendering jobs in DaVinci Resolve. By default, you’re presented with a short
list, but more options are available by clicking the “more options” buttons.
Tape: Puts the Deliver page into Tape Output mode.
Clips: Hides or shows the Thumbnail timeline above the Deliver page timeline
Render Queue: A list of all jobs that you’ve set up to render in the current project.
Previously rendered jobs remain in the queue, for your reference or for you to reuse to
re-render those jobs, unless you manually delete them from the queue.
Render Queue full/half height button: Lets you set the Render Queue to take up the
full height of your display, if you need more area for listing render jobs at the expense
of a narrower Timeline.
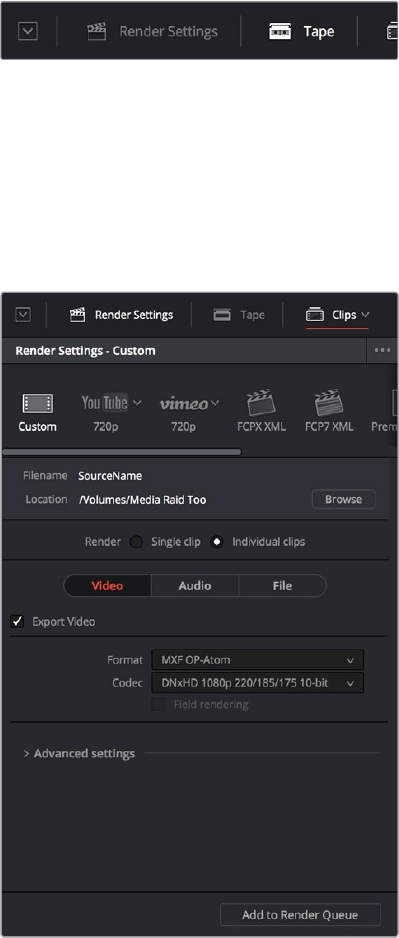
1221
Using the Deliver Page Part 9 – 73
Rendering Files vs. Outputting to Tape
Because the Deliver page does double duty, you control whether you’re rendering files or
outputting to tape using the Tape button in the Interface toolbar. Doing so replaces the controls
in the Viewer with tape controls.
Render or Edit to Tape modes
The Render Settings
The Render Settings contains the customizable settings that determine how media is rendered
out of DaVinci Resolve. If you’re using the Tape option, these settings are disabled.
Render settings
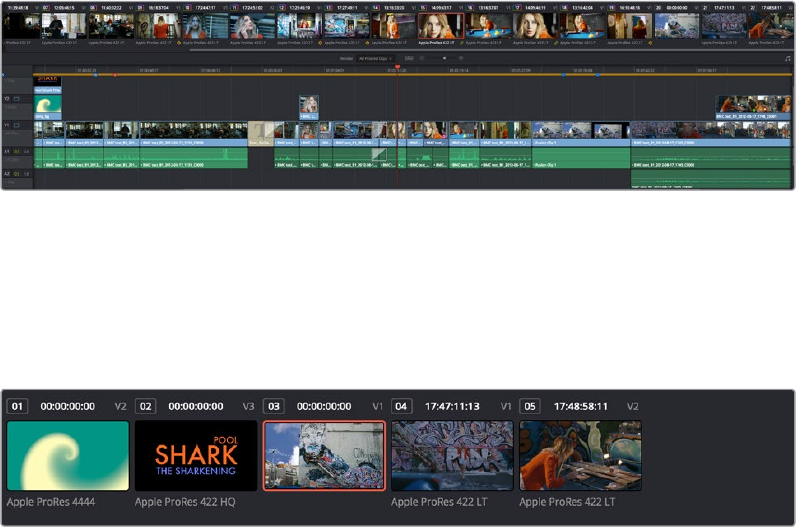
1222
Using the Deliver Page Part 9 – 73
The Render Settings are divided into four general sections:
Render Presets: At the very top, a scrollable row of icons lets you choose one of a
series of presets to quickly set up the type of render you want. The Custom option
exposes all render settings so you can set up a render manually.
Render Location: A Browse button opens a dialog that lets you choose a volume and
directory to render to.
Render Type: Two options let you either render the entire selected area of the Timeline
as a single clip suitable for reviewing or mastering, or as a series of individual clips
more suited to round-trip workflows. The option you choose here changes which
render settings are available below.
Video, Audio, and File Render Settings Panels: All other render settings are divided
among three panels.
For more information on all of these settings, see Chapter 75, “Delivering Media.”
The Deliver Page Timeline
You’ll use the Timeline in the Deliver page to define the range of clips you want to render or
output to tape, and to choose which versions for each clip you want to output. The Deliver page
Timeline consists of a Thumbnail timeline at top (that can be shown or hidden via the Clips
button) that makes it easy to select individual clips for rendering, and a more ordinary timeline
below with controls for enabling and disabling specific tracks. A Timeline toolbar lets you
choose the range of the Timeline you want to render, and has controls for zooming in and out.
The Deliver page’s Timeline and Thumbnail timeline
Filtering the Thumbnail Timeline
The Deliver page Thumbnail timeline also has the Timeline Filter pop-up, available to the right
of the Clips button in the Interface toolbar.
The Deliver page’s Thumbnail timeline matches the Color page
1223
Using the Deliver Page Part 9 – 73
Using this pop-up to filter the contents of the Timeline lets you restrict the range of media you
want to output in different ways. For example, if you’ve already rendered a timeline, but you’ve
since made some changes, you can use one of the “Modified Clips” options to display only the
clips that have changed within a particular timeframe. Another commonly used option is to
choose “Show Unrendered Clips” to isolate all clips that have not yet been rendered in
workflows where you’re only rendering a part of the Timeline at a time.
When you filter the Thumbnail timeline, you can only set up jobs to render in Individual Clips
mode. You can tell if Thumbnail filtering is enabled by an orange underline under the Clips
button in the UI toolbar.
An orange line under the Clips button
shows that filtering is enabled
The Viewer
When rendering file-based media, the Viewer shows you exactly how the media being output
will look using the current settings, and the Transport controls move the playhead throughout
the current Timeline.
Deliver Viewer
When outputting to tape, the Viewer shows you the tape output so you can set up insert or
assembly edit points, and the Transport controls move the tape in the deck if device control is
enabled. You can also put the Viewer into Cinema Viewer mode by choosing Workspace >
Viewer Mode > Cinema Viewer (Command-F), so that it fills the entire screen. This command
toggles Cinema Viewer mode on and off.
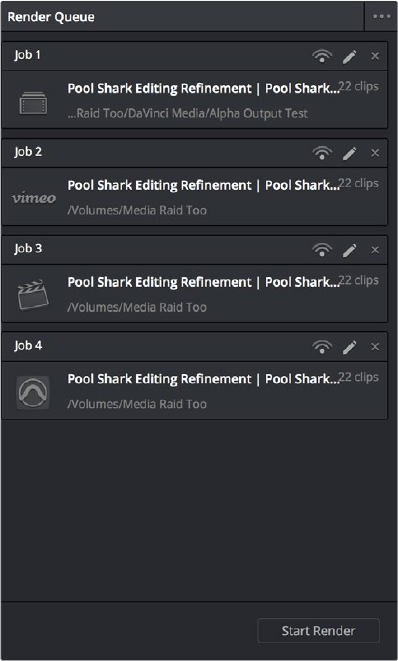
1224
Using the Deliver Page Part 9 – 73
The Render Queue
The Render Queue is a list of all the jobs you’ve queued up for delivery. Each job can have an
individualized range of clips and render settings, which you can use to render multiple sections
or clips of a timeline, the same timeline output to multiple formats, or multiple timelines.
The Render Queue displays all jobs
The Render Queue also has the option to show either just the jobs within the current project, or
jobs queued up and saved within all projects in the currently open SQL database (for the
current user) or disk database (at the currently selected disk location). This can be exceptionally
useful in situations where you’ve broken a program into multiple reels, with each reel being a
different project. This can be turned on and off via the “Show All Projects” option of the Render
Queue Option menu.
Jobs in the Render Queue can be edited (by clicking the pencil button), they can be assigned to
remote rendering workstations, and they can be deleted. Jobs that have already been rendered
can be kept in the Render Queue and re-rendered at a later time.
1226
Delivery Effects Processing Part 9 – 74
Delivery Effects Processing
Delivery Effects Processing 1227
When Rendering a Single Clip or When Outputting to Tape 1227
When Rendering Individual Source Clips for Round-Trip Workflows 1227
More About Rendering Speed Eects 1228
Determining the Rendered Output Resolution of Clips in Mixed Timelines 1229
Rendering Edit and Input Sizing Adjustments 1229
Rendering Mixed Frame Rate Timelines 1230
Export Alpha Channels 1230
1227
Delivery Effects Processing Part 9 – 74
Delivery Effects Processing
When you’re outputting to tape, how effects are rendered depends on whether you’re
rendering individual source clips or as a single clip.
When Rendering a Single Clip or When Outputting to Tape
Whether you’re rendering a QuickTime or MXF master of your project as a single clip, rendering
a DPX image sequence for film output, or outputting directly to tape, all supported compositing,
speed, and transform effects are rendered by DaVinci Resolve and “baked” into the output
media. Unsupported effects are completely ignored, cannot be seen, and have no effect on
media that’s rendered and output.
When Rendering Individual Source
Clips for Round-Trip Workflows
In workflows where you’re rendering individual media files to send a project back to an NLE or
finishing application for final finishing (adding titles and other effects before final delivery),
DaVinci Resolve handles different types of effects in different ways.
Unsupported effects do not appear in DaVinci Resolve. However, this effects data is internally
preserved, and when you export an XML or AAF file to send back to your NLE of choice, these
effects reappear, applied to the color corrected media that you rendered out of DaVinci Resolve
and sent back.
Effects that DaVinci Resolve does support such as composite modes, opacity settings, speed
effects, and transitions are handled differently. Even though these effects are visible in DaVinci
Resolve while you work, they’re not “baked” into the final media that you render in preparation
for sending back to your NLE or finishing application. Instead, the portion of each media clip
that’s used in your project is rendered as an individual file, and the XML file that you export
from DaVinci Resolve contains all of the effects information necessary to reassemble the
rendered media into a timeline that uses Final Cut Pro effects applied to DaVinci Resolve-
graded media.
1228
Delivery Effects Processing Part 9 – 74
EDL FCP 7 FCP X Premiere Pro
Media
Composer*
Color Corrections N/A N/A Rendered N/A N/A
Composite Modes N/A Sent Back Sent Back Sent Back Rendered
Alpha Channels N/A Optionally
Rendered
Optionally
Rendered
Optionally
Rendered
Optionally
Rendered
Transitions Sent Back Sent Back Sent Back Sent Back Sent Back
Opacity Settings N/A Sent Back Sent Back Sent Back Sent Back
Position, Scale, Rotation N/A Conditional Conditional Conditional Conditional
Linear Speed Effects Sent Back Sent Back Sent Back Sent Back Sent Back
Variable Speed Effects N/A Sent Back Sent Back Sent Back Sent Back
Long Duration Still Images N/A N/A N/A N/A N/A
Freeze Frames N/A N/A N/A N/A Rendered
* These effects are only sent back in AAF round trips when you’re updating an existing AAF file, rather then generating a new
AAF file.
The chart shows which effects are rendered by DaVinci Resolve, and which effects are passed back in different
round trip workflows.
After you’ve reimported your project back into your NLE or finishing application, you’re free to
readjust these effects while completing your program, without the need to re-render individual
clips in DaVinci Resolve.
More About Rendering Speed Effects
If you’re rendering a project with speed effects, you should be aware that DaVInci Resolve can
optionally render speed effects using Optical Flow processing, resulting in high-quality slow
motion and fast motion effects delivered straight out of DaVinci Resolve. If you’re satisfied with
Optical Flow processing in DaVinci Resolve, there may be no need for you to do a round-trip
export if the main reason you were doing so was to send the processing of slow motion clips to
another application for rendering, and rendering the Timeline in Single clip mode will “bake” the
speed effects in using whatever settings you’ve selected for the project, or for each clip if
you’ve selected individual Retime Process settings for different clips.
However, if you want to send unrendered speed effects to another application, rendering your
project in Individual source clips mode guarantees that the full range of each original clip of
media will be rendered, with the speed effect itself exported within the XML, AAF, or EDL file
that’s exported.
IMPORTANT: One exception to the preservation of media and effects in round-trip
workflows is that nested sequences from Final Cut Pro 7 and Media Composer are not
compatible with DaVinci Resolve; XML and AAF files containing nested sequences
cannot be imported. On the other hand, Final Cut Pro X projects containing compound
clips can be imported.

1229
Delivery Effects Processing Part 9 – 74
Determining the Rendered Output
Resolution of Clips in Mixed Timelines
Ordinarily, rendering individual source clips results in each clip being rendered at either the
project resolution or the Resolution pop-up in the Render Settings (which overrides the project
resolution), with clips that don’t match the project resolution being resized or not according to
the settings you’ve chosen in the Image Scaling panel of the Project Settings.
However, if you’re rendering dailies for projects containing clips with mixed resolutions, you can
choose to render each clip at its original resolution by turning on the “Render at source
resolution” checkbox in the Video group of controls. This option is only available in the
Intermediate and Advanced groups of Render Settings.
Rendering Edit and Input Sizing Adjustments
Whether or not sizing is rendered into your final media depends on the ”Disable edit and input
sizing” checkbox in the File options of the Deliver page.
If “Disable edit and input sizing” is turned off: Input Sizing and Edit page transform
Pan/Tilt/Zoom/Rotate adjustments are “baked” into the final rendered media using the
optical-quality sizing algorithms available to DaVinci Resolve. This is best if your sizing
adjustments are approved and final, and you want to “bake” sizing adjustments into the
final media your delivering.
If “Disable edit and input sizing” is turned on: Input Sizing and Edit page Pan/Tilt/
Zoom/Rotate adjustments are not rendered, and each clip will be rendered at its
original resolution. However, the Input and Edit sizing adjustments you’ve made will be
exported as part of the XML or AAF file that you’re exporting. This is best for workflows
where the editor wants to continue adjusting sizing after you’ve handed off the graded
project relative to the original size of the clips.
Keep in mind that if you want to render Input Sizing adjustments into the media you’re
outputting, the “Force sizing to highest quality” checkbox guarantees that DaVinci Resolve will
use the highest-quality sizing setting, even if you’ve temporarily chosen a faster-processing
option for a slower computer.
NOTE: DaVinci Resolve adds three frame handles to clips with speed changes applied
to them, and to rendered clips that don’t match the project’s frame rate. This is done to
facilitate reconform in NLEs that require handles beyond the actual length of each of
these clips.
1230
Delivery Effects Processing Part 9 – 74
Rendering Mixed Frame Rate Timelines
Mixed frame rates are supported by DaVinci Resolve when any option other then none is
selected in the “Mixed Frame Rate format” pop-up menu, either in the Conform Options section
of the General Options panel of the Project Settings, or in the Import AAF or XML dialog. When
you choose the appropriate option that corresponds to the application you’re exchanging
projects with (or DaVinci Resolve if you’re working entirely within DaVinci Resolve), then DaVinci
Resolve conforms and processes all clips in the Timeline to play at whichever frame rate is
selected in the “Timeline frame rate” pop-up menu. For example, 23.98, 29.97, 30, 50, 59.94
and 60 fps clips will all play at 24 fps if that’s what “Timeline frame rate” is set to in the Master
Settings panel of the Project Settings.
How clips in mixed framerate timelines are rendered out depends on whether the Render
Settings are set to render Individual source clips or a Single clip.
Individual source clips: All clips are rendered individually at their original frame rate.
Single clip: All clips are converted to the “Timecode calculated at” frame rate and
rendered as a single media file. Clips are converted using whatever method is selected
in the Retime process pop-up of the Master Settings panel of the Project Settings, or
in the individual Retime process setting found in the Video inspector of each clip that
overrides the project-wide setting. You can choose Optical Flow processing for the
highest quality conversion that’s available in DaVinci Resolve.
Export Alpha Channels
Starting in version 12.5, you have the option to turn on the Export Alpha checkbox in the Video
panel of the render settings whenever you render individual source clips. When you do so,
DaVinci Resolve renders clips with alpha channels in either of two cases:
Whenever there is an alpha channel embedded in the source media for that clip, the
embedded alpha channel will be copied to the rendered version of that clip.
Whenever a clip’s grade has a key connected to an alpha output, the alpha output will
be rendered as an alpha channel for that clip.
In either case, you may only render alpha channels out when you render individual source clips
to an RGBA format such as OpenEXR, ProRes 4444, ProRes 4444 XQ, or DNxHR 444.
1232
Rendering Media Part 9 – 75
Rendering Media
This section describes the options that are available for file-based delivery. The workflow is
simple; you define the format and other settings that dictate how the media is to be rendered,
define a range of clips in the currently selected session, and then add a job containing these
settings to the Render Queue.
You can queue up as many different render jobs as you like, each with different formats, output
options, and ranges of clips, depending on what you’re trying to accomplish. When you’re ready
to render, simply click the Start Render button.
Using Presets for Fast Rendering 1233
Choosing a Location To Render 1235
Single Clip vs. Individual Clips 1235
All Other Render Settings for Output 1236
Video Panel 1236
Audio Panel 1240
File 1240
Additional Outputs 1243
How to Avoid Overwriting Clips When Rendering Output Media 1244
Defining a Range of Clips and Versions to Render 1244
Choosing Which Versions to Render For Each Clip 1245
Using the Render Queue 1246
Rendering Jobs from Multiple Projects at Once 1248
Remote Rendering 1249
Sharing Storage 1249
Setting Up and Using Remote Rendering 1249
When You’re Finished Remote Rendering 1250
Setting Up a “Headless” Remote Rendering Workstation 1250

1233
Rendering Media Part 9 – 75
Using Presets for Fast Rendering
The very top of the Render Settings list has a set of presets for many of the most common
rendering workflows you’ll need to accomplish.
Render Presets selection
Custom
Nothing is automatically selected, all options are available. You must manually choose the
settings and options you need. All Render settings are saved on a per-project basis.
YouTube 720p
Selects the appropriate settings for exporting your program as a QuickTime H.264-encoded
file suitable for uploading to Vimeo, YouTube, and many other video file sharing services.
Renders a single clip, and sets the Video Format to QuickTime, the Codec to H.264, sets the
video data rate to 10,000 Kb/s, the Audio Codec to AAC, and the audio data rate to 320 Kb/s.
The Resolution is set to 1280 x 720.
Vimeo 720p
Selects the appropriate settings for exporting your program as a QuickTime H.264-encoded
file suitable for uploading to Vimeo, YouTube, and many other video file sharing services.
Renders a single clip, and sets the Video Format to QuickTime, the Codec to H.264, sets the
video data rate to 10,000 Kb/s, the Audio Codec to AAC, and the audio data rate to 320 Kb/s.
The Resolution is set to 1280 x 720.
Final Cut Pro X XML
Selects the appropriate settings for projects that were sent from Final Cut Pro X to DaVinci
Resolve using XML. This is meant for situations when you’re rendering media intended for a
return trip to Final Cut Pro (by exporting an XML file from the Edit page). Renders Individual
Clips, the “Render to” setting on Mac OS X, defaults to Apple ProRes 422 (HQ), Output Size
defaults to the current Timeline Resolution (as set in the Master Settings panel of the Project
Settings), and Use Unique Filenames is turned on. When you choose this preset, an XML of the
rendered timeline is automatically exported along with the media.
Final Cut Pro 7 XML
Selects the appropriate settings for projects that were sent from Final Cut Pro 7 to DaVinci
Resolve using XML. This is meant for situations when you’re rendering media intended for a
return trip to Final Cut Pro (by exporting an XML file from the Edit page). Renders Individual
Clips, the “Render to” setting on Mac OS X, defaults to Apple ProRes 422 (HQ), Output Size
defaults to the current Timeline Resolution (as set in the Master Settings panel of the Project
Settings), and Use Unique Filenames is turned on. When you choose this preset, an XML of the
rendered timeline is automatically exported along with the media.
1234
Rendering Media Part 9 – 75
Premiere XML
Selects the appropriate settings for projects that were sent from Premiere Pro to DaVinci
Resolve using XML. This is meant for situations when you’re rendering media intended for a
return trip to Premiere Pro. Renders Individual Clips, the “Render to” setting on Mac OS X,
defaults to Apple ProRes 422 (HQ), Output Size defaults to the current Timeline Resolution (as
set in the Master Settings panel of the Project Settings), and Use Unique Filenames is turned
on. When you choose this preset, an XML of the rendered timeline is automatically exported
along with the media.
Avid AAF
Selects the appropriate settings for projects that were sent from Avid Media Composer or
Symphony to DaVinci Resolve using AAF. This is meant for situations when you’re rendering
media intended for a return trip to Media Composer or Symphony (by exporting an AAF file from
the Edit page). “Rendering clips in” is set to Source, the “Render to” setting defaults to DNxHD
1080p 220/185/175 10 bit, Output Size defaults to the current Timeline Resolution (as set in the
Master Settings panel of the Project Settings), and Render Clip with Unique Filename is turned
on. When you choose this preset, an AAF of the rendered timeline is automatically exported
along with the media.
Pro Tools
Selects the appropriate settings for exporting (a) a flattened MXF Op-atom reference movie, (b)
each of the individual audio clips used in that timeline along with all audio channels in every clip
(regardless of which channels may be muted in DaVinci Resolve), and (c) an AAF of the audio
portion of the current timeline that’s formatted for import into Pro Tools, or any other digital
audio workstation (DAW) software that’s compatible with AAF import. Additionally, each audio
track exports whatever custom name you may have given it, for use by Pro Tools.
Audio Only
Disables video rendering, and defaults to QuickTime using Linear PCM, with a single channel,
16-bit output, and a single track of audio on output.
Creating and Using Your Own Presets
If there is a particular group of settings that you find yourself using repeatedly, you can turn it
into a custom Easy Setup, for easy recall.
To create a new Easy Setup:
1 If you want to start from scratch, make sure to choose Custom from the preset panel to
unlock every setting in the Render Settings pane.
2 Choose the particular settings you require in the Video, Audio, and File panels for your
new preset.
3 Open the Render Settings Options menu, and choose Save as New Preset.
4 Type a name into the “Render Preset” dialog, and click Save. The new preset now
appears in the Preset panel.
To load a preset:
Click any preset. Every setting in the Render Settings pane updates to reflect the
preset you selected.
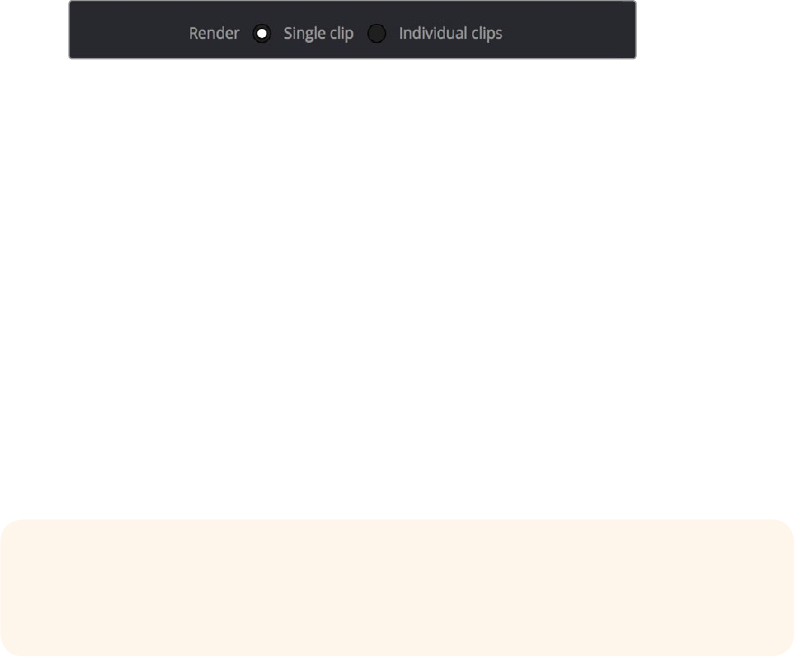
1235
Rendering Media Part 9 – 75
To change a custom preset that you’ve created
Click a preset you want to change, make whatever changes you need to in the Video,
Audio, and File panels, then click the Render Settings Option menu, and choose
Update Current Preset.
To delete a custom preset that you’ve created:
Click a preset you want to delete, then click the Render Settings Option menu, and
choose Delete Current Preset.
Choosing a Location To Render
The first decision you have to make when rendering your output is where it’s going to be
rendered. Accordingly, this is the first set of controls appearing at the top of the Render
Settingsparameters.
Filename: A preview of what the file name will be based on the settings found in the
File panel described later. The Custom/Timeline name and File suffix fields, as well as
the Use x digits in the filename settings all determine what name appears here.
Location: Click the Browse button to choose a directory in which to write the media
being output by DaVinci Resolve. After you’ve selected a directory, the path name
appears in the “Render job to” field.
Single Clip vs. Individual Clips
While there are numerous options available in the Render Settings of the Deliver page, there
are basically two overarching ways you can render your project, depending on which of the
“Render” radio buttons you click in the Output group.
Render a single clip or individual clips
Single clip
When you select the Single clip option in the Output parameters, you’re setting up a render
wherein all clips in the session are output together, as a single media file in whatever format you
choose. This means you’ll be rendering the selected range of the session to a single MXF or
QuickTime file, or as a single collection of image sequences.
Timecode: The timecode that’s written out is dictated by the “Start timeline timecode
at” setting. Media files contain a continuous timecode track, while image sequences
have timecode written into each frame’s data header, and integrated into the file name
(as a frame count).
Frame Rate: If you’re rendering a project that uses mixed frame rates, rendering to a
single clip converts every clip in the entire session to the project frame rate.
Effects: Most effects are “baked into” the rendered output when you render a
single clip.
IMPORTANT: Whenever clip filtering is enabled (via the pop-up menu to the right of
the Clips button), Single Clip rendering cannot be selected. You can see if clip filtering
is enabled by an orange line underneath the Clips button in the UI toolbar.
1236
Rendering Media Part 9 – 75
Individual clips
Selecting the Individual clips option sets up a render where each clip is rendered as an
individual media file in whichever format you choose. The result will be a collection of as many
media files as there are clips in the range you’ve selected to render.
Timecode: The timecode written to each clip is cloned from the original source
media, making it easy to reconform media for projects being passed between
DaVinciResolve and NLEs.
Frame Rate: If you’re rendering a project that uses mixed frame rates, rendering to
source renders each clip at its own individual frame rate, to accommodate round-trip
workflows.
All Other Render Settings for Output
This section covers the different render settings that are available for customizing your output.
Depending on which Render Setting mode you chose, some of these may be hidden, but this
section covers the full list found in the Advanced panel of controls.
If you choose one of the Easy Setups, then some of these settings will be locked, and others
will be editable, depending on the requirements of that setup. If none of the Easy Setups is
suitable for the task at hand, you can leave the Easy Setup pop-up menu set to none, and
manually choose the necessary settings for the task at hand.
Video Panel
This panel contains all video-oriented parameters.
Export Video: Turn this checkbox on to render the source video. Turn this checkbox off
if you want to render the source audio all by itself; this disables all video controls, and
shows an Audio Format pop-up menu in the audio section of settings.
Format: A pop-up menu that gives access to the container formats that are currently
available on your system. The available options depend on whether you have Final
Cut Pro and QuickTime installed, and on the operating system you’re using. This list is
constantly growing, as new file formats are added over time, so be sure to check each
new version for the latest supported formats.
AVI: A deprecated file-based media format that remains popular with Windows
applications, which can deliver using the Cineform and Uncompressed codecs.
Cineon: An older uncompressed image sequence format developed by Kodak,
designed for film scanning and digital mastering, which delivers RGB 10-bit.
DPX: An uncompressed image sequence format favored by the film industry for
mastering and delivery for DCDM mastering, which can be delivered as RGB 10-, 12-,
16-bit integer and half float, or RGBA 8-bit.
EXR: The OpenEXR format is a high-dynamic-range image sequence format developed
by ILM for applications requiring high quality and multiple channels. Used for outputting
ACES and HDR deliverables. When choosing the RGB half (DWAA) or (DWAB)
compression codecs, an additional “Compression level” setting appears that lets you
choose how much compression to apply.
easyDCP: An option that allows you to master a DCP or IMF directly from DaVinci
Resolve in conjunction when you have an installed license of Fraunhofer’s EasyDCP
software.

1237
Rendering Media Part 9 – 75
JPEG 2000: A high-quality compressed image sequence format used for DCP
encoding with a variety of 2K and 4K codec options.
MXF OP–Atom: A simple standard for the Material eXchange Format, a file-based
media format, that’s often used when delivering DNxHD. This version conforms to the
SMPTE 390M standard, and can deliver using the DNxHD, DNxHR, NTSC and PAL Avid,
RGB Avid 10-bit, and XDCAM MPEG2 codec options.
MXF OP1A: A version of the Material eXchange Format that conforms to the SMPTE
378M standard, and can deliver using the 1080i Avid 8-bit, DNxHD, DNxHR, NTSC and
PAL Avid, RGB Avid 10-bit, Sony MPEG4 422 and 444, and Sony AVC Intra CBG and
VBR, and XDCAM MPEG2 codec options.
QuickTime: Apple’s file-based media format, used when delivering Apple ProRes,
Cineform RGB 16-bit and YUV 10-bit, DNxHD or DNxHR wrapped in QuickTime,
Uncompressed, H.264 (single or multi-pass), and VP9 at 8-, 10-, and 12-bits.
TIFF: “Tagged Image File Format,” an image sequence format compatible with many
desktop video applications on many platforms and is also used when delivering for
DCDM mastering.
Codec: A pop-up menu that lets you choose from a selection of codecs that are
available to the format you’ve selected above. Different codec options may also
present different bit depth and color space combinations, as well.
Quality: If the currently selected option in the Render to pop-up menu has options for
changing the compression quality, this pop-up menu lets you choose the quality you
want to use. Otherwise, it’s disabled.
Restrict to X Kb/s: (Available for QuickTime H.264) You can choose automatic, or select
a maximum data rate with which to export H.264.
Passes: (Available for QuickTime H.264) You can choose between Single and Multiple
pass encoding. If you choose Multiple pass, the number of passes performed is
automatic.
Key Frames: (Available for QuickTime H.264) You can choose automatic, or select a
duration for manual keyframe insertion.
Frame Reordering: (Available for QuickTime H.264) On by default, Frame Reordering
enables the encoding of B frames to improve the quality of the resulting compressed
movie file. Turning off Frame Reordering will speed encoding performance at the
expense of visual quality.
Field rendering: If you’re processing interlaced source material, this checkbox sets
DaVinci Resolve to render each field individually before reintegrating them back into
a single frame, in order to process clips most accurately with filtering operations that
would otherwise violate field boundaries and cause problems. If you’re not rendering
interlaced media, you should leave this checkbox turned off, as it is more processing
intensive.
Network Optimization: Optimizes the resulting rendered media file so when it’s
downloaded over a network, the portion of the file that’s been downloaded so far can
be played before the entire file is finished downloading.
NOTE: If you choose QuickTime as the Video Format, and H.264 or VP9 as
the codec, additional options appear underneath Compression Quality, below.
1238
Rendering Media Part 9 – 75
Render at Source Resolution: (When rendering Individual Clips) This checkbox lets you
render each clip at the same resolution as its source media file, letting you preserve
mixed frame sizes for final delivery.
Resolution: The output resolution for rendering. This setting defaults to the current
resolution of the project as set in the Master Settings panel of the Project Settings,
modified by whatever transforms are applied in the Sizing palette in Output mode.
However you can change the resolution here if you need to output at a different
resolution. Using this setting, you can queue up different render jobs at different
resolutions, in order to output both HD and SD resolution media in the same render
session, for example. Some file formats require specific resolutions, in which case the
Output Size settings will be automatically set to the necessary resolution.
Frame rate: (When rendering Single Clip) This setting is typically identical to the
“Timecode calculated at” frame rate in the Master Settings panel of the Project
Settings. However, you may wish to set this to a variation of the current conformed rate,
for example choosing from between 23.98 or 24 fps. Doing so will adjust the metadata
written within the file, which is used to aid playback for the range of systems available
worldwide.
3:2 Pulldown Insertion Options: Starting with DaVinci Resolve Studio 12.5, you have
the option of outputting either 29.97 or 30 fps media with 3:2 pulldown insertion if your
project’s playback frame rate is either 23.98 or 24 fps. To output 29.97 media, the
project must be 23.98 fps; simply choose (23.976 3:2) from the Frame rate pop-up.
Projects with 24 fps frame rates can only be output at 30 fps.
Export Alpha: (When rendering Individual Clips) Turning this checkbox on results in
alpha channels found in each clip’s source media file being output to each delivered
clip, as well as alpha information that you’re creating in DaVinci Resolve and inserting
into that clip via the Alpha Output of the Color page Node Editor being output to each
delivered clip.
Render Stereoscopic 3D: (Only appears if there are stereo clips in a timeline) Three
options let you choose how to render stereoscopic timelines, rendering just one eye’s
worth of media at a time, or rendering a single set of stereo media in one of four ways,
depending on the option you choose from the “Both eyes as” pop-up menu.
Left eye: Lets you render only the left-eye media from a stereo timeline.
Right eye: Lets you render only the right-eye media from a stereo timeline.
Both eyes as: Lets you select from four ways of rendering the left and right eyes of
stereo media as a single set of media files. “Separate files” lets you output both the left-
eye and right-eye media as individual media files, all at once. Side-by-side, Line-by-
Line, and Top-Bottom let you output Frame- Compatible media that can be output to
stereo-capable displays. Anaglyph lets you output a traditional anaglyph red/cyan
stereo image for viewing on any display using red/cyan glasses.
An advanced settings disclosure button hides the following additional controls, by default.
Pixel aspect ratio: Lets you override the Project Settings and change the PAR of the
rendered output to either Square or Cinemascope.
Data levels: Defaults to “Auto,” which simply renders all clips with the data level
appropriate to the currently selected codec in the “Render to” pop-up menu, which is
usually the preferred behavior. Choosing one of the other options (“Video” or “Full”)
outputs all clips using the selected data range. For more information, see Chapter 6,
“Data Levels, Color Management, ACES, and HDR.
1239
Rendering Media Part 9 – 75
Data burn-in: A pop-up menu that defaults to “Same as Project,” which leaves the
current Data Burn In palette settings enabled while rendering, inserting a window burn
into the media being output. Choosing “None” disables window burns while rendering.
Note that when rendering as Individual Source Clips, individual clip burn in presets can
be assigned if they’ve been created in the Data Burn In palette.
Use optimized media: When this checkbox is turned on, DaVinci Resolve will use
optimized media, when available, to do the final render, to save time. If your media has
been optimized to the same format as the one you’re outputting to (or better), this is
convenient. However, if you’ve optimized to a lower quality format than what you’re
outputting to, you should turn this checkbox off to force DaVinci Resolve to process all
clips using the original media, guaranteeing the best quality available.
Use render cached images: When this checkbox is turned on, DaVinci Resolve will
write media from the cache to the files being output to save time. If you’re caching
using the same media format you’re outputting to (or better), this can be convenient.
However, if you’re caching in a lower-quality format than the one you’re outputting to,
you’ll want to turn this checkbox off to force DaVinci Resolve to process all media as it’s
being rendered, writing at the maximum quality you’re outputting to.
Enable flat pass: Three options let you choose whether or not to render each clip with
its grade applied.
Off: DaVinci Resolve always applies each clip’s grade when rendering.
With clip settings: For each version of a clip, the system will check that version’s pass
flat flag. If it’s turned on, the system disables color correction for that version of the clip.
Otherwise, that version will be rendered with its grade intact. Versions can be
individually flagged by right-clicking a clip’s thumbnail in the Timeline, choosing the
submenu of the version you want to flag, and choosing Enable Flat Pass.
Always On: When checked, DaVinci Resolve disables the grade of every clip
being rendered.
Disable edit and input sizing: When turned off, Input Sizing Pan, Tilt, Zoom, and Rotate
adjustments are “baked” into the output. When turned on, all Input Sizing adjustments
are disabled, except output to XML or AAF files that are round-tripped back to an NLE.
Force sizing to highest quality: If you’ve been working with the “When resizing and
scaling:” option set to Bilinear to improve performance when working on slower
workstations, turning this checkbox on automatically renders all clips using the “Uses
Sharper filter” setting of the Image Scaling panel in the Project Settings. For more
information, see Chapter 3, “Project Settings and Preferences.”
Force debayer res to highest quality: When rendering camera raw media formats
that allow variable quality debayering, it’s common to lower the debayering quality to
improve real time performance while grading. Turning this checkbox on guarantees
that media will always be rendered at the highest available quality, saving you
from forgetting to manually change the debayer setting back when setting up a
render at 3am.
Add frame handles: (When rendering Individual Clips) Lets you specify front and
rear handles to be output in frames. This is particularly useful in round trips, when
the finishing editor might want additional handles with which to roll edit points or add
transitions while fine-tuning the graded edit.
1240
Rendering Media Part 9 – 75
Audio Panel
This panel contains all audio-oriented parameters.
Export audio: Turn this checkbox on to render the source audio, or audio that
you’ve synchronized in DaVinci Resolve, along with the media being output by
DaVinci Resolve.
Audio Format: This option only appears if you turn the Export Video checkbox off in
the Video panel. You can choose which format of audio you want to render. Depending
on which format you choose, different audio options will appear below.
MXF OP-Atom: Generates media files that conform to the SMPTE 390M format of MXF
media for file exchange.
QuickTime: Exposes all available formats of audio compatible with QuickTime.
WAVE: Generates media in the WAVE format.
Codec: Lets you choose between Linear PCM (the default) and AAC audio. AAC audio
encoding is only available on Mac OS X.
Quality: (Available for AAC encoding) Five settings you trade between speed and
quality when encoding AAC audio.
Data Rate: (Available for AAC encoding) Lets you choose the maximum data rate for
AAC encoding.
Bit Depth: Lets you specify the bit depth at which to output the source audio.
Render one track per channel checkbox: If you’re exporting a single track, this
checkbox lets you specify whether you want to export each channel as an individual
track in the structure of the exported file.
Output Track #: This pop-up menu lets you choose which Main or Submix you want
to output. A Plus button to the right lets you add additional tracks you want to export
in this job, so if you want to export multiple Mains or multiple Subs, you can add more
Track pop-ups.
When you choose a track with multiple channels of audio, a field appears showing how
many channels will be output; you have the option of using a virtual slider to change
how many channels are output.
File
This panel contains all other parameters.
Filename Uses: Three options let you automatically name the media file(s) that are
output automatically.
Use Custom Filename: Lets you enter your own name in the Custom name/File
prefix field.
Use Timeline Name: (When rendering a Single Clip) When this option is selected, the
name of the Timeline is used.
Use Source Filename: (When rendering Individual Clips) When this option is selected,
the filename of each clip’s corresponding source media file is cloned, and used as the
filename of media being output by DaVinci Resolve. This is preferred when you’re
generating offline media for use by an editor that you later want to reconform to the
originating DaVinci Resolve project. When this checkbox is turned off, you can
customize filenames using the other options in this section of settings.
1241
Rendering Media Part 9 – 75
Custom name: Lets you add custom text to the beginning of the name of all rendered
files. If you’re not using the source filename, and not rendering to a file format that uses
timecode, you can enter a filename here. When editing the Custom Name or File Prefix
(or File Suffix), you can use “metadata variables” that you can add as graphical tags
that let you display clip metadata. This is especially useful when rendering Individual
Source Clips. For example, you could add the corresponding metadata variable tags
%scene_%shot_%take and the File Prefix would be written as “12_A_3” if “scene 12,”
“shot A,” “take 3” were in the source clip’s metadata. For more information on the use
of variables, as well as a list of all variables that are available in DaVinci Resolve, see
Chapter 81, “Using Variables and Keywords.”
File suffix: Lets you add custom text and/or metadata variables (described previously)
to the end of all rendered files.
Use unique filenames: (When rendering Individual Clips) When enabled, additional
characters are added to every rendered media file to guarantee that each rendered
media file has a completely independent name. This prevents multiple rendered clips
from the same source media file from overwriting one another when saved to the same
directory. “Uniquely” named clips append the clip name with the track and clip number
identifying a clip’s position in the currently selected session. For example, a clip that’s
linked to a media file named “DropThatThingCU.mov,” and edited as the twenty-fifth
clip on track V2, will be named “DropThatThingCU_V2-0025.mov” when rendered.
When enabled, two other options are revealed.
Use unique filename prefix/Use unique filename suffix: (When Use Unique Filenames
is on) Radio buttons let you choose whether to add the unique identifier at the
beginning or end of a clip. Choosing Prefix would result in “V2-0025 _
DropThatThingCU.mov,” whereas choosing Suffix would result in “DropThatThingCU_
V2-0025.mov” when rendered.
Add source frame count to filename: (When Use Unique Filenames is on) Adds the
number of frames in the source to the unique filename being created.
Use filename digits: Lets you specify how many digits to use when rendering an image
sequence, although the specified digits will also be used for any media format. This is
particularly useful if you’re outputting media to be used by an application that has strict
requirements for image sequence numbering. Defaults to 8 digits.
Each clips starts at frame: (When rendering Individual Clips) This permits timecode to
be written to the header, and frame count to be written to the filename of of the image
sequences, which is ideal for VFX workflows.
Start timeline timecode at: (When rendering Single Clip) This option is only available
when rendering clips in Single clip order. Specifies the timecode that will be written to
the media being output by DaVinci Resolve. For DPX files, timecode is written into the
header data, and is simultaneously converted to a frame count that’s inserted into the
filename of each frame file, which provides a logical count of the frame numbers. For
other media formats, timecode is written to the appropriate metadata container. You
may find it useful to use custom start times, for example starting each reel of a project
at a particular value, depending on the standards employed at your shop.
Place clips in separate folders: (When rendering Individual Clips) Useful if you need to
preserve the filenames of files you’re outputting when the filenames of clips coming
from the same source media file may cause them to overwrite one another. This option
is also commonly used when rendering VFX shots for additional postproduction
work, allowing the VFX department to identify clips quickly and distribute the work
accordingly.
1242
Rendering Media Part 9 – 75
Preserve Source directory levels: (When rendering Individual Clips) Retains a user-
specified depth of the original directory structure used by a clip’s corresponding source
media file, recreating it when rendering new files for output. The number you select
determines how many levels of subdirectories DaVinci Resolve will automatically create
within the currently specified “Render job to” directory to match the path used by the
source files. Defaults to 0, which creates no matching subdirectories.
After Head/From Tail: When setting how many directory levels of each clip’s file path to
preserve (using the “Preserve x levels” parameter), click one of these buttons to specify
whether that number of path levels is defined relative to the head or the tail of each
media file path.
Preserved Path: Shows you a preview of the preserved path you’ve set up so you
know you’ve gotten it right.
File Subfolder: (Only appears in Additional Output panels) Lets you specify a
subdirectory into which to render the media files being output. If the specified
subdirectory doesn’t exist, a new one with that name will be created within the
currently specified “Render job to” directory.
Use commercial workflow: (When rendering Individual Clips) Automatically renders
every version that’s applied to each clip in the session, except for versions that have
been flagged using the “Render Disabled” flag, found in the Version submenu for each
clip in the Timeline. This option is typically used when you’ve graded multiple versions
of a clip to be used for VFX work, and you want to deliver each grade as a separate
media file. This is also used when rendering programs for commercial broadcast where
you have two or more versions of a grade for each scene. When using this option,
alternate methods of outputting each rendered media file are used, and four additional
settings are revealed.
Alternative pass offset: Lets you separate the timecode values written into each
version of a clip with an offset. For example, if the default version timecode is
01:00:20:00, and you select a 10 minute offset in the Alternative Pass Offset timecode
entry, then the second graded version of that clip will start at 01:10:20:00, the third
version will start at 01:20:20:00, and so on until every version is rendered. You can
offset the clips by whatever value you like, but the idea is to make it easy for editors
and VFX artists to find the versions of each grade. If the clips are shared with a finishing
artist, and they know that each alternate pass is 10 minutes apart, then it’s easy for the
finisher to change the clip version just by adding 10 minutes to the referenced
timecode. To simplify the workflow further, you can put separate source reels in
separate folders using the next three options.
Place reels in separate folders: Automatically places all media that’s output using a
particular reel name into corresponding folders.
Place clips in separate folders: Automatically places alternate grades of clips into
separate folders.
Use version name for folders: Labels each folder with the name of the version when
using the Commercial Workflow option.
Render speed: A pop-up menu lets you throttle the speed at which media is rendered.
Ordinarily you’ll leave this set to the default of Maximum. However, some storage
systems that are shared by multiple rooms in a facility use storage area networks
(SANs) with insufficient bandwidth for multiple real-time image streams. DaVinci
Resolve’s incredibly fast rendering speeds can cause playback problems with other
users accessing the SAN if available bandwidth is insufficient. In this case, you can
throttle the render speed to limit SAN bandwidth usage to between 1 to 50 percent of
full rendering speed
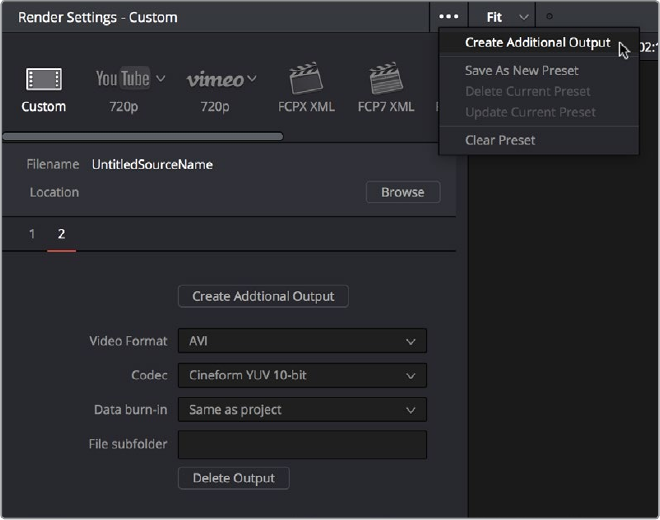
1243
Rendering Media Part 9 – 75
Disk space currently used: Shows the amount of disk space available on the
target volume.
Disk space used after render: Shows the new disk usage based on the specified
range of the current session that you’re rendering.
Additional Outputs
Each job you create in the Render Settings defaults to a single output. However, you can create
multiple outputs when you need to deliver multiple versions of media, with individual Video
Formats and Codecs and different Data burn-in settings, to be rendered into individually named
subfolders (optional).
This can be useful for setting up multiple rendered passes when your client requires two sets of
media, for example QuickTime ProRes 422 (HQ) media along with MXF DNxHD media. This is
also useful when you need to output two sets of media where one has window burns, and the
other is clean.
To add additional Outputs in the Render Settings:
Choose Create Additional Output from the Render Settings Option menu. A row of numbers
below the Filename and Location controls let you open each output you create and adjust its
settings. You can have as many outputs as you require.
The menu command for creating an additional output, shown next
to an existing additional output in panel 2
To Remove an Additional Output:
Open the additional output panel you want to remove, and click the Delete button at
the bottom.
1244
Rendering Media Part 9 – 75
How to Avoid Overwriting Clips
When Rendering Output Media
Three of the options described previously, “Use unique filenames,” “Place clips in separate
folders,” and “Use commercial workflow,” are all ways of organizing your rendered media to
avoid overwriting rendered clips that happen to share the same file name. These options are
necessary because each clip has one logical range of timecode, and because multiple clips
often refer to a single source media file with one name.
When rendering a clip, DaVinci Resolve automatically overwrites any other media files that have
the same name. So, in instances where you’re trying to preserve the previous filename of the
source media file, or where you’re rendering out multiple versions of the same clip, it’s entirely
likely that the clips you’re trying to output will overwrite one another, leaving you with the last
clip you rendered. The three options mentioned previously prevent this in different ways.
Defining a Range of Clips
and Versions to Render
Once you’ve defined the Render Settings, now you need to decide how much of the Timeline
you need to render. A Mini-Timeline and Thumbnail timeline are available to help you navigate
your project’s clips in order to choose which ones you want to render. Track controls let you
enable and disable whole tracks from being output; for example if you need to render a textless
version of a timeline in which all the title clips are on track V4, you can disable track V4.
Furthermore, you can also use these controls to choose which clip versions you want to render.
To render the entire Timeline:
Choose Entire Timeline from the Render pop-up in the Deliver page timeline. This
option only appears if clips are not filtered.
To disable a video or audio track to exclude those clips from being rendered:
Click the Video or Audio Disable Track button for the tracks you want to exclude.
To render a filtered subset of clips in the Timeline:
1 Open the Color timeline, if it’s not already shown, and choose an option from the
Timeline Filter pop-up to the right of the Clips button in the Interface toolbar.
The contents of the Thumbnail timeline are restricted to show only the clips matching
the selected criteria. For example, if you’ve already rendered a session, but you’ve
since made some changes, you can use one of the “Show Modified Clips” options to
display only the clips that have changed within a particular timeframe. Another
possibility is to choose the “Show Unrendered Clips” option to show all clips that have
not yet been rendered.
2 Choose “All Filtered Clips” from the Render pop-up in the Timeline toolbar.
To clear clip filtering:
Choose All Clips from the Timeline Filter pop-up to the right of the Clips button in the
Interface toolbar.

1245
Rendering Media Part 9 – 75
To define a continuous range of clips to render:
1 To define the first clip in the range you want to render, do one of the following:
Right-click a clip thumbnail in the Thumbnail timeline and choose Mark In.
Position the playhead in the Timeline or the Viewer, and press the I key, or right-click
the Timeline ruler and choose Mark In.
2 To define the last clip in the range you want to render, do one of the following:
Right-click a clip thumbnail (in the Color timeline) or a clip (in the Edit timeline) in the
Thumbnail timeline and choose Mark Out.
Position the playhead in the Timeline or the Viewer, and press the O key, or right-click
the Timeline ruler and choose Mark Out.
In and Out points appear within the Timeline ruler, and an orange bar shows the range
you’ve selected to render. The In and Out fields update with the first and last frame
numbers, in timecode and frame count, and the Duration field updates with the total
number of frames you’ll be rendering.
To render a single clip:
Open the Thumbnail timeline if it’s not open already, Right-click any clip thumbnail,
and choose Render This Clip.
An orange bar in the Timeline ruler shows that clip is selected for rendering. If you
need to render several clips individually, you can select each clip one at a time to add
as individual jobs to the Render Queue.
Choosing Which Versions to Render For Each Clip
By default, the currently selected version that was set in the Color page is rendered for each
clip. If you want to render a different version, the easiest thing to do is to make sure they’re
selected on the Color page Timeline before you open the Deliver page.
However, a Versions submenu, within the Thumbnail timeline’s contextual menu for each
thumbnail, also provides options to manage grade versions. These commands are duplicates of
options that are available from the Thumbnail timeline of the Color page.
To choose which Version to Render:
Right-click any clip thumbnail in the Thumbnail timeline, and choose a version from the
Versions submenu.
IMPORTANT: If you’re in Individual Clips mode, In and Out points automatically
snap to the nearest clip In or Out point in the Timeline. You cannot render
partial clips in Individual Clips mode, but you may do so in Single Clip mode.
TIP: You can right-click a clip in the Thumbnail timeline of the Color or Render
screen and rename any version of a grade. This can assist a facility’s workflow
when sharing material between suites and applications.
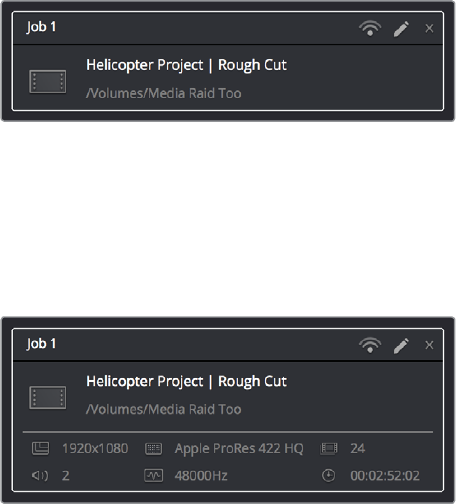
1246
Rendering Media Part 9 – 75
Using the Render Queue
Once you’ve defined the settings necessary to render the type of media you require, and the
range of the current session you want to render, you need to add all that information as a job to
the Render Queue. You can add as many jobs to the Render Queue as you need, depending on
what files you need to output.
Each job can have individually specified ranges of clips and individual clip settings, which can
include different render directories, different formats, resolutions, data levels, burn-in settings,
etcetera. As a result, you can use the Render Queue to queue up the render of multiple
sections of the current session, or multiple versions of the same media. Furthermore, you can
queue up multiple sessions, if you have several differently graded sessions.
To add a job to the Render Queue:
1 Select a timeline.
2 Choose the settings you require in the Render Settings, using one of the Presets, or by
choosing your own custom settings.
3 Choose a range of clips to render using the Deliver page Timeline using the
procedures described in the previous section.
4 Click the Add to Render Queue button at the bottom of the Render Settings.
5 If you haven’t chosen a location for the render yet, you’ll be prompted to do so now
viaa File Destination dialog, so choose a location and click Ok. If there’s already media
in the render location you’ve specified, you may also see a dialog telling you “This
render may overwrite existing clips in this folder.” If you want to continue, click Yes,
otherwise click No.
That render setup is now added as a job to the Render Queue, showing the project and
timeline name, and location path where the render will be written to.
A selected job in the Render Queue
To show more details about jobs in the Render Queue:
Click the Render Queue Option menu (at the upper right-hand corner) and choose Show Job
Details. Each job now lists the frame size, format, frame rate, audio channels and sample rate,
and duration below the name and location path.
A selected job in the Render Queue with Job Details shown

1247
Rendering Media Part 9 – 75
To rename a job:
Jobs can be given custom names simply by clicking on the default job name (Job 1,
Job2, etcetera) and typing a new name of your own. This can be useful for setting up
jobs that you may be re-rendering over and over as you work on a project.
To start rendering:
1 If you want to restrict rendering to only selected jobs in the Render Queue, then select
one or more jobs by clicking on one, and then Command-clicking on others to choose
discontinuous jobs, or Shift-clicking on another to select an entire range of jobs. When
you select one or more jobs, only the selected jobs will be rendered. If no jobs are
selected, then all jobs in the queue will be rendered.
2 Click the Start Render button, underneath the Viewer to the right of the interface.
3 If there are jobs in the Render Queue that have already been rendered, a dialog will
appear asking “Selected items contain already rendered items. Do you want to re-
render them?” Clicking Yes will re-render all jobs in the Render Queue. Clicking No only
renders the jobs that have not yet been rendered. Clicking Cancel cancels the entire
rendering operation.
Rendering begins, starting with the highest job in the list. The Overall Progress bar
starts to fill up, from right to left, indicating how much of what’s been queued up has
been rendered so far. While rendering is in progress, the Start Render button changes
to the Stop Render button, which can be clicked at any time to halt rendering.
To remove jobs from the Render Queue, do one of the following:
To clear a specific job: Click the X at the upper right-hand corner of a job’s entry in the
Render Queue.
To clear all previously rendered jobs: Click the Render Queue Option menu (at the
upper right-hand corner) and choose Clear Rendered.
To clear all jobs: Click the Render Queue Option menu (at the upper right-hand corner)
and choose Clear All.
To change a job that has been rendered to appear unrendered again:
Right-click any rendered job, and choose Clear Render Status. You can also select
multiple jobs to change their rendered status all at once. This makes it easy to re-
render the exact same job.
TIP: While rendering is in progress, a small progress bar will appear on the
DaVinci Resolve icon in the dock of Mac OS X, or on the taskbar of Windows.
1248
Rendering Media Part 9 – 75
To edit a job that has or has not been rendered:
1 Click the Pencil button in the Render Queue to select it.
Clicking the pencil icon to edit a
job in the Render Queue
The selected Render Queue’s settings repopulate the Render Settings list, and resets
the selected range of the Timeline corresponding to that job.
2 Change whichever settings you need to.
3 When you’re finished editing the job, click the Update Job button that appears at the
bottom of the Render Settings, or you can click Add New Job to create a new job with
the changes you’ve made, leaving the previous job untouched.
To review clips that correspond to rendered jobs:
To show a rendered clip in the Media Storage browser: Right-click any rendered job,
and choose Reveal in Media Storage.
To show a rendered clip in your computer’s file system (Mac OS only): Right-click any
rendered job, and choose Reveal in Finder.
Rendering Jobs from Multiple
Projects at Once
You can also add multiple projects from the currently open PostgreSQL or Disk database to the
render queue all at once. This can be exceptionally useful in situations where you’ve broken a
program into multiple reels, with each reel being a different project.
To render output from multiple projects at once:
1 Open each project, set up whatever jobs you want to render in the Render Queue, and
save that project without rendering.
2 When you’ve set up the last project, click the Render Queue Option menu (at the upper
right-hand corner) and choose Show All Projects.
3 All queued items in projects belonging to the currently selected user (if using a
PostgreSQL database) or in the currently specified disk location (if using a disk
database) now appear in the Render Queue.
4 Click Start Render to begin rendering every job from every project in the queue.
5 When you’re finished, turn Show All Projects off to go back to displaying only the
current project’s render queue items.
NOTE: If you click the Pencil button again without clicking Update Job, you’ll
be prompted to Save, Cancel, or Don’t Save.
1249
Rendering Media Part 9 – 75
Remote Rendering
If you have multiple DaVinci Resolve 12.1 (or higher) workstations on the same network, you can
send a job in the Render Queue from the workstation you’re using (referred to as the “artist
workstation”) to one of the “remote workstations” on the network using remote rendering.
Thislets you use any one of your currently unused secondary workstations to render your jobs,
while you continue working on your main workstation.
In order to use remote rendering, you must adhere to the following three criteria:
Both the artist workstation and the remote workstation must have DaVinci
Resolve Studio installed. Remote rendering does not work with the free version of
DaVinci Resolve.
Both the artist workstation and the remote workstation must be using the same
Postgres shared database, either on one of the machines, or on a dedicated Remote
Database Server. For more information on setting up and using a shared databases,
see Chapter 84, “Managing Databases and Database Servers.”
Both the artist workstation and the remote workstation must have access to the same
media files on either the same storage volumes, or identically named storage volumes.
Sharing Storage
It’s important that both the artist and remote workstations have access to the same media on
the same named storage volume for remote rendering to work properly. This can be done via
some manner of shared storage, such as a SAN. However, it can also be done by mounting the
same volume over your network. This will be slower, but it will work.
If you’re mixing Mac OS X, Windows, and Linux workstations for remote rendering, you’ll need
to use the Mapped Mount column of the Media Storage Locations list in the Media Storage
panel of the System Preferences to add each volume’s path as it’s understood on the
workstation it’s attached to. For example, on a Windows workstation that’s accessing volumes
from a Linux workstation, type in the Linux-style file paths in the Mapped Mount column for
each scratch disk that’s listed.
Setting Up and Using Remote Rendering
Using remote rendering is easy, but it does require a bit of preparation.
1 Make sure the storage volume containing the media being referenced by the project
you want to render is mounted on both the artist and remote workstations.
2 Open DaVinci Resolve on the remote workstation, and do one of the following:
When the Project Browser opens, right-click anywhere and choose Remote
Rendering.
If you’ve already opened a project in DaVinci Resolve, you can also choose
Workspace > Remote Rendering.
DaVinci Resolve will automatically open to the Deliver page, awaiting jobs to be
assigned for automatic rendering.
3 On the artist workstation, add a job to the render queue as you normally would.
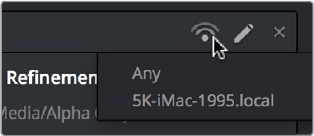
1250
Rendering Media Part 9 – 75
4 Click the remote rendering button for that job in the Render Queue and one of the
options from the list that appears:
Any: Automatically assigns that job to the next workstation that isn’t currently
rendering anything. If all remote rendering workstations are rendering, assigns it as
the next job in line.
YourComputer.local: The artist workstation with the name “YourComputer.” Choose
this if you want to render the job locally, and not remotely.
Other Workstations on Network: All other remote rendering workstations are listed
below, so you can choose which specific workstation you want to assign a job to.
Clicking the Remote Render
button to remotely render a job
5 Click Start Render. The job is sent to the remote workstation you selected and is
rendered, while you’re free to continue working on your artist workstation.
When You’re Finished Remote Rendering
Once you’re done using a particular DaVinci Resolve workstation in Remote Rendering mode
and you want to go back to using it as an artist workstation, choose Workspace > Remote
Rendering to exit remote rendering and return to the Project Manager.
Setting Up a “Headless” Remote Rendering Workstation
In DaVinci Resolve 12.5 (and later) remote rendering clients can operate in a so-called
“headless” mode, with no GUI. This can be accomplished from the command line, by opening
the directory where the app is located and then running DaVinci Resolve in Remote Rendering
(-rr) mode using the correct command line syntax for your operating system. Once run in this
way, DaVinci Resolve silently and invisibly waits on that system for remote rendering jobs to be
sent to that workstation.
On Mac OS X
Open Terminal.
Change the directory to:
cd /Applications//DaVinci\ Resolve/DaVinci\ Resolve.app/Contents/MacOS/
Run the following command:
./Resolve -rr
On Windows
Open the Command Prompt.
Change the directory to:
C:\Program Files\Blackmagic Design\DaVinci Resolve\
Run the following command:
Resolve.exe -rr
1253
Delivering Using EasyDCP Part 9 – 76
Delivering Using EasyDCP
For projects requiring Digital Cinema Package (DCP) or Interoperable Master Format (IMF)
mastering for digital cinema or broadcast distribution, DaVinci Resolve can be integrated with
Fraunhofer’s easyDCP application in order to master these files, play them back for testing, and
generate Key Delivery Messages (KDMs) for theatrical distribution, all directly within
DaVinciResolve. This means you can encode a DCP master straight from your program’s source
media, all within the 32-bit floating point image processing pipeline of DaVinci Resolve, for the
highest possible quality result.
This chapter has the following topics:
Licensing EasyDCP 1254
Requesting Your Server Certificate Set 1254
Importing Your Server Certificate Set 1255
EasyDCP Color Management 1255
EasyDCP Output in the Deliver Page 1255
KDM Generation and Management 1257
Publishing Your Encrypted Digital Cinema Package 1257
Playing Your Digital Cinema Package 1257
Playing Third Party Digital Cinema Packages 1257

1254
Delivering Using EasyDCP Part 9 – 76
Licensing EasyDCP
Both DaVinci Resolve and DaVinci Resolve Studio include a demo version of easyDCP.
Detailsof operation and restrictions of the demo version can be found later in this chapter.
Thefully functional version of easyDCP operates via licensing modules purchased from
http://www.easyDCP.com (info@easyDCP.com) and every new DaVinci Resolve system (server)
needs its own license and specific certificates for DCP and KDM generation and for
playback of DCPs.
Requesting Your Server Certificate Set
For your DaVinci Resolve system to generate DCPs and KDMs you need to request a specific
set of configuration files called the Server Certificate Set. To begin, first purchase your
encoding, encryption, decoding and decryption modules from easyDCP. They will provide a
password to access your easyDCP.com account.
Then, from the DaVinci Resolve file menu, select easyDCP, Request Server Certificate Set.
Fillin the detail listed on the request form and save the form to your desktop or somewhere it
can be easily found. This html file can be emailed to info@easyDCP.com. After sending the html,
a customized Server Certificate Set for your installation will be generated and made available
for download in your easyDCP Website User Account.
The Server Certificate Set generated for your DaVinci Resolve will contain files based on your
purchased modules and your specific DaVinci Resolve server hardware. The table below shows
the modules and the licenses and certificates generated, followed by a brief description of
each item.
License
Server
Certificate
Signer
Certificate
DCP Encoder X – X
DCP Encoder with Encryption XXX
DCP Player X – –
DCP Player with Encryption X X –
License: The License is used to activate the purchased modules on a specific
hardware server.
Server Certificate: Each DCP render (referred in the industry as an ‘Instance’) using
encryption or decryption has an individual server certificate. This certificate is required
to be able to receive Key Delivery Messages (KDMs), which unlock encrypted DCPs.
Signer Certificate: A Signer Certificate is used to sign certain files within a DCP
package and/or Key Delivery Message (KDM) to verify which authority generated the
DCP instance.

1255
Delivering Using EasyDCP Part 9 – 76
Importing Your Server Certificate Set
Once generated and downloaded to your DaVinci Resolve server, the Server Certificate Set
needs to be imported into DaVinci Resolve.
To import your server certificate:
1 Choose File > easyDCP > Import License and Certificates.
2 Use the Import Server Certificate dialog to select the file, enter your Certificate Set
password, then click Import.
3 To verify your easyDCP license and the Server Certificates, choose easyDCP >
About easyDCP.
From this point onward, you can use the controls from within the Settings window, the Deliver
page, and the File menu to master and play DCPs.
EasyDCP Color Management
The Color Management panel of the Project Settings has a Timeline Colorspace pop-up menu
that is enabled for EasyDCP encoding regardless of whether or not DaVinci Resolve Color
Management is used for the current project (the same setting is used for both color
management tasks). You should set this to the color space used by your current DaVinci
Resolve timeline. If, for example, you are grading using a Rec. 709 monitor for television
deliverables but also wish to make a DCP, select Rec. 709 Gamma 2.4 and DaVinci Resolve will
render the DCP with the correct Rec. 709 to XYZ matrix.
EasyDCP Output in the Deliver Page
To master to a DCP in the Deliver page, use the following procedure, which walks you through
all of the easyDCP settings that are available in the Render Settings list.
To master a DCP or IMF:
1 Set “Render timeline as” to Single clip.
2 Choose easyDCP from the Video Format pop-up.
3 Choose the appropriate option from the Codec pop-up that corresponds to the type
(DCP or IMF) resolution (2K or 4K), and aspect ratio (native, scope, or flat) of your
intended output.
Limitations of the Demo Version of easyDCP
The demo version of the DCP encoder embeds visible DaVinci Resolve and easyDCP
logo watermarks in the rendered Digital Cinema Package (DCP) images. The demo
version does not include encryption so these DCPs can be used for screening in a
digital equipped cinema. The demo version of the DCP playback module will play
15seconds in full quality. After that playback quality reduces drastically. Furthermore,
audio won’t be rendered after 15 seconds of playback.

1256
Delivering Using EasyDCP Part 9 – 76
4 Set the Composition Name. This field is intended to hold a standardized name for the
DCP being encoded. You can either type a name into this field directly, or you can
press the “...” button to open the easyDCP Composition Name Generator window.
Aneditable Film Title field appears, along with a number of pop-up menus that let you
select various DCP attributes such as content type, aspect ratio, language of audio
and subtitles, and so forth. As you populate each attribute, the name being generated
appears at the top of the window, and clicking OK copies the resulting Composition
Name into the Composition Name field of the Render Settings.
5 If necessary, set the desired “Maximum DCP bit rate” by either typing or dragging within
the field (the range is 50 to 250 Mbit/sec). If you’re not sure what data rate to use,
consult the client or distributor to whom you’re delivering the DCP.
6 There are two DCP package types you can output, determined by the “Use Interop
packaging” checkbox:
The standard package conforms to the “Interop” specifications for DCPs, which is
turned on by default. With “Use Interop packaging” turned on, however, the frame
rate of your output is limited to either 24fps or 48fps, so you need to make sure that
your timeline conforms to these frame rates.
If you want to generate DCP packages with other frame rates to match your timeline,
you need to turn “Use Interop packaging” off to generate a SMPTE-standard DCP.
This supports additional frame rates including 25, 30, 50 and 60 fps. However,
SMPTE-Standard-DCPs are not supported on all JPEG2000-based playback systems
so it’s generally recommended to use the Interop standard unless you know the
player supports the SMPTE-Standard DCPs.
7 Turn on the “Encrypt package” checkbox to encode an encrypted DCP. This sets the
encoder to generate a Digest containing the keys used during encryption. This Digest
will allow you to play the resulting DCP on your system, and to generate KDMs to allow
that DCP to be played on other servers.
8 Set the Subtitles Path. If you have a properly formatted subtitle file, click the Browse
button to link to it.
9 If you’re including an audio mix in the DCP, go to the Audio section, turn on the Render
audio checkbox, and choose the number of channels in the “Render channels of audio”
pop-up menu that corresponds to the number of Audio Mixer output channels defined
in the Edit page.
10 Click the Browse button under the “Render to” field, and choose a location for the
resulting DCP. Make sure you pick a drive with enough room for the estimated size of
the final DCP.
11 Choose all necessary options from the Output Options to ensure the quality you need.
12 Click the Add Job to Render Queue button, and then click Start Render to create your
DCP. A DCP will be created and placed at the location you chose, ready for playback
or delivery.
NOTE: If you do not encrypt the DCP it can be played on any DCP player/
decoder without restriction
1257
Delivering Using EasyDCP Part 9 – 76
KDM Generation and Management
Key Delivery Messages (KDMs) are required to allow an encrypted DCP play on a designated
projector at a particular theater at a specified time. DaVinci Resolve is capable of creating
KDMs, which is convenient for exporting KDMs for select screenings, but commercial
distributors may require thousands of KDMs. Fortunately, easyDCP allows you to use external
Distribution KDM (DKDM) utilities to generate KDMs for your clients, so you don’t have to tie up
your DaVinci Resolve workstation with this task.
Publishing Your Encrypted
Digital Cinema Package
While you can play your encrypted DCP on the same DaVinci Resolve system that generated it,
if you wish to publish the DCP so other players can decode and play you need to generate a
KDM to send to the player. The user of the other player, or players, will need to generate a
Server Certificate for each of their players and send this to you so when you generate the
KDMit will be just for those players.
Select the DCP in the Media page Library. Right-click and select Generate KDMs. From the
pop-up select the location of the Server Certificate file if the KDM is for one player, or folder for
multiple players. Set the start and end dates that the KDM will be valid for, an output folder to
place the KDM, and then select Generate.
You can now send your DCP and the KDMs to the player you authorized. The user there will
import the KDM and the DCP will play between the start and end dates.
Playing Your Digital Cinema Package
To play a DCP you’ve output from DaVinci Resolve, use the Media page to add it to the Media
Pool and edit it into a timeline like any other clip.
Decoding the JPEG2000 images embedded within the DCP in real time is computationally
intensive. If your system is underpowered you can reduce the decoded resolution of the files by
selecting Half or Quarter Resolution Decode from the File > easyDCP menu. A smaller, less
bandwidth-intensive version of the JPEG2000 files will be decoded by discarding some levels
of the wavelet stage inside the decoder, which will directly increase the playback performance.
Playing Third Party Digital Cinema Packages
To play a non-encrypted DCP simply select the DCP in the Media page like any other clip.
Toplay an encrypted DCP from a third party you first must publish your Server Certificate.
Theyuse the certificate to generate KDMs for their DCP to play on your DaVinci Resolve
system. From the File menu select easyDCP, then select Export Server Certificate, and on the
pop-up menu choose a location to save the file. Send this to the third party for KDM generation.
When you receive a KDM or a Digest for an encrypted DCP you must first import the file into
your DaVinci Resolve system. Using the File, easyDCP menu select Import KDM/Digest, and
then select the file. Then simply select the encrypted DCP in the Media Page Library to play.
1259
Delivering to Tape Part 9 – 77
Delivering to Tape
This section covers how to use the Deliver page to output a timeline, either in whole or in part,
to a device-controllable VTR connected to a compatible Blackmagic Design video interface. For
whichever output interface you use, you need to make sure that the RS-422 interface is
connected to that of the VTR, and that device control has been established.
The Tape Output Interface 1260
Gang Timecode to Tape 1261
Insert/Assemble Pop-Up Menu 1261
Start Record Button 1261
Setting Up for Tape Output 1262
General Options 1262
Capture and Playout Settings 1262
Capture 1263
Playout Settings 1263
Edit to Tape Queue Option Menu Settings 1264
Tape Output Procedures 1265
Power Mastering 1265
Outputting a Program From the Timeline 1265
Batch Outputting Multiple Clips 1266

1260
Delivering to Tape Part 9 – 77
The Tape Output Interface
Tape output is accomplished on the Deliver page, which has to be placed in the Tape mode
before you can proceed.
To switch to tape output in the Deliver page:
Click the Tape button, which is the third button from the left on the Interface toolbar at
the top of DaVinci Resolve. The Deliver page updates to reflect the relevant controls for
editing to tape.
While in Edit to Tape mode, the Deliver page is used to control the VTR, in order to establish In
and Out points for insert or assemble editing of the selected portion of the current
Timeline to tape.
Capture and Playout: The Render Settings panel turns into the Capture and Playout
panel, with controls and settings governing how DaVinci Resolve will output your
program to tape.
Edit to Tape Queue: The Render Queue turns into the Edit to Tape Queue, which
lets you set up a batch of either previously rendered media files, or In and Out point-
defined segments of the current Timeline for simultaneous output to tape.
Transport Controls: The transport controls, while similar in appearance to those used
while in Render mode, now control the VTR. While in Edit to Tape mode, the transport
controls of the DaVinci control panel also control the deck, rather then your program.
Shuttle Control: A Shuttle Control appears in what was formerly the Jog or Scrubber
Bar, which lets you shuttle through the range of reverse and forward speeds
compatible with that deck.
In and Out Controls: In Edit to Tape mode, the In and Out buttons to the right of the
transport controls define a range of the tape to Insert or Assemble edit to, within the
current Timeline. While in Edit to Tape mode, you can still define In and Out points to
define a specific range of the Timeline by right-clicking a clip in the Thumbnail or Mini-
Timeline, and choosing Mark In or Mark Out. You can only add In or Out points to the
beginning and end of clips.
Cue In and Cue Out controls: Buttons next to the timecode In and Out fields cue the
tape to those frames on tape.
Edit to Tape controls
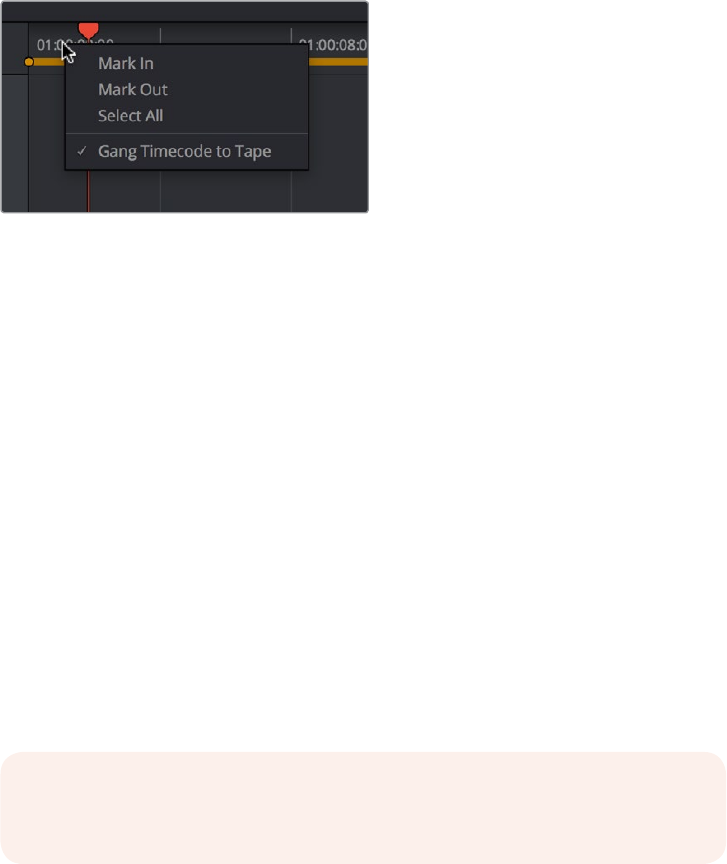
1261
Delivering to Tape Part 9 – 77
Gang Timecode to Tape
When the Deliver page is in Tape mode, you can right-click the ruler running along the top of
the Timeline and choose “Gang Timecode to Tape,” which puts DaVinci Resolve into a mode
where every time you set an In point on the Deliver page Timeline, a corresponding In point is
automatically set on the tape deck. Setting both In and Out points on the Deliver page Timeline
results in the In and Out points on the tape deck being set at the same timecode, making it
easy to set up insert edits to tape on top of a previously output program.
The Gang Timecode to Tape option
Insert/Assemble Pop-Up Menu
A pop-up menu under the In and Out buttons lets you choose how to edit the selected part of
the Timeline to tape. There are two options:
Insert: Performs an insert edit to tape, in which selected tape tracks are seamlessly
and frame-accurately overwritten without interrupting the timecode or control track.
You must be outputting to either a blacked tape, or a prerecorded tape to make an
insert edit.
Assemble: Performs an assemble edit, in which every track of tape is overwritten,
including the video, audio, timecode, and control tracks.
Crash: (Only appears if “Output Source Timecode” has been enabled in the Playout
section of the Capture and Playback panel of the Project Settings) Similar to an
assemble edit, except there is no pre-roll period to let the VTR get up to speed.
Acrash edit also overwrites every track of the tape, including the video, audio,
timecode, and control tracks, and may result in a more visible jump at the resulting
edit point. However, in some instances crash edits may be the only option for a
particularoperation.
Start Record Button
Once you’ve set In and Out points to define how much of the tape to record to, the Start Record
button initiates device-controlled tape output.
NOTE: When DaVinci Resolve is performing a Batch Output operation, you can
only output clips using assemble editing or crash recording.
1262
Delivering to Tape Part 9 – 77
Setting Up for Tape Output
Before you perform an edit to tape, the Capture and Playback panel of the Project Settings
hasa number of options that you should set to match the format and type of tape output
you’re doing.
General Options
The Output LTC checkbox, when turned on, directs DaVinci Resolve to output LTC timecode.
Capture and Playout Settings
These settings affect both capture and playback when using the Tape Ingest options of the
Media page, or the Tape Output options of the Deliver page.
Video capture and playback: You can choose the video format (frame size and
frame rate) with which to output to tape from this pop-up menu. HD timelines can be
downconverted to SD, and SD timelines can be upconverted to HD using the format
conversion of your DeckLink card.
Use left and right eye SDI: A checkbox that enables supported video interfaces to
ingest and output muxed stereoscopic video when used with supported VTRs, such
as HDCAM SR decks with 4:2:2 x 2 mode. (When muxed stereoscopic signals are
ingested, each eye is separated into individual left-eye and right-eye image files.) This
parameter only appears when your hardware is set up appropriately.
Video connection operates as: Selects between the available signal options: Use
4:4:4 SDI, and enable Single Link. Which options are available depend on which video
capture card you are using.
Data Levels: Lets you specify the data range (normally scaled or full range) that’s
used when ingesting from or outputting to tape. This option switches the data range
of the signal output by your video capture card, but only during capture from tape in
the Media page, or output to tape in the Deliver page. When capture or output is not
currently occurring, your video capture card goes back to using the identically-named
data range setting in the Master Settings panel of the Project Settings, which governs
how you monitor the signal being output on an external broadcast display or projector.
Video bit depth: Choose the bit depth that corresponds to the capability of your deck.
You can choose between 8-bit and 10-bit. Outputting to 10-bit is more processor
intensive, but higher quality for compatible devices, and is the default setting.
Use deck autoedit: If supported by your video deck, this is the best method to record
video to the deck, as it enables the deck to roll the edit using the specified preroll, and
control the edits via serial device control. If this checkbox is turned off, a basic edit On/
Off mode is used by the deck, with the potential for frame inaccuracies if the “Non auto
edit timing” setting is not properly adjusted.
Non auto edit timing: Adjusts the edit synchronization of the connected deck when
auto edit is turned off.
Deck preroll: Sets the number of seconds for preroll. How much is appropriate
depends on the performance of your deck.
Video output sync source: When using a DeckLink card this is set to Auto. Other
capture cards may require you to set the sync source to “Reference” for playout and
“Input” for ingest. This setting is only available if you have a DVS card installed on
your system.
Add 3:2 pulldown: Inserts or removes the 3:2 pulldown required to record or play
23.98 fps media to or from a 29.97 tape format.
1263
Delivering to Tape Part 9 – 77
Capture
These settings are used when you use the Capture mode in the Media page to capture clips
from tape into the Media Pool. Media is captured as DPX image sequences.
Capture: Lets you choose whether to capture both Video and Audio, or Video Only.
Video Format: The format that scanned film frames are saved as. When capturing from
tape, the available options are DPX and QuickTime. When capturing from the Cintel
film scanner, this is restricted to Cintel Raw Image (CRI), which is a raw data format that
DaVinci Resolve automatically debayers as a Cineon log-encoded image for grading.
Codec: The codec used to write captured media. When capturing from tape, these
include the various type of Apple ProRes, 8- and 10-bit YUV 422, 10-bit RGB, and the
various types of DNxHD. Cintel Raw Image files default to RGB.
Save clips to: A field that displays the directory path to which media files captured from
tape are written. You want to choose a volume that’s fast enough to accommodate the
data rate of the media format you’re capturing.
Browse: Click this button to choose a directory to write captured media to. The
directory you choose appears in the field above.
Save in this folder path: A series of checkboxes let you specify what other information
to use to define the directory hierarchy that will hold the captured media. Every
checkbox you turn on adds an additional directory with a name defined by that
checkbox’s metadata. You can choose any or all of the following: Program name, Clip
number, Reel number, and Roll/Card.
Apply reel number to: Lets you choose how to write the reel name. Two checkboxes
let you write the reel number to the file’s name, and/or to the Header data.
Use prefix: A field lets you type in a prefix to be used in the media file’s name. This
lets you add text identification that will make the media more easily identifiable and
searchable.
Apply prefix to: Two checkboxes let you choose to use the prefix you typed in the file
name, and/or in the folder name.
Use frame number with: When capturing to image sequences, you can choose how
many digits to use when writing the frame number into the name of each frame file.
Set batch ingest handles to: When capturing to image sequences from a batch list,
defines how many frames of additional handles to ingest along with each logged clip.
Enable audio input: Turn this checkbox on to capture audio along with the video. If
you’re capturing QuickTime or MXF files, the audio will be written as additional tracks
inside each file. If you’re capturing to a DPX image sequence, then a broadcast .wav file
is recorded separately.
Input: Lets you choose how many tracks of audio to capture, from 2 to 16.
Playout Settings
These settings only affect the video signal that’s output when you use the Edit to Tape mode of
the Deliver page.
Output: Lets you choose whether to output both Video and Audio, Video Only, or
Audio Only if you’re doing an audio layback.
Output Source Timecode: Turn this checkbox on to output each individual clip’s source
timecode. This option is only applicable when assemble editing to tape.
1264
Delivering to Tape Part 9 – 77
Output LTC: With a Blackmagic Design DeckLink or UltraStudio device using HD-SDI,
longitudinal timecode (LTC) is available on track 16 of the HD-SDI video signal, making
it easy to use a Mini Converter de-embedder to extract this analog timecode audio
signal and feed it directly to a recording device. This is particularly helpful if you have
outboard video processing equipment such as a noise reducer or format converter that
does not pass through the VITC timecode.
Delay LTC by x frames: When outputting LTC to bypass outboard processing gear, such
as a noise reducer or format converter, you can compensate for the processing delay
by delaying the timecode by a matter of frames to ensure that the processed image
and timecode reach the deck at the same time. With a DVS card there is a separate
timecode output.
Enable audio output: When this checkbox is enabled, DaVinci Resolve will play
all available timeline audio along with the video being output, so both can be
recorded to tape.
Offset audio by x frames: Lets you specify an offset between the audio track and video
to achieve proper A/V sync in cases where the video is being delayed by outboard
processing hardware.
Output x channels of audio: Choose the number of audio tracks to output to tape.
Set batch playout head handle to x seconds: When batch outputting multiple clips, you
can specify a number of frames before the In point of each clip to be output as well.
Set batch playout tail handle to x seconds: When batch outputting multiple clips, you
can specify a number of frames after the Out point of each clip to be output as well.
Apply gaps between clips: This checkbox lets you add a black gap, of the specified
duration in frames, between every two clips being output when outputting in
batch mode.
Edit to Tape Queue Option
Menu Settings
The following settings and options are available in the Option Menu found at the top right-hand
corner of the Edit to Tape Queue.
Show Job Details: Lets you see more information about each job listed in the
Render Queue.
Clear Recorded: Clears all queue items that have already been output to tape.
Clear All: Clears every queue item.
Sort by Reel & Timecode: Does a multi-criteria sort by reel and timecode, reel first,
then timecode.
Sort by Timecode: Sorts by timecode only.
Output Source Timecode: Sets tape output to write source timecode to tape (each
clip’s individual timecode), rather then record timecode (from the Timeline).
Use Preview for Tape Output: Enables Preview mode when outputting to tape. Preview
mode lets you test how an edit to tape operation will work before actually recording it.
1265
Delivering to Tape Part 9 – 77
Tape Output Procedures
There are a few different ways you can output media to tape, depending on what you need
toaccomplish, and on how intensive your grades are relative to the processing capabilities of
yourworkstation.
Power Mastering
Power Mastering allows you to select either a range of clips, or an entire timeline, to be output
to tape in real time, without rendering. This can save you from a time-consuming render, and it
also saves disk space. Power Mastering is a no-compromise procedure, since your program is
still output at full quality.
If there are a handful of clips with grades that you know are too processor-intensive to be Power
Mastered, you can use the Render Cache controls to cache the problem clips before output.
For more information, see Chapter 5, “Improving Performance, Proxies, and the Render Cache.”
Outputting a Program From the Timeline
The simplest method of outputting to tape is to output a single Timeline, either in its entirety, or
in part if you’re insert editing a small section that has been revised.
To Power Master to tape:
1 Use the Render Cache, if necessary, to cache any clips that are too processor-intensive
to output in real time.
2 Click the Edit to Tape mode button to the left of the transport controls to switch to
tapeoutput.
3 Define how much of the current Timeline to output by moving the playhead throughout
the program, and then right-clicking clips that define the beginning and end of the
range you need to output and using the Mark In and Mark Out commands.
4 Use the transport controls to find the In point on tape at which you want to start
recording, and click the In button.
5 Choose Insert from the pop-up menu at the upper right-hand side of the Viewer, if
you’re either outputting to a striped and blacked tape, or inserting over an existing
program on tape.
6 Click the Power Mastering (lightning bolt) button at the bottom of the tape settings to
add the job you’ve just set up to the Edit to Tape Queue.
7 Click Start Record to begin the process of outputting to tape. Device control is used to
record to the designated section of tape; a progress bar appears at the bottom of the
Render Queue to show how long this will take.
If you don’t want to Power Master, you can render the section of the Timeline you need to
output as a single clip first, as a self-contained media file, and then add that clip directly to the
Edit to Tape Queue. This might be an easier solution if you’re outputting an extremely
processor-intensive timeline.
1266
Delivering to Tape Part 9 – 77
To output a pre-rendered media file to tape:
Click the Add Clips button at the bottom of the tape settings, and use the VTR Record dialog to
select the media file you rendered in Step 1, and click Add Clip(s) to Queue.
1 The media file you selected is added to the Edit to Tape Queue as a Power Mastering
job, and will be output in its entirety.
2 Use the transport controls to find the In point on the tape at which you want to start
recording, and click the In button.
3 Choose Insert from the pop-up menu at the upper right-hand side of the Viewer, if
you’re either outputting to a striped and blacked tape, or inserting over an existing
program on tape.
4 To preview what the edit will look like before actually writing it to tape, choose “Use
Preview for Tape Output” from the Edit to Tape queue option-menu, and then click Start
Record to watch DaVinci Resolve run through the edit using the deck. After previewing
the edit, turn this setting off.
5 Click Start Record to begin the process of outputting to tape. Device control is used to
record to the designated section of tape; a progress bar appears at the bottom of the
Render Queue to show how long this will take.
Batch Outputting Multiple Clips
You also have the option of outputting a number of clips to tape in a batch operation, as
opposed to outputting from the Timeline. When you set up a batch of multiple clips in the Edit to
Tape Queue, then DaVinci Resolve will automatically record them sequentially to tape.
How the timecode is generated during batch output depends on the “Output Source
Timecode” setting in the Capture and Playback panel of the Project Settings. If this is turned off,
then a continuous timecode track will be written to cover everything being output to tape. If this
is turned on, then each clip’s source timecode will be written to tape discontinuously.
When batch outputting to tape, you can add black handles to each of the clips to space them
out, making later ingest easier, using the “Set batch playout head/tail handle” settings in the
Capture and Playback panel of the Project Settings.
To make a Batch Record multiple clips to tape:
1 Use the transport controls to find the In point on tape at which you want to start
recording, and click the In button.
2 Do one of the following to add items to output to the Edit to Tape Queue:
3 Click the Add Clips button at the bottom of the tape settings, and choose one or more
media files from the VTR Record browser, and click Add Clip(s) to Queue.
4 Right-click any clip in the Timeline, choose Render This Clip, and then click the Power
Mastering button at the bottom of the tape settings to add that clip to the Queue.
5 Choose either Assemble or Crash from the pop-up menu at the upper right-hand side
of the Viewer. Because you’re outputting clips with discontinuous timecode, you cannot
insert edit when batch outputting.
6 Once you’ve added all the clips you want to output to the queue, click Start Record to
begin outputting to tape. Device control is used to record to the designated section of
tape; a progress bar appears at the bottom of the Render Queue to show how long this
will take.
1268
Exporting Timelines and Metadata Part 9 – 78
Exporting Timelines and Metadata
Once you’ve completed editing and grading a program, you may need to export your final
graded timeline as EDL, AAF or XML files in order to send it to another application for further
finishing, effects work, or to complete a round trip from an NLE.
To send a graded project to another application, you need to render the graded clips first using
the controls on the Deliver page to render the Timeline as individual source clips. In this mode,
the reel name and timecode metadata of each rendered clip is mirrored by the exported project
file, to maintain the correlation between exported EDL, XML, or AAF data and the rendered
media. For detailed information about rendering in the Deliver page, see Chapter 75,
“Delivering Media.”
If you render using the Easy Setups that correspond to Final Cut Pro XML or Avid AAF round
trips, then an XML or AAF will be exported to the same directory you’ve rendered to. However,
you can still export an XML, AAF, or EDL file separately should the need arise.
Alternately, if you’ve edited a project from scratch in DaVinci Resolve and need to move a
timeline to another application, you can export any timeline to any format for purposes of
project exchange, without the need to render new media (depending on your workflow).
Even in situations where you’ve imported a timeline from another application, the robust project
compatibility of DaVinci Resolve makes it possible to import one type of project exchange file,
such as XML, and then export a completely different kind, such as AAF or EDL. This lets you
use DaVinci Resolve as a project exchange utility.
Exporting to AAF/XML 1269
More About Exporting to AAF 1270
Exporting an EDL 1270
Exporting a Missing Clips EDL 1271
Exporting Timeline Markers to EDL 1271
Exporting to CDL 1272
Exporting the Edit Index as a CSV or TXT File 1272
Exporting to ALE 1273
Exporting to ALE with CDL 1275
Exporting Timeline Markers to EDL 1276
Exporting and Importing Media Pool Metadata 1276
1269
Exporting Timelines and Metadata Part 9 – 78
Exporting to AAF/XML
Whether you’ve edited your project from scratch inside of DaVinci Resolve, or you’re doing a
round trip with an application that uses AAF, Final Cut Pro 7 XML, or Final Cut X XML project
exchange formats, you can export any DaVinci Resolve timeline in the Edit page to any project
format DaVinci Resolve supports. Whatever your workflow, keep the following in mind:
Timelines are automatically exported when you render a timeline in the Deliver
page: When you use the “Final Cut Pro Round-Trip” or “Avid AAF Round-Trip” render
setting presets, or a preset created from one of them, a corresponding XML or AAF file
is automatically exported along with the media you render.
Even if you’ve imported a project from another application, you can re-edit imported
projects before export: If necessary, you can freely re-edit projects you’re planning
to export. When you export an AAF or XML file, the Timeline will be sent back to the
originating NLE, or onward to the finishing application of choice.
Unsupported effects are sometimes preserved in Round Trip workflows: If there
were effects or clip constructs in the original sequence that were not compatible with
DaVinci Resolve, how those effects will be handled depends on the project format
you’re exporting to, and whether or not you’ve edited the project. For XML projects,
unsupported effects are saved internally by DaVinci Resolve, and are exported with
the XML file that you output no matter what. Consequently, they should reappear
when you reopen the exported file in the originating NLE. For AAF projects, you can
export unsupported effects as long as you don’t re-edit the project. However, if you
do re-edit the project, then you can only export an AAF file that’s been stripped of all
unsupported effects.
Project formats can be converted to other formats: Using DaVinci’s Export commands,
compatible project formats can be converted from one format to another. For example,
an imported EDL can be output as Final Cut Pro X XML. For that matter, Final Cut Pro
7 XML can be imported and then exported as Final Cut X XML. Or, an AAF file from
Media Composer can be imported and then exported as a Final Cut Pro XML file to
be opened in any NLE or finishing application compatible with that format, such as
Premiere Pro or Smoke.
To export an AAF or XML file after you’ve rendered the graded clips:
1 Do one of the following:
To export the current Timeline, choose File > Export AAF, XML, or press
Shift-Command-O.
Open the Edit page, right-click the Timeline you want to export in the Media Pool,
and choose Timelines > Export > AAF/XML.
2 When the Export XML dialog appears, type a name for the file and choose a location
for the exported XML file, then click Save.
An XML version of that timeline is saved, complete with references to the graded media
you rendered, and is ready for import into an NLE or finishing application.
1270
Exporting Timelines and Metadata Part 9 – 78
More About Exporting to AAF
When you export to AAF, there are actually two options that are available to you, depending on
whether you made editorial changes to the Timeline in the Edit page:
If you didn’t make any editing changes to the Timeline you imported: You can choose
File > Export AAF, XML, and choose “AAF Files” from the Format pop-up menu. This
exports all audio and effects using data from the original AAF file that was exported
from Media Composer, regardless of whether or not they’re supported in DaVinci
Resolve. When you export an unedited AAF, DaVinci Resolve uses the Avid AAF file
that you originally imported to create an updated one; make sure it’s still in the same
location as it was when you first imported it into DaVinci Resolve.
If you made editing changes to the Timeline you imported, or you’re exporting a
project that wasn’t AAF to begin with: Then you need to right-click the Timeline you
want to export in the Media Pool and choose Timelines > Export > Generate New AAF.
This option creates a brand new AAF file, but audio and effects that are not supported
in DaVinci Resolve in an AAF import are discarded.
Exporting an EDL
DaVinci Resolve is also capable of exporting EDLs that can be reimported into other
applications. For more information about EDL workflows, see Chapter 12, “Ingesting From
Tape,” Chapter 34, “Conforming and Relinking Media,” and Chapter 38, “Conforming EDL Files.”
To export an EDL:
1 Open the Edit page and select the Timeline you want to export an EDL from in the
Media Pool.
2 Exported EDLs only have a single video track. For timelines with multiple tracks,
only the events on the video track with the destination control assigned to it will be
exported (the destination control is the first control at the left in the track header). If you
want to export a track other than Video 1, you can assign the destination control to the
specific track you need to export.
3 Right-click the Timeline in the Media Pool, and choose Timelines > Export > AAF/XML/
EDL from the contextual menu.
4 When the Export Timeline dialog appears, type a name, choose a location for the
exported EDL, and choose EDL Files from the pop-up menu at the bottom, then click
Save. An EDL is exported.
1271
Exporting Timelines and Metadata Part 9 – 78
Exporting a Missing Clips EDL
This command lets you export a quick report listing all clips that are offline in the currently
selected track of the Timeline in the Edit page. This report is in EDL format, with one event for
each clip that’s offline, which describes the reel number and source timecode of the missing
media, as well as the record timecode of the missing media’s position on the Timeline.
Here’s an example of an exported Missing Clips EDL:
TITLE: ( no title )
1 A001_C002_0820G A _001 V C 10:28:27:03 10:28:28:00 01:00:00:00 01:00:00:21
2 A004_C012_0820MC_001 V C 14:07:31:21 14:07:35:13 01:00:12:13 01:00:16:05
3 A017_C001_0820C V_001 V C 21:16:14:22 21:16:15:00 01:00:16:05 01:00:16:07
Once you’ve exported this information, you can hand it off to whomever can help you track
down the missing media.
To export a Missing Clips EDL:
1 Open the Edit page and open the Timeline you want to export a Missing Clips EDL for
in the Timeline browser.
2 For timelines with multiple tracks, only the events on the video track with the
destination control assigned to it will be examined for missing clips. If you want to
examine a track other than Video 1, you can assign the destination control to the
specific track you need to examine for missing clips.
3 Right-click the Timeline in the Media Pool, and choose Timelines > Export > Missing
Clips EDL from the contextual menu.
4 When the Save Missing Clips EDL dialog appears, type a name and choose a location
for the exported EDL, then click Save.
Exporting Timeline Markers to EDL
If you keep notes about a project within the notes field of Timeline markers, found in the
Timeline ruler, then it’s possible to export those notes as an EDL.
To export timeline markers as an EDL:
1 Right-click that timeline in the Media Pool, and choose Timelines > Export > Timeline
Markers to EDL.
2 Choose a location and export format from the Export Edit Index dialog, and click Save.
Each Timeline marker is listed in the resulting EDL, with any notes included along with a
duration, where applicable.
1272
Exporting Timelines and Metadata Part 9 – 78
Exporting to CDL
DaVinci Resolve can export and import basic grading data to and from other applications via a
Color Decision List (CDL). CDLs are an industry-standard file format originally developed by the
American Society of Cinematographers’ technology committee. DaVinci Resolve supports the
1.2 CDL standard that defines the slope, offset, and power for each of the red, green, and blue
channels, as well as the overall saturation of each clip in a program.
CDL files are formatted similarly to EDLs, with SOP (Slope/Offset/Power), and SAT (Saturation)
values embedded as metadata in much the same way as comments are in a more typical EDL.
Here’s an example of a single CDL event:
020 001 V C 03:02:49:13 03:02:53:00 01:01:28:11 01:01:31:22
*ASC_SOP (1.109563 1.717648 0.866061)(-0.238880 -0.390357 0.353743)
(0.672948 1.384022 0.889876)
*ASC_SAT 1.000000
Because the CDL definition of a grade is so narrow, projects you’re planning to export to other
applications via a CDL must be constrained to only those operations the CDL mathematically
defines. Here are some things to keep in mind:
Only primary corrections in the first node of each clip are exported.
Restrict yourself to using the Lift/Gamma/Gain, Offset, and Saturation controls.
Keyframes are never exported. If keyframes are present in a grade, only the parameter
values at the first frame of the clip are used.
The track grade and group grades are completely ignored.
If there is an HSL Qualifier or a Power Window in the first node, it is ignored and the
corrections in that node are exported as if it were a primary correction.
Do not make Y’ only adjustments; they’re not compatible with CDLs. To ensure that
your exported CDL is accurate, set the Lum Mix parameter in the Primary Controls
palette for each grade to 0. For workflows involving frequent CDL export, you can turn
on the “Luminance Mixer defaults to zero” option in the Color section of the General
Options panel of the Project Settings to guarantee this parameter is always set to 0.
If your timeline conforms to all of these restrictions, then you’re ready to export a CDL.
To export a CDL:
1 Open the Edit page, right-click the Timeline you want to export in the Media Pool, and
choose Timelines > Export > CDL from the contextual menu.
2 Enter a name for the CDL, choose a location to save it to, and click OK.
For more information on importing a CDL to add grades to your project, see Chapter 54,
“Copying and Importing Grades Using ColorTrace.”
Exporting the Edit Index
as a CSV or TXT File
You can export the current contents of the Edit Index, in the Edit page, as a self-contained file
to use for reference in a variety of ways.
1273
Exporting Timelines and Metadata Part 9 – 78
To export the Edit Index:
1 Open the Edit Index, and choose one of the Edit Index filters from the Edit Index option
menu, if necessary. For example, you could filter the edit index by Offline Clips Only if
you wanted to export a list of all offline clips in the current timeline.
2 Right-click that timeline in the Media Pool, and choose Timelines > Export > Edit Index,
then choose a location and export format from the Export Edit Index dialog, and
click Save.
Exporting to ALE
DaVinci Resolve is also capable of exporting ALE (Avid Log Exchange) files. ALE is a tab-
delimited, ASCII text-based clip logging list format that enables the exchange of clip metadata
that can’t be embedded inside MXF files. ALE files are designed to let you export a log of all
clips that are used in a particular timeline with all of the metadata that’s associated with those
clips in DaVinci Resolve, so this metadata can be imported into and associated with clips inside
Media Composer or Symphony.
ALE files are divided into three sections, labeled Heading, Column, and Data:
The Heading provides information about the clips being logged, including the picture
and audio format, and the frame rate.
The Column line defines each of the columns of metadata being exported in the list.
There’s an automatic minimum of metadata columns that are automatically included,
regardless of whether they’re populated or not. However, additional metadata columns
are automatically added to this list by DaVinci Resolve when any corresponding
metadata field in the Metadata Editor is populated. For example, if you enter information
into the Camera, Keyword, and Shot fields of the Metadata Editor, then those columns
will be added to the exported ALE. There are no user settings that control this.
The Data section contains multiple lines, one for each event being referenced in the
list, that contain all the data corresponding to that clip.
If you’re exporting stereoscopic clips from stereoscopic timelines, the following additional
columns of metadata are automatically included in the two ALE files that are generated:
Pan (relative to timeline resolution)
Tilt (relative to timeline resolution)
Zoom
Rotate
Convergence (relative to timeline resolution)
HFlip (0 or 1)
VFlip (0 or 1)
To export an ALE file:
1 Open the Edit page, right-click the Timeline you want to export in the Media Pool, and
choose Timelines > Export > ALE from the contextual menu.
2 Enter a name for the ALE file, choose a location to save it to, and click OK.
The ALE file is saved, and a dialog appears reminding you of the file path to which it
was saved (click OK to dismiss it).

1274
Exporting Timelines and Metadata Part 9 – 78
Here’s an example of a short ALE export:
Heading
FIELD_DELIM TABS
VIDEO_FORMAT 1080
AUDIO_FORMAT 48khz
FPS 23.976
Column
Name, Tracks, Start, End, Take, Tape, UNC, FPS, Reel, Scene, Shoot,
date, Manufacturer, Source Resolution, Source, Bit Depth, DESCRIPT,
Comments, Audio SR, Audio Bit Depth, Auxiliary TC1, KN Start, Source
File Path, Display Name
Data
A001_C002_V01.CBF6A4FD139AD.mxf, V, 10:28:27:03, 10:28:28:00, A001_C002_
V01.C BF6 A4F D139A D
/Volumes/Disk_1/Avid MediaFiles/MXF/1/A001_C002_V01.CBF6A4FD139AD.m xf
23.98, DaVinci Resolve, 1920x1080, 10
/Volumes/Disk_1/Avid MediaFiles/MXF/1/A001_C002_V01.CBF6A4FD139AD.m xf
A001_C002_V01.CBF6A4FD139A D
A016_C008_V01.CBF6A4FD13A BD.m xf,V, 23:35:56:03, 23:36:00:11, A016_C008_V01.
CBF6A4FD13ABD
/Volumes/Disk_1/Avid MediaFiles/MXF/1/A016_C008_V01.CBF6A4FD13ABD.mxf
23.98, DaVinci Resolve, 1920x1080, 10
/Volumes/Disk_1/Avid MediaFiles/MXF/1/A016_C008_V01.CBF6A4FD13ABD.mxf
A016_C008_V01.CBF6A4FD13A BD
A004_C012_V01.CBF6A4FD1438E.m xf, V, 14:07:31:21, 14:07:35:15, A004_C012_
V01.CBF6A4FD1438E
/Volumes/Disk_1/Avid MediaFiles/MXF/1/A004_C012_V01.CBF6A4FD1438E.mxf
23.98, DaVinci Resolve, 1920x1080, 10
/Volumes/Disk_1/Avid MediaFiles/MXF/1/A004_C012_V01.CBF6A4FD1438E.mxf
A004_C012_V01.CBF6A4FD1438E
Note: The commas shown above are not normally in the ALE but shown here for field clarity

1275
Exporting Timelines and Metadata Part 9 – 78
To export an ALE file:
1 Open the Edit page, right-click the Timeline you want to export in the Media Pool, and
choose Timelines > Export > ALE from the contextual menu.
2 Enter a name for the ALE, choose a location to save it to, and click OK.
Exporting to ALE with CDL
Avid Media Composer and Symphony also support the import of ALE files with additional CDL
metadata columns with which to associate SOP (Slope/Offset/Power) and SAT (Saturation)
adjustment metadata to each clip that’s logged in the ALE.
When you import an ALE with CDL file into Media Composer, the SOP and SAT data populate
metadata columns for preservation and export in various Avid workflows. Here’s an example of
the Heading, Column, and Data sections of a sample ALE with CDL, with one line of clip
and CDL data.
To export an ALE with CDL file:
1 Open the Edit page, right-click the Timeline you want to export in the Media Pool, and
choose Timelines > Export > ALE and CDL from the contextual menu.
2 Enter a name for the ALE file, choose a location to save it to, and click OK.
The ALE file is saved, and a dialog appears reminding you of the file path to which it
was saved (click OK to dismiss it).
Here’s an example of a short ALE with CDL export:
Heading
FIELD_DELIM TABS
VIDEO_FORMAT 1080
AUDIO_FORMAT –
FPS 23.976
Column
Name, Tracks, Start, End, Take, Tape, UNC, FPS, Reel, Scene, Shoot
date, Manufacturer, Source Resolution, Source Bit Depth, DESCRIPT,
Comments, Audio SR, Audio Bit Depth, Auxiliary TC1, KN Start, Source
File Path, Display Name KeyKode, ASC_SOP, ASC_SAT, RESOLVE_SIZING
Data
A001_C002_V01.CBF6A4FD139AD.m xf, V, 10:28:27:03, 10:28:28:00,
A001_C002_V01.CBF6A4FD139A D
/Volumes/Disk_1/Avid MediaFiles/MXF/1/A001_C002_V01.CBF6A4FD139AD.mxf
23.98, DaVinci Resolve, 1920x1080, 10
/Volumes/Disk_1/Avid MediaFiles/MXF/1/A001_C002_V01.CBF6A4FD139AD.mxf
A001_C002_V01.CBF6A4FD139A D
(1.0260 1.0260 1.0260)(-0.0260 -0.0260 -0.0260)(0.8237 0.8237
0.8237) 0.8640
(0.0000 0.0000 1.0000 0.0000 0.0000 0 0)
Note: The commas shown above are not normally in the ALE but shown here for field clarity
1276
Exporting Timelines and Metadata Part 9 – 78
Exporting Timeline Markers to EDL
This command lets you export a quick report listing the text of all markers that have been
added to the Timeline as notes in an EDL. Clip markers are ignored. This report is in EDL format,
with one event for each Timeline marker, with a placeholder reel number (001 by default), and
source and record timecodes that correspond to each marker’s position in the Timeline (with a
duration of one frame). An EDL note for each event lists the Marker note, if there is one. There is
no note available for the color of the markers
Here’s an example of an exported Timeline Marker EDL:
TITLE: ( no title )
001 001 V C 01:00:09:09 01:00:09:10 01:00:09:09 01:00:09:10
Replace with another car door sound effect
002 001 V C 01:00:20:12 01:00:20:13 01:00:20:12 01:00:20:13
Trim this clip shorter
003 001 V C 01:00:30:12 01:00:30:13 01:00:30:12 01:00:30:13
Find another stock footage clip of the bridge
004 001 V C 01:00:30:13 01:00:30:14 01:00:30:13 01:00:30:14
Trim this montage three seconds shorter
Exporting and Importing
Media Pool Metadata
DaVinci Resolve makes it possible to export metadata from the Media Pool of one project for
import into the clips of another project, for instances where you need to move metadata
around. This process exports all metadata from the Media Pool as a .csv file.
For example, a DIT might have entered a lot of metadata to the DaVinci Resolve project used
for generating dailies, but then an impatient editor might have created a separate project to
begin editing those dailies. Instead of requiring the editor to enter each clip’s metadata all over
again, you can export the metadata from the DIT’s project and import it into the editor’s new
project, automatically matching the relevant metadata to each corresponding clip.
To export Media Pool metadata:
1 Open a project containing Media Pool metadata you want to export.
2 Optionally, select which clips in the Media Pool you want to export metadata for.
3 Choose File > Export Metadata From > Media Pool to export metadata from every clip
in the Media Pool, or choose File > Export Metadata From > Selected Clips to only
export metadata from clips you selected in step 2.
4 When the Export Metadata dialog appears, enter a name and choose a location for the
file to be written, then click Save. All metadata is exported into a .csv file that can be
viewed and/or edited in any spreadsheet application.
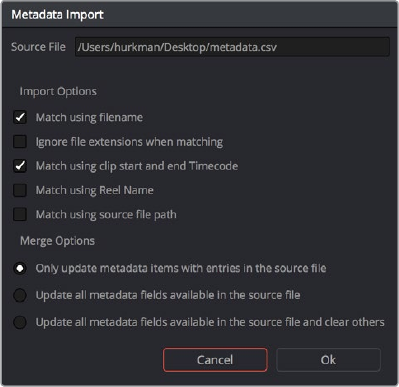
1277
Exporting Timelines and Metadata Part 9 – 78
To import Media Pool metadata:
1 Open a project containing clips you want to populate with imported metadata.
2 Optionally, select which clips in the Media Pool you want to import metadata to.
3 Choose File > Import Metadata To > Media Pool to import metadata to potentially every
clip in the Media Pool, or choose File > Import Metadata To > Selected Clips to only
import metadata to clips you selected in step 2.
4 When the Import Metadata dialog appears, choose a metadata .csv file to import, and
click Open.
5 When the Metadata Import dialog appears, choose the Import Options you want to
use to match the .csv file’s metadata to the correct clips in the currently open project.
By default, DaVinci Resolve tries to use “Match using filename” and “Match using clip
start and end Timecode” to match each line of metadata in the .csv file with a clip in the
Media Pool, but there are other options you can use such as ignoring file extensions,
using Reel Name, and using source file paths.
6 Next, choose which Merge Option you want to use in the Metadata Import dialog.
There are three options:
Only update metadata items with entries in the source file: The default setting. Only
updates a clip’s metadata if there’s a valid entry in the imported .csv file. Other clip
metadata fields are left as they were before the import.
Update all metadata fields available in the source file: For each clip that corresponds
to a line of metadata in the imported .csv file, every single metadata field referenced
by the .csv file is overwritten, regardless of whether or not there’s a valid entry for
that field.
Update all metadata fields available in the source file and clear others: For each clip
that corresponds to a line of metadata in the imported .csv file, every single metadata
field referenced by the .csv file is overwritten, regardless of whether or not there’s a
valid entry for that field. Furthermore, metadata fields that aren’t referenced by the
imported .csv file are cleared of whatever metadata was there before.
The Metadata Import dialog that lets you choose options for
how to match and merge imported metadata
7 When you’re finished choosing options, click Ok and all available metadata from the
source .csv file will be imported.

PART 10
1280
Resolve Live Part 10 – 79
Resolve Live
The Color page has another mode available to aid you in using DaVinci Resolve in on-set
grading workflows. Turning the Resolve Live option on puts DaVinci Resolve into a live grading
mode, in which an incoming video signal from a camera can be monitored and graded
during a shoot.
This chapter covers the following topics:
More About Resolve Live 1281
Configuring Your System for Resolve Live 1281
Grading Live 1282
Getting Started 1282
Going Live 1282
Using Freeze 1283
Using Snapshot 1284
Using Resolve Live Grades Later 1284
Using LUTs in Resolve Live Workflows 1285
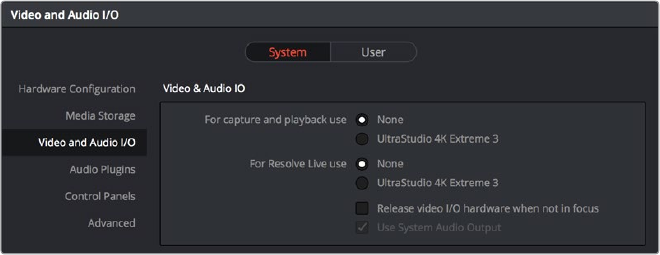
1281
Resolve Live Part 10 – 79
More About Resolve Live
Resolve Live has been designed to let you use all of the features of DaVinci Resolve to grade
these on-set video previews, in the process saving video snapshots that contain a captured
image, your grade, and reference timecode from the camera. The idea is that, using Resolve
Live, you can work with the cinematographer to develop looks and test lighting schemes on the
footage being captured during the shoot, and then later you can use those looks to build
dailies, and as a starting point for the final grade once the edit has been completed.
Additionally, you can use Resolve Live in conjunction with other Color page features such as
the Alpha Output to build test composites to check check green screen shots, comparing them
against imported background images in order to aid camera positioning and lighting
adjustments. The built-in video scopes can also be used to monitor the signal levels of
incoming video. Finally, you can use 1D and 3D LUTs to monitor and grade log-encoded media
coming off the camera.
Configuring Your System for Resolve Live
Setting up Resolve Live is straightforward. Whether your’e using a tower workstation or a
laptop, any of the Blackmagic Design DeckLink or UltraStudio video interfaces can be used to
connect your DaVinci Resolve workstation to a camera and external video display. The
important thing to keep in mind is that, if you want to connect to a live incoming signal and
output that signal for monitoring at the same time, you need to either use two separate
DeckLink PCIe cards or UltraStudio Thunderbolt interfaces, or a single DeckLink Duo or
DeckLink Studio card with multiple separate inputs and outputs on a single PCIe card.
The Video and Audio I/O panel of the System Preferences provides two sets of options for
configuring video interfaces connected to your computer, one for capture and playback, and
one for Resolve Live input. If you only have a single video interface, you can only do one or the
other. If you have two interfaces, then you can use these options to use one interface for
playback, and the other interface for Resolve Live.
Video input/output options in the System Preferences

1282
Resolve Live Part 10 – 79
During the shoot, the digital cinema camera in use needs to be connected to your DaVinci
Resolve workstation via HD-SDI, which must be configured to carry both the video image and
timecode that mirrors the timecode being written to each recorded clip. Most cameras allow
timecode output over HD-SDI, and both DeckLink and UltraStudio interfaces can pass this
timecode to DaVinci Resolve. Without a proper timecode reference, you won’t be able to take
the shortcut of automatically syncing your saved Snapshots to recorded camera original media
using ColorTrace, although you can always apply grades manually.
If you’re shooting with any of the Blackmagic Design cameras, you also have the option of
connecting the camera directly to your Resolve Live workstation using Thunderbolt, eliminating
the need for a second video interface. In this configuration, Thunderbolt carries both video and
timecode for easy capture by DaVinci Resolve.
Grading Live
Once your camera and computer are appropriately connected and configured, using Resolve
Live is straightforward. This section describes the live grading workflow as it was designed to
be used. Once you’re familiar with the capabilities of Resolve Live, you may find your own ways
of working that are more in tune to the needs of your particular project.
Getting Started
When working with Resolve Live on a new shoot, you should begin with an empty project and a
new empty timeline, since the live grading workflow involves capturing live graded snapshots
to an otherwise unoccupied timeline. One recommended way of organizing the live grades of a
shoot is to create one new project per day of shooting. This way, snapshots captured during
shoots using all 24 hours of time-of-day timecode won’t conflict with one another. Also,
separate projects can make it easier to use ColorTrace to copy grades from your live grade
snapshots to the camera original media you’ll be creating dailies from, eventually.
Once you’ve created your new project, you also need to choose the disk where all snapshots
you take will be saved. By default, snapshots are saved on the scratch disk at the top of the
Scratch Disks list in the Media Storage panel of the System Preferences. They’re automatically
saved in a folder named identically to the current project.
Going Live
Once you’ve created your day’s project, you need to turn on Resolve Live to begin work.
To turn on Resolve Live:
1 Open the Color page.
2 Choose Color > Resolve Live (Command-R).
A red Resolve Live badge at the top of the Viewer indicates that Resolve Live is turned
on, and the transport controls are replaced by the Freeze and Snapshot buttons.
TIP: Having an empty Media Pool and timeline doesn’t mean you can’t install useful
LUTs and pre-import reference stills and saved grades to the Gallery, as these can be
valuable tools for expediting your on-set grading.
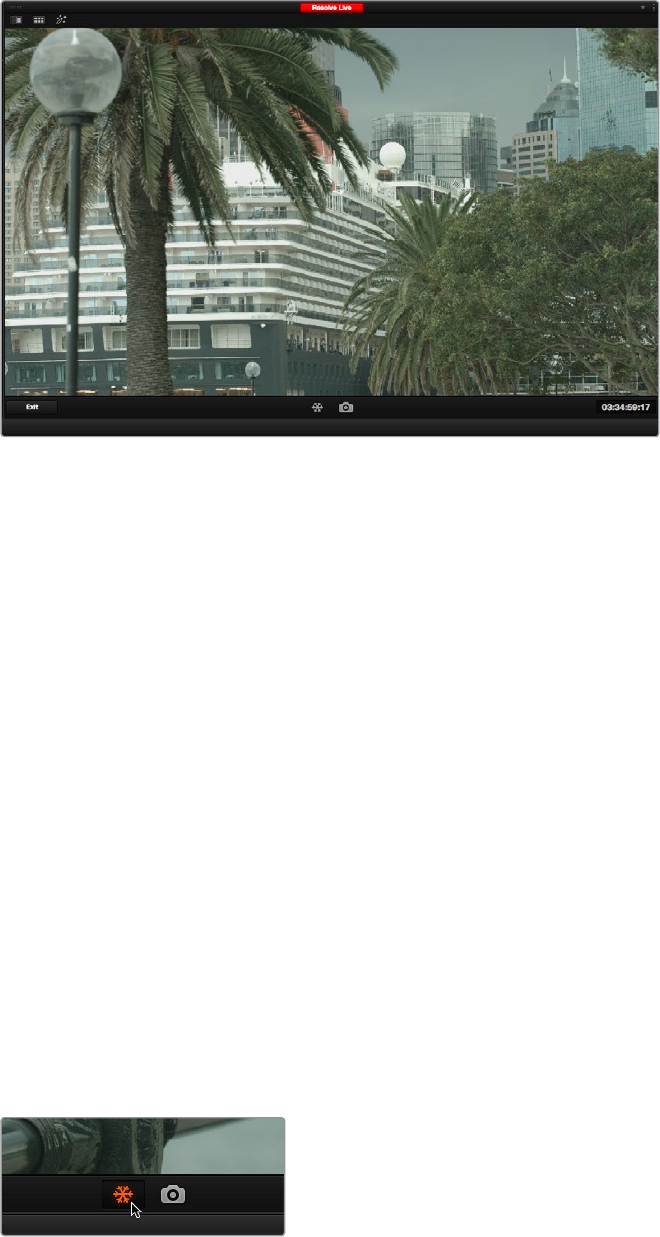
1283
Resolve Live Part 10 – 79
A red badge shows that Resolve Live is active and showing incoming video from the camera
At this point, the video from the connected camera should become visible within the Viewer,
the camera timecode should be displayed in the Viewer’s timecode window, and you can begin
using all of the capabilities of the Color page to begin grading whatever is onscreen, including
Gallery split-screens for matching and comparing. The current color adjustments in all palettes
are automatically applied to both the image in the Viewer and the video output to an external
display (if there is one).
While Resolve Live is on, much of DaVinci Resolve’s non-grading functionality is disabled, so
when you’re finished, be sure to turn Resolve Live off.
To turn off Resolve Live, do one of the following:
Click the Exit button at the bottom left-hand corner of the Viewer.
Choose Color > Resolve Live (Command-R).
Using Freeze
In Resolve Live mode, the Freeze button (it looks like a snowflake) freezes the current incoming
video frame, so you can grade it without being distracted by motion occurring during the shoot.
When you’ve made the adjustment you need, you can unfreeze playback in preparation for
grabbing a snapshot.
To freeze incoming video:
Click the Freeze button (that looks like a snowflake).
Choose Color > Resolve Live Freeze (Shift-Command-R).
The snowflake button freezes the image
so you can grade a particular frame
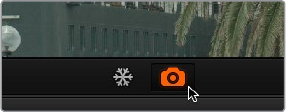
1284
Resolve Live Part 10 – 79
Using Snapshot
Once you’re happy with a grade, clicking the Snapshot button saves a snapshot of the current
still in the Viewer, the incoming timecode value, and your grade into the Timeline. Snapshots
are simply one-frame clips. They use grades and versions just like any other clip. In fact,
ultimately there’s no difference between the timeline created by a Resolve Live session and any
other timeline, other than that the Resolve Live timeline only has a series of one frame clips,
which appear in the Timeline of the Edit page as s series of 1-frame stills.
To save a Snapshot, do one of the following:
Click the snapshot button (with a camera icon).
Choose Color > Resolve Live Snapshot (Command-Option-R).
The snapshot button saves a frame and
the grade for future use
For example, you may begin the process of building and refining a grade for a particular scene
during an unrecorded run-through. Then, once shooting starts, you may take snapshots of each
shot’s slate, and then of significant takes that follow, tweaking where necessary and in
conjunction with the DP’s feedback once things get going. New camera setups may require
further tweaks, which you’ll save as snapshots for those shots, and as you work in this way you’ll
find yourself building up a timeline of snapshots that correspond to that day’s shoot.
As you work, keep in mind that you must temporarily turn Resolve Live off in order to open a
grade from a previous snapshot in the Timeline, in order to use it as a starting point for another
shot. You can also save grades into the Gallery.
Using Resolve Live Grades Later
Since each Snapshot you capture during a Resolve Live session contains timecode that was
captured from the camera, grades from snapshots with timecode that overlaps recorded
camera original media can be synced using ColorTrace when the time comes to start
making dailies.
Keep in mind that snapshot grades correspond to the monitored output of the camera during
the shoot. If you shot using a raw format, you’ll need to use whatever in-camera debayering
settings were used for monitoring during the shoot if you want the grades from your snapshots
to produce the same result.
For more information on using ColorTrace, see Chapter 54, “Copying and Importing Grades
Using ColorTrace.”

1285
Resolve Live Part 10 – 79
Using LUTs in Resolve Live Workflows
Many on-set workflows use Look Up Tables (LUTs) to calibrate displays, normalize log-encoded
media for monitoring, and preview looks in the video village to test how the current lighting
scheme will work with the intended grade. You can apply LUTs using the Look Up Table panel
of the Settings window, or within a grade as part of a node tree.
However, you can also export LUTs, if necessary for monitor previewing, that you can apply by
loading them into a compatible LUT box of some kind, connected in-between the camera’s
video output and a display, or using a display capable of loading LUTs internally.
If you’re exporting LUTs using the Generate 3D LUT command of the Thumbnail timeline’s
contextual menu, you should limit yourself to using only Primaries palette and Custom Curves
palette controls within a single node. These are the only grading controls that can be
mathematically converted into a LUT.
When exporting a LUT, any nodes that use Windows or OpenFX will be ignored along with all
corrections made within these nodes. All other nodes with Primaries palette and Custom
Curves palette adjustments that can be translated into a LUT will have their combined result
translated into a LUT. For any nodes that mix supported and unsupported adjustments for
LUTexport (such as sharpening or blur filtering operations), the unsupported adjustments will
simply be ignored. For more information on exporting LUTs, see “Exporting Grades and LUTs”
in Chapter 48, “Grade Management.”
NOTE: DaVinci Resolve exports LUTs in the .cube format, which is a DaVinci-
developed LUT format, with no relation to the Adobe SpeedGrade.cube format..
1287
Stereoscopic Workflows Part 10 – 80
Stereoscopic Workflows
DaVinci Resolve has robust support for a wide variety of stereoscopic workflows. Using the
built-in tools of the full version of DaVinci Resolve, you can edit using stereoscopic clips, grade
the resulting program, adjust each clip’s stereo-specific properties such as convergence and
floating windows, and master stereoscopic output, all within DaVinci Resolve.
This chapter has the following topics:
Stereoscopic Workflows 1288
Hardware Requirements for Working in Stereo 3D 1288
Setting Up to Display Stereo 3D via SDI 1288
Setting Up to Display Stereo 3D via HDMI 1289
Supported Stereo 3D Media 1289
Using Dual Sets of Media in Any Supported Format 1289
Using CineForm Media 1289
Creating Stereo 3D Clips 1290
Step 1—Import and Organize Your Media 1290
Step 2—Generate 3D Stereo Clips 1290
Step 3—(Optional) Create Optimized Media 1292
Converting Clips Between Stereo and Mono 1292
Converting Stereo Clips Back to Mono 1292
Converting Mono Clips or an Entire Timeline to Stereo 1292
Attaching Mattes to Stereo 3D Clips 1293
Organizing and Grading Stereo 3D Dailies 1293
Step 1—Create 3D Stereo Clips 1293
Step 2—Edit the New Stereo Clips Into One or More Timelines for Grading 1293
Step 3—Align Your Media 1293
Step 4—Grade Your Media 1294
Step 5—Output Oine or Online Media for Editing 1294
Conforming Projects to Stereo 3D Media 1295
Grading Mastered Stereoscopic Media From Tape 1295
Adjusting Clips Using the Stereo 3D Palette 1296
Stereo Eye Selection 1296
Stereo 3D Geometry Controls 1297
Swap and Copy Controls 1298
Automatic Image Processing for Stereo 3D 1299
Stereo 3D Monitoring Controls 1301
Floating Windows 1303
Stereo Controls on the DaVinci Control Panel 1304
Outputting Stereo 3D Media in the Deliver Page 1305
Rendering Frame-Compatible Media 1305
Rendering Individual Left and Right-Eye Clips 1305
1288
Stereoscopic Workflows Part 10 – 80
Stereoscopic Workflows
Creating a stereo 3D project is a multi-step process that benefits from careful media
organization. This chapter covers how to set up for working on stereoscopic projects, how to
import stereoscopic projects, and how to export stereoscopic media. Incidentally, if you’re used
to how DaVinci Resolve used to handle stereo timelines and media in past versions, be aware
that DaVinci Resolve versions 10.1 and later simplify the way stereo is handled, making the
overall process easier to manage.
First, stereoscopic pairs of clips, i.e., the individual left- and right-eye media files, are imported
into the Media Pool, organized, and then linked together using the “Stereo 3D Sync” command
to create a new set of linked stereo clips. Then, these clips stereo clips can be either edited or
conformed to imported project data using a single Timeline. DaVinci Resolve lets you manage
left- and right-eye grades and sizing in the Color page using the controls found in the shortcut
menu of the Thumbnail timeline, and in the Stereo 3D palette.
If you’re using stereoscopic CineForm media, which contains muxed left-eye and right-eye
image data that can be decoded by DaVinci Resolve, you still need to go through this process,
although you’ll be using duplicate clips to populate Left and Right folders with matching
sets of clips.
Hardware Requirements
for Working in Stereo 3D
With DaVinci Resolve on Mac systems, dual 4:2:2 Y’CbCr stereoscopic video streams are output
via SDI from a compatible Blackmagic Design video interface. You can select either Side-by-
Side or Line Mesh output to be fed to your stereo 3D-capable display, depending on its
compatibly. Alternately, if you turn on the “Enable Dual SDI 3D Monitoring” checkbox in the
Video Monitoring group of the Master Settings panel of the Project Settings, your compatible
Blackmagic Design video interface outputs full resolution 4:2:2 Y’CbCr for each eye to
compatible displays.
When setting up a 3D-capable DaVinci Resolve workstation, keep in mind that the dual video
streams of 3D projects make greater demands on disk bandwidth, media decoding via your
workstation’s CPU or via RED ROCKET-X cards, and effects processing via your workstation’s
available GPU cards.
Setting Up to Display Stereo 3D via SDI
All DaVinci Resolve systems can output a side-by-side frame-compatible signal that can be
viewed on a stereo 3D-capable display via a single SDI connection, output from a DeckLink HD
Extreme card or better. For higher-quality monitoring, two SDI signals can be used to output the
left-eye and right-eye images separately at full resolution using one of the following Blackmagic
Design video interfaces:
DeckLink HD Extreme 3D+
DeckLink 4K Extreme
DeckLink 4K Extreme 12G
UltraStudio 4K
UltraStudio 4K Extreme
UltraStudio 4K Extreme 3
Legacy systems accomplish this via NVIDIA dual SDI monitoring outputs.

1289
Stereoscopic Workflows Part 10 – 80
The following procedures describe how to set up stereo 3D monitoring in two different ways.
Monitoring via dual SDI to dual SDI:
1 Open the Master Settings panel of the Project Settings, then do the following:
Make sure Video Connection is set to YUV 4:2:2 SDI.
Turn on the “Use left and right eye SDI output” checkbox.
2 Open the Stereo 3D palette, and do the following:
Set Vision to Stereo.
Set the Out pop-up menu to None.
Setting Up to Display Stereo 3D via HDMI
If your stereo-capable display only has HDMI input, you’ll need to use the HDMI output of a
compatible Blackmagic Design video interface that has HDMI 1.4 or better to output stereo 3D
signals; see the documentation accompanying your video interface for more information.
Supported Stereo 3D Media
When importing stereo 3D media from other applications, there are two types of media that are
compatible with DaVinci Resolve stereoscopic workflows.
Using Dual Sets of Media in Any Supported Format
When originally shot, the media corresponding to stereo 3D workflows consists of two
directories, one for the left-eye media, and one for the right-eye media. For the most automated
workflow possible, this media must be tightly organized. Each pair of left-eye and right-eye
media files in both directories should have matching timecode, and reel numbers that clearly
indicate which are the left-eye shots, and which are the right-eye shots.
Using CineForm Media
CineForm stereo QuickTime files are compatible with DaVinci Resolve. CineForm clips encode
the media corresponding to both eyes and mux (multiplex) it together in such a way so that
CineForm files may output either a single frame of image data, if used in an application that is
not capable of stereoscopic processing, or stereo 3D media when used with an application that
is, such as DaVinci Resolve. This means that you can edit CineForm media using nearly any
NLE, export a project via whatever workflow is convenient, and end up with a stereoscopic
project that can be graded in DaVinci Resolve.
NOTE: If your stereo display is not capable of multiplexing the two incoming SDI
signals by itself, you can accomplish this using an external device to multiplex both
SDI signals into a single stereo 3G signal that will be compatible. Check with your
display manufacturer in advance to see if this is necessary.
NOTE: When “Enable dual SDI 3D monitoring” is turned on, split-screen wipes and
cursors will not be visible on the grading monitor, nor will you be able to view
image resizing.
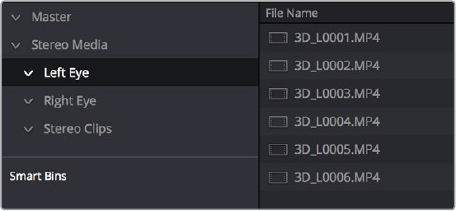
1290
Stereoscopic Workflows Part 10 – 80
There are two ways of creating CineForm files. One is by using a camera or recording system
that processes dual synchronized video signals to create a single set of CineForm media. The
other is to use the CineForm conversion tools that come with GoPro CineForm Studio to
reprocess dual sets of stereo 3D assets into the CineForm format.
The CineForm codec itself encodes full-frame image data using wavelet compression, at any
resolution, at up to 12-bits, in a choice of RGB, Y’CbCr, or RAW color spaces. DaVinci Resolve is
compatible with CineForm in a QuickTime wrapper using any supported color space, allowing
access to the dual streams of image data that are provided.
When the time comes to output your program, keep in mind that while DaVinci Resolve can
read CineForm files, CineForm files cannot be rendered out of DaVinci Resolve unless you’ve
purchased an encoding license for OS X or Windows from GoPro. Furthermore, DaVinci Resolve
cannot render Stereoscopic CineForm files.
Creating Stereo 3D Clips
The very first thing you need to do when working on any stereo 3D project is to create the
stereo 3D clips that you’ll be using. This is a two-step procedure.
Step 1—Import and Organize Your Media
You need to import all of the left-eye and right-eye media into separate bins.
1 Open the Media page, and create three Media Pool bins named “Left,” “Right,”
and “Stereo Clips.” The exact names are not important, but the way the media is
organized is.
2 Import all left-eye media into the ”Left” bin, and all right-eye media into the ”Right” bin.
If you’re importing stereoscopic Cineform media, you still need to create this kind of
organization, which requires you to place duplicates of each clip into each of the “Left”
and “Right” bins.
Step 2—Generate 3D Stereo Clips
Once you’ve organized your media appropriately, you’re set up to synchronize the left- and
right-eye clips using timecode.
1 Create a new bin in the Media Pool, and name it “Stereo Clips.” This is the bin that will
eventually contain the linked stereo clips you’re about to create.
How to organize media for working in stereo 3D
2 Right-click anywhere within the Media Pool and choose Stereo 3D Sync.
The Stereo 3D Sync dialog appears, with buttons for choosing the left-eye folder,
choosing the right-eye folder, choosing the output folder, and checkboxes for
specifying whether to match reel names and file names, and additional fields for
entering characters that identify left- and right-eye clips.
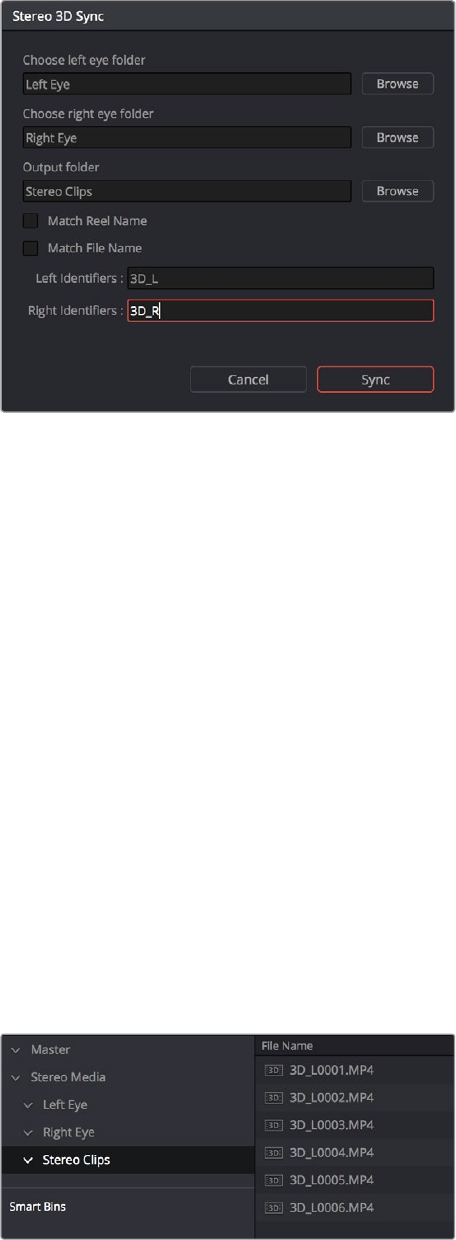
1291
Stereoscopic Workflows Part 10 – 80
The Stereo Media Sync window
3 Click the Browse button corresponding to “Choose left eye folder” and then use the
hierarchical list of bins that appears to choose the bin you named “Left.” Follow the
same procedure to choose the right-eye media.
4 Click the Browse button corresponding to “Output folder” and then use the hierarchical
list of bins that appears to choose the bin you named “Stereo Clips.”
5 Choose which matching criteria to use. Ideally, you only need to use whichever one of
the three criteria that apply. The three options are:
Match Reel Name: If the reel names of the left- and right-eye media match, turn this
checkbox on.
Match File Name checkbox: If the file names of the left- and right-eye media match,
turn this checkbox on.
Left Identifiers and Right Identifiers fields: If the left- and right-eye clips are
identified by a special subset of characters within the file name (for example, “3D_R”
and “3D_L”) then you can type each into the appropriate field, and these characters
will be used to match the left and right eyes together.
6 Click OK.
The original clips in the Left and Right bins disappear, and a full set of Stereo 3D clips appear in
the output bin you selected in step four.
Final stereo clips, ready to be edited and graded
1292
Stereoscopic Workflows Part 10 – 80
Step 3—(Optional) Create Optimized Media
If your stereo media is excessively large, you can create optimized media starting with
DaVinciResolve 14.
1 Select the stereo clips you’ve created.
2 Right-click one of the selected clips, and choose Generate Optimized Media from the
contextual menu. A window appears showing you how long it will take to finish creating
optimized media.
Converting Clips Between
Stereo and Mono
You also have the option of converting clips between mono and stereo 3D using a pair of
commands in the Media Pool.
Converting Stereo Clips Back to Mono
If necessary, you can split one or more stereo clips into mono clips using a single command.
To convert stereo clips into mono clips:
1 Select one or more stereo clips in the Media Pool.
2 Right-click one of the selected clips and choose Split Stereo 3D Clips from the
contextual menu.
Afterwards, two new bins are created named Left and Right, containing the individual
left and right-eye clips that you’ve split apart.
Converting Mono Clips or an Entire Timeline to Stereo
Non-stereo clips (for which there are are not separate left and right eye media files) can be
converted into stereo clips either individually or throughout an entire timeline for one of two
different reasons:
You can convert non-stereo clips into stereo for use in a stereo project, so they output
properly along with the rest of a stereo timeline, albeit without adjustable convergence
or depth effects.
If you want to grade an HDR and non-HDR version of your program at the same time,
converting non-stereo clips to stereo makes it possible for you to a) manage two
separate SDR and HDR grades for each clip in a timeline using the left and right-eye
channels, and b) output the SDR and HDR signals separately via your compatible
Blackmagic Design interface’s left- and right-eye SDI outputs when you turn on the
“Enable Dual SDI 3D Monitoring” checkbox in the Video Monitoring section of the
Master Settings panel of the Project Settings.
To convert mono clips into stereo clips:
1 Select one or more non-stereo clips in the Media Pool.
2 Right-click one of the selected clips and choose Convert to Stereo from the
contextual menu.
Afterwards, that clip appears in the Media Pool as a Stereo 3D clip, and when edited
into a timeline, can expose its controls in the 3D Stereo palette in the Color page.
1293
Stereoscopic Workflows Part 10 – 80
If you have a timeline full of clips that you’ve just converted into stereo using the above
procedure, you need to take the additional step of setting the Timeline to stereo in order to
create stereo grades for each clip.
To convert a timeline to have stereo grades for simultaneous HDR/SDR output while grading:
Right-click a timeline in the Media Pool and choose Timelines > Set Timeline to Stereo
For more information about using stereo timeline workflows for simultaneous HDR and SDR
grading, see Chapter 6, “Data Levels, Color Management, ACES, and HDR.”
Attaching Mattes to Stereo 3D Clips
If you have left- and right-eye mattes that need to be attached to stereo clips, the process
works identically to importing mattes for regular clips, except that when you’ve selected a
stereo 3D clip in the Media Pool, you have two matte import commands, “Add As Left Eye
Matte,” and “Add As Right Eye Matte.”
Organizing and Grading Stereo 3D Dailies
A common workflow is the creation of digital dailies within DaVinci Resolve before editing in an
NLE. This provides the editors, director, and producers with the advantage of having more
attractive media to work with, that’s also more comfortable to view if handled with the automatic
geometry and color-matching functions that match the media of each pair of shots together for
a preliminary left- and right-eye balance. The resulting Timelines can then be output to
whichever media format is most convenient to use.
Step 1—Create 3D Stereo Clips
The very first step in the process of creating dailies is to import all of the left-eye and right-eye
media into individually organized bins, and to then link them together to create stereo 3D clips,
as described in the previous section.
Step 2—Edit the New Stereo Clips Into One or More Timelines for Grading
Now that you’ve created a set of Stereo 3D clips, you’re ready to edit them into one or more
Timelines for grading. You can do this by simply creating a new Timeline and deselect the
‘Empty Timeline” checkbox. A new Timeline will be created with the stereo 3D clips
you created.
Step 3—Align Your Media
For the stereoscopic effect to work without causing headaches, it’s critical that both eyes are
aligned. This can be tricky to adjust using manual controls, but is something that can be
automatically analyzed. You can perform stereo 3D alignment to a single clip using the Stereo
3D Palette controls, or you can select a range of clips to align all of them automatically at once.
There are two methods of alignment; which is more appropriate depends on the type of
geometry issues you have to address.
Transform Alignment: Analyzes the image and makes vertical and rotational
adjustments to line up the left- and right-eye images as closely as possible.
Vertical Skew: Analyzes the images and makes a vertical-only adjustment to line up the
left- and right-eye images.
1294
Stereoscopic Workflows Part 10 – 80
Controls for aligning the left and
right eye media
Step 4—Grade Your Media
Grade the clips in the Timeline as you would any other digital dailies, with the sole addition of
using the controls in the Stereo 3D palette to control monitoring and manage the adjustments
made to each eye as necessary. As when creating any other kind of dailies, you can use LUTs,
the Timeline Grade, and individual clip grading to make whatever adjustments are necessary to
create useful media for editing.
To help you manage the visual differences between left- and right-eye clips, there are also two
automatic color matching commands that can be used to batch process as many clips as you
need to adjust at once.
Stereo Color Match (Primary Controls): Uses the Lift/Gamma/Gain controls to match
one eye to the other. The result is a simple adjustment that’s easy to customize, but
may not work as well as Custom Curves in some instances.
Stereo Color Match (Custom Curves): Uses the Custom Curves to create a
multipoint adjustment to match one eye to the other. Can be more effective with
challenging shots.
Stereo Color Match (Dense Color Match): Performs a pixel by pixel, frame by frame
color match that is incredibly accurate. This operation is processor intensive, so if you’re
going to batch process many clips, or if you’re matching long clips, you’ll want to make
sure you have adequate time. Because this is so precise match, it’s recommended to
use Dense Color Match after you’ve used one of the stereo alignment commands.
Controls for matching the grade of
the left and right eye media
Step 5—Output Oine or Online Media for Editing
When you’re done applying whatever grading is necessary to make the media suitable for
editing, you’ll need to export each clip as separate left- and right-eye clips using the controls of
the Deliver page.
1 Open the Deliver page, and set up your render to output the format of media you
require. Be sure to do the following:
Set Render Timeline As to Individual source clips.
Turn on the Use Source Filename checkbox.
To render both eyes’ worth of media, choose “Both eyes as” from the Render
Stereoscopic 3D option, and choose Separate Files from the accompanying
pop-up menu. Optionally, you could also choose to render only the left-eye or
right-eye media.
2 Choose how much of the Timeline to render from the Render pop-up menu in the
Timeline toolbar; to render everything, choose Entire Timeline.
1295
Stereoscopic Workflows Part 10 – 80
3 Click “Add Job to Render Queue.”
4 Click Start Render.
DaVinci Resolve will now render either two sets of left- and right-eye clips, or one set of
media corresponding to the eye you chose.
To make sure that the resulting edited project conforms easily to the originating DaVinci
Resolve project, it’s important to be sure that you render individual source clips, and that you
turn on the Use Source Filename checkbox, in order to clone the timecode, reel numbers, and
file names of the source media.
Conforming Projects to Stereo 3D Media
Since DaVinci Resolve manages stereo via a single set of specially created stereo 3D clips, you
can use the same project import methods to import stereo 3D projects as you would for any
other project. Only a single imported timeline is necessary.
This also means that you can edit stereo projects in NLEs that aren’t otherwise stereo-aware,
and finish them in full stereo 3D in DaVinci Resolve. To do this, you need to make sure that you
edit the left-eye media in your NLE, and then export either an EDL or XML file to conform in
DaVinci Resolve.
To conform an EDL to stereo 3D media:
1 Open the Media page, and create the necessary set of stereo 3D clips that will
correspond to the project you’re going to import, as described previously.
Open the Edit page, and then use the Import AAF/EDL/XML command to import
your edit.
2 When the Load EDL/XML dialog appears, do the following:
If importing an EDL, verify that the frame rate is correct, and click OK.
If importing XML, make sure you turn off the “Automatically import source clips into
Media Pool” checkbox, since you want to relink the imported project to the stereo
3Dclips you created in step one.
The left-eye media timecode and reel information that’s embedded within each stereo
3D clip will be used to conform the stereo 3D clips with the imported EDL, and you
should be ready to work.
Grading Mastered Stereoscopic Media From Tape
If you’ve been handed a stereo 3D muxed tape with a mastered program that needs to be
graded, but you haven’t been given a project file or EDL, you can ingest it as individual left- and
right-eye media files with a supported VTR, such as HDCAM SR with 4:2:2 x 2 mode, by turning
on the “Enable stereo video” checkbox in the Capture and Playback panel of the Project
Settings. When muxed stereoscopic signals are ingested, each eye is separated into individual
left-eye and right-eye image files
Once ingested, you can use Scene Detection to split the left-eye media in one bin, and to
create an EDL, you can use to split the right-eye media in the same way in another bin, so that
you can create a sequential set of stereo clips for grading.
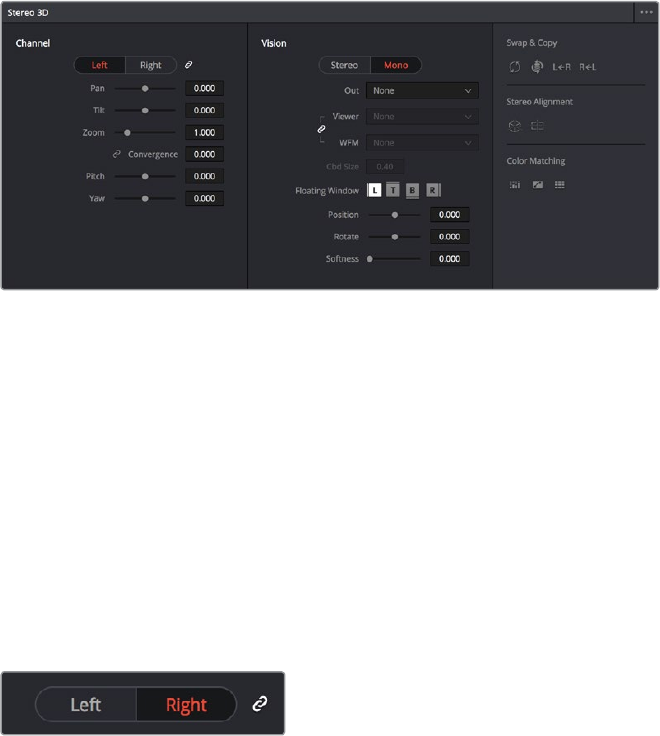
1296
Stereoscopic Workflows Part 10 – 80
Adjusting Clips Using
the Stereo 3D Palette
Once you’ve either created or imported a stereoscopic 3D-identified timeline, you’re ready to
begin grading. The left eye will be displayed in the Edit and Color pages by default; however,
you can right-click on the Timeline and select to view the other eye. Most colorists work by
grading one eye first (typically the left), and rippling their grades to the other eye, making
separate adjustments to each eye’s clips when necessary to match undesirable variation
between cameras. DaVinci Resolve lets you do this automatically.
Setting up stereo 3D media enables the Stereo 3D palette on the Color page. This palette
contains all the controls necessary for working on stereoscopic projects. It provides controls for
choosing which eye to grade, adjusting convergence, swapping and copying grades and media
between matching left- and right-eye clips auto-processing the color and geometry of left- and
right-eye clips to match, stereo 3D monitoring setup, and controls for floating windows.
Stereoscopic 3D palette
Your project must contain stereo 3D clips in order to open this palette. For more information on
setting up a stereo 3D project, see the “Creating Stereo 3D Clips” section of this chapter.
Stereo Eye Selection
Most colorists work by grading one eye first (typically the left), and rippling their grades to the
other eye, making separate adjustments to each eye’s clips when necessary to match
undesirable variation between cameras.
The first three buttons in the Stereo 3D palette let you choose which eye to grade while you’re
working, as well as whether or not to ripple each clip’s grade to the matching opposite-eye clip.
Whenever you switch eyes, the 3D badge above each clip’s thumbnail changes color (blue for
right, red for left) and the thumbnails themselves update to show that eye’s media.
The Left eye is master and ganged with the right
Left button: Displays the left-eye image and grade.
Ripple Link button: When enabled (orange), all changes you make to the grade of
the currently selected eye are automatically copied to the correspondingly opposite
eye. When disabled (gray), grades made to the currently selected eye are made
independently.
Right button: Displays the right-eye image and grade.
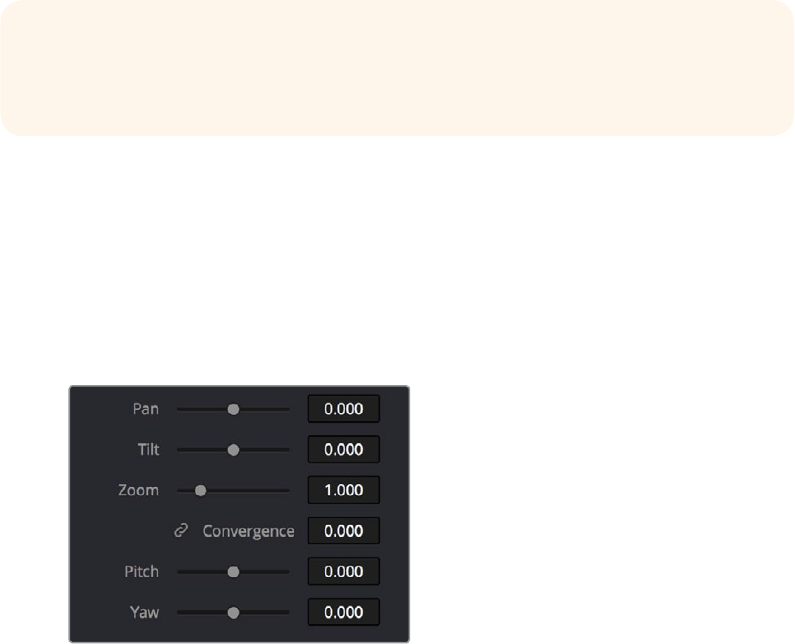
1297
Stereoscopic Workflows Part 10 – 80
You can also choose which eye you’re viewing and grading by right-clicking a clip’s thumbnail
and choosing Stereo > Switch Eye or by choosing View > Switch Eye To > Left Eye or Right Eye.
Using Ripple Link When Grading Stereo 3D Clips
You would turn Ripple Link off to suspend rippling when you want to make an individual
adjustment to the grade of one eye to obtain a better match between the two. When you’re
finished matching the two clips, you can turn it back on to resume automatic grade rippling.
Stereo 3D grade rippling is always relative, so differences between the grades that are applied
to the left- and right-eye clips are preserved. In fact, when you add or remove nodes to or from
one eye, the same nodes are automatically added to or removed from the corresponding clip
it’s paired with, regardless of whether or not Ripple Linked is enabled.
Stereo 3D Geometry Controls
The next group of parameters lets you adjust the geometry of stereo 3D clips. The Pan, Tilt, and
Zoom controls are provided as a convenience, and simply mirror the same parameters found in
the Transform palette’s Input mode, but made specific to the geometry of the Left and Right eye
media. Convergence, Pitch, and Yaw are the three parameters that are unique to the Stereo
3D palette.
Stereoscopic 3D Geometry controls
Convergence: Adjusts the disparity between the left and right eyes, to define the point
of convergence (POC), or the region within the image where the left- and right-eye
features are in perfect alignment. If necessary, Convergence can be animated using the
Stereo Format parameter group in the Sizing track of the Keyframe Editor. If you want
to adjust convergence in pixels, open the Stereo 3D palette option menu, and turn on
“Show convergence in pixels.”
Features that overlap perfectly in both right- and left-eye clips are at zero parallax,
putting that feature’s depth at the screen plane. Matching features that are divergent in
the left- and right-eye clips have increasingly positive parallax, and appear to be farther
away from the audience. Matching features that are divergent and reversed in the left-
and right-eye clips have increasingly negative parallax, and appear to be closer to the
audience than the screen plane.
IMPORTANT: Regardless of whether or not Ripple Link is enabled, local versions
created for one stereo 3D-identified clip are automatically available to the
paired timeline.
1298
Stereoscopic Workflows Part 10 – 80
Linked Zoom button: When enabled (orange), both the left- and right-eye clips are
automatically zoomed whenever Convergence is adjusted so that both eyes always fill
the screen. When disabled (gray), changes to Convergence will cause the opposing left
and right edges of each eye’s clip to have blanking intrude.
Pitch: Pivots the image around the horizontal center plane of the frame.
Yaw: Pivots the image around the vertical center plane of the frame.
Sizing Repositioning in Stereo 3D
Generally, you’ll want to reposition stereo 3D clips with Ripple Link turned on, but you may
occasionally find yourself needing to make a manual adjustment to one eye in particular with
Ripple Link disabled. As with color adjustments, Sizing adjustments made with Ripple Link
disabled are only applied to the clip in the current Timeline. When Ripple Link is turned on, all
Sizing adjustments are automatically copied to the correspondingly numbered shot of the other
stereo 3D timeline.
Protecting Stereo Adjustments When Copying Grades
Each version of a grade has independent stereo adjustments stored along with the Sizing
settings. To prevent accidental overwrite of convergence and alignment data when copying
grades from one clip to another, you can right-click within the Gallery and choose one of the
following options to turn them on:
Copy Grade: Preserve Convergence
Copy Grade: Preserve Floating Windows
Copy Grade: Preserve Auto Align
When enabled, these options lets you overwrite a clip’s grade without overwriting specific
Stereo 3D parameters.
Swap and Copy Controls
Another set of controls at the right of the Stereo 3D palette lets you swap and copy grades, and
swap clips, in situations where you need to reverse what’s applied to a pair of left- and
right-eye clips.
Swap and Copy grades between eyes
WARNING: It is not advisable to use the Rotate parameter when transforming stereo
3D clips. Geometrically, rotation tilts a stereo pair of clips inappropriately, and ruins the
“side-by-side” convergence that’s necessary to create the stereoscopic illusion.
TIP: Stereo 3D and Sizing settings are processed before node-based corrections in
the DaVinci Resolve image processing pipeline.
1299
Stereoscopic Workflows Part 10 – 80
Swap Grade: Exchanges the grades that are applied to the left- and right-eye clips.
Swap Shot: A checkbox that, when enabled, switches the actual media used by two
corresponding left- and right-eye clips. Useful in situations where the eyes of a stereo
3D clip were mislabeled, and you want to switch the clips without rebuilding both EDLs.
Copy Right to Left: Copies the right-clip grade to the corresponding left-eye clip.
Copy Left to Right: Copies the left-clip grade to the corresponding right-eye clip.
Batch Grade Management for Stereo 3D Projects
There are also a series of batch-processing commands that are useful for stereoscopic grading
that are available when you right-click one or more selected clips in the Thumbnail timeline:
Stereo 3D Batch Copy: Copies every grade from the left-eye clips to the right-
eye clips.
Stereo 3D Batch Sync: Copies grades from one eye to the other only when their
node graphs have the same number of nodes. This prevents you from accidentally
overwriting a custom grade with a different node structure that was necessary to match
two eyes for a problem shot.
The Copy Grade, Swap Grade, Swap Shots, Ripple Link, and Switch Eye commands are also
available from the Stereo submenu of the Timeline contextual menu.
Automatic Image Processing for Stereo 3D
It’s common during stereoscopic shoots for minor divergences in geometry and color to appear
in the source footage. To make the process of grading stereo 3D media less onerous, DaVinci
Resolve provides a set of auto-adjustment controls at the right of the Stereo 3D palette that
gives you a starting point for matching left- and right-eye clips together.
Auto align and color match buttons
Options for Auto Processing
You can choose which frame should be used to automatically analyze and process stereo clips
using the Alignment and Matching controls from the Stereo 3D palette option menu. You can
choose Auto Process > First or Middle, depending on what works best for your media.
Auto Process—Stereo Alignment
For the stereoscopic effect to work without causing headaches, it’s critical that both eyes are
aligned. This can be tricky to adjust using manual controls, but is something that can be
automatically analyzed. You can perform stereo 3D alignment to a single clip, or you can select
a range of clips to align all of them automatically at once. There are two options. Which is more
appropriate depends on the type of geometry issues you’re needing to address.
Transform Alignment: Analyzes the image and makes vertical and rotational
adjustments to line up the left- and right-eye images as closely as possible.
Vertical Skew: Analyzes the images and makes a vertical-only adjustment to line up the
left- and right-eye images.

1300
Stereoscopic Workflows Part 10 – 80
To align one or more clips automatically:
1 Select one or more stereo clips in the Thumbnail timeline of the Color page.
2 Choose which frame of each clip you want to use for the analysis by opening the
Stereo 3D palette, clicking the Option menu, and choosing Auto Process > First or Auto
Process > Middle.
3 Click either of the Stereo Alignment buttons. The button to the left is for Automatic
Transform, while the button to the right is for Automatic Vertical Skew.
If you selected multiple clips, then the Stereo Alignment window appears, and a progress bar
shows the remaining time this operation will take.
Auto Process—Color Matching
Due to the design of different stereo 3D rigs, sometimes the color and contrast of one eye’s
media doesn’t precisely match that of the corresponding eye. DaVinci Resolve provides two
commands for quickly and automatically matching two eyes together.
Stereo Color Match (Primary Controls): Uses the Lift/Gamma/Gain controls to match
one eye to the other. The result is a simple adjustment that’s easy to customize, but
may not work as well as Custom Curves in some instances.
Stereo Color Match (Custom Curves): Uses the Custom Curves to create a multipoint
adjustment to match one eye to the other. The result can be more effective with
challenging shots.
Stereo Color Match (Dense Color Match): Performs a pixel by pixel, frame by frame
color match that is incredibly accurate. This operation is processor intensive, so if you’re
going to batch process many clips, or if you’re matching long clips, you’ll want to make
sure you have adequate time. Because this is so precise match, it’s recommended to
use Dense Color Match after you’ve used one of the stereo alignment commands.
Stereo 3D color match works differently depending on whether or not one of the stereo
3D-paired clips has already been graded. The following procedure shows how to match a pair
of left- and right-eye clips before you make any manual adjustments of any kind.
To match a pair of left- and right-eye clips automatically:
1 Select one or more clips in the Thumbnail timeline of the Color page.
2 Open the Stereo 3D palette, and click one of the three Color Match controls.
The Color Matching window appears, and a progress bar shows the remaining time this
operation will take. You can also use automatic color matching to match an ungraded clip to a
paired clip that’s already been graded. This only works for grades consisting of one or more
primary corrections; secondary corrections cannot be auto-matched.
To match an ungraded clip automatically to a paired stereo clip that’s graded:
1 To suspend stereo grade linking temporarily:
Open the Stereo 3D palette, and turn off the Ripple Link button
Right-click the Thumbnail timeline, and choose Stereo 3D > Ripple Link > Solo.
TIP: For the best results, it’s recommended to use automatic color matching in a
separate node, independent of other corrections.
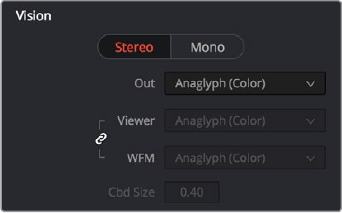
1301
Stereoscopic Workflows Part 10 – 80
2 Make a primary adjustment to a clip in the left-eye timeline to create a simple base
grade. Theleft-eye clip now has a grade, and the right-eye clip does not.
3 Do one of the following to switch eyes:
In the Stereo 3D palette, click Right.
Right-click the Thumbnail timeline again, and choose Stereo 3D > Switch Eye.
This procedure only works when you use the Stereo Color Match commands on the
ungraded clip of a left- and right-eye stereo pair, to match it to the graded clip.
4 To make the match, do one of the following:
In the Stereo 3D palette, click one of the three color match controls.
Both clips should match one another very closely.
Stereo 3D Monitoring Controls
To output both eyes to a stereo 3D display, you need to click the Vision: Mono or Stereo button,
and then choose a display mode from the Out pop-up menu.
Monitoring controls for Stereo 3D
Vision: Click a button to choose between Stereo, where both eyes can be displayed in
the Viewer and output to video in a variety of different formats, and Mono, where only
one eye is monitored in the Viewer and your video output interface.
Out: A pop-up menu that provides different stereo viewing options for previewing
stereo 3D signals in different ways. By default, this option is also linked to the Viewer
display Internal Video Scope options. For detailed descriptions of each stereo 3D
viewing mode, see the following section, “Stereo 3D Output Options.”
Link button: When enabled, the Viewer and internal video scopes both use the Out
pop-up menu’s option for stereo 3D viewing. When disabled, you can choose different
stereo 3D viewing options for the Viewer and internal video scopes.
Viewer: Lets you choose a stereo 3D viewing option for the Viewer.
WFM: Lets you choose a stereo 3D viewing option for the internal video scopes.
Cbd Size: If any stereo 3D viewing options are set to Checkerboard, this parameter
becomes enabled, and lets you define the size of the checkerboard boxes, in pixels.
Dual 4:2:2 Y’CbCr stereoscopic video streams are output via HD-SDI on selected Blackmagic
I/O devices when you turn on the ”Use left and right eye SDI output” checkbox on the Master
Settings panel of the Project Settings. You can select either Side-by-Side or Line-by-Line output
to be fed to your stereo-capable display, depending on your display’s compatibility.
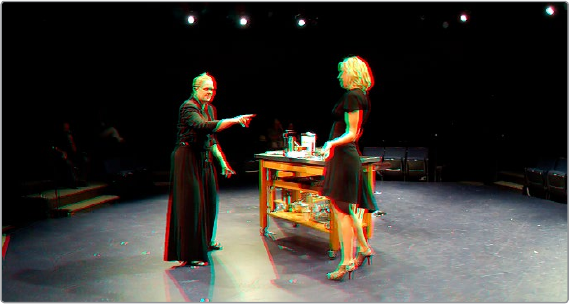
1302
Stereoscopic Workflows Part 10 – 80
Stereo 3D Output Options
Additionally, the Viewer and video scopes can be set to display both “eyes” in one of a variety
of different modes.
Side by Side: Displays both images side by side. Each eye is squeezed anamorphically
to fit both eyes into the same resolution as the GUI viewer.
Top and Bottom: Displays both images one over the other. Each eye is squeezed
vertically to fit both eyes into the same resolution as the GUI viewer.
Line by Line: An interlaced mode where each eye is displayed on alternating lines. The
thickness of the lines as seen in the Viewer depends on how zoomed in you are.
Checkerboard: Displays both eyes via an alternating checkerboard pattern. This is an
excellent mode for identifying regions of the image where there’s variation in color or
geometry between the two eyes.
Anaglyph (B/W): Each eye is desaturated and superimposed via Red/Cyan anaglyph
to show the disparity between both eyes in different regions of the image. Left-eye
divergence is red, and right-eye divergence is cyan. Regions of alignment between
both eyes appear grayscale.
Anaglyph modes are useful for evaluating the geometric differences between both
eyes, as well as for identifying the point of convergence (where both eyes align most
perfectly) that places a region of the image at the screen plane.
Red/cyan color coding also identifies the direction of parallax. For any given feature,
disparity such that red is to the right and cyan is to the left indicates positive parallax
(backward projection away from the audience). Red to the left and cyan to the right
indicates negative parallax (forward projection towards the audience).
Anaglyph (Color): Similar to Anaglyph (B/W), except that regions of close alignment are
shown in full color. Incidentally, both anaglyph modes can be previewed on ordinary
displays using old-fashioned red/cyan anaglyph glasses, enabling stereo 3D monitoring
on non-stereo 3D-capable displays.
Difference: Superimposes grayscale versions of both eyes using the difference
composite mode. Corresponding left/right-eye pixels that are perfectly aligned appear
black, while pixels with disparity appear white. This mode is extremely useful for
evaluating geometric differences between both eyes, as well as for identifying the point
of convergence, without the distraction of color that the anaglyph modes present.
None: Only displays the eye corresponding to the currently selected timeline in the
Viewer. However, this option also works in conjunction with the “Enable dual SDI 3D
monitoring” checkbox in the Master Settings of the Project Settings which, when turned
on, outputs each eye to an individual HD-SDI output of your Blackmagic I/O card.
The Viewer set to display an anaglyph stereo image in color
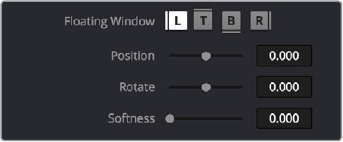
1303
Stereoscopic Workflows Part 10 – 80
Floating Windows
Floating Windows are meant to correct for “Window violations,” where elements of the image
with negative parallax, that project forward from the screen plane towards the audience, are cut
off by the edge of the frame. In these instances, differences between the images being shown
to the left and right eyes can result in a visual paradox that’s difficult for viewers to reconcile.
Specifically, when a forward-projecting element is cut off by the left or right edge of the frame,
one eye sees things that the other eye does not.
If the subject is moving quickly, this may not be an issue, but if the cut off (or occluded) element
lingers onscreen, it causes problems for viewers that defeat the stereo 3D illusion. The viewer’s
binocular vision (or stereopsis) is providing one depth cue, while occlusion is providing a
completely different depth cue.
To fix this, you can use Floating Windows to crop the cut off object from the eye on the side of
the object that’s cut off, thus eliminating the portion of the stereo image that is unseen to the
other eye that causes the problem.
Floating Window controls
The objective of using Floating Windows is to manipulate the illusion of the viewer’s “window
into the scene.” In addition to fixing Window violations, it has been proposed that Floating
Windows can be used as a creative tool by manipulating the geometry of this Window to alter
subtly the viewer’s perception of the screen orientation.
By cropping the right-hand side of the right-eye frame, you also create the illusion that
the right edge of the “window into the image” is tilted farther forward toward the viewer.
By cropping the left-hand side of the left-eye frame, you create the illusion that the left
edge of the Window is tilted toward the viewer.
If you crop both the left-hand side of the left-eye frame and the right-hand side of the
right-eye frame, you create the illusion that the entire plane of the “virtual screen” is
coming toward you.
If you apply opposite-angled Windows to the left- and right-eye clips at one or both of
the edges of the frame, it appears to “tilt” the screen toward or away from the viewer.
Animating Floating Windows
Floating Windows can be animated using the Float Window keyframing track, found within the
Sizing track of the Keyframe Editor, to push the edge of the frame in as needed, and then pull it
back out when the partially occluded subject has moved fully into the frame. For more
information about animating keyframing tracks, see Chapter 53, “Keyframing in the Color Page.”
1304
Stereoscopic Workflows Part 10 – 80
Floating Windows have the following controls and parameters.
L/R/T/B buttons: Lets you choose an edge to which to apply a Floating Window. Click
the button corresponding to the edge you want to adjust. Each edge has its own
position, rotate, and softness settings.
Position: Adds masking to the currently selected edge.
Rotate: Rotates the currently selected edge, letting you create an angled Window.
Softness: Feathers the edge of the currently selected edge, letting you create a soft
Window that can be less noticeable to viewers.
To add a Floating Window to fix a Window violation:
1 Choose to which eye you want to add the Floating Window.
To apply a Floating Window to eliminate a Window violation on the right-hand side of
the screen, click the right eye view.
To apply a Floating Window to eliminate a Window violation on the left-hand side of
the screen, click the left eye view.
2 Choose which edge you want to adjust by clicking the L or R buttons.
To eliminate a Window violation on the right-hand side, click R.
To eliminate a Window violation on the left-hand side, click L.
3 Adjust the Position parameter as necessary to crop the portion along the edge of the
selected eye that’s not visible in the other.
4 Optionally, if you feel that the Window adjustment you’ve just made is too obvious,
increase the Softness parameter to make that edge less noticeable.
Stereo Controls on the DaVinci Control Panel
If you’re doing convergence adjustments and stereographic work throughout a program, you
can use many of the controls described in this section from the DaVinci control panel.
To show the Stereo Transform Controls page on the Transport panel:
1 Press the 3D soft key. The Transport panel’s knobs and soft keys are remapped with all
available Stereoscopic commands.
2 When you’re finished, press MAIN.
To show the Floating Windows controls on the Center panel:
1 From the main page of the Center panel, press the 3D soft key. The Floating Windows,
Auto Match, and Auto Align controls appear on the Center panel.
2 Press the 3D OVERLAY soft key to expose the Stereoscopic sizing controls on the
Transport panel. Press 3D OVERLAY again to return to the ordinary sizing controls.
3 When you’re finished, press the MAIN soft key to exit the 3D control page.

1305
Stereoscopic Workflows Part 10 – 80
Outputting Stereo 3D Media
in the Deliver Page
To render full frame media, you’ll need to render each stereo 3D eye separately using the
controls of the Deliver page, outputting whatever media format is required by the client.
Rendering Frame-Compatible Media
Frame-compatible media has both the left- and right-eye images squeezed anamorphically into
a single media file. To create frame-compatible media, choose the “Both eyes as” option from
the Render Stereoscopic 3D controls at the bottom of the File output options of the Deliver
page, and then choose a method of output from the Mesh Options pop-up menu.
Stereoscopic 3D mesh render options on the Deliver page
You can choose Side-by-Side, Line-by-Line, or Top-Bottom. You can also choose Anaglyph if
you want to output a traditional anaglyph red/cyan stereo 3D image for viewing on any display.
Rendering Individual Left and Right-Eye Clips
If your workflow requires you to deliver separate sets of left- and right-eye media, this is easily
accomplished by either setting up a render job with “Render Stereoscopic 3D” set to either
“Right eye” or “Left eye,” or selecting “Both eyes as” and choosing the “Separate files” option.
1307
Using Variables and Keywords Part 10 – 81
Using Variables and Keywords
This chapter describes how to use metadata variables and keywords to help you manage
your clips.
Using Metadata Variables 1308
Where Variables Can Be Used 1308
How to Edit Metadata Variables 1308
Available Variables in DaVinci Resolve 1309
Using Keywords 1311

1308
Using Variables and Keywords Part 10 – 81
Using Metadata Variables
If you’re an enthusiastic user of clip metadata (and you should be), you can use “metadata
variables” that you can add into supported text fields that let you reference other metadata for
that clip. For example, you could add the combination of variables and text seen in the following
screenshot. Variables, once they’ve been entered, are represented as graphical tags shown
with a background, while regular text characters that you enter appear before and after
these tags.
Variables and text characters entered to create a
display name based on a clip’s metadata
As a result, that clip would display “12_A_3” as its name if scene “12,” shot “A,” and take “3”
were its metadata. When you do this, you can freely mix metadata variables with other
characters (the underscore, as in the example above) to help format the metadata to make it
even more readable.
Be aware that, for clips where a referenced metadata field is empty, no characters appear for
that corresponding metadata variable’s tag wherever it happens to be used.
Where Variables Can Be Used
Metadata variables are extremely flexible, and can be used to procedurally add metadata to
several functions in DaVinci Resolve. Here’s a partial list of where you can use variables.
Display names: You can use variables in the Display Name column of the Media Pool in
List view, or in the Display Name field of the Clip Attributes window’s Clip Name panel,
to use each clip’s metadata to generate a more readable and useful display name.
Other metadata fields in the Metadata Editor: You can use variables to reference
metadata in other fields.
Custom Text in the Data Burn palette: You can use variables to automatically populate
metadata in different combinations as a window burn.
The Filename field of the Render Settings in the Deliver page: Using variables,
you can automatically set the name of rendered clips to follow any metadata that’s
associated with a timeline or individual clip. This is especially useful when you want to
generate specific file names when rendering individual source clips.
How to Edit Metadata Variables
Every single item of metadata that’s available in the Metadata Editor can be used as a variable,
and several other clip and timeline properties such as the version name of a clip’s grade, a clip’s
EDL event number, and that clip’s timeline index number can be also referenced via variables.
To add a variable to a text field that supports the use of variables:
1 Type the percentage sign (%) and a scrolling list appears showing all variables that are
available.
2 To find a specific variable quickly, start typing that variable’s name and this list
automatically filters itself to show only variables that contain the characters you’ve
just typed.
3 Choose which variable you want to use using the Up and Down Arrow keys, and press
Return to choose that variable to add.
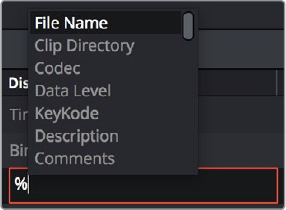
1309
Using Variables and Keywords Part 10 – 81
The variable list that appears
when you type the % character
As soon as you add one or more metadata variables to a field and press return, the string is
replaced by its corresponding text. To re-edit the metadata string, simply click within that field
to edit it, and the metadata variables will re-appear as the graphical tags that they are.
To remove a metadata variable:
Click within a field using variables to begin editing it, click a variable to select it, and
press Delete.
Available Variables in DaVinci Resolve
The following list describes what metadata variables are available to add.
Clip Metadata
File Name
Directory
Codec
Data Level
Key Kode
Metadata Editor Metadata
All Shot Scene metadata
All Clip Details metadata (see Metadata Editor for more information)
All Camera metadata (see Metadata Editor for more information)
All Tech Details metadata (see Metadata Editor for more information)
All Stereo 3D VFX metadata (see Metadata Editor for more information)
All Audio metadata (see Metadata Editor for more information)
All Audio Tracks metadata (see Metadata Editor for more information)
All Production metadata (see Metadata Editor for more information)
All Production Crew metadata (see Metadata Editor for more information)
All Reviewed By metadata (see Metadata Editor for more information)
1310
Using Variables and Keywords Part 10 – 81
Media Pool Metadata
File name
Reel name
File path
Codec
IDT
Input LUT
PAR
Data Level
Description
Comments
Keyword
Shot
Scene
Take
Roll/Card
Input Color Space
Input Sizing Preset
Start Keykode
Optimized Media
Timeline Metadata
Group
Legacy Metadata
EDL Tape Number: Tape number extracted from imported EDL
Render Resolution: Resolution of the rendered file
EDL Event Number: DaVinci Resolve-generated index number of the clip in the timeline
Version: Version Name of the rendered file
Eye: Stereo session, “Left” or “Right”
Reel Number: Reel Name extracted by DaVinci Resolve from source filename
or clip name
Timeline Index: Event number from imported EDL
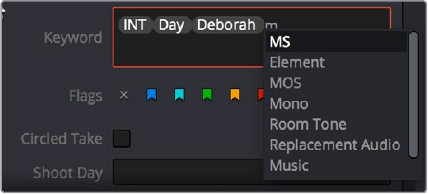
1311
Using Variables and Keywords Part 10 – 81
Using Keywords
While most metadata in the Metadata Editor is edited via text fields, checkboxes, or multiple
button selections (such as Flags and Clip Color), the Keyword field is unique in that it uses a
graphical “tag” based method of data entry. The purpose of this is to facilitate consistency with
keyword spelling by making it easy to reference both a built-in list of standardized keywords, as
well as other keywords that you’ve already entered to other clips.
Once added, keywords are incredibly useful for facilitating searching and sorting in the Media
Pool, for creating Smart Bins in the Media and Edit pages, and for use in Smart Filters on the
Color page. Reaping these benefits by adding and editing keywords is simple and works
similarly to the method of entering metadata variables that’s described above.
To add a keyword:
1 Select one or more clips, then click in the Keyword field of the Metadata Editor, and
begin typing the keyword you want to use. As you begin typing, a scrolling list appears
showing all keywords that are available using the string of characters you’ve just typed.
2 To find a specific keyword in the list, start typing that keyword’s name and this list
automatically filters itself to show only keywords that contain the characters you’ve just
typed. Choose which keyword you want to use in the list using the Up and Down Arrow
keys, and press Return to choose that keyword to add.
3 If you selected multiple clips, don’t forget to click Save or you’ll lose your changes. If
you only selected a single clip, your changes will be saved automatically.
The keyword list that appears when you type
within the Keyword field
As soon as you add one or more keywords, they appear as a graphical tag. To re-edit any
keyword, simply click anywhere within the Keyword field to edit it.
To edit a keyword:
Double-click any keyword to make it editable, then edit it as you would any other piece
of text, and press Return to make it a graphical keyword tag again.
To remove a keyword:
Click any keyword to select it, and press Delete.
1314
Creating DTCL LUTs Part 10 – 82
About DCTL
DCTL files are actually color transformation scripts that DaVinci Resolve sees and applies just
like any other LUT. Unlike other LUTs, which are 1D or 3D lookup tables of values that
approximate image transformations using interpolation, DCTL files are actually comprised of
computer code that directly transforms images using combinations of math functions that you
devise. Additionally, DCTL files run natively on the GPU of your workstation, so they can be fast.
Anyone with the mathematical know-how can make and install a DCTL. Simply enter your
transformation code, using a syntax that’s similar to C (described in more detail below), into any
text editor capable of saving a plain ASCII text file, and make sure its name ends with the “.dctl”
(DaVinci Color Transform Language) file extension. Once that’s done, move the file to the LUT
directory of your workstation. Where that is depends on which OS you’re using:
On Mac OS X: Library/Application Support/Blackmagic Design/DaVinci Resolve/LUT/
On Windows: C:\ProgramData\Blackmagic Design\DaVinci Resolve\Support\LUT
On Linux: /home/resolve/LUT
When DaVinci Resolve starts up, assuming the syntax of your .dctl is correct, they appear in the
Color page Node contextual menu within the DaVinci CTL submenu.
DCTL Syntax
Users need to put __DEVICE__ in front of each function they write. For example:
__DEVICE__ float2 DoSomething()
The main entry function (transform) should come after all other functions, with the following
format argument:
__DEVICE__ float3 transform(float p_R, float p_G, float p_B)
The main entry function must also have a float3 return value.
For the following floating point math functions, please use the described syntax:
float _fabs(float) // Absolute Value
float _powf(float x, float y) // Compute x to the power of y
float _logf(float) // Natural logarithm
float _log2f(float) // Base 2 logarithm
float _log10f(float) // Base 10 logarithm
float _exp2f(float) // Exponential base 2
float _expf(float) // Exponential base E
float _copysignf(float x, float y) // Return x with sign changed to sign y
float _fmaxf(float x, float y) // Return y if x < y
float _fminf(float x, float y) // Return y if x > y
float _saturatef(float x, float
minVal, float maxVal) // Return min(max(x, minVal), maxVal)
1315
Creating DTCL LUTs Part 10 – 82
float _sqrtf(float) // Square root
int _ceil(float) // Round to integer toward + infinity
int _floor(float) // Round to integer toward - infinity
float _fmod(float x, float y) // Modulus. Returns x – y * trunc(x / y)
float _fremainder(float x, float y) // Floating point remainder
int _round(float x) // Integral value nearest to x rounding
float _hypotf(float x, float y) // Square root of (x^2 + y^2)
float _atan2f(float x) // Arc tangent of (y / x)
float _sinf(float x) // S i n e
float _cosf(float x) // Cosine
float _acosf(float x) // Arc cosine
float _asinf(float x) // Arc sine
float _fdivide(float x, float y) // Return (x / y)
float _frecip(float x) // Return (1 / x)
The following functions support integer type:
min, max, abs, rotate
Other supported C Math functions include:
acosh, acospi, asinh, asinpi, atan, atanh, atanpi, atan2pi, cbrt, cosh,
cospi, exp10, expm1, trunc, fdim, fma, lgamma, log1p, logb, rint, round,
rsqrt, sincos, sinh, sinpi, tan, tanh, tanpi, tgamma
We support vector type float2, float3 and float4. The data fields are:
float x
float y
float z
float w
To generate a vector value, use make_floatN() where N = 2, 3 or 4.
Users can define their own structure using “typedef struct.” For example:
typedef struct
{
float c00, c01, c02;
float c10, c11, c12;
} Matrix;
To declare constant memory, use __CONSTANT__. For example:
__CONSTANT__ float NORM[] = {1.0f / 3.0f, 1.0f / 3.0f, 1.0f / 3.0f};
1316
Creating DTCL LUTs Part 10 – 82
To pass the constant memory as a function argument, use the __CONSTANTREF__
qualifier, e.g.:
__DEVICE__ float DoSomething(__CONSTANTREF__ float* p_Params)
A float value must have the ‘f’ character at the end (e.g. 1.2f).
A Simple DCT LUT Example
The following code shows an example of how to create a simple color gain transformation using
the DCT LUT syntax.
// Example to demonstrate simple color gain transformation
__DEVICE__ float3 transform(float p_R, float p_G, float p_B)
{
const float r = p_R * 1.2f;
const float g = p_G * 1.1f;
const float b = p_B * 1.2f;
return make_float3(r, g, b);
}
A Matrix DCT LUT Example
The following code shows an example of creating a matrix transform using the DCT LUT syntax.
// Example to demonstrate the usage of user defined matrix type to
transform RGB to YUV in Rec. 709
__CONSTANT__ float RGBToYUVMat[9] = { 0.2126f , 0.7152f , 0.0722f,
-0.09991f, -0.33609f, 0.436f,
0.615f , -0.55861f, -0.05639f };
__DEVICE__ float3 transform(int p_Width, int p_Height, int p_X, int
p_Y, float p_R, float p_G, float p_B)
{
float3 result;
result.x = RGBToYUVMat[0] * p_R + RGBToYUVMat[1] * p_G +
RGBToYUVMat[2] * p_B;
result.y = RGBToYUVMat[3] * p_R + RGBToYUVMat[4] * p_G +
RGBToYUVMat[5] * p_B;
result.z = RGBToYUVMat[6] * p_R + RGBToYUVMat[7] * p_G +
RGBToYUVMat[8] * p_B;
return result;
}
1317
Creating DTCL LUTs Part 10 – 82
A More Complex DCT LUT Example
The following code shows an example of creating a mirror effect, illustrating how you can
access pixels spatially.
// Example of spatial access for mirror effect
__DEVICE__ float3 transform(int p_Width, int p_Height, int p_X, int
p_Y, _ _TEXTURE_ _ p_TexR, __TEXTURE__ p_TexG, __TEXTURE_ _ p_TexB)
{
const bool isMirror = (p_X < (p_Width / 2));
const float r = (isMirror) ? _tex2D(p_TexR, p_X, p_Y) : _tex2D(p_
TexR, p_Width - 1 - p_X, p_Y);
const float g = (isMirror) ? _tex2D(p_TexG, p_X, p_Y) : _tex2D(p_
TexG, p_Width - 1 - p_X, p_Y);
const float b = (isMirror) ? _tex2D(p_TexB, p_X, p_Y) : _tex2D(p_
TexB, p_Width - 1 - p_X, p_Y);
return make_float3(r, g, b);
}
1319
TCP Protocol for DaVinci Resolve Transport Control Part 10 – 83
TCP Protocol for DaVinciResolve
Transport Control
This chapter describes how to create third party utilities that use Transport Control with
DaVinci Resolve.
About the TCP Protocol Version 1.2 1320
Data Types 1320
Command Format 1320
Response Format 1320
Communication Delays 1320
Status Response Values 1321
TCP Protocol Stream 1321

1320
TCP Protocol for DaVinci Resolve Transport Control Part 10 – 83
About the TCP Protocol Version 1.2
This protocol defines the communication standard between third party applications (“Client”)
and DaVinci Resolve (“Server”) using the TCP protocol.
Port number 9060 will be used by the server. SSL will not be used in this protocol.
Communication takes the form of request-response messages, where the Client initiates a
command, and the Server responds appropriately.
To use this protocol, you must first type the following string into the Advanced panel of the
DaVinci Resolve System Preferences:
System.Remote.Control = 1
Data Types
The following data types are used in this protocol:
float ( f ): A 4-byte IEEE 754 single precision float
int ( i ): A 4-bytes signed int
unsigned char ( uc ): A 1-byte unsigned char (0-255)
string ( s ): A UTF-8 encoded string. No terminator is specified. The string is a
composite type, transmitted as a single int (i) specifying the number of characters in the
string (N), followed by N unsigned chars (uc) containing the letters of the string.
Command Format
Commands are transmitted as a single string (using characters a-z (0x61 – 0x7A) only), followed
by any additional payload required by the command in the definition.
Response Format
The response to any command is composed of a status byte (unsigned char), followed by any
additional payload required by the response.
Communication Delays
Once the first byte of the command string is sent, the rest of the command string and the
payload data must follow without delay. At the end of COMMAND, the server must respond
immediately. If there is a delay of more than 5 seconds during this process, the party waiting for
data may drop the connection assuming that the peer has become unresponsive.
There is currently no limit on the delay between two consecutive commands. (NOTE:
Alternatively, a maximum allowable delay may be defined, in which case, the client may issue
periodic ‘connect’ commands to keep the connection alive.)
NOTE: The bytes of the float and int types are transmitted in little endian order.
1321
TCP Protocol for DaVinci Resolve Transport Control Part 10 – 83
Status Response Values
The meaning of the status values are as follows:
0x00: Command was executed successfully. Any additional payload is sent as
expected.
0xFF: Command could not be executed successfully. No additional payload will follow.
TCP Protocol Stream
The following commands can be sent over the protocol stream.
connect
The client initiates the stream by sending a connect command string. There is no payload. The
server responds with a status value of 0x00.
goto
The client sends a goto command string followed by four unsigned chars representing the hour,
minute, second, and frame of the timecode.
The server responds with an appropriate status byte based on the execution of the command.
play
The client sends a play command string followed by a floating point value. Play in real-time is
1.0, stop is 0.0, reverse is -1.0, 2x is 2.0, etc.
The server responds with an appropriate status byte based on the execution of the command.
gettc
The client sends a gettc command string.
The server responds with an appropriate status byte (status byte may be 0xFF if no timeline
exists, for instance). If the status byte is 0x00, it is followed by four unsigned chars representing
the hour, minute, second, and frame of the timecode.
getframerate
The client sends a getframerate command string.
The server responds with an appropriate status byte. If the status byte is 0x00, it is followed by
a floating point value for the frame rate.

PART 11
1324
Managing Databases and Project Servers Part 11 – 84
Managing Databases
andProjectServers
This chapter describes how to set up and use databases in greater detail, giving you more
control over how projects are saved and organized, including how to set up project servers you
can use to administer DaVinci Resolve projects that are available to multiple DaVinci Resolve
workstations on the same network.
Why Use a Project Server? 1325
Multiple Users Sharing Projects 1325
Using Collaborative Workflow 1325
Know Which Version of PostgreSQL You’re Using 1326
Using the DaVinci Resolve ProjectServer Application 1327
The DaVinci Resolve Project Server Interface 1327
Using the Project Server Application to Manage Databases 1328
Creating New PostgreSQL Databases 1328
Backing Up and Restoring Databases 1328
Upgrading Databases 1329
Reconnecting Databases You Previously Disconnected 1329
Sharing Databases to Create a Project Server 1330
1325
Managing Databases and Project Servers Part 11 – 84
Why Use a Project Server?
Multiple DaVinci Resolve workstations can access the same project when you set up a Project
Server that shares one or more PostgreSQL databases over a local network. Once you’ve set
this up, there are two ways of using a shared database.
Multiple Users Sharing Projects
The simplest case is for users to simply open up a project on the Project Server and work on it.
Working this way, if you ever has to change rooms, or switch workstations, you can easily open
that same project from any machine that’s connected to the server on the same network
without needing to export and import it first. For example, an assistant could be working with a
colorist to prepare files for the next reel by conforming shots, managing VFX replacements,
doing dust busting repairs, and so on in an unsupervised editing suite anywhere in the building,
before saving their work and closing the project so the colorist can immediately open that same
project in the grading theater across the hall.
Another way of taking advantage of shared Project Servers is to split large projects into
sections, so multiple artists can work in parallel on different pieces of the whole in different
suites, handing them off when necessary. For example, a feature film may be split into reels, or
a film can be separated from the trailer and electronic press kit projects that it shares media
with. In this case, each project can be edited, mixed, and graded by different people accessing
the Project Server.
When a shared project is opened by someone else after it’s already been opened, a dialog
informs you that it’s being opened in Read-only mode to prevent multiple users from accessing
the project at the same time. If you load a Read-only project and decide you want to make
changes anyway, you’ll need to use the Save As command to create a duplicate project file
using a new name in order to preserve your work.
Using Collaborative Workflow
Alternately, you can use the Collaborative Workflow features in DaVinci Resolve to enable
multiple collaborators on multiple workstations in multiple rooms to open and work on the very
same project at the same time. For example, an editor can be editing a project’s main timeline
in one room, while an assistant organizes media and adds metadata within the same project in
another room, and a colorist grades dailies in that same project in yet another room, all
accessing the same Project Server which allows them to work together in parallel. For more
information, see Chapter 85, “Collaborative Workflow.”
All participants in a Collaborative Workflow must have the Studio Version of DaVinci Resolve,
and they must be using a PostgreSQL database on a Project Server that’s properly set up.
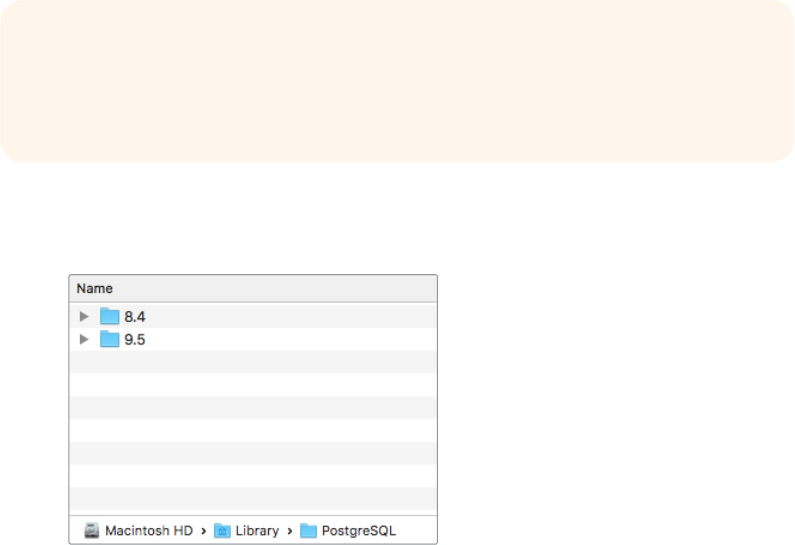
1326
Managing Databases and Project Servers Part 11 – 84
Know Which Version of
PostgreSQL You’re Using
Starting with DaVinci Resolve 12.5.4 on macOS, DaVinci Resolve requires PostgreSQL 9.5,
which is necessary for compatibility with macOS 10.12 Sierra and macOS 10.13 High Sierra. All
previous versions of DaVinci Resolve on macOS use PostgreSQL 8.4, and you must upgrade
PostgreSQL before upgrading to Sierra or High Sierra.
If you’re unsure what version of PostgreSQL you’re using, check to see what versions appear in
the /Library/PostgreSQL/ directory.
The /Library/PostgreSQL/ directory on macOS systems
shows which versions of PostgreSQL you’re using
IMPORTANT: If you’re upgrading from a previous version of DaVinci Resolve that uses
8.4 to a new version of DaVinci Resolve that uses 9.5, it’s vital you read the
instructions located in /Library/Application Support/Blackmagic Design/DaVinci
Resolve/Upgrade PostgreSQL/ before you upgrade.
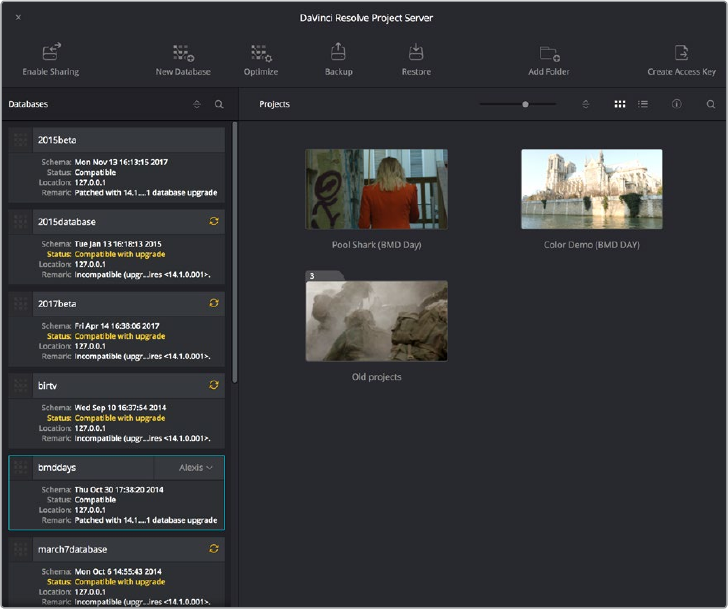
1327
Managing Databases and Project Servers Part 11 – 84
Using the DaVinci Resolve
ProjectServer Application
When you install DaVinci Resolve, an additional application is installed in the DaVinci Resolve
application directory on macOS and Windows, called DaVinci Resolve Project Server. This is a
stand-alone application that lets you create, manage, backup, restore, and most importantly
share project databases on any workstation. Using this application, it’s not necessary to launch
DaVinci Resolve just to manage your databases, and it’s no longer necessary to use Terminal to
set up database sharing as before (although you still can if you want to).
The DaVinci Resolve Project Server Interface
The DaVinci Resolve Project Server interface greatly resembles the DaVinci Resolve Project
Manager with the Database sidebar open. However, a toolbar at the top exposes all of the
database management tools that are available for creating and managing databases, including
controls for sharing databases and creating Access Keys that are essential for quickly and easily
creating and connecting to Project Servers.
The DaVinci Resolve Project Server Window
This window has three main UI areas:
Databases list: Unlike the Databases sidebar in the Project Browser of DaVinci Resolve,
in which you can disconnect databases you no longer want to use, the Databases
list in the Project Server application shows every single DaVinci Resolve PostgreSQL
database on your machine. This makes it easy to find databases you’ve disconnected
that you want to reconnect.
1328
Managing Databases and Project Servers Part 11 – 84
Projects browser: Shows all projects and folders within the currently
selected database.
Toolbar: A toolbar at the top of the window shows you all of the functions that are
available for managing DaVinci Resolve databases on your workstation.
Enable Sharing: Selecting a database and clicking this button lets you turn the
workstation you’re on into a Project Server. When you select a database that’s already
shared, this button changes to Disconnect Database. This process is described in
greater detail in the next section.
New Database: Lets you create new databases without needing to open Resolve.
Optimize: Only available for PostgreSQL databases. Sometimes, databases in DaVinci
Resolve can become so large that the size affects performance. In these cases you
may need to optimize it to improve access speed by “vacuuming” the database of
unnecessary spaces and reindexing it.
Backup: You can back up databases just like any other file. This provides added
protection should your system drive fail, but a database backup can also be used to
move multiple projects between systems (particularly if you’re using PostgreSQL).
Clicking this button exports the currently selected database, with all enclosed projects,
to a self contained .resolve.backup file.
Restore: Imports .resolve.backup files to restore a backed up database.
Add Folder: Creates a project folder inside whatever database is currently selected.
Create Access Key: Selecting a database and clicking this button exports an access
key file that you can send to other users to quickly connect their workstation to a
shared Project Server. This process is described in greater detail in the next section.
Using the Project Server Application
to Manage Databases
The DaVinci Resolve Project Server utility is useful for accomplishing all kinds of
administrative tasks.
Creating New PostgreSQL Databases
If necessary, you can create new PostgreSQL databases right within this utility.
To create a new PostgreSQL project database:
1 Click the New Database button in the toolbar.
2 When the New Database window appears, type a name for the new database into the
Name field. Because all projects in a PostgreSQL database are saved internally within
the PostgreSQL database, no other changes are necessary.
3 Click Create, and the new disk database will appear in the Databases list.
Backing Up and Restoring Databases
You can also back up and restore databases without needing to open Resolve. Furthermore,
you can back up databases even if they’re out of date, making it easy to back up databases for
safety before you upgrade them.

1329
Managing Databases and Project Servers Part 11 – 84
To back up a database for safekeeping:
1 Select the database you want to back up in the Databases list.
2 Click the Backup button in the toolbar.
The Backup Database button in the toolbar
3 Choose a location to which to save the backup in the Backup Database dialog, and
click Save.
To restore a database you’ve backed up previously:
1 Click the Restore button in the toolbar.
The Import Database button
2 Find the database you need to import using the file import dialog, and click Open.
Thedatabase you’ve restored should now appear in the Databases list.
Upgrading Databases
From time to time, new versions of DaVinci Resolve require changes to the way projects are
created, which requires databases created with older versions of DaVinci Resolve to be
upgraded before you can access the projects within. Fortunately, this is a simple process.
To upgrade a database made or used with an older version of DaVinci Resolve:
Right-click any database with an upgrade badge to the right of the database name, and
choose upgrade from the contextual menu.
Reconnecting Databases You Previously Disconnected
Unlike the Project Manager in DaVinci Resolve, the DaVinci Resolve Project Server application
shows you every single DaVinci Resolve database on your computer, whether it’s connected to
Resolve or not. For this reason, it’s a good way to find the names of databases that have been
disconnected, either deliberately or accidentally, in order to reconnect them.
To reconnect any database on your workstation:
1 Open the DaVinci Resolve Project Server application.
2 Find the database you want to reconnect in the Databases list at the left.
3 Open DaVinci Resolve.
4 When the Project Manager window appears, open the Databases sidebar, and then
drag the database you want to reconnect from the DaVinci Resolve Project Server
window to the Database list of the Project Manager. That database is reconnected and
appears in the Database list.
1330
Managing Databases and Project Servers Part 11 – 84
Sharing Databases to
Create a Project Server
You can also use the DaVinci Resolve Project Server to easily set up a shared Project Server on
your local network. However, for this to work, you need to adhere to the following requirements:
All workstations need to be connected to the Project Server on a local network
All network connections should be reasonably fast (preferably Gigabit Ethernet
or faster)
The computer functioning as the Project Server should be reasonably fast, but it
doesn’t need fast GPU processing
The Project Server should have DaVinci Resolve installed, but it doesn’t need a dongle
or serial number, nor need it be the Studio version
The following procedures describe how to set up a shared Project Server, and how to export an
Access Key with which to easily set up other workstations to connect to it.
To set up a workstation as a DaVinci Resolve Project Server:
1 Open the DaVinci Resolve Project Server application, found in the DaVinci Resolve
application folder.
2 Select or Create a DaVinci Resolve project database you want to share, and click the
Enable Sharing button.
3 When a dialog appears asking if you want to authorize the configuration of your
PostgreSQL server. Click Authorize. That database can now be shared among other
Resolve workstations on the same network.
Once you’ve set up a Project Server, it’s easy to connect other machines to that server using
access keys that you can create using the DaVinci Resolve Project Server application.
To create an Access Key to enable easy connection to a Project Server:
1 With the DaVinci Resolve Project Server application open, select a database
that you’ve set up to share, and click the Create Access Key button to the right in
the toolbar.
2 Choose a location via the Create Access Key dialog, and click Save. An access key file
is saved to the location you chose with the file extension .resolvedbkey.
3 Copy the .resolvedbkey file to the workstation you want to connect to the
shared database.
4 Open Resolve, and when the Project Manager appears, open the Databases sidebar,
and then drag the .resolvedbkey file and drop it anywhere within the Project Manager.
The shared database should now appear in the Databases sidebar, and if you select it,
you’ll see all of the projects that are located in that database on the Project Server.
If necessary, you can also disable sharing for any database, preventing remote access to it from
other workstations on the network.
To disable sharing:
1 With the DaVinci Resolve Project Server application open, select a database you
enabled sharing for, and click the Disable Sharing button to the left in the toolbar.
2 When a dialog appears asking if you want to authorize the configuration of your
PostgreSQL server. Click Authorize. That database will no longer be shared.
1332
Collaborative Workflow Part 11 – 85
Collaborative Workflow
Multi-user collaborative workflow has been significantly altered in DaVinci Resolve 14, using
“bin locking” to manage who has access to what when multiple collaborators open the same
project. However, as before, collaborative workflow allows multiple artists to do simultaneous
editing, grading, and Media Pool clip management and metadata entry within a single project
for which Collaboration has been enabled. Multiple users can simultaneously access the same
Timeline within the same project to edit and grade at the same time, while other editors and
assistants can open different bins containing different timelines within the same project to do
their work. This chapter describes how to set up multiple DaVinci Resolve workstations to
collaborate, and how to use bin locking to work together.
Requirements for Collaboration 1333
Enabling Project Collaboration 1333
Opening Projects for Collaboration 1334
Customizing Your CollaboratorIdentification 1335
How Collaboration Works 1335
Automatic Bin and Timeline Locking 1336
Manual Bin Locking 1337
Automatic Clip Locking 1337
Examples of Collaborators Working Together 1338
Multiple Editors Working Together 1338
Editors and Assistant Editors Working Together 1339
Editors and Colorists Working Together 1339
Multiple Colorists Working Together 1339
Collaboration Chat 1340

1333
Collaborative Workflow Part 11 – 85
Requirements for Collaboration
Multi-user collaborative workflow allows simultaneous editing, grading and Media Pool clip
management by multiple people within a single project that has been enabled for collaboration.
Using bin locking, multiple editors can simultaneously edit different timelines in different bins of
the same project, while assistant editors can reorganize clips and edit the metadata in other
bins within the same project. Using clip locking, multiple colorists can work together in the
same Timeline of the Color page, without fear of overwriting one another’s work. And colorists
and editors can work together in the same Timeline of the same project without conflict.
In order to use collaborative workflow:
All users must be using the paid Studio version of DaVinci Resolve.
All users must be connected to a properly configured Remote Database Server.
This Remote Database Server can be on one of the actively used DaVinci Resolve
workstations, or it can be another computer on your network that simply hosts shared
projects, but it should be on a computer that is never shut down or put to sleep, to
prevent projects suddenly becoming unavailable.
All machines participating in a collaborative workflow must be on the same network,
and shared projects should use media on some type of fast storage area network
(SAN), with each owner and collaborator connected to that SAN so the projects being
collaborated on are linked to the same media. In a pinch, shared volumes over a
network will work, but proper SANs will provide significant performance benefits.
For more information on setting up a Database Server, see Chapter 84, “Managing Databases
and Database Servers.”
Enabling Project Collaboration
Starting with DaVinci Resolve 14, the process of initiating a collaborative workflow has been
vastly simplified over previous versions.
To open a project and initiate a collaborative workflow:
1 Open DaVinci Resolve on a computer that’s connected to a Remote Database Server.
2 Open any project on the remote database DaVinci Resolve is connected to using the
Project Manager.
3 When the project is open, choose File > Enable Collaboration.
Once collaboration is enabled, two additional buttons appear at the lower right-hand corner of
the DaVinci Resolve interface, next to the Project Manager and Project Setting buttons. These
are the Collaboration Chat (left) and Collaboration (right) buttons.
The Collaboration Chat button (far left) and the
Collaboration button (second from left)
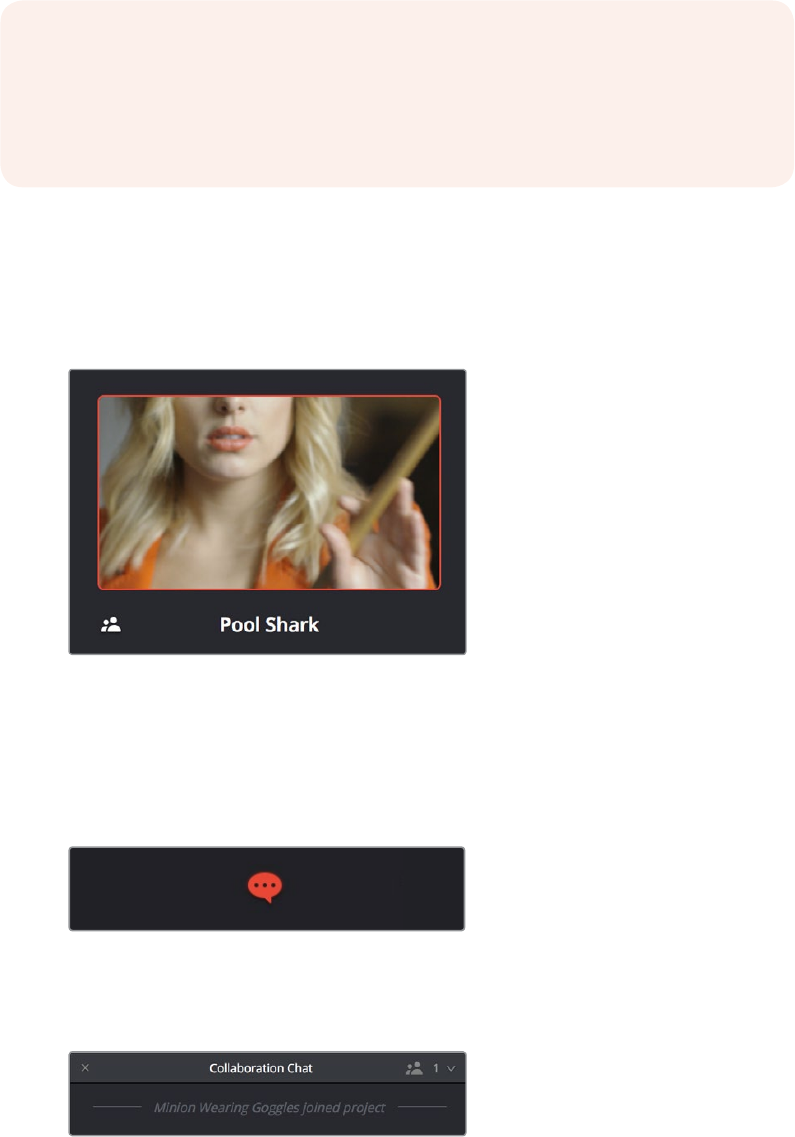
1334
Collaborative Workflow Part 11 – 85
Opening Projects for Collaboration
Projects that have Collaboration enabled appear with a badge below their thumbnail in the
Project Manager to let you know that project is available for collaboration.
An icon indicates that a project in the Project
Manager is available for collaboration
At this point, anyone else who has access to this Remote Database Server can simply open this
project up and work collaboratively with you. Whenever a collaborator opens the same project
you’re working in, the Collaboration Chat button at the bottom of the DaVinci Resolve UI
highlights to let you know you have a message.
The Collaboration Chat button highlights to let you
know you have a message
Opening the Collaboration Chat window shows who’s collaborating with you.
A new message in the Collaboration Chat window lets you
know who else has opened the project you’re working on
NOTE: When you enable collaboration, the “Auto conform missing clips as media is
added to Media Pool” option in the General Options panel of the Project Settings is
automatically disabled, as it interferes with collaborative workflow. Also, Live Save is
automatically turned on in the Auto Save panel of the User Preferences, to ensure that
all collaborators work is saved regularly to avoid conflicts between collaborators.
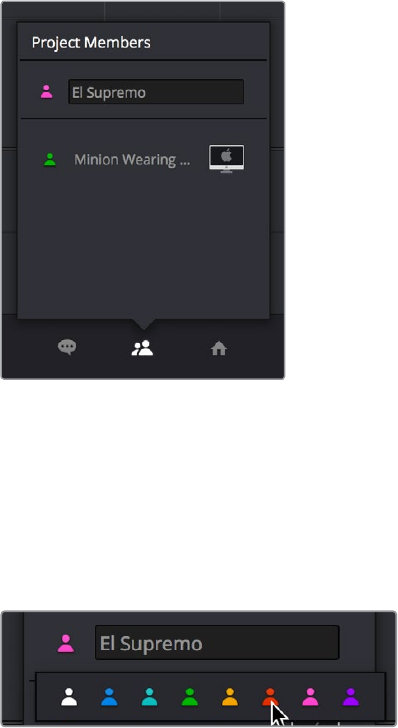
1335
Collaborative Workflow Part 11 – 85
Customizing Your
CollaboratorIdentification
Once you’ve set up a project for collaboration, you want to make sure it’s easy to tell all your
collaborators apart. Clicking the Collaboration button opens a list of all collaborators, or project
members, working in that project.
Opening the Collaboration list shows all
the current project members
The top member is you, and you can change the name you use by editing the text field.
Additionally, you can click the icon to the left and choose a new color for yourself. All the
badges that indicate who has a lock on which folders, timelines, and shots are color-coded, so
it’s a good idea for everyone to choose their own custom color so you can tell who’s
doing what.
There are eight custom colors for
collaborators to choose from
How Collaboration Works
At its simplest, collaborative workflow uses a “first come, first served” model to manage who
has can make changes to what. Essentially, the first collaborator to select a bin in the Media
Pool, open a timeline, or select a clip in the Color page gets a “lock” on that item. Once an item
is locked (indicated by a colored badge), other collaborators can look at it, but they cannot
make changes. This prevents versioning conflicts from occurring.
Locks are released when a collaborator selects a different bin, timeline, or clip in the Color
page. At that point, the changes that have been made are available to all collaborators when
they refresh their project (by clicking a circular refresh icon that appears in the Media Pool).
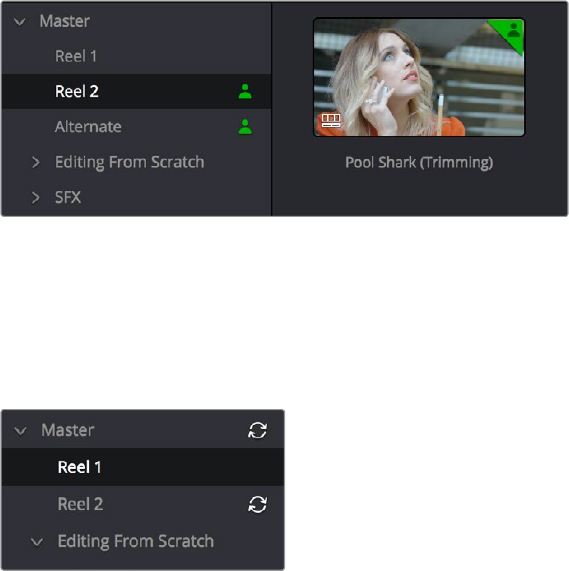
1336
Collaborative Workflow Part 11 – 85
All changes collaborators make are automatically saved to the project as they’re made.
However, collaborators get to decide when they want to update what they’re currently working
on to see these changes, in order to prevent a kaleidoscope of alterations from being a
distraction while working.
The following sections describe Bin and Timeline locking and Clip locking in more detail.
Automatic Bin and Timeline Locking
Whenever a collaborator opens a bin, that bin and its contents are locked to any other
collaborators who open that project. Furthermore, when a collaborator opens a timeline in
either the Edit or Fairlight pages, whatever bin that timeline is in is locked as well, along with
whatever else is in that bin. Collaborators can open locked bins and see the contents, but they
cannot make any changes with the exception of making alterations to clip grades in the
Color page.
You can always tell when a collaborator has a lock on a bin and its contents because a badge
appears to the right of the bin in the Bin list, and in the corner of timelines that are open.
Hovering the mouse over that badge in the Bin list reveals a tooltip with that
collaborator’s name.
An icon indicates that another collaborator has a lock on the Reel
2 bin, the Pool Shark (Trimming) timeline, and the Alternate bin
Once a collaborator (someone other than you) makes changes to a bin’s contents or to a
timeline, you’ll see a circular “refresh” badge appear by the affected bins in the Bin List of the
Media Pool. Click these badges whenever you want to update your version of the shared
project with all changes made by others.
An icon indicates that another collaborator has made changes,
clicking it refreshes your project to show those changes
To release a bin or timeline, simply select another bin or timeline. It’s that simple.
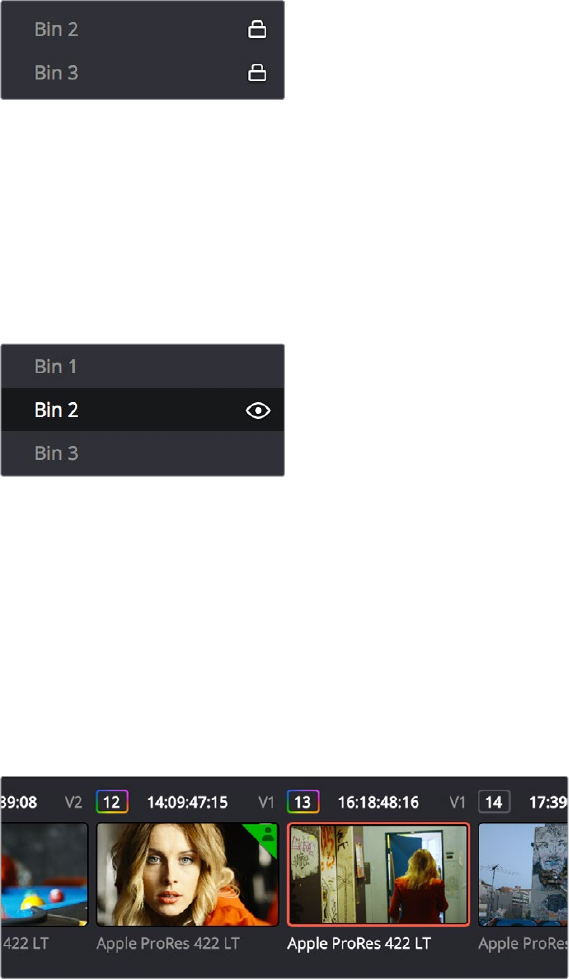
1337
Collaborative Workflow Part 11 – 85
Manual Bin Locking
You can also manually control the locked state of bins. For example, if you want to lock one or
more bins that you know you’re going to be switching among so that nobody else inadvertently
prevents you from having access, you can right-click one or more selected bins and choose
Lock Bins to lock them, and keep them locked until you right-click them again and choose
Unlock Bins. Manually locked bins remain locked even when you de-select them, until the
collaborator who locked them unlocks them again.
Manually locked bins stay locked even
when they’re not selected
Additionally, you can choose not to lock a bin when you select it. For example, you may just
want to look at the contents of a bin without keeping someone else from doing what they need
to do inside of it. Simply Option-click any bin to open that bin in read only mode, which is
indicated by an eyeball badge to the left of that bin in the Bin List. In this mode, any other
collaborator can still lock that bin while you’re examining its contents. Selecting any other bin
will clear this read only status.
Selecting a bin in read only mode allows
collaborators to lock that bin while you
examine its contents
Automatic Clip Locking
Clip locking in the Color page is similar, but with an important difference. As multiple colorists
work in the Color page, the first colorist to select any given clip has a lock on that clip, and
other colorists will see a badge on that clip showing its locked state, so they know they can’t do
anything to that clip. In the following screenshot, a green badge at the corner of clip 12 indicates
that clip is locked.
Badges in the Thumbnail timeline indicate which clips are
locked because a collaborator is grading them
When you’re finished with the clip you’re working on, select another clip, and the changes you
made to the previously selected clip are automatically saved and automatically pushed to all the
other colorists who are working on that timeline in the Color page. No refresh is needed, and
this is the main difference between clip locking in the Color page and bin locking.

1338
Collaborative Workflow Part 11 – 85
Examples of Collaborators
Working Together
The rules of bin locking enable specific ways that different combinations of artists can work
together on the same project at the same time. This section describes the most common
scenarios.
Multiple Editors Working Together
The first collaborator that opens a timeline is the only person that can make editorial changes to
that timeline in the Edit or Fairlight pages. Other collaborators who open that project are
“locked out” of making changes to the Edit or Fairlight pages, but they can see the Timeline,
and they can make grading changes in the Color page. This means it can be ideal to work on
your project in separate “reels,” where each reel of a project is a separate timeline that can be
organized in a separate bin.
On the other hand, if two or more editors must both work on the same timeline, this can be
accomplished using duplicate timelines and then merging the changes back together later on.
For example, collaborating editor Anne can do the following to make changes to a timeline that
editor Erin is already working on:
First, Anne can duplicate the locked timeline into a separate bin from the one Erin has
alock on. Alternately, Erin could be proactive and duplicate the timeline into a separate
bin in advance.
Second, Anne will re-edit the duplicate timeline to make whatever changes are
necessary to a different scene than the one Erin is currently working on. Working
ondifferent scenes is the cleanest and easiest way of using this workflow.
Third, Anne uses Collaborative Chat to notify Erin that the changes are finished.
Fourth, Erin then refreshes the project to see Anne’s updated duplicate timeline in
theMedia Pool, right-clicks it, and chooses Compare With Current Timeline from the
contextual menu to show the Timeline Comparison window that makes it possible to
merge the changed section of the duplicate timeline with the original timeline that
Erinalready has open.
In the following screenshot, Erin’s highlighted changes (made while Anne was working) can be
seen at the left, and Anne’s highlighted changes can be seen at the right. Right-clicking within
the right highlighted area reveals an Accept Change command that lets that scene’s changes
be merged from the duplicate timeline back to Erin’s original timeline.
Using the Compare With Current Timeline command lets you see the differences
between two differently edited versions of the same timeline, and merge a scene’s
worth of changes that a collaborator has made (at right) back to the original timeline
For more information on comparing timelines, see Chapter 15, “Creating and Working
withTimelines.”
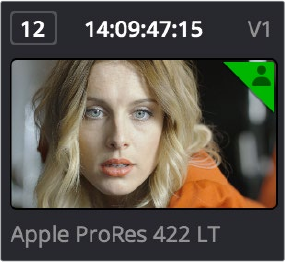
1339
Collaborative Workflow Part 11 – 85
Editors and Assistant Editors Working Together
Collaborators can edit metadata, create new bins, and reorganize clips within unlocked bins
only. This means that your project should be organized so that an editor can lock the contents
of the bins they need to work with at a given point in time, while the assistants can work on
additional timelines and media within the other bins of that project.
However, in addition to being able to copy timelines from a locked bin to a bin that you control,
you can also copy clips from a locked bin to another bin that you control. In this way, if you
absolutely need to make changes to source clips while the original source clips are locked, you
can make your changes to copies of these clips.
Editors and Colorists Working Together
Colorists and editors can work together very closely in DaVinci Resolve, as colorists can grade
the shots of a timeline that an editor is currently working on, even though that timeline and the
bin it’s in are locked.
While a colorist is grading, the changes trigger Refresh badges to appear in the Media Pool for
other collaborators working on that timeline in the Edit page, so the collaborating editor can
decide when to update their timeline to see the changes that have been made.
Multiple Colorists Working Together
Only one colorist can work on a particular clip at a particular time, and the first colorist to select
a clip puts a lock on that clip. Other collaborators looking at the Thumbnail timeline in the Color
page will see a small icon that shows it’s locked, letting them know they can’t make any
changes to it until whoever is grading that clip moves to another clip.
A small icon indicates that you’re locked out
because another colorist is grading that clip
In order to prevent half-finished work from being disseminated to other colorists or editors, a
clip that’s in the process of being graded isn’t updated for other collaborators that are looking at
that timeline until the colorist who’s working on it moves to another clip. These changes are
then automatically refreshed for all other collaborators working in the Color page.
This makes it easy for multiple colorists to work together. For example, an assistant colorist can
be notified via Collaborative Chat to draw a custom window that a senior colorist needs for a
grade. The assistant opens that timeline in another suite, selects the appropriate clip, and draws
the window. Once finished, the assistant simply selects a different clip, and the changes they’ve
made are immediately available to the senior colorist.
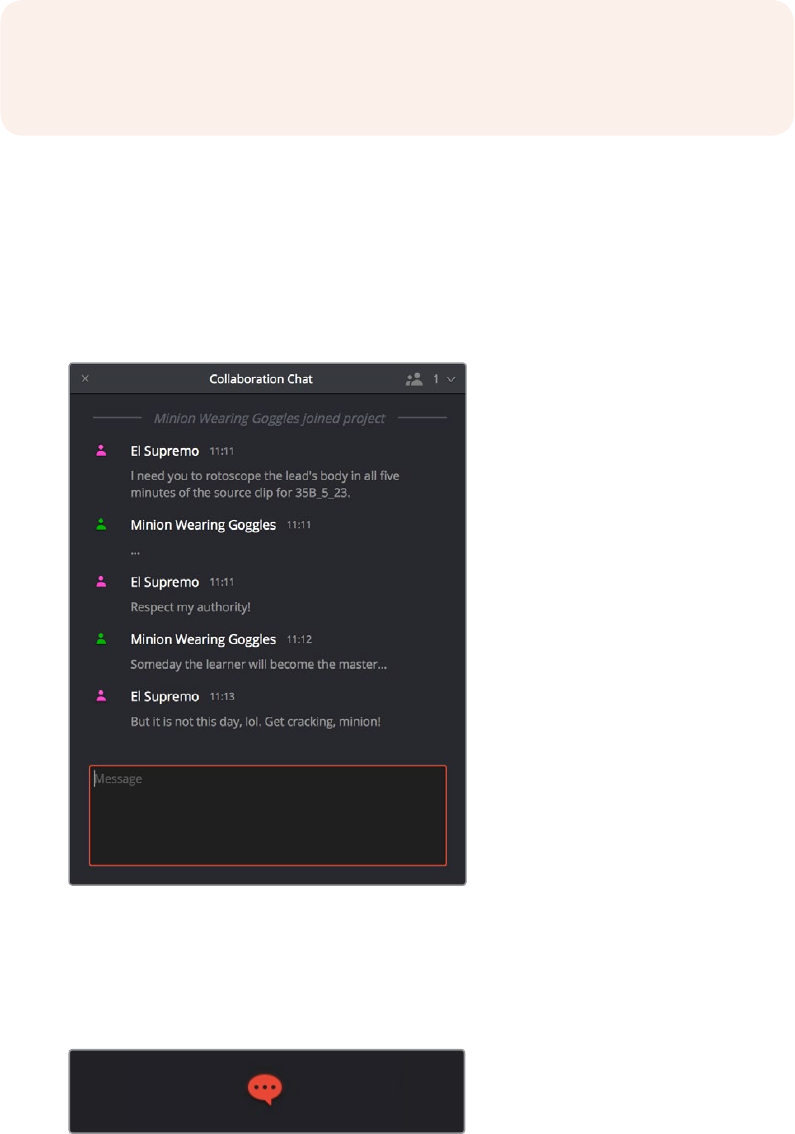
1340
Collaborative Workflow Part 11 – 85
Collaboration Chat
To facilitate communication among collaborators, DaVinci Resolve has built-in text chat, called
Collaboration Chat. Simply click the Collaboration Chat button to open the chat window, and
chat away.
The Collaboration Chat window for communication among collaborators
The Collaboration Chat button at the bottom of the DaVinci Resolve interface highlights
whenever someone texts while this window is closed, letting you know you have messages
that are waiting.
The Collaboration Chat button highlights
to let you know you have a message
NOTE: Collaborators working in the Edit or Fairlight pages will need to manually refresh
their projects to see these changes, in order to control when they want to have the
color change in their timeline.
1342
Remote Grading Part 11 – 86
Remote Grading
This chapter describes how to set up and use databases in greater detail, giving you more
control over how projects are saved and organized.
Introduction to Remote Grading 1343
Requirements for Remote Grading 1343
Setting Up for Remote Grading 1344
Remote Grading Restrictions 1344

1343
Remote Grading Part 11 – 86
Introduction to Remote Grading
To enable colorists to work interactively with clients across the globe, DaVinci Resolve offers a
remote grading option. It allows two matching DaVinci Resolve systems to be synchronized via
an Internet connection such that changes made on the colorist’s workstation are immediately
applied on the remote client’s workstation.
Cue commands are also synchronized to ensure that both systems are always on the same
frame in the Timeline. Starting or stopping playback on the colorist’s DaVinci Resolve also starts
and stops the remote client system. While a remote grading session is in progress, input from
the user at the remote client’s DaVinci Resolve workstation is ignored.
Currently, the remote grading feature supports only color correction and does not allow editing
or conforming during a session. The two colorist and remote DaVinci Resolve systems must
have matching timelines and the number of clips, clip durations and system resolutions must
match. The requirements and limitations of a remote grading session are summarized below.
Requirements for Remote Grading
The following requirements must be met for remote grading to work.
The same version of DaVinci Resolve must be installed on both systems.
The display resolution must be the same on both systems.
The Timeline to be graded must be conformed on both machines prior to the start of
the remote grading session.
The number of clips on the Timeline and the duration of each clip must be identical.
While grading, the active Timeline and versions on the remote client system are
constantly updated. Creating, deleting, or switching the Timeline on the client’s DaVinci
Resolve is not allowed. Doing so will terminate the remote grading session immediately.
You cannot make any grading adjustments on the remote client’s DaVinci Resolve
workstation until the remote grading session has ended.
NOTE: Remote grading does not require a shared database.
1344
Remote Grading Part 11 – 86
Setting Up for Remote Grading
To start a remote grading session, the client’s DaVinci Resolve must be able to connect to the
colorist’s system using TCP/IP.
1 Open DaVinci Resolve on the remote client’s workstation (the one that’s being remotely
controlled), log in, and open the project that will be remotely graded
2 Choose Workspace > Remote Grading (Ctrl-G) on the remote client’s workstation. A
window is displayed with text fields to enter the IP address and port number of the
colorist’s system.
3 Set the IP address field to the IP of the colorist’s DaVinci Resolve workstation. If the
colorist’s system already has a public IP address, the port number can be left at its
default value (15000). If the colorist’s system is on a private network, the colorist or their
network administrator should set the port number to one on the public IP router that is
internally routed to port 15000 of the colorist’s DaVinci Resolve.
4 Once the remote client clicks Connect, the client’s DaVinci Resolve system will attempt
to establish a connection with the remote colorist’s workstation.
5 Once the connection is established, a pop-up appears on the colorist’s screen asking
for permission to accept a Remote Grading connection.
6 Click OK to accept, minimize the size of this dialog window, and continue grading
normally.
The Remote Grading session will remain active until one of the users chooses to disconnect or
an error occurs causing DaVinci Resolve to automatically terminate the session.
Remote Grading Restrictions
To allow operation over low bandwidth and a potentially long latency Internet connection there
are some restrictions to remote operation.
When playback is started, the playback speeds on the two DaVinci Resolve systems
may differ. The frame positions are only guaranteed to be synchronized when playback
is stopped.
Input/output/display LUTs applied from the Config page on the colorist’s DaVinci
Resolve will not have any effect on the client system. LUTs selected on the client’s
DaVinci Resolve will be applied instead.
Presets applied from the Config/Color pages on the colorist’s system will not have any
effect on the client’s system. Presets selected on the client’s DaVinci Resolve will be
applied instead.

1345
Regulatory Notices andSafetyInformation
Regulatory Notices andSafetyInformation
Regulatory Notices
Disposal of waste of electrical and electronic equipment within the European union.
The symbol on the product indicates that this equipment must not be disposed of with
other waste materials. In order to dispose of your waste equipment, it must be handed
over to a designated collection point for recycling. The separate collection and
recycling of your waste equipment at the time of disposal will help conserve natural
resources and ensure that it is recycled in a manner that protects human health and the
environment. Formore information about where you can drop off your waste
equipment for recycling, please contact your local city recycling office or the dealer
from whom you purchased the product.
This equipment has been tested and found to comply with the limits for a Class A digital
device, pursuant to Part 15 of the FCC rules. These limits are designed to
providereasonable protection against harmful interference when the equipment is
operated in a commercial environment. This equipment generates, uses, and can
radiate radio frequency energy and, if not installed and used in accordance with the
instructions, maycause harmful interference to radio communications. Operation of this
product in a residential area is likely to cause harmful interference, in which case the
user will be required to correct the interference at personal expense.
Operation is subject to the following two conditions:
1 This device may not cause harmful interference.
2 This device must accept any interference received, including interference that may
cause undesired operation.
Safety Information
This equipment must be connected to a mains socket outlet with a protective
earthconnection.
To reduce the risk of electric shock, do not expose this equipment to dripping
orsplashing.
This equipment is suitable for use in tropical locations with an ambient temperature of
up to 40ºC.
Ensure that adequate ventilation is provided around the product and is not restricted.
No operator serviceable parts inside. Refer servicing to your local Blackmagic Design
service centre.
Use only at altitudes not more than 2000m above sea level.
1346
Warranty
Warranty
12 Months Limited Warranty
Blackmagic Design warrants that DaVinci Resolve control surface will be free from defects in
materials and workmanship for a period of 12 months from the date of purchase. If a product proves
to be defective during this warranty period, Blackmagic Design, at its option, either will repair the
defective product without charge for parts and labor, or will provide a replacement in exchange
for the defective product. Periodical updates to the operational software are not included under
this warranty.
In order to obtain service under this warranty, you the Customer, must notify Blackmagic Design
of the defect before the expiration of the warranty period and make suitable arrangements for the
performance of service. The Customer shall be responsible for packaging and shipping the
defective product to a designated service center nominated by Blackmagic Design, with shipping
charges pre paid. Customer shall be responsible for paying all shipping changes, insurance, duties,
taxes, and any other charges for products returned to us for any reason.
This warranty shall not apply to any defect, failure or damage caused by improper use or improper
or inadequate maintenance and care. Blackmagic Design shall not be obligated to furnish service
under this warranty: a) to repair damage resulting from attempts by personnel other than Blackmagic
Design representatives to install, repair or service the product, b) to repair damage resulting from
improper use or connection to incompatible equipment, c) to repair any damage or malfunction
caused by the use of non Blackmagic Design parts or supplies, or d) to service a product that
has been modified or integrated with other products when the effect of such a modification or
integration increases the time or difficulty of servicing the product. THIS WARRANTY IS GIVEN
BY BLACKMAGIC DESIGN IN LIEU OF ANY OTHER WARRANTIES, EXPRESS OR IMPLIED.
BLACKMAGIC DESIGN AND ITS VENDORS DISCLAIM ANY IMPLIED WARRANTIES OF
MERCHANTABILITY OR FITNESS FOR A PARTICULAR PURPOSE. BLACKMAGIC DESIGN’S
RESPONSIBILITY TO REPAIR OR REPLACE DEFECTIVE PRODUCTS IS THE WHOLE AND
EXCLUSIVE REMEDY PROVIDED TO THE CUSTOMER FOR ANY INDIRECT, SPECIAL, INCIDENTAL
OR CONSEQUENTIAL DAMAGES IRRESPECTIVE OF WHETHER BLACKMAGIC DESIGN OR THE
VENDOR HAS ADVANCE NOTICE OF THE POSSIBILITY OF SUCH DAMAGES. BLACKMAGIC
DESIGN IS NOT LIABLE FOR ANY ILLEGAL USE OF EQUIPMENT BY CUSTOMER. BLACKMAGIC
IS NOT LIABLE FOR ANY DAMAGES RESULTING FROM USE OF THIS PRODUCT. USER OPERATES
THIS PRODUCT AT OWN RISK.
© Copyright 2018 Blackmagic Design. All rights reserved. ‘Blackmagic Design’, “DaVinci’, ‘Resolve’, ‘DeckLink’,
‘HDLink’, ‘Videohub’, ‘DeckLink’, and ‘Leading the creative video revolution’ are registered trademarks in the US
and other countries. All other company and product names may be trademarks of their respective companies with
which they are associated. Thunderbolt and the Thunderbolt logo are trademarks of Intel Corporation in the U.S.
and/or other countries.
