XC4442 Ultrasonic Sensor XC4490 Manual Main
User Manual:
Open the PDF directly: View PDF ![]() .
.
Page Count: 1
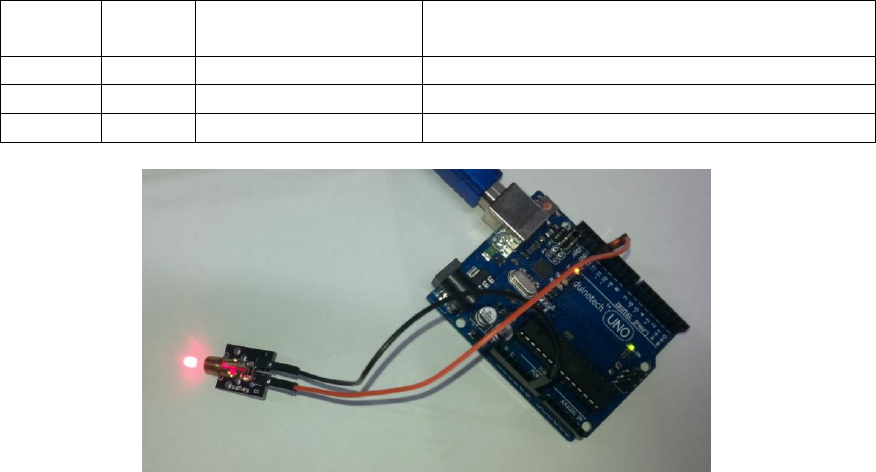
XC4490 Laser Diode Module
The laser diode module brings a controllable laser to your Duinotech Main Board.
The laser can be driven directly from a Duinotech IO pin. As with all lasers, be
careful that the laser is not aimed in anyone’s eyes.
Pin
Main
Board
Function
Comment
S
D13
5V supply
Put 5V on this pin to turn the module on
Not connected
No need to connect anything to this pin.
-
GND
Ground connection
Ground connection
In the above example, S is connected to pin 13 on the Duinotech Main Board and – is
connected to GND, and the ‘Blink’ sketch is uploaded from the Arduino IDE (from
Examples/Basics under the file menu). This blinks the laser on and off.
Sample Code:
/*
Blink
Turns on an LED on for one second, then off for one second, repeatedly.
Most Arduinos have an on-board LED you can control. On the Uno and
Leonardo, it is attached to digital pin 13. If you're unsure what
pin the on-board LED is connected to on your Arduino model, check
the documentation at http://arduino.cc
This example code is in the public domain.
modified 8 May 2014
by Scott Fitzgerald
*/
// the setup function runs once when you press reset or power the board
void setup() {
// initialize digital pin 13 as an output.
pinMode(13, OUTPUT);
}
// the loop function runs over and over again forever
void loop() {
digitalWrite(13, HIGH); // turn the LED on (HIGH is the voltage level)
delay(1000); // wait for a second
digitalWrite(13, LOW); // turn the LED off by making the voltage LOW
delay(1000); // wait for a second
}
