CircleCI Server V2.16 Operations Guide Ops
User Manual:
Open the PDF directly: View PDF ![]() .
.
Page Count: 76
- Overview
- Configuration
- Server Settings, Auto Scaling, and Monitoring
- Advanced System Monitoring
- Scheduled Scaling
- Setting up HTTP Proxies
- Overview
- Service Machine Proxy Configuration
- Data Persistence
- Configuring LDAP Authentication
- Prerequisites
- Configure LDAP Authentication
- Troubleshooting
- Using the machine Executor and Remote Docker Jobs
- Customizations
- Setting Up Certificates
- Enabling Usage Statistics
- Accessing Usage Data
- Maintenance
- Disaster Recovery
- Security
- Troubleshooting
- FAQ
- Can I monitor available build containers?
- How do I provision admin users?
- How can I change my passphrase?
- How can I gracefully shutdown Nomad Clients?
- Why is Test GitHub Authentication failing?
- How can I use HTTPS to access CircleCI?
- Why doesn't terraform destroy every resource?
- Do the Nomad Clients store any state?
- How do I verify TLS settings are failing?
- How do I debug the Management Console (Replicated)?
- Troubleshooting Server Installations
- FAQ
- Appendix
CircleCI Server v2.16 Operations Guide
Reviewed and Tested Documentation
February 11th, 2019
2
Contents
1 Overview 7
Build Environments . . . . . . . . . . . . . . . . . . . . . . . . . . . . . . . . . 7
Architecture . . . . . . . . . . . . . . . . . . . . . . . . . . . . . . . . . . . . . 7
Services Instance . . . . . . . . . . . . . . . . . . . . . . . . . . . . . . . . . . 9
Nomad Clients . . . . . . . . . . . . . . . . . . . . . . . . . . . . . . . . . . . 10
GitHub ....................................... 10
Introduction to Nomad Cluster Operation with CircleCI . . . . . . . . . . . . . . . . 10
Basic Terminology and Architecture . . . . . . . . . . . . . . . . . . . . . . . . . 11
Basic Operations . . . . . . . . . . . . . . . . . . . . . . . . . . . . . . . . . . 11
Checking the Jobs Status . . . . . . . . . . . . . . . . . . . . . . . . . . . 11
Checking the Cluster Status . . . . . . . . . . . . . . . . . . . . . . . . . . 12
Checking Logs . . . . . . . . . . . . . . . . . . . . . . . . . . . . . . . . . 12
Scaling Up the Client Cluster . . . . . . . . . . . . . . . . . . . . . . . . . . 12
Shutting Down a Nomad Client . . . . . . . . . . . . . . . . . . . . . . . . . 12
Scaling Down the Client Cluster . . . . . . . . . . . . . . . . . . . . . . . . 13
2 Configuration 15
Server Settings, Auto Scaling, and Monitoring . . . . . . . . . . . . . . . . . . . . 15
Advanced System Monitoring . . . . . . . . . . . . . . . . . . . . . . . . . . . . 15
Metrics Details . . . . . . . . . . . . . . . . . . . . . . . . . . . . . . . . . 15
Supported Platform(s) . . . . . . . . . . . . . . . . . . . . . . . . . . . . . 16
Scheduled Scaling . . . . . . . . . . . . . . . . . . . . . . . . . . . . . . . . . 21
Auto Scaling Policy Best Practices . . . . . . . . . . . . . . . . . . . . . . . 21
Setting up HTTP Proxies . . . . . . . . . . . . . . . . . . . . . . . . . . . . . . 21
Overview ...................................... 21
Service Machine Proxy Configuration . . . . . . . . . . . . . . . . . . . . . . . . 22
Set up Service Machine Proxy Support . . . . . . . . . . . . . . . . . . . . . 22
Corporate Proxies . . . . . . . . . . . . . . . . . . . . . . . . . . . . . . . 23
Nomad Client Configuration . . . . . . . . . . . . . . . . . . . . . . . . . . 23
Nomad Client Proxy Setup . . . . . . . . . . . . . . . . . . . . . . . . . . . 24
Troubleshooting . . . . . . . . . . . . . . . . . . . . . . . . . . . . . . . . 24
Data Persistence . . . . . . . . . . . . . . . . . . . . . . . . . . . . . . . . . . 25
Configuring LDAP Authentication . . . . . . . . . . . . . . . . . . . . . . . . . . 25
Prerequisites . . . . . . . . . . . . . . . . . . . . . . . . . . . . . . . . . . . . 25
3
4CONTENTS
Configure LDAP Authentication . . . . . . . . . . . . . . . . . . . . . . . . . . . 25
Troubleshooting . . . . . . . . . . . . . . . . . . . . . . . . . . . . . . . . . . . 27
Using the machine Executor and Remote Docker Jobs . . . . . . . . . . . . . . 27
Overview ................................... 27
Configuration . . . . . . . . . . . . . . . . . . . . . . . . . . . . . . . . . 27
Customization . . . . . . . . . . . . . . . . . . . . . . . . . . . . . . . . . 29
Customizations . . . . . . . . . . . . . . . . . . . . . . . . . . . . . . . . . . . 29
Notable Files & Folders . . . . . . . . . . . . . . . . . . . . . . . . . . . . 29
/etc/circle-installation-customizations properties . . . . . . . . . . . . . . . . 30
Other Properties and Env Vars . . . . . . . . . . . . . . . . . . . . . . . . . 30
Setting Up Certificates . . . . . . . . . . . . . . . . . . . . . . . . . . . . . . . . 30
Using a Custom Root CA . . . . . . . . . . . . . . . . . . . . . . . . . . . . 31
Setting up ELB Certificates . . . . . . . . . . . . . . . . . . . . . . . . . . . 31
Setting up TLS/HTTPS on CircleCI Server . . . . . . . . . . . . . . . . . . . 32
Enabling Usage Statistics . . . . . . . . . . . . . . . . . . . . . . . . . . . . . . 34
Detailed Usage Statistics . . . . . . . . . . . . . . . . . . . . . . . . . . . . 34
Weekly Account Usage . . . . . . . . . . . . . . . . . . . . . . . . . . . . 34
Weekly Job Activity . . . . . . . . . . . . . . . . . . . . . . . . . . . . . . 35
Accessing Usage Data . . . . . . . . . . . . . . . . . . . . . . . . . . . . . . . 36
Security and Privacy . . . . . . . . . . . . . . . . . . . . . . . . . . . . . . 36
3 Maintenance 37
System Checks . . . . . . . . . . . . . . . . . . . . . . . . . . . . . . . . . . . 37
Security and Access Control . . . . . . . . . . . . . . . . . . . . . . . . . . 40
System Configuration . . . . . . . . . . . . . . . . . . . . . . . . . . . . . 40
Metrics..................................... 41
Usage Statistics . . . . . . . . . . . . . . . . . . . . . . . . . . . . . . . . 41
Health Checks . . . . . . . . . . . . . . . . . . . . . . . . . . . . . . . . . 41
Health of Service . . . . . . . . . . . . . . . . . . . . . . . . . . . . . . . . 41
Health of Dependencies . . . . . . . . . . . . . . . . . . . . . . . . . . . . 42
Operational Tasks . . . . . . . . . . . . . . . . . . . . . . . . . . . . . . . 42
Leftover VM’s in Your AWS Account . . . . . . . . . . . . . . . . . . . . . . 44
User Management . . . . . . . . . . . . . . . . . . . . . . . . . . . . . . . . . 46
4 Disaster Recovery 47
Backing up CircleCI Data . . . . . . . . . . . . . . . . . . . . . . . . . . . . . . 47
Backing up the Database . . . . . . . . . . . . . . . . . . . . . . . . . . . . . . 47
Backing up Object Storage . . . . . . . . . . . . . . . . . . . . . . . . . . . . . 48
Snapshotting on AWS EBS . . . . . . . . . . . . . . . . . . . . . . . . . . . . . 48
Restoring From Backup . . . . . . . . . . . . . . . . . . . . . . . . . . . . . . . 48
Cleaning up Build Records . . . . . . . . . . . . . . . . . . . . . . . . . . . . . 49
5 Security 51
Overview ................................... 51
Encryption................................... 51
Sandboxing . . . . . . . . . . . . . . . . . . . . . . . . . . . . . . . . . . 52
CONTENTS 5
Integrations . . . . . . . . . . . . . . . . . . . . . . . . . . . . . . . . . . 52
AuditLogs................................... 53
Audit Log Fields . . . . . . . . . . . . . . . . . . . . . . . . . . . . . . . . 54
6 Troubleshooting 55
FAQ......................................... 55
Can I monitor available build containers? . . . . . . . . . . . . . . . . . . . . 55
How do I provision admin users? . . . . . . . . . . . . . . . . . . . . . . . . 55
How can I change my passphrase? . . . . . . . . . . . . . . . . . . . . . . 55
How can I gracefully shutdown Nomad Clients? . . . . . . . . . . . . . . . . 56
Why is Test GitHub Authentication failing? . . . . . . . . . . . . . . . . . . . 56
How can I use HTTPS to access CircleCI? . . . . . . . . . . . . . . . . . . . 56
Why doesn’t terraform destroy every resource? . . . . . . . . . . . . . . . . . 56
Do the Nomad Clients store any state? . . . . . . . . . . . . . . . . . . . . . 56
How do I verify TLS settings are failing? . . . . . . . . . . . . . . . . . . . . 56
How do I debug the Management Console (Replicated)? . . . . . . . . . . . . 57
Troubleshooting Server Installations . . . . . . . . . . . . . . . . . . . . . . . . . 64
Debugging Queuing Builds . . . . . . . . . . . . . . . . . . . . . . . . . . . 64
Check Dispatcher Logs for Errors . . . . . . . . . . . . . . . . . . . . . . . 64
Check Picard-Dispatcher Logs for Errors . . . . . . . . . . . . . . . . . . . . 65
Check Picard-Scheduler Logs for Errors . . . . . . . . . . . . . . . . . . . . 65
Check Nomad Node Status . . . . . . . . . . . . . . . . . . . . . . . . . . 65
Check Job Processing Status . . . . . . . . . . . . . . . . . . . . . . . . . 66
Jobs stay in queued status until they fail and never successfully run. . . . . . 67
7 Appendix 69
System Requirements . . . . . . . . . . . . . . . . . . . . . . . . . . . . . . . . 69
Services Machine . . . . . . . . . . . . . . . . . . . . . . . . . . . . . . . 69
Nomad Clients . . . . . . . . . . . . . . . . . . . . . . . . . . . . . . . . . 69
Server Ports . . . . . . . . . . . . . . . . . . . . . . . . . . . . . . . . . . 70
6CONTENTS
Chapter 1
Overview
CircleCI is a modern continuous integration and continuous delivery (CI/CD) platform installable
inside your private cloud or data center.
CircleCI 2.x provides new infrastructure that includes the following improvements:
• New configuration with any number of jobs and workflows to orchestrate them.
• Custom images for execution on a per-job basis.
• Fine-grained performance with custom caching and per-job CPU or memory allocation.
Refer to the v2.16 Changelog at https://circleci.com/server/changelog for what’s new in this re-
lease.
Build Environments
CircleCI uses Nomad as the primary job scheduler in CircleCI 2.x. Refer to the Introduction to
Nomad Cluster Operation to learn more about the job scheduler and how to perform basic client
and cluster operations.
By default, CircleCI 2.x Nomad clients automatically provision containers according to the image
configured for each job in your .circleci/config.yml file.
Architecture
Figure 1.1 illustrates CircleCI core components, build orchestration services, and executors.
The CircleCI API is a full-featured RESTful API that allows you to access all information and
trigger all actions in CircleCI. The Insights page in the CircleCI UI is a dashboard showing the
health of all repositories you are following including median build time, median queue time, last
build time, success rate, and parallelism.
7

8CHAPTER 1. OVERVIEW
Figure 1.1: CircleCI Services Architecture

SERVICES INSTANCE 9
CircleCI consists of two primary components: Services and Nomad Clients. Any number of
Nomad Clients execute your jobs and communicate back to the Services. All components must
access GitHub or your hosted instance of GitHub Enterprise on the network as illustrated in the
following architecture diagram.
Figure 1.2: A Diagram of the CircleCI Architecture
Services Instance
The machine on which the Services instance runs must not be restarted and may be backed up
using VM snapshotting. If you must restart the Services machine, do so only as a last resort
because restart will result in downtime. Refer to the Disaster Recovery chapter for instructions.
DNS resolution may point to the IP address of the machine on which the Services are installed.
It is also possible to point to a load balancer, for example an ELB in AWS. The following table
describes the ports used for traffic on the Service instance:
Source Ports Use
End Users 80, 443 , 4434 HTTP/HTTPS Traffic
Administrators 22 SSH
Administrators 8800 Admin Console
Builder Boxes all traffic / all ports Internal Communication
GitHub (Enterprise or .com) 80, 443 Incoming Webhooks

10 CHAPTER 1. OVERVIEW
Nomad Clients
The Nomad Clients run without storing state, enabling you to increase or decrease the number
of containers as needed.
To ensure that there are enough running to handle all of the builds, track the queued builds and
increase the number of Nomad Client machines as needed to balance the load.
Each machine reserves two CPUs and 4GB of memory for coordinating builds. The remaining
processors and memory create the containers. Larger machines are able to run more containers
and are limited by the number of available cores after two are reserved for coordination.
Note: The maximum machine size for a Nomad client is 128GB RAM/ 64 CPUs, contact your
CircleCI account representative to request use of larger machines for Nomad Clients.
The following table describes the ports used on the Nomad clients:
Source Ports Use
End Users 64535-65535 SSH into builds
Administrators 80 or 443 CCI API Access
Administrators 22 SSH
Services Machine all traffic / all ports Internal Comms
Nomad Clients (including itself) all traffic / all ports Internal Comms
GitHub
CircleCI uses GitHub or GitHub Enterprise credentials for authentication which, in turn, may
use LDAP, SAML, or SSH for access. That is, CircleCI will inherit the authentication supported
by your central SSO infrastructure. The following table describes the ports used on machines
running GitHub to communicate with the Services and Builder instances.
Source Ports Use
Services 22 Git Access
Services 80, 443 API Access
Nomad Client 22 Git Access
Nomad Client 80, 443 API Access
Introduction to Nomad Cluster Operation with CircleCI
This document provides conceptual and procedural information for operating, backing up, mon-
itoring, and configuring a CircleCI server installation.
BASIC TERMINOLOGY AND ARCHITECTURE 11
CircleCI uses Nomad as the primary job scheduler in CircleCI 2.0. This chapter provides a basic
introduction to Nomad for understanding how to operate the Nomad Cluster in your CircleCI 2.0
installation.
Basic Terminology and Architecture
•Nomad Server: Nomad Servers are the brains of the cluster. It receives and allocates
jobs to Nomad clients. In CircleCI, a Nomad server is running in your service box as a
Docker Container.
•Nomad Client: Nomad Clients execute jobs allocated by Nomad servers. Usually a No-
mad client runs on a dedicated machine (often a VM) in order to fully take the advantage
of its machine power. You can have multiple Nomad clients to form a cluster and the
Nomad server allocates jobs to the cluster with its scheduling algorithm.
•Nomad Jobs: Nomad Job is a specification provided by users that declares a workload
for Nomad. In CircleCI 2.0, a Nomad job corresponds to an execution of CircleCI job/build.
If the job/build uses parallelism, say 10 parallelism, then Nomad will run 10 jobs.
•Build Agent: Build Agent is a Go program written by CircleCI that executes steps in a
job and reports the results. Build Agent is executed as the main process inside a Nomad
Job.
Basic Operations
This section will give you the basic guide to operating a Nomad cluster in your installation.
The nomad CLI is installed in the Service instance. It is pre-configured to talk to the Nomad
cluster, so it is possible to use the nomad command to run the following commands in this
section.
Checking the Jobs Status
The nomad status command will give you the list of jobs status in your cluster. The Status
is the most important field in the output with the following status type definitions:
•running: The status becomes running when Nomad has started executing the job.
This typically means your job in CircleCI is started.
•pending: The status becomes pending when there are not enough resources avail-
able to execute the job inside the cluster.
•dead: The status becomes dead when Nomad finishes executing the job. The status
becomes dead regardless of whether the corresponding CircleCI job/build succeeds or
fails.
12 CHAPTER 1. OVERVIEW
Checking the Cluster Status
The nomad node-status command will give you the list of Nomad clients. Note that
nomad node-status command also reports both Nomad clients that are currently serving
(status active) and Nomad clients that were taken out of the cluster (status down). Therefore,
you need to count the number of active Nomad clients to know the current capacity of your
cluster.
The nomad node-status -self command will give you more information about the client
where you execute the command. Such information includes how many jobs are running on the
client and the resource utilization of the client.
Checking Logs
As noted in the Nomad Jobs section above, a Nomad Job corresponds to an execution of Cir-
cleCI job/build. Therefore, checking logs of Nomad Jobs sometimes helps you to understand
the status of CircleCI job/build if there is a problem.
The nomad logs -job -stderr <nomad-job-id> command will give you the logs
of the job.
Note: Be sure to specify -stderr flag as most of logs from Build Agent appears in the
stderr.
While the nomad logs -job command is useful, the command is not always accurate
because the -job flag uses a random allocation of the specified job. The term allocation
is a smaller unit in Nomad Job which is out of scope of this document. To learn more, please
see the official document.
Complete the following steps to get logs from the allocation of the specified job:
1. Get the job ID with nomad status command.
2. Get the allocation ID of the job with nomad status <job-id> command.
3. Get the logs from the allocation with nomad logs -stderr <allocation-id>
Scaling Up the Client Cluster
Refer to the Scaling section of the Configuration chapter for details about adding Nomad Client
instances to an AWS auto scaling group and using a scaling policy to scale up automatically
according to your requirements.
Shutting Down a Nomad Client
When you want to shutdown a Nomad client, you must first set the client to drain mode. In
the drain mode, the client will finish already allocated jobs but will not get allocated new jobs.
BASIC OPERATIONS 13
1. To drain a client, log in to the client and set the client to drain mode with node-drain
command as follows:
nomad node-drain -self -enable
2. Then, make sure the client is in drain mode with node-status command:
nomad node-status -self
Alternatively, you can drain a remote node with nomad node-drain -enable -yes
<node-id>.
Scaling Down the Client Cluster
To set up a mechanism for clients to shutdown in drain mode first and wait for all jobs to be
finished before terminating the client, configure an ASG Lifecycle Hook that triggers a script
when scaling down instances.
The script should use the above commands to put the instance in drain mode, monitor running
jobs on the instance, wait for them to finish and then terminate the instance.
14 CHAPTER 1. OVERVIEW
Chapter 2
Configuration
This chapter describes configuration, customizations, and metrics.
Server Settings, Auto Scaling, and Monitoring
This section is for System Administrators who are setting environment variables for installed
Nomad Clients, scaling their cluster, gathering metrics for monitoring their CircleCI installation,
and viewing logs:
Advanced System Monitoring
Enable the ability to forward system and Docker metrics to supported platforms by going
to Replicated Admin > Settings and enabling the provider of your choice, for example
https://example.com:8800/settings#cloudwatch_metrics.
Metrics Details
Services VM Host and Docker metrics are forwarded via Telegraf, a plugin-driven server agent
for collecting and reporting metrics.
Following are the metrics that are enabled:
• CPU
• Disk
• Memory
• Networking
• Docker
15

16 CHAPTER 2. CONFIGURATION
Nomad Job Metrics
In addition to the metrics above, Nomad job metrics are enabled and emitted by the Nomad
Server agent. Five types of metrics are reported:
circle.nomad.server_agent.poll_failure: Returns 1 if the last poll of the No-
mad agent failed, otherwise it returns 0. circle.nomad.server_agent.jobs.pending:
Returns the total number of pending jobs across the cluster. circle.nomad.server_agent.jobs.running:
Returns the total number of running jobs across the cluster. circle.nomad.server_agent.jobs.complete:
Returns the total number of complete jobs across the cluster. circle.nomad.server_agent.jobs.dead:
Returns the total number of dead jobs across the cluster.
When the Nomad Metrics container is running normally, no output will be written to standard
output or standard error. Failures will elicit a message to standard error.
Supported Platform(s)
There are two built-in platforms; AWS CloudWatch and DataDog.
AWS CloudWatch
Click Enable under AWS CloudWatch to begin configuration.
Figure 2.1: AWS CloudWatch
Configuration
There are two options for configuration:
• Use the IAM Instance Profile of the services box and configure your custom region and
namespace.
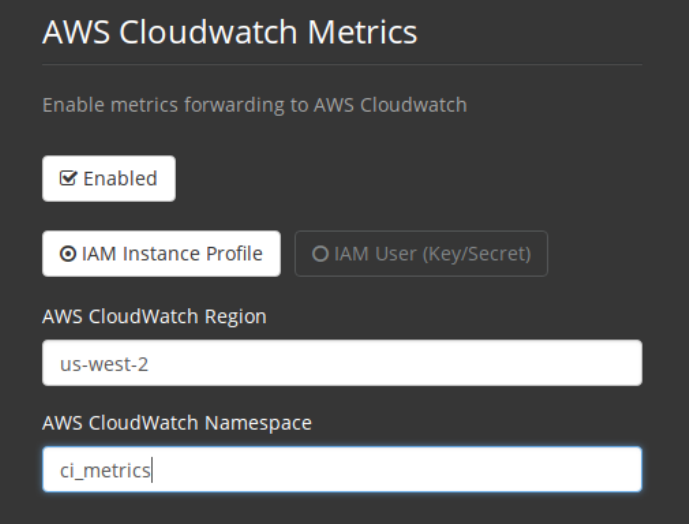
ADVANCED SYSTEM MONITORING 17
Figure 2.2: Configuration IAM
18 CHAPTER 2. CONFIGURATION
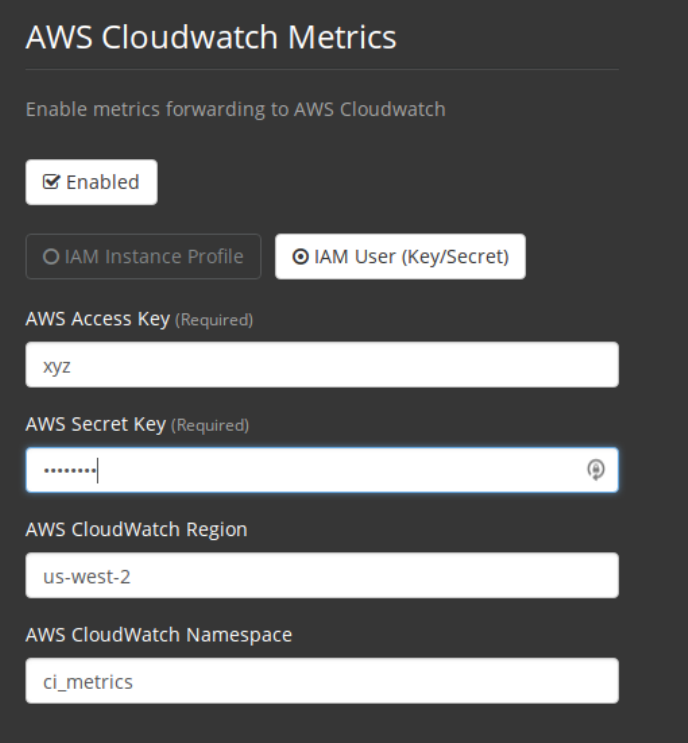
• Alternatively, you may use your AWS Access Key and Secret Key along with your custom
region and namespace.
Figure 2.3: Configuration Alt
After saving you can verify that metrics are forwarding by going to the AWS CloudWatch console.
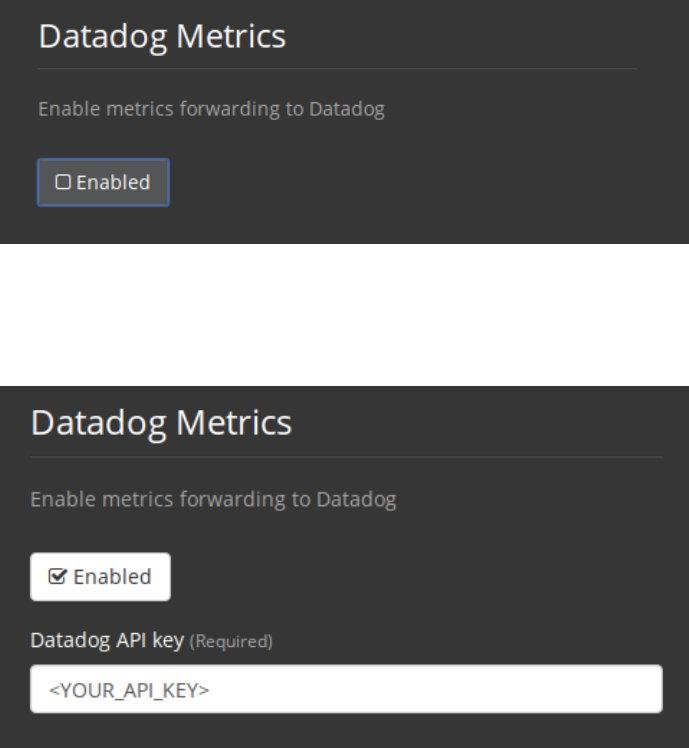
DataDog
Click Enable under DataDog Metrics to begin configuration.
Configuration
ADVANCED SYSTEM MONITORING 19
Figure 2.4: DataDog
Enter your DataDog API Key.
Figure 2.5: DataDog
After saving you can verify that metrics are forwarding by going to the DataDog metrics summary.
Custom Metrics
Custom Metrics using Telegraf configuration file may be configured in addition to the predefined
CloudWatch and Datadog metrics described above. Telegraph can also be used instead of
CloudWatch and Datadog for more fine grained control.
Configuration

20 CHAPTER 2. CONFIGURATION
Figure 2.6: Custom
Configuration options are based on Telegraf’s documented output plugins. See their documen-
tation here.
For example, if you would like to use the InfluxDB Output Plugin you would need to follow these
steps; 1. SSH into the Servics Machine 2. cd /etc/circleconfig/telegraf/influxdb.conf
3. Adding the desired ouputs, for example
[[output.influxdb]]
url = "http://52.67.66.155:8086"
database = "testdb"
4. Run docker restart telegraf to restart the container to load or reload any
changes.
You may check the logs by running docker logs -f telegraf to confirm your output
provider (e.g. influx) is listed in the configured outputs.
Additionally, if you would like to ensure that all metrics in an installation are tagged against an
environment you could place the following code in your config:
[global_tags]
Env="<staging-circleci>"
Please see the InfluxDB documentation for default and advanced installation steps.
Note: Any changes to the config will require a restart of the system.
SCHEDULED SCALING 21
Scheduled Scaling
By default, an Auto Scaling Group (ASG) is created on your AWS account. Go to your EC2
Dashboard and select Auto Scaling Groups from the left side menu. Then, in the Instances
tab, set the Desired and Minimum number to define the number Nomad Clients to spin up and
keep available. Use the Scaling Policy tab of the Auto Scaling page to scale up your group
automatically only at certain times, see below for best practices for defining policies.
Refer to the Shutting Down a Nomad Client section of the Nomad document for instructions on
draining and scaling down the Nomad Clients.
Auto Scaling Policy Best Practices
There is a blog post series wherein CircleCI engineering spent time running simulations of cost
savings for the purpose of developing a general set of best practices for Auto Scaling. Consider
the following best practices when setting up AWS Auto Scaling:
1. In general, size your cluster large enough to avoid queueing builds. That is, less than
one second of queuing for most workloads and less than 10 seconds for workloads run
on expensive hardware or at highest parallellism. Sizing to reduce queuing to zero is
best practice because of the high cost of developer time, it is difficult to create a model
in which developer time is cheap enough for under-provisioning to be cost-effective.
2. Create an Auto Scaling group with a Step Scaling policy that scales up during the normal
working hours of the majority of developers and scales back down at night. Scaling up
during the weekday normal working hours and back down at night is the best practice
to keep queue times down during peak development without over provisioning at night
when traffic is low. Looking at millions of builds over time, a bell curve during normal
working hour emerges for most data sets.
This is in contrast to auto scaling throughout the day based on traffic fluctuations because model-
ing revealed that boot times are actually too long to prevent queuing in real time. Use Amazon’s
Step Policy instructions to set this up along with Cloudwatch Alarms.
Setting up HTTP Proxies
This document describes how to configure CircleCI to use an HTTP proxy in the following sec-
tions:
Overview
If you are setting up your proxy through Amazon, read this before proceeding:
Using an HTTP Proxy - AWS Command Line Interface
22 CHAPTER 2. CONFIGURATION
Avoid proxying internal requests, especially for the Services machine. Run export
NO_PROXY=<services_box_ip> to add it to the NO_PROXY rules. In an ideal case, traf-
fic to S3 will not be proxied, and instead be bypassed by adding s3.amazonaws.com,*.s3.amazonaws.com
to the NO_PROXY rule.
These instructions assume an unauthenticated HTTP proxy at 10.0.0.33:3128, a Services
machine at 10.0.1.238 and use of ghe.example.com as the GitHub Enterprise host.
Note: The following proxy instructions must be completed before installing CircleCI on fresh
VMs or instances. You must also configure JVM OPTs again as well as described below.
Service Machine Proxy Configuration
The Service machine has many components that need to make network calls, as follows:
•External Network Calls - Replicated is a vendor service that we use for the Management
Console of CircleCI. CircleCI requires Replicated to make an outside call to validate the
license, check for updates, and download upgrades. Replicated also downloads docker,
installs it on the local machine, and uses a Docker container to create and configure S3
buckets. GitHub Enterprise may or may not be behind the proxy, but github.com will need
to go through the proxy.
•Internal Network Calls
–If S3 traffic requires going through an HTTP proxy, CircleCI must pass proxy set-
tings into the container.
–The CircleCI instance on the Services machine runs in a Docker container, so it
must to pass the proxy settings to the container to maintain full functionality.
Set up Service Machine Proxy Support
For a static installation not on AWS, SSH into the Services machine and run the following code
snippet with your proxy address.
echo '{"HttpProxy": "http://<proxy-ip:port>"}' |
sudo tee /etc/replicated.conf
(cat <<'EOF'
HTTP_PROXY=<proxy-ip:port>
HTTPS_PROXY=<proxy-ip:port>
EOF
| sudo tee -a /etc/circle-installation-customizations
sudo service replicated-ui stop; sudo service replicated stop;
sudo service replicated-operator stop; sudo service replicated-
ui start;
sudo service replicated-operator start; sudo service replicated start
SERVICE MACHINE PROXY CONFIGURATION 23
If you run in Amazon’s EC2 service then you’ll need to include 169.254.169.254 EC2
services as shown below.
echo '{"HttpProxy": "http://<proxy-ip:port>"}' |
sudo tee /etc/replicated.conf
(cat <<'EOF'
HTTP_PROXY=<proxy-ip:port>
HTTPS_PROXY=<proxy-ip:port>
NO_PROXY=169.254.169.254,<circleci-service-ip>,
127.0.0.1,localhost,ghe.example.com
JVM_OPTS="-Dhttp.proxyHost=<ip> -Dhttp.proxyPort=<port>
-Dhttps.proxyHost=<proxy-ip> -Dhttps.proxyPort=<port) -
Dhttp.nonProxyHosts=169.254.169.254|<circleci-service-ip>|
127.0.0.1|localhost|ghe.example.com"
EOF
| sudo tee -a /etc/circle-installation-customizations
sudo service replicated-ui stop; sudo service replicated stop;
sudo service replicated-operator stop; sudo service replicated-
ui start;
sudo service replicated-operator start; sudo service replicated start
Note: The above is not handled by by our enterprise-setup script and will need to be added to
the user data for the services box startup or done manually.
Corporate Proxies
Also note that when the instructions ask you if you use a proxy, they will also prompt you for
the address. It is very important that you input the proxy in the following format <proto-
col>://<ip>:<port>. If you are missing any part of that, then apt-get won’t work
correctly and the packages won’t download.
Nomad Client Configuration
•External Network Calls - CircleCI uses curl and awscli scripts to download ini-
tialization scripts, along with jars from Amazon S3. Both curl and awscli respect
environment settings, but if you have whitelisted traffic from Amazon S3 you should not
have any problems.
•Internal Network Calls
–CircleCI JVM:
*Any connections to other Nomad Clients or the Services machine should be
excluded from HTTP proxy
*Connections to GitHub Enterprise should be excluded from HTTP proxy
–The following contains parts that may be impacted due to a proxy configuration:
24 CHAPTER 2. CONFIGURATION
*Amazon EC2 metadata (http://docs.aws.amazon.com/AWSEC2/latest/UserGuide/ec2-
instance-metadata.html). This should not be proxied. If it is, then the
machine will be misconfigured.
*Amazon S3 traffic — note S3 discussion above
*Amazon EC2 API - EC2 API traffic may need to be proxied. You would note
lots of failures (timeout failures) in logs if the proxy setting is misconfigured,
but it will not block CircleCI from functioning.
Nomad Client Proxy Setup
If you are using AWS Terraform install you’ll have to add the below to your Nomad client launch
configuration. These instructions should be added to /etc/environment. If you are using
Docker, refer to the Docker HTTP Proxy Instructions documentation. If using static installation,
add to the server before installation.
#!/bin/bash
(cat <<'EOF'
HTTP_PROXY=<proxy-ip:port>
HTTPS_PROXY=<proxy-ip:port>
NO_PROXY=169.254.169.254,<circleci-service-ip>,
127.0.0.1,localhost,ghe.example.com
JVM_OPTS="-Dhttp.proxyHost=<ip> -Dhttp.proxyPort=<port>
-Dhttps.proxyHost=<proxy-ip> -Dhttps.proxyPort=3128 -Dhttp.nonProxyHosts=169.254.169.254|<circleci-
service-ip>|
127.0.0.1|localhost|ghe.example.com"
EOF
) | sudo tee -a /etc/environment
set -a
. /etc/environment
You’ll also need to follow these instructions: https://docs.docker.com/network/proxy/ for making
sure that your containers have outbound/proxy access.
Troubleshooting
If you cannot access the page of the CircleCI Replicated management console, but the
services machine seems to be running, try to SSH tunnel into the machine doing the fol-
lowing: ssh -L 8800:<address you want to proxy through>:8800
ubuntu@<ip_of_services_box>.
DATA PERSISTENCE 25
Data Persistence
Refer to the following documents for instructions to configure your installation for data persis-
tence:
• Adding External Databases and Vault Hosts to CircleCI v2.15
• Adding External Redis, Rabbitmq, Slanger, and Nomad Services to CircleCI v2.16
Configuring LDAP Authentication
This document describes how to enable, configure, and test CircleCI to authenticate users with
OpenLDAP or Active Directory credentials.
Prerequisites
• Install and configure your LDAP server and Active Directory.
• GitHub Enterprise must be configured and is the source of organizations and projects to
which users have access.
• Install a new instance of CircleCI 2.0 with no existing users using the Installing CircleCI
2.0 on Amazon Web Services with Terraform document. Note: LDAP is not supported
with existing installations, only clean installations may use LDAP.
• Contact CircleCI support and file a feature request for CircleCI installed on your own
servers.
Note: After completing this configuration, all users must log in to CircleCI with their LDAP cre-
dentials. After logging in to CircleCI, each user will then click the Connect button on the Accounts
page to connect and authenticate their GitHub account.
Configure LDAP Authentication
This section provides the steps to configure LDAP in the management console (Replicated).
1. Verifying access over the LDAP/AD ports to your LDAP/AD servers.
2. Log in to the management console for a newly installed CircleCI 2.0 instance as the
admin user.
3. Check the LDAP button on the Settings page. Select OpenLDAP or Active Directory.

26 CHAPTER 2. CONFIGURATION
4. Fill in your LDAP instance Hostname and port number.
5. Select the encryption type (plain text is not recommended).
6. Fill in the Search user field with the LDAP admin username using the format
cn=<admin>,dc=<example>,dc=<org> replacing admin,example, and
org with appropriate values for your datacenter.
7. Fill in the Search password field with the LDAP admin password.
8. Fill in the User search DN field with an approrpiate value using the format ou=<users>
replacing users with the value used in your LDAP instance.
9. Fill in the Username field with an approriate unique identifier used for your users, for
example, mail.
10. Fill in the Group Membership field with an appropriate value. By default, the value is
uniqueMember for OpenLDAP and member for Active Directory. This field will list
member dn for a group.
11. Fill in the Group Object Class field with an approrpiate value. By default, the value is
TROUBLESHOOTING 27
groupOfUniqueNames for OpenLDAP and group for Active Directory. The value
of the objectClass field indicates a dn is a group.
12. (Optional) Fill in the Test username and Test password fields with a test email and pass-
word for an LDAP user you want to test.
13. Save the settings.
A user who logs in will be redirected to the Accounts page of the CircleCI application with a
Connect button that they must use to connect their GitHub account. After they click Connect,
an LDAP section with their user information (for example, their email) on the page will appear
and they will be directed to authenticate their GitHub account. After authenticating their GitHub
account users are directed to the Job page to use CircleCI.
Note: A user who has authenticated with LDAP and is then removed from LDAP/AD will be able
to access CircleCI as long as they stay logged in (because of cookies). As soon as the user logs
out or the cookie expires, they will not be able to log back in. A users’ ability to see projects or to
run builds is defined by their GitHub permissions. Therefore, if GitHub permissions are synced
with LDAP/AD permissions, a removed LDAP/AD user will automatically lose authorization to
view or access CircleCI as well.
Troubleshooting
Troubleshoot LDAP server settings with LDAP search as follows:
ldapsearch -x LLL -h <ldap_address_server>
Using the machine Executor and Remote Docker Jobs
This document outlines how to set up VM service for your CircleCI installation for machine
executor and remote Docker jobs, as well as how customize your own VM service images. Note:
This configuration is only available for installations on AWS, please contact your CircleCI account
representative to request this configuration for static.
Overview
VM service enables users of CircleCI installed on AWS to run jobs using the Remote Docker
Environment and the machine executor.
Configuration
To configure VM service, it is best practice to select the AWS EC2 option in the Replicated
Management Console, which will allow CircleCI to run remote Docker and machine executor
jobs using dedicated EC2 instances.

28 CHAPTER 2. CONFIGURATION
Figure 2.7: Configuring VM Service on CircleCI Server

CUSTOMIZATIONS 29
If you do not provide a custom Amazon Machine Image (AMI) for VM service, machine ex-
ecutor and remote Docker jobs on Server will run using the same machine image that we pro-
vide by default on Cloud: an Ubuntu 14.04 or 16.04 image with Docker version 17.03.0-ce
and docker-compose version 1.9.0, along with a selection of common languages, tools, and
frameworks. See the picard-vm-image branch of our image-builder repository for details.
Customization
It may be beneficial to customize the VM service image for your installation of CircleCI; it will allow
you to specify other versions of Docker and docker-compose, as well as install any additional
dependencies that may be part of your CI/CD pipeline. Without doing so, you will likely need
to run these additional install and update steps on every commit as part of your config.yml
file.
To build custom VM service images, use the following repository branch: https://github.com/
circleci/image-builder/tree/picard-vm-image.
Run the packer build aws-vm.json command after filling in the required groups in
aws-vm.json. It requires an access key and secret key to upload. Handle the key and
secret process according to the your requirements, but consider restricting the ami_groups
to only within your organization.
Refer to https://packer.io/docs/builders/amazon-ebs.html#ami_groups for more information
and see https://github.com/circleci/image-builder/blob/picard-vm-image/provision.sh for details
about settings.
You will need to associate the circleci user with the image you want to use as shown
in the following example: https://github.com/circleci/image-builder/blob/picard-vm-image/aws_
user_data.
Customizations
This section is a brief summary of key files and variables that impact Server behavior.
Notable Files & Folders
Need Path More info
General Config /etc/circle-installation-
customizations
See table below for values
JVM Heap Sizes /etc/circleconfig/XXXX/customizations
Supports: frontend, test_results
Adjust heap size for
individual containers with
JVM_HEAP_SIZE
Custom CA Certs /usr/local/share/ca-certificates/

30 CHAPTER 2. CONFIGURATION
Need Path More info
Container Customizations /etc/circleconfig/XXX/customizationsUsed lots of places in
replicated
/etc/hosts /etc/hosts Respected by several
containers including
frontend, copied to
container’s /etc/hosts
/etc/environment /etc/environment Respected by all
containers
/etc/circle-installation-customizations properties
Note: Every property should be in format export ENV_VAR="value"
Property Impact More info
CIRCLE_URL Override the scheme
and host that CircleCI
uses
JVM_HEAP_SIZE Set JVM heap size for
all containers reading
this property
Use container specific
settings when possible (see
files above)
Other Properties and Env Vars
Property Impact More info
HTTP_PROXY, NO_PROXY Proxy for replicated and
other services outside
CircleCI containers to
use
Setting Up Certificates
This document provides a script for using a custom Root Certificate Authority and the process
for using an Elastic Load Balancing certificate in the following sections:

SETTING UP CERTIFICATES 31
Using a Custom Root CA
Any valid certificates added to the following path will be trusted by CircleCI services:
/usr/local/share/ca-certificates/
The following example openssl command is one way of placing the certificate. It is also
possible to pull a certificate from a vault/PKI solution within your company.
Some installation environments use internal Root Certificate Authorities for encrypting and es-
tablishing trust between servers. If you are using a customer Root certificate, you will need to
import and mark it as a trusted certificate at CircleCI GitHub Enterprise instances. CircleCI will
respect such trust when communicating with GitHub and webhook API calls.
CA Certificates must be in a format understood by Java Keystore, and include the entire chain.
The following script provides the necessary steps.
GHE_DOMAIN=github.example.com
# Grab the CA chain from your GitHub Enterprise deployment.
openssl s_client -connect ${GHE_DOMAIN}:443 -showcerts < /dev/null | sed -
ne '/-BEGIN CERTIFICATE-/,/-END CERTIFICATE-/p' > /usr/local/share/ca-
certificates/ghe.crt
Then, navigate to the system console at port 8800 and change the protocol to upgraded. You
can change the protocol to “HTTPS (TLS/SSLEnabled)” setting and restart the services. When
trying “Test GitHub Authentication” you should get Success now rather than x509 related error.
Setting up ELB Certificates
CircleCI requires the following steps to get ELB (Elastic Load Balancing) certificates working as
your primary certs. The steps to accomplish this are below. You will need certificates for the
ELB and CircleCI Server as described in the following sections.
Note: Opening the port for HTTP requests will allow CircleCI to return a HTTPS redirect.
1. Open the following ports on your ELB:
Load
BalancerProtocol
Load
Balancer
Port
Instance
Protocol
Instance
Port Cipher
SSL
Certificate
HTTP 80 HTTP 80 N/A N/A
SSL 443 SSL 443 Change your-cert
SSL 3000 SSL 3000 Change your-cert
HTTPS 8800 HTTPS 8800 Change your-cert
SSL 8081 SSL 8081 Change your-cert
SSL 8082 SSL 8082 Change your-cert

32 CHAPTER 2. CONFIGURATION
{: class=“table table-striped”}
2. Add the following security group on your ELB:
Note: The sources below are left open so that anybody can access the instance over these
port ranges. If that is not what you want, then feel free to restrict them. Users will experience
reduced functionality if your stakeholders are using IP addresses outside of the Source Range.
Type Protocol Port Range Source
SSH TCP 22 0.0.0.0
HTTPS TCP 443 0.0.0.0
Custom TCP Rule TCP 8800 0.0.0.0
Custom TCP Rule TCP 64535-65535 0.0.0.0
3. Next, in the management console for CircleCI, upload a valid certificate and key file to
the Privacy Section. These don’t need to be externally signed or even current certs
as the actual cert management is done at the ELB. But, to use HTTPS requests, Cir-
cleCI requires a certificate and key in which the “Common Name (FQDN)” matches the
hostname configured in the admin console.
4. It is now possible to set your Github Authorization Callback to https rather than http.
Using Self-Signed Certificates
Because the ELB does not require a current certificate, you may choose to generate a self-
signed certificate with an arbitrary duration.
1. Generate the certificate and key using openssl command openssl req -newkey
rsa:2048 -nodes -keyout key.pem -x509 -days 1 -out cer-
tificate.pem
2. Provide the appropriate information to the prompts. NOTE: The Common Name provided
must match the host configured in CircleCI.
3. Save the certificate.pem and key.pem file locally.
Setting up TLS/HTTPS on CircleCI Server
You may use various solutions to generate valid SSL certificate and key file. Two solutions are
provided below.
Using Certbot
This section describes setting up TLS/HTTPS on your Server install using Certbot by manually
adding a DNS record set to the Services machine. Certbot generally relies on verifying the DNS
SETTING UP CERTIFICATES 33
record via either port 80 or 443, however this is not supported on CircleCI Server installations
as of 2.2.0 because of port conflicts.
1. Stop the Service from within the Replicated console (hostname:8800).
2. SSH into the Services machine.
3. Install Certbot and generate certificates using the following commands:
sudo apt-get update
sudo apt-get install software-properties-common
sudo add-apt-repository ppa:certbot/certbot
sudo apt-get update
sudo apt-get install certbot
certbot certonly --manual --preferred-challenges dns
4. You’ll be instructed to add a DNS TXT record.
5. After the record is successfully generated, save fullchain.pem and privkey.pem
locally.
If you’re using Route 53 for your DNS records, adding a TXT record is straightforward. When
you’re creating a new record set, be sure to select type -> TXT and provide the appropriate
value enclosed in quotes.
Adding the certificate to CircleCI Server
Once you have a valid certificate and key file in pem format, you must upload it to CircleCI
Server.
1. To do so, navigate to hostname:8800/console/settings.
2. Under “Privacy” section, check the box for “SSL only (Recommened)”
3. Upload your newly generated certificate and key.
4. Click “Verify TLS Settings” to ensure everything is working.
5. Click “Save” at the bottom of the settings page and restart when prompted.
Reference: https://letsencrypt.readthedocs.io/en/latest/using.html#manual
Ensure the hostname is properly configured in the Replicated/management console ~ (host-
name:8800/settings) and that the hostname used matches the DNS records associated with
the TLS certificates.
Make sure the Auth Callback URL in Github/Github Enterprise matches the domain name point-
ing to the services box, including the protocol used, for example https://info-tech.io/.

34 CHAPTER 2. CONFIGURATION
Enabling Usage Statistics
This chapter is for System Administrators who want to automatically send some aggregate usage
statistics to CircleCI.
Usage statistics data enhances visibility into CircleCI installations and is used to better support
you and ensure a smooth transition from CircleCI 1.0 to CircleCI 2.0.
Opt-In to this feature by going to Settings > Usage Statistics on the management console in
Replicated. Then, enable the radio button labeled Automatically send some usage statistics to
CircleCI as shown in the following screenshot.
Detailed Usage Statistics
The following sections provide information about the usage statistics CircleCI will gather when
this setting is enabled.
Weekly Account Usage
Name Type Purpose
account_id UUID Uniquely identifies each
vcs account
usage_current_macos minutes For each account, track
weekly builds performed in
minutes.
usage_legacy_macos minutes

ENABLING USAGE STATISTICS 35
Name Type Purpose
usage_current_linux minutes
usage_legacy_linux minutes
Weekly Job Activity
Name Type Purpose
utc_week date Identifies which week the
data below applies to
usage_oss_macos_legacy minutes Track builds performed by
week
usage_oss_macos_current minutes
usage_oss_linux_legacy minutes
usage_oss_linux_current minutes
usage_private_macos_legacy minutes
usage_private_macos_current minutes
usage_private_linux_legacy minutes
usage_private_linux_current minutes
new_projects_oss_macos_legacy sum Captures new Builds
performed on 1.0. Observe
if users are starting new
projects on 1.0.
new_projects_oss_macos_current sum
new_projects_oss_linux_legacy sum
new_projects_oss_linux_current sum
new_projects_private_macos_legacysum
new_projects_private_macos_currentsum
new_projects_private_linux_legacy sum
new_projects_private_linux_currentsum
projects_oss_macos_legacy sum Captures Builds performed
on 1.0 and 2.0. Observe if
users are moving towards
2.0 or staying with 1.0.
projects_oss_macos_current sum
projects_oss_linux_legacy sum
projects_oss_linux_current sum
projects_private_macos_legacy sum
projects_private_macos_current sum
projects_private_linux_legacy sum
projects_private_linux_current sum
36 CHAPTER 2. CONFIGURATION
Accessing Usage Data
If you would like programatic access to this data in order to better understand your users you
may run this command from the Services VM.
docker exec usage-stats /src/builds/extract
Security and Privacy
Please reference exhibit C within your terms of contract and our standard license agreement for
our complete security and privacy disclosures.
Chapter 3
Maintenance
This chapter describes system checks and the basics of user management.
System Checks
Question: When are executor instances created and destroyed?
Answer: CircleCI creates a new instance for each job. The instance will be destroyed at the
end of the job. However, given that cloud instance creation may take significant time (~1 to 3
minutes), CircleCI offers a pre-scale option, where a set number of instances will be created in
anticipation of demand. These will be killed at the end of the job. The number of pre-scaled
instances is configured in the settings section of the Management Console. At any given time,
CircleCI expects to have a base of pre-scaled instances and the required instances to service
current job load.
Question: When are executor instances reused?
Answer: Machine executor VMs never get reused for multiple jobs. EBS Volumes are reused
for multiple jobs, but only get shared among jobs within the same project.
Question: How are EBS volumes managed?
Answer: Since docker layers can be large (GBs), CircleCI prefers caching by using attached
EBS volumes to using an object storage (for example, S3). Volumes are created when a job
is configured to use docker layer caching (for example, set docker_layer_caching:
true in config). Note: For docker layer caching to work, you cannot use preallocated in-
stances. You must set the remote docker and/or machine executor (depending on which one
you want to use DLC, or both) to 0 in the replicated settings for “on-demand” instances. Other-
wise, DLC will not work.
CircleCI reuses any existing available volume for that job project. If there is none (or all existing
volumes are busy), CircleCI creates a new volume for the project. Volumes are associated with
37
38 CHAPTER 3. MAINTENANCE
a project. No two project jobs can share an EBS volume for security reasons. CircleCI deletes
EBS volumes in few circumstances (for example, when there is a risk of running out of disk
space).
Question: Can the amount of EBS volumes and EC2 instances be bounded?
Answer: Not at this time.
You may utilize the metrics provided to alert when reaching a specific threshold.
Question: How do you prevent executors from existing indefinitely?
Answer: A process runs that periodically detects and stops any leaked VMs (for example, a task
completed but it’s VM is running for over N hours). You may also manually inspect instances
that have been running for over 24 hours (CircleCI currently does this as well). You may also
utilize the metrics provided to alert when stale VMs are detected.
Question: Where can I find the audit log(s)?
Answer: The Audit logs are found at the root of your object storage installation under /audit-
logs/audit_log/v1. Audit Log Service (as of CircleCI v2.13) handles the storage of audit
log events. Services running within a cluster may fire audit events that are then captured by this
service and persisted to the provisioned Storage mechanism for AWS S3 and On-Host.
Question: What do the audit log files contain?
Answer: A JSON representation of event(s) for the period of time since the last file created
(each file starts with a timestamp and is generally an hourly period). For example;
{
"id":"27aa77e3-0255-4464-93ad-f8236533ab53",
"version":1,
"action":"workflow.job.finish",
"success":true,
"payload":{
"job":{
"id":"e8cef7c4-60d4-429b-8c94-09c05f309408",
"contexts":[ ],
"job_name":"remote_docker",
"job_status":"success"
},
"workflow":{
"id":"c022ca3c-5f6f-41ba-a6ca-05977f6a336a",
"vcs_branch":"master"
}
},
"target":{
"id":"3c4886e1-b810-4765-a1a2-d588e6e4b9cb",
"type":"project"
},
"request":{
SYSTEM CHECKS 39
"id":""
},
"actor":{
"id":"27075c88-9ba4-47d7-8523-fa576e839bfd",
"type":"user"
},
"scope":{
"id":"3c4886e1-b810-4765-a1a2-d588e6e4b9cb",
"type":"project"
}
}
Question: What action types are there?
Answer:
context.create
context.delete
context.env_var.delete
context.env_var.store
project.add
project.follow
project.settings.update
project.stop_building
project.unfollow
user.create
user.logged_in
user.logged_out
user.suspended
workflow.error
workflow.job.context.request
workflow.job.finish
workflow.job.scheduled
workflow.job.start
workflow.retry
workflow.start
Question: How can I access the files and do something with them?
Answer: 1. Set up the awscli and jq or another JSON processor for your OS.
2. In this example, grep for all workflow.job.start events.
#!/bin/bashBUCKET=YOUR-BUCKET-NAME
for key in `aws s3api list-objects --bucket BUCKET -
-prefix audit-logs/audit_log/v1/ --output json | jq -
r '.Contents[].Key'`;
do
echo $key;
40 CHAPTER 3. MAINTENANCE
aws s3 cp --quiet s3://BUCKET/$key - | grep workflow.job.start;
done
Question: How do I ensure proper injection of Internal CA Certificate?
Answer: If using an internal CA, or self-signed certificate, you must ensure the signing certificate
is trusted by the domain service to properly connect to GitHub Enterprise. 1. The Domain
Service uses a Java Truststore, loaded with Keytool. Must match the formats supported by that
tool. 2. You need the full CA chain, not just root/intermediate certificates. 3. The CA certificate
chain should be saved in /usr/local/share/ca-certificates/
Security and Access Control
CircleCI conducts ongoing security checks, for example, CircleCI containers are scanned by
TwistLock prior to being published. CircleCI does not conduct ongoing security checks of your
environment.
Password and PII Security
Question: What kind of security is in place for passwords and Personally Identifiable Information
(PII)? Are the passwords hashed with a strong hash function and salted?
Answer: Passwords are hashed with a 10-character salt and SHA265, refer to the Security
chapter for more details.
Ongoing Security Checks
Question: How will the Host and Nomad clients be monitored for security issues?
Answer: Your internal security teams are responsible for monitoring the Host and Nomad clients
installed in your private datacenter or cloud. CircleCI containers are scanned by TwistLock prior
to being published.
System Configuration
Question: How is configuration managed for the system?
Answer: Replicated Management Console handles all of the post-installation configuration.
Installation-specific configuration is managed by Terraform or Shell scripts.
Question: How are configuration secrets managed?
Answer: Configuration secrets are stored in plain-text on the host.
SYSTEM CHECKS 41
Metrics
Question: What significant metrics will be generated?
Answer: Refer to the Configuration Chapter for details about monitoring and metrics.
Question: How do I find out how many builds per day are running?
Answer:
use <database>
var coll = db.builds
var items = coll.find({
"start_time": {
$gte: ISODate("2018-03-15T00:00:00.000Z"),
$lt: ISODate("2018-03-16T00:00:00.000Z")
}
})
items.count()
Usage Statistics
Question:
How do I find the usage statistics?
Answer:
docker exec server-usage-stats /src/builds/extract
Health Checks
Question: How is the health of dependencies (components and systems) assessed? How does
the system report its own health?
Answer: Ready Agent can be used to determine the health of the system. Replicated looks to
the server-ready-agent API for a 200 response. server-ready-agent waits to receive a
200 from all listed services, reporting a 5XX until all services come online and then it reports a
200. You can tail the logs to determine current and final state as follows: docker logs -f
ready-agent
Health of Service
Each documented service provides /health-check,/healthcheck,/status HTTP
endpoint: 200 indicates basic health, 500 indicates bad configuration. To determine the health
of individual services you must ssh into your Services VM (where all the containers are running)
and make the request. The current list of services that expose a check are listed below:
42 CHAPTER 3. MAINTENANCE
• Frontend localhost:80/health-check
• API Service localhost:8082/status
• Workflows Conductor localhost:9999/healthcheck
• Federations Service localhost:8090/status
• Permissions Service localhost:3013/status
• Context Service localhost:3011/status
• Domain Service localhost:3014/status
• Cron Service localhost:4261/status
• VM Service localhost:3001/status if enabled
As an example, following is how you would determine if the frontend is healthy:
curl -s -o /dev/null -I -w "%{http_code}\n" 0.0.0.0:80/health-
check
Health of Dependencies
Use /health HTTP endpoint for internal components that expose it. Other systems and
external endpoints: typically use HTTP 200 except some synthetic checks for some services.
Operational Tasks
• Deployment
Question: How is the software deployed? How does rollback happen?
Answer: CircleCI uses Enterprise-Setup Terraform or Static bash scripts for deployments, Repli-
cated is installed and orchestrates pulling all containers into your VPC. Rollbacks can only occur
by reloading a previous backup and are not possible through Replicated.
• Scaling Events
Question: What kind of scaling events take place?
Answer: Vertically scaling Service and Nomad clients is possible with downtime, Horizontally
scaling Nomad Clients is possible without downtime. Refer to the Monitoring section of the
Configuration chapter for details.
• Routine and sanity checks
Question: What kind of checks need to happen on a regular basis?
Answer: All /health endpoints should be checked every 60 seconds including the Replicated
endpoint.
SYSTEM CHECKS 43
• Troubleshooting
Question: How should troubleshooting happen? What tools are available?
Answer:
It is worth noting two things. First is that the REPL is a extremely powerful tool that can cause
irreparable damage to your system when used improperly. We cannot guarantee that any of the
repl commands outside of this guide are safe to run, and do not support custom repl being
run in our shell. The second thing is that in order to run any of our commands you’ll need to run
the following commands below: 1. ssh into services box 2. run circleci dev-console
If the above does not bring you into a REPL that mentions it is the CircleCI Dev-Console you
can run the alternative command. 1. Ssh into the services box 2. Run sudo docker exec
-it frontend bash 3. Run lein repl :connect 6005
Once you are in the repl, you can copy and paste any of the commands below, and making the
necessary substitutions in order to make the command work.
• User/Admin Problems:
Question: How do I view all users?
Answer: (circle.model.user/where { :$and [{:sign_in_count {:$gte
0}}, {:login {:$ne nil}}]} :only [:login])
Question: How do I delete a user?
Answer: (circle.http.api.admin-commands.user/delete-by-login-
vcs-type! "Sirparthington" :github)
Question: How do I make a user an admin?
Answer: (circle.model.user/set-fields! (circle.model.user/find-
one-by-github-login "your-github-username-here") {:admin
"all"})
Question: How do I get user statistics?
Answer: If a if you need some basic statistics (name, email, sign in history) for your users, run
the following REPL commands.
All Time
circleci dev-console
(circle.model.user/where {} :only [:name :login :emails :admin :dev_admin :activated :sign_in_count :current_sign_in_at :current_sign_in_ip :last_sign_in_at :last_sign_in_ip])
Last Month
(circle.model.user/where
{:last_sign_in_at {:$gt (clj-time.core/minus (clj-time.core/now) (clj-
time.core/months 1))}}
:only
[:name :login :emails :admin :dev_admin :activated :sign_in_count :current_sign_in_at :current_sign_in_ip :last_sign_in_at :last_sign_in_ip])
44 CHAPTER 3. MAINTENANCE
Question: How do I create a new admin?
Answer: By default, the first user to access the CCIE instance after it is started becomes the
admin.
Options for designating additional admin users are found under the Users page in the Admin
section at https://[domain-to-your-installation]/admin/users.
In the event the admin is unknown, or has left the company without creating a new admin, you
can promote a user in the following way:
• SSH into the services box
• Open the CircleCI dev console with the command circleci dev-console
• Run this command (replacing <username> with the GitHub username of the person you
want to promote:
(-> (circle.model.user/find-one-by-login "<username>") (circle.model.user/set-
fields! {:admin "write-settings"}))
Question: How do I reset the Management Console password?
Answer: https://www.replicated.com/docs/kb/supporting-your-customers/resetting-console-
password/
1. SSH into the services box
2. Use the following command: replicated auth reset to remove the password
3. Visit https://<server>:8800/create-password to create a new password
or connect LDAP.
Leftover VM’s in Your AWS Account
Question: How do I resolve the case of VM spin-up / spin-down issues? Answer: Make sure
no builds are running that require the remote Docker environment or the machine executor,
and make sure to terminate any running preallocated/remote VM EC2 instances first. Then,
complete the following:
1. SSH into the services box
2. Log into the VM service database in the Postgres container: sudo docker exec
-it postgres psql -U circle vms
3. Delete these records: delete from vms.tasks; delete from
vms.volumes; delete from vms.vms;
4. Configure the settings in the management console to on-demand instancing (for example,
set to 0 to prevent preallocated instances from being used)
5. Terminate all existing vm ec2 instances that are currently running.
6. Run circleci dev-console to REPL in. You should now be able to run the below
commands to check queues.
7. After checking queues with the commands below, change the setting back to their original
values.
SYSTEM CHECKS 45
• Queues Queues may become an issues for you if you are running version 2.10 or earlier.
As 1.0 builds pile up and block any builds from running, run the commands below to get a
feeling for how long the queues are. Then, you can promote builds from the usage-queue
to the run-queue or just cancel them from the run queue.
• Checking Usage Queue
(in-ns 'circle.backend.build.usage-queue)
(->> (all-builds) count) # Will give you the count for how many builds are in the queue
(->> (all-builds) (take 3) (map deref) (map circle.http.paths/build-
url)) # If you want to check the top three builds at the top of the queue.
(->> (all-builds) reverse (take 3) (map circle.http.paths/build-
url)) # If you want to check the builds at the end of the queue.
# If you want to promote builds from the usage queue to the run queue you can do the following:
(let [builds (->> (all-builds)
(take 3)
(map circle.http.paths/build-url)
(map circle.model.build/find-one-by-circle-url))]
(doseq [b builds]
(circle.backend.build.usage-queue/forward-build b)))
Its safe to do this by the 100's, but do not put the entire queue in.
• Checking Run Queue
(circle.backend.build.run-queue/queue-depths) # returns how many are in the queue
(->> (circle.backend.build.run-queue/all-builds) (take 3) (map circle.http.paths/build-
url)) # Check the top three builds in the run-queue
# In case builds are jammed run the following. You can cancel in batches of 100.
(->> (circle.backend.build.run-queue/all-builds) (take 100) (map circle.backend.build.cancel/cancel!))
Note: Remember to set values back to original in your settings after checking queues.
• Daylight-saving time changes
Question: Is the software affected by daylight-saving time changes (both client and server)?
Answer: No. All date/time data converted to UTC with offset before processing.
• Data cleardown
Question: Which data needs to be cleared down? How often? Which tools or scripts control
cleardown?
Answer: If using On-Host storage and Static, all storage should be mounted.
46 CHAPTER 3. MAINTENANCE
• Log rotation Question: Is log rotation needed? How is it controlled?
Answer: Docker automatically rotates the logs automatically.
• Replicated Failover and Recovery procedures
Question: What needs to happen when parts of the system are failed over to standby systems?
What needs to happen during recovery?
Answer: Refer to the Backup and Troubleshooting sections of this document for details.
User Management
Question: How do I provision admin users?
Answer: The first user who logs in to the CircleCI application will automatically be
designated an admin user. Options for designating additional admin users are found
under the Users page in the Admin section at https://[domain-to-your-
installation]/admin/users.
Chapter 4
Disaster Recovery
This chapter describes failover or replacement the services machine. Refer to the Backup sec-
tion below for information about possible backup strategies and procedures for implementing a
regular backup image or snapshot of the services machine.
Specify a spare machine, in an alternate location, with the same specs for disaster recovery
of the services machine. Having a hot spare regularly imaged with the backup snapshot in a
failure scenario is best practice.
At the very least, provide systems administrators of the CircleCI installation with the hostname
and location (even if co-located) of an equivalent server on which to install a replacement server
with the latest snapshot of the services machine configuration. To complete recovery, use the
Installation procedure, replacing the image from that procedure with your backup image.
Backing up CircleCI Data
This document describes how to back up your CircleCI application so that you can recover from
accidental or unexpected loss of CircleCI data attached to the Services machine:
Note: If you are running CircleCI in an HA configuration, you must use standard backup mech-
anisms for the external datastores. See the High Availability document for more information.
Backing up the Database
If you have not configured CircleCI for external services, the best practice for backing up your
CircleCI data is to use VM snapshots of the virtual disk acting as the root volume for the Services
machine. Backups may be performed without downtime as long the underlying virtual disk sup-
ports such an operation as is true with AWS EBS. There is a small risk, that varies by filesystem
47
48 CHAPTER 4. DISASTER RECOVERY
and distribution, that snapshots taken without a reboot may have some data corruption, but this
is rare in practice.
Note: “Snapshots Disabled” refers to Replicated’s built-in snapshot feature that is turned off by
default.
Backing up Object Storage
Build artifacts, output, and caches are generally stored in object storage services like AWS S3.
These services are considered highly redundant and are unlikely to require separate backup.
An exception is if your instance is setup to store large objects locally on the Services machine,
either directly on-disk or on an NFS volume. In this case, you must separately back these files
up and ensure they are mounted back to the same location on restore.
Snapshotting on AWS EBS
There are a few features of AWS EBS snapshots that make the backup process quite easy:
1. To take a manual backup, choose the instance in the EC2 console and select Actions >
Image > Create Image.
2. Select the No reboot option if you want to avoid downtime. An AMI that can be readily
launched as a new EC2 instance for restore purposes is created.
It is also possible to automate this process with the AWS API. Subsequent AMIs/snapshots
are only as large as the difference (changed blocks) since the last snapshot, such that storage
costs are not necessarily larger for more frequent snapshots, see Amazon’s EBS snapshot
billing document for details.
Restoring From Backup
When restoring test backups or performing a restore in production, you may need to make a
couple of changes on the newly launched instance if its public or private IP addresses have
changed:
1. Launch a fresh EC2 instance using the newly generated AMI from the previous steps
2. Stop the app in the Management Console (at port 8800) if it is already running
3. Ensure that the hostname configured in the Management Console at port 8800 reflects
the correct address. If this hostname has changed, you will also need to change it in the
corresponding GitHub OAuth application settings or create a new OAuth app to test the
recovery and log in to the application.
CLEANING UP BUILD RECORDS 49
4. Update any references to the backed-up instance’s public and private IP addresses
in /etc/default/replicated and /etc/default/replicated-
operator on Debian/Ubuntu or /etc/sysconfig/* in RHEL/CentOS to
the new IP addresses.
5. From the root directory of the Services box, run sudo rm -rf /opt/nomad. State
is saved in the /opt/nomad folder that can interfere with builds running when an in-
stallation is restored from a backup. The folder and its contents will be regenerated by
Nomad when it starts.
6. Restart the app in the Management Console at port 8800.
Cleaning up Build Records
While filesystem-level data integrity issues are rare and preventable, there will likely be some
data anomalies in a point-in-time backup taken while builds are running on the system. For
example, a build that is only half-way finished at backup time may result in missing the latter half
of its command output, and it may permanently show that it is in Running state in the application.
If you want to clean up any abnormal build records in your database after a recovery, you can
delete them by running the following commands on the Services machine replacing the example
build URL with an actual URL from your CircleCI application:
$ circleci dev-console
# Wait for console to load
user=> (admin/delete-build "https://my-circleci-hostname.com/gh/my-
org/my-project/1234")
50 CHAPTER 4. DISASTER RECOVERY
Chapter 5
Security
This document outlines security features built into CircleCI and related integrations.
Overview
Security is our top priority at CircleCI, we are proactive and we act on security issues immediately.
Report security issues to security@circleci.com with an encrypted message using our security
team’s GPG key (ID: 0x4013DDA7, fingerprint: 3CD2 A48F 2071 61C0 B9B7 1AE2 6170 15B8
4013 DDA7).
Encryption
CircleCI uses HTTPS or SSH for all networking in and out of our service including from the
browser to our services application, from the services application to your builder fleet, from our
builder fleet to your source control system, and all other points of communication. In short, none
of your code or data travels to or from CircleCI without being encrypted unless you have code
in your builds that does so at your discretion. Operators may also choose to go around our SSL
configuration or not use TLS for communicating with underlying systems.
The nature of CircleCI is that our software has access to your code and whatever data that
code interacts with. All jobs on CircleCI run in a sandbox (specifically, a Docker container or an
ephemeral VM) that stands alone from all other builds and is not accessible from the Internet or
from your own network. The build agent pulls code via git over SSH. Your particular test suite
or job configurations may call out to external services or integration points within your network,
and the response from such calls will be pulled into your jobs and used by your code at your
discretion. After a job is complete, the container that ran the job is destroyed and rebuilt. All en-
vironment variables are encrypted using Hashicorp Vault. Environment variables are encrypted
using AES256-GCM96 and are unavailable to CircleCI employees.
51
52 CHAPTER 5. SECURITY
Sandboxing
With CircleCI you control the resources allocated to run the builds of your code. This will be done
through instances of our builder boxes that set up the containers in which your builds will run. By
their nature, build containers will pull down source code and run whatever test and deployment
scripts are part of the code base or your configuration. The containers are sandboxed, each
created and destroyed for one build only (or one slice of a parallel build), and they are not
available from outside themselves. The CircleCI service provides the ability to SSH directly to
a particular build container. When doing this a user will have complete access to any files or
processes being run inside that build container, so provide access to CircleCI only to those also
trusted with your source code.
Integrations
A few different external services and technology integration points touch CircleCI. The following
list enumerates those integration points.
•Web Sockets We use Pusher client libraries for WebSocket communication between
the server and the browser, though for installs we use an internal server called slanger,
so Pusher servers have no access to your instance of CircleCI nor your source control
system. This is how we, for instance, update the builds list dynamically or show the output
of a build line-by-line as it occurs. We send build status and lines of your build output
through the web socket server (which unless you have configured your installation to run
without SSL is done using the same certs over SSL), so it is encrypted in transit.
•Replicated We use Replicated to manage the installation wizard, licensing keys, system
audit logs, software updates, and other maintenance and systems tasks for CircleCI. Your
instance of CircleCI communicates with Replicated servers to send license key informa-
tion and version information to check for updates. Replicated does not have access to
your data or other systems, and we do not send any of your data to Replicated.
•Source Control Systems To use CircleCI you will set up a direct connection with your
instance of GitHub Enterprise or GitHub.com. When you set up CircleCI you authorize
the system to check out your private repositories. You may revoke this permission at any
time through your GitHub application settings page and by removing Circle’s Deploy Keys
and Service Hooks from your repositories’ Admin pages. While CircleCI allows you to
selectively build your projects, GitHub’s permissions model is “all or nothing” — CircleCI
gets permission to access all of a user’s repositories or none of them. Your instance
of CircleCI will have access to anything hosted in those git repositories and will create
webhooks for a variety of events (eg: when code is pushed, when a user is added, etc.)
that will call back to CircleCI, triggering one or more git commands that will pull down
code to your build fleet.
•Dependency and Source Caches Most CircleCI customers use S3 or equivalent cloud-
based storage inside their private cloud infrastructure (Amazon VPC, etc) to store their
dependency and source caches. These storage servers are subject to the normal security
53
parameters of anything stored on such services, meaning in most cases our customers
prevent any outside access.
•Artifacts It is common to use S3 or similar hosted storage for artifacts. Assuming these
resources are secured per your normal policies they are as safe from any outside intrusion
as any other data you store there.
•iOS Builds If you are paying to run iOS builds on CircleCI hardware your source code
will be downloaded to a build box on our macOS fleet where it will be compiled and any
tests will be run. Similar to our primary build containers that you control, the iOS builds
we run are sandboxed such that they cannot be accessed.
Audit Logs
The Audit Log feature is only available for CircleCI installed on your servers or private cloud.
CircleCI logs important events in the system for audit and forensic analysis purposes. Audit logs
are separarate from system logs that track performance and network metrics.
Complete Audit logs may be downloaded from the Audit Log page within the Admin section of
the application as a CSV file. Audit log fields with nested data contain JSON blobs.
Note: In some situations, the internal machinery may generate duplicate events in the audit logs.
The id field of the downloaded logs is unique per event and can be used to identify duplicate
entries.
Audit Log Events
Following are the system events that are logged. See action in the Field section below for
the definition and format.
• context.create
• context.delete
• context.env_var.delete
• context.env_var.store
• project.env_var.create
• project.env_var.delete
• project.settings.update
• user.create
• user.logged_in
• user.logged_out
• workflow.job.approve
• workflow.job.finish
• workflow.job.scheduled
• workflow.job.start
54 CHAPTER 5. SECURITY
Audit Log Fields
•action: The action taken that created the event. The format is ASCII lowercase words
separated by dots, with the entity acted upon first and the action taken last. In some
cases entities are nested, for example, workflow.job.start.
•actor: The actor who performed this event. In most cases this will be a CircleCI user.
This data is a JSON blob that will always contain id and and type and will likely contain
name.
•target: The entity instance acted upon for this event, for example, a project, an org, an
account, or a build. This data is a JSON blob that will always contain id and and type
and will likely contain name.
•payload: A JSON blob of action-specific information. The schema of the payload is
expected to be consistent for all events with the same action and version.
•occurred_at: When the event occurred in UTC expressed in ISO-8601 format with up to
nine digits of fractional precision, for example ‘2017-12-21T13:50:54.474Z’.
•metadata: A set of key/value pairs that can be attached to any event. All keys and values
are strings. This can be used to add additional information to certain types of events.
•id: A UUID that uniquely identifies this event. This is intended to allow consumers of
events to identify duplicate deliveries.
•version: Version of the event schema. Currently the value will always be 1. Later ver-
sions may have different values to accommodate schema changes.
•scope: If the target is owned by an Account in the CircleCI domain model, the account
field should be filled in with the Account name and ID. This data is a JSON blob that will
always contain id and type and will likely contain name.
•success: A flag to indicate if the action was successful.
•request: If this event was triggered by an external request this data will be populated
and may be used to connect events that originate from the same external request. The
format is a JSON blob containing id (the request ID assigned to this request by CircleCI),
ip_address (the original IP address in IPV4 dotted notation from which the request
was made, eg. 127.0.0.1), and client_trace_id (the client trace ID header, if
present, from the ‘X-Client-Trace-Id’ HTTP header of the original request).
Chapter 6
Troubleshooting
This chapter answers frequently asked questions and provides installation troubleshooting tips.
FAQ
Can I monitor available build containers?
Yes, refer to the Introduction to Nomad Cluster Operation document for details. Refer to the
Administrative Variables, Monitoring, and Logging section for how to enable additional container
monitoring for AWS.
How do I provision admin users?
The first user who logs in to the CircleCI application will automatically be designated an admin
user. Options for designating additional admin users are found under the Users page in the
Admin section at https://[domain-to-your-installation]/admin/users.
How can I change my passphrase?
1. Change your passphrase on the system console (services box port 8800) settings page.
2. Restart the application.
3. Update CIRCLE_SECRET_PASSPHRASE in the init script that you use to add No-
mad Clients to your fleet.
55
56 CHAPTER 6. TROUBLESHOOTING
New Nomad Clients joining the fleet will use the new passphrase. Existing Nomad Clients with
the old passphrase will also continue functioning. But, it is best practice to restart these boxes
as soon as you can to use the consistent passphrase across your fleet.
How can I gracefully shutdown Nomad Clients?
Refer to the Introduction to Nomad Cluster Operation chapter for details.
Why is Test GitHub Authentication failing?
This means that the GitHub Enterprise server is not returning the intermediate SSL certificates.
Check your GitHub Enterprise instance with https://www.ssllabs.com/ssltest/analyze.html - it
may report some missing intermediate certs. You can use commands like openssl to get the
full certificate chain for your server.
In some cases authentication fails when returning to the configuration page after it was suc-
cessfully set up once. This is because the secret is encrypted, so when returning checking it
will fail.
How can I use HTTPS to access CircleCI?
While CircleCI creates a self-signed cert when starting up, that certificate only applies to the
management console and not the CircleCI product itself. If you want to use HTTPS, you’ll have
to provide certificates to use under the Privacy section of the settings in the management
console.
Why doesn’t terraform destroy every resource?
CircleCI sets the services box to have termination protection in AWS and also writes to an s3
bucket. If you want terraform to destroy every resource, you’ll have to either manually delete
the instance, or turn off termination protection in the circleci.tf file. You’ll also need to
empty the s3 bucket that was created as part of the terraform install.
Do the Nomad Clients store any state?
They can be torn down without worry as they don’t persist any data.
How do I verify TLS settings are failing?
Make sure that your keys are in unencrypted PEM format, and that the certificate includes the
entire chain of trust as follows:
FAQ 57
-----BEGIN CERTIFICATE-----
your_domain_name.crt
-----END CERTIFICATE-----
-----BEGIN CERTIFICATE-----
intermediate 1
-----END CERTIFICATE-----
-----BEGIN CERTIFICATE-----
intermediate 2
-----END CERTIFICATE-----
...
How do I debug the Management Console (Replicated)?
If you’re experiencing any issues with Replicated, here are a few ways to debug it.
Check the current version of Replicated installed
First, make sure you have the CLI tool for Replicated installed:
replicated -version
Restart Replicated and the CircleCI app
Try restarting Replicated services. You can do this by running the following commands on the
service box for Ubuntu 14.04:
sudo restart replicated-ui
sudo restart replicated
sudo restart replicated-agent
For Ubuntu 16.04, run the following commands:
sudo systemctl restart replicated-ui
sudo systemctl restart replicated
sudo systemctl restart replicated-operator
Then, go to your services box admin (for example, https://YOUR-CCIE-INSTALL:8800) and try
restarting with “Stop Now” and “Start Now”.
Try to log into Replicated
Try to log in to Replicated. You can do this by running the following commands on the service
box. You will only be asked to enter password, which is the same one used to unlock the admin
(i.e.: https://YOUR-CCIE-INSTALL:8800).
replicated login
58 CHAPTER 6. TROUBLESHOOTING
If you could login, then please run the following command too and give us the output.
sudo replicated apps
You are getting Error: request returned Unauthorized for API route.. error
probably because you are not logged into Replicated, so please check if you are still getting the
error after successful login.
Check Replicated logs
You can find Replicated logs under /var/log/replicated.
Check output of docker ps
Replicated starts many Docker containers to run CCIE, so it may be useful to check what con-
tainers are running.
You should see something similar to this output:
sudo docker ps
CONTAINER ID IMAGE COMMAND NAMES
eb2970306859 172.31.72.162:9874/circleci-api-
service:0.1.6910-8b54ef9 "circleci-service-run"
26 hours ago Up 26 hours 0.0.0.0:32872-
>80/tcp, 0.0.0.0:32871->443/tcp, 0.0.0.0:8082->3000/tcp,
0.0.0.0:32870->6010/tcp, 0.0.0.0:32869->8585/tcp api-
service
01d26714f5f5 172.31.72.162:9874/circleci-workflows-
conductor:0.1.38931-1a904bc8 "/service/docker-ent…"
26 hours
ago Up 26 hours 0.0.0.0:9998-
>9998/tcp, 0.0.0.0:32868->80/tcp, 0.0.0.0:32867->443/tcp,
0.0.0.0:9999->3000/tcp, 0.0.0.0:32866->8585/tcp workflows-
conductor
0cc6e4248cfb 172.31.72.162:9874/circleci-permissions-
service:0.1.1195-b617002 "/service/docker-ent…"
26 hours
ago Up 26 hours 0.0.0.0:3013->3000/tcp
permissions-service
FAQ 59
9e6efc98b7d6 172.31.72.162:9874/circleci-cron-
service:0.1.680-1fcd8d2 "circleci-service-run"
26 hours
ago Up 26 hours 0.0.0.0:4261->4261/tcp
cron-
service
8c40bd1cecf6 172.31.72.162:9874/circleci-federations-
service:0.1.1134-72edcbc "/service/docker-ent…"
26 hours
ago Up 26 hours 0.0.0.0:3145->3145/tcp, 0.0.0.0:8010-
>8010/tcp, 0.0.0.0:8090->8090/tcp
federations-
service
71c71941684f 172.31.72.162:9874/circleci-contexts-
service:0.1.6073-5275cd5 "./docker-entrypoint…"
26 hours
ago Up 26 hours 0.0.0.0:2718->2718/tcp, 0.0.0.0:3011-
>3011/tcp, 0.0.0.0:8091->8091/tcp
contexts-service
71ffeb230a90 172.31.72.162:9874/circleci-domain-
service:0.1.4040-eb63b67 "/service/docker-ent…"
26 hours
ago Up 26 hours 0.0.0.0:3014->3000/tcp domain-
service
eb22d3c10dd8 172.31.72.162:9874/circleci-audit-log-
service:0.1.587-fa47042 "circleci-service-run"
26 hours
ago Up 26 hours audit-log-service
243d9082e35c 172.31.72.162:9874/circleci-frontend:0.1.203321-
501fada "/docker-entrypoint.…"
26 hours
ago Up 26 hours 0.0.0.0:80->80/tcp, 0.0.0.0:443-
>443/tcp, 0.0.0.0:4434->4434/tcp
frontend
af34ca3346a7 172.31.72.162:9874/circleci-picard-
dispatcher:0.1.10401-aa50e85 "circleci-service-run"
26 hours
ago Up 26 hours
picard-dispatcher
60 CHAPTER 6. TROUBLESHOOTING
fb0ee1b02d48 172.31.72.162:9874/circleci-vm-
service:0.1.1370-ad05648 "vm-service-service-…"
26 hours ago Up 26 hours 0.0.0.0:3001-
>3000/tcp vm-service
3708dc80c63e 172.31.72.162:9874/circleci-vm-
scaler:0.1.1370-ad05648 "/scaler-entrypoint.…"
26 hours
ago Up 26 hours 0.0.0.0:32865->5432/tcp
vm-scaler
77bc9d0b4ac9 172.31.72.162:9874/circleci-vm-gc:0.1.1370-
ad05648 "docker-entrypoint.s…"
26 hours
ago Up 26 hours 0.0.0.0:32864->5432/tcp
vm-gc
4b02f202a05d 172.31.72.162:9874/circleci-output-
processing:0.1.10386-741e1d1 "output-processor-se…"
26 hours
ago Up 26 hours 0.0.0.0:8585-
>8585/tcp, 0.0.0.0:32863->80/tcp, 0.0.0.0:32862->443/tcp
picard-output-processor
b8f982d32989 172.31.72.162:9874/circleci-frontend:0.1.203321-
501fada "/docker-entrypoint.…"
26 hours ago Up 26 hours 0.0.0.0:32861-
>80/tcp, 0.0.0.0:32860->443/tcp, 0.0.0.0:32859->4434/tcp
dispatcher
601c363a0c38 172.31.72.162:9874/circleci-frontend:0.1.203321-
501fada "/docker-entrypoint.…"
26 hours
ago Up 26 hours 0.0.0.0:32858->80/tcp, 0.0.0.0:32857-
>443/tcp, 0.0.0.0:32856->4434/tcp
legacy-
notifier
f2190c5f3aa9 172.31.72.162:9874/mongo:3.6.6-
jessie "/entrypoint.sh"
26 hours
ago Up 26 hours 0.0.0.0:27017->27017/tcp
mongo
3cbbd959f42e 172.31.72.162:9874/telegraf:1.6.4 "/telegraf-
entrypoin…"
26 hours
ago Up 26 hours 0.0.0.0:8125-
>8125/udp, 0.0.0.0:32771->8092/udp, 0.0.0.0:32855->8094/tcp
FAQ 61
telegraf
15b090e8cc02 172.31.72.162:9874/circleci-schedulerer:0.1.10388-
741e1d1 "circleci-service-run"
26 hours
ago Up 26 hours
picard-scheduler
fb967bd3bca0 172.31.72.162:9874/circleci-server-
nomad:0.5.6-5.1 "/nomad-entrypoint.sh"
26 hours
ago Up 26 hours 0.0.0.0:4646-4648->4646-4648/tcp
nomad
7e0743ee2bfc 172.31.72.162:9874/circleci-test-
results:0.1.1136-b4d94f6 "circleci-service-run"
26 hours
ago Up 26 hours 0.0.0.0:2719->2719/tcp, 0.0.0.0:3012-
>3012/tcp
test-results
0a95802c87dc 172.31.72.162:9874/circleci-slanger:0.4.117-
42f7e6c "/docker-entrypoint.…"
26 hours
ago Up 26 hours 0.0.0.0:4567->4567/tcp, 0.0.0.0:8081-
>8080/tcp
slanger
ca445870a057 172.31.72.162:9874/circleci-postgres-script-
enhance:0.1.9-38edabf "docker-entrypoint.s…"
26 hours
ago Up 26 hours 0.0.0.0:5432->5432/tcp
postgres
a563a228a93a 172.31.72.162:9874/circleci-server-ready-
agent:0.1.105-0193c73 "/server-ready-agent"
26 hours
ago Up 26 hours 0.0.0.0:8099->8000/tcp
ready-agent
d6f9aaae5cf2 172.31.72.162:9874/circleci-server-usage-
stats:0.1.122-70f28aa "bash -c /src/entryp…"
26 hours
ago Up 26 hours
usage-stats
086a53d9a1a5 registry.replicated.com/library/statsd-
graphite:0.3.7 "/usr/bin/supervisor…"
26 hours
ago Up 26 hours 0.0.0.0:32851-
>2443/tcp, 0.0.0.0:32770->8125/udp
replicated-statsd
cc5e062844be 172.31.72.162:9874/circleci-shutdown-hook-
poller:0.1.32-9c553b4 "/usr/local/bin/pyth…"
62 CHAPTER 6. TROUBLESHOOTING
26 hours
ago Up 26 hours
musing_volhard
9609f04c2203 172.31.72.162:9874/circleci-rabbitmq-
delayed:3.6.6-management-12 "docker-entrypoint.s…"
26 hours
ago Up 26 hours
0.0.0.0:5672->5672/tcp, 0.0.0.0:15672->15672/tcp, 0.0.0.0:32850-
>4369/tcp, 0.0.0.0:32849->5671/tcp,
0.0.0.0:32848->15671/tcp, 0.0.0.0:32847->25672/tcp rabbitmq
2bc0cfe43639 172.31.72.162:9874/tutum-logrotate:latest "crond -
f"
26 hours
ago Up 26 hours
hardcore_cray
79aa857e23b4 172.31.72.162:9874/circleci-vault-cci:0.3.8-
e2823f6 "./docker-entrypoint…"
26 hours
ago Up 26 hours 0.0.0.0:8200-8201->8200-8201/tcp
vault-cci
b3e317c9d62f 172.31.72.162:9874/redis:4.0.10 "docker-
entrypoint.s…"
26 hours
ago Up 26 hours 0.0.0.0:6379->6379/tcp
redis
f2d3f77891f0 172.31.72.162:9874/circleci-nomad-
metrics:0.1.90-1448fa7 "/usr/local/bin/dock…"
26 hours
ago Up 26 hours
nomad-metrics
1947a7038f24 172.31.72.162:9874/redis:4.0.10 "docker-
entrypoint.s…"
26 hours
ago Up 26 hours 0.0.0.0:32846->6379/tcp
slanger-redis
3899237a5782 172.31.72.162:9874/circleci-exim:0.2.54-
697cd08 "/docker-entrypoint.…"
26 hours
ago Up 26 hours 0.0.0.0:2525->25/tcp
exim
97ebdb831a7e registry.replicated.com/library/retraced:1.2.2 "/src/replicated-
aud…"
26 hours
ago Up 26 hours 3000/tcp
retraced-
processor
FAQ 63
a0b806f3fad2 registry.replicated.com/library/retraced:1.2.2 "/src/replicated-
aud…"
26 hours
ago Up 26 hours 172.17.0.1:32771->3000/tcp
retraced-api
19dec5045f6e registry.replicated.com/library/retraced:1.2.2 "/bin/sh -
c '/usr/lo…"
26 hours
ago Up 26 hours 3000/tcp
retraced-cron
7b83a3a193da registry.replicated.com/library/retraced-
postgres:10.5-20181009 "docker-entrypoint.s…"
26 hours
ago Up 26 hours 5432/tcp
retraced-
postgres
029e8f454890 registry.replicated.com/library/retraced-
nsq:v1.0.0-compat-20180619 "/bin/sh -c nsqd"
26 hours
ago Up 26 hours 4150-4151/tcp, 4160-4161/tcp, 4170-
4171/tcp
retraced-nsqd
500619f53e80 quay.io/replicated/replicated-operator:current "/usr/bin/replicated…"
26 hours
ago Up 26 hours
replicated-
operator
e1c752b4bd6c quay.io/replicated/replicated:current "entrypoint.sh -
d"
26 hours
ago Up 26 hours 0.0.0.0:9874-9879->9874-9879/tcp
replicated
1668846c1c7a quay.io/replicated/replicated-ui:current "/usr/bin/replicated…"
26 hours
ago Up 26 hours 0.0.0.0:8800->8800/tcp
replicated-ui
f958cf3e8762 registry.replicated.com/library/premkit:1.2.0 "/usr/bin/premkit da…"
3 weeks
ago Up 26 hours 80/tcp, 443/tcp, 2080/tcp, 0.0.0.0:9880-
>2443/tcp
replicated-
premkit
Providing support with the output of sudo docker ps in service box will be helpful in diag-
nosing the problem.
64 CHAPTER 6. TROUBLESHOOTING
Troubleshooting Server Installations
This document describes an initial set of troubleshooting steps to take if you are having problems
with your CircleCI installation on your private server. If your issue is not addressed below, please
generate a support bundle and contact our Support Engineers by opening a support ticket.
Debugging Queuing Builds
If your Services component is fine, but builds are not running or all builds are queueing, follow
the steps below.
Check Dispatcher Logs for Errors
1. Run sudo docker logs dispatcher, if you see log output that is free of errors
you may continue on the next step. If the logs dispatcher container does not exist or is
down, start it by running the sudo docker start <container_name> com-
mand and monitor the progress. The following output indicates that the logs dispatcher
is up and running correctly:
Jan 4 22:38:38.589:+0000 INFO circle.backend.build.run-
queue dispatcher mode is on - no need for
run-queue
Jan 4 22:38:38.589:+0000 INFO circle.backend.build.usage-
queue 5a4ea0047d560d00011682dc:
GERey/realitycheck/37 -> forwarded to run-queue
Jan 4 22:38:38.589:+0000 INFO circle.backend.build.usage-
queue 5a4ea0047d560d00011682dc: publishing
:usage-changed (:recur) event
Jan 4 22:38:39.069:+0000 INFO circle.backend.build.usage-
queue got usage-queue event for
5a4ea0047d560d00011682dc (finished-build)
If you see errors or do not see the above output, investigate the stack traces because they
indicate that there is an issue with routing builds from 1.0 to 2.0. If there are errors in the output,
then you may have a problem with routing builds to 1.0 or 2.0 builds.
If you can run 1.0 builds, but not 2.0 builds, or if you can only run 2.0 builds and the log dispatcher
is up and running, continue on to the next steps.
TROUBLESHOOTING SERVER INSTALLATIONS 65
Check Picard-Dispatcher Logs for Errors
1. Run the sudo docker logs picard-dispatcher command. A healthy picard-
dispatcher should output the following:
Jan 9 19:32:33 INFO picard-dispatcher.init Still running...
Jan 9 19:34:33 INFO picard-dispatcher.init Still running...
Jan 9 19:34:44 INFO picard-dispatcher.core taking build=GERey/realitycheck/38
Jan 9 19:34:45 INFO circle.http.builds project GERey/realitycheck at revision
2c6179654541ee3d succcessfully fetched and parsed .circleci/config.yml
picard-dispatcher.tasks build GERey/realitycheck/38 is using resource
class {:cpu 2.0, :ram 4096, :class :medium}
picard-dispatcher.tasks Computed tasks for build=GERey/realitycheck/38,
stage=:write_artifacts, parallel=1
Jan 9 19:34:45 INFO picard-dispatcher.tasks build has matching jobs:
build=GERey/realitycheck/38 parsed=:write_artifacts passed=:write_artifacts
The output should be filled with the above messages. If it is a slow day and builds are not
happening very often, the output will appear as follows:
Jan 9 19:32:33.629:+0000 INFO picard-dispatcher.init Still running...
As soon as you run a build, you should see the above message to indicate that it has been
dispatched to the scheduler. If you do not see the above output or you have a stack trace in the
picard-dispatcher container, contact CircleCI support.
If you run a 2.0 build and do not see a message in the picard-dispatcher log output, it often
indicates that a job is getting lost between the dispatcher and the picard dispatcher.
2. Stop and restart the CircleCI app in the Management Console at port 8800 to re-establish
the connection between the two containers.
Check Picard-Scheduler Logs for Errors
1. Run sudo docker logs picard-scheduler . The picard-scheduler
schedules jobs and sends them to nomad through a direct connection. It does not actually
handle queuing of the jobs in CircleCI.
Check Nomad Node Status
1. Check to see if there are any nomad nodes by running the nomad node-status
-allocs command and viewing the following output:
66 CHAPTER 6. TROUBLESHOOTING
ID DC Name Class Drain Status Running Allocs
ec2727c5 us-east-1 ip-127-0-0-1 linux-64bit false ready 0
If you do not see any nomad clients listed, please consult our nomad guide for more detailed
information on managing and troubleshooting the nomad server.
Note: DC in the output stands for datacenter and will always print us-east-1 and should be left
as such. It doesn’t affect or break anything. The things that are the most important are the Drain,
Status, and Allocs columns.
• Drain - If Drain is true then CircleCI will not route jobs to that nomad client. It is
possible to change this value by running the following command nomad node-drain
[options] <node>. If you set Drain to true, it will finish the jobs that were currently
running and then stop accepting builds. After the number of allocations reaches 0, it is
safe to terminate instance. If Drain is set to false it means the node is accepting
connections and should be getting builds.
• Status - If Status is ready then it is ready to accept builds and should be wired up
correctly. If it is not wired up correctly it will not show ready and it should be investigated
because a node that is not showing ready in the Status will not accept builds.
• Allocs - Allocs is a term used to refer to builds. So, the number of Running Allocs is the
number of builds running on a single node. This number inidicates whether builds are
routing. If all of the Builders have Running Allocs, but your job is still queued, that means
you do not have enough capacity and you need to add more Builders to your fleet.
If you see output like the above, but your builds are still queued, then continue to the next step.
Check Job Processing Status
1. Run the sudo docker exec -it nomad nomad status command to view
the jobs that are currently being processed. It should list the status of each job as well
as the ID of the job, as follows:
ID Type Priority Status
5a4ea06b7d560d000116830f-0-build-GERey-realitycheck-1 batch 50 dead
5a4ea0c9fa4f8c0001b6401b-0-build-GERey-realitycheck-2 batch 50 dead
5a4ea0cafa4f8c0001b6401c-0-build-GERey-realitycheck-3 batch 50 dead
After a job has completed, the Status shows dead. This is a regular state for jobs. If the status
shows running, the job is currently running. This should appear in the CircleCI app builds
dashboard. If it is not appearing in the app, there may be a problem with the output-processor.
Run the docker logs picard-output-processor command and check the logs for
any obvious stack traces.
1. If the job is in a constant pending state with no allocations being made, run the sudo
docker exec -it nomad nomad status JOB_ID command to see where
Nomad is stuck and then refer to standard Nomad Cluster error documentation for infor-
mation.
TROUBLESHOOTING SERVER INSTALLATIONS 67
2. If the job is running/dead but the CircelCI app shows nothing:
• Check the Nomad job logs by running the sudo docker exec -it nomad
nomad logs --stderr --job JOB_ID command. Note: The use of
--stderr is to print the specific error if one exists.
• Run the picard-output-processor command to check those logs for spe-
cific errors.
Jobs stay in queued status until they fail and never successfully run.
• Check port 8585 if the nomad client logs contain the following type of error message:
{"error":"rpc error: code = Unavailable desc = grpc: the
connection is unavailable","level":"warning","msg":"error
fetching config, retrying","time":"2018-04-17T18:47:01Z"}
68 CHAPTER 6. TROUBLESHOOTING

Chapter 7
Appendix
System Requirements
This section defines the system requirements for installing CircleCI v2.16.
Services Machine
The Services machine hosts the core of the Server product, including the user-facing website,
API engine, datastores, and Nomad job scheduler. It is best practice to use an isolated machine.
The following table defines the Services machine CPU, RAM, and disk space requirements:
Number of daily active CircleCI users CPU RAM Disk space NIC speed
<50 8 cores 32GB 100GB 1Gbps
50-250 12 cores 64GB 200GB 1Gbps
251-1000 16 cores 128GB 500GB 10Gbps
1001-5000 20 cores 256GB 1TB 10Gbps
5000+ 24 cores 512GB 2TB 10Gbps
Nomad Clients
Nomad client machines run the CircleCI jobs that were scheduled by the Services machine.
Following are the Minimum CPU, RAM, and disk space requirements per client:
• CPU: 4 cores
• RAM: 16GB
• Disk space: 100GB
• NIC speed: 1Gbps
69

70 CHAPTER 7. APPENDIX
The following table defines the number of Nomad clients to make available as a best practice.
Scale up and down according to demand on your system:
Number of daily active CircleCI users Number of Nomad client machines
<50 1-5
50-250 5-10
250-1000 10-15
5000+ 15+
Server Ports
Following is the list of ports for machines in a CircleCI 2.0 installation:
Machine
type
Port
number Protocol Direction
Source /
destina-
tion Use Notes
Services
Machine
80 TCP Inbound End users HTTP web
app traffic
443 TCP Inbound End users HTTPS
web app
traffic
7171 TCP Inbound End users Artifacts
access
8081 TCP Inbound End users Artifacts
access
22 TCP Inbound AdministratorsSSH
8800 TCP Inbound AdministratorsAdmin
console
8125 UDP Inbound Nomad
Clients
Metrics
8125 UDP Inbound Nomad
Servers
Metrics Only if
using ex-
ternalised
Nomad
Servers
8125 UDP Inbound All
Database
Servers
Metrics Only if
using ex-
ternalised
databases

SYSTEM REQUIREMENTS 71
Machine
type
Port
number Protocol Direction
Source /
destina-
tion Use Notes
Services
Machine
4647 TCP Bi-
directional
Nomad
Clients
Internal
communication
8585 TCP Bi-
directional
Nomad
Clients
Internal
communication
7171 TCP Bi-
directional
Nomad
Clients
Internal
communication
3001 TCP Bi-
directional
Nomad
Clients
Internal
communication
80 TCP Bi-
directional
GitHub
Enterprise /
GitHub.com
(whichever
applies)
Webhooks
/ API
access
443 TCP Bi-
directional
GitHub
Enterprise /
GitHub.com
(whichever
applies)
Webhooks
/ API
access
80 TCP Outbound AWS API
endpoints
API access Only if
running on
AWS
443 TCP Outbound AWS API
endpoints
API access Only if
running on
AWS
5432 TCP Outbound PostgreSQL
Servers
PostgreSQL
database
connection
Only if
using ex-
ternalised
databases.
Port is
user-
defined,
assuming
the default
Post-
greSQL
port.

72 CHAPTER 7. APPENDIX
Machine
type
Port
number Protocol Direction
Source /
destina-
tion Use Notes
Services
Machine
27017 TCP Outbound MongoDB
Servers
MongoDB
database
connection
Only if
using ex-
ternalised
databases.
Port is
user-
defined,
assuming
the default
MongoDB
port.
5672 TCP Outbound RabbitMQ
Servers
RabbitMQ
connection
Only if
using ex-
ternalised
RabbitMQ
6379 TCP Outbound Redis
Servers
Redis
connection
Only if
using ex-
ternalised
Redis
4647 TCP Outbound Nomad
Servers
Nomad
Server
connection
Only if
using ex-
ternalised
Nomad
Servers
443 TCP Outbound CloudWatch
Endpoints
Metrics Only if
using AWS
CloudWatch
Machine
type
Port
number Protocol Direction
Source /
destina-
tion Use Notes
Nomad
Clients
64535-
65535
TCP Inbound End users SSH into
builds
feature
80 TCP Inbound AdministratorsCircleCI
Admin API
access
443 TCP Inbound AdministratorsCircleCI
Admin API
access
22 TCP Inbound AdministratorsSSH

SYSTEM REQUIREMENTS 73
Machine
type
Port
number Protocol Direction
Source /
destina-
tion Use Notes
22 TCP Outbound GitHub
Enterprise /
GitHub.com
(whichever
applies)
Download
Code From
Github.
4647 TCP Bi-
directional
Services
Machine
Internal
communication
8585 TCP Bi-
directional
Services
Machine
Internal
communication
7171 TCP Bi-
directional
Services
Machine
Internal
communication
3001 TCP Bi-
directional
Services
Machine
Internal
communication
443 TCP Outbound Cloud
Storage
Provider
Artifacts
storage
Only if
using
external
artifacts
storage
53 UDP Outbound Internal
DNS
Server
DNS
resolution
This is to
make sure
that your
jobs can
resolve all
DNS
names that
are
needed for
their
correct
operation
Machine
type
Port
number Protocol Direction
Source /
destina-
tion Use Notes
GitHub
Enterprise
/
GitHub.com
(whichever
applies)
22 TCP Inbound Services
Machine
Git access

74 CHAPTER 7. APPENDIX
Machine
type
Port
number Protocol Direction
Source /
destina-
tion Use Notes
22 TCP Inbound Nomad
Clients
Git access
80 TCP Inbound Nomad
Clients
API access
443 TCP Inbound Nomad
Clients
API access
80 TCP Bi-
directional
Services
Machine
Webhooks
/ API
access
443 TCP Bi-
directional
Services
Machine
Webhooks
/ API
access
Machine
type
Port
number Protocol Direction
Source /
destina-
tion Use Notes
PostgreSQL
Servers
5432 TCP Bi-
directional
PostgreSQL
Servers
PostgreSQL
replication
Only if
using ex-
ternalised
databases.
Port is
user-
defined,
assuming
the default
Post-
greSQL
port.

SYSTEM REQUIREMENTS 75
Machine
type
Port
number Protocol Direction
Source /
destina-
tion Use Notes
MongoDB
Servers
27017 TCP Bi-
directional
MongoDB
Servers
MongoDB
replication
Only if
using ex-
ternalised
databases.
Port is
user-
defined,
assuming
the default
MongoDB
port.
Machine
type
Port
number Protocol Direction
Source /
destina-
tion Use Notes
RabbitMQ
Servers
5672 TCP Inbound Services
Machine
RabbitMQ
connection
Only if
using ex-
ternalised
RabbitMQ
5672 TCP Bi-
directional
RabbitMQ
Servers
RabbitMQ
mirroring
Only if
using ex-
ternalised
RabbitMQ
Machine
type
Port
number Protocol Direction
Source /
destina-
tion Use Notes
Redis
Servers
6379 TCP Inbound Services
Machine
Redis
connection
Only if
using ex-
ternalised
Redis
6379 TCP Bi-
directional
Redis
Servers
Redis
replication
Only if
using ex-
ternalised
Redis and
using
Redis
replication
(optional)

76 CHAPTER 7. APPENDIX
Machine
type
Port
number Protocol Direction
Source /
destina-
tion Use Notes
Nomad
Servers
4646 TCP Inbound Services
Machine
Nomad
Server
connection
Only if
using ex-
ternalised
Nomad
Servers
4647 TCP Inbound Services
Machine
Nomad
Server
connection
Only if
using ex-
ternalised
Nomad
Servers
4648 TCP Bi-
directional
Nomad
Servers
Nomad
Servers
internal
communication
Only if
using ex-
ternalised
Nomad
Servers
