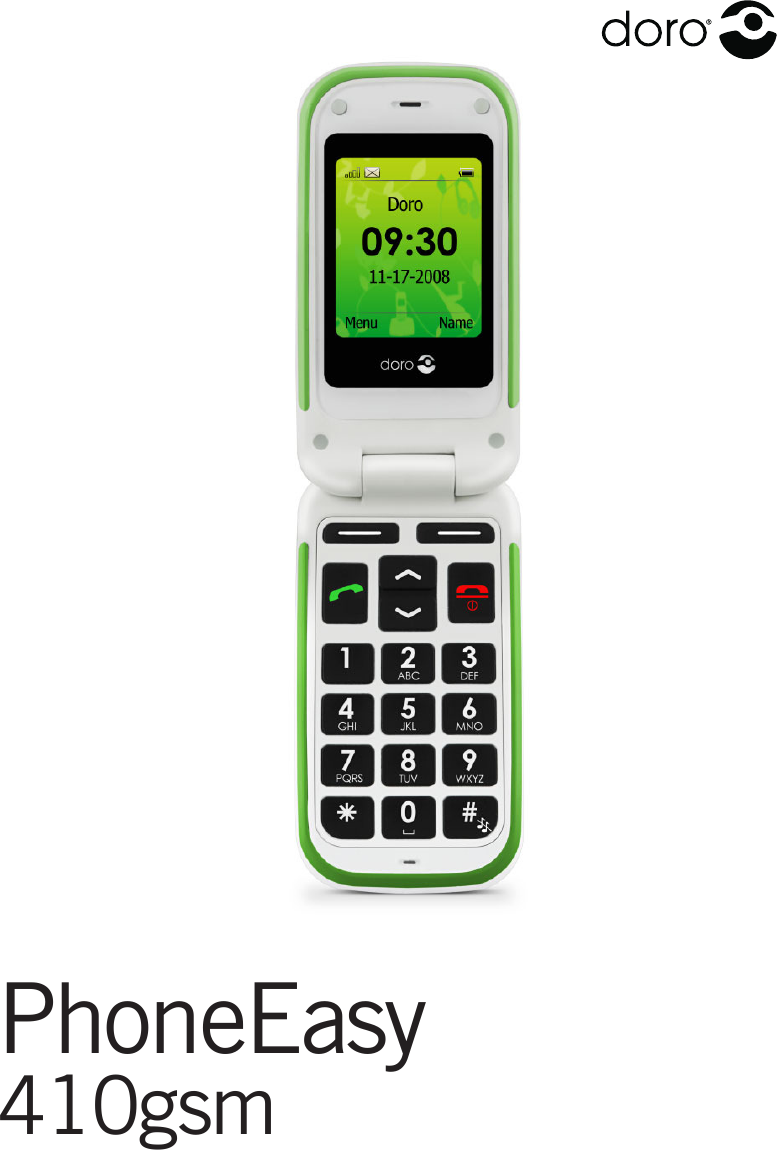
Doro DORO410G GSM TRI-BAND DIGITAL MOBILE TELEPHONE User Manual
Doro AB GSM TRI-BAND DIGITAL MOBILE TELEPHONE Users Manual
UserManual.wiki
>
Doro
>
DORO410G User Manual
Users Manual
Navigation menu
Upload a User Manual
Namespaces
Wiki Guide
HTML
PDF
Info
Views
User Manual
Discussion / Help
Navigation
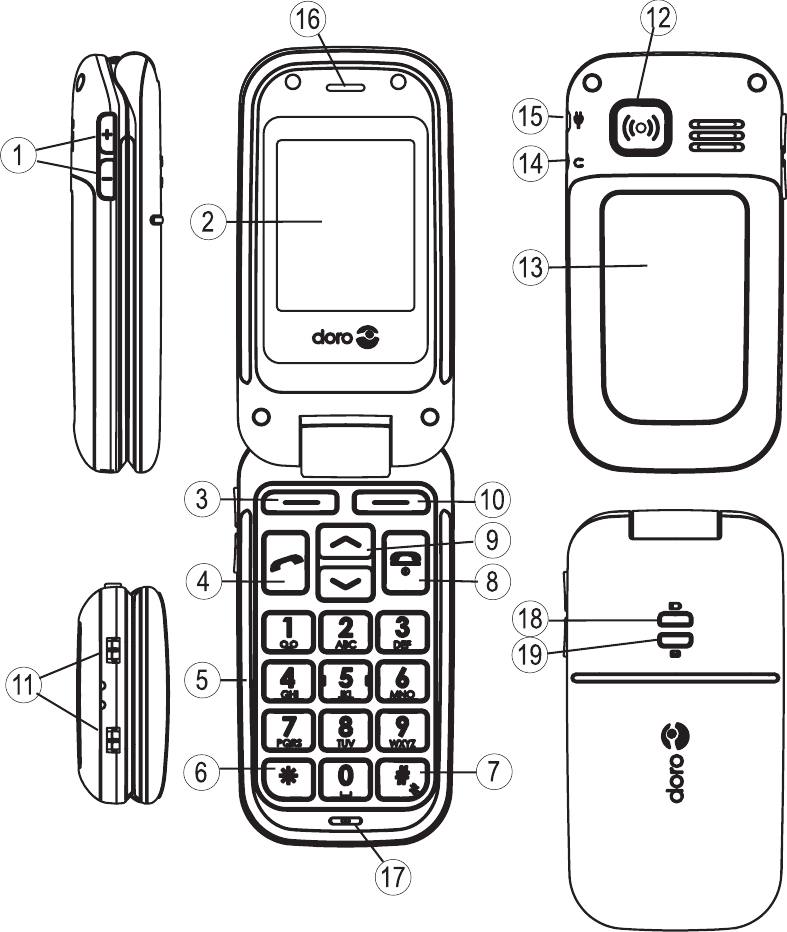

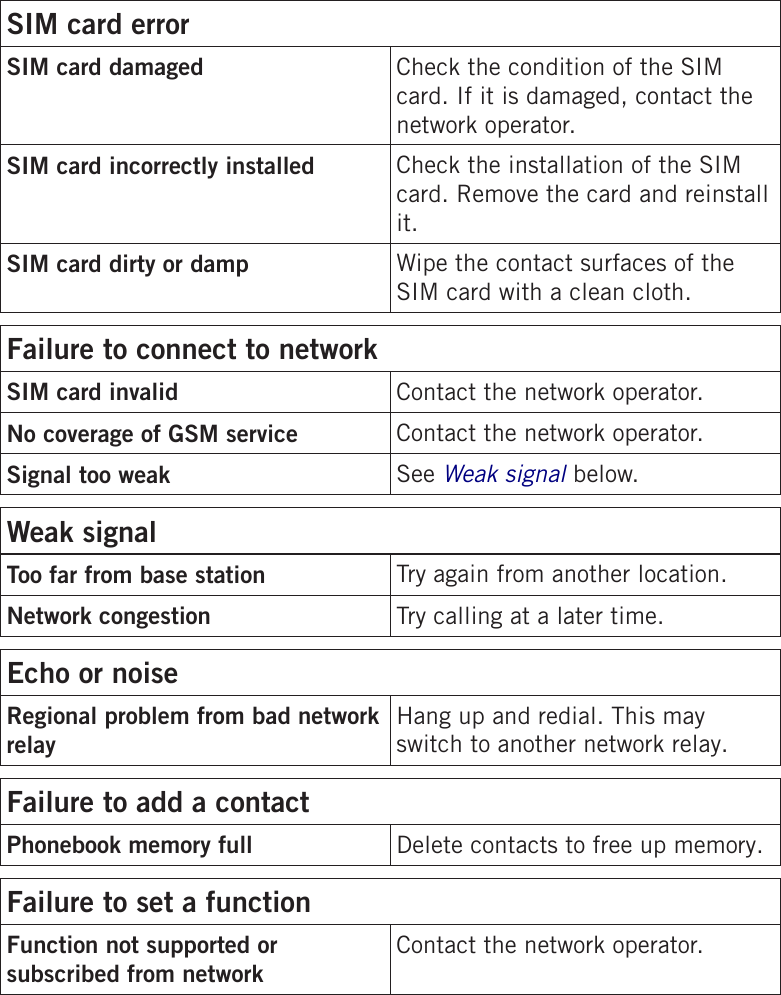
![4EnglishChargingWarning!Only use batteries, charger and accessories that have been approved for use with this particular model. Connecting other accessories may be dangerous and may invalidate the phone’s type approval and guarantee.When the battery is running low, is displayed and a warning signal is heard. To charge the battery, connect the mains adapter to the wall socket and to the charging socket y. is displayed briey when the charger is connected to the phone, and when it is disconnected.The battery charge indicator will be animated while charging.It takes approximately 3 hours to fully charge the battery. is displayed when charging is completed.Note!Full battery capacity will not be reached until the battery has been charged 3–4 times.The ambient temperature must be in the range 32°–104°F when charging.Batteries degrade over time, which means that call time and standby time will normally decrease with regular use.Phone indicatorsWhen 5 ash you have a new message or a missed call.When ] ash the battery is running low.](https://usermanual.wiki/Doro/DORO410G/User-Guide-1139462-Page-8.png)