E RAE Electronics Industry Co ELM-17ND LCD Monitor User Manual
E-RAE Electronics Industry Co Ltd LCD Monitor Users Manual
UserManual.wiki
>
E RAE Electronics Industry Co
>
ELM 17ND User Manual
Users Manual
Navigation menu
Upload a User Manual
Namespaces
Wiki Guide
HTML
PDF
Info
Views
User Manual
Discussion / Help
Navigation


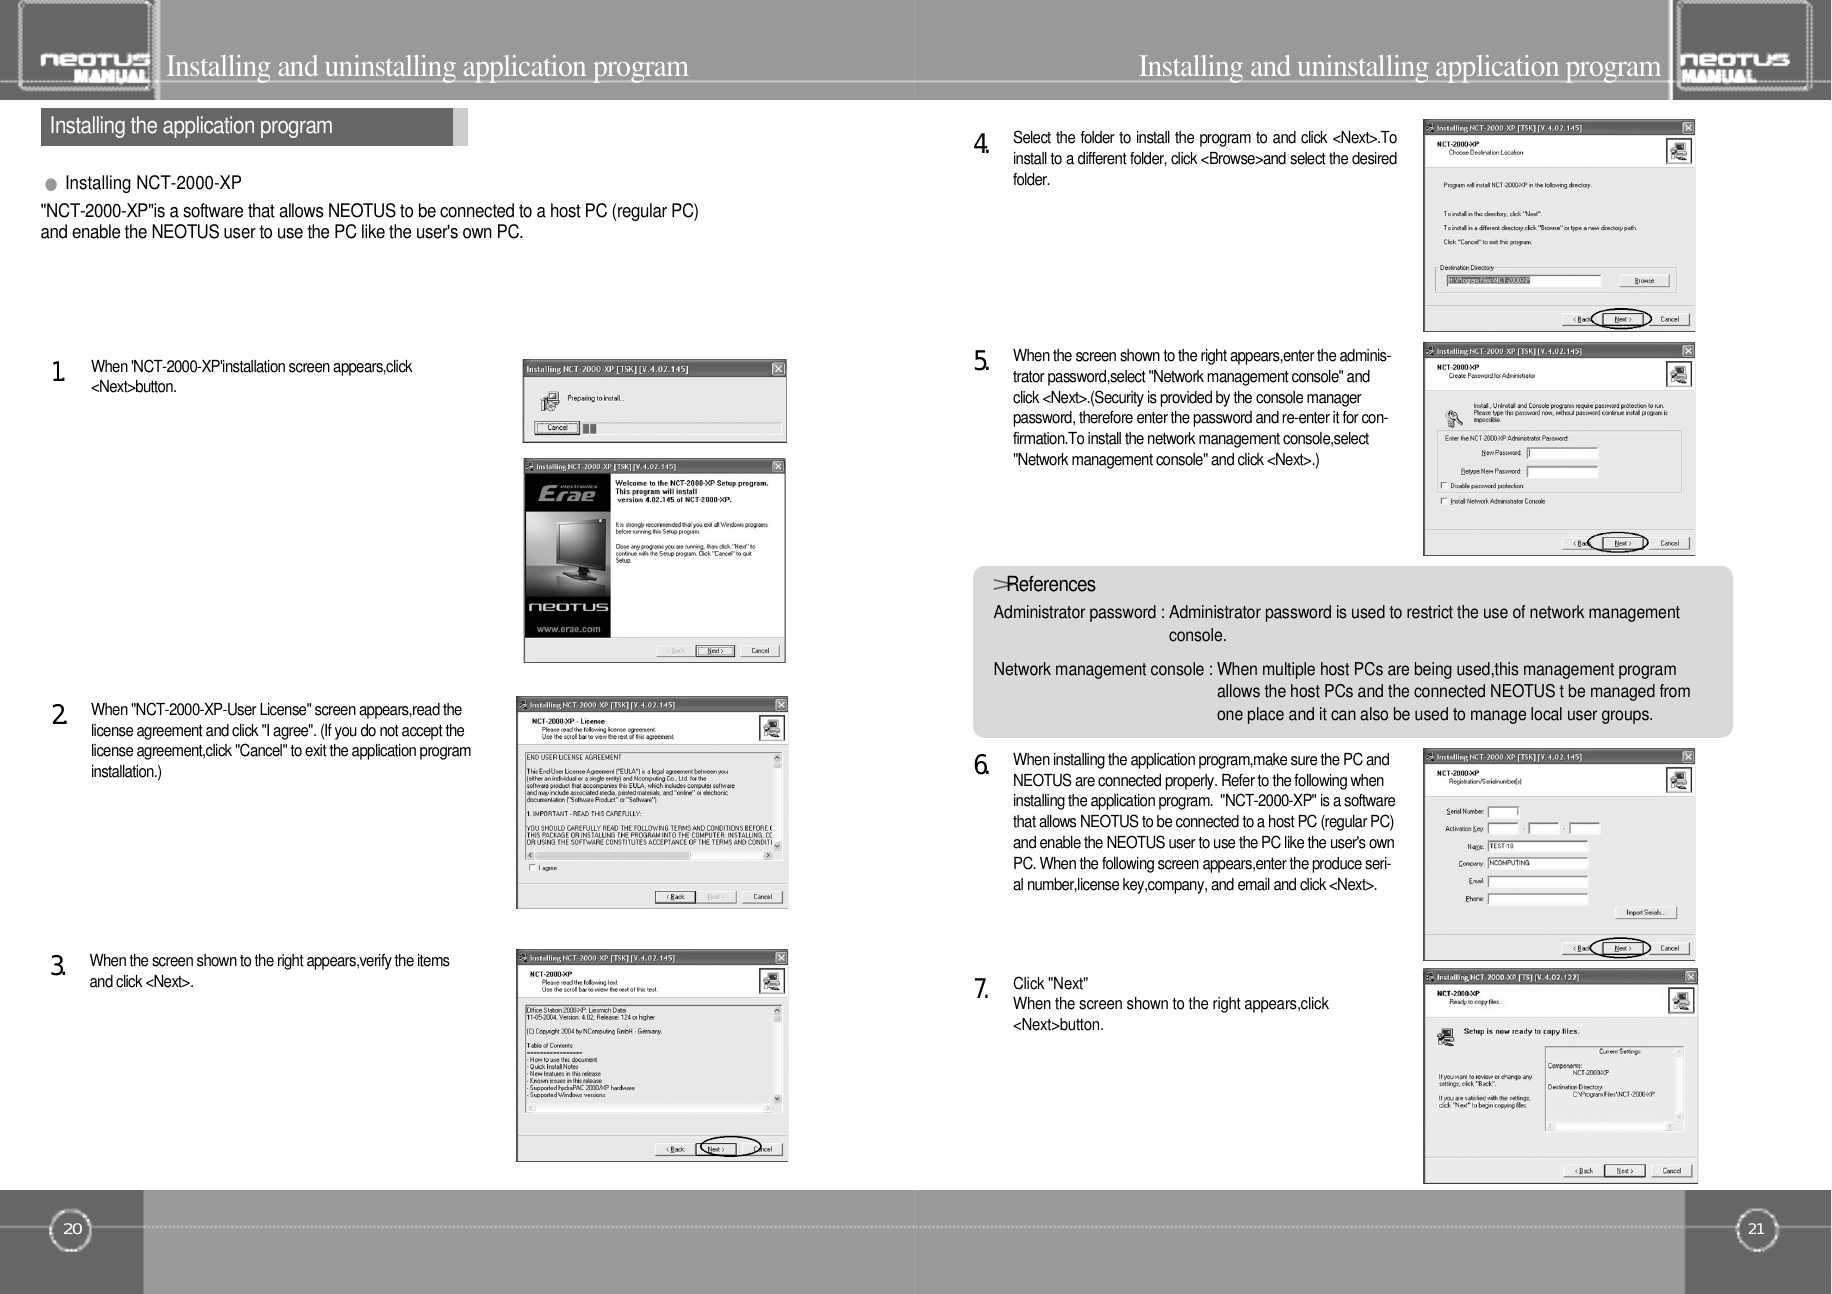

![Selecting and adjusting OSD screen43Selecting and adjusting OSD screenMonitor screen adjustment42Screen adjustmentSelecting and adjusting OSD screenO S D(On Screen Display)selection and screen adjustment[OSD] start screen1. Click "Menu" to open OSD screen.2. Click ◀/ ▶to select desired main menu.3. Click "Select" after selecting the main menu.4. The cursor moves to the lower menu. Use ◀/ ▶button to go to the desired menu.5. Click "Select" after selecting the lower menu.6. Use ◀/ ▶to adjust the settings.7. Click the "Menu" button 3 times to close the OSD screen and save the adjustments.※If "Menu" button is clicked during configuration,the screen will go to the previous screen.※The number may change according to the saved value.Adjusts brightness.>B r i g h t n e s s◀: Dims the screen.▶: Brightens the screen.>C o n t r a s t Adjusts contrast.◀: Darkens the contrast.▶: Lightens the contrast.>P h a s e Fine adjustment of phase.This cannot be adjusted in the digital mode.This cannot be adjusted in the digital mode.This cannot be adjusted in the digital mode.This cannot be adjusted in the digital mode.◀: The fine adjustment value decreases.▶: The fine adjustment value increases.Adjusts frequency sampling.Frequency◀: Reduces sampling frequency value.▶: Increases sampling frequency value.HpositionAdjusts H position.◀: Screen moves toward the right.▶: Screen moves toward the right.Vposition◀: Screen moves toward the bottom.▶: Screen moves toward the top.Adjusts V position.](https://usermanual.wiki/E-RAE-Electronics-Industry-Co/ELM-17ND/User-Guide-470187-Page-22.png)
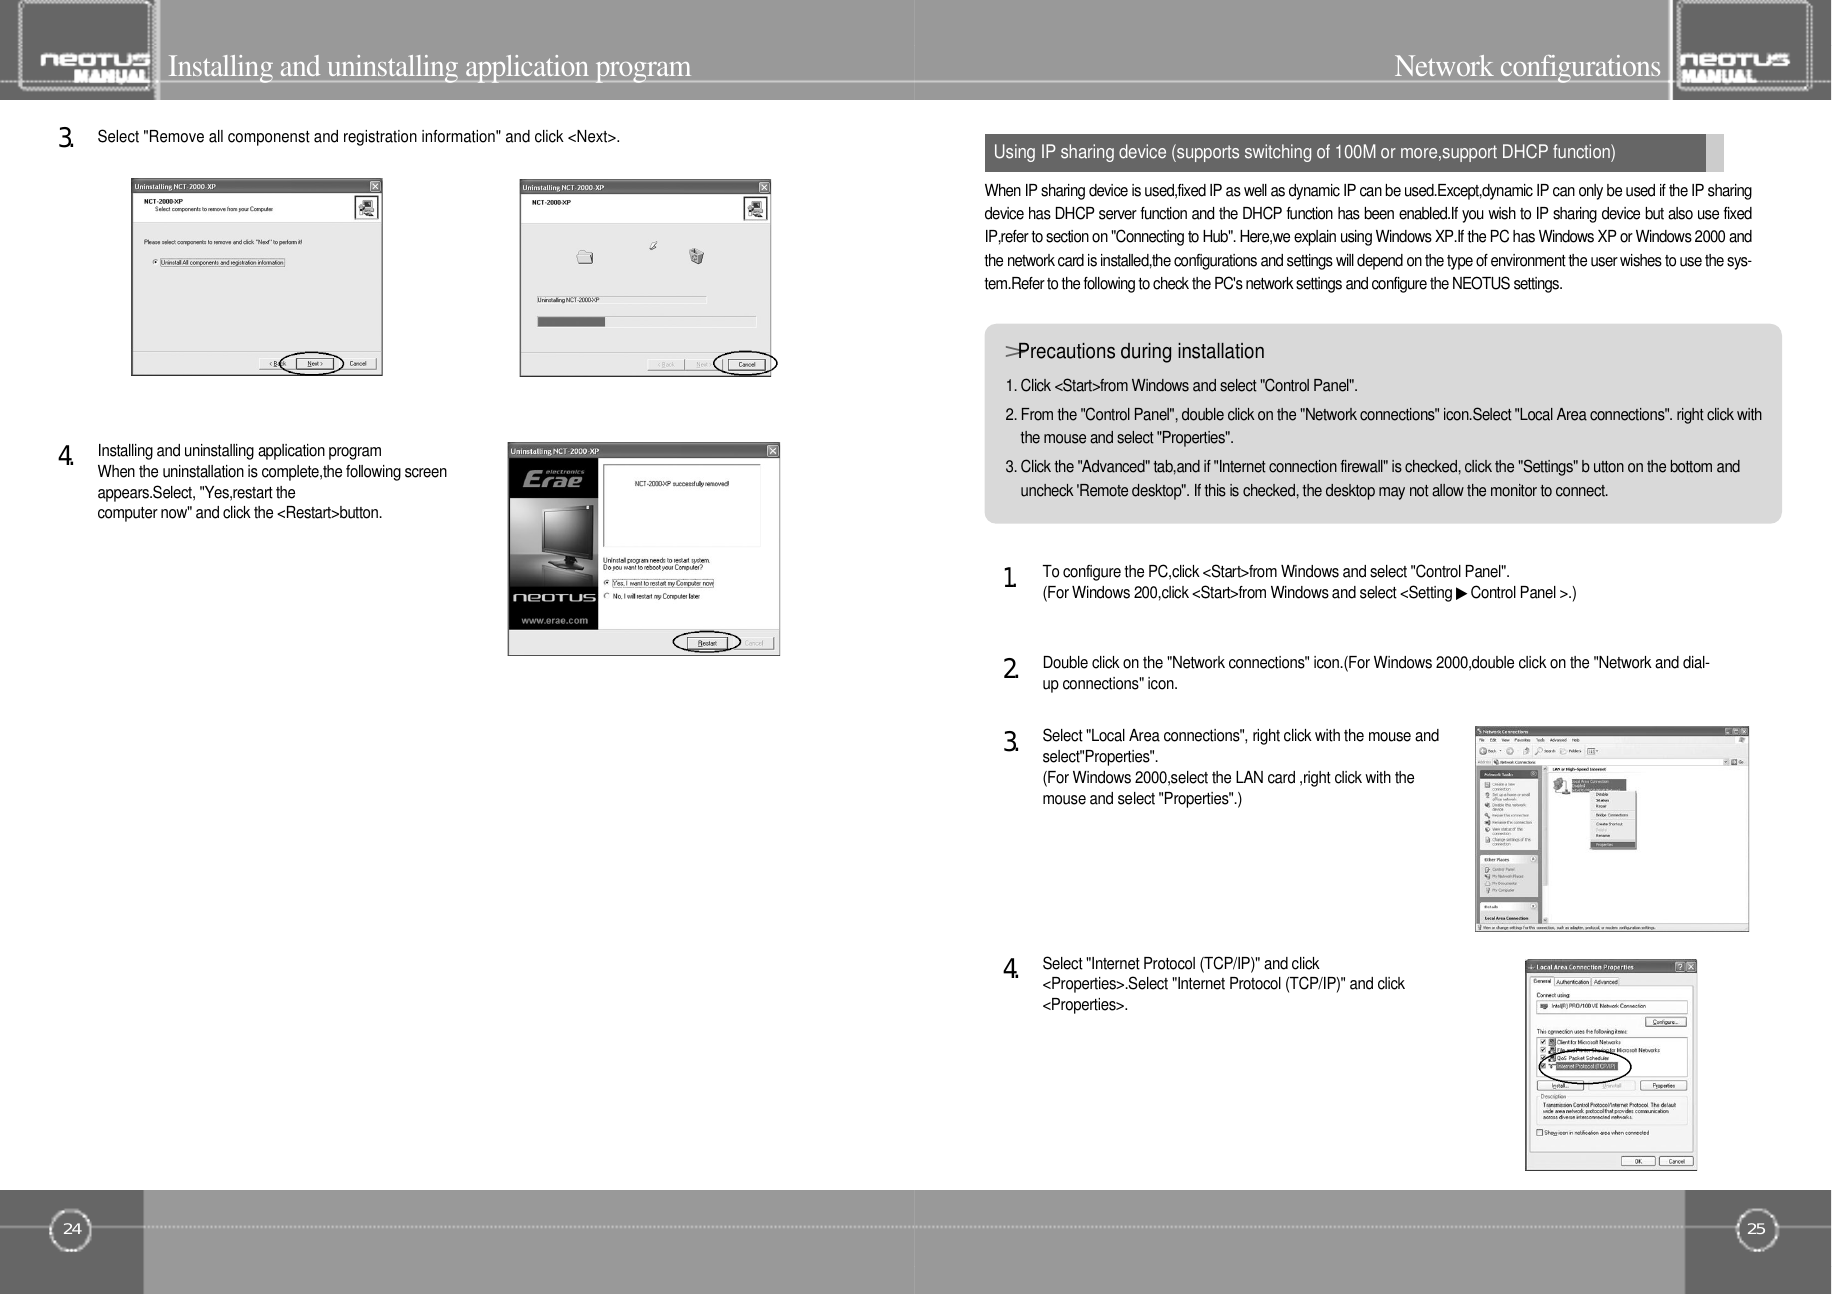
![45Selecting and adjusting OSD screen44ColoradjustmentSelecting and adjusting OSD screenColor adjustment detailed categoriesThe default value is 7500K.[6500K] Warm colors [7500K] Standard colors[9300K] Cool colors> Color intensity adjustment - Color intensity adjustment can be used to select the desired color.[User] User can adjust the intensity of "Red","Green", and "Blue" colors.OSD◀:Screenmovestowardtheleft.▶:Screenmovestowardtheright .>MenuhorizontalpositionadjustmentAdjustsmenu'horizontalposition.>MenuverticalpositionadjustmentAdjustsmenu'verticalposition.>Semi-transparentmenuturnsthemenusemi-transparent.O S D>Adjustsmenuposi t ion.◀,▶:Menuverticalpositionadjustment-Adjustsmenu'sverticalposition.◀,▶: Use this button to adjust the position of the OSDm e n u .>Menu time adjustment Adjusts time display on the menu.Menulocationadjustment◀:Screenmovestowardthebottom.▶:Screenmovestowardthetop.◀/▶:UsethisbuttontoadjustthetransparencyoftheOSDbackground.](https://usermanual.wiki/E-RAE-Electronics-Industry-Co/ELM-17ND/User-Guide-470187-Page-23.png)