E RAE Electronics Industry Co EPT-425BKA Monitor PDP TV User Manual 90 X 42Q7 X3M SAB 00
E-RAE Electronics Industry Co Ltd Monitor PDP TV 90 X 42Q7 X3M SAB 00
UserManual.wiki
>
E RAE Electronics Industry Co
>
EPT 425BKA User Manual
Users Manual
Navigation menu
Upload a User Manual
Namespaces
Wiki Guide
HTML
PDF
Info
Views
User Manual
Discussion / Help
Navigation


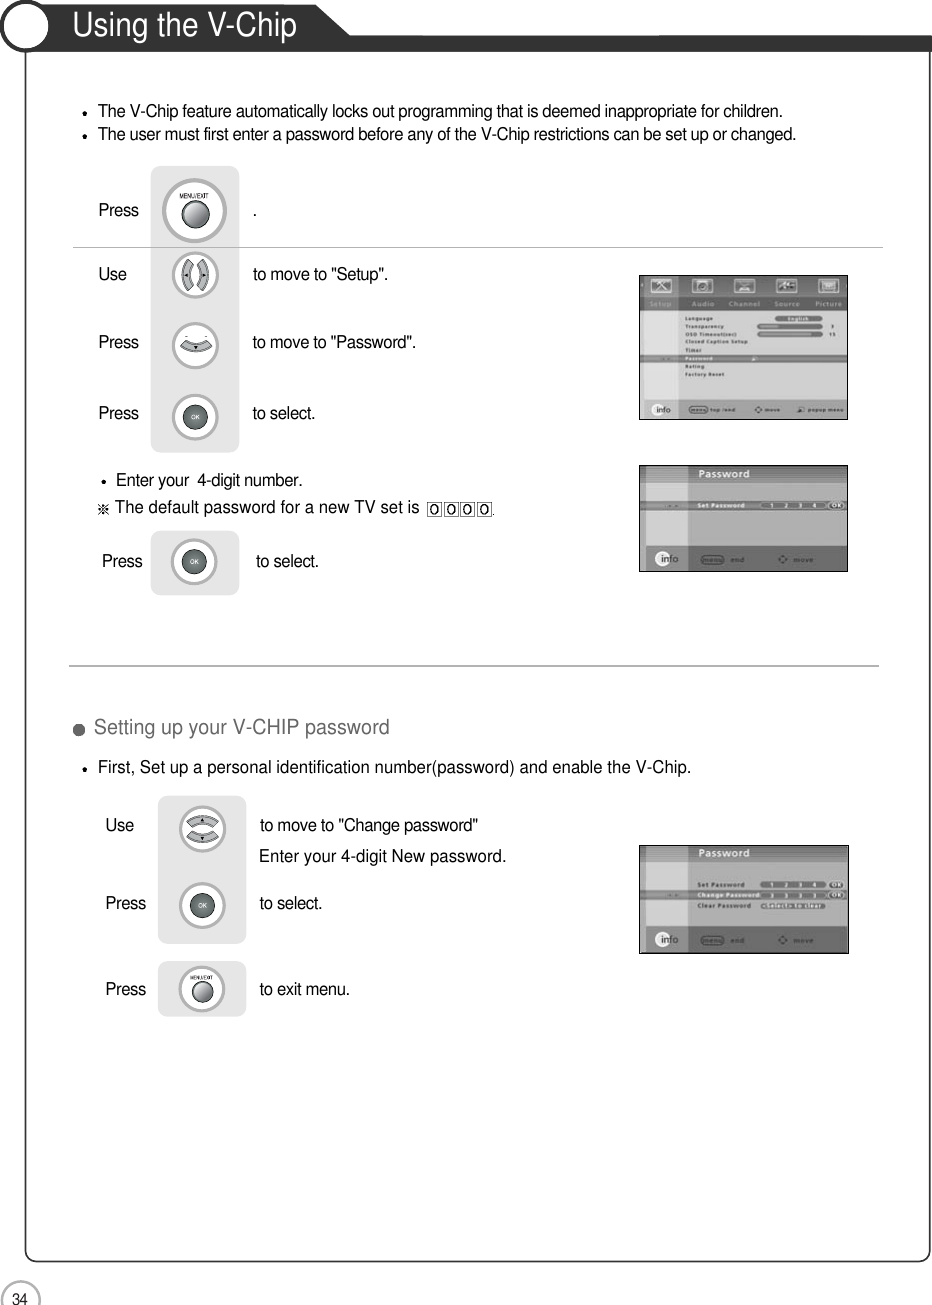
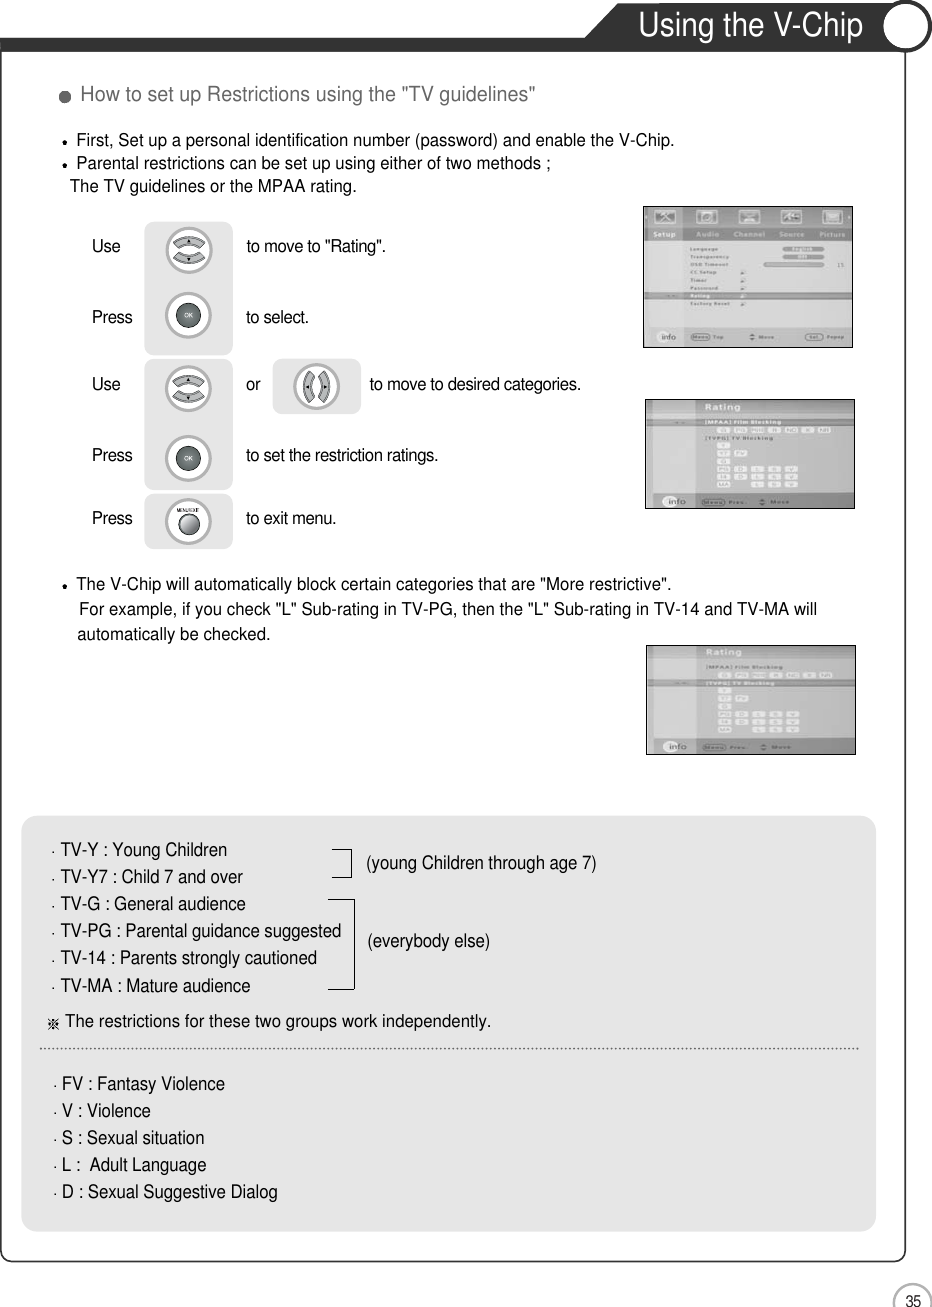
![36ApplicationUsing the V-ChipHow to Set up Restrictions using the MPAA RatingsUse to move to [MPAA] Film Blocking. Use to move to desired categories.Press to set the restriction ratings. Press to exit menu. The MPAA rating system uses the Motion Picture Association of America(MPAA) system, and its mainapplication is for movies.When the V-Chip lock is on, the TV will automatically block any programs that are coded with objectionable rating (either MPAA or TV-Rating).First, Set up a personal identification number(password) and enable the V-Chip.G : All Children and General audience.PG : Parental guidance suggestedPG13 : Parental guidance for children under 13R : Restricted viewing, parental guidance is suggested for children under17.NC17 : No children under age 17X : Adults onlyNR : Not rated](https://usermanual.wiki/E-RAE-Electronics-Industry-Co/EPT-425BKA/User-Guide-694239-Page-36.png)
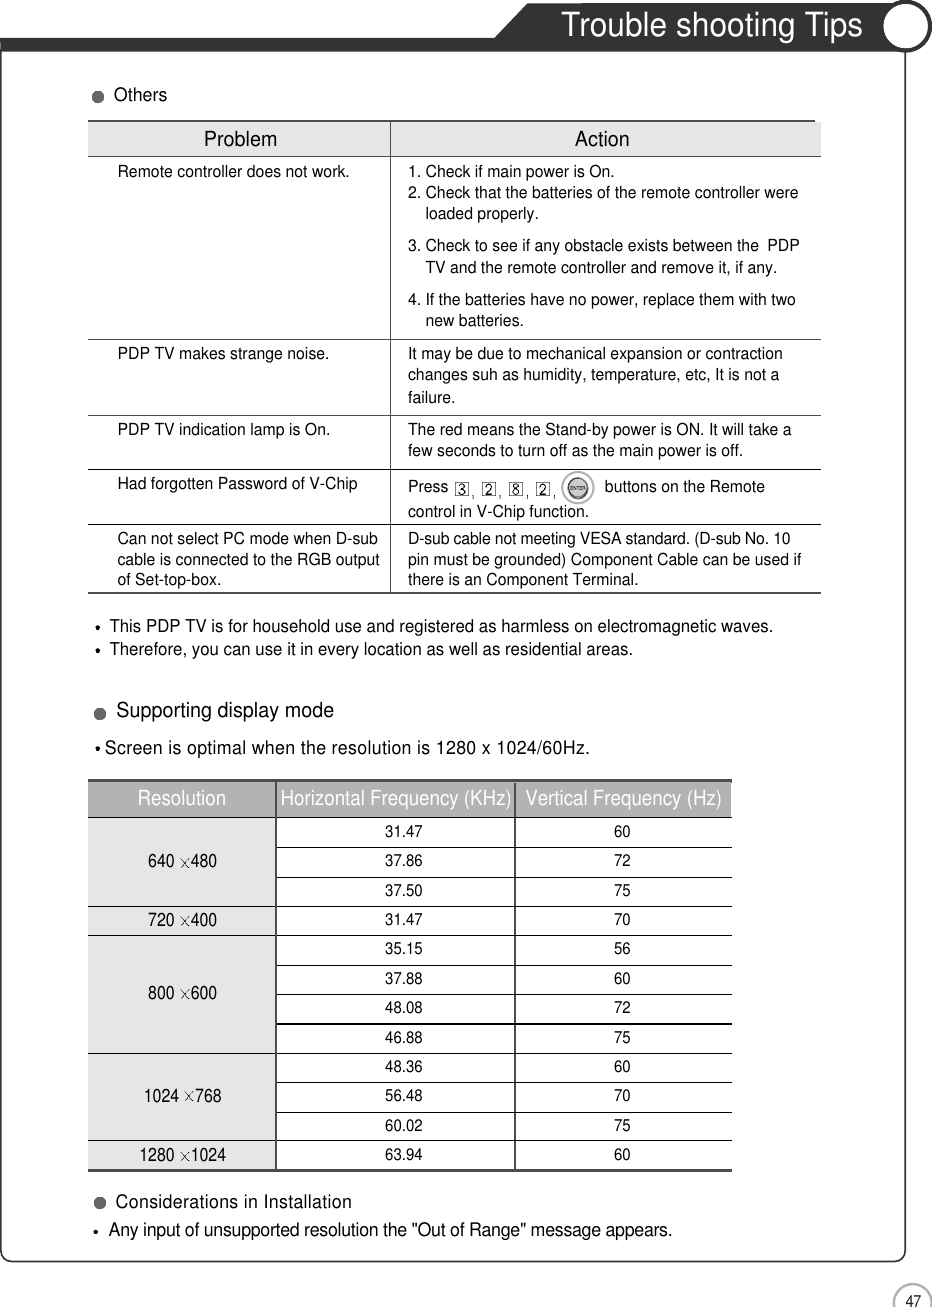
![48Supported Display ModesMaintenance and ServiceAny input of unsupported resolution.The cabinet design and electronics specifications will be modified without prior notice forimproving the performance.SpecificationsComponent Mode [Y, CB(PB), CR(PR)]Resolution Horizontal Frequency (KHz) Vertical Frequency (Hz)720 480 15.73 60.00 SDTV, DVD 480i720 480 31.47 59.94 SDTV, 480p1280 720 44.96 59.94 HDTV, 720p1280 720 45.00 60.00 HDTV, 720p1920 1080 33.72 59.94 HDTV, 1080i1920 1080 33.75 60.00 HDTV, 1080iAspect Ratio 16 : 9Screen Size (H V) 708.954(H) 398.592(V)mmResolution 1024 768Cell pitch (H V) 300 (H) 676 (V)Displayable Colors 16.7MBrightness 1200cd/m2 (w/o filter)Contrast 10,000:1(MAX)Viewing Angle 160Input signal NTSC, SD, HD , VGA, SVGA, XGA, SXGA (1280 1024 60Hz)Tuner NTSC-M, ATSCPC Input Analog RGB, HDMIAC Input AC100-240V~, 50/60Hz, 4A (MAX)Power Consumption 320W (MAX)Standby Mode 1W](https://usermanual.wiki/E-RAE-Electronics-Industry-Co/EPT-425BKA/User-Guide-694239-Page-47.png)