EC Electronics ECAM102 Android Terminal User Manual M102 EC 2017
EC Electronics, Limited Android Terminal M102 EC 2017
Users manual
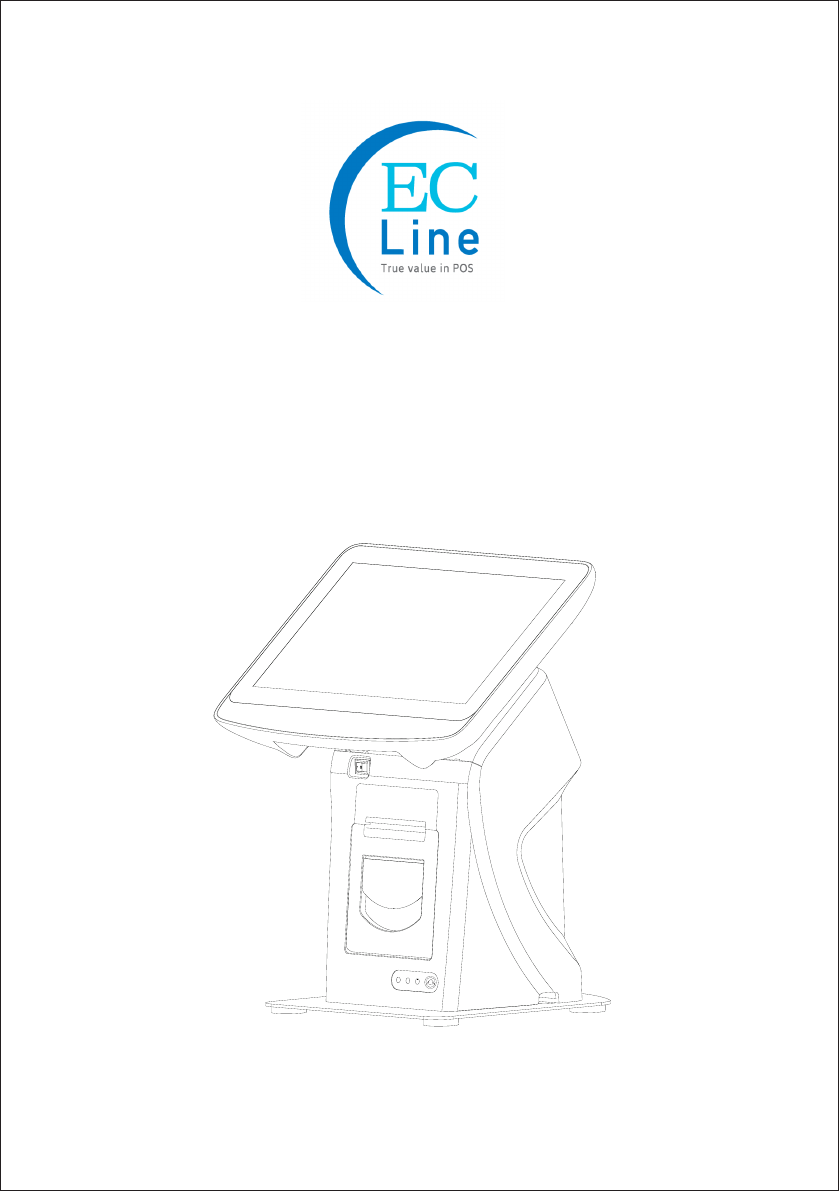
User’s Manual
EC-AM-102
Android POS Terminal
EC-AM-102 User Manual V1.0
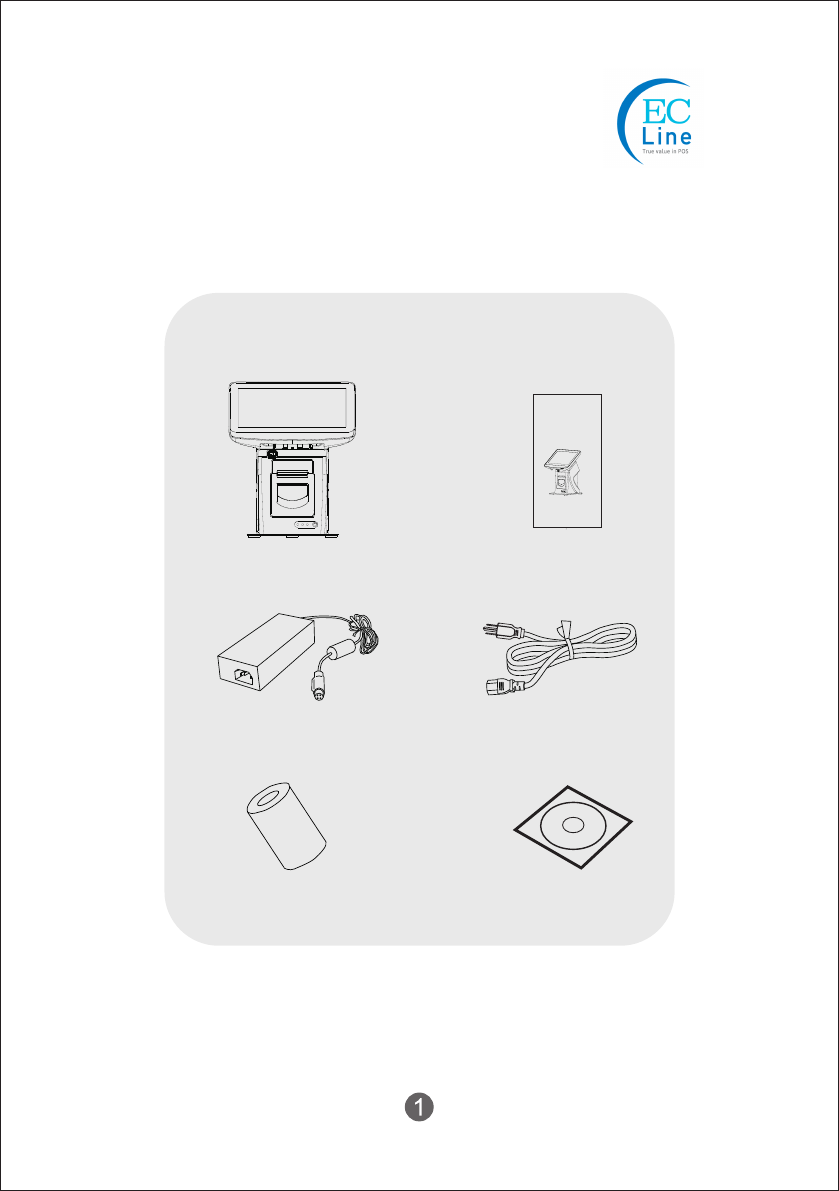
(1) EC-AM-102 (2) User manual
(3) Power adapter (4) Power cable
(5) Paper roll (6) CD disk
Check the following items in the package, if any of these items is missing,
please contact your dealer
>> User manual <<
1. Unpacking and Checking

Read the instructions carefully and thoroughly and save them for later reference. The
unauthorized operation may lead to error or accident. Follow all the warnings and
instructions in the manual as well as marked on the product. Whenever problem exists,
power off and unplug the terminal and contact the authorized reseller / distributor.
Introduction
This manual is for EC-AM-102 Android POS terminal series, all contents have been
validated and reviewed.
EC-AM-102 complies with GB4943.1-2011; GB9254-2008
Device must be opened by authorized person or qualified technical engineer. If the
product does not operate normally when the operating instructions are followed. Adjust
only those controls that are covered by the operating instructions since importer
adjustment of other controls may result in damage and will often require extensive work
by a qualified technician to restore the product to normal operation.
Warranty
About this manual / Safety statement:
** The content of this manual is subject to change without prior notice.
managment function for non-cash settlement.
Feature: Through commodity and media bussiness .Supply data service and

1. Avoid radio interference
2. Use genuine accessories or spare parts. Use improper spare part may cause damage
or malfunction.
3. The power cord of this product is come with ground connection. Make sure the
voltage of the electricity is correctly match our power supply.
4. Keep the product, power supply and paper roll in a dry or cool environment. It should
never be placed near or over a radiator or heat origin, and should avoid of direct
sunshine.
5. Make sure the connection of the cable are connected correctly to the interfaces.
6. Keep your communication device and the integrated printer in the WAN environment,
don’t connect it to unknown or unrecognized network.
7. The product should use horizontally
8. Unplug this product from the power outlet before cleaning. Do not use liquid or aerosol
cleaners. Use a damp cloth for cleaning.
9. Slots and openings on the cabinet and the back or bottom are provided for air
ventilation. To ensure reliable operation of the product and to protect it from
overheating, do not block or cover these openings. The openings should never be
blocked by placing the product on a bed, sofa, rug or other similar surface. This
product should never be placed near or over a radiator or heater. This product should
not be placed in a built-in installation or kiosk stand unless proper ventilation is provided.
10. This product should never be placed near or over a radiator or heat origin, and should
avoid of direct sunshine.
11. Do not locate this product where the cord will be walked on. When the cord or the
plug is mangled, please stop using and get a new one replaced. Make sure the old
one is far away from the printer, so it can avoid someone who does not know the inside
story getting damage.
12. Do not use in locations subject to high humidity or dust levels. Excessive humidity and
dust may cause equipment damage or fire.
13. Never push objects of any kind into this product through cabinet slots as they may
touch dangerous voltage dots or short out parts.
14. Make sure to turn off the power of the printer whenever repair.
15. Unplug this product from the power outlet and leave servicing to qualified service
personnel under the following conditions:
Caution
16. When the power cord or plug is damaged or frayed.
a) If liquid has been spilled into the product.
b) If the product has been exposed to rain or water.
c) Power cable is damaged
d) Strongly impact
3
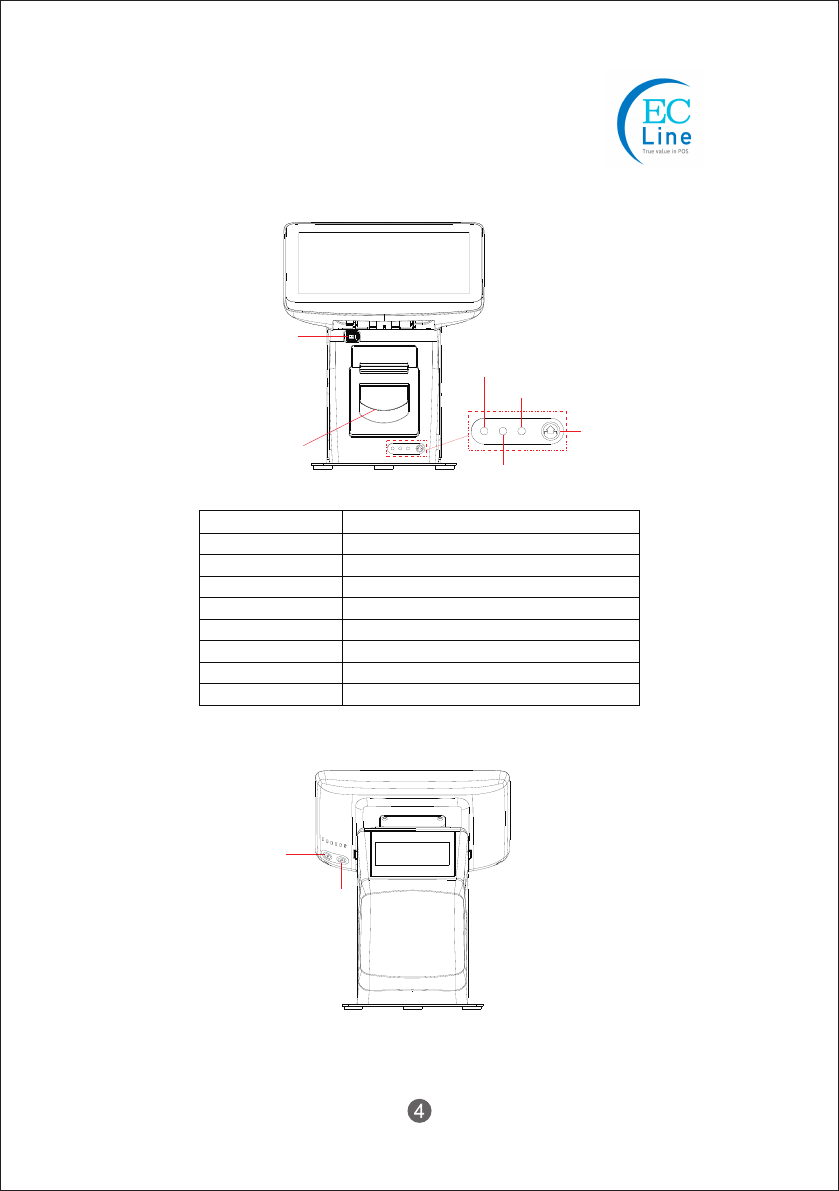
Indicator and buttons
Cover-open button
Power indicator
Paper out
Feed button
Error indicator
Printer ON/OFF Switch
Host control button
Terminal Power Button
“Return” Button
Indicator and button
Power indicator
Error indicator
Paper out indicator
Feed button
Switch ON-OFF
Cover-open button
Power button
Back button
Shows power status. Blue light when power is on
Red light flash when errors occurs
Red light flash when out of paper
Paper feed
On/off button for printer
Open the cover of the printer to change paper roll
On/off switch of the terminal
Return to previous menu
DescriptionIndicator and buttonIndicator and buttonIndicator and buttonIndicator and buttonIndicator and buttonIndicator and button
2. Button and Interface
DescriptionDescriptionDescription

Host Interface
Power
Ethernet
interface Serial
interface USB
DK port OTG
Power
Ethernet
interface
Serial port
USB
DK port
OTG
Integrated printer interface
Power input
100M LAN, RJ-45 module connector
RJ11interface, Dual 12V connector cash drawer
RS232, D-SUB 9 PIN
Support USB V2.0/1.1
RJ11interface, Dual 12V connector cash drawer
For system adjusting
Reserved for built-in printer
DescriptionInterface
This interface is only for cash drawer, do not connect with mobile phone or
any other device, otherwise will be damaged.
DK Interface
Warnings
PIN No.
Ground
Cash drawer drive 1
Cash drawer switch
+12V
Cash drawer drive 2
Ground
Signal
Null
Output
Input
Output
Output
Null
Flow
Integrated printer interface
The voltage of the cash drawer should be 12V.
The DK interface is a standard RJ-11, 6 pins socket, output DC 12V / 1A.
Below is the pin assignment:
PIN No.PIN No.PIN No.PIN No.PIN No.PIN No.PIN No.
DescriptionDescription
Signal Flow
Signal Flow
Signal Flow
Signal Flow
Interface Description
DescriptionDescription
Bluetooth Connection
1. Open Bluetooth function.
2. Search other device name.Choose one and press key word.then click pair up .
3. Bluetooth Connected.
the same operate on the other end .
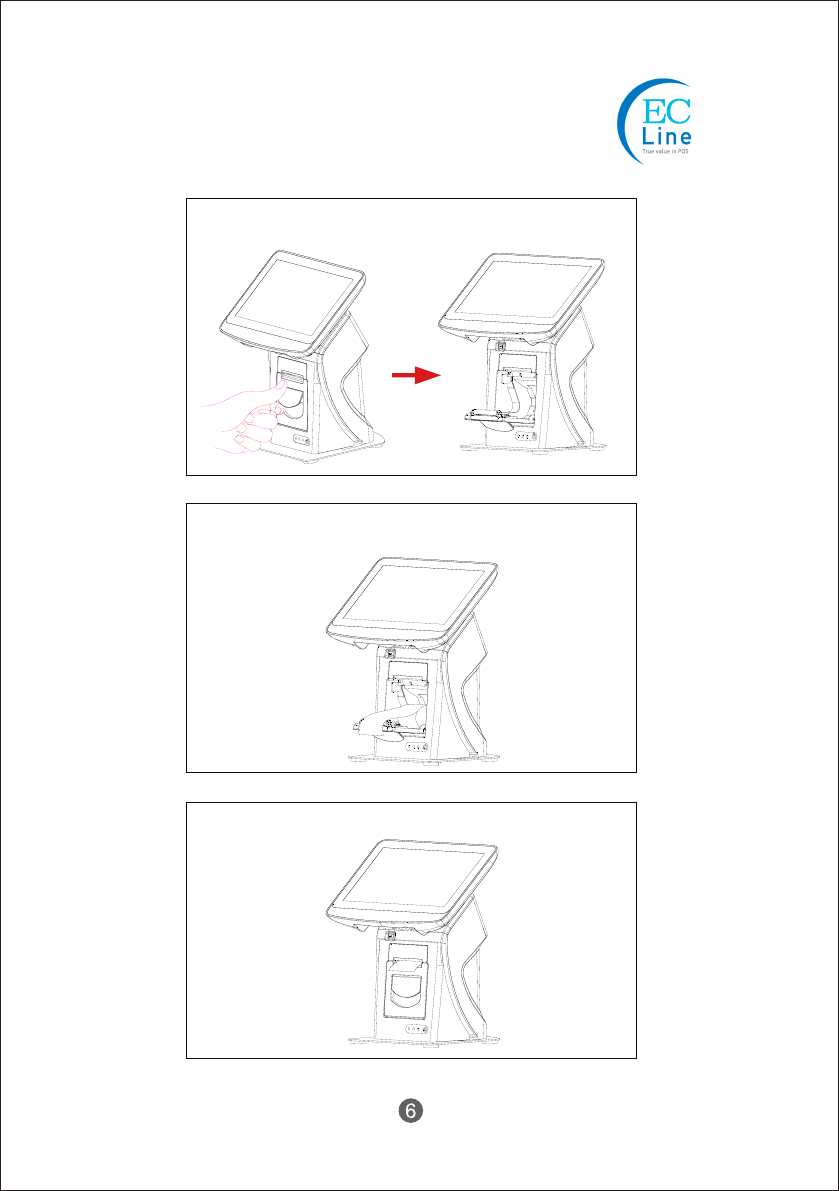
1. Press the cover-open button, open the cover of the printer.
2. Load paper roll into the printer, pull out the paper roll
till it pass gap sensor, complete paper loading.
3. Carefully close the cover.
3. Paper loading
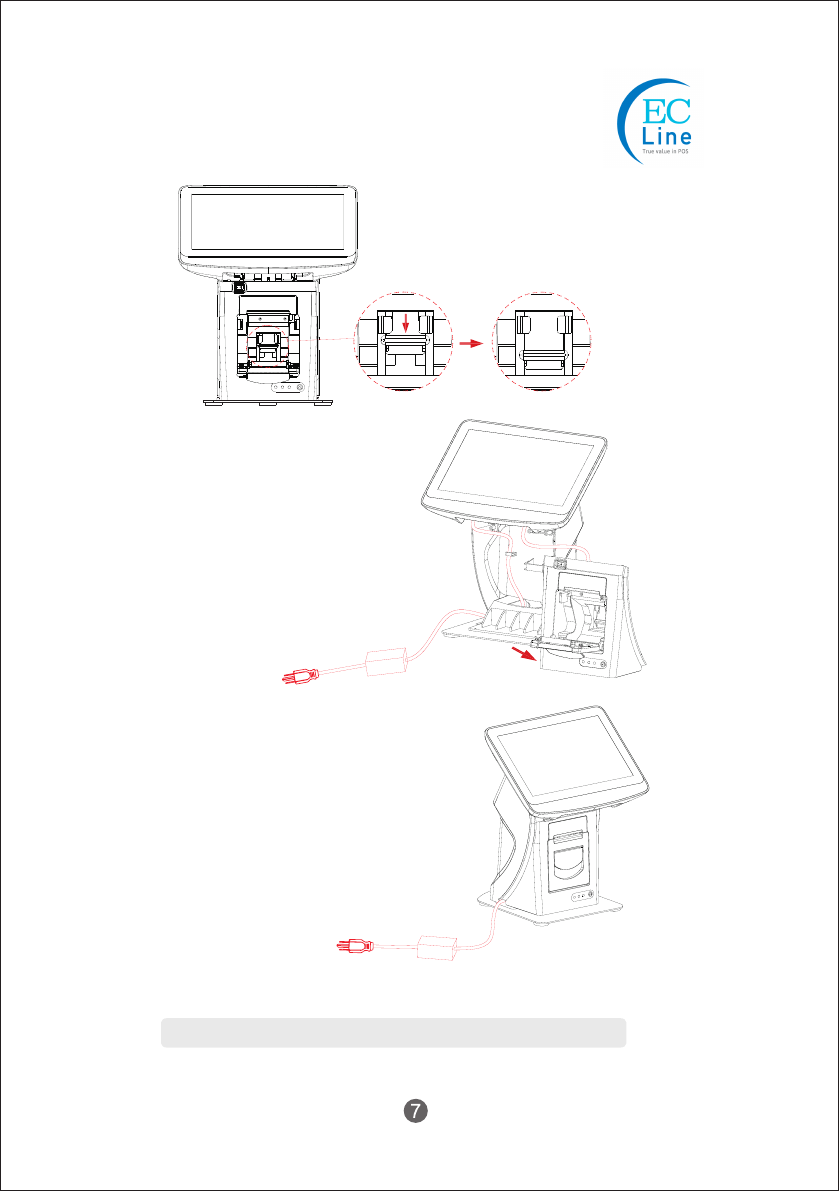
4. Power Cable Connection
1. Pull the printer open button, there is a host
uncover button inside. Drag down the host
uncover button until the printer mechanism and
the host separates into two parts.
Cabling between cables that connected with host and power cable are the same procedure.
2. Place the cable in between the
printer and host, and connect it as
shown on the graphic
3. Place the printer back into
the host, pull up the printer
open button then lock it.
1. To prolong the life of the terminal, make sure that it is well away from heaters, other
sources of extreme heat, sunlight; and the surrounding area is clean, dry, and free of
dust.
2. The device should never be placed near or over a radiator or electromagnetic.
3. The device should use under a stable power voltage connection with an
independent power supply.
4. Do not shake or kick the device.
5. Do not remove or install any integrated device that is not approved from the
manufacturer. Do not relocate the device frequency.
6. Remove the dirt of the case with clean and soft cloth. Do not use any chemical
detergent.
7. Turn off the power immediately whenever problem occurs. Do not maintain and
disassemble the units, contact the authorized person for service.
8. Check the cable connection to make sure they are connected correctly.
9. Disconnect the power when the terminal is not going to use for a period of time.
Can not start device, power indicator off.
1. Check whether power socket works.
2. Check whether power cable plugs tightly.
No noise, the printer can not print.
1. Check whether the printer cover is opened.
Receipt is printed unclearly.
1. Turn off the power, clean up the print head with medical alcohol.
Printer keeps beeping, fail to print.
1. Check whether the cover of printer is closed correctly.
2. Check whether the paper is out.
3. Check whether the LED is still on.
5. Troubleshooting
6. Maintenance
The manual content and version are subject to change without prior notice.
Manufacturer: EC LINE
Thank you very much for using EC Line product
For service, please contact service@ecline.com.hk
www.eclinepos.com