EU3C SCND502E1234 PART 15 CLASS B COMPUTING PERIPHERAL User Manual
EU3C COMPANY LIMITED PART 15 CLASS B COMPUTING PERIPHERAL Users Manual
EU3C >
Users Manual
FilmScan35 I
User Manual
-1-
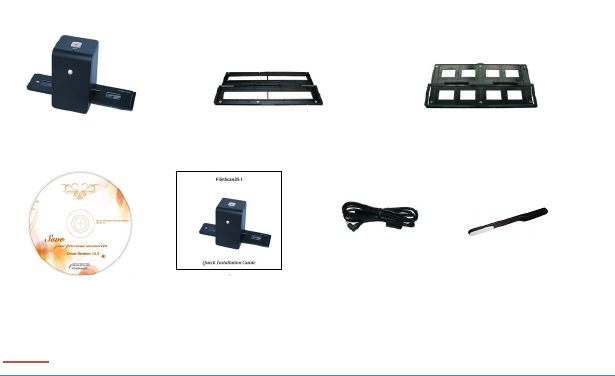
I. UnpackFilmScan35I
NOTE
ThisfilmscannersupportsWindowsXP,Vista/Windows7(32/64bits)viaUSB
2.0only.
Westronglysuggestusingaclean,dry,non‐alcoholcottonswabtoinsertinto
thefilmscannerslotandcleantheglasssurfaceperiodicallytoproducea
clearimage.
MakeSureallnegativefilms,slidefilmsandcovertraysarefreeofdustand
dirtbeforeinsertingintothefilmscan35Iasthismayaffecttheimagequality
whenscanning.
Whencleaningfilms,pleaseuseaprofessionalrecommendedpurgerfroma
photostoretoavoiddamagingoldorpreciousfilms.
FilmScan35ISlideFilmHolderNegativeFilmHolder
CD‐ROMCleanbrush
QuickInstallationGuide USBcable
-2-
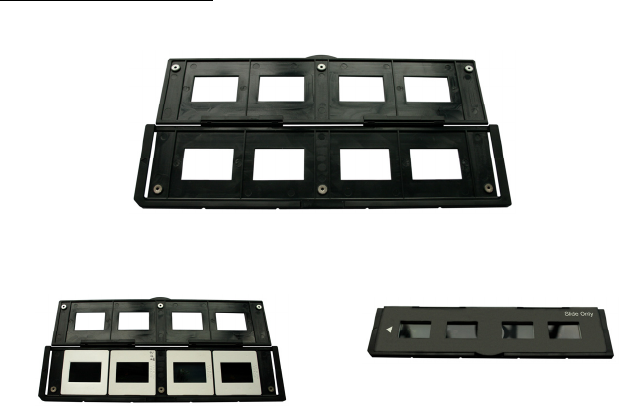
II. Installfilmintothefilmholder
Install the slide into holder:
1. Opentheslideholderasillustrated
2. Putslideintopositiveslideslot 3.Closethefilmholder
-3-
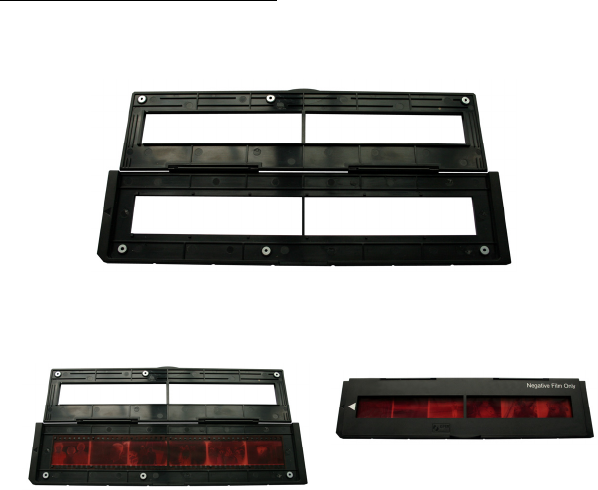
Install the negative film into holder:
1. Openthefilmholderasillustrated
2. Installfilmintonegativefilmslot 3.Closethefilmholder
-4-
NOTE
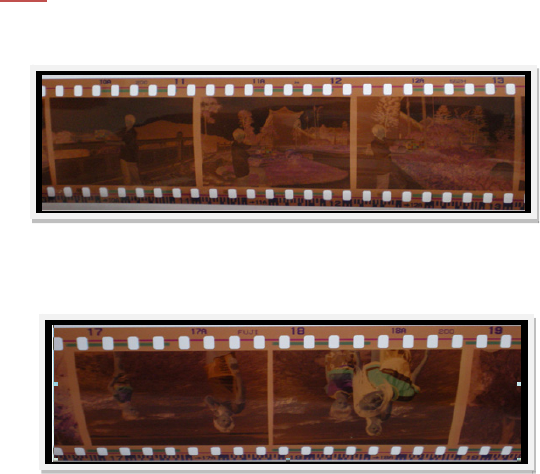
Toavoidmirrorimage,followtheserialnumbers(fromlefttoright)ontopof
filmwheninstallnegativefilmintoholder.
Figure1
Iftheimageisupsidedown[seefig.2],theimagecanbecorrectedby
continuously“Rotate”functioninImageScanToolaftercapture[seefig.3].
Figure2
-5-
Figure3
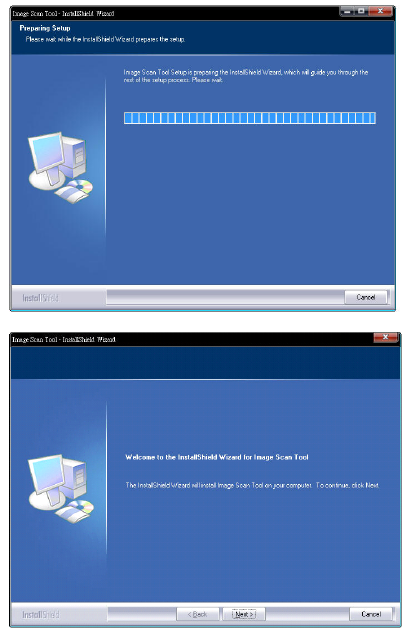
III. Installation
To use FilmScan35 I, please complete
the following installation in advance.
1. Turn on the computer.
2. Insert the installation CD into the
CD-ROM drive and the installation CD
menu will appear.
3. Choose Installation.
-6-
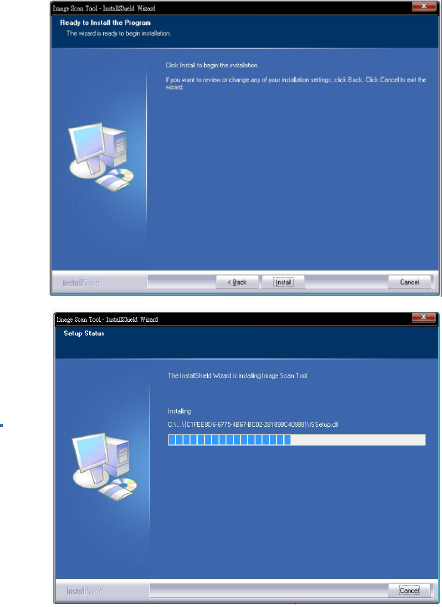
4. Follow the on-screen instructions. (XP,Vista/Windows 7)
-7-
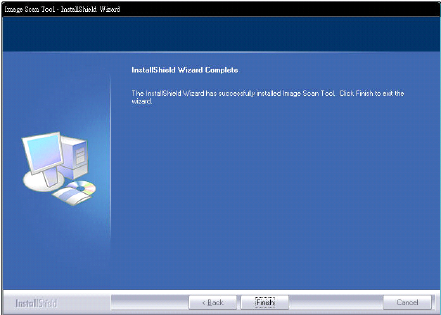
-8-
-9-
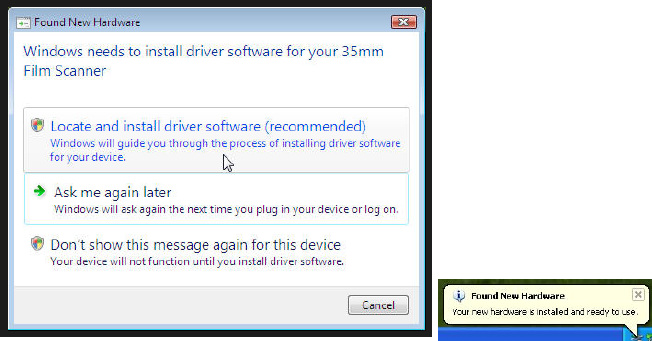
5. After completing software installation, please connect FilmScan35 I to PC. The
New Hardware Wizard will detect a new device if your OS is Vista .
6.Select “Locate and install driver software(recommended)” in Vista OS.
-10-
7.After completing the installation, the filmscanner is ready to start with “Image Scan
Tool” under program files. (XP,Vista/Windows 7) restart is not required, but it is
recommemded to restart your PC after installation/un-installation.
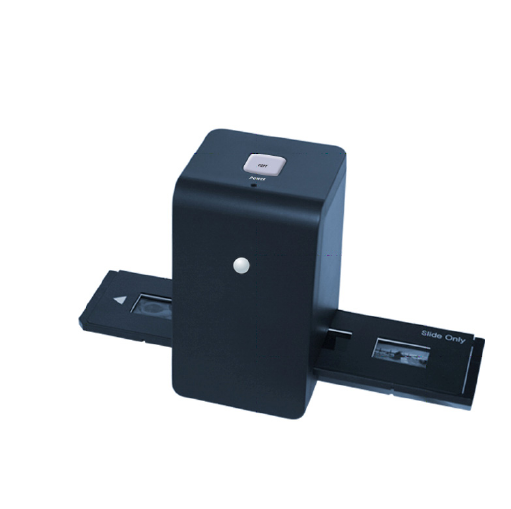
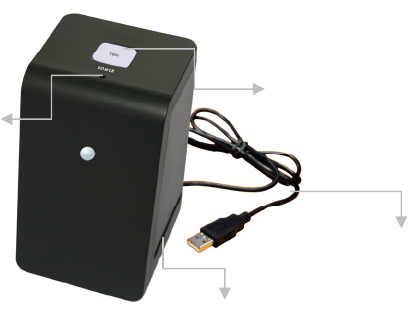
IV. UseFilmScan35I
Copybutton
PowerstausLED
USBCable
FilmSlot
-11-
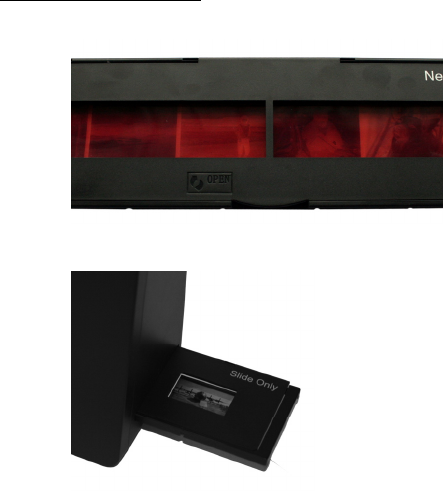
Start to use FilmScan35 I
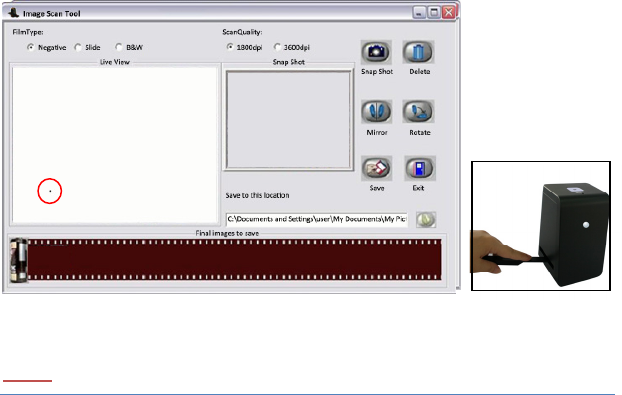
1. PutFilmintofilmslot
2. InserttheslotintoFilmScan35I
-12-
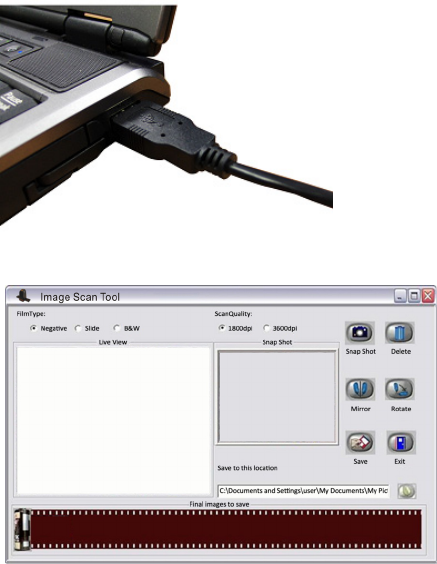
3. ConnectFilmScan35ItoPC:
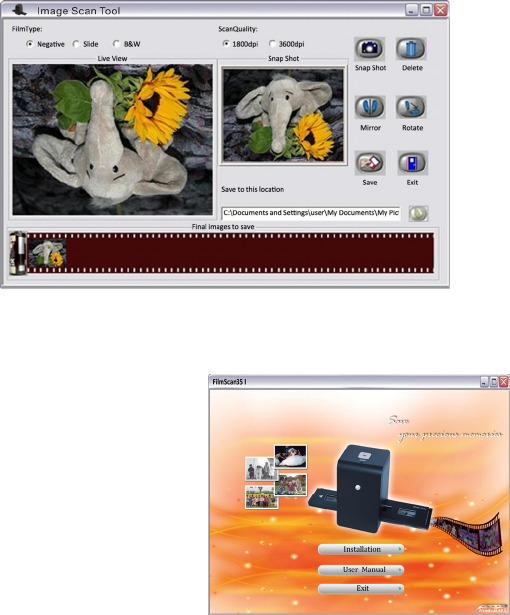
4. Click“ImageScanTool”toenteroperationinterfaceasbelow
-13-
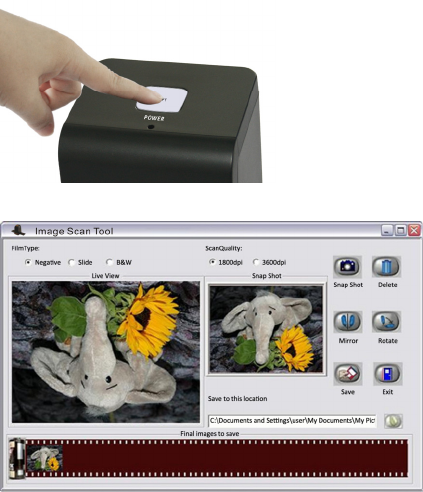
5. Press“Copy”buttontocapturetheimage
6. Processnecessarymodificationbyfunctionbuttonsinrighthandside
-14-
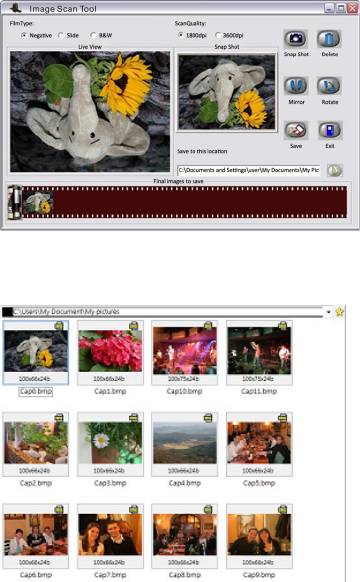
7. SavecapturedimagestoPC
8. GetfinalimagesfromPCforfurtherreviewandedit
-15-
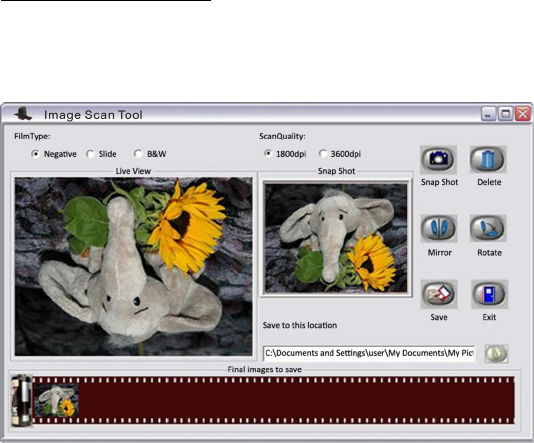
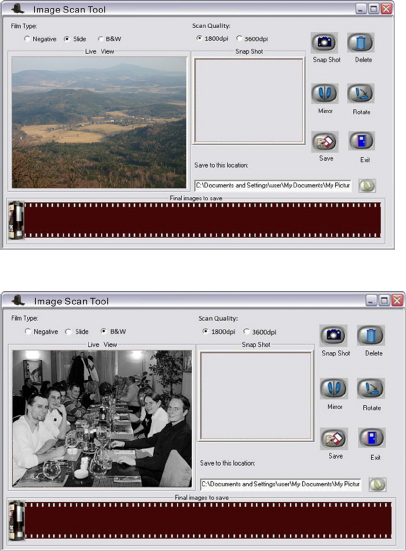
User interface introduction
Whenuserselecteda“Negative”source,theimagein“LiveView”windowwillbeexactlylike
theprocessedresult.
-16-
Ifdeviceappliesaslide,“LiveViewType”willstillshowcolorimageandtheFilmTypewill
remainthesame.
Thisistheliveviewunderblackandwhitenegativeoption.
-17-
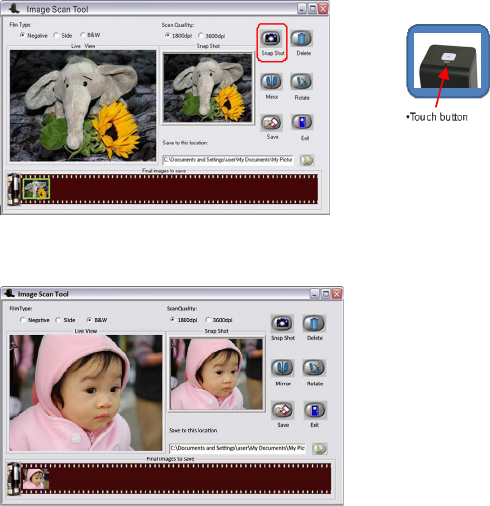
Usercanconvertimagesfromtraditionalfilmtodigitaleitherby“SnapShot”
buttoninImageScanToolorthebuttonontopoffilmscanner.Then,the
captureresultwillappearinthe“SnapShot”and“Finalimagestosave”windozw.
AlloftheeffectinImageScanToolwillbereadyforinstantpreviewin“SnapShot”and“Final
imagestosave”window.
-18-
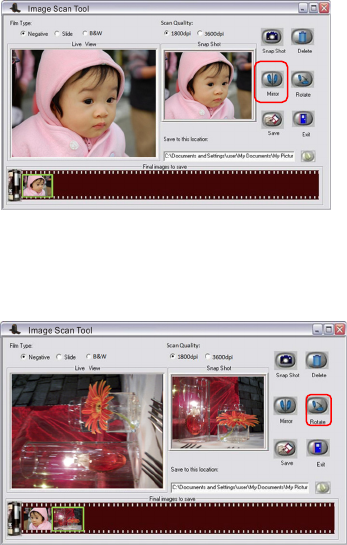
ApplytheMirrorfunctionbypressingthe“Mirror”icon,thatwillflipthe
imageandbeshowninthe“SnapShot”windowaswellasthe“Finalimagestosave”.
OrapplytheRotatefunctionbypressing“Rotate”button,theimagewillberotated90
degreeseachtime.Imagescanbecontinuouslyrotatedafull360degreesoruntildesired.
-19-
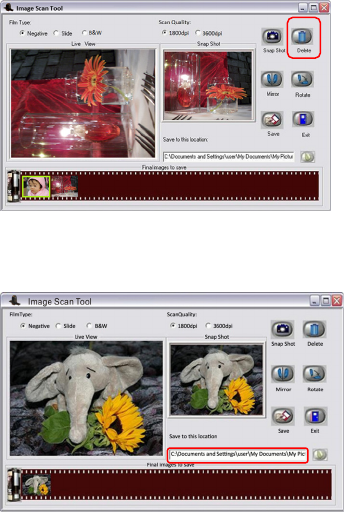
Ifuserwishestodeleteaspecificimagefromcapturedpool,simplyclicktheimageunder
“Finalimagetosave”again,thentheselectedimagecanbedeleteddirectlybyapplyingthe
“Delete”button.
Aftermodification,usercansavetheimagestodefaultlocationat“C:\Documentsand
Settings\Users\MyDocuemtns\MyPictures”.
-20-
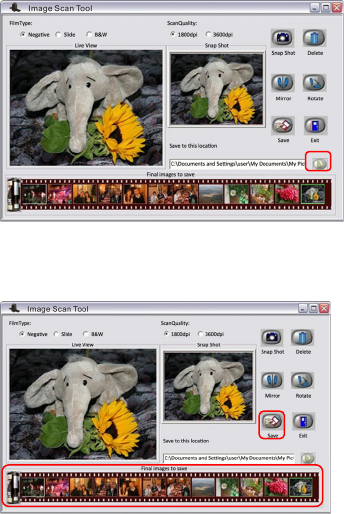
Ordefinepreferablelocationforsavingcapturesimagesbypressingdirectorybutton.
Anotherwindowwillpopoutforusertoselectrequiredlocation.
Oncepress“Save”key,allofcapturesimageswillbesavedintodefinedlocation.The“final
image”savingwindowshallbeemptyafterpressthe“Save”button.
-21-
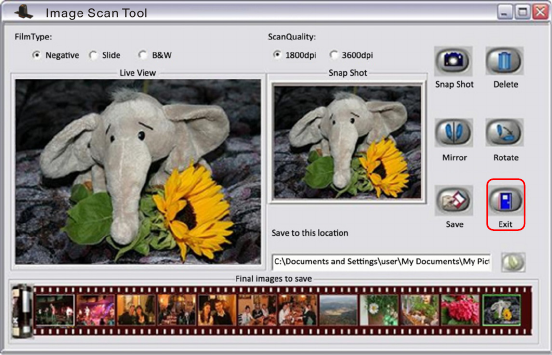
Whencompletedthecapture,usercanpress“Exit”buttontoquitthisImageScanTool.
Then,reviewcapturedimagesorprocessmorefancymodificationwithbundlesoftwarefor
PC.

-22-
V. Specification
Image Sensor: 5 mega CMOS sensor
Lens: F no.= 2.0, 4 Glass elements,
Focus Range: Fixed focus
Exposure Control: Automatic
Color Balance: Automatic
Scan Quality 1,800 dpi /3,600 dpi(SW interpolation)
Data Conversion 10 bits per color channel
Scan Method Single pass
Light Source Back light (3 white LEDs)
Interface: USB 2.0
Power: USB port
Dimensions 90.45x100.6x150.3mm
Weight 0.392kg
Operating Systems Windows XP/ Vista/Windows 7
-23-
VI. Cleandustfromfilmscanner
Please remove the film folder from device when you found any dust on live view window.
Z
Then you can use the clean brush to wipe the dust.
NOTE
Westronglysuggestusingaclean,dry,non‐alcoholcottonswabtocleantheglasssurface
periodicallytoproduceaclearimageduringoperation.
-24-
NOTE
THEMANUFACTURERISNOTRESPONSIBLEFORANYRADIOORTVINTERFERENCECAUSEDBY
UNAUTHORIZEDMODIFICATIONSTOTHISEQUIPMENT.SUCHMODIFICATIONSCOULDVOID
THEUSERAUTHORITYTOOPERATETHEEQUIPMENT.
ThisequipmenthasbeentestedandfoundtocomplywiththelimitsforaClassBdigital
device,pursuanttopart15oftheFCCRules.Theselimitsaredesignedtoprovidereasonable
protectionagainstharmfulinterferenceinaresidentialinstallation.Thisequipment
generates,usesandcanradiateradiofrequencyenergyand,ifnotinstalledandusedin
accordancewiththeinstructions,maycauseharmfulinterferencetoradiocommunications.
However,thereisnoguaranteethatinterferencewillnotoccurinaparticularinstallation.If
thisequipmentdoescauseharmfulinterferencetoradioortelevisionreception,whichcan
bedeterminedbyturningtheequipmentoffandon,theuserisencouragedtotrytocorrect
theinterferencebyoneormoreofthefollowingmeasures:
‐Reorientorrelocatethereceivingantenna.
‐Increasetheseparationbetweentheequipmentandreceiver.
‐Connecttheequipmentintoanoutletonacircuitdifferentfromthattowhichthereceiver
isconnected.
‐Consultthedealeroranexperiencedradio/TVtechnicianforhelp.
‐ Modificationsnotexpresslyapprovedbythemanufacturercouldvoidtheuser'sauthority
tooperatetheequipmentunderFCCrules.