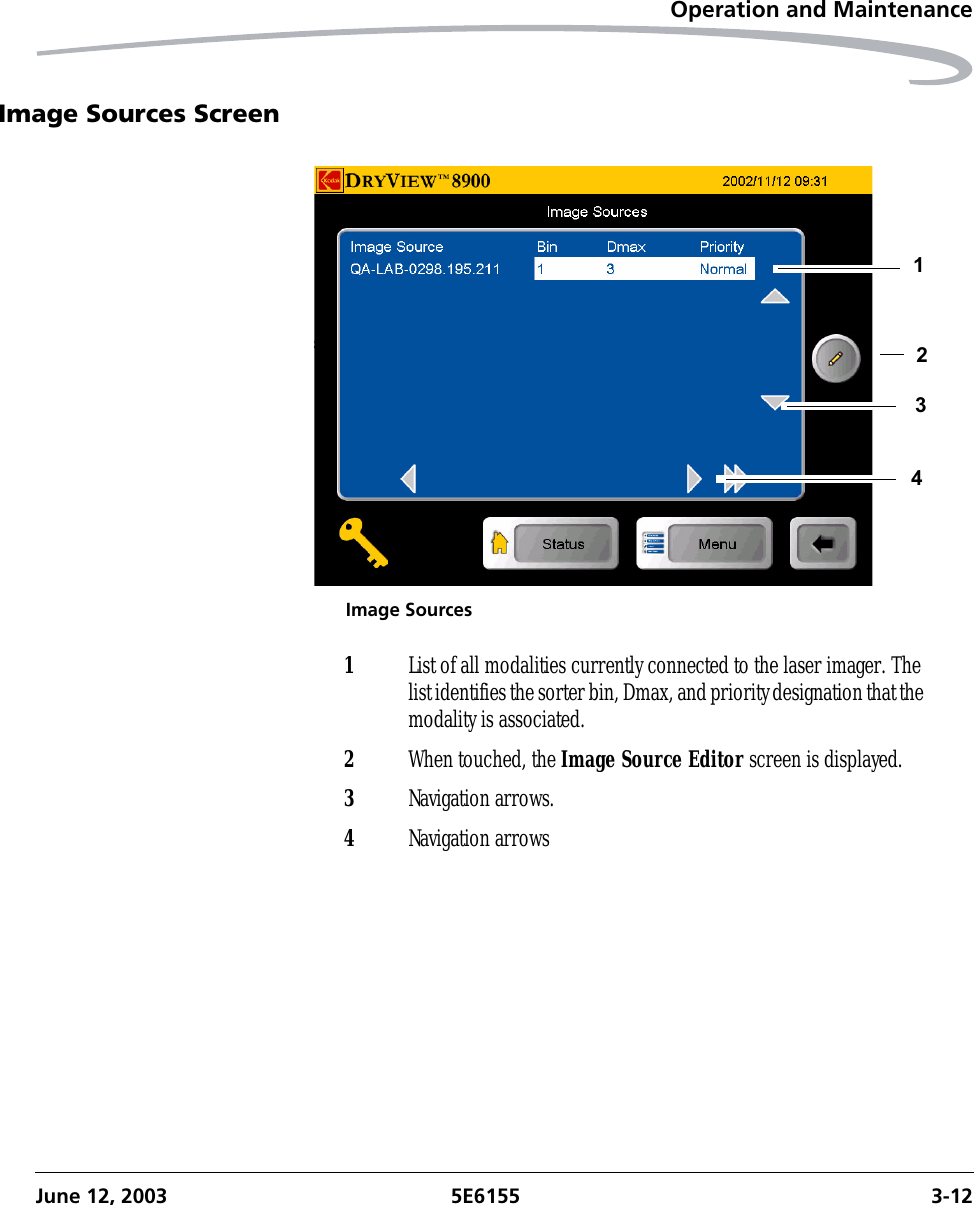
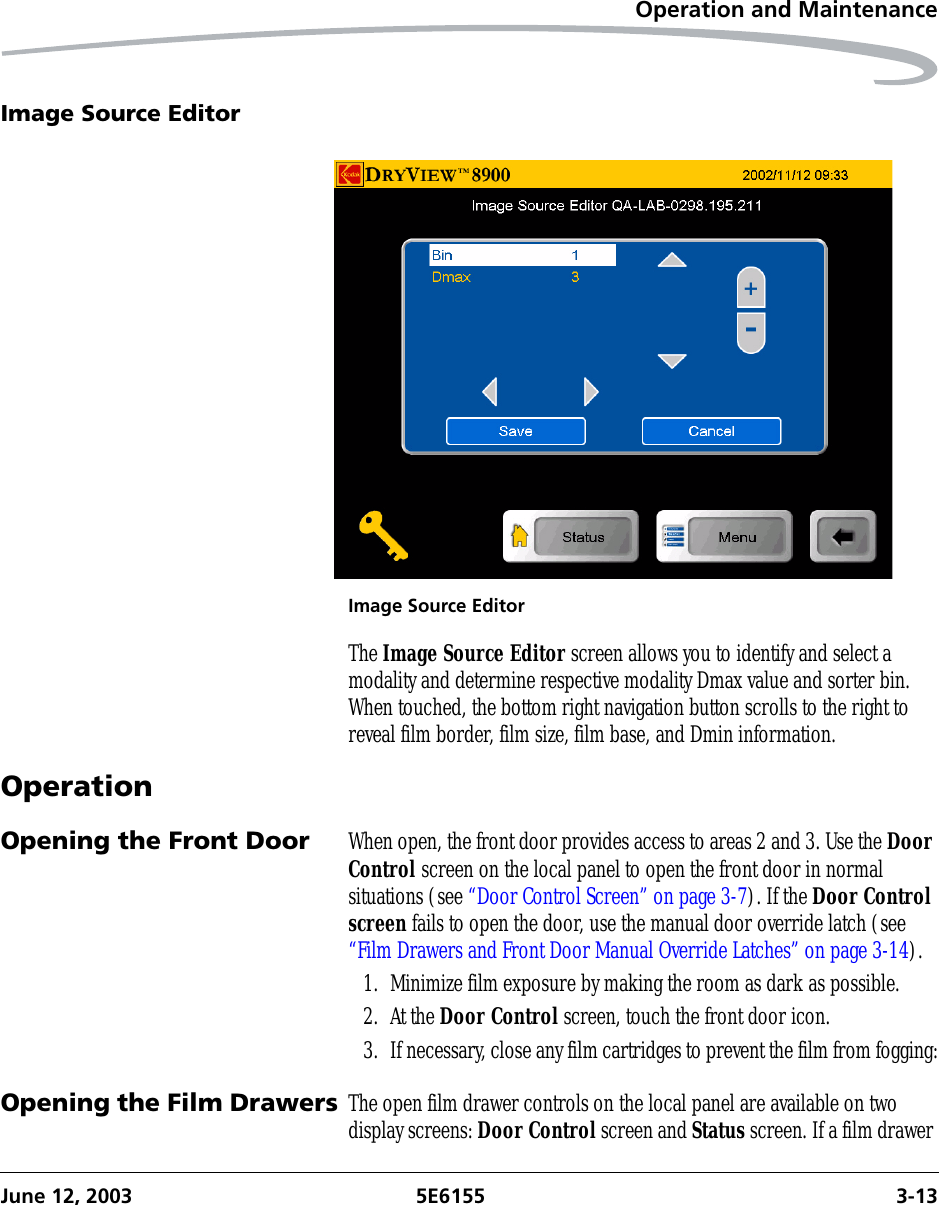
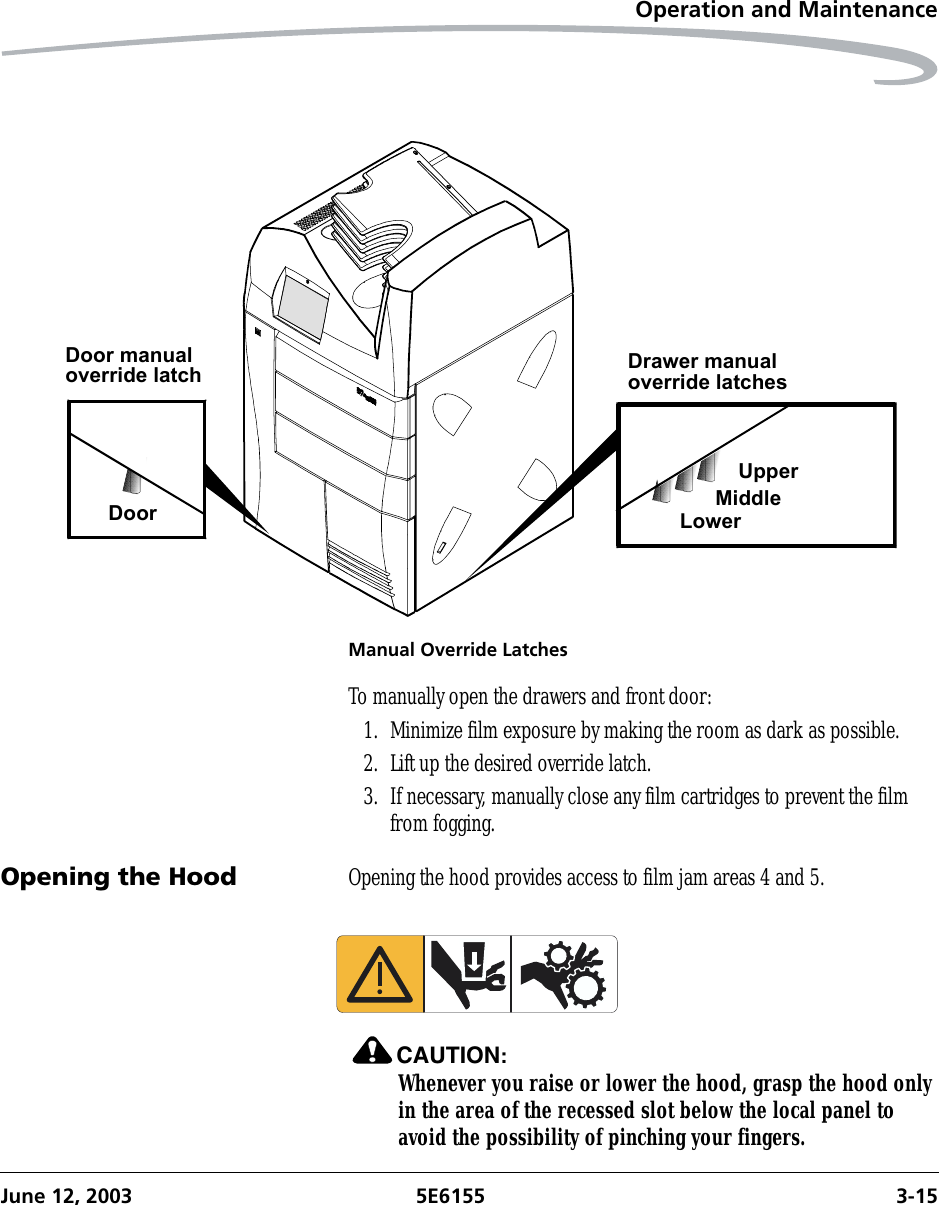
Eastman Kodak 8E1587 Modular 13.56 MHz RF Tag Reader Board User Manual urg 00123
Eastman Kodak Company Modular 13.56 MHz RF Tag Reader Board urg 00123
UserManual.wiki
>
Eastman Kodak
>
8E1587 User Manual
>
manual 2
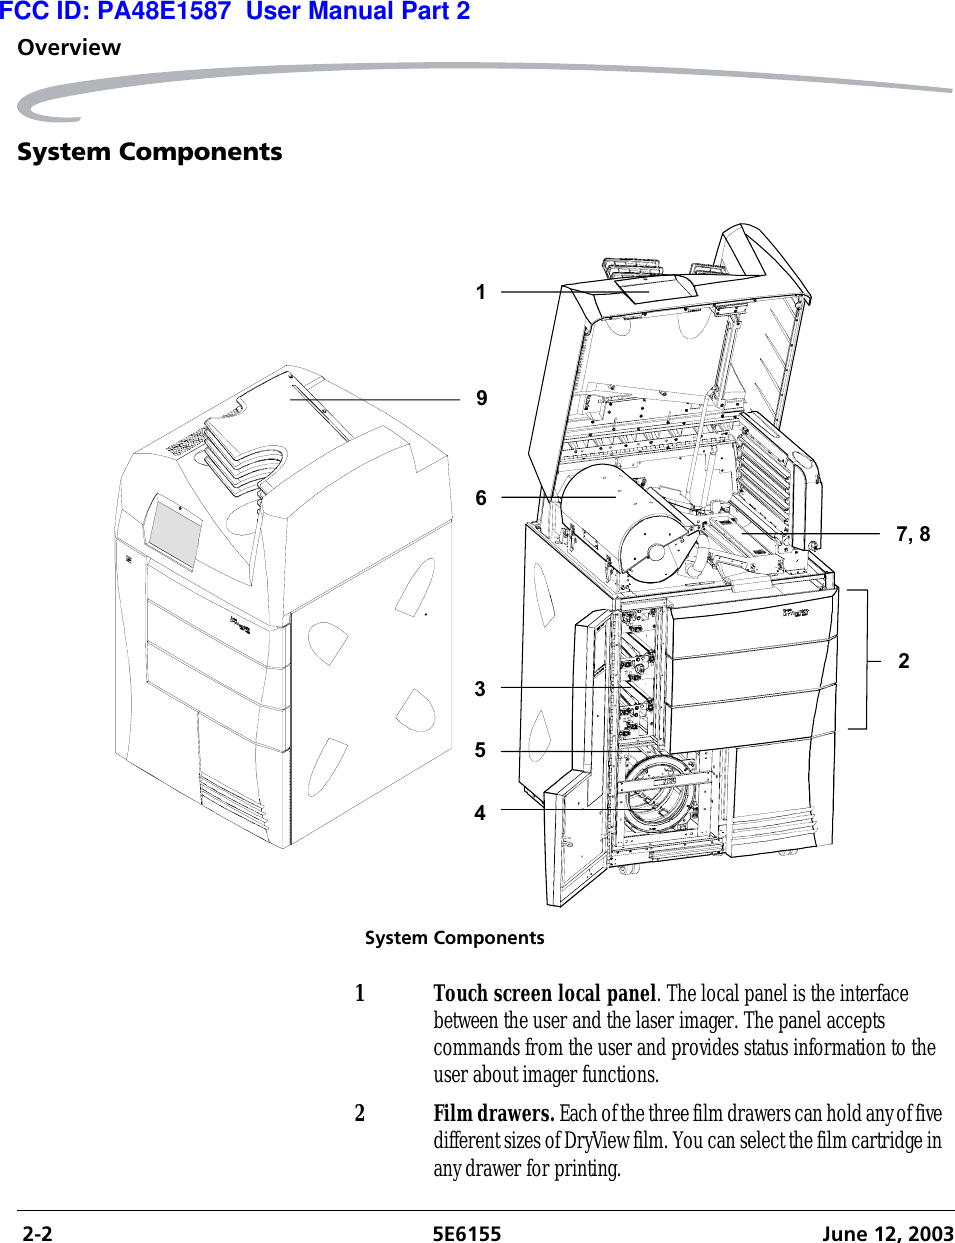
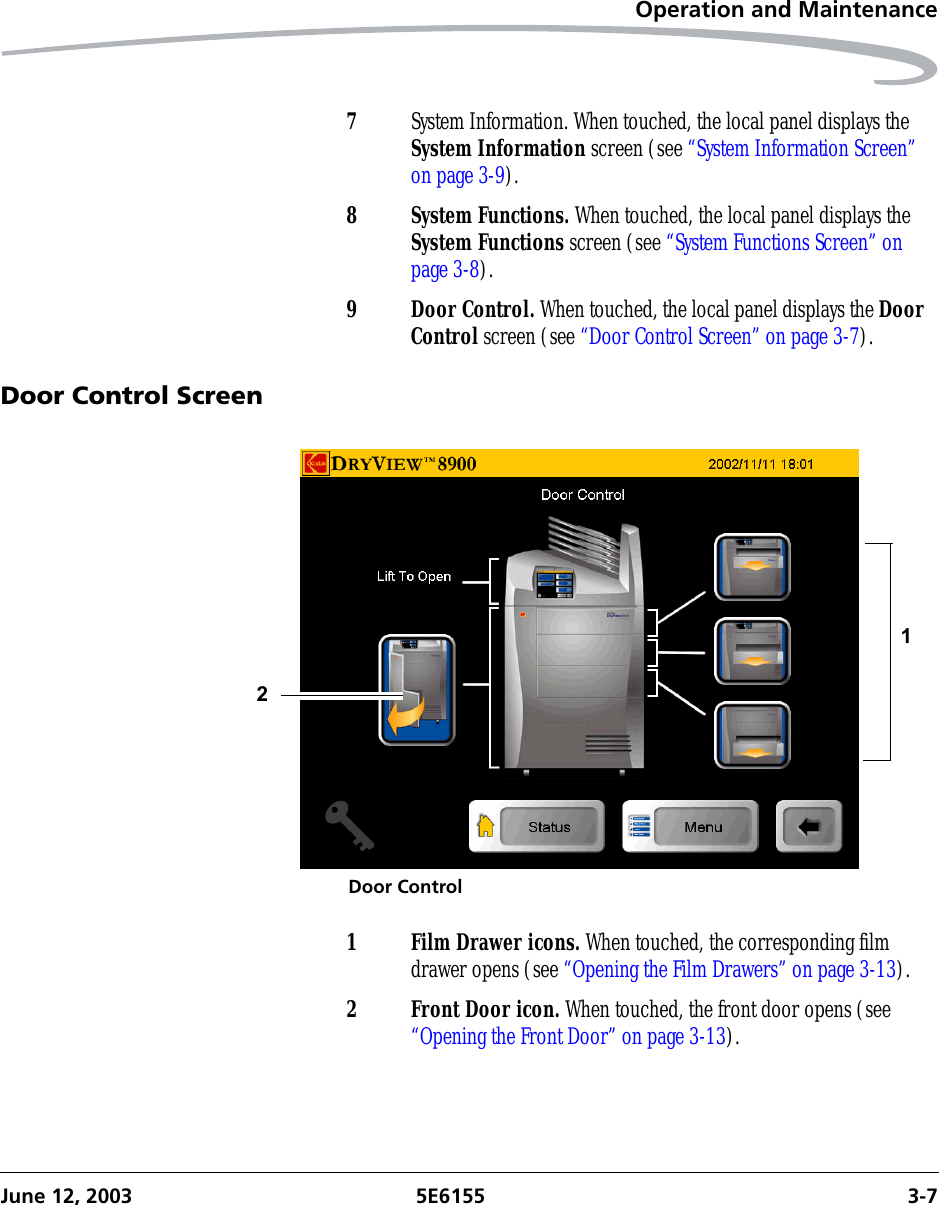
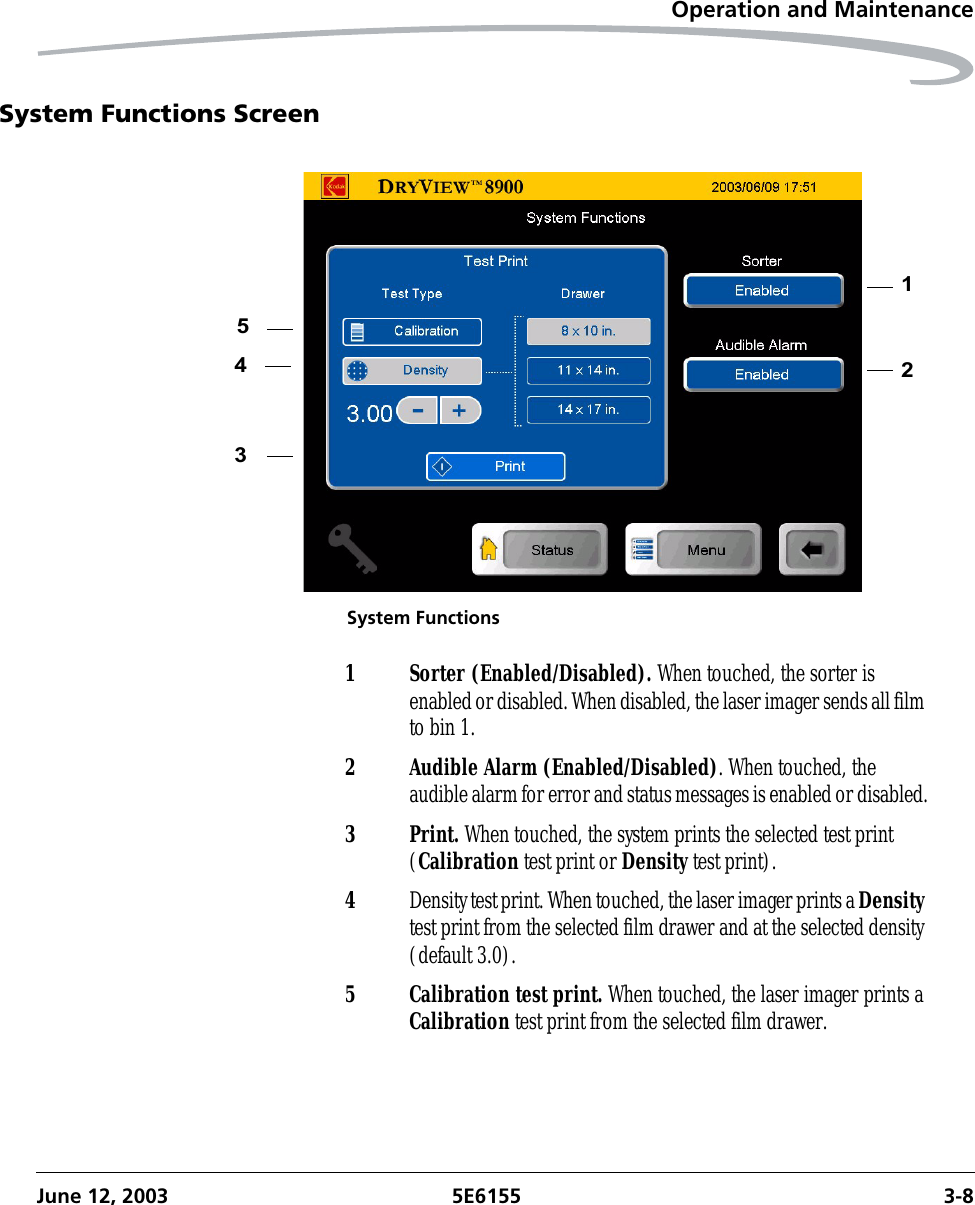
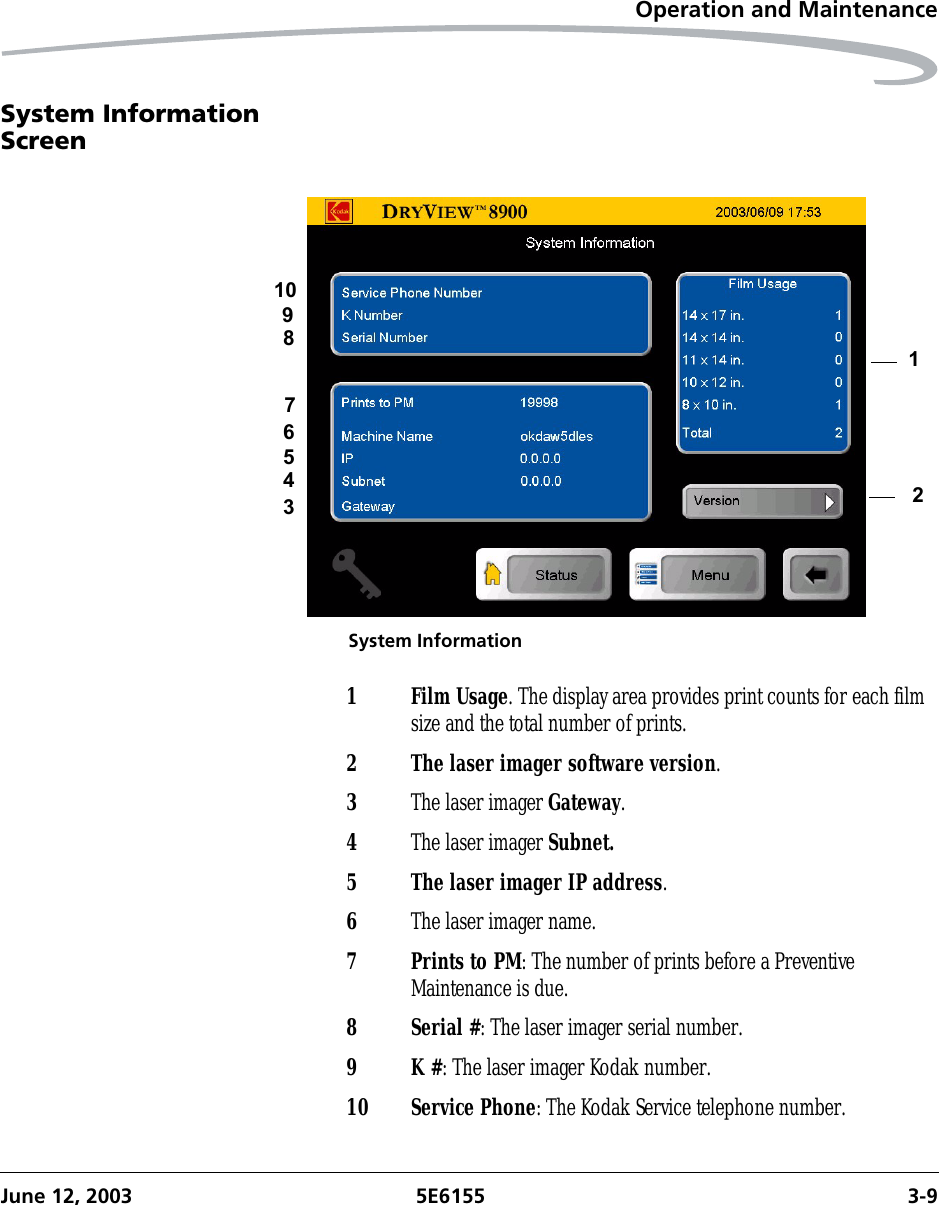
Contents
1.
manual 1
2.
manual 2
3.
manual 3
manual 2
Navigation menu
Upload a User Manual
Namespaces
Wiki Guide
HTML
PDF
Info
Views
User Manual
Discussion / Help
Navigation