Electronic Technologies MARCUM-RT9 MarCum RT-9 User Manual
Electronic Technologies LLC MarCum RT-9
User Manual
RT-9 Quick Start
Marcum has a long tradition of being on the forefront of technology. While some fear
change, we welcome it, as do our loyal customers and they continually contact us in eager
anticipation of the next big thing.
New features require new technology, and New Features + New Technologies = more
complex interface. It’s true-- there is a little more to the RT-9 that just turning it on. And
while operating this system is somewhat more intricate than the basic models out there,
don’t let that stop you from taking advantage of the advanced features. Once you get a feel
for the “flow” of the menu you’ll wonder how you have gotten by without it! The amazing
touch screen allows for many more adjustments and configurations that what is possible on
other units, and all who have used the RT-9 agree that the additional few minutes on the
learning curve are well worth it for what the RT-9 has to offer.
The RT-9 features built-in GPS mapping with Sonar and
Underwater Camera Options. This quick start guide will
get you started using your RT-9 right away, but be sure
to check out the complete user manual on
marcumtech.com.
HIGHLIGHTS
• Built in GPS, Navionics compatible
• Marcum Classic Sonar
• Optional camera
• Digital recording
• Share your videos to social media
• Browse the internet through Wi-Fi
• Download games, music, books or videos for when the fish aren’t biting
• Modular additions allow the use of multiple ducers or cameras
Assembly—
Battery—
Remove the RT-9 tablet from the box, note where the ports are located on
the back. The RAM mount assembly must be screwed to the shuttle and the
cradle.
The RT-9 has an internal lithium battery that will power the tablet for about 2 hours. This
battery is charged through the external 12 volt 9 amp battery by the pogo pins on the cradle.
It is important that you start out each day with a fully charged external battery, and make sure
that the tablet is seated in the cradle properly (charging the external battery during operation
is not recommended).
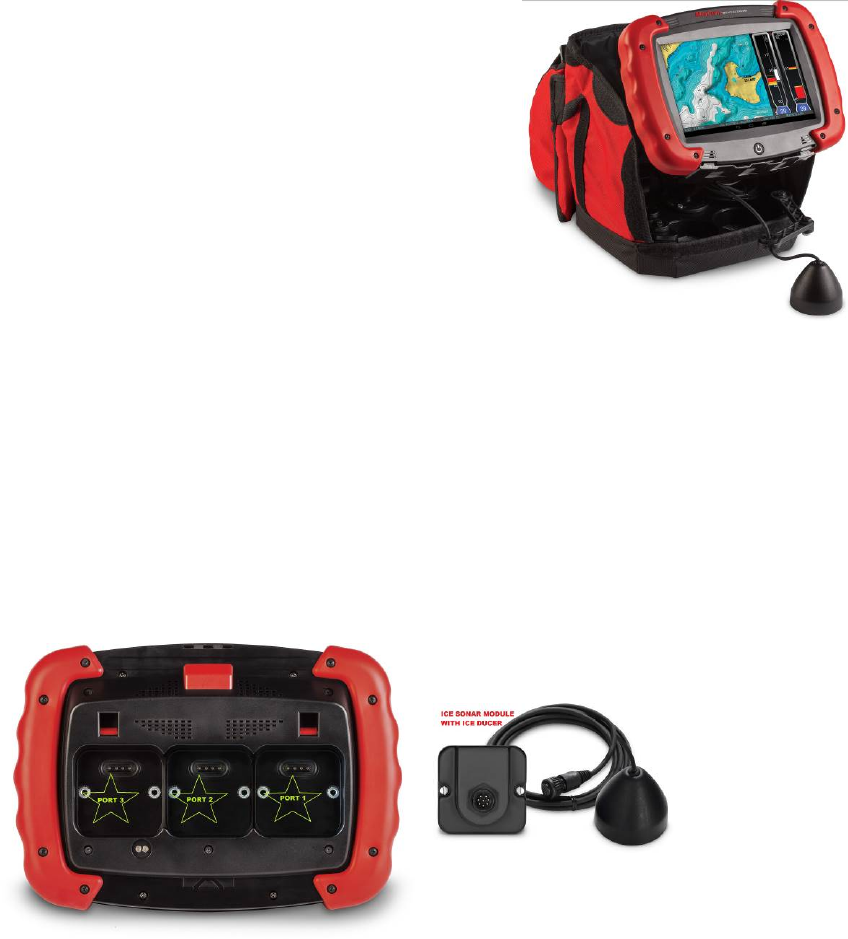
On the back of the tablet there are 3 ports where the Sonar or Camera Modules can
Ports/Modules— be attached. You must have a Sonar or Camera Module in order to have Sonar or
Camera functions. The ports are opened/closed in the General
Settings, and it comes from the factory with Ports 1 and 2 open.
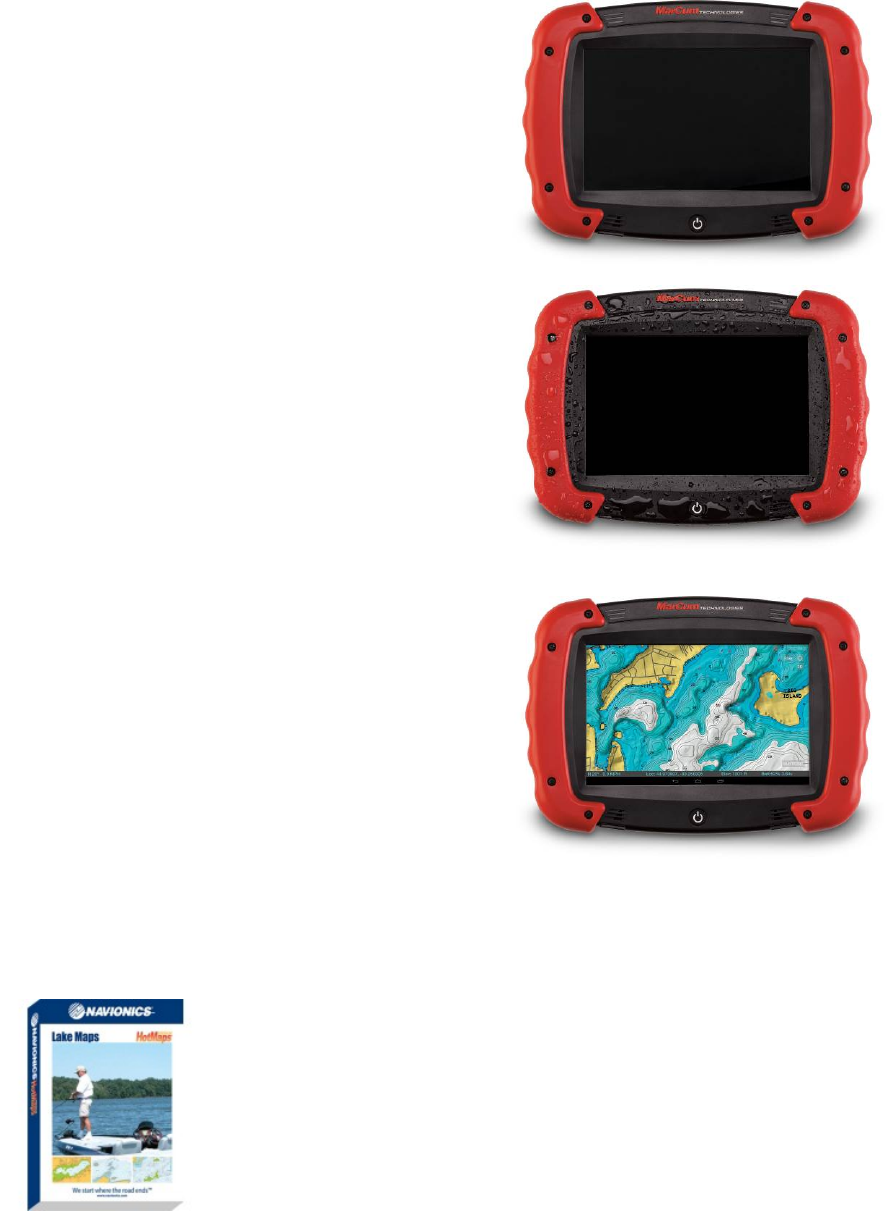
Power on—
RT-9 App—
Panels—
Press the power button, when
the Start screen comes on, slide
the lock button to open the
Home Screen
Once at the Home Screen,press
the RT-9 App button to open the
RT-9. The RT-9 will appear with
Panels 1 and 2 open. The Map
will be on Panel 1, and Panel 2
will be blank.
The RT-9 screen is divided into
panels, and depending on your
preferences you can have 1, 2 , or
3 panels open. The panel number
does not correlate to a port
number—for example, a module
plugged into Port 1 may be
displayed on Panel 1, 2, or 3. It is
possible to have the Sonar signal
displayed on top of the map or
the camera feed
Mapping/Navionics— The first time you use the GPS, it may take up to 10 minutes to lock in a signal.
As soon as the RT-9 App is opened, the process of locking in the satellites has
begun. You must be outdoors for it to locate the satellites. The RT-9 comes
with a basic map installed, but for maximum performance it is suggested that
mapping software be installed, we recommend Navionics version 123xyz. The
map may be oriented for “North Up”, “Free”, or “Follow”. In the upper left
corner, a blinking light indicates search mode. When the light stops blinking it
has locked in your position.
Sonar—
Arguably the most important of all, the Sonar on the RT-9 is unmatched on the ice or off. You
must have a Sonar module in place, and the ducer plugged in to it to have Sonar functions. You
can use any of the ports, but for simplicity put it in the middle [#2] Port at first.
With the Sonar Module in Port 2, display it on panel 2 by first
pressing the “2” located at the bottom of the screen. Now a
window will open, select Sonar. Another window will open, and
you may now select which type of Sonar Display you want
[Graph, Vertical, etc.]. Choose one, and this will now be running
on Panel 2. To adjust the Sonar settings, press “Settings” in the
upper left corner, then select “Sonar”. You will now be able to
adjust all of the Sonar settings, like sensitivity, range,
interference rejection, etc.
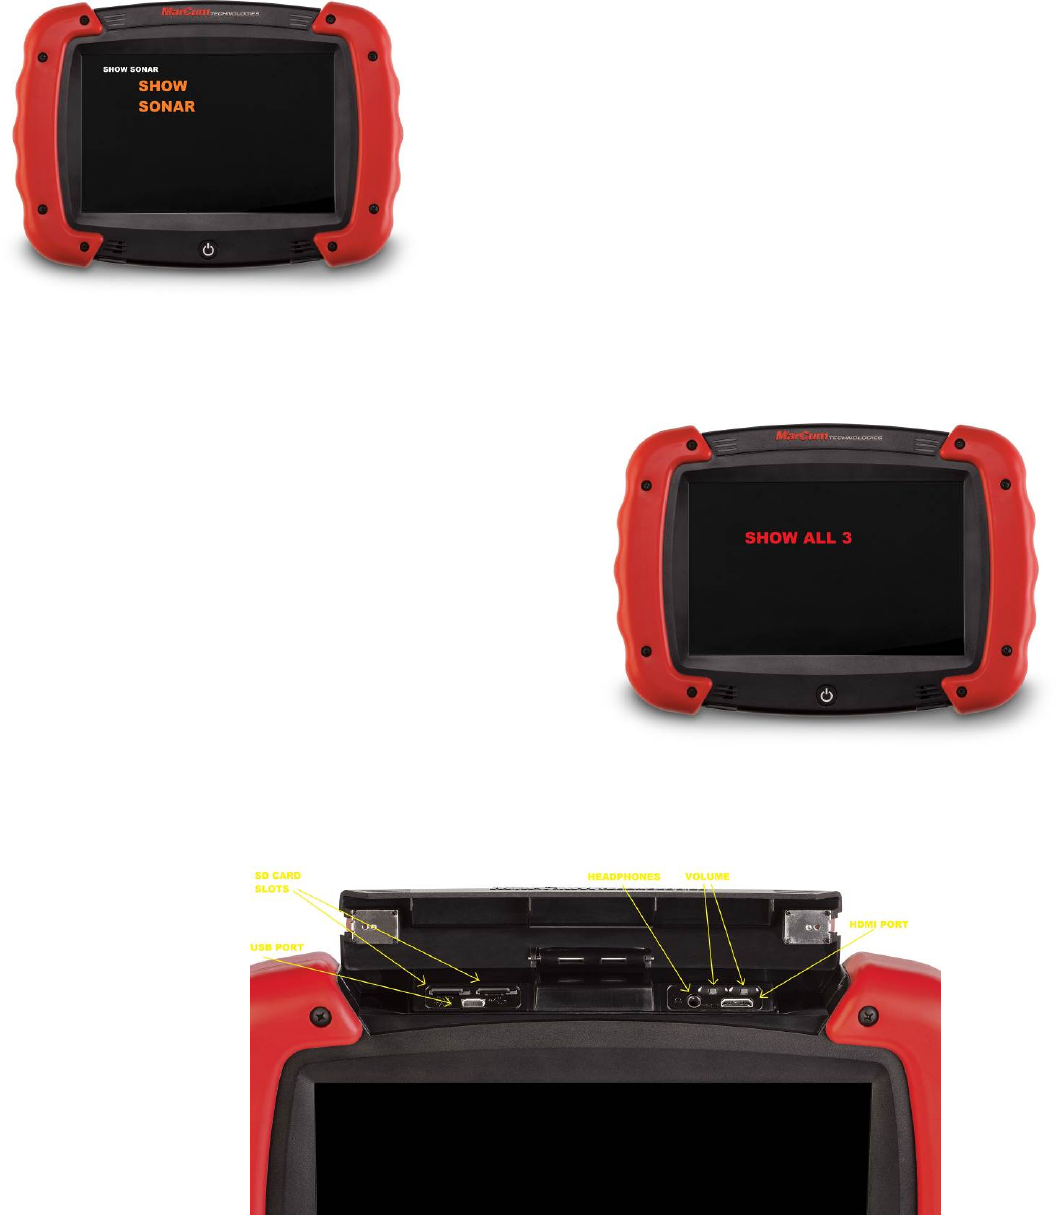
Camera--
The camera module is sold separately, but using one will complete the RT-9 “Trifecta”—now you
can have GPS mapping, sonar, and camera all in one unit. You can even display all three at
once! Remember to have whichever port you have the camera module plugged open.
To adjust the camera settings, first select
“Settings” in the upper right corner, and
then select camera. You can make
recordings at any time by simply pressing
the red “Record” button in the upper right
corner of the display.
Top compartment—
This compartment is opened
by sliding the latches inward.
This is where SD cards for
mapping or recording are
inserted. This is also where
the ports for USB, HDMI, and headphones are located.
The two small buttons are volume control. When the
compartment is closed, slide the latches outward to
secure the hatch.

FCC AND COMPLIANCE
PER FCC 15.19(a)(3) AND (a)(4), THIS DEVICE COMPLIES WITH PART 15 OF THE FCC RULES.
OPERATION IS SUBJECT TO THE FOLLOWING TWO CONDITIONS: (1) THIS DEVICE MAY NOT CAUSE
HARMFUL INTERFERENCE, AND (2) THIS DEVICE MUST ACCEPT ANY INTERFERENCE RECEIVED,
INCLUDING INTERFERENCE THAT MAY CAUSE UNDESIRED OPERATION.
The MarCum RT-9 has been tested and found to comply with the limits for a Class B digital device, pursuant to Part
15 of the FCC rules. These limits are designed to provide reasonable protection against harmful interference in a
residential installation.
This equipment generates, uses, and can radiate radio frequency energy and, if not installed and used in accordance
with the instructions, may cause harmful interference to radio communications.
INDUSTRY CANADA COMPLIANCE
PER RSS-GEN, SECTION 8.4, THIS DEVICE COMPLIES WITH INDUSTRY CANADA'S LICENSE-EXEMPT
RSSs. OPERATION IS SUBJECT TO THE FOLLOWING TWO CONDITIONS: (1) THIS DEVICE MAY NOT
CAUSE INTERFERENCE, AND (2) THIS DEVICE MUST ACCEPT ANY INTERFERENCE, INCLUDING
INTERFERENCE THAT MAY CAUSE UNDESIRED OPERATION OF THE DEVICE.
CONFORMITÉ AUX NORMES D’INDUSTRIE CANADA
SELON LA SECTION 8.4 DU RSS-GEN, CET APPAREIL EST CONFORME A L’EXEMPT DE LICENCE RSS
D’INDUSTRIE CANADA. SON FONCTIONNEMENT EST SOUMIS AUX DEUX CONDITIONS SUIVANTES:
(1) CET APPAREIL NE DOIT PAS CAUSER D’INTERFÉRENCE ET (2) CET APPAREIL DOIT ACCEPTER
TOUTES LES INTERFÉRENCES, Y COMPRIS LES INTERFÉRENCES POUVANT ENTRAÎNER UN
FONCTIONNEMENT INDÉSIRABLE.
NOTE:
ELECTRONIC TECHNOLOGIES, LLC. IS NOT RESPONSIBLE FOR ANY CHANGES OR MODIFICATIONS
NOT EXPRESSLY APPROVED BY ELECTRONIC TECHNOLOGIES, LLC. IN WRITING. SUCH
UNAPPROVED MODIFICATIONS COULD VOID THE USER’S AUTHORITY TO OPERATE THE
EQUIPMENT.
There is no guarantee that interference will not occur in a particular installation. If this equipment does cause
harmful interference to radio or television reception, which can be determined by turning the equipment off and on,
the user is encouraged to try to correct the interference by one or more of the following measures:
•
Reorient or relocate the RT-9.
•
Increase the separation between the RT-9 and receiver.
•
Consult the dealer or an experienced radio/TV technician for help.