Electronics LS2P Self Contained Door Lock, LS2P User Manual Manual
International Electronics Inc. Self Contained Door Lock, LS2P Manual
UserManual.wiki
>
Electronics
>
LS2P User Manual
Manual
Navigation menu
Upload a User Manual
Namespaces
Wiki Guide
HTML
PDF
Info
Views
User Manual
Discussion / Help
Navigation

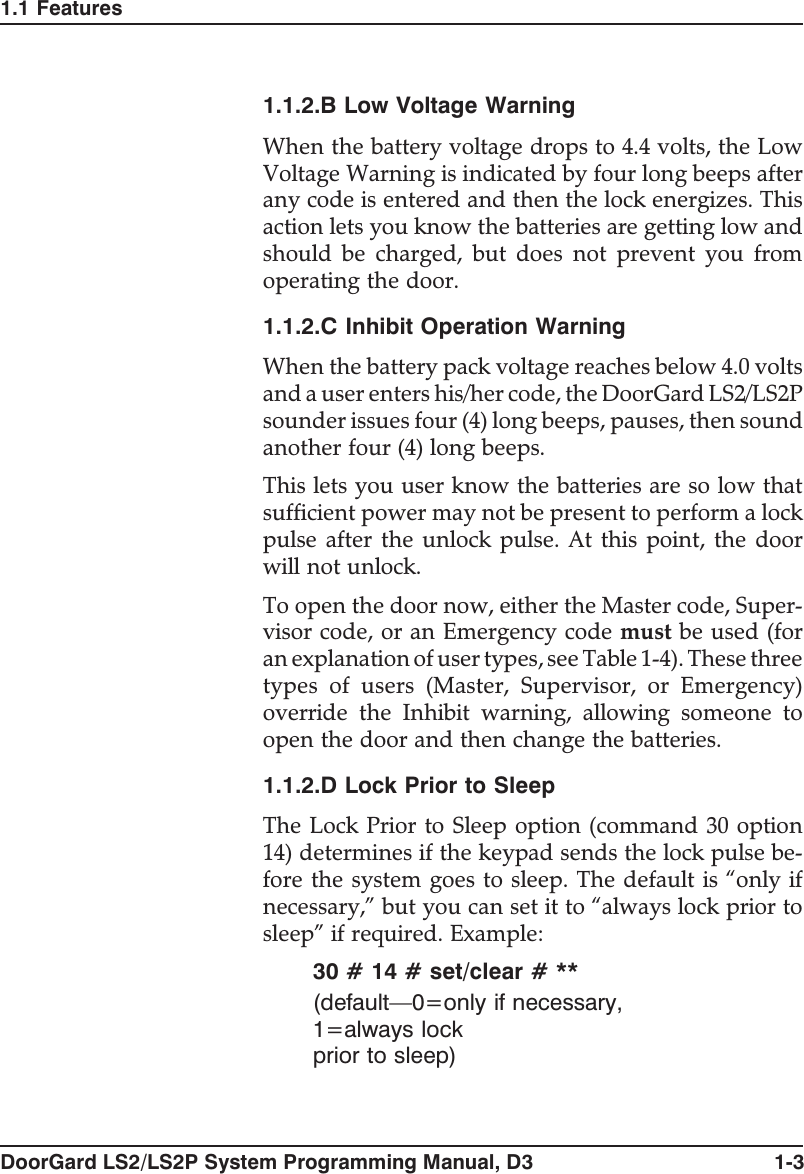

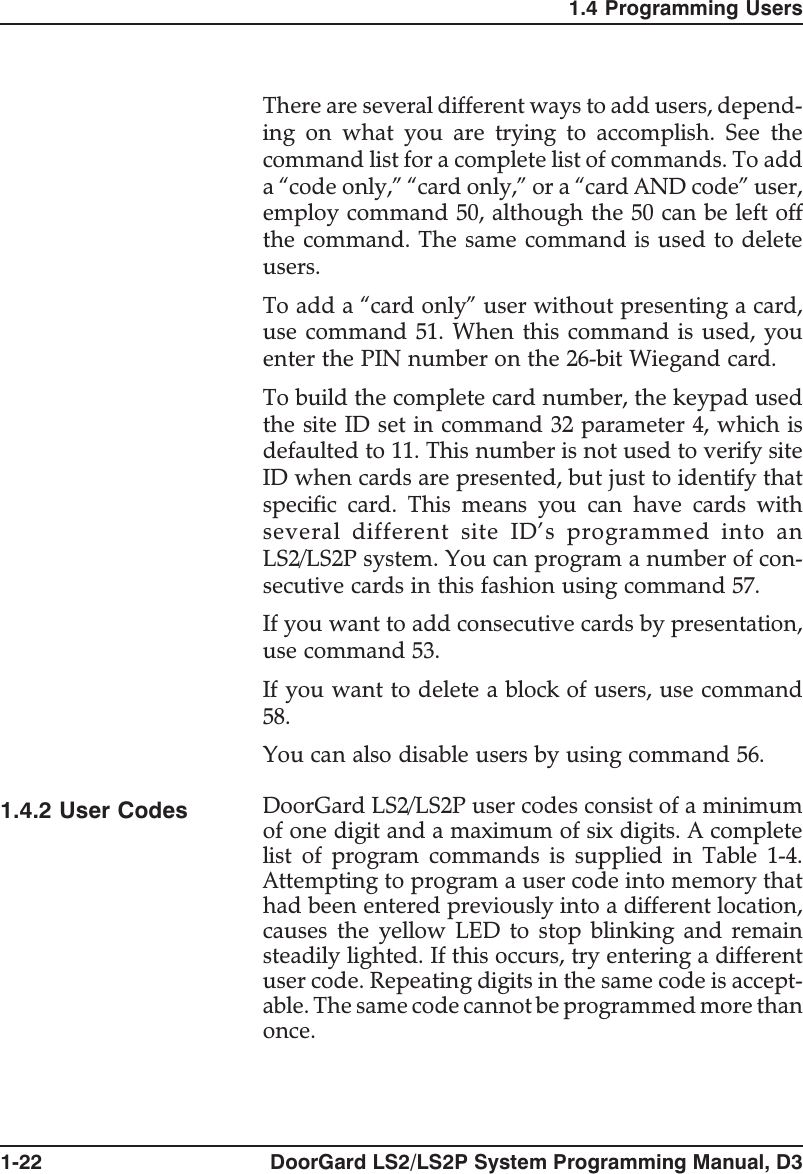
![the Lockout By Group “operand” in Command 32parameter 7 to one of the following values:•0 = lockout all other groups•1=lockoutjustthisgroup•2 = lockout higher numbered groups•3 = lockout lower numbered groupsWhen a “lockout just this group” is activated, all usersin that group are locked out with the exception of thoseusers programmed as Lockout Codes. This allows theuser who initiated the lockout to cancel the lockout.1.3.6 Error LockoutOptionThe LS2/LS2P system supports error lockout, which isalways enabled and cannot be disabled. When thelockout threshold (set with command 32 parameter 0,defaults to 3) is reached, the keypad locks up and theyellow LED turns on (it does not process codes) untilthe lockout duration expires (lockout duration is setwith command 32 parameter 1, defaults to 10 seconds).Example:32 # parameter # value # **[0, error lockout threshold1-50 (default=3)1, error lockout duration1-255 (default=10)]When the lockout duration is activated, the yellowLED on turns on for 5 seconds and shuts off. Whenthe keypad wakes up and error lockout is still active,the LED turns back on for an additional 5 seconds.This is to preserve battery life.The count is cleared after a correct code is entered orif the DoorGard LS2/LS2P system goes to sleep.1.3.7 Turning AudioKeypress FeedbackON/OFFThe Audio Keypress Feedback command enables thesounder to beep once for each key press. This featureprovides an audio acknowledgment that a particularkey was pressed hard enough for the system to un-derstand. The factory-shipped default setting is ON,butitcanbetoggledONandOFFasdesiredusing1.3 Programming Keypad Options and Parameters1-10 DoorGard LS2/LS2P System Programming Manual, D3](https://usermanual.wiki/Electronics/LS2P/User-Guide-302195-Page-20.png)
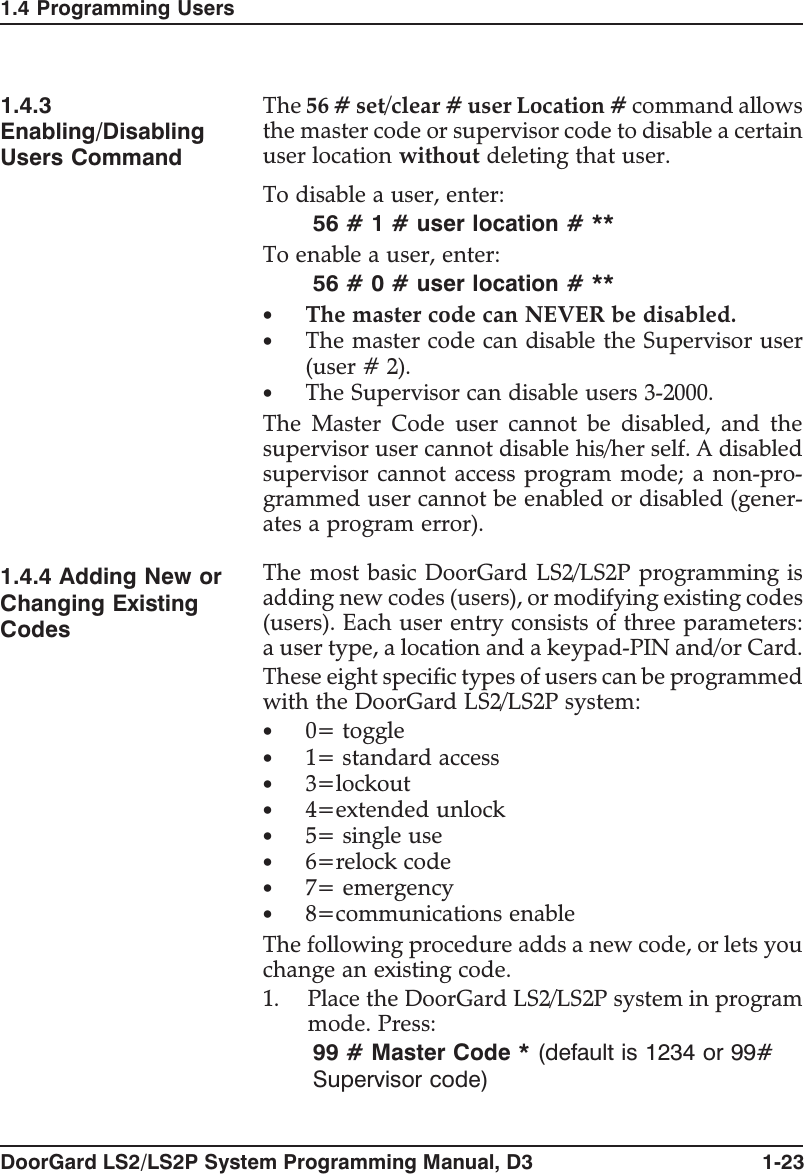
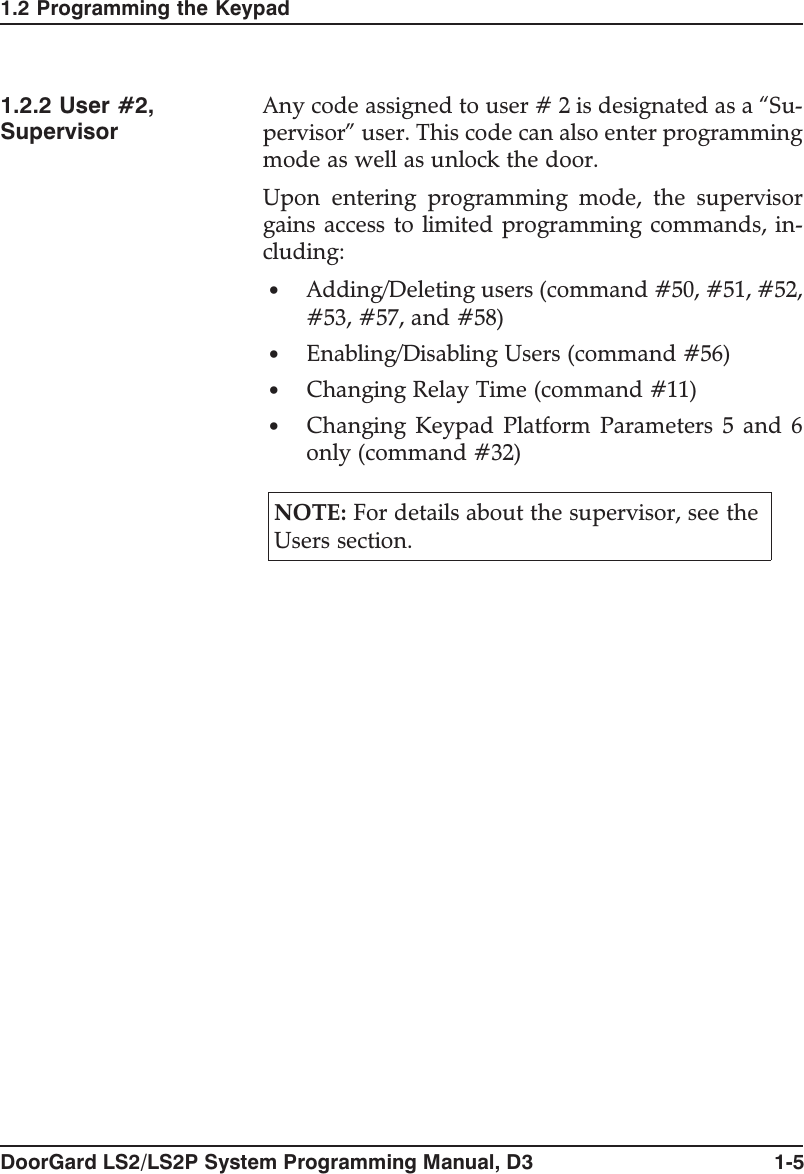
![A.M. (turn back one hour). When set to Europeanformat, daylight savings begins on the last Sunday inMarch at 2:00 A.M. (turn back one hour) and ends onthe last Sunday in October at 2:00 A.M. (turn back onehour).1.3.10.D Leap YearThe LS2/LS2P system supports leap year; on the ap-propriate leap years February 29th is a valid date.1.3.10.E Time/Date SetThe time is set using command 41 and is in 24-hourformat. The date is set using command 42. NOTE: TheTime/Date is not reset with the default command. Toset the Time, enter:41 # hhmm # 0 # **[hhmm=hour and minute (24-hour format)]To set the Date, enter:42 # mmddyy # dow # **[mmddyy=month, day, yeardow=day of week (1=Sunday,2=Monday, etc.)]1.3.11 TransactionEvent LogUp to 2000 transaction log events can be stored in theLS2/LS2P system. See command 73 in the commandlist (Table 1-5) for the list of transactions. To delete thetransaction log, use command 76. Transactions canonly be viewed if you are using the PDA software andHubmanager Pro 4.x.1.3.12CommunicationsThe LS2/LS2P system supports IRDA communications.The IRDA transceiver is located on the right-hand sideof the keypad faceplate, and is used to communicatewith a PDA device with IEI PDA software for use inHubmanager Pro 4.x.1.3 Programming Keypad Options and ParametersDoorGard LS2/LS2P System Programming Manual, D3 1-15](https://usermanual.wiki/Electronics/LS2P/User-Guide-302195-Page-25.png)
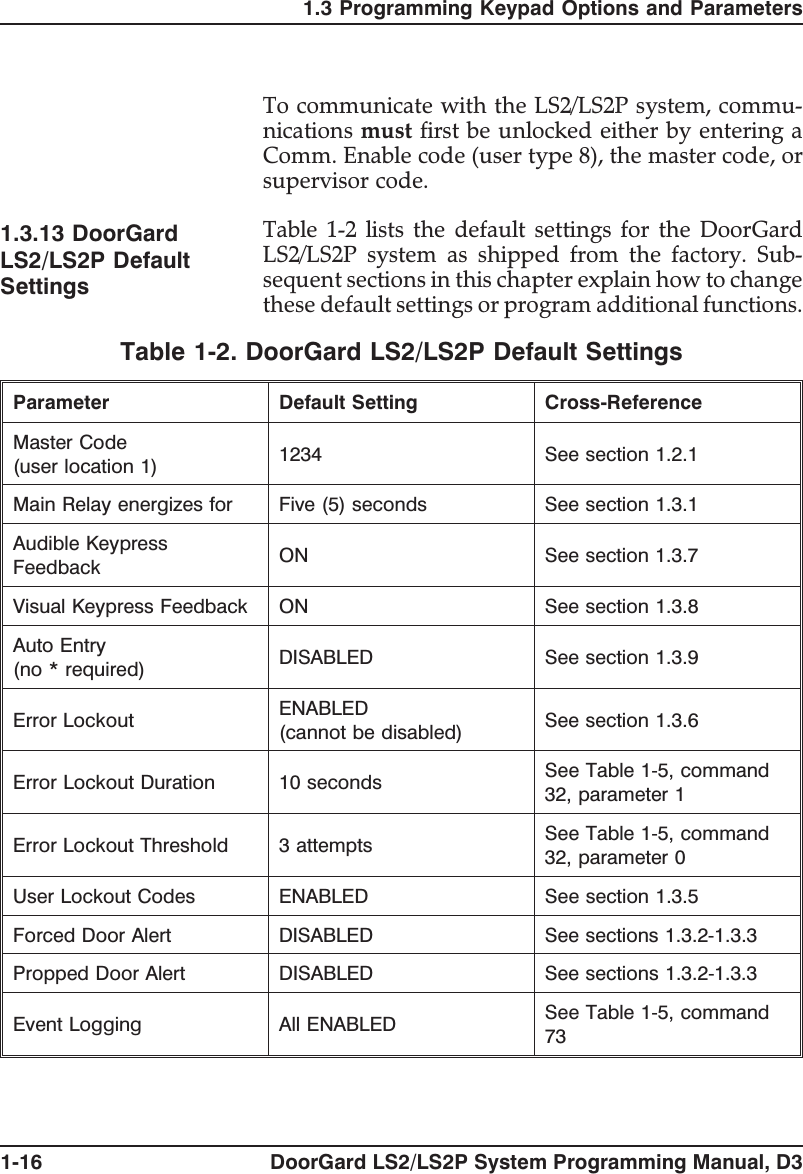

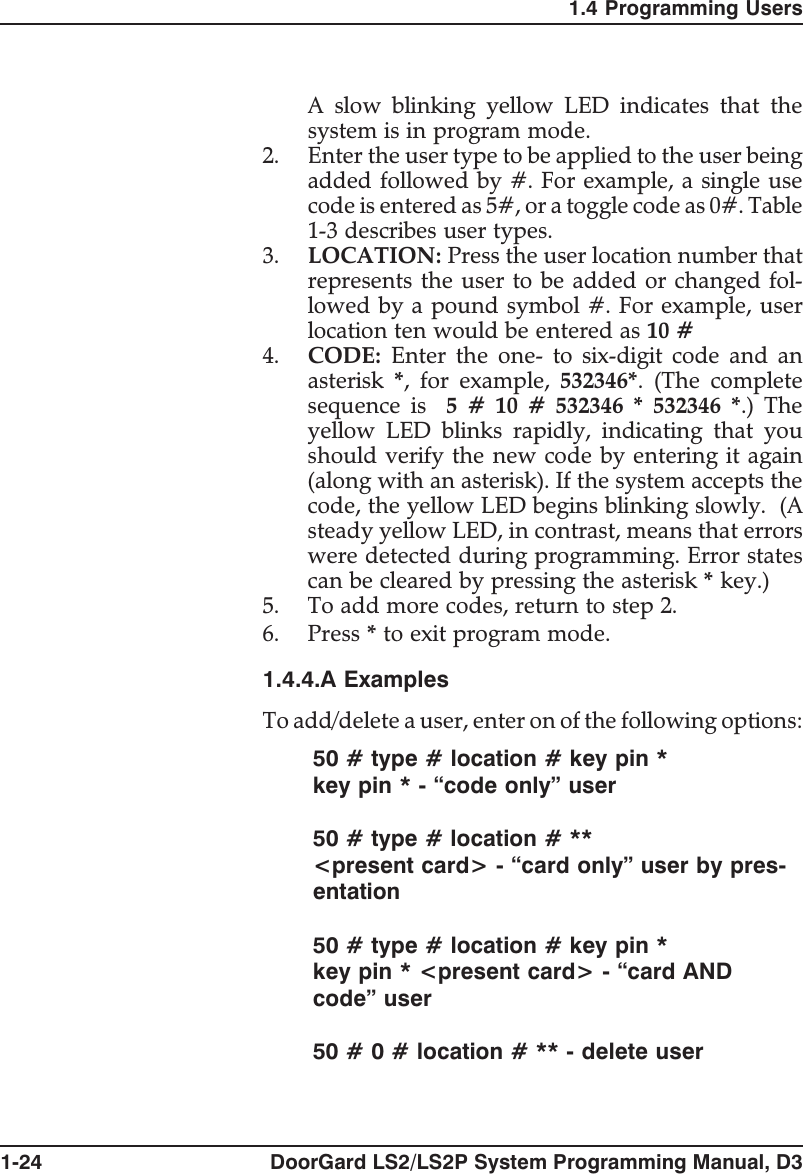
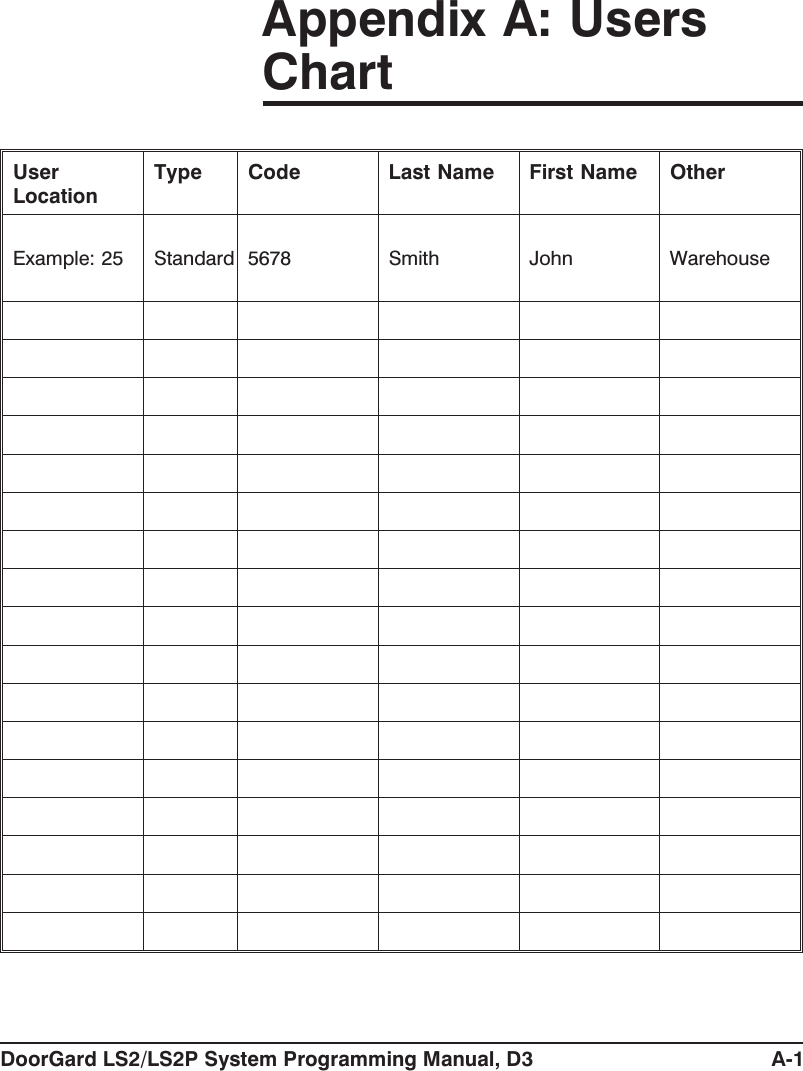
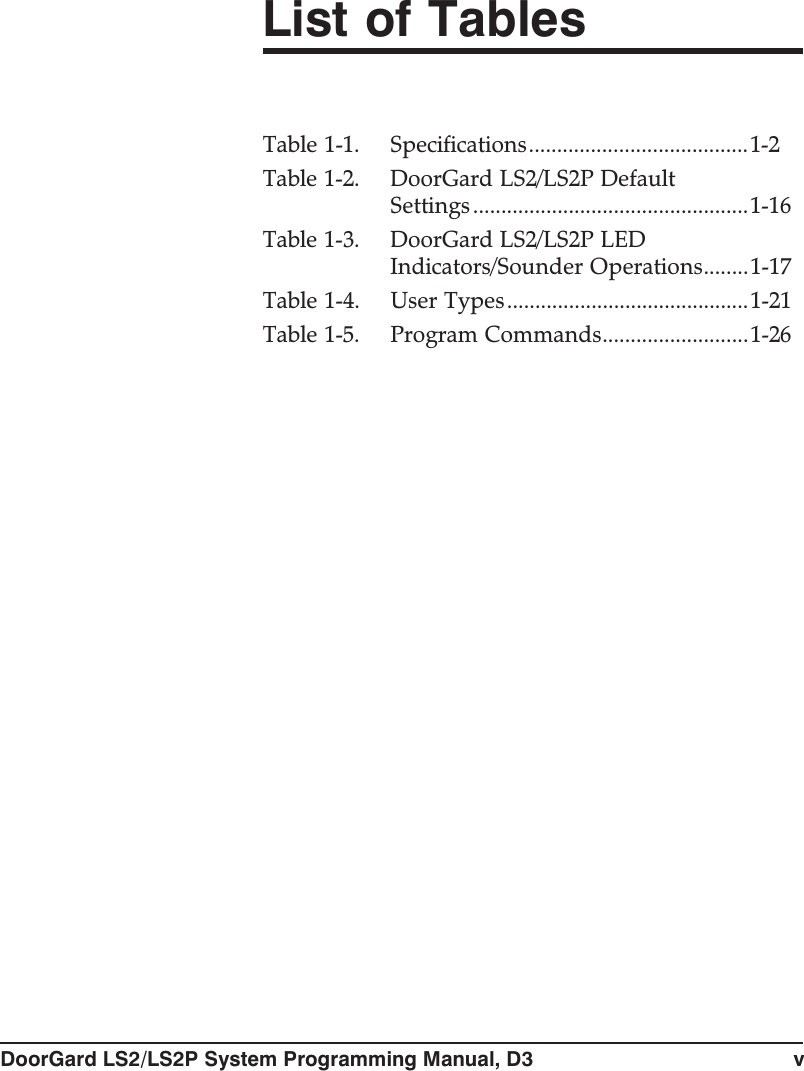
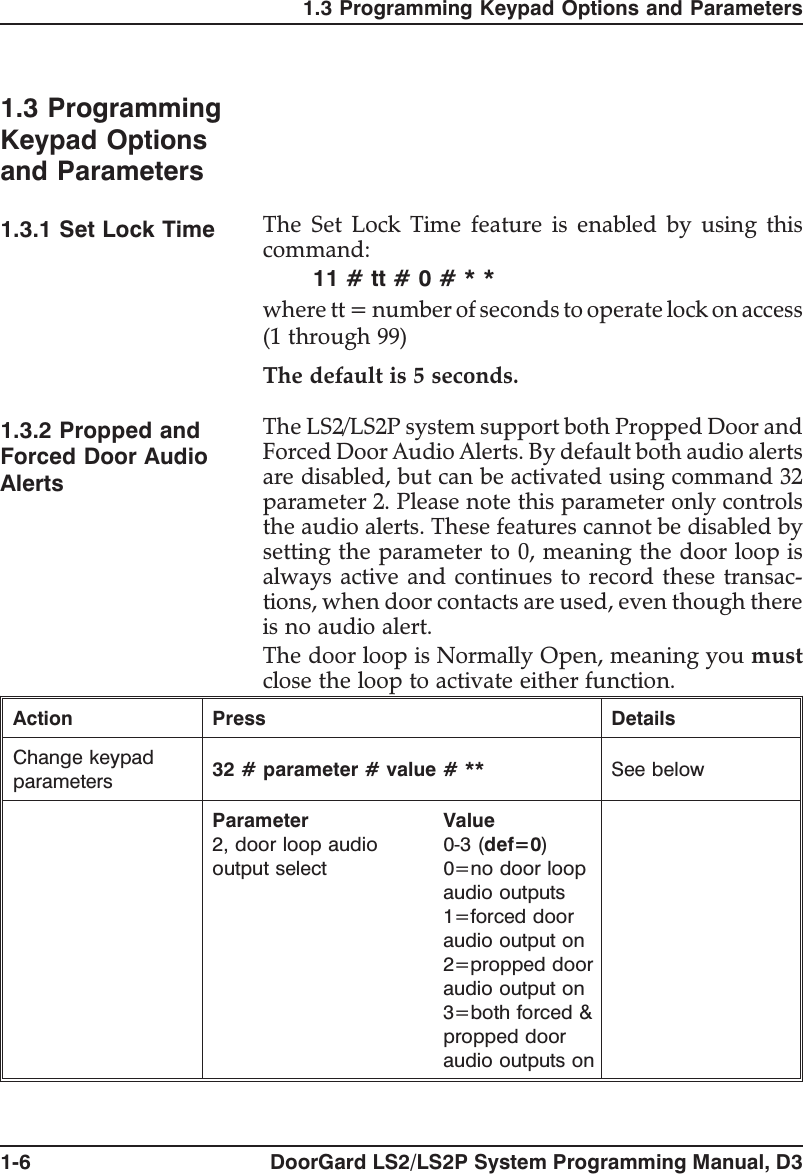
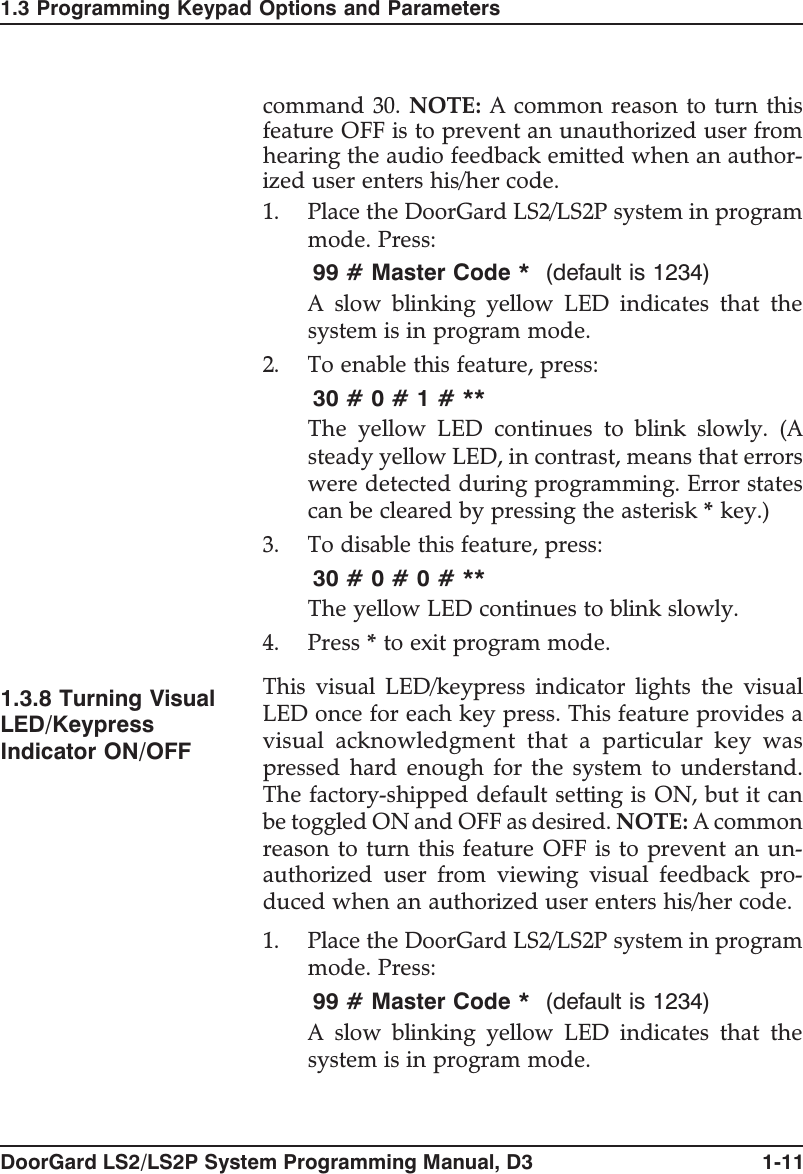
![Table 1-4. User TypesUser Type Numeric ID DescriptionToggle 0Toggle users latch the lock in the unlockposition. Toggle mode is indicated by 6quick beeps and a solid green LED.Standard 1 Standard users use the lock durationprogrammed in command 11.Lockout 3Lockout users “lock out” other users -see User Lockout (section 1.3.5). Thesecodes do not unlock the door.Extended Unlock 4Extended Unlock Users are like standardusers except they use the unlockduration programmed in command 32option 3.Single Use Code 5SingleUseCodesarecodesthatcanonly be used once. To verify a SingleUse is programmed, enter the sequence[5# PIN *] and this looks up the PIN andgenerates a 1/2 second green flash if thePIN is programmed as a single use code.If the PIN is not found, the systemgenerates 3 quick beeps and incrementsthe invalid PIN counter. If PIN is foundbut is not programmed as a single usecode, the system does not respond at all.Relock 6 Relock codes are used to relock the doorwhen a toggle or auto-unlock is active.Emergency 7Emergency users are special users thatcannot be locked out and operate belowthe Low Voltage Inhibit Threshold. Theuser also uses the unlock durationprogrammed in command 32 option 3.Comm. Enable 8Comm Enable User (Communications) isused to enable communications, whichallows transfer of data to/from the PDA tothe LS2/LS2P system. This code doesnot unlock the door.1.4 Programming UsersDoorGard LS2/LS2P System Programming Manual, D3 1-21](https://usermanual.wiki/Electronics/LS2P/User-Guide-302195-Page-31.png)