EnGenius Technologies ETA1305 802.11bgn gigabits Access Point User Manual
EnGenius Technologies 802.11bgn gigabits Access Point
UserManual.wiki
>
EnGenius Technologies
>
ETA1305 User Manual
user manual
Navigation menu
Upload a User Manual
Namespaces
Wiki Guide
HTML
PDF
Info
Views
User Manual
Discussion / Help
Navigation


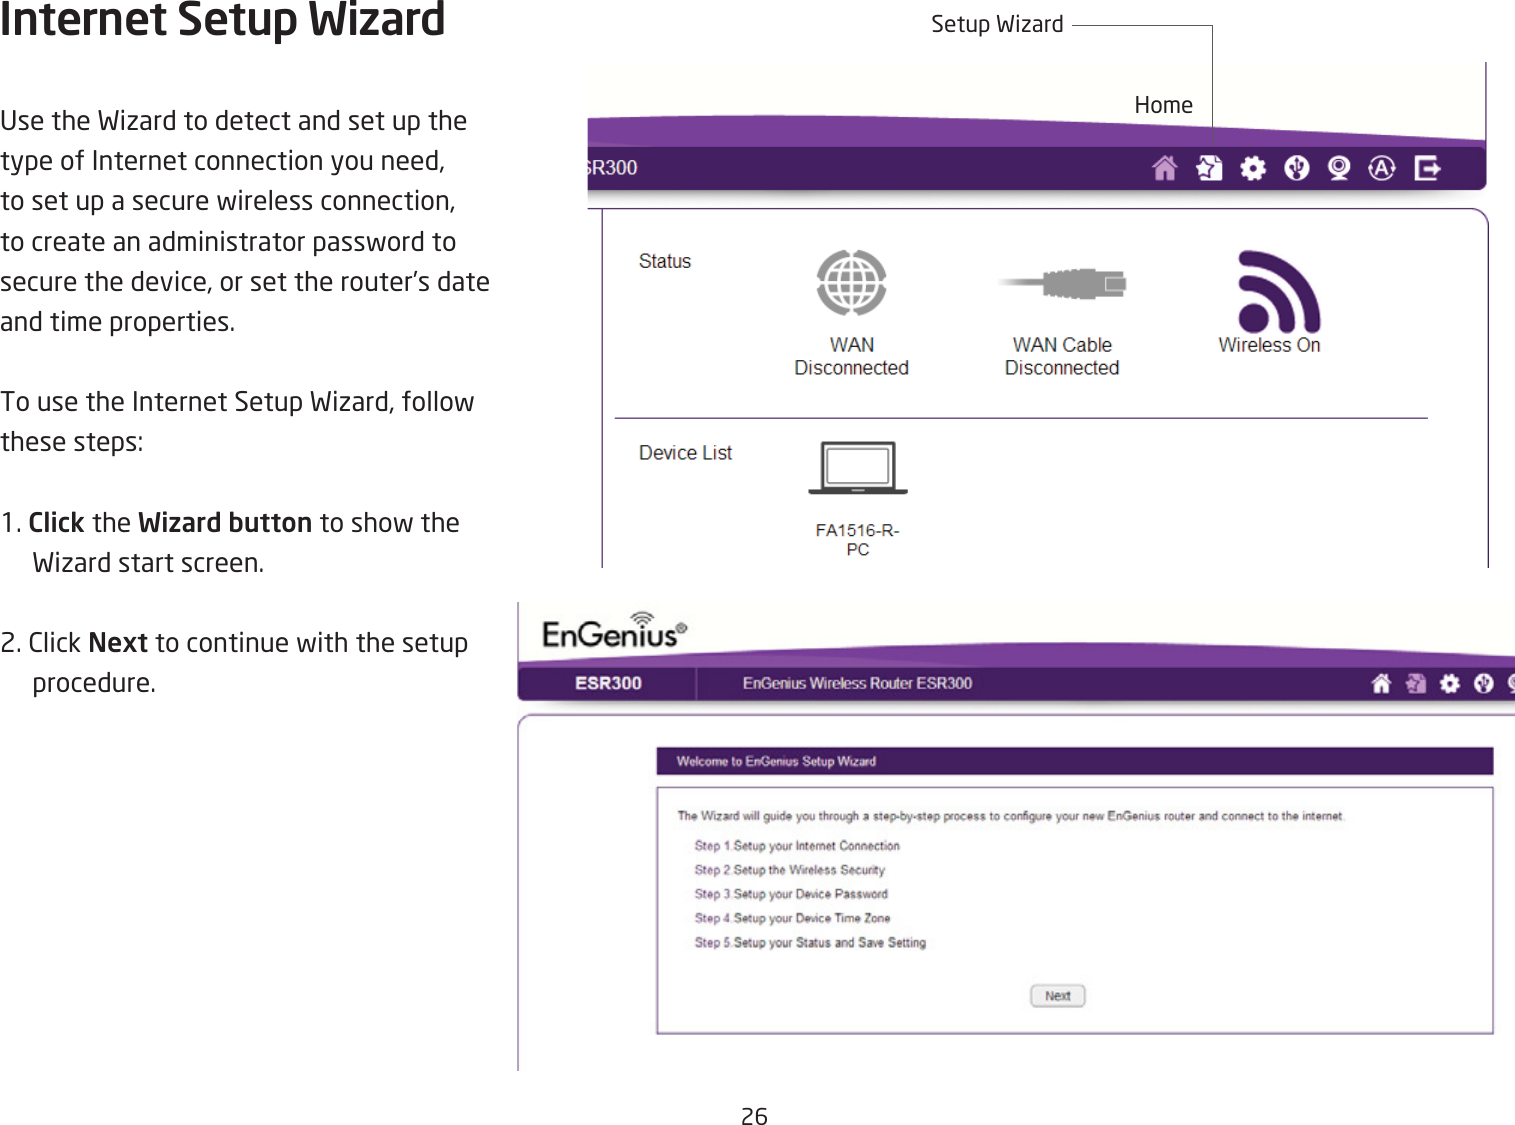
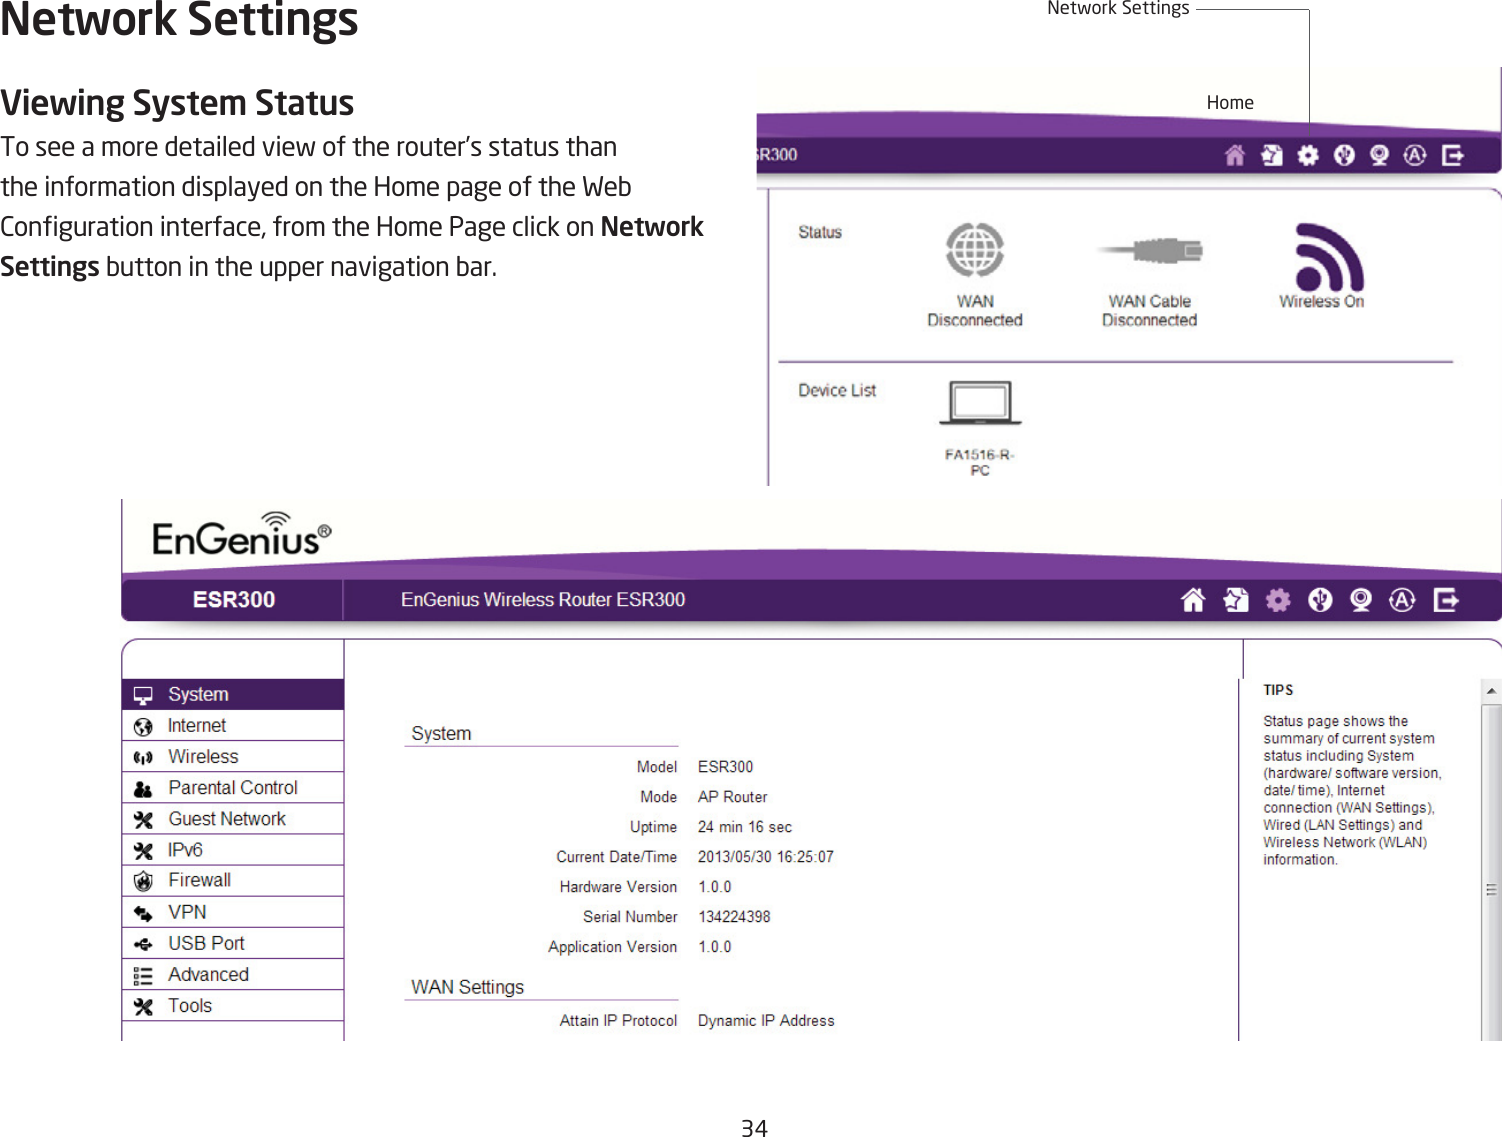
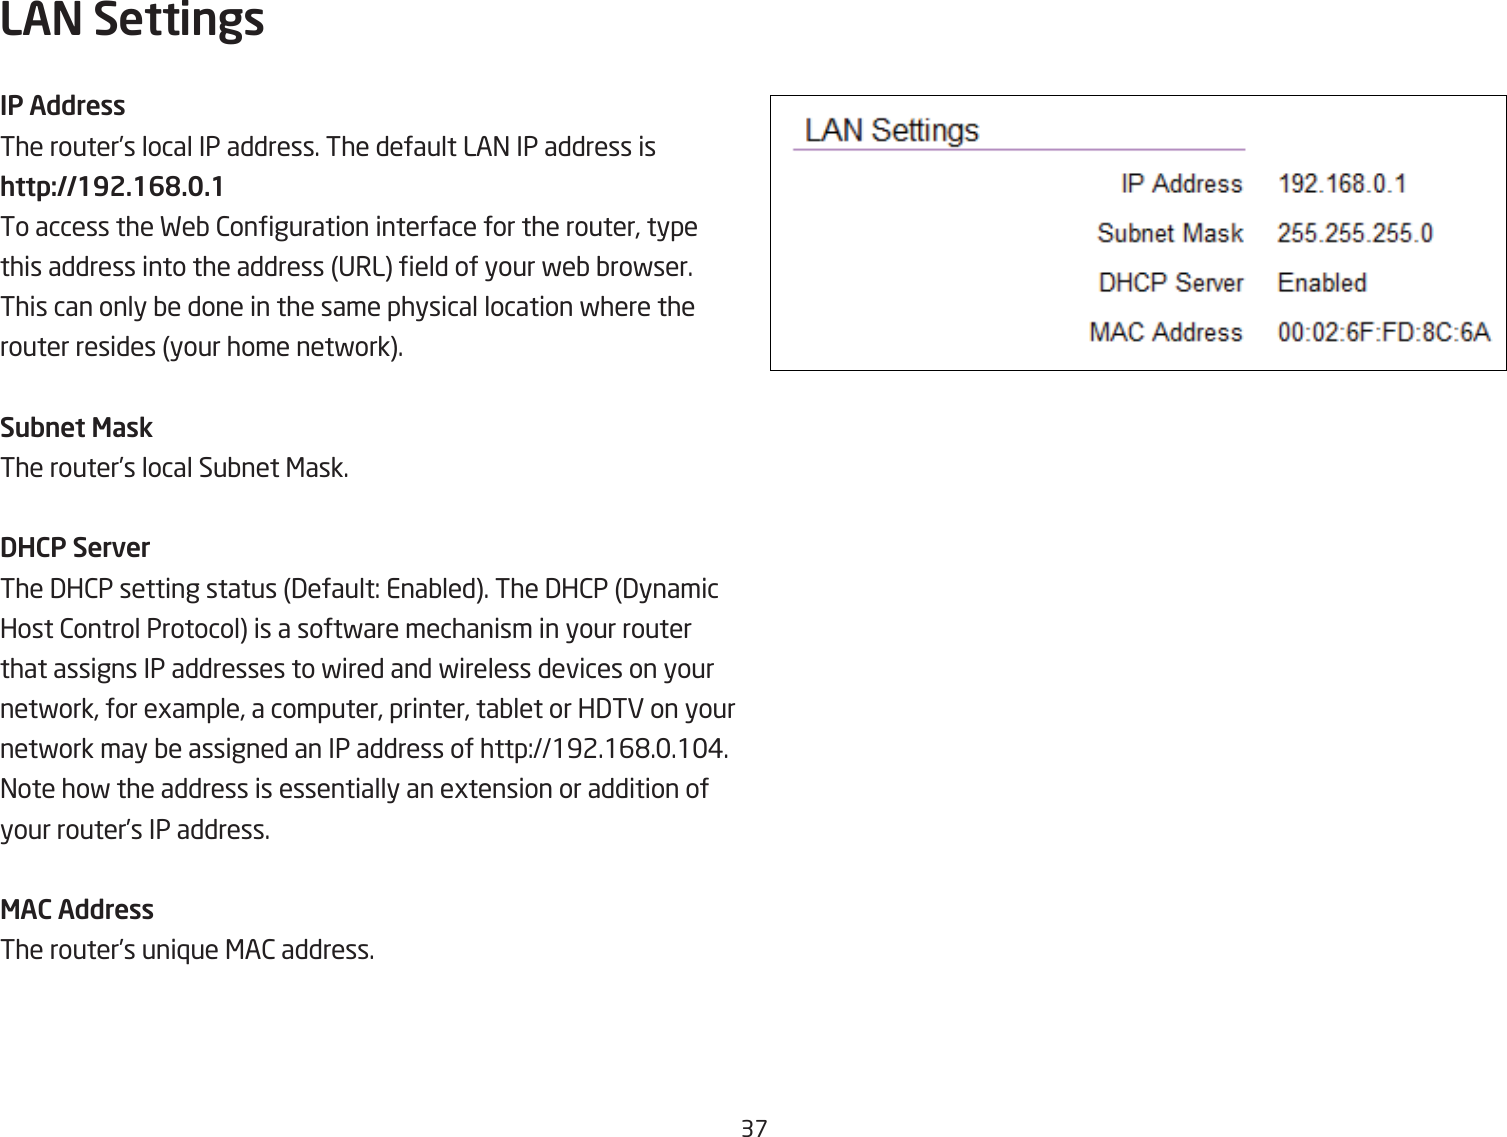


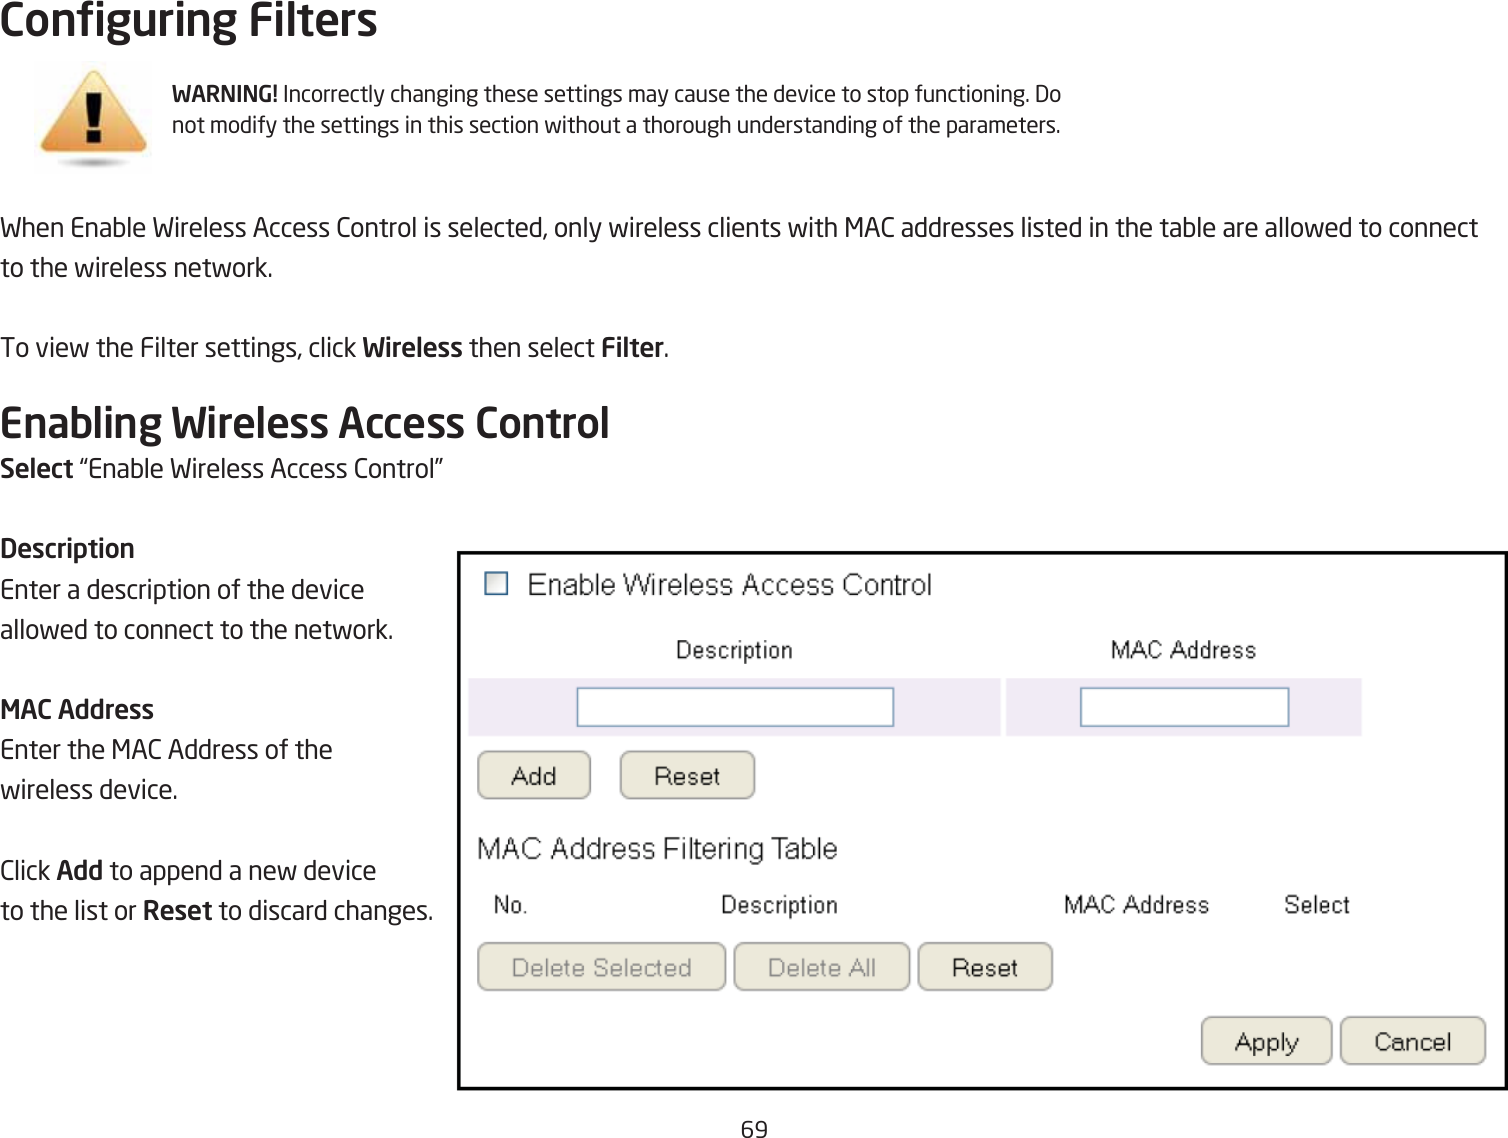
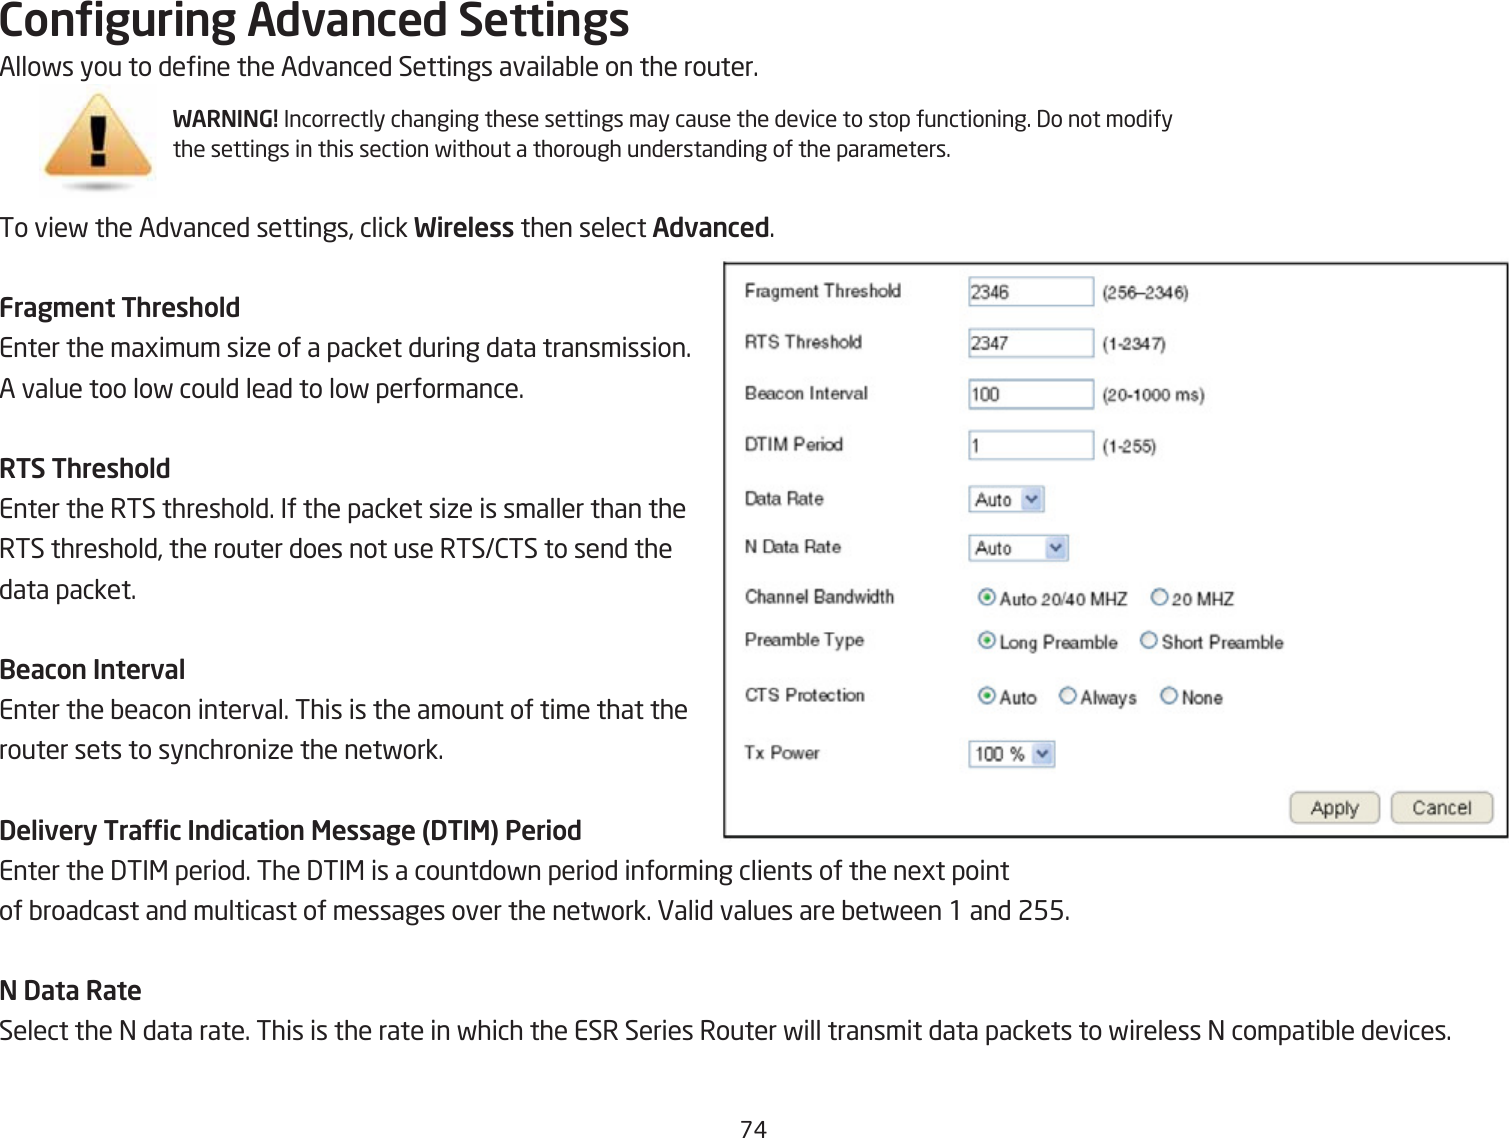
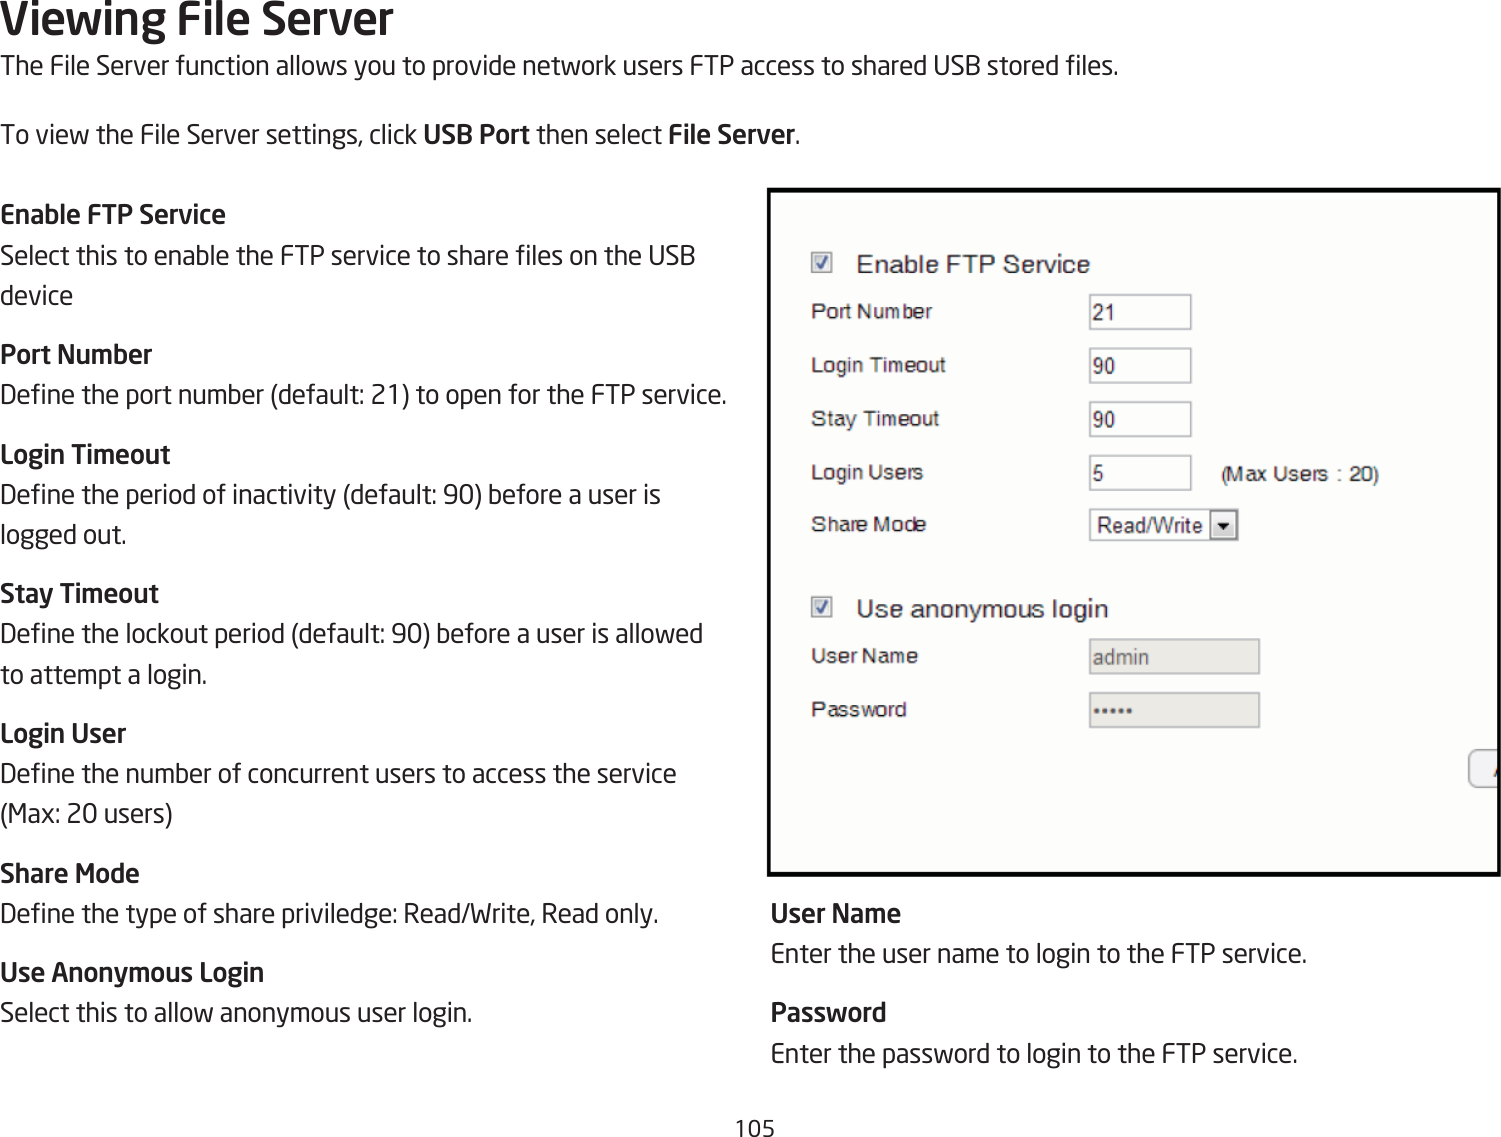
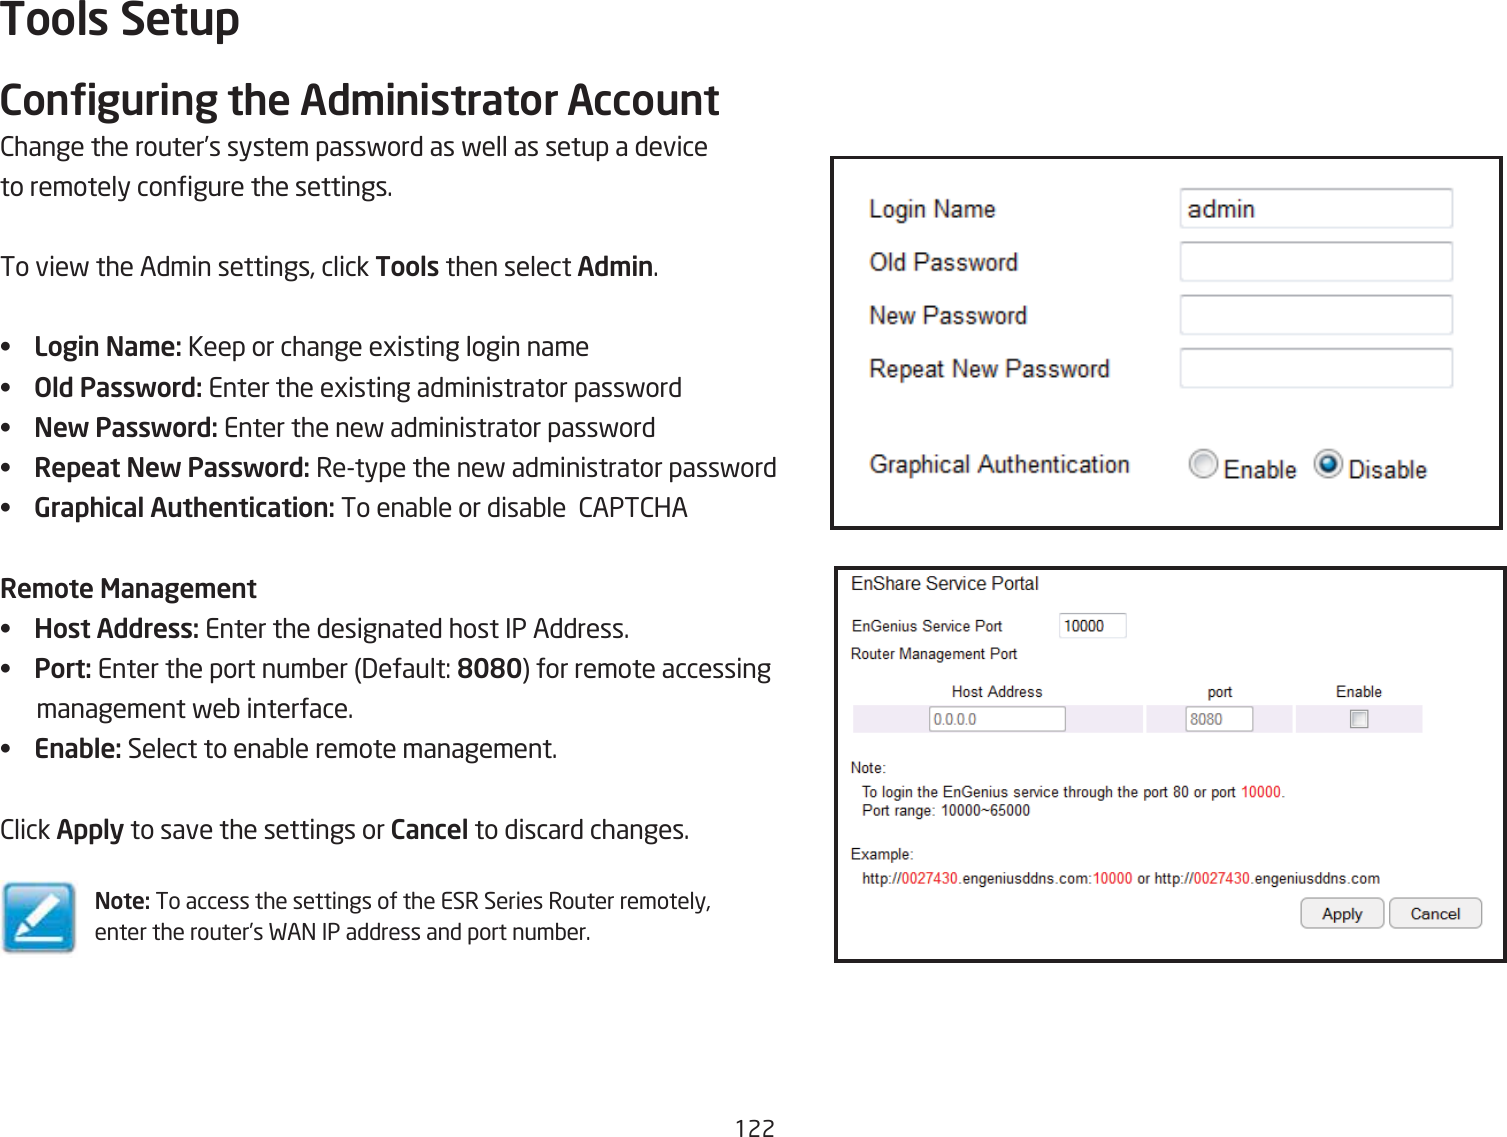
![6Access Point ModeThese instructions apply to Qoth the 2.# 6Hi and fre`uency Qands. The router Qy default is already congured in Access Point <ode. For optimum connectivity to a numQer of different fireless client devices, it’s recommended that you keep the router in its default fireless settings. You can choose to have the router associate only fith certain iterations IEEE standards and Qy doing so this fill either positively or negatively affect the router’s speed and throughput performance. BandSelect a fireless standard for the netfork from the follofingoptions:• 2.# 6Hi IEEE '2.11Q• 2.# 6Hi IEEE '2.11n• 2.# 6Hi IEEE '2.11Qg• 2.# 6Hi IEEE '2.11g• 2.# 6Hi IEEE '2.11QgnEnable SSID#Select the numQer of fireless groups, Qetfeen one and four,availaQle on the netfork.SSID[#]Enter the name of the fireless netforks.Auto ChannelEnaQle or disaQle having the router automatically select achannel for the fireless netfork. Auto 2hannel is enaQled Qydefault. Select disaQle to manually assign a specic channel.3efault , 3isaQleCheck Channel Ti\eFhen Auto 2hannel is enaQled, select a time period that thesystem checks the appropriate channel for the router.ChannelFhen Auto 2hannel is disaQled, select a channel to assign tothe fireless netfork. Ealid values are from one to eleven inthe US and one to thirteen in the EU.](https://usermanual.wiki/EnGenius-Technologies/ETA1305/User-Guide-2103421-Page-60.png)
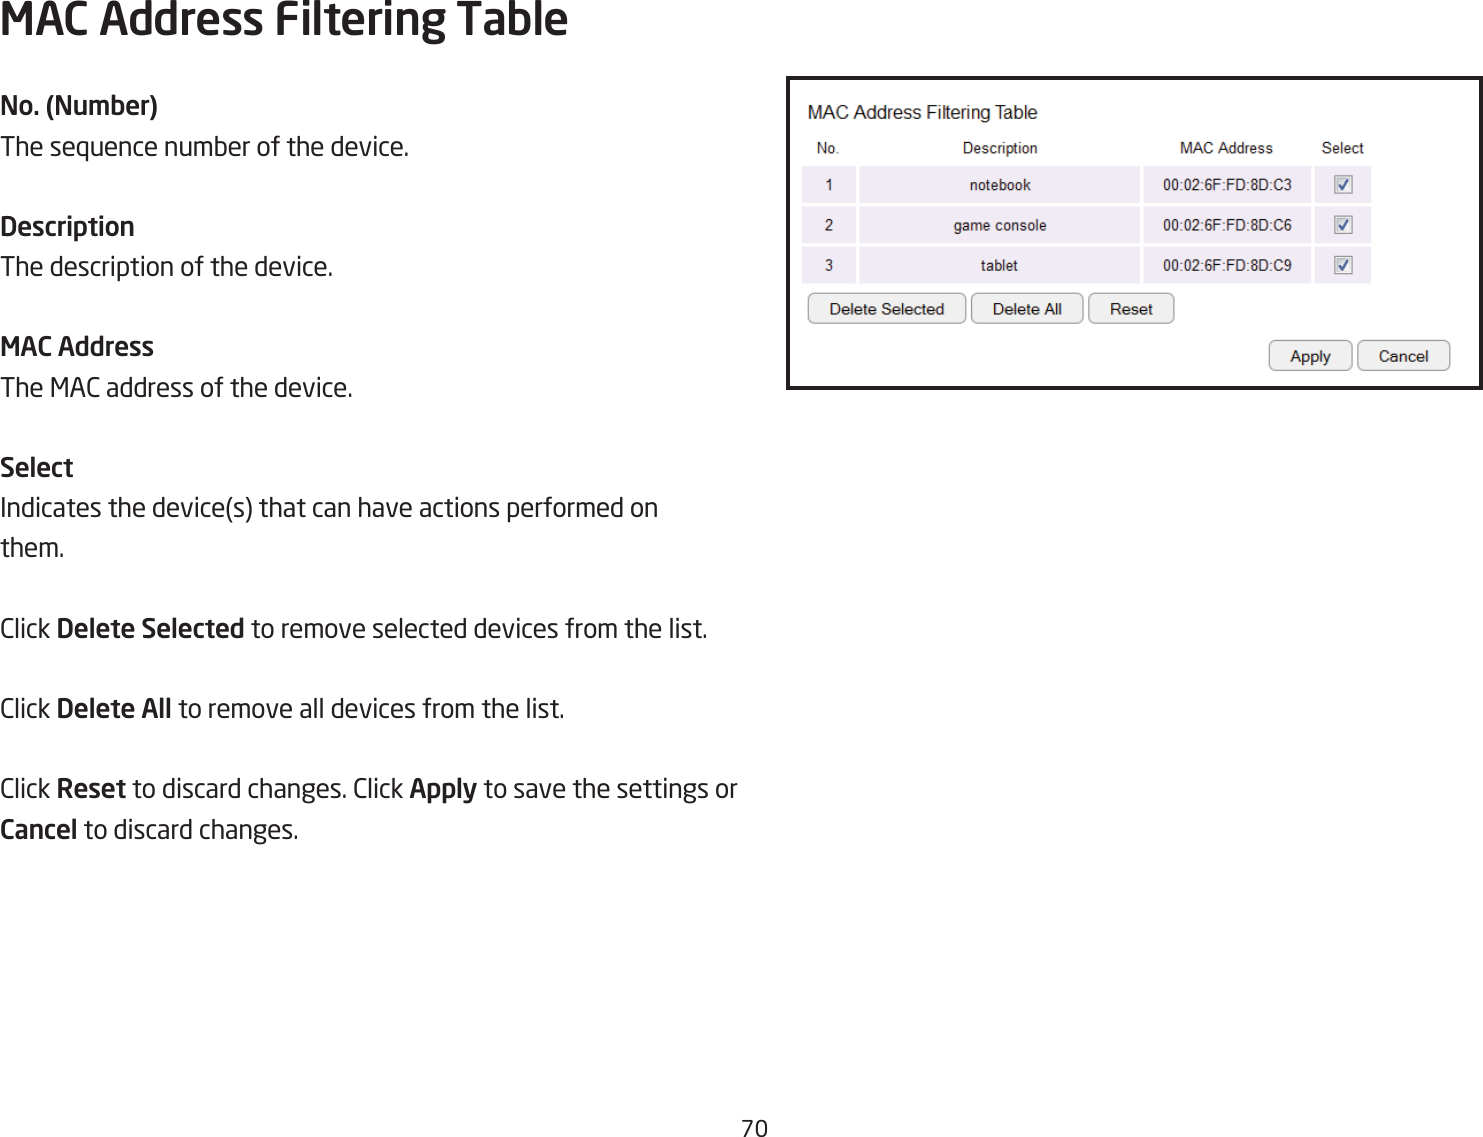
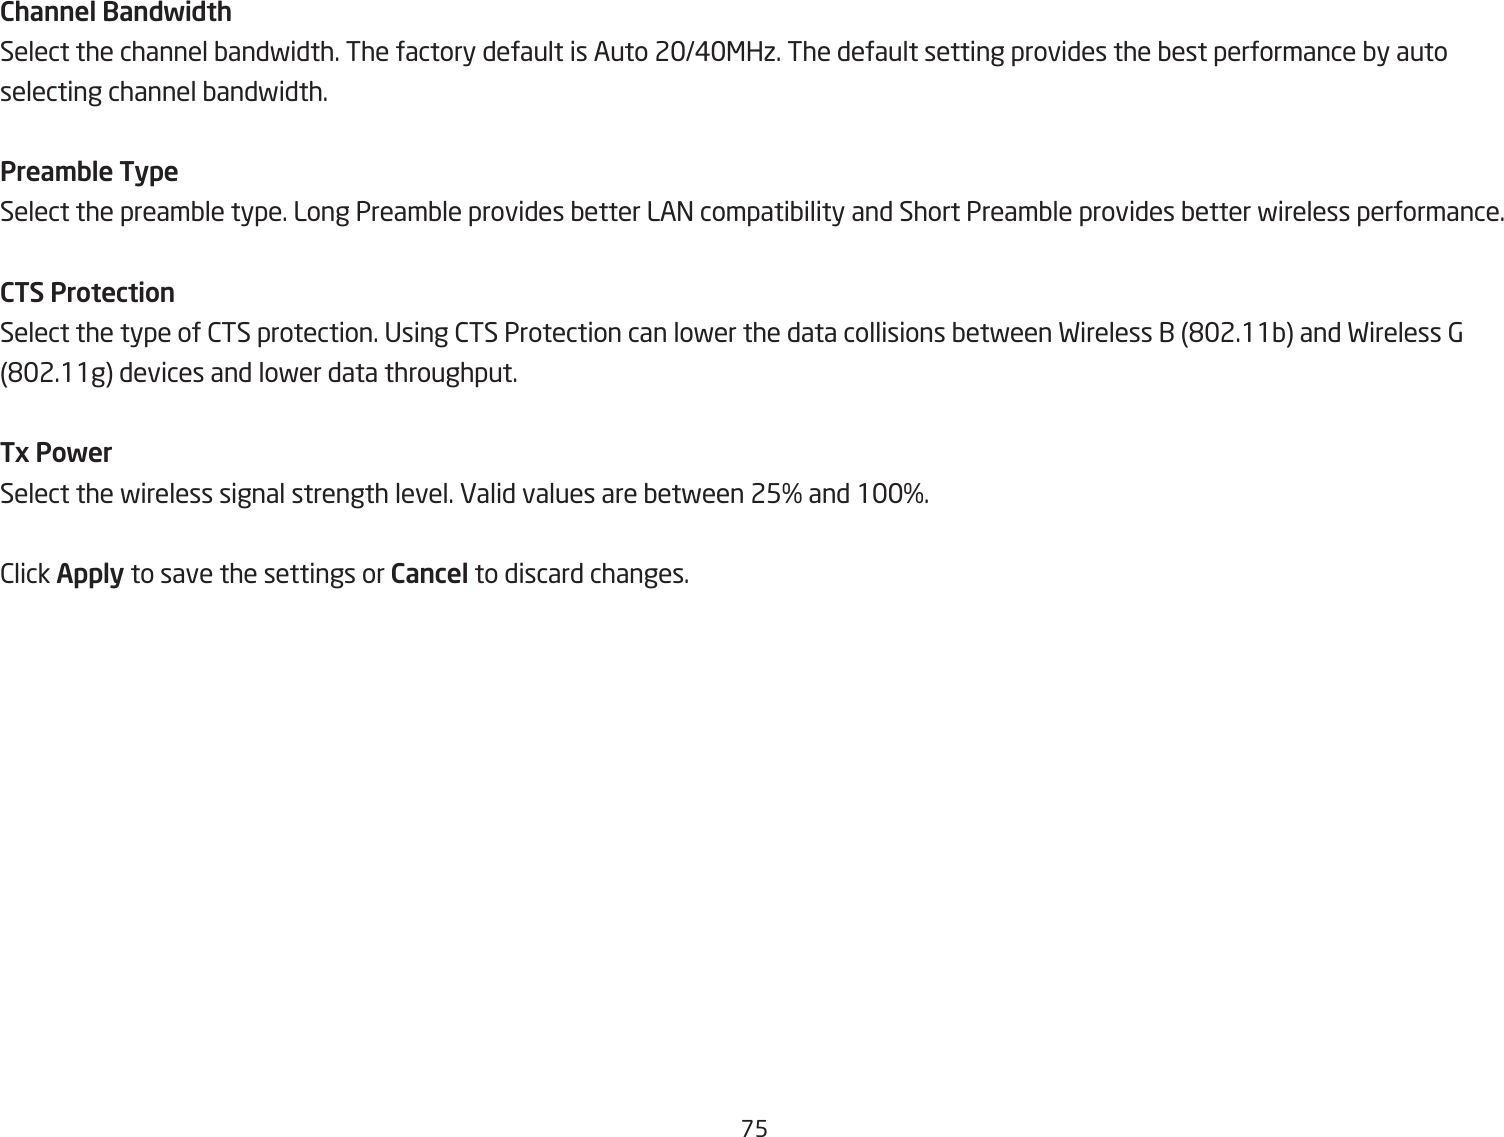
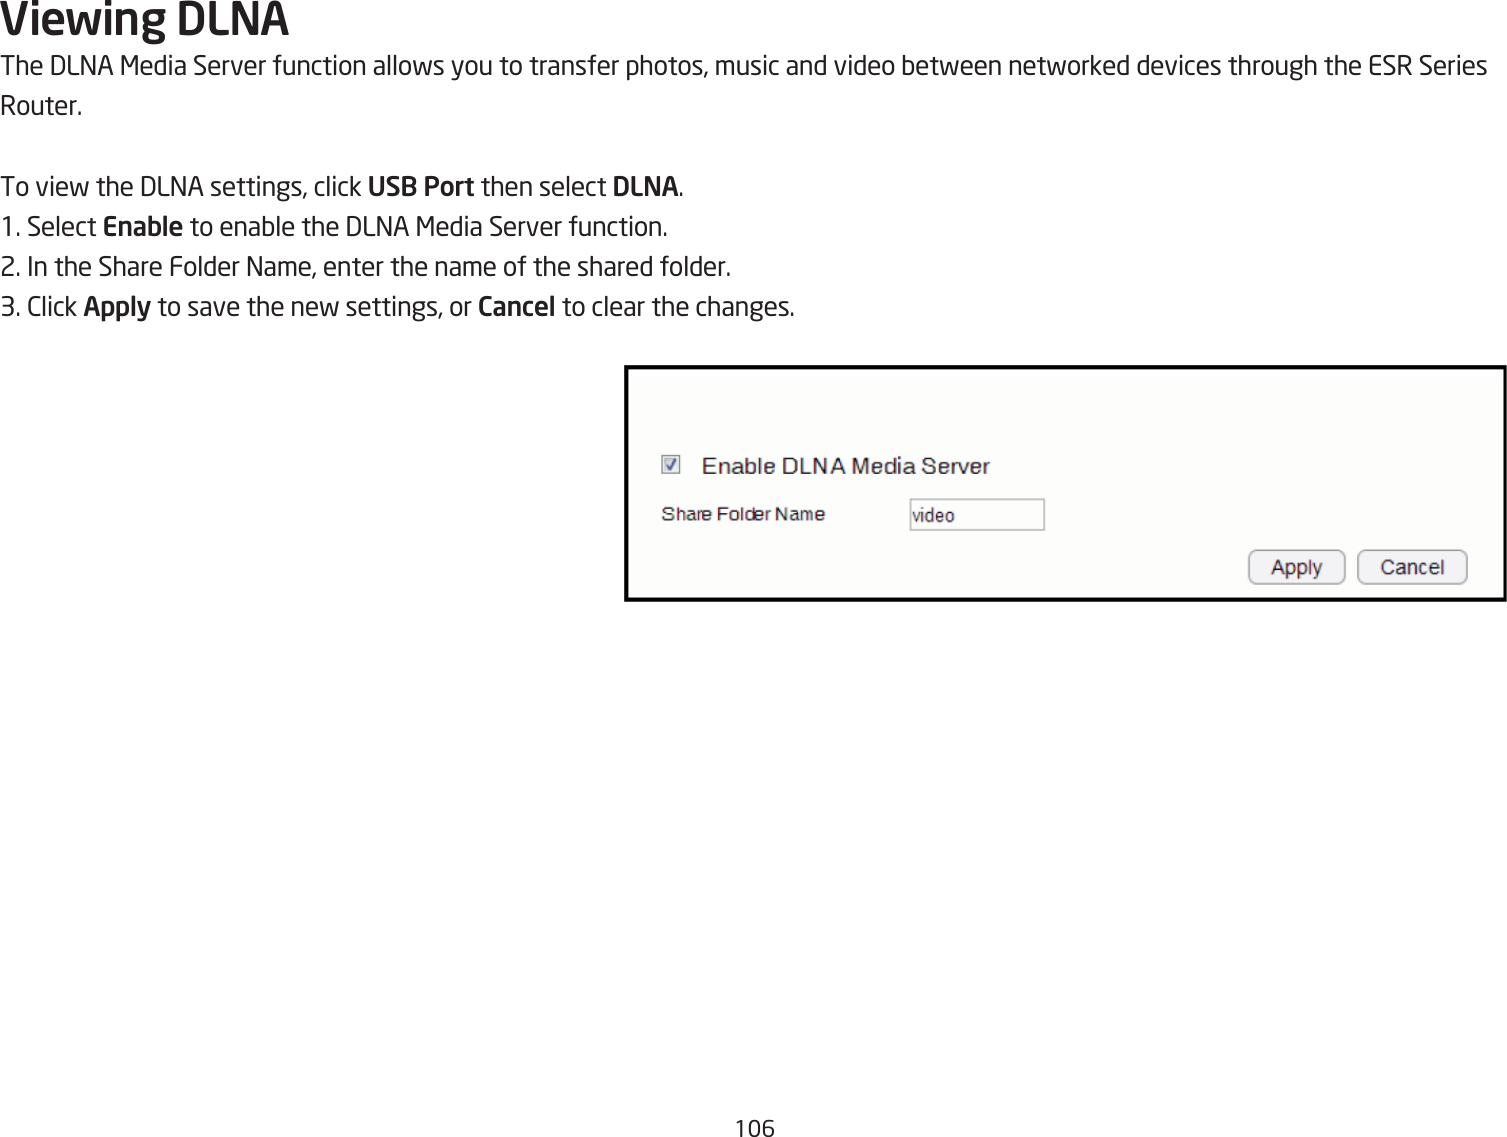
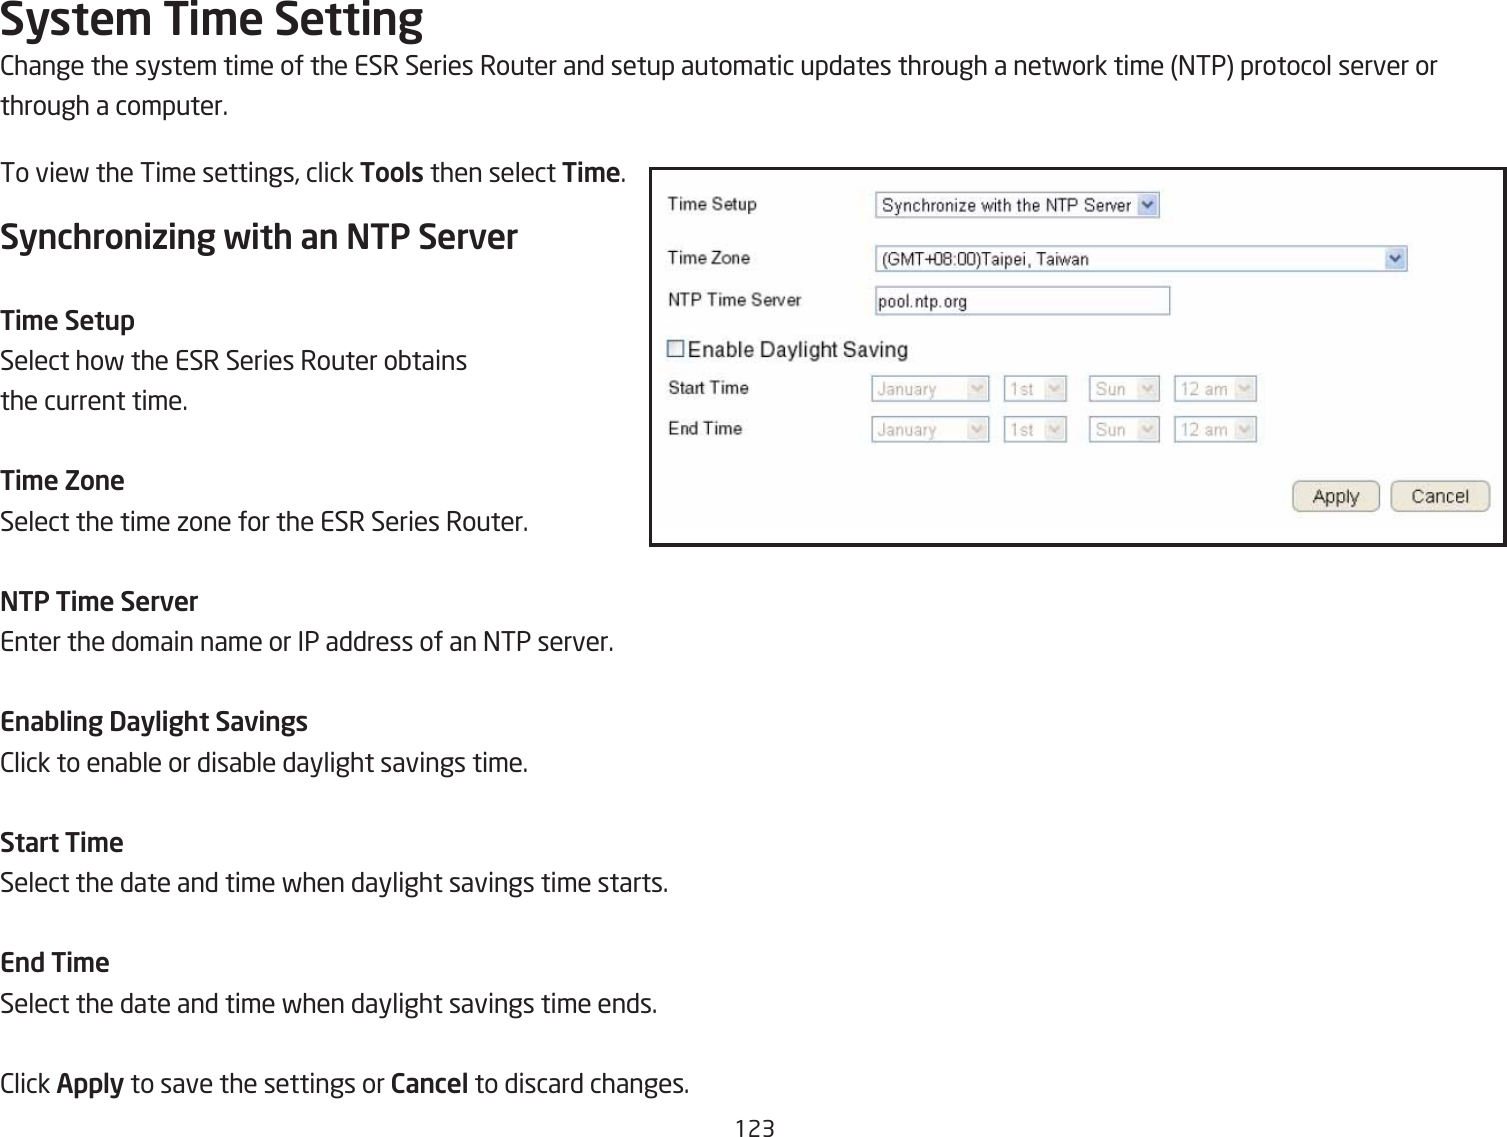
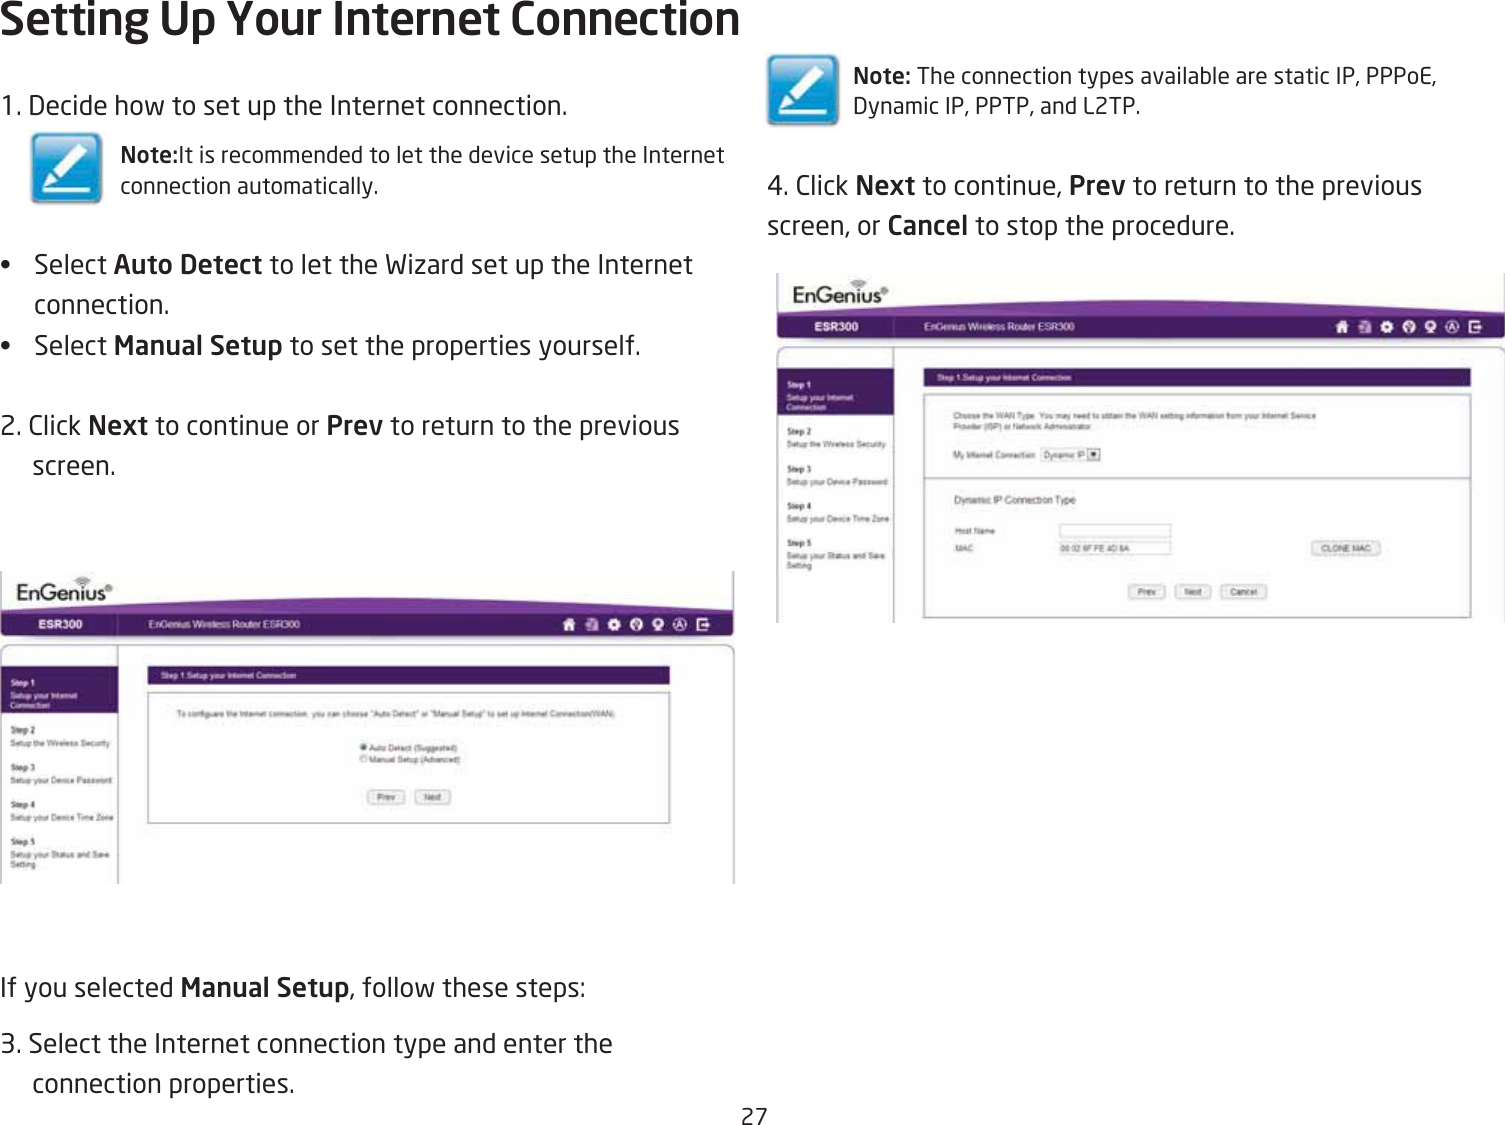
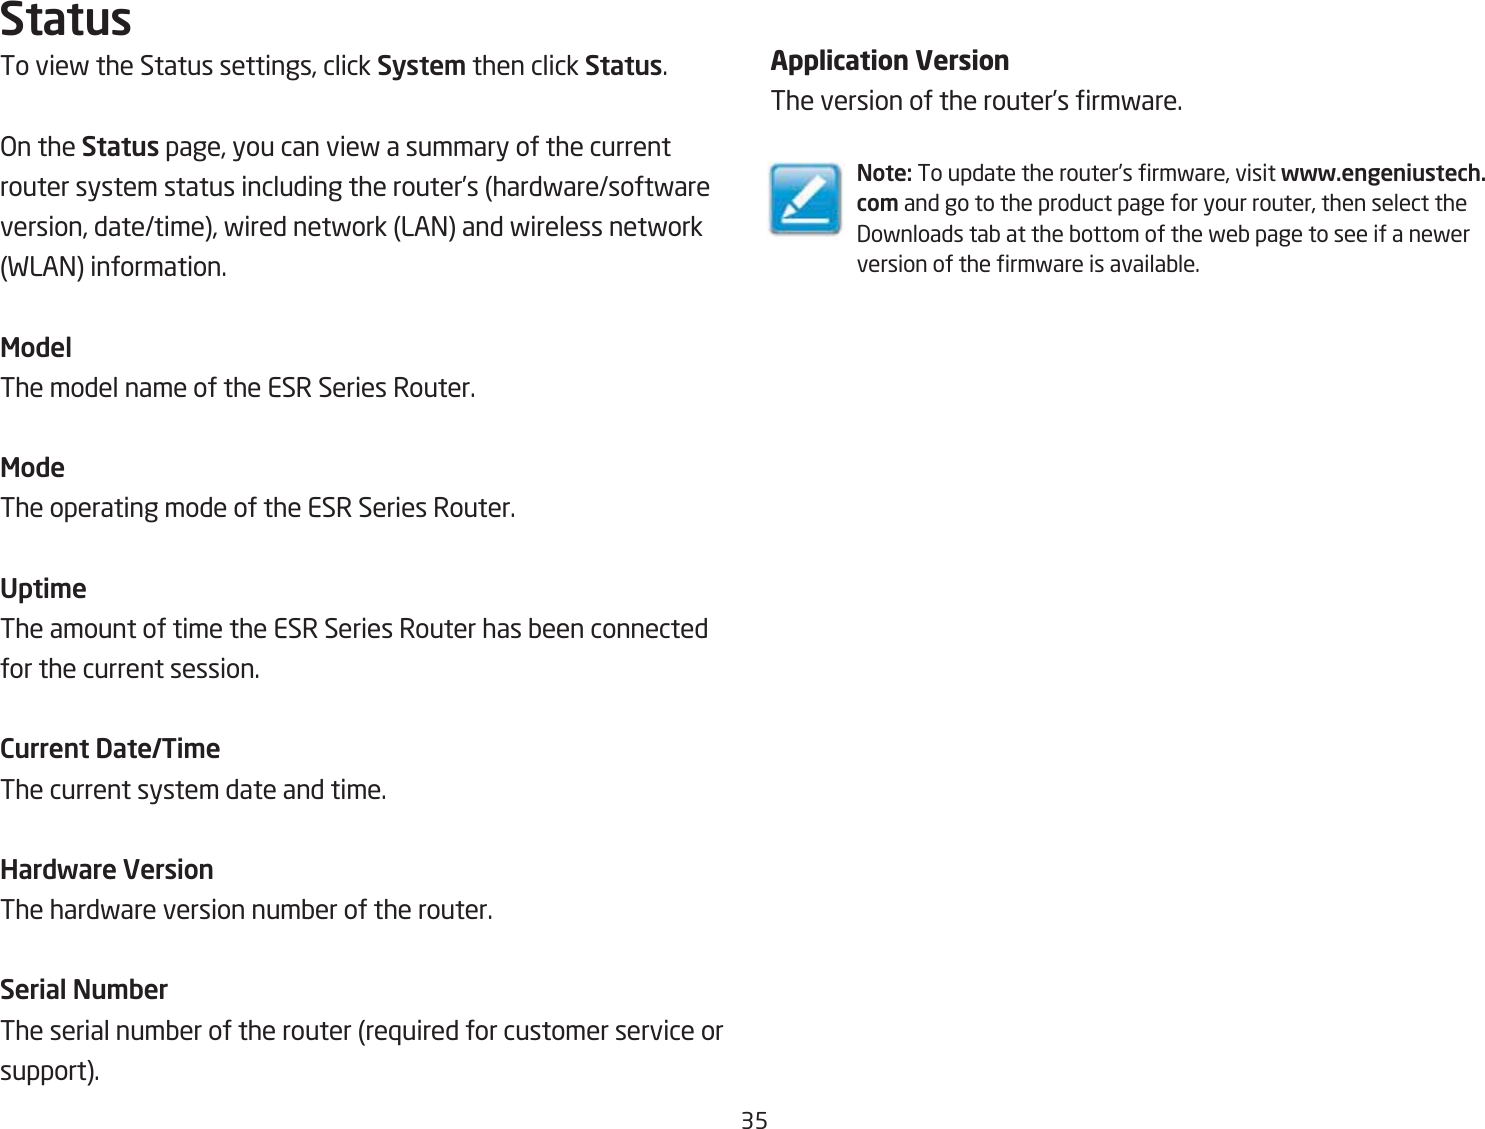
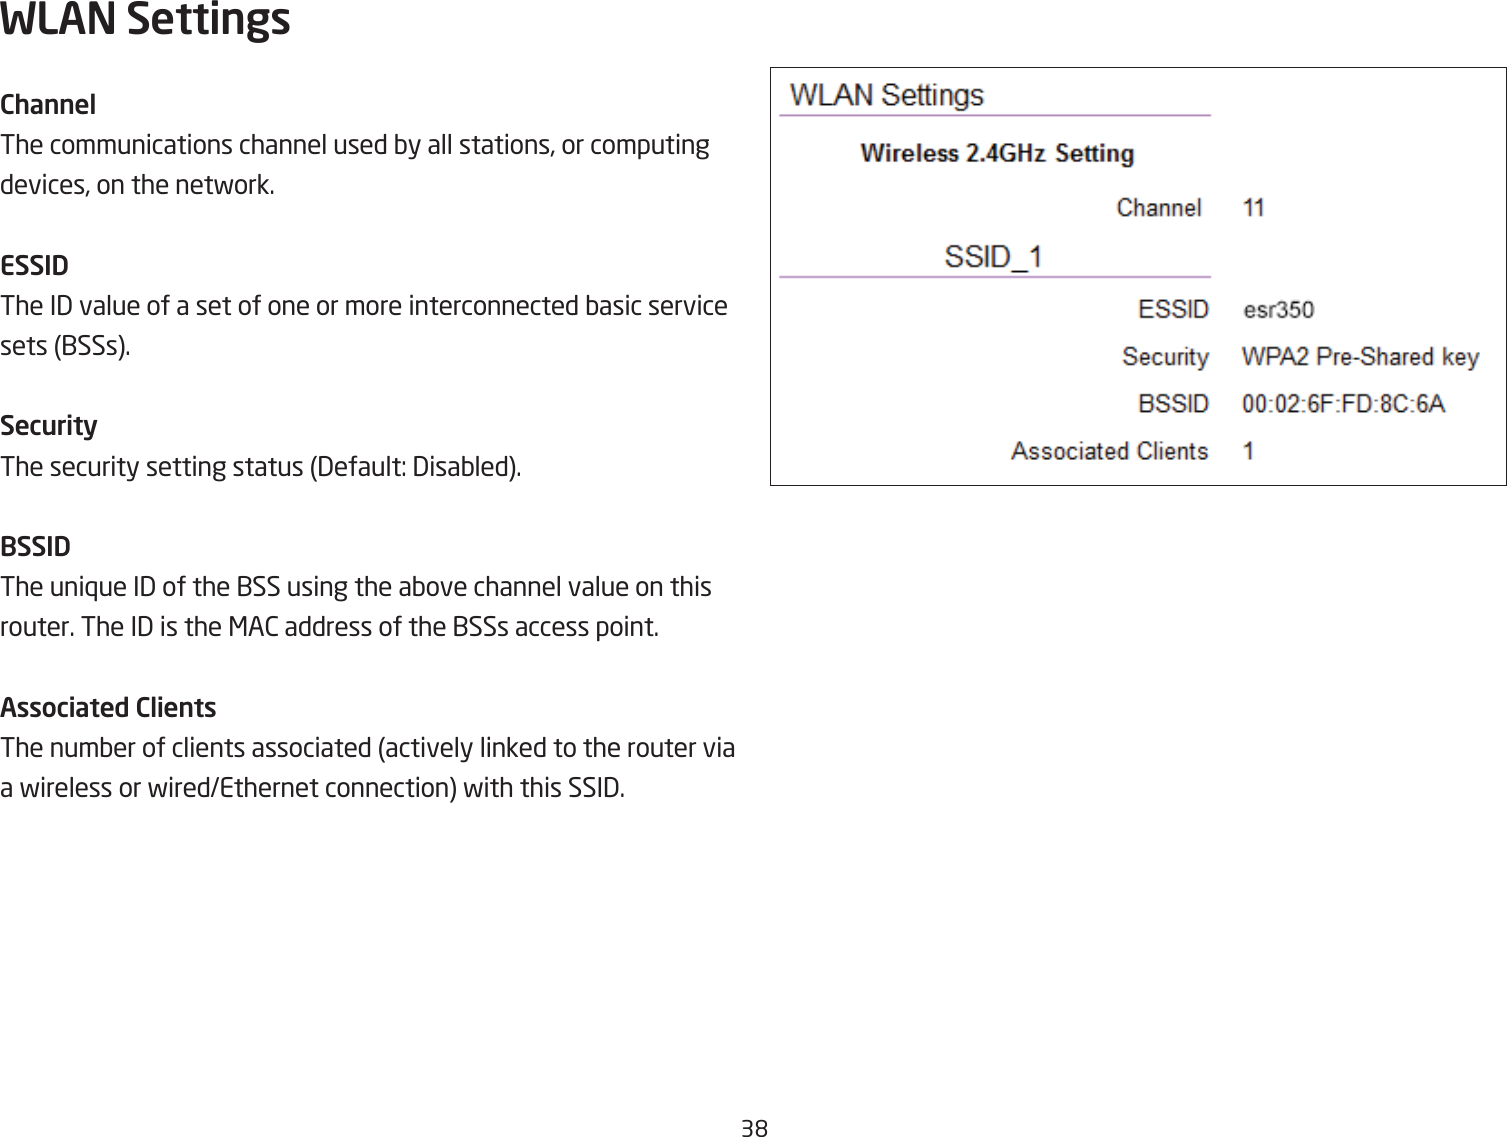
![61Wireless Distribution Syste\ Mode2onguring the router’s fireless settings for F3S Fireless 3istriQution System mode.ChannelSelect a channel to assign to the fireless netfork. Ealid values are from one to eleven in the US and one to thirteen in the EU.MAC Address [#]Enter the <A2 addresses for the fireless access points that are part of the F3S.WDS Data RateSelect the data rate for the F3S.Set Security2lick Set Security to set up the F3S security settings screen.](https://usermanual.wiki/EnGenius-Technologies/ETA1305/User-Guide-2103421-Page-61.png)
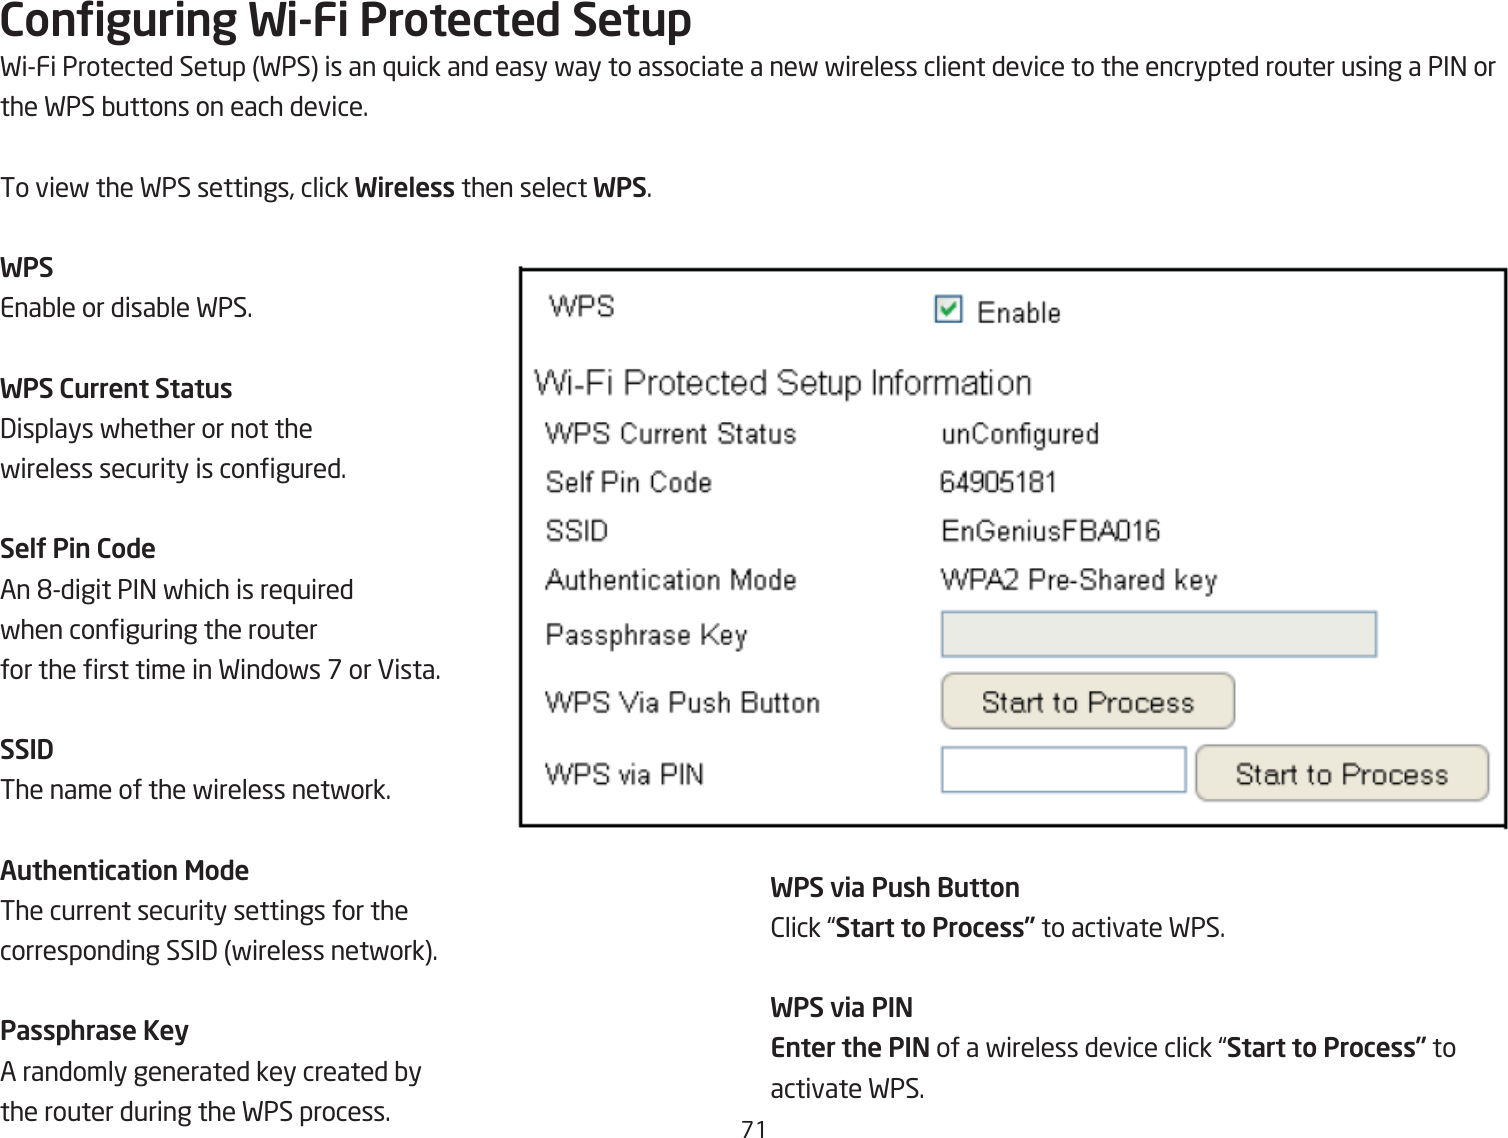
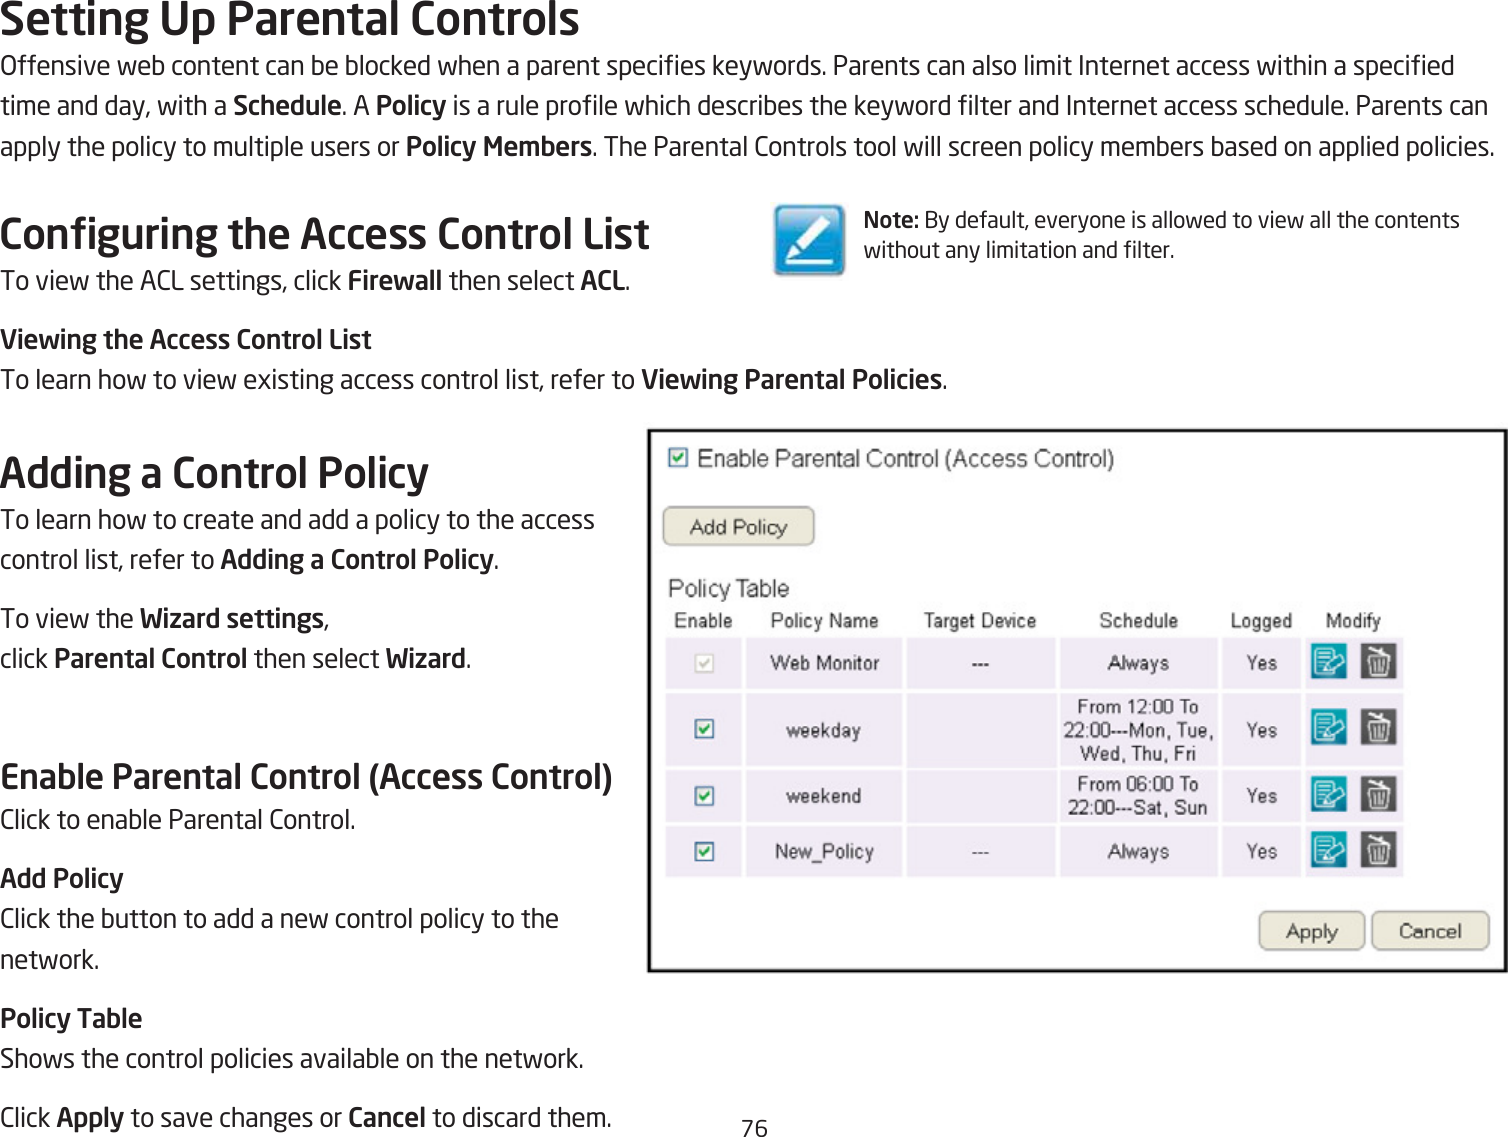
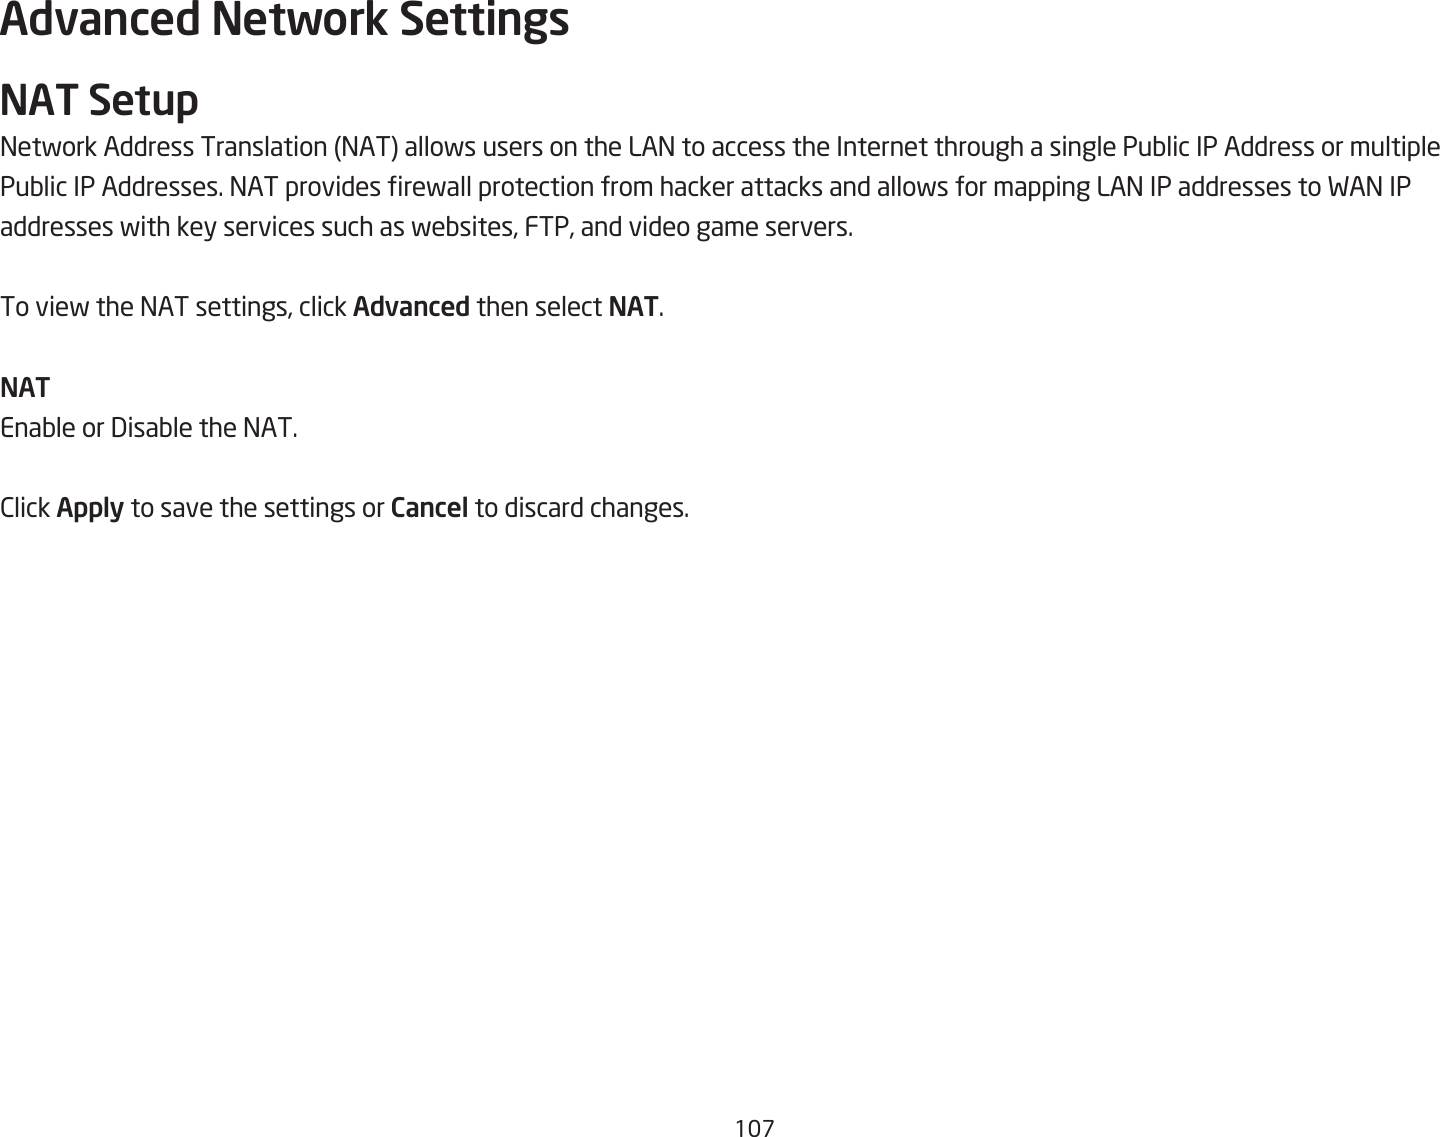
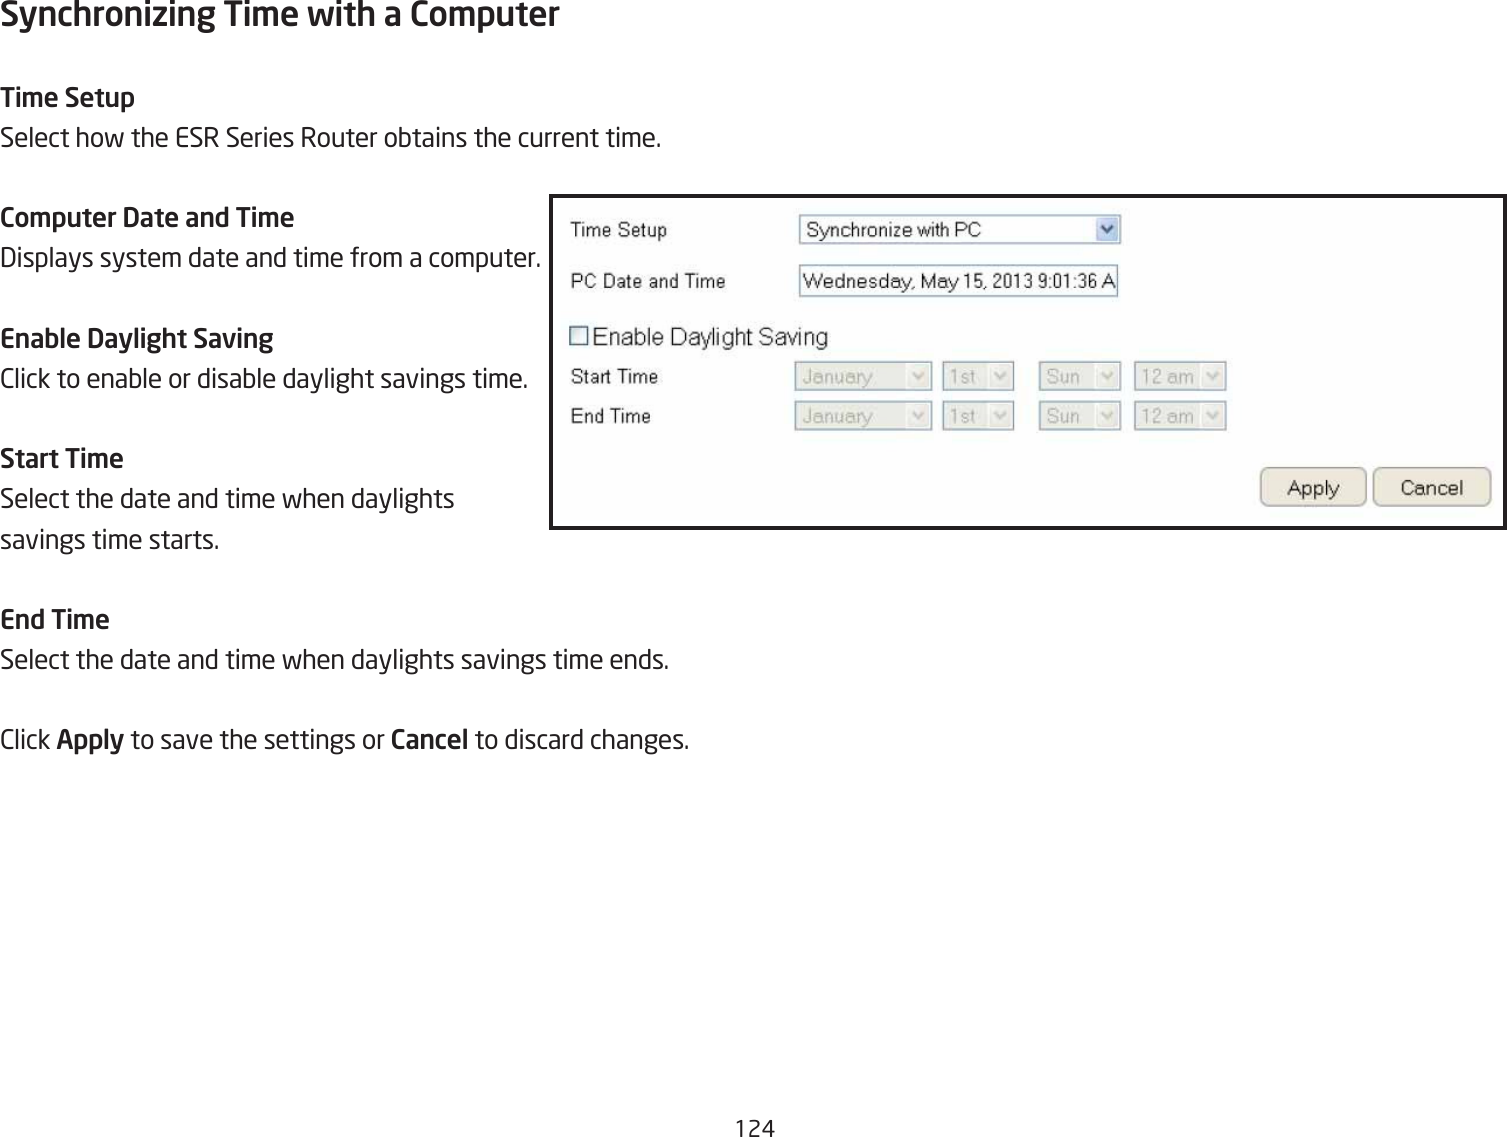
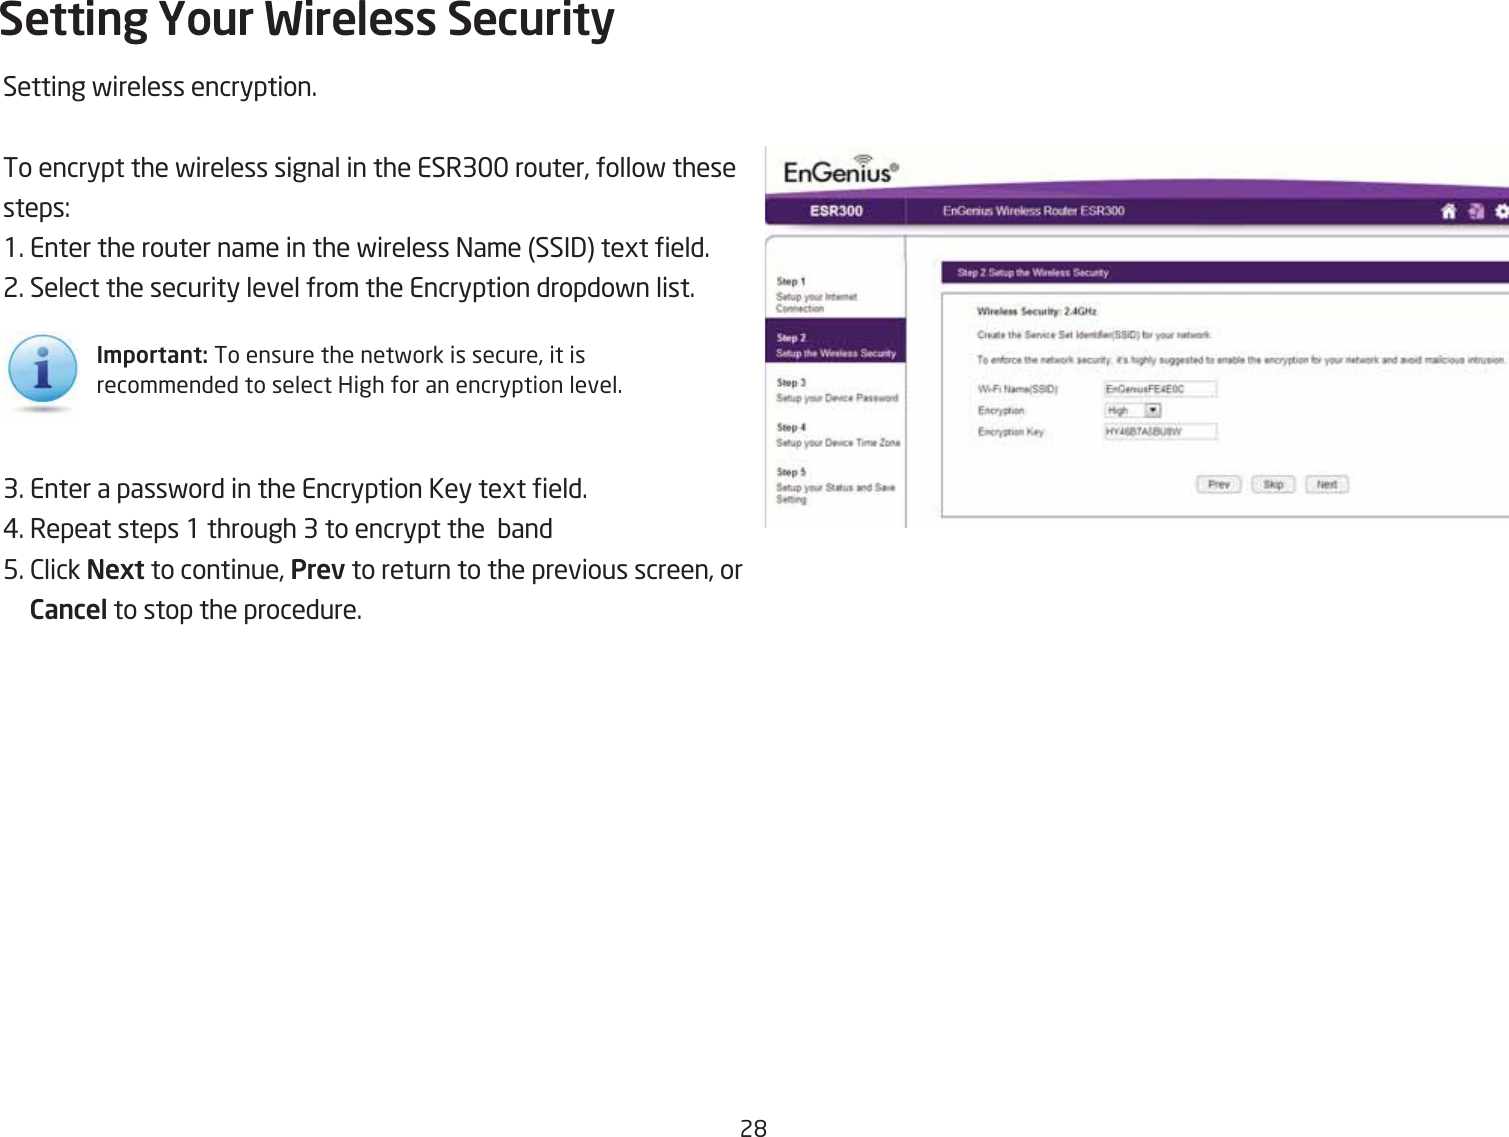
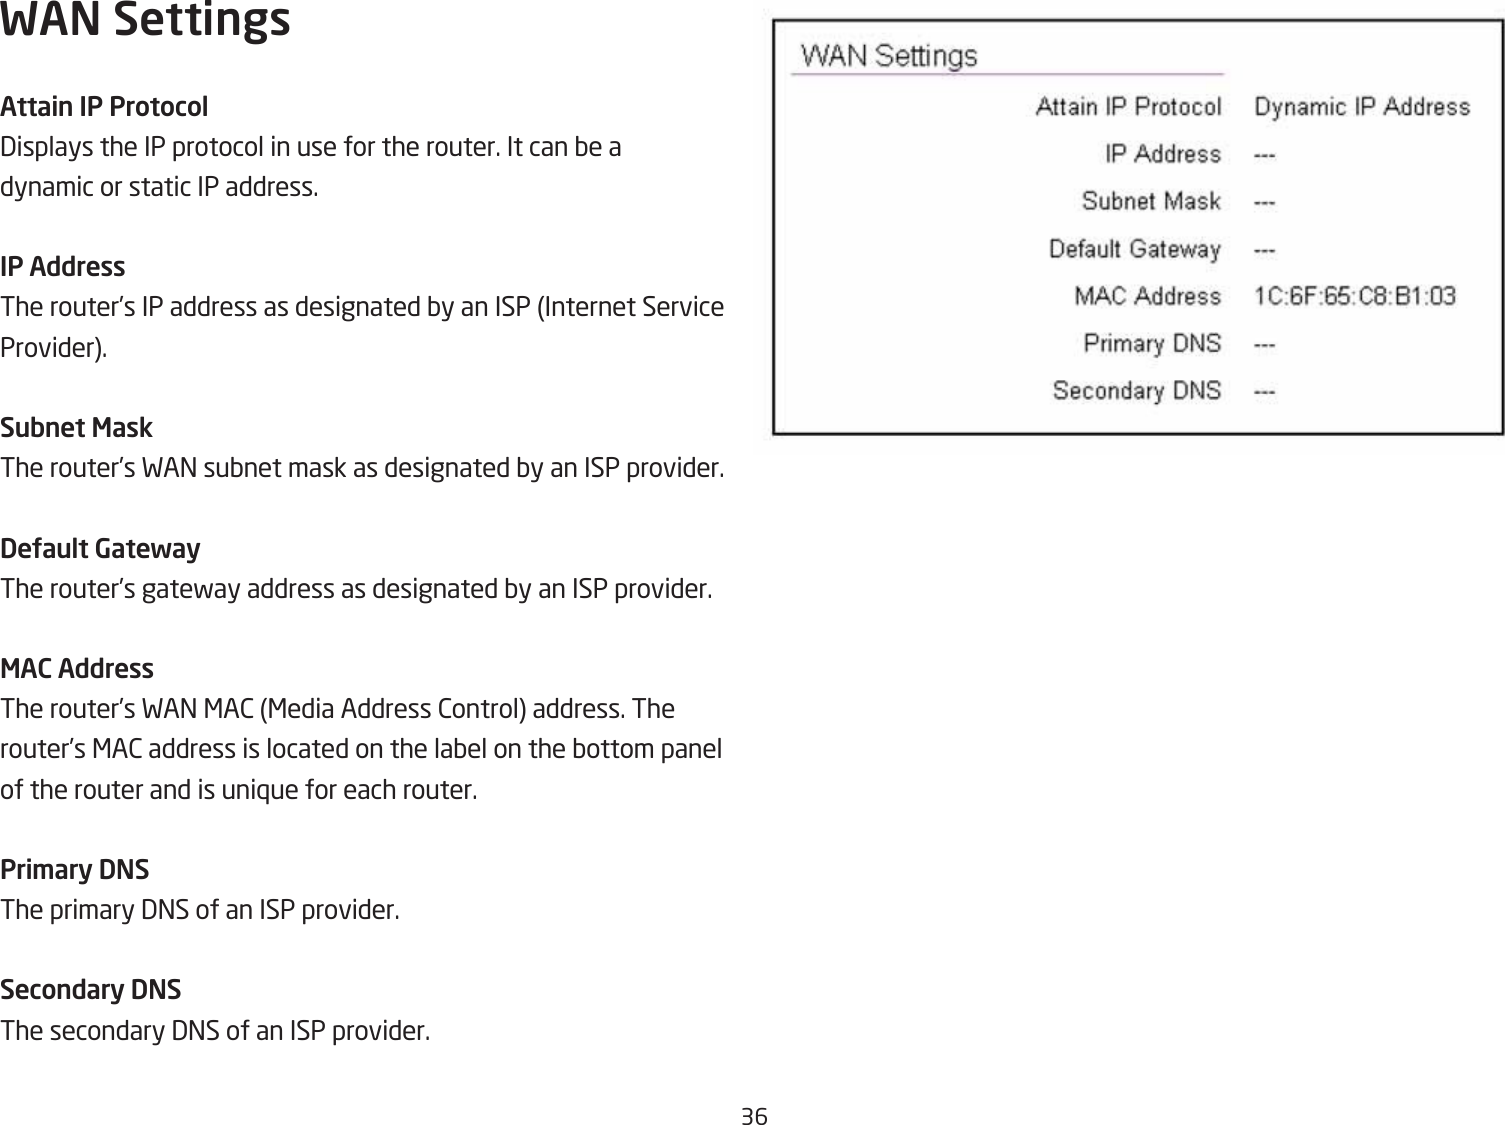
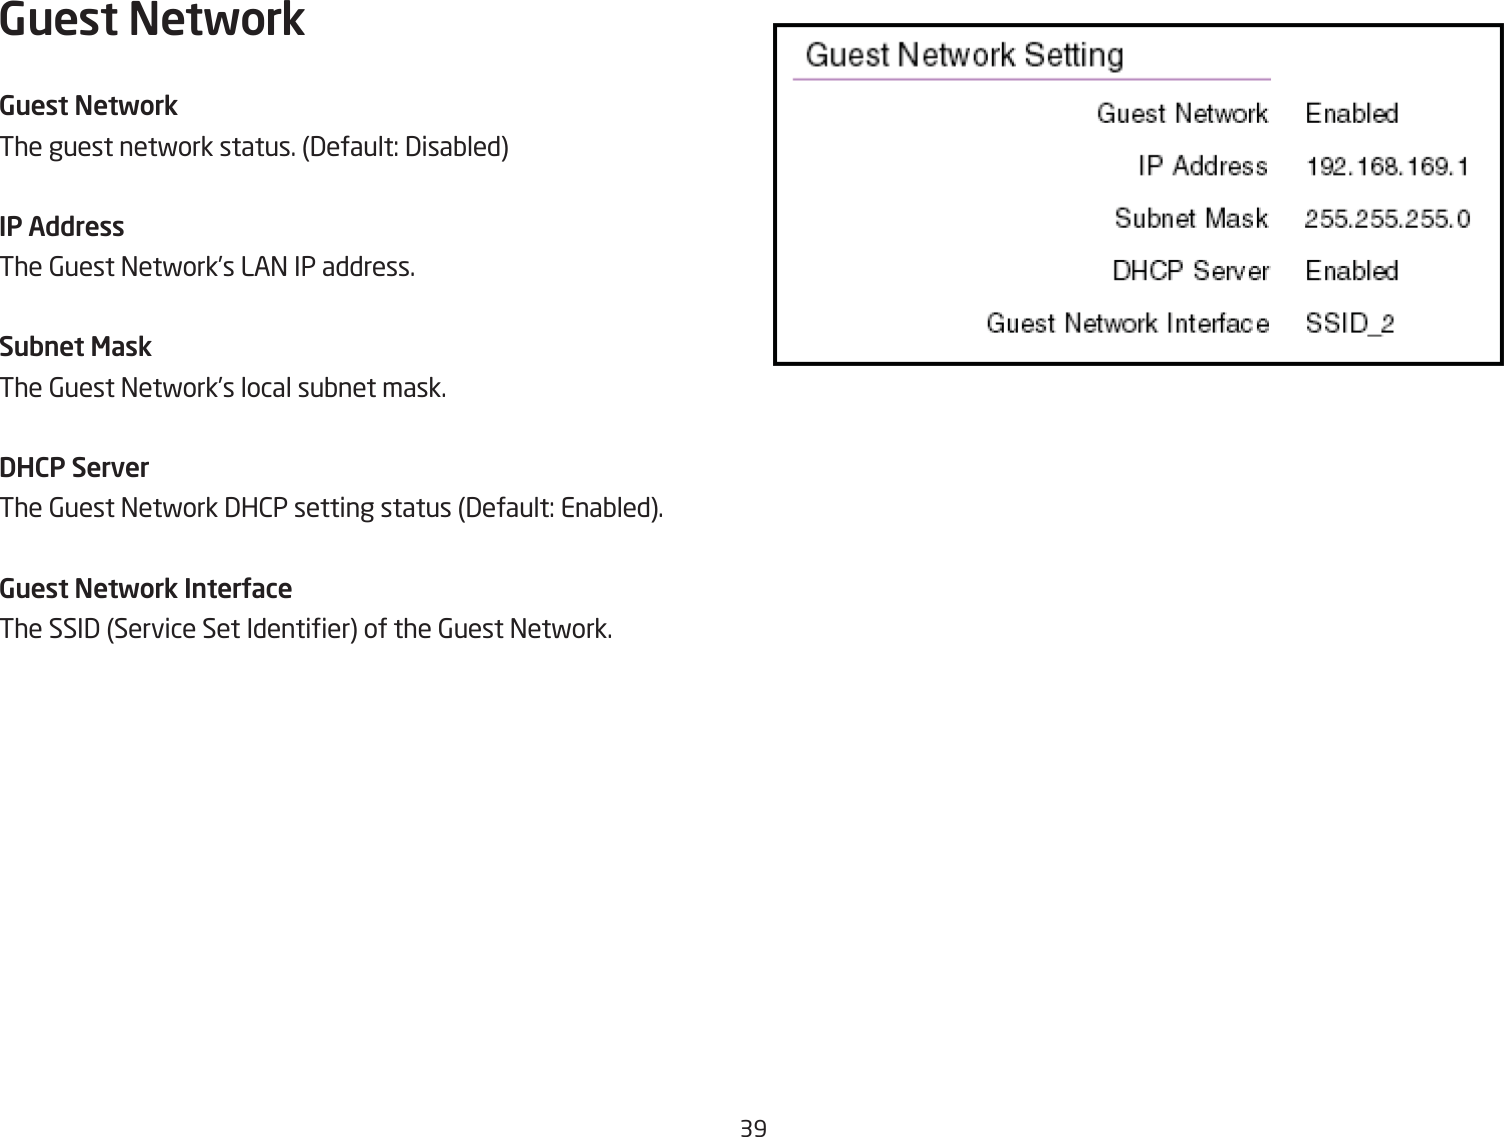
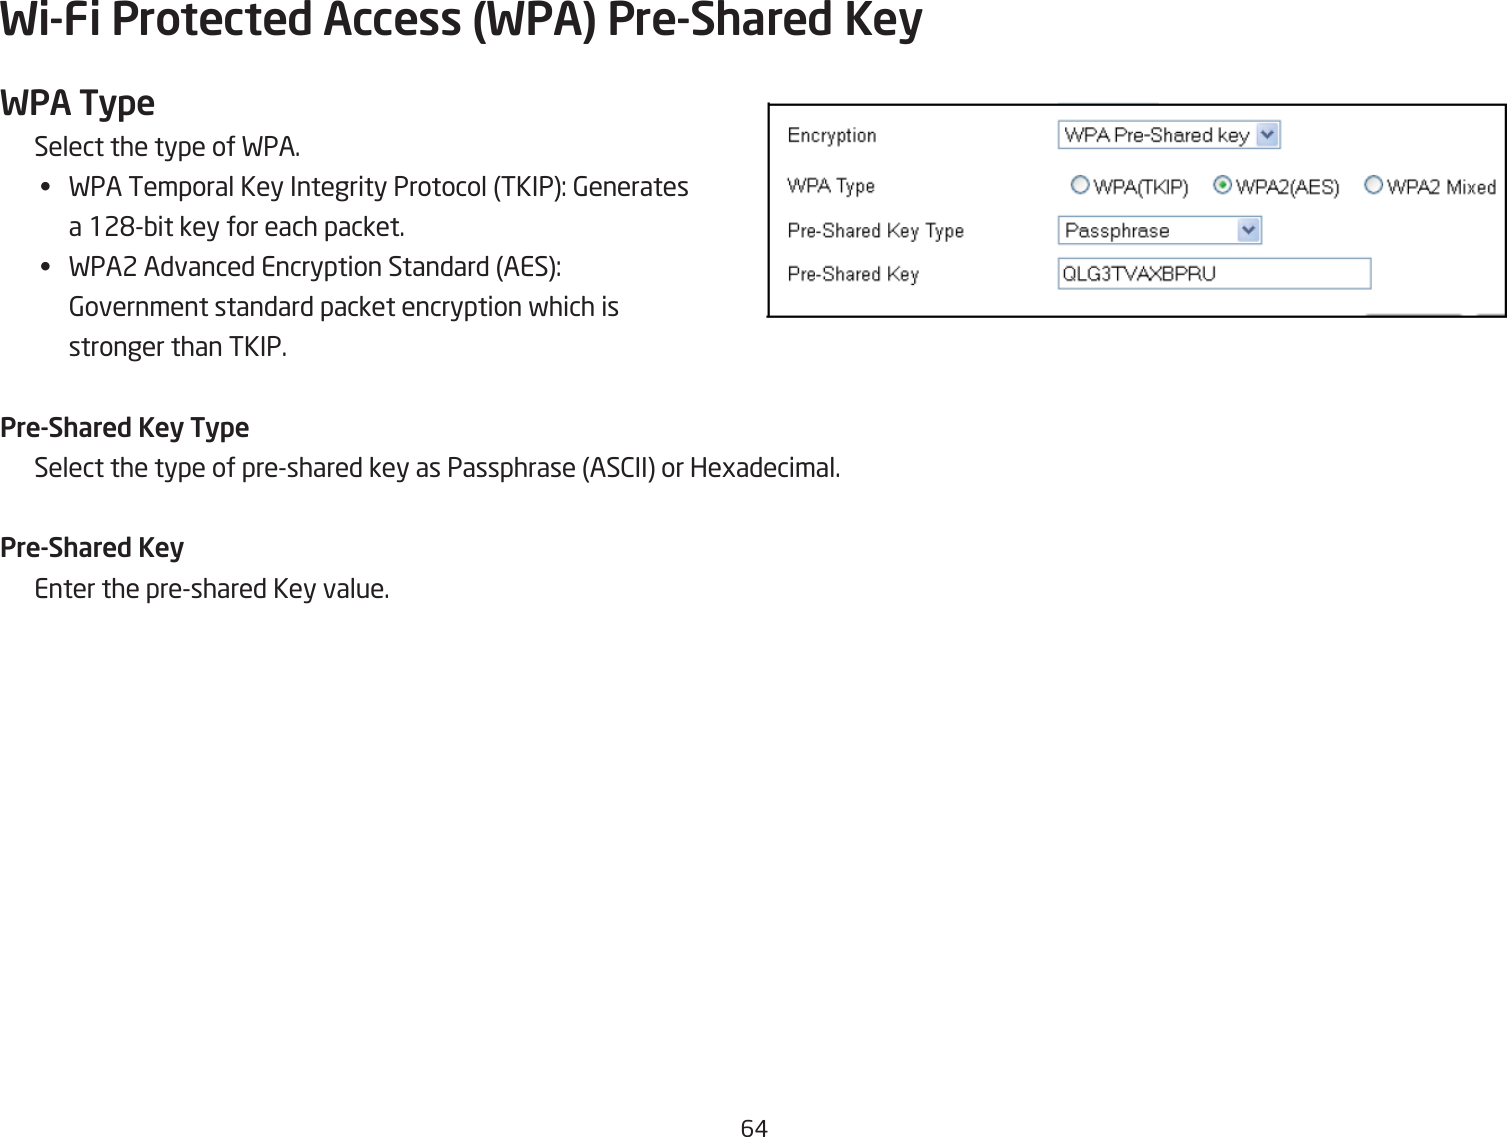
![62WDS Security Settings ScreenSelecting the type of F3S encryption 3isaQle, FEP or FPA PreShared Key for the fireless netfork.Wired Equivalent Privacy (WEP)Key LengthSelect Qetfeen 6#Qit and 12'encryption.Key For\atSelect the type of characters used for the FEP Key: AS2II5 characters or Hegadecimal 1 characters.DeUault KeySelect the default encryption key for fireless transactions.Encryption Key [#]Enter the encryption keys used to encrypt the data packetsduring data transmission.](https://usermanual.wiki/EnGenius-Technologies/ETA1305/User-Guide-2103421-Page-62.png)
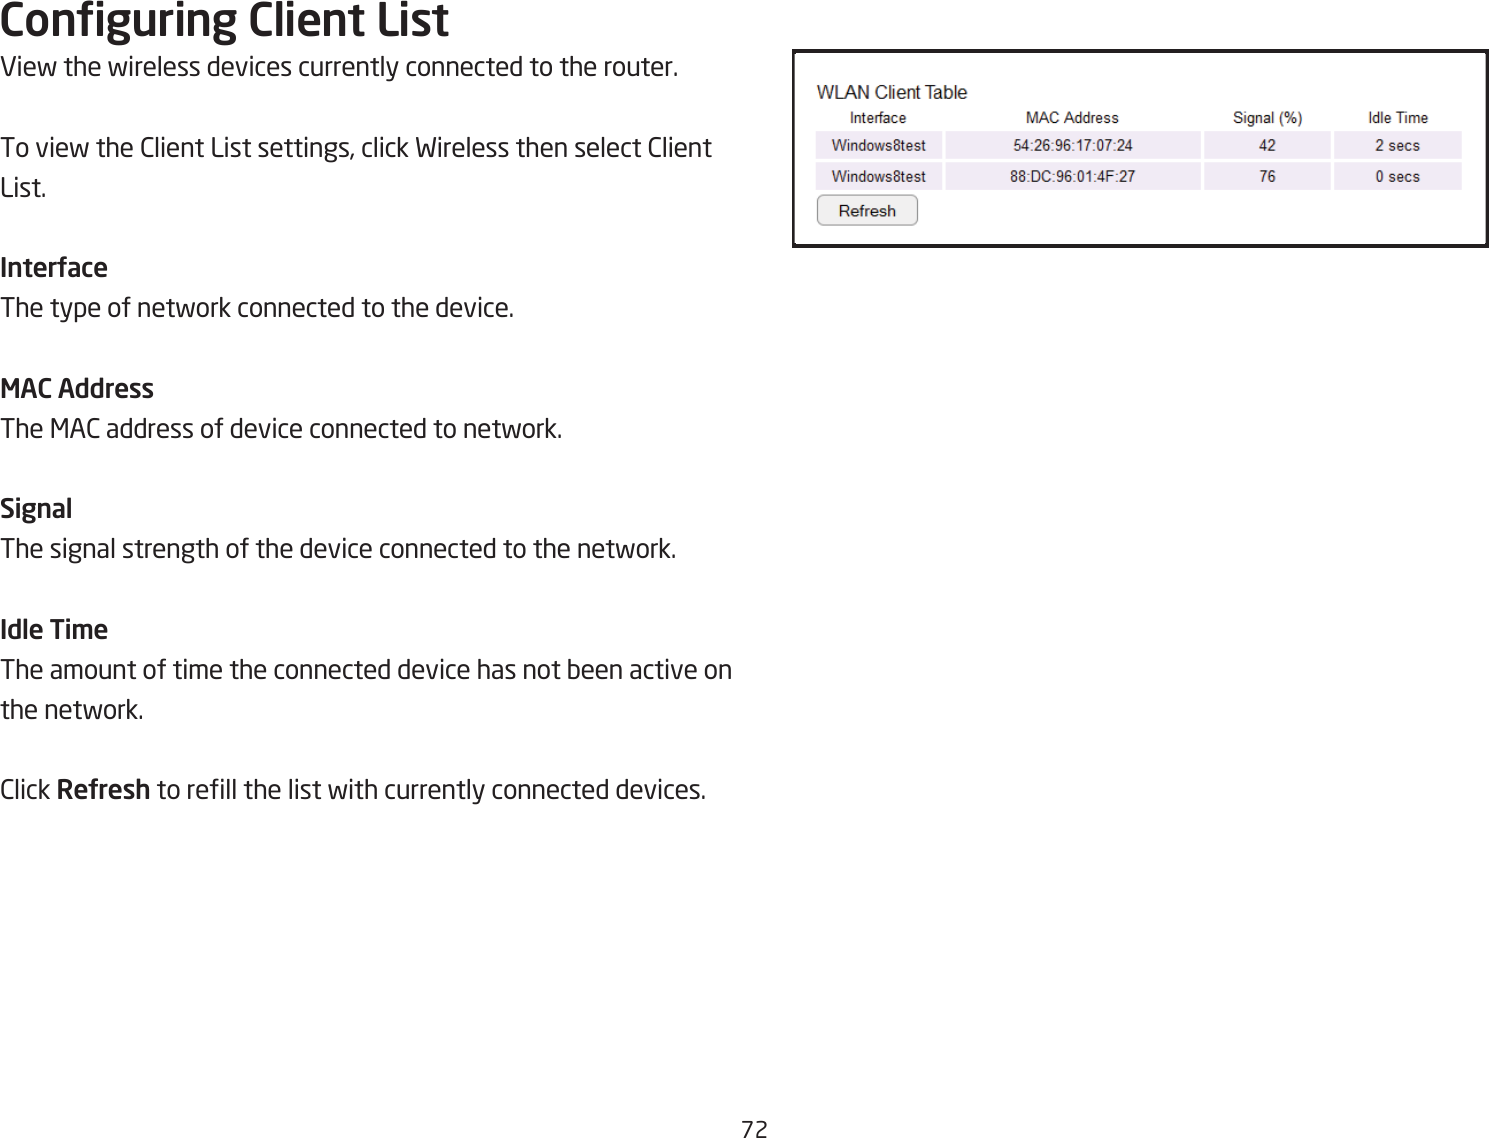
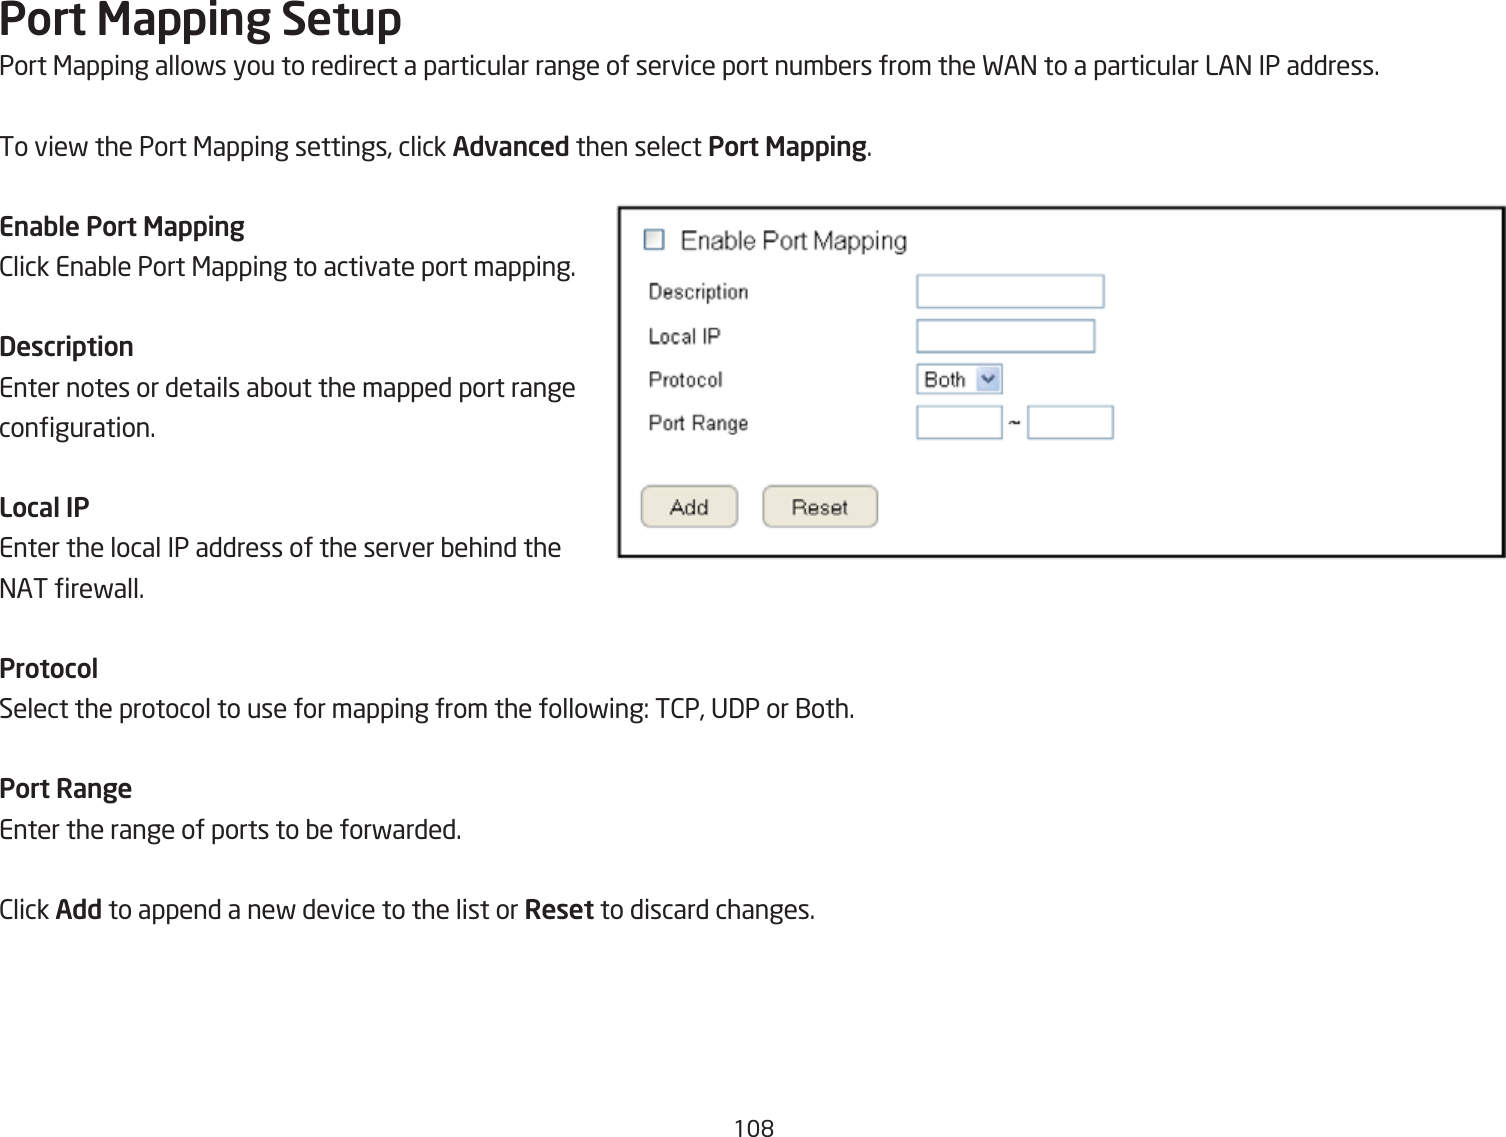
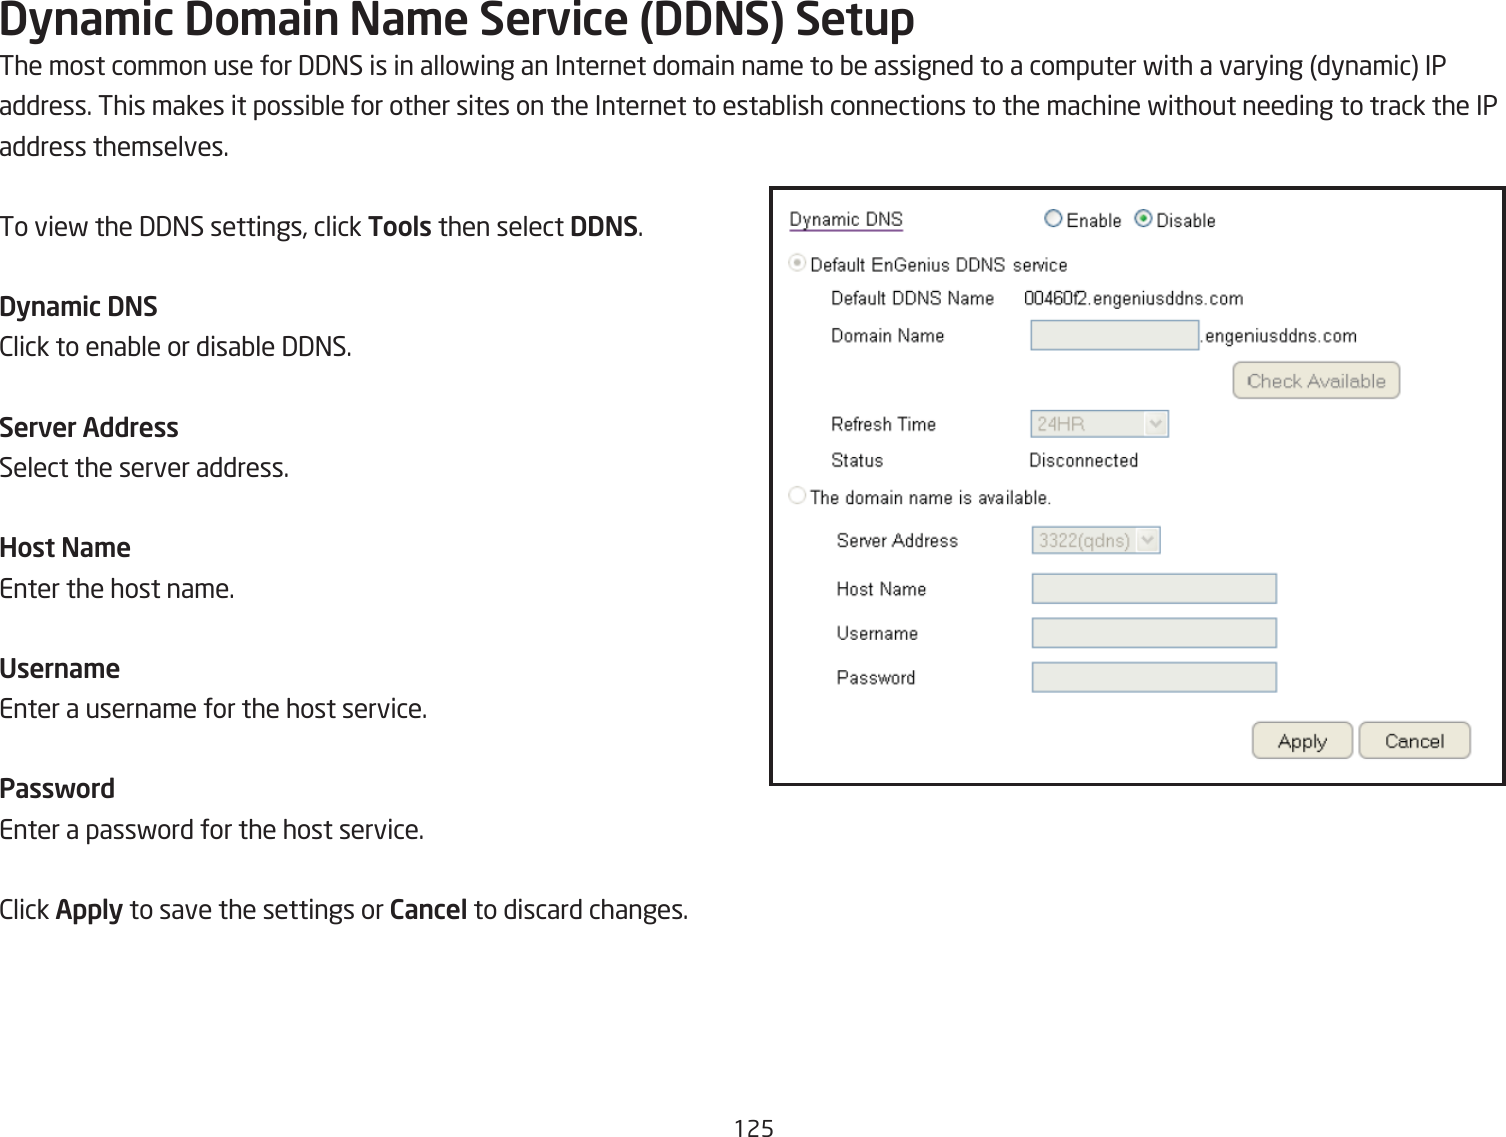
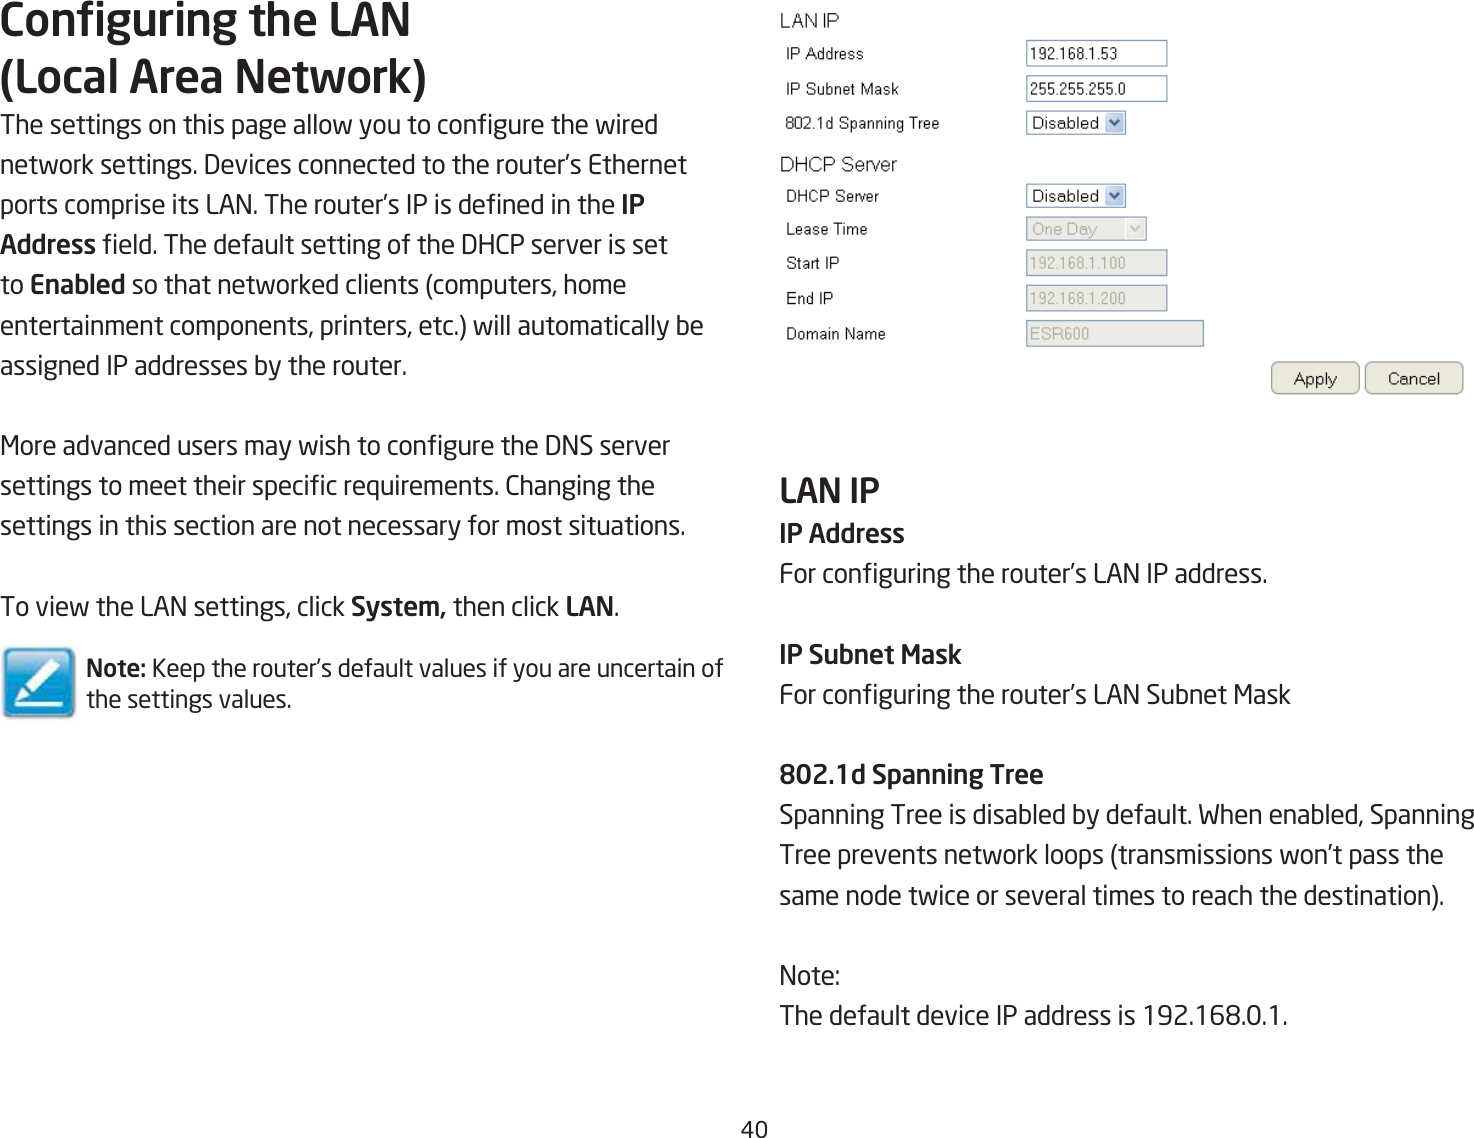
![6'Wired Equivalent Privacy (WEP)Authentication TypeSelect the type of authentication from the follofing:• Open Syste\: Fireless stations can associate fith the router fithout FEP encryption• Shared Key: 3evices must provide the corresponding FEP keys fhen connecting to the router• Auto: The router automatically detects fhether >pen System or Shared Key is Qeing usedKey LengthSelect Qetfeen 6#Qit and 12'encryption.Key TypeSelect the type of characters used for the FEP Key: AS2II5 characters or Hegadecimal 1 characters.Encryption Key [#]Enter the encryption keys used to encrypt the data packets during data transmission.Enable 802.1x AuthenticationEnaQle or disaQle '2.1g authentication.](https://usermanual.wiki/EnGenius-Technologies/ETA1305/User-Guide-2103421-Page-68.png)