Etekcity ESWL01 Etekcity Smart Wi-Fi Light Switch User Manual
Etekcity Corporation Etekcity Smart Wi-Fi Light Switch
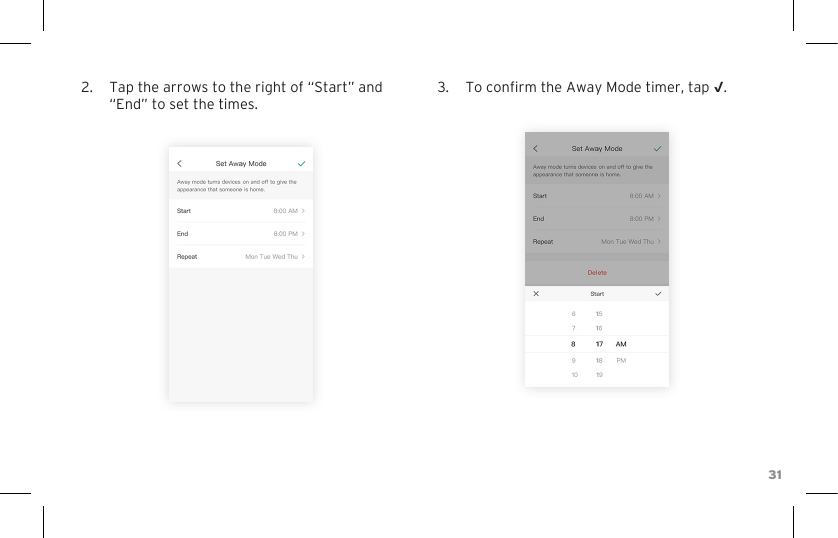
UserManual.wiki
>
Etekcity
>
ESWL01 User Manual
User manual
Navigation menu
Upload a User Manual
Namespaces
Wiki Guide
HTML
PDF
Info
Views
User Manual
Discussion / Help
Navigation

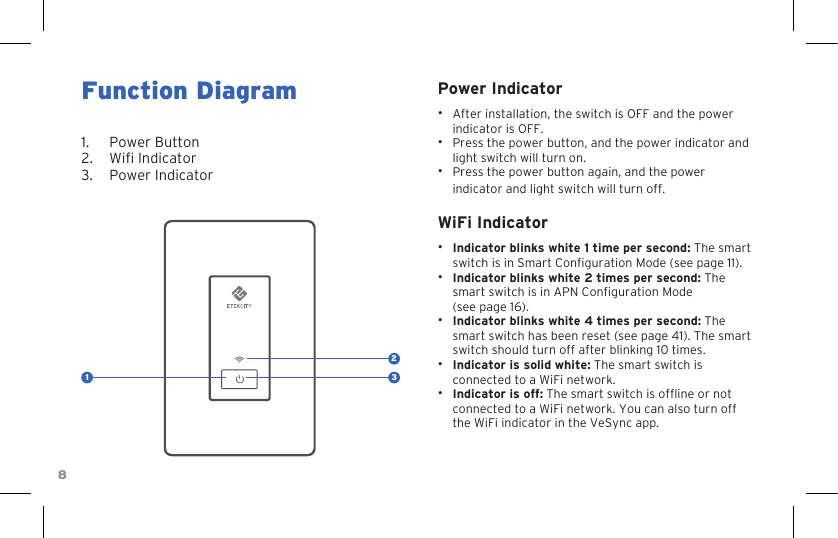
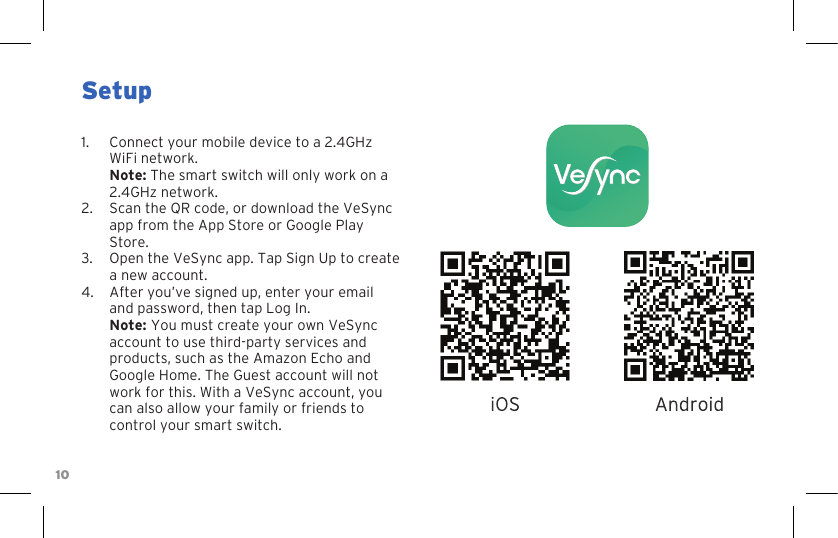
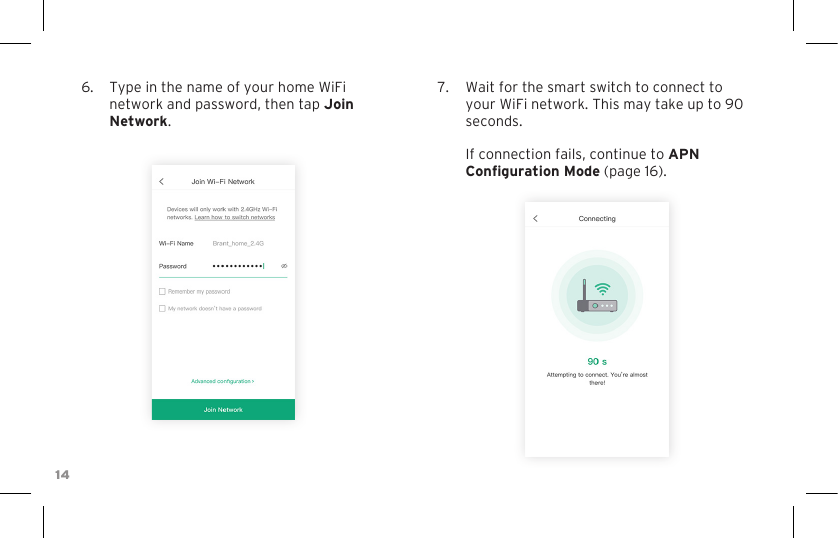
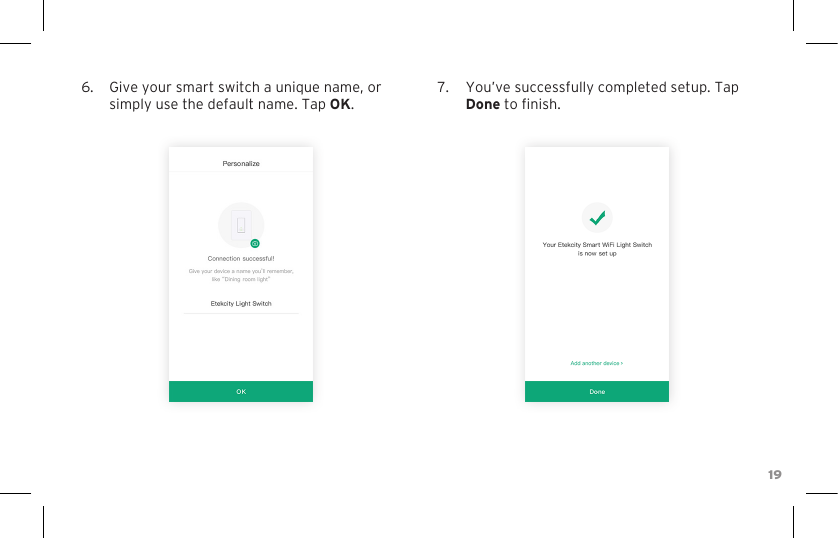
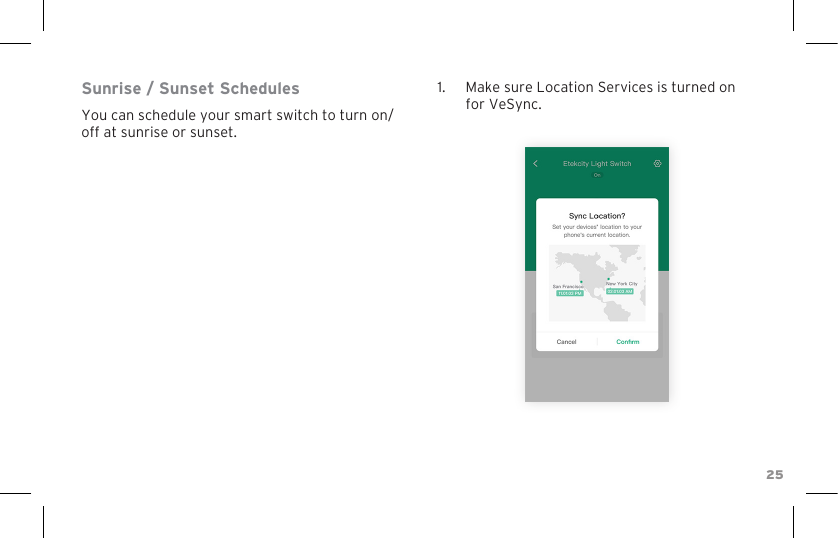
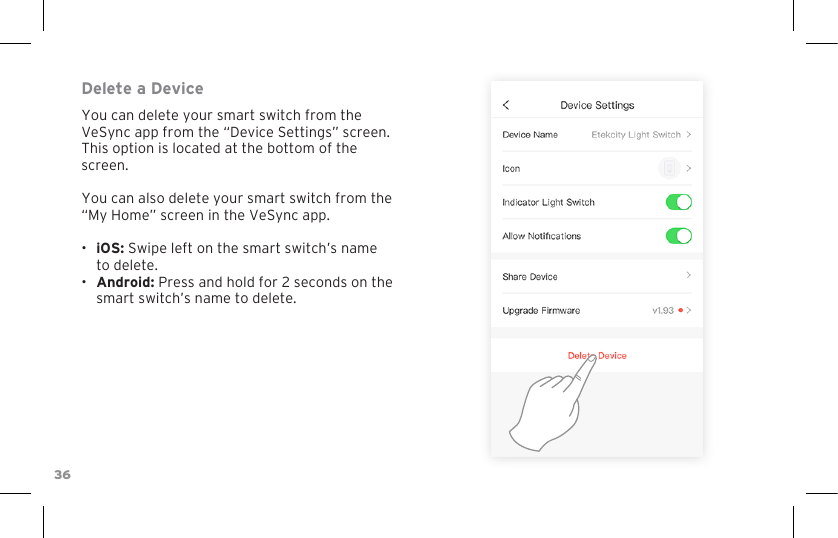
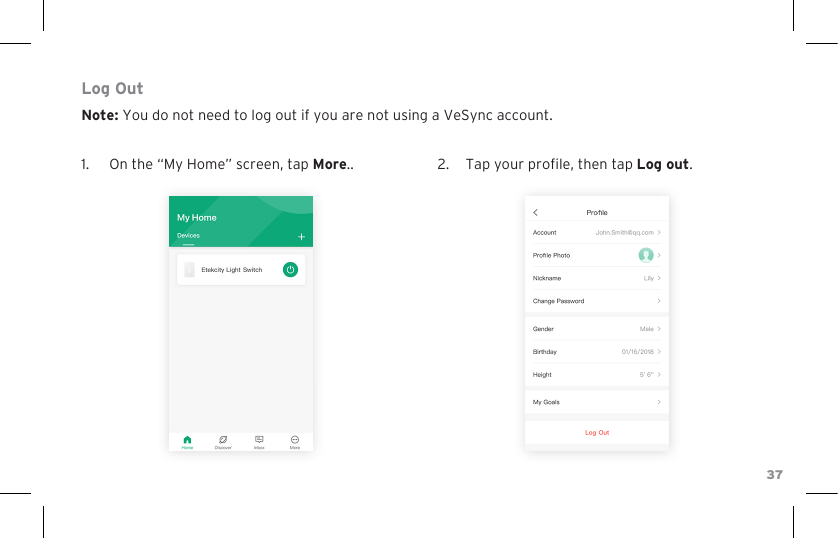
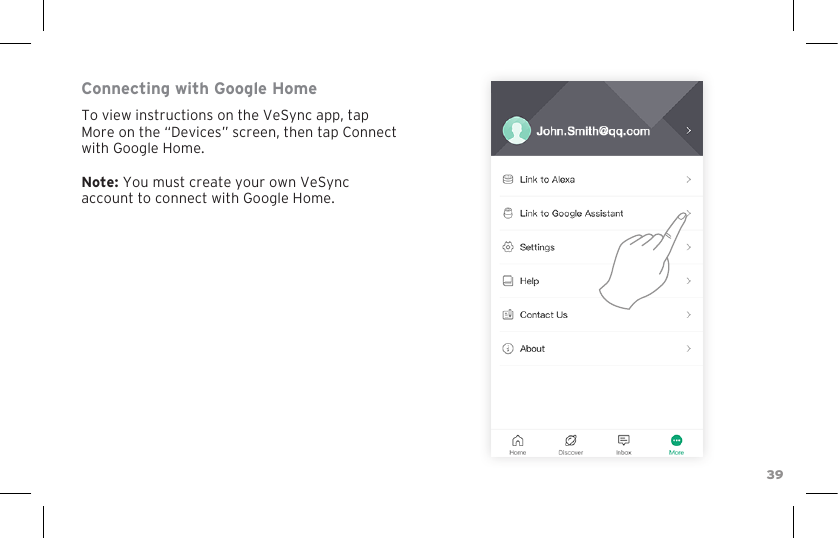
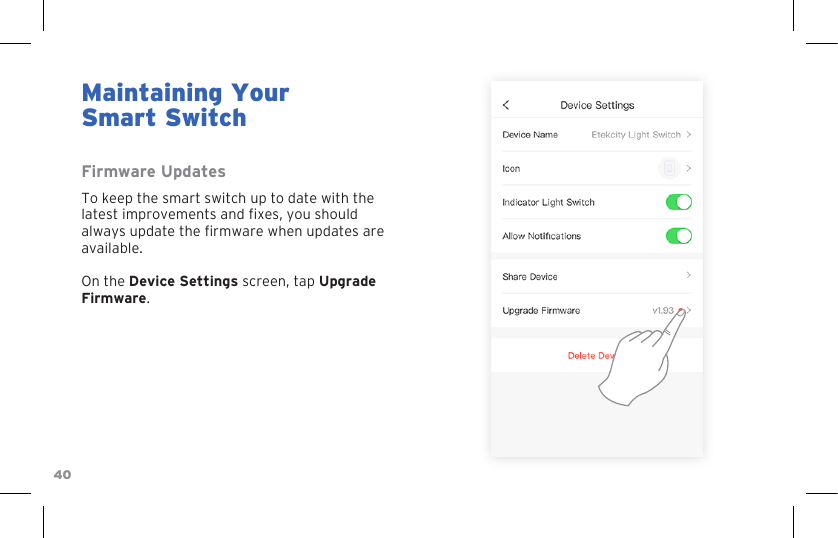
![9InstallationRemove the faceplate from the smart switch [Figure 1.1], then install the smart switch into a switch box in the wall [See Figure 1.2 and Figure 1.3].Note: A neutral wire is required to install the smart switch.Figure 1.1Figure 1.2 Figure 1.3GroundL-In120V – InputNL-OutL-InNeutralGreenLampBlackBlackWhite](https://usermanual.wiki/Etekcity/ESWL01/User-Guide-3924430-Page-9.png)