EverFocus Electronics EQN2201-W IP Camera User Manual
EverFocus Electronics Corp. IP Camera
UserManual.wiki
>
EverFocus Electronics
>
EQN2201 W User Manual
User Manual
Navigation menu
Upload a User Manual
Namespaces
Wiki Guide
HTML
PDF
Info
Views
User Manual
Discussion / Help
Navigation


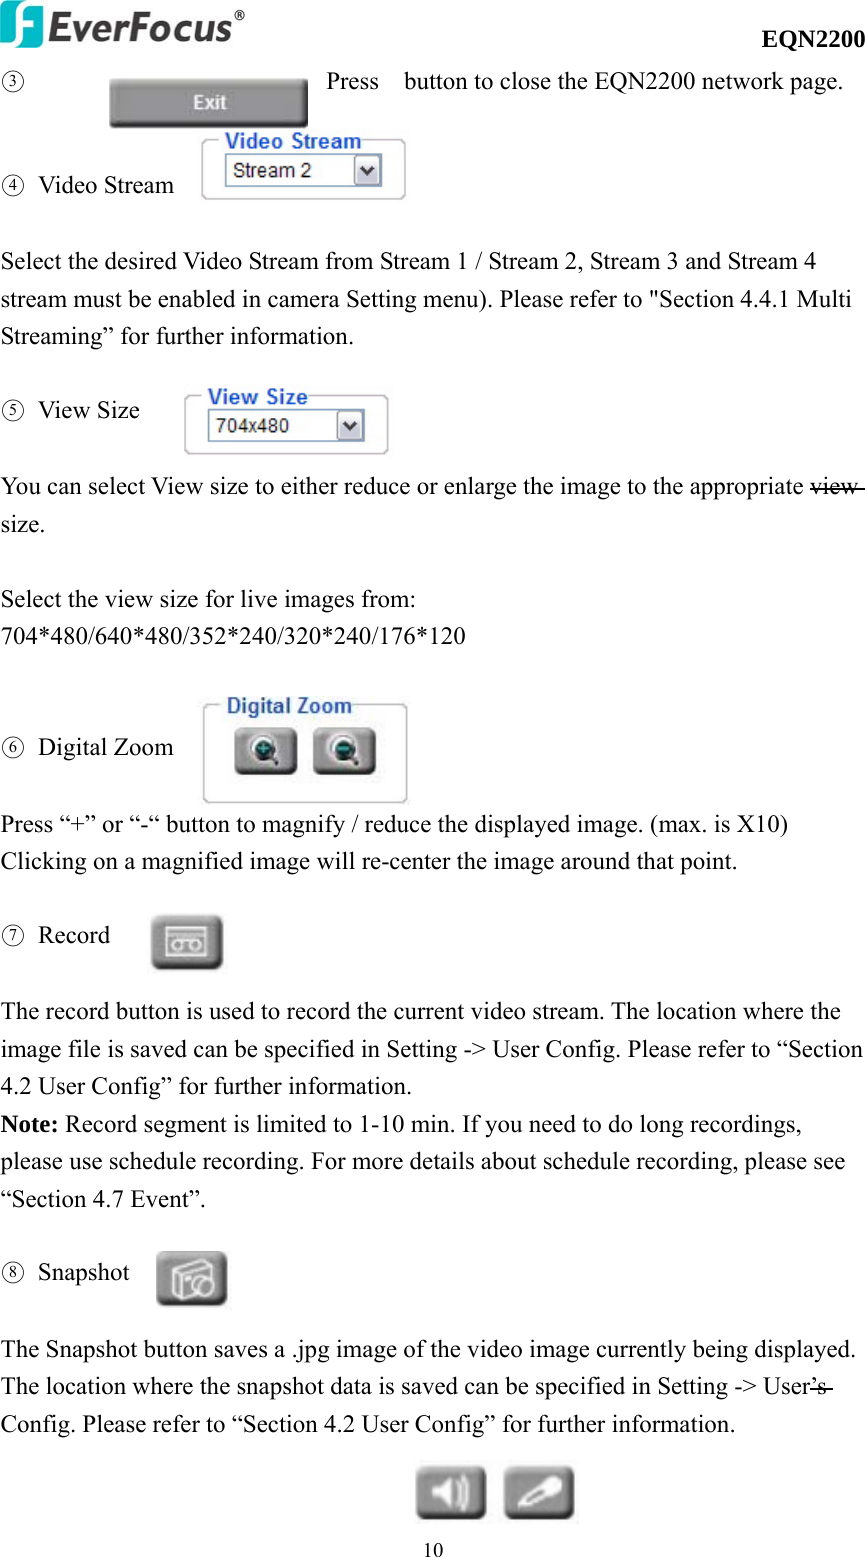
![EQN2200 94. ACCESSING THE CAMERA MENU Step 1.Start an Internet Explorer browser session. Step 2. Enter the IP address or host name of the camera in the Location/Address field of your Internet Explorer browser in the form http://nn.nn.nn.nn:port, or http://ddnsname.everfocusddns.com. (Please refer to EQN2200 Installation Guide for how to find the IP address by using the IP Finder) Step 3. At the login popup window enter “Username” and “Password”. Default Username is “user1” and default password is “11111111”. Step 4. Click “Login” button. Step 5. You might be required to download Active X files, which are required to process camera video. Please click "Yes". Step 6. Congratulations!! You should now be able to see the live image. Callouts hard to read on figure and in list below!!! ○1 Press button to display the "Live" page. Double click on the image to show a full screen display, double click again or press ESC to return to the normal display. ○2 Press button to enter the camera Setting page. In the Setting page, there are 8 sections: [System Info], [User Config], [Network], [Video], [Audio], [User], [Event] and [System]. Please refer to “Section 5. SETTING” for further information. ○1 ○2 ○12 ○11 ○10 ○9 ○8 ○7 ○3 ○4 ○6 ○13○5 ○14](https://usermanual.wiki/EverFocus-Electronics/EQN2201-W/User-Guide-1253225-Page-9.png)
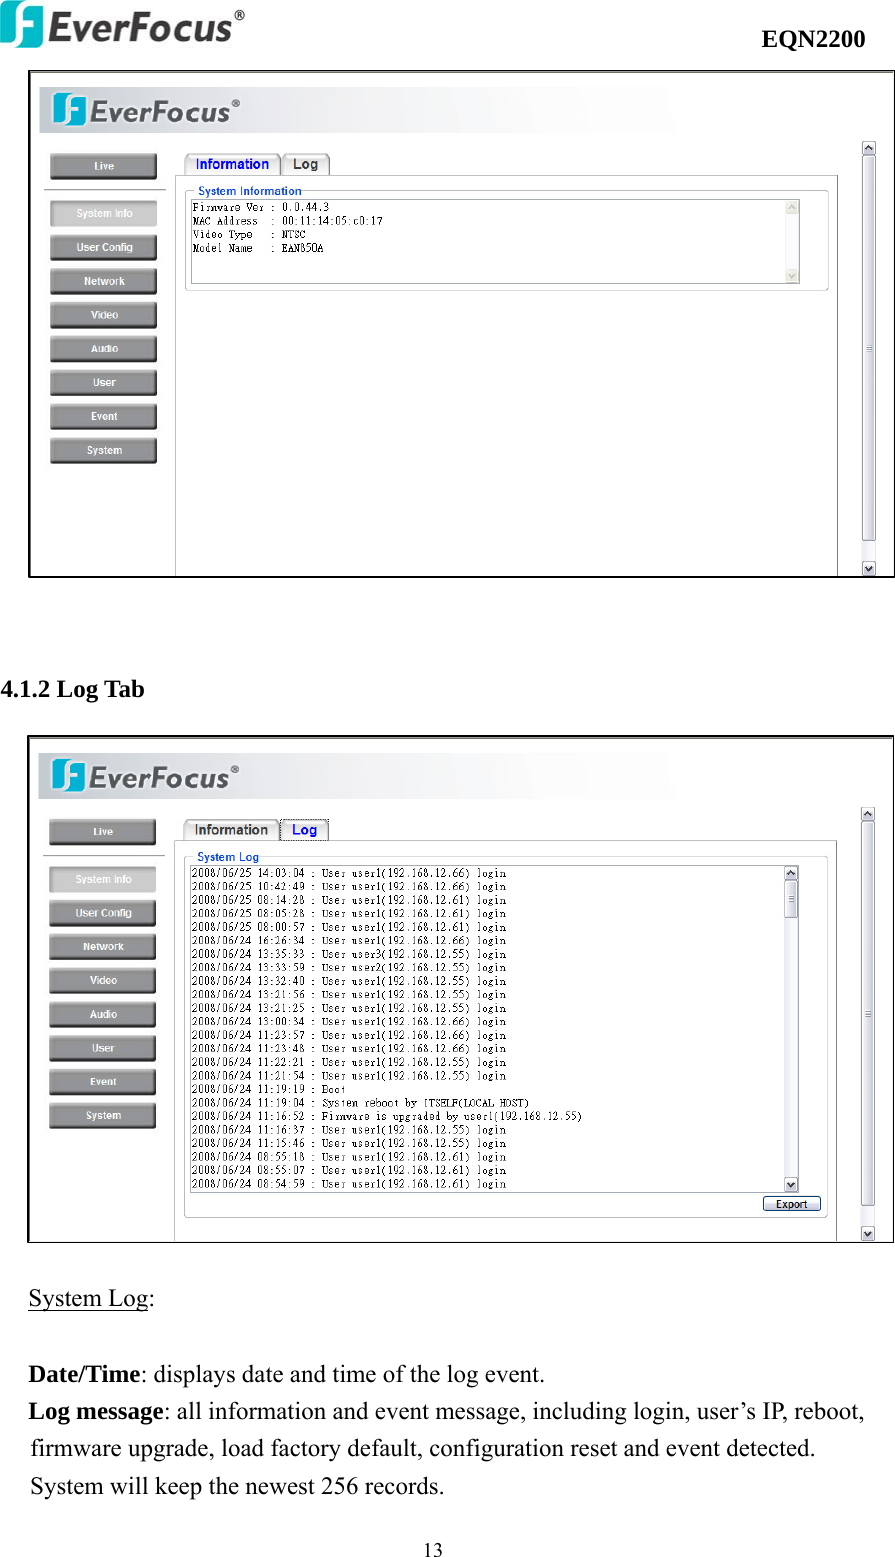
![EQN2200 125. SETTING Click this button to display the camera setup menu. 4.1 System Info System information and system log events can be accessed on this page via 2 tabs: [Information] tab and [Log] tab. 4.1.1 Information Tab System Information: Firmware version, MAC address, Video Type, Model number. (this data may not be changed in this page and is for reference only)](https://usermanual.wiki/EverFocus-Electronics/EQN2201-W/User-Guide-1253225-Page-12.png)
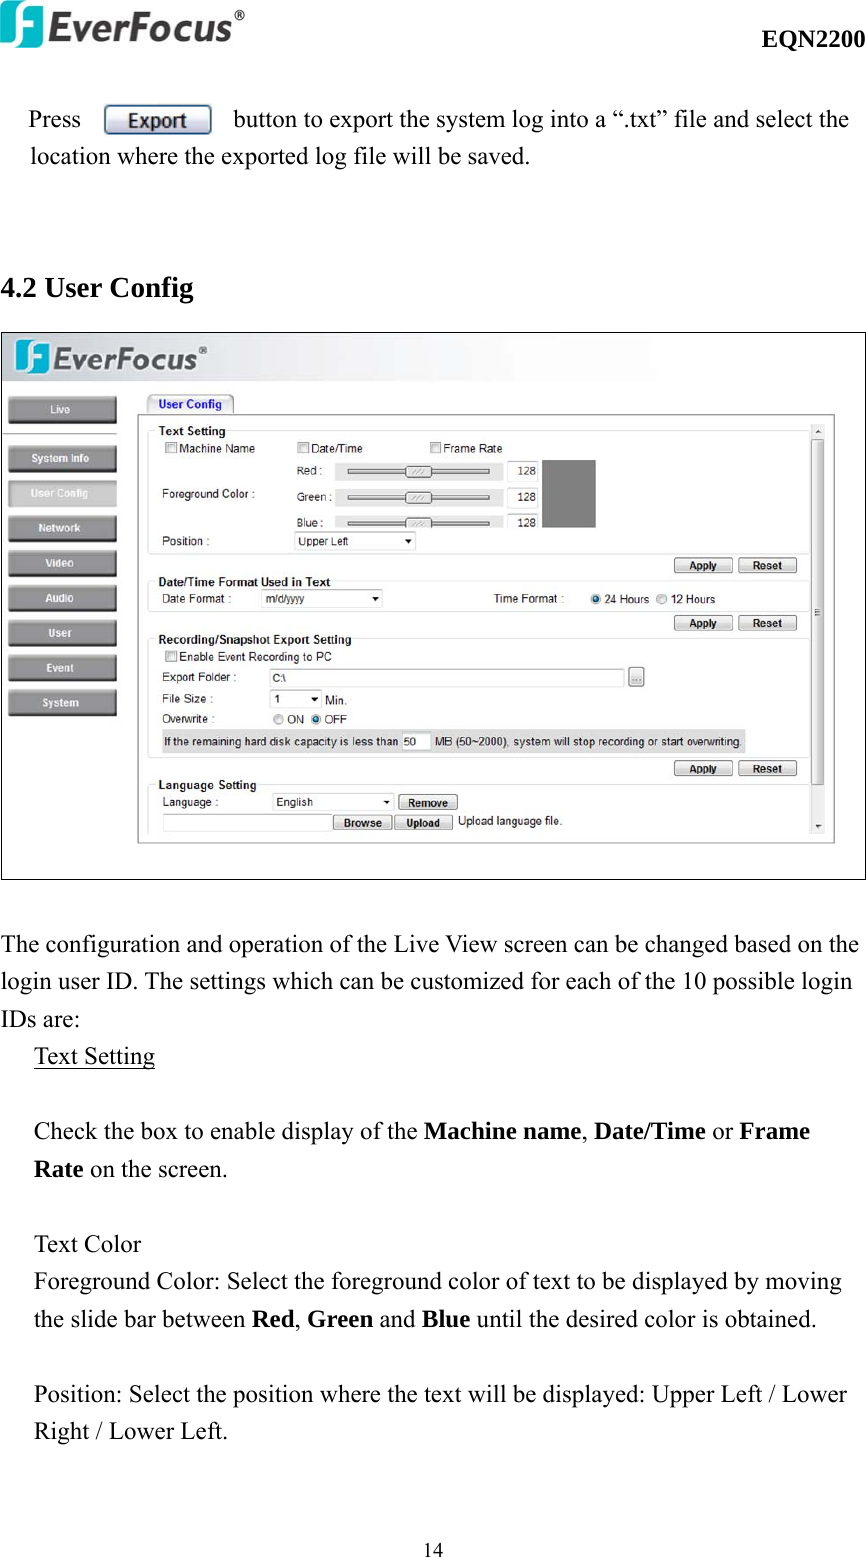
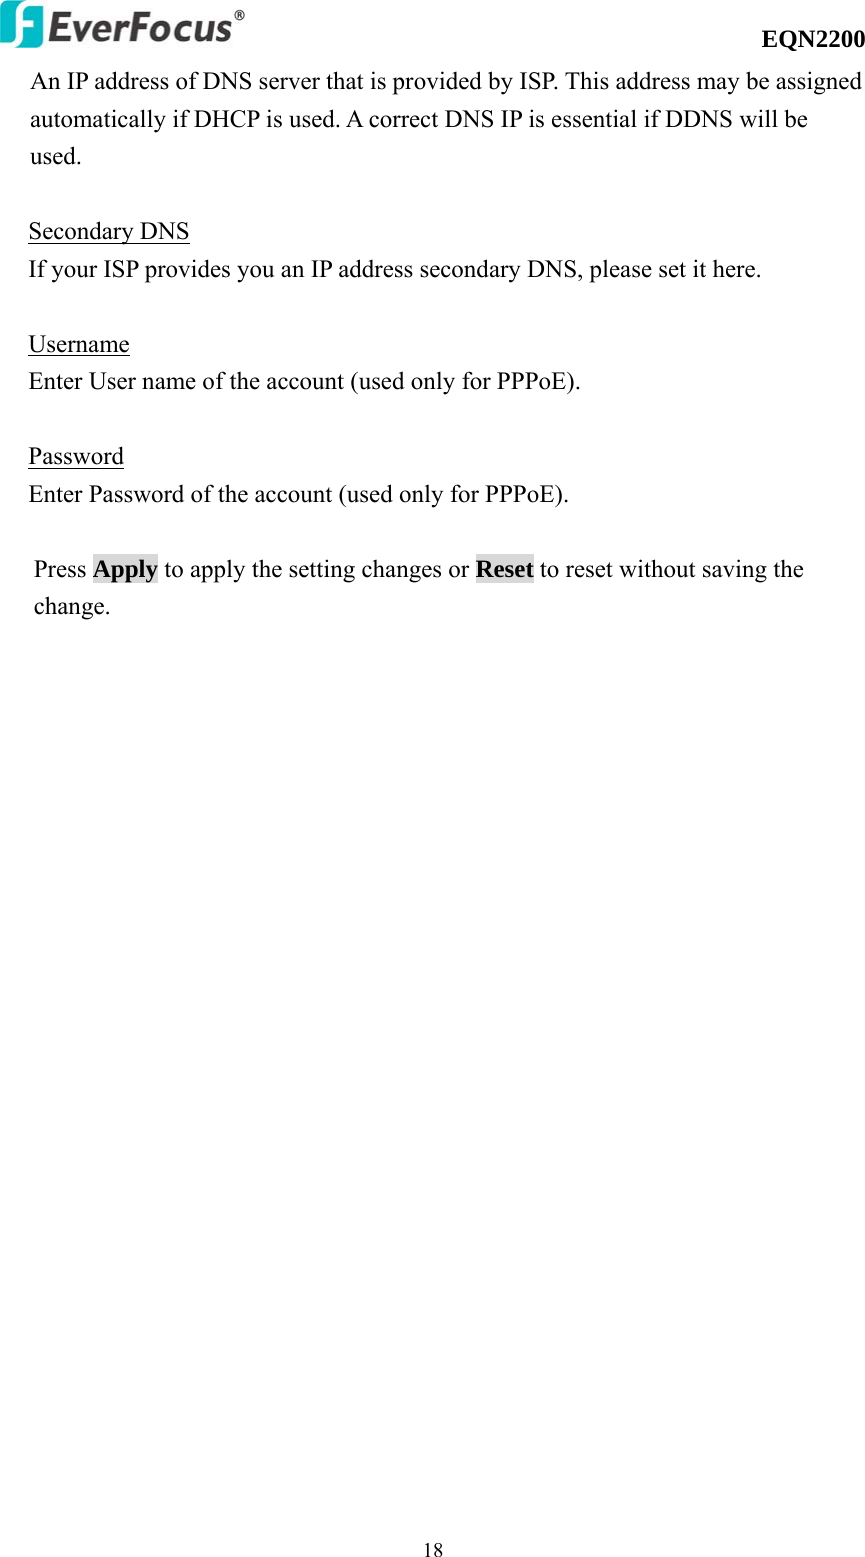
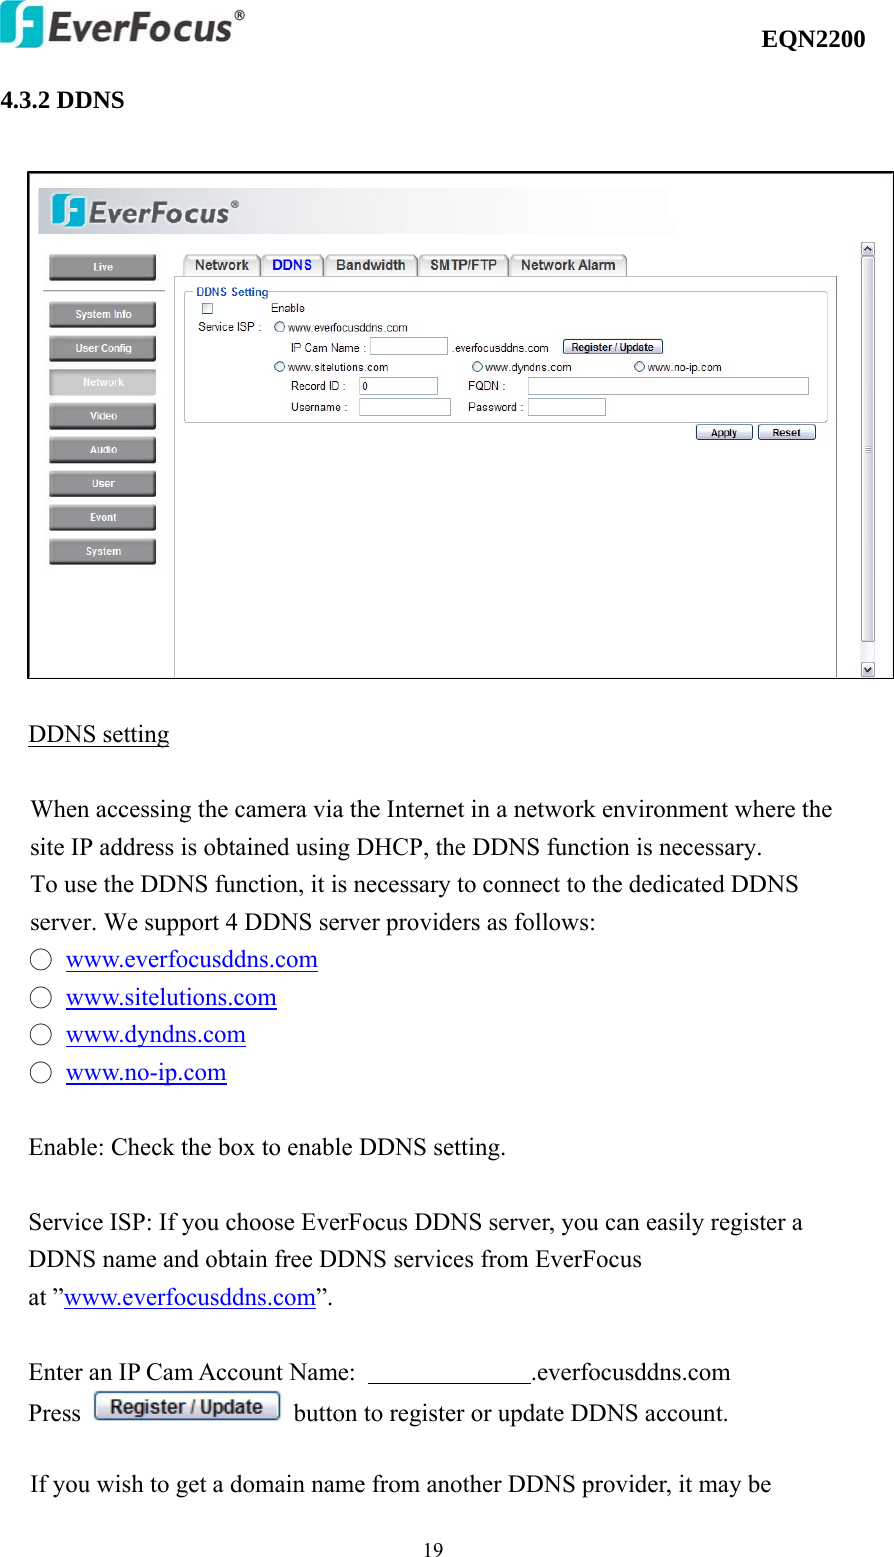
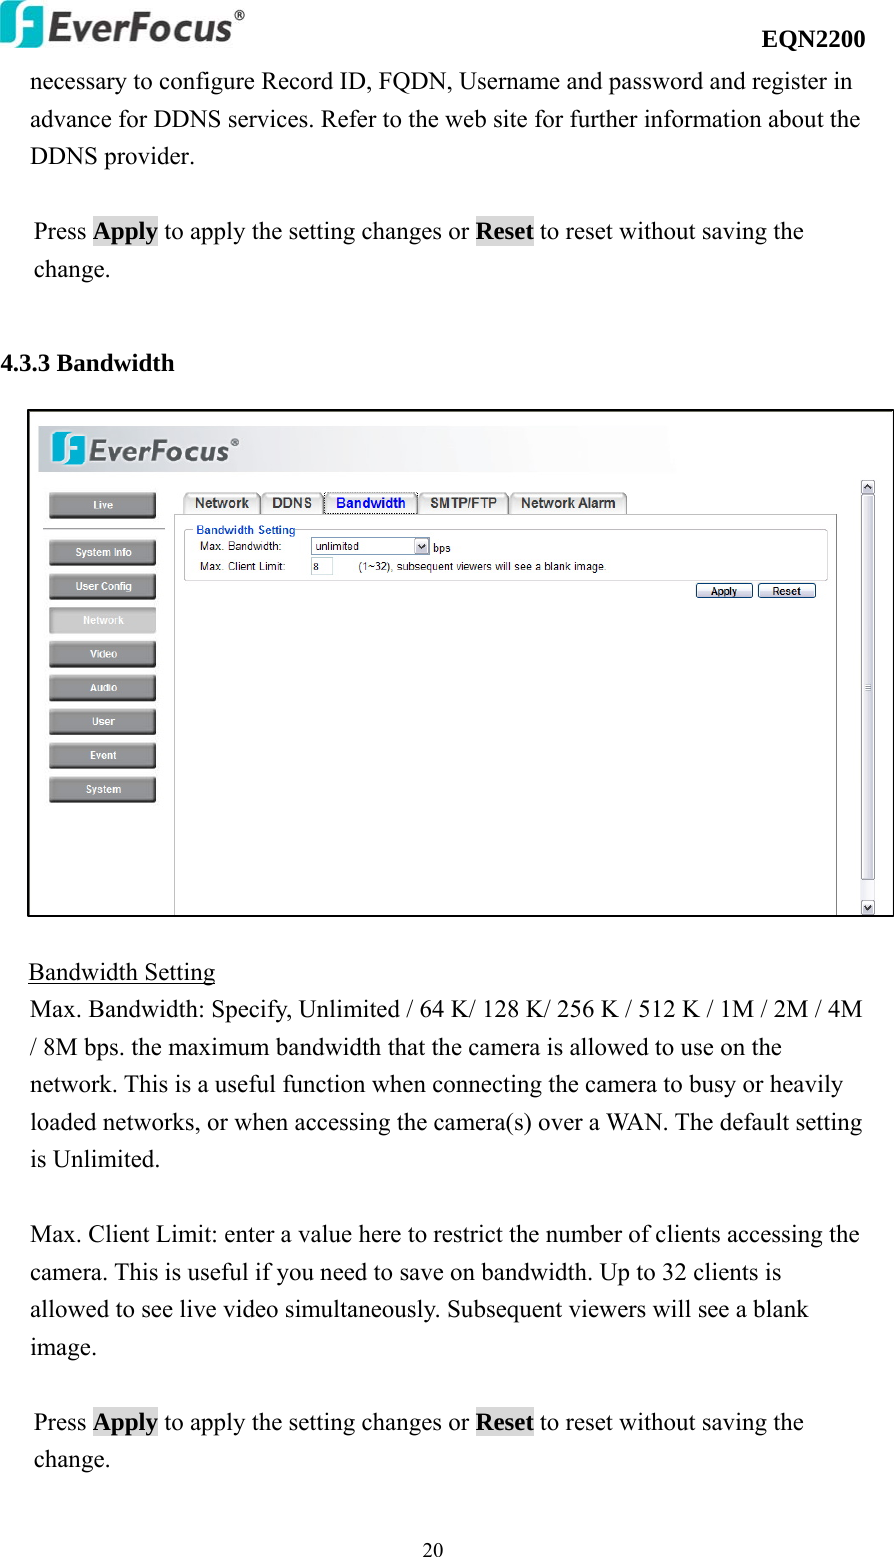
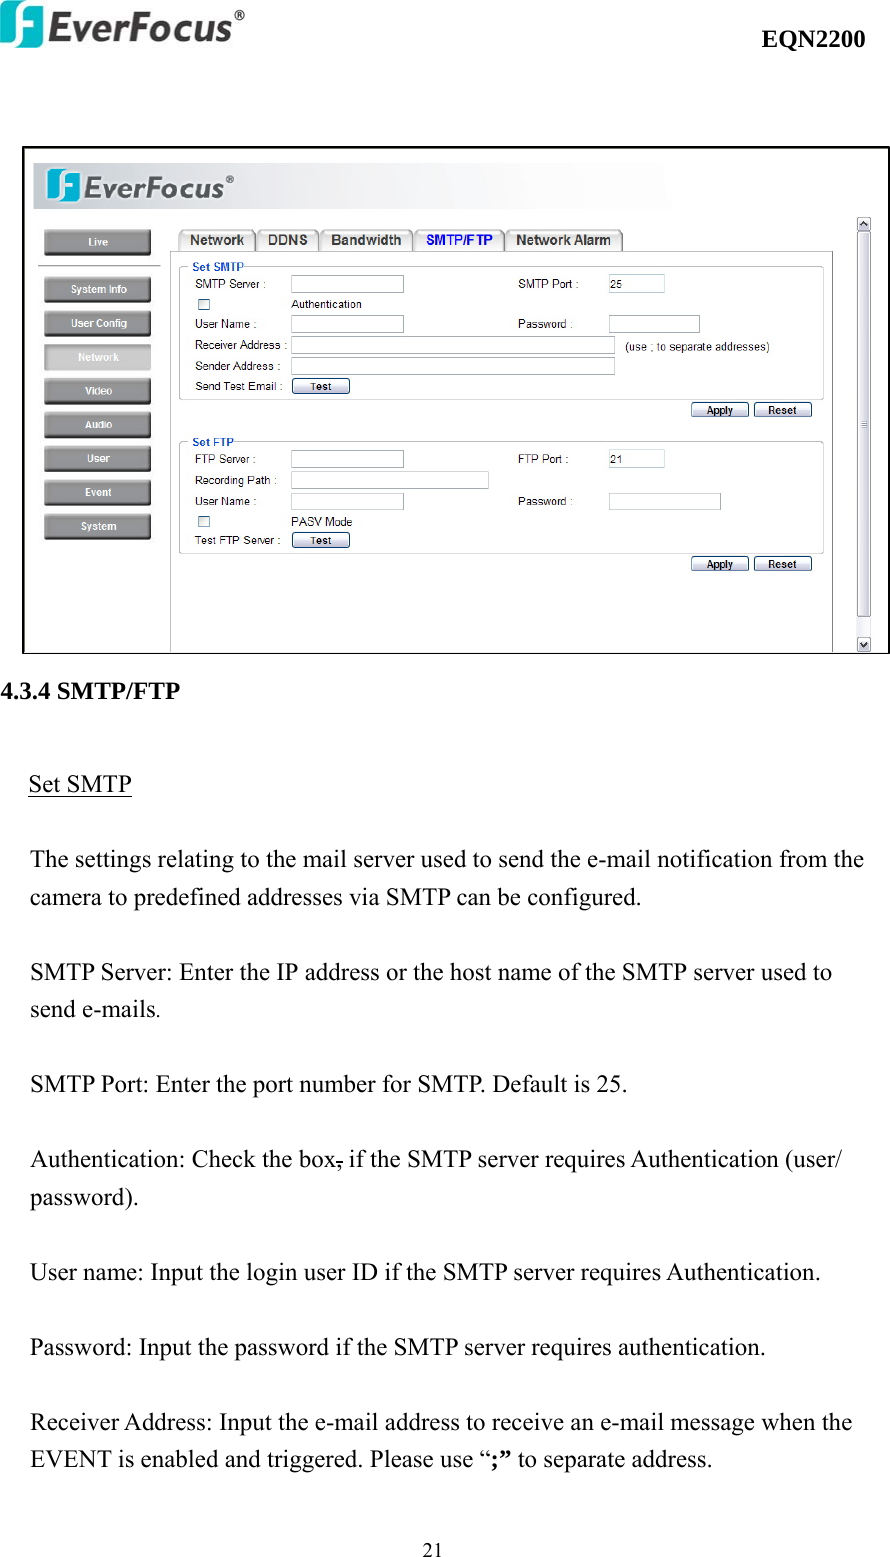
![EQN2200 16 Press Apply to apply the setting changes or Reset to reset without saving the change. 4.3 Network The network settings and the settings relating to DDNS, Bandwidth, SMTP/FTP and Network Alarm can be configured on this page. The "Network setup" page has 5 tabs: [Network] tab, the [DDNS] tab, the [Bandwidth] tab, the [SMTP/FTP] tab and the [Network alarm] tab. 4.3.1 Network The following information is required to configure the network settings. Contact the network administrator or your Internet service provider. Note: 1. A maximum five languages can be in the language list. 2. Uploading a new language file will reboot the system automatically. Please reconnect to the IP camera after reboot.](https://usermanual.wiki/EverFocus-Electronics/EQN2201-W/User-Guide-1253225-Page-16.png)
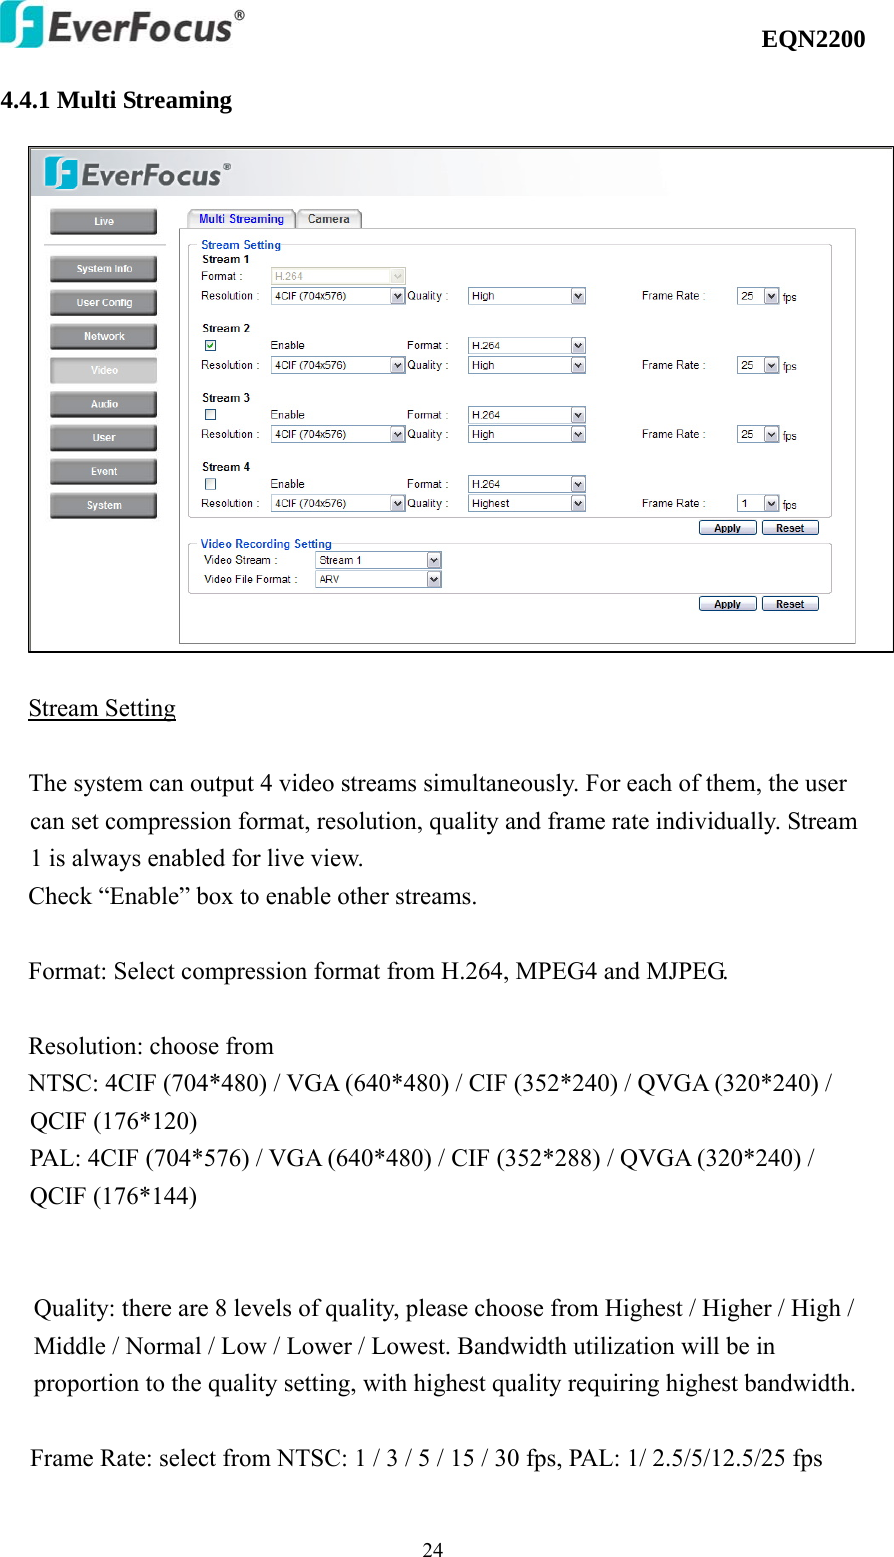
![EQN2200 234.3.5 Network Alarm (reserved for PowerCon) Set Network Alarm This function is reserved for PowerCon software, for the details regarding these settings please refer to the documentation for the PowerCon network alarm protocol. 4.4 Video The settings relating video such as streaming, camera OSD can be configured on this page. The "Video" page has 2 tabs: the [Multi-streaming] tab and the [Camera] tab.](https://usermanual.wiki/EverFocus-Electronics/EQN2201-W/User-Guide-1253225-Page-23.png)
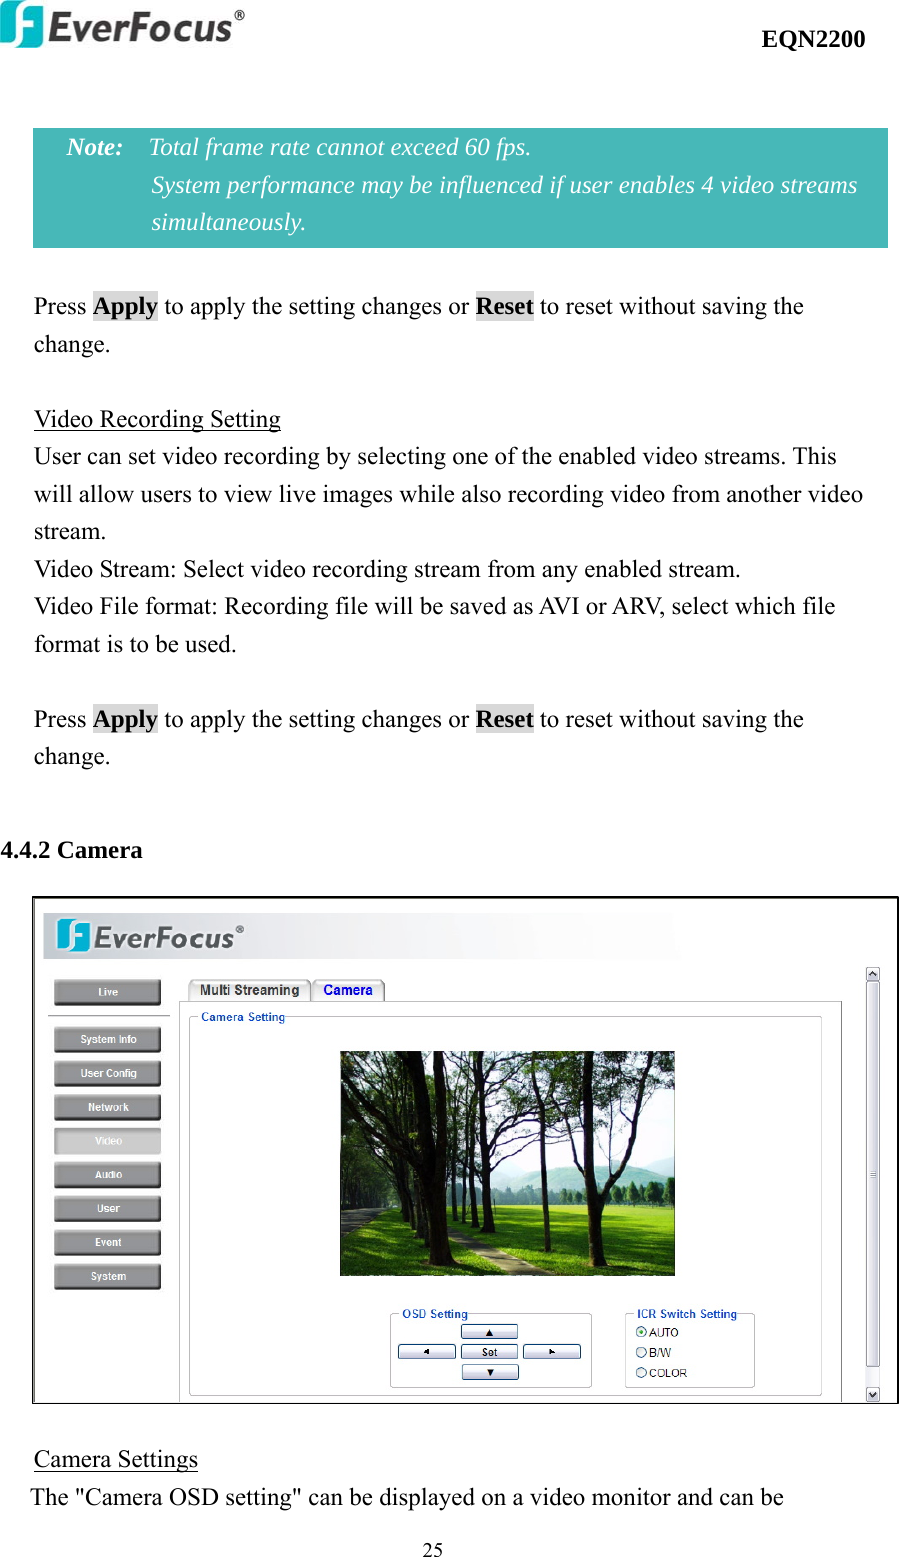
![EQN2200 26configured using the operation buttons on this tab. OSD setting: Use the following buttons on the operation panel to operate the "Camera OSD setting" remotely from a PC. (Please refer to Section 4.4.2.1 for a detailed guide to the Camera OSD Setting menu) [SET] button: Click this button to select choices or to bring up the menu and submenus. [Left] button/ [Right] button: Click these buttons to change or select the parameters. [Down] button/ [Up] button: Click these buttons to move the cursor. ICR Switch Setting: AUTO: ICR switches automatically according to the illumination. B/W: Select to keep B/W image. COLOR: Select to keep color image.](https://usermanual.wiki/EverFocus-Electronics/EQN2201-W/User-Guide-1253225-Page-26.png)
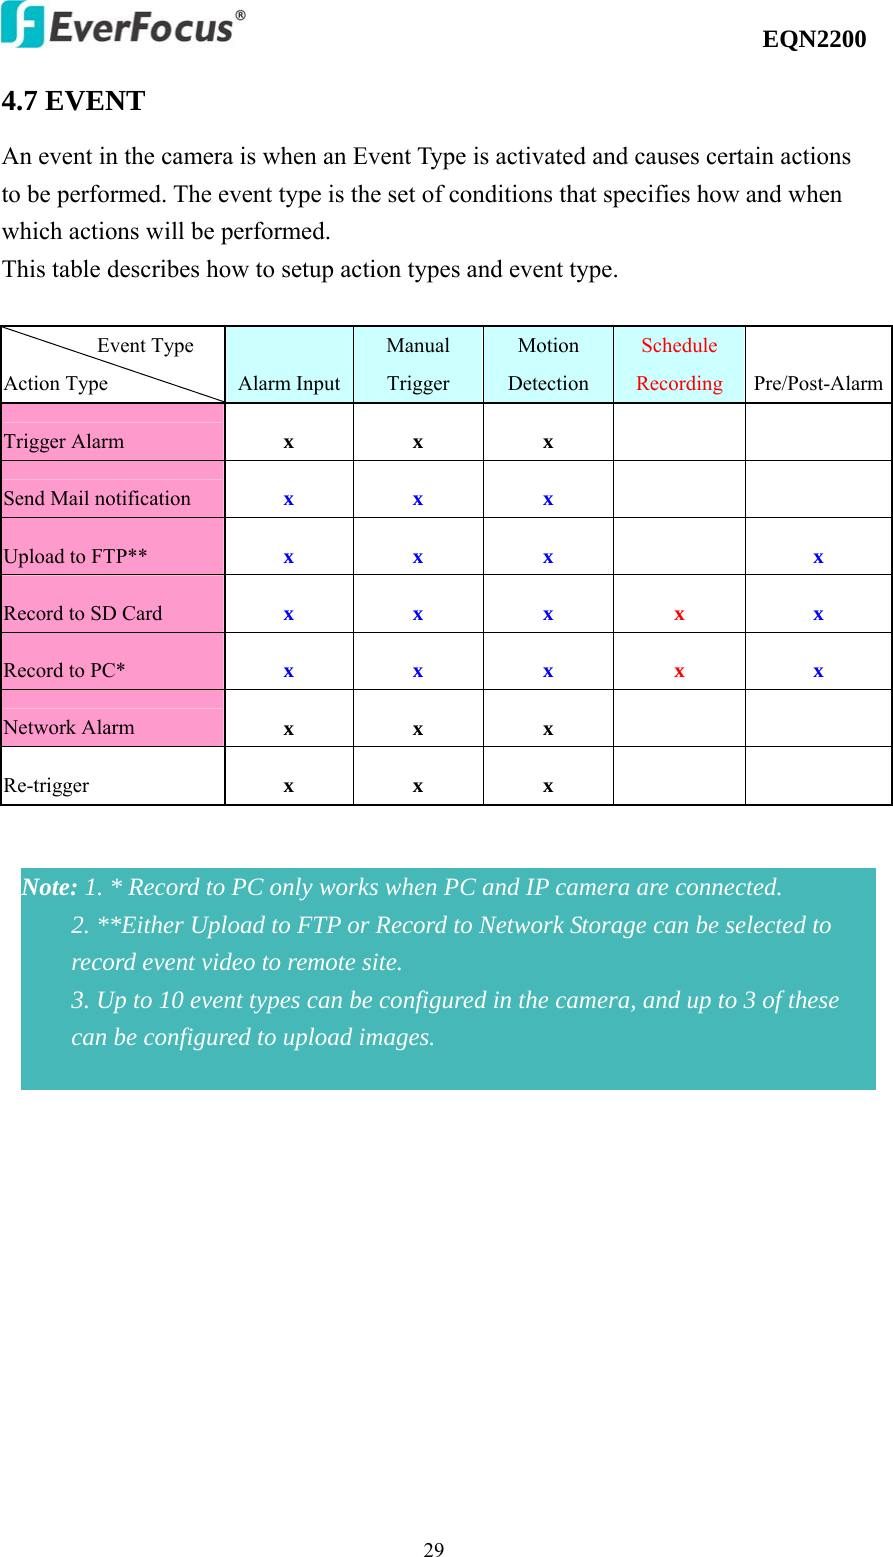
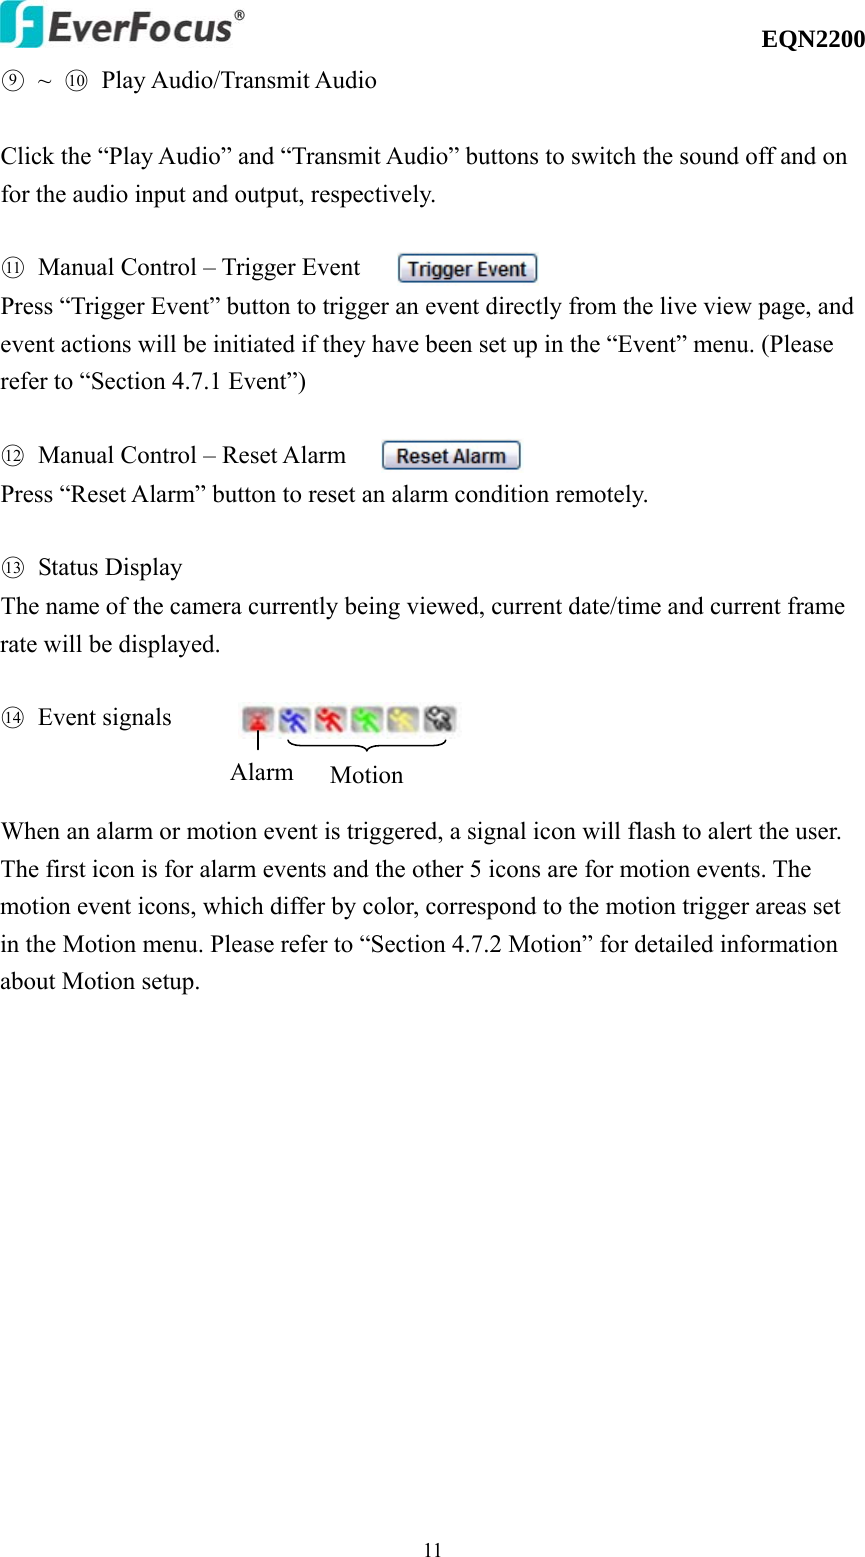
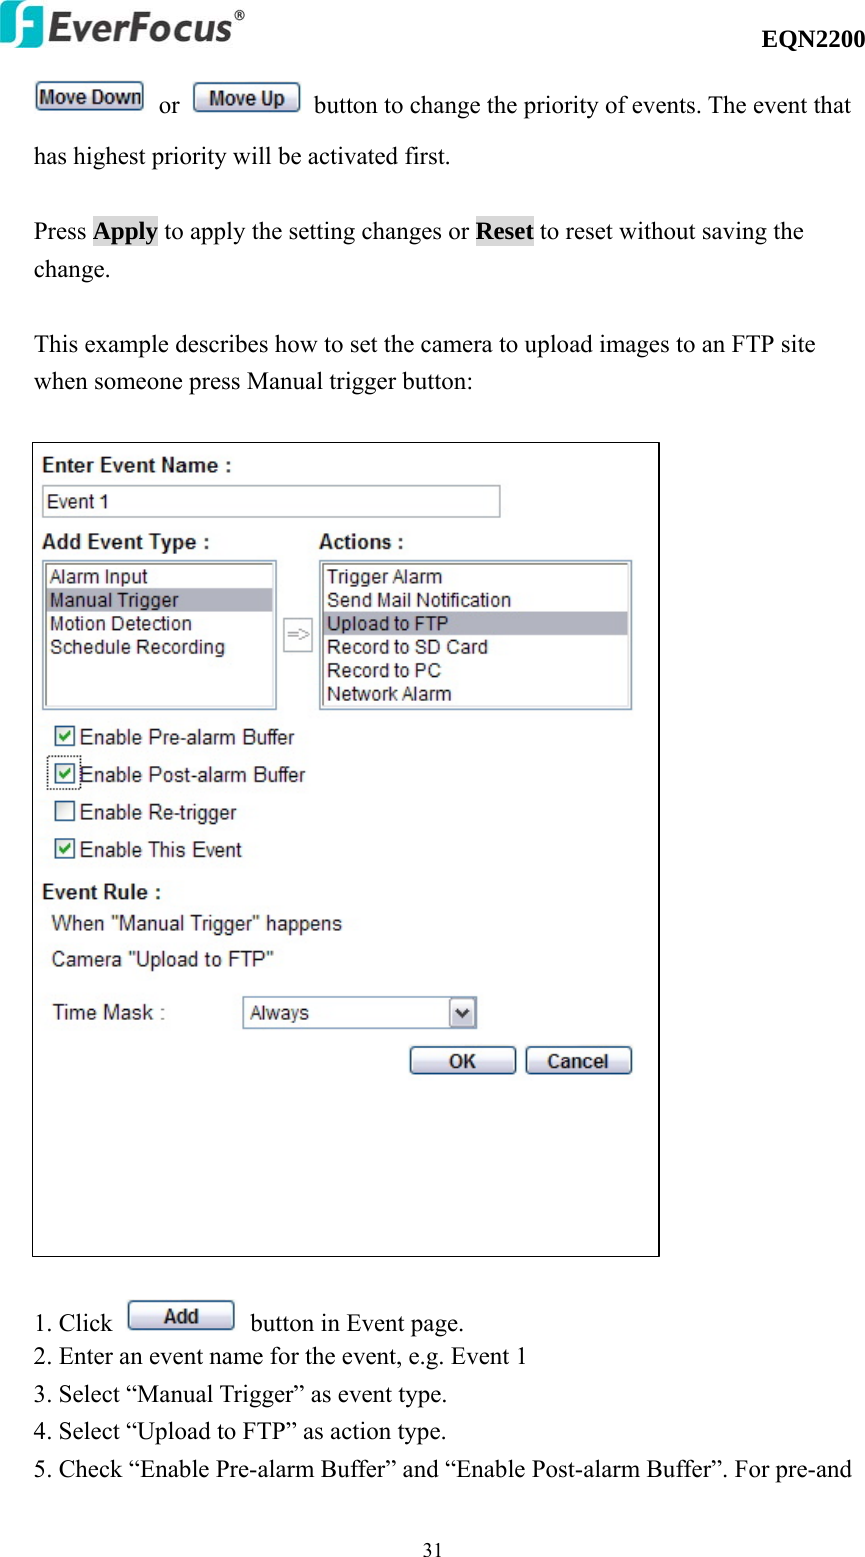
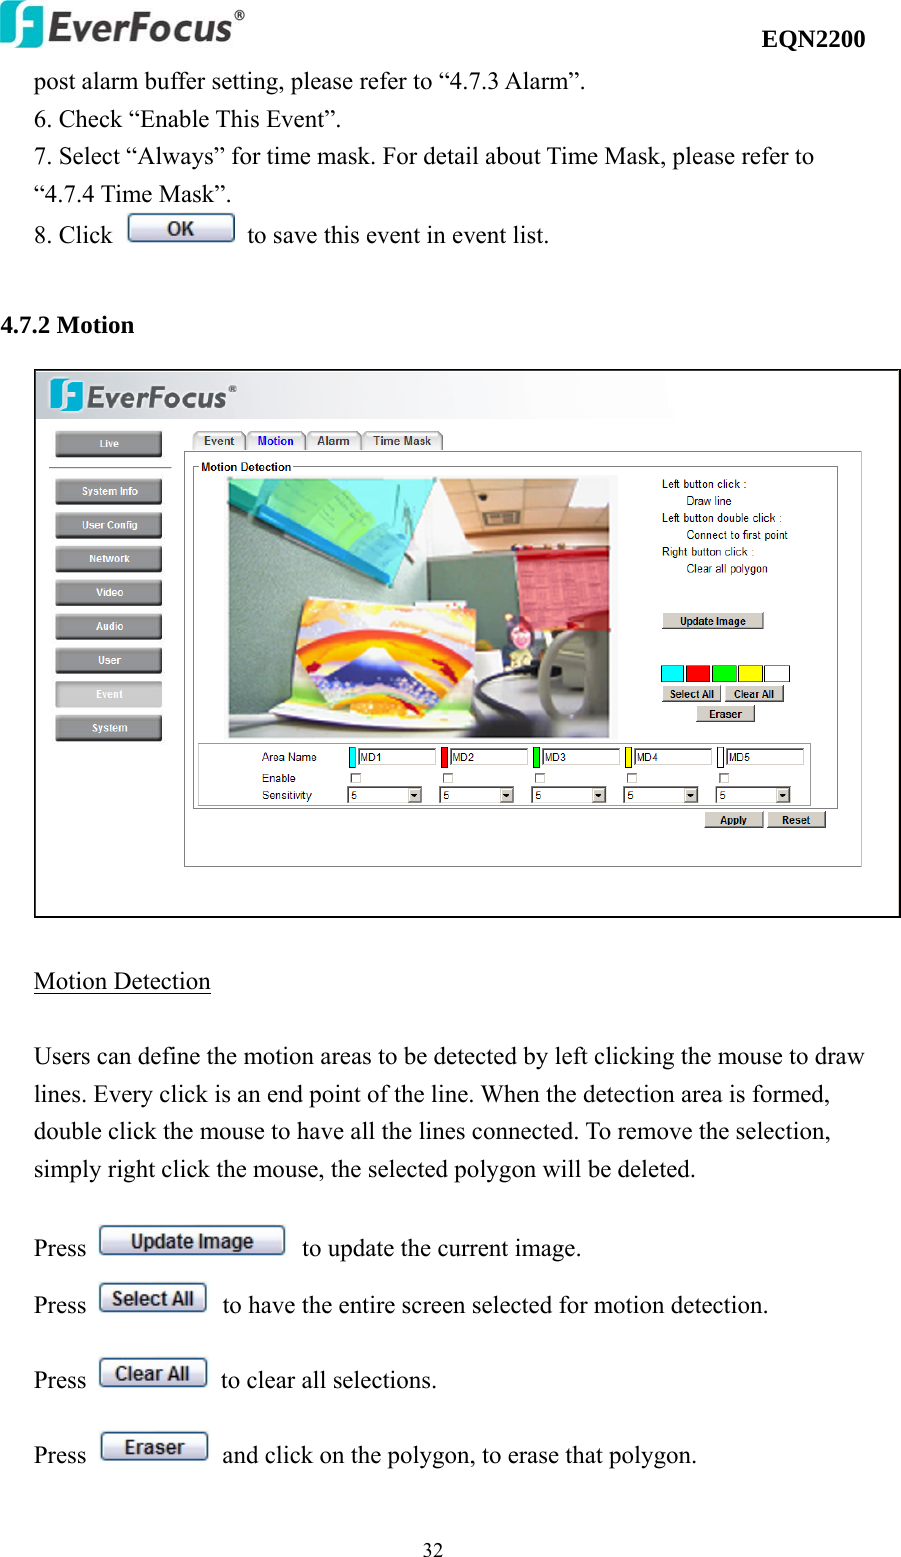
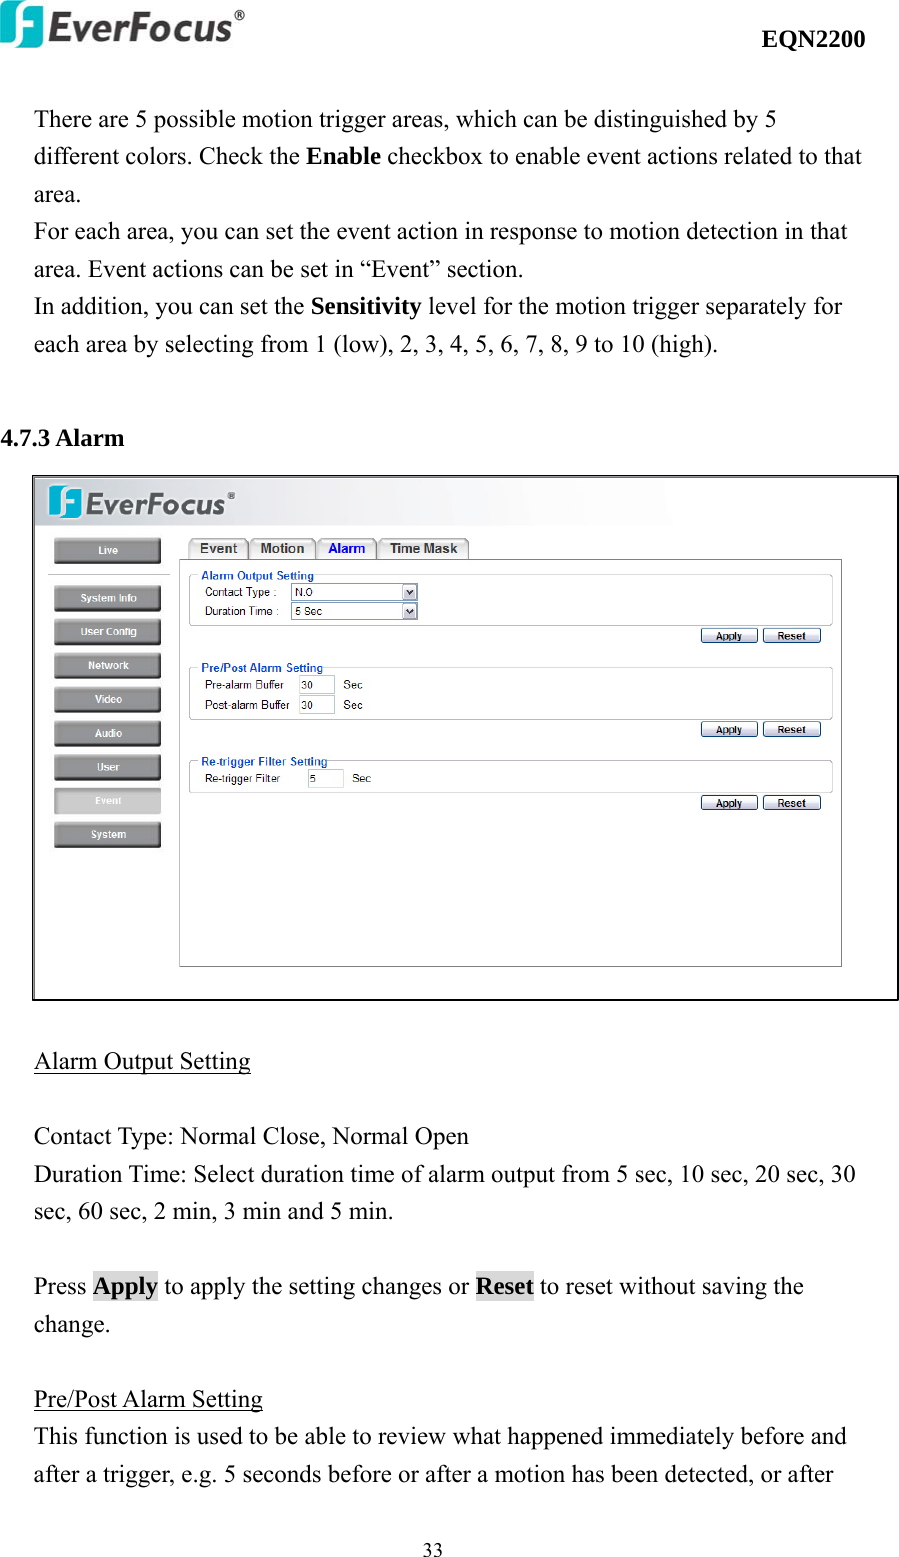
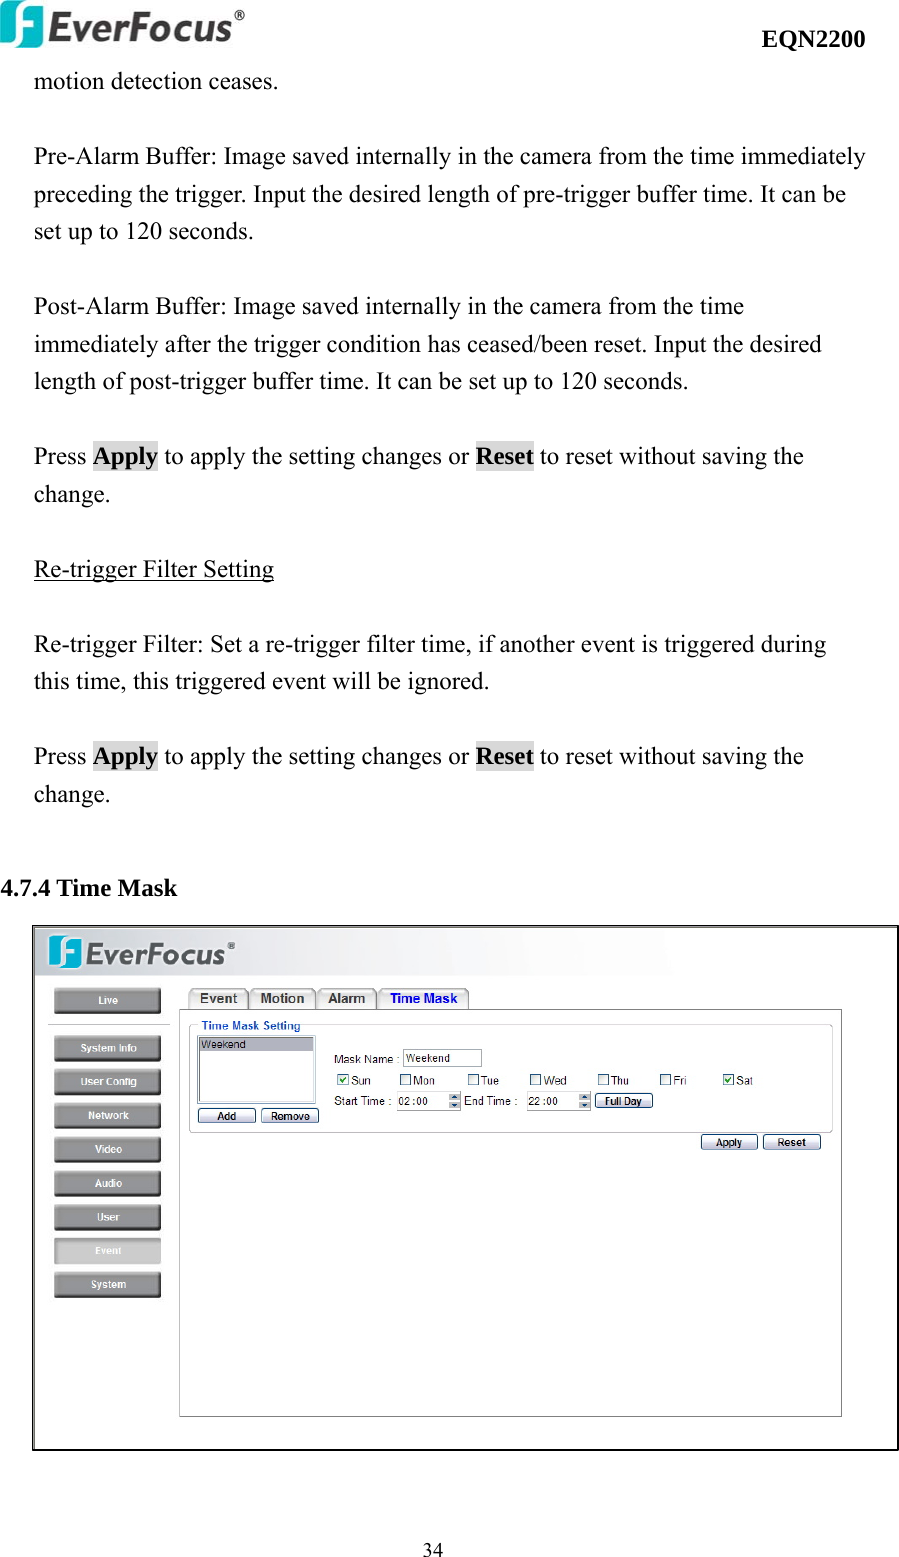
![EQN2200 304.7.1 Event The settings relating to event occurrences such as settings for motion, alarms and time mask can be configured on this page. The "Event" page has 4 tabs: [Event] tab, [Motion] tab, [Alarm] tab and [Time Mask] tab. Press button to add an event condition. To modify the event list, click on the event and it will be highlighted. Press button to modify the setting. To remove an event from event list, click on the event and it will be highlighted. Press button to remove the event. Check Enable checkbox to activate event actions when the event occurs in the specified time zone. To change the priority of events, click on the event and it will be highlighted. Press](https://usermanual.wiki/EverFocus-Electronics/EQN2201-W/User-Guide-1253225-Page-30.png)
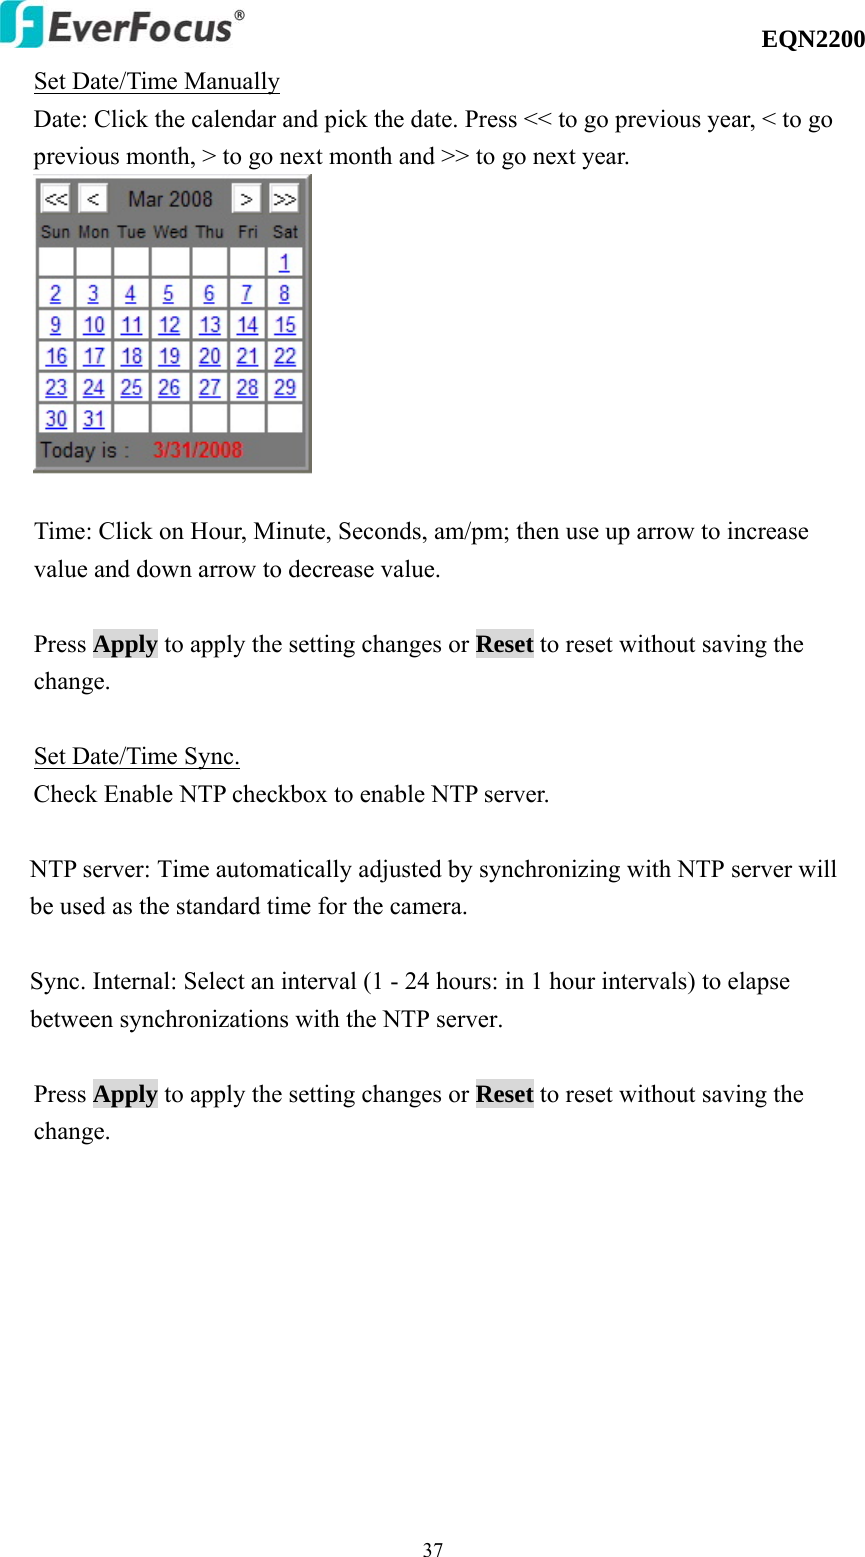
![EQN2200 364.8 SYSTEM Date/Time, Daylight Saving, SD card and Maintenance settings can be accessed on this page. The "System" page has 4 tabs: [Date/Time] tab, [Daylight Saving] tab, [SD card] tab and [Maintenance] tab. 4.8.1 Date/Time Machine Name Setting Machine Name: Enter the name for the camera. The entered name will be displayed in the status display area, and used to label any recoding and/or snapshot folders created on a user’s PC. Press Apply to apply the setting changes or Reset to reset without saving the change. Set Time Zone Time Zone: Select a time zone according to where the camera is located.](https://usermanual.wiki/EverFocus-Electronics/EQN2201-W/User-Guide-1253225-Page-36.png)