Everspring Industry Co SP122 Wireless PIR Alarm User Manual FU5SP122 UserMan
Everspring Industry Co Ltd Wireless PIR Alarm FU5SP122 UserMan
UserManual.wiki
>
Everspring Industry Co
>
SP122 User Manual
User Mamual
Navigation menu
Upload a User Manual
Namespaces
Wiki Guide
HTML
PDF
Info
Views
User Manual
Discussion / Help
Navigation
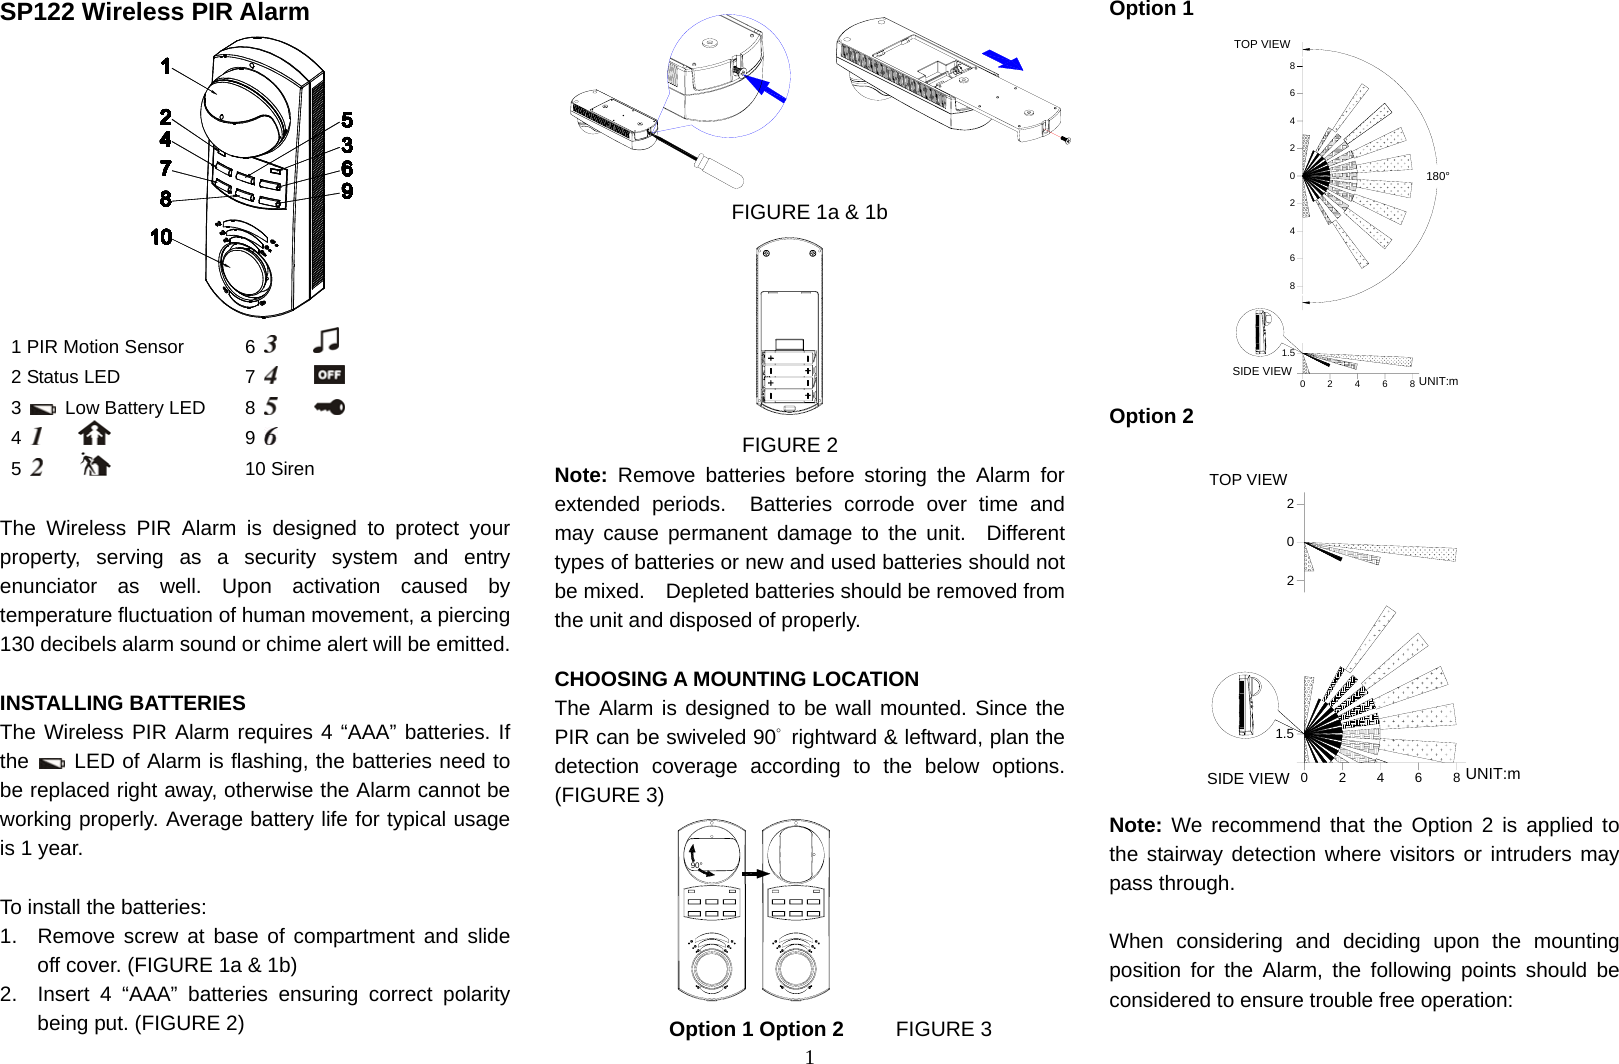
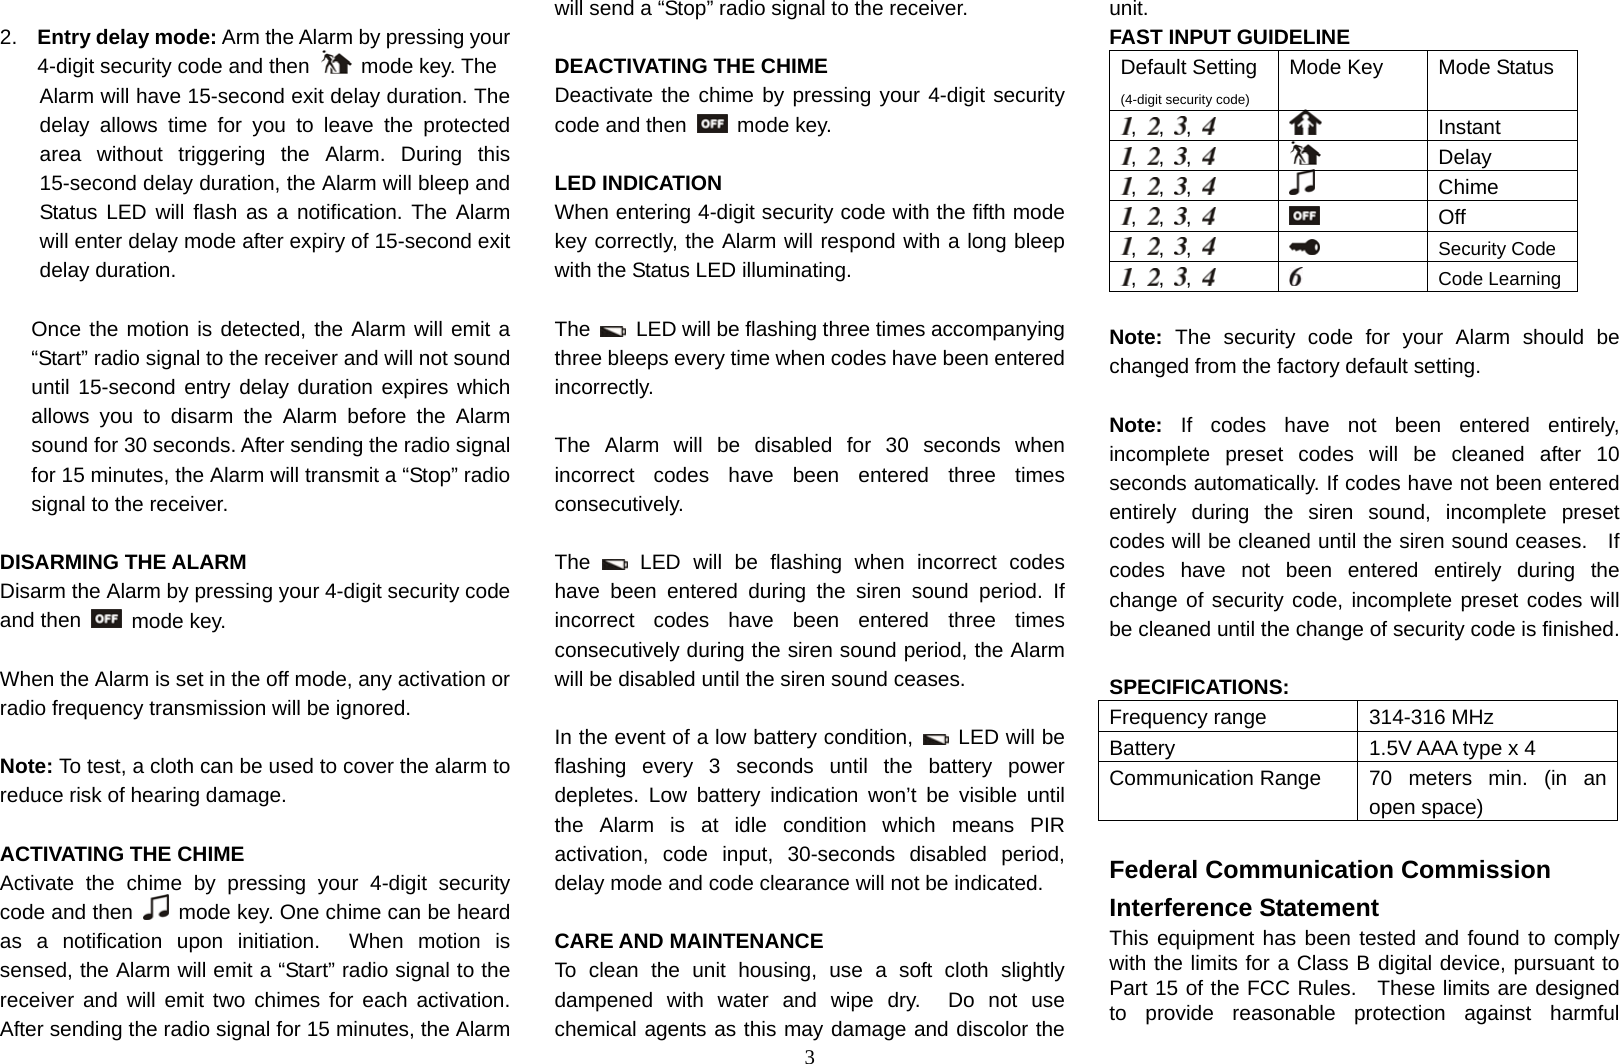
![2 1. Do not locate the Alarm facing a window or where it is exposed to or facing direct sunlight. The Alarms are not suitable for use in conservatories. 2. Do not locate the Alarm where it is exposed to ventilators. 3. Do not locate the Alarm directly above a heat source, (e.g. fire, radiator, boiler, etc). 4. Where possible, mount the Alarm on the flat wall at a 1.5m height so that the logical path of an intruder would cut across the fan detection pattern. PIR Alarm responds more effectively to movement across the device than to movement directly towards it. (FIGURE 4) FIGURE 4 5. Ensure that the position selected for the Alarm is within effective range of the system. INSTALLING THE PIR ALARM Choose desired location and fix the battery cover on the wall using plastic wall plugs and screws provided. Place the Alarm to the battery cover and secure with the screw. (FIGURE 5) FIGURE 5 STARTING UP Upon completion of batteries insertion, the Alarm will have 60 seconds warm-up period. During this period, the Status LED keep flashing, any inputting or movement of human body will be ignored. The Status LED will be off after expiry of 60 seconds warm-up period. The ex-factory mode is set for “off “ and 4-digit security code [ , , , ] has been set as the default secret code. When you remove the battery, pressing any button will clean out your previous setting. (Note: After removing or replacing the batteries, the Alarm security code would be automatically set back as default [ , , , ]. SETTING THE 4-DIGIT SECURITY CODE Default setting: , , , For initial operation, press [ , , , ] 4-digit security code and then mode key, the Status LED and LED will keep illuminating. Press your new 4-digit security code and then mode key within 15 seconds. This 15-second period is designed for entering the new security code. If setting fails to be entered or incorrect codes were made for three times consecutively within 15 seconds, the Alarm will skip to off mode automatically. While setting the security code, no radio signal will be transmitted to the receiver if motion is sensed. CODE LEARNING SETTING Press [[ , , , ] 4-digit security code and then mode key to enter the code learning mode. The Alarm will transmit a radio signal to the receiver instantly. Upon completion of code learning transmission, the Alarm will skip to off mode automatically. During code learning mode, any input or activation will be ignored. ARMING THE ALARM Both “instant” and “entry delay” mode have a 15-second exit delay duration. 1. Instant mode: Arm the Alarm by pressing your 4-digit security code and then mode key. The Alarm will have 15-second exit delay duration before the Alarm is armed. The delay allows time for you to leave the protected area without triggering the Alarm. During this 15-second delay duration, the Alarm will bleep and Status LED will flash as a notification. The Alarm will enter instant mode after expiry of 15-second exit delay duration. When motion is sensed, the Alarm will sound for 30 seconds for each activation and emit a “Start” radio signal to the receiver simultaneously. After sending the radio signal for 15 minutes, the Alarm will transmit a “Stop” radio signal to the receiver. Note: We would recommend that the Alarm mode is set for Chime when you are at home to avoid hearing damage resulted from frequent activation.](https://usermanual.wiki/Everspring-Industry-Co/SP122/User-Guide-593259-Page-2.png)