Everspring Industry Co ST812 FLOOD DETECTOR User Manual UserMan
Everspring Industry Co Ltd FLOOD DETECTOR UserMan
UserManual.wiki
>
Everspring Industry Co
>
ST812 User Manual
UserMan
Navigation menu
Upload a User Manual
Namespaces
Wiki Guide
HTML
PDF
Info
Views
User Manual
Discussion / Help
Navigation
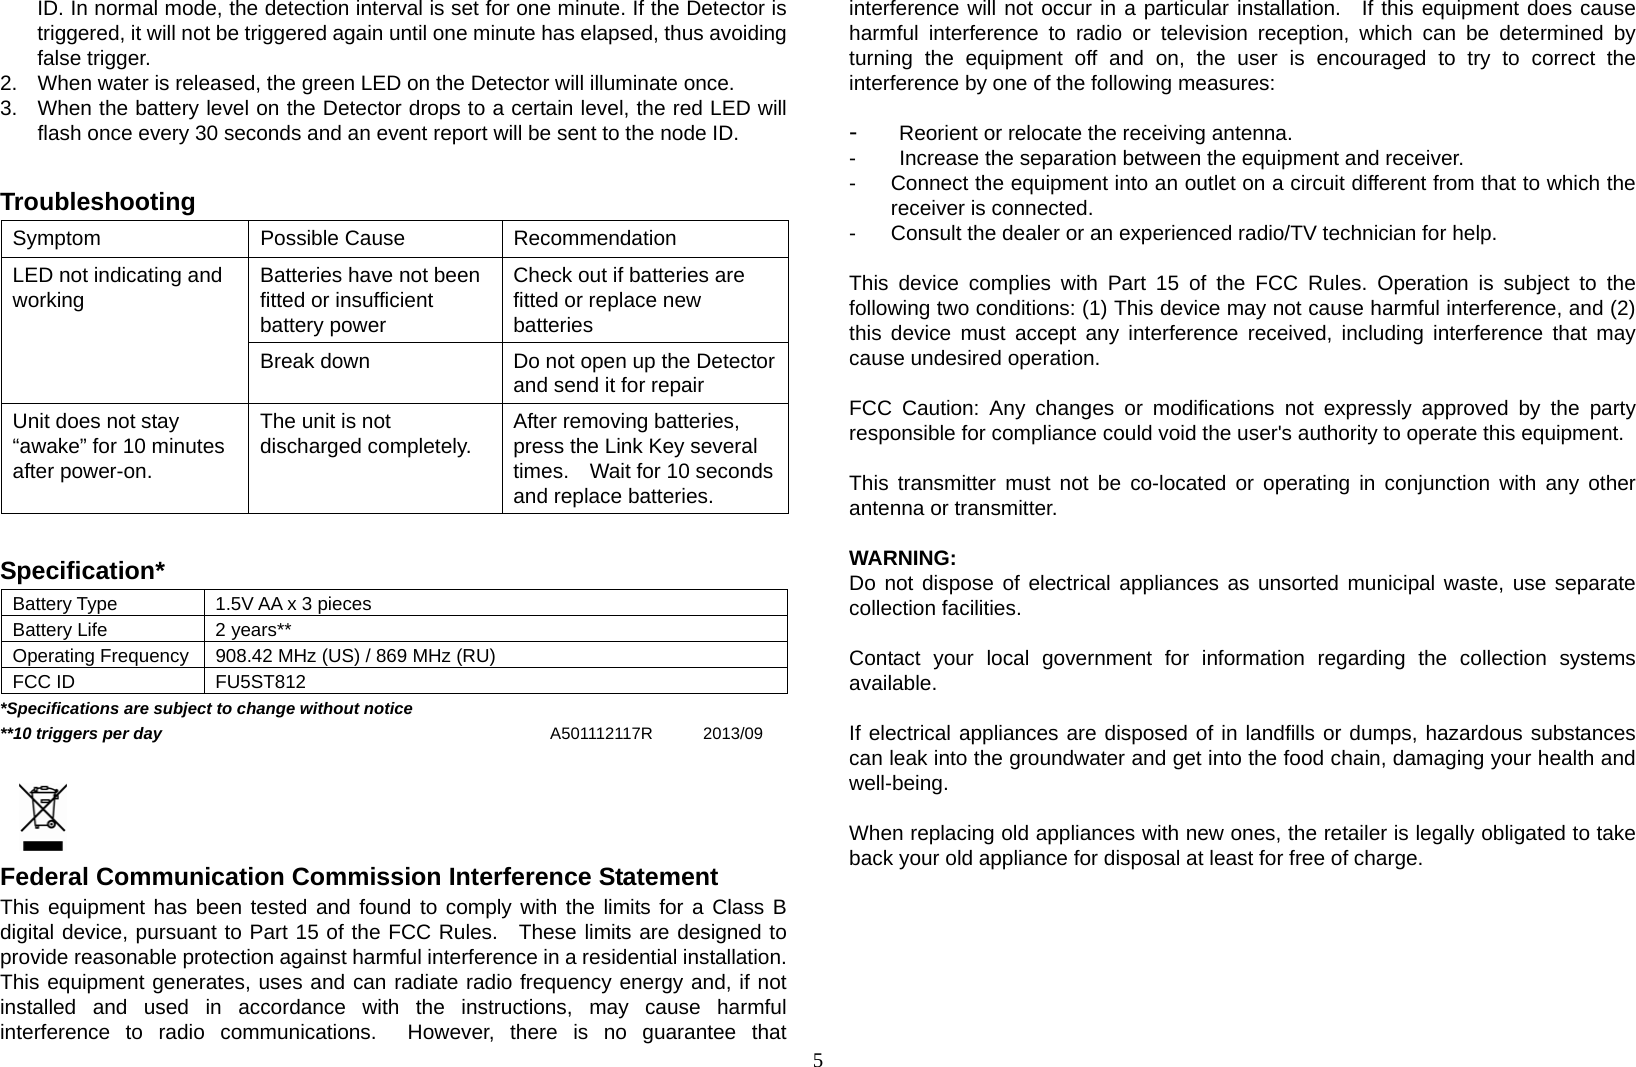
![3 ÚFailure or success in including/excluding the node ID can be viewed from the Z-Wave Controller. Installation A clean smooth surface is required to mount the Flood Detector securely. The length of flood sensor cable is 3 meters. If a 3-meter cable is too long, roll up the cable and fasten it by twist ties. The transceiver should be placed as high up as possible on the wall to improve communication and to prevent it from coming into contact with water in case of flooding. After completion of battery insertion and set up, follow the below procedures: 1. Attach the flood sensor near the floor. 2. Use the back cover, flood sensor cable rack and sensor rack as a template to mark the position of fixing holes on the wall. Drill the holes and insert the plastic wall plugs supplied respectively. 3. Fix the back cover, flood sensor cable rack and sensor rack using the fixing screws provided. 4. Refit the transceiver to the back cover and secure with the fixing screw supplied. 5. Place the flood sensor cable and flood sensor to its rack. Note: The transceiver should never be submerged in water. Programming 1. Z-Wave’s Groups (Association Command Class Version 2) The Flood Detector supports two association groups with one node support for Grouping 1 and three nodes support for Grouping 2. This has the effect that when the Detector is triggered, all devices associated with the Detector will receive the relevant reports. There are two kinds of reports: ALARM_REPORT and SENSOR_ALARM_REPORT. 1-1 Grouping 1 (Max. node 1) 1-1-1 Power Applied command The Detector will send ALARM_REPORT command to the nodes of Grouping 1 to inform the devices that the Detector is powered up. ALARM_REPORT Command: [Command Class Alarm, Alarm Type = 0x02, Alarm Level = 0x01] 1-1-2 Flood Event Report (Binary Sensor Report) Once the Detector has been triggered by water, the Detector will send SENSOR_ALARM_REPORT to the nodes of Grouping 1 to inform them there is a flood event; meanwhile, its red LED will flash for one minute and beep for 30 seconds. Wait till water is released, SENSOR_ALARM_REPORT will be sent to the associated devices. SENSOR ALARM REPORT Command: Event Present: [Command Class Sensor Alarm, Sensor Alarm Report, Sensor Type Water Leak Alarm State = 0xFF(255), Seconds = 0x00] Event Clear: [Command Class Sensor Alarm, Sensor Alarm Report, Sensor Type Water Leak Alarm State = 0x00(0), Seconds = 0x00]](https://usermanual.wiki/Everspring-Industry-Co/ST812/User-Guide-2103159-Page-3.png)
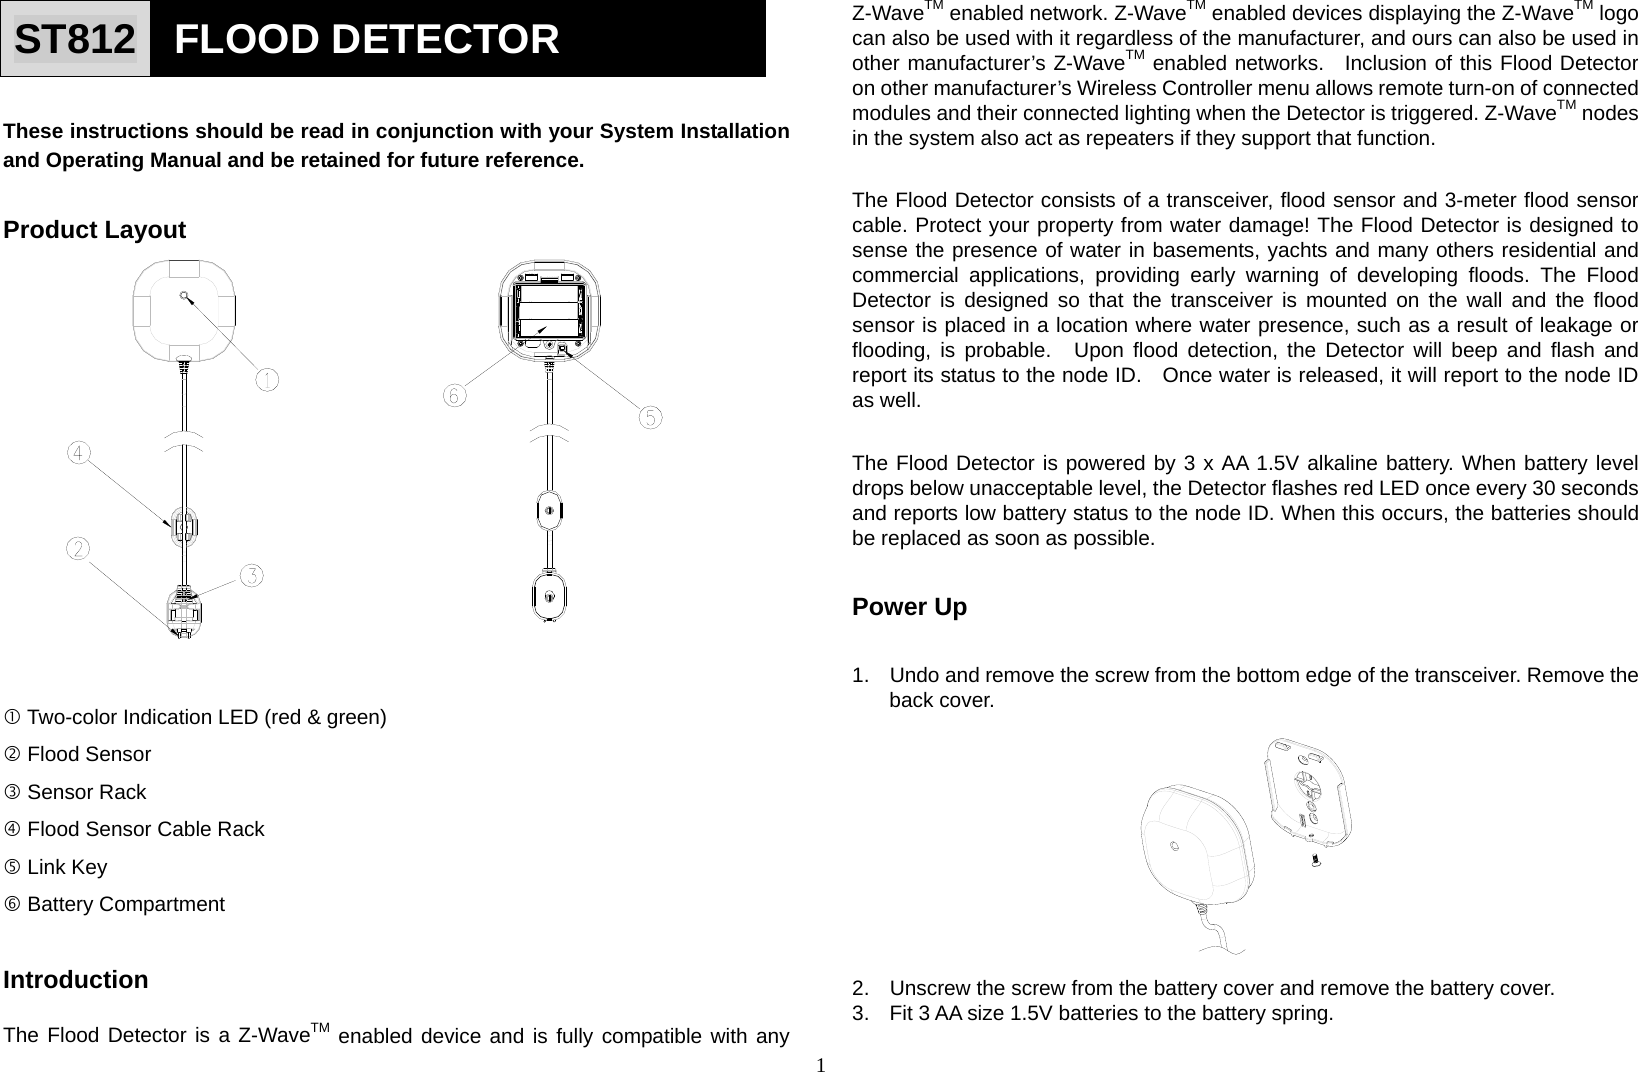
![4 1-1-3 Low Battery Report (Alarm Command Class) When the battery level of the Detector drops to an unacceptable level, the Detector will send a low battery command to the nodes of Grouping 1; meanwhile, the Detector will flash red LED once every 30 seconds. ALARM REPORT Command: [Command Class Alarm, Alarm Type = 0x01, Alarm Level = 0x01] 1-2 Grouping 2 (Max. nodes 3) 1-2-1 Control other Z-Wave devices When the Detector has been triggered, it will control other Z-Wave devices for operation by sending Basic Set command to the nodes of Grouping 2; meanwhile, the Detector will flash red LED for one minute and beep for 30 seconds. Basic Set Command:Event Present: [Command Class Basic, Basic Set, Value = Basic set level]Event Clear: [Command Class Basic, Basic Set, Value = 0x00(0)] 2. Z-Wave’s Configuration 2-1 Basic Set Level When Basic Set Command is sent where contains a value, the receiver will take it for consideration; for instance, if a lamp module is received the Basic Set command of which value is decisive as to how bright of dim level of lamp module shall be. Example: 0: OFF 1-99: ON (Binary Switch Device) Dim Level (Multilevel Switch Device) Function Parameter Number Size Range DefaultBasic Set level 1 1 0~99 99 Configuration Command 3. Advanced Programming 3-1 Low Battery Indication The users can also enquire the battery status of the Detector by sending BATTERY_GET command via Z-Wave Controller. Once the Detector receives the command, it will return BATTERY_REPORT command. The Detector will send Battery_Level = 255 (0xFF) command to the Z-Wave Controller to inform that the Detector is in low battery status. BATTERY REPORT Command: [Command Class Battery, Battery Report, Battery Level = 20%-100%] 3-2 Wakeup Command Class The unit stays in sleep status for the majority of time in order to conserve battery power. However, it can be woken up at specified intervals by setting WAKE_UP_INTERVAL_SET command by Z-Wave Controller. After the unit wakes up, it will send Wakeup Notification Command to the node ID that requires to be reported. The minimum and maximum wakeup interval is 60 seconds and 194 days respectively. Allowable interval among each wakeup interval is 1 second, such as 60, 61, 62 …. 4. Command Classes The Flood Detector supports Command Classes including… *COMMAND_CLASS_SENSOR_BINARY *COMMAND_CLASS_BASIC *COMMAND_CLASS_CONFIGURATION *COMMAND_CLASS_WAKE_UP_V2 *COMMAND_CLASS_MANUFACTURER_SPECIFIC *COMMAND_CLASS_VERSION *COMMAND_CLASS_ASSOCIATION_V2 *COMMAND_CLASS_BATTERY *COMMAND_CLASS_SENSOR_ALARM *COMMAND_CLASS_ALARM Operation 1. When water is detected, the Detector flashes red LED for one minute and beeps for 30 seconds as maximum during which an event report will be sent to the node](https://usermanual.wiki/Everspring-Industry-Co/ST812/User-Guide-2103159-Page-4.png)