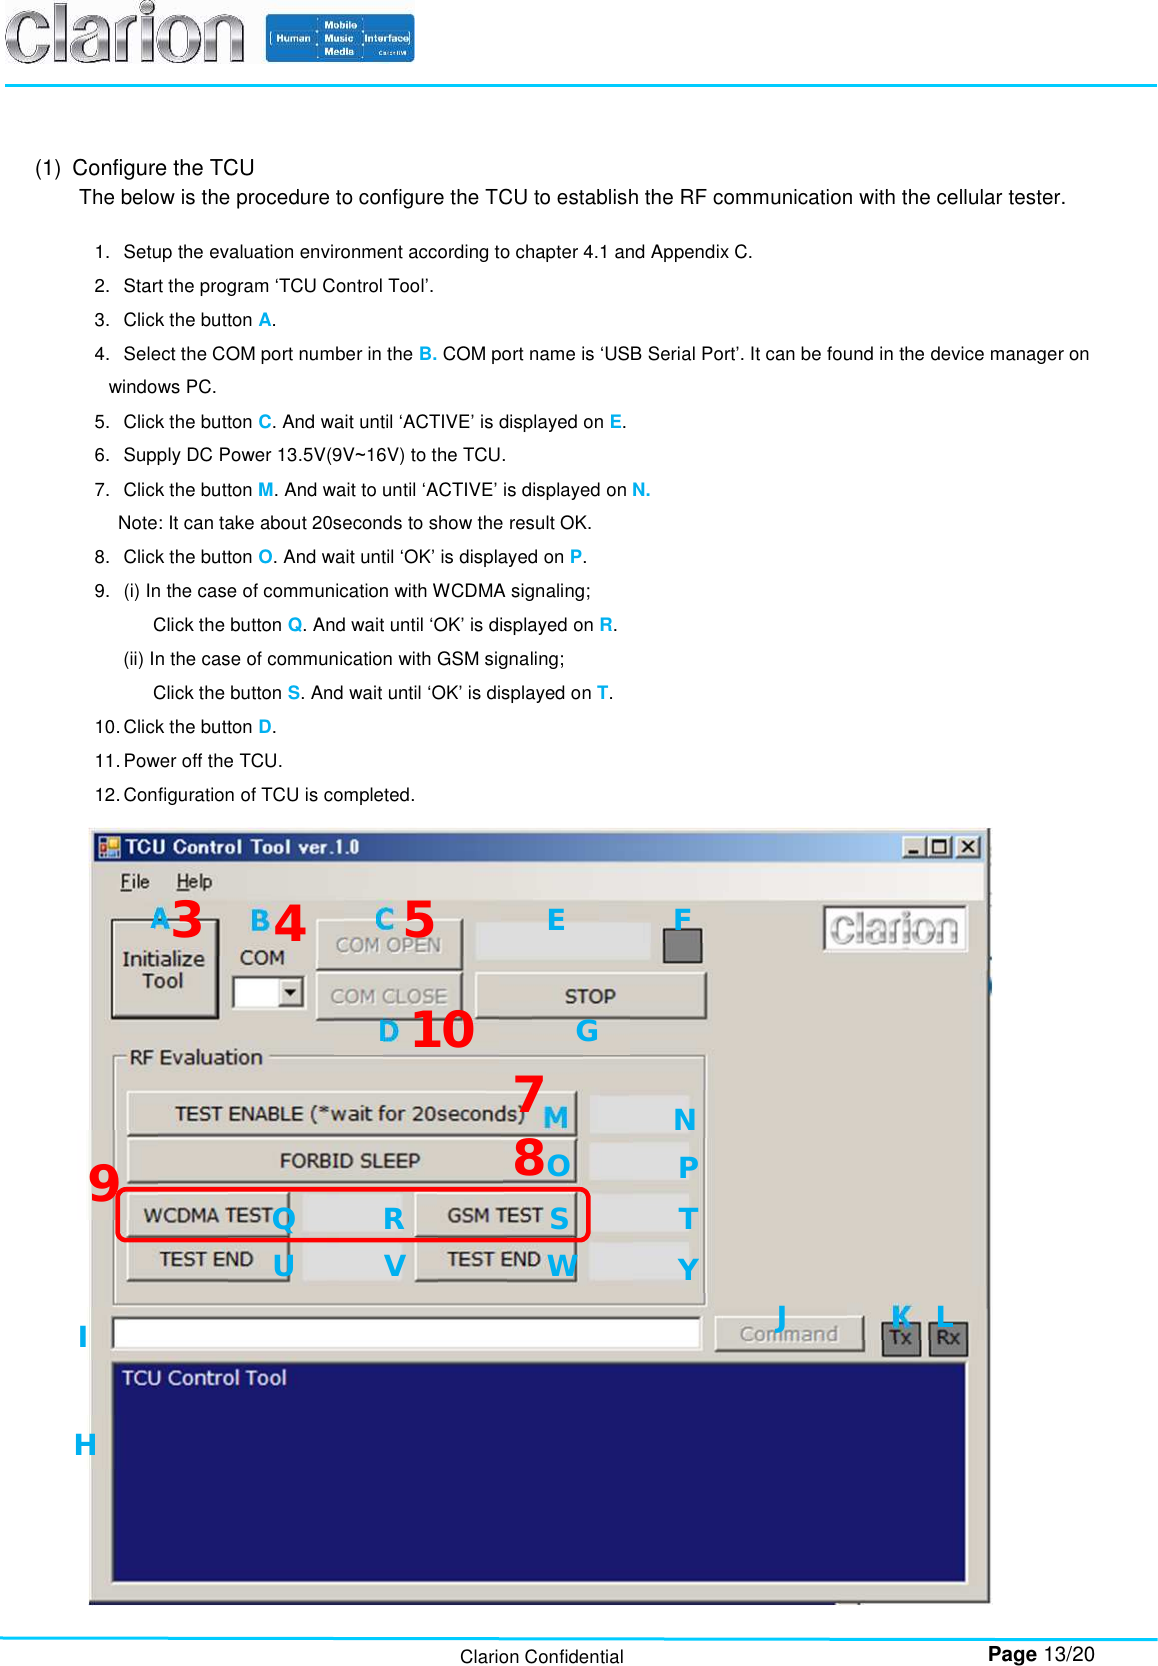
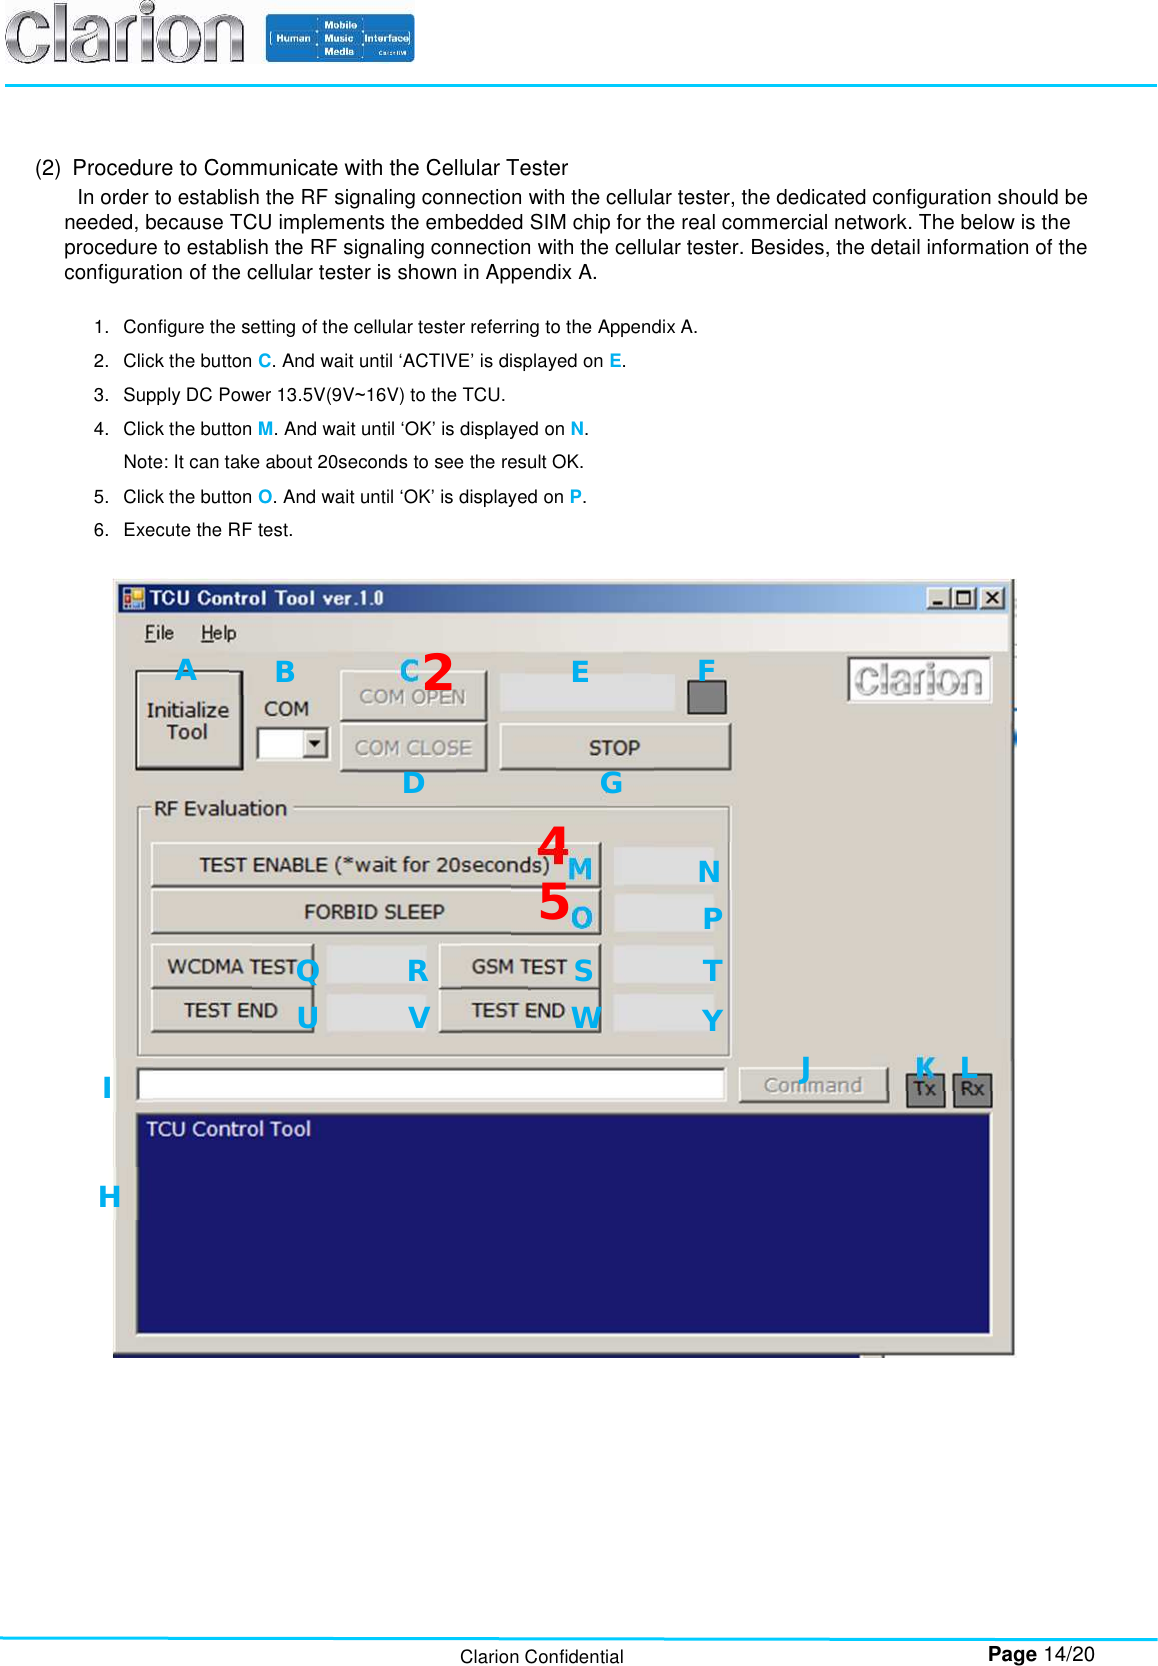
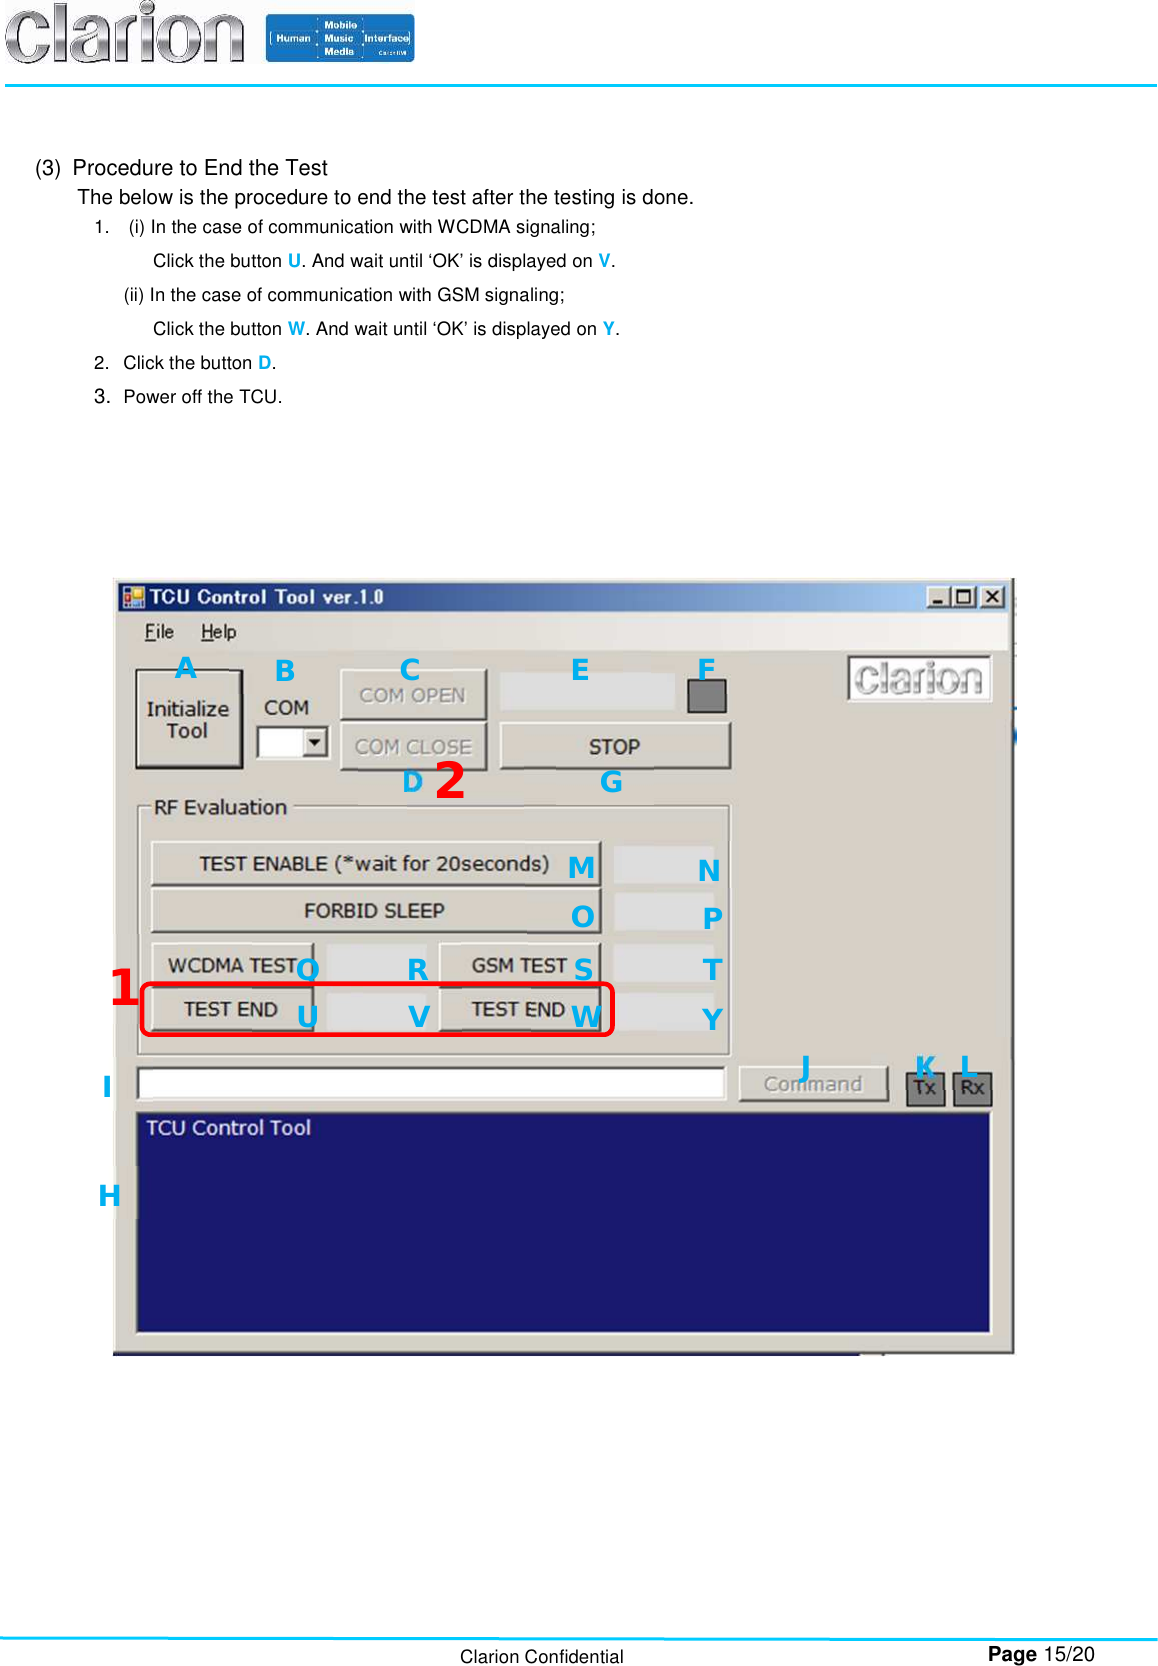
Faurecia Clarion Electronics JE5030 2G/3G Telematics Control Unit User Manual
Clarion Co Ltd 2G/3G Telematics Control Unit
UserManual.wiki
>
Faurecia Clarion Electronics
>
JE5030 User Manual
User Manual
Navigation menu
Upload a User Manual
Namespaces
Wiki Guide
HTML
PDF
Info
Views
User Manual
Discussion / Help
Navigation
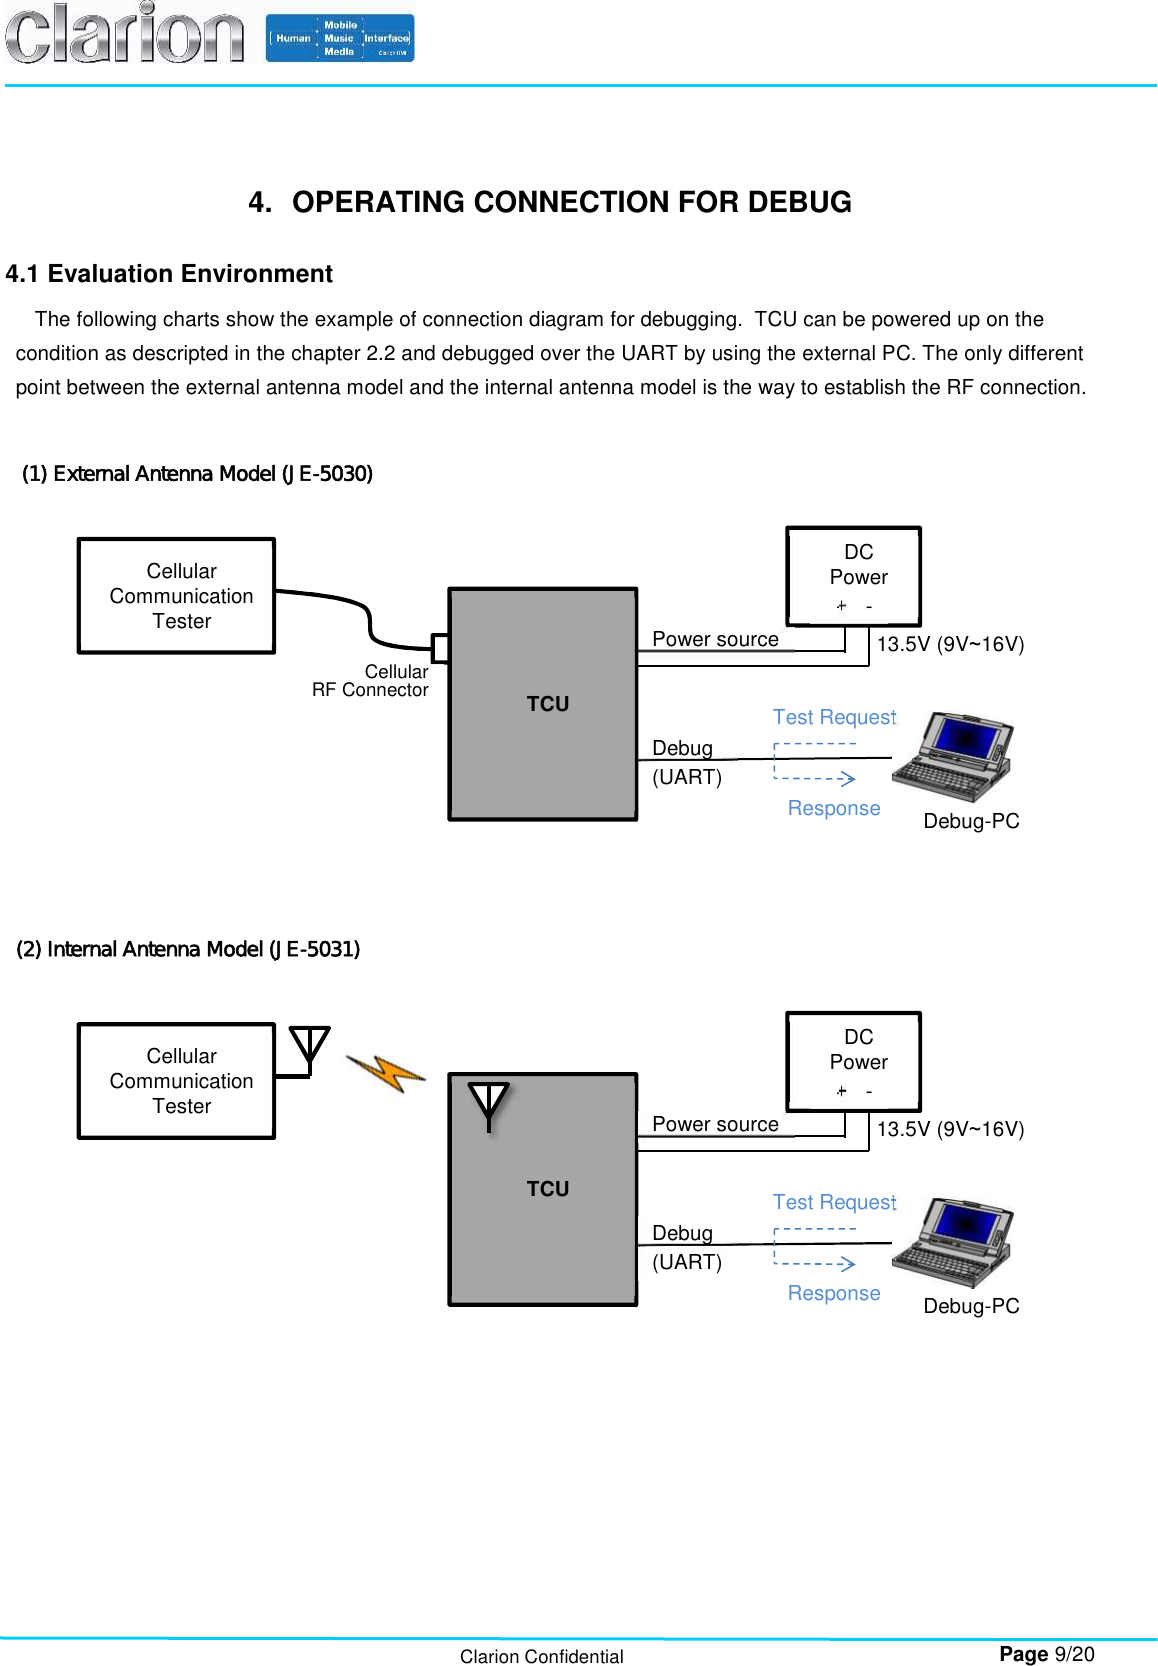
![Page 6/20 Clarion Confidential 3. HARDWARE SPECIFICATION 3.1 External View and Block Diagram 3.1.1 External Antenna Model (JE-5030) (1) External View (2) Block Diagram Size: 155.0x76.3x38.0 [mm] Weight: under 200 [g] Main Connector Cellular RF Connector](https://usermanual.wiki/Faurecia-Clarion-Electronics/JE5030/User-Guide-2224183-Page-6.png)
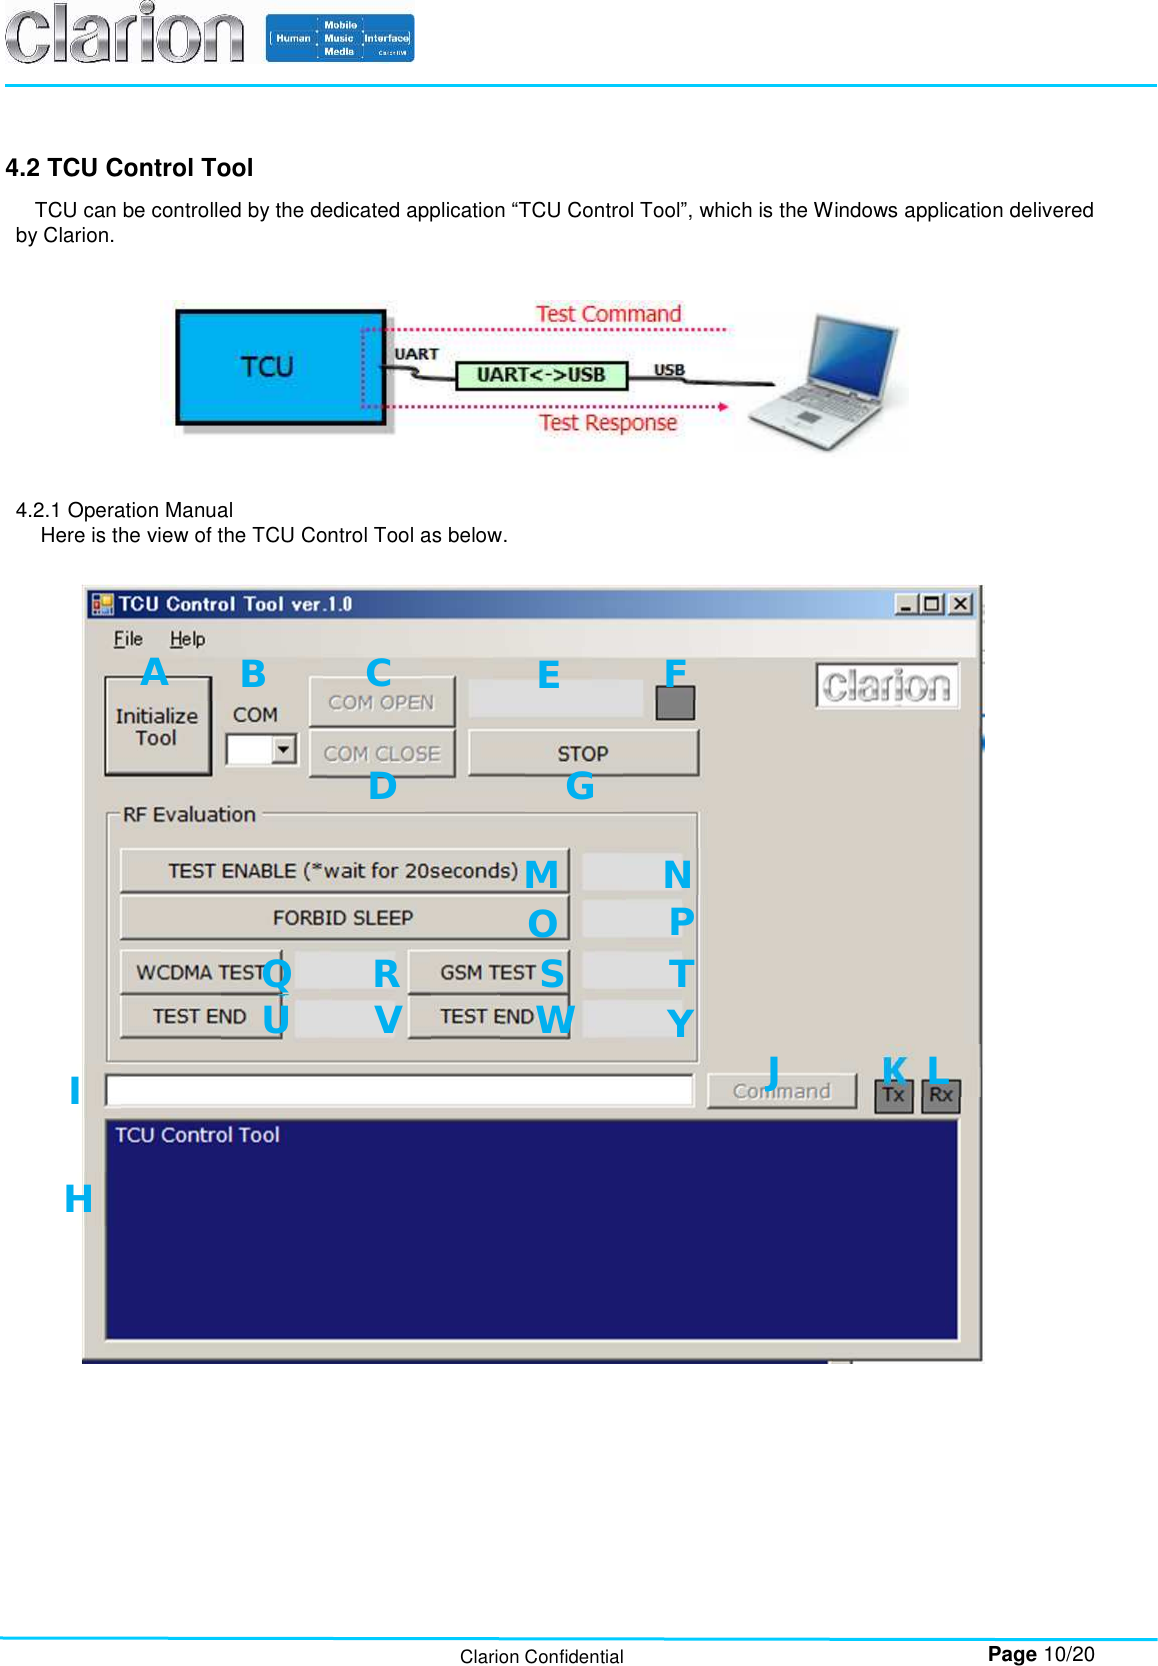
![Page 7/20 Clarion Confidential 3.1.2 Internal Antenna Model (JE-5031) (1) External View (2) Block Diagram Main Connector Size: 155.0x76.3x38.0 [mm] Weight: under 200 [g]](https://usermanual.wiki/Faurecia-Clarion-Electronics/JE5030/User-Guide-2224183-Page-7.png)
![Page 17/20 Clarion Confidential Appendix A. Configuration of Cellular Tester for WCDMA Signaling Connection As described above, TCU implements the embedded SIM (eSIM) chip for the real commercial carrier, so the dedicated configuration of the cellular tester (pseudo base station) should be needed in order to establish the RF connection with it. Specifically, the process of authentication and security has to be skipped according to the below configuration of the cellular tester. 1. CMW500 (ROHDE&SCHWARTZ) [Network] [Security Settings] - Authentication: OFF - Security: OFF 2. MT8820/MT8815(ANRITSU) [Call Processing Parameter] - Integrity Protection: OFF - Ciphering: OFF](https://usermanual.wiki/Faurecia-Clarion-Electronics/JE5030/User-Guide-2224183-Page-17.png)