Faurecia Clarion Electronics NX603 Car Navigation User Manual NX604 FX503 OM NAM US
Clarion Co Ltd Car Navigation NX604 FX503 OM NAM US
Contents
- 1. Users Manual add
- 2. Users Manual
- 3. User Manual-1(NX604)
- 4. User Manual-2(NX604)
User Manual-2(NX604)
NX604/FX503 7
English
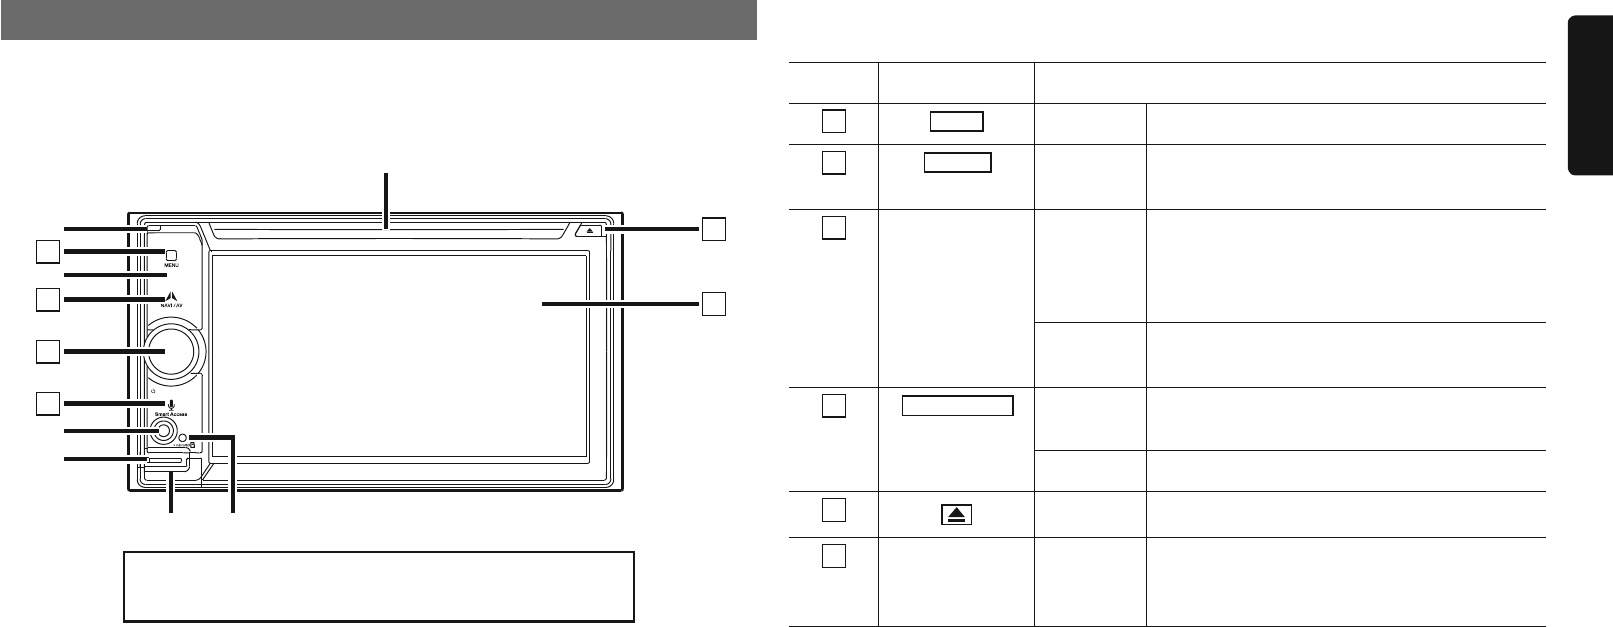
Names and functions of parts
The following describes the button names on the operation panel of the unit and their
functions.
NX604
1
2
3
4
5
6
✽ 4
✽ 7
✽ 3
✽ 5
✽ 6
✽ 1
✽ 2
Insert and remove the microSD card after turning off
the unit, because the microSD card might get damage.
✽1 This is the built-in microphone. This is used as the microphone for the hands free function
when the unit is connected to a Bluetooth compatible cellphone by a wireless connection.
✽2 This is the remote control sensor. This receives the signal from the remote control (sold
separately).
✽3 This is the AUX terminal. Audio and video from external devices connected to this terminal can
be played when the audio mode is switched to AUX. p P.28
✽4 This is the Antitheft Indicator. This light blinks when the Antitheft Activation setting is set to “ON”
to indicate that the antitheft function is activated. p P.42
✽5 This is where the microSD card is inserted to enjoy data in microSD cards. p P.10
✽6 The map microSD is housed in here. To update the map, open this cover, and remove and
insert the card.
Do not open the cover for other operations.
✽7 This is where DVD video, CD, MP3, WMA, and DivX discs are inserted. p P.10
This document uses the following inline graphics and conventions to indicate operations
using the buttons on the operation panel.
Number Inline graphic Description of operation
1
MENU Short press This displays the main menu screen.
2
NAVI AV Short press
This switches between the current position map
screen and currently selected audio screen.
3
— Turn This is the rotary volume knob.
Use this to adjust the volume of the audio-
visual function or the route audio guidance,
etc.
Short press This turns off the screen and stops audio
output.
4
Smart Access Short press This starts up the voice recognition application.
p P.37
Long press This starts up Smart Access.
5
Short press This ejects the disc inserted in the unit.
6
— Touch This is the monitor and touch panel. This
functions as a touch panel by touching the
screen when it is displayed.
8 NX604/FX503
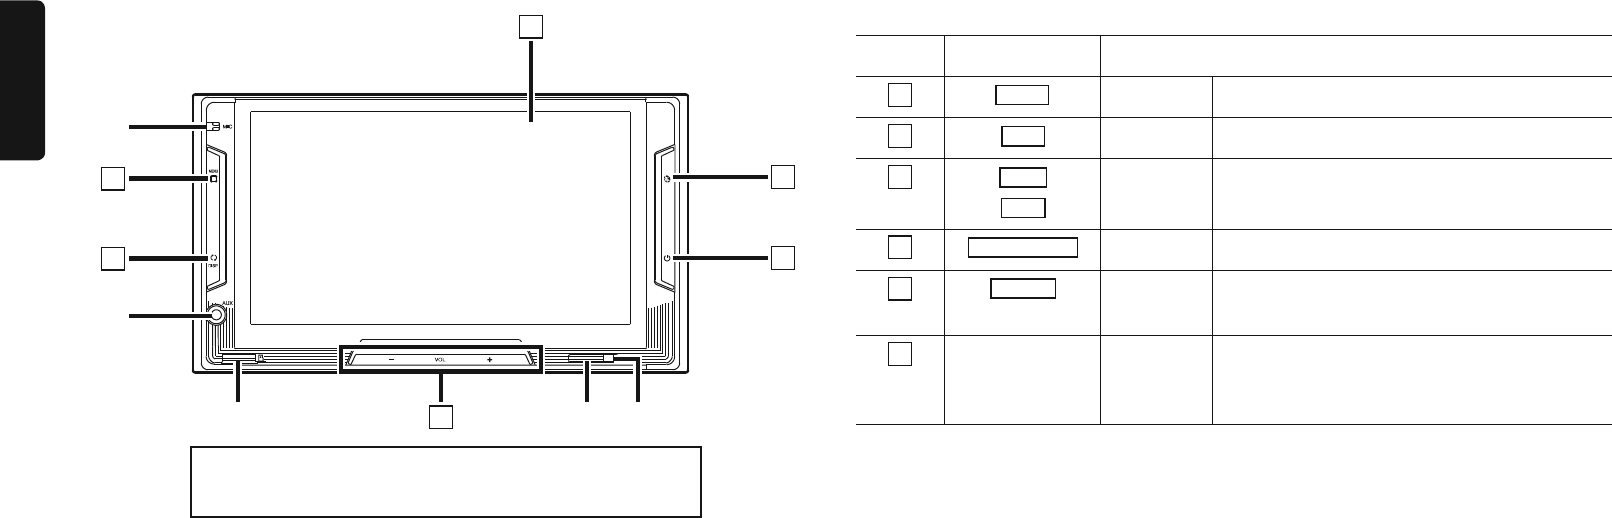
English
FX503
14
5
✽ 3
✽ 1
✽ 2
2
✽ 5
✽ 4
3
6
Insert and remove the microSD card after turning off
the unit, because the microSD card might get damage.
✽1 This is the built-in microphone. This is used as the microphone for the hands free function
when the unit is connected to a Bluetooth compatible cellphone by a wireless connection.
✽2 This is the AUX terminal. Audio and video from external devices connected to this terminal can
be played when the audio mode is switched to AUX. p P.28
✽3 This is where the microSD card is inserted to enjoy data in microSD cards. p P.10
✽4 This is the remote control sensor. This receives the signal from the remote control (sold
separately).
✽5 This is the Antitheft Indicator. This light blinks when the Antitheft Activation setting is set to “ON”
to indicate that the antitheft function is activated. p P.42
This document uses the following inline graphics and conventions to indicate operations
using the buttons on the operation panel.
Number Inline graphic Description of operation
1
MENU Short press This displays the main menu screen.
2
DISP Short press This switches to the audio screen.
3
VOL+
VOL-
Short press Use this to adjust the volume of the audio-
visual function.
4
Smart Access Short press This starts up Smart Access.
5
POWER Short press This turns off the screen and stops audio
output.
6
— Touch This is the monitor and touch panel. This
functions as a touch panel by touching the
screen when it is displayed.
NX604/FX503 9
English
AUX1 :
This displays the AUX1 mode. p
P.28
AUX2 :
This displays the AUX2 mode. p
P.28
(Settings) :
This displays the various setting
screens. p P.41
Using the shortcut menu
You can open a shortcut menu by touching
in the top screen of a function selected
from the main menu screen.
Up to five frequently used functions can be
registered to the shortcut menu. p P.42
Touching returns the screen to the
previous screen.
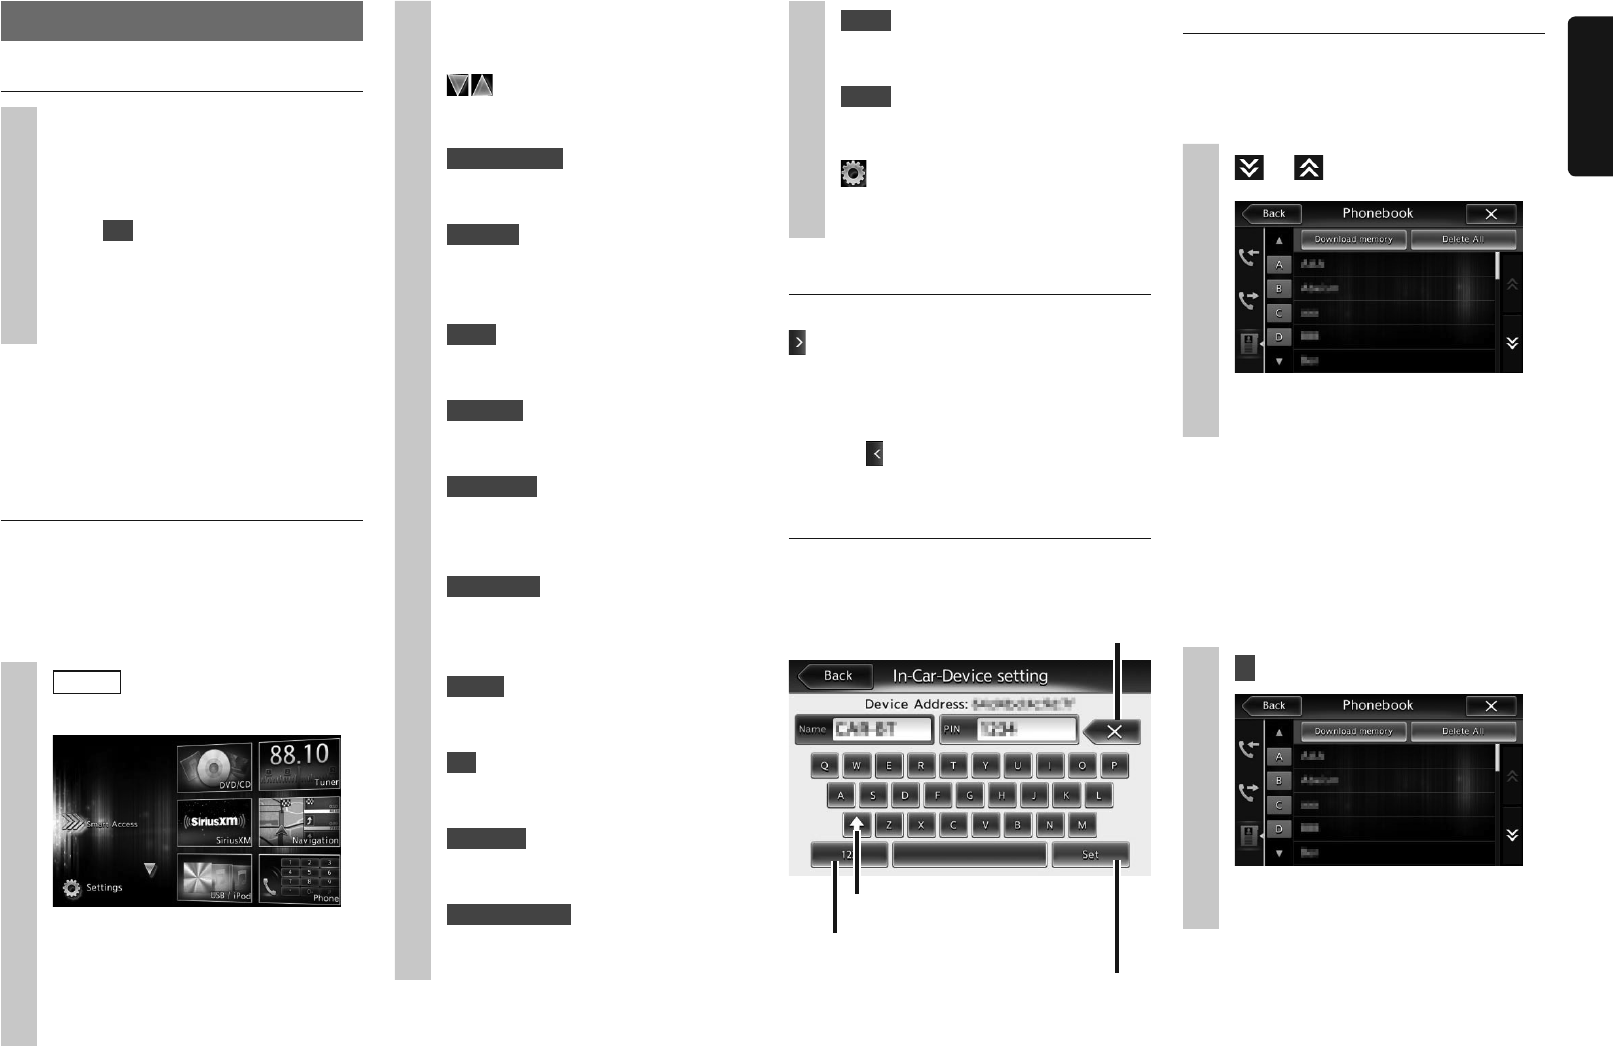
How to enter text
In the text entry screen, letters and numbers
can be entered by touching the keypad.
This switches to the alphabet/number
entry mode.
This applies the character string you
entered.
This deletes one character. Continuously
touching this deletes all characters.
This switches between uppercase
and lowercase.
Operating lists
When a list contains many items, the list is
displayed over two or more pages.
❏Moving between pages in a list
1 or
You can also scroll through pages in
a list by flicking.
❏Using the index to select a list
When alphabet keys are displayed on the
left side of the screen, items beginning with
the letter of the alphabet that was touched
can be displayed as a list. The following
example explains how to select items
beginning with the letter “B” from the list.
1 B
Items beginning with “B” are
displayed.
Basic method of use
Turning the power on
1Turn the engine key to the “ACC”
or “ON” position.
The unit turns on.
After the opening screen is displayed,
touch OK . The current position
map screen or the audio screen is
displayed.
When the engine key is turned to the
“OFF” position, the unit is turned off.
MEMO:
p P.42
How to use menus
The unit has a main menu for using all
functions and a shortcut menu that groups
together frequently used functions. Use of
the shortcut menu allows you to quickly
access frequently used functions.
1 MENU
The main menu screen is displayed.
Touching the main menu screen and
quickly sliding your finger up or down
then removing it, moves you to the
previous or next page. This operation
is called flicking.
Screens can be changed by slowly
sliding your finger across the screen.
:
Touch these to move to the
previous or next menu screen.
Smart Access :
This displays the Smart Access
mode. p P.35
DVD/CD :
This displays the DVD, CD or DivX
modes. (NX604 only)
p P.17, P.20, P.22
Tuner :
This displays the radio mode. p
P.11
SiriusXM :
This displays the SiriusXM Satellite
Radio mode. p P.14
Navigation :
This displays the navigation mode.
(NX604 only) p “Owner’s Manual -
Navigation”
USB / iPod :
This displays the USB audio mode
or iPod audio/iPod video mode. p
P.22, P.24
Phone :
This displays the telephone mode.
p P.33
SD :
This displays the SD audio mode.
p P.22
BT Audio :
This displays the Bluetooth audio
mode. p P.26
Pandora Radio :
This displays the Pandora Radio
mode. p P.30
10 NX604/FX503
English
2Select the relevant item from the
list.
If all indexes are not displayed, either
touch or or flick to move to
the next page.
❏Adjusting numerical values
When and are displayed, numerical
values, volume, etc. can be adjusted.
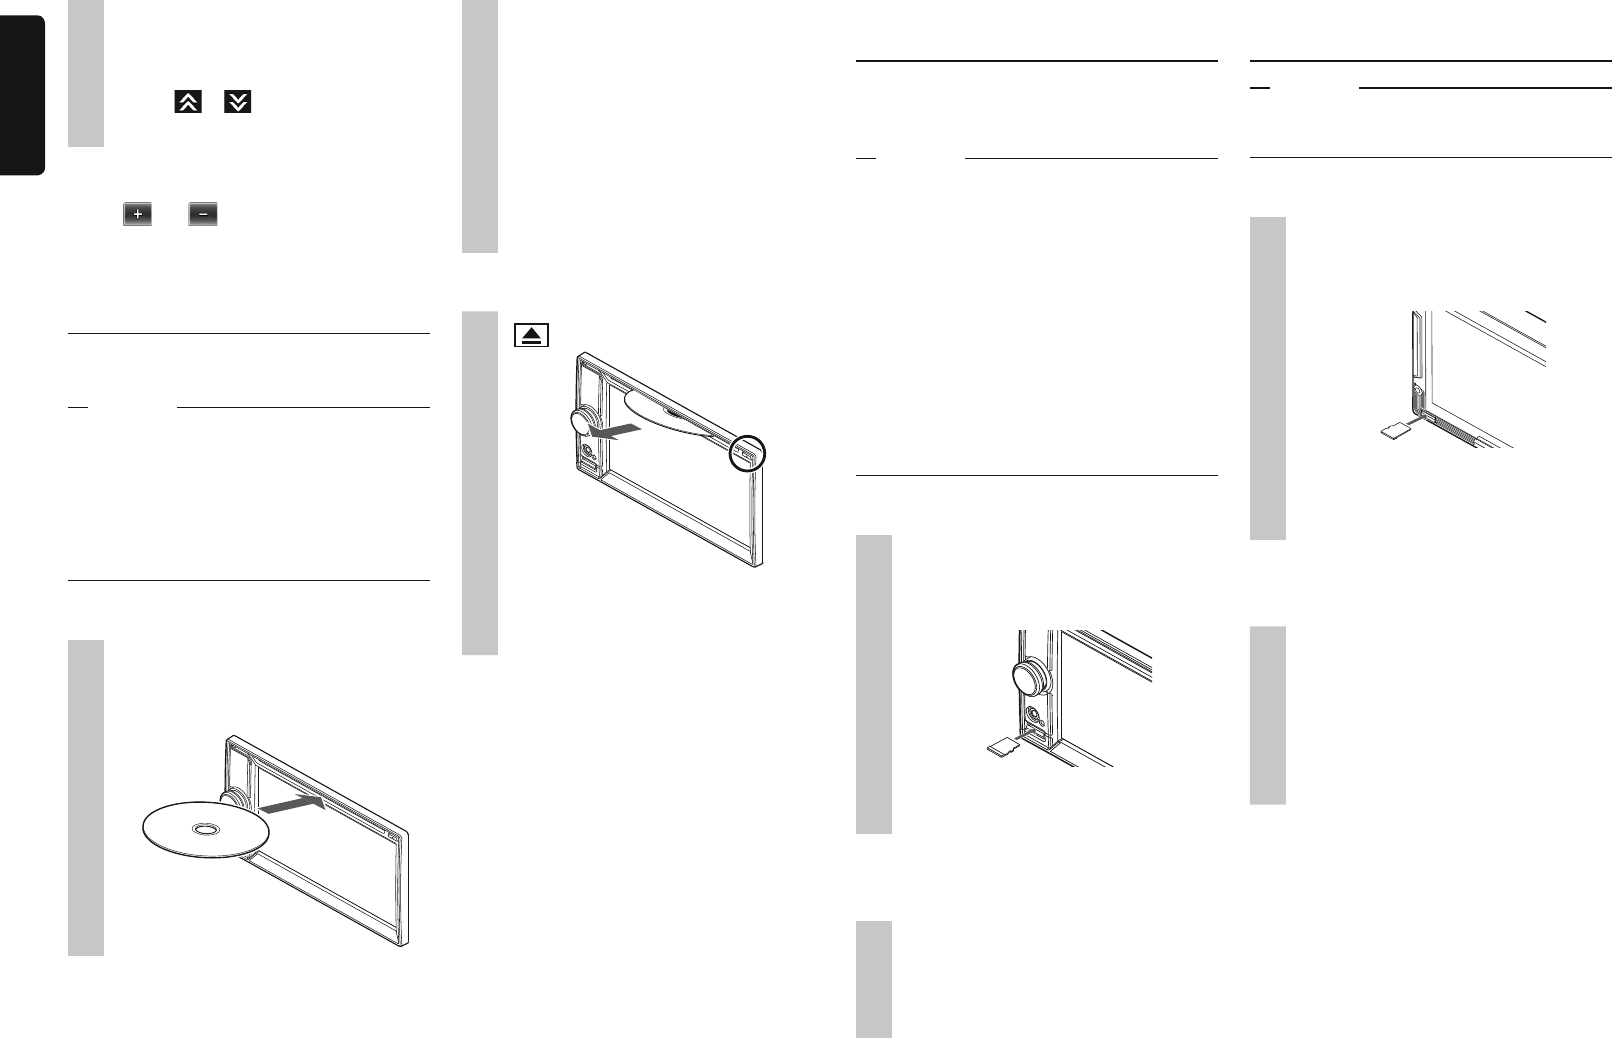
Inserting and removing discs
(NX604 only)
To enjoy data in CD, MP3/WMA or DVD
discs, the disc must be loaded into the unit.
Attention
❏How to insert discs
1Insert the disc into the loading
slot with its label surface face
up.
The disc is drawn in. After a while, the
disc starts playing.
When the disc is inserted a short way,
it is automatically drawn in. If the disc
is not drawn in, this means that a disc
is already loaded.
Do not exert unnecessary force when
inserting discs. First remove the disc
that is already loaded, and then load
the new disc.
❏How to remove discs
1
The disc is ejected.
2Remove the disc.
MEMO:
Inserting and removing the
microSD card (NX604)
To enjoy MP3/WMA data in microSD cards,
the microSD card must be loaded into the
unit.
Attention
❏How to insert the microSD card
1Insert the microSD card into the
loading slot with its label surface
face up.
Firmly insert the microSD card as far
as it can go.
❏How to remove the microSD
card
1Grip the microSD card with your
fingers and pull it out.
To remove the microSD card, grip it
with your fingers and pull it out.
Inserting and removing the
microSD card (FX503)
Attention
❏How to insert the microSD card
1Insert the microSD card into the
loading slot with its label surface
face down.
Firmly insert the microSD card as far
as it can go until you hear it click in
place.
❏How to remove the microSD
card
1Push in the microSD card.
The microSD card springs out slightly.
2Remove the microSD card.
To remove the microSD card, grip it
with your fingers and pull it out. The
microSD card might spring out.