Faurecia Clarion Electronics NX603 Car Navigation User Manual NX603 FX503 OM NAM US
Clarion Co Ltd Car Navigation NX603 FX503 OM NAM US
Contents
Users Manual

Owner’s manual
NX603
FX503
DVD MULTIMEDIA STATION WITH BUILT-IN NAVIGATION & 6.2-INCH TOUCH PANEL CONTROL
MULTIMEDIA STATION & 6.2-INCH TOUCH PANEL CONTROL
Thank you for purchasing the Clarion NX603 or FX503.
●Please read this owner’s manual thoroughly before operating this equipment.
●After reading this manual, be sure to keep it on hand for future reference.
●Check the contents of the enclosed warranty card and keep it carefully with this manual.
●The provided disc (CD-ROM manual) cannot be played back on this unit.
In particular, read the descriptions in “To Ensure Safe Use.” This describes cautions
to ensure safe use of the unit without inflicting harm or damage on yourself or
others. p P. 3
●The content of this manual may differ in part with that of the actual product due to
modifications, etc. to the specifications.
●The content of this manual may be changed in part without notice.
When transferring or reselling the unit or disposing of it, delete (initialize) all data
saved on it to protect your personal information and copyright protection.
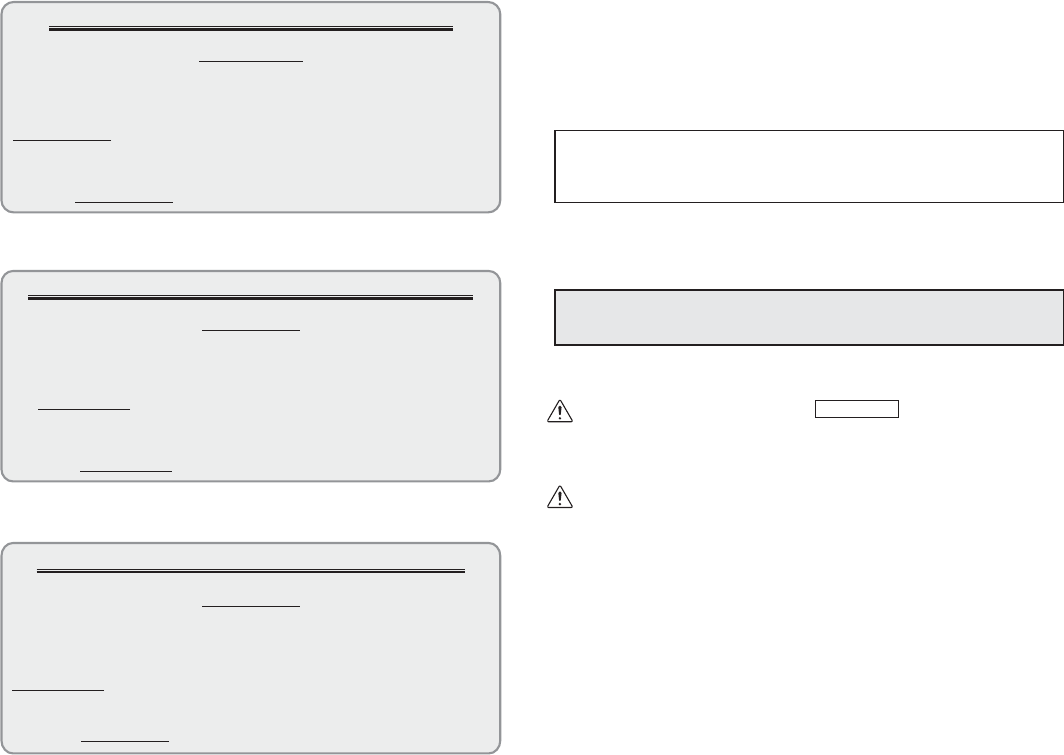
■Meanings of Symbols Used in This Manual
WARNING Preparations
This indicates the possibility that failure to
follow this instruction might lead to death
or serious injury.
This explains what must be done
beforehand to operate the product.
CAUTION Notice
This explains things that may cause injury
if instructions are not followed.
This explains limitations related to
operations.
Attention MEMO
Though this does not fall under the
category of “WARNING” or “CAUTION”,
this indicates that there is the danger of
money or time being lost.
This explains supplementary information
for mastering use of the unit.
CLARION PRODUCT REGISTRATION INFORMATION
For USA and Canada only
www.clarion.com
Dear Customer:
Congratulations on your purchase of a Clarion mobile electronic product. We are
confident that you’ll enjoy your Clarion experience.
There are many benefits to registering your product. We invite you to visit our website at
www.clarion.com to register your Clarion product.
We have made product registration simple with our easy to use website. The registration
form is short and easy to complete. Once you’re registered, we can keep you informed of
important product information.
Register at www.clarion.com - it’s easy to keep your Clarion product up to date.
INFORMATIONS DE L’ENREGISTREMENT DE PRODUITS CLARION
Pour les Étas Unis et le Canada seulement
www.clarion.com
Cher client:
Nous vous remercions d’avoir acheté ce produit électronique mobile Clarion. Nous sommes
confiants que vous apprécierez votre expérience Clarion.
Il y a beaucoup d’avantage à enregistrer votre produits. Nous vous invitons à visiter notre site
Web www.clarion.com pour enregistrer votre produit Clarion.
Nous avons facilité la tache d’enregistrement de produit simple et facile grâce à notre site Web.
Le formulaire d’enregistrement est court et facile à compléter. Lorsque vous êtes enregistrer,
nous pouvons vous tenir informé des informations important de produits.
Enregistrer à www.clarion.com - c’est facile de mettre à jour votre produit Clarion.
INFORMACIÓN DEL REGISTRO DE PRODUCTO DE CLARION
Para USA y Canada nomas
www.clarion.com
Querido Cliente:
Felicitaciones por su compra de producto electrónico móvil de Clarion. Estamos seguros que
usted gozará de su experiencia con el producto de Clarion.
Hay muchas ventajas al registrar su producto. Le invitamos a que visite nuestro sitio en internet
www.clarion.com para registrar su producto de Clarion.
Hemos hecho el registro de producto fácil en nuestro sitio. La forma de registro es corta y fácil
de completar. Una vez que lo registre, podremos proporcionarle la información de su producto.
Registrese en www.clarion.com - es fácil mantener su producto de Clarion actualizado.
NX603/FX503 1
English
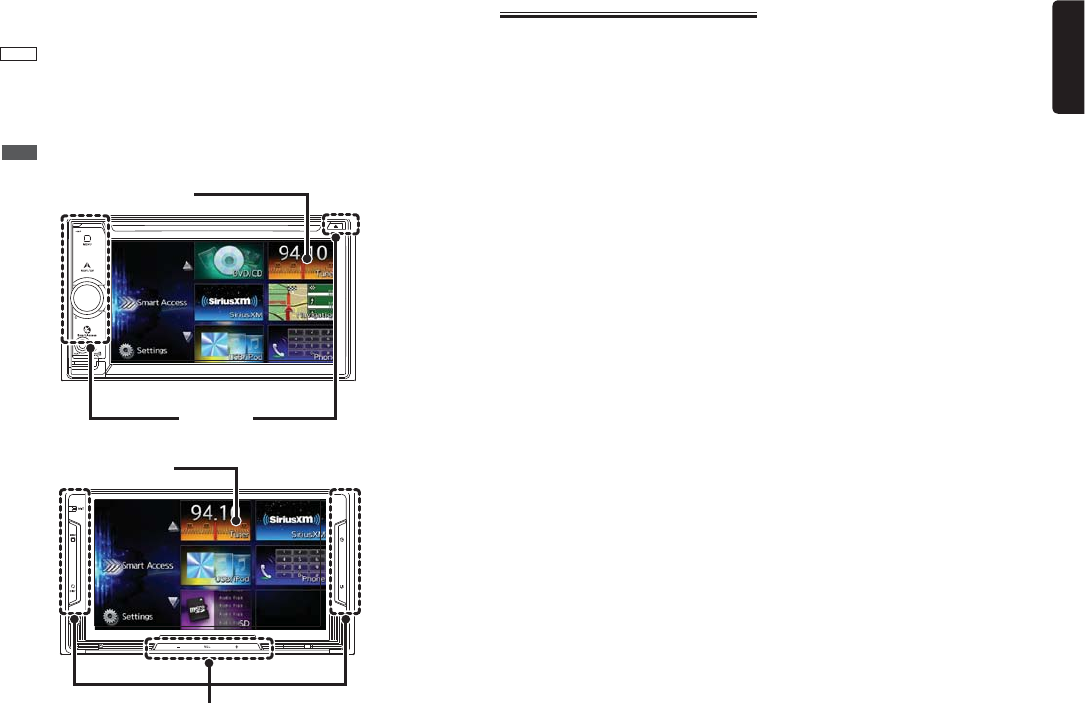
■Hard buttons and touch keys
In operation descriptions in this manual, hard buttons on the main unit are indicated by
dotted frames as the example shown below.
Example: MENU
The unit uses a touch panel system that you can operate simply by touching the screen with
your fingertip.
In this manual, operations performed by touching keys on screen are indicated by the
grayed out keys as the example shown below.
Example: Tuner
NX603
Hard button
Touch key
FX503
Touch key
Hard button
To Ensure Safe Use …………………… 3
Symbols relating to safety ……………… 3
WARNING………………………………… 3
CAUTION ………………………………… 4
Request and Notice …………………… 4
Before Starting Operations ………… 5
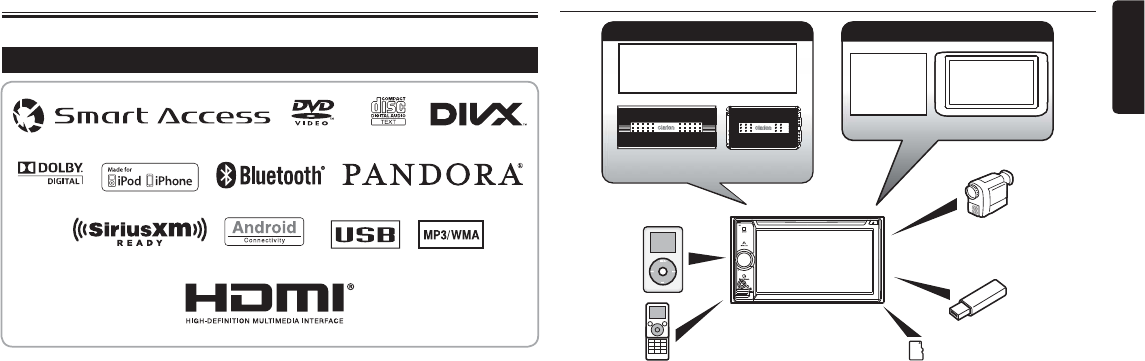
Features available on the unit ………… 5
Expanding Systems ……………………… 5
PRECAUTIONS ………………………… 6
Operation Panel/Generalities …………… 6
Names and functions of parts ………… 7
Basic method of use ………………… 9
Turning the power on …………………… 9
How to use menus ……………………… 9
Using the shortcut menu ……………… 9
How to enter text ……………………… 9
Operating lists …………………………… 9
Moving between pages in a list ………… 9
Using the index to select a list …………… 9
Adjusting numerical values ……………… 10
Inserting and removing discs (NX603
only) ………………………………… 10
How to insert discs………………………… 10
How to remove discs ……………………… 10
Inserting and removing the microSD card
(NX603) …………………………… 10
How to insert the microSD card ………… 10
How to remove the microSD card ……… 10
Inserting and removing the microSD card
(FX503) ……………………………… 10
How to insert the microSD card ………… 10
How to remove the microSD card ……… 10
Adjusting the audio volume ………… 11
Switching the display screen (NX603
only) ………………………………… 11
Switching to the audio screen …………… 11
Switching to the map screen …………… 11
Displaying the AV control bar (NX603
only) ………………………………… 11
Turning off the screen ………………… 11
Listening to the radio ………………… 11
Receiving radio broadcasts ………… 11
Switching between AM and FM radio …… 11
Automatically selecting a station ………… 11
Manually selecting the station …………… 12
Selecting stations from the list …………… 12
Using the radio preset
channel list ………………………… 12
What is a “preset channel”? ……………… 12
Using reception bands …………………… 12
Automatically registering to lists (auto store)
…………………………………………… 12
Manually registering to lists ……………… 12
Listening to SiriusXM Satellite Radio
……………………………………… 12
Displaying the SiriusXM Radio ID …… 12
Receiving SiriusXM Satellite Radio … 13
Selecting channels …………………… 13
Selecting channels from preset channels
…………………………………………… 13
Selecting from the category list ………… 13
Selecting channels from channel lists …… 13
Entering a channel number to select it … 13
Registering preset channels ………… 13
Using Parental Control ……………… 14
Locking a channel ………………………… 14
Changing passwords ……………………… 14
SiriusXM Satellite Radio Advisory Messages
…………………………………………… 14
Viewing DVDs (NX603 only) ………… 15
Playing DVDs ………………………… 15
Stopping play ……………………………… 15
Pausing……………………………………… 15
Playing the previous or next chapter …… 15
Rewinding/fast forwarding ……………… 15
Slow play …………………………………… 15
Repeat play ……………………………… 15
Contents

2 NX603/FX503
English
Playing from menus ……………………… 16
Entering a title or chapter number to play a
title or chapter ………………………… 16
Setting DVDs ………………………… 16
Switching the audio language/subtitle
language/angle ………………………… 16
Adjusting image quality …………………… 16
Switching the screen size ………………… 16
Setting the monitor size ………………… 17
Setting priority language ………………… 17
Setting the parental level ………………… 18
Setting the country code ………………… 18
Listening to music on CDs or discs
(MP3/WMA) (NX603 only) ………… 18
Playing discs ………………………… 18
Playing CDs ………………………………… 19
Playing MP3/WMA discs ………………… 19
Rewinding/fast forwarding ……………… 19
Playing the previous/next track ………… 19
Playing the previous/next folder (only when
playing MP3/WMA) …………………… 19
Playing from the folder list/track list …… 19
Repeat/shuffle play ……………………… 19
Scan play …………………………………… 19
Viewing DivX content (NX603 only) … 20
Viewing DivX content ………………… 20
Playing DivX content ………………… 20
Listening to microSD card/USB memory
files ………………………………… 20
Playing microSD card/USB memory
……………………………………… 20
Playing microSD card or USB memory … 20
Rewinding/fast forwarding ……………… 21
Playing the previous/next track ………… 21
Playing from the folder list/track list …… 21
Playing the previous/next folder ………… 21
Repeat/shuffle play ……………………… 21
Scan play …………………………………… 21
Listening to iPod/viewing iPod video
……………………………………… 22
Connectible iPods …………………… 22
Playing iPods ………………………… 23
Listening to iPods ………………………… 23
Watching iPod video ……………………… 23
Rewinding/fast forwarding ……………… 23
Playing the previous/next track/chapter … 23
Repeat/shuffle play ……………………… 23
Playing under specified conditions ……… 24
Setting iPod (video only) …………… 24
Adjusting the image quality of iPod video
…………………………………………… 24
Switching the iPod connection method … 24
Listening to Bluetooth audio ……… 25
To listen to Bluetooth audio ………… 25
Playing Bluetooth audio ……………… 25
Playing Bluetooth Audio ………………… 25
Rewinding/fast forwarding ……………… 25
Playing the previous/next track ………… 25
Playing from the track list ………………… 25
Playing under specified conditions ……… 25
Repeat/shuffle play ……………………… 26
Viewing connected external devices
(AUX) ………………………………… 26
Connecting external devices………… 26
Listening to video from
external devices …………………… 27
Watching video from external devices
……………………………………… 27
Setting external device listening …… 27
Compensating for volume differences … 27
Switching the screen size ………………… 27
Adjusting image quality …………………… 27
Listening to Pandora Internet radio
……………………………………… 28
Playing stations ……………………… 28
Pausing play ………………………… 28
Skipping the tune being played …… 28
Rating the tune currently being played
……………………………………… 28
Registering the tune being played to a
bookmark list ……………………… 28
Editing stations ……………………… 28
Making stations …………………………… 28
Deleting stations ……………………… 29
Registering Bluetooth-compatible
devices ……………………………… 29
What is “Bluetooth”? ………………… 29
Registering cellphones (pairing) …… 29
Switching the connected cellphone
……………………………………… 30
Deleting registered cellphones ……… 30
Using cellphones ……………………… 30
Screen during a telephone call ……… 30
Entering a number to make a call … 31
Making calls from the
outgoing/incoming calls log ……… 31
Deleting the incoming/
outgoing calls log ………………… 31
Registering a phonebook …………… 31
Making calls from the phonebook … 32
Deleting phonebook data …………… 32
Receiving telephone calls …………… 32
Setting the call volume ……………… 32
Using Smart Access ………………… 33
What is Smartphone linking? ……… 33
Linking-compatible applications ………… 33
Procedure up to Smartphone linking …… 33
Starting up applications ……………… 33
For iPhone ………………………………… 33
For Android smartphones ………………… 34
Correcting the touch position on screen
(Android smartphones only) ……… 34
Ending Smartphone linking ………… 34
Using a remote control (sold separately)
……………………………………… 34
Cautions during remote
control operations ………………… 34
Battery related precautions ………… 35
Replacing the battery ………………… 35
How to use the remote control ……… 35
Names and functions of remote control
parts ………………………………… 35
Using the rear camera ……………… 36
Image in the rear camera …………… 36
Displaying the image in the
rear camera ………………………… 36
Adjusting the image quality of the rear
camera ……………………………… 37
Displaying guidelines ………………… 37
Adjusting the guidelines ……………… 37
Displaying the quasi bumper line …… 38
Adjusting the quasi bumper line …… 38
Using the rear seat monitor ………… 38
Video images displayable on the rear
seat monitor ……………………… 38
Various settings ……………………… 38
Making general settings for
the unit ……………………………… 38
Setting the Shortcut Menu ………… 39
Setting the illumination display color on
the control panel (NX603 only) … 39
This sets the desired illumination color. … 39
Setting the password for antitheft
activation …………………………… 39
Making Bluetooth settings …………… 40
Renaming devices and changing the PIN
…………………………………………… 40
Setting sound quality ………………… 40
Adjusting speaker volume balance and vocal
volume balance ………………………… 40
Selecting and setting sound quality effects
memory ………………………………… 40
Setting preferred sound quality effects … 40
Adjust the Volume Smoother …………… 41
Setting screens ……………………… 41
Other settings ………………………… 41
NX603/FX503 3
English
Troubleshooting ……………………… 42
Navigation related (NX603 only) …… 42
Audio related ………………………… 42
Smartphone linking …………………… 44
Rear camera…………………………… 45
Others ………………………………… 45
Discs that can be used on the unit
(NX603 only)………………………… 46
CDs that can be played ……………… 46
CDs that cannot be played ………… 46
DVDs that can be played …………… 46
Note on region numbers of DVD video discs
…………………………………………… 46
DVD Video Features ……………………… 46
DVDs that cannot be played ………… 47
microSD cards/USB memory that can
be used on the unit ……………… 47
microSD card handling precautions
……………………………………… 47
Audio files that can be played on the
unit …………………………………… 47
MP3 files ……………………………… 48
WMA files ……………………………… 48
Folder structure of discs …………… 48
Folder structure of microSD card/USB
memory …………………………… 49
Notes for playing back MP3 and WMA
on the unit ………………………… 49
Video files that can be played on the
unit (NX603 only)…………………… 49
Country code ………………………… 50
Daily care and handling ……………… 50
Daily care and handling of
main unit …………………………… 50
Warranty and customer support …… 50
Specifications ………………………… 50
Trademarks …………………………… 51
Disposal, transfer and resale of this
product ……………………………… 52
Deletion of data from the unit ……… 52
To protect your privacy... ………………… 52
To protect copyright... …………………… 52
Deleting data (initializing) …………… 52
INSTALLATION AND WIRE
CONNECTION MANUAL ………… 53
1. SAFETY PRECAUTIONS …………… 53
Symbol Identification ……………………… 53
Before Use ………………………………… 53
Installation Precautions …………………… 53
Installation Notes ………………………… 53
Connection Notes ………………………… 53
2. PACKAGE CONTENTS ……………… 54
3. GENERAL CAUTIONS ……………… 54
4. CAUTIONS ON INSTALLATION ……… 54
5. INSTALLING THE MAIN UNIT ……… 54
Installing the Main Unit in a NISSAN Vehicle
…………………………………………… 55
Installing the Main Unit in a TOYOTA Vehicle
…………………………………………… 55
Vehicles other than NISSAN and TOYOTA
…………………………………………… 56
6. REMOVING THE MAIN UNIT ………… 56
7. CAUTIONS ON WIRING ……………… 56
8. INSTALLING THE GPS ANTENNA (NX603
ONLY) ……………………………… 56
9. WIRE CONNECTION ………………… 57
Connecting the Accessories ……………… 58
Index …………………………………… 59
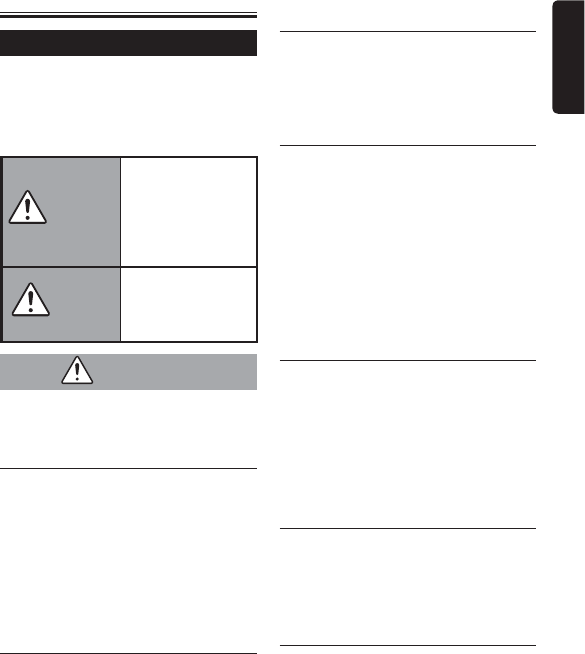
To Ensure Safe Use
Symbols relating to safety
The “possibility of the driver or other people
being injured” is indicated as follows, and
the following describes these dangers and
how to avoid them. Be sure to read these
important warnings.
WARNING
This indicates the
possibility that
failure to follow this
instruction might lead
to death or serious
injury.
CAUTION
This explains things
that may cause injury
if instructions are not
followed.
WARNING
Do not use the product’s
guidance information for finding
emergency facilities.
This product does not contain information
on all hospitals, fire stations, police stations,
etc. Also, this information may differ from
actual information, so there is the possibility
that you might not reach these facilities
within the expected time.
Always disconnect the minus
terminal of the battery before
doing any work.
Failure to do so might cause electric shock,
injury or device malfunction.
The driver must not operate or
stare at the unit while driving.
The driver may be distracted and cause
a traffic accident. Always stop in a safe
location.
Follow all applicable traffic
regulations
Information such as maps, one-way traffic
signs, traffic regulation marks and signs,
etc., or route advice (recommended routes
and voice guidance), etc. displayed on
navigation screens may differ from actual
road conditions. Be sure to follow actual
road signs and traffic conditions when
driving. Failure to do so might cause traffic
accidents.
Do not disassemble or modify the
product.
Do not open the case to oil parts or cut
through the insulation on wires to supply
power to other devices. Doing so might
cause accidents, fire, electric shock, or
malfunction.
Ask a professional engineer to
replace any fuses and use only
fuses with the rated capacity.
Use of fuses exceeding the rated capacity
might cause fire or malfunctions.
Do not use the product if it has
malfunctioned or is not operating
properly.
Stop using the product immediately if there
is no image or audio, if any foreign objects
get inside it, if it gets wet, if it emits smoke,
strange noises, or strange smells. Failure to
4 NX603/FX503
English
do so might cause fire or electric shock.
Do not use benzene or paint
thinner, car cleaner, polish spray,
or similar fluids.
Use of these fluids inside the vehicle will, for
example, cause inflammable gas to ignite
and cause fire.
Also, use of these for daily care of this
product will deform material or cause paint
to peel off.
Do not leave microSD memory
cards within the reach of children.
They might swallow them by mistake. Get
medical treatment immediately if anyone
swallows a microSD memory card.
CAUTION
Ask a professional engineer
to install, remove, change
installation or wire the unit.
Installation and wiring must be done
correctly. If it is installed or wired incorrectly,
it may interfere with driving and cause an
accident or malfunction.
Do not use the main unit except
in a vehicle.
Doing so may cause injury or electric shock.
Set the volume during driving to
a level that allows you to hear
sounds outside the vehicle.
Driving without being able to hear sounds
outside the vehicle might cause an accident.
Do not place objects on the
control panel or subject it to
strong impact
Doing so might cause the control panel or
LCD to malfunction, break or be deformed.
●Do not place objects on it.
●Do not press strongly with your hand.
●Do not hit it with hard objects such as
the tip of a pen, pin or fingernails.
●Do not splash it with water, juice or other
liquids.
Request and Notice
■LCD display
●Small black spots or bright spots
may appear on the screen, this is a
phenomenon unique to LCD monitors,
and is not a malfunction.
●Do not stick protective sheets, etc.
on the touch panel. This might cause
malfunctions or reduce response time.
When the LCD panel becomes dirty, refer
to “Daily care and handling of main unit.”
p P.50
■Operating environment
●To prevent the battery from going flat,
operate the unit with the engine running.
●The unit has a high-speed CPU, which
means that the case may get hot. Pay
particular attention to handling the unit
during use or immediately after turning
the engine off.
●On vehicles with a keyless entry system,
the unit may stop operating if you bring
the key close to it. Also, skipping might
occur if you bring the key close to the
unit or Bluetooth Audio device. If this
happens, move the key away.
●There may be static or the screen may
be distorted if electrical components that
generate strong electrical noise are used
near the unit. If this happens, either move
the electrical component considered the
cause of the electrical noise away from
the unit or stop using it.
■Routes
●When the position of a facility displayed
from the search function is set as it is as
a destination, you may be guided to an
inappropriate location such as the back
of the facility or on to an expressway.
Please understand this and check the
route near the destination.
●Names may be difficult to understand,
depending on the audio data.
●When a route cannot be calculated,
move the destination to a main road
nearby and try calculating again. Routes
sometimes cannot be calculated
depending on conditions such as
distance to the destination.
■Cautions about the Warranty within
the warranty period
●Contact your retailer about using the
warranty for repairs.
●You may need to return accessories
when you use the warranty for repairs.
●Data that could not be saved due to
the unit malfunctioning and data that
has disappeared is not covered by the
Warranty.
●The Warranty is not applied in the
following cases even within the warranty
period:
sCareless handling (inappropriate
operations not described in the User’s
Manual, dropping, impact, splashing
with water, etc.)
sMalfunction and damage caused by
improper repair, modification and
disassembly
sMalfunction and damage caused
by fire, salt damage, gas damage,
earthquakes, storm and flood damage,
lightning strikes, abnormal voltage,
and other natural disasters
sScratching, discoloring and dirt
resulting from use or damages from
improper storage.
■Copyright
●Software and data whose copyright
is owned by third parties licensed to
Clarion in accordance with a licensing
agreement is recorded on the unit.
Excluding instances that are clearly
indicated as being permitted in
descriptions in the User’s Manual,
removing, reproducing, or modifying the
software in the unit (including updates
and data) is strictly forbidden by law.
NX603/FX503 5
English
Before Starting Operations
The following describes information you should know before you start using the unit.
Features available on the unit
(NX603 only)
(NX603 only)
(NX603 only)
(NX603 only)
NX603
●Smartphone Connectivity
●Latest Map Guarantee
●Advanced Sound Tuning and 4V/6ch RCA Output
FX503
●Smartphone Connectivity
●Built-in Bluetooth® Hands-free(HFP) and Audio Streaming(A2DP & AVRCP)
●Advanced Sound Tuning and 4V/6ch RCA Output
Expanding Systems
microSD memory card
External Amplifier
Rear Vision
Camera
Bluetooth Telephone
AUX etc.
✽The illustrations for the main
unit are of the NX603.
USB Memory
Rear Monitor
Expanding audio features
iPod®/iPhone®
Expanding visual features
SiriusXM-ConnectTM Vehicle
Tuner (sold separately)
✽The items listed outside of the frames are the commercial products generally sold.
6 NX603/FX503
English
PRECAUTIONS
WARNING
s For your safety, the driver should not
watch the DVD video/movie data or
operate the controls while driving.
Please note that watching and
operating the DVD video/movie data
while driving are prohibited by law in
some countries. Also, while driving,
keep the volume to a level at which
external sounds can be heard.
1. When the inside of the car is very
cold and the player is used soon after
switching on the heater, moisture may
form on the disc (DVD/CD) or the optical
parts of the player and proper playback
may not be possible. If moisture forms on
the disc (DVD/CD), wipe it off with a soft
cloth. If moisture forms on the optical
parts of the player, do not use the player
for about one hour. The condensation
will disappear naturally allowing normal
operation.
2. Driving on extremely bumpy roads which
cause severe vibration may cause the
sound to skip.
3. This unit uses a precision mechanism.
Even in the event that trouble arises,
never open the case, disassemble the
unit, or lubricate the rotating parts.
4. This equipment has been tested and
found to comply with the limits for a
Class B digital device, pursuant to Part
15 of the FCC Rules.
These limits are designed to provide
reasonable protection against harmful
interference in a residential installation.
This equipment generates, uses, and
can radiate radio frequency energy and,
if not installed and used in accordance
with the instructions, may cause harmful
interference to radio communications.
However, there is no guarantee that
interference will not occur in a particular
installation. If this equipment does cause
harmful interference to radio or television
reception, which can be determined by
turning the equipment off and on, the
user is encouraged to consult the dealer
or an experienced radio/TV technician for
help.
■INFORMATION FOR USERS:
CHANGES OR MODIFICATIONS TO
THIS PRODUCT NOT APPROVED BY
THE MANUFACTURER WILL VOID THE
WARRANTY AND WILL VIOLATE FCC
APPROVAL.
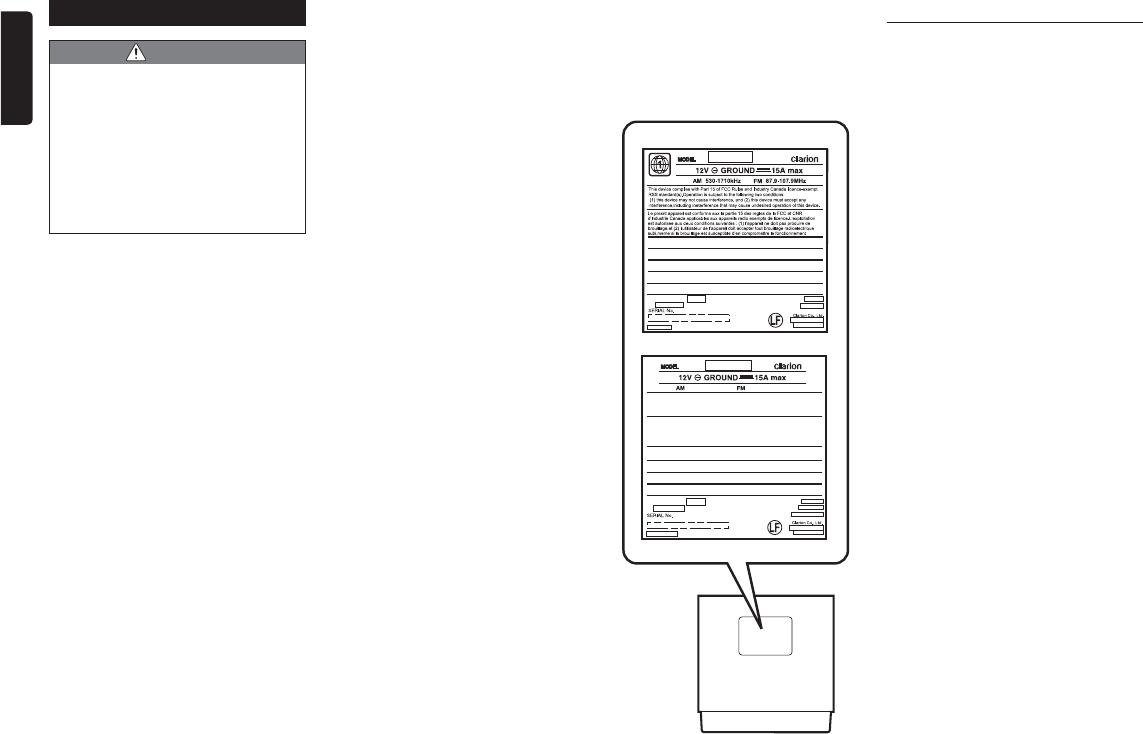
JAPAN
THIS DEVICE COMPLIES WITH DHHS RULES 21 CFR CHAPTER I SUBCHAPTER J
APPLICABLE AT DATE OF MANUFACTURE.
This product includes technology owned by Microsoft Corporation and cannot be used
or distributed without a license from MSLGP.
MANUFACTURED:
NCL
276-1168-00
QY-1010U-A
IC: 419C-NX603
Manufactured under license from Dolby Laboratories. “Dolby” and the double-D symbol
are trademarks of Dolby Laboratories.
This Class B digital apparatus complies with Canadian ICES-003.
Cet appareil numérique de la classe B est conforme à la norme NMB-003 du Canada.
FCC ID:AX2NX603
Bluetooth QD ID No.: B020554
NX603
CLARION CO.,LTD.
7-2,SHINTOSHIN,CHUO-KU,SAITAMA-SHI,SAITAMA-KEN,JAPAN
JAPAN
This device complies with Part 15 of FCC Rules and Industry Canada licence-exempt
RSS standard(s).Operation is subject to the following two conditions:
(1) this device may not cause interference, and (2) this device must accept any
interference,including ineterference that may cause undesired operation of this device.
MANUFACTURED:
NCL
276-1215-00
QZ-3010U-A
FCC ID:AX2FX503
Bluetooth QD ID No.: B020554
IC: 419C-FX503
530-1710kHz 87.9-107.9MHz
FX503
THIS DEVICE COMPLIES WITH DHHS RULES 21 CFR CHAPTER I SUBCHAPTER J
APPLICABLE AT DATE OF MANUFACTURE.
This product includes technology owned by Microsoft Corporation and cannot be used
or distributed without a license from MSLGP.
This Class B digital apparatus complies with Canadian ICES-003.
Cet appareil numérique de la classe B est conforme à la norme NMB-003 du Canada.
CLARION CO.,LTD.
7-2,SHINTOSHIN,CHUO-KU,SAITAMA-SHI,SAITAMA-KEN,JAPAN
Le presnt appareil est conforme aux la partie 15 des regles de la FCC et CNR
d’lndustrie Canada applicables aux appareils radio exempts de licence.L’exploitation
est autorisee aux deux conditions suivantes : (1) l’appareil ne doit pas produire de
brouillage,et (2) l’utilisateur de l’appareil doit accepter tout brouillage radioelectrique
subi,meme si le brouillage est susceptible d’en compromettre le fonctionnement
NX603
FX503
Operation Panel/Generalities
For a longer service life, be sure to read the
following cautions.
●Do not allow any liquids on the set from
drinks, umbrellas, etc. Doing so may
damage the internal circuitry.
●Do not disassemble or modify the set
in any way. Doing so may result in
damage.Also, subjecting the operation
panel to shocks may result in breakage,
deformation, or other damage.
●Do not let cigarettes burn the display.
Doing so may damage or deform the
cabinet.
●If a problem should occur, have the set
inspected at your store of purchase.
●The optional remote control unit may
not work if the remote control sensor is
exposed to direct sunlight.
●In extremely cold weather, the display
movement may slow down and the
display may darken, but this is not
a malfunction. The display will work
normally when the temperature
increases.
●Small black and shiny spots inside the
operation panel are normal for LCD
products.
●The touchkeys on the display operate
when slightly touched. Do not press the
touchkey screen with much force.
●Do not push the case surrounding
the touchkey panel with much force.
This may cause malfunctioning of the
touchkeys.
NX603/FX503 7
English
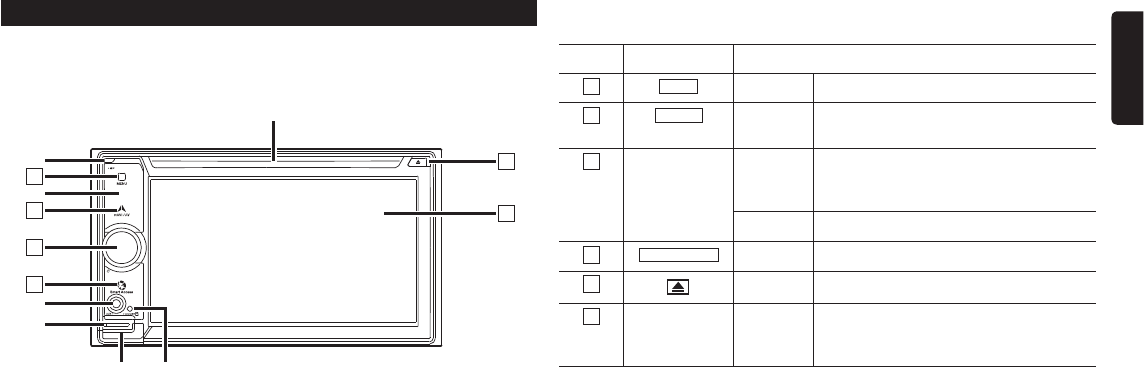
Names and functions of parts
The following describes the button names on the operation panel of the unit and their
functions.
NX603
1
2
3
4
5
6
✽ 4
✽ 7
✽ 3
✽ 5
✽ 6
✽ 1
✽ 2
✽1 This is the built-in microphone. This is used as the microphone for the hands free function
when the unit is connected to a Bluetooth compatible cellphone by a wireless connection.
✽2 This is the remote control sensor. This receives the signal from the remote control (sold
separately).
✽3 This is the AUX terminal. Audio and video from external devices connected to this terminal can
be played when the audio mode is switched to AUX. p P.26
✽4 This is the Antitheft Indicator. This light blinks when the Antitheft Activation setting is set to “ON”
to indicate that the antitheft function is activated. p P.39
✽5 This is where the microSD card is inserted to enjoy data in microSD cards. p P.10
✽6 The map microSD is housed in here. To update the map, open this cover, and remove and
insert the card.
Do not open the cover for other operations.
✽7 This is where DVD video, CD, MP3, WMA, and DivX discs are inserted. p P.10
This document uses the following inline graphics and conventions to indicate operations
using the buttons on the operation panel.
Number Inline graphic Description of operation
1
MENU Short press This displays the main menu screen.
2
NAVI AV Short press
This switches between the current position map
screen and currently selected audio screen.
3
— Turn This is the rotary volume key.
Use this to adjust the volume of audio-visual
functions or the route audio guidance, etc.
Short press This turns off the screen.
4
Smart Access Short press This starts up Smart Access.
5
Short press This ejects the disc inserted in the unit.
6
— Touch This is the monitor and touch panel. This
functions as a touch panel by touching the
screen when it is displayed.
8 NX603/FX503
English
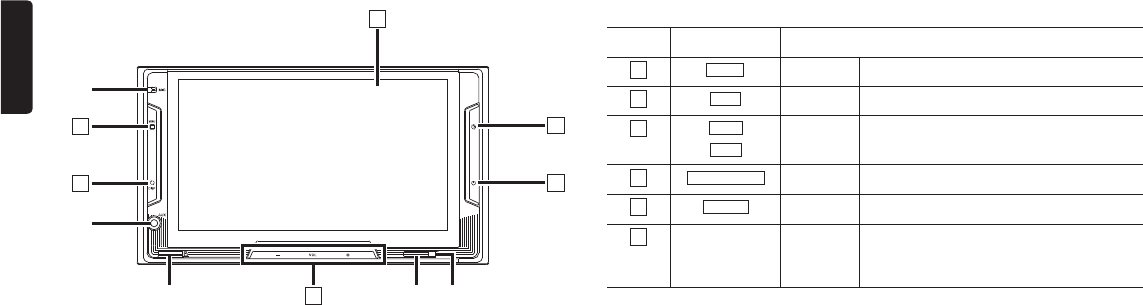
FX503
14
5
✽ 3
✽ 1
✽ 2
2
✽ 5
✽ 4
3
6
✽1 This is the built-in microphone. This is used as the microphone for the hands free function
when the unit is connected to a Bluetooth compatible cellphone by a wireless connection.
✽2 This is the AUX terminal. Audio and video from external devices connected to this terminal can
be played when the audio mode is switched to AUX. p P.26
✽3 This is where the microSD card is inserted to enjoy data in microSD cards. p P.10
✽4 This is the remote control sensor. This receives the signal from the remote control (sold
separately).
✽5 This is the Antitheft Indicator. This light blinks when the Antitheft Activation setting is set to “ON”
to indicate that the antitheft function is activated. p P.39
This document uses the following inline graphics and conventions to indicate operations
using the buttons on the operation panel.
Number Inline graphic Description of operation
1
MENU Short press This displays the main menu screen.
2
DISP Short press This switches to the audio screen.
3
VOL+
VOL-
Short press Use this to adjust the volume of the audio-
visual function.
4
Smart Access Short press This starts up Smart Access.
5
POWER Short press This turns off the screen.
6
— Touch This is the monitor and touch panel. This
functions as a touch panel by touching the
screen when it is displayed.
NX603/FX503 9
English
AUX2 :
This displays the AUX2 mode. p
P.26
:
This displays the various setting
screens. p P.38
Using the shortcut menu
Touching on the various audio top
menu screens or the telephone top screen
displays the shortcut menu.
Up to five frequently used functions can be
registered to the shortcut menu. p P.39
Touching returns the screen to the
previous screen.
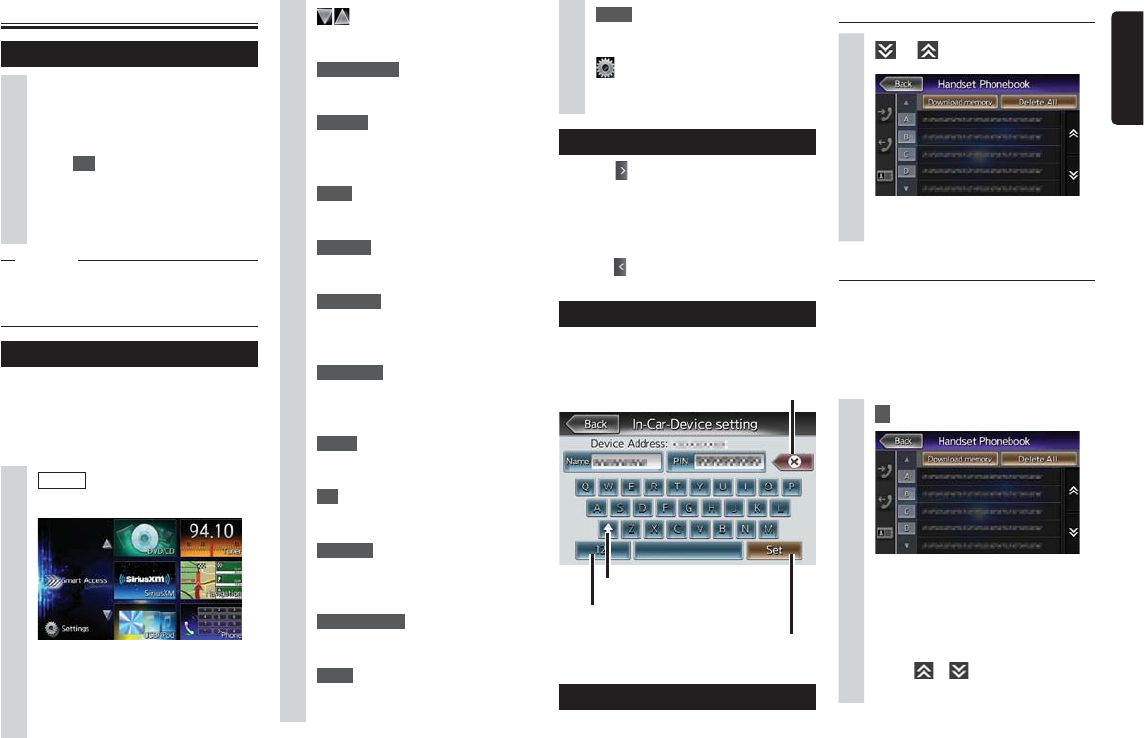
How to enter text
In the text entry screen, letters and numbers
can be entered by touching the keypad.
This switches to the alphabet/number
entry mode.
This applies the character string you
entered.
This deletes one character. Continuously
touching this deletes all characters.
This switches between uppercase
and lowercase.
Operating lists
When a list contains many items, the list is
displayed over two or more pages.
Moving between pages in a list
1 or
You can also scroll through pages in
a list by flicking.
Using the index to select a list
When alphabet keys are displayed on the
left side of the screen, items beginning with
the letter of the alphabet that was touched
can be displayed as a list. The following
example explains how to select items
beginning with the letter “B” from the list.
1 B
Items beginning with “B” are
displayed.
2Select the relevant item from the
list.
If all indexes are not displayed, either
touch or or flick to move to
the next page.
Basic method of use
Turning the power on
1Turn the engine key to the “ACC”
or “ON” position.
The unit turns on.
After the opening screen is displayed,
touch OK . The current position
map screen or the audio screen is
displayed.
When the engine key is turned to the
“OFF” position, the unit is turned off.
MEMO
sWhen the Antitheft Activation function
is set, the password entry screen is
displayed. p P.39
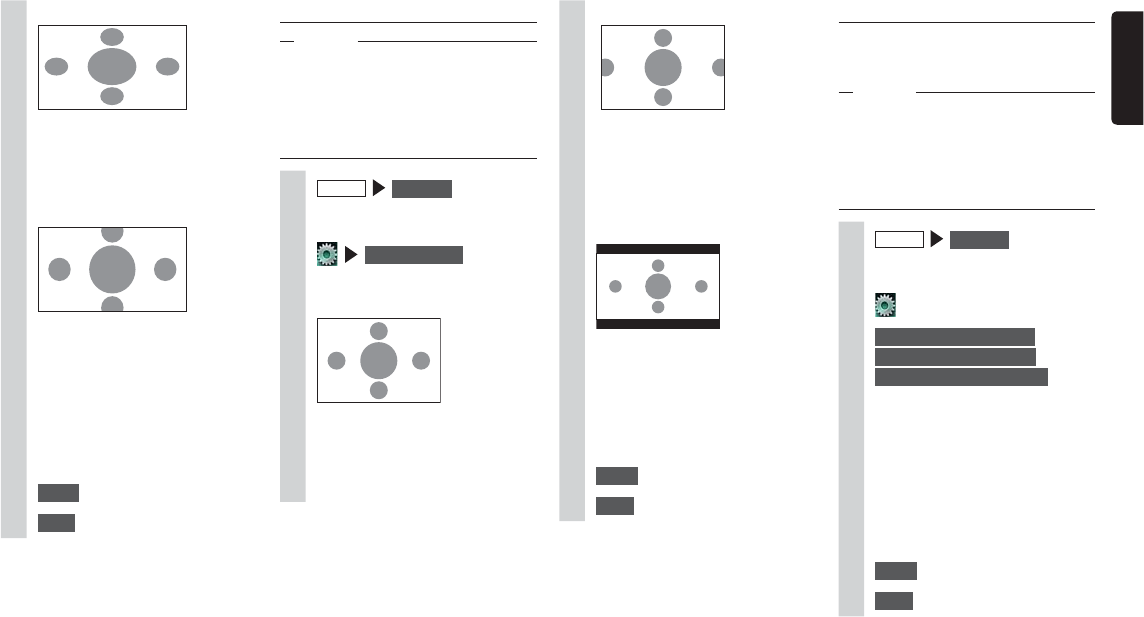
How to use menus
The unit has a main menu for using all
functions and a shortcut menu that groups
together frequently used functions. Use of
the shortcut menu allows you to quickly
access frequently used functions.
1 MENU
The main menu screen is displayed.
Touching the main menu screen and
quickly sliding your finger up or down
then removing it, moves you to the
previous or next page. This operation
is called flicking.
:
Touch these to move to the
previous or next menu screen.
Smart Access :
This displays the Smart Access
mode. p P.33
DVD/CD :
This displays the DVD, CD or DivX
modes. (NX603 only)
p P.15
Tuner :
This displays the radio mode. p
P.11
SiriusXM :
This displays the SiriusXM Satellite
Radio mode. p P.12
Navigation :
This displays the navigation mode.
(NX603 only) p “Owner’s Manual -
Navigation”
USB / iPod :
This displays the USB audio mode
or iPod audio/iPod video mode. p
P.20, P.22
Phone :
This displays the telephone mode.
p P.30
SD :
This displays the SD audio mode.
p P.20
BT Audio :
This displays the Bluetooth audio
mode.
p P.25
Pandora Radio :
This displays the Pandora Radio
mode. p P.28
AUX1 :
This displays the AUX1 mode. p
P.26
10 NX603/FX503
English
Adjusting numerical values
When and are displayed, numerical
values, volume, etc. can be adjusted.
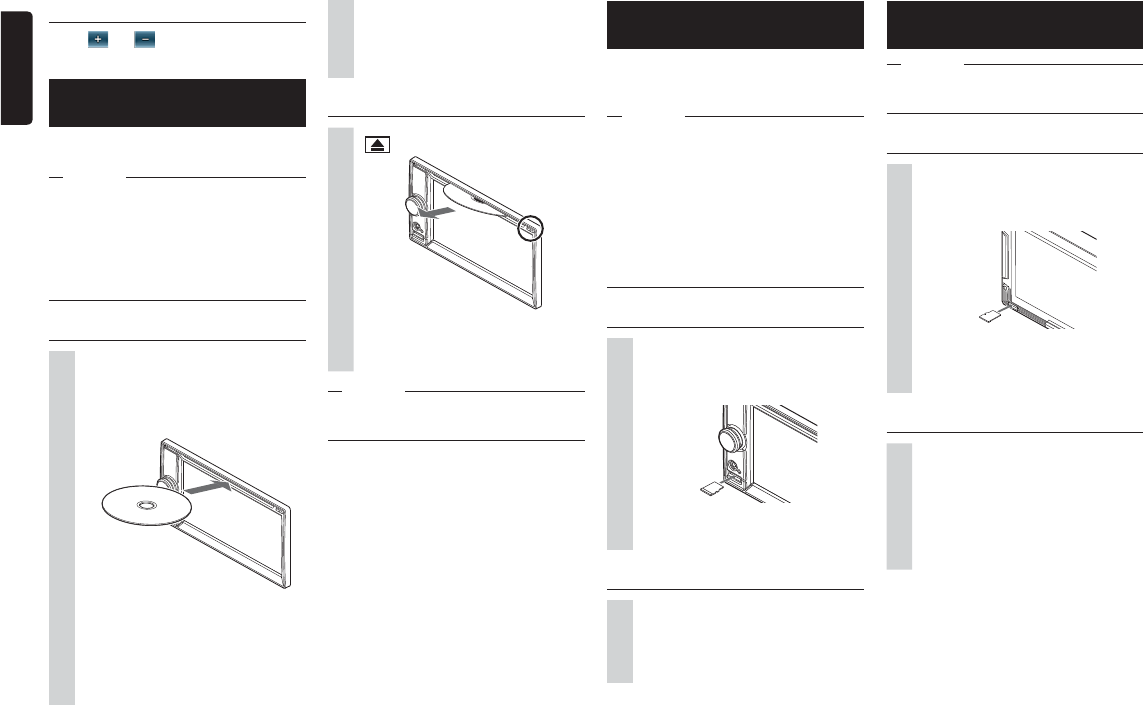
Inserting and removing discs
(NX603 only)
To enjoy data in CD, MP3/WMA or DVD
discs, the disc must be loaded into the unit.
Attention
sDo not leave discs protruding from the
loading slot. Either insert them completely
or remove them.
sDo not touch the recording surface (shiny
side) of the disc.
sDo not insert two discs at the same time.
How to insert discs
1Insert the disc into the loading
slot with the recording surface
(shiny side) of the disc face
down.
The disc is drawn in. After a while, the
disc starts playing.
When the disc is inserted a short way,
it is automatically drawn in. If the disc
is not drawn in, this means that a disc
is already loaded.
Do not exert unnecessary force when
inserting discs. First remove the disc
that is already loaded, and then load
the new disc.
How to remove discs
1
The disc is ejected.
2Remove the disc.
MEMO
sIf a disc is not removed immediately, after
a while it is automatically drawn in again.
Inserting and removing the
microSD card (NX603)
To enjoy MP3/WMA data in microSD cards,
the microSD card must be loaded into the
unit.
Attention
sThe map microSD card is already inserted
into the microSD card loading slot under
the slot cover.
If the map microSD card is removed, the
unit does not function. Do not remove or
insert the map microSD card except to
update map information.
sDo not touch the terminal surface of
microSD cards.
How to insert the microSD card
1Insert the microSD card into the
loading slot with its label surface
face up.
Firmly insert the microSD card as far
as it can go.
How to remove the microSD card
1Grip the microSD card with your
fingers and pull it out.
To remove the microSD card, grip it
with your fingers and pull it out.
Inserting and removing the
microSD card (FX503)
Attention
sDo not touch the terminal surface of
microSD cards.
How to insert the microSD card
1Insert the microSD card into the
loading slot with its label surface
face down.
Firmly insert the microSD card as far
as it can go until you hear it click in
place.
How to remove the microSD card
1Push in the microSD card.
The microSD card springs our slightly.
2Remove the microSD card.
To remove the microSD card, grip it
with your fingers and pull it out. The
microSD card might spring out.
NX603/FX503 11
English
Adjusting the audio volume
1Turn the rotary volume (NX603)
or VOL+ and VOL- (FX503).
MEMO
s VOL+ or VOL- changes the volume
continuously. (FX503 only)
sThe volume of the navigation audio
guidance is adjusted by a different
operation. (NX603 only) p “Owner’s
Manual - Navigation”
Switching the display screen
(NX603 only)
The audio screen and map screen are
switched by the following operation.
Switching to the audio screen
1In the map screen NAVI AV
The audio screen of the selected
source is displayed.
Switching to the map screen
1In the audio screen NAVI AV
The map screen is displayed.
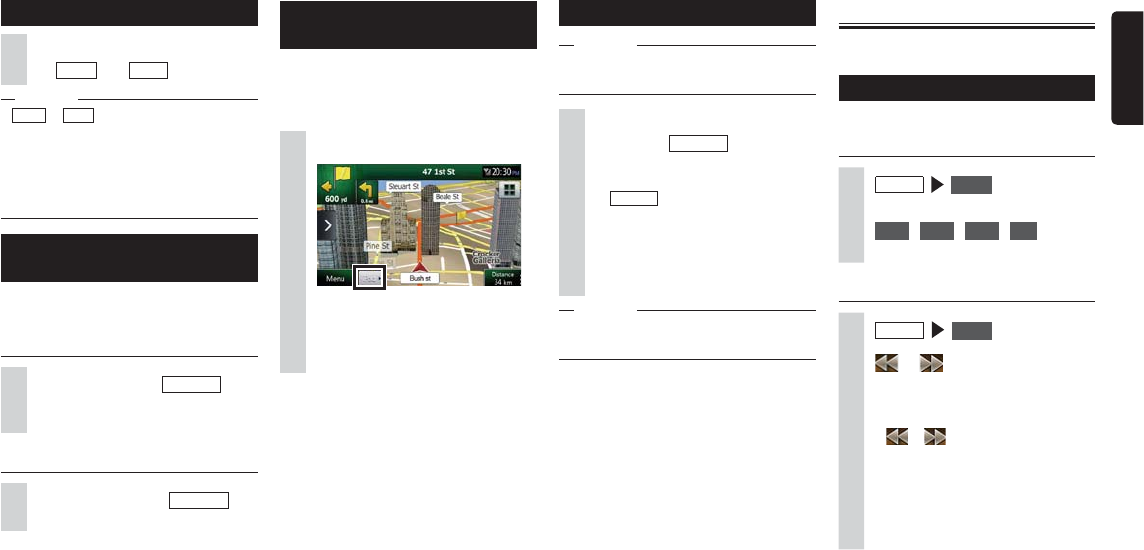
Displaying the AV control bar
(NX603 only)
The AV control bar for quickly accessing
audio-visual functions can be displayed.
Display content differs according to the
currently selected audio-visual type.
1AV control bar display key
The AV control bar of the currently
displayed audio-visual is displayed.
To hide the AV control bar, touch the
bar display key.
Turning off the screen
Notice
sWhile the screen is off, the voice guidance
of the navigation does not work.
1Press the rotary volume key
(NX603) or POWER (FX503).
The screen turns off.
Press the rotary volume key (NX603)
or POWER (FX503) again to display
the screen as before.
When the audio screen is previously
displayed, the audio main menu
screen of the selected source is
displayed.
MEMO
sThe screen temporarily turns on when you
receive a call or use the camera.
Listening to the radio
You can enjoy both AM and FM radio on the
unit.
Receiving radio broadcasts
Switching between AM and FM
radio
1 MENU
Tuner
Radio broadcasts are received.
2 FM1 , FM2 , FM3 , AM
Switches to the band you touch.
Automatically selecting a station
1 MENU Tuner
2 or
(Long press within 1.5 seconds)
When a receivable station is detected,
that station is automatically received.
If or is long pressed for at
least 1.5 seconds, the frequency
switches continuously while the
key is touched. When you release
your finger from the key, receivable
broadcast stations are automatically
detected and received.
12 NX603/FX503
English
Listening to SiriusXM
Satellite Radio
Everything worth listening to is on SiriusXM,
getting over 130 channels, including the
most commercial-free music, plus the best
sports, news, talk and entertainment. A
SiriusXM Vehicle Tuner and Subscription are
required. For more information, visit www.
siriusxm.com.
Preparations
●To use this function,SiriusXM-Connect
Vehicle Tuner (sold separately) is
required.
●Use the SiriusXM Radio ID to register
yourself as a member.
Displaying the SiriusXM
Radio ID
The SiriusXM Radio ID is used, for
example, for registering your membership
or transactions with SiriusXM customer
support.
1 MENU SiriusXM
2
SiriusXM Radio ID is displayed.
Manually selecting the station
1 MENU Tuner
2 or
Each touch switches the frequency.
The frequency can also be switched
by touching the frequency setting
area or sliding the frequency setting
bar.
Frequency setting bar
Selecting stations from the list
Select a registered station from the list.
1 MENU Tuner
2Select the desired station.
The selected station is received.
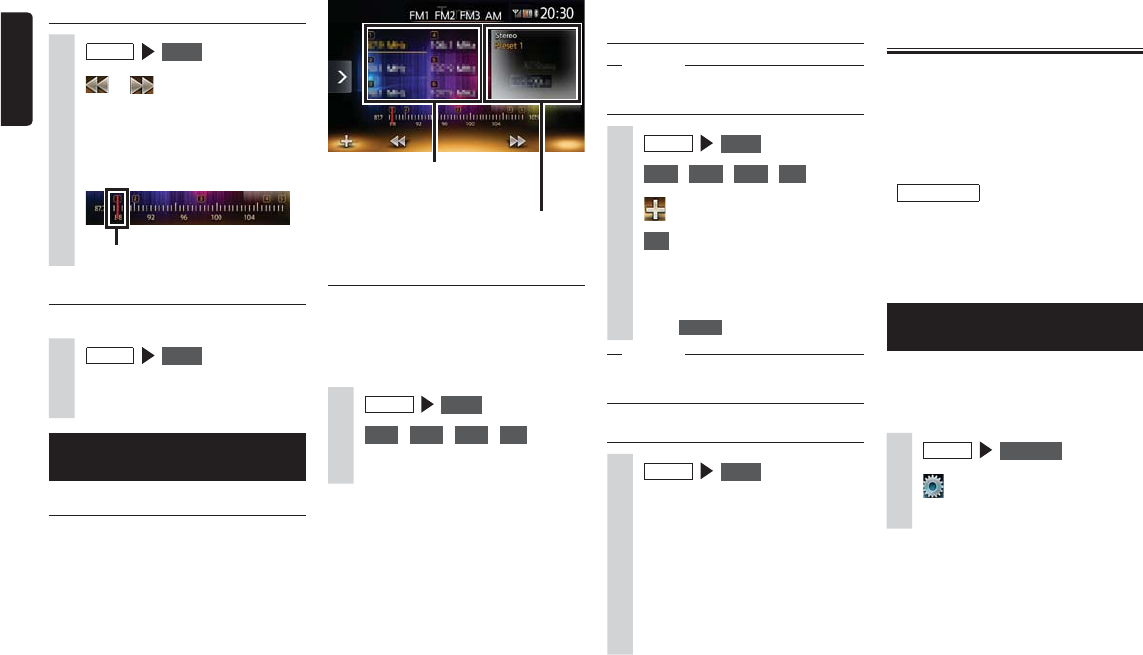
Using the radio preset
channel list
What is a “preset channel”?
You can register (preset) the frequency of
a station that can be received in the area
you are driving. You can receive any desired
station at the touch of a button without
having to adjust the frequency.
There are four preset channel lists: FM1,
FM2, FM3, and AM. Up to six stations can
be registered in each list.
There are two ways of registering to preset
channel lists, manual and automatic.
Preset channel list
(Station list)
The stereo status, preset channel number
and frequency are displayed.
Using reception bands
When the station differs according to region,
reception bands can be switched and used
at the touch of a button by setting preset
channels in that area to each of FM1, FM2,
FM3, and AM.
1 MENU Tuner
2 FM1 , FM2 , FM3 , AM
The preset channel list display is
switched.
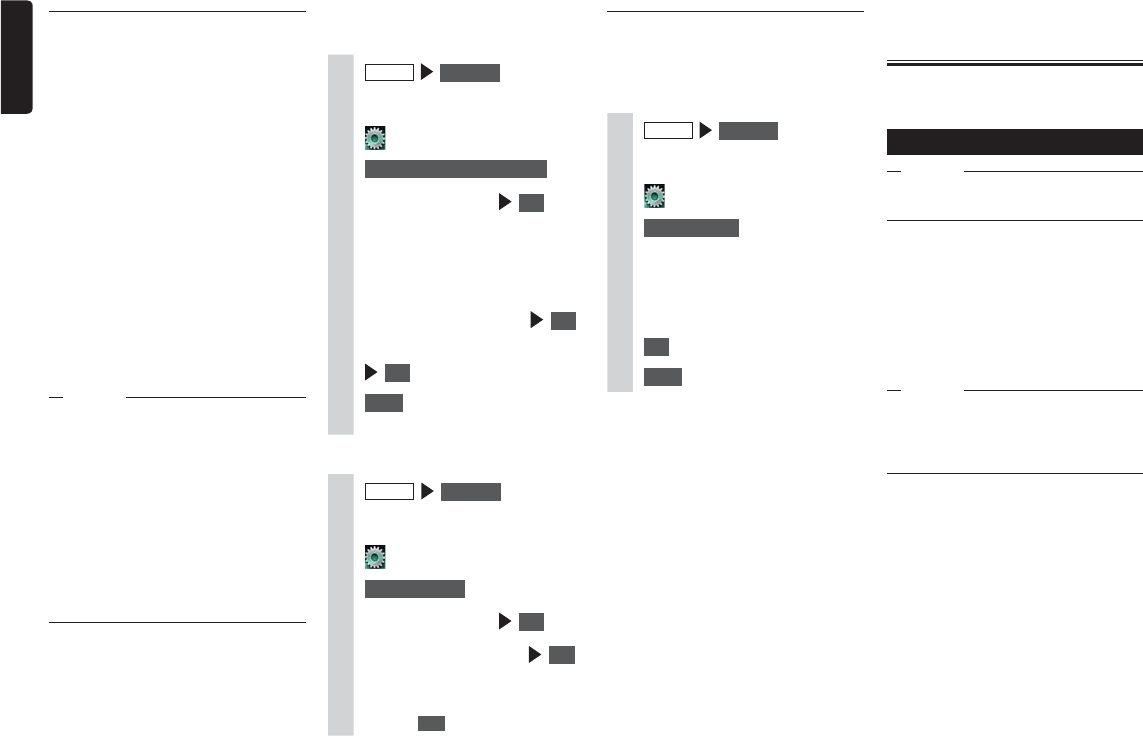
Automatically registering to lists
(auto store)
Notice
sStations cannot be selected during this
operation. Wait for the operation to end.
1 MENU Tuner
2 FM1 , FM2 , FM3 , AM
3
4 OK
Receivable stations are overwritten to
and registered to the current preset
channel.
To cancel an auto store,
touch Cancel .
MEMO
sWhen an auto store is stopped midway,
stations received so far are not registered.
Manually registering to lists
1 MENU Tuner
2Receive the station you want to
register.
3Long press the channel to be
overwritten in the preset channel
list until you hear a sound
The station currently being received is
overwritten to and registered to that
channel.
NX603/FX503 13
English
SiriusXM Satellite Radio comes with
three modes. (Default: All Channels)
Presets:
In this mode, the channels
registered to the preset channels
are selected.
Categories:
In this mode, the channels
belonging to the category currently
being received are selected.
All Channels:
In this mode, all channels currently
being received are selected.
Each touch of the Seek Mode Key
switches the mode in the following
order:
All Channels
p
Presets
p
Categories
p
All Channels…
Touching or switches the
channel in the currently selected
mode.
Continuously touching or
switches the channel while that key
is held down. When you release
your finger, the selected channel is
received.
Notice
sChannels to which parental lock
is set are not included in tuning
when All Channels or Categories is
selected for Seek Mode.
The SiriusXM Radio ID can also be
found by tuning to Channel 0. In
addition, the Radio ID is located on
the bottom of the SiriusXM Connect
Vehicle Tuner.
Please note that the SiriusXM Radio
ID does not include the letters I, O, S
or F.
Activate the SiriusXM Vehicle Tuner
using one of the two methods below:
s/NLINE'OTOhWWWSIRIUSXMCOM
activatenow” and choose ACTIVATE
RADIO.
s0HONE#ALL8-2!$)/
800-967-2346).
Receiving SiriusXM Satellite
Radio
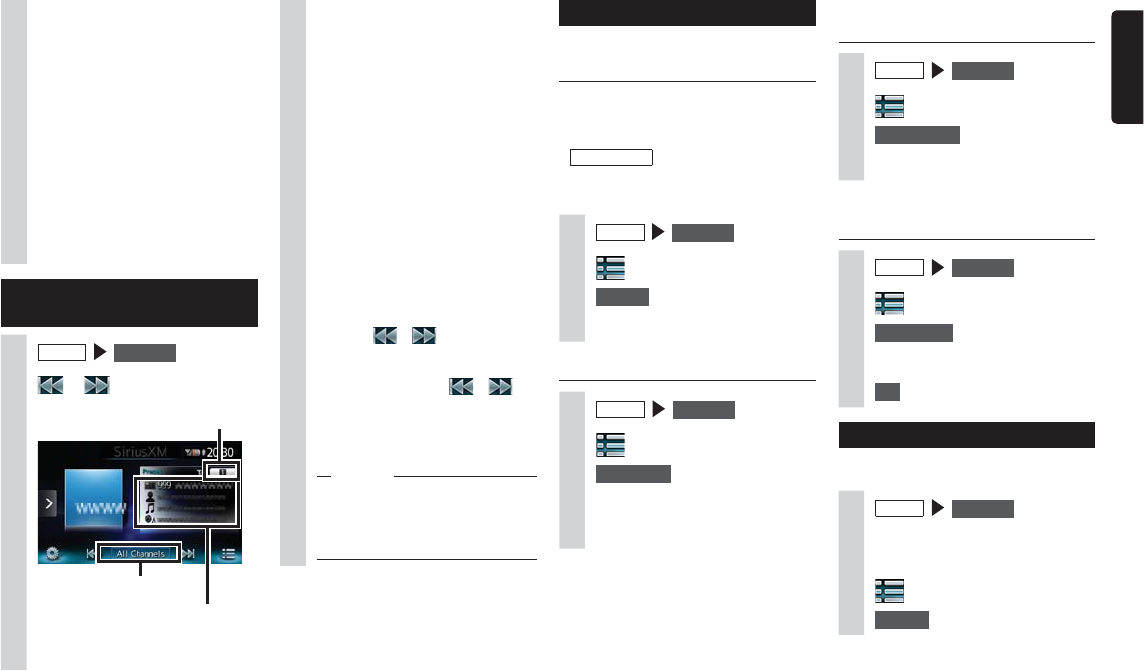
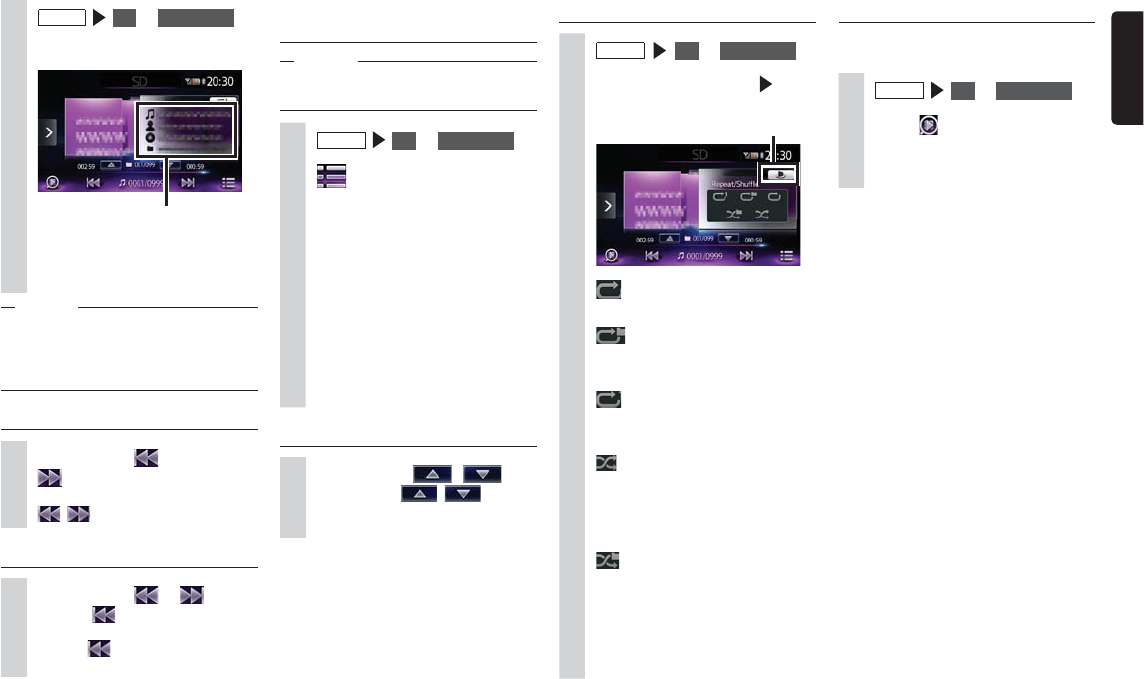
1 MENU SiriusXM
2 or
Seek Mode key
Touching this displays the
currently selected Content Info.
The preset number, channel number,
channel name, category name, song
title currently being played, and artist
name are displayed.
Selecting channels
Selecting channels from preset
channels
Frequently used channels can be selected
and received from preset channel lists you
have registered in advance.
Preparations
●To select a preset channel, the channel
must first be registered. p P.13
1 MENU
SiriusXM
2
3 Presets
4Select the desired channel.
Selecting from the category list
1 MENU SiriusXM
2
3 Categories
4Select the desired category.
5Select the desired channel.
Selecting channels from channel
lists
1 MENU SiriusXM
2
3 All Channels
4Select the desired channel.
Entering a channel number to
select it
1 MENU SiriusXM
2
3 Direct Tune
4Enter the channel number
5 OK
Registering preset channels
Up to 30 channels can be registered to
preset channels.
1 MENU SiriusXM
2Receive the channel you want to
register.
3
4 Presets
14 NX603/FX503
English
5Touch the channel you want to
lock.
The password is set for the selected
channel.
6 Close
MEMO
sThe lock setting of each channel is held in
memory even if the engine key is turned
off.
sThe password is canceled by touching the
channel again in step 5.
Changing passwords
1 MENU SiriusXM
2
3 Channel Lock Password
4Enter the password OK
5Enter the new password OK
6Enter the password again for
confirmation OK
This completes changing of the
password.
5Long press the channel to be
overwritten in the preset channel
list until you hear a sound
The channel currently being received
is overwritten to and registered to
that channel.
Using Parental Control
The Parental Control function applies
viewing restrictions to channels that are
considered inappropriate viewing for
children.
Channels can be locked by setting
passwords for particular channels. (Default:
0000)
When a locked channel is selected, the
password entry screen is displayed.
The channel can be accessed and switched
to by entering the correct password. From
here onwards, the password does not need
to be entered until the engine key is turned
off.
Notice
sThis operation is not possible while you
are driving.
Locking a channel
1 MENU SiriusXM
2
3 Channel Lock
4Enter the 4-digit password
OK
The channel list is displayed.
SiriusXM Satellite Radio Advisory Messages
Message Description
Check Tuner. Check the SiriusXM tuner connection on the back of the unit
to ensure that its correctly connected.
Check Antenna. Ensure the SiriusXM antenna cable is connected to the
SiriusXM tuner correctly.
Check the SiriusXM antenna wire for breaks or sharp bends.
Replace the antenna if necessary.
No Signal. The vehicle must be outside, and the antenna must have a
clear view of the southern sky.
Channel * not
Subscribed.
Call SiriusXM to
Subscribe.
This channel is not included in your SiriusXM subscription
plan. Call 1-800-XMRADIO
(1-800-967-2346) to subscribe.
Channel * Not
Available.
This channel is not a valid SiriusXM channel.
The channel number has been entered incorrectly, or the
channel was removed from the SiriusXM channel lineup.
Ch Locked.
Lock Code?
The selected channel has been locked by the parental
controls.
A prompt to enter the unlock code will appear. p P.14
Subscription updated.
Press OK to continue.
An update to your SiriusXM subscription has been received
by the SiriusXM tuner. Press any button to continue.
NX603/FX503 15
English
Stopping play
1Touch the screen while playing
DVD video is hidden and playing
stops. (resume stop)
If is touched during a resume stop,
play is resumed from the place where
it was stopped.
If is long pressed during a resume
stop, play is completely stopped.
(complete stop) When play is next
started, the disc is played from the
beginning.
Pausing
Notice
sIn the case of DVD video, key operations
such as pause or start sometimes are not
possible in some menus. If this happens,
touch Top Menu or Menu use the
operation keys in the DVD menu.
1Touch the screen while playing
Play pauses while the DVD image is
displayed. If is touched during a
pause, play is resumed from the place
where it was stopped.
Viewing DVDs (NX603 only)
Playing DVDs
WARNING
s If the driver wants to view video on
a DVD, he or she should always stop
at a safe place before doing so.
Notice
sFor safety’s sake, view video on a DVD
only when the vehicle has stopped. While
you are driving, you can enjoy only audio.
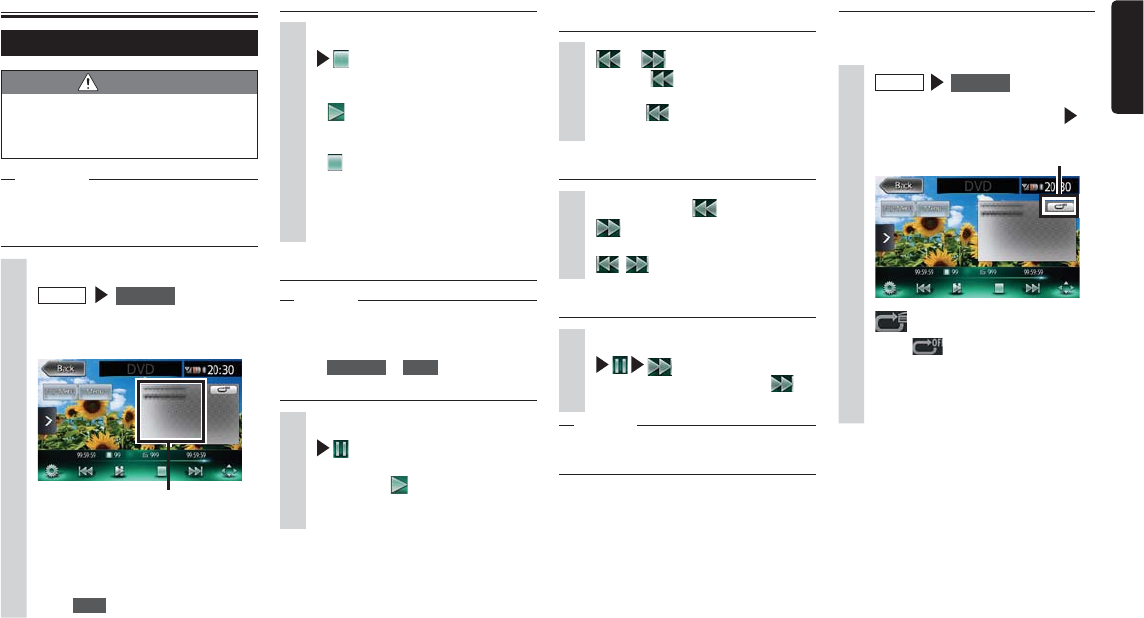
1Load the DVD, or
MENU DVD/CD
The DVD loaded in the unit is played.
Menu keys are displayed by touching
the screen.
The screen size and play status are
displayed.
If five seconds passes with no
operations, the keys displayed on
screen are hidden.
To manually hide the keys,
touch Back .
Playing the previous or next
chapter
1 or
Touching returns you to the start
of the chapter, and each additional
touch of moves you to previous
chapters.
Rewinding/fast forwarding
1While playing, (rewind) or
(fast forward)
If you release your finger from
, , normal play resumes.
Slow play
1Touch the screen while playing
(long press)
If you release your finger from ,
normal play resumes.
MEMO
sDuring slow play, “Slow play” is displayed
in the Audio status display area.
Repeat play
This function is for repeatedly playing the
chapter currently being played.
1 MENU DVD/CD
2Touch the screen and touch
Trick Play key.
Trick Play key
3
Touch to resume normal play.
4Touch the Trick Play key.
The screen returns to the previous
screen.
16 NX603/FX503
English
Setting DVDs
Switching the audio language/
subtitle language/angle
Notice
sThis function is enabled only when
subtitles, multiple audio, and angles are
recorded to DVDs.
sThe available languages differ according
to the disc.
1 MENU DVD/CD
2Touch the screen.
3 Audio/Subtitle/Angle
4 Angle , Audio Language ,
Subtitle Language
Each touch of this switches the
settings of each item.
Subtitles can be hidden by setting
“OFF”.
MEMO
s“Others” is displayed when a
language other than that can be
set at “Setting priority language” is
recorded. p P.17
5 Back
Adjusting image quality
1 MENU DVD/CD
2Touch the screen.
3 Display Adjustment
4 or of item to adjust
Adjust the image quality while viewing
the video image on screen.
5 Back
This sets the newly adjusted image
setting.
MEMO
sImage quality adjustments can be set for
both the day and night screens.
Switching the screen size
1 MENU DVD/CD
2Touch the screen.
3 Display Mode
4Select the screen size
Normal:
Video is displayed in the center of
the screen with its aspect ratio held
intact. When the size of the video
and screen differ, excess parts of
the screen are displayed in black.
Entering a title or chapter number
to play a title or chapter
1 MENU DVD/CD
2Touch the screen.
3 10Key Search
4 Title or Chapter
5Enter the number.
6 OK
The entered title or chapter is played.
Playing from menus
DVD video discs are recorded with a DVD
menu (disc menu) unique to that disc. The
disc menu can be used to quickly play video
you want to watch, such as the main title or
bonus content.
Displayed menus and operation methods
differ according to each disc.
1 MENU DVD/CD
2Touch the screen.
3 Top Menu or Menu
MEMO
sWhen “The operation is not
available.” is displayed, this means
that the menu is not set to the DVD
video disc itself.
4Direct touch the menu item to
select it.
Move:
This moves the operation key to
the left and right of the screen.
5To use an operation key to select
a menu item
6Select the menu by , ,
, OK
The selected menu item is played.
NX603/FX503 17
English
Full:
The video is displayed to fit the
entire screen. When the size of the
video and screen differ, the aspect
ratio of the video is displayed
altered.
Cinema:
This is used when displaying
cinema scope size or vista size
video. When the size of the video
and screen differ, the horizontal
size of the video is displayed to
match the horizontal and vertical
size of the screen. Unused parts at
the top and bottom are displayed
in black.
5 Close
6 Back
Setting the monitor size
Notice
sThe recorded monitor size differs
according to each disc. Even if the
monitor size is set to “Pan Scan” or “Letter
Box”, video is automatically played at
either of these settings depending on the
disc.
1 MENU DVD/CD
2Touch the screen.
3 Sizing Monitor
4Select the monitor size.
WIDE:
Video is displayed to fit in the entire
screen. When the video and screen
aspect ratios are different, video is
reshaped and displayed. No parts
of the video are clipped.
Pan Scan:
The video is displayed with its
height aligned in the vertical
direction of the screen. When the
video and screen aspect ratios are
different, video is displayed with its
left and right sides clipped.
Letter Box:
The video is displayed with its
width aligned in the horizontal
direction of the screen. When the
video and screen aspect ratios
are different, black bands are
displayed at the top and bottom of
the screen.
5 Close
6 Back
Setting priority language
You can set the menu language, audio
language, and subtitle language that are
given priority when something is playing.
Notice
sThe available languages differ according
to the disc.
This setting is for the language to be
given priority while playing DVDs. Video is
not necessarily played with the selected
language.
1 MENU
DVD/CD
2Touch the screen.
3
4 Default Menu Language ,
Default Audio Language ,
Default Subtitle Language
Touch any key to open the list of
languages and you can select the
language to give priority to while the
video is playing.
You can select English, French or
Spanish as the language. At Default
Subtitle Language, you can select
“OFF” to hide subtitles.
5Select the language.
6 Close
7 Back
18 NX603/FX503
English
Setting the country code
The country code is the code for identifying
countries. The parental level differs
according to country. To use the parental
level correctly on the unit, the country code
of the DVD must be set. p P.50
1 MENU
DVD/CD
2Touch the screen.
3
4 Country Code
5Enter the country recorded
on the DVD or the country
code of the region (default:
8583 (United States)).
6 OK
7 Back
Listening to music on
CDs or discs (MP3/WMA)
(NX603 only)
On the unit, you can enjoy discs containing
MP3/WMA format music data in addition to
regular music CDs.
Playing discs
Notice
sWhile you are driving, available items are
limited.
When the following discs are played, the
artist name, track title and other information
is displayed.
●Discs containing CD-TEXT
●Discs containing ID3 tags and WMA tags
When discs other than the above are
played, only a number such as “Track01” is
displayed.
MEMO
sWhen a non-stop CD (CD comprising
tracks joined together) is played, a silent
period of a few seconds occurs between
tracks.
Setting the parental level
■What are parental levels?
The parental level setting is for applying
restrictions to children viewing DVDs.
Some DVD videos have parental level
settings. There are eight levels 1 through
8, with stricter viewing restrictions being
applied as the number becomes smaller.
Discs set with viewing restrictions
sometimes cannot be played depending on
the parental level setting made on the unit.
Example: When the viewing restriction of
the DVD is parental level 3
The DVD can be played only when the
parental level set on the unit is level 4 to 8. If
an attempt is made to play a DVD when the
parental level set on the unit is level 1 to 3,
then a warning message “Change parental
level” will be displayed.
The default parental level is “OFF” which
means that no viewing restrictions are
applied to any DVD videos.
Notice
sA password is required to set the parental
level. Viewing restrictions sometimes do
not function successfully if the country
code is not set since parental level differs
according to country. p P.50
sThe parental level is written on the DVD
package, for example. Viewing restrictions
are not applied to discs whose package
does not indicate any parental level even
if parental level is set.
sThis setting is not required if viewing
restrictions are not to be applied.
■Setting and changing passwords
Set or change the password that is required
for setting viewing restrictions.
1 MENU DVD/CD
2Touch the screen.
3
4 Parental Control Password
5Enter the password OK
“✽✽✽✽” is displayed for the entered
password. (Default: password not set)
If a password is not set, there is no
need to enter one.
To set a new password p Step 7
6Enter the new password OK
7Enter the same password again
OK
8 Back
The new password is set.
■Setting the parental level
1 MENU DVD/CD
2Touch the screen.
3
4 Parental Level
5Enter the password OK
6Select the parental level Set
The parental level is set.
Viewing restrictions on all parental
levels for DVD video are canceled by
touching OFF .
NX603/FX503 19
English
Playing CDs
1Load the CD, or
MENU
DVD/CD
The CD loaded in the unit is played.
The track name, artist name and
album name currently being played are
displayed.
Playing MP3/WMA discs
1Load the MP3/WMA disc,
or MENU
DVD/CD
The disc loaded in the unit is played.
DivX contents are played if any are on
the disc. p P.20
The track name, artist name, album
name, and folder name currently being
played are displayed.
Rewinding/fast forwarding
1While playing, (rewind) or
(fast forward) (long press)
If you release your finger from
, , normal play resumes.
Playing the previous/next track
1While playing, or
Touching returns you to the start
of the track, and each additional
touch of moves you to the
previous track.
Playing the previous/next folder
(only when playing MP3/WMA)
1While playing, ,
Each touch of , moves
you to the previous or next folder, and
the first track in the folder is played.
Playing from the folder list/track
list
Notice
sWhile you are driving, folder lists and track
lists cannot be scrolled by flicking.
1 MENU DVD/CD
2
:
All tracks in the disc are repeated.
:
All tracks in the disc are played at
random.
:
All tracks in the folder currently
being played are played at random.
(MP3/WMA only)
3Touch the Trick Play key.
The screen returns to the previous
screen.
Scan play
Ten seconds of the first part of each track is
played.
1 MENU DVD/CD
2Touch (scan key).
Touching the scan key again cancels
scan play, and the mode returns to
the repeat all tracks mode.
3(MP3/WMA discs)
Select the folder currently being
played.
The track list is displayed.
When a folder other than the one
currently being played is selected,
the folder list remains displayed and
play begins from the first track of the
selected folder. To display the track
list, select the same folder again.
(CD discs)
The track list is displayed.
4Select the track.
Play begins from the selected track.
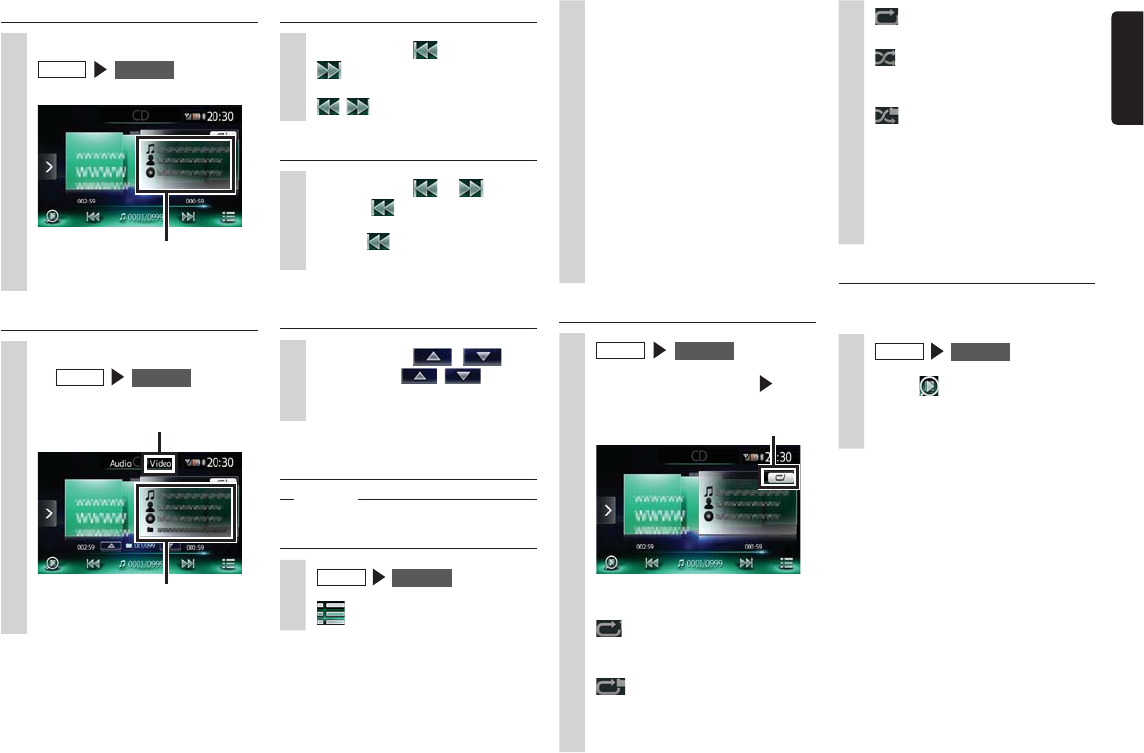
Repeat/shuffle play
1 MENU DVD/CD
2Touch the Trick Play key select
the desired item.
Trick Play key
✽The above screen is for playing music
CDs.
:
Only the track currently being
played is repeated.
:
All tracks in the folder currently
being played are repeated. (MP3/
WMA only)
20 NX603/FX503
English
Listening to microSD card/
USB memory files
Music saved on your microSD cards or USB
memory can be played on the unit.
Playing microSD card/USB
memory
Audio files in MP3/WMA format that have
been edited on a personal computer can
be played using a microSD card or USB
memory.
Attention
sDo not leave USB memory inside the
vehicle. The inside of the vehicle gets hot
under the blazing sun, for example, and
might cause them to malfunction.
sDo not get onto or place objects on USB
memory while they are connected. Doing
so might cause them to malfunction.
Notice
sUSB memory cannot be used when an
iPod is connected.
Playing microSD card or USB
memory
1Connect the microSD card or
USB memory.
You can perform the following operations
on DivX discs. Methods of operation are the
same as those for DVD/CDs.
●Stopping/pausing play p P.15
●Playing the previous/next track p P.15
●Rewinding/fast forwarding p P.15
●Playing from the folder list/track list p
P.19
●Repeat play p P.15
●Entering a title number to play a title p
P.16
●Switching the subtitle display/audio p
P.16
✽In the DivX mode, the subtitle and audio
languages are not displayed.
●Adjusting image quality p P.16
●Switching the screen size p P.16
Viewing DivX content
(NX603 only)
Viewing DivX content
DivX® is a digital video format created by
DivX, LLC, a subsidiary of Rovi Corporation.
This is an official DivX Certified® device that
plays DivX video.
Visit divx.com for more information and
software tools to convert your files into DivX
videos.
A feature of DivX is that long videos can be
compressed to small files with high image
quality kept intact.
The copyright of DivX content is protected,
so check the status of the device that is
playing and the viewing count limit.
Also, to view DivX VOD (Video-On-Demand)
content, the device that is playing must be
registered as a DivX certified device.
Register DivX certified devices by the
following procedure: For details, browse the
Rovi Corporation website.
1. Acquire a DivX account on your
personal computer, for example.
2. Check the registration code on the
unit. p P.41
3. Register the registration code of
the unit to the DivX account on your
personal computer.
4. Write the activation file to disc.
MEMO
sContent exceeding the viewing count limit
cannot be played. In this case, move to
the next track by OK .
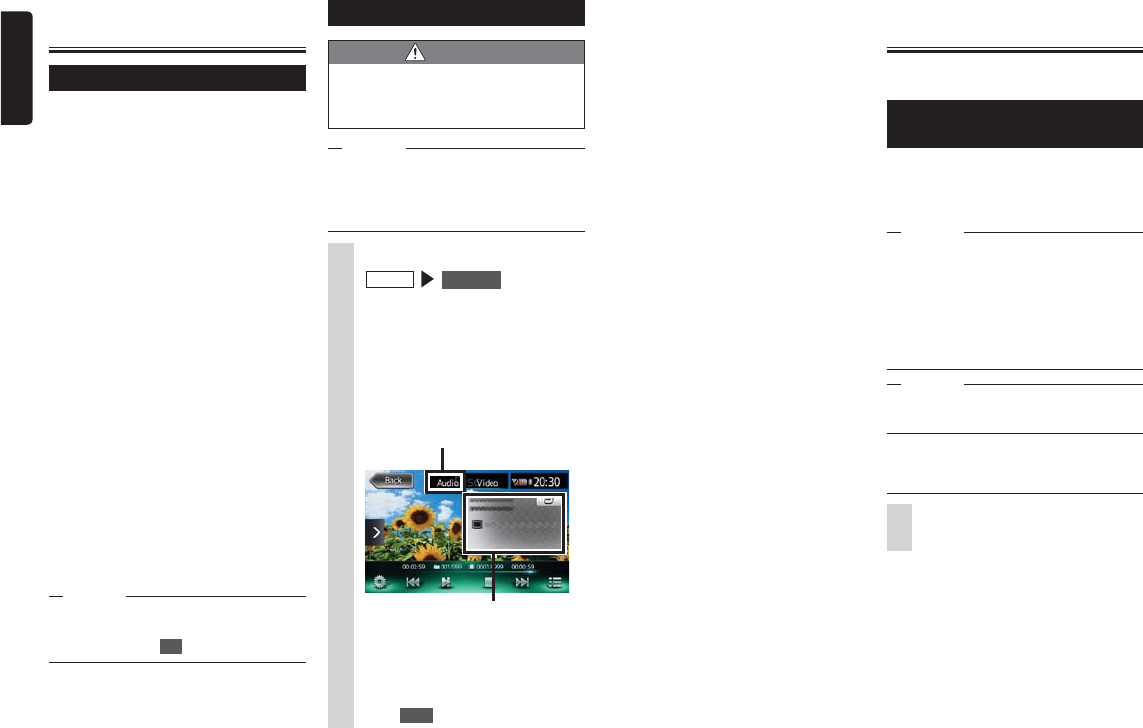
Playing DivX content
WARNING
s If the driver wants to view video on
a DVD/CD, he or she should always
stop at a safe place before doing so.
Notice
sFor safety’s sake, view video on a DVD/
CD only when the vehicle has stopped.
While you are driving, you can enjoy only
audio.
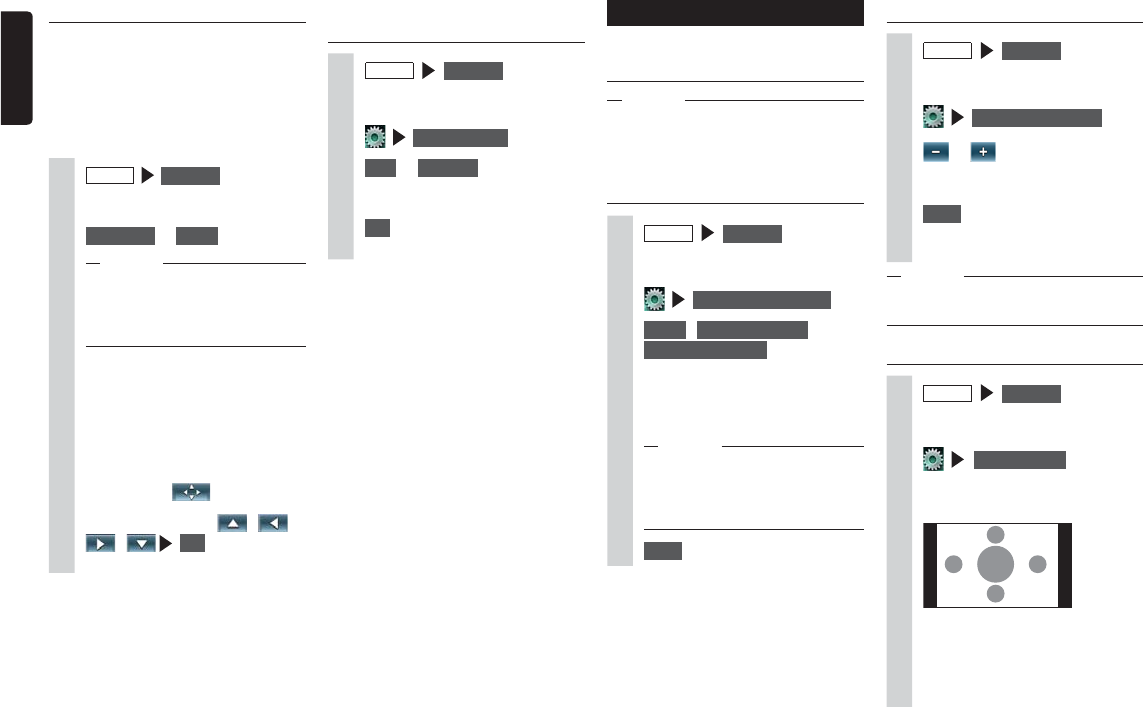
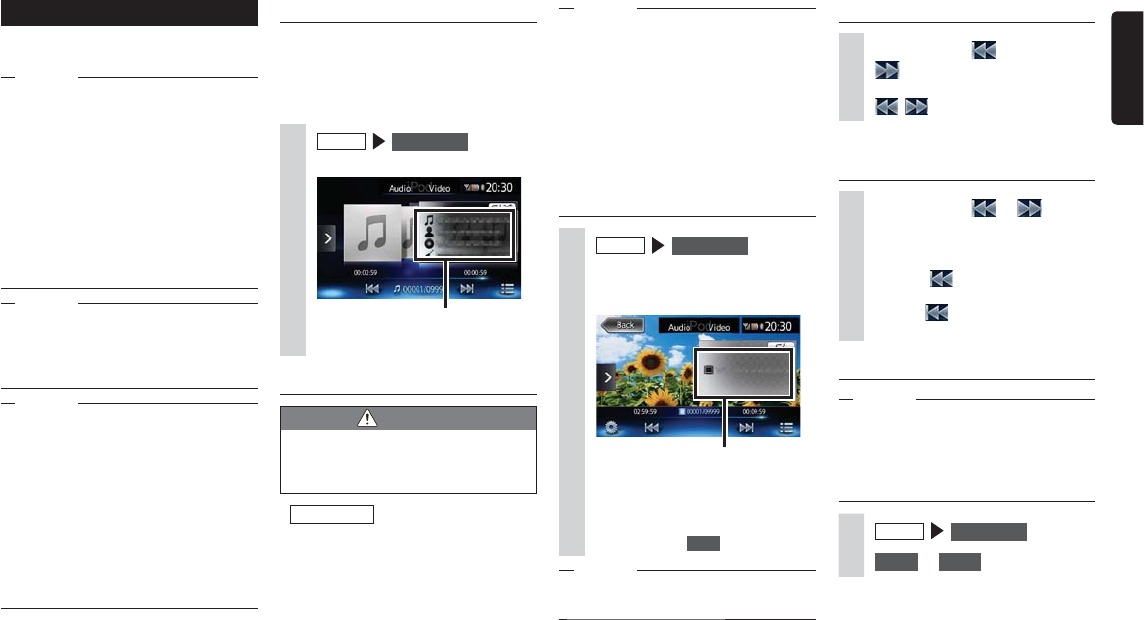
1Load the DivX disc, or
MENU
DVD/CD
The DVD/CD loaded in the unit is
played.
The registration code must be set
when viewing is not possible as it is
because of DivX certification limits.
Menu keys are displayed by touching
the screen.
If the disc contains MP3 or WMA audio
files, switch the mode to play them. p
P.18
The file name, screen size and status of
play for the current song are displayed.
If five seconds passes with no
operations, the keys displayed on
screen are hidden.
To manually hide the keys,
touch Back .
NX603/FX503 21
English
2 MENU
SD or USB / iPod
The files on the microSD card or USB
memory are played.
The song title, artist name, album
name, and folder name currently being
played are displayed.
✽The above screen is for playing a
microSD card.
MEMO
sFiles on the microSD card or USB memory
are played in file name order. To change
the play order, prefix the file names with a
number.
Rewinding/fast forwarding
1While playing, (rewind) or
(fast forward) (long press)
If you release your finger from
, , normal play resumes.
Playing the previous/next track
1While playing, or
Touching returns you to the start
of the track, and each additional
touch of moves you to the
previous track.
Playing from the folder list/track
list
Notice
sWhile you are driving, folder lists and track
lists cannot be scrolled by flicking.
1 MENU SD or USB / iPod
2
3Select the folder currently being
played.
The track list is displayed.
When a folder other than the one
currently being played is selected,
the folder list remains displayed and
play begins from the first track of the
selected folder. To display the track
list, select the same folder again.
4Select the track.
Play begins from the selected track.
Playing the previous/next folder
1While playing, ,
Each touch of , moves
you to the previous or next folder, and
the first track in the folder is played.
Scan play
Ten seconds of the first part of each track is
played.
1 MENU SD or USB / iPod
2Touch (scan key).
Touching the scan key again cancels
scan play, and the mode returns to
the repeat all tracks mode.
Repeat/shuffle play
1 MENU SD or USB / iPod
2Touch the Trick Play key select
the desired item.
Trick Play key
:
All tracks are repeated.
:
All tracks in the folder currently
being played are repeated.
:
Only the track currently being
played is repeated.
:
Folders are selected at random
from all folders, and tracks selected
at random from that folder are
played.
:
All tracks in the folder currently
being played are played at random.
3Touch the Trick Play key.
The screen returns to the previous
screen.

22 NX603/FX503
English
sAudio sometimes is not output in the iPod
mode when Bluetooth Audio is playing or
hands free calls are being made while the
iPod touch or iPhone is still connected
via Bluetooth. Perform operations from
the iPod touch or iPhone main unit,
and switch the settings (audio output)
from Bluetooth (CAR-BT) to the Dock
connector. Also, remove the iPod from
the unit and reconnect it. For details, refer
to the User’s Manual for the connected
device.
sAudio is sometimes not output from
the USB-connected iPod touch or
iPhone if the audio device is connected
via Bluetooth. In this case, switch the
Bluetooth connection mode to other than
[Playing music], and reconnect iPod touch
or iPhone. p P.40
MEMO
sWhen iPod operation is stopped,
operations sometimes become possible
by selecting a tune or video from the
category list.
sIf an error message is displayed, remove
the iPod from the unit and reconnect it.
sIf the iPod becomes inoperable, reset the
iPod main unit and reconnect it.
Reset methods (examples)
- iPod:
Simultaneously hold down the “Center”
and “Menu” buttons until the Apple
logo is displayed.
- iPod touch:
Simultaneously hold down the “Sleep/
Cancel sleep” and “home” buttons until
the Apple logo is displayed.
For details on how to reset the iPod,
check in the User’s Manual for the iPod.
✽If operation is not remedied by resetting
and reconnecting the iPod, reset the
iPod, check operation of the iPod in
an unconnected state and then try
connecting it again.
Listening to iPod/viewing
iPod video
Connectible iPods
The unit supports the following devices: 5th
generation iPod, iPod classic®, iPod nano®,
iPod touch®, iPhone 3G, iPhone 3GS,
iPhone 4, iPhone 4S.
For more details, see the table below. The
iPod is not supplied with the unit. Use your
own iPod. To play ipod, CCA-750 (sold
separately) is required.
When an iPod is used on the unit, the iPod
firmware must be the most recent.
Connectible iPod Remarks
iPod (5th generation) Video can be
played.
iPod classic (80GB,
120GB, 160GB)
Video can be
played.
iPod nano
(1st generation, 2nd
generation)
iPod nano (3rd generation,
4th generation, 5th
generation)
Video can be
played.
iPod nano (6th generation)
iPod touch (1st generation
✽
)
Video can be
played.
iPod touch (2nd
generation, 3rd generation,
4th generation)
Video can be
played.
iPhone 3G/iPhone 3GS/
iPhone 4/iPhone 4S
Video can be
played.
✽ Video can be played from firmware 2.0
onwards. In firmware versions older than 2.0,
use only in the music mode.
Attention
sBe sure to remove the iPod after the
vehicle’s engine key is turned to the
"OFF" position. The iPod’s power supply
might run down if it is not turned off while
still connected to the unit.
Notice
siPad/iPad2 are not supported.
sNot all iPod operations are guaranteed.
sSome iPods sometimes do not operate
depending on their firmware version
even if they are in the list of connectible
models.
sWhen connecting an iPod to the unit,
do not use iPod headphones or other
accessories.
sSome functions are restricted depending
on the iPod model and firmware version.
For information about connectible models,
refer to the following web site:
http://www.clarion.com/us/en/support/
compatibility/ipod/index.html
sThe iPod might not operate correctly
when the iPod’s track repeat function is
set.
sThe iPod might not operate correctly
when the iPod’s shuffle function is set.
In this case, cancel the shuffle function
before using the iPod.
sThe iPod sometimes is not recognized
when only video files are saved to it. This
problem is resolved when even one music
file is saved.
sWhen there are lots of tunes to play,
the titles or list sometimes cannot be
displayed depending on the iPod model.
NX603/FX503 23
English
Playing iPods
Audio data and video images in connected
iPods can be enjoyed on the unit.
Attention
sWhile you are driving, do not operate the
iPod main unit.
sDo not leave iPods inside the vehicle. The
inside of the vehicle gets hot under the
blazing sun, for example, and might cause
them to malfunction.
sDo not get onto or place objects on iPods
while they are connected. Doing so might
cause them to malfunction.
sPlace iPods at a safe place before starting
to use them.
Notice
sYou cannot operate from the iPod once it
is connected to the unit.
sWhile you are driving, available items are
limited.
MEMO
sIf the iPod becomes inoperable, reset
it. For details on how to reset the iPod,
check in the User’s Manual for the iPod.
sWhen an iPod that is playing an audio file
is connected to the unit, play continues
from the tune that is being played. When
a video-compatible iPod is connected to
the unit while video is being played, the
point in the video may differ depending on
the iPod. To watch video, select the video
file again.
Listening to iPods
The ipod starts to play automatically when
CCA-750 (sold separately) is connected to
the USB jack on the unit.
When the iPod is already connected, play
audio by the following procedure.
1 MENU USB / iPod
Tracks in the iPod are played.
The song title, artist name, album
name, and genre name currently being
played are displayed.
Watching iPod video
WARNING
s If the driver wants to view iPod
video, he or she should always stop
at a safe place before doing so.
Preparations
●Connect the video jack of CCA-750 (sold
separately) to the VTR cable.
●Set the iPod connection method to “USB
+ VTR”. p P.24
Notice
sFor safety’s sake, view iPod video only
when the vehicle has stopped. While you
are driving, you can enjoy only audio.
siPod touch with firmware version older
than 2.0 does not support playing video.
sVideo images sometimes are not
displayed while playing iPod videos
depending on the version of the OS. In
this case, this symptom can be remedied
by setting the music application to the
foreground on the iPod.
1 MENU USB / iPod
iPod video is played.
Menu keys are displayed by touching
the screen.
The track name currently being played
is displayed.
If five seconds passes with no
operations, the keys displayed on
screen are hidden. To manually hide
the keys, touch Back .
MEMO
sWhen audio is played, video images in
iPod video are switched to manually.
Rewinding/fast forwarding
1While playing, (rewind) or
(fast forward) (long press)
If you release your finger from
, , normal play resumes.
Playing the previous/next track/
chapter
1While playing, or
The first track in the previous or next
chapter is played when playing a
track that exists in the chapter.
Touching returns you to the start
of the track, and each additional
touch of moves you to the
previous track.
Repeat/shuffle play
Notice
sRepeat play is sometimes not possible
depending on the iPod model.
sIf the iPod is switched to the video
mode during shuffle play, shuffle play is
automatically canceled.
1 MENU USB / iPod
2 Audio or Video
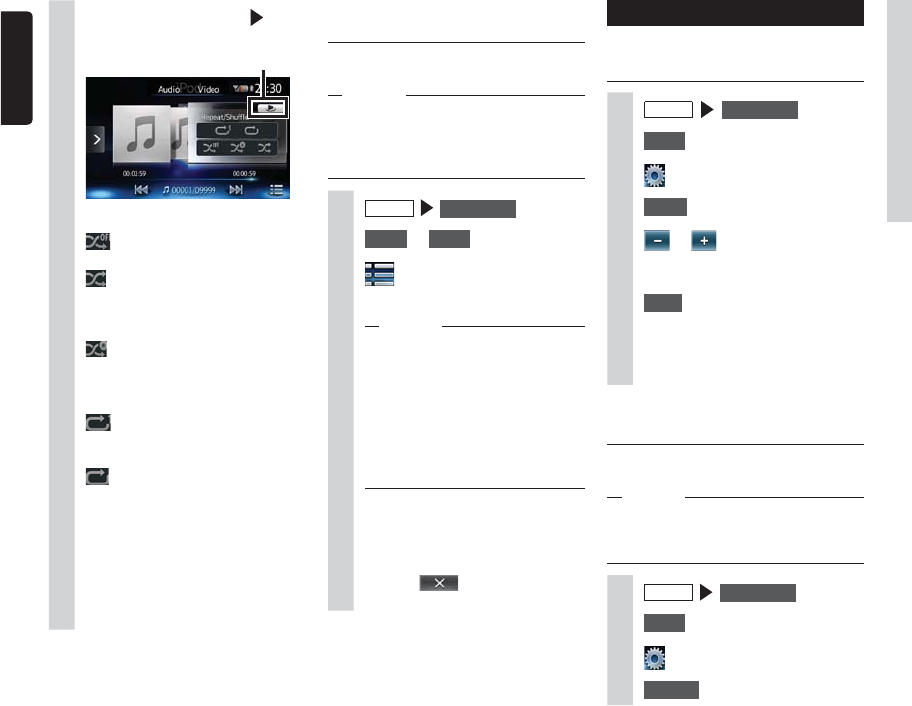
24 NX603/FX503
English
Setting iPod (video only)
Adjusting the image quality of
iPod video
1 MENU
USB / iPod
2 Video
3
4 Setup at [Display Adjustment]
5 or of item to adjust
Adjust the image quality while viewing
the video image on screen.
6 Back
This sets the newly adjusted image
setting. Image quality adjustments
can be set for both the day and night
screens.
Switching the iPod connection
method
Select the iPod connection method from
“USB” or “USB + VTR”. (Default: USB)
MEMO
sWhen the connection method has been
changed, disconnect the iPod and then
reconnect it.
1 MENU USB / iPod
2 Video
3
4 Change at [Connection Method]
5Select the connection method.
USB:
iPod supports only the music
mode. Cannot switch to the iPod
video mode.
USB + VTR:
The VTR jack is used for iPod video
and audio input.
When “USB + VTR” is set, the
video jack of CCA-750 (sold
separately) must be connected to
the VTR cable.
3Touch the Trick Play key
select the desired item.
Trick Play key
(Shuffle play (audio only))
:
Cancels shuffle play.
:
Plays the entire album at random.
Tracks in the album are played in
order.
:
All tracks in the album currently
being played are played at random.
(Repeat play)
:
Only the track currently being
played is repeated.
:
All tracks in the entire album are
repeated.
Play begins with the selected
operation.
4Touch the Trick Play key.
The screen returns to the previous
screen.
Playing under specified
conditions
You can search for tracks that match
specific conditions and play these.
Notice
sWhen the playlist is arranged in a multi-
layer hierarchy, unclear items might be
displayed depending on the depth of the
hierarchy.
1 MENU USB / iPod
2 Audio or Video
3
4Select the desired item.
MEMO
sSelectable items (examples)
(Audio)
Tracks/Playlists/Artists/Albums/
Others (Genres/Composers/
Audiobooks/Podcasts)
(Video)
Video Playlist/Others (TV programs/
Rentals, etc.)
Similar operations are repeated until
the track list is displayed.
5Select the track.
The selected track starts playing.
Touching returns the screen to
the screen in step 3.
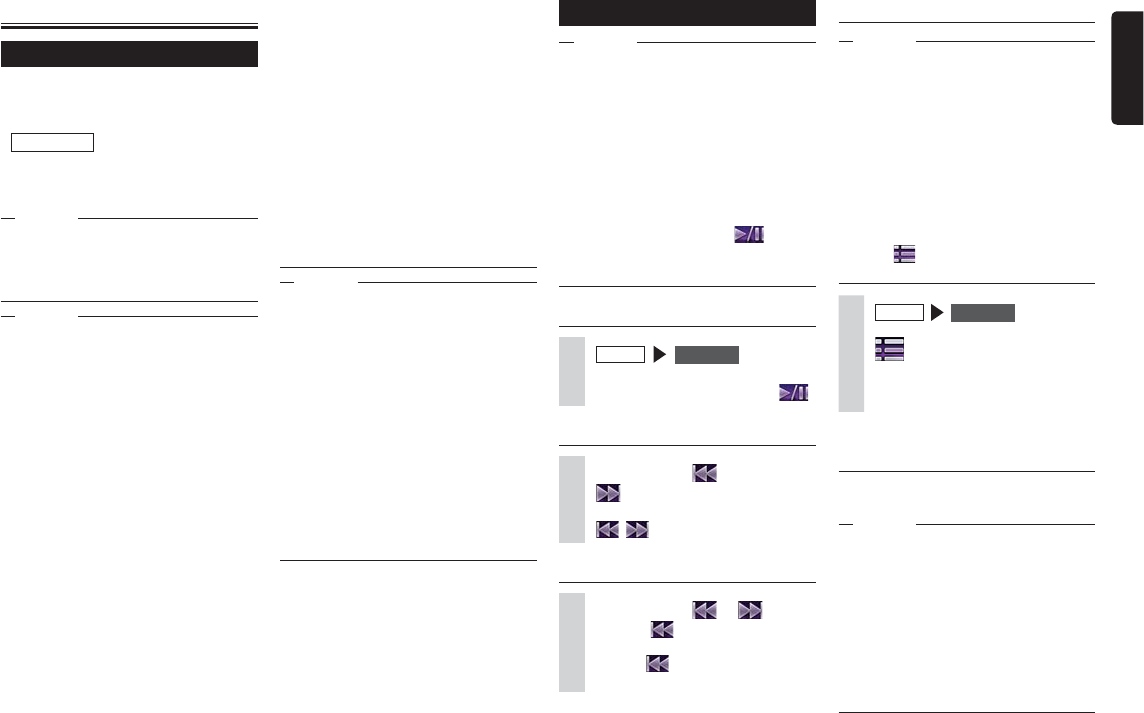
NX603/FX503 25
English
Listening to Bluetooth audio
To listen to Bluetooth audio
Register audio devices compatible with
Bluetooth to the unit so that music can be
played.
Preparations
●When using Bluetooth Audio for the first
time, the audio device must be registered
(paired) with the unit. p P.29
Attention
sDo not leave portable devices inside the
vehicle. The inside of the vehicle gets hot
under the blazing sun, for example, and
might cause them to malfunction.
Notice
sUse audio devices that are compatible
with the Bluetooth protocol. Note,
however, that with some types of
Bluetooth Audio device the unit
sometimes cannot be used or available
functions are sometimes limited. When a
function is not supported, its button or key
cannot be pressed. Or, a message to the
effect that operation is not possible will be
displayed. Note, however, that a message
to the effect that operation is not possible
sometimes is not displayed depending on
the audio device.
sThe unit sometimes cannot be connected
or skipping sometimes happens
depending on distance and where
the Bluetooth Audio is installed. We
recommend situating audio devices where
the reception is as good as possible.
sPairing cannot be executed while you are
driving.
sAudio will not be output while telephone
related functions or online functions are
being executed using a Bluetooth Audio
compatible cellphone.
sSkipping sometimes occurs while an
iPhone is playing as Bluetooth Audio and
the Bluetooth screen is displayed on the
iPhone. In this happens, audio is played
normally by closing the Bluetooth screen
display.
sWith Bluetooth Audio, an automatic
connection from the unit is not performed.
Operate the audio device you want to
connect to establish the connection to the
unit.
MEMO
sFor details on Bluetooth Audio devices,
refer to the respective User’s Manual.
sUp to five Bluetooth Audio devices
including hands free devices can be
paired. When five devices are already
paired, one device must be deleted from
the pairing information and a new device
must be registered.
sSome Bluetooth Audio compatible
cellphones automatically connect audio
profiles from the cellphone while at the
same time connecting hands free profiles.
sIf audio is not output even when the audio
device is connected, disconnect the
profile from the device and reconnect it.
Playing Bluetooth audio
Notice
sWith some types of Bluetooth Audio
device, operation such as playing,
pausing, rewinding, and fast forwarding
are sometimes not possible from the
unit. If this happens, operate from the
Bluetooth Audio device. For details, refer
to the User’s Manual for the Bluetooth
Audio device.
sWith some Bluetooth Audio devices, play
does not start automatically sometimes.
If this happens, either touch , or
operate the Bluetooth Audio device to
start playing.
Playing Bluetooth Audio
1 MENU BT Audio
Bluetooth Audio is played.
To pause or resume play, touch
.
Rewinding/fast forwarding
1While playing, (rewind) or
(fast forward) (long press)
If you release your finger from
, , normal play resumes.
Playing the previous/next track
1While playing, or
Touching returns you to the start
of the track, and each additional
touch of moves you to the
previous track.
Playing from the track list
Notice
sFor this function, only Bluetooth Audio
that is compatible with AVRCP Ver1.4 can
be used. With some types of Bluetooth
Audio device, this function cannot be
used.
sWhen the Bluetooth Audio player that is
playing the audio is not started up, list
operations sometimes are not possible.
Start up the player and try the operation
again.
sWith some types of Bluetooth Audio
device, sometimes cannot be
touched.
1 MENU BT Audio
2
3Select the track.
Play begins from the selected track.
Playing under specified
conditions
You can search tracks to be played from
folders or categories and play them.
Notice
sFor this function, only Bluetooth Audio
that is compatible with AVRCP Ver1.4 can
be used. With some types of Bluetooth
Audio device, this function cannot be
used.
sWhen the Bluetooth Audio player that is
playing the audio is not started up, list
operations sometimes are not possible.
Start up the player and try the operation
again.
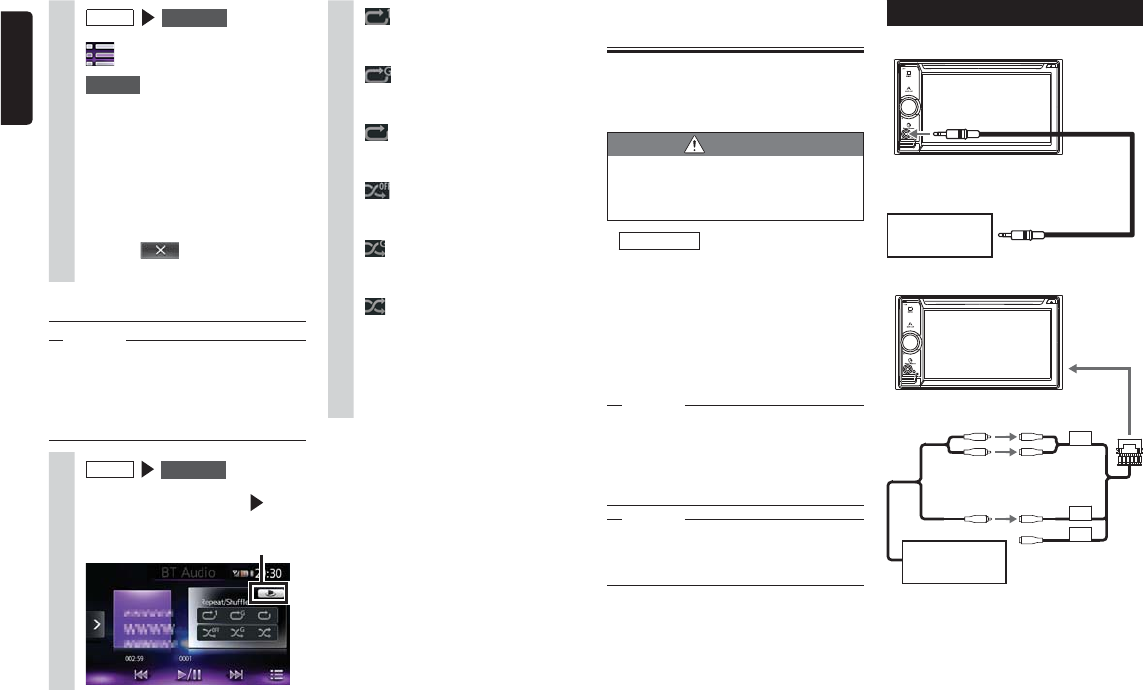
26 NX603/FX503
English
Viewing connected
external devices (AUX)
Audio and video from external devices
connected to the AUX terminal can be
played on the unit by switching the audio
mode to AUX1 or AUX2.
WARNING
s If the driver wants to view TV or
video, he or she should always stop
at a safe place before doing so.
Preparations
●The following cables are required for
connecting external devices to the unit.
(When using AUX1)
sCCA-772 (3.5 mm AV mini plug-
RCA[L/R/V] cable) or 3.5 mm stereo
mini plug cable
(When using AUX2)
sVTR cable
Attention
sDo not leave connected external devices
inside the vehicle. The inside of the
vehicle gets hot under the blazing sun,
for example, and might cause them to
malfunction.
Notice
sFor safety’s sake, view TV or video images
only when the vehicle has stopped. While
you are driving, you can enjoy only audio.
Connecting external devices
<Connection example> When using AUX1
✽ The illustrations for the main unit are of the NX603.
Commercially available
portable device
(Example: For audio)
3.5 mm AV mini plug cable (sold separately)
<Connection example> When using AUX2
✽ The illustrations for the main unit are of the NX603.
Commercially available
portable device
VTR cable
Video jack
Audio jack
VIDEO IN
AUDIO IN
1 MENU BT Audio
2
3 Browse
4Select the desired item.
Available items differ according to the
type of Bluetooth Audio device.
Similar operations are repeated until
the track list is displayed.
5Select the track.
Play begins from the selected track.
Touching returns the screen to
the screen in step 2.
Repeat/shuffle play
Notice
sFor this function, only Bluetooth Audio
that is compatible with AVRCP Ver1.3
or later can be used. With some types
of Bluetooth Audio device, shuffle play
sometimes is not possible.
1 MENU BT Audio
2Touch the Trick Play key
Select the desired item.
Trick Play key
:
Only the track currently being
played is repeated.
:
All tracks in the group currently
being played are repeated.
:
All tracks in the Bluetooth Audio
device are repeated.
:
All song shuffle or group shuffle is
canceled.
:
All tracks in the group currently
being played are played at random.
:
All tracks in the Bluetooth Audio
disc are played at random.
3Touch the Trick Play key.
The screen returns to the previous
screen.
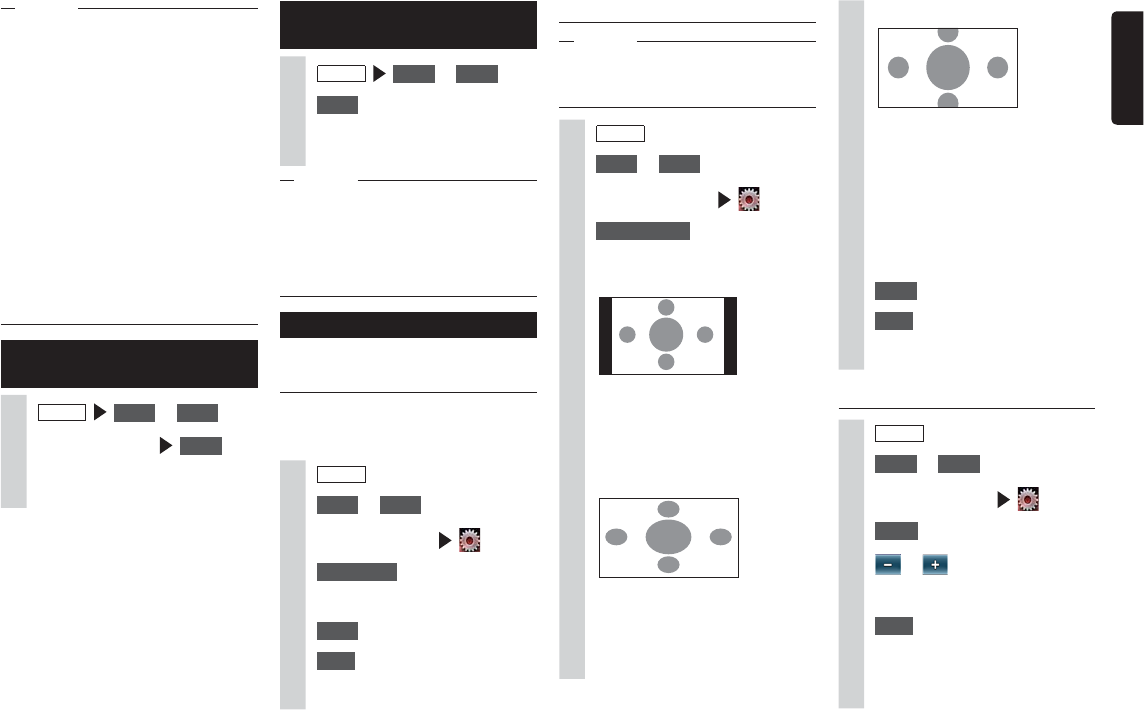
NX603/FX503 27
English
MEMO
sAlso refer to the User’s Manual for the
connected external device.
sExternal input connector jack
- A 3.5 mm dia. stereo mini plug can
be connected. Thoroughly read the
User’s Manual for the audio cable
(without resistor) and the device to be
connected.
- Use the battery, etc. provided with the
device as the power supply for that
device. Using an external device while
it is being charged by the accessory
socket on the vehicle sometimes
causes noise.
sThe screen momentarily turns black when
switching between the audio and video
modes. However, this is not a malfunction.
Listening to video from
external devices
1 MENU AUX1 or AUX2
2Touch the screen Audio
3Operate the external device.
Audio is played.
Watching video from external
devices
1 MENU AUX1 or AUX2
2 Video
3Operate the external device.
Video and audio are played.
MEMO
sWhile linked to a smartphone, the
smartphone application screen is
displayed though it cannot be operated
on by touch operations. When using
Smartphone linking, see “Using Smart
Access.” p P.33
Setting external device listening
Compensating for volume
differences
Compensate for volume difference that
occurs depending on the type of connected
external device.
1 MENU
2 AUX1 or AUX2
3Touch the screen
4 Audio Level
5Select the audio level.
6 Close
7 Back
The level is adjusted to the adjusted
volume.
Switching the screen size
Notice
sWhen the screen size is switched, the
image sometimes appears different from
the original video image.
1 MENU
2 AUX1 or AUX2
3Touch the screen
4 Display Mode
5Select the screen display size.
Normal:
Video is displayed in the center of
the screen with its aspect ratio held
intact. When the size of the video
and screen differ, excess parts of
the screen are displayed in black.
Full:
The video is displayed to fit the
entire screen. When the size of the
video and screen differ, the aspect
ratio of the video is displayed
altered.
Cinema:
This is used when displaying
cinema scope size or vista size
video on a regular TV. When the
size of the video and screen differ,
the horizontal size of the video is
displayed to match the horizontal
and vertical size of the screen.
Unused parts at the top and
bottom are displayed in black.
6 Close
7 Back
The screen is displayed at the
selected size.
Adjusting image quality
1 MENU
2 AUX1 or AUX2
3Touch the screen
4 Setup at [Display Adjustment]
5 or of item to adjust
Adjust the image quality while viewing
the video image on screen.
6 Back
This sets the newly adjusted image
setting. Image quality adjustments
can be set for both the day and night
screens.
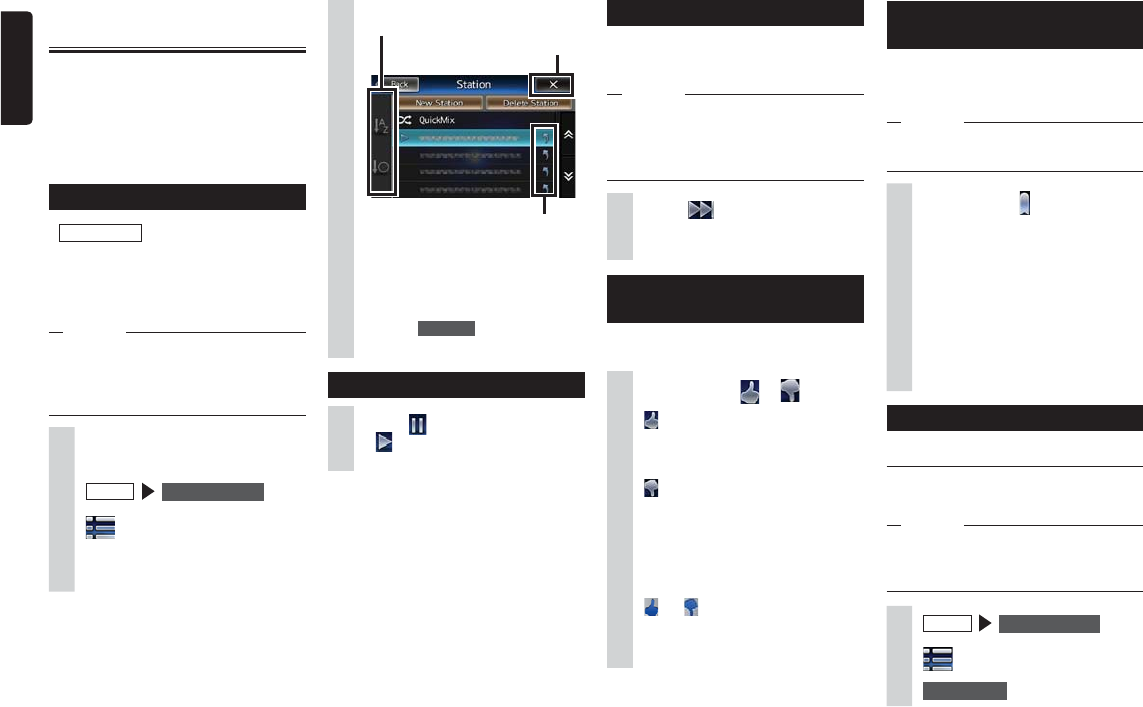
28 NX603/FX503
English
Skipping the tune being played
You can skip the tune that is currently being
played. Up to six tunes can be skipped in
each hour on each station.
Notice
sFree users can skip 12 times in one day
as the total of all stations.
sSkipped stations are not played for about
the next four hours on all stations.
1Touch while music is
playing.
The next tune is played.
Rating the tune currently being
played
You can rate the tune that is currently being
played.
1While playing, or
:
Gives a tune a high score.
Tunes with a similar melody are
more likely to be played.
:
Gives a tune a low rating.
Tunes with a similar melody are
less likely to be played. Also, tunes
with a low rating are skipped and
are less likely to be played from
that station.
and are displayed for tunes that
have been rated.
Tunes can be rated any number of
times.
Registering the tune being
played to a bookmark list
Tunes or artists that are currently being
played can be registered to Pandora
bookmarks.
Notice
sThe bookmark list cannot be displayed on
the unit. Display it on the smartphone.
1While playing,
2Select the item.
Track:
This registers the tune currently
being played to the tune bookmark
list.
Artist:
This registers the artist of the tune
currently being played to the artist
bookmark list.
Editing stations
Making stations
You can make stations associated with the
tune or artist you are currently listening to.
Notice
sIf a station with the same name is already
registered, the station playing is switched,
though the new station is not registered.
1 MENU Pandora Radio
2
3 New Station
Listening to Pandora
Internet radio
Pandora is an Internet radio service that
lets users rate songs as they are played and
then selects songs that the user should like.
Pandora is not a station that broadcasts,
however it is called a station.
Users can make their own stations and
import stations made by other users.
Playing stations
Preparations
●Install the Pandora application on your
smartphone.
●Connect the smartphone to the unit
using the USB cable.
Notice
sWhen there are no stations in the station
list, Pandora cannot be operated on the
unit. Make a station on the smartphone
first so that it can be operated on the unit.
1Start up Pandora Radio on the
smartphone.
2 MENU Pandora Radio
3
4Select the station you want to
listen to.
This is shared with two or more users.
Displayed in the case of a station.
The screen returns to the
screen in step 2.
The station is sorted in date order or
alphabetical order.
If a station is selected on the
smartphone, it is played at step 2.
Multiple tunes in the station
can be played at random by
touching QuickMix at the top of the
station list.
Pausing play
1Touch while music is playing.
If is touched during a pause, play
is resumed.
NX603/FX503 29
English
4Select the station.
From Track:
The station is made using the name
of the track currently being played.
The station will play tunes
associated with the tune currently
being played.
From Artist:
The station is made using the name
of the artist of the tune currently
being played.
The station will play tunes
associated with the artist of the
tune currently being played.
Deleting stations
1 MENU Pandora Radio
2
3 Delete Station
4Select the station you want to
delete OK
Registering Bluetooth-
compatible devices
Bluetooth-compatible devices such as
cellphones can be registered so that
incoming and outgoing telephone calls and
audio can be played from the unit.
If you use a Bluetooth-compatible
cellphone, you can use hands free functions
using Bluetooth without connecting a cable.
For more information about connectible
cellphones, visit Clarion’s web site.
http://www.clarion.com/us/en/support/
compatibility/bluetooth/index.htmll
Preparations
●To use Bluetooth, the Bluetooth functions
of the unit must be turned on. p P.40
When using a Bluetooth-compatible
device, the device must be registered
(paired) with the unit. p P.29
Notice
sWhile you are driving, selectable items are
limited.
What is “Bluetooth”?
Bluetooth is a short-range wireless
communications technology for portable
information devices advocated by
the Bluetooth SIG trade association.
Communications between Bluetooth-
compatible devices is performed using radio
waves in the 2.4 GHz band.
Cellphones and audio devices that support
Bluetooth can be connected for use on the
unit.
1 MENU
2 Set at [BT Devices Connection]
3 ON at [Connect with Bluetooth]
4Select the Bluetooth connection
mode.
Hands free:
Select this when using the
cellphone only as a hands free
phone.
(Hands free phone+)
Smartphone linking:
Select this when using the
cellphone as a hands free phone
and for Smartphone linking.
(Hands free phone+)
Playing music:
Select this when using the
cellphone as a hands free phone
and for Bluetooth Audio.
Smartphone linking:
Select this when using the
cellphone for Smartphone linking.
Playing music:
Select this when using the
cellphone only for Bluetooth Audio.
5 OK
6Select “CAR-BT” (default) from
the cellphone, and enter the PIN
“1234” (default).
The cellphone searches for the unit to
complete pairing.
When MENU
Phone is next
touched, the screen changes to the
telephone number entry screen.
To use each of the Bluetooth functions,
you will need a cellphone that supports the
following profiles:
Hands free calling
HFP (Hands-Free Profile)
Phonebook forwarding
OPP (Object Push Profile)
Phonebook forwarding and telephone
call log, etc. synchronization
PBAP (Phone Book Access Profile)
Audio
A2DP (Advanced Audio Distribution
Profile), AVRCP (Audio/Video Remote
Control Profile)
Even if devices support Bluetooth profiles,
phenomena sometimes occur where
devices cannot connect to each other or
display and operation are different because
of their characteristics or specifications.
Registering cellphones (pairing)
When using a Bluetooth-compatible
cellphone for the first time, the cellphone
must be registered (paired) with the unit.
Notice
sPairing cannot be executed while you are
driving.
sAlso, pairing sometimes cannot be
executed if the Bluetooth function is
not enabled on the cellphone, too. For
details, refer to the User’s Manual for the
cellphone.
sDuring hands free operations (making
outgoing calls, taking incoming calls,
telephone calls), connection (telephone
calls, communications) with other
Bluetooth-compatible devices and pairing
are not possible. Also, during hands free
operation, audio sound is not output.
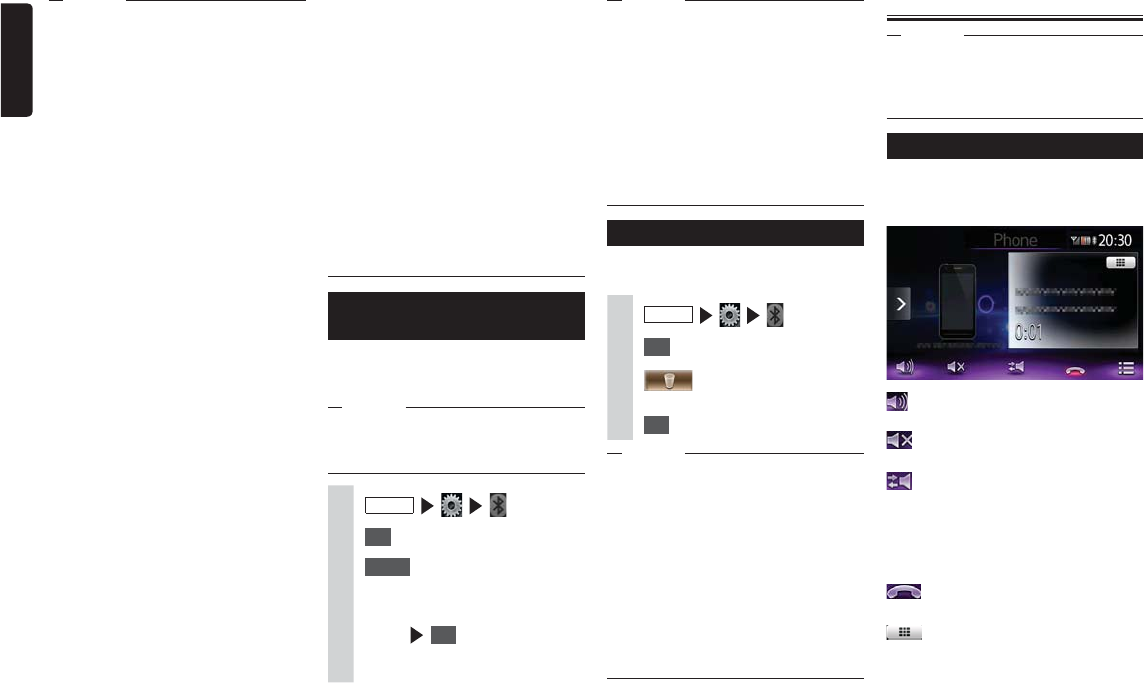
30 NX603/FX503
English
MEMO
sWhen a cellphone currently in use is
switched, the device information including
the incoming/outgoing calls log also is
switched to the information of the other
cellphone that you switched to.
sWhen a cellphone is restarted,
some cellphones sometimes are not
automatically switched to. If the cellphone
is not automatically switched to, select
the cellphone that you want to connect to
by this operation.
Deleting registered cellphones
You can delete the information of paired
Bluetooth-compatible devices.
1 MENU
2 Set at [BT Devices Connection]
3 for the device you want
to delete
4 OK
MEMO
sBluetooth Audio devices other than
cellphones also can be deleted.
sWhen the registration information of
a cellphone is deleted, the incoming/
outgoing calls log and phonebook
information of the corresponding
cellphone also are deleted.
sWhen the unit is turned off while cellphone
registration information is being deleted,
the information sometimes cannot be
deleted. If this happens, turn the unit on
and try deleting the information again.
Using cellphones
Attention
sDo not leave cellphones inside the vehicle.
The inside of the vehicle gets hot under
the blazing sun, for example, and might
cause them to malfunction.
Screen during a telephone call
The following screen is displayed during a
telephone call:
Screen during a telephone call
:
This displays the option screen.
:
This mutes the phone outgoing volume.
:
This switches to telephone calls on the
cellphone unit.
Private call operation is sometimes not
switched to depending on the cellphone
you are using.
:
This ends the telephone call.
:
When the number entry screen is
displayed, enter the numbers for the
password, etc. during the telephone call.
MEMO
sEntry of the PIN is not required on some
cellphone models. Also, on some models,
the PIN entered on the unit is the same
as the PIN on the cellphone or the
confirmation screen is displayed. When
registering a device, follow the on-screen
instructions.
sAfter pairing is completed, the operation
of checking the connection is sometimes
required on the cellphone.
sFor details on operations to perform on
the cellphone, refer to the User’s Manual
for the cellphone.
sWith some connected cellphones,
numerical values for the cellphone’s
reception sensitivity and remaining battery
power displayed on the unit sometimes
do not match actual cellphone values.
sUp to five Bluetooth-compatible devices
can be paired. To pair a sixth device, an
already registered Bluetooth-compatible
device must be deleted. p P.30
sFor details on how to register Bluetooth-
compatible devices to cellphones, refer to
the User’s Manual for the cellphone.
sThe name of the device and the PIN can
be changed.
sConnections sometimes are not made
automatically if the cellphone is not set as
“Waiting for connection” or the cellphone
is not in a standby state. For details, refer
to the User’s Manual for the cellphone.
sReconnection is automatically retried if
the connection is broken, such as if the
Bluetooth-compatible cellphone is too far
away.
sProblems on some cellphones sometimes
cause communication errors or prevent
operations from being performed or
displayed properly. If this happens, switch
the Bluetooth functions off then back on
again. (Default: OFF)
sWhen switching the Bluetooth functions
on the cellphone off then back on again,
do the same for the Bluetooth functions
on the unit.
sWhen Bluetooth functions are turned off,
Bluetooth functions on the unit cannot
be operated. Also, connection to and
operations of the unit from Bluetooth-
compatible cellphones are no longer
possible.
Switching the connected
cellphone
When two or more Bluetooth-compatible
devices are registered to the unit, the device
to be connected can be switched.
Notice
sThough up to five Bluetooth-compatible
devices can be paired, only one can be
connected to at any one time.
1 MENU
2 Set at [BT Devices Connection]
3 Select for the device to be
switched
4Select the Bluetooth connection
mode OK
The screen switches to the telephone
call screen.
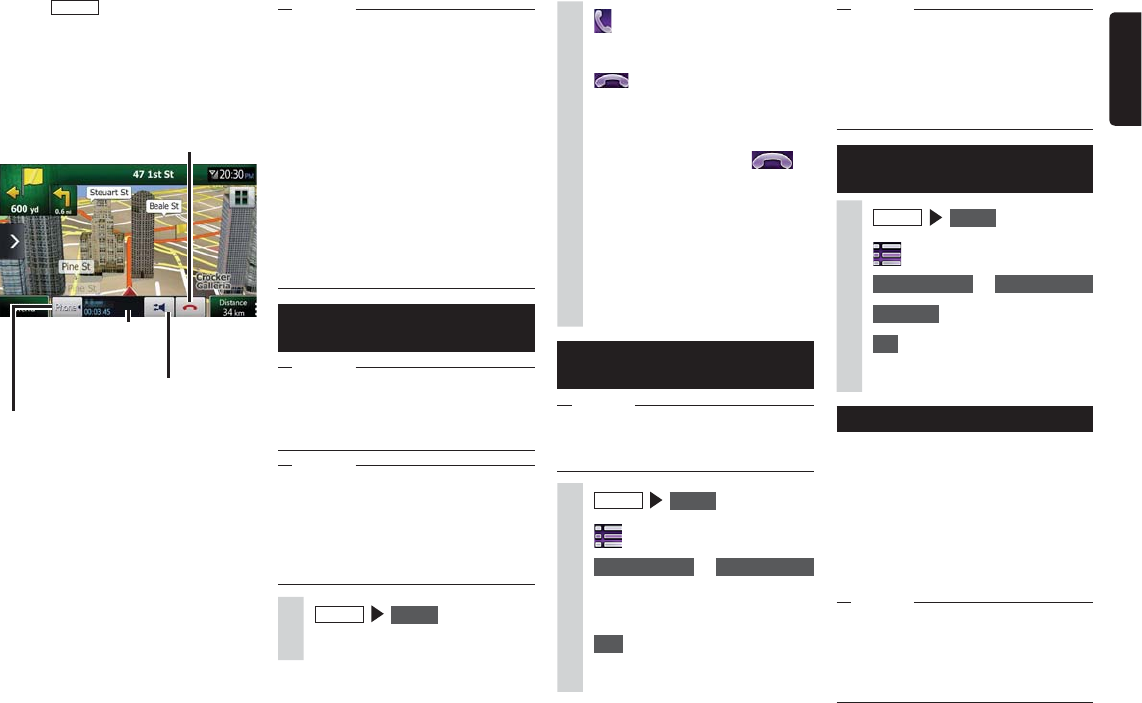
NX603/FX503 31
English
Pressing NAVI AV during a telephone call
switches the screen as follows. With this
screen displayed as it is, operations such
as searching for a destination can be
performed.
Map screen during a telephone call
The call time, name of
other party or telephone
number is displayed.
The call is disconnected and the
current position is displayed.
This switches to telephone calls on the
cellphone unit.
This toggles the telephone control bar
between display and hide.
MEMO
sWith some cellphone models, incoming
calls are automatically rejected when
there is an incoming call from a third party
during a telephone call. The incoming
calls log is not saved.
sWhen the vehicle moves outside the
cellphone service area during a telephone
call (i.e.to an area where radio waves
cannot be received), the line will be
disconnected.
sDuring hands free telephone calls, the
audio source cannot be switched or
selected.
sIt may not be possible to make or receive
calls unless the cellphone is in standby.
Entering a number to make a
call
Attention
sWhile you are driving, you cannot enter
telephone numbers to make a call. Always
stop at a safe location before making a
telephone call.
Notice
sAlways input the area code when calling a
land-line phone.
sWith some cellphones, you may not be
able to redial immediately after hanging
up a call you dialed. Wait a while before
dialing the number again.
1 MENU Phone
2Enter the telephone number.
MEMO
sThe latest ten calls recorded on the unit
are displayed in the incoming/outgoing
calls log.
sIn the case of telephone numbers
registered to the phonebook, the
registered names are displayed.
Deleting the incoming/
outgoing calls log
1 MENU Phone
2
3 Incoming Calls or Outgoing Calls
4 Delete All
5 OK
The entire outgoing call log or
incoming call log is deleted.
Registering a phonebook
You can register the phonebook on a
cellphone in advance to the unit, and make
calls from there.
To register the phonebook on a cellphone,
use the phonebook download function
on the cellphone. With some cellphones,
phonebooks cannot be downloaded.
For details, refer to the User’s Manual for
the cellphone.
MEMO
sAfter a phonebook is downloaded, the
cellphone connection is sometimes
disconnected. If this happens, select the
cellphone you want to connect to again
from the telephone selection screen.
3
The telephone number is dialed and
the other party is called.
:
The call is stopped if this is
touched while you are calling the
other party.
4To end a telephone call
This disconnects the call and returns
you to the screen before you made
the call.
The telephone number you called,
name (when registered to the
phonebook) and dial date/time are
saved as the outgoing calls log. Only
the latest call log is shown for the
same phone numbers.
Making calls from the
outgoing/incoming calls log
Notice
sYou cannot make calls from the incoming
calls log when the incoming call was from
a withheld number.
1 MENU Phone
2
3 Incoming Calls or Outgoing Calls
4Select the other party you want
to dial.
5 Call
The registered telephone number is
dialed and the call is made.
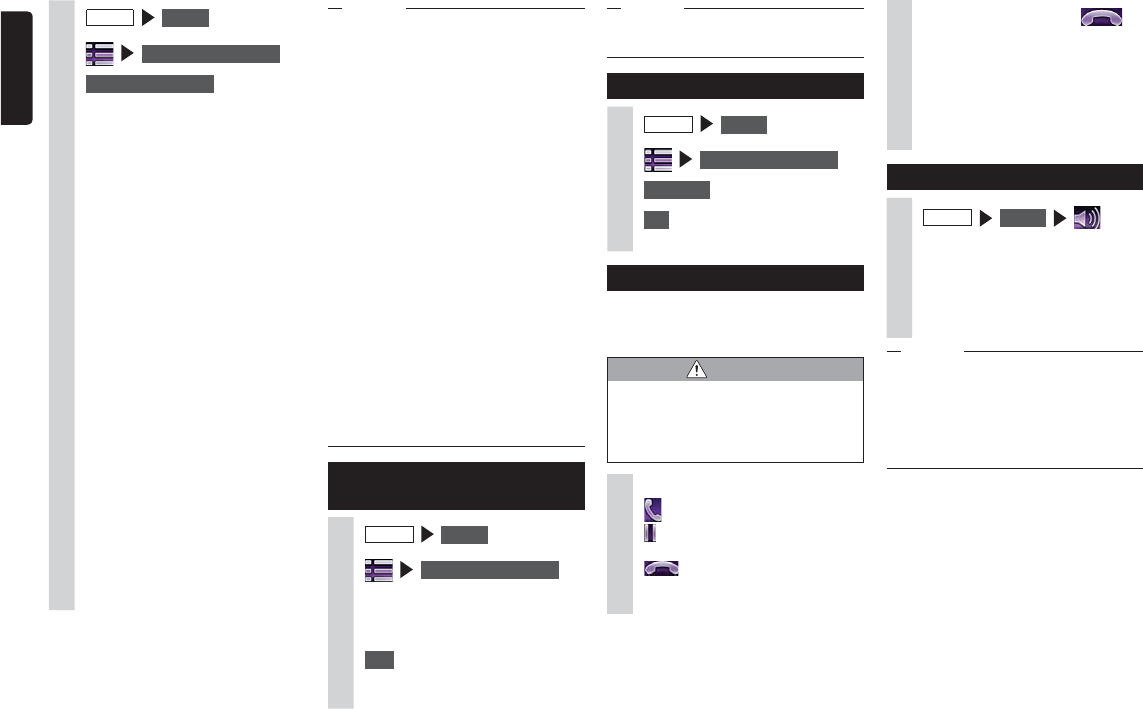
32 NX603/FX503
English
MEMO
sFor details on how to register phonebooks,
see “Registering phonebooks.” p P.31
Deleting phonebook data
1 MENU Phone
2 Handset Phonebook
3 Delete All
4 OK
All of the phonebook data is deleted.
Receiving telephone calls
When a cellphone connected to the unit
receives an incoming call, the incoming call
screen is displayed.
CAUTION
s When you receive a call while you
are driving, be sure to check the
safety around you before taking the
call.
1When you have an incoming call
:
Put your response on hold.
:
Touching this during an incoming
call, rejects the call.
2To end a telephone call
This disconnects the call and returns
you to the previous screen.
The telephone number of the
incoming call, name (when registered
to the phonebook) and incoming
date/time are saved as the incoming
calls log.
Setting the call volume
1 MENU Phone
2Set the phone ringer volume,
phone incoming volume and
phone outgoing volume.
The volume can be set to level 1 to
16. (Default: Level 4)
MEMO
sWhen the volume is adjusted while you
are making a telephone call, calls can be
made at the original volume when the next
telephone call is received or made even
though other audio sources are switched
to and the volume is changed.
1 MENU Phone
2 Handset Phonebook
3 Download memory
The screen stands by to download
the phonebook.
4Select the download method.
Download Phonebook:
This downloads the phonebook
data from a Bluetooth-compatible
cellphone and overwrites and
saves the phonebook data on the
unit.
Note that the previous downloaded
data is overwritten and can no
longer be used.
Download 1 Entry:
This downloads the phonebook
data from a Bluetooth-compatible
cellphone and adds and saves
this data to the phonebook data
on the unit. Note that the previous
downloaded data is not overwritten
and can still be used.
Cancel:
This cancels the download and
returns you to the previous screen.
5Download the phonebook from a
cellphone.
The phonebook of the currently
selected cellphone is downloaded to
the unit.
MEMO
sWith some cellphone models, the
operation of downloading the phonebook
from the cellphone is not required.
sUp to 1,000 phonebook entries can be
registered per cellphone.
sUp to five telephone numbers can
be displayed for each name in the
phonebook.
sWhen downloading from a cellphone,
even the same telephone numbers are
always added and registered, and are not
overwritten. Delete telephone numbers, as
required.
sThe following types of icons are displayed
in the telephone list:
Cellphones/General telephone/Home/
Company/Others
sThe display order of the downloaded
phonebook differs from the order
displayed in the cellphone. Entries are
sorted by their reading in kana, so confirm
the number of the other party when
dialing.
Making calls from the
phonebook
1 MENU Phone
2 Handset Phonebook
3Select the name.
4Select the telephone number.
5 Call
The registered telephone number is
dialed and the call is made.
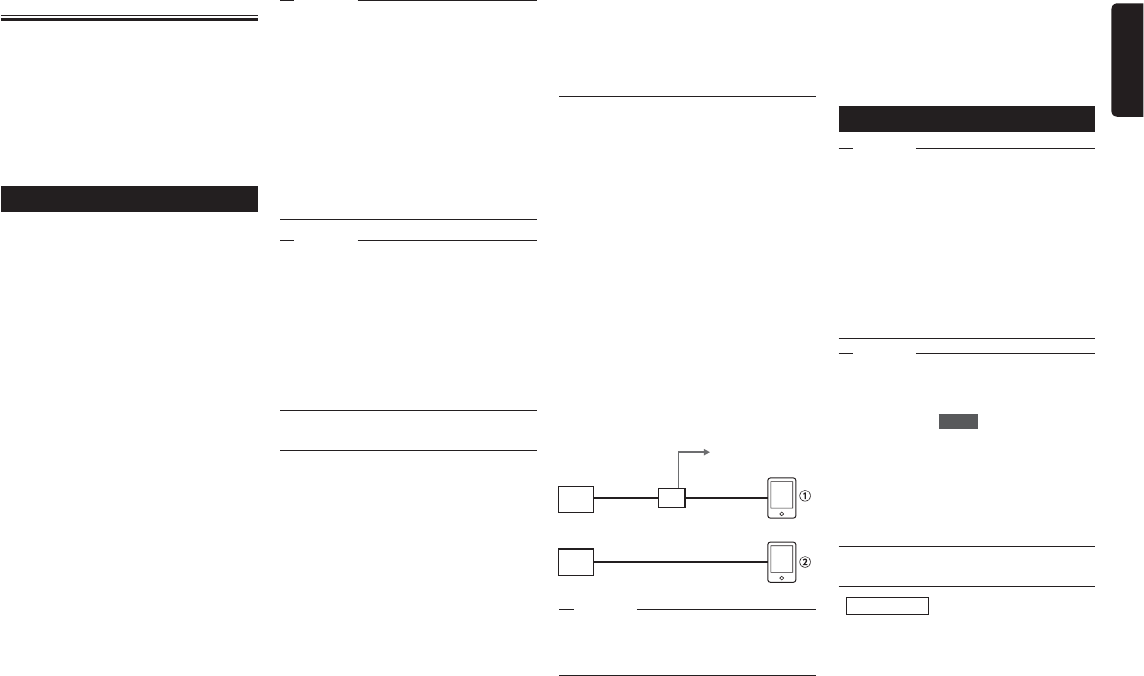
NX603/FX503 33
English
Using Smart Access
Smart Access is a telematics service
provided by Clarion so that all automobile
users can enjoy comfortable, safe and
convenient driving.
By “linking” vehicles to Smart Access by
smartphone, etc., Smart Access provides
customers in vehicles with various
conveniences such as entertainment, driving
related information and Internet information.
What is Smartphone linking?
You can connect the unit to your
smartphone and operate the various
applications that run on your smartphone
from the unit.
For example, you can output audio that
is played from the speakers connected
to the unit or display images displayed
in applications on the unit. This is called
“Smartphone linking.”
The following lists the smartphones that can
be linked to the unit:
●Covered models: iPhone 4, iPhone 4S,
Android smartphones
✽iPhone and iPad other than the above are not
supported.
●Covered OS: iOS 5 or later, Android
OS4.0 or later
(as of January 2013)
Also, with this function, only applications
compatible with Smartphone linking can be
used. This User’s Manual refers to these as
“linking-compatible applications.”
Attention
sUse of Smartphone linking function is
charged to smartphone communications
fees. Charges are borne by the person
contracted to the smartphone being
used. Charges billed from the cellphone
carrier may be expensive depending on
the method of use. Before use, check the
price plans and methods of use with the
cellphone carrier you are contracted to.
We recommend using the optimum price
plan, such as a flat-rate data plan based
on the frequency of use.
Notice
sWhile you are driving, some applications
cannot be operated so as to prevent
obstruction to driving.
sInformation content that is distributed in
real time belongs to third parties having
the rights concerned. The content of
services might be changed or suspended
for reasons of third parties having the
rights concerned.
Linking-compatible applications
To use Smartphone linking, linking-
compatible applications and application
management software “Smart Access” must
be installed on the software.
First, search for “Smart Access” from the
App Store or Google Play Store and install
this.
Next, install the linking-compatible
applications. Start up Smart Access on
the smartphone and download the linking-
compatible applications from recommended
lists.
Linking-compatible applications are
scheduled to be added as they become
available.
Connect a smartphone that supports the
following Bluetooth profile via Bluetooth for
use.
●SPP (Serial Port Profile)
●HID (Human Interface Device Profile)
3. Start Smartphone linking on the unit.
Starting up applications
Notice
sThe unit sometimes does not support
smartphone multi-touch or flicking
functions.
sApplications cannot be added or deleted
from the unit. Execute addition or deletion
of applications on the smartphone.
sDuring Smartphone linking, do not set
the smartphone to a sleep state. Doing
so might prevent the smartphone from
functioning properly.
MEMO
sWhen Smart Access is used for the first
time, the Terms of Use confirmation
screen is displayed. Check the terms of
use, and touch Check .
s“!” will be displayed when there is a
new version of Smart Access available.
To update Smart Access, remove the
smartphone from the unit, and execute
the update by operating the application
on the smartphone.
For iPhone
Preparations
●Set the iPod connection method to “USB
+ VTR”. p P.24
●Set “Device:In-car-device LNK” in the
Settings menu to “iPhone”. p P.41
●Start up Smart Access on the
smartphone.
For details on how to use applications,
refer to the Help for each application that is
started up on the smartphone.
Procedure up to Smartphone
linking
The Smartphone linking procedure is as
follows.
(For iPhone)
1.
Start up Smart Access on the
smartphone.
2. Connect the unit to the smartphone.
Use CCA-750 (sold separately) and VTR
cable.
3. Start Smartphone linking on the unit.
(For Android smartphones)
1.
Start up Smart Access on the
smartphone.
2. Connect the unit to the smartphone.
There are two methods of connection as
follows depending on the smartphone
model.
The unit
The unit
HDMI cable
HDMI
cable
HDMI/MHL
conversion adapter
HDMI/MHL
conversion cable
Connect to the
cigarette lighter port,
etc. on the vehicle to
supply power.
Smartphone
Smartphone
Attention
sFor the HDMI/MHL convertion adapter,
only an adapter that supports EDID
transfer can be used.
34 NX603/FX503
English
1During Smartphone
linking Smart Access .
The side menu is displayed.
2
:
The screen returns to the
application list screen.
:
The screen returns to the
immediately previous screen when
the screen is not the application list
screen.
:
This hides the side menu.
3 Yes
No:
This cancels correction of the
touch position.
Reset to Factory Setting:
This resets the touch positions after
correction to their factory settings.
4Touch the + mark at the top left
of the screen.
5Touch the + mark at the bottom
right of the screen.
This completes correction of the
touch position.
Ending Smartphone linking
1 MENU
2Disconnect CCA-750 or HDMI
cable.
Using a remote control
(sold separately)
Cautions during remote
control operations
Pay attention to the following points when
using the remote control.
The remote control sometimes cannot be
operated when direct sunlight is striking
the remote control sensor on the unit. In
instances like this, block off the direct
sunlight to operate the remote control.
Do not leave the remote control in places
that get hot, such as the dashboard in
direct sunlight. Doing so might result in
the main unit becoming deformed, the
batteries leaking or other malfunctions.
When the emission distance of the remote
control gets shorter or its operable range
gets narrower, replace the batteries inside
the remote control.
When the remote control is not to be used
for at least a month, remove the batteries
from inside the remote control to prevent
battery leakage. If the battery has leaked,
wipe off the liquid thoroughly and replace
the battery.
Notice
sDuring Smartphone linking, operations on
the smartphone are not possible.
1Connect the smartphone to the
unit.
Connect iPhones with the video jack
of CCA-750 (sold separately) still
connected to the VTR cable.
2 Smart Access , or
MENU Smart Access
Start up Smart Access. The list of
linking-related applications installed
on the smartphone is displayed.
When an application is started up
on the smartphone, the screen is
switched to the application screen.
3Select the application you want
to start up.
The application starts up. The
application can be operated from
screens on the unit as if you are
operating the smartphone.
To end an application, touch MENU
Smart Access .
For Android smartphones
Preparations
●Set “Device:In-car-device LNK” in the
Settings menu to “Android”. p P.41
●Register (pair) the smartphone to the
unit. p P.29
●Start up Smart Access on the
smartphone.
MEMO
sWith some smartphone models, the HDMI
output setting on the smartphone must be
enabled.
sWhen you connect an Android
smartphone, the unit can display pictures
of the following formats by Smartphone
linking.
- the HDMI output resolution of
smartphones:
480p (720×480/640×480), 576p
(720×576)
1Connect the smartphone to the
unit.
Connect the smartphone by HDMI
cable and enable the connection via
Bluetooth. p P.29
From here on, operations are the
same as from step 2 of the procedure
for “For iPhones”.
Correcting the touch position on screen
(Android smartphones only)
During Smartphone linking, the positions
of keys displayed on the unit is sometimes
deviate from the actual touch position
because of different resolutions on the unit
and the smartphone. This deviation can be
automatically corrected by the following
procedure.
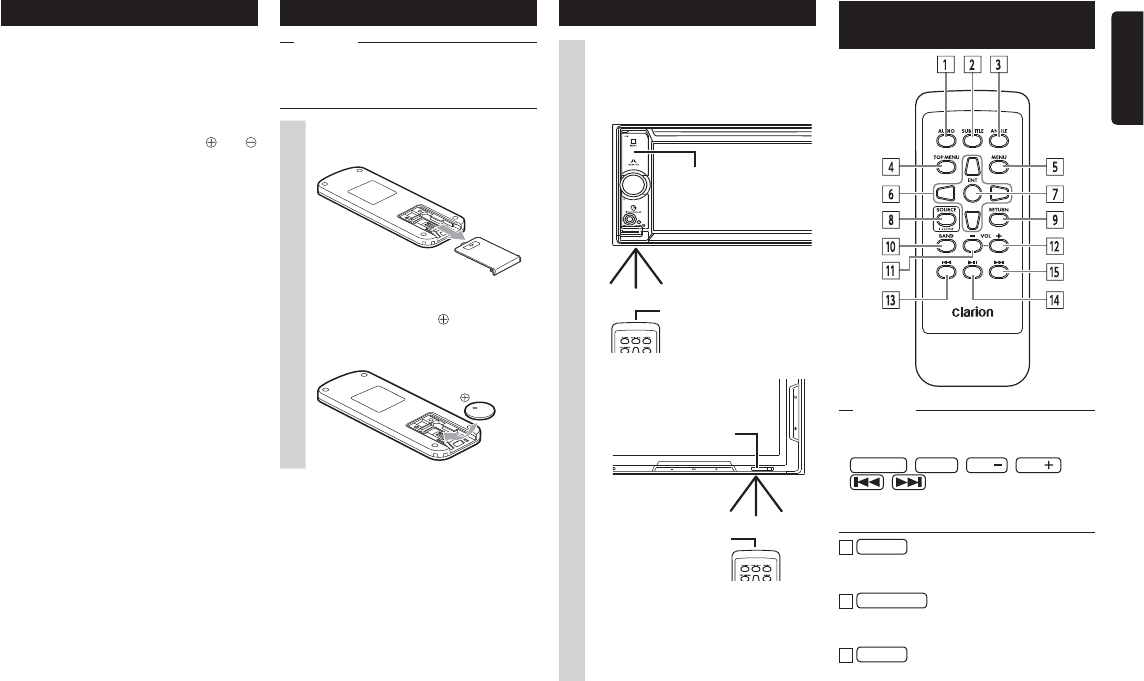
NX603/FX503 35
English
Battery related precautions
Use only the specified battery. Do not use
other batteries.
Doing so might cause the battery to
burst or leak, or cause fire or injury, and
contaminate the surrounding area.
When inserting the battery into the remote
control, pay attention to polarity ( and
pole) and insert it as instructed.
Failure to follow instructions might cause
the battery to burst or leak, or cause
injury, and contaminate the surrounding
area.
Do not heat or disassemble the battery, or
put it in fire or water.
Doing so might cause the battery to
burst or leak, or cause fire or injury.
Do not carry the battery around or store
it together with metal ballpoint pens,
necklaces, coins, or other metal objects.
Doing so might cause the battery to
burst or leak, or cause fire or injury.
Dispose of used batteries according
to predetermined methods and at
predetermined locations.
Do not leave the battery provided with the
remote control within the reach of small
children or infants.
They might swallow them by mistake. If
you think that a small child or infant has
swallowed a battery, immediately consult
a physician.
Replacing the battery
Notice
sWhen using the remote control for the first
time, insert the battery provided with the
remote control.
1Open the battery compartment
cover and remove the battery.
2Insert the new lithium cell
(CR2032) with the mark
face up, and close the battery
compartment cover.
Names and functions of remote
control parts
Notice
sOn the FX503, available buttons are as
follows:
s SOURCE , BAND , VOL , VOL ,
,
sDuring telephone calls and when AUX is
selected, these cannot be operated.
1
AUDIO button
This switches the audio language of
DVD video and DivX.
2
SUB TITLE button
This switches the subtitle language of
DVD video and DivX.
3
ANGLE button
This switches the multi angle setting of
DVD video.
How to use the remote control
1Operate the remote control with
it pointed at the remote control
sensor on the unit.
Remote control sensor
Remote control emitter
Remote control sensor
Remote control emitter
30 degrees
FX503
NX603
30 degrees
30 degrees 30 degrees
Operate the remote control with its
emitter pointed at the remote control
sensor within a range 30 degrees
above, below, left and right of the
sensor.
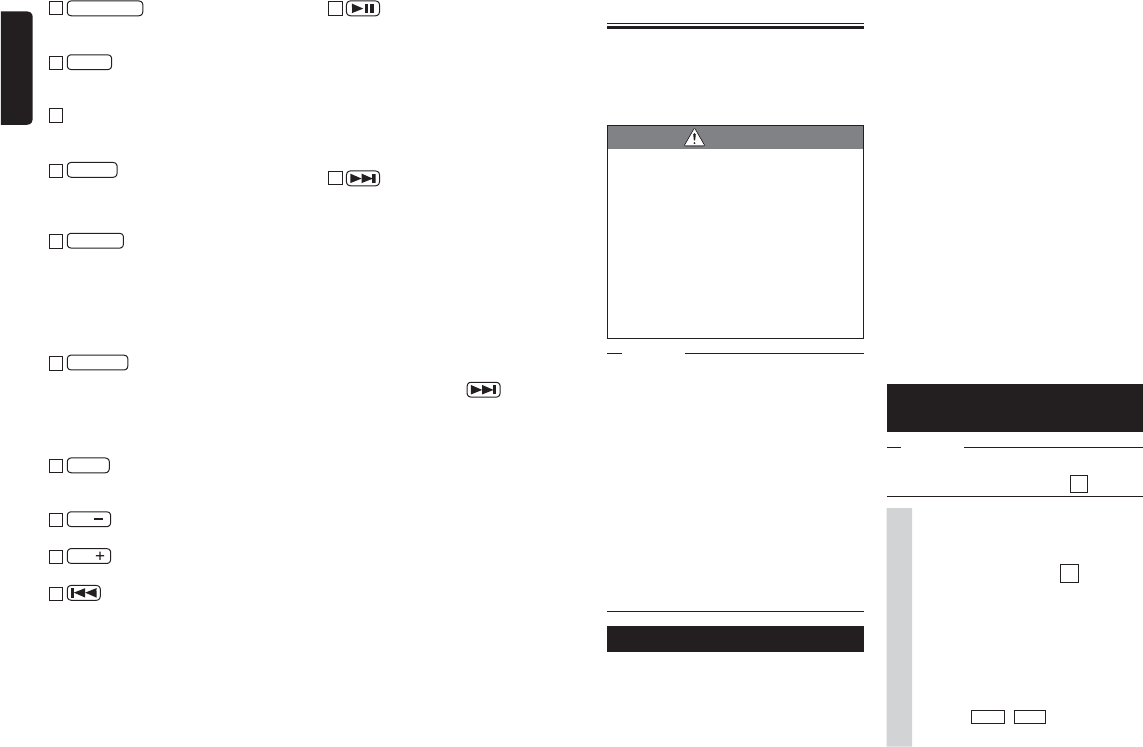
36 NX603/FX503
English
Using the rear camera
When the rear color camera (sold
separately) is connected to the unit, the rear
of the vehicle can be viewed on the monitor.
Consult your dealer before buying the rear
color camera (sold separately).
WARNING
s Never reverse the vehicle while
viewing only the monitor screen. Be
sure to check the safety of the area
around the vehicle directly with your
eyes and drive at a slow speed.
s Before adjusting the image quality
and adjusting, for example, the guide
display, be sure to stop the vehicle
at a safe place and then proceed
with these operations.
Notice
sThe range projected by the rear camera
is limited. Also, the guides displayed on
the rear camera screen sometimes differ
from the actual vehicle width and actual
distance between cars. (Guides are
straight lines.)
sUse the image in the rear camera as an
aid for checking for obstructions, etc. The
quality of the projected image might get
worse when water droplets, etc. adhere to
the camera.
sBe sure to adjust the guides to match the
car you are driving when the guides are
displayed.
Image in the rear camera
●Actual distances and the impression from
the image in the rear camera is different
since it uses a wide-angle lens.
●The image in the rear camera is a mirror
image. A “mirror image” is an image
obtained by inverting the left and right
of an image like in a rear mirror or side
mirror on a vehicle.
●The image in the rear camera cannot be
seen or is difficult to view at night or in
dark locations.
●The camera is in a drip-proof sealed
structure to prevent condensation on the
lens.
●Never loosen the screws on the camera
body or disassemble the camera. This
will impair the drip-proof performance
and cause malfunction, etc.
●Clear images cannot be obtained when
the lens front cover is dirty. When water
droplets, snow, mud, etc, is adhering to
the cover, wipe the cover clean with a
soft cloth, for example, moistened with
water. Wiping the lens cover firmly with a
dry cloth, for example, with dirt, etc. still
on the cover will sometimes scratch it.
Displaying the image in the
rear camera
Notice
sThe guides can be displayed and adjusted
only when the gear lever is at R (reverse).
1Turn the engine key to the “ON”
position.
2Set the gear lever to R (reverse).
The display switches to the image in
the rear camera.
Display priority is given to the image
in the rear camera even when audio-
related items are displayed.
Only volume adjustment
by the rotary volume key
(NX603) VOL+ ,
VOL- (FX503) can be
operated during camera display.
4
TOP MENU button
This displays the top menu screen of
DVD video.
5
MENU button
This displays the top menu screen of
DVD video.
6
direction button
This selects items in the DVD video
menu screen and top menu screen.
7
ENTER button
This determines items selected in the
DVD video menu screen and top menu
screen.
8
SOURCE button
This switches the source of the audio
mode.
When the unit is turned off, this turns the
power on.
Keeping this button held down switches
the audio power supply on and off.
9
RETURN button
This returns you to the immediately
previous screen in the DVD video menu
screen and top menu screen.
✽The 2ZONE function cannot be used
with the unit.
10
BAND button
This switches the tuner FM and AM
bands.
11
VOL button
This lowers the volume.
12
VOL button
This raises the volume.
13
button
With Radio/SiriusXM Satellite Radio:
Preset channel increment
Long press time:
Channel seek increment
When other audio sources are selected
✽ 1
:
Track/chapter increment, track/chapter
rewind
14
button
This pauses play of DVD video and DivX.
If this button is pressed during a pause,
play is resumed from the place where it
was stopped.
Long press time:
This resume stops DVD video and DivX.
If this button is long pressed during
a resume stop, play is completely
stopped.
15
button
With Radio/SiriusXM Satellite Radio:
Preset channel decrement
Long press time:
Channel seek decrement
When other audio sources are selected
✽ 1, ✽ 2
:
Track/chapter decrement, track/chapter
fast forward
✽1
With DVDs, keys other than on the disc
menu cannot be operated on the remote
control. Touch the unit to operate them.
✽2
With DVDs, slow play during a pause is
possible by pressing .
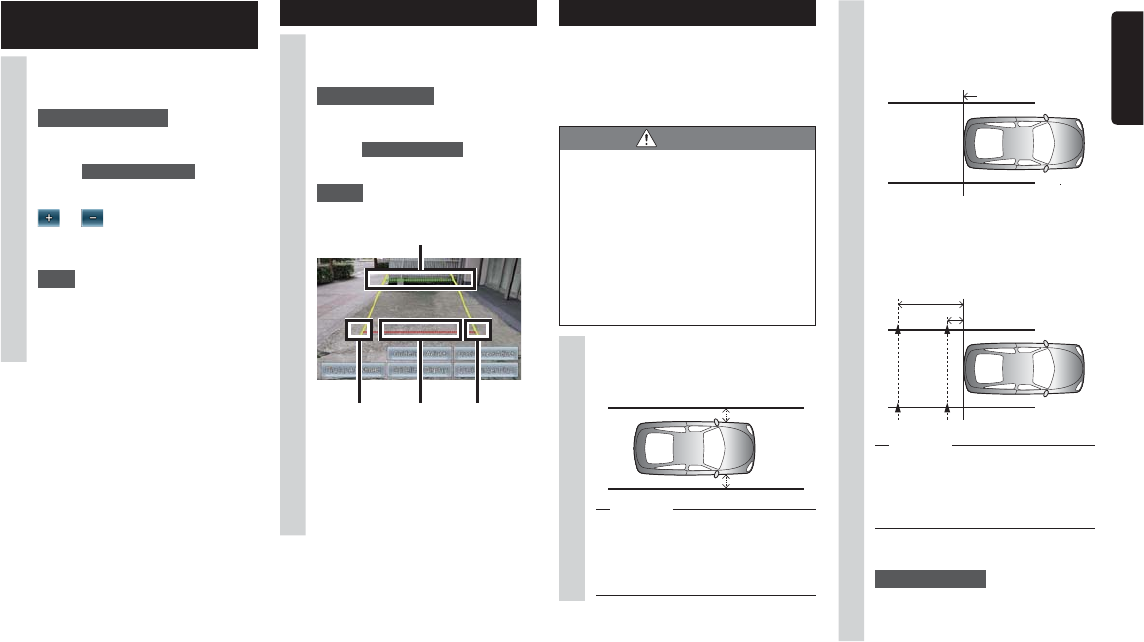
NX603/FX503 37
English
Displaying guidelines
1Touch the screen while the rear
camera image is displayed.
2 Guideline Display
If five seconds elapses
without you touching the
screen, Guideline Display will be
hidden.
3 Check
The guidelines are displayed.
A
BC C
A: Position about 6.6 ft (2 m) from the
rear end of the vehicle
B:
Position about 20 in (50 cm) from
the rear end of the vehicle
C:
Approximately vehicle width
+ 8 in (20 cm)
Adjusting the image quality of
the rear camera
1Touch the screen while the rear
camera image is displayed.
2 Display Adjustment
If five seconds elapses
without you touching the
screen, Display Adjustment will be
hidden.
3 or of item to adjust
Adjust the image quality while viewing
the video image on screen.
4 Back
This sets the newly adjusted image
setting.
Image quality adjustments can be set
for both the day and night screens.
2Drive the vehicle forward by
about 8.2 ft (2.5 m), and mark
straight lines at the rear of the
vehicle.
Rear of vehicle
3Mark four locations on the left
and right 20 in (50 cm) and 6.6 ft
(2 m) away from the marks you
made in step 2.
6.6 ft (2 m)
20 in (50 cm)
MEMO
sWe recommend making an X mark
using packaging or similar tape that
is easily visible from the driver’s
seat.
4Display the guidelines p P.37
5 Guideline Adjust
6Select the four guideline points
you want to adjust.
Adjusting the guidelines
When adjusting guidelines, marks must
be drawn on the ground. Prepare tools for
drawing lines on the ground, such as duct
tape. Also, be sure to do the adjustments to
match the car you drive.
WARNING
s Before adjusting the guidelines, stop
at a safe location.
s Before getting out of the vehicle and
marking the ground, be sure to turn
the engine key to the “OFF” position.
s Remember that guidelines are solely
for reference. During actual driving,
be sure to check the safety of the
area around you yourself.
1Mark straight marks on the
ground at vehicle width + about
8 in (20 cm) positions.
Approx. 8 in (20 cm)
Approx. 8 in (20 cm)
MEMO
sMark on both sides of the vehicle
using packaging or similar tape.
sMake the marks slightly longer than
the length of the vehicle.
38 NX603/FX503
English
7 , , ,
Align the marks you made in step 3.
MEMO
sContinuously holding
down , , , allows you to
move all the guide points together.
8Repeat steps 6 and 7 to align all
guide points with the marks you
made in step 3.
9 Back
This saves the settings and displays
the regular image in the rear camera.
Displaying the quasi bumper
line
The rear bumper is sometimes not displayed
in the rear camera image depending on
where the rear camera is installed. In cases
like this, you can display a quasi bumper
line so that you can park your vehicle while
checking the position of the rear bumper in
a quasi manner.
1Touch the screen while the rear
camera image is displayed.
2 Quasi Bumper Disp.
If five seconds elapses
without you touching the
screen, Quasi Bumper Disp. will be
hidden.
3 Check
The quasi bumper line is displayed.
Adjusting the quasi bumper line
When adjusting the quasi bumper line,
marks must be drawn on the ground.
Prepare tools for drawing lines on the
ground, such as duct tape.
WARNING
s Before adjusting the quasi bumper
line, first stop at a safe location.
s Before getting out of the vehicle and
marking the ground, be sure to turn
the engine key to the “OFF” position.
s Remember that the quasi bumper
line is solely for reference. During
actual driving, be sure to check
the safety of the area around you
yourself.
1Mark straight marks on the
ground at the vehicle rear + 8 in
(20 cm) position.
2Display the quasi bumper line.
3 Quasi Bumper Adjust
4 or
Adjust the upper and lower positions
of the quasi bumper lines to match
the mark made in step 1.
5 Back
This saves the settings and displays
the regular image in the rear camera.
Using the rear seat
monitor
Passengers can also enjoy video in the rear
seats if you install an additional rear seat
monitor (sold separately).
Preparations
●To connect a rear seat monitor to the
unit, the rear seat monitor and rear seat
monitor installation attachment are
required.
Attention
sInstall the rear seat monitor at a location
where the driver cannot see video images
while he or she is driving.
Video images displayable on
the rear seat monitor
The following video images can be
displayed on the rear seat monitor. Note,
however, that the control bar and other aids
are not displayed on the rear seat monitor.
Video images are displayed regardless of
whether or not you are driving or the car has
stopped.
●DVD/DivX
●AUX
●iPod video
Nothing will be displayed on the rear seat
monitor if a source other than DVD, DivX,
AUX, and iPod video is selected.
The image currently being played is
displayed on the rear seat monitor even
while the navigation screen is displayed on
the unit’s screen.
Various settings
You can set various operations, sound
quality and video image quality relating to
the unit.
Notice
sWhile you are driving, selectable items are
limited.
Making general settings for
the unit
1 MENU
System Language:
This switches the language of text
that is displayed in screens and
messages. (Default: English)
When the language is switched,
the unit is automatically restarted
and the language is switched
to the newly selected language.
Navigation screens are dependent
on the language setting of the
navigation. (NX603 only) p
“Owner’s manual - Navigation”
Main Menu Icons:
This switches the icon display of
the main menu screen. (Default:
Simple)
When Active is selected, the
icons in the main menu become
animated. When Simple is
selected, the icons become still
images.
Shortcut Menu:
This assigns frequently used
functions to shortcut keys. p
P.39
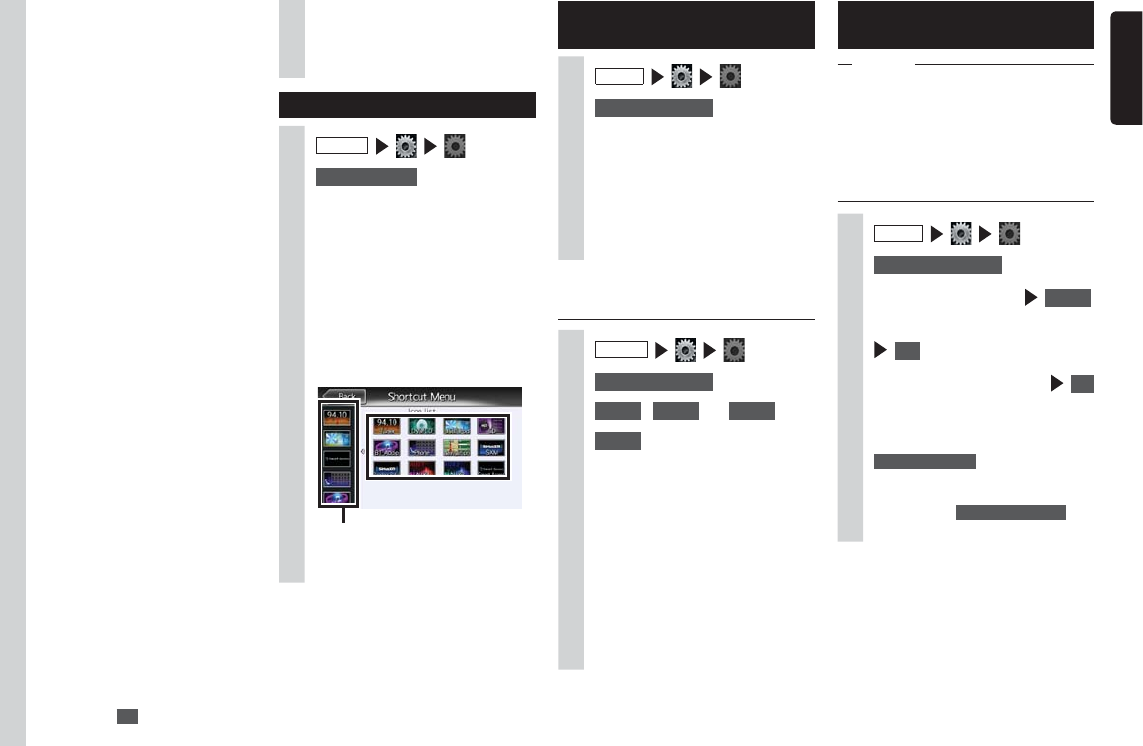
NX603/FX503 39
English
Illumination Color:
This sets the illumination color of
the operation panel. (NX603 only)
p P.39
Button Beeps:
This selects whether or not to
sound a beep when a button or
a touch key is operated. (Default:
ON)
Time:
This manually adjusts the time in
1-minute units. (FX503 only)
The adjustable range is -59 mins to
+59 mins.
Clock Format (24h):
This switches the clock display
format between the 24-hour display
and 12-hour display. (Default: ON)
Antitheft Indicator:
When the engine key is turned off,
the illumination on the unit blinks to
indicate that the antitheft function
is activated. (Default: OFF)
Antitheft Activation:
Security functions are activated if
the main unit is stolen, once it is
removed a password must be input
to start it. (Default: OFF)
Change antitheft PW.:
This is for changing the antitheft
activation password. p P.39
System Software:
This is for displaying the software
version and product information
on the unit and for updating the
program.
Check connectivity:
Check the connectivity of various
devices with the unit.
When the connectivity is
confirmed, OK is displayed on the
list screen.
Reset to Factory Setting:
This returns the data and settings
on the unit to their factory defaults.
p P.52
Setting the Shortcut Menu
1 MENU
2 Shortcut Menu
3Drag the icon you want to
register to the shortcut keys to
the shortcut key registration
area.
With your finger touching the icon, do
not release your finger and slide the
icon across the screen to where you
want to register it and then take your
finger away from the screen. This
operation is called dragging.
Shortcut registration area
The icon you dragged is registered to
the shortcut keys. (max.5 icons)
Setting the password for
antitheft activation
Attention
sWhen the unit is transferred or resold, be
sure to cancel the password.
sIf you enter the wrong password three
times, entry of the password is disabled
for a fixed period of time. Make a note of
the password and keep it in a safe place
so you do not forget it.
1 MENU
2 Antitheft Activation
3Read the precautions Check
4Enter the 4-digit password
OK
5Enter the password again OK
A message is displayed and the
password is saved.
To change the password, touch
Change antitheft PW.
, enter the password
and enter it again.
To cancel the Antitheft Activation
setting, touch
Antitheft Activation
and
enter the password.
Setting the illumination display color
on the control panel (NX603 only)
1 MENU
2 Illumination Color
3Select the color.
Color1 - Color9:
Select from the prepared colors.
Scan:
Switch the illumination display
color on the operation panel in
order Color1 to 9.
This sets the desired illumination
color.
1 MENU
2 Illumination Color
3 User 1 , User 2 , or User 3
4 Adjust
5Set the illumination display color.
Set the color on the color palette or
by adjusting the numerical values.
The colors you have set can be
checked in the Sample area.
Reset to Factory Setting:
This resets the settings to their
factory defaults.
From the next operation onwards, the
same settings can be accessed at
step 3.
40 NX603/FX503
English
Making Bluetooth settings
1 MENU
2Set the Bluetooth connection
using the keys.
BT Devices Connection:
This toggles the Bluetooth function
on/off, and registers, switches
and deletes Bluetooth-compatible
devices. p P.29
In-Car-Device setting:
Renames the device already set to
the unit and changes the PIN. p
P.40
Renaming devices and changing
the PIN
Notice
sDevice addresses cannot be changed.
1 MENU
2 Set at [In-Car-Device setting]
3 Name or PIN
4Enter the new name (default:
CAR-BT) or PIN (default: 1234).
5 Set
Setting sound quality
Make sound quality related settings.
1 MENU
2Set sound quality using the keys.
Balance/Fader:
This adjusts the volume balance of
the speakers at the front, back, left,
and right. (Default: 0) p P.40
Loudness:
This enhances treble and bass to
suit the volume. (Default: OFF)
Graphic Equalizer:
This is for selecting the desired
sound quality from the preset
sound quality effects memory.
(Default: Flat) p P.40
Create and save a sound quality
effects memory. p P.40
Sound Restorer:
Interpolating the treble region
of compressed audio brings the
sound quality closer to the original
sound before it was compressed.
(Default: OFF)
Volume Smoother:
This detects differences in volume
level based on the source being
played and differences in level
in each scene in a film, and
automatically adjusts the volume
level. (Default: OFF) p P.41
Virtual Bass:
Adding a bass component in
the bass region enhances bass
to enable a richer bass sound.
(Default: OFF)
Vocal Image Control:
Adjusting vocal volume balance
moves the vocal image to the front,
back, left, and right. (Default: 0) p
P.40
Sub Woofer Control:
This adjusts the output level of a
connected sub woofer speaker.
(Default: 0)
High Pass Filter:
This sets the cutoff frequency of
the high pass filter for the front and
rear speakers. (Default: Through)
Low Pass Filter:
This sets the cutoff frequency
of the low pass filter for the sub
woofer. (Default: 120Hz)
Adjusting speaker volume
balance and vocal volume
balance
Balance/Fader adjusts the overall volume
balance. Vocal Image Control adjusts vocal
which is oriented in the center of the stereo
sound source and the volume balance
of components such as main musical
instruments. Use these settings to adjust
the left/right balance and depth of vocals to
suit the speaker configuration and number
of passengers.
1 MENU
2 Balance/Fader
or Vocal Image Control
3Touch and set , , ,
and
Reset to Factory Setting:
This returns the currently set
adjustment settings (volume
balance or Vocal Image Control) to
their factory settings.
Selecting and setting sound
quality effects memory
You can select and set your preferred sound
quality
1 MENU
2 Graphic Equalizer
3Select the sound quality.
Bass.B:
Enhances bass.
High.B:
Enhances treble.
Acoustic:
Enhances the mid level (human
voice).
Impact:
Enhances the low and high regions.
Smooth:
Creates a soft, gentle feel.
Flat:
Turns the sound source and
equalizer off.
Setting preferred sound quality
effects
1 MENU
2 Graphic Equalizer
3 User 1 , User 2 , or User 3
4 Adjust
NX603/FX503 41
English
1 MENU
2 Volume Smoother
3 OFF , Low , Mid , or High
4 Close
The Volume Smoother level is
adjusted.
MEMO
sWhen listening to sources such as DVDs
having a large difference in volume level,
we recommend setting the Volume
Smoother level to “Mid” or “High”.
sThe Volume Smoother can be set to
each of video sources and other sources.
When a source is switched, the Volume
Smoother is switched to the value set for
the new source.
5Set the sound quality effect.
, :
This adjusts the band setting for
each of the base, mid and treble
regions.
Reset to Factory Setting:
This resets the settings of each
band to “0”.
From the next operation onwards,
the same settings can be accessed
at step 3.
Adjust the Volume Smoother
Volume Smoother functions to automatically
adjust differences in volume level of
all kinds of music sources and scenes
and compensate volume. When Volume
Smoother is on, the volume level in audibility
of audio signals is monitored and adjusted
at all times, and differences in volume level
are suppressed to a fixed range to enhance
listening pleasure. Differences in audio level
occur in the following kinds of instances:
●Difference in audio level between
listening to CDs and the radio
●Difference in audio level between quiet
scenes and scenes with loud noises such
as explosion scenes when watching films
on DVD, etc.
When Volume Smoother is on, each source
can be listened to even in the above cases
at an easy-to-listen volume level without
having to operate the volume level.
The “volume compensation” effect can
be altered by adjusting the Volume
Smoother level. The volume compensation
effect is increased in the order
“Low”p“Mid”p“High”.
Setting screens
1 MENU
2Set image quality using
respective keys.
Day/Night Mode:
Switch to the day screen or night
screen.
The screen can be made easier to
view by manually switching to the
day screen, for example, when the
headlights are lit during the day
and the screen is difficult to view.
When Auto is selected, the screen
automatically switches to the night
screen when the parking light is lit.
MEMO
sWhen the engine key is turned to
the "OFF" position then back to the
"ON" position, Auto is set.
Brightness:
Adjust the image quality
by or .
Image quality adjustments can
be set for both the day and night
screens.
During Smartphone linking, the
image quality of the smartphone
application screen can be adjusted.
Other settings
1 MENU
2Set the functions using
respective keys.
DivX® VOD:
Displays the code required for
setting DivX VOD content to a
playable state (Register state) or
unplayable state (Deregister state).
(NX603 only) This also changes
the state (Register state/Deregister
state) of the device being played.
Device:In-car-device LNK:
Sets the OS of the smartphone to
be connected when Smartphone
linking is performed. (Default:
iPhone)
42 NX603/FX503
English
Troubleshooting
The following kinds of symptoms sometimes are not malfunctions. First check the following
points before you ask for repair of the unit.
Navigation related (NX603 only)
Symptom Remedy
GPS reception is not displayed. Connect the antenna cable if it is not
connected.
Reception can be enabled by removing
obstructions, etc.
Positioning is sometimes not possible when
the placement of the satellite is poor.
Display appears by driving the vehicle.
Own vehicle is out of position.
(Other electrical components are attached)
Move attached electrical components
sufficiently away from the unit and the GPS
antenna wire.
Audio related
Symptom Remedy
Radio
There is lots of noise. Tune to the correct frequency. p P.12
Stations cannot be tuned to
automatically.
Manually select the station. p P.12
CD/DVD/MP3/WMA (NX603 only)
No sound is output after a disc is
inserted or the disc is immediately
ejected.
Load the disc with its label surface face up.
CDs recorded as CD-R/RW or copy-protected
CDs sometimes cannot be used. Check the
CD in use again.
Finalize the disc so that it can be used.
MIX MODE CDs cannot be played, eject them.
8 cm discs cannot be played, eject them.
Cannot remove the disc even by
pressing the eject button.
Consult your retailer.
Skipping
Sound contains noise.
The disc might be dirty. Wipe the disc with a
dry cloth.
Replace with an unscratched disc.
No sound is output after the power is
turned on.
There might be water drops on the lens inside.
Leave with the power on for about one hour
to let it dry.
Cannot insert the disc. Check to see if other discs are not loaded. p
P.10
Jumping/skipping of MP3/WMA Change the encoder software and try
recording again.
MP3/WMA sound is poor. Try recording at a higher sampling frequency
or bitrate. p P.47
MP3/WMA skipping Play on a personal computer to see if skipping
occurs.

NX603/FX503 43
English
CD/DVD/MP3/WMA (NX603 only)
Some files or folders cannot be
played.
When making files, delete data sections other
than music data. Playing is not possible when
tunes are recorded to a folder having eight or
more layers, or the number of folders exceeds
the maximum of 255 (including roots) and the
number of files exceeds 512 (maximum of 255
files in one folder).
Incorrect display Change the write setting to ISO9660-LV1 or
LV2 and try writing again.
MP3/WMA recorded to CD Extra
cannot be played.
Play a CD to which an MP3/WMA file is
written to the 1st session of the CD Extra.
The “Disc read error.” screen is
displayed.
Load the disc with its label surface face up.
iPod
List is not displayed. The list sometimes is not displayed since the
number of items displayed in the list is limited.
This is not a malfunction.
iPod operations are not possible. Cancel the USB connection, set the iPod to
play, and reconnect it.
Cancel the USB connection, reset the iPod,
and reconnect it.
iPod audio is not output. Perform operations from the iPod, and switch
the settings (audio output) from Bluetooth
(CAR-BT) to the Dock connector. Also,
remove the iPod from the unit and reconnect
it.
microSD card/USB memory
Cannot play from microSD card. Check to see if the microSD card can be used
on the unit. p P.47
Cannot insert the microSD card. Insert the microSD card into the loading slot
with its label surface face up (NX603).
Insert the microSD card into the loading slot
with its label surface face down (FX503).
Cannot play from USB memory. Remove the USB memory and insert it again.
Check to see if the USB memory can be used
on the unit. p P.47
Skipping Play on a personal computer to see if skipping
occurs.
Poor sound Try recording at a higher sampling frequency
or bitrate. Check audio files that can be
played on the unit. p P.47
Some files or folders cannot be
played.
Playing is not possible when tunes are
recorded to a folder having eight or more
layers, or the number of folders exceeds the
maximum of 512 (including roots) and the
number of files exceeds 8000 (maximum
of 255 files in one folder). Use the personal
computer to reconfigure so that the number
of folders and files are within their respective
limits.
Wrong number of MP3/WMA files Delete files other than MP3/WMA.
Audio play continues but the play
time stops.
When a file exceeding 1 GB is played, the
display of the play time sometimes stops. This
is not a malfunction.
44 NX603/FX503
English
●Audio related
Bluetooth audio
Cannot connect Correctly connect the Bluetooth-compatible
cellphone. p P.29
Turn the audio device on.
The unit sometimes cannot be connected
or skipping sometimes happens depending
on distance and where the Bluetooth Audio
is installed. Situate the audio device so the
reception is as good as possible.
Audio is not played. Use audio devices that are compatible with
AVRCP.
Cancel the connection and reconnect.
Start up the player for the connected audio
device.
The track name, artist name and
album name are not displayed.
Use audio devices that are compatible
with AVRCP1.3. Restart the player on the
Bluetooth Audio device side.
Sound is no longer output from the
connected audio device.
Specify the Bluetooth Audio device from the
Bluetooth setting screen.
Smartphone linking
Symptom Remedy
An error message is displayed and
Smartphone linking is not possible.
Cancel the sleep state on the smartphone.
Install the linking-compatible application and
application management software “Smart
Access” on the smartphone beforehand.
Start up the linking-compatible application on
the smartphone beforehand.
Reconnect the smartphone in a place with
good reception.
Disconnect the connector cable and
reconnect it.
Check the OS setting on the unit.
In the case of Android smartphones, enable
the HDMI output setting on the smartphone.
Also, check to see if the smartphone supports
Bluetooth SPP and HID profiles.
“!” cannot be touched in the Smartphone
linking screen on the unit, and the
application cannot be updated.
For reasons of safety, the application cannot
be updated during Smartphone linking.
Disconnect the connector cable and update
the application on the smartphone.
The Smartphone linking screen is not
displayed, and the screen is black.
Check to see if the connector cable is
connected properly.
In the case of Android smartphones, check
to see if the HDMI output resolution of your
smartphone can be displayed on the unit.
The error screen is displayed in the
Smartphone linking screen after an
outgoing call is made.
In some versions of the smartphone OS,
Smartphone linking is sometimes canceled
after an outgoing call is made.
Start up Smart Access from the Home screen
by operating on the smartphone.
NX603/FX503 45
English
The error screen is displayed while the
application is in use.
Use the smartphone in a place with good
reception.
The Smartphone linking that could
previously be used can no longer be used.
Check to see if the smartphone is turned
on. Also, cancel the sleep state on the
smartphone.
The smartphone appears not to be
operating.
Disconnect the connector cable and
reconnect it. Or, turn the smartphone off then
back on again.
Rear camera
Symptom Remedy
Camera image is not displayed. Check to see if the select lever is at the R
position.
The screen may be difficult to view in bright
or dark locations, however this is not a
malfunction.
Camera image is poor. Lightly wipe the front lens cover, for example,
with a soft cloth moistened with water.
The guidelines of the rear camera are not
displayed.
Touch the screen with the vehicle in a stopped
state, and touch Guideline Display .
Others
Symptom Remedy
The screen is difficult to view just after the
power is turned on.
This is due to the properties of the LCD panel,
and is not a malfunction. Please wait.
The screen is not displayed. When the screen is hidden, it can be
redisplayed by pressing the rotary volume key
(NX603) or the POWER (FX503). p P.11
The fuse might be blown. Consult with your
dealer.
The screen flickers. Use electrical components (cellphones,
wireless radios, minus ion generators, etc.)
that generate electrical noise as far away from
the unit as possible. Refrain from using these
components when the unit might be adversely
influenced even when they are used far away.
The screen grows dark (or is partially dark
or disappears while navigation is in use.
Stop the vehicle at a safe location, turn the
engine key to the "OFF" position and then to
the “ACC” or “ON” position. If this does not
rectify the problem, a probable cause might
be an LCD backlight malfunction or erroneous
operation of the unit. Consult with your dealer.
Buttons sometimes do not react
immediately after the unit is started up.
Wait a while before retrying the operation.
The menu cannot be operated. Stop the vehicle in a safe place and apply the
parking brake.

46 NX603/FX503
English
Discs that can be used on
the unit (NX603 only)
Attention
sDo not use the following discs since
there is the possibility that they might get
scratched or can no longer be removed.
- 8 cm CD
- Non-standard shaped discs
- Dual discs
- Discs with labels on them
sDo not stick labels on disc surfaces or
write on them with a pencil or pen, for
example.
sWhen handling discs, take care not to
leave fingerprints or scratches on the
surfaces.
sDo not use discs if there is any glue or
paper left on them from adhesive labels.
If discs like these are inserted into the
unit in this state, they may jam or cause a
malfunction.
sDo not store discs in the following places:
- Places subject to the direct sunlight
- Humid or dusty places
- Places subject to direct heat from
heating apparatus
DVDs that can be played
●Discs with mark
●Discs whose region number is “1” or
“ALL”
●DivX discs
Commercially available DVD videos can be
played on the unit.
Note on region numbers of DVD
video discs
The DVD video system assigns a region
number to DVD players and DVD discs by
sales area.
The DVD video region number playable in
this system is marked on the disc jacket as
shown below.
ALL
1
DVD Video Features
This unit provides the following functions
in addition to the high image quality and
sound quality of DVD video.
MEMO
sThe functions described in this section
differ depending on the DVD video disc.
Refer to the instructions provided with the
DVD video.
sSome disc functions may operate
differently from described in this manual.
■Multi-sound function
DVD video can store up to 8 languages
for one film; select the language of your
preference.
●The languages stored on the disc are
indicated by the icon shown below.
■Multi-angle function
A DVD video that is filmed from multiple
angles allows you to select the angle of
choice.
●The number of recorded angles is
indicated by the icon shown below.
■Subpicture (subtitles) function
A DVD video can record subtitles for up
to 32 languages and you can select the
language of the subtitles you wish to see.
●The number of recorded subtitle
languages is indicated by the icon shown
below.
■Multi-story function
When a DVD video contains more than one
story for a film, you can select the story you
wish to enjoy. The operation procedures
vary with the disc; observe the instructions
for selecting a story provided during
playback.
CDs that can be played
●Music CDs
●CD-TEXT discs
●CD-Extra discs
✽Excluding music CDs
●Super Audio CD
✽Only the CD layer of hybrid discs
●Discs recorded in the correct format on a
personal computer✽ 1
●CD-R and CD-RW discs for music
recorded on an music CD recorder✽ 2
●Copy-protected CDs✽ 3
●DivX discs
✽1 These sometimes cannot be played
depending on the application software
settings or environment. For details,
contact your dealer of the application
software.
✽2 These sometimes cannot be played
normally. Or, CD-RW discs may take longer
than regular CDs or CD-Rs to start playing
after the disc has been inserted.
✽3 These sometimes cannot be played.
CDs that cannot be played
●MIX MODE CD
●Discs other than CD-DA (e.g. over
burned CDs)
●DTS CD
●Video CD
●CD-R and CD-RW discs that have not
been finalized

NX603/FX503 47
English
■DVD menu
DVD Menus can be called up during DVD
video playback to perform menu setting.
DVDs that cannot be played
●Discs whose region number is other than
“1” or “ALL”
●Discs recorded in packet write mode
●Discs recorded in hi-vision at home
●DVD-RAM
✽DVD-R, DVD-RW, DVD+R or DVD+RW
recorded and finalized in the video mode
sometimes cannot be played due to device
specifications or environment settings, disc
characteristics, or scratches and dirt on the
disc.
microSD cards/USB
memory that can be used
on the unit
Use the commercially available microSD
cards/USB memory listed below on the unit.
●Recording media
microSD card✽/USB memory
✽High Capacity is supported up to Class10,
and eXtended Capacity is not supported.
●Recording format
FAT16, FAT32 compatibility
●Files with the .MP3 or .WMA extension
(Do not append files other than MP3
or WMA with the “.MP3” or “.WMA”
extension since this may cause noise or
malfunction.)
●Files with of 2 GB or less
Note, however, that when a file exceeding
1 GB is played, the display of the play
time sometimes stops.
●When purchasing microSD cards, select
a commercially available product that is
compliant with standards.
●Recording media incompatible with
microSD cards are not supported.
microSD card handling
precautions
●Do not fold or bend or drop microSD
cards.
●Do not wipe microSD cards with paint
thinner, benzene or other organic
solvents.
●During reading or writing, do not remove
microSD cards from the unit or turn the
engine key to the "OFF" position. Doing
so might result in damage or loss of
recorded data.
●When using microSD cards on the unit,
also read the warning and cautionary
instructions provided by the manufacturer
of the personal computer and peripheral
devices.
●Do not leave microSD cards at places
where they are likely to get hot, such as
on the dashboard or at places subject
to direct sunlight. Doing so might
cause them to become deformed or
malfunction.
●Do not touch the terminal surface of
microSD cards with your hands or metal
objects.
●Do not optimize microSD cards.
●We recommend backing up important
data stored on microSD cards.
Audio files that can be
played on the unit
CD-ROM, CD-R, CD-RW, DVD-R, DVD-RW,
DVD+R, DVD+RW (from here on, NX603
only), microSD cards, and USB memory
recorded with MP3 or WMA files can be
played on the unit.
MP3 stands for MPEG Audio Layer 3,
and is a standard format relating to audio
compression technology.
MP3 files hold music data compressed to
about 1/10 of its original size.
WMA stands for Windows Media Audio, and
is an audio compression format original to
Microsoft Corporation.
MP3 and WMA discs (NX603 only) and files
that can be played are as follows:
●Recording media✽ 1:
CD-ROM, CD-R, CD-RW, DVD-R, DVD-
RW, DVD+R, DVD+RW
●Recording format:
CD: ISO9660 level 1/level 2, Joliet,
Romeo
DVD: UDF (Ver1.02/1.5/2.0), UDF-bridge
●Packet writing is not supported.
●Files with the .MP3 or .WMA extension
(Do not append files other than MP3
or WMA with the “.MP3” or “.WMA”
extension since this may cause noise or
malfunction.)
✽1 Up to 40 sessions on discs recorded with
multi-session support can be played.
(Multi-session is not supported on DVD-R/
RW and DVD+R/RW.)
MEMO
sDisplay of the play time sometimes
deviates when MP3 and WMA VBR files
are played, or fast-forwarded or rewound.
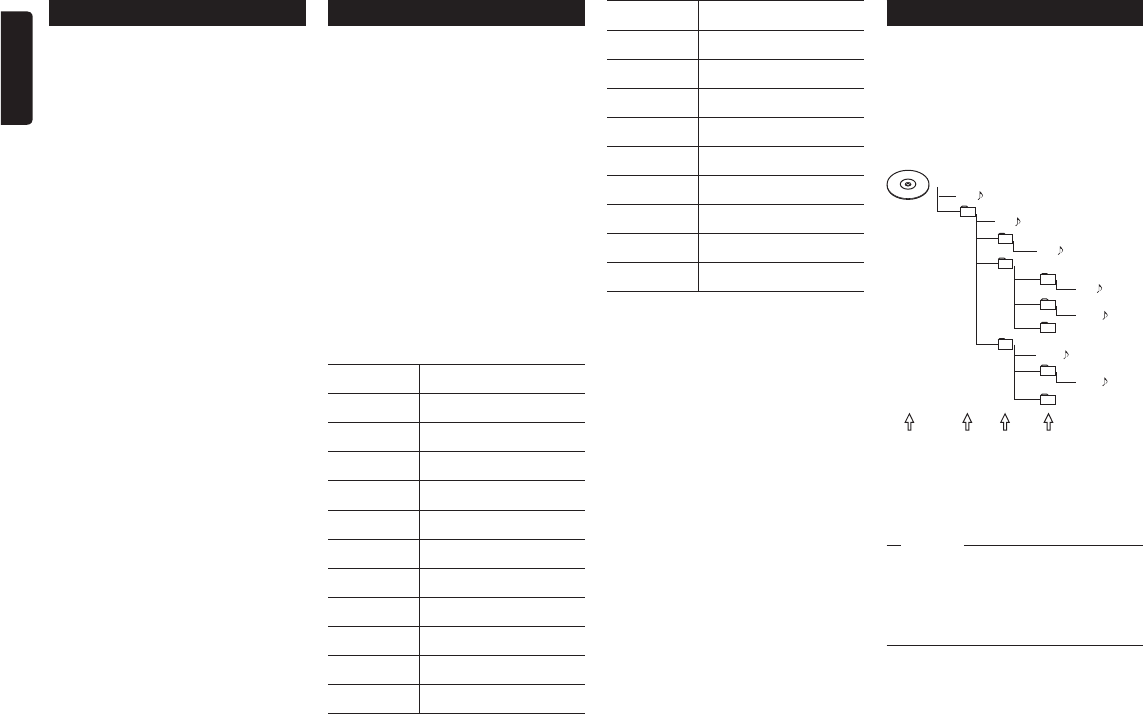
48 NX603/FX503
English
MP3 files
●ID3-Tag: Display of Ver1.x, 2.x album
(displayed as Disc Title), track (displayed
as Track Title) and artist (displayed as
Track Artist) are supported.
●Emphasis: Supported only when playing
44.1 kHz files
●Playable sampling frequencies
MPEG1: 44.1 kHz/48 kHz/32 kHz
MPEG2: 22.05 kHz/24 kHz/16 kHz
MPEG2.5: 11.025 kHz/12 kHz/8 kHz
✽In terms of audio quality, 44.1 kHz or
higher is recommended.
●Playable bitrates
MPEG1: 32 kbps to 320 kbps/VBR
MPEG2: 8 kbps to 160 kbps/VBR
MPEG2.5: 8 kbps to 160 kbps/VBR
✽In terms of audio quality, 128 kbps or
higher is recommended.
●Jumping sometimes occurs with files
recorded at the following sampling
frequencies and bitrates:
Sampling frequency: 16 kHz or less
Bitrate: 8 kbps or less
●MP3i (MP3 interactive) and mp3 PRO
format are not supported.
●Skipping sometimes occurs depending
the data content of the MP3 file.
●Files with a short recording time
sometimes cannot be played.
●When discs (NX603 only)/microSD
cards/USB memory contain large data
other than music data, tunes sometimes
cannot be played.
●Display of the play time sometimes
deviates when low bitrate files are
played, or fast-forwarded or rewound.
●When TAG information is changed in TAG
editing software other than Windows
Media Player or iTunes®, TAGs are
sometimes not displayed properly.
WMA files
●Characters in album names sometimes
are corrupted depending on the software
on the PC where the names were made.
●WMA9 Professional, WMA9 Voice and
WMA9 lossless format are not supported.
●When discs (NX603 only)/microSD
cards/USB memory contain large data
other than music data, tunes sometimes
cannot be played.
●Display of the play time sometimes
deviates depending on the data content
of the WMA file. Also, skipping or
jumping sometimes occurs partially or
noise sometimes occurs depending on
the bitrate.
●The sampling frequency and bitrates
that can be played differ according to
the recording version. Refer to the table
below.
Bitrate (kbps) Sampling frequency (kHz)
192 44.1
160 44.1
128 44.1
96 44.1
80 44.1
64 44.1/32
48 44.1/32
44 32
40 32
36 32
32 48/44.1/32/22.05
Bitrate (kbps) Sampling frequency (kHz)
22 32/22.05
20 44.1/32/22.05/16
16 22.05/16
12 16/8
10 16/11.025
8 11.025✽ /8✽
68
✽
58
✽
VBR 48/44.1
✽Jumping sometimes occurs.
Folder structure of discs
The maximum number of folders, files and
tracks on discs are as follows:
Folders: 255 (including root)
Files: 512
Tracks: 255 per folder
The following is an illustration of a disc
recorded with MP3 and WMA files (example,
layers 1 to 4 of the folder hierarchy).
(1)-- Song A
(2)
(3)-- Song B
(4)
(5)-- Song C
(6)
(7) (8)-- Song D
(9)
(10)-- Song E
(11)
(12)
(13)-- Song F
(14)
(15)-- Song G
(16)
Level 1
(Root)
Level
2
Level
3
Level
4
Folders without tunes are skipped to
determine the play order.
The play order in the case of the above figure
becomes (1)p(3)p(5)p(8)p(10)p(13)p(15).
Notice
sIn the case of discs, playing files down to
eight layers (including the root directory)
is supported, though it may take time
until play starts when the disc has lots of
folders.
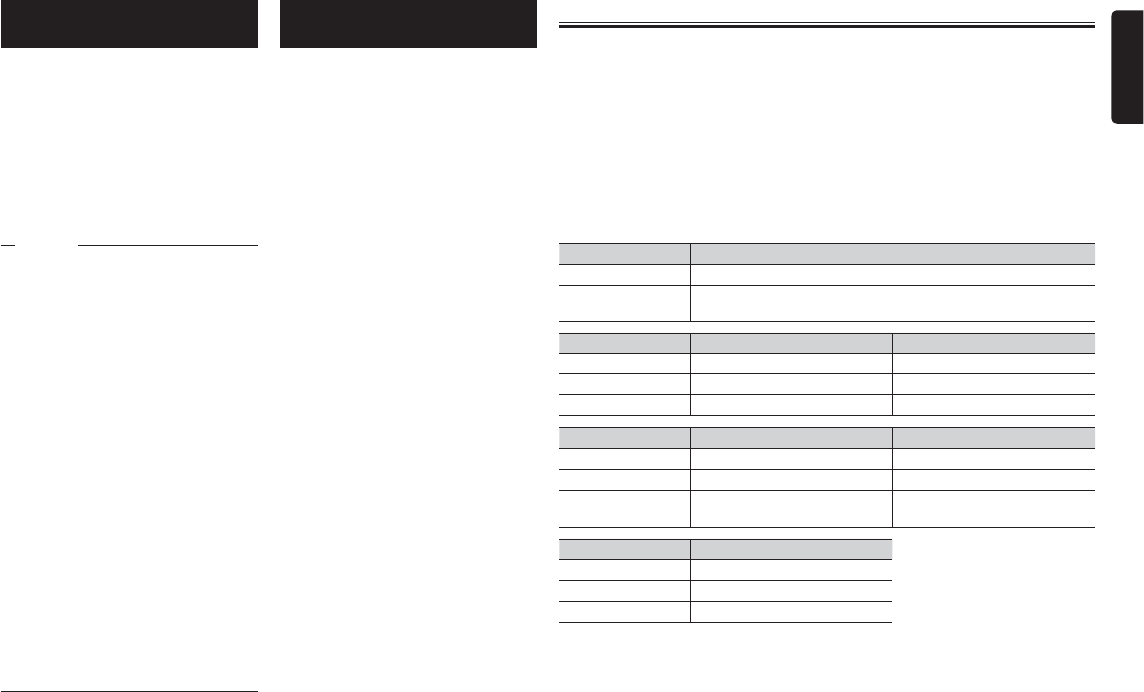
NX603/FX503 49
English
Folder structure of microSD
card/USB memory
Music data can be recognized in eight
layers of the folder hierarchy (excluding
the root) on both microSD cards and USB
memory. Only MP3 and WMA music data
in these layers is recognized. There is no
designation as to which layer data must be
placed.
Limit the total number of characters in folder
names and file names to 250 characters for
both 2-byte and 1-byte characters.
MEMO
sFolders not containing MP3 and WMA
files are not recognized.
sIn the case of microSD cards and USB
memory, play of files down to eight layers
(including the root directory) is supported,
though it may take time until play starts
when the card or memory has lots of
folders.
sWhen a folder contains 255 or more
tracks, the tracks that are recognized
change according to the order in which
data is written to the personal computer.
sWhen a folder contains files other than
MP3 and WMA, the number of tracks that
are recognized may be reduced.
sThe maximum number of folders, files
and tracks that can be recognized are as
follows:
Folders: 512
Files: 8,000
Tracks: 255 per folder
sWhen there are files on the 1st layer, they
are placed in the “MASTER FOLDER” in
the folder list screen.
Notes for playing back MP3
and WMA on the unit
●When folders, files and tracks are
recorded beyond their maximum
numbers, folders, files and tracks over
the respective maximum number are not
recognized. Also, the display order of
folders and files on the unit differs from
the display on a personal computer.
●In the case of long file names that
contain folders, files in those folders
sometimes cannot be played.
●When displaying MP3 or WMA file
names, part of the extension (./.m/.mp/.
W/.WM) may be left behind following
the file name depending on the length
of the file name. If this happens, adjust
the length of file names you create. (The
length of file names on which part of the
extension is left behind depends on the
file system you are using.)
●Music files protected by copyright on
both microSD cards and USB memory
cannot be played on the unit.
Video files that can be played on the unit (NX603 only)
CD-ROM, CD-R, CD-RW, DVD-R, DVD-RW, DVD+R, and DVD+RW recorded with DivX
content can be played on the unit. DivX discs and files that can be played are as follows:
●Recording media:
CD-ROM, CD-R, CD-RW, DVD-R, DVD-RW, DVD+R, DVD+RW
●Recording format:
UDF (Ver1.02/1.5/2.0), UDF-Bridge, ISO9660 Level1, ISO9660 Level2, Joliet, Romeo
●Packet writing is not supported.
●Files with the .DivX or .AVI extension (Do not append files other than DivX with the “.DivX”
or “.AVI” extension since this may cause noise or malfunction.)
●Profile: DivX Home Theater Profile
●Container format: AVI
●Version: Ver.1.0 supported (Ver.2.0 or later not supported)
Video codec DivX Ver.3,Ver.4,Ver.5,Ver.6
Bit rate kbps 4854 or less
Resolution Play at 30 fps: 32 x 32 to 720 x 480
Play at 25 fps: 32 x 32 to 720 x 576
Audio codec MP3(MPEG1/2 AudioLayer-3) MPEG-BC(MPEG1/2 AudioLayer-2)
Bit rate (kbps) 16~320 16~320
Sampling rate (kHz) 16,22.05,24,32,44.1,48 16,22.05,24,32,44.1,48
Audio Coding mode 1/0,2/0,Dual,Mono,MP3,Surround 1/0,2/0,Dual Mono
Audio codec MPEG2.5 AC3
Bit rate (kbps) 6~160 32~640
Sampling rate (kHz) 8,11.025,12 32,44.1,48
Audio Coding mode 1/0,2/0,Dual,Mono 1/0,2/0,3/0,2/1,3/1,2/2,3/2,Dual
Mono
Audio codec LPCM
Bit rate (kbps) 8,11.025,12,16,22.05,24,32,44.1,48
Quantization bit rate 8,16
Audio Coding mode 1/0,2/0

50 NX603/FX503
English
Warranty and customer
support
■Warranty
This product is provided with a Warranty. Be
sure to check the information and keep the
form in a safe place.
■Warranty period
Check the warranty period written on the
Warranty.
■Repair after end of warranty period
If performance can be maintained by
repairing this product, we shall repair it for
a charge in accordance with the customer’s
wishes.
Specifications
Navigation (GPS) unit (NX603 only)
Reception frequency: 1575.42 MHz
C/A code
Sensitivity: -130 dBm or less
Number of channels: Parallel 13
LCD monitor
Screen size: 6.2"
Display method: Transmission type
TN liquid crystal
panel
Drive method: TFT (thin-film
transistor)
Active matrix
Drive method
Number of pixels: 1,152,000
[800 (H) x 480 (V)
x 3 (RGB)]
CD player (NX603 only)
Frequency characteristics:20 Hz to 20 kHz
Signal-to-noise ratio: 80 dB
Total distortion factor
: 0.05% (1 kHz)
DVD player (NX603 only)
Frequency characteristics:20 Hz to 20 kHz
Signal-to-noise ratio: 80 dB
Total distortion factor
: 0.05% (1 kHz)
FM tuner
Reception frequency: 76.0 MHz to
90.0 MHz
Practical sensitivity: 8 dBμV
AM tuner
Reception frequency: 522 kHz to
1,629 kHz
Practical sensitivity: 30 dBμV
Audio unit
Rated output: 18 W x 4
(10%, 4
:)
Max. momentary output: 47 W x 4
Compatible impedance:
4
:
Country code
Name of country Country
code
Entry
number
Bermuda BM 6677
Canada CA 6765
United States US 8583
Daily care and handling
Daily care and handling of
main unit
Pay attention to the following points when
performing daily care on the main unit.
●When performing daily care on the main
unit, wipe lightly with a soft, dry cloth.
If dirt is stubborn, wipe lightly with a soft
cloth moistened with a small amount of
neutral detergent diluted with water, and
then finish by wiping with a dry cloth. If
liquid gets into the cracks of the device,
this may cause a malfunction.
✽When performing daily care on the main
unit, never use benzene or paint thinner,
car cleaner, polish spray, or similar fluids.
Doing so might cause fire.
Also, leaving rubber or plastic products in
contact with the cabinet for long periods
of time may cause stains.
●Occasionally wipe off any dust that
adheres to the LCD display with a soft,
dry cloth.
NX603/FX503 51
English
Bluetooth unit
Reception frequency: 2402 MHz to
2480 MHz
(1 MHz increments)
Reception sensitivity: -70 dBm or less
Standard: Version 2.1+EDR
Common sections
Rated voltage: 14.4 V
(permissible voltage
range 10.8 to 15.6 V)
Grounding method: Minus ground
Current consumption: Approx. 4 A (at 1 W)
Power Output: 18 Watts RMS×4 Channels
at 4 Ohms and d 1% THD+N
Signal to Noise Ratio: 76 dBA
(reference: 1 Watt into 4 Ohms)
Trademarks
●This product incorporates copyright
protection technology that is protected
by U.S. patents and other intellectual
property rights. Use of this copyright
protection technology must be authorized
by Rovi Corporation, and is intended
for home and other limited viewing uses
only unless otherwise authorized by Rovi
Corporation. Reverse engineering or
disassembly is prohibited.
Use of this product by the customer
is restricted to play program materials
to which the Rovi copyright protection
process has been applied. (NX603 only)
●Manufactured under license from Dolby
Laboratories.
“Dolby” and the double-D symbol are
trademarks of Dolby Laboratories.
(NX603 only)
● is the trademark of DVD Format/
Logo Licensing Corporation. (NX603
only)
●“SDHC memory card,” “SD memory
card,” “miniSDTM”, and “microSDTM” are
registered trademarks of the SD Card
Association.
●“Made for iPod” and “Made for
iPhone”mean that an electronic
accessory has been designed to
connect specifically to iPod, or iPhone,
respectively, and has been certified by
the developer to meet
Apple performance standards. Apple is
not responsible for the operation of this
device or its compliance with safety and
regulatory standards. Please note that
the use of this accessory with iPod or
iPhone may affect wireless performance.
iPhone, iPod, iPod classic, iPod nano,
iPod touch, and iTunes are trademarks
of Apple Inc., registered in the U.S. and
other countries.
●DivX®, DivX Certified® and associated
logos are trademarks of Rovi Corporation
or its subsidiaries and are used under
license.
DivX Certified® to play DivX® video,
including premium content.
Covered by one or more of the following
U.S. patents:7,295,673; 7,460,668;
7,515,710; 7,519,274 (NX603 only)
●SiriusXM™ and all related marks and
logos are trademarks of Sirius XM Radio,
Inc. All rights reserved.
●Pandora, the Pandora logo and other
Pandora marks are trademarks or
registered trademarks of Pandora Media,
Inc. or its subsidiaries worldwide.
If you have any issues with the Pandora
application on your mobile phone,
please direct them to pandora-support@
pandora.com.
●The Bluetooth® word mark and logos
are registered trademarks owned by
Bluetooth SIG, Inc. and any use of
such marks by Clarion Co.,Ltd, is under
license.
●The terms HDMI and HDMI High-
Definition Multimedia Interface, and the
HDMI Logo are trademarks or registered
trademarks of HDMI Licensing LLC in the
United States and other countries.
●Android is the trademark of Google Inc.
●How to get source code that is
considered open source
This unit uses open source software.
If you want to get this software’s source
code, you can download it from our
website.
Refer to the following website about
getting the source code.
http://www.clarion.com/us/en/support/
index.html

52 NX603/FX503
English
Disposal, transfer and
resale of this product
The following describes the cautions when
reselling or transferring the unit to a third
party or disposing of it.
Deletion of data from the unit
When reselling or transferring the unit to
a third party or disposing of it, please pay
attention to the following points and please
delete all data at your own responsibility.
To protect your privacy...
Initialize (delete) all data (registration lists,
maintenance information, etc.) including
individual information saved to memory by
following the procedure below.
To protect copyright...
Initialize (delete) all image data saved in
memory by following the procedure below.
There is the risk that copyrighted data
might infringe on copyright laws if the unit
is transferred (for a charge or free of charge)
or resold with data still left on it without the
consent of the copyright holder.
✽Clarion bears no responsibility for damages
to the customer due to leakage of leftover
data, the customer is responsible for
managing data appropriately as described
above.
Deleting data (initializing)
Delete (initialize) all data saved on the unit.
1 MENU
2 Reset to Factory Setting
The confirmation screen is displayed.
3 OK
This clears all data saved on the unit.
MEMO
sData after updates is saved, initialization
is not done to programs that are updated.
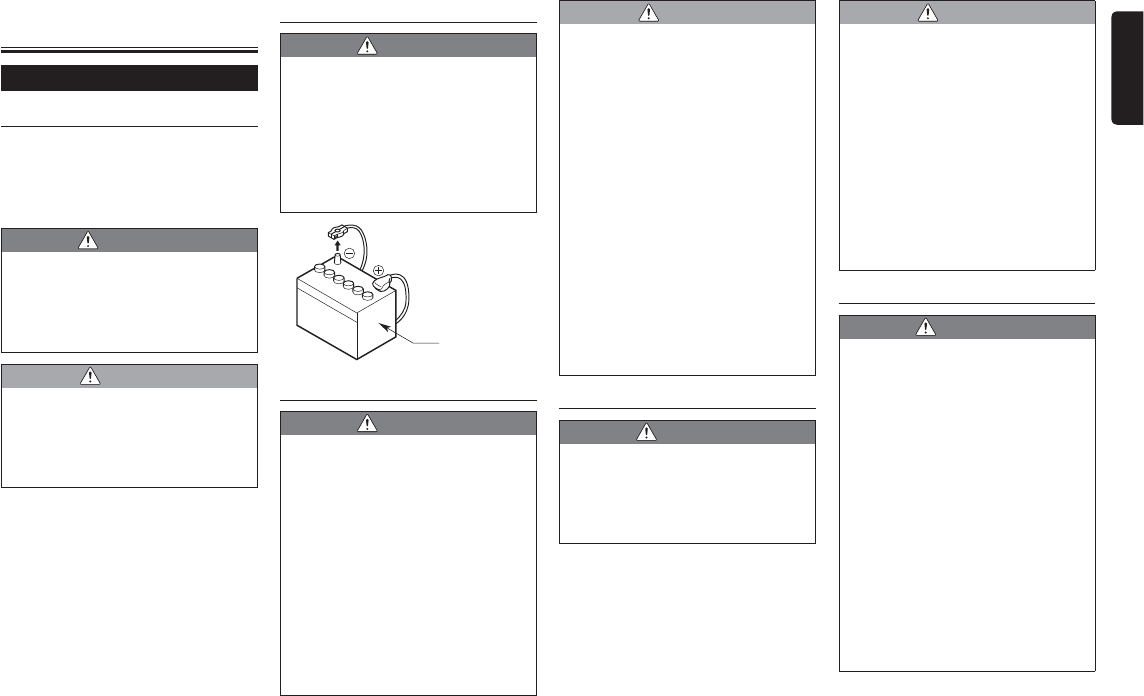
NX603/FX503 53
English
INSTALLATION AND WIRE
CONNECTION MANUAL
1. SAFETY PRECAUTIONS
Symbol Identification
This manual uses symbols and icons to
indicate safety precautions and concerns
during the installation procedure. Be sure
to carefully read and understand each
precaution prior to beginning the installation.
WARNING
s This symbol is intended to alert the
user to the presence of important
operating instructions. Failure to
heed the instructions may result in
severe injury or death.
CAUTION
s This symbol is intended to alert the
user to the presence of important
operating instructions. Failure to
heed the instructions can result in
injury or material damage.
Before Use
WARNING
s Confirm the battery voltage of the
vehicle to be installed. This unit is
designed only for vehicles with DC
12V power supply.
s Disconnect the negative terminal of
the battery before connecting wires,
otherwise an electric shock, injury
by short circuit may occur.
Car battery
Installation Precautions
WARNING
s When installing the unit to a vehicle
with an airbag system, never install
it in a place where it may affect the
operation of the airbag.
s Do not install this unit in the
following locations:
A location interfering with the
driver’s visual range or operation.
A location where the gear shift or
brake pedal are hindered.
A location where passengers are at
risk.
An unstable location, or where the
system may fall.
CAUTION
s Do not install the system in the
locations described below. This may
cause a fire, accident or electrical
shock:
A location exposed to rain or dust.
An unstable location, or where the
system may fall.
s Do not install this unit in a place
exposed to direct sunlight, heat or a
place where the vent holes or heat
radiation holes are covered.
s When you install the antenna, mount
it in a place where the elements of
the antenna do not protrude beyond
the edge of the front, back, left and
right of the vehicle.
If it comes in contact with
pedestrians, it may cause an
accident.
Installation Notes
WARNING
s Please note the position of pipes,
tanks and electrical wirings before
installing the unit into the vehicle;
failure in avoiding these may cause
a fire or malfunction.
CAUTION
s Use only the supplied parts.
If unspecified parts are used, they
may cause damage.
s Any holes made in the body of the
vehicle should be sealed with a
silicon adhesive.
If exhaust fumes or water penetrates
into the vehicle, this may cause an
accident.
s Fasten the bolts securely when
installing the unit. If the bolts are
loose an accident or malfunction
could occur.
Connection Notes
WARNING
s Loom all cables according to the
instruction manual, so as not to
hinder operation.
s Wire the connecting cords/cables
away from high temperature areas.
If the coatings of the cables melt,
it could cause an accident/fire by a
short circuit.
Take care when wiring in the engine
compartment.
s When wiring the connecting cables
in a vehicle with an airbag system,
never feed the cables through
a place where it may affect the
operation of the airbag.
An airbag not operating correctly in
an emergency may cause increased
injury.
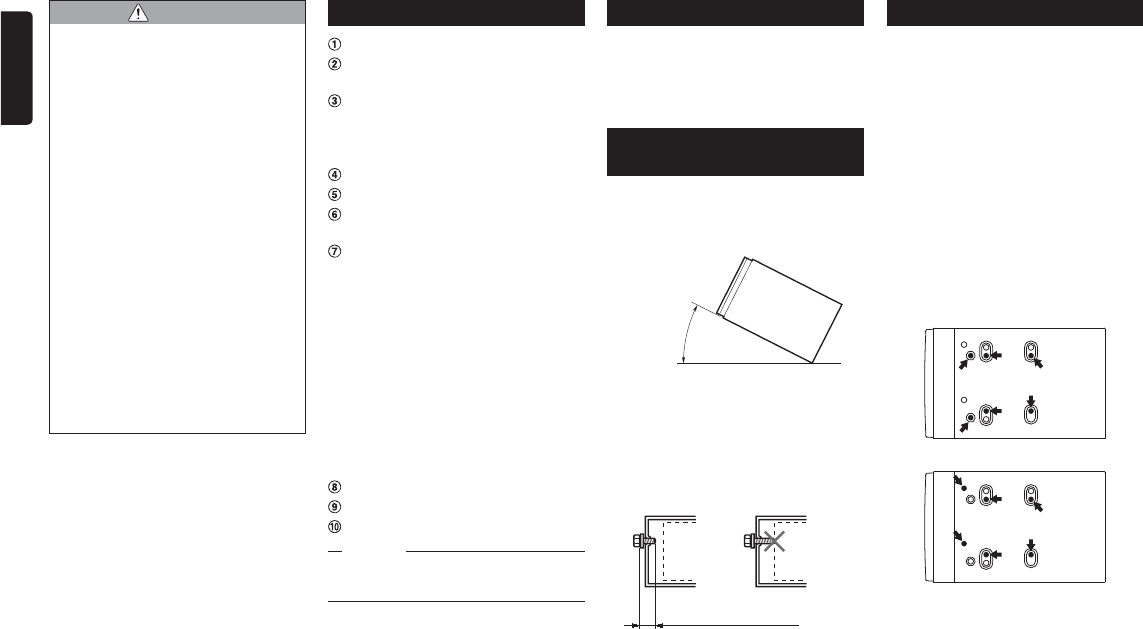
54 NX603/FX503
English
CAUTION
s Verify wires with a digital multi-meter
prior to making any connections.
Many new vehicles use multiplexed
and/or low voltage circuits that can
be damaged if a test light or logic
probe is used.
s Connect cables appropriately. If a
wrong connection is made, this may
cause a fire or accident.
s When passing cables through
the body of the vehicle, use non-
conductive grommets.
If the coatings of the cables are
worn out by rubbing, this may cause
an accident, fire or a short circuit.
s After wiring cables, fix them with
insulation tape.
s Be sure to switch off the vehicle
when connecting or disconnecting
cables to/from the unit, otherwise
an electric shock, injury or accident
may occur.
2. PACKAGE CONTENTS
Main unit
Quick Start Guide & Installation
Manual
CD-ROM
sOwner’s manual
sOwner’s manual - Navigation (NX603
only)
Power supply cable
RCA pin cable (6ch)
RCA pin cable (Rear AUX-IN/Rear
Video Out)
Bag for accessories
sFlat head screw (M5 × 8 mm)
............................................................8
sHexagonal bolt (M5 × 8 mm)
............................................................8
sRubber cap (for RCA pin cable)
..........................................................10
sCable holder (NX603 only)
………………………………………… 3
sDouble-sided tape for fastening GPS
antenna (NX603 only)
………………………………………… 1
sCable tie ……………………………… 1
Finisher
Warranty card
GPS antenna(NX603 only)
Notice
sThe provided disc (CD-ROM manual)
cannot be played back on this unit.
3. GENERAL CAUTIONS
●Do not open the case. There are no user-
serviceable parts inside. If you drop
anything into the unit during installation,
consult your dealer or an authorized
Clarion service center.
4. CAUTIONS ON
INSTALLATION
●Prepare all articles necessary for
installing the main unit before starting.
●Install the unit within 30° of the horizontal
plane. (Figure 1)
Max. 30°
Figure 1
●If you have to do any modification on the
car body, such as drilling holes, consult
your car dealer beforehand.
●Use the included screws for installation.
Using other screws can cause damage.
(Figure 2)
Figure 2
Chassis Chassis
Damage
Max. 3 mm (M4 screw)/
Max. 8 mm (M5 screw)
5. INSTALLING THE MAIN UNIT
This unit is designed for fixed installation in
the dashboard.
●When installing the main unit in NISSAN
vehicles, use the parts attached to the
unit and follow the instructions in Figure
3.
When installing the main unit in TOYOTA
vehicles, use the parts attached to the
vehicle and follow the instructions in
Figure 4.
●Wire as shown in Section 9p P.57.
●Reassemble and secure the unit in the
dashboard and set the face panel and
center panel.
■Mounting Screw Holes (Side View
of the Main Unit)
For NISSAN vehicle
For TOYOTA vehicle
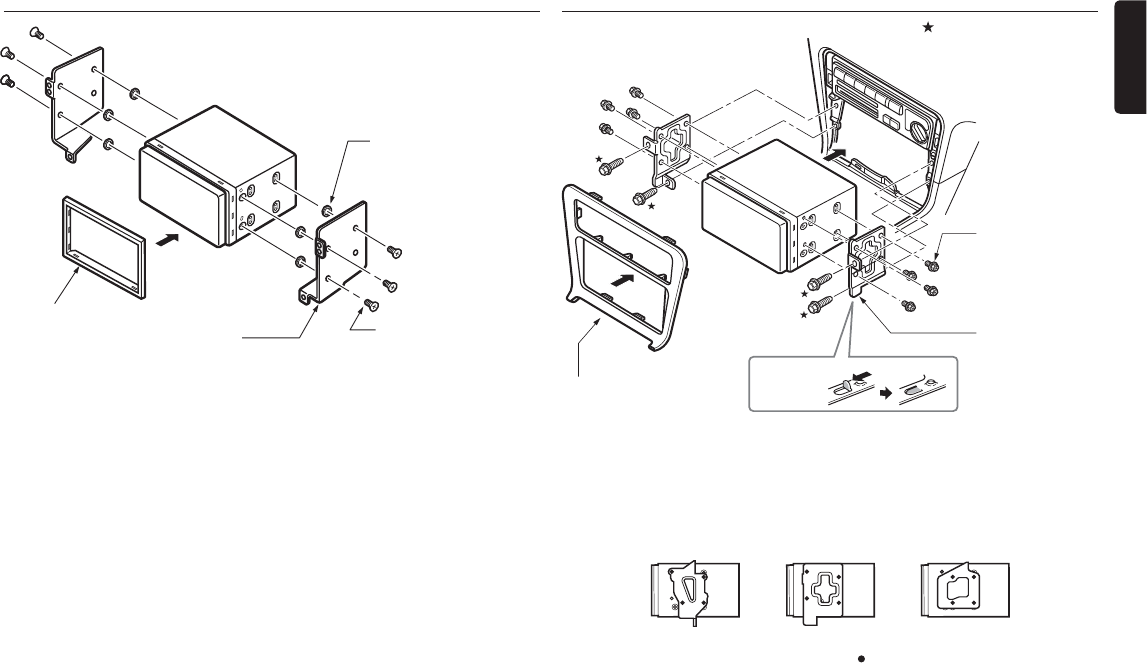
NX603/FX503 55
English
Installing the Main Unit in a NISSAN Vehicle
Figure 3
Mounting bracket
(1 pair for the left and right sides)
6-Spacer (thickness: 1 mm)
6-Flat head screw
(M5 x 8)
(attached to the main unit)
Main Unit
Finisher ✽1
✽1 Position the face panel with its wide edge at the bottom. Fit the edge into the groove of the main
unit.
Installing the Main Unit in a TOYOTA Vehicle
Install by using parts attached to the vehicle. (Screws marked are attached to the vehicle.)
Figure 4
✽3
Mounting bracket
(1 pair for the left
and right sides)
8-Hexagonal screw
(M5 x 8)
Main Unit
Center Panel ✽2
✽2 Some panel openings are too small for the unit depending on the vehicle type and model. In
such a case, trim the upper and lower sides of the panel frame by about 0.5 to 1.5 mm so the
unit can be inserted smoothly.
✽3 If a hook on the installation bracket interferes with the unit, bend and flatten it with a nipper or
similar tool.
■Typical Mounting Brackets
Example 1 Example 2 Example 3
Affix the screws to the marks.
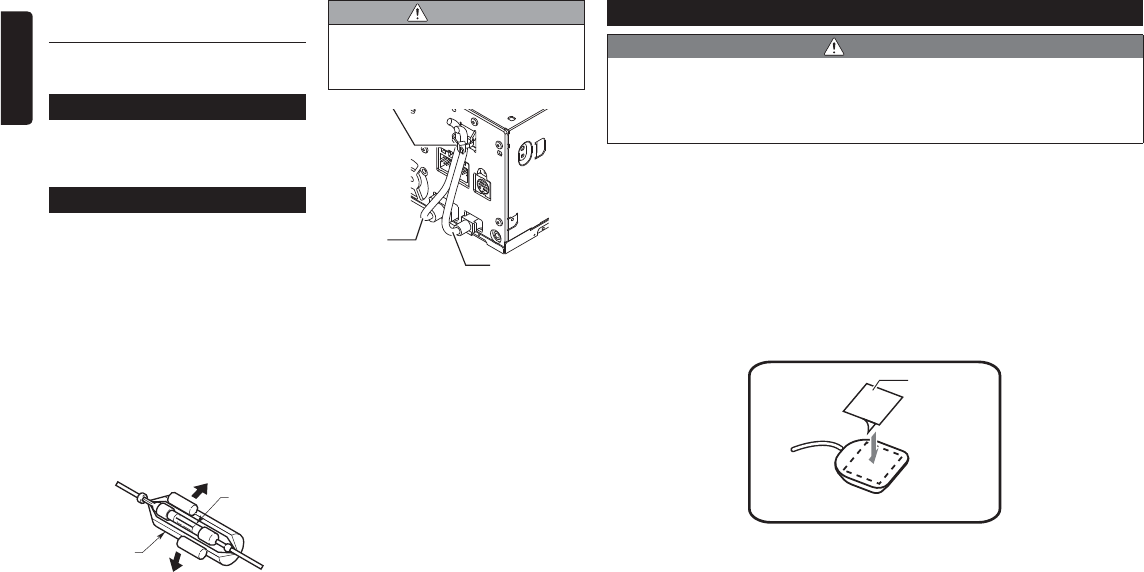
56 NX603/FX503
English
8. INSTALLING THE GPS ANTENNA (NX603 ONLY)
WARNING
s Do not install the GPS antenna in a place where it may interfere with the operation
of the airbag or hinder the driver’s visual range.
s Do not use the navigation system with the GPS antenna cable cut off. The power
line in the cable may be short-circuited.
●The supplied GPS antenna is for installing inside the vehicle. Do not install it outside the
vehicle.
●Install the GPS antenna more than 19.7in (50 cm) away from the main unit, other audio
devices such as CD player, and a radar detector. If it is installed near these devices, GPS
reception may be impaired.
●To improve the GPS signal reception, install the GPS antenna horizontally on a flat plane.
●Do not wax or paint the cover of the GPS antenna. This may reduce the performance of
the GPS antenna.
●Install the GPS antenna at least 3.9in (10 cm) away from the windshield.
●Wipe off the dirt of the mounting surface before installing the GPS antenna.
●Stick the double-sided tape to the bottom face of the GPS antenna.
Double-sided
tape
Bottom face of the GPS antenna
Vehicles other than NISSAN and
TOYOTA
In some cases the center panel may require
modification. (Trimming, filing, etc.)
6. REMOVING THE MAIN UNIT
When the main unit is to be removed,
disassemble it in the reverse of the order in
“INSTALLTING THE MAIN UNIT”.p P.54
7. CAUTIONS ON WIRING
●Be sure to turn the power off before
wiring.
Be particularly careful where you route
the wires.
●Keep them well away from the engine,
and exhaust pipe, etc. Heat may damage
the wires.
●If the fuse should blow, check to see if
the wiring is correct.
If a fuse is blown, replace it with a new
one of the same specification as the
original.
●To replace the fuse, remove the old fuse
of the power supply cable and insert the
new one. (Figure 5)
Fuse holder
Fuse (15A
FUSE)
Figure 5
●There are various types of fuse holder.
Do not let the battery side touch other
metal parts.
CAUTION
s After connecting the HDMI and USB
cables to the unit, use a cable tie to
tie them down. (Figure 6)
Cable tie
USB Cable
HDMI
Cable
Figure 6

NX603/FX503 57
English
●Mount the GPS antenna.
Stick it surely on a flat plane of the passenger-side dashboard where GPS signal
interruption is minimized.
●Wire the GPS antenna cable.
Fasten the cable using the Cable holders.
GPS antenna
Cable holder
(Shows an example in case of the left-hand traffic.)
9. WIRE CONNECTION
Radio antenna jack
Microphone (sold
separately)
GPS antenna
jack (NX603
only)
Refer to the following
page.
Right
Left
Black
Black
Yellow
Red
White
Red
White
audio input
terminal
video output
terminal
SiriusXM-
Connect
Vehicle Tuner
terminal (sold
separately)
Rear
audio
output
terminal
Android
smartphone
Android
smartphone
External
Amplifier
Rear Monitor
Steering
wheel remote
control
terminal (sold
separately)
Rear Vision
Camera
terminal
Purple
Right
Left
Gray Red
White
Front
audio
output
terminal
Subwoofer
output
terminal
(MONO 2ch)
Right
Left
Yellow
White
Right
Left
video input
terminal
Gray iPod/iPhone
HDMI cable
(sold separately)
HDMI/MHL
conversion adapter
HDMI/MHL
conversion cable
or
Black
Red
USB terminal
Connection cable
(CCA-750)
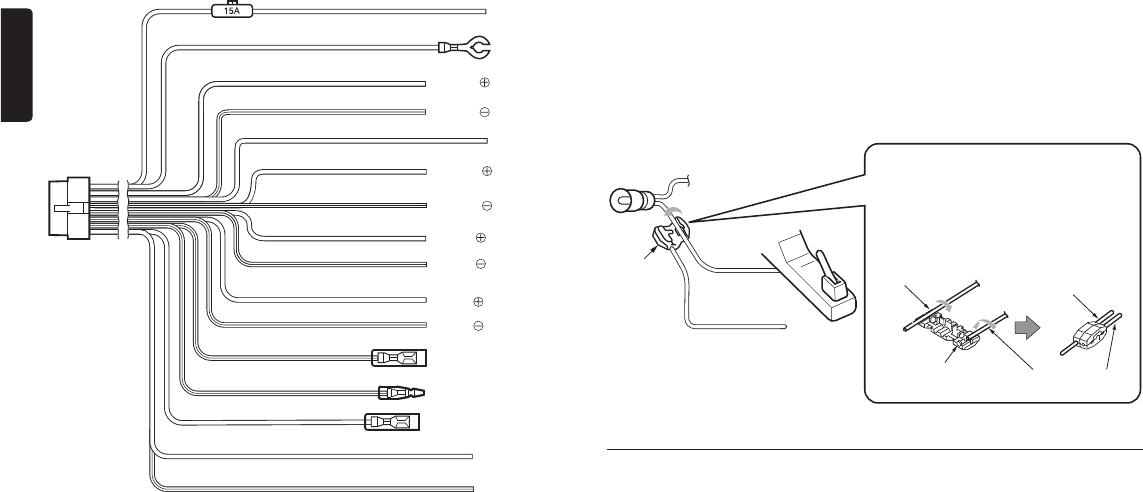
58 NX603/FX503
English
Yellow
Black
Purple
Purple/Black
Red
Gray
Gray/Black
White
White/Black
Green
Green/Black
Blue/White
Orange/White
Blue
Grass-green
Purple/white
Reverse gear lead
Parking brake lead
Auto antenna
Illumination
Amplifier turn-on lead
Rear left
Rear left
Front left
Front left
Front right
Front right
+12V accessory
Rear right
Rear right
Ground
+12V main power
See next page for how to connect the parking brake lead.
■Connecting the parking brake lead
Connect the lead to parking brake lamp ground in the meter panel.
●Connecting the parking brake lead to lamp ground allows you to watch video images
when the parking brake is engaged.
●When the parking brake lead is not connected, the monitor will not display video images.
●If “Audio Only” appears on the screen just after turning on the ACC power of the car,
release the parking brake while confirming safety, and then engage the parking brake
again.
Parking brake lamp
Electro-tap
(sold
separately)
Parking brake lead
(Grass-green)
Parking brake
signal lead
Parking brake
+ lead to battery
● How to attach the electro-tap
1. Place the Parking brake lead at the stopper,
and fold it back in the direction of the arrow.
2. Pass the Parking brake signal lead through,
and fold it back in the direction of the arrow.
Parking brake
signal lead
Stopper
Parking brake
signal lead
Parking brake lead
(Grass-green)
Connecting the Accessories
■Connection to the Rear Vision Camera for vehicle
The Rear Vision Camera for vehicle can be connected to optional Rear Vision Camera input
cable (CCA-644) with RCA pin cable. For detailed information, refer to the instruction sheet
or manual for the Rear Vision Camera.
●Be sure to connect the reverse gear lead to the vehicle’s relevant terminal.
●Connect the Rear Vision Camera to the RCA pin cable; if not, the screen turns black
while the gearshift lever is in the reverse gear position.
■SiriusXM-Connect Vehicle Tuner
Connect this tuner to SiriusXM-Connect Vehicle Tuner terminal.
For more information on how to install the SiriusXM Connect Vehicle tuner, consult the
installation guide included with the tuner.

NX603/FX503 59
English
Index
■A
Adjusting volume
Audio-visual …………………………… 11
Phone …………………………………… 32
AM/FM selection ………………………… 11
Angle(DVD Video) ………………………… 16
Antitheft Activation ……………………… 39
Antitheft Indicator ………………………… 39
Audio Language(DVD Video) …………… 16
Audio Level(AUX) ………………………… 27
Automatic tuning
Radio …………………………………… 11
Auto store
Radio …………………………………… 12
AUX ………………………………………… 26
AV control bar display key ……………… 11
■B
Balance/Fader …………………………… 40
Bluetooth ………………………………… 29
Bluetooth Audio ………………………… 25
Bluetooth ON/OFF ……………………… 29
Brightness ………………………………… 41
BT Devices Connection ………………… 40
Button Beeps …………………………… 39
■C
CD …………………………………… 18, 46
Channel Lock …………………………… 14
Channel Lock Password ………………… 14
Check connectivity ……………………… 39
Clock Format(24h) ……………………… 39
Connection Method(iPod) ……………… 24
Country Code ……………………… 18, 50
■D
Day/Night Mode ………………………… 41
Default Audio Language ………………… 17
Default Menu Language ………………… 17
Default Subtitle Language ……………… 17
Deleting incoming call/outgoing call logs
…………………………………………… 31
Deleting phonebook …………………… 32
Deleting registered cellphones ………… 30
DISP ………………………………………… 8
Display Adjustment
AUX …………………………………… 27
DVD Video ……………………………… 16
iPod Video ……………………………… 24
Rear Vision Camera …………………… 37
Display Mode
AUX …………………………………… 27
DVD Video ……………………………… 16
DivX ……………………………………… 20
DivX VOD ………………………………… 41
DVD Video …………………………… 15, 46
■E
EJECT button ……………………………… 7
■G
Graphic Equalizer ………………………… 40
Guideline ………………………………… 37
■H
Handset Phonebook …………………… 31
High Pass Filter ………………………… 40
■I
Illumination Color ………………………… 39
In-Car-Device setting …………………… 40
Inserting and removing microSD cards 10
Inserting/removing discs ………………… 10
iPod Audio ………………………………… 22
iPod Video ………………………………… 22
■L
Loudness ………………………………… 40
Low Pass Filter …………………………… 40
■M
Main Menu Icons ………………………… 38
Making calls
Handset Phonebook ………………… 32
Incoming/outgoing calls log ………… 31
Telephone number …………………… 31
Manually registering stations
Radio …………………………………… 12
Manual tuning
Radio …………………………………… 12
MENU ………………………………… 7, 8, 9
microSD card ……………………… 20, 47
MP3 ………………………………… 18, 47
■N
NAVI AV ……………………………………… 7
■O
Operation panel …………………………… 7
OS ………………………………………… 41
■P
Pairing …………………………………… 29
Pandora Radio …………………………… 28
Parental Control Password ……………… 18
Parental Level …………………………… 18
Play from list
Bluetooth Audio ……………………… 25
CD ……………………………………… 19
microSD card ………………………… 21
MP3 …………………………………… 19
USB memory ………………………… 21
WMA …………………………………… 19
Play from menus
DVD Video ……………………………… 16
Playing under specified conditions
Bluetooth Audio ……………………… 25
iPod Audio ……………………………… 24
iPod Video ……………………………… 24
POWER ……………………………………… 8
Preset channel
Radio …………………………………… 12
SiriusXM Radio ………………………… 13
■Q
Quasi Bumper …………………………… 38
■R
Radio ……………………………………… 11
Rear Monitor ……………………………… 38
Rear Vision Camera ……………………… 36
Receiving calls …………………………… 32
reception band …………………………… 12
Remote control …………………………… 34
Repeat play
Bluetooth Audio ……………………… 26
CD ……………………………………… 19
DVD Video ……………………………… 15
iPod Audio ……………………………… 23
iPod Video ……………………………… 23
microSD card ………………………… 21
MP3 …………………………………… 19
USB memory ………………………… 21
WMA …………………………………… 19
Reset to Factory Setting ………………… 52
Rotary volume key ………………………… 7
■S
Scan play
CD ……………………………………… 19
microSD card ………………………… 21
MP3 …………………………………… 19
USB memory ………………………… 21
WMA …………………………………… 19
Shortcut Menu ………………………… 9, 39
Shuffle play
Bluetooth Audio ……………………… 26
CD ……………………………………… 19
iPod Audio ……………………………… 23
microSD card ………………………… 21
MP3 …………………………………… 19
USB memory ………………………… 21
WMA …………………………………… 19
SiriusXM Radio ID ……………………… 12
SiriusXM Satellite Radio ………………… 12
Sizing Monitor
DVD Video ……………………………… 17
Smart Access ……………………… 7, 8, 33
Smartphone linking ……………………… 33
Sound Restorer…………………………… 40
Station(Pandora Radio) ………………… 28
Subtitle Language(DVD Video) ………… 16
Sub Woofer Control ……………………… 40
Switching cellphone connections ……… 30
Switching display screen ……………… 11
System Language ……………………… 38

60 NX603/FX503
English
■T
Time ……………………………………… 39
Title/Chapter ……………………………… 16
Tuning
SiriusXM Radio ………………………… 13
Tuning from list
Radio …………………………………… 12
Turning off the screen …………………… 11
Turning power ON/OFF …………………… 9
■U
USB memory ………………………… 20, 47
■V
Virtual Bass ……………………………… 40
Vocal Image Control …………………… 40
volume ……………………………………7, 8
Volume Smoother ………………………… 41
■W
WMA ………………………………… 18, 47

All Rights Reserved. Copyright © 2013: Clarion Co., Ltd.
2013/2
QY-1010U
QZ-3010U
QCA-500-100