Fibar Group FGKF601 Fibaro KeyFob User Manual Manual 1of2
Fibar Group S.A. Fibaro KeyFob Manual 1of2
UserManual.wiki
>
Fibar Group
>
FGKF601 User Manual
>
Manual 1of2
Contents
1.
Manual 1of2
2.
Manual 2of2
Manual 1of2
Navigation menu
Upload a User Manual
Namespaces
Wiki Guide
HTML
PDF
Info
Views
User Manual
Discussion / Help
Navigation
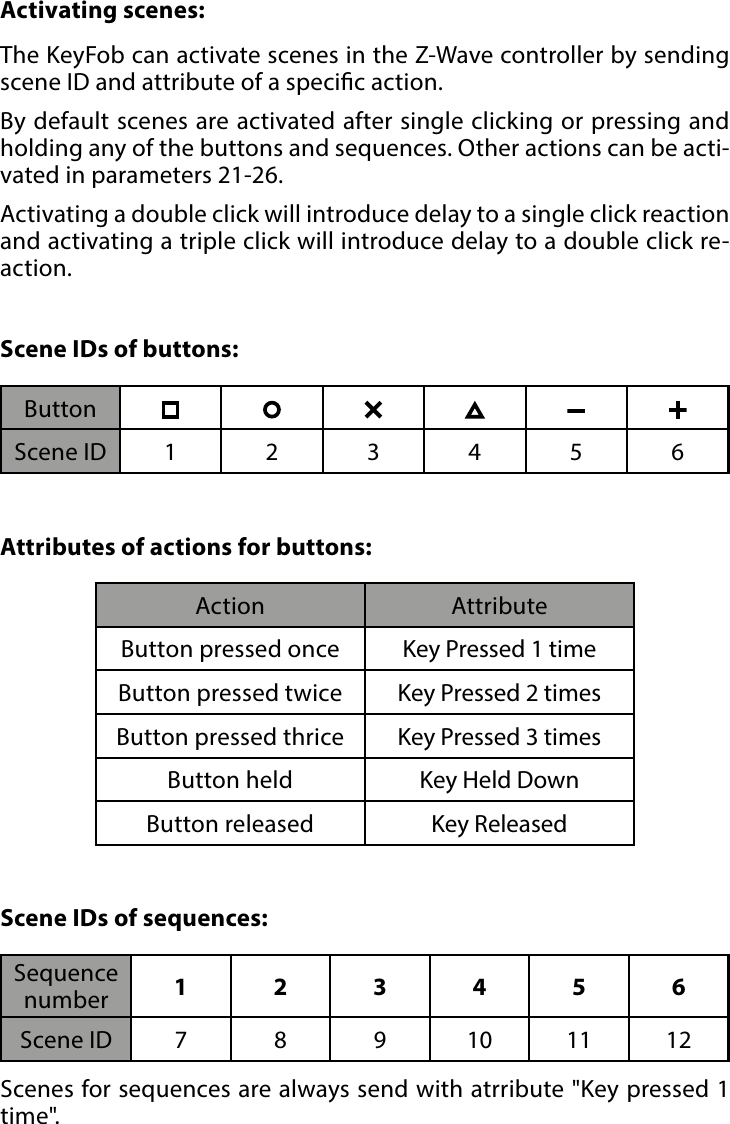
![9LOCK MODESetting the unlocking sequence using advanced parameter: 1. Calculate value of parameter using table and formula:Value of parameter = Value of rst button + + 8 * Value of second button + 64 * Value of third button + + 512 * Value of third button + 4096 * Value of third button 2. Change the value of parameter 1 [2 bytes] to calculated value.3. Press and simultaneously to wake up the device.4. Wait for the device to congure.ButtonValue 123456Setting time to lock and locking button using advanced parameter: 1. Calculate value of parameter using table and formula: Time to lock should be 0 or 5-255 (seconds)Value of parameter = Time to lock in seconds + + 256 * Value of locking button 2. Change the value of parameter 2 [2 bytes] to calculated value.3. Press and simultaneously to wake up the device.4. Wait for the device to congure.ButtonValue 123456](https://usermanual.wiki/Fibar-Group/FGKF601.Manual-1of2/User-Guide-3330742-Page-9.png)
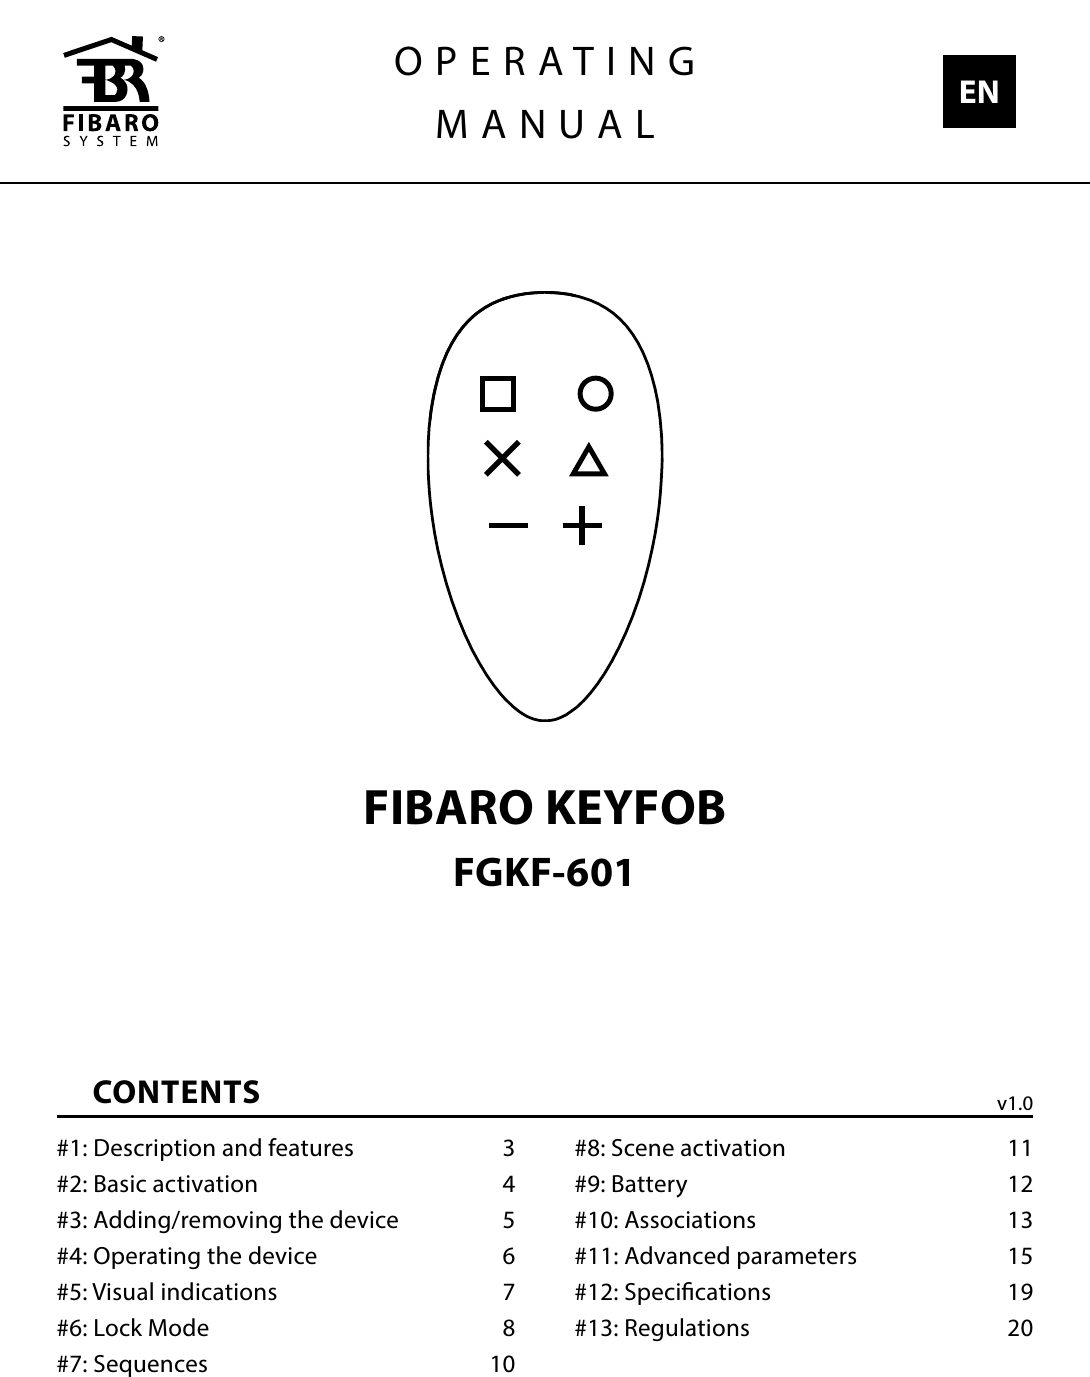
![10SEQUENCES#7: SequencesSequences:User can create sequences of two to ve button to expand number of possible actions. Every sequence sends corresponding Scene ID to the Z-Wave controller with attribute "Key pressed 1 time" (see "Scene activation" on page 11). Sequences are saved in advanced parameters (no. 3-8).Activating sequence introduces delay in single, double and tripple press actions for rst button in the sequence.Rules of creating sequences:• Maximum of six sequences can be created. • Each sequence must be unique. • Sequence can consist of two to ve button pushes.• Sequence can contain multiple presses of the same button.Setting a new sequence using advanced parameter: 1. Calculate value of parameter using table and formula:Value of parameter = Value of rst button + + 8 * Value of second button + 64 * Value of third button + + 512 * Value of third button + 4096 * Value of third button 2. Change the value of corresponding parameter [2 bytes] (parame-ters 3 to 8 for slots 1 to 6).3. Press and simultaneously to wake up the device.4. Wait for the device to congure.ButtonValue 123456Setting a new sequence using Home Center conguration interface: 1. Go to the device options by clicking the icon: 2. Clicking “Add a new sequence”.3. Select sequence of 2 to 5 buttons.4. Select reaction to sequence.5. Save conguration.6. Press and simultaneously to wake up the device.7. Wait for the device to congure.](https://usermanual.wiki/Fibar-Group/FGKF601.Manual-1of2/User-Guide-3330742-Page-10.png)