Fimi Srl 802170 DIGITAL TRANSMISSION SYSTEM User Manual User Man a
Fimi Srl DIGITAL TRANSMISSION SYSTEM User Man a
Fimi Srl >
Contents
- 1. User Man a
- 2. UserMan b
- 3. UserMan a
- 4. User Man b
- 5. GZM802170 UserMan1
- 6. GZM802170 UserMan2
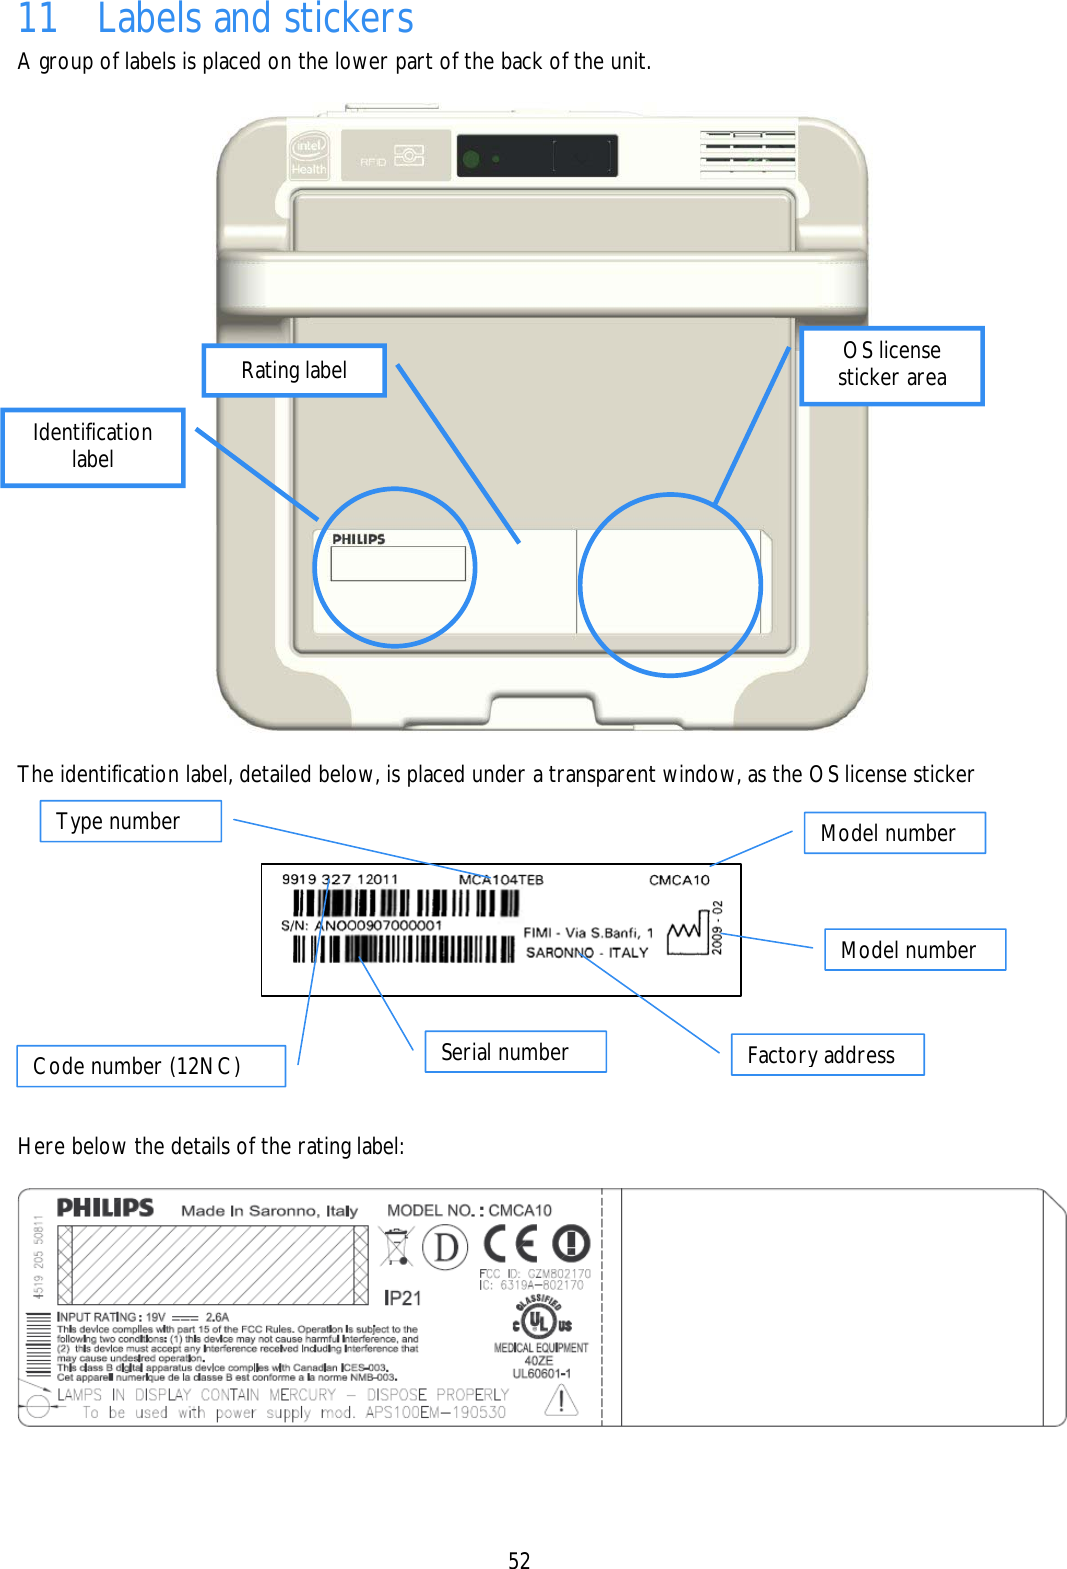
User Man a


UserMan a