First Computer MH47CW Notebook Computer With 802.11b Wireless LAN User Manual MH47 English manual final
First International Computer Inc Notebook Computer With 802.11b Wireless LAN MH47 English manual final
Contents
- 1. Users manual 1
- 2. Users manual 2
- 3. Users manual 3
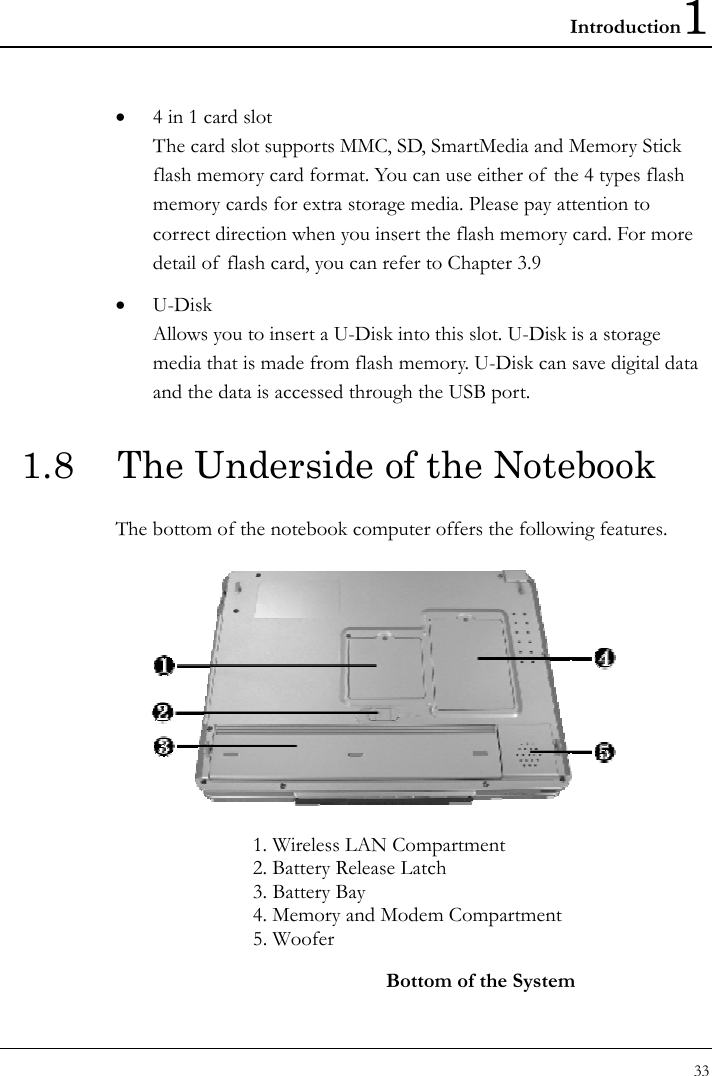
Users manual 1