First Computer T700 Tablet PC User Manual Manual 1
First International Computer Inc Tablet PC Manual 1
UserManual.wiki
>
First Computer
>
T700 User Manual
>
Manual 1
Contents
1.
Manual 1
2.
Manual 2
Manual 1
Navigation menu
Upload a User Manual
Namespaces
Wiki Guide
HTML
PDF
Info
Views
User Manual
Discussion / Help
Navigation


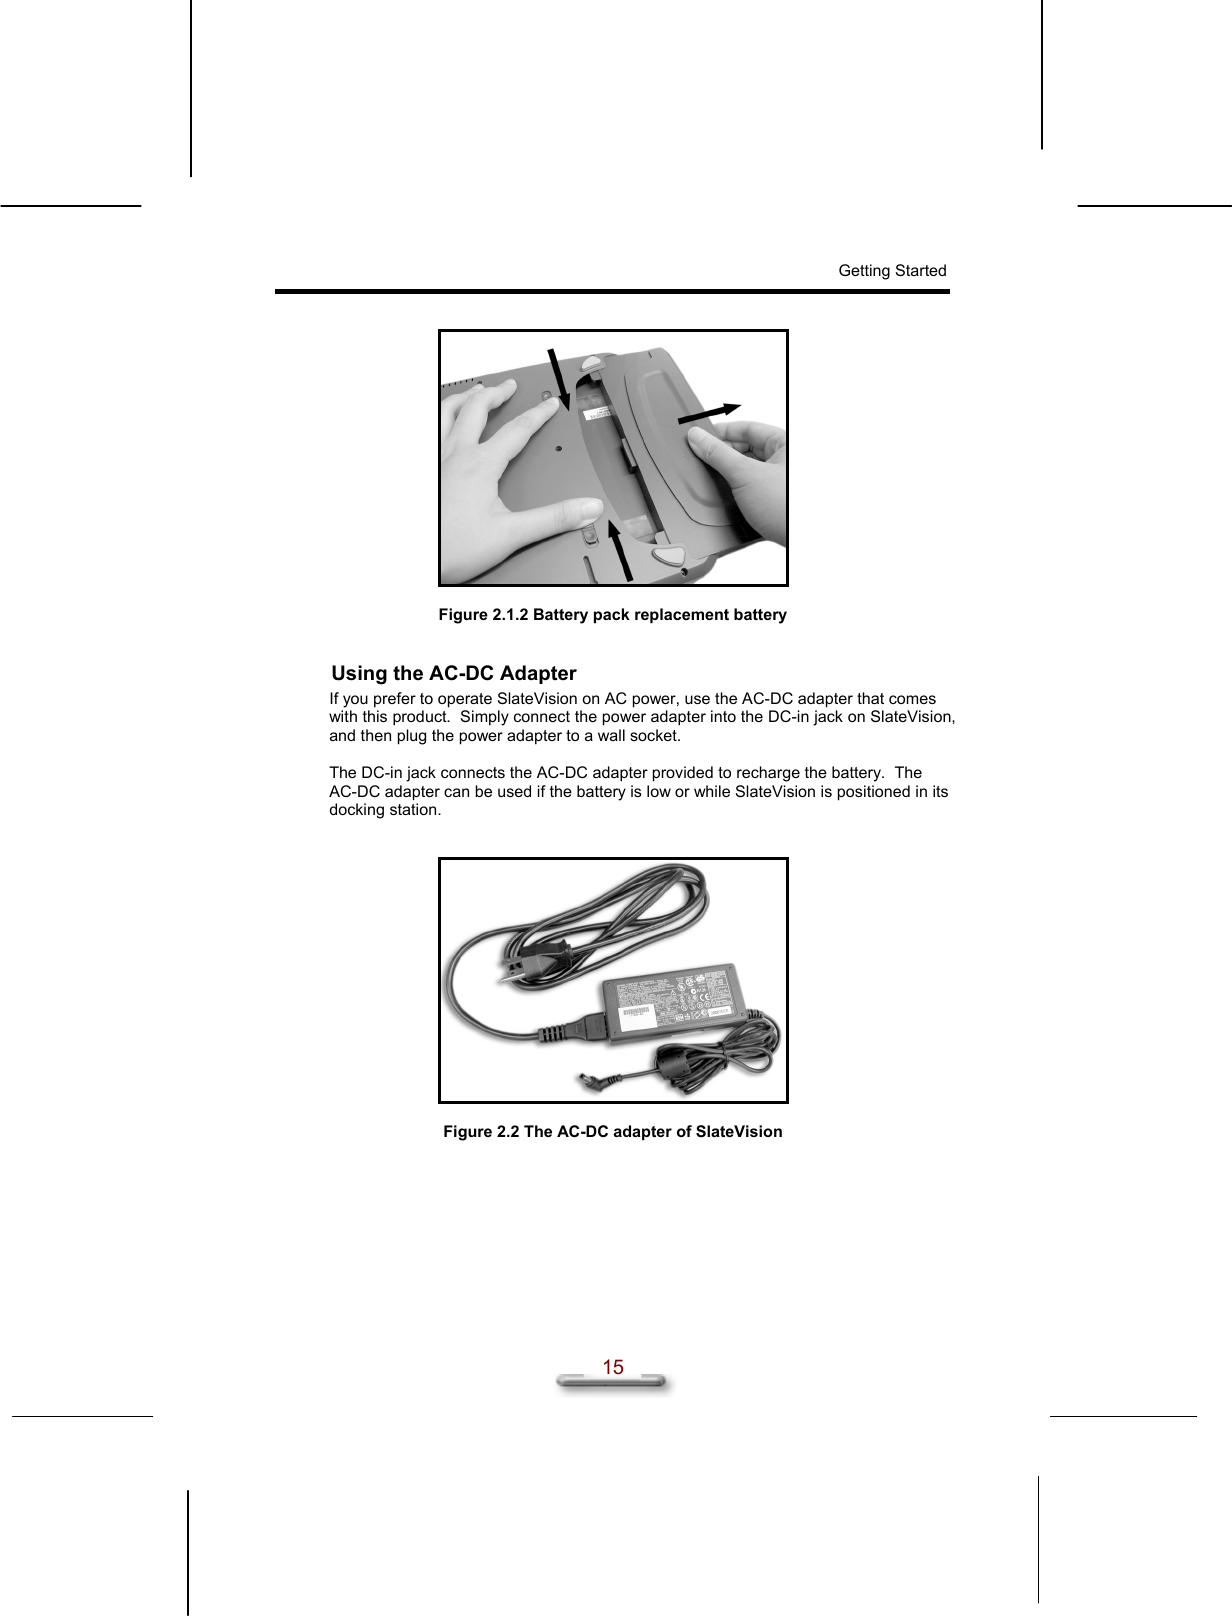
![SlateVision System User Guide 14 Preparing the Power Supply SlateVision features a two-way power supply that lets you use either batteries or a household AC current. Using Battery The primary source of SlateVision power is a battery pack. The 6-cell 3600 mAH Lithium-Ion battery combined with the Code Morphing Software advantage of the Crusoe processor allows up to 3 - 5 hours of battery life at full on operation (with www access). The battery pack is visible and accessible from rear of SlateVision. Recharging is available using the AC-DC adapter provided with SlateVision. It is not necessary to access the battery pack except to replace a fresh battery pack. To remove the battery pack, follow these steps: Turn off SlateVision power. Slide the latch from right to left orientation as shown in [Figure. 2.1.1] and [Figure. 2.1.2] below. Slide the latch first, and then slide the battery from left to right orientation as shown in [Figure. 2.1.1] and [Figure. 2.1.2] below. Remove the discharged batteries and replace with new Lithium battery. Turn on SlateVision power. Figure 2.1.1 Battery pack replacement battery](https://usermanual.wiki/First-Computer/T700.Manual-1/User-Guide-291617-Page-14.png)

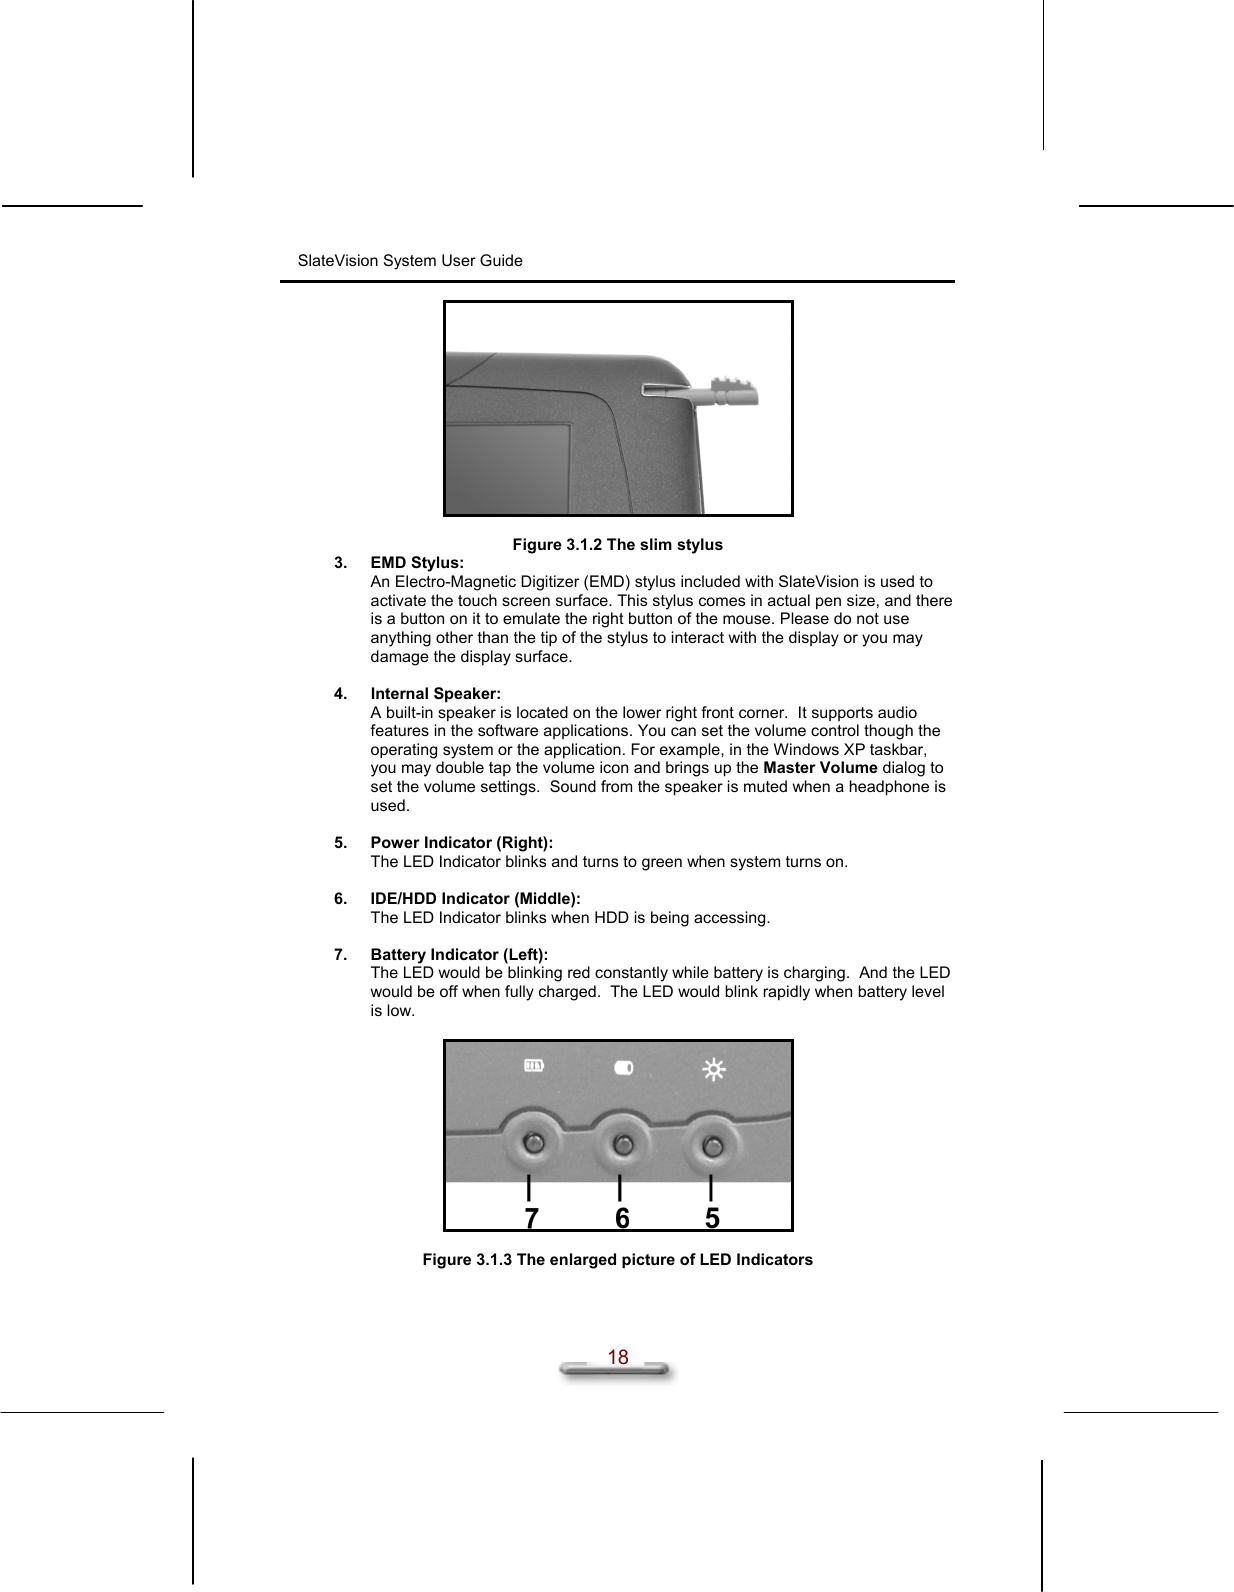
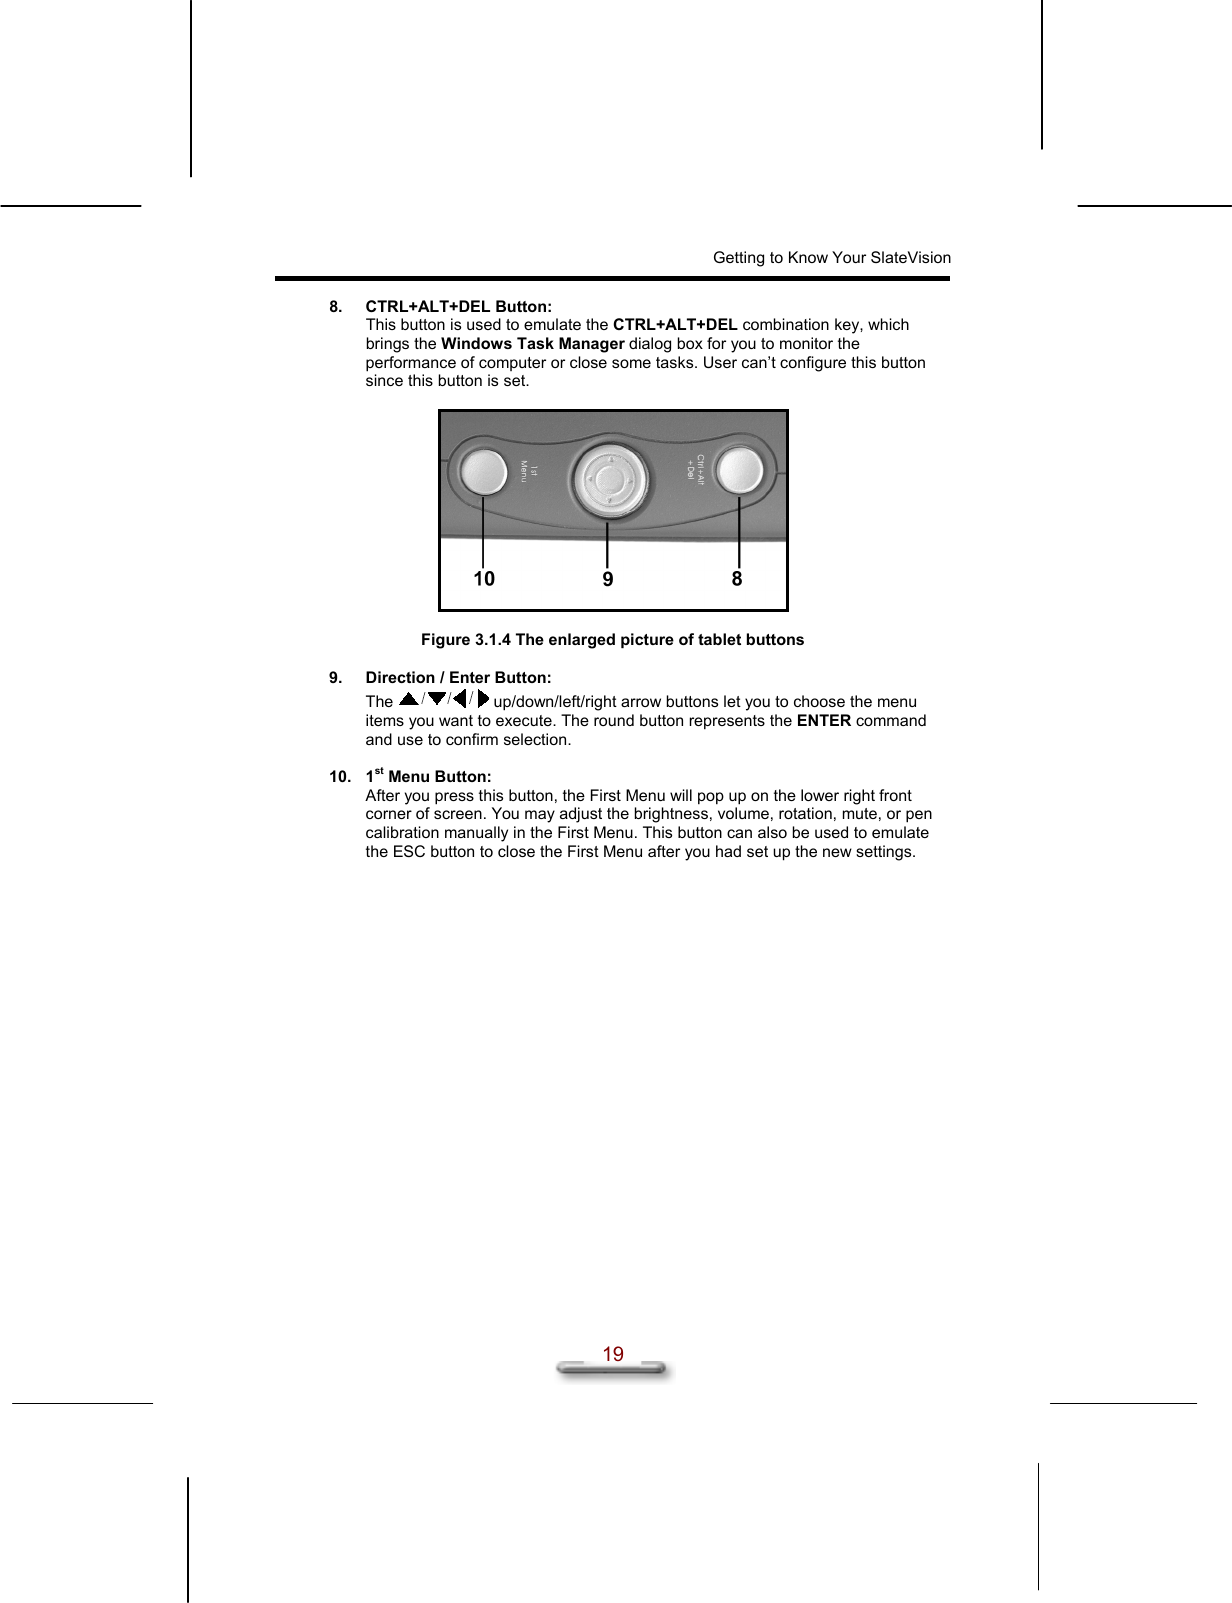
![17 CChhaapptteerr 33 GGeettttiinngg ttoo KKnnooww YYoouurr SSllaatteeVViissiioonn Front View Features are shown in [Figure 3.1.1], and are described as follows. Figure 3.1.1 Front View of SlateVision 1. TFT LCD Display: The wide 10.4’’ TFT-LCD LTPS integrates touch panel that provides 1024X768 XGA resolution in 16-bit high color, 124 dpi and portrait and landscape mode support makes SlateVision ideal for Internet browsing on the go. Data can be entered from the touch screen using the stylus and soft keyboard. The soft keyboard is displayed by tapping the bottom-left area on the screen. Data can also be entered via a USB keyboard plugged into the USB port of SlateVision. The USB ports of SlateVision support most USB keyboards and pointing devices. 2. Slim Stylus: SlateVision offers you two styluses for input data in Tablet PC. This is a slim stylus and you can remove this slim stylus from its slot on the edge of the LCD display. It is partially visible on the top right front corner.](https://usermanual.wiki/First-Computer/T700.Manual-1/User-Guide-291617-Page-17.png)
![SlateVision System User Guide 20 Right Side View Features are shown in [Figure 3.2.1], and are described as follows. Figure 3.2.1 Right Side View of SlateVision 1. Infrared Receiver/Transceiver: The FIR (IrDA) provides active sync and wireless data transferring interface, e.g., infrared printer, IR-aware computers. 2. Modem Jack: A built-in modem for you to connects to a phone line. 3. Ethernet Jack (RJ45): A built-in modem for you to connects to a phone line. Connect the SlateVision to your LAN via this Ethernet jack. Figure 3.2.2 4. Expansion PC Card Socket (PCMCIA Type II): PCMCIA cards can be inserted in this slot for added functionality and also supports Card Bus function. The built-in Mini PCI slot supports for Wireless LAN connection. Figure 3.2.3](https://usermanual.wiki/First-Computer/T700.Manual-1/User-Guide-291617-Page-20.png)
![Getting to Know Your SlateVision 21 Top View Features are shown in [Figure 3.3.1], and are described as follows. Figure 3.3.1 Top View of SlateVision 1. USB Port x 2: Connect USB peripheral devices to these 2 ports to take advantage of the universal functionality and flexibility of Plug and Play technology. The USB port supports most USB mouse and keyboard devices. It is recommended that the SlateVision be stored in the docking station when working on the USB keyboard or when using a USB mouse. 2. IEEE 1394 Connector: Use this connector to connect 1394-type devices, e.g., digital camcorder, digital camera, or 1394-type CD-RW, to these ports to take advantage of the higher speeding data transmission than USB. Figure 3.3.2](https://usermanual.wiki/First-Computer/T700.Manual-1/User-Guide-291617-Page-21.png)
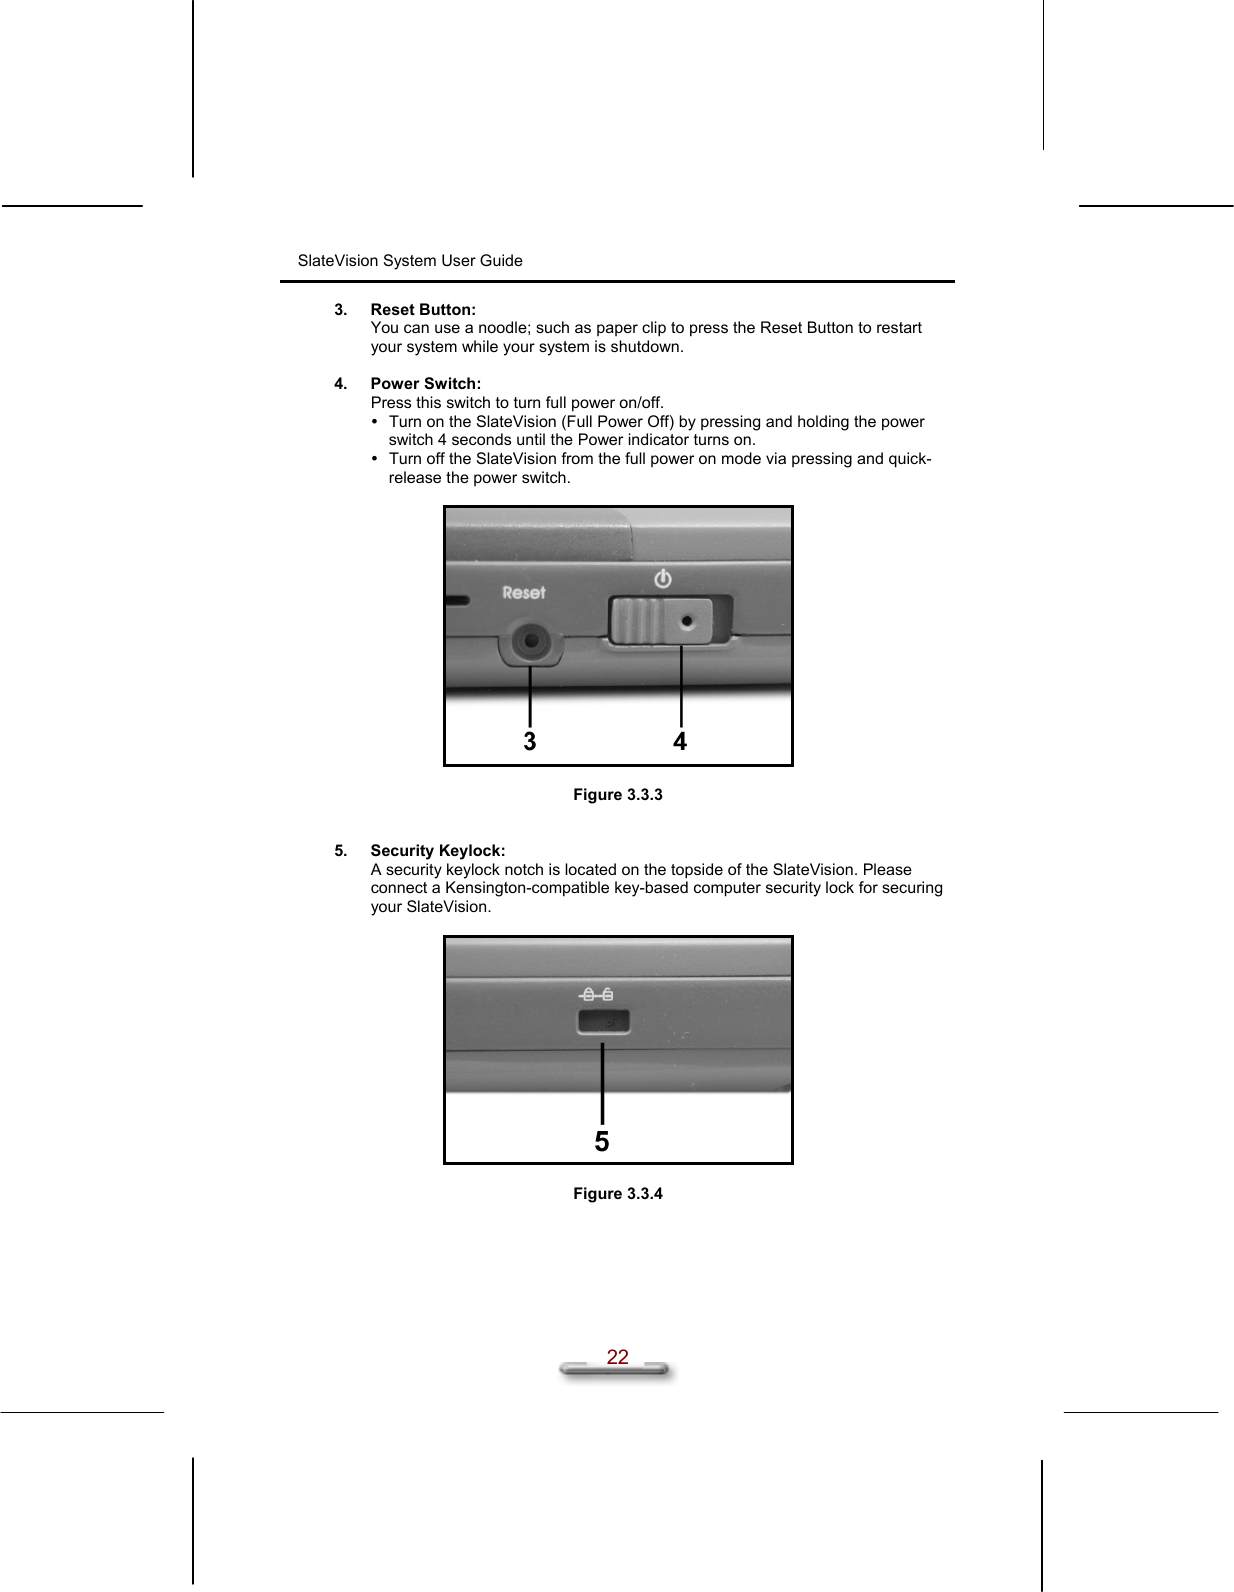
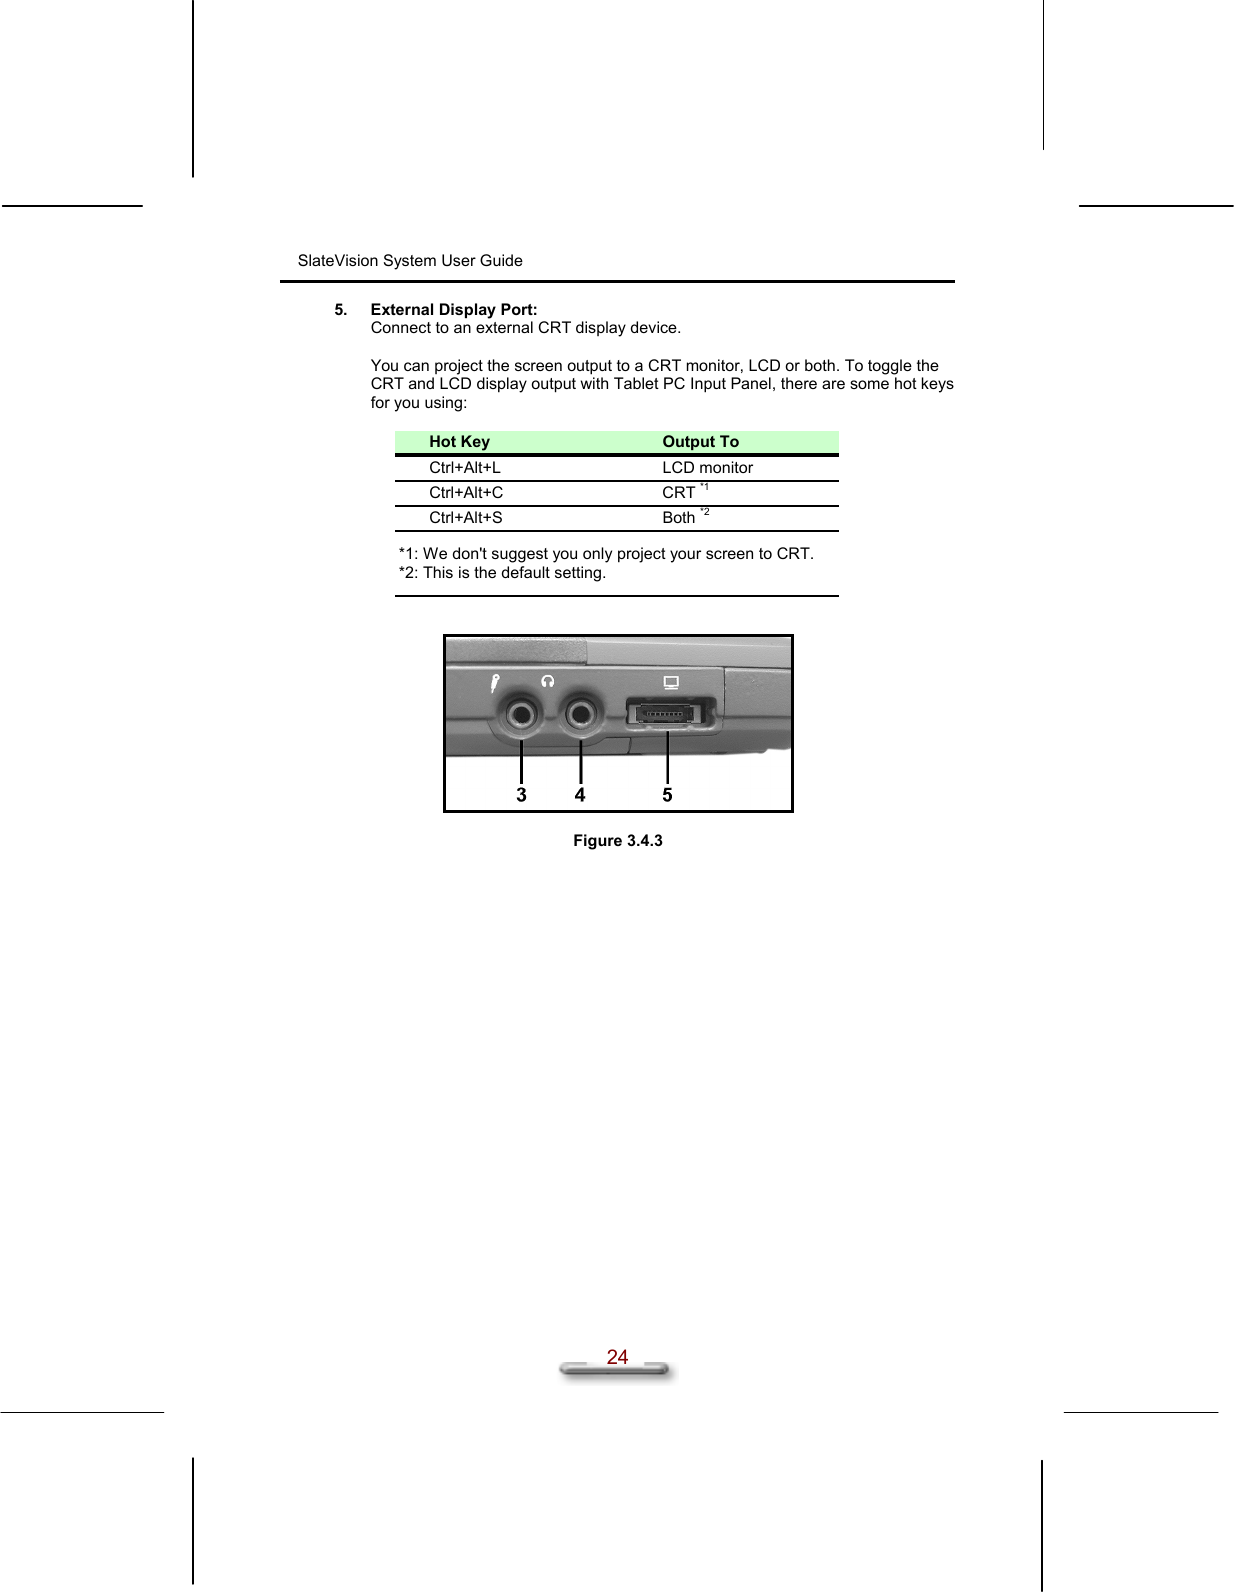
![Getting to Know Your SlateVision 23 Bottom View Features are shown in [Figure 3.4.1], and are described as follows. Figure 3.4.1 Right Side View of SlateVision 1. AC DC-in Power Jack: Plug the AC-DC adapter into this jack and to power the system. WARNING Before you plug the AC power cord, you must first check the voltage toggle switch setting is appropriate for your geographical area. 2. Female Connector to Docking Station: Place this female connector of SlateVision to the male connector on the docking station. Figure 3.4.2 3. Microphone In Jack: Plug the microphone into this jack for recording or voice-control functions. 4. Line Out (Earphone) Jack: Connect audio devices such as headphones or speakers to this jack.](https://usermanual.wiki/First-Computer/T700.Manual-1/User-Guide-291617-Page-23.png)
![Getting to Know Your SlateVision 25 Rear View Features are shown in [Figure 3.5.1], and are described as follows. Figure 3.5.1 Rear View of SlateVision Battery Cover: The 6-cell 3600 mAH Lithium-Ion battery combined with the Code Morphing Software advantage of the Crusoe processor allows up to 3 ~ 5 hours of battery life at full on operation. Figure 3.5.2 Location of the battery cover](https://usermanual.wiki/First-Computer/T700.Manual-1/User-Guide-291617-Page-25.png)