Program Edit Sequence
Program:Edit Sequence Program:Edit Sequence Program:Edit Sequence Manual fitlight 3:
2018-05-21
: Fitlight Program Edit Sequence Program_Edit Sequence system_operations
Open the PDF directly: View PDF ![]() .
.
Page Count: 3
1
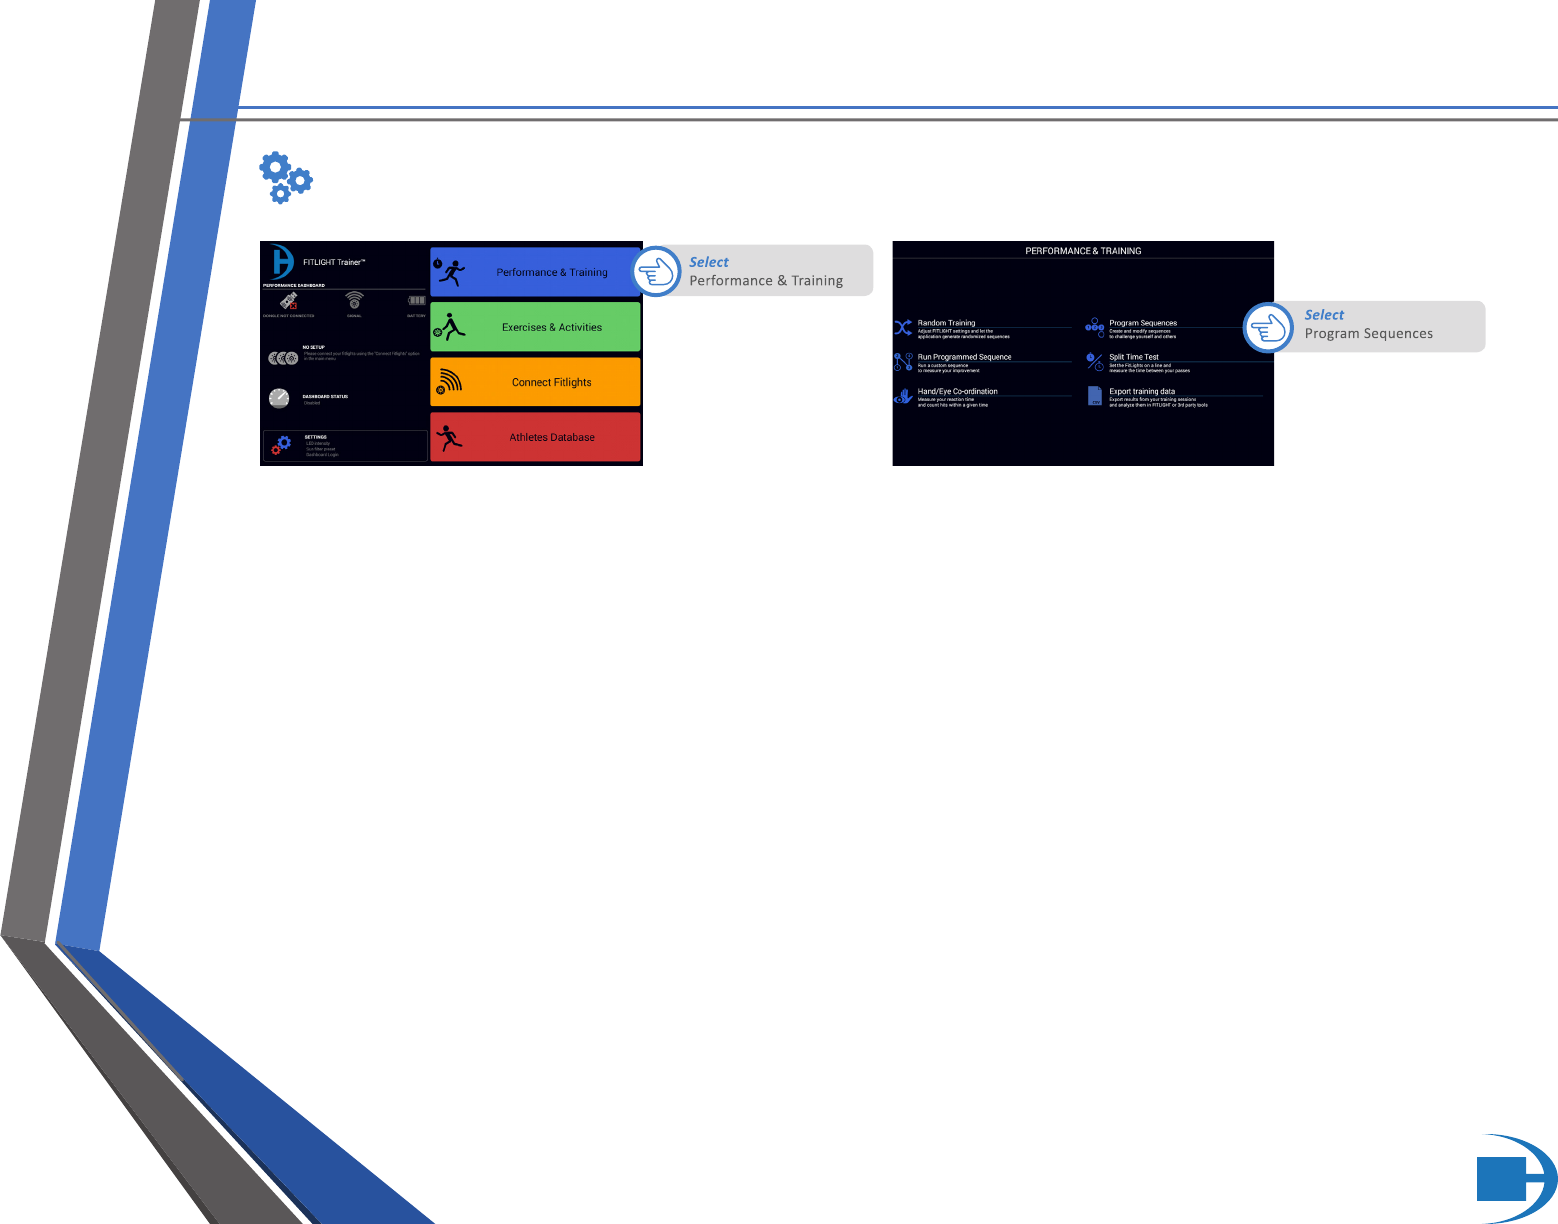
PROGRAM A SEQUENCE
After Program Sequences is selected, select “New” to begin the process of programming the FITLIGHTS™. To learn more
about the features (Import, Export and New Group ) please refer to the Saving, Searching and Grouping Manual.
Select “New Step”. A drop-down menu will appear to enable you to select the FITLIGHT™ number.
1. Select the FITLIGHT™ number by scrolling down.
2. Once the number appears in the window, touch “OK”. In this example, FITLIGHT™ #1 is selected.
3. Once “Ok” is selected a new screen will appear which will allow the selection of all the FITLIGHT™ parameters.
Repeat the process as per the previous step for all subsequent FITLIGHTS™ required for the routine
SYSTEM OPERATION
PROGRAM OR EDIT A SEQUENCE
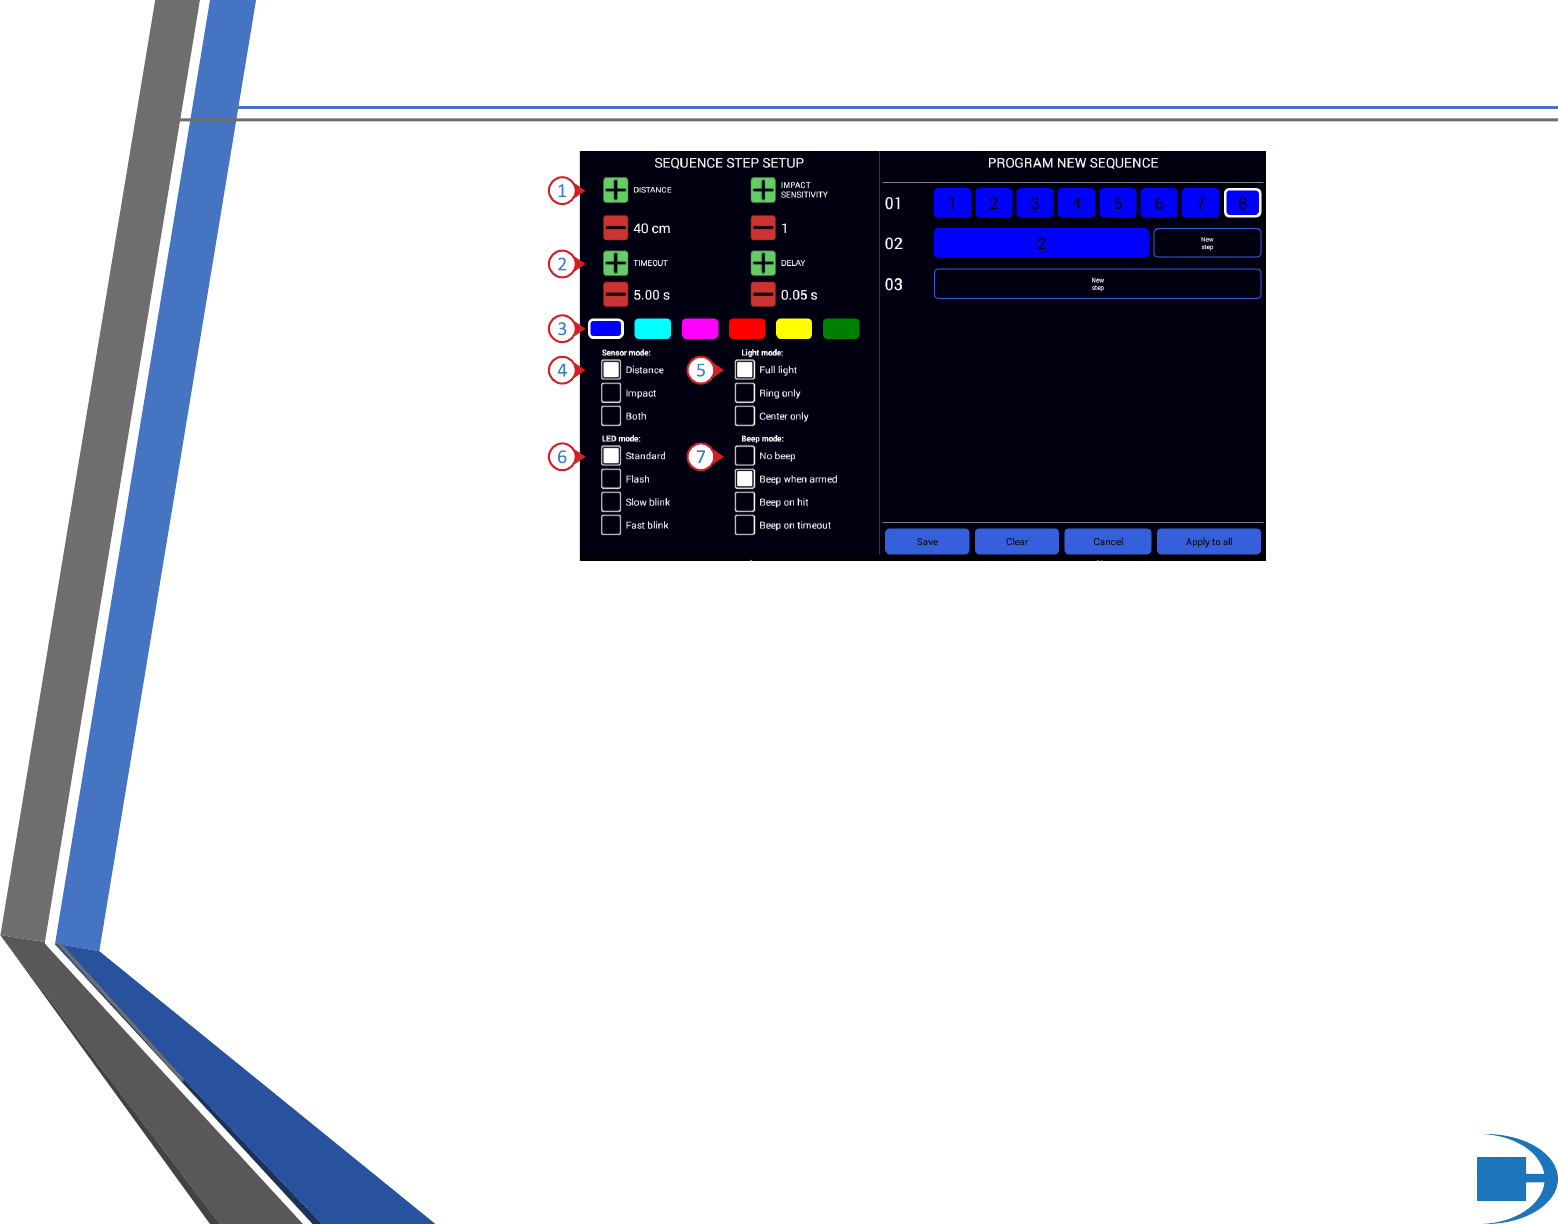
2
SYSTEM OPERATION
Indicates FITLIGHT™ #1 is the first step and it is Blue.
The FITLIGHT™ parameters can now be selected as per requirements.
1. DISTANCE: Indicates the deactivation range from the center of
the FITLIGHT™. The distance can be set from 10 cms to 80 cms.
2. TIMEOUT: The Timeout can be set from 0.10 seconds to 120
seconds. The TIMEOUT increments are .10 seconds up to 10
seconds, after which it increases by 5 seconds. The “Time Out”
function can also be turned off by going past 120 seconds.
3. COLOUR: Select FITLIGHT™ colour as required by selecting the
colour box.
4. SENSORE MODE: There are 3 deactivation modes to select from:
a. Distance only
b. Impact only
c. Both (meaning the FITLIGHTS™ can be deactivated by
motion or impact)
5. LIGHT MODE: There are 3 choices of Light mode: Center only,
Full light and Ring only. Please refer to “Parameter Explanations”
for more information.
6. LED MODE: Select the “LED” mode of the FITLIGHT™. There
are 4 selections which will have the LEDs flash rapidly or slowly
etc. per your preference and ease of visibility. Please refer to
“Parameter Explanations” for more information.
7. BEEP MODE: Select if sound (Beep) is required.
3
SYSTEM OPERATION
8. SAVE: Select “Save” to save your program, a drop-down menu
will appear to enable you to name the program as required.
9. CLEAR: This removes all data. A drop-down menu will appear
to query if you are sure as all data inputs will be cleared and
cannot be recovered.
10. Select “Apply to All” if you require the FITLIGHTS™ to have all of
the same parameters.
11. IMPACT SENSITIVITY: Select the sensitivity of ‘Impact” as
required. The higher the value the less sensitive the deactivation
requires (i.e. the more force that is required for the FITLIGHT™
to be deactivated upon impact).
12. DELAY: The interval between FITLIGHTS™ activating in
succession.
PLEASE NOTE: Depending on the Tablet Controller that you have, you may have to scroll up/down
within the “Sequence Step Setup” to view all of the options.
