Fortuneship Technology E351 WCDMA Mobile Phone User Manual ok
Shenzhen Fortuneship Technology Co., LTD WCDMA Mobile Phone ok
Users Manual
Instuction Manual – English
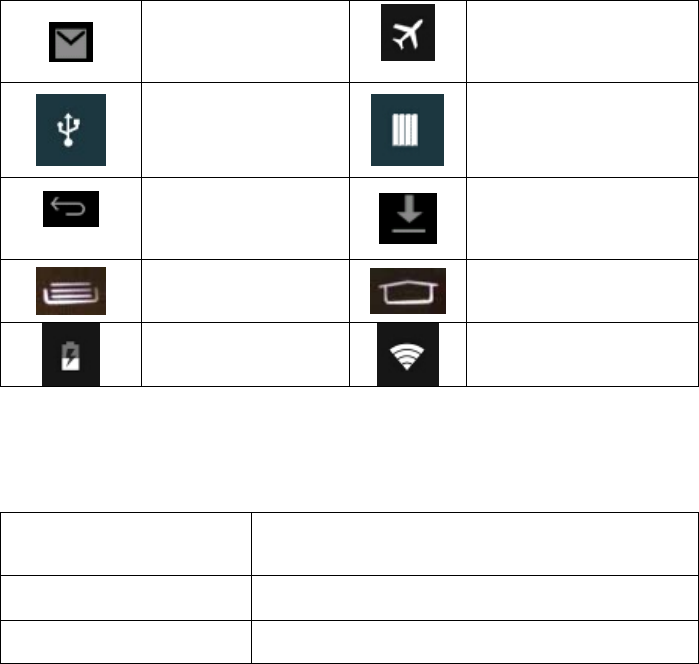
1. ICONS:
New email
Airplane Mode on
USB connected
USB debugging connected
Return button
Downloading
Display options of a
selected function
Home button
Battery Level WIFI connected, internet is
available
2 Quick Start Guide
2.1 Keys Function
Power button Short press to sleep/wake up, long press to startup and
shutdown.
Volume +(up) increase the volume
Volume -(down) decrease the volume

HOME button (home)
Click it in any interface will return to main interface.
Back button(back) click it in any interface will return to previous menu
App button
This button will display in menu interface.
Menu button
Touch this icon to access options of a selected function
3.0 Home Page
Main interface as below, long press the blank and it will popup windows to set wallpaper.
Search
App button
3.1 USB Connection
Phone storage configuration
Before transmitting documents, you have to conduct storage configuration for your Phone:
1) Connect the Phone and computer by USB cable, the reminder column will show the remind
information.
2) Open the reminder board; please view the Phone status and reminder to learn how to open
the board.
3) In the reminder board, click the “USB Connected”, then click “Turn on USB storage
configuration”.
4) Now the USB is connected successfully.
3.2 Copy the document into memory card
1. Connect the Phone to computer with USB cable.
2. As Phone storage configuration, it is connected with computer successfully.
3. Open the “My computer” in your computer, check the items in “removable disc”.
4. Copy the documents you need into “removable disc”.
5. After copying finishes, click “shutdown the USB storage configuration” to uninstall.
Notice: When the Phone is connected with USB cable, and you open the USB storage
configuration, you can’t view the memory card through the Phone. Only after you detach the
USB cable, you can view the memory card in the Phone.
3.3 Typing words
Use the screen keyboard
When you start the procedure or choose the words or numbers edition, it will show the screen
keyboard. The keyboard contains below typing options:
1) Android keyboard
3.4 Choose the typing method you want
1) Click Settings procedure application.
2) Click Language & input.
3) In the text setting area will reveal all the installed words-typing methods in your Phone
4) Tick the typing method you want.
4 Basic Setting
4.1 SIM Management
4.1-1 Voice call
Click settings in main menu, choose SIM Management
4.1-2 Messaging
Click settings in main menu, choose SIM Management, click message, choose the defaulted
SIM card when sends message,
4.1-3 Data Connection
Click setting application in main menu, choose SIM management, click data connection, choose
the defaulted SIM card,
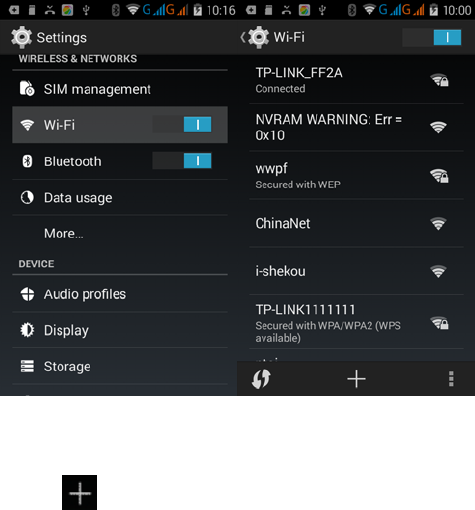
4.2 Wireless and Internet
1. Connect Wi-Fi
1) In the main menu or interface, choose setting application procedure.
2) Click Wi-Fi, open Wi-Fi, Phone will automatically search the available Wifi wireless internet.
3) Choose the Wi-Fi internet you want to connect, if it has password, it will popup the password
window, enter password, click connect.
2. Add Network
1) Click icon.
2) Input network SSID, the wireless network name, click save.

3) Click user name already saved, click connect to use network
3. Network Notice
If you open Network Notice, when WIFI signal appears, the right bottom will remind you
available WLAN network.
4. Keep WI-FI on during sleep
1) Click icon, select advanced.
2) Click Keep WI-FI on during sleep.
4.3 Bluetooth
Bluetooth function operation
1) Click setting application in main menu interface.
2) Click Bluetooth and open it.
3) If somebody opens Bluetooth in your surroundings, click search device, then Phone will
automatically search the Bluetooth device nearby.
4) Click the available Bluetooth device, it will popup request window, enter into related password,
and match the device to connect.
5) After match successfully, choose the operation you want to, click to enter into.
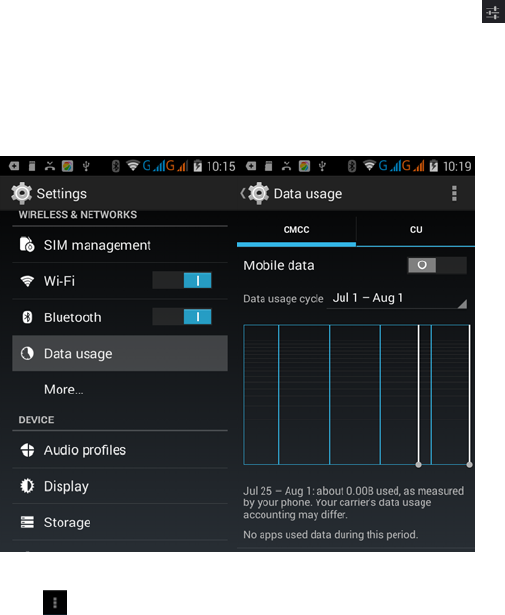
4.4 Data Usage
Check SIM card data usage as below
Check WIFI data usage
Click icon in right top as above, click Data Usage,
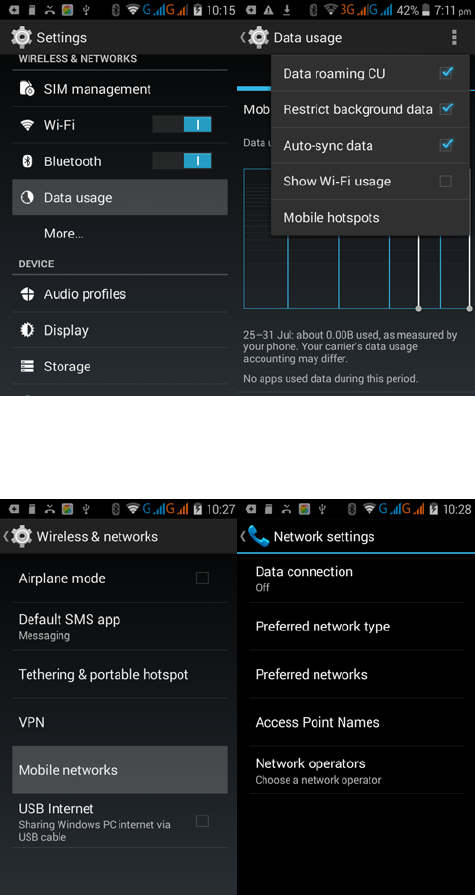
4.5 Mobile Networks
1) Access Point Name( APN)
Click mobile network
Choose access points name (APN), choose SIM card you need to connect,
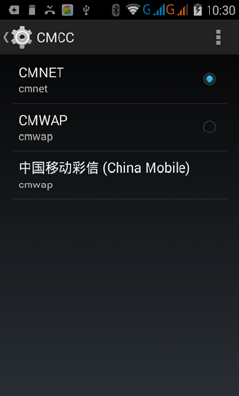
Choose connect type
Remark: (CMWAP transmitters data through GPRS, the webpage it visit belongs to wap
webpage, and CMNET support www browse mobile phone network, it can also log in webpage
in computer. And the charges are also different.)
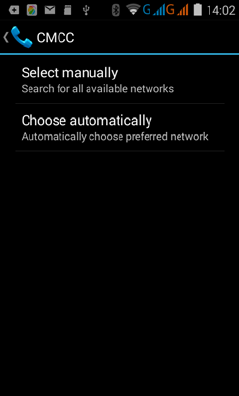
2) Network Operator
Click network operator, choose SIM card you need to connect, system will search available GSM
network
4.6 Storage
Open setting function, click memory, click preferred install location, you can choose install new
application to choose preferred install location.
Check SD card and Phone storage space.
1. Enter into setting application.
2. Click storage, check storage space.
Phone storage
1) System storage
System storage is the space Phone leave
For system file, it can’t be viewed.
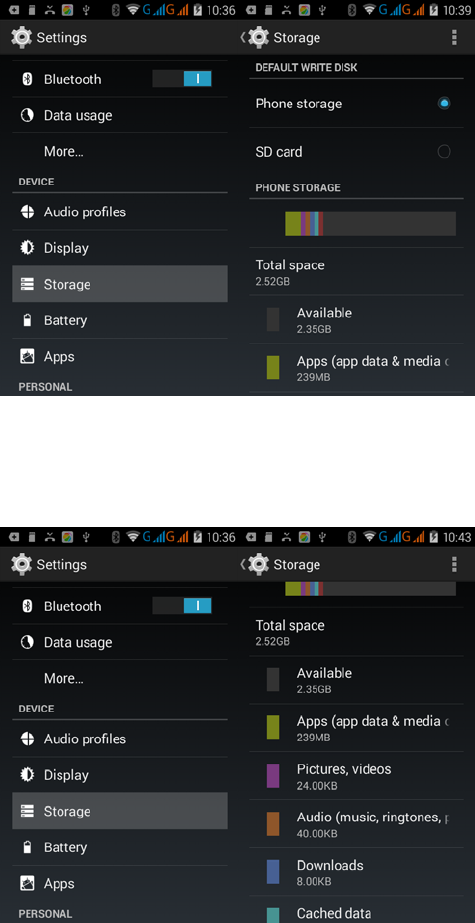
2) Internal storage
Internal storage is Phone local NAND storage, if you need to check the storage content, you
can check it in main menu.
SD card
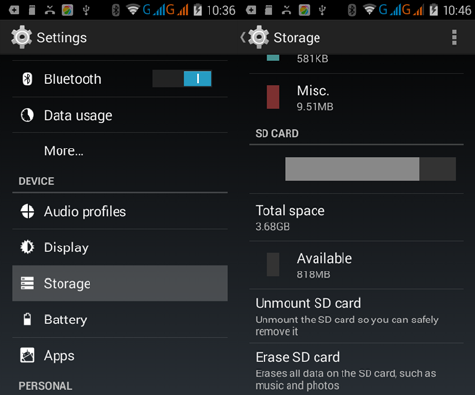
You can check storage space, SD card available space, unmount SD card and erase SD card
Safely remove SD card
1. Click setting application.
2. Click storage.
3. Click unmount SD card.
4. Now you can remove SD card safely.
Note: Removing SD card safely can protect SD card and increase its lifetime.
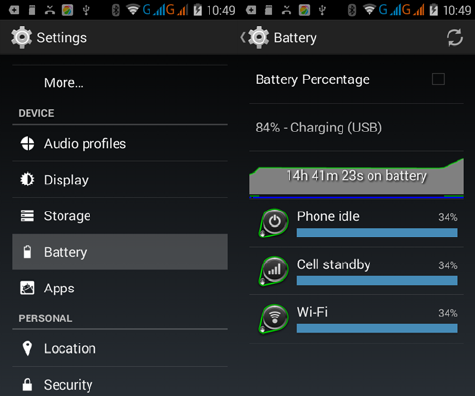
4.7 Battery
Click setting function, select battery, you can view the battery situation
4.8 Application program
1. Click setting application in Apps.
2. Select application, after enter, you can manage and delete installed application and check
system used storage space and left space.
3. View internal storage used space and left space
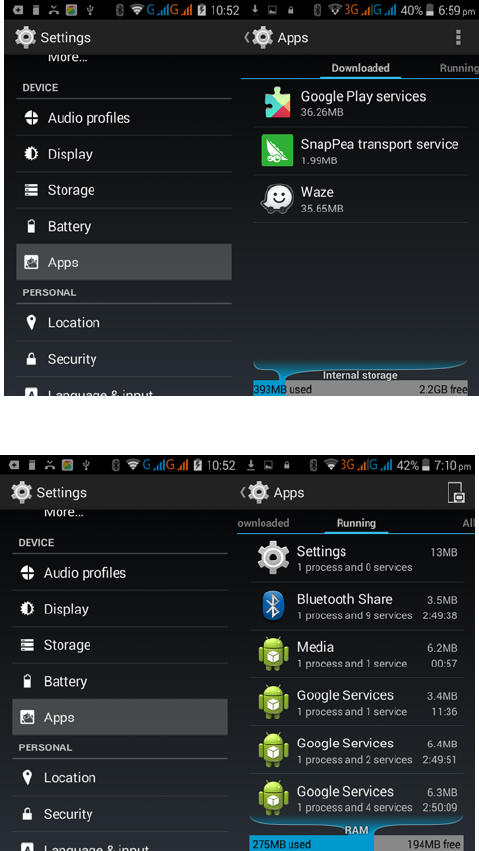
4. View the working device, used space and available space
4.9 Location service
Click setting, select Location
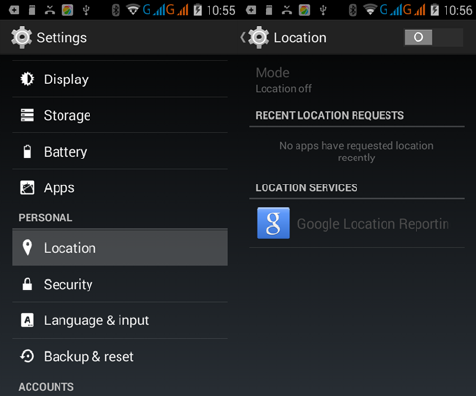
1) Access to Mode
Open access to my location, you can activate High accuracy, Battery saving and Device
only.
2) Recent location requests
You can view the recent location requests.
3) Google location reporting
Know about location reporting and location history.
4.10 Safety setting
Set locked screen
Lock the touch screen by unlock icon or password to protect your Phone.
Note: After setting screen locked, you should enter the passcode each time when you startup or
screen is locked
Set unlocked picture
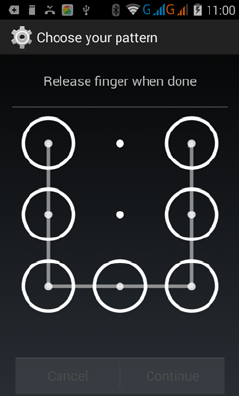
1) Click setting application in main interface.
2) Click Security.
3) Click Screen lock.
4) Click Pattern.
5) The unlocked pattern board pop up, there are nine touch spots, connect 4 points from
vertical, horizontal or diagonal direction. move your finger from the screen when finish. The
system will record yous new unlock pattern.
6) Click continue.
7) When you see the reminder, enter the unlock pattern, then click confirm.
Set unlock PIN code
1) Click setting application in main interface.
2) Click Security.
3) Click Screen lock.
4) Click PIN
5) Enter new PIN code(numbers) and click continue.
6) Enter new PIN code again and click confirm.
Set unlock password
1) Click setting application in main interface.
2) Click Security.
3) Click Screen lock.
4) Click Password.
5) Set new password(letters and numbers) and then click continue.
6) Enter the password again and the click confirm.
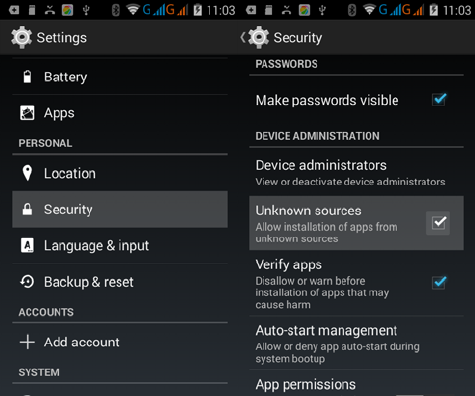
Unknown source
1) In main interface, click setting.
2) Click Security.
3) Click unknown source
Note: Manual installing APK files needs to turn on unknown source.
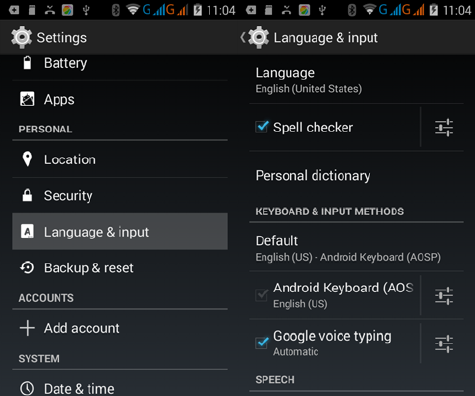
4.11 Language and Input Method
Click setting, select language and input method, choose language to switch language.
4.12 Backup and Reset
Connect WIFI and login your Google account, choose backup my data, system will backup your
data into google server.
4.13 Account
1. Select setting application
2. Click add an account

4.14 Date and Time
According to the preset, system will voluntarily apply the date, zone, and time provided by
internet. Manual set date, time and zone
1) Click Settings application procedure.
2) Slide down the screen, then click Date & time.
3) Turn off “Automatic date & time”.
4) Turn off “Automatic time zone”.
5) Click Select time zone, then choose the zone lists. Slide down the list to view more zones.
6) Click Set date, then click upper or down button to adjust date, month, and year, click setting
when you finish selection.
7) Click Set time, then click upper or down button to adjust hour and minute, click AM or PM to
Change morning or afternoon (there is no such selection when you set 24-hour format). Click
Done to finish.
8) Click Use 24-hour format, switch between 12-hour or 24-hour format, the time format you
choose will be used on the alarm clock.
9) Click Choose date format, then choose the time format you want to show on Phone.
Note: If you use the time internet provided, you will not able to set the date, time and time zone.
4.15 Scheduled power on & off
1) Click Settings application procedure
2) Click fixed-time power on and power off.
5 Multi-Media
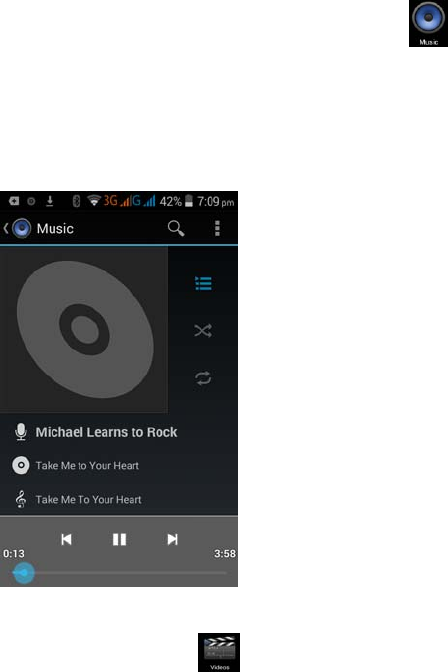
5.1 Music
Enter into music player: in menu or desktop click music icon to enter into music player,
click the music you want to play
Drag the progress bar to adjust play progress.
Operation of music player button
5.2 Video
Enter video player: choose application in main menu, choose the video you want to play.
5.3 Photo Gallery
Photo gallery application can auto search photos and video files in SD card, and photo gallery
will classify these photos and videos in folder. You can apply photo gallery to view and edit
photos, set the photos as wallpaper and watch the video.
Random play
View pictures
Click application in main interface.
Enter into Gallery; click the folder you want to view.
Click the picture you want to view; the system will play it in full screen mode automatically.
The pictures can be zoom in and zoom out, put two fingers on the screen, the separate the
fingers (gather up the fingers, the picture will be zoom in) or double click the screen.
Note: when you browse the pictures, slide left or right to view more pictures.
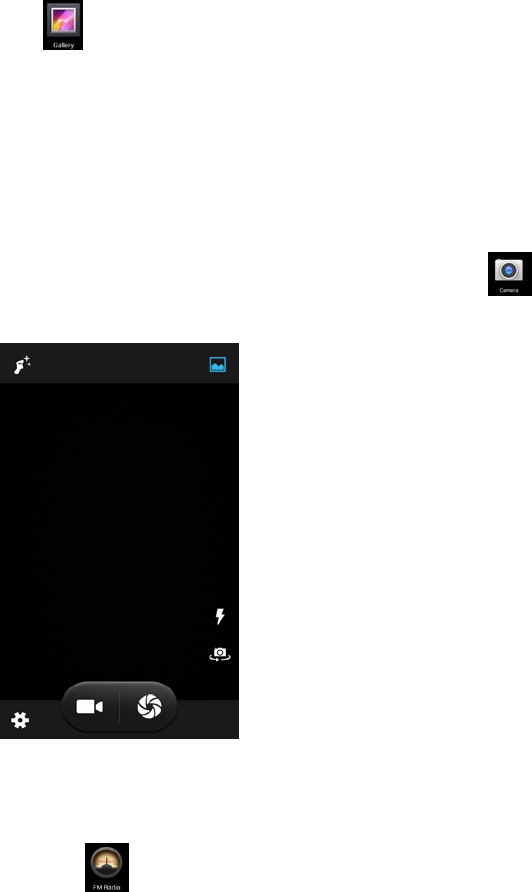
5.4 Camera
In the main interface or desktop, click camera application procedure enter into camera.
Operation of camera, Switch camera: click camera icon, switch front/back camera
5.5 FM Radio
Click in the main interface or desktop to enter into FM radio interface.
Radio button operation instruction
View
t
pictures
a
videos
Switch fron
t
camera
Click it t
o
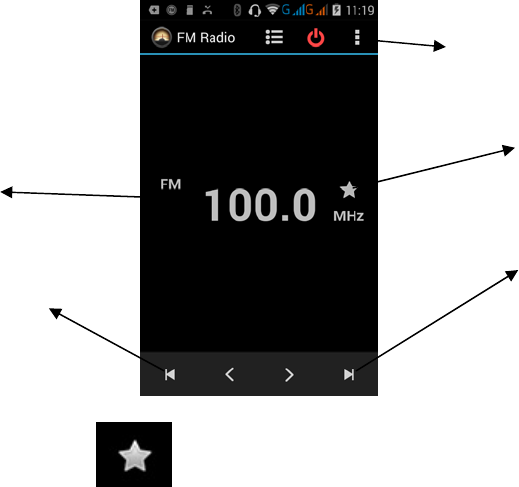
Enter into channel list
Save button
Current
Frequency
Next
channel
Previous channel
Save channels: Click button in the main interface to save the channel, and the
channel will be saved in channels list.
Note: You need to insert earphone as antenna when using FM radio, if no antenna, your
phone can’t search any frequency band.
6 Communication Function
6.1 Phone
Click Phone application procedure
Enter into
channel list
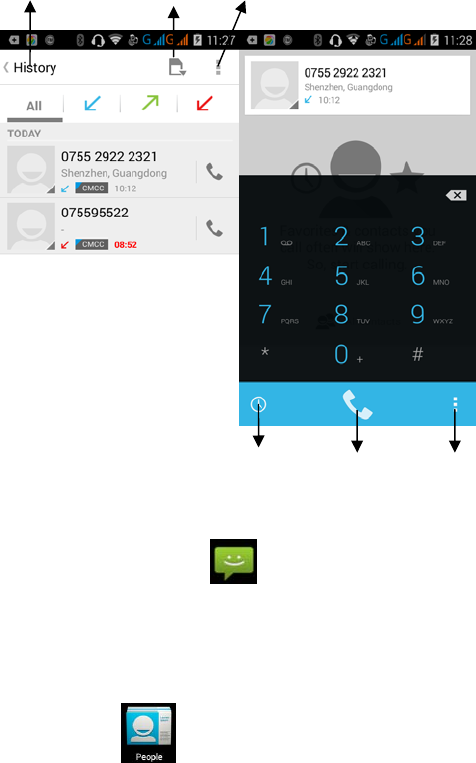
Call log Contacts Delete
Enter call log dial Speed Dial, People
6.2 Text Message
1) Enter into main menu, choose application procedure.
2) Click “Edit new message”
6.3 Contact List
Click Contact list in the main interface, enter into the contact list
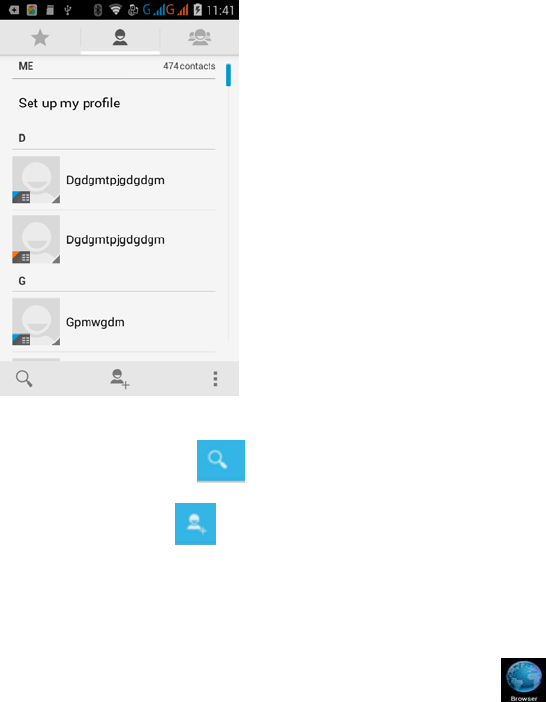
Search contact: click button, enter into search function
Add contact: click button, enter into add contact interface.
7 Internet
7.1 Browser
In case of Wi-Fi or mobile internet is connected well, click IE browser in the main menu
or desktop to enter the IE interface.
7.2 Email
Email application procedure contains email setting guide, you can add the external POP3 OR
IMAP email account of normal web email service provider (For instance, Yahoo, Gmail, Hotmail
and 163).

a. Email Setting
1. After you click the sending email icon , you can see the email setting guide, which
can help you to set.
2. Input your email address and password.
3. Click “Next step” button, choose your email type is POP3 or IMAP.
4. Click “Next Step” button to check whether the email box servicer can receive or send
emails
5. Input the email account and display the email subiject, and click finish.
6. If the email box is available, you will enter into your mail box automatically.
b. Delete the email account
You can delete setted POP3 or IMAP email account from your Phone.
Click Settings IMAP account remove account
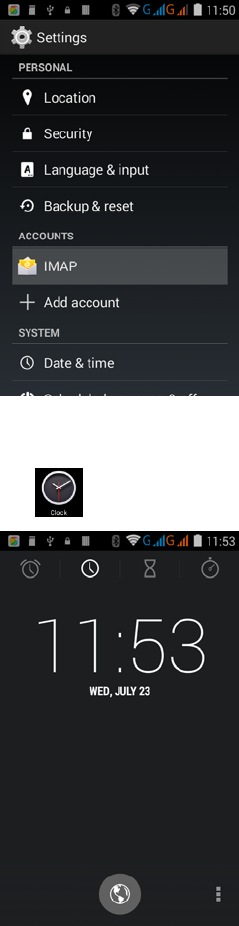
8 Other Application Procedures
8.1 Clock
Click , enter into below interface.
There are alarm clock, timer and stopwatch buttons.
8.2 Calculator
1) Click .
2) Enter into the basic board of calculator.
3) Soft touch the numbers or operator in calulator to calculate.
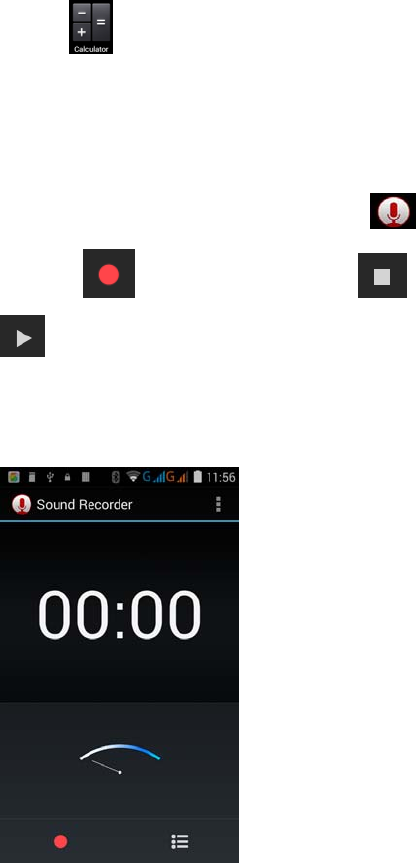
8.3 Sound Recorder
In the main interface or desktop, click recorder icon to enter into record interface, click
record key to start record. Click Stop key to stop recording. Click Play key
to play the recorded sound. The system will auto remind you to use or abandon this
record, please choose it manually.
Play the record: choose the video player to play the recorded sound, choose the recorded sound
in the source manager, and click it to play.
8.4 Calendar

1) Click
2) Enter into the calendar interface.
3) You can use Calendar to create events .
8.5 To Do
1) Click
2) Enter into the To Do interface.
3) You can create the note you need to do to remind you .
EC COMPLIANCY DECLARATION
The company S.p.A., with legal headquarters in Via B. Gozzoli n. 60-00142 Roma and
operative base in Via Guido Rossa 3-10024 Moncalieri (TO), declaration that the device
SURFING PHONE A 3G complies with all the requirements specified in the 95/5/CE
European Directive Concerning radio and equipment and that it complies with the following
telecommunication regulations
EN 60950-1 : 2006 + A11 : 2009 + A1 : 2010 + A12 : 2011
EN 301 489-1 V1.9.2
EN 301 489-17 V2.2.1
EN 55022 : 2010
EN 55024 : 2010

EN 300 328 V1.8.1
EN 62311 : 2008
The compliance with the above mentioned requirements is shown by the label
The product complies with the 2004/108/CE Directive relating to the electromagnetic compliancy
and with the 2006 /95 / CE (LVD) concerning safety regulations.
The Product complies with the ROHS 2011 / 65 / EU Standard.
FCC Waring:
Any Changes or modifications not expressly approved by the party responsible for compliance
could void the user's authority to operate the equipment.
This device complies with part 15 of the FCC Rules. Operation is subject to the following two
conditions: (1) This device may not cause harmful interference, and (2) this device must accept
any interference received, including interference that may cause undesired operation.
Specific Absorption Rate (SAR) information
SAR tests are conducted using standard operating positions accepted by the FCC with the
phone transmitting at its highest certified power level in all tested frequency bands, although the
SAR is determined at the highest certified power level, the actual SAR level of the phone
while operating can be well below the maximum value, in general, the closer you are to a
wireless base station antenna, the lower the power output.
Before a new model phone is a available for sale to the public, it must be tested and certified to
the FCC that it does not exceed the exposure limit established by the FCC, Tests for each phone
are performed in positions and locations (e.g. at the ear and worn on the body)as required by the
FCC.
For body worn operation, this model phone has been tested and meets the FCC RF exposure
guidelines when used with an accessory designated for this product or when used with an
accessory that contains no metal and that positions the handset a minimum of 1.0 cm from the
body.
Note: This equipment has been tested and found to comply with the limits for a Class B digital
device, pursuant to part 15 of the FCC Rules. These limits are designed to provide reasonable
protection against harmful interference in a residential installation. This equipment generates,
uses and can radiate radio frequency energy and, if not installed and used in accordance with
the instructions, may cause harmful interference to radio communications. However, there is no
guarantee that interference will not occur in a particular installation. If this equipment does cause
harmful interference to radio or television reception, which can be determined by turning the
equipment off and on, the user is encouraged to try to correct the interference by one or more of
the following measures:
—Reorient or relocate the receiving antenna.
—Increase the separation between the equipment and receiver.
—Connect the equipment into an outlet on a circuit different from that to which the receiver is
connected.
—Consult the dealer or an experienced radio/TV technician for help.