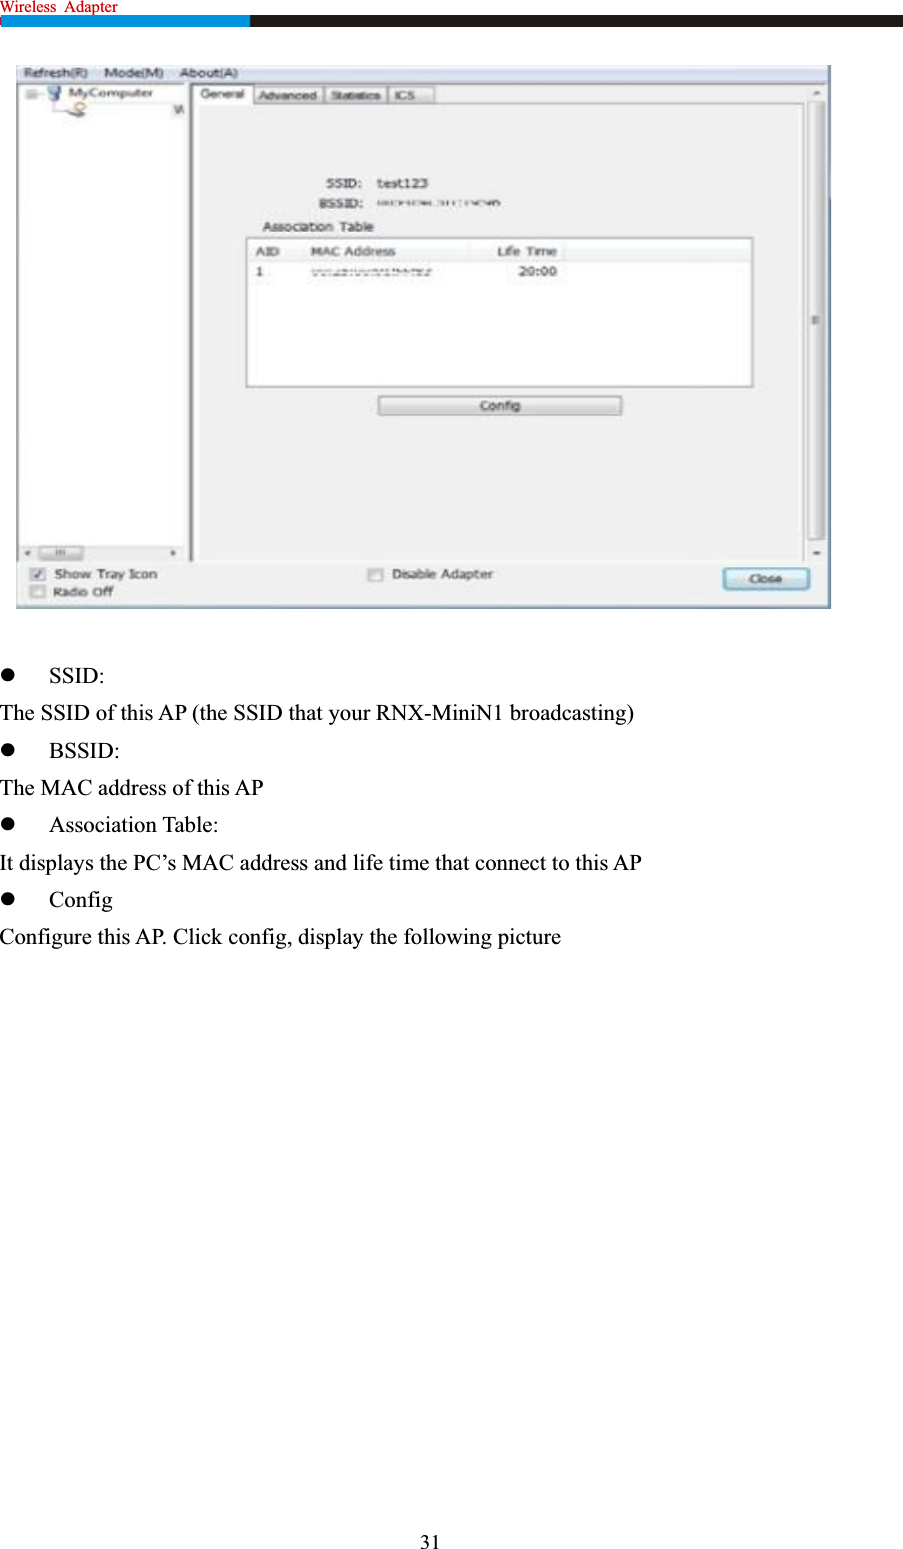
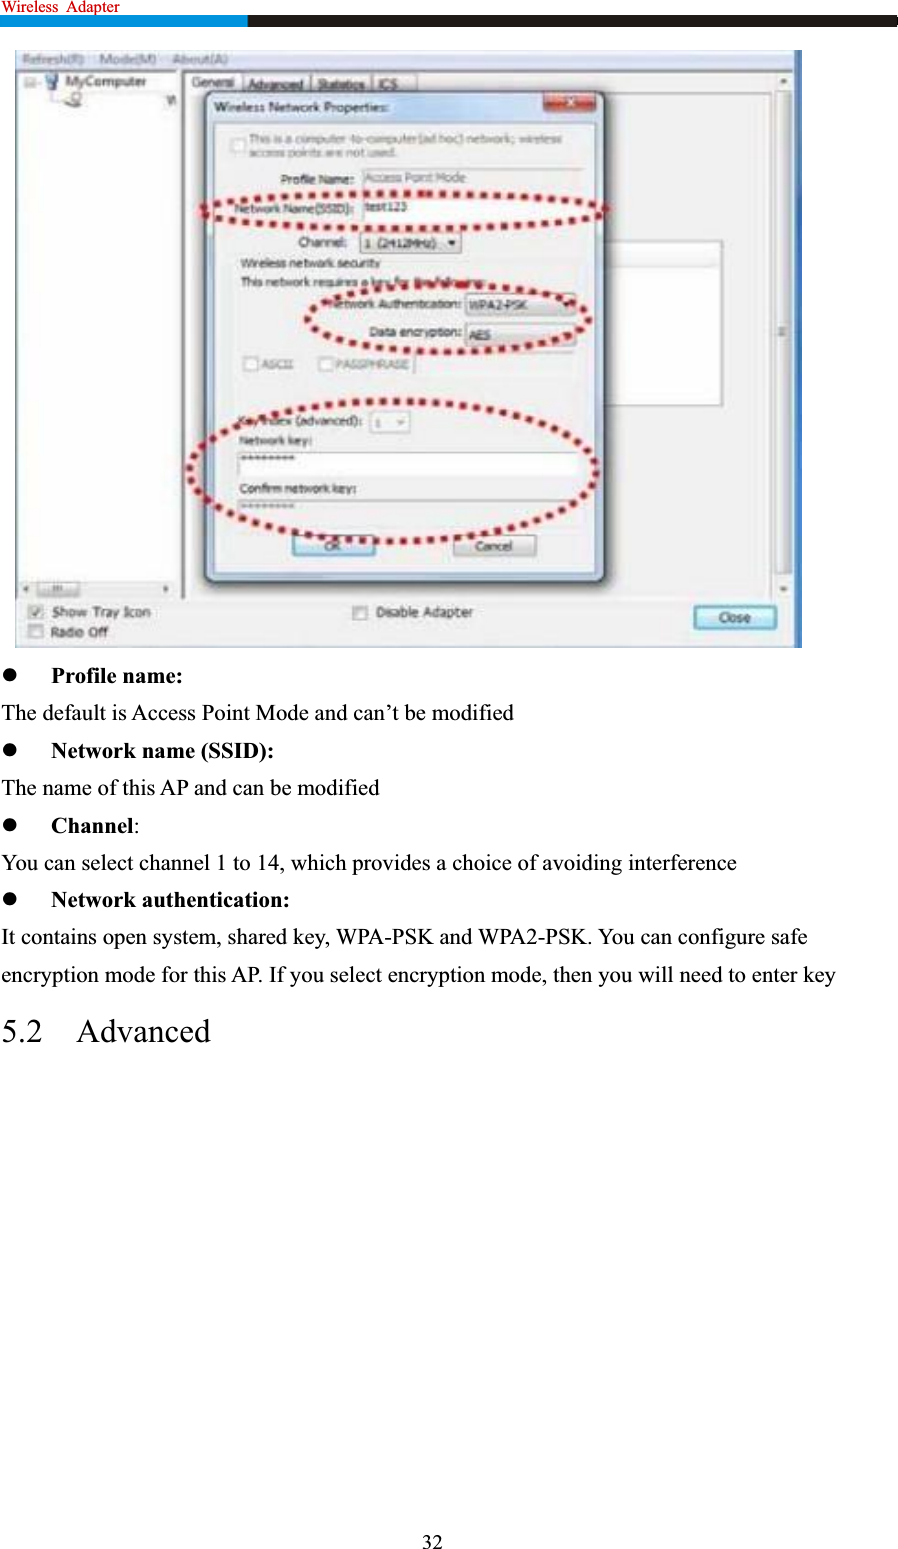
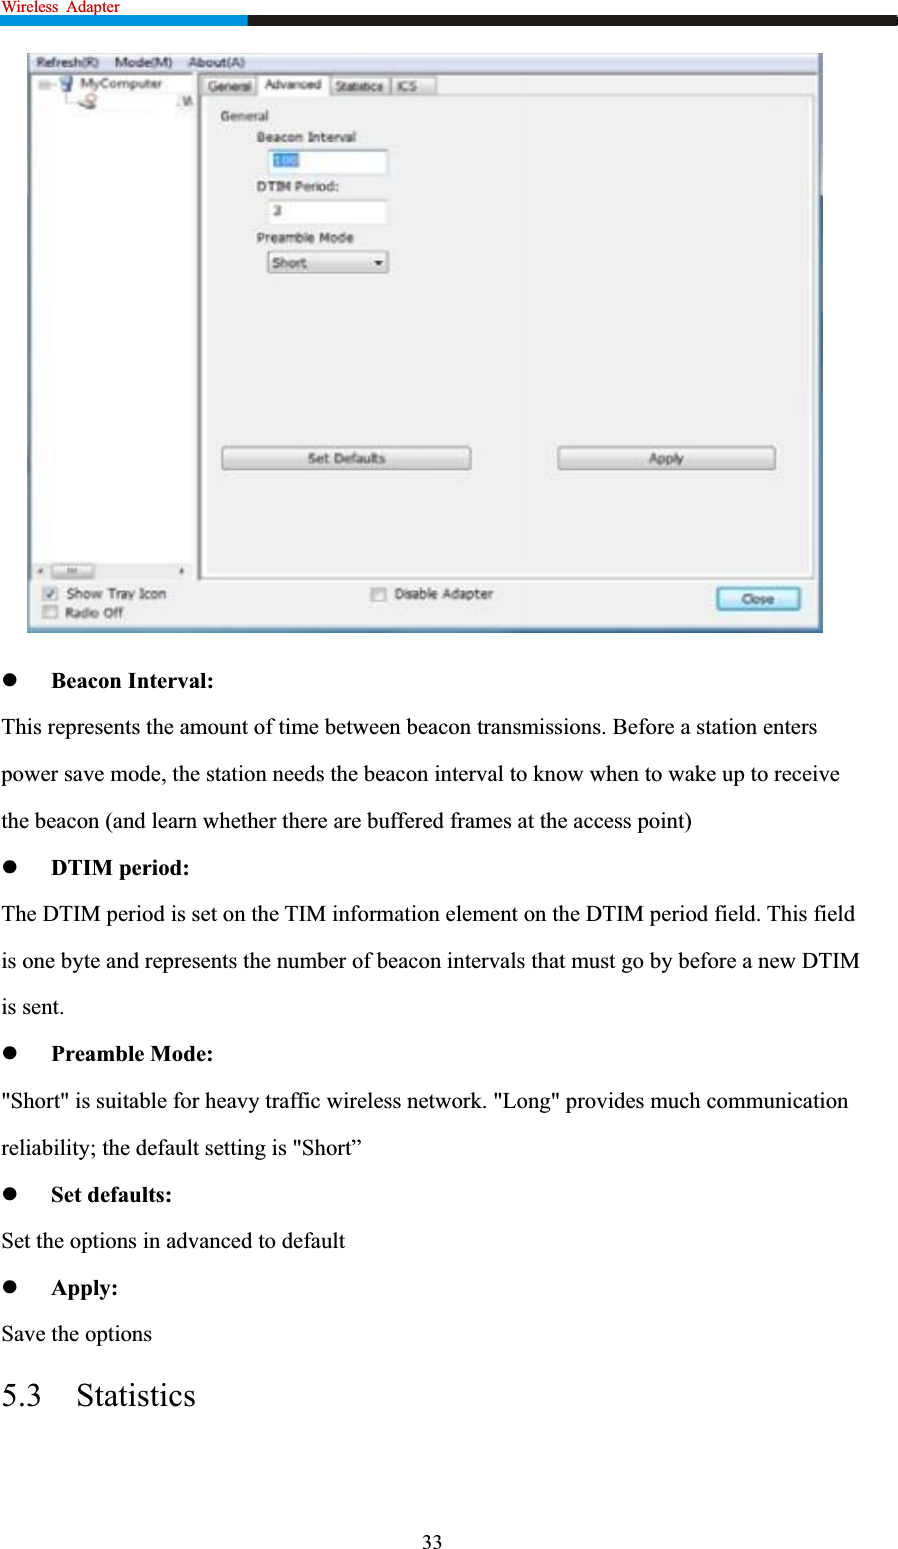
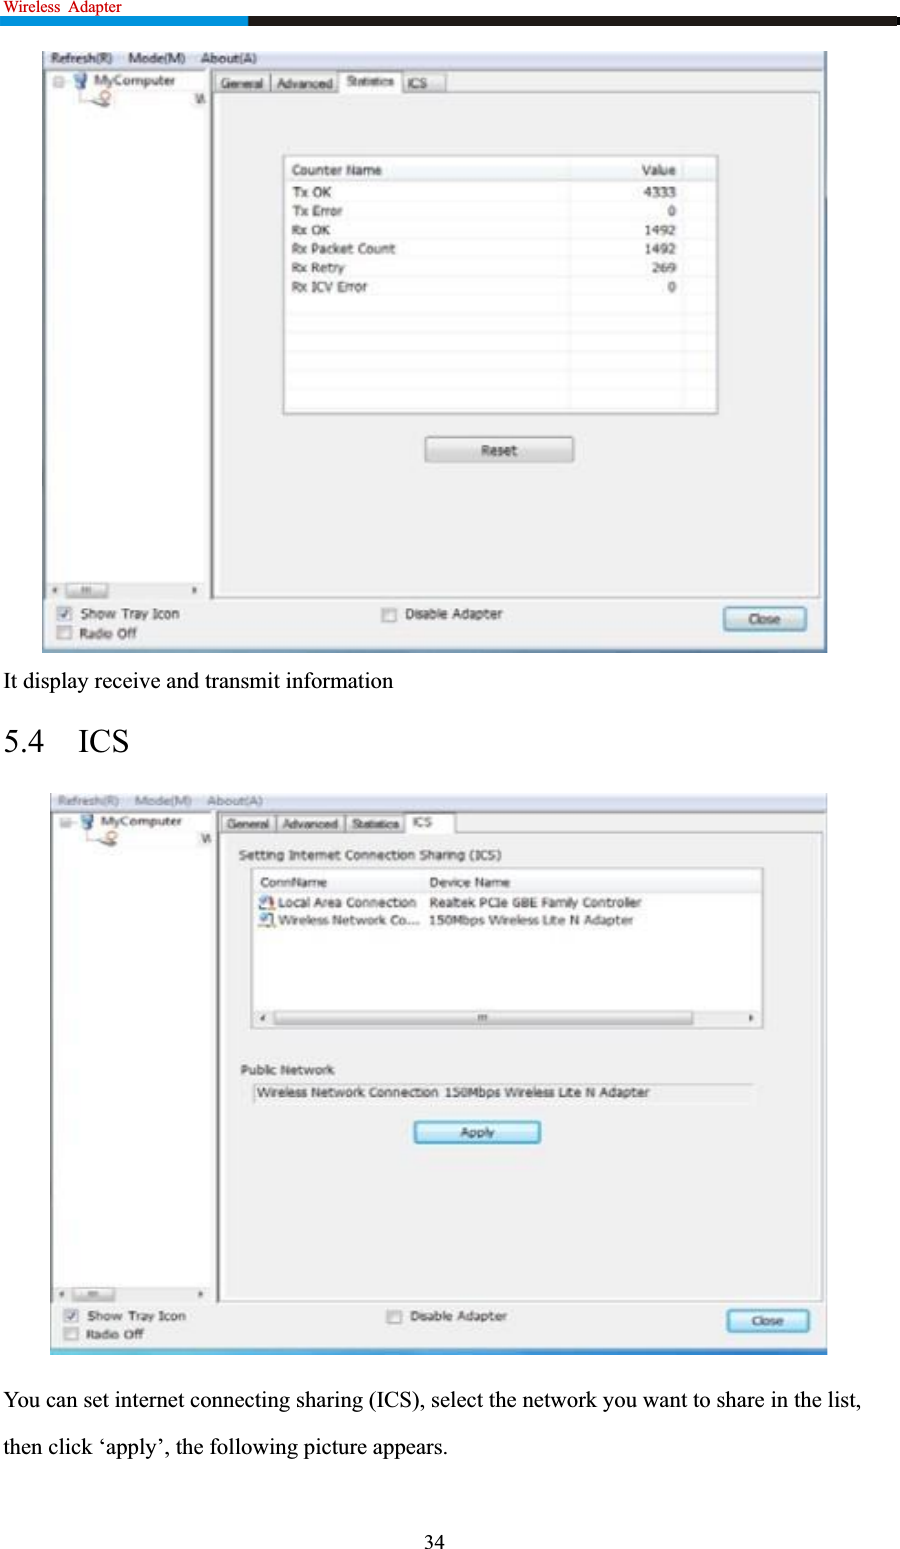
Four Seas Global Link Network Technology COMFAST88 Wireless Adapter User Manual RNX MiniN1 User Manual
Shenzhen Four Seas Global Link Network Technology Co., Ltd Wireless Adapter RNX MiniN1 User Manual
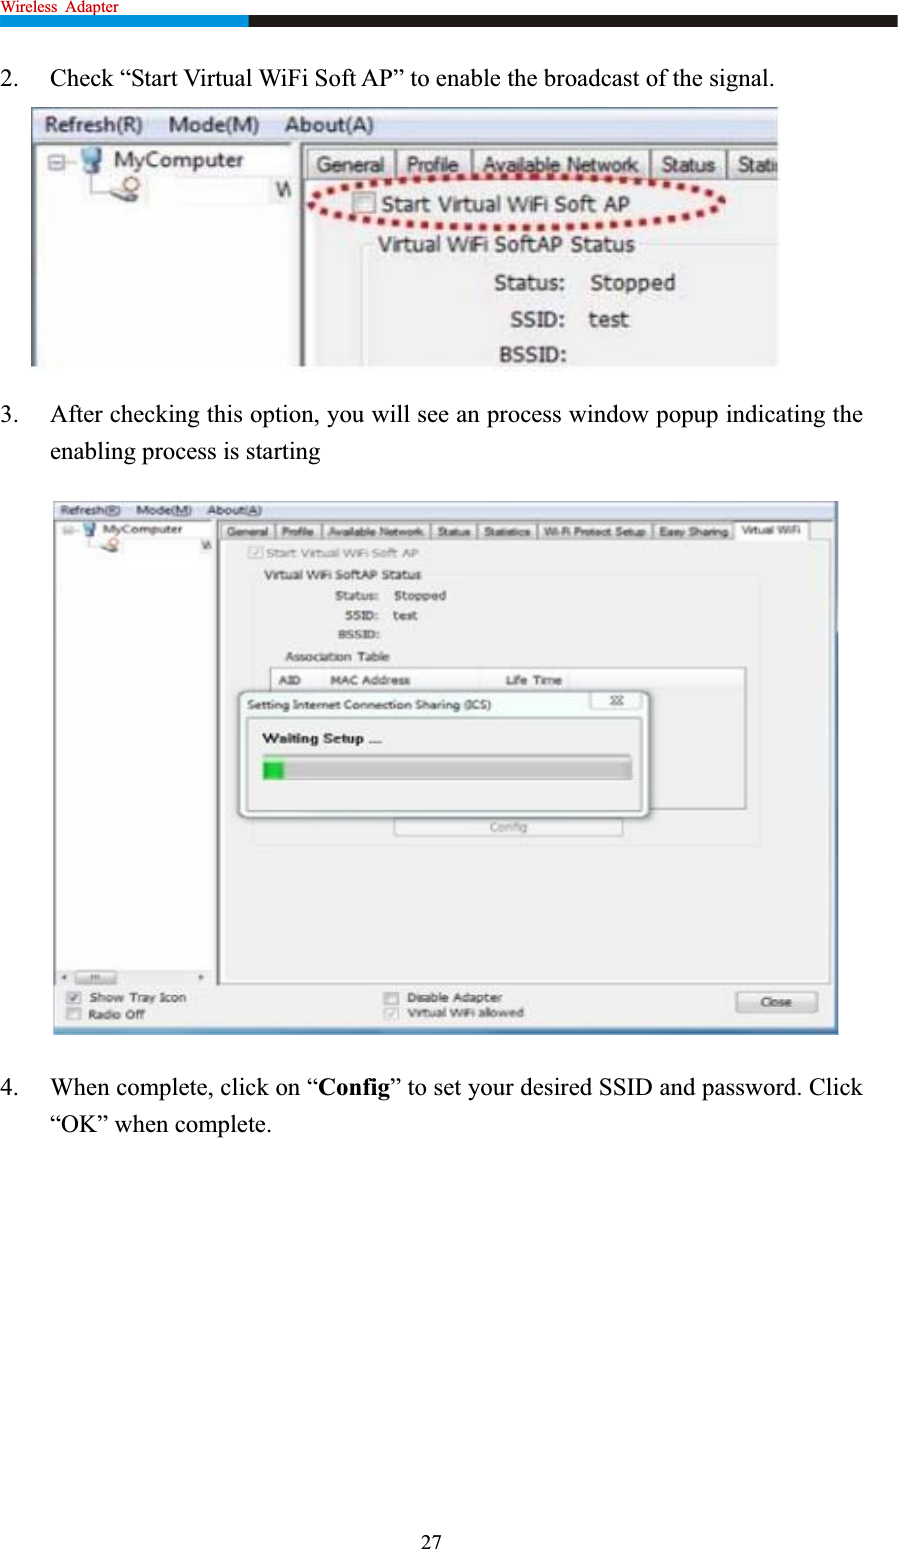
UserManual.wiki
>
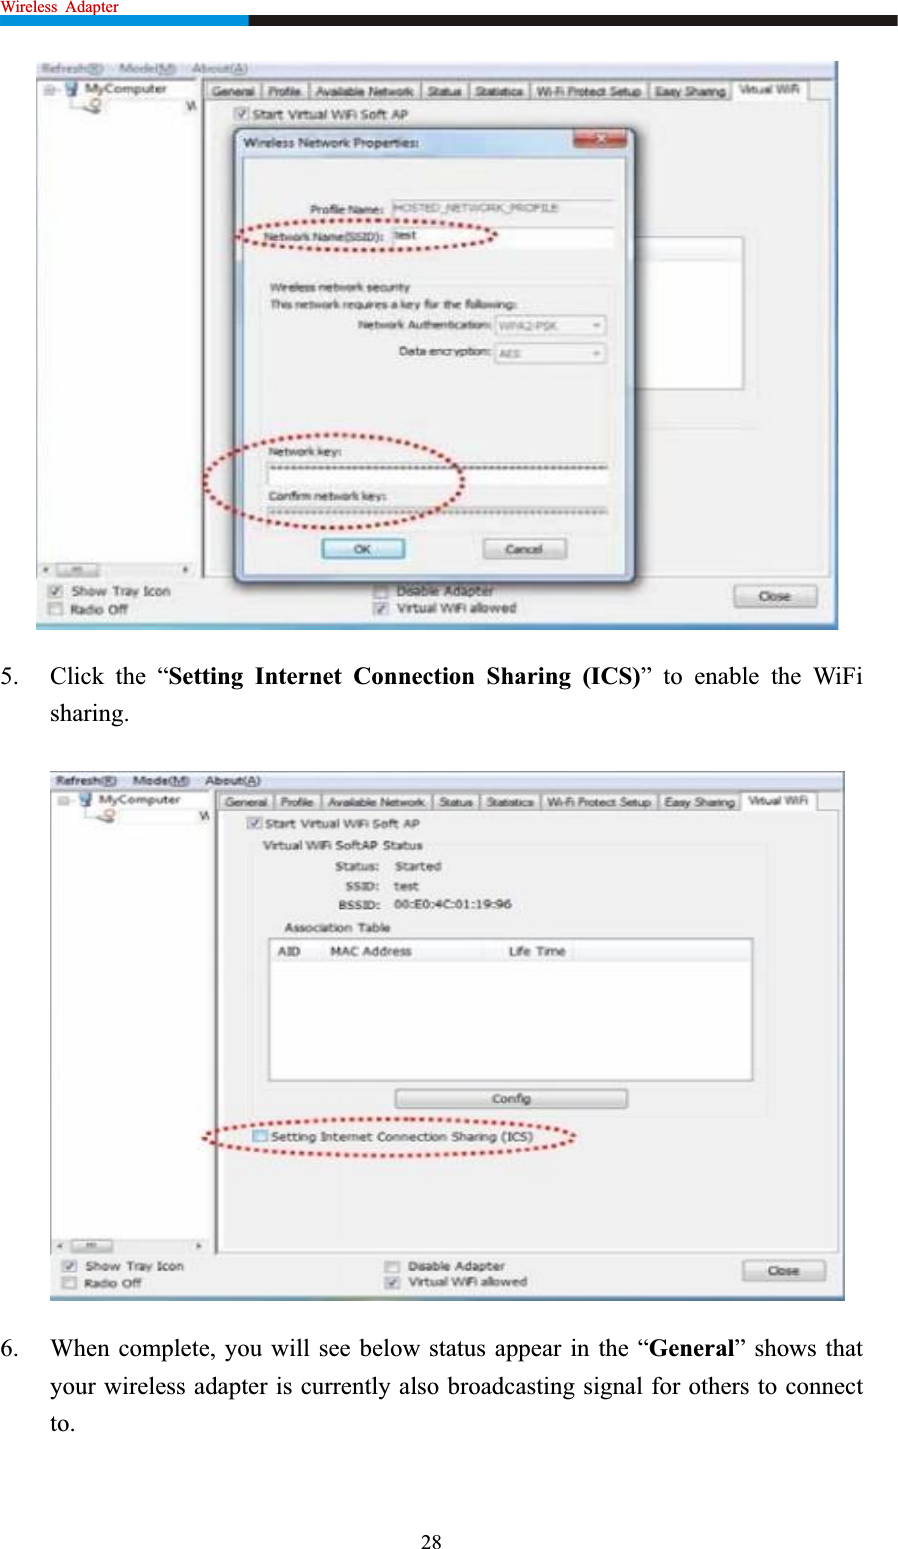
Four Seas Global Link Network Technology
>
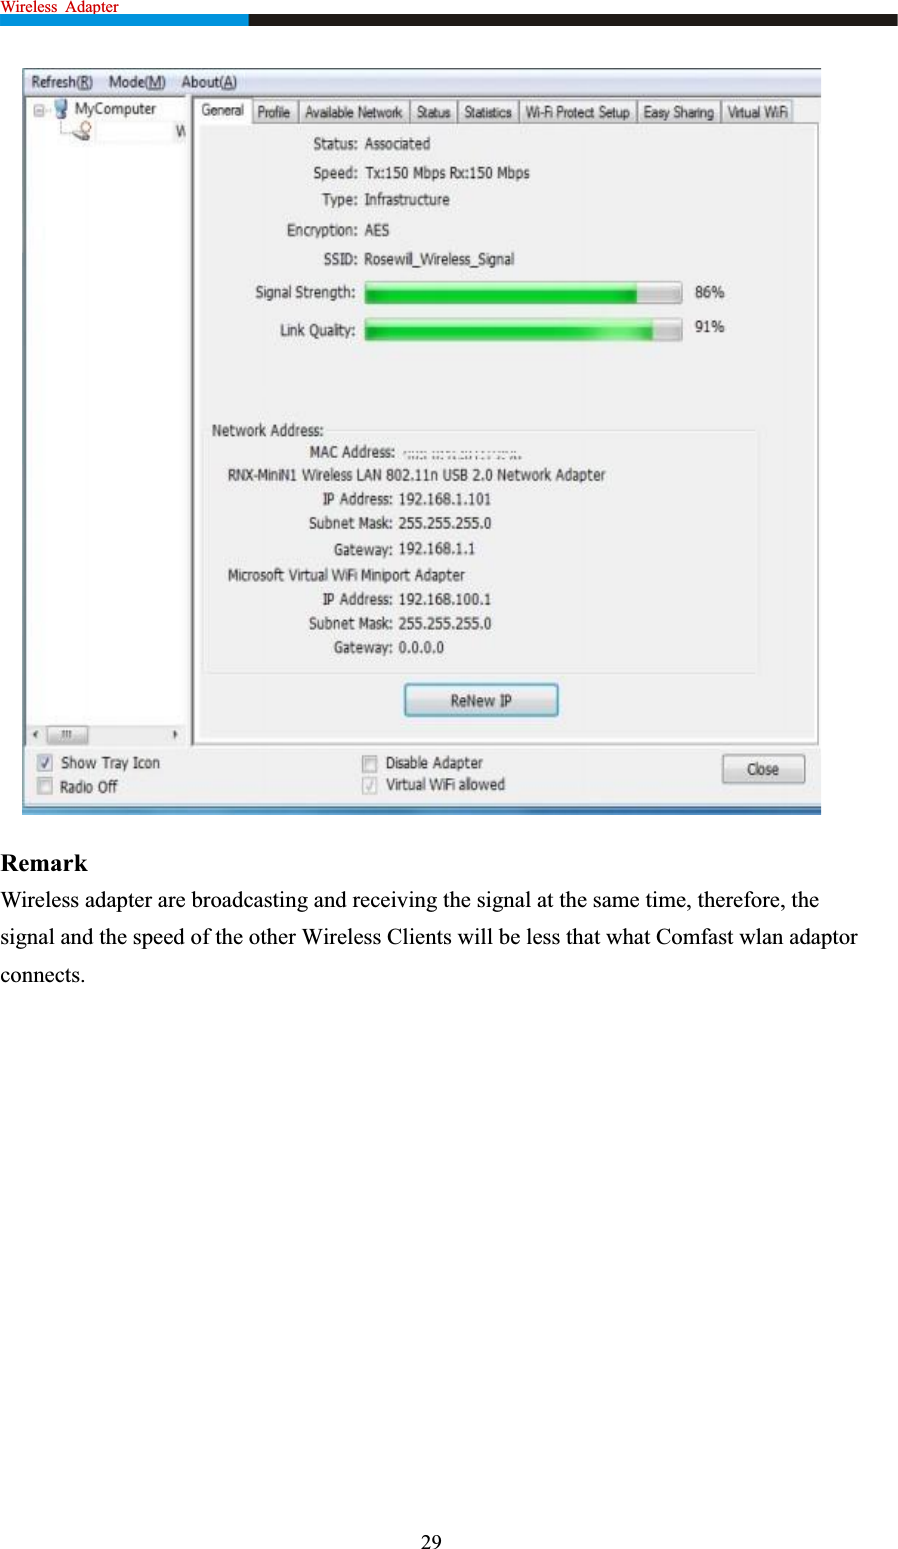
COMFAST88 User Manual
user manual
Navigation menu
Upload a User Manual
Namespaces
Wiki Guide
HTML
PDF
Info
Views
User Manual
Discussion / Help
Navigation