Fujian Newland Auto ID Tech NLS-PT80 Portable Data Collector User Manual
Fujian Newland Auto-ID Tech Co., Ltd. Portable Data Collector
UserManual.wiki
>
Fujian Newland Auto ID Tech
>
NLS PT80 User Manual
Users Manual
Navigation menu
Upload a User Manual
Namespaces
Wiki Guide
HTML
PDF
Info
Views
User Manual
Discussion / Help
Navigation
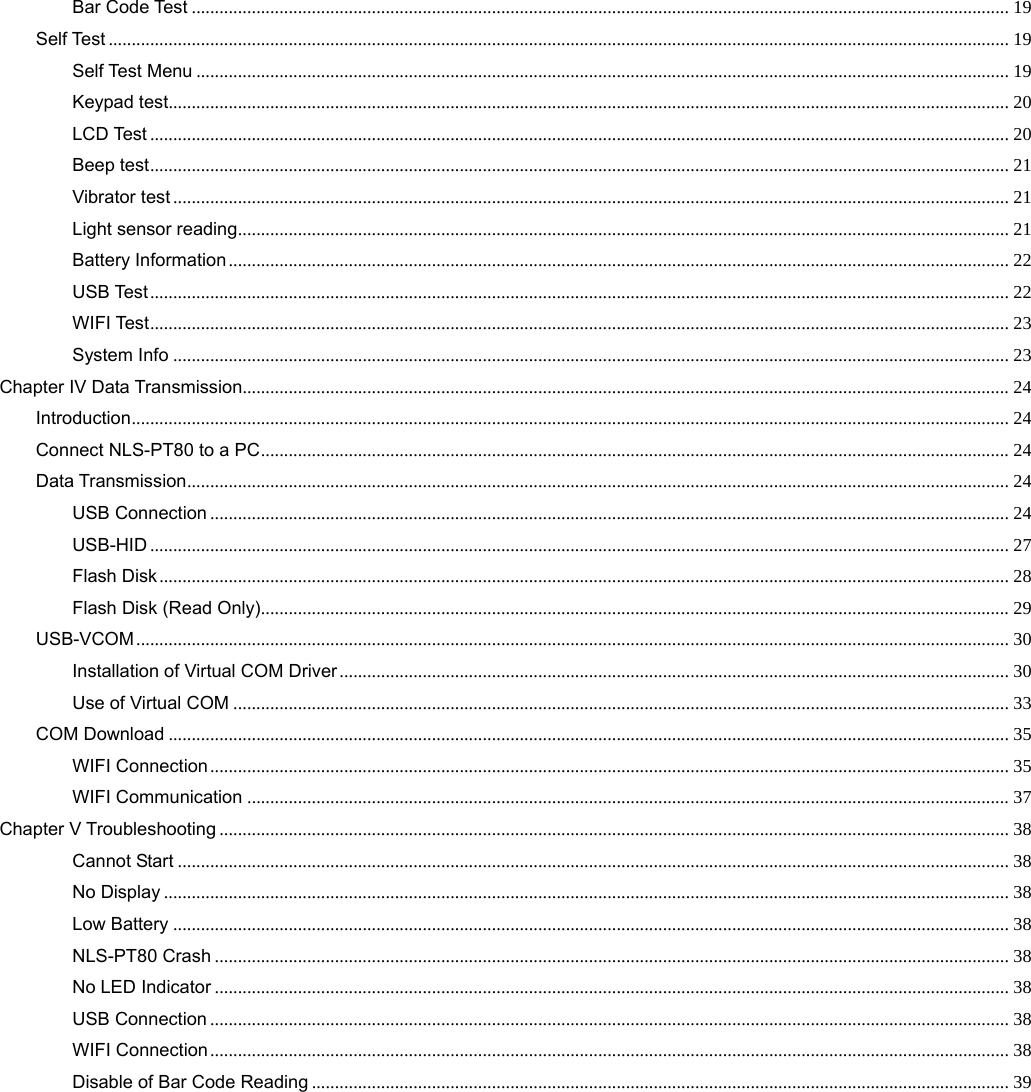


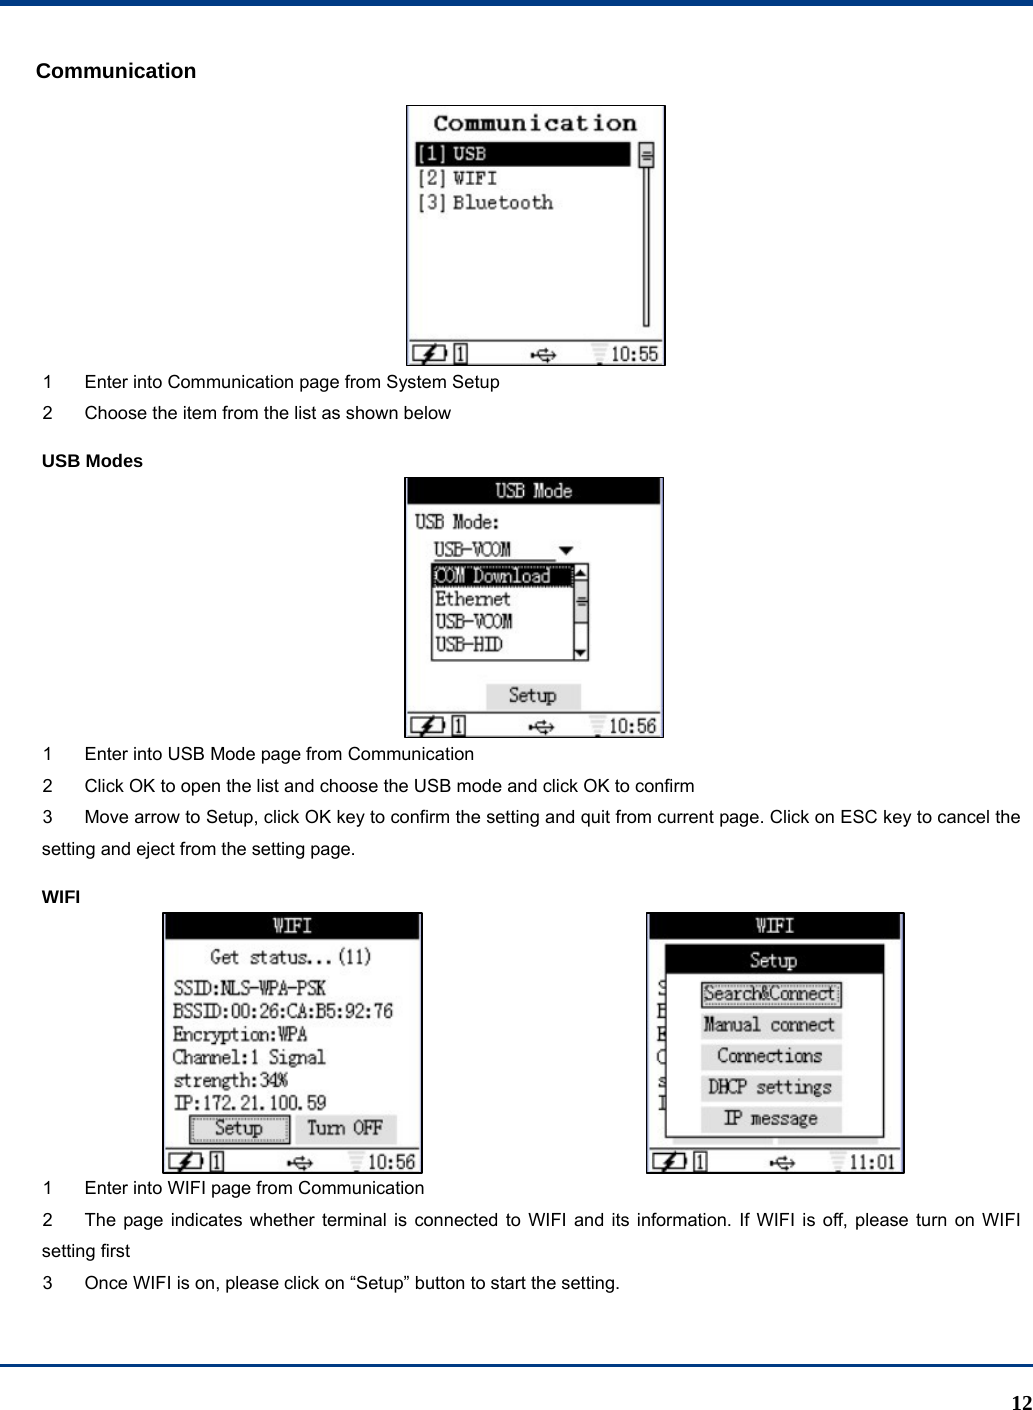
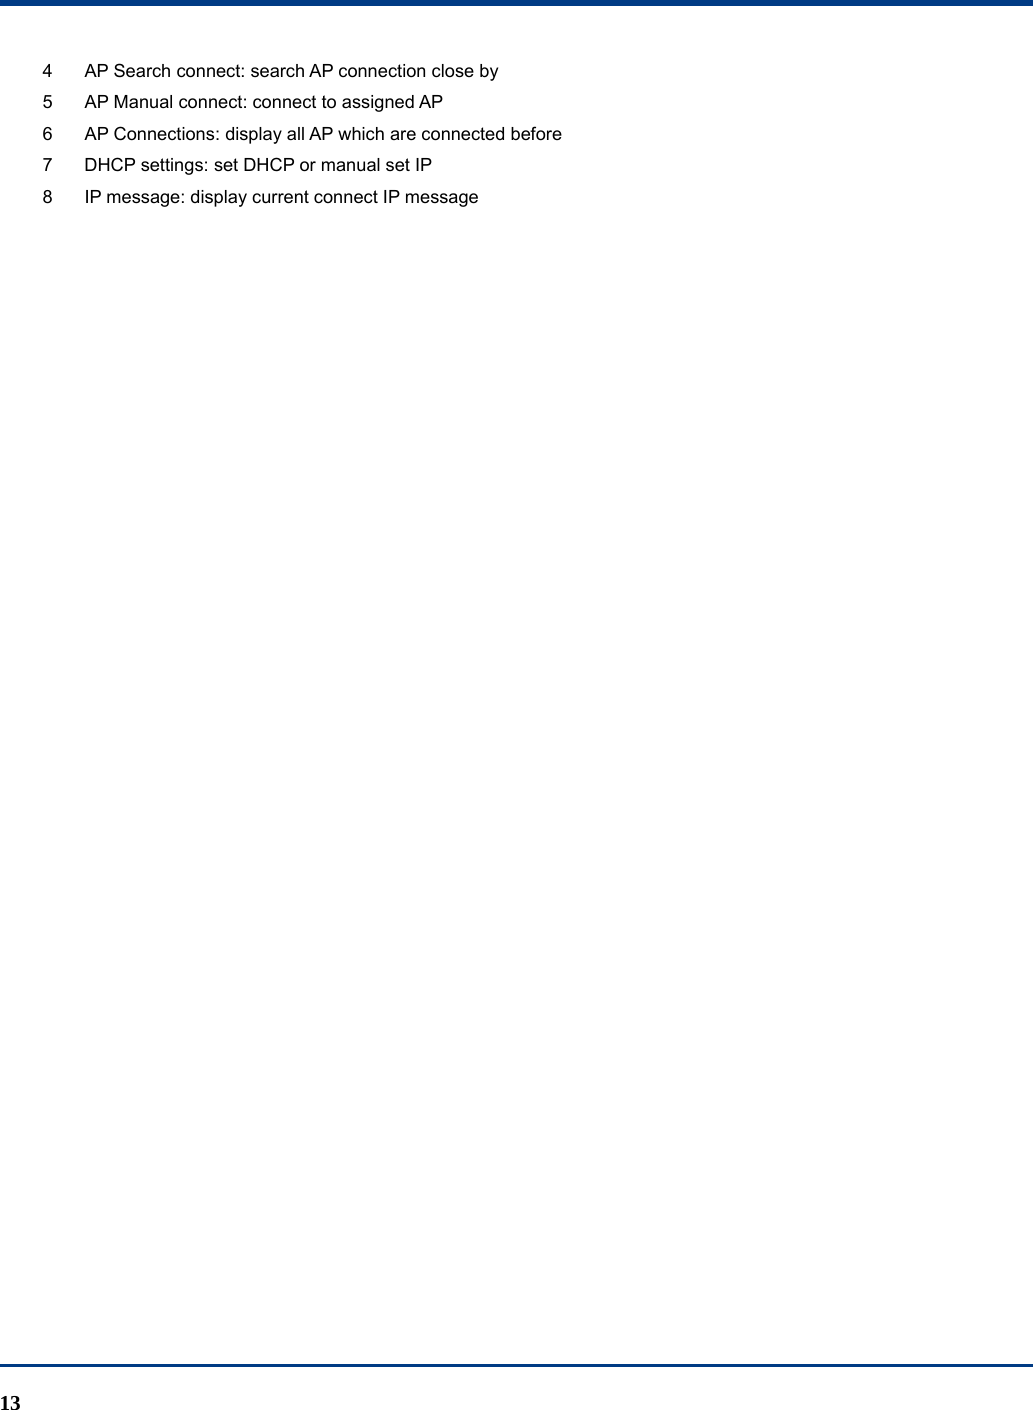

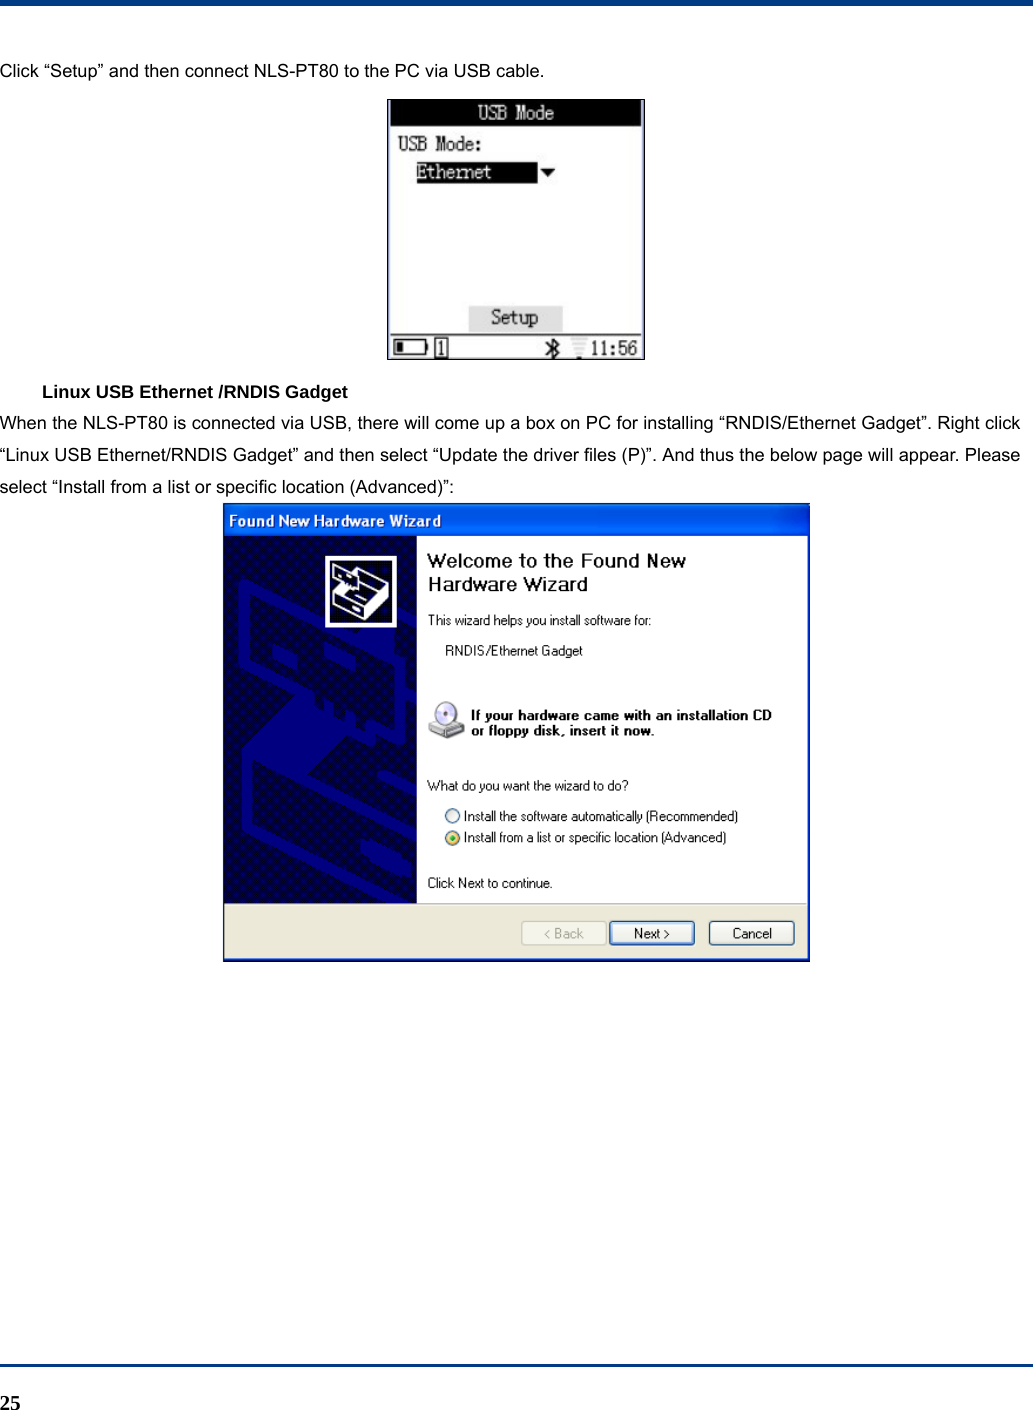
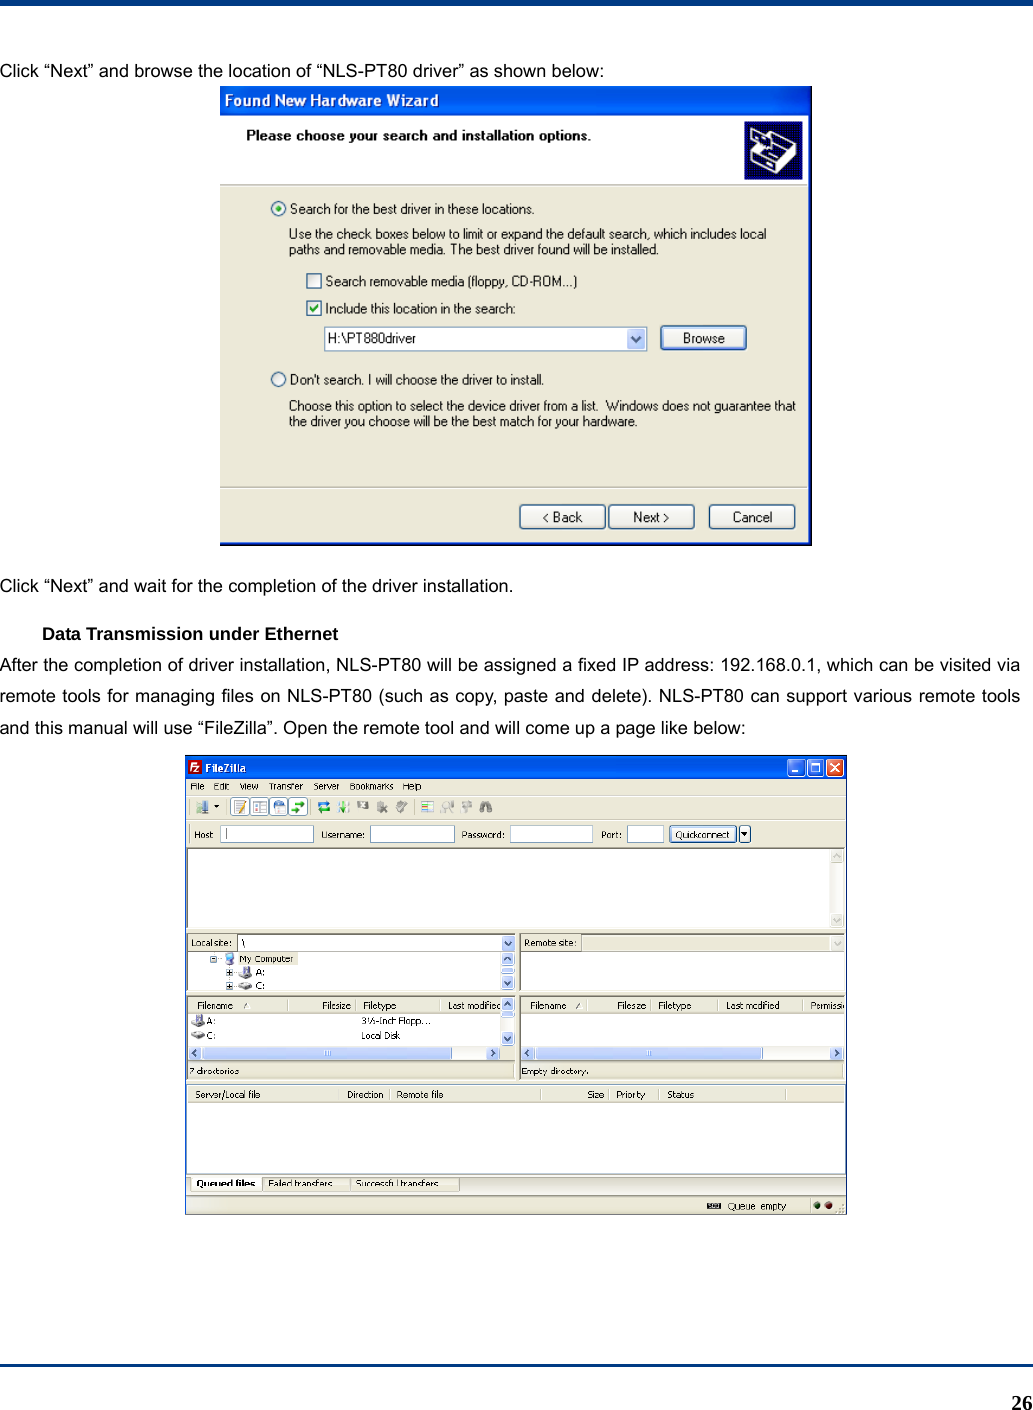
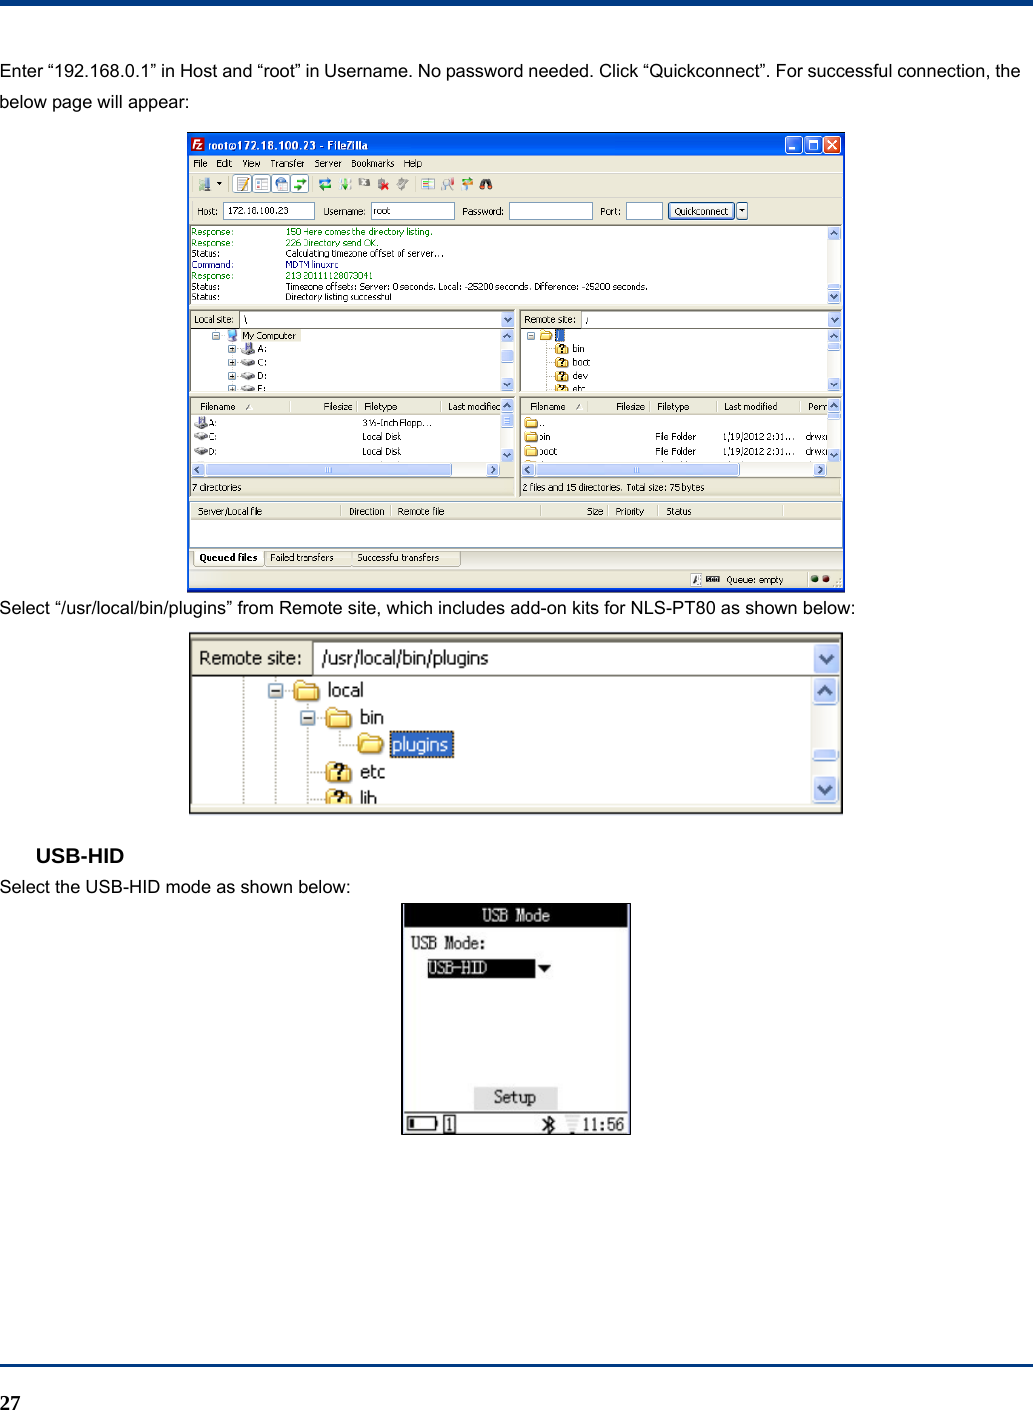
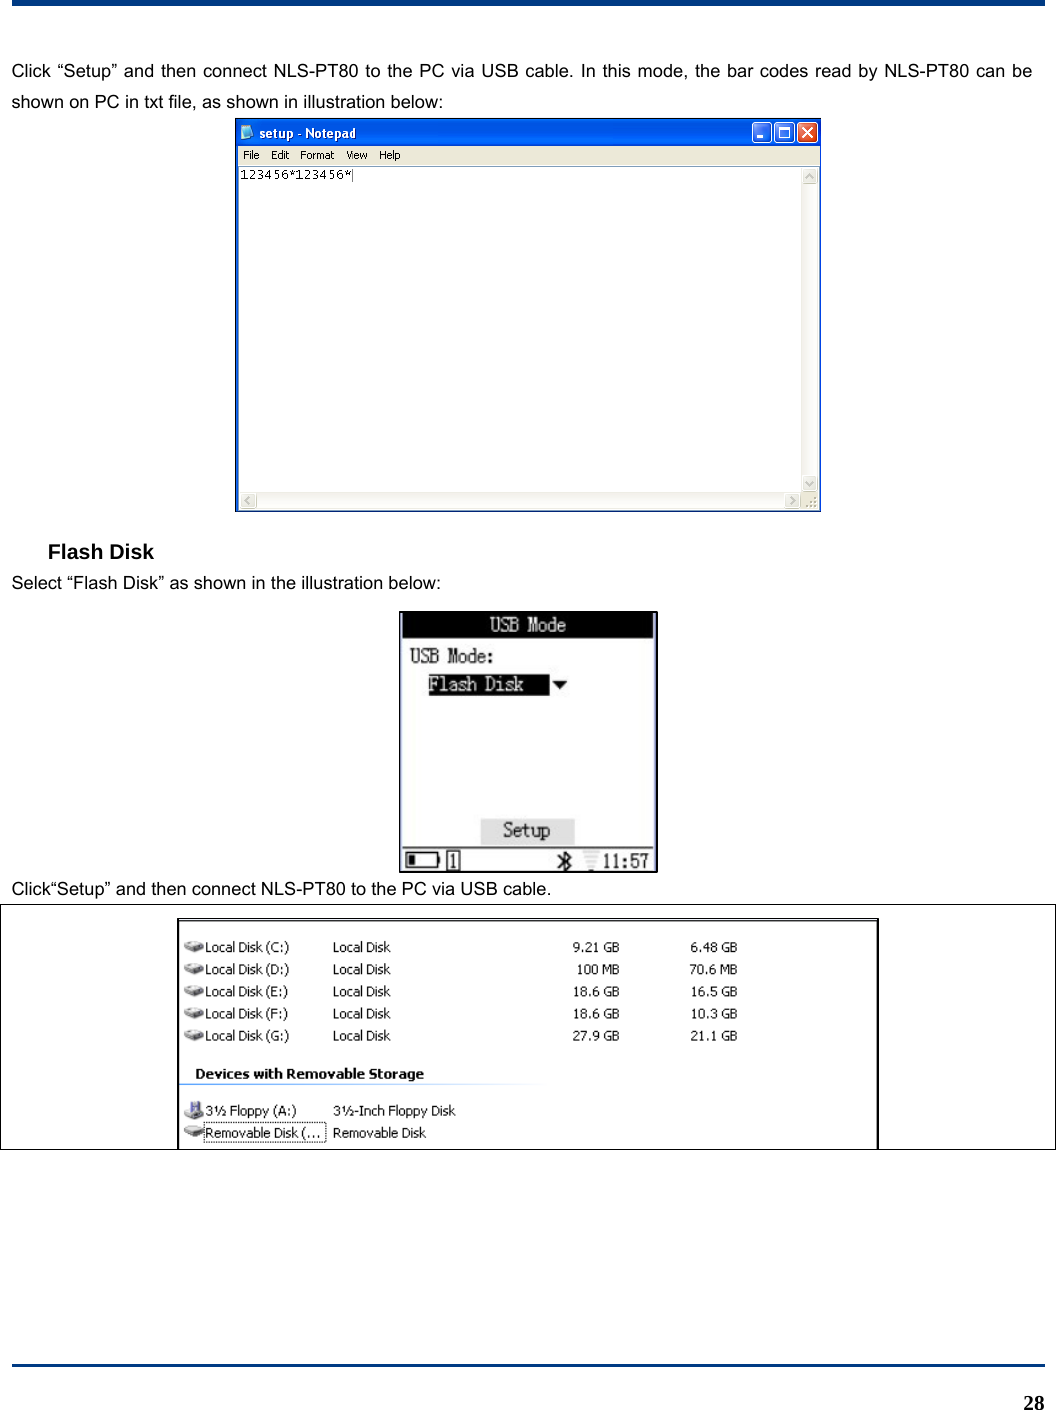
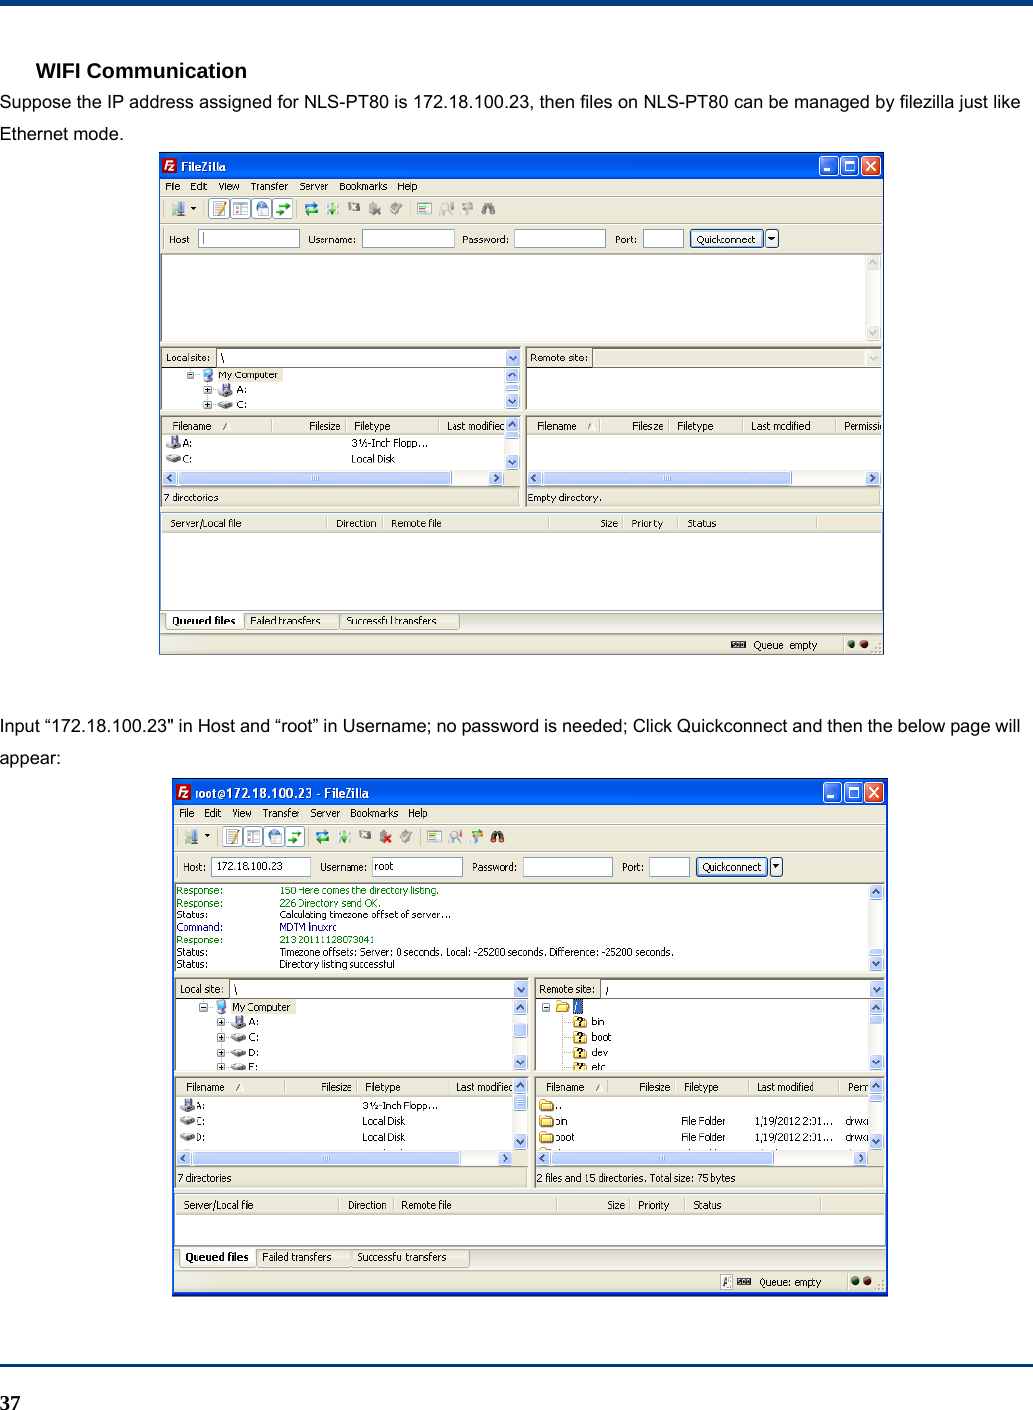
![24 Chapter IV Data Transmission Introduction This chapter will illustrate how to connect NLS-PT80 to a PC and how to realize data transmission between them. Connect NLS-PT80 to a PC The bottom of NLS-PT80 has a rubber to protect USB port. Please open this rubber and connect NLS-PT80 to a PC via USB cable. Data Transmission There are three ways for data transmission, i.e. USB, WIFI , which will be illustrated respectively as follows. Please setup in the “Communication” of NLS-PT80 as shown below: USB Connection Select “[1] USB” in the “Communication” and then click “OK” to enter “USB Mode” configuration. There are 6 items under “USB Mode”, including “COM Download”, “Ethernet”, “USB-VCOM”, “USB-HID”, “Flash Disk” and “ Flash Disk (Read Only)”: Ethernet Select “System Setup”-> “Service Management”-> “FTP Service”, and then click “Setup”. Select the mode below:](https://usermanual.wiki/Fujian-Newland-Auto-ID-Tech/NLS-PT80/User-Guide-2308321-Page-28.png)