Fujitsu Client Computing WB0009 LifeBook T Series w/ WLAN Atheros & Bluetooth User Manual T Series
Fujitsu Limited LifeBook T Series w/ WLAN Atheros & Bluetooth T Series
Contents
User Manual Part1
Copyright
Copyright & Trademark Information
Fujitsu Computer Systems Corporation has made every
effort to ensure the accuracy and completeness of this
document. However, as ongoing development efforts are
continually improving the capabilities of our products, we
cannot guarantee the accuracy of the contents of this
document. We disclaim liability for errors, omissions, or
future changes.
Fujitsu, the Fujitsu logo, and LifeBook are registered
trademarks of Fujitsu Limited.
MS, MS-DOS, and Windows are either registered
trademarks or trademarks of Microsoft Corporation in the
United States and/or other countries.
PCMCIA is a trademark of the Personal Computer
Memory Card International Association.
Intel and Pentium are trademarks or registered trademarks
of Intel Corporation or its subsidiaries in the United States
and other countries.
Bluetooth is a registered trademark of Bluetooth SIG, Inc.
Adobe, Acrobat, and Acrobat Reader are either a registered
trademarks or trademarks of Adobe Systems Incorporated
in the United States and/or other countries.
All other trademarks mentioned herein are the property
of their respective owners.
© Copyright 2004 Fujitsu Computer Systems Corpora-
tion. All rights reserved. No part of this publication may
be copied, reproduced, or translated, without prior
written consent of Fujitsu Computer Systems Corpora-
tion. No part of this publication may be stored or trans-
mitted in any electronic form without the written
consent of Fujitsu Computer Systems Corporation.
B6FH-3071-01EN-00
Warning
Handling the cord on this product or cords
associated with accessories sold with this
product, will expose you to lead, a
chemical known to the State of California
to cause birth defects or other
reproductive harm.
Wash hands after handling.
DECLARATION OF CONFORMITY
according to FCC Part 15
Responsible Party Name: Fujitsu Computer Systems Corporation
Address: 1250 E. Arques Avenue, MS 122
Sunnyvale, CA 94085
Telephone: (408) 746-6000
Declares that product: Model Configuration:
LifeBook T4010 Tablet PC
LifeBook T4010D Tablet PC
Complies with Part 15 of the FCC Rules.
This device complies with Part 15 of the FCC rules. Operations are subject to the following two conditions:
(1) This device must not be allowed to cause harmful interference, (2) This device must accept any interference
received, including interference that may cause undesired operation.
T Series.book Page 1 Wednesday, July 28, 2004 3:35 PM

LifeBook T Series Tablet PC
T Series.book Page 2 Wednesday, July 28, 2004 3:35 PM

Table of Contents
Fujitsu LifeBook® T Series Tablet PC
Table of Contents
1
PREFACE
Preface
About This Guide . . . . . . . . . . . . . . . . . . . . . . . . .3
Fujitsu Contact Information . . . . . . . . . . . . . . . . .3
Warranty . . . . . . . . . . . . . . . . . . . . . . . . . . . . . . .3
2
GETTING TO KNOW
YOUR TABLET PC
Overview
Unpacking . . . . . . . . . . . . . . . . . . . . . . . . . . . . . .7
Optional Accessories . . . . . . . . . . . . . . . . . . . . . .8
Locating the Controls and Connectors
Top and Front Components . . . . . . . . . . . . . . . .10
Left-Side Panel Components . . . . . . . . . . . . . . .11
Right-Side Panel Components . . . . . . . . . . . . . .12
Rear Panel Components . . . . . . . . . . . . . . . . . . .13
Bottom Components . . . . . . . . . . . . . . . . . . . . .14
Status Indicator Panel
Power Indicator . . . . . . . . . . . . . . . . . . . . . . . . .15
AC Adapter Indicator . . . . . . . . . . . . . . . . . . . . .15
Battery Level Indicators . . . . . . . . . . . . . . . . . . .15
Battery Charging Indicator . . . . . . . . . . . . . . . . .16
Hard Drive Access Indicator . . . . . . . . . . . . . . . .16
NumLk Indicator. . . . . . . . . . . . . . . . . . . . . . . . .16
CapsLock Indicator. . . . . . . . . . . . . . . . . . . . . . .16
ScrLk Indicator . . . . . . . . . . . . . . . . . . . . . . . . . .16
Security Indicator . . . . . . . . . . . . . . . . . . . . . . . .16
Display Panel
Opening the Display Panel . . . . . . . . . . . . . . . . .17
Using the System as a Tablet . . . . . . . . . . . . . . .17
Adjusting Display Panel Brightness . . . . . . . . . . .18
Keyboard
Using the Keyboard . . . . . . . . . . . . . . . . . . . . . .19
Numeric Keypad. . . . . . . . . . . . . . . . . . . . . . . . .19
Windows Keys . . . . . . . . . . . . . . . . . . . . . . . . . .19
Cursor Keys . . . . . . . . . . . . . . . . . . . . . . . . . . . .20
Function Keys. . . . . . . . . . . . . . . . . . . . . . . . . . .20
LifeBook Security/Tablet PC Buttons
Changing Tablet PC Button Functions . . . . . . . .22
Setting up LifeBook Security Panel . . . . . . . . . . .22
Passwords . . . . . . . . . . . . . . . . . . . . . . . . . . . . .22
Using Your LifeBook Security Panel . . . . . . . . . .23
Precautions. . . . . . . . . . . . . . . . . . . . . . . . . . . . .23
Uninstalling the Security Panel Application . . . . .24
Touchpad Pointing Device
Clicking . . . . . . . . . . . . . . . . . . . . . . . . . . . . . . .25
Double-Clicking . . . . . . . . . . . . . . . . . . . . . . . . .25
Dragging . . . . . . . . . . . . . . . . . . . . . . . . . . . . . .26
Scrolling . . . . . . . . . . . . . . . . . . . . . . . . . . . . . . .26
Touchpad Control Adjustment . . . . . . . . . . . . . .26
Pen and Active Digitizer
Using the Pen. . . . . . . . . . . . . . . . . . . . . . . . . . .27
Calibrating the Pen. . . . . . . . . . . . . . . . . . . . . . .27
Replacing the Pen Tip. . . . . . . . . . . . . . . . . . . . .28
Using the Active Digitizer . . . . . . . . . . . . . . . . . .28
Volume Control
Controlling the Volume . . . . . . . . . . . . . . . . . . .29
T Series.book Page 3 Wednesday, July 28, 2004 3:35 PM

LifeBook T Series Tablet PC
3
USING YOUR TABLET PC
Power Sources
Connecting the Power Adapters. . . . . . . . . . . . . 33
Starting Your Tablet PC
Power On . . . . . . . . . . . . . . . . . . . . . . . . . . . . . 34
Boot Sequence. . . . . . . . . . . . . . . . . . . . . . . . . . 34
BIOS Setup Utility . . . . . . . . . . . . . . . . . . . . . . . 34
Booting the System . . . . . . . . . . . . . . . . . . . . . . 35
Activating Additional Utilities . . . . . . . . . . . . . . . 35
Registering Your LifeBook T Series Tablet PC . . . 35
Power Management
Suspend/Resume Button . . . . . . . . . . . . . . . . . . 36
Standby Mode . . . . . . . . . . . . . . . . . . . . . . . . . . 36
Hibernate Mode. . . . . . . . . . . . . . . . . . . . . . . . . 37
Display Timeout . . . . . . . . . . . . . . . . . . . . . . . . . 37
Hard Disk Timeout . . . . . . . . . . . . . . . . . . . . . . . 37
Windows Power Management. . . . . . . . . . . . . . 37
Restarting the System. . . . . . . . . . . . . . . . . . . . . 37
Power Off . . . . . . . . . . . . . . . . . . . . . . . . . . . . . 38
4
USER-INSTALLABLE FEATURES
Lithium ion Battery
Recharging the Battery. . . . . . . . . . . . . . . . . . . . 41
Replacing the Battery. . . . . . . . . . . . . . . . . . . . . 42
Memory Upgrade Module
Installing Memory Upgrade Modules . . . . . . . . . 43
To Remove a Memory Upgrade Module . . . . . . 43
Checking the Memory Capacity. . . . . . . . . . . . . 44
PC Cards
Installing PC Cards . . . . . . . . . . . . . . . . . . . . . . . 45
Removing PC Cards . . . . . . . . . . . . . . . . . . . . . . 45
Smart Card Reader. . . . . . . . . . . . . . . . . . . . . . . 45
Port Replicator
Rear Panel Components. . . . . . . . . . . . . . . . . . . 46
Front Panel Components . . . . . . . . . . . . . . . . . . 47
Attaching the Port Replicator. . . . . . . . . . . . . . . 47
Detaching the Port Replicator . . . . . . . . . . . . . . 47
Device Ports
Modem (RJ-11) Jack . . . . . . . . . . . . . . . . . . . . . 48
Internal LAN (RJ-45) jack. . . . . . . . . . . . . . . . . . 48
Docking Port . . . . . . . . . . . . . . . . . . . . . . . . . . . 48
Universal Serial Bus Ports . . . . . . . . . . . . . . . . . . 48
Infrared Port . . . . . . . . . . . . . . . . . . . . . . . . . . . 48
Microphone Jack . . . . . . . . . . . . . . . . . . . . . . . . 49
Headphone Jack . . . . . . . . . . . . . . . . . . . . . . . . 49
External Monitor Port . . . . . . . . . . . . . . . . . . . . 49
5
TROUBLESHOOTING
Troubleshooting
Identifying the Problem . . . . . . . . . . . . . . . . . . . 53
Specific Problems. . . . . . . . . . . . . . . . . . . . . . . . 53
Troubleshooting Table . . . . . . . . . . . . . . . . . . . . 54
Power On Self Test Messages . . . . . . . . . . . . . . 61
Modem Result Codes. . . . . . . . . . . . . . . . . . . . . 62
Restoring Your Software
Drive Image Special Edition (DISE) . . . . . . . . . . . 63
6
CARING FOR YOUR TABLET PC
Care and Maintenance
Keyboard. . . . . . . . . . . . . . . . . . . . . . . . . . . . . . 68
Batteries. . . . . . . . . . . . . . . . . . . . . . . . . . . . . . . 68
Optional Floppy Disk Drive and Floppy Disks. . . 68
Optional CD Drive and CDs. . . . . . . . . . . . . . . . 68
PC Cards . . . . . . . . . . . . . . . . . . . . . . . . . . . . . . 69
T Series.book Page 4 Wednesday, July 28, 2004 3:35 PM

Table of Contents
7
SPECIFICATIO NS
Specifications
Configuration Label . . . . . . . . . . . . . . . . . . . . . . 73
Physical Specifications . . . . . . . . . . . . . . . . . . . . 73
Processing Specifications . . . . . . . . . . . . . . . . . . 73
Memory/Storage Specifications . . . . . . . . . . . . . 73
Display Specifications . . . . . . . . . . . . . . . . . . . . . 73
Interface Specifications. . . . . . . . . . . . . . . . . . . . 73
Power Specifications. . . . . . . . . . . . . . . . . . . . . . 74
Environmental Specifications . . . . . . . . . . . . . . . 74
Agency Approval Specifications . . . . . . . . . . . . . 74
Additional Specifications. . . . . . . . . . . . . . . . . . . 74
Regulatory Information . . . . . . . . . . . . . . . . . . . 75
8
GLO SSARY
Glossary . . . . . . . . . . . . . . . . . . . . . . . . . . . . . . . 81
APPENDIX: INTEGRATED
W IRELESS LAN USER’S GUIDE
Before Using the Wireless LAN
W ireless LAN M odes Using this Device. . . . . . . . 90
W ireless Network Considerations . . . . . . . . . . . . 91
Deactivating the W LAN Device . . . . . . . . . . . . . 92
Activating the W LAN Device . . . . . . . . . . . . . . . 92
Configuration of the W LAN Device
Flow of O perations. . . . . . . . . . . . . . . . . . . . . . . 93
Configuration Using W ireless
Zero Configuration Tool. . . . . . . . . . . . . . . . 93
Configuration Using Intel PRO Set Software . . . . 94
Configuration Using Atheros
Client Utility Software . . . . . . . . . . . . . . . . . 95
Connection to the network. . . . . . . . . . . . . . . . . 97
Troubleshooting the W LAN
Troubleshooting . . . . . . . . . . . . . . . . . . . . . . . . 101
Wireless LAN Glossary
Glossary . . . . . . . . . . . . . . . . . . . . . . . . . . . . . . 102
IP address information
Additional Information . . . . . . . . . . . . . . . . . . . 103
W LAN Specifications
Specification . . . . . . . . . . . . . . . . . . . . . . . . . . . 104
T Series.book Page 5 Wednesday, July 28, 2004 3:35 PM
Using the Bluetooth Device
W hat is Bluetooth . . . . . . . . . . . . . . . . . . . . . . 109
W here to Find Information About Bluetooth . . 109

LifeBook T Series Tablet PC
T Series.book Page 6 Wednesday, July 28, 2004 3:35 PM

1
1
Preface
T Series.book Page 1 Wednesday, July 28, 2004 3:35 PM

2
LifeBook T Series Tablet PC
T Series.book Page 2 Wednesday, July 28, 2004 3:35 PM
3
Preface
Preface
ABOUT THIS GUIDE
The LifeBook® T Series Tablet PC from Fujitsu
Computer Systems Corporation is a powerful convert-
ible computer. It can be used either as a standard note-
book using keyboard input, or in tablet configuration
using pen input. It is powered by an Intel® micropro-
cessor, has a built-in color display with an active digi-
tizer, and brings the computing power of desktop
personal computers (PCs) to a portable and versatile
environment.
This manual explains how to operate your LifeBook T
Series Tablet PC’s hardware and built-in system soft-
ware. Your LifeBook T Series Tablet PC comes with
Windows® XP Tablet Edition pre-installed.
Your LifeBook T Series Tablet PC is a completely self-
contained unit with an active-matrix (TFT) color LCD
display. The display has a wide viewing angle and can be
used indoors or outdoors. The tablet has a powerful
interface that enables it to support a variety of optional
features.
Conventions Used in the Guide
Keyboard keys appear in brackets.
Example: [Fn], [F1], [Esc], [Enter] and [Ctrl].
Pages with additional information about a specific topic
are cross-referenced within the text.
Example: (See page xx.)
On screen buttons or menu items appear in bold.
Example: Click OK to restart your Tablet PC.
DOS commands you enter appear in Courier type.
Example: Shutdown the computer?
FUJITSU CONTACT INFORMATION
Service and Support
You can contact Fujitsu Computer Systems Service and
Support the following ways:
■Toll free: 1-800-8Fujitsu (1-800-838-5487)
■Fax: 1-408-764-2724
■E-mail: 8fujitsu@us.fujitsu.com
■Web site: http://us.fujitsu.com/computers
Before you place the call, you should have the
following information ready so that the customer
support representative can provide you with the
fastest possible solution:
■Product name
■Product configuration number
■Product serial number
■Purchase date
■Conditions under which the problem occurred
■Any error messages that have occurred
■Type of device connected, if any
Fujitsu Online
You can go directly to the online Fujitsu Product catalog
for your Tablet PC. Go to Start -> All Programs ->
Service & Support Software, and click on Pen Accesso-
ries Web site.
You can also reach Fujitsu Service and Support online by
going to Start -> All Programs -> Service & Support
Software, and clicking on Fujitsu Service & Support Web
site.
WARRANTY
Your LifeBook T Series Tablet PC is backed by an Inter-
national Limited Warranty and includes toll-free tech-
nical support. Check the service kit that came with your
Tablet PC for warranty terms and conditions.
The information icon highlights
information that will enhance your
understanding of the subject material.
The caution icon highlights information
that is important to the safe operation of
your computer, or to the integrity of your
files. Please read all caution information
carefully.
The warning icon highlights information
that can be hazardous to either you, your
system, or your files. Please read all
warning information carefully.
You must have an active internet
connection to use the online URL links.
T Series.book Page 3 Wednesday, July 28, 2004 3:35 PM

4
LifeBook T Series Tablet PC - Preface
T Series.book Page 4 Wednesday, July 28, 2004 3:35 PM

5
2
Getting to Know
Your Tablet PC
T Series.book Page 5 Wednesday, July 28, 2004 3:35 PM

6
LifeBook T Series Tablet PC
T Series.book Page 6 Wednesday, July 28, 2004 3:35 PM
22
LifeBook T Series Tablet PC - Section Two
Page Down / Application A Button
When you press the Page Down button when the system
is running, each press of the button will scroll the screen
down one frame. This allows you to navigate quickly
through large documents.
When you press the Fn button while you press then
release the Page Down/Application A button, you will
automatically start whichever program is assigned to the
button. The default application for this button is Calcu-
lator.
See “Changing Tablet PC Button Functions” on page 22
to select a different application for this button.
Page Up / Application B Button
When you press the Page Up button when the system is
running, each press of the button will scroll the screen
up one frame. This allows you to navigate quickly
through large documents.
When you press the Fn button while you press then
release the Page Up/Application A button, you will auto-
matically start whichever program is assigned to the
button. The default application for this button is
Microsoft Journal.
See “Changing Tablet PC Button Functions” on page 22
to select a different application for this button.
Screen Rotation / VGA-Out Button
The screen rotation feature would normally be used only
when the system is configured as a tablet. When you
would like to use the tablet as an eBook, for example,
you would use the portrait orientation; when accessing
spreadsheets or using the system as a notebook, you
would more typically use landscape orientation.
When the system is changed to tablet configuration, the
orientation automatically changes to portrait mode by
default.
When you press the Screen Rotation / VGA-Out button,
the system screen orientation changes from portrait
(vertical) to landscape (horizontal) or from landscape to
portrait.
Function / Fujitsu Menu Utility Button
The Function button works in conjunction with the
other application buttons to provide additional func-
tionality for the buttons. Refer to specific details above.
Pressing the Fn button twice in succession causes the
Fujitsu Menu Utility to appear on your screen, allowing
you to modify certain system settings.
Ctl+Alt+Del Button
Pressing and holding the Ctl-Alt-Del button for up to
750 msecs launches the Logon screen or the Windows
Task Manager (if the system hasn’t yet been configured).
CHANGING TABLET PC BUTTON FUNCTIONS
The Application A and B buttons can be changed to
launch a program or perform an action you select. By
default, the Application A button launches the Calcu-
lator, and the Application B button launches MS
Journal.
To launch different applications or cause the Application
A or B buttons to perform a specific action:
1. Double-click on the Tablet and Pen Settings icon in
the Control Panel.
2. Select the Tablet Buttons tab and select the button
you would like to change from the list.
3. Click [Change] and open the drop down list in the
Action: field.
4. Select the action you would like the button to
perform. If you want to launch a program, click on
Launch an Application then browse to the location
of the program.
5. Click [OK], then click [OK] again. The buttons will
now perform the actions you have assigned to them.
SETTING UP LIFEBOOK SECURITY PANEL
When you receive your Tablet PC, the security panel
application is pre-installed without any passwords. The
following sections provide detailed information on your
security panel, how to set, change or remove passwords.
Numbered Buttons
Use these buttons to enter your password.(Figure 2-18)
Enter Button
After entering the button strokes, push this button to
enter the password into the Tablet PC. (Figure 2-18)
PASSWORDS
The user and supervisor password may be set on this
Tablet PC. A supervisor password is typically the same
for all Tablet PC’s and notebooks in a work group, office,
or company to allow for system management. Individual
computers in a group environment should not use a
common password. A password consists of one to five
button strokes plus the enter button. A valid stroke
consists of pushing one or up to four buttons simulta-
neously.
The screen orientation default can be
changed by going to the Control Panel and
double-clicking on the Fujitsu Display
Control icon and selecting the desired
defaults from the Display Orientation
section. After changing the defaults, click
[OK].
T Series.book Page 22 Wednesday, July 28, 2004 3:35 PM
23
Getting to Know Your Tablet PC
The following are valid button strokes:
■Pushing [4] by itself
■Pushing [2] and [3] at the same time
■Pushing [1], [2], and [4] at the same time
■Pushing [1], [2], [3], and [4] at the same time
The following are valid passwords. The numbers within
braces ({ }) are button strokes using more than one
button.
■{[2]+[3]}, [1], [Enter]
■[4], [enter]
■{[1]+[3]}, {[2]+[3]+[4]}, [1], [4], [2], [Enter]
Setting Passwords
When shipped from the factory, no passwords are set.
You have a choice of having no password or setting a
supervisor and user password. You must set the super-
visor password before the user password.
Setting Supervisor Password
You must have set a supervisor password before setting
any user passwords. The supervisor password can bypass
the user password.
1. Go to the Start menu.
2. Click on Run.
3. Type in:
C:\Program Files\Fujitsu\Security
Panel Application\Supervisor\
FJSECS.EXE, then press [Enter]
4. Follow the on-screen instructions to set the
Supervisor password.
Setting User Password
1 Go to the Start menu.
2. Click on All Programs.
3. Click on Security Panel Application -> Security
Panel Application.
4. Follow the on-screen instructions to set the
user password.
USING YOUR LIFEBOOK SECURITY PANEL
The security lock feature is in effect both when the system
resumes from Off, Standby, or Hibernation state. You
always need to push the Security Panel buttons to input
the user password. Your system will not begin the boot
sequence until you enter your supervisor/user password.
From Off State
1. Turn on your system.
2. When the Security Indicator flashes, enter the pass-
word and press Enter button.
For example, if the password is 22222, first press
Button 2 five times and press the Enter button. The
Tablet PC will boot to normal operation.
From Standby/Hibernation State
1. Press your Suspend/Resume button.
2. When the Security Indicator flashes, enter the pass-
word and press Enter button.
The Tablet PC should resume normal operation.
Incorrect Password Entry
If an invalid supervisor or user password is entered three
times in succession, the system will “beep” for about one
minute. If a valid password is entered within a minute
(while system beeps), the beeping will stop and the
Tablet PC will resume normal operation. If no password
is entered or an invalid password is entered while the
system beeps, the system will return to its previous
locked state (standby or off) and the Security Indicator
will go off. To reactivate the Tablet PC after a password
failure, you must press the Suspend/Resume button,
then enter a correct password.
PRECAUTIONS
Opening and Closing the Cover
By default, closing the cover automatically places your
system into Standby mode. (You can change the action
the system takes when the cover is closed by opening the
Power Options Properties icon in the Control Panel, and
selecting the Advanced tab. Make a choice from the drop
down menu for “When I close the lid of my portable
computer:” and click the [OK] button.) Opening the
cover does not automatically place the Tablet PC into
normal operation. Instead, you must enter the proper
security password after pushing the Suspend/Resume
button.
■The purpose of supervisor password is to
be able to bypass the user password in
case the user password is forgotten. The
supervisor password alone will not lock
the system.
■You must set the supervisor and user
passwords for the security panel to work.
You may change or remove the supervisor
or user password by repeating the steps
defined above.
Remember the user password you specified
on the Security Panel Application. If you
forget the password you will not be able to
use your computer. The supervisor pass-
word can override the user password.
T Series.book Page 23 Wednesday, July 28, 2004 3:35 PM
24
LifeBook T Series Tablet PC - Section Two
Low Battery Operations
If your Tablet PC has a low battery, pushing the suspend/
resume button only turns on the Security
Indicator. Your Tablet PC does not unlock, the Security
Indicator turns off after one minute. To resume normal
operation, first attach a power supply to the Tablet PC.
Then you may unlock the Tablet PC.
UNINSTALLING THE SECURITY
PANEL APPLICATION
You have two options when uninstalling the security
panel application:
■Remove passwords and uninstall the security panel
application software. This will disable all security
features.
■Uninstall the security panel application with password
still active. This will not allow any changes to the
password.
Uninstalling the Security Panel
Application Software
Remove passwords when User wants no password
protection whatsoever and doesn’t want to give anybody
the utility to set a password on their computer. In this
case, if passwords (supervisor, user, or both) are set, the
passwords must first be cleared BEFORE removing the
application. To clear passwords, follow same procedure
in SETTING PASSWORD CODES except this time,
select REMOVE, enter current password then click Next.
When asked to confirm select Yes .
Removing Security Panel Application with
Passwords Still Active
Using this feature will not allow any changes to
the password.
User:
1. Go to Start -> Control Panel.
2. Open Add or Remove Programs Properties in the
Control Panel.
3. Select the Security Panel Application in the list, and
click Change/Remove.
4. When the Confirm File Deletion box appears,
click Yes.
Supervisor:
1. Go to Start -> Control Panel.
2. Open Add or Remove Programs Properties in the
Control Panel.
3. Select the Security Panel Application for
Supervisor in the list, and click Change/Remove.
4. When the Confirm File Deletion box appears,
click Yes.
Reinstalling the Security Panel Application
To reinstall supervisor or user security application, you
will need your Drivers and Applications CD. The
Utilities\Security Panel Application folder contains two
separate folders: Supervisor and User. The setup files for
supervisor and user security applications are contained
in those folders.
1. Go to the Utilities\Security Panel Applica-
tion\Supervisor folder on the CD and double-click
the setup.exe file. The Installing Security Panel
Application window will appear. Follow the instruc-
tions on the screen.
2. Go to the Utilities\Security Panel Application\User
folder on the CD and double-click the setup.exe file.
The Installing Security Panel Application window
will appear. Follow the instructions on the screen.
Supervisor and user passwords can be set via Windows
software using the FJSECS.exe and FJSECU.exe files,
respectively. FJSECU.exe for the user password cannot
run without first setting a supervisor password. You
need to run FJSECS.exe first to set the supervisor pass-
word. Follow instructions under Setting Passwords on
page 23.
If you forget both passwords, please contact Fujitsu
Computer Systems Corporation Service and Support at
1-800-8FUJITSU (1-800-838-5487). Fujitsu Computer
Systems Corporation charges a service fee for unlocking
a password-restricted Tablet PC. When calling please
have a valid credit card and provide proof of ownership.
You will then be given instructions on where to ship
your Tablet PC.
Removing the applications does not remove
the password. It simply removes the utility
to change/add/remove passwords. To
change your password you must reinstall
the application.
T Series.book Page 24 Wednesday, July 28, 2004 3:35 PM
25
Getting to Know Your Tablet PC
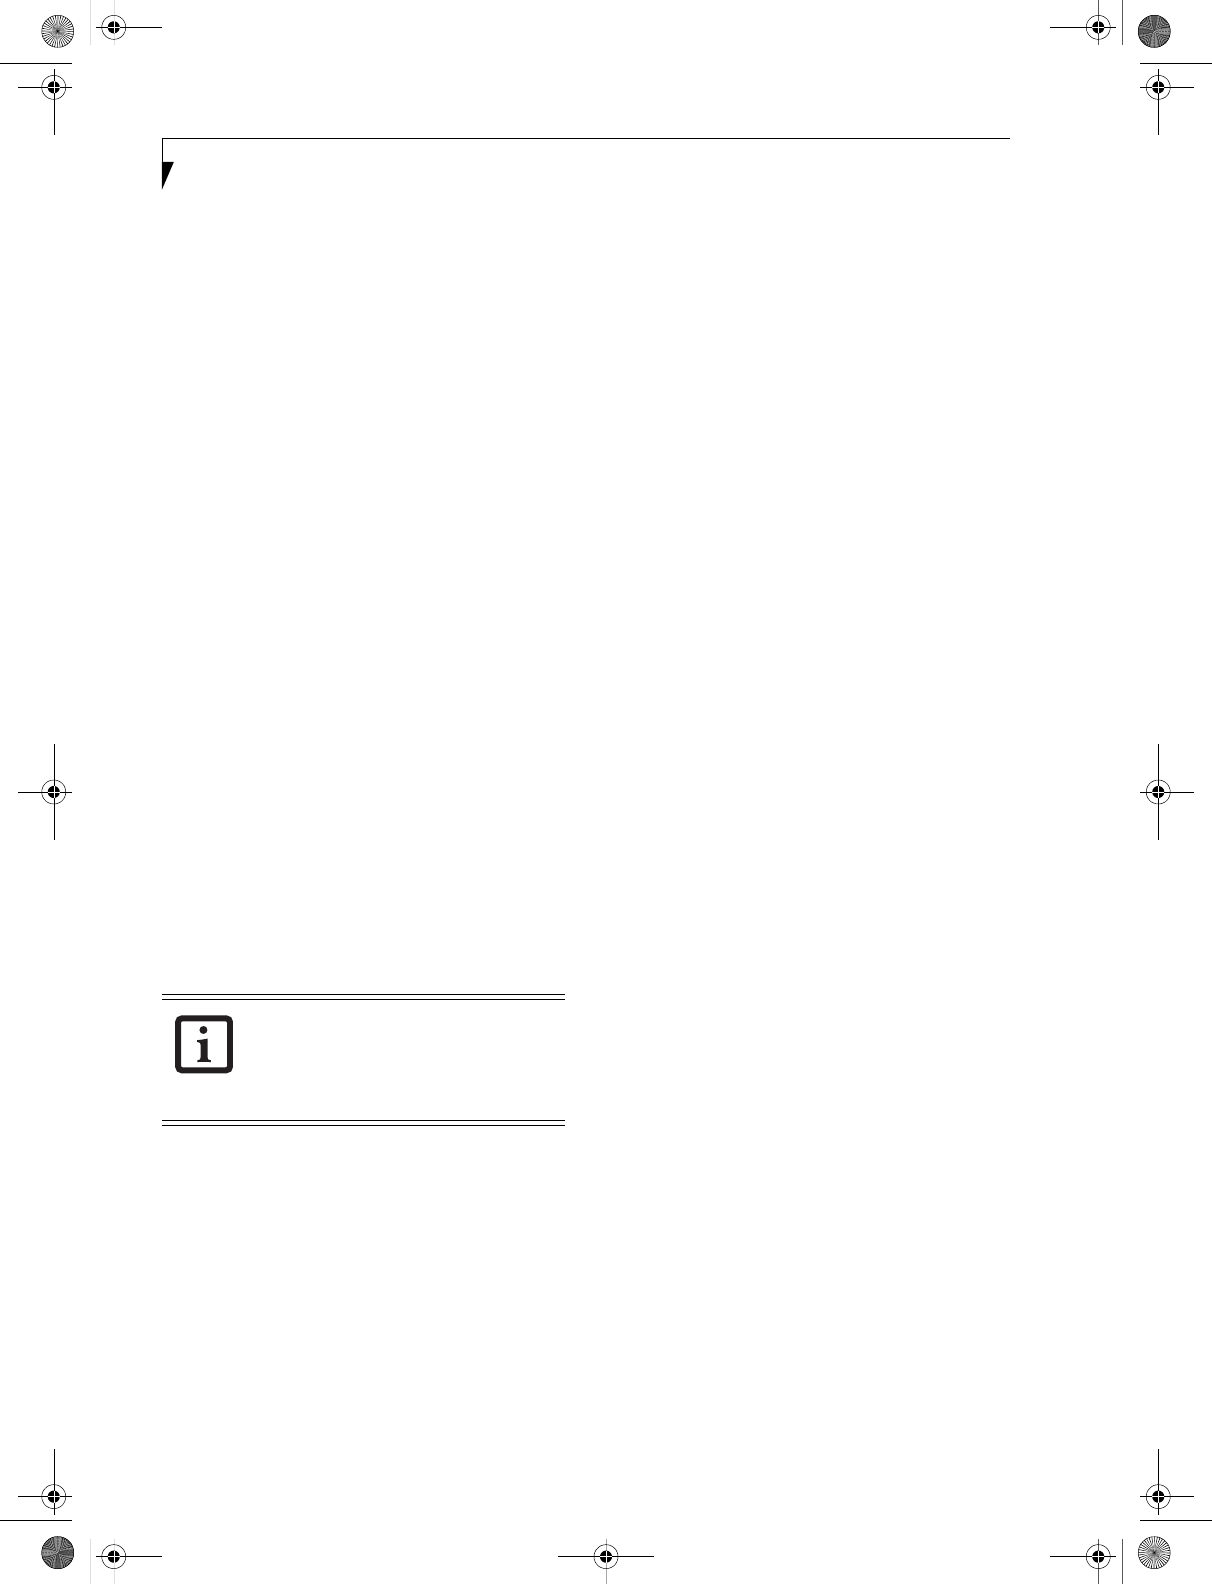
Figure 2-19. Touchpad pointing device
Touchpad Pointing
Device
The Touchpad pointing device built into your Tablet PC
is used to control the movement of the cursor to select
items on your display panel. The Touchpad is composed
of a cursor control, left and right buttons, and a scroll
button. The cursor control works the same way a mouse
does, and moves the cursor around the display. It only
requires light pressure with the tip of your finger. The
left and right buttons function the same as left and right
mouse buttons. The scroll button allows you to navigate
through pages quickly without using the scroll bars. The
actual functionality of the buttons may vary depending
on the application that is being used. (Figure 2-19)
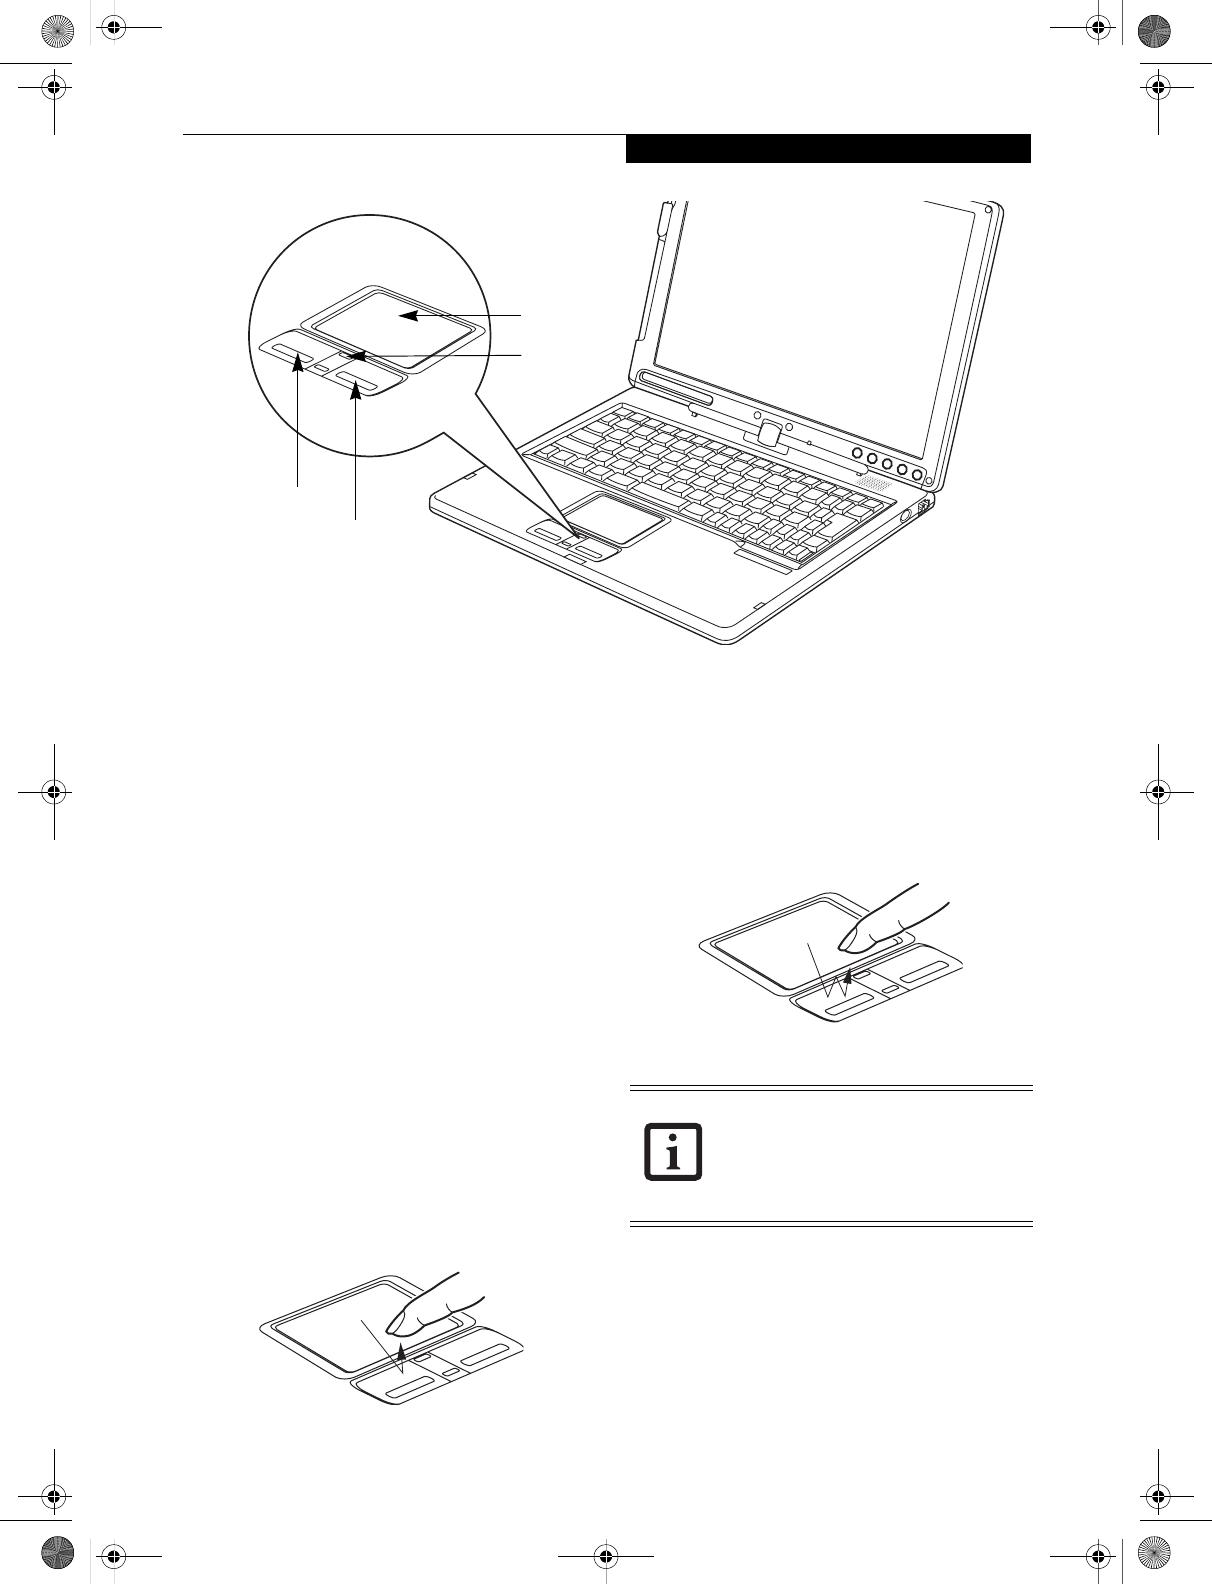
CLICKING
Clicking means pushing and releasing a button. To left-
click, move the cursor to the item you wish to select,
press the left button once, and then immediately release
it. To right-click, move the cursor to the item you wish
to select, press the right button once, and then immedi-
ately release it. (Figure 2-20)
Figure 2-20. Clicking
DOUBLE-CLICKING
Double-clicking means pushing and releasing the left
button twice in rapid succession. This procedure does
not function with the right button. To double-click,
move the cursor to the item you wish to select, press
and release the left button twice. (Figure 2-21)
Figure 2-21. Double-clicking
Left Button
Right Button
Scroll Button
Cursor Control
NEW GRAPHIC
■If the interval between clicks is too long,
the double-click will not be executed.
■Parameters for the Touchpad can be
adjusted from the Mouse dialog box
located in the Windows Control Panel.
T Series.book Page 25 Wednesday, July 28, 2004 3:35 PM
26
LifeBook T Series Tablet PC - Section Two
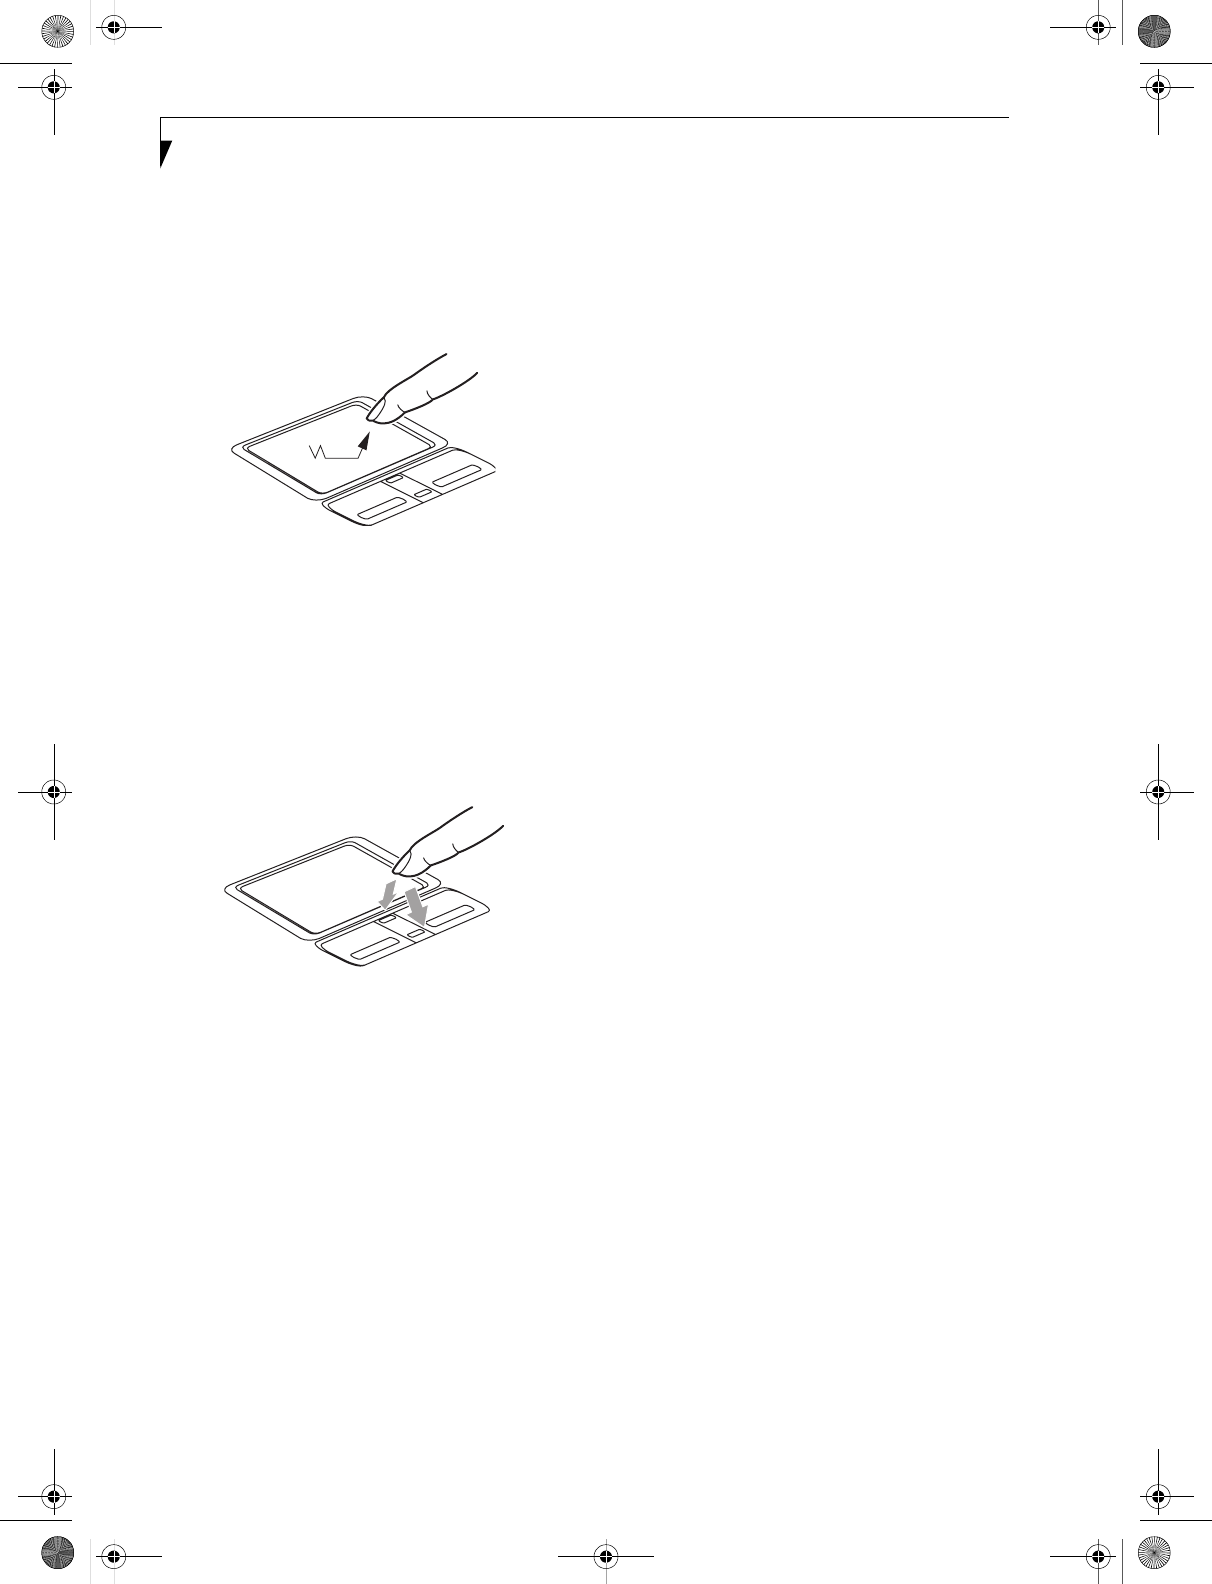
DRAGGING
Dragging means pressing and holding the left button
while moving the cursor. To drag, move the cursor to
the item you wish to move. Press and hold the left
button while moving the item to its new location
and then release it. (Figure 2-22)
Figure 2-22. Dragging
SCROLLING
Using the scroll button allows you to navigate through a
document quickly without having to use the scroll bars.
This is particularly useful when you are navigating
through online pages. To use the scroll button, press the
raised horizontal line at the top or bottom of the button
to scroll up or down a page. When you have reached the
desired section of the page, release the button.
(Figure 2-23)
Figure 2-23. Scrolling
TOUCHPAD CONTROL ADJUSTMENT
The Windows Control Panel allows you to customize
your Touchpad with selections made from within the
Mouse Properties dialog box. There are several aspects of
Touchpad operation, which you can adjust.
To access the Mouse Properties window, open the
Control Panel and double-click the Mouse icon. In the
window that appears, you will see a variety of different
mouse functions that you can change.
T Series.book Page 26 Wednesday, July 28, 2004 3:35 PM
29
Getting to Know Your Tablet PC
Volume Control
Your Fujitsu Tablet PC has multiple volume controls
which interact with each other.
CONTROLLING THE VOLUME
The volume can be controlled in several different ways:
■Volume can be set from within the Volume Control on
the Taskbar.
■Volume can be controlled with the [F8] and [F9] func-
tions keys. Pressing [F8] repeatedly while holding [Fn]
will decrease the volume of your Tablet PC. Pressing
[F9] repeatedly while holding [Fn] will increase the
volume of your Tablet PC.
■Volume can be controlled by many volume controls
that are set within individual applications.
■Certain external audio devices you might connect to
your system may have hardware volume controls.
■Each source discussed above puts an upper limit on
the volume level that must then be followed by the
other sources.
We recommend that you experiment with the various
volume controls to discover the optimal sound level.
Any software that contains audio files will
also contain a volume control of its own. If
you install an external audio device that has
an independent volume control, the
hardware volume control and the software
volume control will interact with each other.
It should be noted that if you set your
software volume to Off, you will override
the external volume control setting.
There are twenty-six levels through which
the function keys cycle.
T Series.book Page 29 Wednesday, July 28, 2004 3:35 PM

30
LifeBook T Series Tablet PC - Section Two
T Series.book Page 30 Wednesday, July 28, 2004 3:35 PM

27
Getting to Know Your Tablet PC
Pen and Active Digitizer
USING THE PEN
You can use the LifeBook T Series Tablet PC pen to
generate and create electronic “ink”, to select items, and
to navigate through programs on the Tablet PC.
Programs that support handwriting recognition also
allow you to write characters directly on the screen with
the pen. You can also use the pen as a drawing tool.
Figure 2-24. LifeBook T Series Pen
The screen reacts when the pen tip is approximately 1/8
inch (3-5 mm) from the screen. The pen has three
switches: a tip switch and a barrel button toggle switch
with switches at both ends. By default, the tip switch
corresponds to the left mouse button, and the front
toggle (closest to the pen tip) barrel button switch corre-
sponds to the right mouse button (when used in combi-
nation with the tip switch). The rear toggle of the barrel
button switch acts as an electronic ink "eraser".
The functions of the rear toggle and the tip click pres-
sure can be changed by clicking [Start] -> Control
Panel, and double-clicking the Fujitsu Pen Settings icon.
To change the rear toggle function, select the drop-down
list to select a new function, then click [Apply]. If you
don’t want the rear toggle to have any function, select
Ignore from the list.
Adjusting the click pressure determines how much pres-
sure must be put on the pen tip in order for the screen to
react. The softer it is set, less pressure is required; the
harder it is set, more pressure is required. To change the
click pressure, use the slider bar to make the click pres-
sure harder or softer, then click [Apply].
Here are some hints that may help you use the pen more
effectively:
• To activate the tip switch, tap or hold the pen tip
against the screen.
• To activate the barrel button switch, press and hold
the end of the button you wish to use (front toggle is
the right mouse button switch; the rear toggle acts as
an electronic “eraser”).
• To move the cursor, hold the pen tip within 1/8 inch
(3 - 5 mm) from the screen and move the pen.
• To start a program, double-tap the pen tip (tap the
pen tip twice rapidly) on the program icon as you
would double-click a mouse.
•To select an object, tap the pen tip on the object
once.
•To double-click an object, quickly tap the object
twice.
CALIBRATING THE PEN
In order to ensure accurate tracking between the pen
and cursor, you must run the Touch Screen Calibration
Utility before you use the active digitizer for the first
time, or after you change the display resolution.
To run the calibration utility:
1. Go to Start -> Control Panel and double-click on
the Table t and Pen Setting s icon.
2. Click Calibrate.
3. Adjust the display of your Tablet PC to a comfort-
able angle.
You are advised to use a screen protector
on your system display to minimize the
chance of its being scratched. Screen
protectors are available from the Fujitsu
Web site at us.fujitsu.com/computers.
The LifeBook T Series Tablet PC pen is a
high-quality electronic instrument that can
be damaged if used improperly. Treat the
pen as you would any precision device.
Observe the following guidelines:
• Do not gesture with the pen, use it as a
pointer, or tap it on surfaces other than
the Tablet PC screen.
• Do not try to turn the thumb grip on
the pen; it is designed for inserting and
removing the pen from the pen holder.
• Never store the pen with the tip bearing
the weight of the pen (e.g., sitting tip
down in a pencil cup). Storing the pen
tip down could distort the internal
mechanism over a period of time
(especially in higher temperatures),
causing the tip to act as if it is always
depressed. The pen should be stored in
the pen holder when not in use.
Tip Switch
Barrel Switch
Use only the pen provided with your
Tablet PC. Do not use substitutes that
were not designed for the LifeBook T
Series Tablet PC.
T Series.book Page 27 Wednesday, July 28, 2004 3:35 PM
28
LifeBook T Series Tablet PC - Section Two
4. Using the pen, firmly touch the screen directly on
the (+) symbol; the (+) symbol will move to the
next location.
5. Repeat step 4 in the four corners, then click OK.
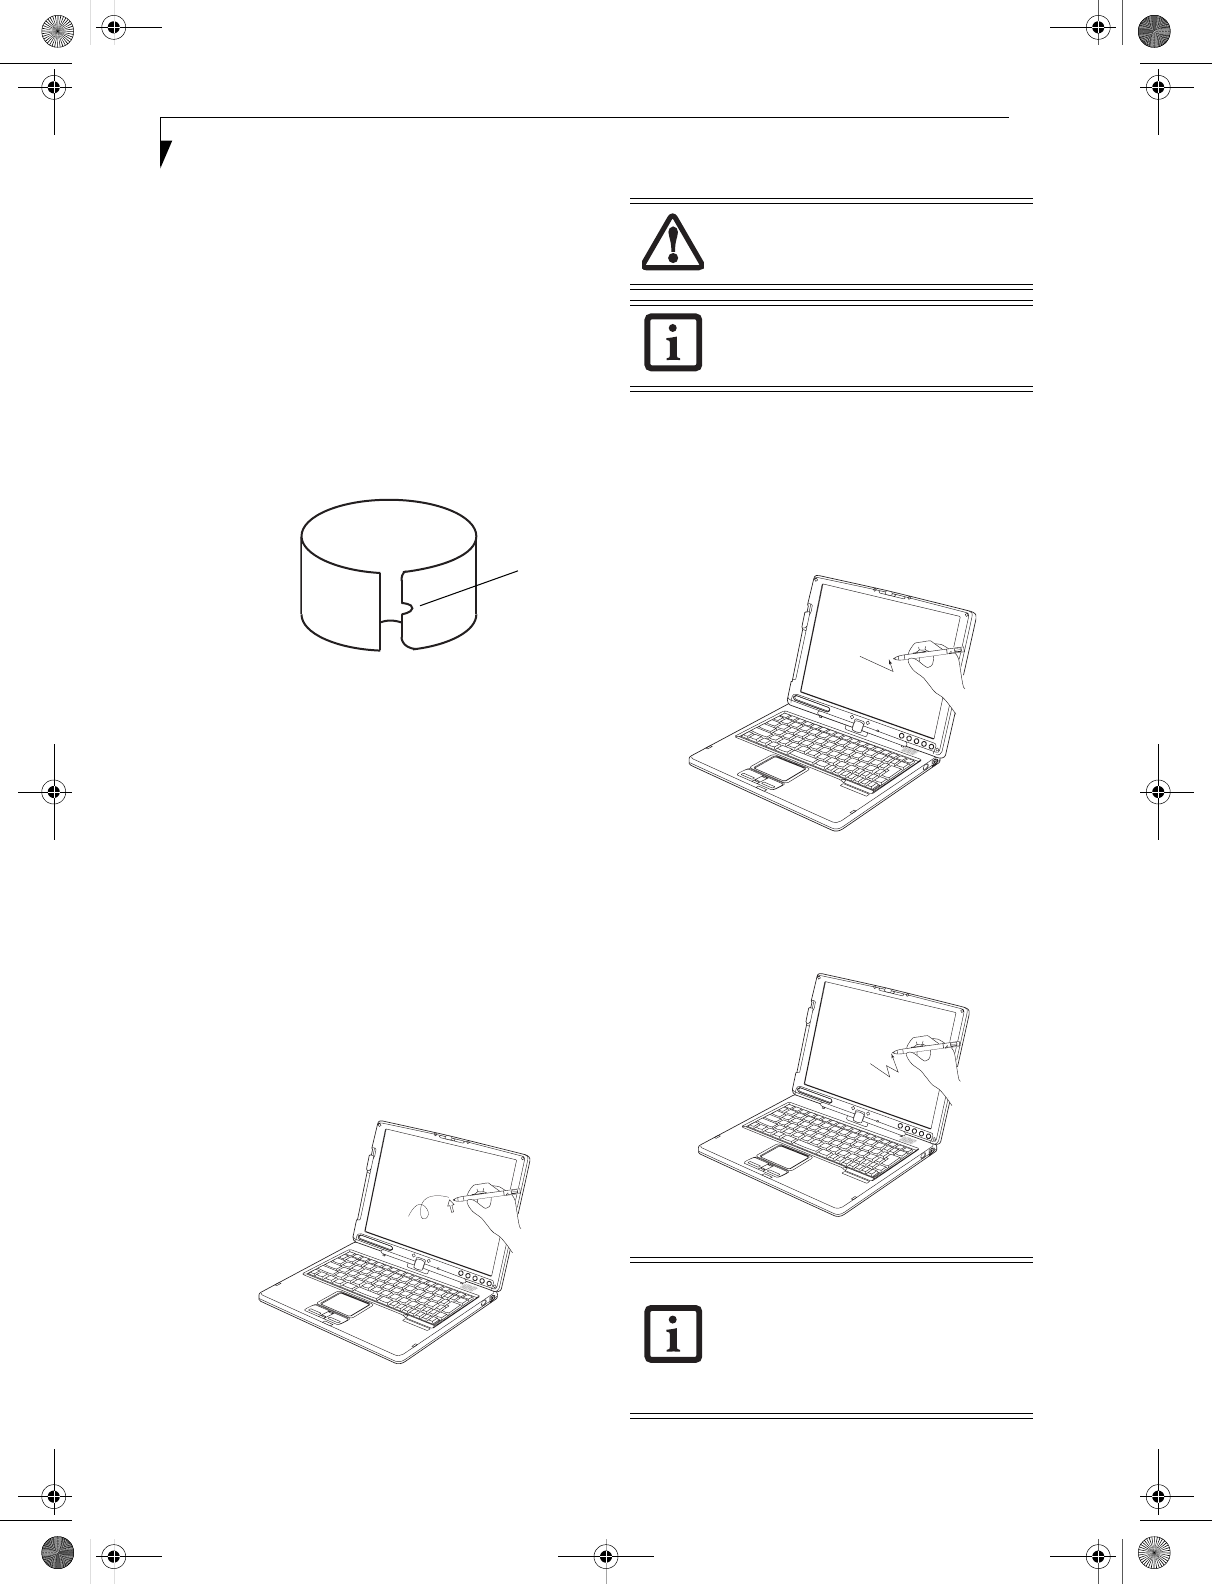
REPLACING THE PEN TIP
With use, the pen tip may become worn or may pick up
foreign particles that can scratch the screen. A damaged
or worn tip may not move freely, causing unpredictable
results when using the pen. If your pen exhibits these
problems, you should replace the pen tip. To do so, use
the pen tip removal tool included with your pen.
Figure 2-25. Tip Removal Tool
To remove the tip, position the tip in the gap between
the two ends of the tool (Figure 2-25). Pinch the tool
together so the tip is firmly clasped, then pull it from the
barrel. If the tip is worn or damaged, discard it.
To replace the tip, retrieve one of the new tips that
accompanied your pen. Insert the flat end of the tip into
the barrel and push it in firmly until it is seated.
If you need more tips, they can be ordered from the
Fujitsu Web site at: us.fujitsu.com/computers.
USING THE ACTIVE DIGITIZER
The integrated active digitizer allows you to use the
included pen as a pointing device. You can use the pen
to click, double-click, drag items and icons, or to draw
like a pen or pencil in applications that support this
behavior, such as drawing or painting programs. See the
documentation that came with your application for
details. (Figure 2-26)
Figure 2-26. Using the pen with the screen
Clicking
To left-click, touch the object you wish to select and then
lift the pen tip immediately. (Figure 2-27)
To right-click, press the front button on the barrel
switch or touch the pen to the screen for a couple of
seconds until the right mouse icon appears at the tip.
Figure 2-27. Clicking the screen
Double-Clicking
To double-click, touch the item twice, and then immedi-
ately remove the pen tip. (Figure 2-28)
Figure 2-28. Double-clicking the screen
Gap
To avoid potential scratching and damage,
never use anything but the included pen
with the display.
To purchase additional or replacement
pens, visit the Fujitsu accessories Web site
at: http://us.fujitsu.com/computers.
■If the interval between taps is too long,
the double-click will not be executed.
■Parameters for the screen can be
adjusted from the Mouse Properties dia-
log box located in the Windows Control
Panel.
T Series.book Page 28 Wednesday, July 28, 2004 3:35 PM
33
Getting Started
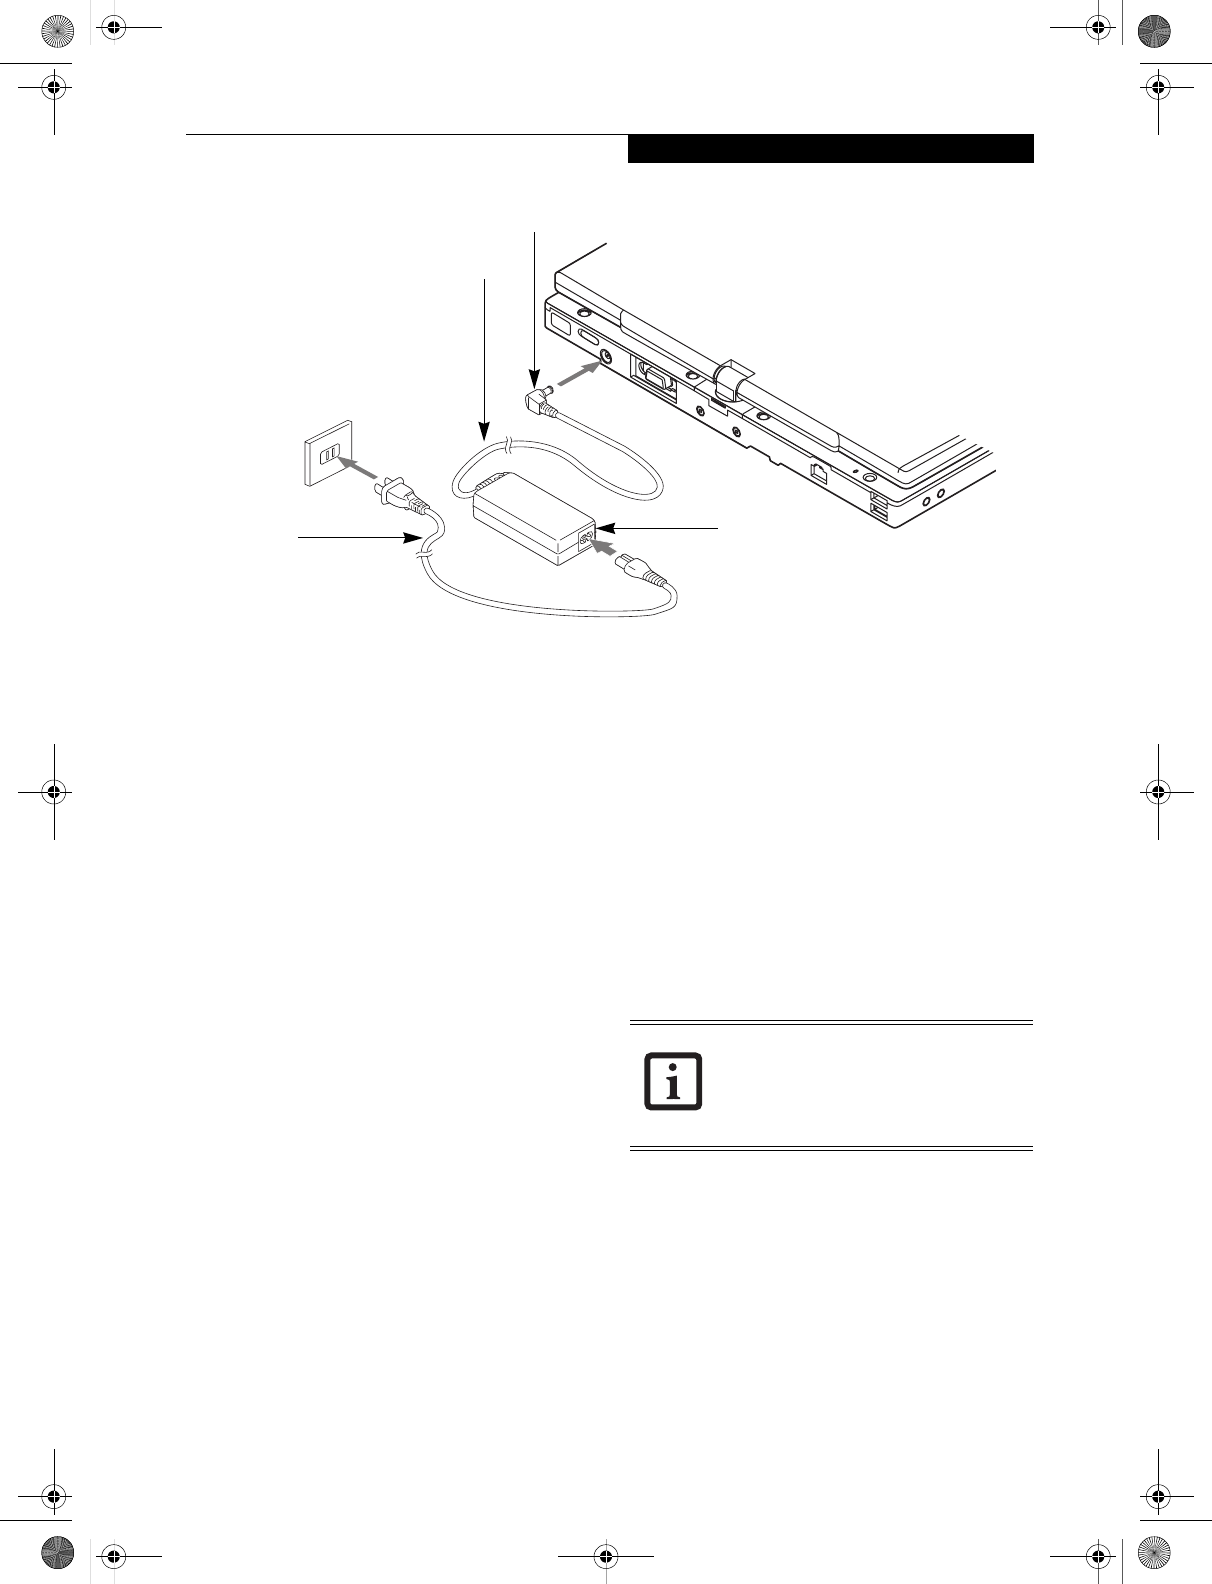
Figure 3-1. Connecting the AC Adapter
Power Sources
Your LifeBook T Series Tablet PC has three possible
power sources: a primary Lithium ion battery, an AC
adapter or an optional Auto/Airline adapter.
CONNECTING THE POWER ADAPTERS
The AC adapter or optional Auto/Airline adapter
provides power for operating your Tablet PC and
charging the battery.
Connecting the AC Adapter
1. Plug the DC output cable into the DC power jack
of your Tablet PC.
2. Plug the AC adapter into an AC electrical outlet.
(Figure 3-1)
Connecting the Optional Auto/Airline Adapter
1. Plug the DC output cable into the DC power jack
on your Tablet PC.
2. Plug the Auto/Airline adapter into the cigarette
lighter of an automobile with the ignition key in
the On or Accessories position.
OR
3. Plug the Auto/Airline adapter into the DC power
jack on an airplane seat.
Switching from AC Adapter Power or the
Auto/Airline Adapter to Battery Power
1. Be sure that you have a charged battery installed.
2. Remove the AC adapter or the Auto/Airline adapter.
DC Power Plug
DC Output Cable
AC Adapter
AC Cable
NEW GRAPHIC
The Lithium ion battery is not charged
upon purchase. Initially, you will need to
connect either the AC adapter or the
Auto/Airline adapter to use your Tablet
PC.
T Series.book Page 33 Wednesday, July 28, 2004 3:35 PM

31
3
Using Your Tablet PC
T Series.book Page 31 Wednesday, July 28, 2004 3:35 PM