Fujitsu Client Computing WB0085 Tablet PC User Manual M532 Bright UG
Fujitsu Limited Tablet PC M532 Bright UG
user manual
User’s
Guide
Learn how to use your
Fujitsu STYLISTIC® M532
Android Tablet

Copyright and Trademark Information
Fujitsu America, Inc.has made every effort to ensure the accuracy and completeness of this document. Because ongoing development efforts are made to
continually improve the capabilities of our products, however, the data contained herein represents Fujitsu design objectives and is provided for comparative
purposes; actual results may vary based on a variety of factors. This product data does not constitute a warranty. Specifications are subject to change without
knowledge.
Fujitsu and the Fujitsu logo are registered trademarks of Fujitsu Limited; STYLISTIC is a registered trademark of Fujitsu America, Incorporated.
Google, the Google Logo, Android, the Android Logo, Android Market, the Android Market Logo, Google Play, the Google Play Logo, Gmail, the Gmail
Logo, Google Mail, the Google Mail Logo, Google Latitude, YouTube, the YouTube Logo and Picasa are registered trademarks of Google Incorporated.
Adobe Reader is a trademark of Adobe Systems Incorporated.
NVIDIA and Tegra are trademarks and/or registered trademarks in the United States and other countries.
Absolute and Computrace are registered trademarks of Absolute Software Corporation.
Norton is a trademark of Symantec Corporation in the United States and other countries.
Bluetooth and the Bluetooth logo are registered trademarks of Bluetooth SIG, Inc.
All rights reserved, including intellectual property rights. Subject to technical alterations. Delivery subject to availability. No warranty is offered or liability
accepted in regard of the completeness, correctness, or current applicability of any data or illustrations. Brand names may be protected trademarks of
the respective manufacturer and/or protected by copyright. Use of these by third parties for their own purposes may constitute an infringement of the
holders’ rights.
Copyright 2012 Fujitsu America, Incorporated. All rights reserved. No part of this publication may be copied, reproduced, or translated, without the prior
written consent of Fujitsu America, Incorporated. No part of this publication may be stored or transmitted in any electronic form without the prior consent
of Fujitsu America, Incorporated. B6FJ-9251-01ENZ0-00
IMPORTANT SAFETY INSTRUCTIONS
This unit requires an AC adapter to operate. Use only UL Listed I.T.E. Class II Adapters with an output rating of 19 VDC, with a current of 1.58 A (30 W).
When using your tablet, basic safety precautions should always be followed to reduce the risk of fire, electric shock and injury to persons, including the
following:
•Do not use this product near water for example, near a bathtub, washbowl, kitchen sink or laundry tub, in a wet basement or near a
swimming pool.
•Use only the power cord and batteries indicated in this manual. Do not dispose of batteries in a fire. They may explode. Check with local
codes for possible special disposal instructions.
CAUTION: HOT SURFACE: THE BOTTOM OF THIS COMPUTER CAN BECOME HOT WHEN USED FOR LONG PERIODS OF TIME. WHEN USING THIS
DEVICE, TAKE CAUTION TO LIMIT LONG TERM OR CONTINUOUS USE WHILE RESTING IT ON EXPOSED SKIN, SUCH AS THE LAP.
+
AC adapter output polarity:
DECLARATION OF CONFORMITY
according to FCC Part 15
Responsible Party Name: Fujitsu America, Inc.
Address: 1250 E. Arques Avenue
Sunnyvale, CA 94085
Telephone: (408) 746-6000
Declares that product: Base Model Configuration: STYLISTIC M532 Android Tablet
Complies with Part 15 of the FCC Rules.
This device complies with Part 15 of the FCC rules. Operations are subject to the following two conditions:
(1) This device may not cause harmful interference, (2) This device must accept any interference received,
including interference that may cause undesired operation.

SAVE THESE INSTRUCTIONS
For Authorized Repair Technicians Only
DANGER OF EXPLOSION IF LITHIUM (CLOCK) BATTERY IS INCORRECTLY REPLACED. REPLACE ONLY WITH THE SAME OR EQUIVALENT TYPE
RECOMMENDED BY THE MANUFACTURER. DISPOSE OF USED BATTERIES ACCORDING TO THE MANUFACTURER’S INSTRUCTION.
FOR CONTINUED PROTECTION AGAINST RISK OF FIRE, REPLACE ONLY WITH THE SAME TYPE AND RATING FUSE.

5
Contents
About This Guide . . . . . . . . . . . . . . . . . . . . . . . . . . . . . . . . . . . . . . . . . . . . . .8
Conventions Used in the Guide . . . . . . . . . . . . . . . . . . . . . . . . . . . . . . . . 8
Fujitsu Contact Information . . . . . . . . . . . . . . . . . . . . . . . . . . . . . . . . . . . 9
Chapter 1 Getting to Know Your Android Tablet
Overview. . . . . . . . . . . . . . . . . . . . . . . . . . . . . . . . . . . . . . . . . . . . . . . . . . . . .10
Locating the Connectors and Controls. . . . . . . . . . . . . . . . . . . . . . . . . . . . .11
Front Features. . . . . . . . . . . . . . . . . . . . . . . . . . . . . . . . . . . . . . . . . . . . . . 11
Back Features . . . . . . . . . . . . . . . . . . . . . . . . . . . . . . . . . . . . . . . . . . . . . . 13
Chapter 2 Getting Started with Your Android Tablet
First-time setup of your tablet. . . . . . . . . . . . . . . . . . . . . . . . . . . . . . . . . . .15
Unpacking and checking the device . . . . . . . . . . . . . . . . . . . . . . . . . . . . 16
Selecting a suitable location . . . . . . . . . . . . . . . . . . . . . . . . . . . . . . . . . . 16
Power Sources. . . . . . . . . . . . . . . . . . . . . . . . . . . . . . . . . . . . . . . . . . . . . . 16
Turning on the system the first time . . . . . . . . . . . . . . . . . . . . . . . . . . . . 17

6
-
Chapter 3 Working with Your Android Tablet
Tablet Features . . . . . . . . . . . . . . . . . . . . . . . . . . . . . . . . . . . . . . . . . . . . . . 18
Battery charging indicator . . . . . . . . . . . . . . . . . . . . . . . . . . . . . . . . . . . . 18
Turning the Tablet On and Off . . . . . . . . . . . . . . . . . . . . . . . . . . . . . . . . . 19
Touchscreen . . . . . . . . . . . . . . . . . . . . . . . . . . . . . . . . . . . . . . . . . . . . . . . 19
Background lighting . . . . . . . . . . . . . . . . . . . . . . . . . . . . . . . . . . . . . . . . . 19
Selecting display orientation . . . . . . . . . . . . . . . . . . . . . . . . . . . . . . . . . . 19
Android Tablet buttons. . . . . . . . . . . . . . . . . . . . . . . . . . . . . . . . . . . . . . . 20
Web Cams . . . . . . . . . . . . . . . . . . . . . . . . . . . . . . . . . . . . . . . . . . . . . . . . . 21
Rechargeable battery . . . . . . . . . . . . . . . . . . . . . . . . . . . . . . . . . . . . . . . . 21
User-Installable Devices . . . . . . . . . . . . . . . . . . . . . . . . . . . . . . . . . . . . . . . 23
Memory cards . . . . . . . . . . . . . . . . . . . . . . . . . . . . . . . . . . . . . . . . . . . . . . 23
Switching the wireless components on and off . . . . . . . . . . . . . . . . . . . . 24
WLAN and Bluetooth . . . . . . . . . . . . . . . . . . . . . . . . . . . . . . . . . . . . . . . . 24
GPS. . . . . . . . . . . . . . . . . . . . . . . . . . . . . . . . . . . . . . . . . . . . . . . . . . . . . . . 24
Using the optional cradle . . . . . . . . . . . . . . . . . . . . . . . . . . . . . . . . . . . . . . 25
Setting up the Cradle . . . . . . . . . . . . . . . . . . . . . . . . . . . . . . . . . . . . . . . . 25
Chapter 4 Working with Android
Getting Started with Android . . . . . . . . . . . . . . . . . . . . . . . . . . . . . . . . . . . 29
Initial setup of your device with Android . . . . . . . . . . . . . . . . . . . . . . . . . 29
Home Page . . . . . . . . . . . . . . . . . . . . . . . . . . . . . . . . . . . . . . . . . . . . . . . . 30
Navigating on the home page . . . . . . . . . . . . . . . . . . . . . . . . . . . . . . . . . 31
Customizing the home page . . . . . . . . . . . . . . . . . . . . . . . . . . . . . . . . . . 32
Operation . . . . . . . . . . . . . . . . . . . . . . . . . . . . . . . . . . . . . . . . . . . . . . . . . 33
Settings . . . . . . . . . . . . . . . . . . . . . . . . . . . . . . . . . . . . . . . . . . . . . . . . . . . 39
System updates. . . . . . . . . . . . . . . . . . . . . . . . . . . . . . . . . . . . . . . . . . . . . 47
Apps. . . . . . . . . . . . . . . . . . . . . . . . . . . . . . . . . . . . . . . . . . . . . . . . . . . . . . 49

7
-
Chapter 5 Connecting External Devices
Peripheral Device Connections. . . . . . . . . . . . . . . . . . . . . . . . . . . . . . . . . . 52
Connecting USB devices . . . . . . . . . . . . . . . . . . . . . . . . . . . . . . . . . . . . . . 52
HDMI port . . . . . . . . . . . . . . . . . . . . . . . . . . . . . . . . . . . . . . . . . . . . . . . . . 53
Headphone/Microphone port . . . . . . . . . . . . . . . . . . . . . . . . . . . . . . . . . . 54
Chapter 6 Troubleshooting Your Android Tablet
Troubleshooting. . . . . . . . . . . . . . . . . . . . . . . . . . . . . . . . . . . . . . . . . . . . . . 55
Identifying the Problem . . . . . . . . . . . . . . . . . . . . . . . . . . . . . . . . . . . . . . 55
Using the Reset Button. . . . . . . . . . . . . . . . . . . . . . . . . . . . . . . . . . . . . . . 56
Specific Problems . . . . . . . . . . . . . . . . . . . . . . . . . . . . . . . . . . . . . . . . . . . 57
Chapter 7 System Specifications
Specifications . . . . . . . . . . . . . . . . . . . . . . . . . . . . . . . . . . . . . . . . . . . . . . . . 59
Android Tablet. . . . . . . . . . . . . . . . . . . . . . . . . . . . . . . . . . . . . . . . . . . . . . 59
Rechargeable Battery . . . . . . . . . . . . . . . . . . . . . . . . . . . . . . . . . . . . . . . . 61
AC Adapter. . . . . . . . . . . . . . . . . . . . . . . . . . . . . . . . . . . . . . . . . . . . . . . . . 61
Optional Cradle . . . . . . . . . . . . . . . . . . . . . . . . . . . . . . . . . . . . . . . . . . . . . 62
Chapter 8 Regulatory Information
For Android Tablets without radio device . . . . . . . . . . . . . . . . . . . . . . . . . . . . . 63
For Android Tablets with radio device . . . . . . . . . . . . . . . . . . . . . . . . . . . . . . . . 64
8
Preface
About This Guide
The STYLISTIC® M532 Android Tablet offers innovative technology and an ergonomic design, making it a reliable and
convenient companion. The responsive touch screen design and on-screen keyboard allow you to interact with it easily
and enjoyably. The STYLISTIC M532 was pre-installed with the Android™ operating system along with many useful
applications.
The STYLISTIC M532 Android Tablet is a completely self-contained unit with a 10.1” TFT WXGA high-brightness LED,
front and rear web cameras, and an NVIDIA® Tegra® processor.
This manual explains how to operate your Android Tablet hardware and built-in system software.
Conventions Used in the Guide
Pages with additional information about a specific topic are cross-referenced within the text.
On screen buttons or menu items appear in bold. Example: Click OK to restart your Android Tablet.
THE INFORMATION ICON HIGHLIGHTS INFORMATION THAT WILL ENHANCE YOUR UNDERSTANDING OF THE SUBJECT MATERIAL.
THE CAUTION ICON HIGHLIGHTS INFORMATION THAT IS IMPORTANT TO THE SAFE OPERATION OF YOUR COMPUTER, OR TO THE INTEGRITY OF YOUR
FILES. PLEASE READ ALL CAUTION INFORMATION CAREFULLY.
9
- About This Guide
Fujitsu Contact Information
Service and Support
You can contact Fujitsu Service and Support in the following ways:
•Toll free: 1-800-8Fujitsu (1-800-838-5487)
•Website: http://solutions.us.fujitsu.com/www/content/support/contact/index.php
Before you place the call, you should have the following information ready so that the customer support
representative can provide you with the fastest possible solution:
•Product name
•Product configuration and serial numbers
•Purchase date
•Conditions under which the problem occurred
•Any error messages that have occurred
•Type of device connected, if any
Fujitsu Shopping Online
You can go directly to the online by going to the website at: www.shopfujitsu.com.
Limited Warranty
Your STYLISTIC M532 Android Tablet is backed by a Fujitsu International Limited Warranty. Check the service kit that
came with your tablet for the Limited Warranty period and terms and conditions.
THE WARNING ICON HIGHLIGHTS INFORMATION THAT CAN BE HAZARDOUS TO EITHER YOU, YOUR TABLET, OR YOUR FILES. PLEASE READ ALL
WARNING INFORMATION CAREFULLY.
10
Chapter 1
Getting to Know Your Android Tablet
Overview
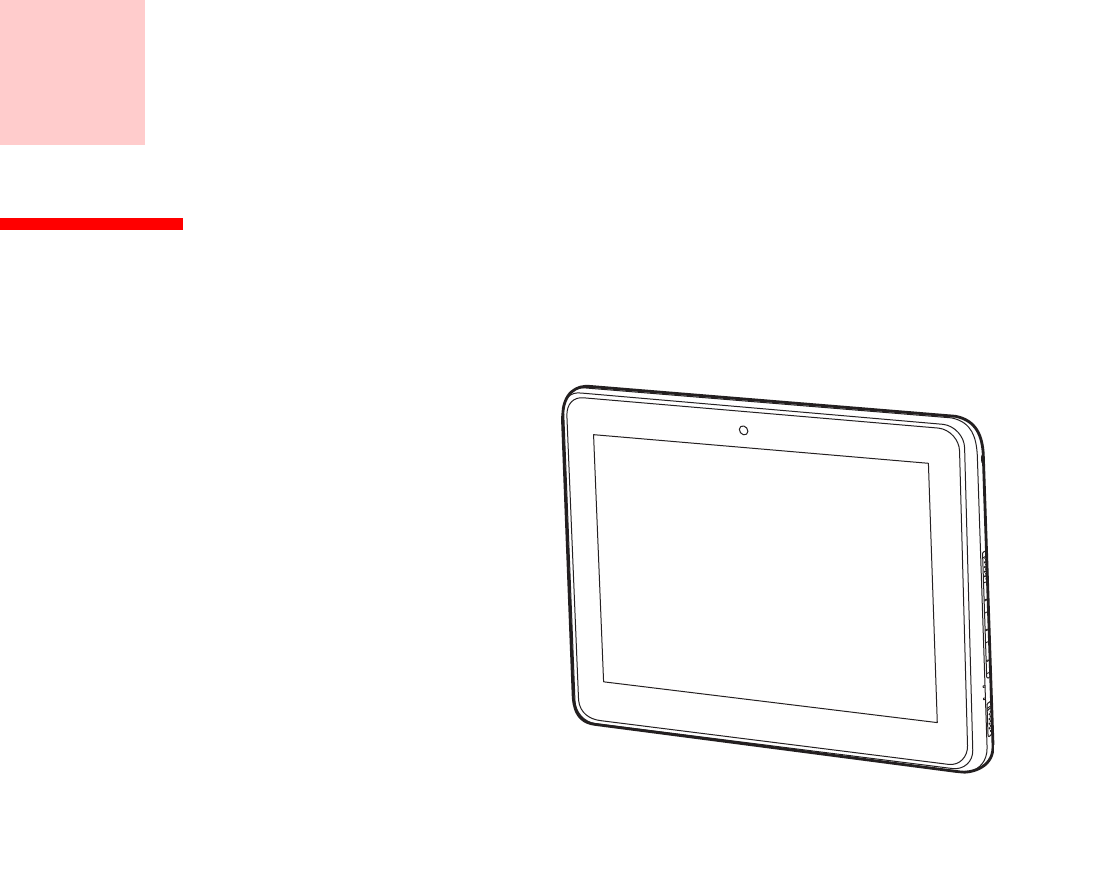
The STYLISTIC® M532 Android Tablet is a
highly-efficient computer that has been
designed to support the Android™ 4.0
operating system.
This chapter presents the individual
hardware components of your device. It
gives you an overview of the tablet’s
indicators and connections. Please
familiarize yourself with these
components before you start to work
with the device.
Figure 1. STYLISTIC M532 Android Tablet
11
- Locating the Connectors and Controls
Locating the Connectors and Controls
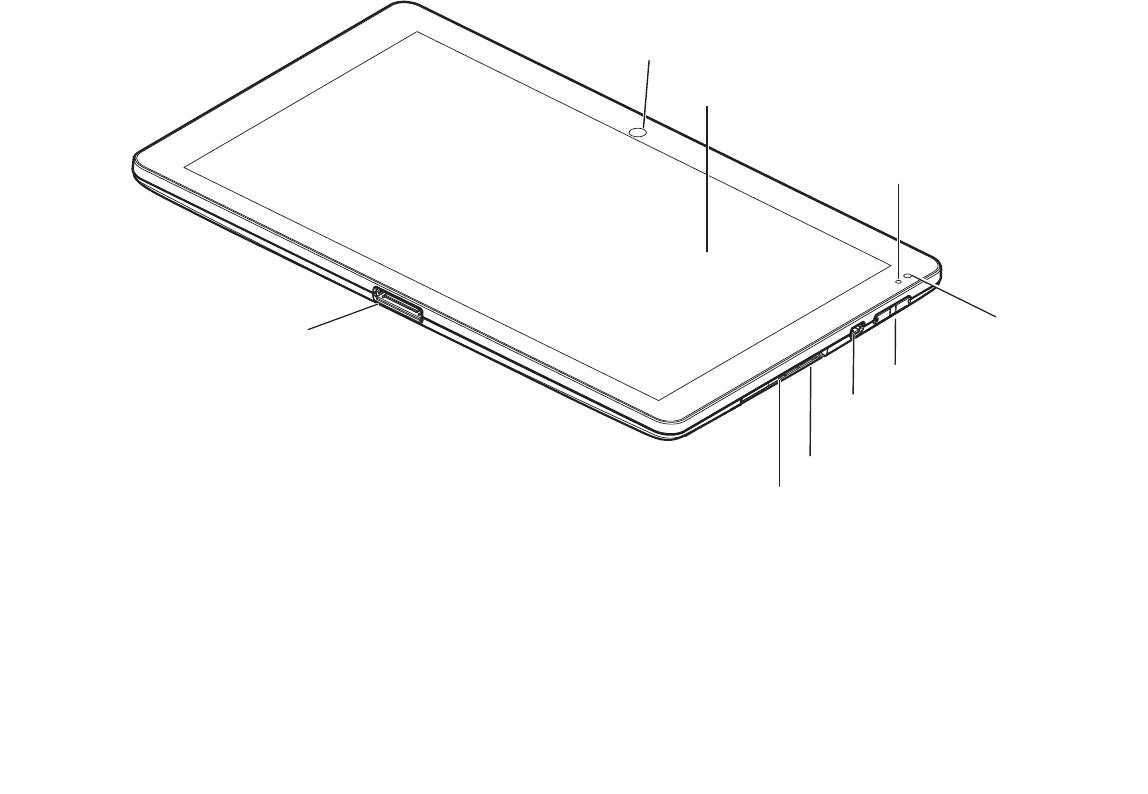
Features and controls that you use to operate your Android Tablet are outlined below and illustrated in Figures 2 and
3. Details on using these features and controls are provided later in this manual.
Figure 2. STYLISTIC M532 Android Tablet Features (Bottom, Right View)
Front Features
Front Web Camera
The front-facing VGA web camera allows you to take pictures of yourself to send over the internet.
Display
The 10.1” Wide XGA display offers wide vertical and horizontal viewing angles.
Front Web Camera
Connector for Docking Cradle
Display
Ambient Light Sensor
Battery Charging Indicator
Volume Buttons
Micro-USB Port
Reset Button (under cover)
Micro SD Card Slot (under cover)
and AC Adapter

12
- Locating the Connectors and Controls
Battery Charging Indicator
The battery charging indicator displays the current power condition of the internal battery. (See “Battery charging
indicator” on page 18).
Ambient Light Sensor
The ambient light sensor automatically recognizes lighting conditions and adjusts the display to provide optimum
battery life.
Volume Buttons
The volume buttons allow you to adjust the system volume. (See “Android Tablet buttons” on page 20).
Micro-USB Port
The Micro USB port allows you to connect a USB device by using a Micro USB adapter (See “Connecting USB devices”
on page 52).
Reset Button
The Reset Button allows you to do a hard reset of your system in the event the device no longer reacts to input or the
ON/OFF switch. (See “Using the Reset Button” on page 56)
Micro SD Card Slot
The Micro SD card allows you to save data on removable Micro SD memory cards. (See “Memory cards” on page 23)
Docking Cradle and AC Adapter Connector
Allows you to connect the optional STYLISTIC Docking Cradle (see “Using the optional cradle” on page 25) or an AC
Adapter (see“Power Sources” on page 16).
13
- Locating the Connectors and Controls
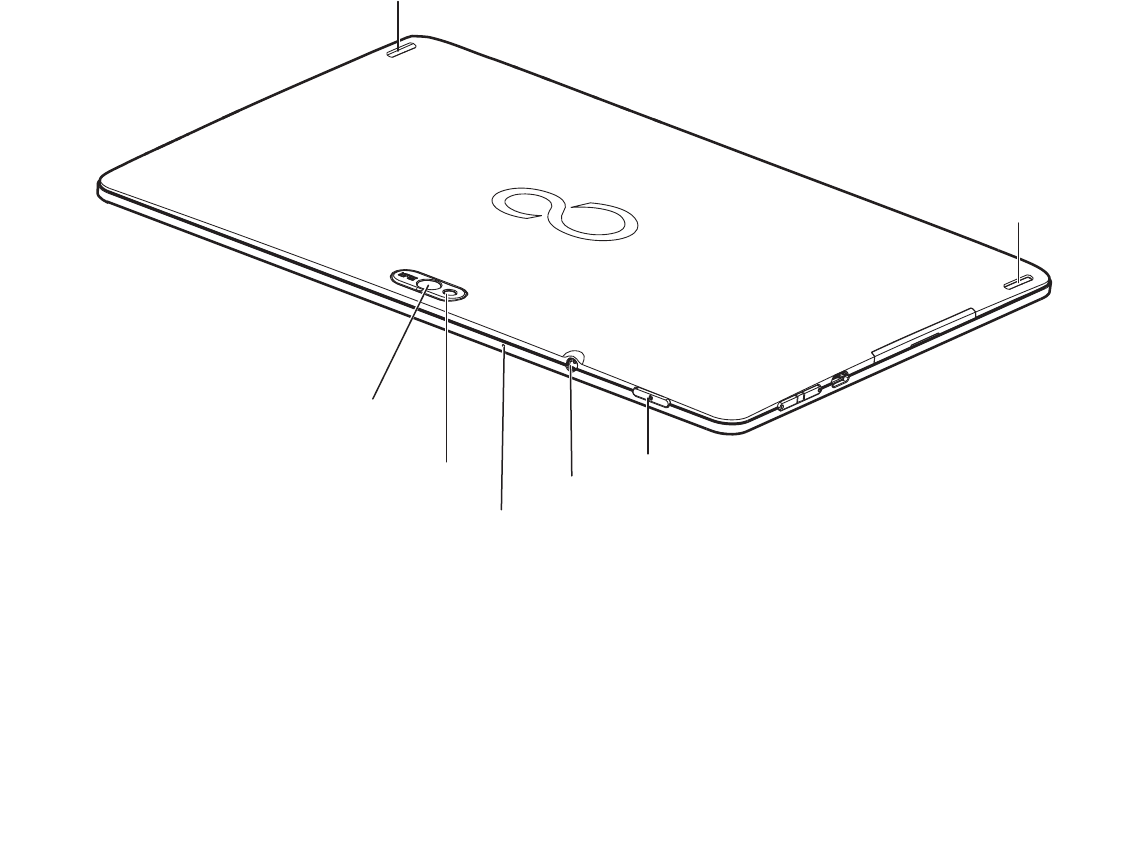
Figure 3. STYLISTIC M532 Android Tablet Features (Back View)
Back Features
Stereo Speakers
The built-in dual speakers allow for stereo sound.
On/Off Switch
The On/Off Switch allows you to power your system on and off (see “Turning on the system the first time” on page 17).
Rear Web Camera
Stereo Speaker
Stereo Speaker
On/Off Switch
Headphone/Microphone Port
Microphone
Photoflash

14
- Locating the Connectors and Controls
Headphone/Microphone Port
The headphone/microphone port allows you to set up connect headphones, a microphone or external loudspeakers
to your Android Tablet. (See “Headphone/Microphone port” on page 54)
Microphone
The internal microphone allows you to record audio files.
Photoflash
The Photoflash acts as a flash device when you are using the rear-facing web camera.
Rear Web Camera
The rear web camera allows you to take pictures of objects in front of you for sharing over the internet.

15
Chapter 2
Getting Started with Your Android Tablet
First-time setup of your tablet
The battery is permanently installed in the system and must be charged if you want to use your device under
battery operation.
When used on the move, the built-in battery provides the device with the necessary power. You can increase the
operating time by using the available energy-saving functions.
Please refer to “Connecting External Devices” on page 52 for instructions on how to connect external devices (e.g.,
mouse, flash storage) to your device.
•THE NECESSARY HARDWARE DRIVERS AND THE SUPPLIED SOFTWARE FOR THE DEVICE ARE ALREADY PRE-INSTALLED.
•BEFORE YOU SWITCH ON THE DEVICE FOR THE FIRST TIME, CONNECT IT TO THE POWER USING THE AC ADAPTER. THE AC ADAPTER MUST BE
CONNECTED DURING THE ENTIRE INSTALLATION PROCESS.
•A SYSTEM TEST IS PERFORMED WHEN YOUR DEVICE IS FIRST SWITCHED ON. VARIOUS MESSAGES CAN APPEAR. THE DISPLAY MAY REMAIN DARK
FOR A SHORT TIME OR MAY FLICKER.
•PLEASE FOLLOW THE INSTRUCTIONS ON THE SCREEN.
•NEVER SWITCH OFF YOUR DEVICE DURING THE FIRST-TIME SETUP PROCESS.
16
- First-time setup of your tablet
Unpacking and checking the device
1Unpack all the individual parts from the packing box.
2Check your device and peripherals for any visible damage which may have occurred during transportation.
3Save the packaging in the event you need it to transport your system in the future.
Selecting a suitable location
There are several factors to consider when choosing a location for your system. Please observe the following
precautions when doing so.
Power Sources
Your Fujitsu STYLISTIC Android Tablet has three possible power sources: an internal Lithium Polymer battery, an AC
adapter or an optional docking cradle.
SHOULD YOU DISCOVER ANY MISSING ITEMS OR DAMAGE THAT OCCURRED DURING TRANSPORTATION, CONTACT YOUR SUPPORT REPRESENTATIVE:
TOLL FREE: 1-800-8FUJITSU (1-800-838-5487)
WEB SITE: HTTP://SOLUTIONS.US.FUJITSU.COM/WWW/CONTENT/SUPPORT/CONTACT/INDEX.PHP
•NEVER PLACE THE DEVICE OR THE AC ADAPTER ON A HEAT-SENSITIVE SURFACE. THE SURFACE COULD BE DAMAGED AS A RESULT.
•THE UNDERSIDE OF THE DEVICE HEATS UP DURING NORMAL OPERATION. PROLONGED CONTACT WITH THE SKIN MAY BECOME UNPLEASANTLY
HOT.
•KEEP OTHER OBJECTS AT LEAST 100 MM AWAY FROM THE DEVICE AND ITS AC ADAPTER TO ENSURE ADEQUATE VENTILATION.
•DO NOT EXPOSE THE DEVICE TO EXTREME ENVIRONMENTAL CONDITIONS. PROTECT THE DEVICE AGAINST DUST, HUMIDITY AND HEAT.
17
- First-time setup of your tablet
Turning on the system the first time
When you switch on the device for the first time, the supplied software is installed and configured. Because this
procedure must NOT be interrupted, you should set aside enough time for it to be fully completed and connect
the device to power using the AC adapter.
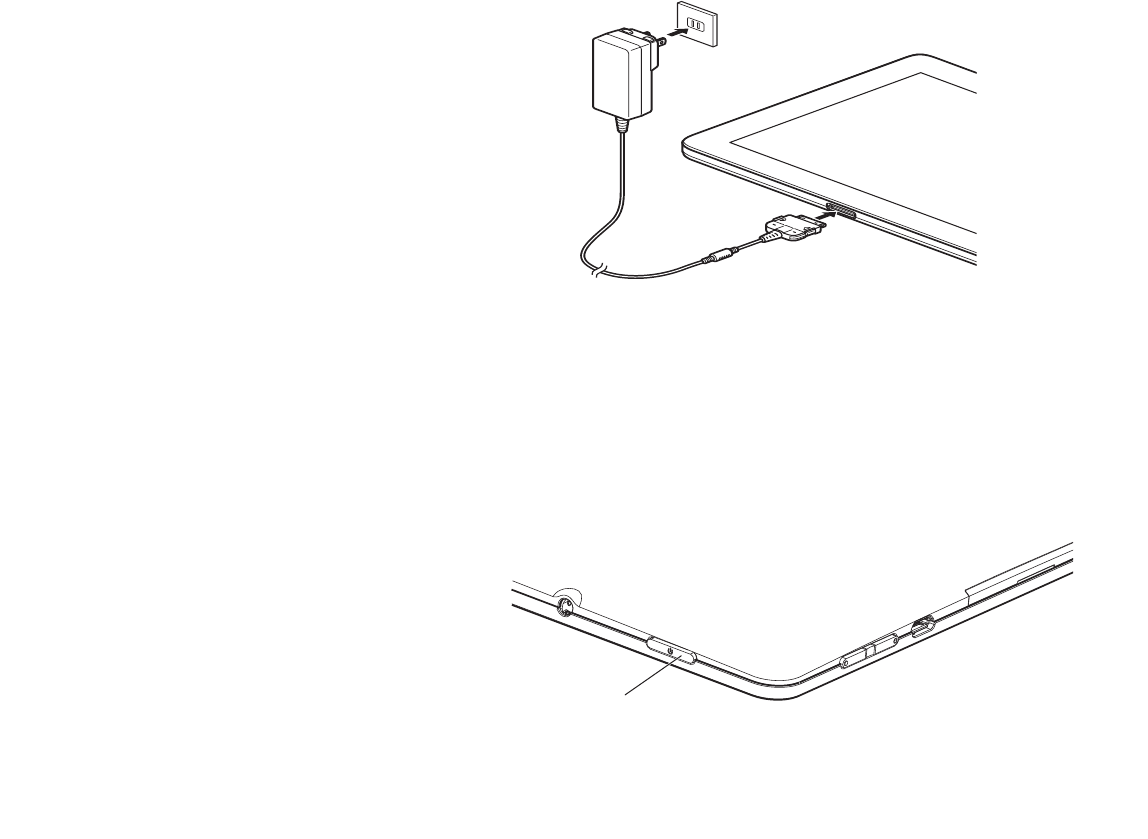
Connecting the AC Adapter
The AC adapter provides power for operating your
Android Tablet and charges the battery.
1Plug the AC Adapter cable into the AC Adapter
connector on the bottom edge of your tablet.
(Figure 4)
2Plug the AC adapter into an AC electrical outlet.
Figure 4. Connecting the AC Adapter
During the installation process, DO NOT restart
the device unless you are requested to do so. To
make it easier to use your device for the first
time, the operating system
is pre-installed.
1Press the On/Off switch (1) for 2 seconds to
switch the Android Tablet on.
2During installation, follow the instructions
on screen.
Figure 5. Powering on the system
On/Off Switch
18
Chapter 3
Working with Your Android Tablet
This chapter describes the basics for operating your Android Tablet. Even if you are already familiar with
operating a computer, you should read this chapter to ensure you are familiar with all of the features.
Tablet Features
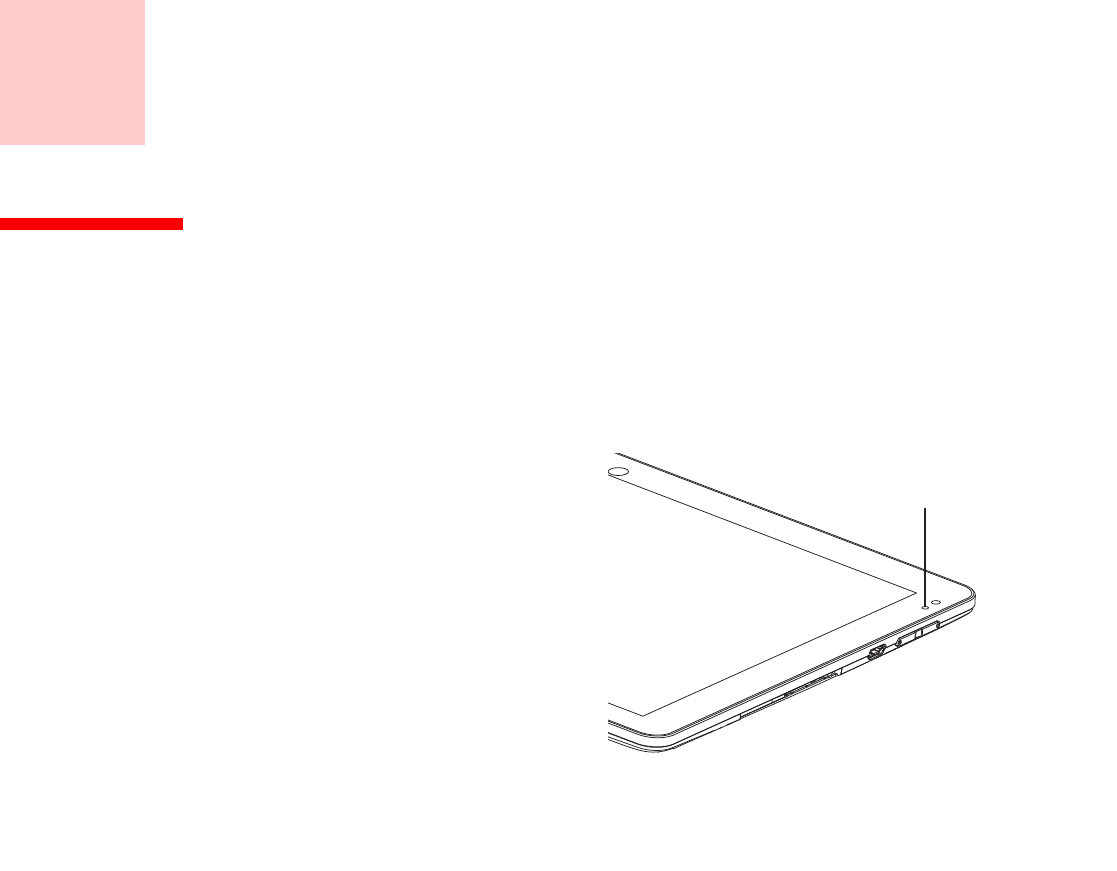
Battery charging indicator
When the AC adapter is connected, the battery
charging indicator provides information on the
state of the power supply.
Battery LED
Condition Description
Red, lit The battery is being charged
White, lit The battery is 100% charged
Figure 6. Battery Charging Indicator
Battery Charging Indicator
19
- Tablet Features
Turning the Tablet On and Off
Touchscreen
High-quality TFT displays are installed in Fujitsu Android Tablets. TFT monitors are manufactured for a specific
resolution. An optimal, clear picture can only be ensured with the correct resolution intended for the relevant
TFT monitor. A monitor resolution that differs from the specification can result in an unclear picture.
The screen resolution of your Android Tablet’s touchscreen is optimally set at the factory.
Background lighting
TFT monitors are operated with background lighting. The luminosity of the background lighting can decrease
while the tablet is in use; however, you can set the brightness of your monitor individually.
Selecting display orientation
You can choose to use either portrait (vertical) or landscape (horizontal) orientation for the display.
The alignment of the screen adapts automatically to the alignment in which you are using the tablet. If you hold
the tablet in portrait orientation, the image will be shown in portrait format. If you hold the tablet in landscape
orientation, the image will be shown in landscape format.
If you want to disable automatic matching of the alignment, proceed as follows:
To turn the tablet on: Press the On/Off switch (Figure 7) for
two seconds. The tablet may vibrate slightly while it is
starting up.
To turn the tablet off: Press the On/Off switch until a
message appears asking if you want to turn off the tablet.
Confirm that you do. The tablet may vibrate slightly while it
is shutting down.
Figure 7. Powering the system on and off
On/Off Switch

20
- Tablet Features
1From
All apps
, select the
Settings
option and select
Display.
2Uncheck
Auto-rotate screen
. When the checkmark on the setting disappears, automatic alignment matching is
disabled.
3To re-enable matching of the alignment, tap again on the setting
Auto-rotate screen
. When the checkmark on
the setting appears, automatic alignment matching is enabled.
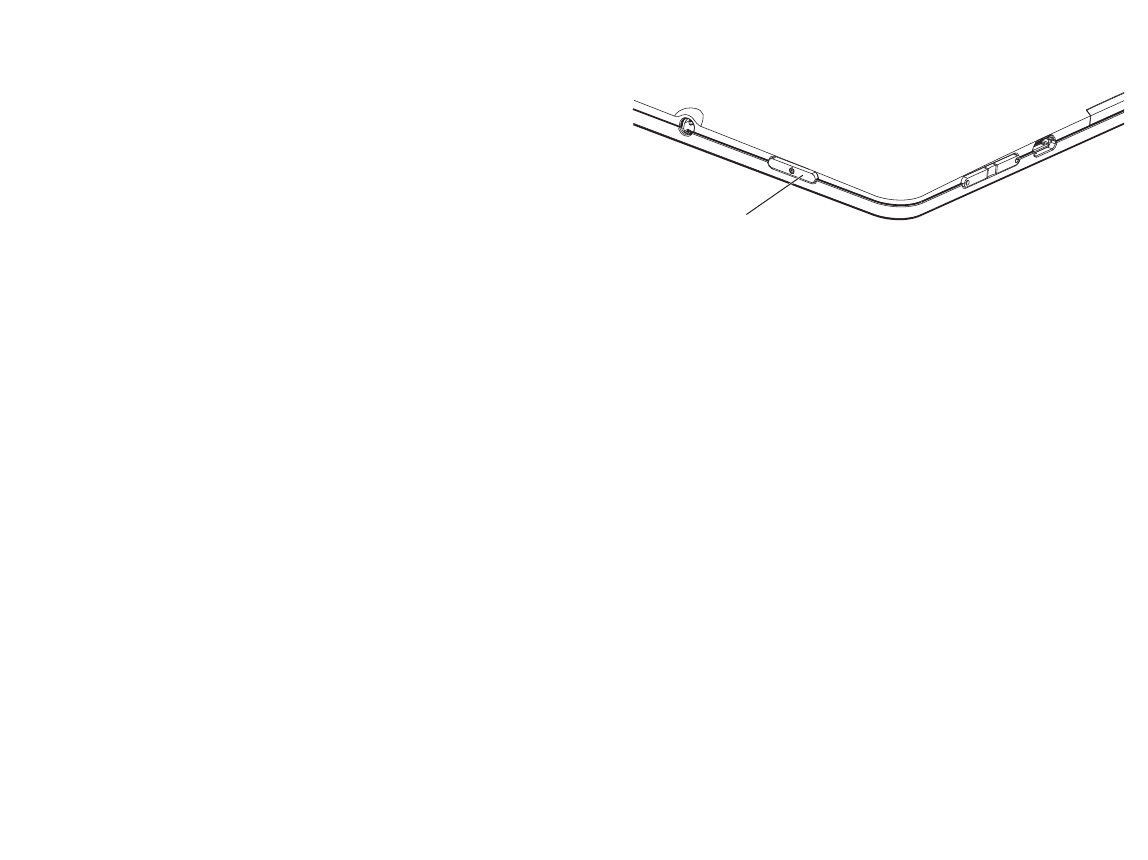
Android Tablet buttons
Your tablet has three tablet buttons: On/Off, Volume Up and Down, and Reset.
Figure 8. Tablet Buttons
Button Description
On/Off Switch Switch the tablet on and off
Volume Button - Up Increase the volume
Volume Button - Down Decrease the volume.
Reset Button If the device no longer reacts to input and does not respond to the ON/OFF switch, use the
Reset button to restart the device (See “Using the Reset Button” on page 56.).
On/Off Switch
Volume Button - Up
Volume Button - Down
Reset Button

21
- Tablet Features
Web Cams
Your device has two web cams: one on the front side of the device and one on the rear.
Depending on the software used, you can use your web cam to take pictures, record video clips
or take part in web chats.
• The picture quality depends on the lighting conditions and the software being used.
• You can only operate the webcam with a particular application (e.g., an Internet telephony program or a
video conferencing program which supports a webcam).
• When using the webcam, the tablet support must not wobble.
• The webcam automatically adjusts itself to the current light level. For this reason the touchscreen
may flicker while the light level is being adjusted.
Rechargeable battery
For mobile use, the built-in battery provides the tablet with the necessary power. You can increase the
life of the battery by caring for the battery properly. The average battery life is around 500
charge/discharge cycles. In the event you should need to have your battery replaced, please contact your
Fujitsu Support Representative.
You can also extend the battery life by taking advantage of the available energy saving functions.
Charging, caring for and maintaining the battery
The Android Tablet battery can only be charged when the ambient temperature is between 5°C and 35°C.
You can charge the battery by connecting the tablet to the AC adapter
(see “Power Sources” on page 16).
If the battery is running low you will hear a warning alarm. If you do not connect the AC adapter within five
minutes of the warning alarm described above, your tablet will switch off automatically.
Monitoring the battery charging level
In the system bar / status display there is a battery symbol shown for monitoring the battery capacity.
The battery symbol shows you the remaining battery charge.

22
- Tablet Features
Using the power-management features
The Android Tablet uses less power when the power management features are enabled. That allows you to work
longer when using the battery before having to recharge it.
When you use the power-management features, power efficiency is increased and environmental pollution
reduced. By choosing the best power options, you can make significant savings while helping to protect the
environment.
We recommend the following settings: Hibernate the Tablet after 5 minutes without activity.
To change your power settings, select
Settings
>
Display
and set the desired value for
Hibernate
.
When the Android Tablet is in power saving mode, you must remember the following:
•During power saving mode, open files are held in the main memory or in a swap file.
•Never switch off the tablet while it is in a power saving mode. If the built-in battery is nearly discharged, close
the open files and do not go into power saving mode.
If you do not intend to use your tablet for a long period of time:
•Exit the power saving mode if necessary via touching the screen or by switching on the tablet.
•Close all opened programs and completely shut down the tablet.

23
- User-Installable Devices
User-Installable Devices
Memory cards
Your Android Tablet is equipped with an integrated memory card reader. Be sure to observe the manufacturer’s
instructions when handling memory cards.
Supported format
The memory card reader supports the following format:
• MicroSD Card™
Inserting a memory card
To insert a MicroSD card:
1Open the slot cover (Figure 9, #1).
2Position the card so that the card label is facing upwards.
3Gently push the memory card into the slot (Figure 9, #2) until
you feel it click into place. Do not use too much force, otherwise
the sensitive contact surfaces could be damaged.
4Replace the slot cover.
Figure 9. Inserting a MicroSD Card
1
2
24
- Switching the wireless components on and off
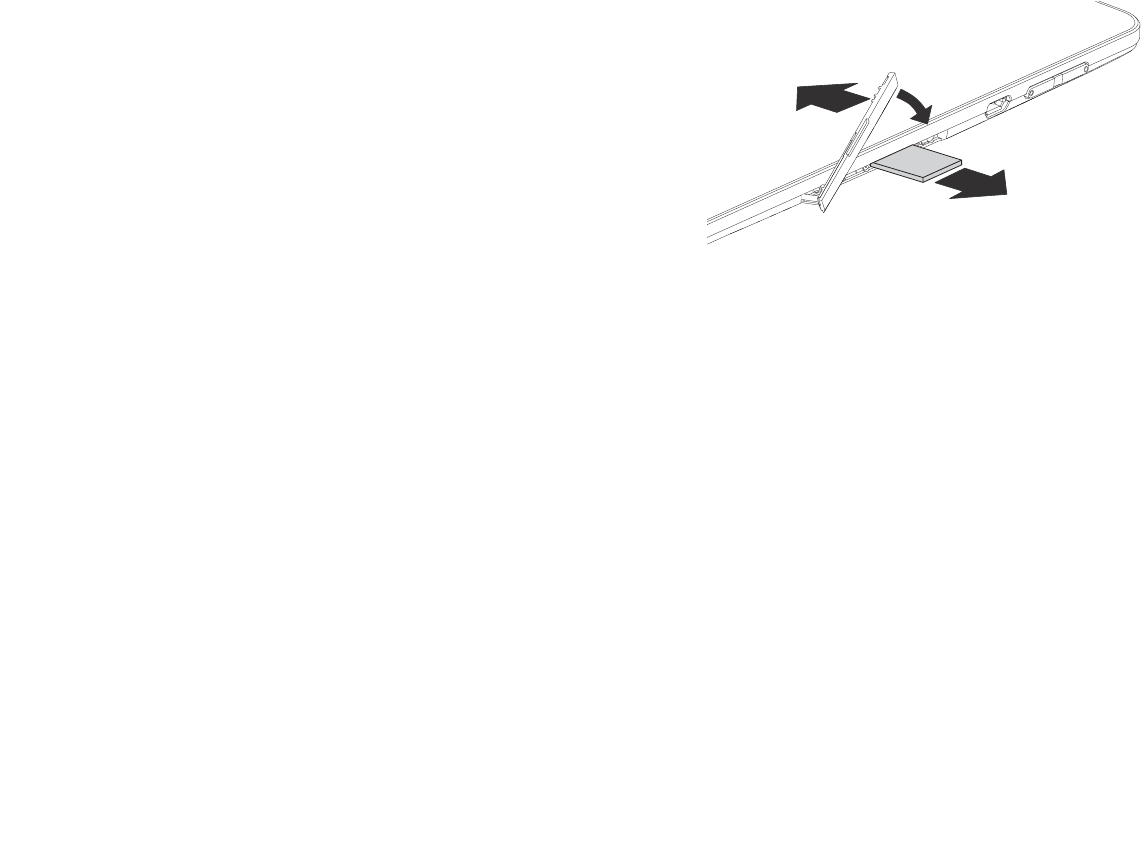
Removing a memory card
Switching the wireless components on and off
WLAN and Bluetooth
1Select
Settings
.
2Set the switch for WLAN or Bluetooth to ON.
3Click on WLAN and select your preferred network.
4Click on
Bluetooth
and select the Bluetooth device with which you would like to connect your tablet.
GPS
Your device is equipped with an integrated GPS module. With the aid of suitable software, you can therefore use
your device as a navigation system.
It is very important that the correct procedure be used for removing
the memory card. Failure to do so could result in data loss.
To remove a MicroSD card, you must log the memory card out of the
system before you can remove it. Proceed as follows:
1Select
Settings > Memory
. In
Memory
, all the memory components
are displayed.
2Select
Remove SD card
.
3Confirm the message with
OK
.
The memory card is logged out.
4Press the memory card slightly inwards so that the catch
disengages.
5Pull the memory card out of the slot (Figure 10, #1).
6Replace the slot cover (Figure 10, #2)10
Figure 10. Removing a MicroSD Card
1
2
25
- Using the optional cradle
Using the optional cradle
The optional cradle is a device with which you can quickly connect your Android Tablet to your peripheral devices
such as a display screen, keyboard, mouse, headphones, etc.
You only need to dock the tablet in order to work with your peripheral devices.
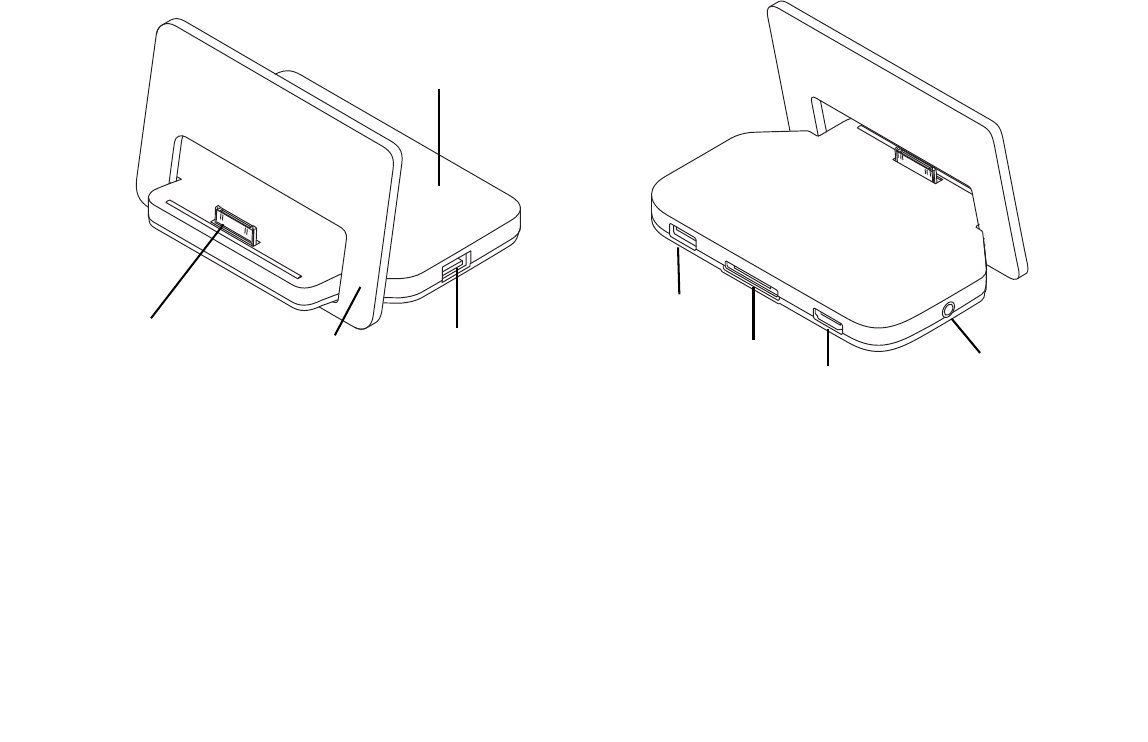
Figure 13. Docking Cradle Components
Setting up the Cradle
Select a suitable location for the cradle before setting it up. Observe the following conditions when doing so:
•Place the cradle on a flat, stable, non-slippery surface.
•Never place the cradle and the AC adapter on a heat-sensitive surface.
•Do not expose the cradle to extreme environmental conditions.
•Protect the cradle from dust, humidity and
heat.
Figure 11. Cradle - Front Figure 12. Cradle - Rear
Cradle Base
Cradle Easel USB Port
Docking
Connector
Line Out
USB Port
HDMI Port
DC In
26
- Using the optional cradle
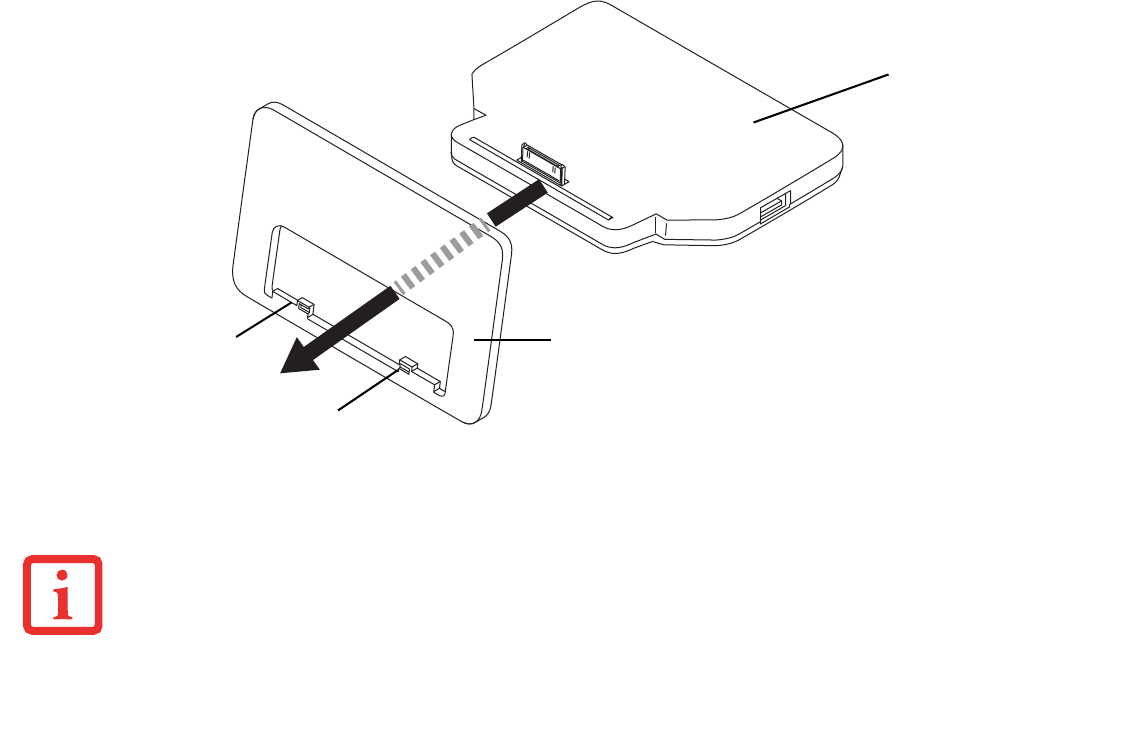
Assembling the Cradle
The cradle consists of two pieces: The cradle base and the cradle easel.
To assemble the cradle, simply slide the narrow end of the base into the slot in the easel until the notches in the
bottom of the base are aligned above the alignment point. Rest the base on the easel.
Figure 14. Assembling the Cradle
Connecting the Tablet to the Cradle
1Switch off the tablet.
•IF YOU CONNECT THE TABLET TO THE CRADLE DURING OPERATION, PROBLEMS CAN OCCUR. WE RECOMMEND THAT YOU SWITCH OFF THE
TABLET BEFOREHAND.
•IF THE TABLET IS CONNECTED TO THE CRADLE, YOU MUST CONNECT THE AC ADAPTER TO THE CRADLE IN ORDER TO CHARGE OR POWER
THE TABLET.
Cradle Base
Cradle Easel
Alignment Point
Alignment Point
27
- Using the optional cradle
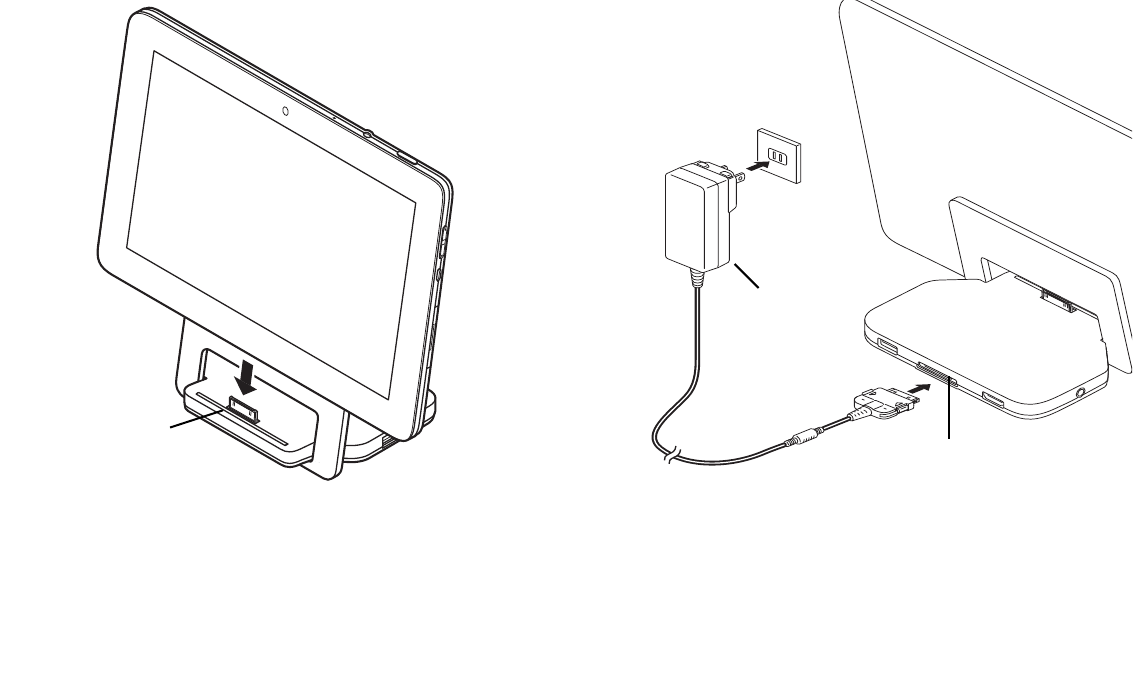
2If connected, remove the AC adapter cable from the DC In connector on the rear of the cradle base (Figure 16).
3Position the tablet so that the docking connector on the bottom of the unit is aligned with the docking
connector on the cradle base (Figure 15).
4Push the tablet onto the cradle in the direction of the arrow until it engages with the plug.
5Plug the AC adapter into the DC In connector on the rear of the cradle.
6Plug the AC adapter cable into an AC socket.
Figure 15. Connecting the tablet to the cradle Figure 16. Powering the tablet with the cradle
Docking
Connector
AC Adapter
DC In

28
- Using the optional cradle
Disconnecting the Tablet from the Cradle
If you connect the tablet to the cradle during operation, problems can occur. We recommend that the tablet be
switched off or that the appropriate undocking function provided by the operating system is executed.
1Switch off the tablet.
2Lift the tablet from the cradle while supporting the underneath of the cradle.

29
Chapter 4
Working with Android
Getting Started with Android
Your Android Tablet is pre-installed with the Android 4.0 operating system and many useful apps. Android 4.0 has
been specially optimized for the operation of Android Tablets using the finger, so that you will quickly become
familiar with it, without any long training periods.
Initial setup of your device with Android
When you switch on your device for the first time the welcome page is displayed. Follow the onscreen instructions.
You can choose your language on the welcome screen. If you wish to set another language, select it from the menu
by tapping on it and then confirm with
Start
.
You will be asked for your Google account information during the installation process. If you have not already set
this up, you can do so now.
When the installation process is complete, the home page will be displayed.
YOU CAN SKIP SETTING UP THE GOOGLE ACCOUNT AND PUT YOUR ANDROID TABLET INTO OPERATION WITHOUT A GOOGLE ACCOUNT.
HOWEVER, SOME APPLICATIONS REQUIRE THAT A GOOGLE ACCOUNT IS SET UP, FOR INSTANCE GMAIL / GOOGLE MAIL. YOU CAN SET UP THE
GOOGLE ACCOUNT AT A LATER TIME (“PERSONAL SETTINGS” ON PAGE 42). WHEN YOU SET UP A GOOGLE ACCOUNT, ALL EMAILS, CONTACTS,
CALENDAR EVENTS AND OTHER DATA WHICH ARE LINKED TO THIS ACCOUNT WILL AUTOMATICALLY BE SYNCHRONISED WITH YOUR TABLET.
30
- Getting Started with Android
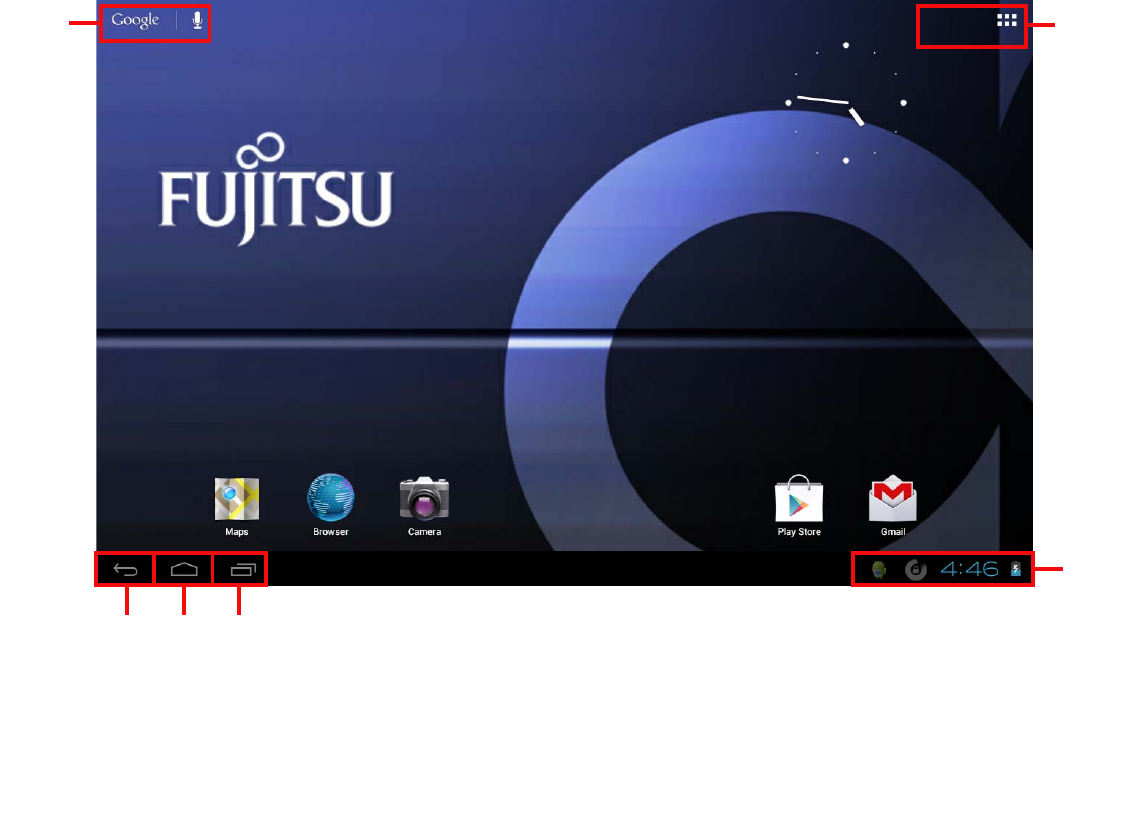
Home Page
1: Google Search
2: Applications and Widgets
3: Back
4: Desktop
5: Recently Used Apps
6: System Bar / Status Display
12
345
6
31
- Getting Started with Android
Navigating on the home page
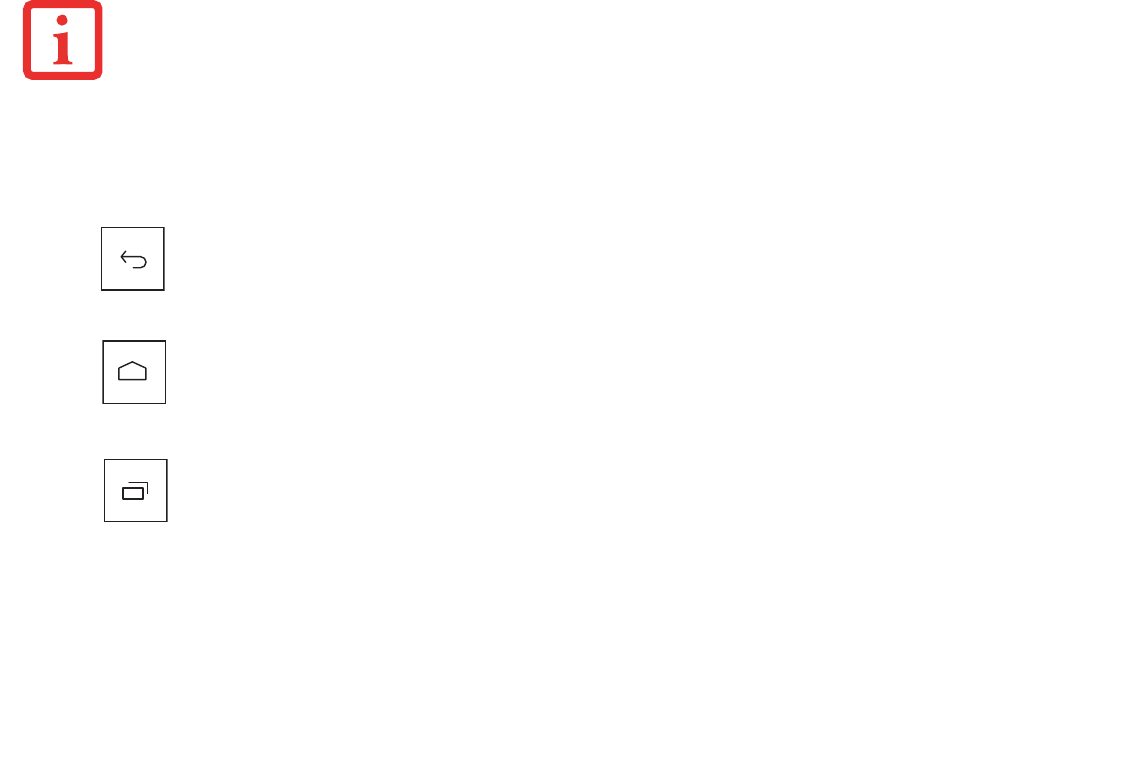
There are three navigation buttons shown on the lower left of the home page. These buttons are always available
while your Android Tablet is operating.
IF THE BUTTONS HAVE NOT BEEN USED FOR SOME TIME, THEY MAY BE HIDDEN OR REPLACED BY SMALL DOTS, DEPENDING ON THE APP.
THEY ARE STILL ACTIVE HOWEVER; SIMPLY TOUCH THE DOT OR THE CORRESPONDING POSITION.
Button Description
Back Button:
Opens the previously used page. This can also return to another app.
Desktop Button (homepage):
Displays your primary home page.
Recently Used Apps Button:
Shows a list of the apps you have most recently used. Includes thumbnails for quick
identification.
> To open one of the listed apps, tap on it.
> To delete an app from the list, swipe it to the left or right.

32
- Getting Started with Android
Customizing the home page
Changing between home
pages
Five home pages are available. You are on the third screen by default (the central home page).
•To change between the five home pages, stroke the home page toward the left or right with your finger.
•To return to the central home page, tap on the desktop button.
Changing the
background
•To change the background for all home pages, tap and hold your finger at a free position on a home
page. A list of options will be displayed, from which you can choose a background:
•Gallery:
– Select a photo which you have taken with the camera or which you have downloaded.
– Select the layout and tap on
Cut
to select the background from the gallery.
•Live background: Select an animated background.
•Backgrounds:
– Select a background from the system.
– You can select additional backgrounds from the Android Market.

33
- Getting Started with Android
Operation
Using fingers
You can use your finger on the touch screen to execute commands and start applications.
Action Description
Tapping Tap on a symbol, menu, button or folder to select this option or to activate it.
Tap and hold Tap on a button and let your finger stay there longer until the action is
taken.
Dragging Tap and hold a symbol and drag it to another place.
You can - for instance - drag apps or widgets onto the home page in this way.
Stroke or slide Stroke your finger quickly on the screen in one direction. In this way you can
switch between different home pages.
Double-tap To enlarge a view, quickly tap twice on a web page, map or another screen.
When you double-tap on an image in a web browser, it will be enlarged
and another double-tap will make it smaller again.
Zoom in/Zoom out With some apps (
maps
,
browser
and
gallery
) you can enlarge by putting two
fingers on the screen and moving them apart, and make smaller by moving
the fingers together.
Input fields Data must be entered for some apps, such as on an Internet page or your
name and password.
When you tap on the input field, an on-screen keyboard opens, with which you
can enter your data.
34
- Getting Started with Android
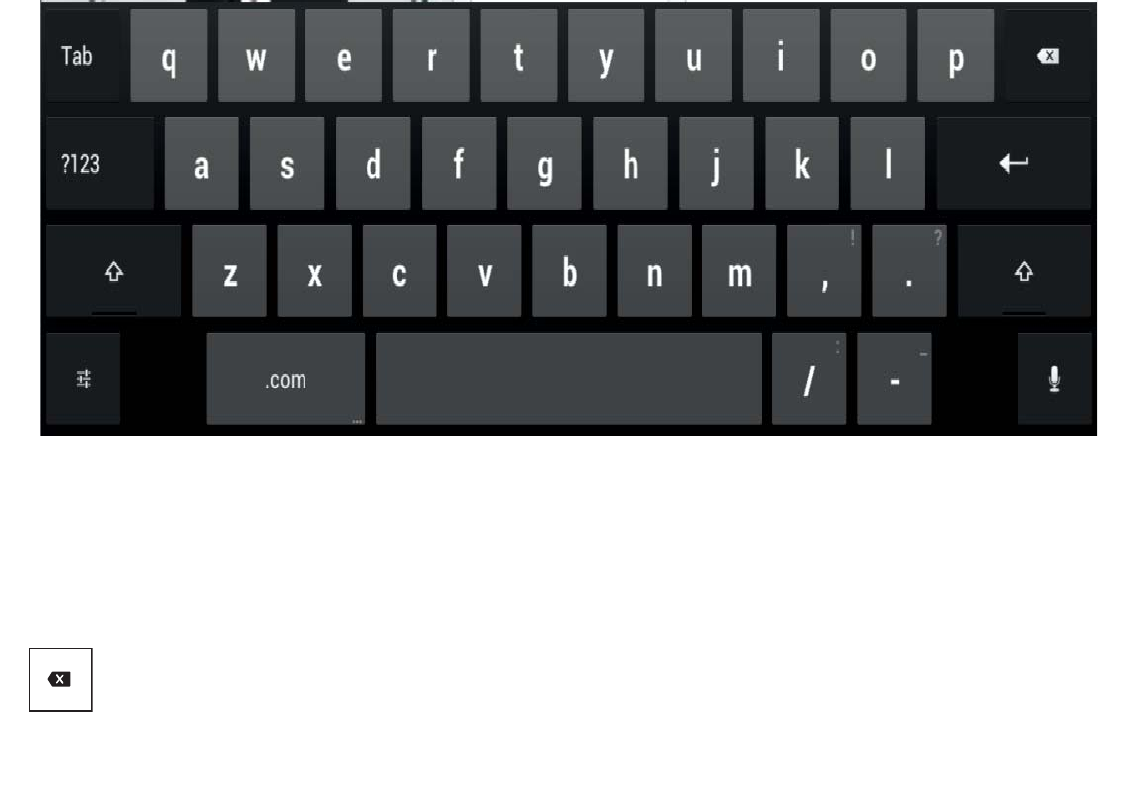
Entering text via the on-screen keyboard
If you tap on an input field, an on-screen keyboard opens and you can enter text.
Action Description
Enter text > Move the cursor to the position where you wish to enter text. A tab will be
shown under the position.
> To move the cursor, pull the tab
[Clear] Button
Delete text or letters
before the cursor
Tap on
Clear
. The text or letters before the cursor will be cleared.

35
- Getting Started with Android
Selecting text
> Tap and hold or double-tap on the text.
The nearest word will be highlighted and a tab will be shown at the start
and end of the selection.
> To change the selection, pull the tabs.
The tabs will disappear after a certain time. If you tap on the text again, they
will reappear.
Cutting, copying, inserting text > Select a text.
> Tap on the Cut, Copy or Insert buttons in the top right-hand corner.
Entering an uppercase letter > Tap the shift key.
Entering several letters in uppercase
> Hold the shift key during the input.
> To switch back to lower case letters, release the shift key.
or
> Double-tap on the Caps Lock key.
> To switch back to lower case letters, tap the shift key again.
Entering numbers and symbols > Tap on the [?123] key.
> To show a wider selection, tap on the [=\>] key.
Quickly show common punctuation
marks and symbols > Press and hold the key to the right of the space bar.
Entering special characters
Special characters are shown on the keyboard as small grey colored fields in
the corner.
> Press and hold down the shift key while you tap on the key for the special
character.
> Press and hold any key to show alternative characters, symbols or numbers.
Changing the entry language for the
keyboard Tap on the key for the keyboard settings at the lower left on the keyboard.

36
- Getting Started with Android
Using the dictation function
A mobile or WiFi network is required to be able to use this function.
Using the speech recognition facility from
Google
, you can enter text by dictation. At most places where you can
enter text via the keyboard, you can also use the dictation function.
> To use the speech recognition, tap on the field where you would like to enter text. The on-screen keyboard is
displayed.
> Press the microphone key on the on-screen keyboard.
> When you see the microphone symbol, speak your text.
If you pause, the spoken words are converted into text by the speech recognition program and displayed in the
text field with underscore.
The underscore disappears if you enter more text via the keyboard or via the dictation function. You can delete the
underscored text using the delete key.
> For punctuation, say "comma", "full stop", "question mark" or "exclamation mark".
Messages, status and system symbols
You will be informed of new messages, calendar events, warning messages and app updates, etc.
In the system bar or status display (lower right on the home page), there is a digital clock, with status symbols
displayed on its left and system symbols on its right. Status symbols represent app messages. System symbols
show the current strength of the wireless and network connections, battery state of charge, etc.
37
- Getting Started with Android
Managing
messages
When the list with the messages is displayed, you can call up the
Settings
menu by tapping on the "Quick settings"
symbol.
Working with apps/widgets
Action Description
Display messages > Tap on the clock or the symbols
Reacting to messages > Tap on the message
Discarding a message > Slide the message away to the left or right
Discarding all messages > Tap on the X in the bottom right-hand corner
Action Description
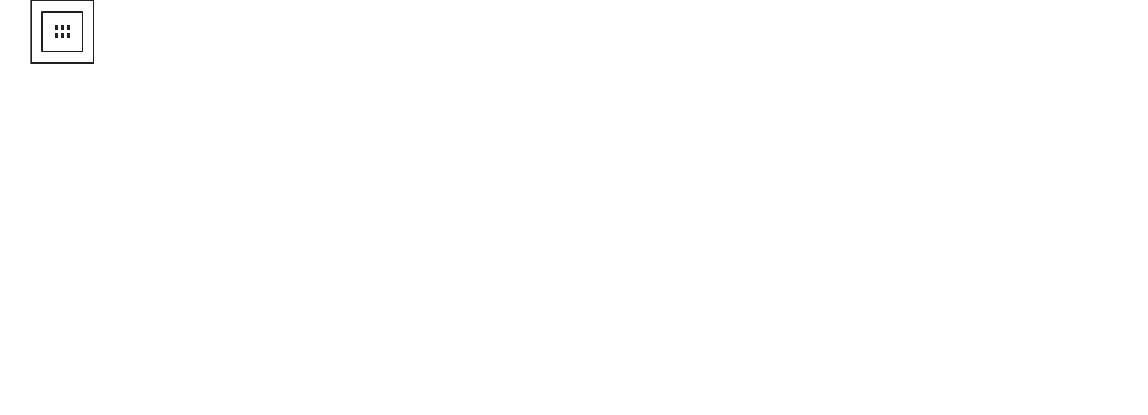
“All Apps” button
Show all apps
> With the button on the top right of your screen, you can navigate to all the
apps and widgets which are installed on your Android Tablet.
> Tap on
All apps
.
All the apps and widgets will be displayed on the lower right at the edge of the
screen.
Switching between apps and
widgets
> Stroke to the left or right
or
> Tap on the
Apps
or
Widgets
tab. A list of the apps/widgets is shown.
Starting an app or widget > Tap on the app or widget.
Installing additional apps/widgets
from the Android Market (now
called Google Play Store)
> Tap on the
Apps
tab.
> Tap on the Market symbol (now the Play Store symbol) in the list of apps.
or
> Tap on the shop symbol in the right lower corner.

38
- Getting Started with Android
Placing an app or widget on a home
page
> Tap on
All apps
.
All the apps and widgets will be displayed on the lower right at the edge of the
screen.
> Tap on the corresponding symbol and then hold it. The home page is
displayed.
> Slide the symbol to a free place on your home page.
> As soon as the symbol is at the desired place, lift the finger.
The app or widget is placed at this location.
Note: Widgets can have different sizes. If there is not enough space where the
app or widget should be placed, it will not be added to the home page.
Putting apps or widgets in a folder > Drag the app/widget to another app/widget and put it down there.
A folder with these two apps/widgets will be created.
You can add further apps/widgets to this folder and use various folders to
categorize the apps/widgets on your home page.
Opening a folder > Tap on the fold er.
The list of the apps or widgets contained in this folder will be displayed.
Changing a folder name > Open the folder on the home page and type on the name.
Removing an app, folder or widget
from a home page.
> Tap and hold the symbol and slide it upwards onto the edge of the screen.

39
- Getting Started with Android
Settings
Managing the WiFi network
Everywhere that there is a wireless access point, you can make a connection to a network.
Action Description
Making a network connection > From
All apps
, select the option
Settings
.
> Select
Wireless networks and networks
.
> To switch on the WiFi or WLAN, slide the switch to ON.
Your Android Tablet searches for available WiFi networks and displays a list of those it has
found.
> Select a network. You will be asked to enter your logon information.
Entering the proxy server for the
network
Proxy settings are used by browser apps but not by other apps.
> If network requires a proxy server, tap and hold the network name in the WiFi settings.
> Select
Change network
.
If you select
Display advanced options
, you can make the proxy settings manually.
Changing existing network
connections
> Tap on the network name and hold the network name.
> Select
Change
.
If you save these network settings, the next time that you are in this district your device
will automatically make a connection.
Removing network connection
(deactivating automatic
connection or if this will no longer
be used)
> Tap on the network name and hold the network name.
> Select
Discard
.
Customizing WiFi information,
rules and other advanced options
> Tap on the menu button.
> Select
Advanced
.

40
- Getting Started with Android
Establishing a Bluetooth connection
> Switch on the Bluetooth function of your tablet.
> From
All apps
, select the option
Settings
.
> Select
Wireless networks and networks
.
> To switch on the Bluetooth, slide the switch to ON.
A list of the available Bluetooth devices in your vicinity is
displayed.
> Under
Settings
-
Wireless networks and networks
, select the option
Bluetooth
.
Your device searches for Bluetooth devices within range and shows them.
> Select the device with which you wish to connect your tablet and follow the instructions.
Limiting data volumes for mobile data use
You can give your mobile data use a limit, so that the mobile network switches off when the data volume is
reached.
> From
All apps
, select the option
Settings
.
> Select
Data usage
.
The previous data volume usage will be shown. You can specify a limit for mobile data.
Airplane Mode, VPN, Tethering and Portable Hotspot, and WiFi Direct
> From
All apps
, select the option
Settings
.
> Select
Further...
, to make further settings.
WHEN YOU USE A NEW BLUETOOTH DEVICE FOR THE FIRST TIME, THE TWO DEVICES MUST BE "PAIRED" SO THAT A SECURE CONNECTION CAN BE
MADE. AFTERWARDS, THE DEVICES AUTOMATICALLY CREATE A CONNECTION. THE DEVICES STAY PAIRED UNTIL YOU CANCEL THE CONNECTION.

41
- Getting Started with Android
The following options are possible:
DEVICE SETTINGS
> From
All apps
, select the option
Settings
.
> Select
Device
, to make further settings.
Option Description
Airplane Mode All radio connections of your Android Tablet will be disabled when this mode is
set.
VPN Permits connection to virtual private networks.
Tethering and Portable Hotspot Tethering allows the use of your Android Tablet as a modem, so that external
devices which are connected via USB, WiFi or Bluetooth can make an Internet
connection.
WiFi Direct Manage all the settings and options for mobile data networks. This includes the
activation/deactivation of mobile data networks and data roaming, as well as
the management of APNs (Access Point Names) and network administrators.
IF YOUR NETWORK SETTINGS ARE NOT AUTOMATICALLY CONFIGURED, PLEASE ASK YOUR MOBILE NETWORK PROVIDER FOR THE SETTINGS AND ENTER
THIS DATA UNDER
W
I
F
I
D
IRECT
.
Option Description
Sounds For setting the volume, ring tone and vibration alarm

42
- Getting Started with Android
Personal settings
> From
All apps
, select the option
Settings
.
> Select
Personal...
, to make further settings.
Display To set the brightness, background, automatic rotation, time until sleep mode and font size information.
Ambient light sensor
The ambient light sensor adapts the brightness depending on the ambient light. You can enable and
disable automatic brightness in the
Brightness
menu.
Sensor for recognizing the screen orientation
The sensor detects the orientation and changes the screen view accordingly. You can enable or disable
automatic turning of the screen display via the
Automatically turn display
control box.
Memory Informs you of the internal and external memory usage and free memory space and allows you to clear
the SD card.
Battery Shows the battery state of charge and battery consumption data as well as a list of the applications and
their battery consumptions in percent.
Apps Displays the following app lists:
• All the pre-installed apps and in addition the apps installed from the Android Market (now called Play
S
tore)
• Only additionally installed apps
• Apps on the SD card
• Only active applications
By tapping on an app you can de-install it (if it was additionally installed from the Android Market),
cancel the application or erase data and cache.

43
- Getting Started with Android
The following options are possible:
Option Description
Accounts and Sync. You can use several Google accounts and Microsoft Exchange ActiveSync accounts on your
device. Depending on your apps, you can possibly also add or delete other accounts.
Location services You can enable or disable Google location services and GPS satellites.
Security/screen security You may wish to lock your tablet to prevent unauthorized access. If a screen lock was set
up, the screen locks automatically when your tablet switches to the quiescent state.
There are the following options for the screen lock:
Move finger
Offers no protection. You do however reach the home screen quickly or can open the camera
immediately with a stroking movement. To unlock and return to the home screen, stroke
towards the right. Stroke upwards to the left to open the camera.
Unlocking through face recognition
Offers minimal protection. The device can be unlocked by recognition of your face via the
front camera.
Pattern
Offers minimal protection. The locking can be overridden by a simple pattern with the
finger.

44
- Getting Started with Android
Security/screen security
(continued)
Password
At least four or more characters are required. The best security is offered by a password with
8 characters, consisting of digits, letters and special characters and which does not contain
any easy to guess words or phrases.
Owner information
You can enter a text such as name and telephone number via the owner information;
these will then be displayed on the locked screen.
Security/encryption You can encrypt all the data on your Android Tablet: Google accounts, application data, music
and other media, downloaded information etc. Encryption offers additional protection if your
tablet is stolen and it may be required or recommended in some companies.
If there is encryption however, every time your tablet is switched on you have to enter a
numeric PIN or a password. Please note that this must be the same password or the same
PIN that you have used to lock the screen. A separate password cannot be set up.
Warning: An encryption is irreversible. The only way to remove an encryption is to
reset your tablet to the factory settings.
Setting up encryption
Contact your system administrator before you set up encryption. In many cases, the PIN or
the password for the encryption is managed by the system administrator. Before you
enable encryption, make the following preparations:
> Enter a PIN or a password for the screen locking.
> Connect your Android Tablet with the AC Adapter.
> Fully charge the battery.
> Plan for about one hour for the encryption process: The encryption process must not be
interrupted; an interruption will cause you to lose some or all data.

45
- Getting Started with Android
Language and entry You can change the language, enable or disable spelling and change the keyboard and
language settings.
Backup and reset You can perform a backup of your settings and other data which are associated with one
or more of your Google accounts. If you replace your device or have to reset it to the
factory settings, you can access your previously saved data on this account and restore
your data.
Backup and reset /
backup my data
When you enable this option, a major part of your data is automatically saved by a
backup, this also includes:
•your WiFi passwords
• your browser bookmarks
• the list of your apps which you have installed via the App Market (now Play Store
app)
• the words which you have entered in the dictionary used by the on-screen keyboard
• most of the settings which you have made
Some apps from third-party suppliers can also use this function, so that you can recreate your
data after reinstallation of an app.
If you disable this option, your data will no longer be secured through a backup and the
existing backups will be deleted from your Google accounts.
Backup and reset /
backup account
Shows the Google accounts where the information is backed up. On a new or reset device,
you must register for one or more accounts to be able to access the corresponding
information.
> To add a new account, select
Backup account
-
Add account
.

46
- Getting Started with Android
System settings
> From
All apps
, select the option
Settings
.
> Select
System
to make further settings.
The following options are possible:
•Date and time: To set the date, time and time zone. Select the time format (12 hour or 24 hour clock)
and the display format for the date
•Input aids such as TalkBack, large fonts, automatic turning of the screen or spoken password input
•Developer options such as USB debugging or user interface
options
•Via the tablet: serial number of the tablet, unique IMEI number, status and detailed tablet information. You
will find the serial number in the status menu.
Backup and reset /
automatic restore
> Enable this option to restore the settings and other data when an app is reinstalled. This
function requires that you back up your data via a Google account and that the app uses
the backup service.
Backup and reset / reset
to the factory data
Deletes all personal data on the internal memory, including information on your Google
account, other accounts, your system and app settings, downloaded applications, your
music, photos, videos and other files.
> To reset the Android Tablet to the factory data, select
Reset to factory state
. After
resetting your tablet, you must enter the same data that you entered during the first
setup. If you have backed up the data on a Google account, you can restore the data
during the setup.

47
- Getting Started with Android
System updates
Fujitsu can make system updates available for your tablet, to resolve problems or to update the operating system
or applications.
You can choose between two update methods:
•Over-the-air (OTA): Updating over the Internet directly from your Android Tablet.
•Updating via an external memory card (micro SD card)
Over-the-air (OTA)
1Go to Settings and select About Tablet. Click on System Updates. You will automatically be sent to the OTA portal
and will be presented with either index.html or noupdate.html.
2Follow the instructions on the screen to complete the procedure.
Updating via an external memory card (micro SD card)
1Open the Internet browser on your tablet or another computer.
2Navigate to "http://support.ts.fujitsu.com".
3Select
Drivers & Downloads
.
4Search for your tablet in the list of devices.
5Download the current system update package which is identified as an SD card update.
6Copy this system update package onto an external memory card (micro SD card).
7Slide the memory card (micro SD card) into your tablet.
FUJITSU ACCEPTS NO RESPONSIBILITY FOR LOSS OF YOUR DATA AFTER A SYSTEM UPDATE.
BEFORE AN UPDATE, YOU SHOULD WITHOUT FAIL PERFORM A DATA BACKUP.

48
- Getting Started with Android
8Switch your tablet off by one long press of the ON/OFF switch and confirm the question on the shut down
with
OK
.
9Switch your tablet on again.
10 When you see the Android logo on the screen, press the ON/OFF switch and the volume button (increase volume)
and keep them pressed for 2 seconds and then release
t
hem.
After a few seconds you reach the restore mode.
11 Select
wipe data/factory reset
.
12 Follow the instructions on the screen to perform the system update. After the system update has completed,
you will be in the restore mode again.
13 Select
Reboot system now
to finish the system update.
IF THE FUJITSU LOGO APPEARS ON THE SCREEN, THEN YOU HAVE NOT REACHED THE RESTORE MODE. REPEAT THE ABOVE STEP UNTIL YOU
REACH THE RESTORE MODE.
NAVIGATE AS FOLLOWS THROUGH THE MENU:
•VOLUME BUTTON (INCREASE VOLUME) TO SELECT AN OPTION ABOVE THE CURRENT OPTION
•VOLUME BUTTON (DECREASE VOLUME) TO SELECT AN OPTION BELOW THE CURRENT OPTION
•ON/OFF SWITCH TO CONFIRM THE SELECTION
49
- Getting Started with Android
Apps
In the following section you will find a list of some of the practical apps which are pre-installed on your Android
Tablet. Via the Android Market (whose new name is Play Store), you have direct access to practical apps for games
and much more, which you can download and install on your tablet.
TO GAIN ACCESS TO THE ANDROID MARKET (NOW CALLED PLAY STORE), YOU NEED A GOOGLE ACCOUNT AND INTERNET ACCESS.
FUJITSU IS NOT LIABLE FOR MALFUNCTIONS WHICH ARE CAUSED BY ADDITIONAL APPS WHICH YOU HAVE INSTALLED. IN SUCH CASES, A
REPAIR IS CHARGEABLE, EVEN WITHIN THE WARRANTY PERIOD.
FUJITSU IS NOT LIABLE FOR ANY DAMAGES INCURRED BY YOU OR A THIRD PARTY PROVIDER, ARISING FROM AN INSTALLATION PERFORMED BY
YOU.
ALWAYS CHECK THE SECURITY OF ADDITIONAL APPLICATIONS. INSTALLATION IS CARRIED OUT AT YOUR OWN RISK. A NORTON SECURITY PACKAGE IS
PRE-INSTALLED ON YOUR TABLET. ACTIVATE THIS SOFTWARE TO PROTECT YOURSELF AGAINST ATTACKS FROM THE INTERNET AND FROM MALICIOUS
SOFTWARE.
IF THEY WERE NOT PRE-INSTALLED ON YOUR TABLET, FUJITSU DOES NOT FURNISH ANY GUARANTEE NOR GIVE ANY SUPPORT FOR APPS FROM
THIRD PARTY SUPPLIERS.
SOME APPLICATIONS AUTOMATICALLY MAKE AN INTERNET CONNECTION AND COMMUNICATE. PLEASE NOTE THAT THIS MAY LEAD TO HIGHER
TELECOMMUNICATION COSTS.

50
- Getting Started with Android
Applications
App Description
Browser Displays web pages from the Internet
Downloads Offers easy access to downloaded files
Settings Allows system and personal settings on your tablet Email
Email Manages your emails from various accounts
Gallery Displays pictures and videos on your tablet
Google Mail/GMail Manages your Google mail
Google+ Enables updates and social networking
Calendar Calendar applications
Camera Creates recordings and videos with the rear or front camera
Contacts Manages your contacts
Latitude Exchanges your own location and that of your friends and shows these on a map
Maps Shows your location and much more on a map
Music Plays your favorite music
Navigation Shows the route to your destination
Places Classifies places and gives recommendations
Android Market (now Play
Store)
Offers access to Android apps, games and more

51
- Getting Started with Android
Sound Recorder Allows recordings of messages
Talk Allows you to chat with your Google Talk contacts
Video Studio Allows video editing
YouTube Shows YouTube videos
Absolute® Computrace® Your Android Tablet is equipped with Computrace® persistence technology from Absolute®
Software.
Once enabled, the Computrace persistence technology creates a permanent connection to
your device. If the device is lost or stolen, it can be frozen with this technology, data can be
deleted and other remote security or administrative functions can be performed.
Note: This technology is disabled by default. A separate license is required to enable the
Computrace persistence technology. Contact your local dealer.
Provider: Absolute Software Web page: "http://www.absolute.com/absolute-tablet"

52
Chapter 5
Connecting External Devices
Peripheral Device Connections
Connecting USB devices
If your external USB devices have a micro USB interface, you can connect external devices to the USB port. If they
have a traditional USB interface, you can also connect devices to the optionally available docking cradle (e.g., a
keyboard, mouse or memory stick).
•ALWAYS READ THE DOCUMENTATION SUPPLIED WITH THE DEVICE YOU WISH TO CONNECT. NEVER CONNECT OR DISCONNECT CABLES DURING
A THUNDERSTORM.
•NEVER PULL AT A CABLE WHEN DISCONNECTING IT. ALWAYS GRASP THE PLUG.
•WITH SOME DEVICES, SUCH AS USB DEVICES, IT IS NOT NECESSARY TO SWITCH OFF THE TABLET AND THE DEVICE BEFORE
CONNECTING/DISCONNECTING. FOR MORE INFORMATION ABOUT WHETHER OR NOT DEVICES NEED TO BE SWITCHED OFF, PLEASE REFER TO
THE DOCUMENTATION SUPPLIED WITH THE EXTERNAL DEVICE.
•USB DEVICES ARE HOT-PLUGGABLE. THIS MEANS YOU CAN CONNECT AND DISCONNECT DEVICES WHILE YOUR OPERATING SYSTEM IS RUNNING.
•USB 2.0 HAS A DATA TRANSFER RATE OF UP TO 480 MBIT/S.
•ADDITIONAL INFORMATION CAN BE FOUND IN THE DOCUMENTATION FOR THE USB DEVICES.

53
- Peripheral Device Connections
HDMI port
To connect a USB device to your tablet:
1Connect the data cable to the external device.
2Connect the data cable to a USB port or to the
cradle of the tablet.
To remove a USB device from your tablet:
Always correctly remove the device according to the
steps below, to ensure that none of your data is lost.
1Select Settings > Memory > Remove USB memory.
It is now safe to remove the USB device. Figure 17. Connecting a USB Device
DEVICE DRIVERS
USB DEVICES WILL BE AUTOMATICALLY RECOGNIZED AND INSTALLED BY YOUR OPERATING SYSTEM.
You can use the optionally available cradle to connect
HDMI-capable end devices such as an LCD, plasma TV or
video projector.
2Place the tablet in the cradle.
3Connect the data cable to the HDMI port of the
cradle.
Figure 18. Connecting an HDMI Device
54
-
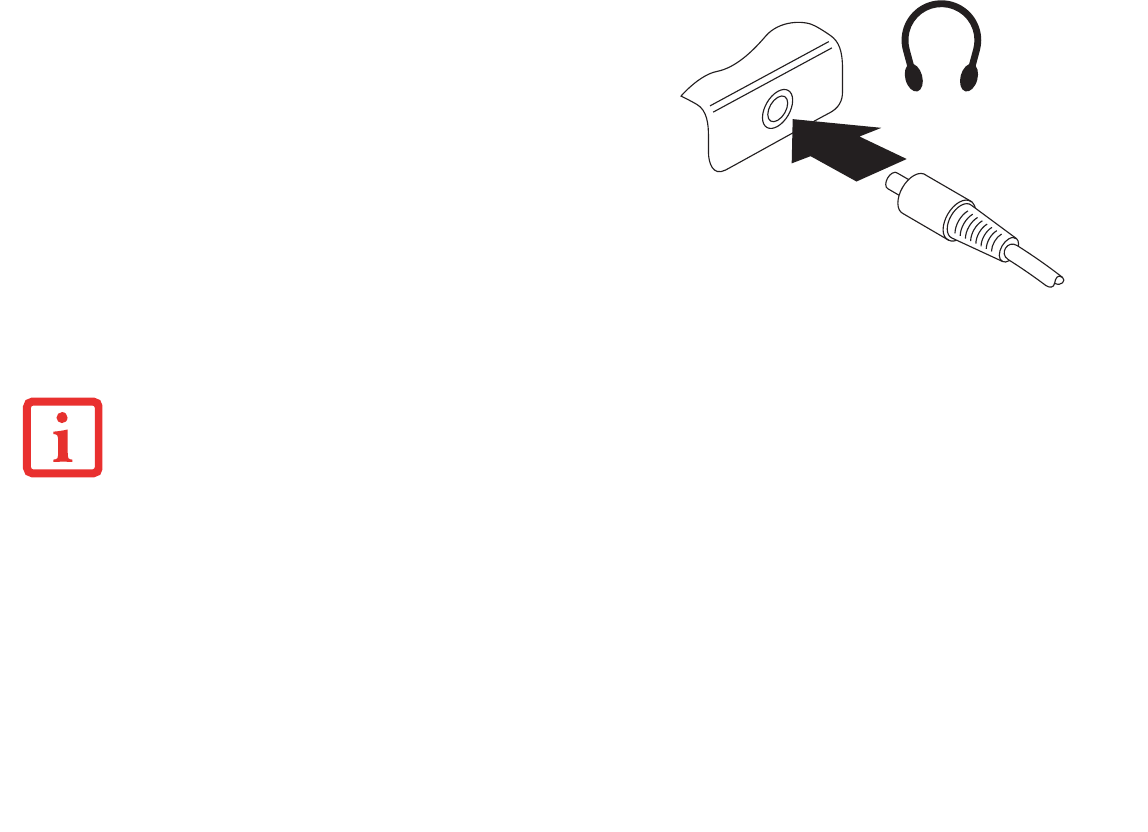
Headphone/Microphone port
You can connect headphones, a microphone or
external loudspeakers to your tablet via the
headphones port.
1Connect the audio cable to the external device.
2Connect the audio cable to the headphone port of
the tablet.
The internal speakers are disabled when the
external device is plugged in.
Figure 19. Connecting a Headphone Device
IF YOU PURCHASE A CABLE FROM A RETAILER, PLEASE NOTE THE FOLLOWING INFORMATION: THE HEADPHONE PORT ON YOUR TABLET IS A "3.5
MM JACK SOCKET".
IF YOU WANT TO CONNECT HEADPHONES OR A SPEAKER YOU WILL NEED A "3.5 MM JACK PLUG".

55
Chapter 6
Troubleshooting Your Android Tablet
Troubleshooting
There may be occasions when you encounter simple setup or operating problems that you can solve on the spot, or
problems with peripheral devices that can be solved by replacing the device. The information in this section helps you
isolate and resolve some of these straightforward issues and identify failures that require service.
Identifying the Problem
If you encounter a problem, go through the following procedure before pursuing complex troubleshooting:
1Turn off your STYLISTIC Android Tablet.
2Make sure the AC adapter is plugged into your tablet and to an active AC power source.
3Make sure that any devices connected to the external connectors are plugged in properly. You can also disconnect
such devices, thus eliminating them as possible causes of failure.
4Turn on your tablet. Make sure it has been off at least 10 seconds before you turn it back on.
5If the problem has not been resolved, try resetting your system with the Reset Button (See “Using the Reset
Button” on page 56). If that doesn’t solve the problem, refer to the Troubleshooting Table for more detailed
troubleshooting information.
56
- Troubleshooting
6If you have tried the solutions suggested in the Troubleshooting Table without success, contact your support
representative:
Toll free: 1-800-8Fujitsu (1-800-838-5487)
Web site: http://solutions.us.fujitsu.com/www/content/support/contact/index.php
Before you place the call, you should have the following information ready so that the customer support
representative can provide you with the fastest possible solution:
•Product name
•Product configuration number
•Product serial number
•Purchase date
•Conditions under which the problem occurred
•Any error messages that have occurred
•Type of device connected, if any
See the Configuration Label on the bottom of your tablet for configuration and serial numbers.
Using the Reset Button
If the device no longer reacts to input or the ON/OFF switch, use the Reset key to restart the device.
1Disconnect the tablet from the AC adapter.
2Open the slot cover of the memory card.
3Press a small, rigid wire (e.g., a paper clip) into the opening of the Reset key for approximately five seconds
to restart the device.
4Replace the slot cover.
IF YOU KEEP NOTES ABOUT WHAT YOU HAVE TRIED, YOUR SUPPORT REPRESENTATIVE MAY BE ABLE TO HELP YOU MORE QUICKLY BY GIVING
ADDITIONAL SUGGESTIONS OVER THE PHONE.
57
- Troubleshooting
5Connect the AC adapter to the device again.
Specific Problems
Using the Troubleshooting Table
If you have problems with your Android Tablet, try to find the symptoms under the Problem column of the
troubleshooting table for the feature giving you difficulty. You will find a description of common causes for that
symptom under the column Possible Cause and what, if anything, you can do to correct the condition under Possible
Solutions. All possible causes or solutions may not apply to your tablet.
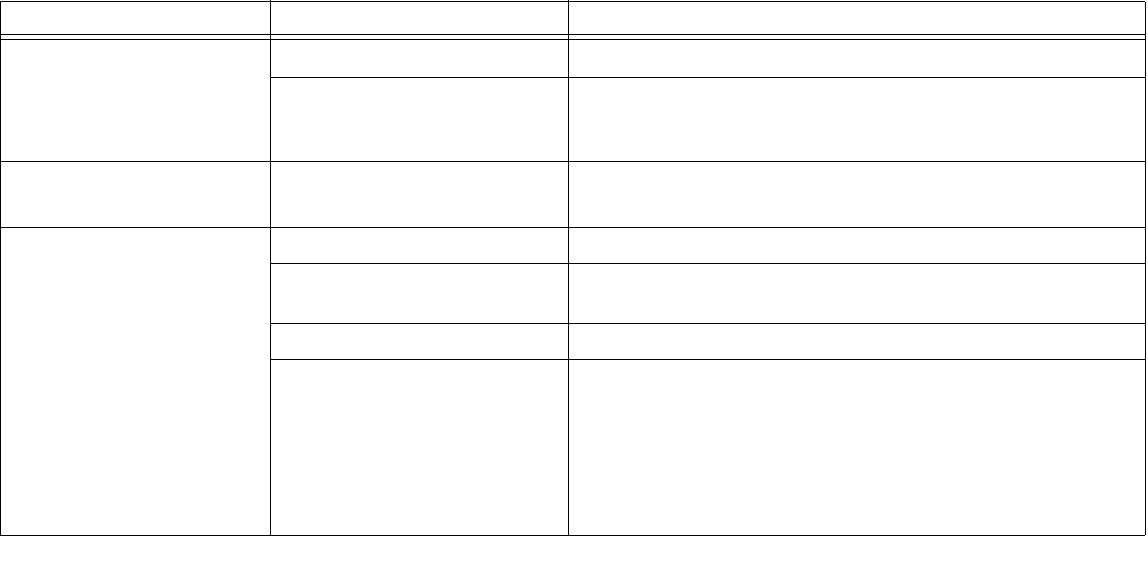
Troubleshooting Table
Problem Possible Cause Possible Solutions
The Android Tablet’s date or
time is incorrect
Time and date are incorrect. Select
Settings > Date & Time
, then adjust the settings.
Date and time are still set
incorrectly after switching on the
tablet.
Please contact your sales outlet or our Service and Support.
The display on the touch-
screen is difficult to read
Reflected glare •Move the tablet into a different position.
•Increase the brightness of the screen.
The external monitor remains
blank
Monitor is switched off Switch the external monitor on.
Power saving has been activated
(monitor is blank).
Press a key (external keyboard) or tap on the touchscreen.
Brightness is set too dark. Adjust the brightness of the monitor.
The external monitor’s power
cable or data cable is not
connected properly.
Switch off the ANdroid Tablet and the external monitor.
•Check whether the power cable is plugged properly into the
external monitor and into the power socket.
•Check whether the data cable is properly connected to the
tablet and the external monitor (if it is plugged in with a
connector).
•Switch on the tablet and the external monitor.
58
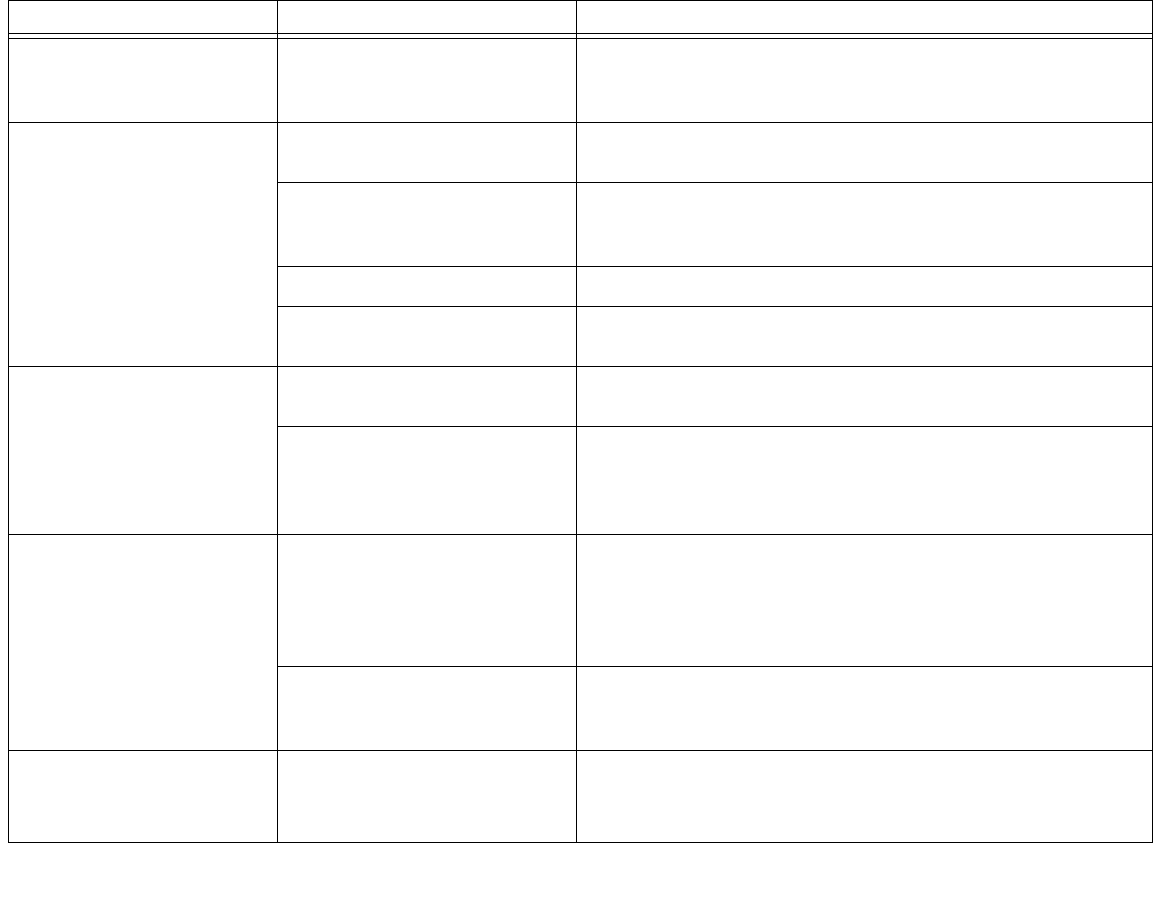
- Troubleshooting
The tablet does not start after
powering on
The power adapter is not
connected correctly. • Check whether the AC adapter is connected correctly to the
tablet.
•Switch on the tablet.
The tablet stops working The tablet is in energy saving
mode. Leave the energy saving mode: Press the ON/OFF switch.
An application has caused the
malfunction.
Close the application program or
restar
t
the tablet
(by restarting
the operating system or switching the device off and back on
again).
The battery is dead. Charge the battery, or, connect the AC adapter to the Tablet
.
The tablet does not respond to
inputs.
Restart the tablet manually (see “Using the Reset Button” on
page 56).
The radio connection to a net-
work does not work
The wireless component is
disabled.
Switch the radio component on.
The wireless component is
enabled. Despite this, the
wireless connection to a network
does not work.
Check that the wireless connection is correctly set up via
the
Settings
.
The battery discharges too
quickly
You may have an application
running that consumes a great
deal of power due to frequent
accessing of radio, GPS or network
connections.
•Use the AC adapter as frequently as possible.
•Close unnecessary applications, reduce the frequency of the
access to radio components or the network or switch off the
radio components in a targeted way via the settings.
The maximum brightness may
have been set for the screen.
Reduce the brightness of the screen to lower energy consump-
tion: you will find the adjustment under
Settings > Display >
Brightness
.
Acoustic warnings A beep sounds every few
seconds., indicating the battery is
almost empty.
Charge the battery.
Problem Possible Cause Possible Solutions

59
Chapter 7
System Specifications
Specifications
This section provides the hardware and environmental specifications for your Fujitsu STYLISTIC Android Tablet.
Specifications of particular configurations will vary.
Android Tablet
General Specs
Processor NVIDIA® Tegra® 3 T30S, Quad Core ARM Cortex A9 (1.4
GHz)
Main Memory (SO DIMM) 1GB LPDDR2 onboard
Electrical
Safety Regulations CE
Protection Class II
Maximum power consumption:
(Tablet on with battery charging) 30 W

60
- Specifications
Touchscreen
Size 10.1 “ (25.7 cm) TFT WXGA
Resolution 1280 x 800 pixels
Pixel Class II
Technology Wide-view high brightness LED display with rugged glass
Cameras Front: 2 megapixels
Rear: 8 megapixels with auto focus and flash
Maximum external display resolution Full HD 1920 x 1080 pixels
Dimensions
Width x depth x height 10.3” x 6.9” x 0.35” (262.6 mm x 175.4 mm x 8.6 mm)
Weight 1.23 lb. (.56 kg)
Input Devices
Tablet Buttons 3 keys
Slots
Memory Card Slot 1 x MicroSD
Ports
HDMI Port 1 x (optionally via cradle)
Headphone Port/Line Out 3.5 mm stereo mini jack
Docking Port 1 x
Micro USB Port 1 x USB 2.0
61
- Specifications
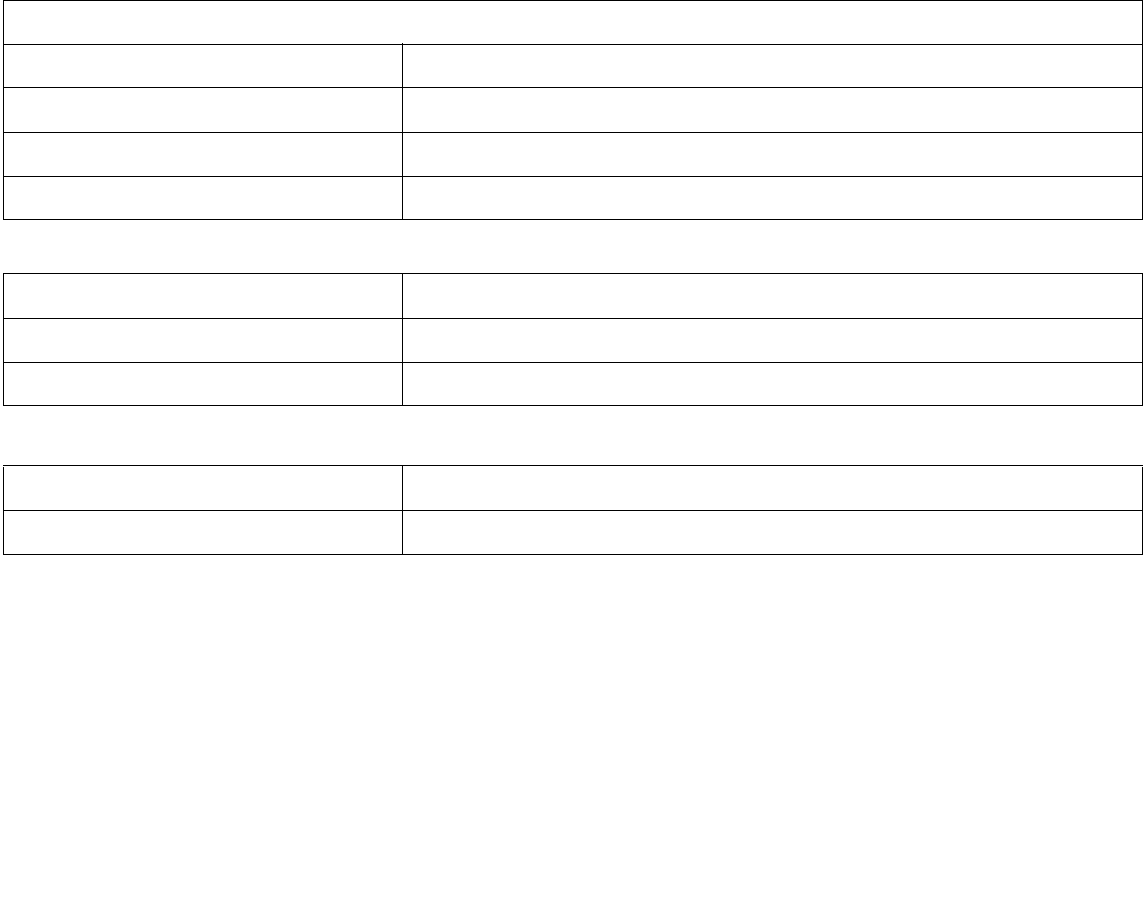
Rechargeable Battery
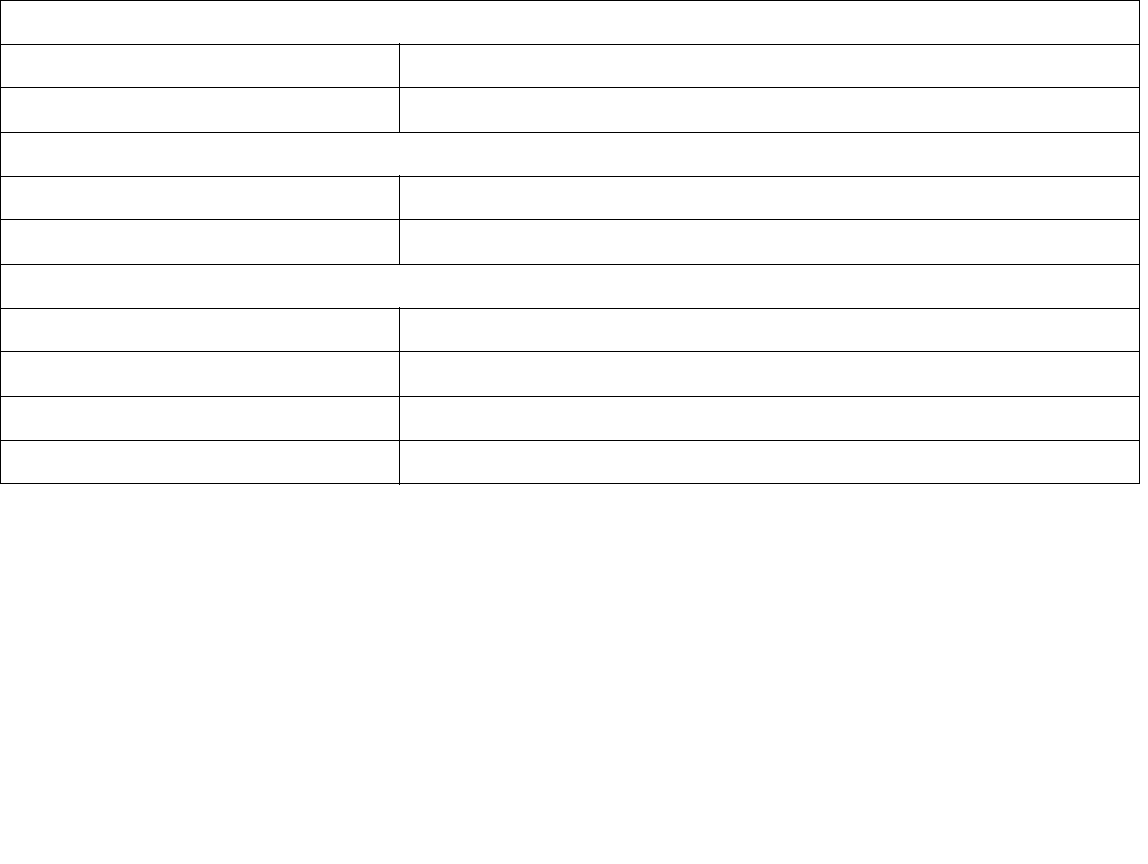
AC Adapter
Ambient Conditions
Environment Class DIN IEC 721 7K1
Mechanism Class DIN IEC 721 7M2
Operating Temperature 41° to 104° F (5° to 40° C)
Transport Temperature 5° to 140° F (–15° to 60° C)
Type 2-cell Lithium Polymer 3170 mAh rechargeable battery
Rated Voltage 12 V
Rated Capacity 38 Wh
Rated Voltage 19 V
Maximum Rated Current 1.58 A
62
- Specifications
Optional Cradle
Electrical
Safety Regulations CE
Protection Class II
Ports
Universal Serial Bus (USB) 2 x USB 2.0
Docking Port 30-pin
Ambient Conditions
Environment Class DIN IEC 721 7K1
Mechanism Class DIN IEC 721 7M2
Operating Temperature 41° to 95° F (5° to 35° C)
Transport Temperature 5° to 140° F (–15° to 60° C)

63
Chapter 8
Regulatory Information
Regulatory information for Android Tablets without radio device
NOTICE:
Changes or modifications not expressly approved by Fujitsu could void this user’s authority to operate the equipment.
Notice to Users of Radios and Television
These limits are designed to provide reasonable protection against harmful interference in a residential installation. This
equipment generates, uses, and can radiate radio frequency energy and, if not installed and used in accordance with the
instructions, may cause harmful interference to radio communications. However, there is no guarantee that interference will
not occur in a particular installation. If this equipment does cause harmful interference to radio or television reception, which
can be determined by turning the equipment off and on, the user is encouraged to try to correct the interference by one or
more of the following measures:
•Reorient or relocate the receiving antenna.
•Increase the separation between the equipment and receiver.
IF THERE IS NO FCC LOGO OR FCC ID ON THE DEVICE THEN THIS DEVICE IS NOT APPROVED BY THE FEDERAL COMMUNICATIONS COMMISSION
(FCC) OF THE USA. ALTHOUGH IT IS NOT EXPLICITLY FORBIDDEN TO TRAVEL IN THE US TRADING AREA CARRYING THIS DEVICE, TO AVOID
TROUBLE AT CUSTOMS CLEARANCE, FUJITSU RECOMMENDS NOT TO BRING THIS DEVICE INTO THE US TRADING AREA.

64
- FCC Regulatory information for Android Tablets with radio device
•Connect the equipment into an outlet that is on a different circuit than the receiver.
•Consult the dealer or an experienced radio/TV technician for help.
DOC (Industry CANADA) notices
Notice to Users of Radios and Television
This Class B digital apparatus meets all requirements of Canadian Interference-Causing Equipment Regulations.
CET appareil numérique de la class B respecte toutes les exigence du Réglement sur le matérial brouilleur du Canada.
FCC Regulatory information for Android Tablets with radio device
Federal Communications Commission statement
This device complies with Part 15 of FCC Rules. Operation is subject to the following two conditions: (1) this device may
not cause interference, and (2) this device must accept any interference, including interference that may cause undesired
operation of this device.
FCC Interference Statement
This equipment has been tested and found to comply with the limits for a Class B digital device, pursuant to Part 15 of the
FCC Rules. These limits are designed to provide reasonable protection against harmful interference in a residential
installation. This equipment generates, uses, and can radiate radio frequency energy. If not installed and used in accordance
with the instructions, it may cause harmful interference to radio communications.
However, there is no guarantee that interference will not occur in a particular installation. If this equipment does cause
harmful interference to radio or television reception, which can be determined by turning the equipment off and on, the
user is encouraged to try to correct the interference by one or more of the following measures:
1. Reorient or relocate the receiving antenna.
2. Increase the distance between the equipment and the receiver.
3. Connect the equipment to an outlet on a circuit different from the one the receiver is connected to.
4. Consult the dealer or an experienced radio/TV technician for help.
Please note the following regulatory information related to the optional radio device.

65
- FCC Regulatory information for Android Tablets with radio device
RF Exposure Information (SAR)
This device is in compliance with Specific Absorption Rate (SAR) for general population /uncontrolled exposure limits in
ANSI/IEEE C95.1-1999 and has been tested in accordance with the measurement methods and procedures specified in OET
Bulletin 65 Supplement C. This equipment complies with FCC RF radiation exposure limits set forth for an uncontrolled
environment. This device was tested for operations with the device contacted directly to the human body to the back side of the
EUT. To maintain compliance with FCC RF exposure compliance requirements, avoid direct contact with the transmitted antenna
during transmitting.
OPERATION ON THE 5.15-5.2 5GHZ FREQUENCY BAND IS RESTRICTED TO INDOOR USE ONLY. THE FCC REQUIRES INDOOR USE FOR THE 5.15-
5.25 GHZ BAND TO REDUCE THE POTENTIAL FOR HARMFUL INTERFERENCE TO CO-CHANNEL MOBILE SATELLITE SYSTEMS. THEREFORE, IT WILL
ONLY TRANSMIT ON THE 5.25-5.35 GHZ, 5.47-5.725 GHZ AND 5.725 –5.850 GHZ BAND WHEN ASSOCIATED WITH AN ACCESS POINT (AP).
LE PRÉSENT APPAREIL EST CONFORME AUX CNR D'INDUSTRIE CANADA APPLICABLES AUX APPAREILS RADIO EXEMPTS DE LICENCE.
L'EXPLOITATION EST AUTORISÉE AUX DEUX CONDITIONS SUIVANTES:
(1) L'APPAREIL NE DOIT PAS PRODUIRE DE BROUILLAGE, ET
(2) L'UTILISATEUR DE L'APPAREIL DOIT ACCEPTER TOUT BROUILLAGE RADIOÉLECTRIQUE SUBI, MÊME SI LE BROUILLAGE EST SUSCEPTIBLE D'EN
COMPROMETTRE LE FONCTIONNEMENT."
THE DEVICE COULD AUTOMATICALLY DISCONTINUE TRANSMISSION IN CASE OF ABSENCE OF INFORMATION TO TRANSMIT, OR OPERATIONAL FAILURE.
NOTE THAT THIS IS NOT INTENDED TO PROHIBIT TRANSMISSION OF CONTROL OR SIGNALING INFORMATION OR THE USE OF REPETITIVE CODES WHERE
REQUIRED BY THE TECHNOLOGY.
THE DEVICE FOR THE BAND 5150-5250 MHZ IS ONLY FOR INDOOR USAGE TO REDUCE POTENTIAL FOR HARMFUL INTERFERENCE TO CO-CHANNEL
MOBILE SATELLITE SYSTEMS; THE MAXIMUM ANTENNA GAIN PERMITTED (FOR DEVICES IN THE BANDS 5250-5350 MHZ AND 5470-5725 MHZ)
TO COMPLY WITH THE E.I.R.P. LIMIT; AND THE MAXIMUM ANTENNA GAIN PERMITTED (FOR DEVICES IN THE BAND 5725-5850 MHZ) TO COMPLY
WITH THE E.I.R.P. LIMITS SPECIFIED FOR POINT-TO-POINT AND NON POINT-TO-POINT OPERATION AS APPROPRIATE, AS STATED IN SECTION A9.2(3).
IN ADDITION, HIGH-POWER RADARS ARE ALLOCATED AS PRIMARY USERS (MEANING THEY HAVE PRIORITY) OF THE BAND 5250-5350 MHZ AND
THIS RADAR COULD CAUSE INTERFERENCE AND/OR DAMAGE TO LE-LAN DEVICES.
THE COUNTY CODE SELECTION FEATURE IS DISABLED FOR PRODUCTS MARKETED IN THE US/CANADA. FOR PRODUCT AVAILABLE IN THE
USA/CANADA MARKETS, ONLY CHANNEL 1~11 CAN BE OPERATED. SELECTION OF OTHER CHANNELS IS NOT POSSIBLE.

66
- FCC Regulatory information for Android Tablets with radio device
Regulatory Notes and Statements
Radio device, health and authorization for use
Radio-frequency electromagnetic energy is emitted from the wireless devices. The energy levels of these emissions, however,
are far much less than the electromagnetic energy emissions from wireless devices such as mobile phones. Radio devices are
safe for use by consumers because they operate within the guidelines found in radio frequency safety standards and
recommendations.
The use of the radio devices may be restricted in some situations or environments, such as:
•on board an airplane, or
•in an explosive environment, or
•in situations where the interference risk to other devices or services is perceived or identified as harmful.
In cases in which the policy regarding use of radio devices in specific environments is not clear (e.g., airports, hospitals,
chemical/oil/gas industrial plants, private buildings), obtain authorization to use these devices prior to operating the
equipment.
Regulatory Information/Disclaimers
Installation and use of this radio device must be in strict accordance with the instructions
included in
the user documentation
provided with the product. Any changes or modifications made to this device that are not expressly approved by the
manufacturer may void the user’s authority to operate the equipment. The manufacturer is not responsible for any radio or
television interference caused by unauthorized modification of this device, or the substitution or attachment of connecting
cables and equipment other than those specified by the manufacturer. It is the responsibility of the user to correct any
interference caused by such unauthorized modification, substitution or attachment. The manufacturer and its authorized
resellers or distributors will assume no liability for any damage or violation of government regulations arising from failure to
comply with these guidelines.
Export restrictions
This product or software contains encryption code which may not be exported or transferred from the US or Canada without
an approved US Department of Commerce export license. This device complies with Part 15 of FCC Rules, as well as ICES
003 B / NMB 003 B. Operation is subject to the following two conditions:
(1) this device may not cause harmful interference, and
(2) this device must accept any interference received, including interference that may cause undesirable operation.
Modifications not expressly authorized by Fujitsu may invalidate the user’s right to operate this equipment.