Fujitsu F04J Mobile Phone User Manual
Fujitsu Limited Mobile Phone Users Manual
UserManual.wiki
>
Fujitsu
>
F04J User Manual
Users Manual
Navigation menu
Upload a User Manual
Namespaces
Wiki Guide
HTML
PDF
Info
Views
User Manual
Discussion / Help
Navigation
![IntroductionThank you for purchasing "F-04J" mobile terminal.Before using your terminal, or when necessary, read this manual to ensure safe use and handling.ManualsViewing this manual・"F-04J" mobile terminal is usually referred to as "the terminal".・The images or illustration used in this manual are examples. They may differ from the actual displays.・Explanations and screen images for "標準メニュー (Standard menu)" that is set by default are provided. If there are differences between "標準メニュー (Standard menu)" and "シンプルメニュー (Simple menu)" in operation, they are distinguished by mark or .・Menu items for "シンプルメニュー (Simple menu)" are described when [リスト (List)] is set. When [タイル (Tile)] is set, some names of menu items are different from the description in this manual.・Descriptions when setting of らくらくタッチ (Raku raku touch) is enabled are provided.・"Authenticate" indicates the operating procedure for entering security code or password depending on functions.・In some step descriptions, pressing button is shown by illustration (→p.14).・Main operations are provided. A part of operation steps is simplified in the descriptions.・Unauthorized copying of parts of or this entire manual is prohibited.・The contents in this manual, URL and contents are subject to change without prior notice."かんたん操作ガイド (Kantan operation guide)" (booklet)This manual provides main functions and operations for the terminal. Operate according to the explanation to use basic function of F-04J."らくらくスマートフォン4をお使いになる前に (Before using Raku raku smartphone 4)" (booklet)This manual provides important information for using the terminal. For attaching docomo nano UIM card, microSD card, battery pack or charging, refer to this booklet."使いかたガイド (User's guide)" (installed in the terminal)This manual provides detailed information and operations of the functions.<Step> : From the Home screen, [使いかたガイド (User's guide)]eSearch method : On the Standby screen, [使い方 (How to use)]e[使いかたガイドを読む (Read User's guide)]eSearch method"Instruction manual" (PDF file)This manual provides detailed information and operations of the functions.<From a PC>https://www.nttdocomo.co.jp/support/trouble/manual/download/index.html*You can download the latest information.Indicates that the operation in 標準メニュー(Standard menu) is described.On the 標準メニュー (Standard menu) Home screen, touch and push .Describes operation result and complemental explanation.1From the Home screen, [メール (Mail)]Touch and push .[送受信履歴 (Sent and received logs)]2Touch and push [送信した人 (Sender)] or [受信した人 (Recipient)] according to your purpose.[受信した人 (Recipient)]/[送信した人 (Sender)]A log list appears.・To delete all logs, touch and push [受信履歴を削除する (Delete received log)]/[送信履歴を削除する (Delete Sent log)].・Select a log to create mail, register/add to phonebook or delete.](https://usermanual.wiki/Fujitsu/F04J/User-Guide-3249465-Page-2.png)
![Contents/Precautions2・This terminal supports LTE, W-CDMA, GSM/GPRS, Wireless LAN System.・Because your terminal uses wireless transmission, it may not function in locations where it is difficult for radio waves to penetrate, such as tunnels, underground passages and some buildings, in areas where radio waves are weak, or out of Xi and FOMA service area. Even when you are high up in a tall building or condominium and nothing blocks your view outside, your terminal may not be able to receive or transmit signals. Also, communication may be interrupted even when there are strong radio waves with 4 signal status icons on the terminal and you are not moving (traveling).・Because your terminal uses radio waves to communicate, it is possible that a third party may attempt to tap your calls. However, the LTE, W-CDMA, GSM/GPRS automatically applies a confidential communication function to all calls, so even if a third party could somehow tap a call, they only hear noise.・Your terminal encodes voice communication as digital data. When you are operating your terminal while moving to a location subject to weaker radio wave conditions, the transmitted digital data may not be correctly decoded and as a result the decoded voice may differ somewhat from the actual voice.・Maintain a separate record of the data you saved in the terminal. Note that DOCOMO assumes no responsibility for any loss of saved contents of data resulting from malfunction, repair, changing of the model or other handling of the terminal.・In the terminal, as it is for a PC, some applications that you install may give instability of the operation, or may send your location information or personal information registered to the terminal to outside via the Internet and the information may be used improperly. Please thoroughly check a provider and operation status of the application etc. which you want to use beforehand and then use it.・You are recommended to save important data to microSD card. or a PC.・This terminal supports FOMA Plus-Area and FOMA HIGH-SPEED Area.・The terminal does not support i-mode sites (programs) or i-αppli.・You can use the terminal only with docomo nano UIM card. If you have a UIM or FOMA card, bring it to a docomo Shop to replace.・Even in Manner mode, shutter sound, auto focus lock sound for camera shooting, and count down sound for self timer are emitted.・To check your own phone number, touch and push [自分の電話番号 (My own phone number)] on the Home screen.・The terminal automatically performs communication for some functions, for example, to synchronize data, check the latest software or maintain connection with the server. If you transmit a large amount of data such as downloading applications or watching video, a packet communication charge becomes high. Subscription of packet flat-rate service is highly recommended.・Depending on the applications or service you use, packet communication charge may be applied even in Wi-Fi communication.・The software on the terminal can be updated with the latest information.・Improving the terminals quality may be included in the software update.・Display is manufactured by taking advantage of highly advanced technology but some dots may be always or never lit. Note that, this shows characteristics of liquid crystal displays and not defects in the terminals.・When the memory of the microSD card or the terminal is almost full, running application may not operate normally. In this case, delete saved data.・In the terminal, only specified applications such as sp-mode mail, i-channel, etc. are available. Downloading applications from Google Play and using them are not available.・If your terminal is lost, change your password or disable your PC mail accounts using a PC to prevent other persons from using them.・Set the screen lock to ensure the security of your terminal for its loss.・The terminal supports only sp-mode, mopera U and Business mopera Internet. Other providers are not supported.・For details on usage fee, refer to https://www.nttdocomo.co.jp/english/.Before using the terminal](https://usermanual.wiki/Fujitsu/F04J/User-Guide-3249465-Page-4.png)
![Before using the terminal18◆Turning power ON1Press and hold P (2 sec. or more) until the indication light lights in green and the terminal vibrates.The top screen appears following the startup screen.2On the Top screen, slide from bottom to top・When a confirmation screen for sending terminal error information appears, touch and push [OK].■Turning power ON for the first timeMake initial setting for DOCOMO services after making the initial setting for the terminal (setup the terminal). Follow the onscreen instructions.■Changing the Home screen[標準メニュー (Standard menu)] is set in Home screen for the first activation. To change to "シンプルメニュー (Simple menu)", operate from [メニュー切替 (Switch menu)] in the Settings menu.❖Top screenTop screen is a screen for preventing misoperation.1On the Top screen, slide from bottom to topHome screen/Standby screen appears.✔INFORMATION・On the top screen, the display is automatically turned off according to the screen time out setting and the terminal goes into sleep mode.❖When the screen display is turned offWhen no operation is performed in certain period of time, the display is automatically turned off according to the screen time out setting and the terminal turns into sleep mode.1P keySleep mode is deactivated, and the top screen appears.Setting sleep mode manually : P key✔INFORMATION・When receiving a call while in sleep mode, sleep mode is deactivated.◆Turning power OFF1Press and hold P until the phone options menu appears2[電源を切る (Power off)]e[OK]The terminal vibrates and turns OFF.Restarting : [再起動 (Restart)]e[OK]◆Using touch panelYou can operate the terminal by directly touching with your finger.❖Notes for using the touch panelTouch panel is designed to be operated with your fingertip. Do not apply excessive force on the touch panel or use sharp objects (nail, ball point pen, pin, etc.).・Touching the touch panel may not work in the following cases. Note that it may cause malfunction.- Operation with gloved hands- Operation with tip of fingernail- Operation with a foreign object on the display- Operation with protective sheet or seal on the display- Operation with the touch panel wet- Operation with finger wet by sweat or water- Operation under waterTurning power ON/OFFBasic operation](https://usermanual.wiki/Fujitsu/F04J/User-Guide-3249465-Page-20.png)
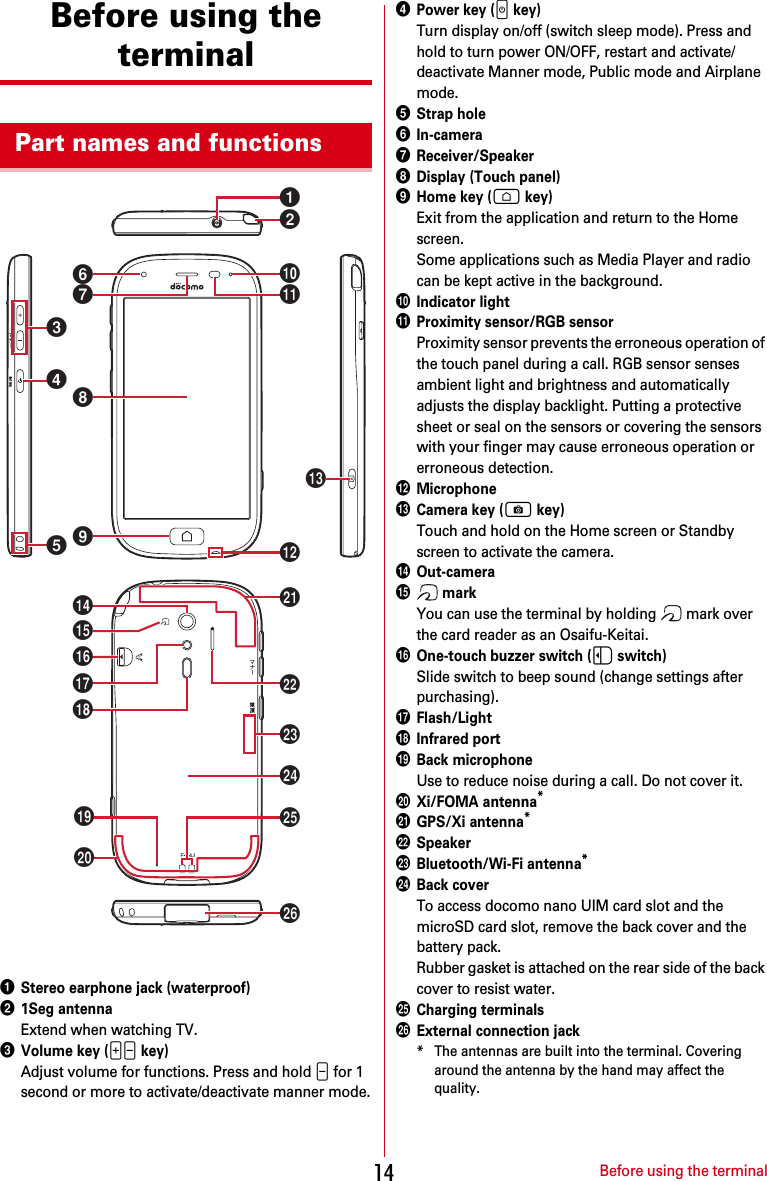
![Before using the terminal20For the first time you turn the power ON, a screen for preparation before using the terminal (initial settings) appears.・The settings can be changed later.・If you turn the power OFF with some settings not made in the initial settings, unset items appear again when you turn the power ON next time.・If you turn on the power without docomo nano UIM card inserted, "日付と時刻 (Day & time)" setting appears. The initial setting screen for DOCOMO services does not appear.1On the "初期設定(Initial settings)" screen, [次へ (Next)]2Following the onscreen instructions, set Text-to-speecheSetting my bodyeSecurity codeeOne-touch buzzer音声読み上げ設定 (Text-to-speech):Set whether to enable Text-to-speech function which lets the terminal read information on the screen or operation.自分からだ設定 (Setting my body) : Set basic information for 自分からだ設定 (Setting my body).暗証番号 (Security code) : Set security code for using the security lock.・By default, "0000" is set. To change, enter "0000" on the security code entry screen, then enter a new security code.ワンタッチブザー (One-touch buzzer) : Set whether to enable one-touch buzzer.3On the "ソフトウェア更新 (software update)" screen, [次へ (Next)]4Follow the onscreen instructions to make initial settings for DOCOMO servicesアプリ一括インストール (Install apps all at once) : Install applications for subscribed DOCOMO services all at once.おサイフケータイの利用 (Use Osaifu-Keitai) : Make settings for using Osaifu-Keitai.ドコモアプリパスワードの設定 (Set docomo apps password) : Set a password for DOCOMO applications.・By default, "0000" is set for docomo apps password.位置提供設定 (Location information setting) : Set location information function settings.Home screen is a start screen to use applications. The terminal has two types home screens; "標準メニュー (Standard menu)" and "シンプルメニュー (Simple menu)".・To switch the home screen, operate from "メニュー切替 (Switch menu)" in the Settings menu.◆Learning the Home screen 【標準 (Standard)】On the Home screen in "標準メニュー (Standard menu)", slide the screen up and down.・Press H key to return to the top position of the Home screen.aStatus area→p.22Status icons, notification icons and date & time are displayed. They are displayed at the bottom of the top screen.・Touch and push the status area on the Home screen, the notification panel (→p.22) appears.Initial settings Home screenghicdafeb](https://usermanual.wiki/Fujitsu/F04J/User-Guide-3249465-Page-22.png)
![Before using the terminal22 : Roaming / : Communicating in LTE/LTE available / : Communicating in 3G/3G available / : Communicating in GSM/GSM available* : Airplane mode* : Manner mode* : Public mode (Drive mode)* : Osaifu-Keitai lock is set : New mail (sp-mode mail, MessageR, SMS) : New mail (PC mail) : Missed call : Message in Voice mail Service : Phone memo ON : Unread Phone memo exists : Wi-Fi is connected. : Bluetooth function is ON : Bluetooth device is connected : Speaker phone is on : Ringtone volume 0 : Enable vibrate for reception : Ringtone off and enable vibrate for reception* Icons are also displayed in the status area on the Home screen.■Main notification icons : New Area Mail : Sending SMS is failed : Wi-Fi is on, and Wi-Fi network is available : Calling : Call on hold / : Uploading data completed/Downloading data is complete : Error message exists : Positioning with GPS : Earphone is connected (terminal microphone input) : Earphone is connected (earphone microphone input) : Receiving 1Seg* : Alarm is set : Screenshot image is saved : Koe-no-Takuhaibin (message received, playback completion notification) / / : Software update available/completed/unable to continue : Omakase Lock is set : Available memory on the terminal is low : USB is connected (appears only in the status area)* Icons are also displayed in the status area on the Home screen.◆Learning Status area【標準 (Standard)】Status area appears at the bottom of the Home screen and top screen in the Standard menu. Status icons to be displayed on the status bar and a part of the notification icons.・The same icons on the status bar are displayed. Some icons may not be displayed or may be displayed highlighted.・Up to 2 notification icons are displayed in the status area. When 3 or more notification icons exist, (Hidden icons) appears.・Touch and push the status area to display notification panel. The details of notification icons can be checked on the notification panel.◆Notification panelDisplay the notification panel to set [簡単モード切替 (Easy mode switch)] or check the details of notification icons.1Touch and push the status area on the Home screen・Touch and push each notification to check the detail of the notification.・Touch and push [通知を消去 (Clear notification)] to clear the notifications. [通知を消去 (Clear notification)] may not be displayed depending on the content of the notification.・When all the notifications are not displayed, scroll the screen.・Tap [閉じる (Close)] to close the notification window. : Touch and push the status bar on the Standby screenStatus display areaNotification iconStatus icon](https://usermanual.wiki/Fujitsu/F04J/User-Guide-3249465-Page-24.png)
![Before using the terminal23✔INFORMATION・Even if you touch and push the status area on the top screen or status bar other than one on the Standby screen, the notification panel does not appear.◆Incoming notificationOnly when there are missed calls or incoming mails, incoming notification appears on the Home screen, the Standby screen, or the top screen. You can check the details of notifications from the incoming notifications on the Home screen and the Standby screen.・Missed calls, incoming calls, incoming mails, incoming SMS, phone memos and voicemail messages, incoming notifications form Rakuraku community (comments for posted messages, friend requests etc.) are displayed as incoming notifications.1On the Home screen, touch and push an incoming notificationA related application activates. : Touch and push the incoming notification on the Standby screen■When different types of incoming notifications exist[新着あり (New arrival)] appears. Touch and push the notification to display a list of incoming notifications. Touch and push each notification to activate a related application.Press new arrival notification](https://usermanual.wiki/Fujitsu/F04J/User-Guide-3249465-Page-25.png)
![Calling24CallingEnter a phone number of the other party to make a call/video call. You can also make a call/video call from the phonebook.◆Making a call/video call 【標準 (Standard)】1On the Home screen, [電話/電話帳(Phone/Phonebook)]The dialpad screen appears.・When the call history screen is displayed, touch and push [ダイヤル (Dial)].2Enter a phone number・To correct a wrong number, touch and push .・Touch and push [メニュー (Menu)] to register a phonebook entry, show/hide caller ID, make an international call.3[電話をかける (Call)]Making a video call : [メニュー (Menu)]▲[ビデオコールをかける (Make a video call)]4When a call is ended, [電話を切る (End call)]・Alternatively, Press H key, then touch and push [はい (Yes)] to end a call.❖Making a call/video call from the phonebook1On the Home screen, [電話/電話帳(Phone/Phonebook)]▲[電話帳 (Phonebook)]▲[電話をかける (Call)]Making a video call : [ビデオコールをかける (Make a video call)]◆Making a call/video call【シンプル (Simple)】1On the Standby screen, [電話 (Phone)]▲[電話をかける (Call)]The dialpad screen appears.2Enter a phone number・To correct a wrong number, touch and push .・Touch and push [メニュー (Menu)] to register/add a phonebook entry, show/hide caller ID, make an international call.3[電話をかける (Call)]Making a video call : [メニュー (Menu)]▲[ビデオコールをかける (Make a video call)]4When a call is ended, [電話を切る (End call)]・Alternatively, Press H key, then touch and push [はい (Yes)] to end a call.❖Making a call/video call from the phonebook1On the Standby screen, [電話 (Phone)]▲[電話帳の内容を見る (View phonebook entries)]▲Select a phonebook entry▲[電話をかける (Call)]Making a video call : [メニュー (Menu)]▲[ビデオコールをかける (Make a video call)]◆International call (WORLD CALL)Enter "+" to make an international call. Touch and hold "0" to enter "+".・For details on WORLD CALL, contact "総合お問い合わせ先 (General Inquiries)" on the last page of this manual.1On the Home screen, [電話/電話帳(Phone/Phonebook)]: On the Standby screen, [電話 (Phone)]▲[電話をかける (Call)]2+ (Touch and hold "0")▲Enter "Country code-Area code (City code) omitted prefix 0" and phone number3[電話をかける (Call)]・If [自動変換機能 (Automatic conversion function)] of [国際ダイヤルアシスト(International dial assist)] is ON, "International dial assist" screen appears when dialing. Touch and push [元の番号で発信 (Original number)] or [変換後の番号で発信 (Converted number)].・In some countries and areas such as Italy, entering "0" is required.・To enter "+ Country code" by selecting the country list, enter the area code (city code) and a phone number, then [メニュー (Menu)]▲[国際電話をかける (Make an international call)]▲Select a country.Making a call/video call](https://usermanual.wiki/Fujitsu/F04J/User-Guide-3249465-Page-26.png)
![Calling25Answer an incoming call/video call. You can reject a call, hold answering, or record a phone memo (only for voice call) while a call is incoming.・Video calls cannot be answered as voice calls. To switch to voice call during a video call, on the video call screen, [メニュー (Menu)]▲Touch and push [音声通話に切替 (Switch to voice call)].◆Receiving a call/video call 【標準 (Standard)】1A call/video call is received.・To stop ringtone or vibration, touch and push [着信音を消す (Mute ringtone)], or press + or - key.2[電話に出る (Answer a call)]Receiving a video call : [映像で通話する (Call with image)].・When Rakuraku touch is OFF, slide the incoming call screen up, then touch [電話に出る (Answer a call)]/[映像で通話する (Call with image)].Declining a call : [メニュー (Menu)]▲[拒否 (Decline)]Recording a phone memo : [メニュー (Menu)]▲[伝言メモ (Phone memo)]・Available only for voice calls.3When a call is ended, [電話を切る (End call)]◆Receiving a call/video call【シンプル (Simple)】1A call/video call is received.・To stop ringtone or vibration, press + or - key.2[電話に出る (Answer a call)]Receiving a video call : [映像で通話する (Call with image)].・When Rakuraku touch is OFF, slide the incoming call screen up, then touch [電話に出る (Answer a call)]/[映像で通話する (Call with image)].Recording a phone memo : [メニュー (Menu)]▲[伝言メモ (Phone memo)]・Available only for voice calls.Declining a call : [メニュー (Menu)]▲[着信拒否 (Decline a call)]3When a call is ended, [電話を切る (End call)]Register frequently dialed parties to the one-touch dial to call or send email easily.◆Registering to the one touch dial1On the Home screen, touch and push any key from to 2[新規電話帳作成して登録 (Add a new phonebook entry)]▲Set each item▲Check the phone number/email address, then [OK]Registering from the phonebook : [電話帳から選ぶ (Select from the phonebook)]▲Select a party you want to register▲Check the phone number/ email address, then [OK]3[アイコンを選択 (Select icon)]/[設定しない (Do not set)]▲[OK]・If you touch and push [アイコンを選択 (Select icon)], select an icon.1On the Standby screen, touch and push any key of - 2[新規電話帳作成して登録 (Add a new phonebook entry)]▲Set each item▲[OK]Registering from the phonebook : [電話帳から選ぶ (Select from the phonebook)]▲Select a party you want to register▲Check the phone number, then [次へ (Next)]▲Check the email address, then [決定 (OK)]▲[OK]◆Using the one touch dial1On the Home screen, touch and push any key of - , or or ・When you lightly touch a registered key such as - , or or with your finger, the name of registered party appears.: On the Standby screen, touch and push any key of - Receiving a call/video call One-touch dial](https://usermanual.wiki/Fujitsu/F04J/User-Guide-3249465-Page-27.png)
![Calling262[電話をかける (Call)]/[ビデオコールをかける (Make a video call)]/[メールを送る (Send email)]・For the standard menu, you can change the registered parties or the icons, whether to show the names when lightly touching the registered keys on the Home screen such as - , or or , correct the phonebook entries, or cancel the one-touch dial by touching and pushing [メニュー (Menu)]. For the simple menu, you can change the registered parties, correct the phonebook, or cancel the one-touch dial by touching and pushing [修正する (Correct)].◆Phonebook【標準 (Standard)】1On the Home screen, [電話/電話帳(Phone/Phonebook)]▲[電話帳 (Phonebook)]aNew entryAdd new phonebook entry.bNameTouch and push to display the entry detail. From the entry detail screen, you can make voice calls or video calls, use send email or SMS, correct the contents, set ringtone, send via infrared communication, etc.cIndexDisplay the index.dMenuDisplay groups, search phonebook entry, log into cloud, etc.◆Phonebook 【シンプル (Simple)】1On the Standby screen, [電話 (Phone)]▲[電話帳の内容を見る (View phonebook entries)]aIndexDisplay the index.bNameTouch and push to display the detail screen. From the entry detail screen, you can make voice calls or video calls, send email or SMS, correct the contents, set ringtone, send via infrared communication, etc.cMenuChange the search method, log into cloud, make overseas use settings, etc.dNew entryAdd new phonebook entry.◆Registering a phonebook entry【標準 (Standard)】Add phonebook entry.1On the Home screen, [電話/電話帳(Phone/Phonebook)]▲[電話帳 (Phonebook)]2[新規登録 (New entry)]3Enter a name▲[次へ (Next)]4Enter a reading▲[次へ (Next)]・The reading corresponding to entered name is entered in advance. If it is not necessary to correct, touch and push [次へ (Next)].5Enter a phone number▲[次へ (Next)]6Enter an email address▲[次へ (Next)]7[この内容で登録する (Register this content)]▲[OK]・To register memo, address, etc., touch and push [追加 (Add)] on each item.◆Phonebook 【シンプル (Simple)】1On the Standby screen, [電話 (Phone)]2[電話帳に登録する (Register to the phonebook)]▲Enter a name▲[次へ (Next)]Phonebookdcabdabc](https://usermanual.wiki/Fujitsu/F04J/User-Guide-3249465-Page-28.png)
![Calling273Enter a reading▲[次へ (Next)]・The reading corresponding to entered name is entered in advance. If it is not necessary to correct, touch and push [次へ (Next)].4Select the entry method▲Enter a phone number▲[次へ (Next)]・You can select from direct input or call history for entry method.5Select the entry method▲Enter an email address▲[次へ (Next)]6[入力する (Enter)]▲Enter a postal code and the address▲[次へ (Next)]7[入力する (Enter)]▲Enter a memo▲[次へ (Next)]8[入力する (Enter)]▲Select the entry method▲Enter a birthday▲[OK]・You can select from 明治 (Meiji), 大正 (Taisho), 昭和 (Showa), 平成 (Heisei), 西暦 (Christian year) for the entry method.・If you register a group, the group settings screen appears.・If you enter with Christian year, [次へ (Next)] appears when a group is registered, or [決定 (Done)] appears when a group is not registered.9[終了する (End)]Registering the one-touch-dial : [登録する (Register)]▲Select a unregistered one-touch dial▲[決定 (Done)]▲[OK]・Registered phonebook entry is registered to the one-touch dial.◆Editing the phonebook entriesCorrect contents of registered phonebook entries.1Select a phonebook entry you want to edit▲[修正する (Correct)]2Set each item・You can edit a name, phonebook, etc.3[この内容で登録する (Register this content)]▲[OK]1Select a phonebook entry you want to edit▲[メニュー (Menu)]▲[修正する (Correct)]2Set each item・You can edit a name, phonebook, etc.3[上書きする (Overwrite)]/[新規登録する (Register new entry)]▲[終了する (End)]Registering the one-touch-dial : [登録する (Register)]▲Select a unregistered one-touch dial・Edited phonebook entry is registered to the one-touch dial.◆Deleting the phonebook entriesDelete the registered phonebook entries.1Select a phonebook entry you want to delete2[メニュー (Menu)]▲[削除する (Delete)]▲[削除する (Delete)]▲[OK]: [メニュー (Menu)]▲[電話帳から削除 (Delete from the phonebook)]▲[削除する (Delete)]▲[OK]◆Searching the phonebook entriesSearch the phonebook entries.1In the phonebook list, [メニュー (Menu)]▲[検索する (Search)]2Enter a search word▲[検索する (Search)]1On the Standby screen, [電話 (Phone)]▲[電話帳を検索する (Search the phonebook)]・For search by Japanese alphabet, [メニュー (Menu)]▲Touch and push [検索方法を変更 (Change search method)] to change the search method. If you select the search by group or search by text, the search method can be changed by touching and pushing [検索方法 (Search method)]. You can select the search method from 50 音順検索 (Search by Japanese alphabet), グループ検索 (Search by group), 文字列検索 (Search by text).・To use temporary selected search method, on the selection screen for search method, touch and push the item name of the search method. Touch and push for the search method item to turn to to preferentially search by the search method when you operate from the Standby screen, [電話 (Phone)]▲[電話帳を検索する (Search the phonebook)].](https://usermanual.wiki/Fujitsu/F04J/User-Guide-3249465-Page-29.png)
![Appendix33・The following dictionary data is installed in the built-in storage.<Iwanami Shoten>広辞苑 第六版 DVD-ROM版(内蔵版)(新村出編)<Sanseido>デイリーコンサイス和英辞典(内蔵版)(三省堂編修所編)デイリーコンサイス英和辞典(内蔵版)(三省堂編修所編)◆Open source software・Software licensed under Apache License V2.0 and necessarily modified by us is used for this product.・This product contains open source software complying with GNU General Public License (GPL), GNU Lesser General Public License (LGPL), etc.For details on the software license, refer to the following. : From the Home screen, [設定 (Settings)]e[その他 (More)]e[端末情報 (About phone)]e[法的情報 (Legal information)]e[オープンソースライセンス (Open source licenses)] : On the stand-by screen, [メニュー (Menu)]e[設定を行う (Make settings)]e[その他の設定を行う (Make other settings)]e[端末情報を見る (View phone information)]e[法的情報を確認する (Check legal information)]e[オープンソースライセンス (Open source licenses)]For software source codes disclosed based on the open source licenses, refer to the following website. For details, refer to the website below.http://spf.fmworld.net/fujitsu/c/develop/sp/android/This terminal supports SIM unlock. If you release SIM lock, you can use SIM by a carrier other than NTT DOCOMO.・The SIM unlock service is provided at a docomo Shop.・A SIM unlock charge is separately required.・With UIM other than by DOCOMO, using the terminal in LTE system is unavailable. And available services and functions will be limited. DOCOMO is not liable to any failures or malfunctions.・For details of SIM unlock, refer to NTT DOCOMO website.SIM unlock](https://usermanual.wiki/Fujitsu/F04J/User-Guide-3249465-Page-35.png)