Fujitsu FOMA-F884I PCS Licensed Transmitter User Manual part 2
Fujitsu Limited PCS Licensed Transmitter part 2
UserManual.wiki
>
Fujitsu
>
FOMA-F884I User Manual
>
user manual part 2
Contents
1.
user manual part 1
2.
user manual part 2
3.
manual part 1
4.
manual part 2
user manual part 2
Navigation menu
Upload a User Manual
Namespaces
Wiki Guide
HTML
PDF
Info
Views
User Manual
Discussion / Help
Navigation


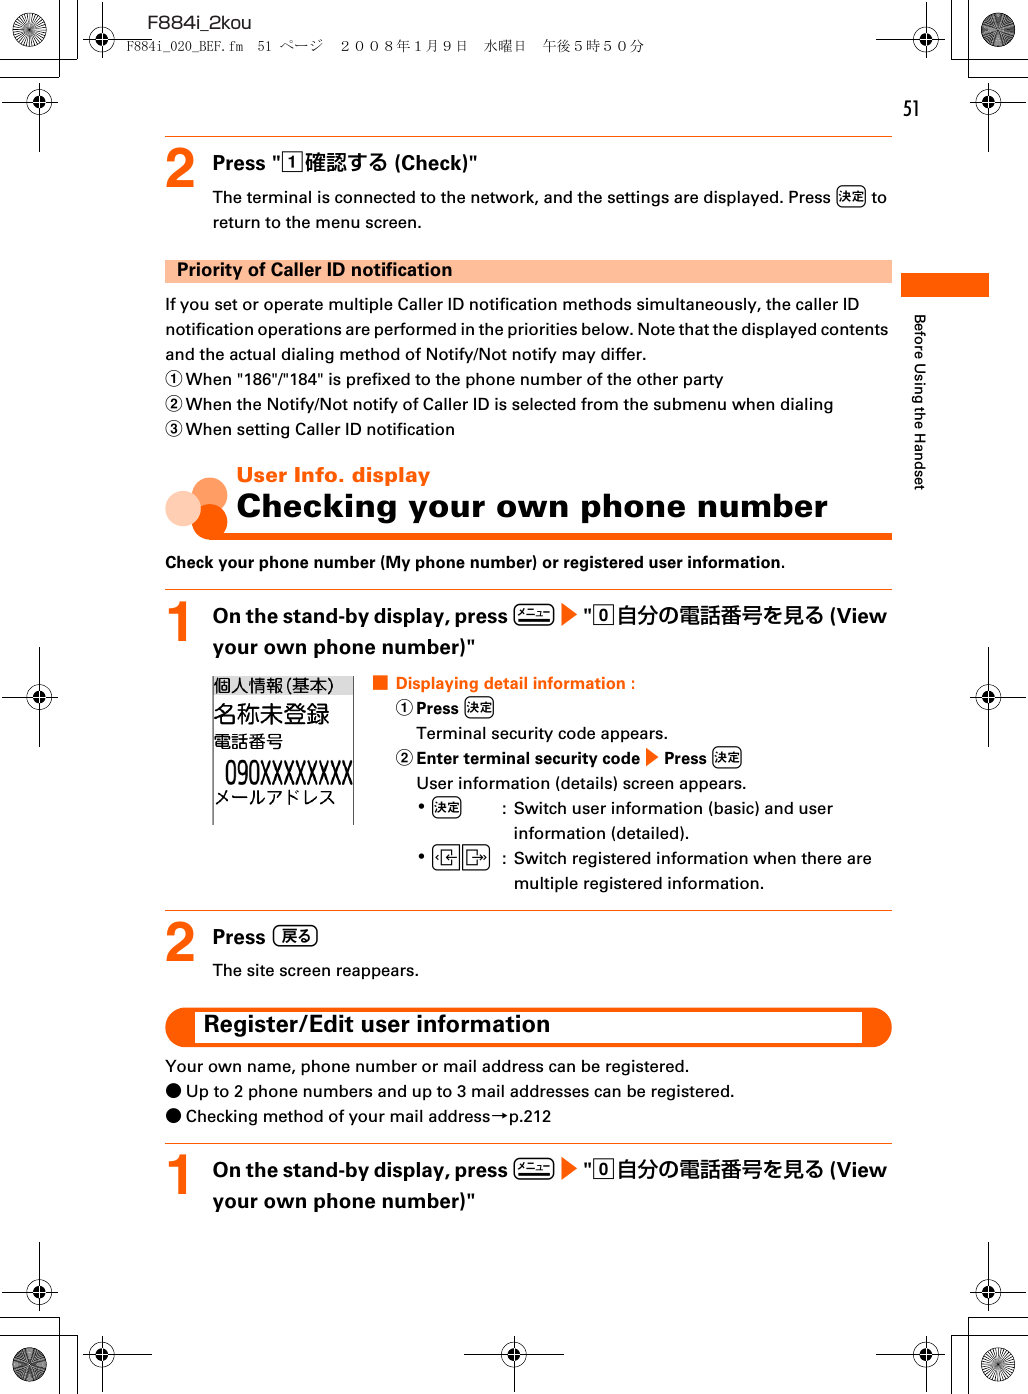
![50F884i_2kouBefore Using the Handset●If automatic correction of date and time has never been performed and date and time are displayed with "--", the functions below do not record the date and time, display them instead as "----/--/--", etc.・Redial ・Received calls・Recorded messages・Saving date and time of still images and movies taken with the camera (file name)・Date and time of sent/unsent mails ・Receiving date and time of ToruCa・Loc. history of GPS ・Voice memoCaller ID notificationNotifying your phone number to the other partyYou can set FOMA terminal to display your number (Caller ID) on the other party's terminal when making a call.●Caller ID is your important information. Carefully consider if you want to include caller ID information when making a call.●Caller ID notification is unavailable outside the service area or where radio waves are hard to reach. Do it in locations with good radio wave conditions.●For details, see "Mobile Phone User's Guide [Network Services]".●Each time you make a call, you can set either Notify/Not notify caller ID.→p.631On the stand-by display, press m e "a基本の機能・設定 (Basic function/setting)" e "a発信者番号通知を使う (Use Caller ID notification)" e "a発信者番号通知を設定する (Set Caller ID notification)"2Press "a通知する (Notify)"The terminal is connected to the network, and a message appears indicating that the Caller ID notification is set. Press k to return to the menu screen.Checking the settings1On the stand-by display, press m e "a基本の機能・設定 (Basic function/setting)" e "a発信者番号通知を使う (Use Caller ID notification)" e "b発信者番号通知を確認する (Check Caller ID notification)"F884i_020_BEF.fm 50 ページ 2008年1月9日 水曜日 午後5時50分](https://usermanual.wiki/Fujitsu/FOMA-F884I.user-manual-part-2/User-Guide-915251-Page-22.png)