Furuno USA 9ZWDSC60 Maritime DSC controller With MF/HF Watchkeeping Receiver User Manual dsc60 Part 2 of 2
Furuno USA Inc Maritime DSC controller With MF/HF Watchkeeping Receiver dsc60 Part 2 of 2
Contents
- 1. DSC60
- 2. dsc60 - Part 1 of 2
- 3. dsc60 Part 2 of 2
dsc60 Part 2 of 2
5-1
5. LOG FILE
The log file stores routine received messages (messages other than Distress), received distress
messages and transmitted messages, each in its own separate log.
5.1 Log File Description
Three memory banks are provided for storage of messages: received ordinary log, received
distress log and transmitted log. Each memory bank stores 50 messages, on a first-in, first-out
basis. This means that a latest message is saved as log no.1 and the log no. of all previous
messages in that memory bank increments by one. When the storage capacity is exceeded the
oldest message is deleted to make room for the latest. Any unread messages are retained, and
marked with *.
5.2 Opening a Log File
5.2.1 Distress log
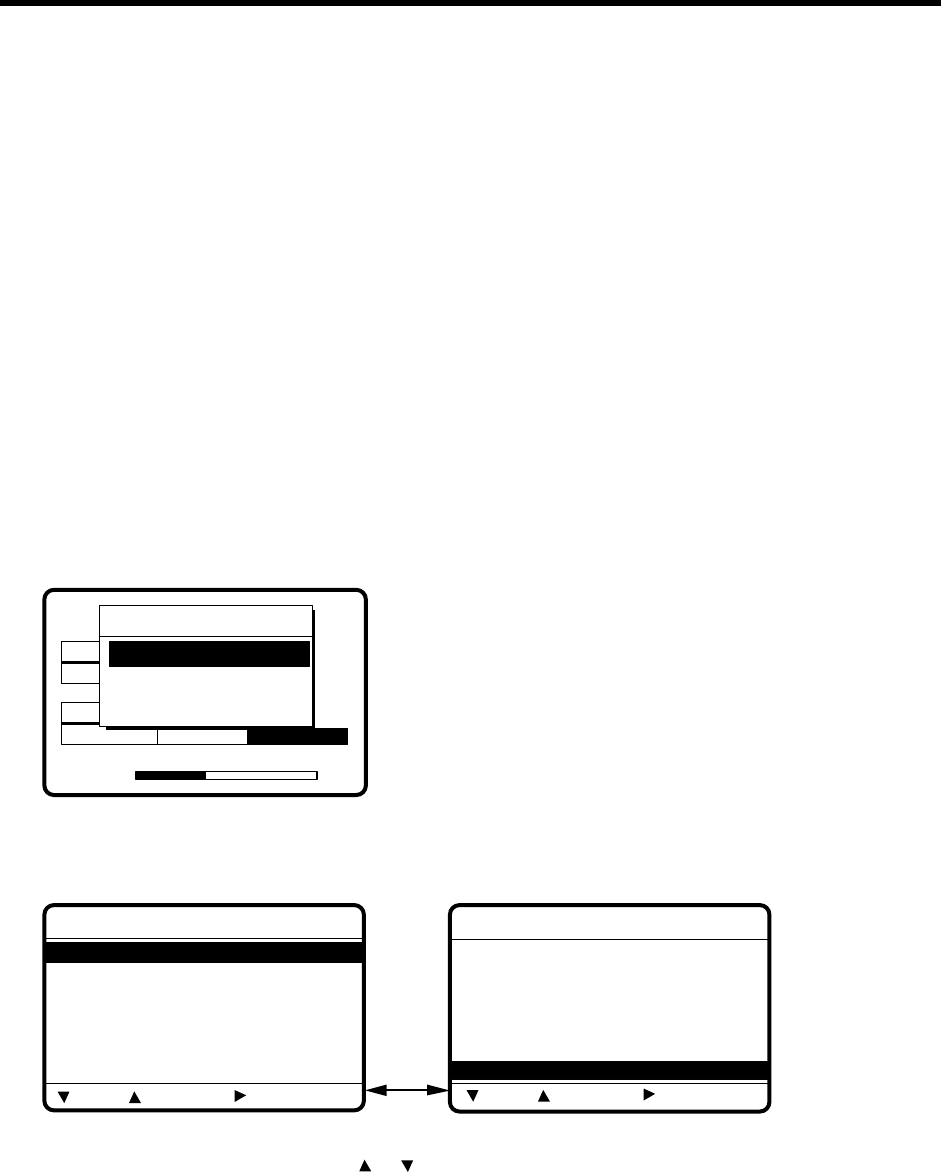
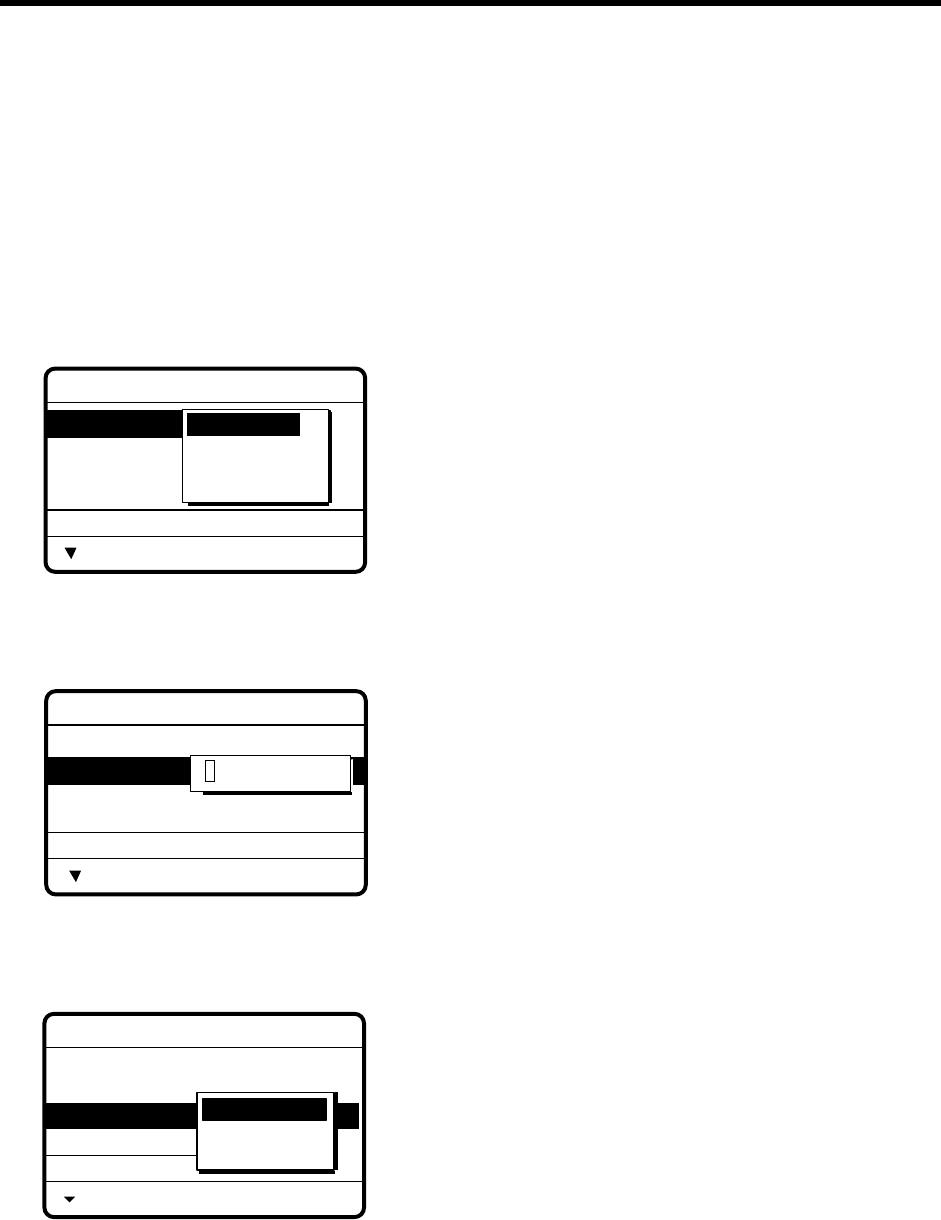
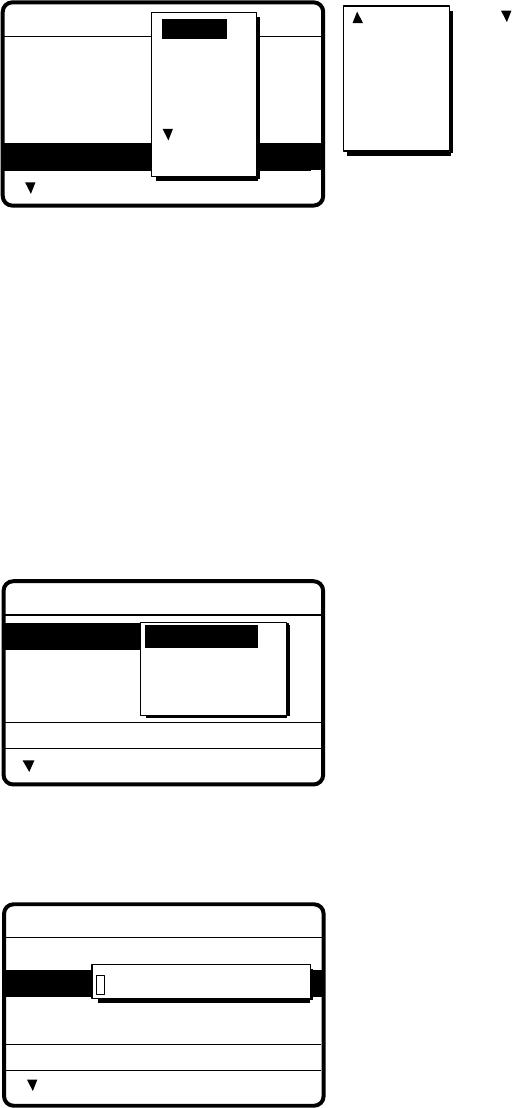
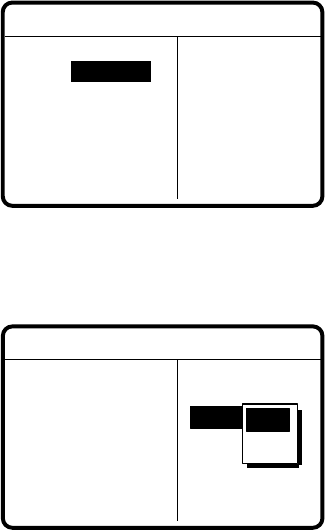
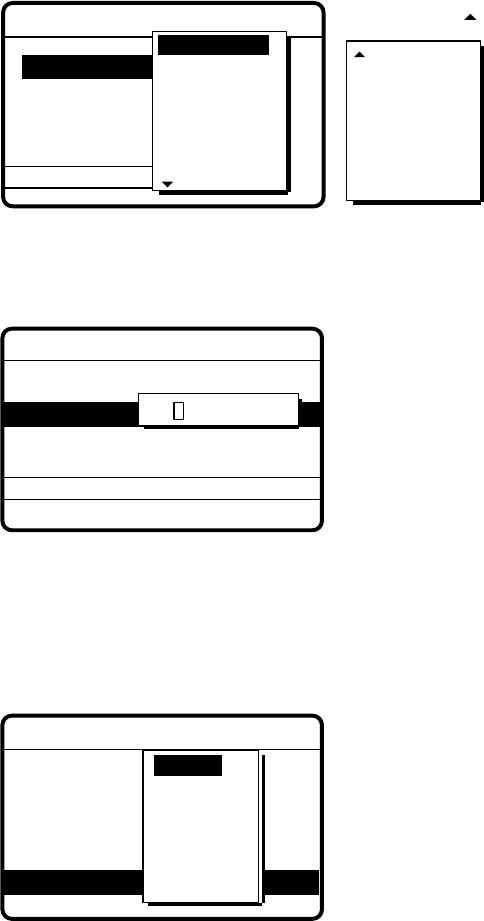
1. Press the [0/LOG] key to open the log file menu.
8436.5
35˚00.000N 135˚00.000E 23:59
WATCH KEEPING
21
168
DIST
ROUT
21
16903.0 12657.0
VOLUME
Select log file
RECEIVED ORDINARY
RECEIVED DISTRESS
TRANSMITTED
22
2. Select RECEIVED DISTRESS and press the [ENT] key. Use or to scroll the log as
desired.
Scroll with
or .
*
Rcvd distress log
*
02.JUL-23-19:56 DISTRESS
03.JUL-23-13:45
*
RELAY ALL
04.JUL-23-11:52 RELAY AREA
05.JUL-23-11:43 RELAY GRP
06.JUL-22-21:18 RELAY INDV
01.JUL-23-19:58 ACKNOWLEDG
*
Rcvd distress log
*
46.JUN-29-19:56
*
RELAY ALL
47.JUN-29-19:48
*
DISTRESS
48.JUN-29-19:44
*
DISTRESS
49.JUN-26-12:36
*
ACKNOWLED
45.JUL-01-23:45
*
RELAY ALL
50.JUN-26-12:34
*
DISTRESS
OLD NEW DELETE
OLD NEW DELETE
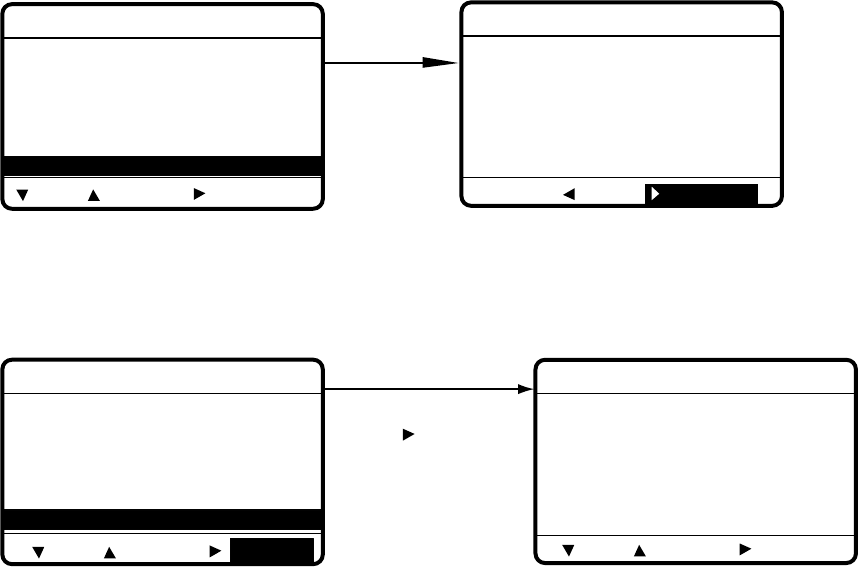
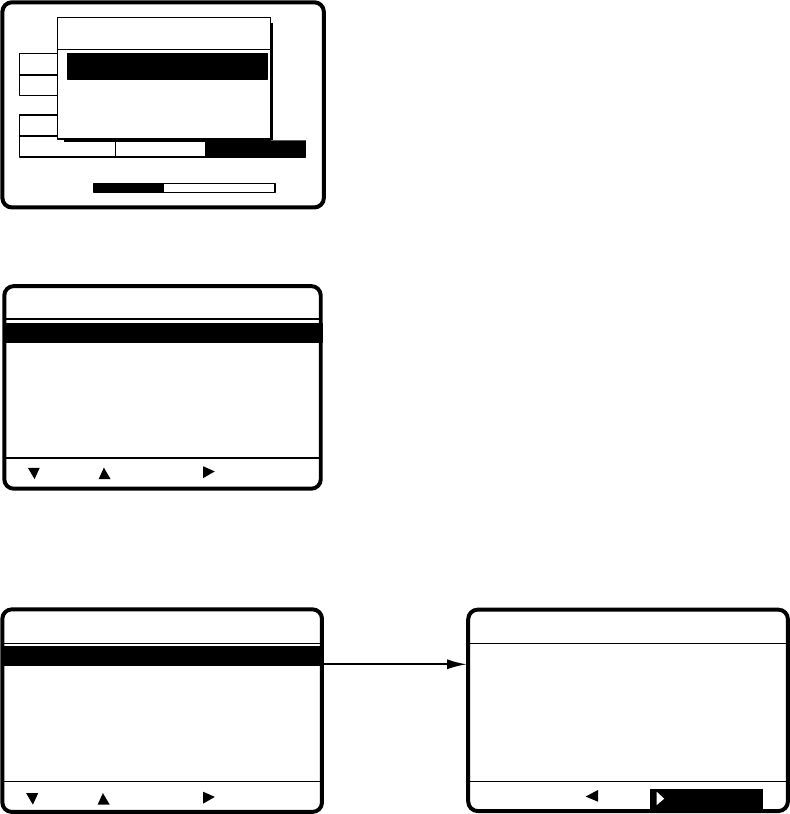
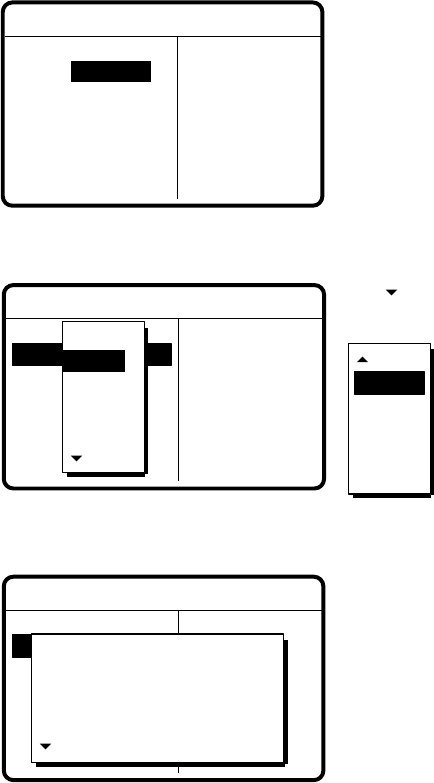
3. To view a file, select it and press the [ENT] key. To return to the distress log, press the
[CANCEL] key.
5-2
Select file,
press [ENT]
to view.
* Rcvd distress log *
46.JUN-29-19:56 *
RELAY ALL
47.JUN-29-19:48
*
DISTRESS
48.JUN-29-19:44
*
DISTRESS
49.JUN-26-12:36
*
ACKNOWLED
45.JUL-01-23:45
*
RELAY ALL
50.JUN-26-12:34
*
DISTRESS
* Received message *
JUN-26-1999-12:34:56 ECC: OK
DISTRESS CALL
ANSWER
SHIP IN DIST : 987654321
NATURE : UNDESIGNATED
POS : 12˚34N 123˚45E AT 12:34
TELEPHONE 2182.0 KHZ
ALL VIEW
OLD NEW DELETE
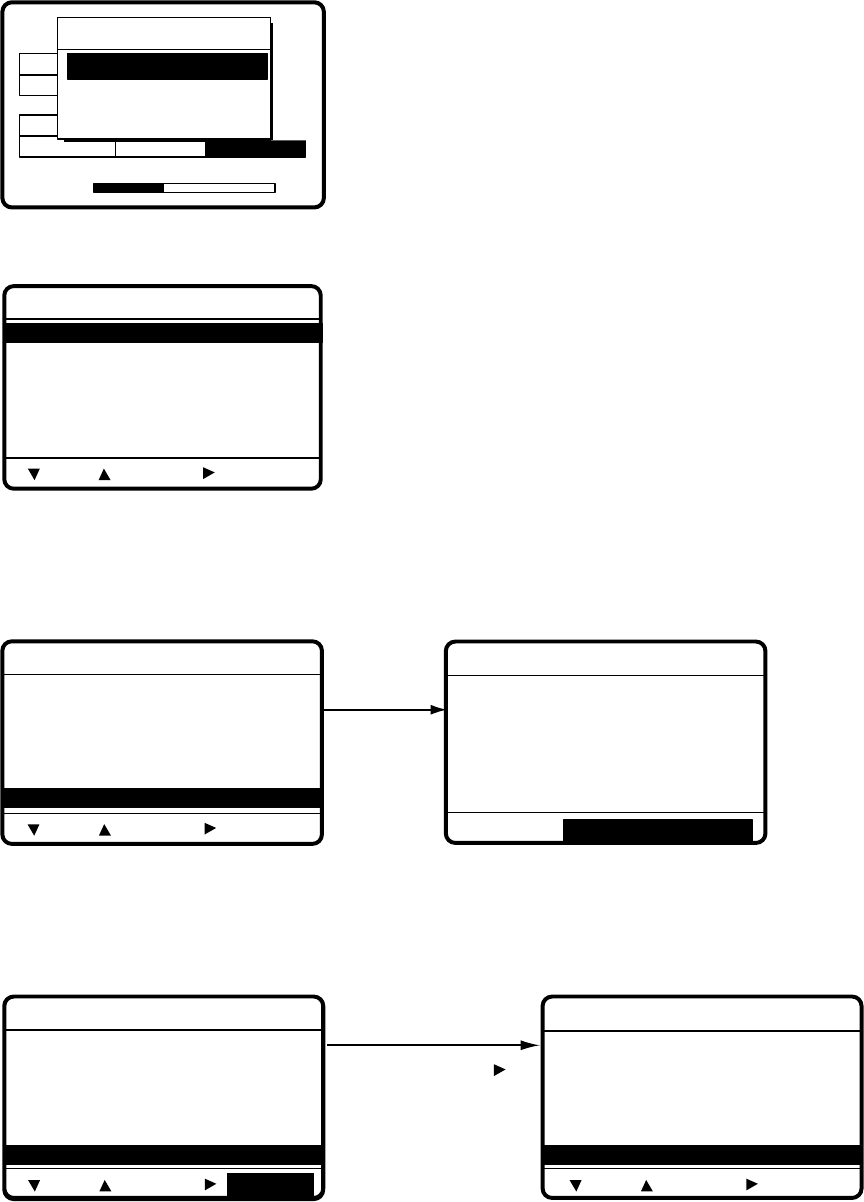
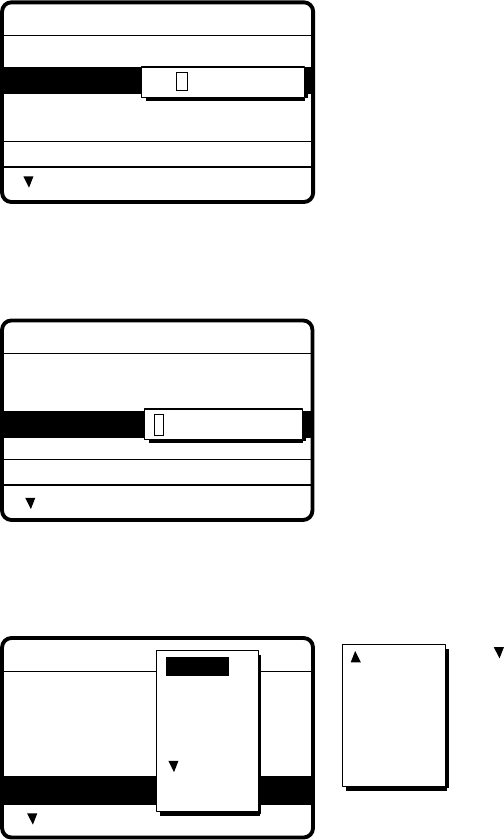
4. To delete a file, select it, press to select DELETE, and press the [ENT] key. The log files
are renumbered to reflect the deletion.
Note: Unread files cannot be deleted.
Select file to delete,
press to select
DELETE, press
[ENT] to delete.
*
Rcvd distress log
*
46.JUN-29-19:56
*
RELAY ALL
47.JUN-29-19:48
*
DISTRESS
48.JUN-29-19:44
*
DISTRESS
49.JUN-26-12:36
*
ACKNOWLED
45.JUL-01-23:45
*
RELAY ALL
50.JUN-26-12:34
*
DISTRESS
*
Rcvd distress log
*
46.JUN-29-19:56
*
RELAY ALL
47.JUN-29-19:48
*
DISTRESS
48.JUN-29-19:44
*
DISTRESS
49.JUN-26-12:36
*
ACKNOWLED
45.JUL-01-23:45
DELETE
*
RELAY ALL
44.JUL-01-12:34
*
RELAY ALL
OLD NEW OLD NEW DELETE
5-3
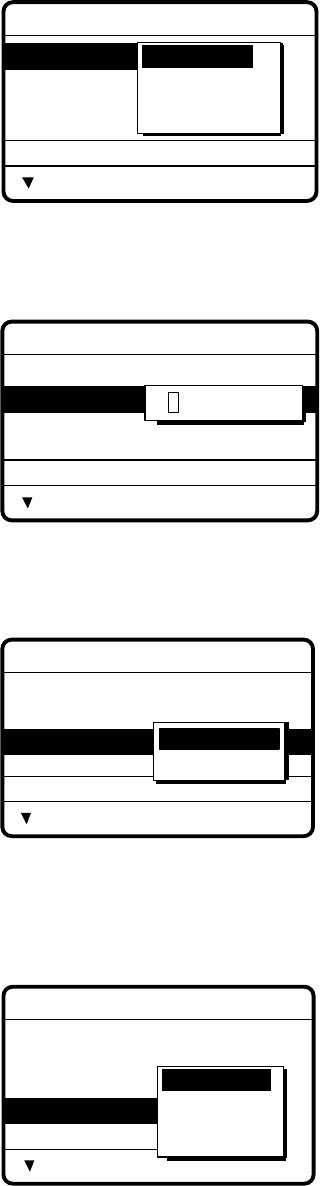
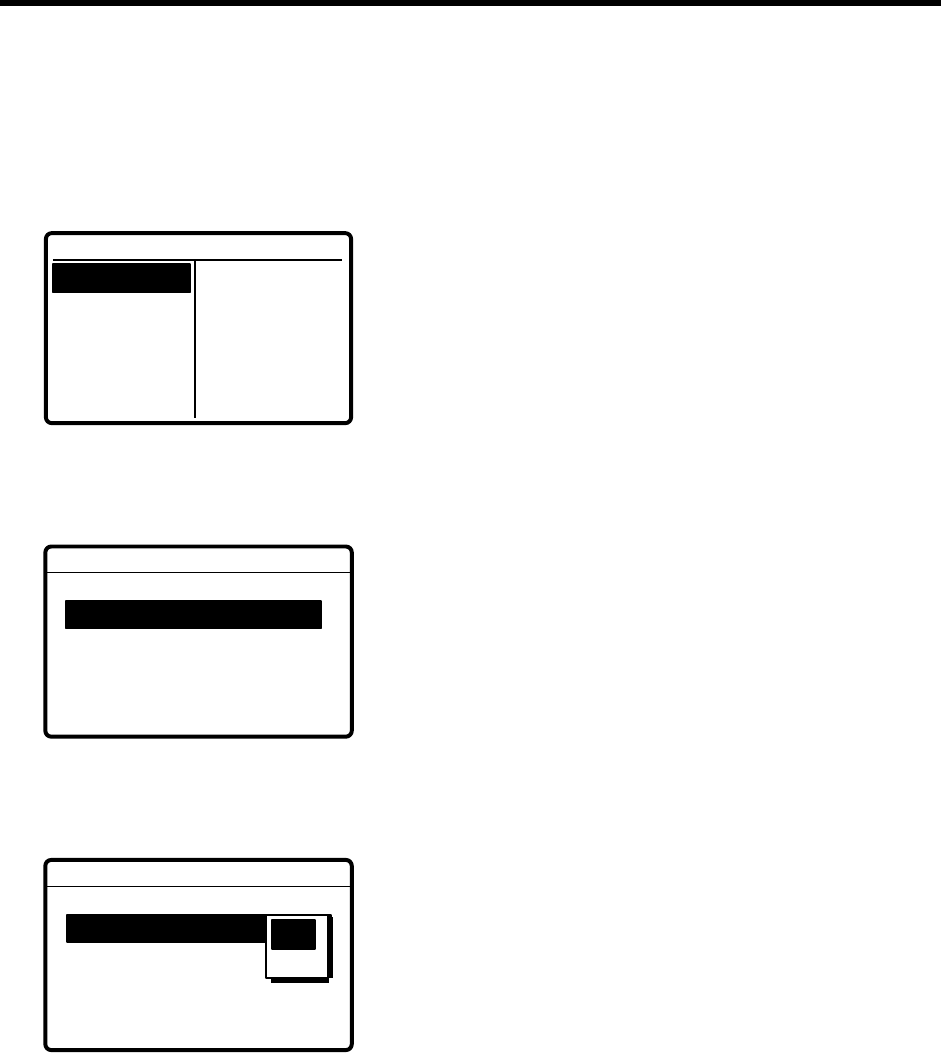
5.2.2 Ordinary log
1. Press the [LOG] key to open the log file menu.
8436.5
35˚00.000N 135˚00.000E 23:59
WATCH KEEPING
21
168
DIST
ROUT
21
16903.0 12657.0
VOLUME
Select log file
RECEIVED ORDINARY
RECEIVED DISTRESS
TRANSMITTED
22
2. Press the [ENT] key to open the received ordinary log.
*
Rcvd ordinary log
02.JUL-23-23:41
PSTN CALL
03.JUL-23-21:34
TEST CALL
04.JUL-22-12:34
ALL SHIPS
05.JUL-13-18:21
*GROUP CALL
06.JUN-29-11:23
AREA CALL
01.JUL-23-23:55
*INDIVIDUAL
OLD NEW
DELETE
3. Use or to scroll the log.
4. To view the contents of a file, select it and press the [ENT] key. To return the ordinary log,
press the [CANCEL] key.
*
Rcvd ordinary log
46.MAY-12-03:31
NEUTRAL
47.APR-24-01:54
MEDICAL
48.MAR-27-22:09
*
INDIVIDUAL
49.FEB-13-18:17
INDIVIDUAL
45.JUN-29-20:49
*
P
OLLING
50.JAN-11-11:23
*ALL SHIPS
JAN-11-1999-11:23:45 ECC: OK
ALL SHIPS CALL
FROM SHIP :
234567890
SAFETY
TELEPHONE
2182.0 KHZ
*
Received message
*
GO TO ALL VIEW
[ENT] to
view file.
OLD NEW
DELETE
5. To delete a file, select it, press to select DELETE, and press the [ENT] key. The log files
are renumbered to reflect the deletion.
Note: Unread files cannot be deleted.
* Rcvd ordinary log
46.MAY-12-03:31
NEUTRAL
47.APR-24-01:54
MEDICAL
48.MAR-27-22:09
*INDIVIDUAL
49.FEB-13-18:17
INDIVIDUAL
45.JUN-29-20:49
*POLLING
50.JAN-11-11:23
ALL SHIPS
DELETE
* Rcvd ordinary log
46.MAY-12-03:31
NEUTRAL
47.APR-24-01:54
MEDICAL
*INDIVIDUAL
44.JUL-01-23:45
INDIVIDUAL
45.JUN-29-20:49
*POLLING
48.MAR-27-22:09
49.FEB-13-18:17
INDIVIDUAL
Select file, press to
select [DELETE],
and press [ENT[.
OLD NEW OLD NEW
DELETE
5-4
5.2.3 Transmitted log
1. Press the [LOG] key to open the log file menu.
8436.5
35˚00.000N 135˚00.000E 23:59
WATCH KEEPING
21
168
DIST
ROUT
21
16903.0 12657.0
VOLUME
Select log file
RECEIVED ORDINARY
RECEIVED DISTRESS
TRANSMITTED
22
2. Select TRANSMITTED and press the [ENT] key.
**
Transmitted log
*
02.JUL-23-23:41
PSTN CALL
03.JUL-23-21:34
TEST CALL
04.JUL-22-12:34
ALL SHIPS
05.JUL-13-18:21
*GROUP CALL
06.JUN-29-11:23
AREA CALL
01.JUL-23-23:55
*INDIVIDUAL
OLD NEW
DELETE
3. Use or to scroll the log.
4. To view the contents of a file select it and press the [ENT] key.
**
Transmitted log
*
02.JUL-23-23:41
PSTN CALL
03.JUL-23-21:34
TEST CALL
04.JUL-22-12:34
ALL SHIPS
05.JUL-13-18:21
*GROUP CALL
06.JUN-29-11:23
AREA CALL
01.JUL-23-23:55
*INDIVIDUAL
Select file,
press [ENT]
to view.
MAY-12-1999-03:31:45
UNABLE ACK
NO REASON GIVEN
TO SHIP :
234567890
ROUTINE
*
Xmitted message
*
RE-SEND ALL VIEW
OLD NEW
DELETE
5. To delete a file, select it, press to select DELETE, and press the [ENT] key. The log files
are renumbered to reflect the deletion.
Note:
Unread files cannot be deleted.
6. To re-send a file do the following:
a) Do steps 1-4 above to select file to re-send.
b) Press
to select RE-SEND.
c) Press the [ENT] key.
d) Press the [CALL] key.
6-1
6. PREPARING SEND MESSAGES
In Chapter 3 you learned how to manually send individual, group and area calls. In this chapter
you will learn how to send prepare and send them automatically, using prepared messages (files).
50 such files can be stored for future use.
6.1 Preparing Individual Call Messages
1. Press the [#/SETUP] key to open the Setup menu.
2. Select MESSAGE and press the [ENT] key.
3. Press the [ENT] key to open the CALL TYPE menu.
*
Message file entry
CALL TYPE
STATION ID
COM. TYPE
COM. FREQ
DSC FREQ
: INDIVIDUAL
:
---------
: TELEPHONE
: NO INFO
: 2M-INTL
INDIVIDUAL
PSTN CALL
GROUP CALL
AREA CALL
4. Use or to select INDIVIDUAL and press the [ENT] key.
5. Press to select STATION ID and press the [ENT] key.
*
Message file entry
CALL TYPE
STATION ID
COM. TYPE
COM. FREQ
DSC FREQ
: INDIVIDUAL
:
---------
: TELEPHONE
: NO INFO
: 2M-INTL
000000000
6. Key in ID of station which is to receive the call and press the [ENT] key.
7. Press to select COM. TYPE and press the [ENT] key.
*
Message file entry
CALL TYPE:
STATION ID
COM. TYPE
COM. FREQ
DSC FREQ
INDIVIDUAL
: 001234567
: TELEPHONE
: NO INFO
: 2M-INTL
TELEPHONE
NBDP-ARQ
NBDP-FEC
6-2
8. Press to select COM. FREQ and press the [ENT] key. Choose appropriate item and press
the [ENT] key.
*
Message file entry
CALL TYPE:
STATION ID
COM. TYPE
COM. FREQ
DSC FREQ
INDIVIDUAL
: 123456789
: TELEPHONE
: NO INFO
: 2M-INTL
NO INFO
FREQUENCY
CHANNEL
POSITION
9. Press to select DSC FREQ and press the [ENT] key.
* Message file entry
CALL TYPE
STATION ID
COM. TYPE
COM. FREQ
DSC FREQ
: INDIVIDUAL
: 001234567
: TELEPHONE
: NO INFO
: 2M-INL
6 MHZ
8 MHZ
12 MHZ
4 MHZ
2 MHZ 16 MHZ
18 MHZ
22 MHZ
25 MHZ
OTHER
MANUAL
Use to scroll
menu.
10. Select appropriate frequency and press the [ENT] key.
11. Enter file name and file number as shown on the next page.
6-3
GO TO NEXT FILE
* Message file entry
FURUNO
NO001 file entered
* Message file entry
FILE NAME
:
----------------
FILE NUMBER :
---
FILE ENTRY
How to Enter File Name and Number
1. Press to scroll the display and then press the [ENT] key.
2. Use the numeric keys and cursor pad to enter file name (max. 16 characters) and press the
[ENT] key. For example, enter FURUNO as the file name. (If the file name exists
the message "Duplicate name! Overwrite OK?" appears. Press [ENT] to write over the
name, or press the [CANCEL] key to escape.)
3. Press followed by the [ENT] key. Key in file number in three digits with the numeric keys,
and press the [ENT] key. For example, press [0] [0] [1] to enter file number 001.
4. Press the [ENT] key. The display shows the name and file number entered.
5. Press
the [ENT] key
to continue.
How to enter "FURUNO" as file name
How to assign file name
[1_] key : 1→_→1
[2ABC] : 2→A→B→C→2
[3DEF] : 3→D→E→F→3
[4GHI] : 4→G→H→I→4
[5JKL] : 5→J→K→L→5
[6MNO] : 6→M→N→O→6
[7PQRS] : 7→P→Q→R→S→7
[8TUV] : 8→T→U→V→8
[9WXYZ]: 9→W→X→Y→Z→9
[0_] : 0→_→0
1. Press or to select location.
2. Press appropriate key.
1. Press the [3] key to display F.
2. Press
.
3. Press the [8] key to select U.
4.
Press
.
6. Press the [7] key to select R.
7. Press
.
8. Press the [8] key to select U.
7. Press
.
8. Press the [6] key to select N.
9. Press
.
10. Press the [6] key to select O.
FILE ENTRY
: FURUNO
* Message file entry
FILE NAME
FILE NUMBER :
---
000
6-4
6.2 Preparing Group Call Messages
1. Press the [#/SETUP] key to open the Setup menu.
2. Select MESSAGE and press the [ENT] key.
3. Press the [ENT] key to open the CALL TYPE menu.
*
Message file entry
CALL TYPE
STATION ID
COM. TYPE
COM. FREQ
DSC FREQ
: INDIVIDUAL
:
---------
: TELEPHONE
: NO INFO
: 2M-INTL
INDIVIDUAL
PSTN CALL
GROUP CALL
AREA CALL
4. Use or to select GROUP CALL and press the [ENT] key.
5. Press to select GROUP ID and press the [ENT] key.
* Message file entry
CALL TYPE:
GROUP ID
COM. TYPE
COM. FREQ
DSC FREQ
GROUP CALL
: 0
--------
: TELEPHONE
: NO INFO
: 2M-INTL
000000000
6. Key in ID of group which is to receive the call and press the [ENT] key.
7. Press to select COM. TYPE and press the [ENT] key.
*
Message file entry
CALL TYPE:
GROUP ID
COM. TYPE
COM. FREQ
DSC FREQ
GROUP CALL
: 001234567
: TELEPHONE
: NO INFO
: 2M-INTL
TELEPHONE
NBDP-FEC
8. Select appropriate communications type and press the [ENT] key.
9. Press to select COM. FREQ and press the [ENT] key. Choose appropriate item and press
the [ENT] key.
*
Message file entry
CALL TYPE:
GROUP ID
COM. TYPE
COM. FREQ
DSC FREQ
GROUP CALL
: 123456789
: TELEPHONE
: NO INFO
: 2M-INTL
NO INFO
FREQUENCY
CHANNEL
POSITION
10. Press to select DSC FREQ and press the [ENT] key.
6-5
* Message file entry
CALL TYPE
GROUP ID
COM. TYPE
COM. FREQ
DSC FREQ
: INDIVIDUAL
: 001234567
: TELEPHONE
: NO INFO
: 2M-INTL
6 MHZ
8 MHZ
12 MHZ
4 MHZ
2 MHZ 16 MHZ
18 MHZ
22 MHZ
25 MHZ
OTHER
MANUAL
Use to scroll
menu.
11. Select appropriate frequency and press the [ENT] key.
12. Follow “How to Enter File Name and Number” on page 6-3 to enter file name and number.
Note: Your ship’s group ID will be as registered as entered in step 6 of this procedure.
6.3 Preparing Geographic Area Call Messages
1. Press the [#/SETUP] key to open the Setup menu.
2. Select MESSAGE and press the [ENT] key.
3. Press the [ENT] key to open the CALL TYPE menu.
*
Message file entry
CALL TYPE
STATION ID
COM. TYPE
COM. FREQ
DSC FREQ
: INDIVIDUAL
:
---------
: TELEPHONE
: NO INFO
: 2M-INTL
INDIVIDUAL
PSTN CALL
GROUP CALL
AREA CALL
4. Use or to select AREA CALL and press the [ENT] key.
5. Press to select AREA and press the [ENT] key.
* Message file entry
CALL TYPE:
AREA
COM. TYPE
COM. FREQ
DSC FREQ
AREA CALL
:
--
˚N
---
˚E ↓
--
˚ →
--
˚
: TELEPHONE
: NO INFO
: 2M-INTL
00˚N 000˚E ↓ 00˚ → 00˚
6. Select location where to enter data with or , set value with numeric keys and press the
[ENT] key.
6-6
7. Press to select COM. TYPE and press the [ENT] key.
* Message file entry
CALL TYPE:
AREA:
34˚N 135˚W ↓10˚ →10˚
COM. TYPE
COM. FREQ
DSC FREQ
INDIVIDUAL
: TELEPHONE
: NO INFO
: 2M-INTL
TELEPHONE
NBDP-FEC
8. Press to select COM. FREQ and press the [ENT] key.
* Message file entry
CALL TYPE:
AREA
COM. TYPE
COM. FREQ
DSC FREQ
AREA CALL
: 34˚N 135˚E ↓ 05˚ → 05 ˚
: TELEPHONE
: NO INFO
: 2M-INTL
NO INFO
FREQUENCY
CHANNEL
POSITION
9. Press to select DSC FREQ and press the [ENT] key.
* Message file entry *
CALL TYPE
AREA
COM. TYPE
COM. FREQ
DSC FREQ
: AREA CALL
: 34˚N 123˚E ↓12 ˚ → 05 ˚
: TELEPHONE
: NO INFO
: 2M-INTL
6 MHZ
8 MHZ
12 MHZ
4 MHZ
2 MHZ 16 MHZ
18 MHZ
22 MHZ
25 MHZ
OTHER
MANUAL
Use to scroll
menu.
10. Select appropriate frequency and press the [ENT] key.
11. Follow “How to Enter File Name and Number” on page 6-3 to enter file name and number.
6.4 Preparing PSTN Call Messages
1. Press the [#/SETUP] key to open the Setup menu.
2. Select MESSAGE and press the [ENT] key.
3. Press the [ENT] key to open the CALL TYPE menu.
*
Message file entry
CALL TYPE
STATION ID
COM. TYPE
COM. FREQ
DSC FREQ
: INDIVIDUAL
:
---------
: TELEPHONE
: NO INFO
: 2M-INTL
INDIVIDUAL
PSTN CALL
GROUP CALL
AREA CALL
4. Select PSTN CALL and press the [ENT] key.
5. Press to select COAST ID and press the [ENT] key.
6-7
* Message file entry
CALL TYPE
COAST ID
TEL NO. :
DSC FREQ
: PSTN CALL
: 0
-------
----------------
: 2M-INTL
000000000
6. Key in ID of coast station (seven digits) to send the call to and press the [ENT] key.
7. Press to select TEL NO. and press the [ENT] key.
* Message file entry
CALL TYPE:
COAST ID
TEL NO. :
DSC FREQ
PSTN CALL
: 001234567
:
----------------
: 2M-INTL
-----------------
8. Key in telephone no. (max. 16 digits) and press the [ENT] key.
9. Press to select DSC FREQ and press the [ENT] key.
*
Message file entry
CALL TYPE:
COAST ID
TEL NO. :
PSTN CALL
001234567
1234567890
---
DSC FREQ : 2M-INTL TL
6 MHZ
8 MHZ
12 MHZ
4 MHZ
2 MHZ 16 MHZ
18 MHZ
22 MHZ
25 MHZ
OTHER
MANUAL
Use to scroll
menu.
10. Select appropriate frequency and press the [ENT] key.
11. Follow “How to Enter File Name and Number” on page 6-3 to enter file name and number.

6-8
6.5 Sending Prepared Messages
1. Press the [*/FILE] key at the DSC standby screen to show the send message file list. Below
is an example of the send message file list.
*
Send message file *
001 - FURUNO JAPAN
002 - FURUNO USA
003 - FURUNO UK
004 - FURUNO DENMARK
005 - FURUNO NORWAY
006 - FURUNO SPAIN
007 - FURUNO FRANCE
2. Select file with or . (You can also select a file by entering its number with the numeric
keys and pressing the [ENT] key.)
3. Press the [CALL] key to send the file.
7-1
7. SETUP MENU
7.1 Setup Menu Overview
The Setup menu, consisting of 11 menus, provides for set up of the equipment according to
expected usage and user's preferences.
1. At the DSC standby screen, press the [#/SETUP] key to display the Setup menu.
**** Setup menu ****
SCAN FREQ
USER CH
VOLUME
TEST
SYSTEM
ALARM
AUTO ACK
ERASE FILE
MESSAGE
POSITION
PRINT OUT
2. Use the Cursor Pad to select a menu and press the [ENT] key. For example, select the
VOLUME menu.
KEY CLICK
HANDSET
ORDINARY ALARM
DISTRESS ALARM
: ON
: 40
: 30
: 63
*** Volume setup ***
3. Use the Cursor Pad to choose item and press the [ENT] key. For example, select KEY
CLICK. A pop-up window showing choices appears.
KEY CLICK
HANDSET
ORDINARY ALARM
DISTRESS ALARM
: ON
: 40
: 30
: 63
*** Volume setup ***
ON
N
OFF
4. Use
or to choose option desired and press the [ENT] key.
5. Press the [CANCEL] key twice to close the menu and return to the DSC standby screen.
7-2
7.2 Alarm Menu
The Alarm menu enables/disables internal and external alarms. Note that the Distress/Urgency
alarm cannot be disabled. Press the [#/SETUP] key, select ALARM and press the [ENT] key to
display the Alarm menu.
35˚00.000N 135˚00.000E 23:59
WATCH KEEPING
2187.5 4207.5 6312.0
8414.516804.5 12577.0
DISTRESS
ROUTINE
2177.0 4219.5 6331.0
8436.516903.0 12657.0
VOLUME
****
Alarm setup
***
INTERNAL AUDIO ALARM
RCVD CALL
OLD POSITION
POSITION OLDER
EXT ALARM : DSTRS/URG
: ON
: ON
: 4.0 H
OFF
ON
OFF
ON
3.0
2.0
1.0
0.5
4.0
ROUTINE
ALL
OFF
DSTRS/URG
35˚00.000N 135˚00.000E 23:59
WATCH KEEPING
2187.5 4207.5 6312.0
8414.516804.5 12577.0
DISTRESS
ROUTINE
2177.0 4219.5 6331.0
8436.516903.0 12657.0
VOLUME
Warning for
old position!
Default: ON
Default: ON
Default: ON
Default: DSTRS/URG
Disables/enables alarm for received Safety,
Ship's Business and Routine messages.
Disables/enables old position alarm, which alerts
the operator when position data is older by the
number of hours or minutes set in the Position
Older field.
Alarm is output when position is older by the
number of hours set here.
Sets type of message to be output to the
IC-303 incoming Indicatior.
DSTRS/URG: Distress or urgency
message output upon
receipt.
ROUTINE: Routine message output
upon receipt.
ALL: All messages output.
OFF: No output.
Note: Alarm for Distress and Urgency
messages cannot be disabled, and its
decibel level is fixed at 75-85 dB.
Note: Authorities require that position be
updated at least every four hours.
22
22
AUTO ACK
AUTO ACK
or
to set.
or
to set.
or
to set.

7-3
7.3 Auto Ack Menu
The Auto Ack menu enables/disables automatic acknowledgement of individual, position and
polling messages. Press the [#/SETUP] key, select AUTO ACK and press the [ENT] key to
display the Auto Ack setup menu. See the next page for the Auto Ack menu.
Comply type, automatic
acknowledge
ABLE UNABLE
AUTO ACK Can send acknowledge
automatically
Cannot send automatic
acknowledge
MANUAL ACK Can send acknowledge manually Cannot send manual
acknowledge
7-4
Default: ABLE
**
Auto ack setup
**
COMPLY TYPE : ABLE
UNABLE REASON :
NO REASON GIVEN
POSITION CALL : OFF
POLLING CALL : ON
ABLE
UNABLE
Choose ABLE or UNABLE as automatic
acknowledgement reply to Individual, Position
and Polling messages.
Note: Automatic acknowledge is automatically
disabled when Rx message contains error,
as required by law. Further, automatic
acknowledge is disabled in case of OFF
HOOK.
Automatic acknowledge of Position or
Polling request is not available when
UNABLE is selected.
Default: NO REASON
NO REASON
BUSY
EQUIP DISABLED
MODE NOT USABLE
CH NOT USABLE
Sets reason for UNABLE.
Note: This menu is the same as manual
acknowledgement. EQUIPMENT
DISABLED is shown in messages when
EQUIP DISABLED is selected.
Default: ON
Overrides/follows AUTO ACK setting
in case of position.
OFF: Disables automatic
acknowledgement of position
request.
ON: Enables automatic
acknowledgement of position
request.
[ENT] key
[ENT] key
[ENT] key
[ENT] key
ON
OFF
Default: ON
Overrides/follows AUTO ACK setting
in case of polling.
OFF: Disables automatic
acknowledgement of polling
request.
ON: Enables automatic
acknowledgement of polling
request.
ON
OFF
or
to set.
or
to set.
or
to set.
or
to set.
7-5
7.4 Erase File Menu
The Erase File menu separately erases the entire contents of the received ordinary log, received
distress log, transmitted log, send messages and user channels. Press the [#/SETUP] key,
select ERASE FILE and press the [ENT] key to display the Erase File menu. Select the item to
erase and press the [ENT] key.
**** Erase file ****
RCVD ORDINARY LOG?
RCVD DISTRESS LOG?
TRANSMITTED LOG?
SEND MESSAGE?
USER CHANNEL?
To cancel, press [ENT] or [CANCEL].
Item selected for erasure
appears in 2nd row.
To erase, select YES with
and press [ENT].
ERASE
XXXXXXXXXXXXXXXXX.
ARE YOU SURE?
YES NO
[ENT] key
7.5 Message Menu
The Message menu prepares and stores messages for later transmission. Press the [#/SETUP]
key, select MESSAGE and press the [ENT] key to display the Message menu. For further details
see Chapter 6.
7-6
7.6 Position Menu
Position and time are entered (automatically or manually) on the Position menu. Manually enter
position and time when the DSC-60 is not interfaced with EPFS or the EPFS is not working.
Press the [#/SETUP] key, select POSITION and press the [ENT] key to display the Position
menu. For further details see Paragraph 2.10 “Manual Input of Position and Time” on page 2-10.
7.7 Print Out Menu
The Print Out menu enables/disables automatic printing of transmitted and received messages
and the results of the daily test. Press the [#/SETUP] key, select PRINT OUT and press the
[ENT] key to display the Print Out menu.
Default: MANUAL
* Print out setup *
XMTD CALL : MANUAL
RCVD CALL : AUTO
DAILY TEST : MANUAL
MANUAL
AUTO
Select AUTO to automatically print
transmitted messages.
Default: MANUAL
MANUAL
AUTO
Select AUTO to automatically print
received messages.
Default: MANUAL
MANUAL
AUTO
Select AUTO to automatically print
results of Daily Test.
[ENT] key
[ENT]
key
[ENT] key
or
to set.
or
to set.
or
to set.

7-7
7.7.1 Sample printouts
Printing can be done automatically or manually. For manual printing, press the [8/PRINT] key.
Note that messages comprised of more than one page (for example, received messages) are
printed out in their entirety.
* Received message at JAN-08-1999-16:10:12 *
FORMAT : DISTRESS CALL
SELF-IDENTITY : 987654321
NATURE OF DISTRESS : UNDESIGNATED DISTRESS
DISTRESS COORDINATES: NO INFORMATION
DISTRESS TELECOMMAND: J3E TELEPHONE
END OF SEQUENCE : EOS
ERROR-CHECK : OK
DSC FREQUENCY TX: 2187.5 kHz
RX: 2187.5 kHz
Sample Received Message
Printout (Distress)
* Received message at JAN-08-1999-16:10:12 *
FORMAT : INDIVIDUAL CALL
ADDRESS : 111660000
CATEGORY : ROUTINE
SELF-IDENTITY : 987654321
1st TELECOMMAND : J3E TELEPHONE
2nd TELECOMMAND : NO INFORMATION
WORKING FREQUENCY : NO INFORMATION
END OF SEQUENCE : ACK. RQ
ERROR-CHECK : OK
DSC FREQUENCY TX: 2177.0 kHz
RX: 2177.0 kHz
Sample Received Message
Printout (Individual)
*Transmitted message at JAN-08-1999-16:10:12 *
FORMAT : INDIVIDUAL CALL
ADDRESS : 987654321
CATEGORY : ROUTINE
SELF-IDENTITY : 111660000
1st TELECOMMAND : J3E TELEPHONE
2nd TELECOMMAND : NO INFORMATION
WORKING FREQUENCY : NO INFORMATION
END OF SEQUENCE : ACK. RQ
ERROR-CHECK : OK
DSC FREQUENCY TX: 2177.0 kHz
RX: 2177.0 kHz
Sample Transmitted Message
Printout (Individual)
Note: Messages are not framed in actual printouts.
*************** Send message *************
FORMAT : INDIVIDUAL CALL
ADDRESS : 111660000
CATEGORY : ROUTINE
SELF-IDENTITY : 987654321
1st TELECOMMAND : J3E TELEPHONE
2nd TELECOMMAND : NO INFORMATION
WORKING FREQUENCY : NO INFORMATION
END OF SEQUENCE : ACK. RQ
ERROR-CHECK : OK
DSC FREQUENCY TX: 2177.0 kHz
RX: 2177.0 kHz
Sample Send Message
Printout (Individual)
7-8
7.8 Scan Freq Menu
The Scan Freq menu determines which DSC routine and distress frequencies to scan. Follow the
instructions below to select/deselect DSC routine and distress frequencies to scan.
7.8.1 Distress frequencies
1. Press the [#/SETUP] key, select SCAN FREQ and press the [ENT] key to display the SCAN
FREQ menu.
DISTRESS
2M :
FIXED
4M :
FIXED
6M : ON
8M :
FIXED
12M : ON
16M : OFF
**
Scan freq setup
*
ROUTINE
F1 : 2M-INTL
F2 : 4M-INTL
F3 : 6M-INTL
F4 : 8M-INTL
F5 : 16M-INTL
F6 : 25M-INTL
2. Press
to shift the cursor to the DISTRESS column.
3. Select the frequency to process and press the [ENT] key. For example, select 4 MHz.
ROUTINE
F1 : 2M-INTL
F2 : 2M-USR3
F3 : 4M-INTL
F4 : 8M-INTL
F5 : 16M-LCL1
F6 : 25M-LCL2
DISTRESS
2M : FIXED
4M : ON
6M : ON
8M : FIXED
12M : ON
16M : OFF
**
Scan freq setup
*
ON
OFF
4. Select ON or OFF as appropriate and press the [ENT] key.
5. Press the [CANCEL] key twice to return to the DSC standby screen.
Note: Regulations require that 2 MHz and 8 MHz be watched continuously. These frequencies
cannot be turned off.
7-9
7.8.2 Routine frequencies
1. Press the [#/SETUP] key, select SCAN FREQ and press the [ENT] key to display the SCAN
FREQ menu.
DISTRESS
2M :
FIXED
4M :
FIXED
6M : ON
8M :
FIXED
12M : ON
16M : OFF
**
Scan freq setup
*
ROUTINE
F1 : 2M-INTL
F2 : 4M-INTL
F3 : 6M-INTL
F4 : 8M-INTL
F5 : 16M-INTL
F6 : 25M-INTL
2. Select the frequency to process and press the [ENT] key. For example, select 2 MHz.
ROUTINE
F1 : 2M-INTL
F2 : 2M-USR3
F3 : 4M-INTL
F4 : 8M-INTL
F5 : 16M-LCL1
F6 : 25M-LCL2
DISTRESS
2M : FIXED
4M : ON
6M : ON
8M : FIXED
12M : ON
16M : OFF
** Scan freq setup *
OFF
2 MHZ
4 MHZ
6 MHZ
8 MHZ
12 MHZ
16 MHZ
22 MHZ
25 MHZ
OTHER
Use to scroll
the menu.
3. Press the [ENT] key, and the display looks something like the one below.
ROUTINE
F1 : 2M-INTL
F2 : 2M-USR3
F3 : 4M-INTL
F4 : 8M-INTL
F5 : 16M-LCL1
F6 : 25M-LCL2
DISTRESS
2M :
FIXED
4M : ON
6M : ON
8M :
FIXED
12M : ON
16M : OFF
**
Scan freq setup
*
INTL :
T12577.5/R12657.0
LOCAL1 :
T12578.0/R12657.5
LOCAL2 :
T12578.5/R12658.0
USER CH1
:
T12345.0/R12345.0
4. Select frequency desired and press the [ENT] key.
5. Press the [CANCEL] key twice to return to the DSC standby screen.
7-10
7.9 User CH Menu
The User CH menu allows registration of user Tx and Rx channels, where permitted by the
Authorities. Follow the instructions below to register user channels.
CAUTION
FURUNO will assume no responsibility
for the disturbance caused by the
unlawful or improper setting of user
channels.
1. Press the [#/SETUP] key, select USER CH and press the [ENT] key to display the User ch
entry menu.
*** User ch entry **
MODE: TEL
0201. TX: 2111.5 RX: 2111.5
0202. TX: 2222.0 RX: 2222.0
0203. TX: 2333.5 RX: 2333.5
0204. TX: 2444.0 RX: 2444.0
0205. TX: 2555.5 RX: 2555.5
CH: 2-01
256 channels may be registered, and each mode has its
own channels.
Band and channel no. appear to right of "CH."
Band no. setting range is 0-29 and band channel no. range
is 00-99. When the full 256 channels have been entered no
more channels can the entered. However, only four DSC
channels can be registered per band.
2. Press
to select MODE and press the [ENT] key.
***
User ch entry
**
MODE: TEL
0201. TX: 2111.5 RX: 2111.5
0202. TX: 2222.0 RX: 2222.0
0203. TX: 2333.5 RX: 2333.5
0204. TX: 2444.0 RX: 2444.0
0205. TX: 2555.5 RX: 2555.5
CH: 2-01
TEL
NBDP
DSC
3. Select appropriate mode and press the [ENT] key.
4. Press
to select CH and press the [ENT] key.
*** User ch entry **
MODE: NBDP
0201. TX: 2101.5 RX: 2101.5
0202. TX: 2202.0 RX: 2202.0
0203. TX: 2303.5 RX: 2303.5
0204. TX: 2404.0 RX: 2404.0
0205. TX: 2505.5 RX: 2505.5
CH : 2-01
CH:0−00
7-11
5. Key in channel no. and press the [ENT] key. For example, press [1], [2], [3], [4] and [ENT] to
enter channel 1234. The channel selected is shown in black on white characters at the top of
the screen.
***
User ch entry
**
MODE: NBDP
01234. TX: 0.0 RX: 0.0
01240. TX: 12666.0 RX: 13666.0
01241. TX: 12777.5 RX: 13777.5
01242. TX: 12999.5 RX: 13999.5
01250. TX: 12100.0 RX: 13100.0
CH: 12-40
6. Press the [ENT] key to enter Rx and Tx frequencies. For example, enter 12345.5 kHz as the
Tx frequency and 13456.0 kHz as the Rx frequency.
***
User ch entry
**
MODE: NBDP
01234. TX: 12345.5 RX: 13456.0
01240. TX: 12666.0 RX: 13666.0
01241. TX: 12777.5 RX: 13777.5
01242. TX: 12999.5 RX: 13999.5
01250. TX: 12100.0 RX: 13100.0
CH: 12-40
7. The display shows the information entered. Using the examples mentioned in this procedure,
Tx frequency 12345.5, Rx frequency 13456.0 are registered to channel 1234.
***
User ch entry
**
MODE: NBDP
01234. TX: 12345.5 RX: 13456.0
01240. TX: 12666.0 RX: 13666.0
01241. TX: 12777.5 RX: 13777.5
01242. TX: 12999.5 RX: 13999.5
01250. TX: 12100.0 RX: 13100.0
CH: 12-34
7-12
7.10 Volume Menu
The Volume menu enables/disables key beep (acknowledges correct key input) and adjusts the
volume of the handset, ordinary alarm and distress/urgency alarm. Press the [#/SETUP] key,
select VOLUME and press the [ENT] key to display the Volume menu.
Default: ON
Default: 32
*** Volume setup ***
KEY CLICK : ON
HANDSET : 40
ORDINARY ALARM : 30
DISTRESS ALARM : 63
ON
OFF
VOLUME (8~63)
40
Turns on/off beep generated when
keyboard is operated.
Note : Do not confuse keyboard beep
(single beep) with ACK beep
(three beeps).
Sets volume of handset.
Default: 32
VOLUME (8~63)
30
Sets loudness of Safety/Ships Business/Routine
alarm and old position alarm.
Default: 63
VOLUME (8~63)
63
Sets loudness of Distress/Urgency alarm and
Distress Alert alarm.
[ENT] key
[ENT]
key
[ENT] key
[ENT] key
or
to set.
or
to set.
or
to set.
or
to set.
7-13
7.11 Test Menu
The Test menu provides test facilities (including tone test) for the service technician. This menu
cannot be accessed by the operator.
TONE
BK
REMOTE
EXT ALARM
EXT ALERT
*** Test function **
AF PCB
CONT PCB
PANEL PCB
RX PCB
TX TEST
PROTECTION: ON
7.12 System Menu
The System menu sets up the equipment and is for use by service technicians. This menu
cannot be accessed by the operator. However the operator can view the settings by using and
.
MMSI: 123456789 FIXED
WATCH RCVR : MF/HF
LINE OUT : +0.0DBM
TX-KEY TIMING : AUTO
RT PORT : MIF3
*** System setup ***
PROTECTION: ON
REMOTE STATION: ON
NBDP PORT : OFF
LANGUAGE: ENGLISH
*** System setup ***
PROTECTION: ON
Use or
to switch.
8-1
8. CHECKING, MAINTENANCE
WARNING
Do not open the equipment.
Hazardous voltage which can
cause electrical shock exists
inside the equipment. Only
qualified personnel should
work inside the equipment.
8.1 Daily Test
Authorities require that the equipment be checked daily for proper operation to ensure that it will
function properly in the event of distress. Set the frequency of the radiotelephone to other
than 2182 kHz. Execute the daily test as below.
1. At the DSC standby screen or radiotelephone setting screen, press the [3/TEST] key to start
the test.
2. After several seconds the test results appear followed by the audio alarm. OK denotes
normal operation, and NG (No Good), error. For NG (No Good) contact your dealer for
advice.
MAIN CPU
MODEM
RCVR1
RCVR2
REMOTE RT
REMOTE DP
: OK VER.XX*
: OK VER.XX*
: OK
: OK
: OK FS1562
: OK DP6
**DSC-60 daily test
**
Alarm: Distress alarm sounds for two seconds after completion
of test.
MAIN CPU: ROM/RAM test executed and version no. displayed.
MODEM: DSP ROM and DSC signal loopback tests executed and
version no. displayed.
RCVR1: Distress/safety watch received tested.
RCVR2: Routine watch receiver tested.
REMOTE RT: CAID of MIF command sent and received. (System
setting RP PORT must be set for MIF otherwise
nothing appears.)
REMOTE DP: CAID of MIF command sent and received. (System
setting NBDP PORT must be set for MIF otherwise
nothing appears.)
* XX = Version number

8-2
3. If auto printing is active the test results are printed. To manually print results, press the
[8/PRINT] key. Below is a sample test results printout.
* DSC-60 daily test *
AUG-14-1999-15:24
MMSI: 123456789
MAIN CPU: OK VER.01
MODEM: OK VER.02
RCVR1: OK
RCVR2: OK
REMOTE RT: OK FS1562
REMOTE DP: OK DP6
4. Press the [CANCEL] key to quit the test and return to the previously used screen.
8.2 Maintenance
Regular maintenance is necessary for continued performance. Following the procedures below
will help keep the equipment in top operating condition.
8.2.1 Preventive maintenance
• Check the following points periodically to ensure proper performance.
• Check that each connector is firmly connected and is clean.
• Check the earth terminal for corrosion. If corroded, clean.
8.2.2 Cleaning
Dust on the display unit and display screen may be removed with a soft cloth. Do not use
commercial cleaners to clean the display unit - they can remove paint and markings.
8-3
8.3 Simple Troubleshooting
The table below provides common problems and the means with which to restore normal
operation. If normal operation cannot be restored do not attempt to check inside the equipment.
Any servicing should be referred to a qualified technician.
Problem Probable cause Remedy
Power cannot be
turned on. • Mains switchboard may be off.
• DC overvoltage input.
• Battery may have discharged, or
poor contact at terminals.
• Turn on the mains switch
• Check supply voltage.
• Recharge battery and tighten battery
terminals.
Display indications
do not appear but
key lamps are lit.
• Contrast is too low. • Press the [9/ ] key followed by or to
adjust the contrast.
Power is on but no
sound from
loudspeaker.
• Loudspeaker is off. • Operate the [7/ ] key to turn on the loud-
speaker.
8.4 Error Messages
The table below shows error messages and their meanings.
Error messages
Error message Meaning Remedy
EPFS error No position data from navigator
for one minute.
Press the [CANCEL] key to silence alarm.
Check the navigator. If it is malfunctioning
manually enter position.
Warning: Update
position
Position data is older by the
amount of time preset on the
Alarm setup menu.
Press the [CANCEL] key to silence alarm.
Reenter position on the Position menu.
8-4
8.5 Test Call
This function sends a test signal over one of six distress and safety frequencies to a coast
station. For that reason, it should not be executed unnecessarily.
1. Press the [CALL] key at the DSC standby screen, and press the [ENT] key to open the CALL
TYPE menu.
***
Send message
***
: Test
: 00-------
: Safety
: 2187.5 kHz
PSTN CALL
TEST CALL
ALL SHIPS
GROUP CALL
AREA CALL
POSITION RELAY SEL
POLLING
NEUTRAL
MEDICAL
RELAY ALL
DISTRESS
INDIVIDUAL
CALL TYPE
STATION ID
PRIORITY
COM TYPE
COM TYPE
DSC FREQ
If this part of the menu
appears, use to scroll.
2. Use
or to select TEST CALL and press the [ENT] key.
3. Press the [ENT] key to open the COAST ID menu.
GO TO ALL VIEW
*** Send message ***
CALL TYPE
PRIORITY
DSC FREQ : 2187.5 KHZ
: TEST
: SAFETY
COAST ID 000000000
4. Key in the ID of the coast station ID (nine digits) to where to send the test call and press the
[ENT] key.
5. Press the [ENT] key to open the DSC FREQ menu. (Note that PRIORITY is automatically
selected to SAFETY.)
DSC FREQ KHZ
***
Send message
***
CALL TYPE
COAST ID
PRIORITY
: Test
: 001234567
: Safety
: kHz
VIEW
4207.5
6312.0
8414.5
12577.0
16804.5
MANUAL
2187.5
8-5
6. Select an appropriate frequency and press the [ENT] key, and the display changes as below.
*** Send message ***
CALL TYPE : TEST
COAST ID :
001234567
PRIORITY : SAFETY
DSC FREQ :
2187.5 KHZ
GO TO ALL VIEW
7. Press the [CALL] key to send the test call (transmission time: 6-8 sec.). The display shows
"Test call in progress!" while the test call is being transmitted.
Test
call in progress!
DSC FREQ :
2187.5 KHZ
TIME TO GO : 8S
TO COAST :
001234567
SAFETY
8. After the test call has been sent, the following message appears.
Waiting for test
acknowledgement.
DSC FREQ :
2187.5 KHZ
TIME TO GO : 4M12S
FROM COAST :
001234567
SAFETY
9. One of the following displays appears. (“No response! Try calling again?” appears when the
timer counts down to zero, meaning no response from coast station.)
No response!
Try calling again?
DSC FREQ :
2187.5 KHZ
FROM COAST:
001234567
SAFETY
Test acknowledge
call received.
FROM COAST:
001234567
SAFETY
NO INFORMATION
STOP ALARM CALL AGAIN
Test acknowledge received No response to test call
10. Do one of the following depending on the message shown in step 9.
8-6
Test acknowledge call received
The audio alarm sounds; press the [CANCEL] key to silence the alarm. The display changes as
below.
JUL-23-1999-23:59 ECC : OK
TEST ACKNOWLEDGEMENT
FROM COAST :
001234567
SAFETY
NO INFORMATION
*
Received message
*
GO TO ALL VIEW
No response! Try calling again?
Press the [ENT] key (the display shown in step 6 appears) followed by the [CALL] key to re-send
the test call, or press the [CANCEL] key to return to the DSC standby screen.

A-1
APPENDIX
Menu Tree
INTERNAL AUDIO ALARM
RCVD CALL (
ON
, OFF)
OLD POSITION (
ON
, OFF)
POSITION OLDER (
4.0
, 3.0, 2.0, 1.0, 0.5 hr)
EXT ALARM (
DSTRS/URG
, ROUTINE, ALL, OFF)
[SETUP] key ALARM
AUTO ACK
ERASE FILE
MESSAGE
POSITION
PRINT
SCAN FREQ Selects DSC frequencies to scan.
USER CH Registers user channels.
VOLUME
TEST (For technicians)
SYSTEM (For technicians)
COMPLY TYPE (
ABLE
, UNABLE)
UNABLE REASON (
NO REASON
, BUSY, EQUIP DISABLED,
MODE NOT USABLE, CH NOT USABLE)
POSITION CALL (
ON
, OFF)
POLLING CALL (
ON
, OFF)
RCVD ORDINARY LOG
RCVD DISTRESS LOG
TRANSMITTED LOG
SEND MESSAGE
USER CHANNEL
INPUT TYPE (
AUTO
, MANUAL)
LAT
LONG
TIME
XMTD CALL (AUTO,
MANUAL
)
RCVD CALL (AUTO,
MANUAL
)
DAILY TEST (AUTO,
MANUAL
)
KEY CLICK (
ON
,OFF)
HANDSET (0-63,
32
)
ORDINARY ALARM (0-63,
32
)
DISTRESS ALARM (0-63,
63
)
[LOG] key RECEIVED ORDINARY
RECEIVED DISTRESS
TRANSMITTED
Default settings
in boldface italic.

A-2
DSC Frequency Table
Tx (kHz) Rx (kHz) Remarks File Name
2187.5 2187.5
4207.5 4207.5
6312.0 6312.0
8414.5 8414.5
12577.0 12577.0
16804.5 16804.5
Distress and
Safety Frequencies
458.5 455.5 INTL-0.4M
2189.5 2177.0 INTL-2M
4208.0 4219.5 INTL-4M
6312.5 6331.0 INTL-6M
8415.0 8436.5 INTL-8M
12577.5 12567.0 INTL-12M
16805.0 16903.0 INTL-16M
18898.5 19703.5 INTL-18M
22374.5 22444.0 INTL-22M
25208.5 26121.0
International
Frequencies
INTL-25M
4208.5 4220.0 LOCAL1-4M
6313.0 6331.5 LOCAL1-6M
8415.5 8437.0 LOCAL1-8M
12578.0 12657.5 LOCAL1-12M
17805.5 16903.5 LOCAL1-16M
18899.0 19704.0 LOCAL1-18M
22375.0 22444.5 LOCAL1-22M
25209.0 26121.5
Local-1
Frequencies
LOCAL1-25M
4209.0 4220.5 LOCAL2-4M
6313.5 6332.0 LOCAL2-6M
8416.0 8437.5 LOCAL2-8M
12578.5 12658.0 LOCAL2-12M
16806.0 16904.0 LOCAL2-16M
18899.5 19704.5 LOCAL2-18M
22375.5 22445.0 LOCAL2-22M
25209.5 26122.0
Local-2
Frequencies
LOCAL2-25M
SP - 1
SPECIFICATIONS OF DSC/WATCH RECEIVER
DSC-60
1. DSC TERMINAL
(1) Line Out: 0 dBm (adjustable between –10 dBm and +10 dBm),
600 ohms, balanced
(2) Line In: -10 to +10 dBm, 600 ohms, balanced
(3) Frequency Shift: Mark; 1615 Hz, Space; 1785 Hz
(4) Baud Rate: 100 baud’s ±30 x 10-6
(5) Protocol: Complies with ITU-R Rec.493‐9, 541‐8, 1082-1
2. GMDSS DSC WATCH KEEPING RECEIVER
(1) Receiving Frequency
For MF spec: 2187.5 kHz
For MF/HF spec: 2187.5 kHz, 4207.5 kHz, 6312 kHz, 8414.5 kHz,
12577 kHz and 16804.5 kHz
(2) Class of Emission: F1B, J2B
(3) Frequency Stability: Within ±10 Hz
(4) Intermediate Frequency: 1st: 54455 kHz, 2nd: 455 kHz
(5) Selectivity: -6 dB : 270 Hz or more
-30 dB: within ±380 Hz
-60 dB: within ±550 Hz
(6) RF Input Impedance: 50 ohms
(7) Receiving Sensitivity: Better than 0 dBµ (at error rate within 1%)
(8) Warming-up Time: 1 minute (oven 30 minutes)
3. GENERAL WATCH KEEPING RECEIVER (option)
(1) Receiving Frequency 1.6 MHz to 27.5 MHz
(2) Class of Emission: F1B, J2B
(3) Frequency Stability: Within ±10Hz
(4) Intermediate Frequency: 1st: 54455 kHz, 2nd: 455 kHz
(5) Selectivity: -6 dB : 270 to 300Hz
-30 dB: within ±380Hz
-60 dB: within ±550Hz
(6) RF Input Impedance: 50 ohms
(7) Receiving Sensitivity: Better than 0 dBµ (at error rate within 1%)
(8) Warming-up Time: 1 minute (oven 30 minutes)
SP - 2
4. MF/HF SSB TRANSCEIVER REMOTE STATION
(1) Line Out: 0 dBm, 600 ohms, balanced
(2) Line In: 0 dBm, 600 ohms, balanced
(3) AF Input (Microphone): -46 dBm, 600 ohms, unbalanced
(4) AF Output (Loudspeaker): 3 W, 4 ohms
(Handset): 1 mW, 200 ohms
5. DISPLAY
(1) LCD Unit: 120 x 64 dots
(2) Characters 20 characters x 8 lines (1 character: 5 x 7 dot) max.
20 characters x 10 lines (1 character: 5 x 5 dot) max.
(3) Back-light: Yellow, 8 tones
(4) Contrast: 64 tones
6. I/O DATA
(1) Nav. Data Input: IEC61162-1, current loop; 1 pair/port
(2) DMC: IEC61162-1/RS232C or
DMC OUT/IN/CTR H/C; 3 pairs/port
(3) Received Call Output: RCV BZ OUT/IN/CTR; 3 pairs/port
(4) NBDP: IEC61162-1/RS232C
(5) Printer: Centronics (parallel)
(6) RT (MF/HF Transceiver): IEC61162-1/RS232C,
Line in: 0dBm, 600 ohms,
Line out: 0dBm, 600 ohms,
and other control signals
7. ENVIRONMENTAL CONDITION
(1) Temperature: -15°C to +55°C
(2) Relative Humidity: 93% ( 40°C)
(3) Category of Equipment Unit
Display Unit: Protected from the weather
8. POWER SUPPLY
24VDC (backed up by battery), 1 A, less than 24 W
9. COLOR
Panel: N3.0 (not changeable)
Cabinet: 2.5GY5/1.5

Index-1
INDEX
#/SETUP key.................................................. 7-1
*/FILE key ....................................................... 6-8
0/LOG key ...................................................... 5-1
1/ RT/2182 key ............................................... 2-3
2/DSC key ...................................................... 2-3
3/TEST key..................................................... 8-1
4/IntCom key .................................................. 2-8
5/ACK key....................................................... 2-7
6/SCAN key .................................................... 2-6
7/ key........................................................... 2-5
8/PRINT key ................................................... 7-7
9/ key ......................................................... 2-4
Alarm menu .................................................... 7-2
All ships call
receiving ..................................................... 4-3
sending ....................................................... 4-1
Auto ack menu................................................ 7-3
Automatic acknowledge.................................. 2-7
Backlighting adjustment ................................. 2-4
Channel selection ......................................... 2-12
Cleaning ......................................................... 8-2
Contrast adjustment ....................................... 2-4
Control description.......................................... 2-1
Daily test......................................................... 8-1
Distress alert
receiving ..................................................... 3-7
sending ....................................................... 3-1
Distress relay
all ships (MF/HF band) ............................. 3-13
receiving ................................................... 3-21
DSC frequency setting.................................... 4-8
DSC frequency table ......................................A-2
Erase file menu............................................... 7-5
Error messages .............................................. 8-3
Frequency selection ..................................... 2-13
Geographic area call
receiving ................................................... 4-24
sending ..................................................... 4-21
Group call
receiving ................................................... 4-20
sending ..................................................... 4-18
Indications ...................................................... 2-3
Individual call
automatic acknowledge............................ 4-13
manual acknowledge................................ 4-15
sending....................................................... 4-4
Intercom ......................................................... 2-8
Log file
description .................................................. 5-1
opening....................................................... 5-4
Maintenance................................................... 8-2
Medical transport call
receiving ................................................... 4-28
sending..................................................... 4-27
Menu tree ....................................................... A-1
Message menu............................................... 7-5
Mode selection ............................................. 2-12
Neutral craft call
receiving ................................................... 4-26
sending..................................................... 4-25
Polling call
receiving ................................................... 4-32
sending..................................................... 4-29
Position call
other ship requests your position ............. 4-37
requesting other ship’s position................ 4-35
Position entry (manual) ................................ 2-10
Position menu................................................. 7-6
Power selection ............................................ 2-13
POWER switch............................................... 2-3
Print out menu ................................................ 7-6
PSTN call
charge information.................................... 4-48
receiving ................................................... 4-47
sending..................................................... 4-40
Remote control ............................................. 2-12
Scan freq menu .............................................. 7-8
Scan frequency setup..................................... 7-9
Scanning ........................................................ 2-6
Send message files
geographic area call ................................... 6-5
group call.................................................... 6-4
individual call .............................................. 6-1
PSTN call ................................................... 6-6
sending....................................................... 6-8
Setup menu .................................................... 7-1
Specifications ...............................................SP-1
Index-2
System menu................................................ 7-13
Test call........................................................... 8-4
Test menu ..................................................... 7-13
Time entry (manual) ..................................... 2-10
Troubleshooting .............................................. 8-3
Tuning........................................................... 2-14
User CH menu.............................................. 7-10
Volume menu ............................................... 7-12
Working frequency setting..............................4-6

C
9-52, Ashihara-cho,
Nishinomiya, Japan
Telephone: 0798-65-2111
Telefax: 0798-65-4200
Your Local Agent/Dealer
All ri
g
hts reserved.
PUB. No. OME-56280
DSC-60
(
DAMI
)
FIRST EDITION :
Printed in Japan