GAPOSA Srl QCTSERIES QCT Series Transmitters User Manual gb
GAPOSA Srl QCT Series Transmitters gb
User Manual
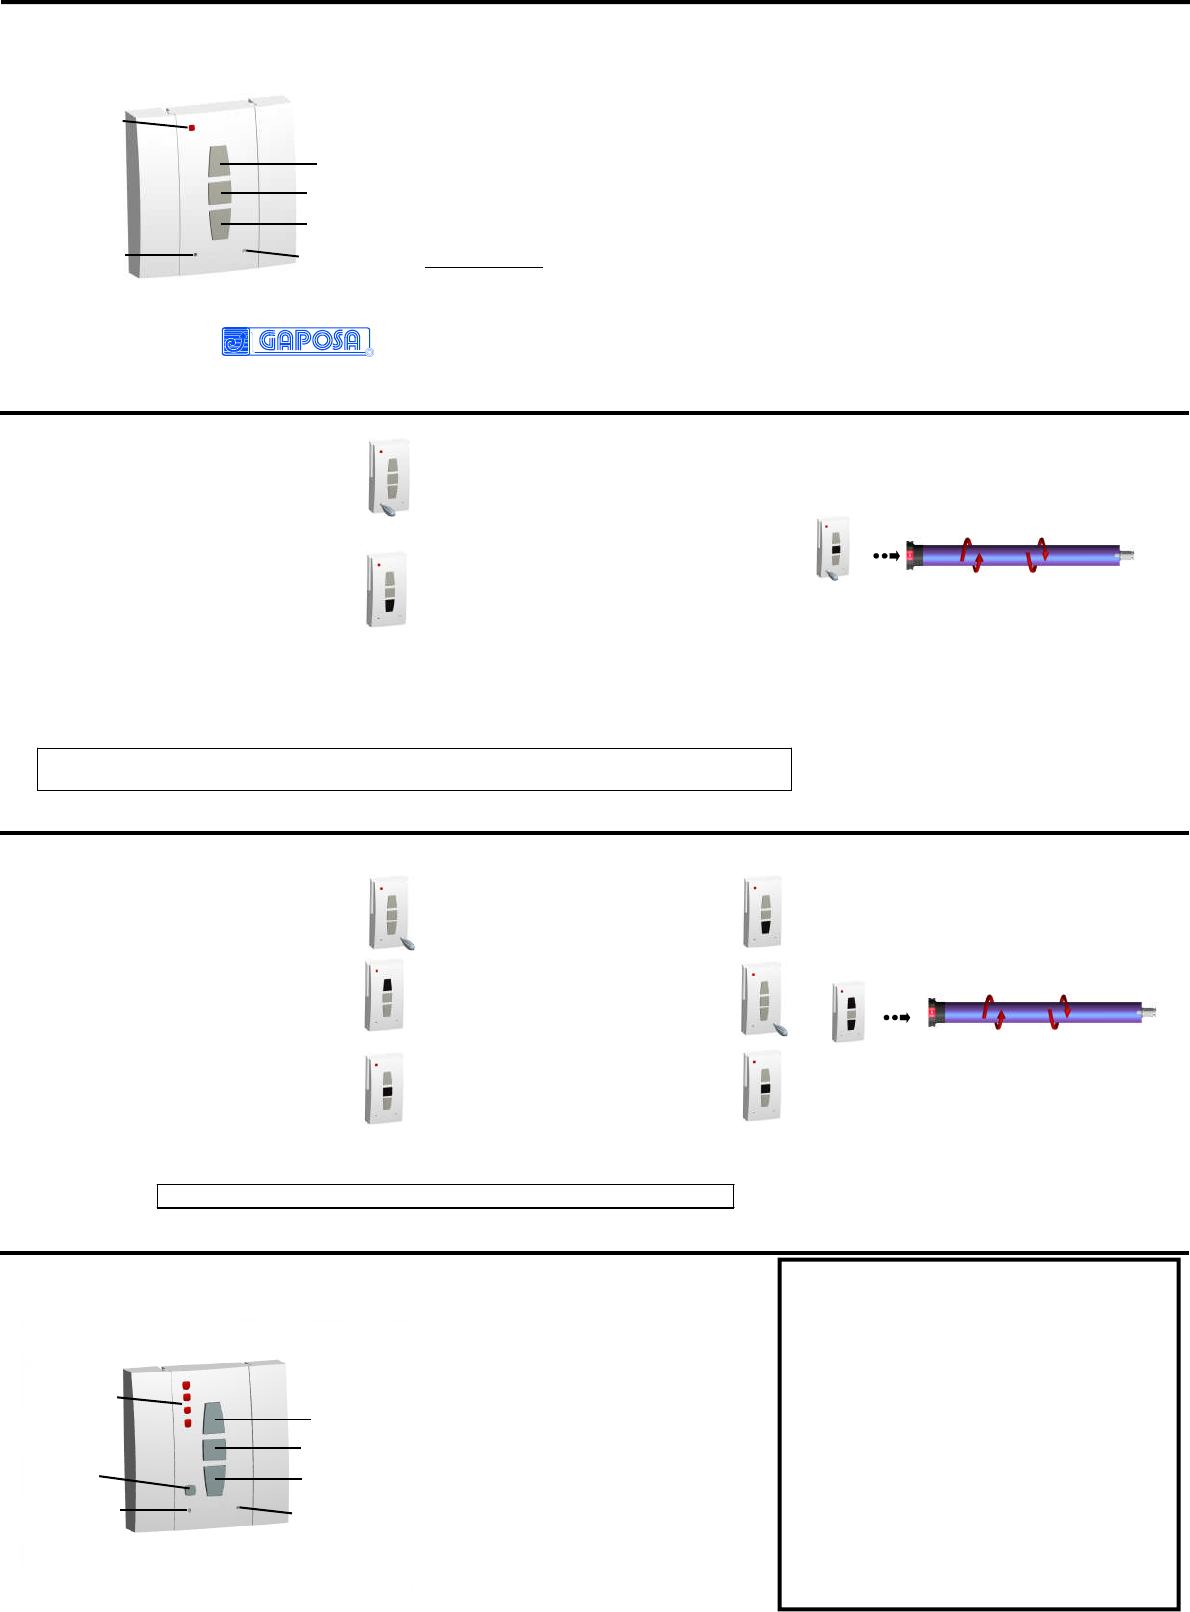
Prog-Tx
Led
Prog-FC
UP
STOP
DOWN
Prog-Tx
SEL
Led
Prog-FC
UP
STOP
DOWN
Installation guide
QCT3-QCT3S-QCT3SD
QCT34-QCT34S
(Just for the electronic limit switch motors AXEL-AXELO RI)
®
TECHNICAL DATA
·Dimensions: 70x70x19 mm
·Protection rate: IP 30
·Radio frequency: 434.15 MHz
·Range: 20 mt internal; 300 mt open air
·1 button UP
·1 button STOP
·1 button DOWN
·1 Prog-Tx= Instruction button
·1 Prog-FC= limit switch setup button (AXEL)
·1 LED
·2 Litium 3V batteries (CR2025 type)
QCT34-QCT34S (additional features)
·4 channel selection button
·4 LEDs
Both transmitters are compatible with:
·QC19
·All the RI motors
OPERATION of the 4 channels QCT34S
The 4 channels transmitter has a channel
selection button (SEL) with a sequence working
mode: by pressing it repeatly you change
channel.
Selecting group of channels:
Choose with the SEL button the first channel of
the group, then push it again and keep it pushed
until the LED starts blinking. When moving
through the channels you can confirm the channel
to be added by pushing the SEL button until the
LED stops blinking. In order to confirm the group
selection push the STOP button. With the UP,
STOP, DOWN buttons all the motors belonging to
that group will be activated.
To erase a group and going back to the the
sequence working mode you have to push,
release and then push again the SEL button.
BATTERY SUBSTITUTIONS
1. Open the cover by levering up the hook on the
transmitter’s bottom
2. Lift the transmitter card, then remove the used up
batteries
3. Insert the new batteries and check the polarity: -
towards the card/+ towards the cover bottom
CONFORMITY DECLARATION
GAPOSA srl declares that the QCT Series is in conformity
with the essenatial requirements and with the other
disposition established by the 1999/5/EC law.
These devices complie with Part 15 of the FCC Rules.
Operation is subject to the following two conditions: (1) this
device may not cause harmful interference, and, (2) this
device must accept any interference received, including
interference thet may cause undesired operation”.
Changes or modifications not expressly approved by the
party responsible for compliance could void the user’s
authority to operate the equipment.
OPERATION AND WARNINGS
The QCT Series transmitters enable the user to
control one or more motors with receiver, installed
on awnings, curtains and screens. It is possible to
setup them with group commands, in order to let
more motors work simultaneously.
The radio signal is shown by the transmission
LED. If the LED doesn’t blink after the button
pressure, then the battery has to be replaced.
CAUTION:
Please don’t use these transmitters in areas with
risks of radio disturbs over the norm (i.e. airports
or radio repeaters).
These transmitters may also be disturbed by
telecommunication plants and trans-ceiver with
the same frequency.
PROGRAMMING
1. Power up the motor to be programmed
2. Hold the Prog-Tx button until the motor
starts moving.
3. Check the rotation way of the motor,
then release the Prog-Tx button.
4. Within 5 seconds press the
corresponding button (i.e. UP if the
motor rotates to the top or DOWN if
viceversa).
In this way the transmitter has been
programmed as MASTER and the rotation
direction of the motor has been syncronized.
IMPORTANT: Whilst you keep pressing the
Prog-Tx button the motor will keep on
turning in one direction. By releasing and
pressing it again the motor will rotate in the
other direction (sequence working).
LIMIT SWITCH SETUP
UP LIMIT SWITCH
1. Push the Prog-Fc button till it makes a
small movement in both direction, then
press the UP button
2. Be ready to press the STOP button when
the motor reaches the desired limit
switch position or wait till the motor stops
automatically on the limit positions of the
curtain/awning. In both cases the limit
switch setups the position where the
motor stops.
3. For an accurate setup press the Prog-Fc
button while the motor is running. The
motor will move slowly and jerkily
towards the limit switch position.
DOWN LIMIT SWITCH
4. Push the Down button and be
ready to stop the motor (by
pressing the STOP button) when
the desired limit switch position
has been reached.
5. For an accurate setup press the
Prog-Fc button while the motor is
running. The motor will move
slowly and jerkily towards the
DOWN limit switch position.
ADDING MORE TRANSMITTERS/CHANNELS
1. Keep pushing the MASTER Prog-Tx button till
the motor starts running
2. Check the motor rotation direction, then
release the Prog-Tx button.
3. Within 5 seconds press the corrisponding
button (i.e. UP if the motor rotates to the top or
DOWN if viceversa) of the new QCT3S or
QCT34S you wish to add.
In this way a new transmitter has been added to
the motor receiver.
TRANSMITTERS ERASE
1. Push simultanously the Prog-Tx and STOP
buttons of the MASTER transmitter until the
motor makes a small movement in both
directions.
CANCELLING WITHOUT MASTER
1. Remove power.
2. Push simultaneously the Prog Tx and STOP
buttons of a new QCT3S or QCT34S and
then power up the motor again until it makes
a small movement in both directions.
INTERMEDIATE POSITION SETUP
1. Bring the curtain/awning in the desired
intermediate position, then press
simultaneously the UP and DOWN buttons
until the motor makes a small movement in
both directions.
The intermediate position has been setup.
RECALLING THE INTERMEDIATE POSITION
Keep pushing the STOP button for 3 seconds at
least: the curtain/awning will move till it reaches the
intermediate position.
ERASING THE INTERMEDIATE POSITION.
Push simultaneously the UP and DOWN buttons
until the motor makes a small movement in both
directions.
CAUTION: If more motors with receiver have to be installed, then just one motor has to be powered up
during the first programming session, in order to avoid nterferences with the other motors.
CAUTION: The first limit switch to setup is always the UP one.