GE PROFILE Free Standing, Gas Manual L0502309
User Manual: GE GE PROFILE Free Standing, Gas Manual GE PROFILE Free Standing, Gas Owner's Manual, GE PROFILE Free Standing, Gas installation guides
Open the PDF directly: View PDF ![]() .
.
Page Count: 60
GEAppliances
©
0
°y..q
0
cJ
0
oq
Safety Instructions ... 2,4-_
A_gi-dl_ device ..........4, 43, 5l
Operadng lnstr_getions, Tips
A[uminum joi[ ............... l 7
Clock (rod Hm(.:v, ............. J9
77[_-'U*7__Javm7_I<L_"dvauJ_-m....2_5'-2 9
(J_m_................... l b- 27
t_<U<7_g,". ............... l 7, 20
lh'oili_<g:,lh'oi{H_<g'g_Ude ...... 18
Co_medTo_ cookT_g", ...... 22-23
Door/arch .............. 30, 31
ISb_,'*7_ _g_itio_ ......... 16, 49
Lgi'_t bulb r_.jdoce*_m_t ....... 39
Ov_.q__onO'o[ ............... 12
PrelteoU_<7". ................ 77
Pm be ..................... 27
[7oa,sU_g, RoasUn 2"
<g'_u(l(,............l 7, 20, 24-25
S(,Oc(b(mi_g"7_,stvu_tio_,s ,, 3(/- 31
&ek)(_s ................... 16
77meg bakikt<g , .......... 20, 26
7),pc %imatgY_*ine ........... 27
(7o_tvo{ sefti_<its .............. 9
waw_U_g"zos_e.............. / /
Care and Cleaning
Bvoi[(_r/_an and gv'id ......... 3d
Buv_(.'r o,ss(,mb[3' ..........32, 33
th_*'_ev g'mt(,s ................ 34
Co_trol 2(m('7 ............... L_
Cookt@ ................. 34- _5
G&,ss ..................... _5
Pg_*'ge[(U_ .................. 34
Door r(.mov(H' ................ 36
Ov(.q_bottom ................ 36
Sdi-([(_(mi_<g"7_s,'vu(,'7o_,s , ,, 3(7- 3 l
SD(4v(.:s..................... 39
l,V(m_7_g"(Irow(.m, ............37
www.ge@pliaszce,s,corn
Be ore You
f . Call For
S_v_ee
7"her_tio.stat adfl_.st_*e}_t-
Uoit yo_o:s('(7, ............... 2 7
7"_>ub[e.d_oogD_gdlzs ,....... 52- _5
Preparation
k7r ac,!]u.s[men[ ............... 50
F[o_(, siz(:' .................. 49
Floorh_g"v_d(_v #_er(m2(.: ....... 43
b_,s_'a[[otTo_7_,O'm Ho_,s .... 4#- 5/
k(,v(,gh_g, ................... 50
LP ........................ 51
Consumer Services
GE Answer Center ®800.626.2000
_umb_:s, i ........... Bg_ckCov(.r
ProUud *vGO'otio_ ...... 3, 57, 5_
l.V<_vm_@ ................... 59
JGI, 910
g
.1G1_920
IMPORTANTSAFETYINFORMAtiON.
READALLINSTRUCtiONSBEFOREUSING.
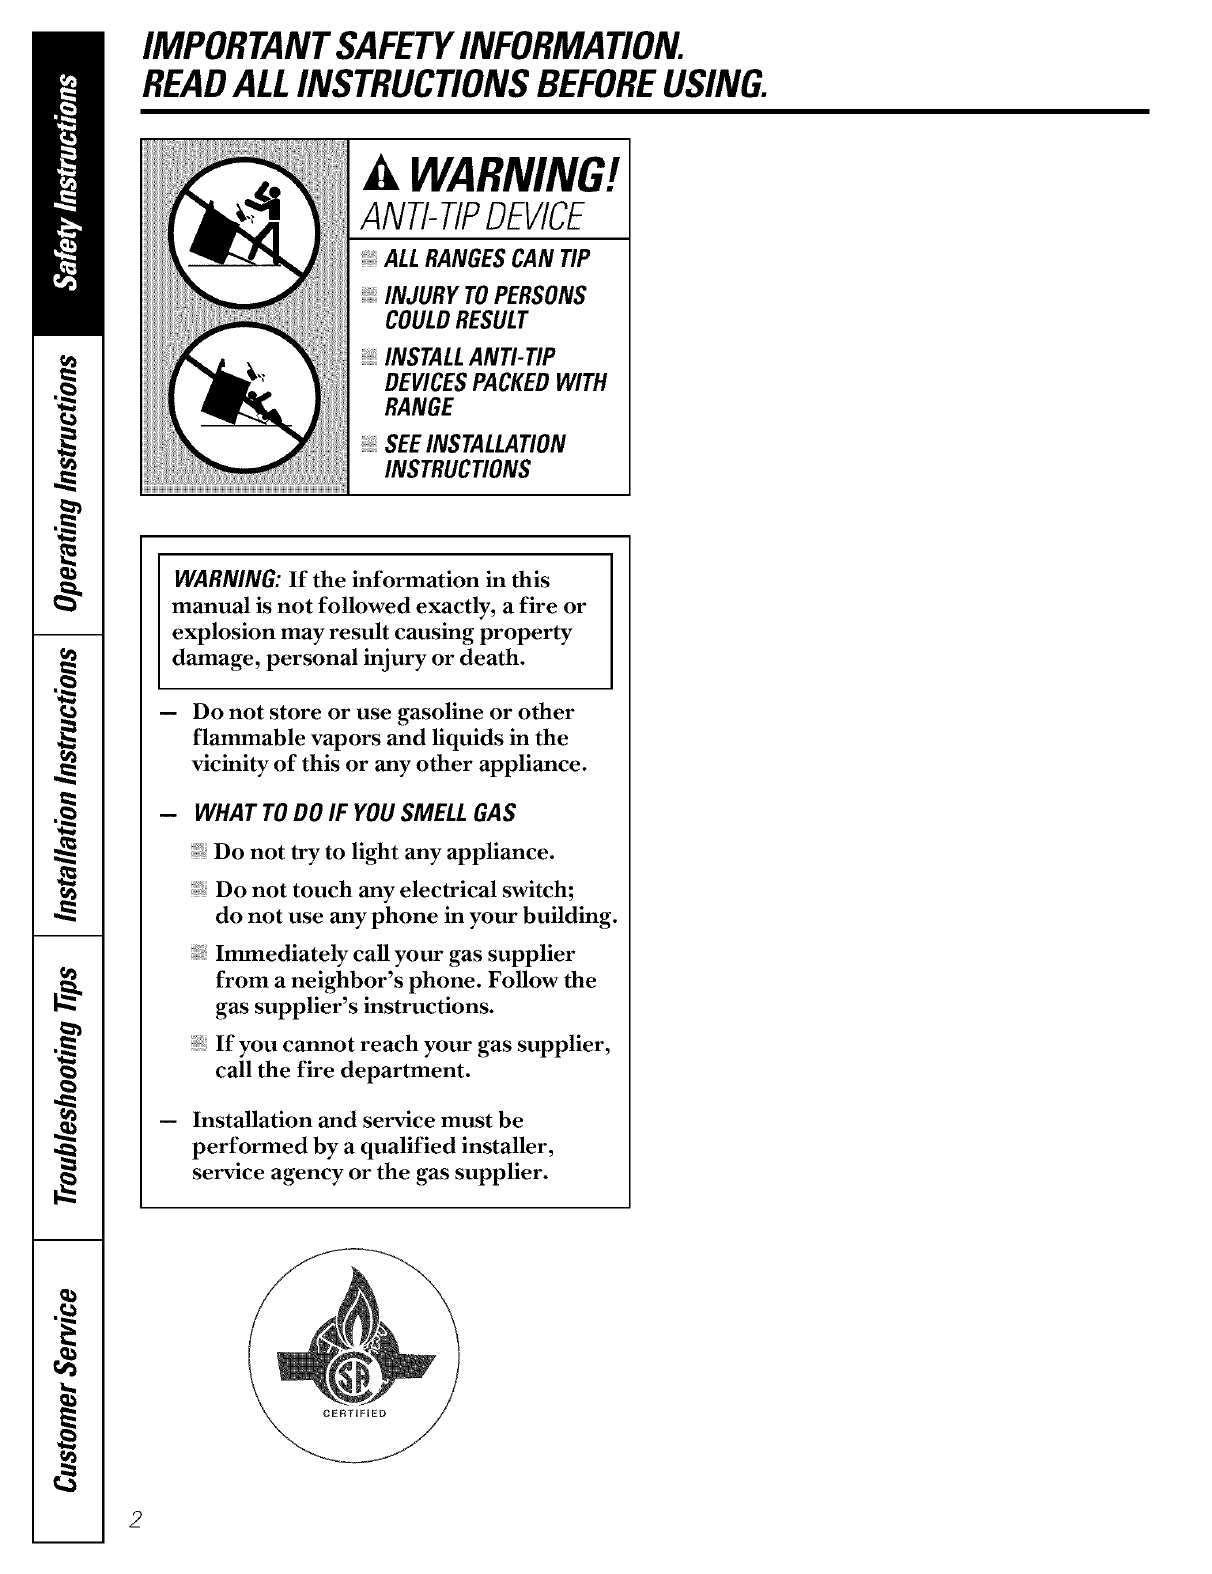
WARNING!
ANTI-TIPDEVICE
ALL RANGES CAN TIP
INJURY TO PERSONS
COULD RESULT
INSTALL AN_ TIP
DEVICES PACKED WITH
RANGE
SEE INSTALLAtiON
INSTRUCtiONS
WARNING: If the information in this
manual is not followed exactly, a fire or
explosion may result causing property
damage, personal injury or death.
-- Do not store or use gasoline or other
flammable vapors and liquids in the
vicinity of this or any other appliance.
WHAT TODO IF YOUSMELL GAS
Do not try to light any appliance.
Do not touch any electrical switch;
do not use any phone in your building.
Immediately call your gas supplier
from a neighbor's phone. Follow the
gas supplier's instructions.
If you cannot reach your gas supplier,
call the fire department.
-- Installation and service must be
performed by a qualified installer,
service agency or the gas supplier.

GE& You,A Service Partnership.
IMPORTANT!
Fill out tile ( onsumer Product Registration Card.
Twoeasy ways to registeryour appliance!
• Through the internet at _v.geappliances.com
• Complete and mail the enclosed Product Registration (ard
FORYOURRECORDS
Write the model and serial numbershere:
#
#
You can find them on a label on the flont of the range behind the warming &awer.
Staple sales slip or cancelled check here.
Proof of the original purchase date is needed to obtain se_ice under the w:uramy.
READTHISMANUAL
Inside you will find many helpfid hints on how to use and maintain your range properly.
Just a little preventive care on your part can save you a great deal of time and money _)verthe lite
of your vdnge.
IFYOUNEEDSERVICE
Y_)u'll find many answers to common problems in the Before You Call For Service section.
If you rexiew our chart of Troubleshooting 77psfirst, you may not need to call tin sevvice at all.
If you do need sevvice, you can relax knowing help is only a phone call away. A list of toll-flee
customer sevvice numbers is included in the back section of this mamml. Or, y{)ucan ahvays
call the GE Answer Center Pat 800.626.2000, 24 h{)urs a day, 7 days a week.
3
IMPORTANTSAFETYINFORMATION.
READALLINSTRUCTIONSBEFOREUSING.
WARNING!
For your safety the information in this manual must be followed to minimize the risk of fire or explosion,
electric shock, or to prevent property damage, personal injury, or loss of fife.
WARNINGANTI-TIPDEVICE
All ranges can tip and injury could result.
Toprevent accidental tipping of the range, attach it to the waft by installing the Anti--tip device supplied.
To check if the device is installed and engaged properly, carefully tip the range forward. The Anti--tip
device should engage and prevent the range from tipping over.
If you pull the rmlge out from tire wall for any reason, make sure tire device isproperly engaged
when you push the rangy back against the wall. Ifit isnot, there isa possible risk of the range
tipping over and causing injuUif you or a child stand, sit or lean on an open door.
Please refbr m the Anti-Tip device information in this manual. Failure m take this precaution
could result in tipping of the range and injuU.
IMPORTANTSAFETYNOtiCE
The California Safe Drinking Water and Toxic Enforcement Act requires the Governor of California to
publish a list of substances known to the state to cause birth defects or other reproductive harm, and
requires businesses to warn customers of potential exposure to such substances.
Gas appliances can cause minor exposure to four of these substances, namely benzene, carbon
monoxide, formaldehyde and soot, caused primarily by the incomplete combustion of natural gas or
LP fuels. Properly adjusted burners, indicated by a bluish rather than a ye#ow flame, will minimize
incomplete combustion. Exposure to these substances can be minimized by venting with an open
window or using a ventilation fan or hood.
Fluorescent light bulbs and safety valves on standing pilot ranges contain mercury. If your model has
these features, they must be recycled according to local, state and federal codes.
SAFETYPRECAUtiONS
Have the installer show you the location of the range gas shut-off valve and how to shut it off if
necessary.
Have _xmr range installed and properly
gTounded by a qualified installer, in
accor, lance with the Installation Instnlctions.
Any adjusmmnt mid se_ice should be
pe_tbrmed only by qualified gas range
installers or service technicians.
Do not attempt to repair or replace any part
of your range unless it is specifically
recommended in this manual. All other
serxice should be referTed m a qualified
technician.
Ph|g your range into a 120-volt gTounded
outlet only. Do not remove fire r_)t|nd
gTounding prong from the plug. If in (Mubt
about the gTounding of the home electrical
system, it is your personal responsibility and
obligation to have an ung_mnded outlet
replaced with a pr_)perly g_mnded, three-
prong outlet in accordance with the National
Electrical Code. Do not use an extension
co_,l with this appliance.
4

SAFETYPRECAUTIONS
I,ocate the range out of kitchen traffic path
and out of (Daffy locations to prevent pilot
outage (on standing pilot models) and poor
air circulation.
Be sure all packaging materials are removed
fi_ml the range 1)effete operating it to prevent
tire or smoke damage should the packaging
material ignite.
Be sure your range is correctly a(!justed by a
qualified sere'ice tedmician or installer f{_r
the t}_)e of gas (natural or I2) that is u_ be
used. Your range can be converted f{_ruse
with either t}_oeof gas. See the Installation of
the range section.
WARNING: These a(!justments nmst be
made by a qualified sere'ice technician in
accoi,lance with the manufacturer's
instructions and all codes and requirelnents
of the authority having jurisdiction. Failure to
fk_llow these instructions could result in
serious in jur?_or property damage. The
qualified agency pe_tk_rming this work
assumes responsibility fk_rthe conversion.
After prolonged use of a range, high floor
temperatures may result and many floor
coverings will not withstand this kind of use.
Never install the range over vinyl tile or
linoleum that cannot withstand such b_e of
use. Never install it directly over interior
kitchen carpeting.
Do not leave children alone or unattended
where a range is hot or in operation. They
could be seriously burned.
Do not allow anyone to climb, stand or hang
on the oven door, storage drmver, warming
drms_r or cooktop. They could damage the
range and even tip it over, causing severe
personal in jur?_.
CAUTION: Items ofinterest to children
should not be stored in cabinets above a
range or on the backsplash of a range-
children climbing on the range m reach
items could be seriously injured.
For 3_mr safety, never use your appliance
f(_r warming or heating the room.
Never wear loose fitting or hanging garments
while using the appliance. Be carefid when
reaching f{_ritems stored in cabinets over the
range. Flammable material could be ignited
ifbrought in contact with flame or hot oven
smtaces and may cause severe burns.
Do not store flammable materials in an oven,
a range storage drawer, a warming drawer or
near a cooktop.
Do not store or use combustible materials,
gasoline or other flammable vapors and
liquids in the vicinity of this or any other
appliance.
Do not let cooking g_ease or other
flammable materials accumulate in or near
the range.
Do not use water on gTease tires. Never pick
up a flaming pan. Turn the controls off.
Smother a flaming pan on a su_hce burner
by covering the pan completely with a well-
fitting lid, cookie sheet or flat uay. Use a
multi-purpose dry_chemical or f0am-t}i)e fire
extingafisher.
Flaming g_ease outside a pan can be put out
by covering it with baking soda or, it
available, by using a multi-purpose (h) _
chemical or fkmm-type fire extingadsher.
Flame in the oven or wanning drawer can be
smothered completely by dosing the oven
door or (kawer and turning the conrail to ofl
or by using a multi-purpose d Uchemical or
f{mm-type fire extingafisher.
Let the burner gTates and other surfaces cool
bef()re touching them or leaving them where
children can reach them.
Never block the vents (air openings) of the
range. They provide the air inlet and outlet
that are necessa Ufi_r the range to operate
pmpeliy with correct combustion. Air
openings are located at the rear of the
cooktop, at the top and bottom ofthe oven
door, and at the bottom of the range under
the wmming drawer, storage drawer or kick
panel.
IMPORTANTSAFETYINFORMATION.
READALLINSTRUCTIONSBEFOREUSING.
AWARNING!
SURFACEBURNERS
Use proper pan size--avoid pans that are unstable or easily tipped. Select cookware having flat bottoms
large enough to cover burner grates. To avoid spillovers, make sure cookware is large enough to contain
the food properly. This will both save cleaning time and prevent hazardous accumulations of food, since
heavy spattering or spillovers left on range can ignite. Usepans with handles that can be easily grasped
and remain cooL
Always use tire LITE position (on electric
ignition models) or dre HI position (on
standing pilot models) when igniting the top
burners and rnal<e sure file burners have ignited.
Never leave tile smtace burners unattended
at higil flame settin D. lk)ilove_s cause smoking
and g_,easy spillovers that m W catch on fire.
A(!just tile mp burner flame size so it (bes
not extend be>rod tile edge of the cookwar,e.
Excessive flame is hazardous.
Use only d_T pot hoMers- moist or damp pot
holders on hot surfaces mW r,esult in burns
fi_)m steam. Do not let pot hoMers come
near open flames when lifting cookwar,e. Do
not use a towel or other bulky dotb in place
of a pot holder.
_qmn using glass cookware, make sure it
is designed for top-ot:range cooking.
To minimize the possibility ofburns, ignition
of flammable materials and spillage, turn
cookwar,e bandies mwa_d tile side or back
of the range without extending over a(!jacent
burners.
Carefully watdl foods being flied at a high
flame setting.
Always heat fat slowly, and watch as it heats.
Do not leave any items on tile cooktop. Tile
hot air fi_)nl tile vent may ignite flammable
items and will increase pr,essur,e in closed
containers, which may cause them to burst.
Ifa combination of oils or fats will be used in
flying, stir uNether befbr,e heating or as fats
melt slowly.
Use a deep fat themlometer whenever
possible u_ prevent overheating fat beyond
tile smoking point.
Use tile least possible amount offat for
efIective shallow or deep4at flying. Filling the
pan mo full offat can cause spillovers when
fbod is added.
V_qmn flaming fbods are under tile hood,
mrn the fan ottL The fan, ifoperating, may
spr,ead the flames.
Do not use a wok on dm cooking smtace if
tile wok has a round metal ring that is placed
over tile burner grate to support tile wok. This
ring acts as a heat trap, which m W damage
tile burner gTate and burner bead. Also, it
m W cause tile burner m wofl<improperly.
This may cause a carl)on monoxkle level
above that allowed by current standards,
resulting in a health hazard.
Foods fbr fiTing should be as d Uas possible.
Frost on fi_zen R_ods or moismr,e on fresh
foods can cause hot fat m bubble up and
over tile sides of tile pan.
Never uy m move a pan of hot fat, especially
a deep fat flyer. Wait until tile fat is cool.
Do not leave plastic items on the cooktop-
they mW meh if left too dose to the vent.
Keep all plastics away from tile smtace
burners.
To avoid the possibility of a burn, aMays be
certain fllat tile controls R_rall burners are
at the OFFposition and all grams are cool
befbr,e attempting m remove them.
ifrange islocated near a window, do not
hang long curtains that couM blow over tile
smtace burners mid create a fire hazard.
If>)u smell gas, turn off tile gas to tile rang,e
and call a qualified service teclmician. Never
use an open flame to locate a leak.
Alx_%vsmrn tile surface burner conmfls off
l)efk_r,eremoving cool<ware.
WARNING!
GLASSCOOKTOPSURFACE(onsomemode/s
Use care when touching the glass cooktop surface. The glass surface of the cooktop will retain heat after
the controls have been turned off.
Avoid scratdling tile glass cooktop smiace.
The glass smihce can be scratched with items
such as sharp instruments, rings or other
jewelry and rivets on dothing.
Do not operate dm cooktop if tim glass is
broken. Spillovers or cleaning solution may
penetrate a broken cooktop and create a risk
of electrical shock. Contact a qualified
teclmician immediately should your glass
cooku)p smiace become broken.
Never use file glass cooktop smth(:e as a
oating board.
Do not place or store items that can melt or
catch fire on tim glass cookmp smiace, even
when it is not being used.
Be carefld when placing spoons or other
sdrTing utensils on glass cooku)p smlace
when it is in use. They may become hot and
could cause burns.
(;lean tim cooktop smiace with caution. If a
wet sponge or cloth is used to wipe spills on a
hot smthce, be careful to avoid steam bums.
Some deaners can produce noxious fumes if
applied u) a hot snrlace.
NOTE: We recommend that mu avoid wiping
any smihce areas until they l_ave cooled and
the indicator light has gone ore Sugar spills
are the exception m this. Please see CIoaning
the glass cooktop surface section.
V_qmn tim cooktop smlace is cool, use only
the recommended cleaning cream m dean
the cookmp.
To avoid possible damage to tim cooking
smiace, do not apply cleaning cream to the
glass smlace when it is hot.
After cleaning, use a (h T clofll or paper tox_l
to remove all deaning (:r_am residue.
Read and follow all instructions and warnings
on the cleaning cream labels.
ELECTRICWARMINGDRAWER
The purpose of tim warming drawer
is to hold hot cooked fbods at sers'ing
temperature. Always start with hot food;
cold tood cannot be heated or cooked in
tim warming drawer.
Do not use the warming drm_r to dr T
newspapers. If overheated, they can cau:h
on fire.
Do not leave paper products, cooking
umnsils or food in the warming drawer
when not in use.
Never leave jars or cans of fat drippings in
or near your warming drawer.
Alx_ys keep x_x_oden and plastic utensils and
canned f_od a safe distance away from your
wamfing drinker.
Do not warm food in the warming drawer
for more than two hours.
Do not touch the heating element or the
interior surface of the warming drawer.
These surfaces may be hot enough to
burn.
REMEMBER: The inside surtace of tim
warming drawer may be hot when the
drawer is opened.
Use care when opening tim drawer. ()pen
tim drawer a crack and let hot air or steam
escape before removing or replacing f?)od.
Hot air or steam which escapes can cause
burns to hands, face and/or eyes.
Do not use aluminum f()il to line tim
drawer. Foil is an excellent heat insulator
and will trap heat beneath it. This will upset
the pe_t?)rmance of the drawer and it could
damage the interior finish.
IMPORTANTSAFETYINFORMATIONo
READA£LINSTRUCTIONSBEFOREUSING.
COOKMEATANDPOULTRYTHOROUGHLY...
Cookmeat andpoultry thoroughly--meat to at least an INTERNALtemperatureof 160°Eandpoultry to at least an
INTERNALtemperatureof 180°ECookingto these temperaturesusuallyprotects againstfoodbomeillness.
OVEN
Stand away from the range when opening the door of a hot oven. The hot air and steam that escape can
cause burns to hands, face and eyes.
Do not use tire oven for a storage area. Items
stored in dre oven can ignite.
Keep tire oven flee tiom g_ease buildup.
Place tire oven shelves in the desired position
while tire oven is cool.
Pulling out tire shelf to the stop-lock is a
convenience in lifting hem T foods. It is also
a precaution against bums tiom touching
hot su_taces of tire door or oven walls. Tire
lowest position "R" is not designed to slide.
Do not heat unopened food containers.
Pressure could build up and the container
could burst, causing an i_!juU.
Never use aluminum foil to line tire oven
N)ttom. Improper use of ff)il could start a fire.
Do not use aluminum R)il anDvhere in tire
oven except as described in this manual.
Misuse could result in a fire haza_xl or
damage m the range.
_qren using cooking or roasting bags in dre
oven, follow the manufacturer's directions.
Do not use your oven to d Unewspapers.
Ifoverheated, they can catch fire.
Use only glass cookware that is
recommended for use in gas ovens.
_Always remove tire broiler pan fiom range as
soon as xxm finish broiling. Grease lef* in the
pan can catch fire ifoven is used without
removing the g_ease from the broiler pan.
V_qmnbroiling, if meat is too close to tire
flame, the fat mW ignite. Trim excess fat to
prevent excessive flare-ups.
Make sure tire broiler pan is in place cor_ecdy
m redu(:e tire possibility of g_ease fires.
Ifgin should have a gTease fire in tire broiler
pan, press the CLEAR/OFFpad,and keep
the oven door closed to contain fire until
it burns out.
SELF-CLEANINGOVEN
Be sure to wipe up excess spillage befbre
selt:cleaning operation.
lk_fbre selfZcleaning the oven, remove
the shelves, broiler pan, g_id and
other cookware.
Do not clean the door gasket. Tire door
g_asketisessential R_ra good seal. Care
should be taken not m rub, damage or
move fire gasket.
Cleml only pans listed in dlis Oxmer's Manual.
If dm sell:cleaning mode malfunctions, turn
the oven off and disconnect the power supply.
Have it sets'iced by a qualified technician.
Do not use oven cleaners. No commercial
oven cleaner or oven liner of any kind should
be used in or around any part of the oven.
Residue fi_m oven cleaners will damage
the inside of the oven when the sell:clean
Qvle is used.
Readandfollow this SafetyInformationcarefullF
SAVETHESEINSTRUCTIONS
8
Usingthegassurfaceburners.
Throughout this manual, features and appearance may vary from your model
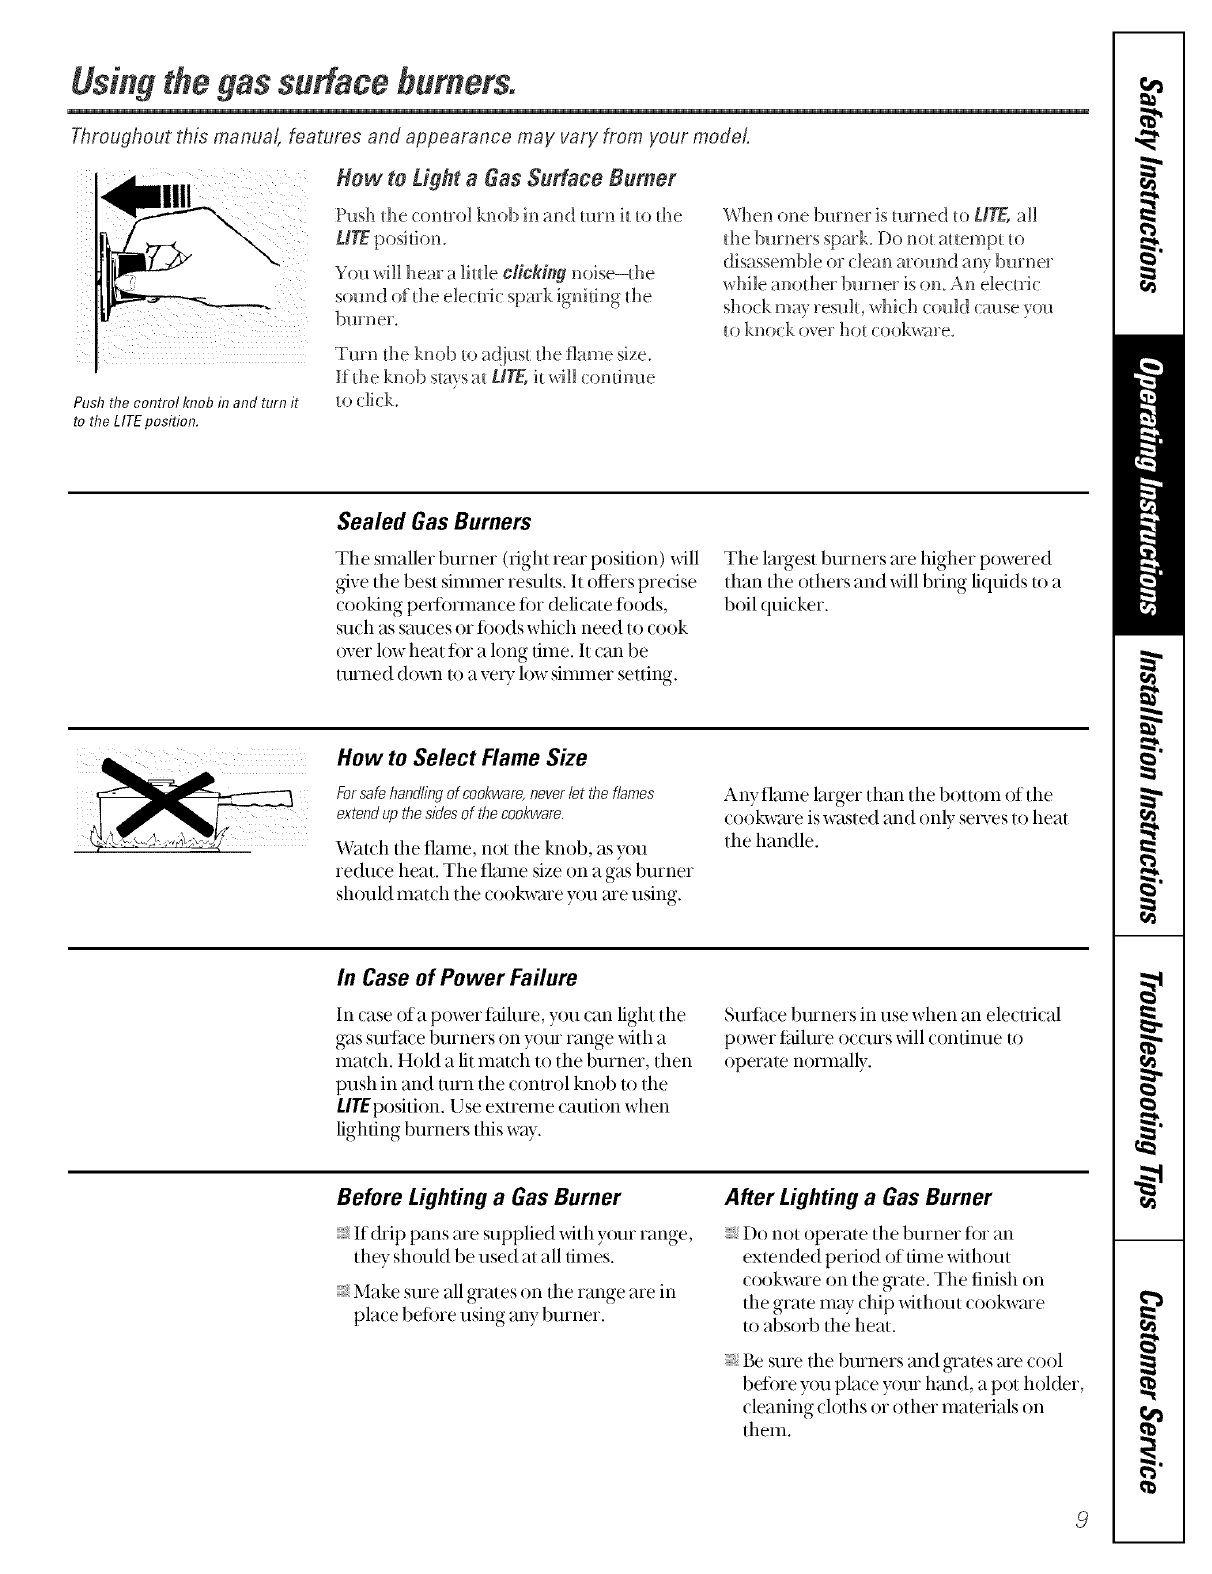
Push the control knob in and turn it
to the LITEposition.
How to Light aGas Surface Burner
Push [he ( ormo] knob in and turn it to the
UTEposidon.
You will heara little clickflgl noise--die
sound of the electric spark igniting the
burner.
Turf1 tile knob t(1adjust tile flame size.
If die knob sm) s at UTE, h _dl] (:omirme
t(1 (:lick.
When one burner is turned to LITE all
the bm hers spmk. 1-)onot attempt to
disassemble o1 (lear_ around ar_yburner
while anodler bmner is (m Ar_ ele( _ri(
shock may result, which could cm_seyou
to knock over hot cookwme.
Sealed Gas Burners
The smaller burner (right rear position) will
We the best simmer resuhs, It offers predse
cooking pefibrmance fi/r delicate fitods,
such as statues or fi)ods which need to cook
over low heat fi)r a long time. It can be
turned (ht_/o a vet) htw simmer setting.
The largest burners are higher powered
than the others and will bring liquids to a
boil quicker.
How to Select Name Size
Forsafe handling of cookware,never let the flames
extend up the sides of the cookware.
Watch the flame, not the knob, as you
reduce heat. The tlmne size on a gas burner
should match the cookware you are using.
Anyflame larger than tile bottom of the
( ookwate is wasted and only serves to heat
the handle.
In Case of Power Failure
In case of a power tailure, you can light the
gas suflace burners on your range with a
mauh. Hold a lit match to the burner, then
push in and turn tile conuol knob tl1the
LITEposition. Use extreme caution when
lighting burners this way.
Surface burners in use when an electri(al
power f:,filure occurs _dll continue to
operate normally.
Before Lighting a Gas Burner
:_If drip pans are supplied with yt_urrange,
they should be used at all dines.
;_Make sure all grates on the range are in
place betore using any burner.
After Lighting a Gas Burner
:_ Do not operate the burner fi)r an
extended period of time without
cookwme on the grate. The finish on
tile grate may chip without cookwme
to absorb the heat.
Be sure the burners and grates are cool
befi)re you place your hand, a pot holder,
cleaning cloths or other materials on
thetn.
Usingthegassurfacebwnem(cont.),
Top-of-Range Cookware
Aluminum:Medium-weight cookwme is
recommended because it heats quickly
and evenly. Most ioods br()wn exvnly in an
aluminum skillet. Use saucepans with figh/-
fitting lids when cooking with minimum
aIIIOllIltS of water.
Cast-Iron: If heated slowly, most skillets xdll
give satisfhcto_y resuhs.
Enamelware: Under some conditions,
the enamel of some (ookware may meh.
Follow cookware illanufacttliei"s
recommendations ti)r cooking methods.
Glass:There me two Upes of glass
cookwme-those fi)r oven use only and
those tbr top-of range cooking (sm_cepans,
coffee and teapo/s). (;lass con&_cts heat
veUslowly.
HeatproofGlassCeramic:Can be used fi)r
dther suflilce or oven cooking. It conducts
heat veUslowly and cools xv U slowly. Check
cookwme manufitcmrer's directions to be
sure it can be used on gas ranges.
StainlessSteer This metal alone has poor
heating properties and is usually combined
with copper, ahHninum or other metals fi)r
impr()ved heat disuibufion. ( ombinafion
me/al skillets usually work safislimtorily if
they are used _dth me(fium heat as the
manuthcmrer recommends.
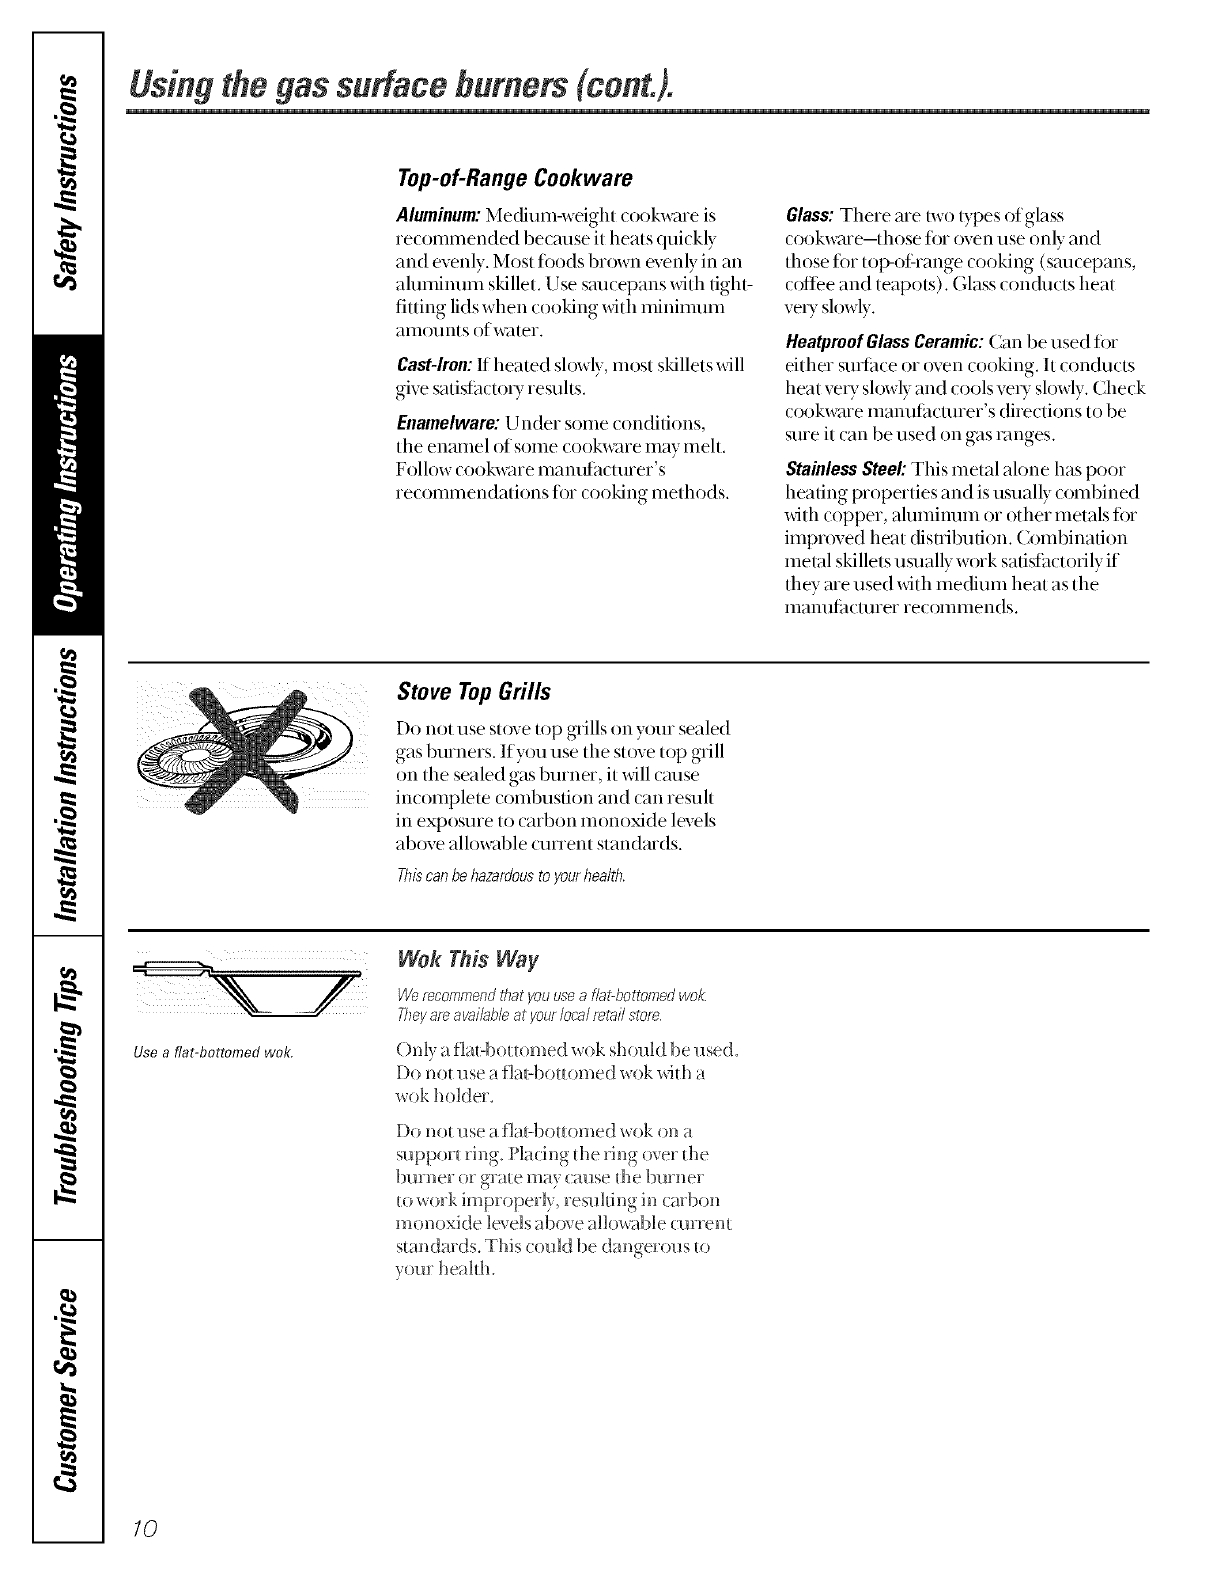
Stove Top Grills
Do not use stove lop grills on y()m sealed
gas burners. If you use the st()ve top grill
on the sealed gas burner, it will cm_se
incomplete combustion and can resuh
in exposure to carbon monoxide levels
above allowable olnent standmds.
Thiscan be hazardous to yourhealth.
Use a fiat-bottomed wok.
Wok This Way
We recommendfilat Vouuse a fiat-bottomed wok.
Theyareavailahleatyourlocalretailstore.
()n]y afla_-bo_omed wok should be used
1-)ono_ use a fla_>bot_omed wok wi_]_ a
wok holdeL
Do no{ 11se a _]a{-boHome(] wok on a
suppov{ _Ting.P]a( ins d_e ring over d_e
b!llTneY017g-_a_emay (ause d_e blll'neF
to work impvope;ly, ;esuidng in carbon
monoxide levels above allowable cu;rem
s_andmds.This (ould be dange;ous _o
yore heahh.
10
Usingthe electric glass top warmingzone (onsomemodels).
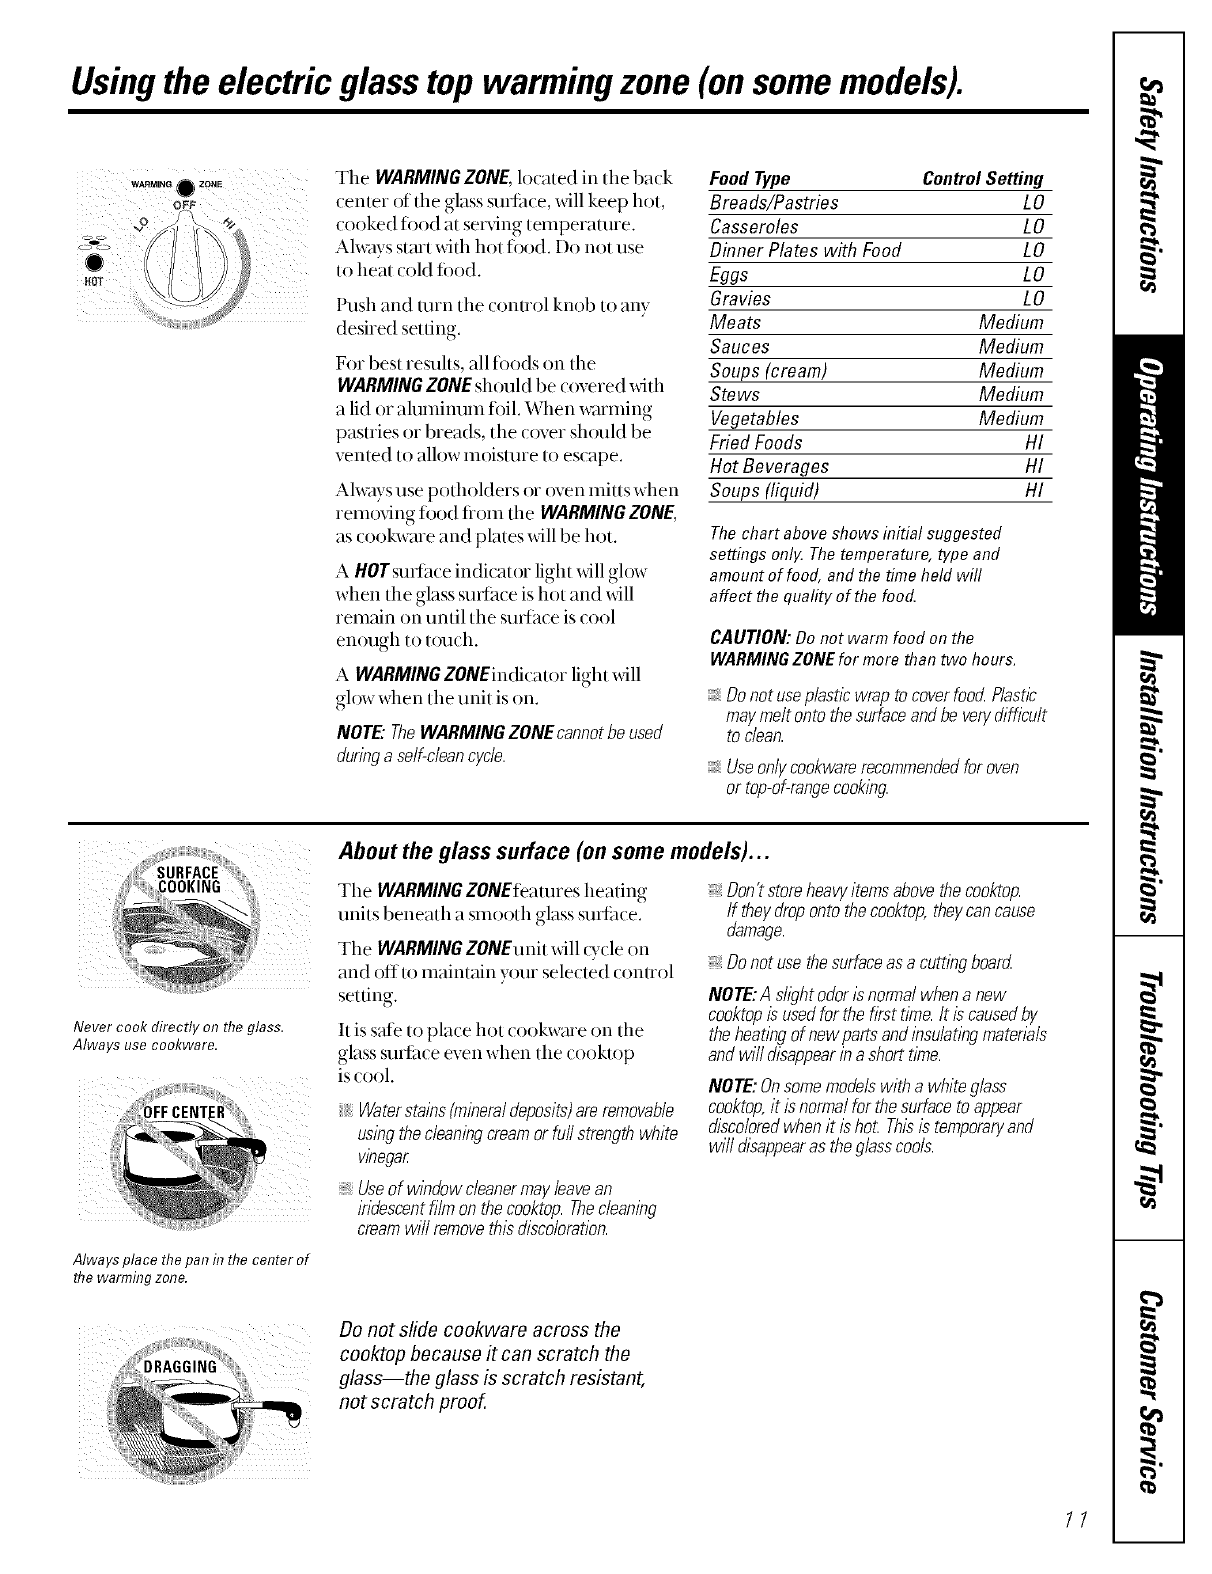
The WARMINGZONE,located in tile back
center of the glass surlitce, xdll keep hot,
cooked fi)od at serving temperature.
Ahvays stmt _itll hot fi)od. Do not use
to heat cold fi)od.
Push and turn tile control knob to any
desired setting.
For best resuhs, all fi)ods on tile
WARMINGZONEshould be covered with
a lid or ahmfinum ti)il. When warming
pastries or breads, the c{)vershould be
vented to allow moisture to escape.
Ahvays use pofllolders or oven mitts when
removing food tiom the WARMINGZONE,
as cookware and plates will be hot.
AHOTsufface indicator light will glow
when the glass sufihce is hot and will
remain on until tile surlhce is cool
enough to touch.
AWARMINGZONEin(ficatorlight will
glow when the unit is on.
NOTE: TheWARMING ZONE cannotbe used
duringa self-cleancycle.
Food Type Control Setting
Breads/Pastries L0
Casseroles LO
Dinner Plates with Food LO
Eggs LO
Gravies LO
Meats Medium
Sauces Medium
Soups (cream) Medium
Stews Medium
Vegetables Medium
Fried Foods HI
Hot Beverages HI
Soups (liquid) HI
The chart above shows initial suggested
settings only The temperature, type and
amount of food, and the time held will
affect the quality of the food.
CAUTION: Do not warm food on the
WARMINGZONE for more than two hours.
Donot useplastle wrap to cover food Plastic
may melt onto thesurface and be verydifficult
to clean.
Useon/}/cookwarerecommendedfor oven
ortop-of-rangecooking.
Never cook directly on the glass.
Always use cookware.
Always place the pan in the center of
flTewarming zone.
1
About the glass surface (on some models)...
Tile WARMINGZONEfeatures heating
units beneath a smooth glass surlilce.
The WARMINGZONEunit will Q,cle on
and off to maintain your selected control
setting.
It is s_d_'to place hot cookw_ue on the
glass SUltilce even wllen tile cooktop
is cool.
Waterstains(mineraldeposits)areremovable
usingthecleaningcreamor fu//strengthwhite
wnegar
,Useof windowcleanermayleavean
Yidescentfilmonthecooktop.Thecleaning
creamwill removethisdiscoloration.
Don'tstoreheavyitemsabovethecooktop.
If theydropontothecooktop,theycancause
damage.
Donot use thesurfaceas a cutting board
NOTE:A shghtodorIsnormalwhena new
cooktopis usedfor thefirst time.It iscausedby
theheatingof newpartsandinsulatingmaterbls
andwill disappearina shorttime.
NOTE:Onsomemodelswithawhiteglass
cooktop,it is normalfor thesurfacetoappear
discoloredwhenit is hoLThisis temporaryand
will disappearas theglasscools.
Do not slide cookwara across the
cooktop because it can scratch the
glass--the glass is scratch resistant,
not scratch proof.
11
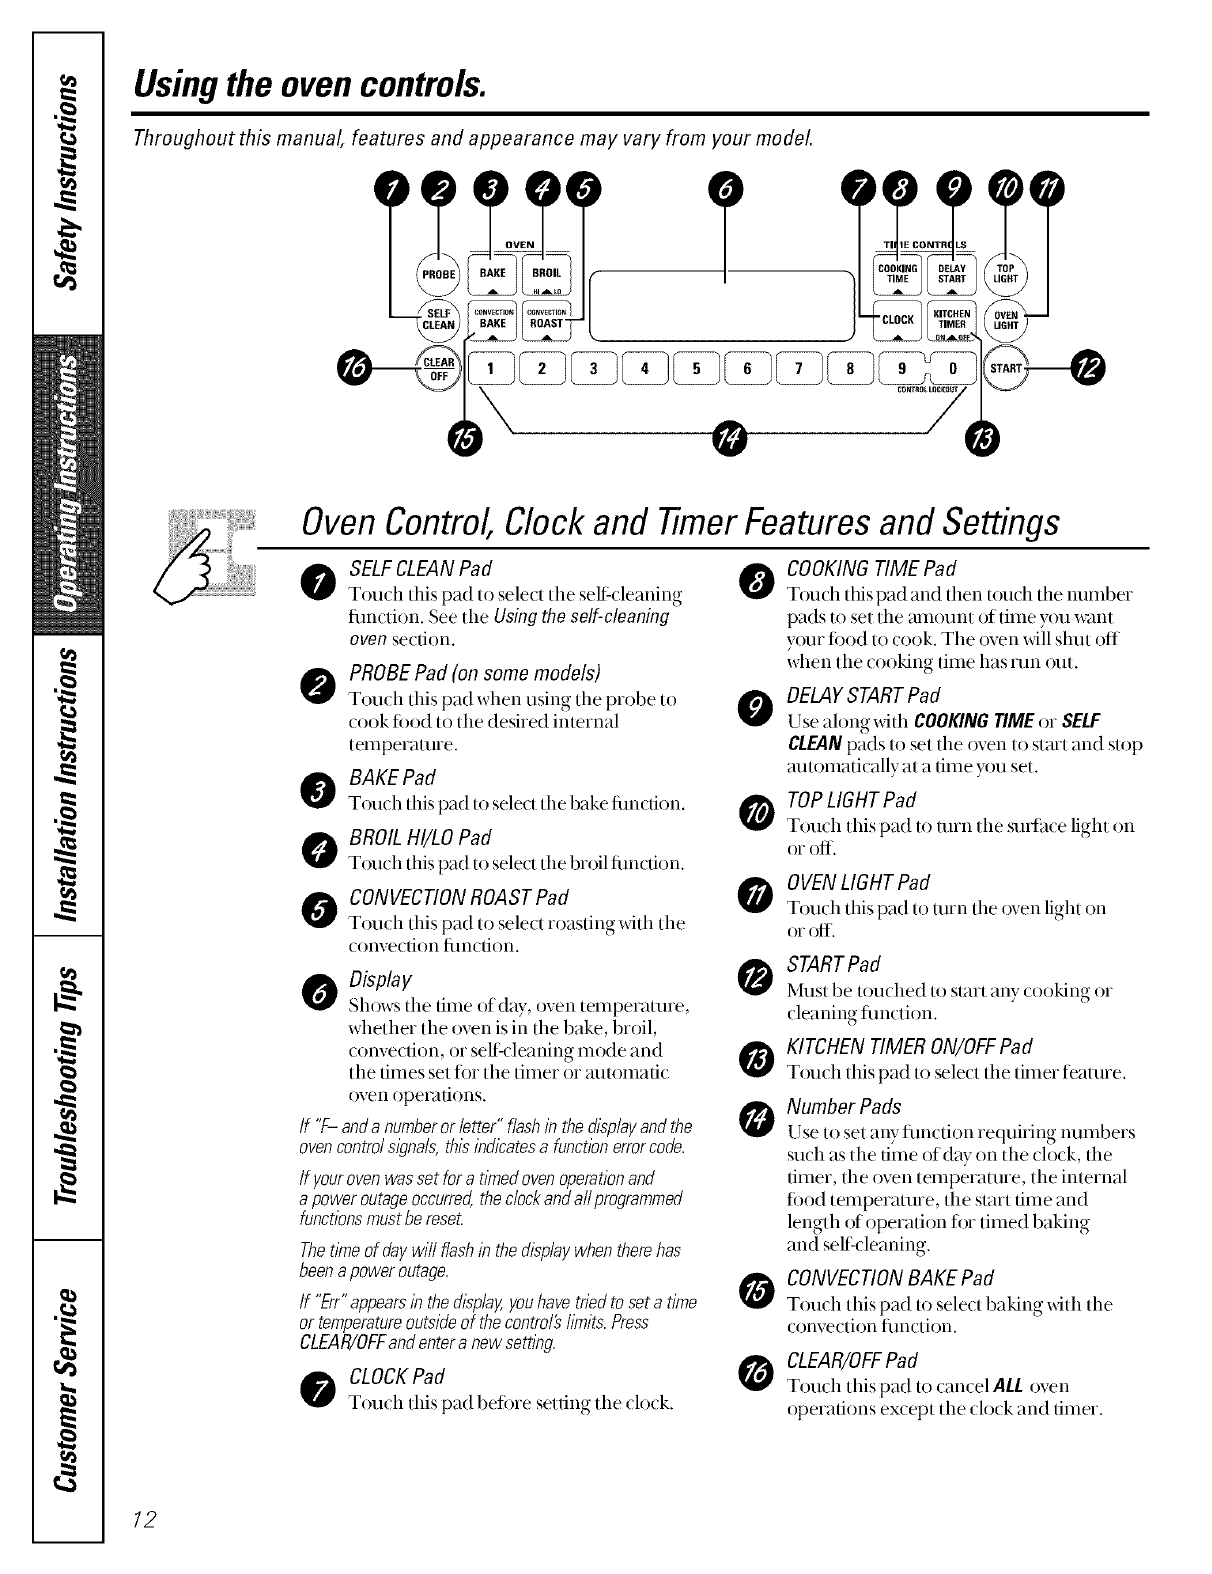
Usingthe oven controls.
Throughout this manual, features and appearance may vary from your model
o
Oven Control, Clock and TimerFeatures and Settings
0SELF CLEANPad
Touch tllis pad to select the self-cleaning
hmction. Seetile Usingthe self-cleaning
oven section.
PROBE Pad (on some models)
Touch this pad when using the probe to
cook food to the desired internal
temperature.
OBAKEPad
Tou(h this pad to sele(t tile bake fim(tion.
OBROIL HI/LO Pad
Tou(h tiffs pad to sele(t tile broil fim(tion.
OCONVECTIONROASTPad
Tou(h tiffs pad to sele(t roasting with tile
convection fimction.
oisplay
Showsthe lime ofday, oven temperature,
whether the oven is in the bake, broil,
convecdon, or self cleaning mode and
the dines set fin the timer or mnomafic
)yen ope_vnions.
If "f- anda numberorletter"flashin thedisplayandthe
ovencontrolsigna& thisindicatesa functionerrorcode.
If yourovenwassetfora tYnedovenoperationand
apoweroutageoccurred,thedockandaftprogrammed
functionsmustbereseL
ThetYneof daywill flash in the display when there has
beena power outage.
If "Err"appears in the &splay, you have tried to set a time
or temperatureoutside of the control's bruits.Press
CLEAR/OFFand entera new setting.
oCLOCKPad
Tou(h this pad before setting tile (lo( k.
OOOKING TIME Pad
Tou(h this pad and then touch the number
pads u) set the alllount of time y_)uw:mt
your tood to cook. The oven will shut off
when the cooking time has mn out.
OELAYSTARTPad
Use along wifll COOKINGTIMEor SELF
CLEANpads u) set tile oven to start and slop
automatically at a time you set.
TOP LIGHT Pad
Touch this pad to turn tile stnfa( e light on
or off.
OVEN LIGHT Pad
Touch tiffs pad to mrn tile oven light on
or off.
STARTPad
Must be t_nwhed to slm't any cooking or
cleaning fimction.
KITCHEN TIMER ON/OFFPad
T{mch this pad 1oselecttile timer feature.
Number Pads
Use to set any flmction requiting numbers
such as the time of day on the clock, the
timer, tile oven temperature, the internal
ti)od temperature, tile start time and
length of operation for timed baking
and self cleaning.
CONVECTIONBAKE Pad
Touch this pad to select baking with the
convection flmction.
OCLEAR/OFFPad
Touch this pad to cancel ALLoven
operations ex(ept tile (lo(k and timer.
12
Special features ofyour oven control
Yournew touch pad control has additional features that you may choose to use. The following are the features
and how you may activate them.
The special feature modes can only be activated while the display is showing the time of day. They remain
in the control's memory until the steps are repeated.
When the display shows your choice, touch the STARTpad. The special features will remain in memory after
a power failure.
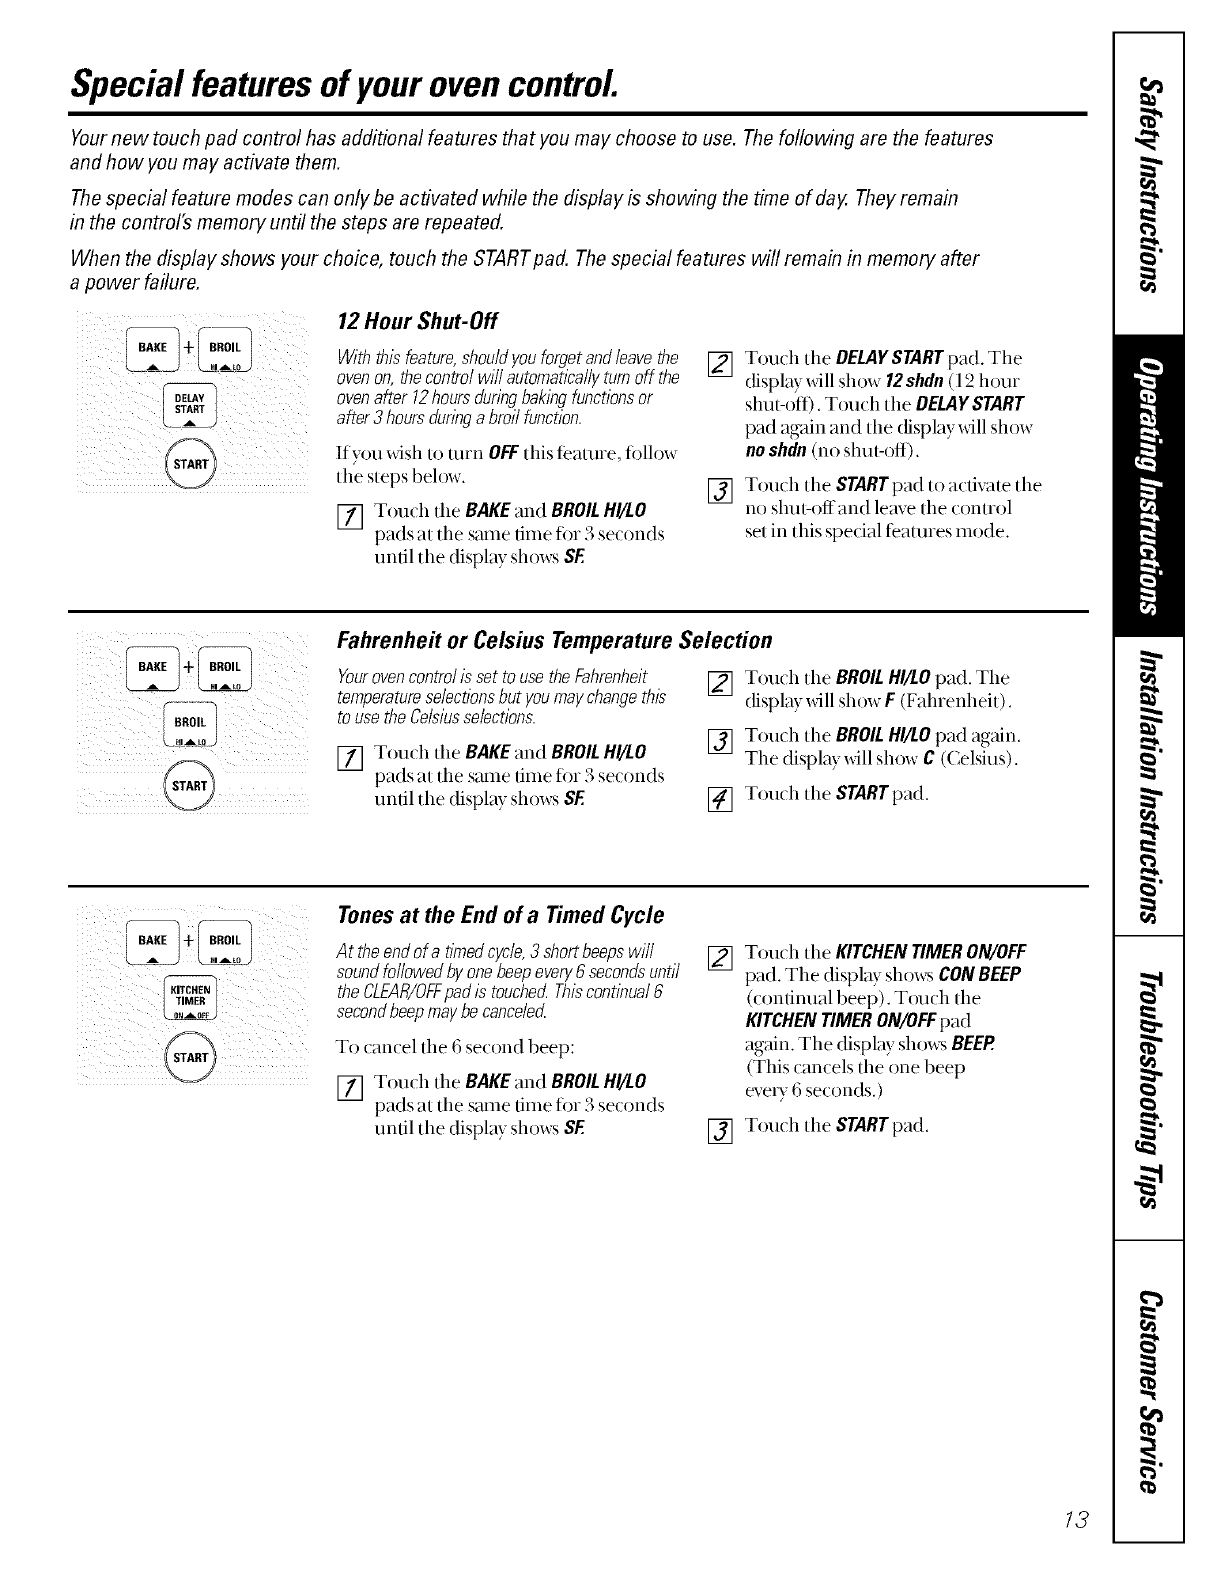
12 Hour Shut-OH
iBAKE _ththisfeature, shouldyouforgetandleavethe []
oven on, thecontrol will automatically turn off the
ovenafter 12hours duringbaklbg functions or
after 3 hours dunbga broil function.
I@ If you wish to turn OFFthis featuie, follow
the steps below.
[] Touch tile BAKE and BROIL H!/LO
pads at the same tilne for 3 seconds
until the display shows SF
[]
Touch the DELAYSTART pad. The
display xdll show 12shdn (12 hour
shut-off). Touch the DELAYSTART
pad again and tile (fisplay xdll show
no shdn (no shut-off).
Touch the START pad to activate tile
no shut-offand leave the control
set in this special i_'atures mode.
Fahrenhe# or Celsius Temperature Selection
Yourovencontrol isset to use the Fahrenheit
temperatureselections but youmay changethis
to use the Celsiusselections.
[] Touch tile BAKE and BROIL H!/LO
pads at the same tilne for 3 seconds
until tile display shows SE
[] Touch tile BROIL HI/LO pad. Tile
display will show F(Fahrenheit).
[] Touch tile BROIL HI/LO pad again.
The display xdll show C((eMus).
[] Touch tile START pad.
i!i/ _ i Tonesat the End of a Timed Cycle
At the end of a tinnedcycle,3 short beeps will
soundfollowed by one beep every 6 secondsuntil
the CLEAR/OFFpad is touched Thiscontinual 6
secondbeep may be canceled
To cancel tile 6 second beep:
[] Tou(h the BAKE and BROIL H!/LO
pads at tile same time tbr 3 se(onds
until tile display shows SF
[] Touch tile KITCHENTIMERON/OFF
pad. The display shows CONBEEP
(continual beep). Touch tile
KITCHENTIMERON/OFFpad
again. The display shows BEEP.
(This cancels the one beep
eveI y 6 seconds.)
[] Touch tile START pad.
13
Special features ofyourovencontrol (cont.).
! i ¸
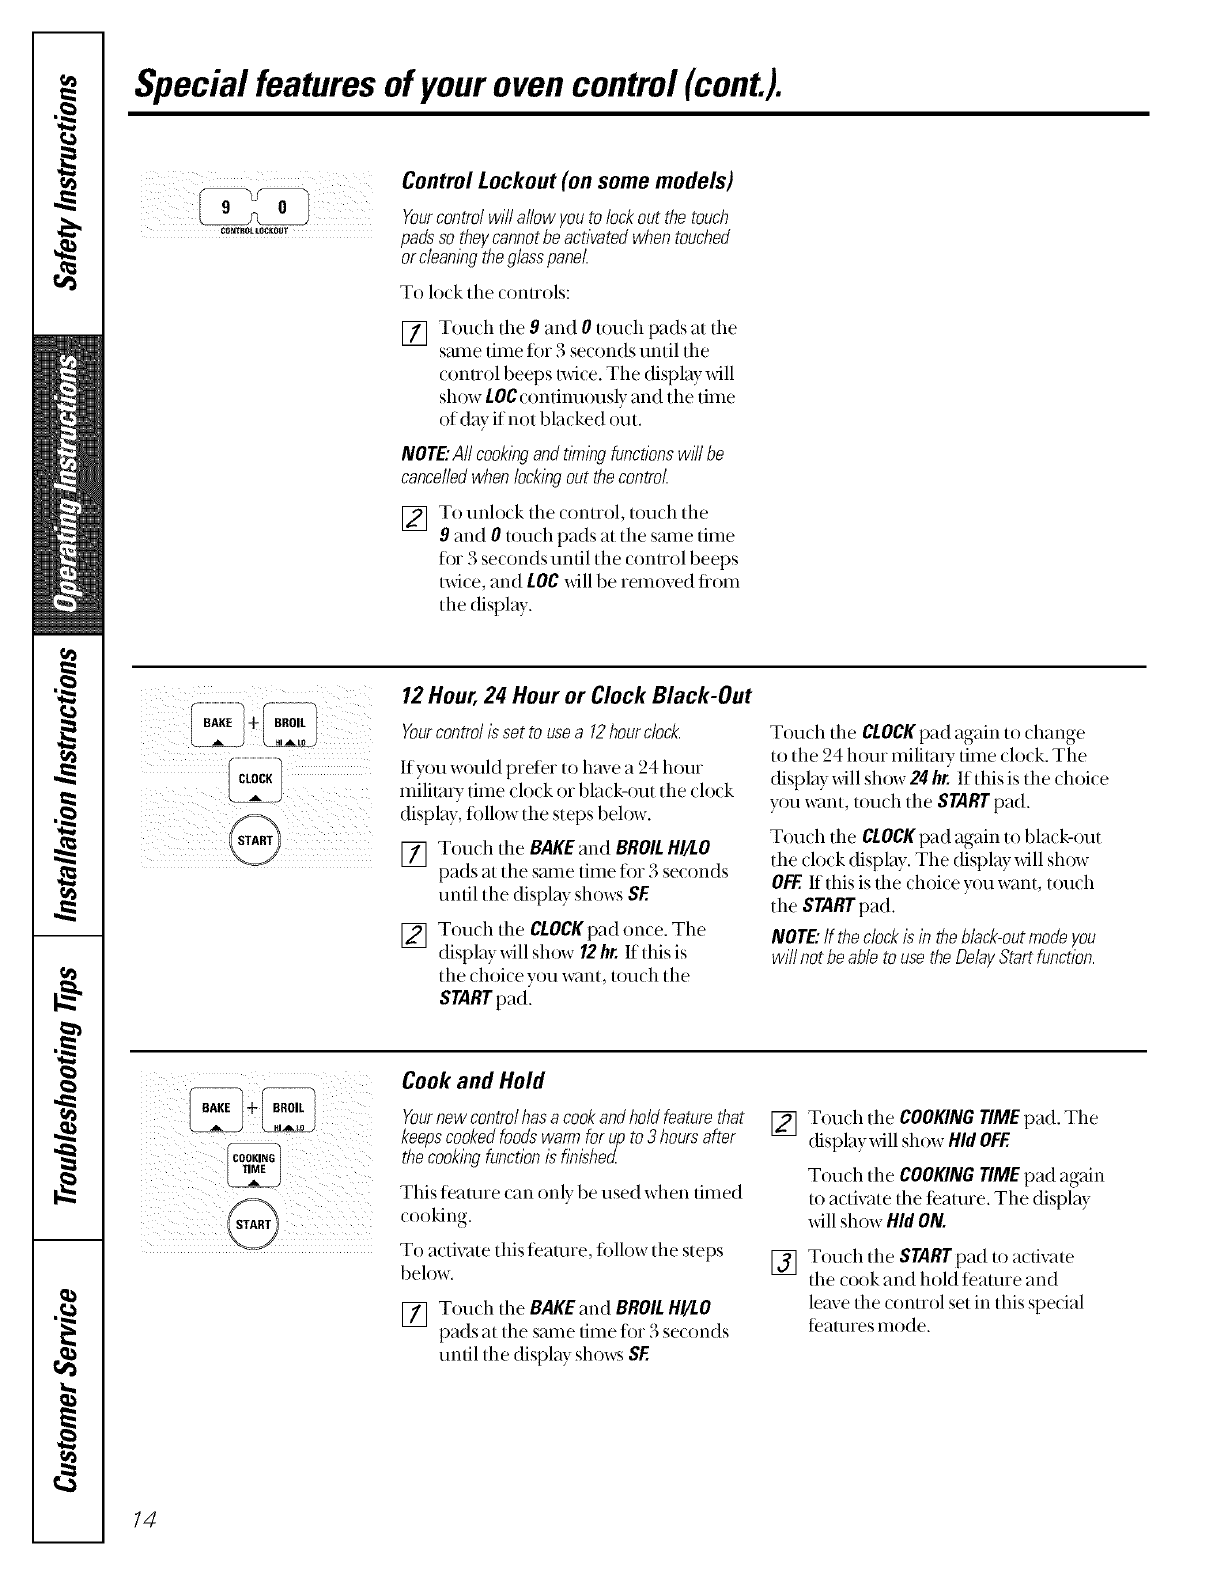
CONTROL LOCKOUT
Control Lockout (on some models)
Yourcontrolwill allowyoutolockout thetouch
padssotheycannotbeactivatedwhentouched
orc/eanlbgtheglasspanel.
To lock tile conuols:
[] Touch tile 9and 0tou(h pads at the
s_une time f(n 3 seconds until the
( (muol beeps txd(e. The display xdll
show LOCcontinuously and the time
of day if not bla( ked out.
NOTE"A//cooklbgandtYningfunctionsw#/be
cancelledwhenlockingoutthecontrol
[] To unlock the control, touch the
9and 0touch pads at the same time
for 3 seconds until the control beeps
twice, and LOCwill be removed tiom
the display.
12Hour, 24 Hour or Clock Black-Out
Yourcontrol/ssetto usea 12hourdock.
Ifyou would preter to have a 24 hour
milita Utime (lo(k or 1)lack-out the (lo(k
display, fi)llow the steps below.
[] Tou(h the BAKEand BROILHI/LO
pads at the same time fi)r 3 se( onds
until the display shows SE
[] Touch tile CLOCKpad once. The
display xdll show 12hr. If this is
the (hoice you want, tou(h tile
STARTpad.
Touch the CLOCKpad again to change
to tile 24 hour militmy time clock. The
display will sh{)w 24 hr. If this is the choice
y_)u w:mt, u)uch the STARTpad.
Touch the CLOCKpad again to black-out
the clock display. The display will sh{)w
OFF.If this is the choice you want, touch
the STARTpad.
NOTE"If theclockisintheblack-outmodeyou
wi// notbeableto usetheDelayStartfunction.
COOKING
TIME
Cook and Hold
Yournewcontrolhasacookandholdfeaturethat
keepscookedfoodswarmfor upto3hoursafter
thecooklbgfunctionis flbished
This feature can only be used when timed
(ooking.
To activate this teature, fi)llow tile steps
below.
[] Touch tile BAKEand BROILHI/LO
pads at the same time for 3 seconds
until tile display shows SE
[] Touch the COOKINGTIME pad. The
display will show HidOFF.
[]
Touch the COOKINGTIME pad again
to activate tile feature. The display
will show Hid ON.
Touch tile STARTpad to activate
tile cook and hold l[eature and
leave the contxol set in this special
t_'atures mode.
14
Notes.
15
Usingthe oven.
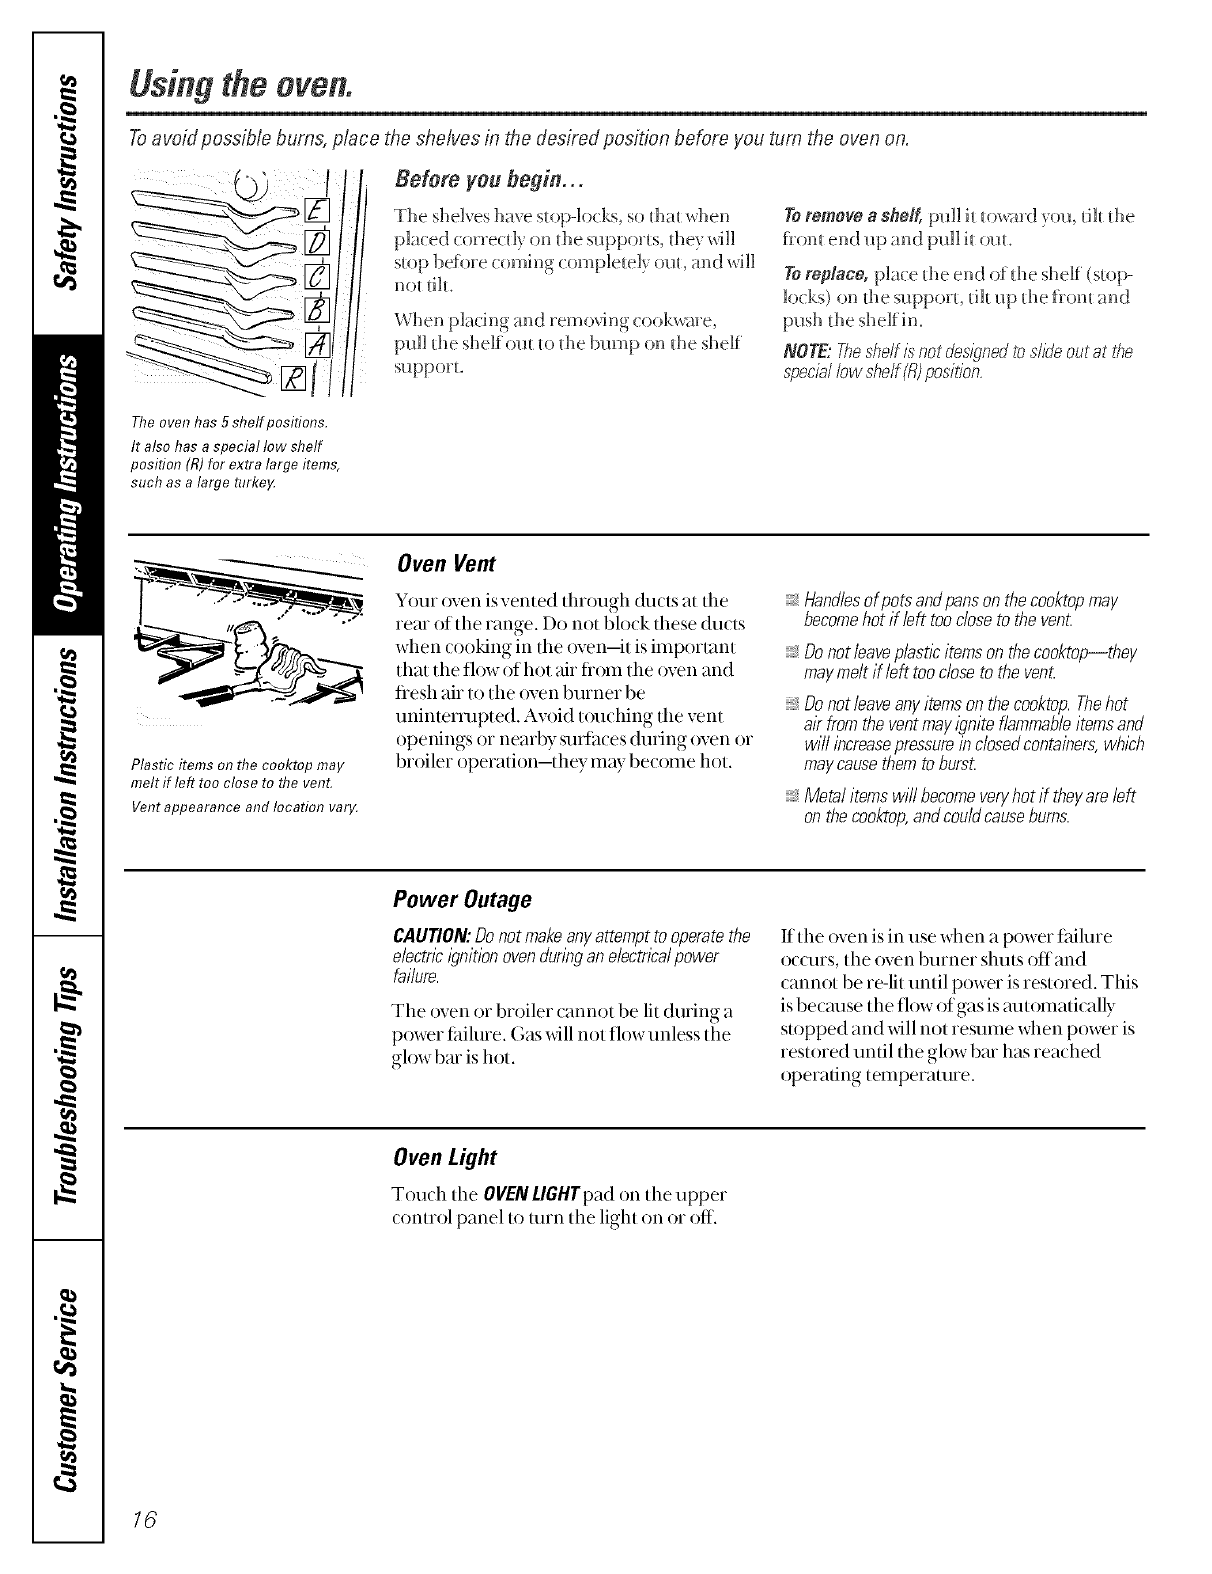
Toavoid possible burns, place the shelves in the desired position before you turn the oven on.
dl
Before yeu begin...
The she]_ es have su)p-]ocks, so dlat _dlen
ply( ed (one(tl)on the supports, they vdll
stop before coming (ompletely out, and will
m)t till.
When placing and remo,Ang (ook_are,
pull the shelf om to tile bmllp on tile shelf
support.
Toremove a shelf, pull it to_ard you tih the
fiom end up and pull it out.
Toreplace, pl _(:edie end of die shelf (su)p-
locks) on die support, tilt up die fiom and
NOTE:Theshelfis notdesl_,nedtosMe outat the
speciallow shelf(ill position.
The oven has 5 shelf positions.
It also has a special low shelf
position (R)for extra large items,
such as a large terke,A
Plastic items on the cooktop may
melt if left too close to the vent.
Vent appearance and location vary.
Oven Vent
Y(_m ()yen is vented through (h_cls at tile
rear of the range. Do not block these ducls
when cooking in the oven-it is important
that the flow of hot air flom the oven and
flesh air to the oven burner be
uninten_upted. Av_)id t()uching the vent
openings or nembv surfaces during oven or
broiler operation-they may become hot.
_,Handlesof potsandpansonthecooktopmay
becomehot if left toocloseto thevenL
:_Donotleavep/astleitemsonthecooktop--they
maymeltif left toodoseto the ven£
:_Donot/eaveanyitemsonthecooktop.Thehot
ak fromtheventmayigniteflammableitemsand
wi//increasepressureindosedcontainers,which
maycausethemto burst.
;;;;;;_,Metalitemswi//becomeveryhot if theyareleft
onthecooktop,andcouldcausebums.
Power Outage
CAUTION:Donotmakeanyattemptto operatethe
e/ectrleignitionovendunbgane/ectrlea/power
failure.
Tile oven or broiler cannot be lit during a
power failure. Gas _fill not flow unless tile
glow l)ar is hot.
If the oven is in use when a power Ltilure
oc(urs, tile oven burner shuts offand
cannot be re-lit until power is restored. This
is becm_se the flow of gas is mm)matically
stopped and will not resume when power is
restored until the glow bin has reached
operating temperature.
Oven Light
Touch the OVENLIGHTpad on the upper
(ontrol panel to turn tile light on or off.
16
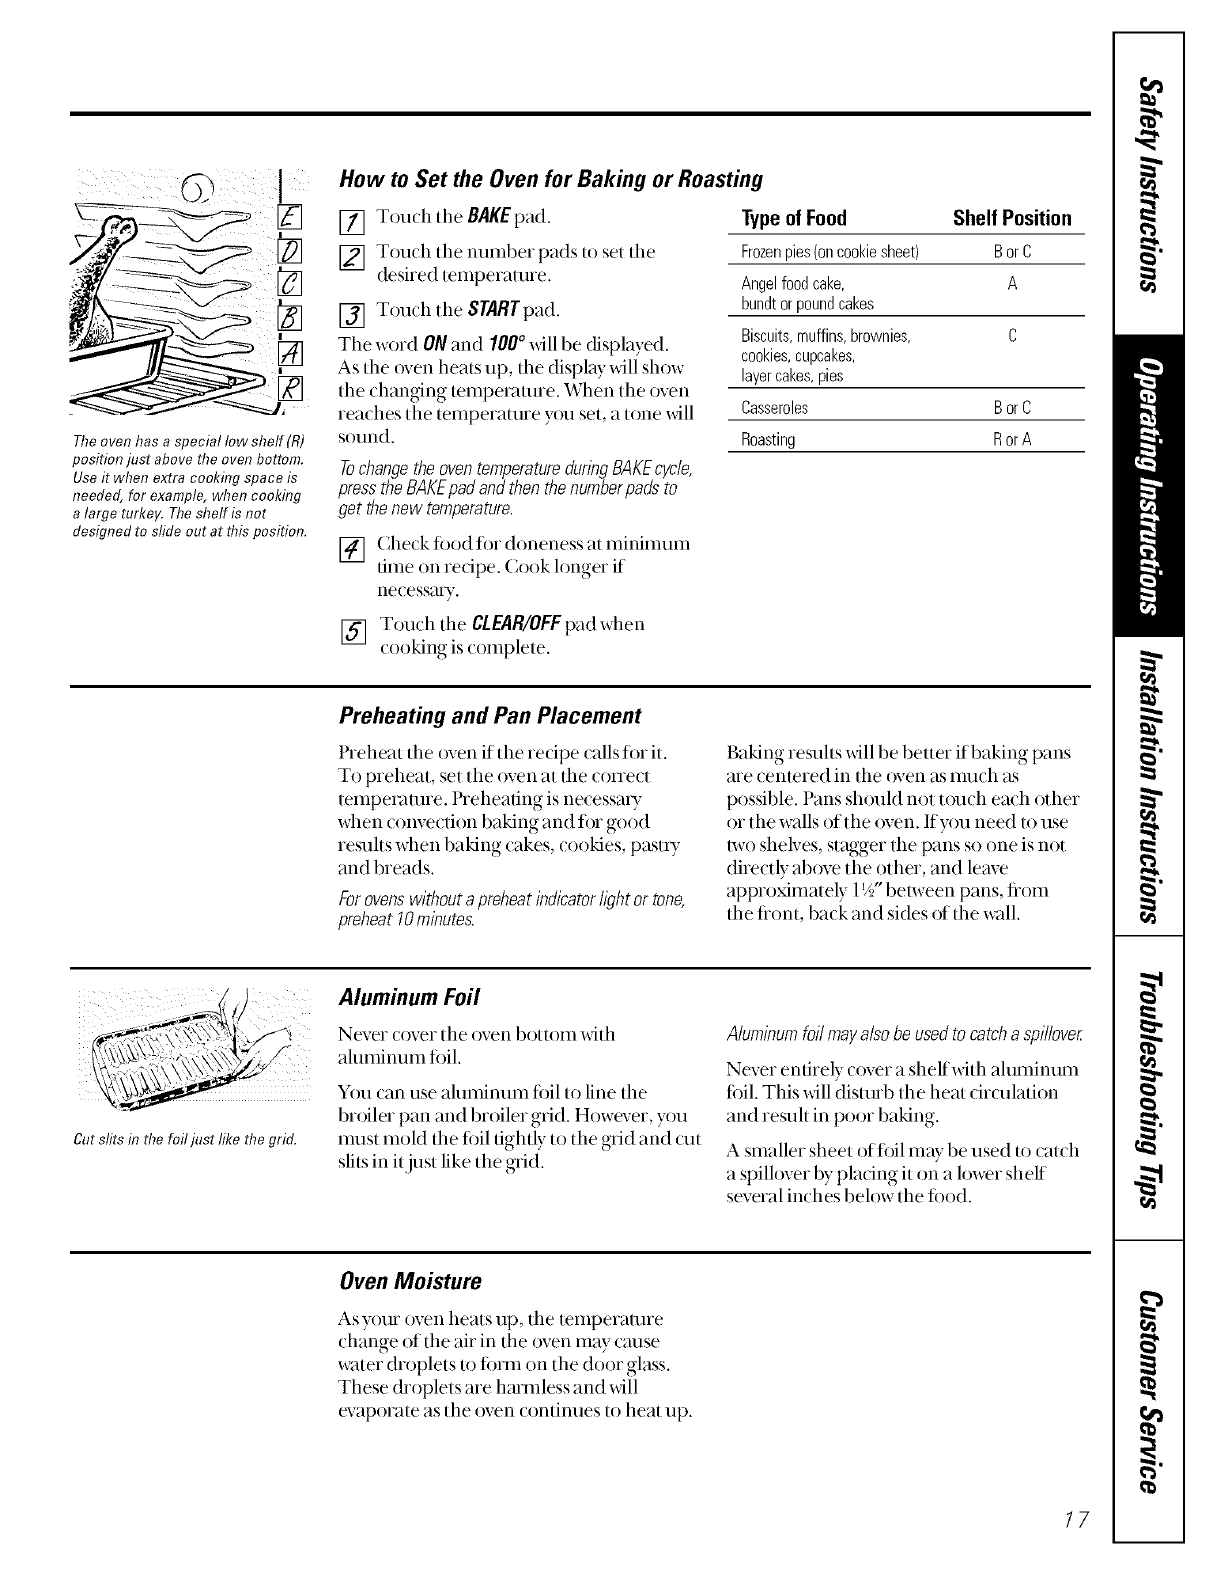
The oven has aspecial low shelf (R)
position just above the oven bottom.
Use it when extra cookhTgspace is
needed, for example, when cooking
a large turkey. Theshelf is not
designed to sfide out at this position.
How to Set the Oven for Baking or Roasting
[] Touch the BAKEpad.
[] Touch tile number pads to set tile
desired temperature.
[] Touch the STARTpad.
The word ON and 100° will be displayed.
As the oven heats up, the display will show
the changing tempex>mne. When the oven
reaches the temperature y{)uset, a tone will
SOtlnd.
Tochangethe oven temperaturedunng BAKEcycle,
press the BAKEpad and then thenumberpads to
get thenew temperature.
Typeof Food Shelf Position
Frozenpies(oncookiesheet) BorC
Angelfoodcake, A
bundtorpoundcakes
Biscuits,muffins,brownies, C
cookies, cupcakes,
layercakes,pies
Casseroles BorC
Roasting RorA
[] (_heck t_od for doneness at minimum
rune on redpe. Cook hmger if
net essal)e
[] Touch the CLEAR/OFFpad when
cooking is con]plete.
Preheating and Pan Placement
Preheat the {)yenif tile recipe calls fi)r it.
To preheat, set the oven at the conect
temperature. Preheating is necessa U
when convection baking and ti)r good
resuhs when baking cakes, cookies, past U
and breads.
Forovenswithoutapreheatindicator/l_?htor tone,
preheat10minutes.
Baking resuhs will be better if baking pans
me centered in the oven as IIlllch as
possible. Pans shouM not t()uch each other
or the walls of the oven. If you need to use
two shelves, stagger the pans so one is not
directly ab()ve the other, and leave
approximately 1V/' belween pans, fiom
the fiont, back and sides r)f the wall.
Cut slits in the foil just like the grid.
Aluminum Foil
Never cover the oven bottom with
ahmfinum ti)il.
You can use ahnninum ti)il to line the
broiler pan and broiler grid. However, you
nmst rooM the ti)il tightly to the grid and cut
slits in itjust like the grid.
Aluminumfoilmayalsobeusedtocatchaspillover
Never entirely cover a shelf with ahnninum
fi)il. This will disturb tile heat circulation
and resuh in poor baking.
A smaller sheet of foil may be used to catch
a spilh)ver by plating it on a h)wer shelf
several in(hes beh)w the fi)od,
Oven Moisture
As your oven heats up, the temperature
change of the air in the {)yen may cruise
water droplets to finm on the door glass.
These droplets are hmmless and will
evaporate as the oven continues to heat up,
17
Usingthe oven(cont.).
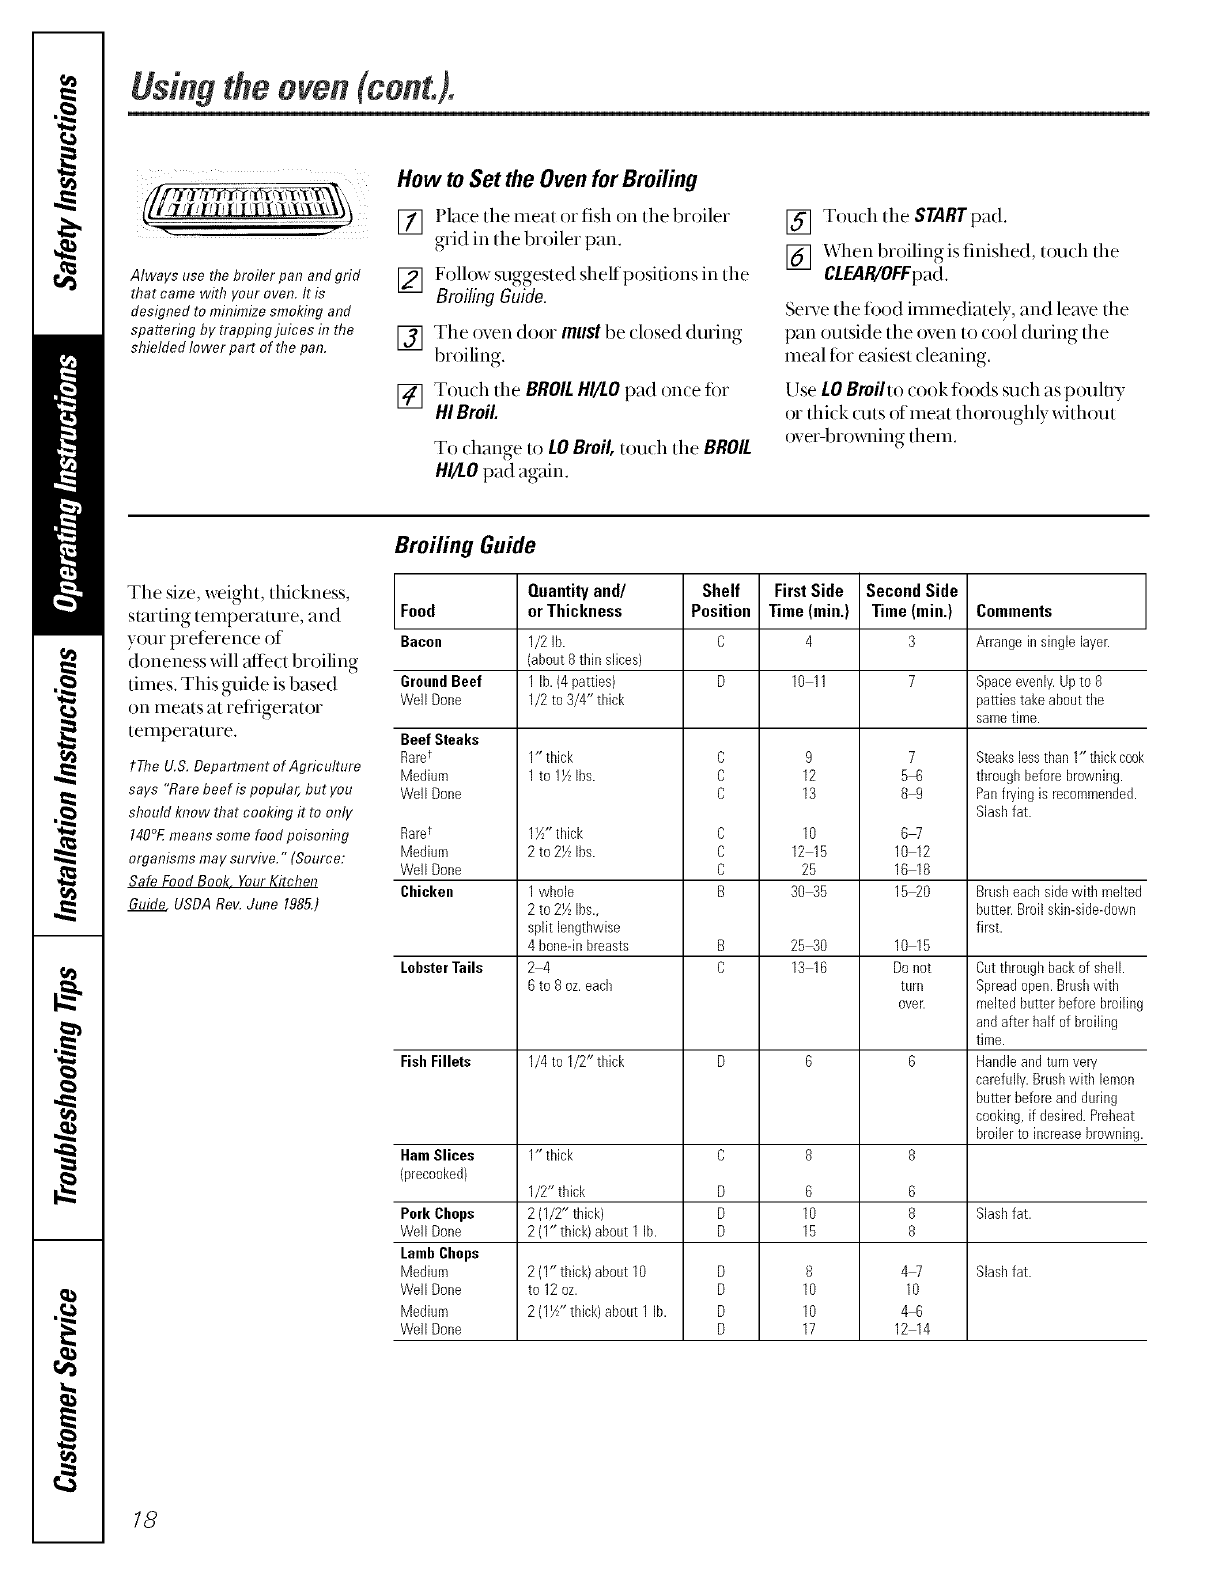
Always use the broiler pan and grid
that came with your oven. It is
designed to minimize smoking and
spattering by trapping juices f17the
shielded lower part of the pan.
How to Set the Oven for Broiling
[] Place tile meat offish on the broiler
grid in the broiler pan.
[] Follow suggested shelfposiuons in the
BroilingGuide.
[] The oven door must be closed during
broiling.
[] Touch the BROIL HI/LO pad on(e for
HI Broil.
To change to LO Broil, tou(h the BROIL
HI/LOpad again.
[] Touch the STARTpad.
[] When broiling is finished, tou(h the
CLEAR/OFFpad.
Serve the food immediately, and leave the
pan outside the oven to (ool during the
meal fi)r easiest (leaning.
Use LOBroiltocook foods suchas pouh U
or thick cuts of meat thoroughly without
over-browning them.
Broiling Guide
The size, weight, thickness,
starting temperature, and Food
y()llI" piet_'ien(e of Bacon
doneness will affect broiling
times. This guide is based GroundBeef
on meats at refiigerator WellDone
temperature.
?The U.S. Department of Agriculture
says "Rare beef is popular, but you
should know that cooking it to only
140°F.means some food poisonhTg
organisms may survive." (Source:
Safe Food Book YourKitchen
Guide USDARoy. June 1985.)
Beef Steaks
Raret
Medium
Well Done
Raret
Medium
Well Done
Chicken
LobsterTails
FishFillets
HamSlices
srec00ked}
Pork Chops
Well Done
LambChops
Medium
Well Done
Medium
Well Done
Quantityand/
orThickness
1/2 lb.
(about 8 tbin slices)
1 lb. (4patties)
1/2 to 3/4" thick
1" thick
1 to 1> Ibs.
1X" thick
2 to 2_ Ibs.
1 whole
2 to 2X Ibs.,
split lengtbwise
4 bone-inbreasts
24
6 to 8 oz.eacb
1/4 to I/2" thick
1" thick
1/2"tbick
2 (1/2" thick)
2 (I" thick) about 1 lb.
2 (1" thick) about 10
to 12 oz.
2 (I>" tldck) about 1 lb.
Shelf
Position
C
C
C
C
C
C
B
D
D
D
D
D
D
D
First Side
Time (rain.)
4
10 11
9
12
13
10
12 15
25
3045
25 30
13 16
6
10
15
8
10
10
17
Second Side
Time (min.)
3
7
5-6
89
6W
1012
1618
15_0
1015
Donot
turll
ovelt
6
8
8
4W
10
4-6
12 14
Comments
Arrangeinsinglelayer.
Space evenly. Up to 8
patties take about the
same time.
Steakslessthan 1" thickcoo
through before browning.
Panfrying is recommended.
Slashfat.
Brusheacbsidewith melte(
butter.Broil skin-side-down
first.
Cutthrough backof shell.
Spreadopen.Brushwith
melted butter before broilim
and after half of broiling
time.
Handleand turnvery
carefully.Brushwith lemon
butter beforeand during
cooking, if desired. Prebeat
broilerto increasebrowning
Slashfat.
Slashfat.
18
Usingthe clock and timer.
Not all features are on all models.
To Set the Clock
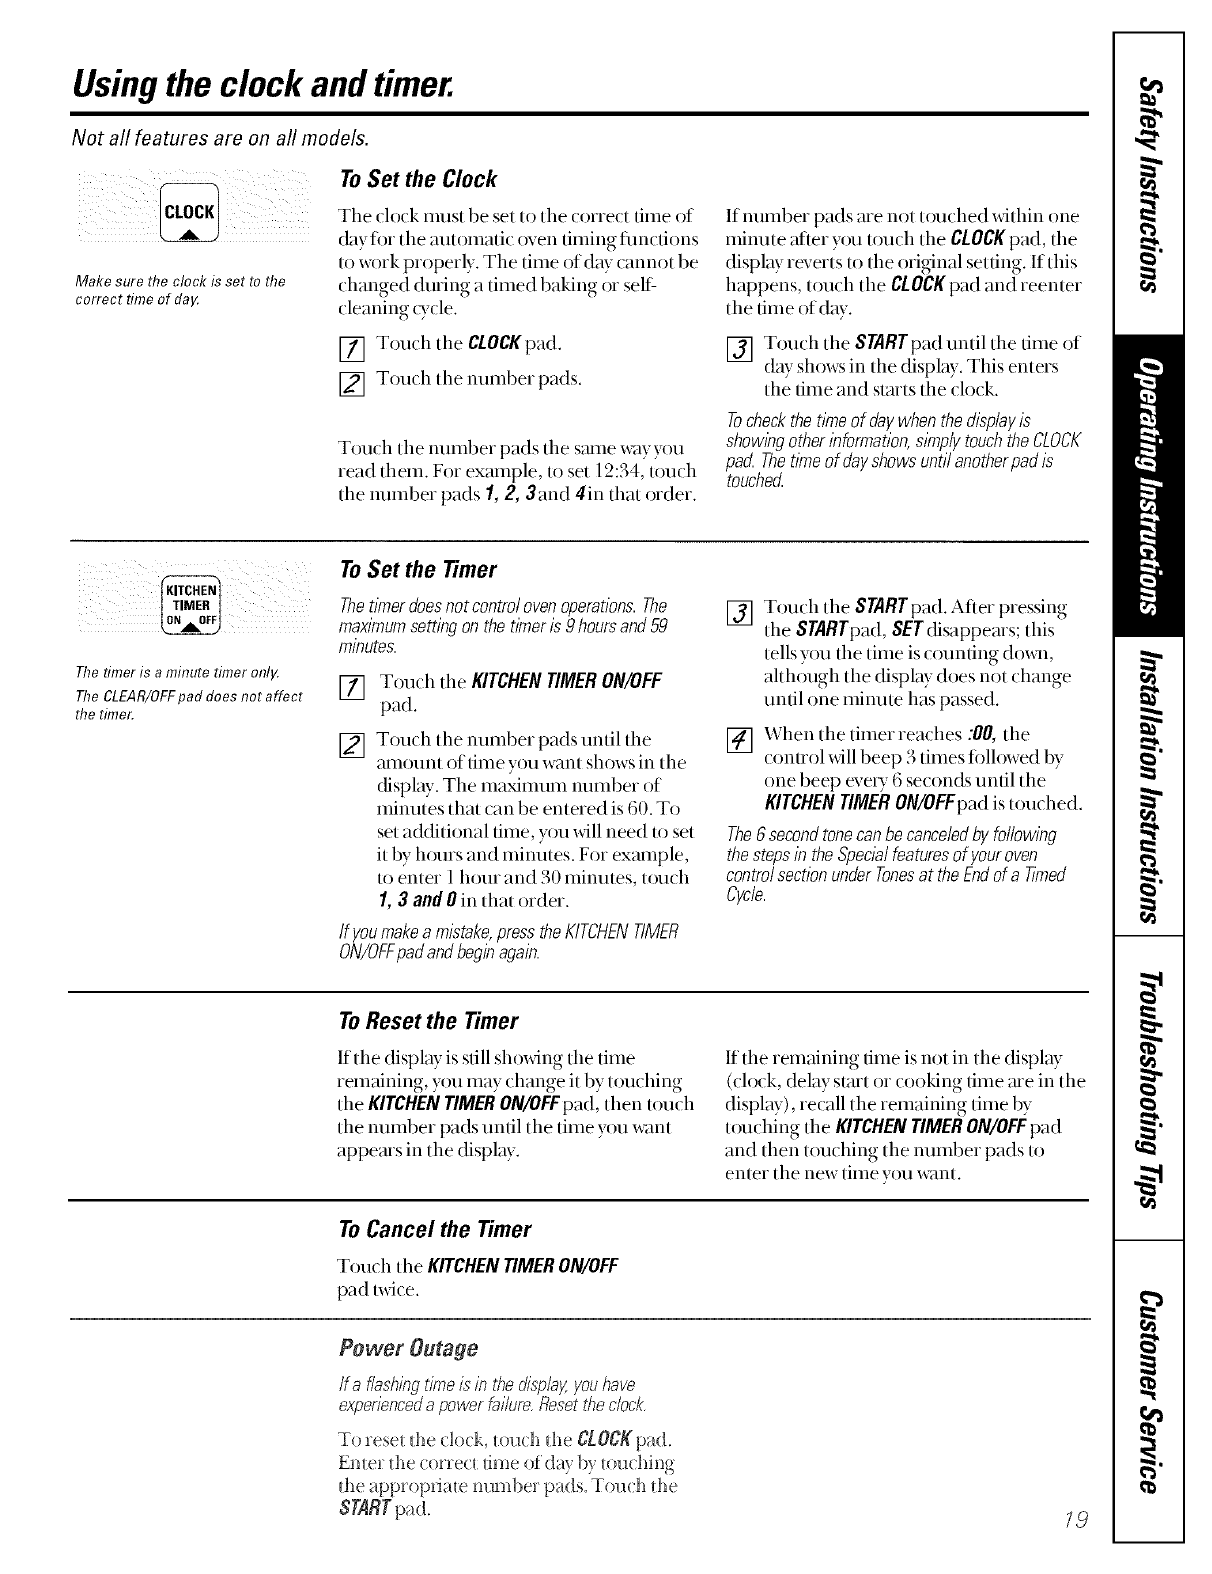
Make sure the clock is set to the
correct time of da,¢
The clock nmst be set to tile correct time of
day tin tile automatic oven timing tractions
to w{)rkproperly. The time of day cannot be
changed during a timed baking or sell:
cleaning _ycle.
[] Touch tile CLOCKpad.
[] Touch tile number pads.
Tou(h tile ntlmber pads tile s_unewayyou
read them. For example, to set 12:34, touch
the number pads I, 2, 3and 4in that order.
If number pads me not touched within one
minute after y{)u touch the CLOCKpad, the
display reverts to the original setting. If this
happens, touch the CLOCKpad and reenter
tile time of day.
[] Touch tile STARTpad until tile time of
day shows in the display, This enters
the time and starts the dock,
Tocheckthetitheof daywhenthedisplayis
showingotherinformation,simplytouchtheCLOCK
pad Thetimeof dayshowsuntilanotherpadis
touched
The timer is a minute timer onltz
TheCLEAR/OFFpad does not affect
the timer.
To Set the Timer
ThetlYnerdoesnot contro/ oven operations. The
maximum setting on the timer is 9 hoursand 59
minutes.
[] Touch tile KITCHEN TIMER ON/OFF
pad.
[] Touch the number pads until the
atllOUn[ ()f time you want shows in tile
display. Tile maximum mmlber of
minutes that can be entered is 60. To
set a(klitional tithe, you _dll need m set
it by h_)urs and minutes. For exmnple,
to enter l hour and 30 minutes, touch
I, 3and 0in that order.
If youmakeamistake,presstheKITCHENTIMER
ON/OFFpadandbeginagain.
[] Touch tile STARTpad. After pressing
tile STARTpad, SETdisappears; this
tells you tile time is counting (lo_l,
ahhough tile display does not change
until one ininute has passed.
[] When tile timer reaches :00, tile
conuol will beep 3 times ti)llowed by
one beep eve U6 seconds until the
KITCHENrIMER ON/OFFpad is touched.
The6secondtonecanbecanceledby following
thestepsin theSpecialfeaturesof youroven
controlsectionunderTonesat theEndof a Timed
Cycle
ToReset the Timer
If tile display is still showing tile time
remaining, you may change it by touching
the KITCHENTIMERON/OFFpad, then touch
tile number pads until tile time you want
appems in the display.
If tile remaining time is not in tile display
(clock, delay stzut or cooking time me in the
display), recall the remaining time by
touching tile KITCHENTIMERON/OFFpad
and then touching tile number pads to
enter tile new time you want.
To Cancel the Timer
Tou,ch the KITCHENTIMERON/OFF
pad twit e.
Power Outage
lf a flashing tingeis in the display:youhave
expedenceda power failure. Resett¢Teclock.
To rese_ d_e clock, _ouch d_e CLOCKpad.
Emer d_e correc_ dine of day by _ouching
the appropriate m3mber pads. Touch d_e
STARTpad. 18
Usingthe timed baking and masting features.
NOTE: Foods that spoil easily-such as milk, eggs, fish, stuffings, poultry and pork-should not be allowed to sit for
more than 1hour before or after cooking. Room temperature promotes the growth of harmful bacteria. Be sure that
the oven light is off because heat from the bulb will speed harmful bacteria growth.
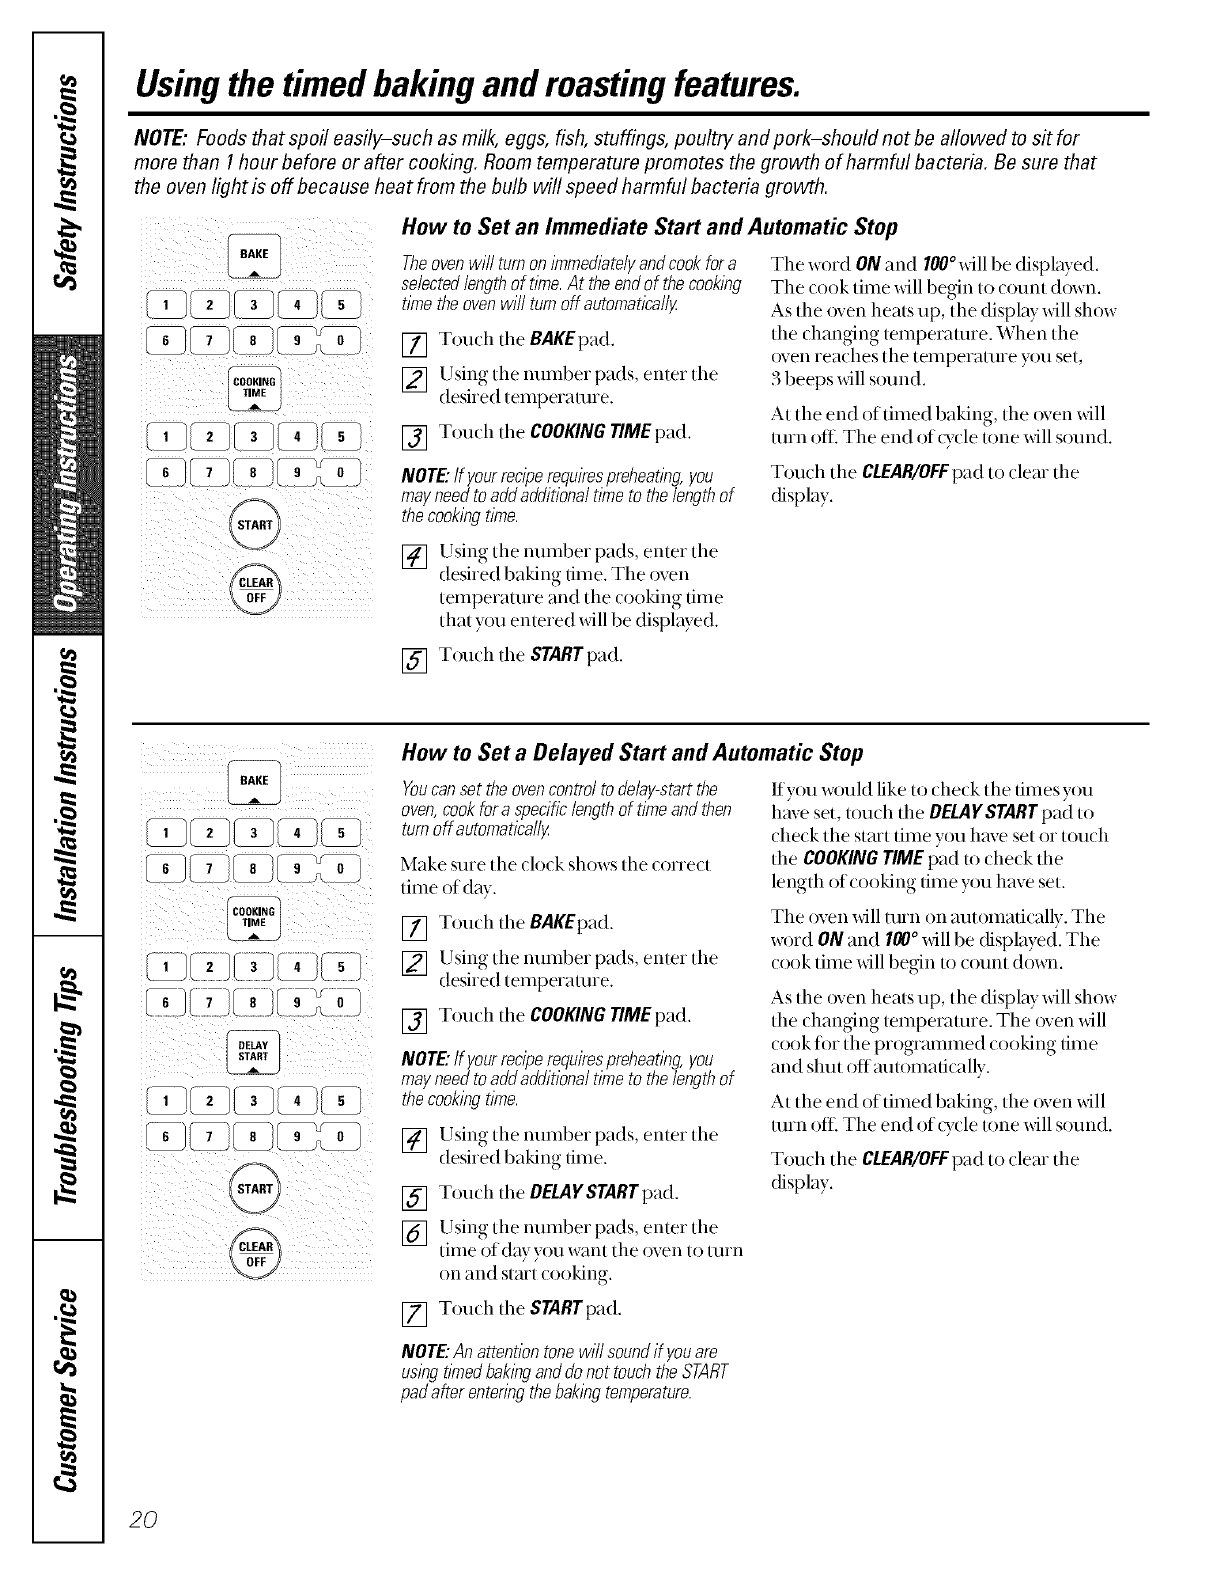
How to Set an Immediate Start and Automatic Stop
Theovenwill turnonknmed&telyandcookfora The word ON and 100°will be displayed.
selectedlength of tkne. At the endof the cooklhg
tkne the oven will turn off automatically
[] Toudl tile BAKEpad.
[] Using tile number pads, enter tile
desired temperature.
[] Tou(h tile COOKING TIME pad.
The cook time will be_n to count down.
As the oven heals up, the display will show
the chan_ng mmpemmre. When the
oven reaches the teiilpei;4Hlie you set,
3 beeps will sound.
At the end of timed baking, the oven will
turn of LThe end of (_,( le tone xdll sound.
NOTE"If your reciperequirespreheating, you Touch tile CLEAR/OFFpad to clear the
may needto add additional time to the lengthof display.
thecooking time.
[] Using the number pads, enter the
desired baking time. The oven
temperature and the cooking time
dmt you entered xdll be displayed.
[] Touch the START pad.
How to Set a Delayed Start and Automatic Stop
Youcanset the ovencontrol to de&y-start the
oven, cook for a specific lengthof time and then
turnoff automatica//}z
Make sure the clock shows the conect
time of day.
[] Touch the BAKEpad.
[] Using the number pads, enter the
desired temperature.
[] Touch the COOKINGTIMEpad.
NOTE"If yourreciperequirespreheatlbg,you
mayneedtoaddadditionaltimeto thelengthof
thecookingtime.
[] Using the number pads, enter the
desired baking time.
[]
[]
Touch the DELAYSTART pad.
Using the number pads, enter tlle
time of day you want the oven to mrn
on and start cooking.
If you would like to check the times you
have set, tomh the DELAYSTARTpad to
d_eck the starttime you have set or totuh
the COOKINGTIMEpad to _lle_k the
length of cooking time you haw set.
The oven xdll mrn on autonmtically. The
word ON and 100°will be displayed. The
cook tilne will begin to count (lox_11.
As the oven Imam up, the display will show
the changing temperature. The oven will
cook fi)r the progrmnmed cooking time
and shut oflm]tomafically.
At the end of timed baking, tile oven will
mrn oil The end of o,cle tone will sound.
Touch tile CLEAR/OFFpad to clear the
display.
[] Touch the STARTpad.
NOTE"An attention tone will sound if youare
using tkned baking and donot touch theSTART
pad afier enteringthe baking temperature.
2O
Usingtheprobe (onsomemodels).
For many foods, especially roasts and poultry, internal food temperature is the best test for doneness. The
temperature probe takes the guesswork out of roasting by cooking foods to the exact doneness you want.
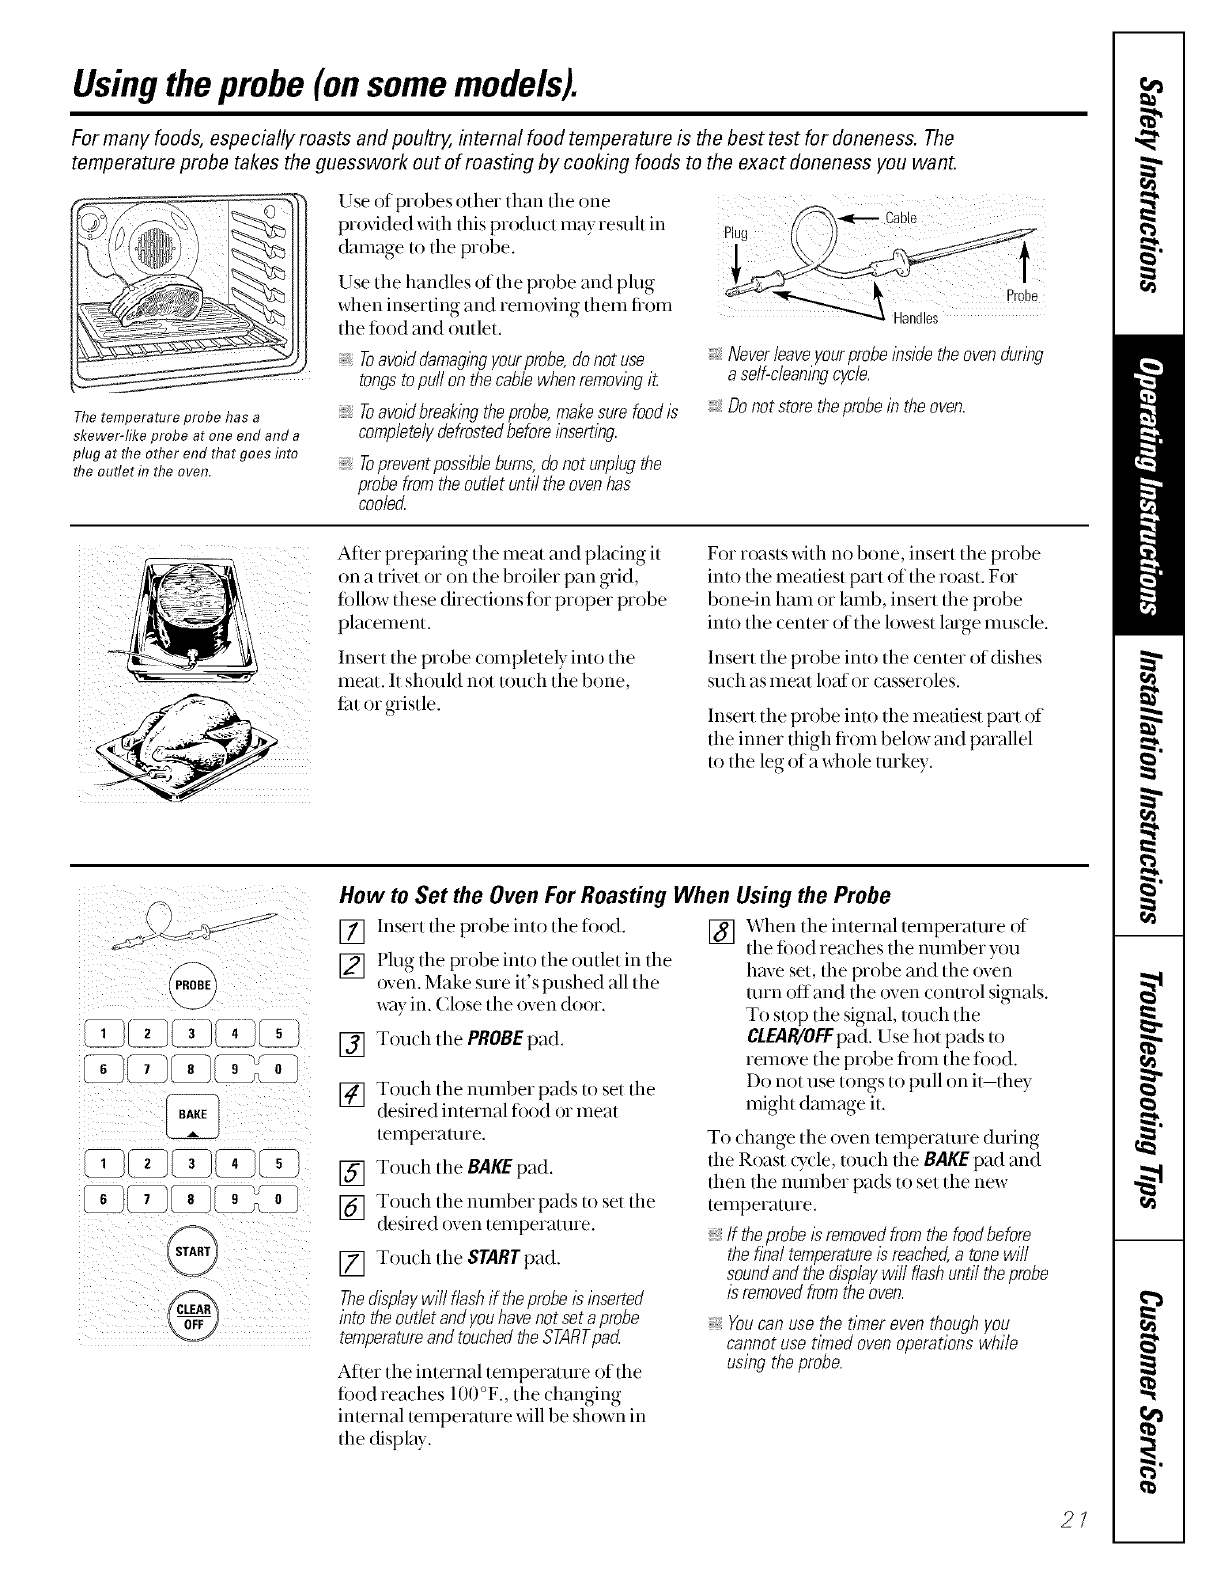
Thetemperature probe has a
skewer-like probe at one end and a
plug at the other end that goes flTto
the outlet f17the oven.
Use of probes other than tile one
prmdded _dtll this produ(t may resuh in
(kunage to the probe.
Use tile handles of file probe and plug
when inserting and rem(Mng them fiom
tlle fi)od and outlet.
_,Toavoiddamagingyourprobe,donot use
tongstopull onthecablewhenremowbg/t
Toavoidbreakingtheprobe,makesurefood/s
completelydefrostedbeforeinserting
Toprevent possible bums, do not unplug the
probe from the outlet until the ovenhas
coolecL
Plug
i _ Handles ![!!!
Neverleaveyourprobeinsidetheovendunbg
a serf-cleaningcycle.
Donot store the probe in the oven.
After preparing the meat and placing it
on a trivet or on the broiler pan grid,
tblh)w these directions fi)r proper probe
placement.
Insert tile probe completely into tlle
meat. It should not touch the bone,
fat or gristle.
For roasts x_ith no bone, insert the probe
into the meatiest part of the roast. For
bone-in ham or lamb, insert the probe
into the center of the lowest large muscle.
Insert the probe into the center of dishes
such as ineat loaf or casseroles.
Insert the probe into the meatiest part of
the inner flngh flom below and parallel
to tlle leg of a whole turkey.
! i/if@ (i
How to Set the Oven For Roasting When Using the Probe
[]
[]
Insert the probe into the food.
Plug tile probe into the outlet in tile
oven. Make sure it's pushed all the
way in. Close the oven door.
[] Touch the PROBEpad.
[] Touch tile number pads to set tile
desired internal food or meat
temperature.
[] Touch tlle BAKE pad.
[] Touch the number pads to set the
desired oven temperature.
[] Touch the STARTpad.
Thedisplaywill flashif theprobeis inserted
into theoutletandyouhavenotsetaprobe
temperatureandtouchedtheSTARTpad
After the internal temperature of the
toed reaches 100°F., the changing
internal temperature will be sh{)wn in
the (fisplay.
[] When the internal temperature of
the food rea(hes the number you
have set, the probe and the oven
mrn offand the oven control signals.
To stop the signal, touch the
CLFJIR/OFFpad. Use hot pads m
remove the probe fiom the toed.
Do not use tongs to pull on it-they
might dmnage it.
To change the (wen temperature during
the Roast _ycle, touch the BAKE pad and
then the mm_ber pads to set the new
temperature.
_,If theprobe/sremovedfromthefoodbefore
thefinal temperatureisreached,a tonewill
soundandthedisplaywill flashuntiltheprobe
isremovedfromtheoven.
Youcan use the timer even though you
cannot use timed oven operations while
using the probe.
2/
Usingthe convectionoven.
The convection oven fan shuts off when the oven door is opened. DO NOT leave the door open for long periods of
time while using convection cooking.
117 aCOITVectim7 oveR, afar
circulates hot air over, under and
around the food. This circulating
hot air is evenly distributed
throughout the oven cavity. As a
result, foods are evenly cooked and
browned_often h7less time than
with regular heat.
To help you understand the difference
between convection bake and ioas[ and = :
traditional bake and roas[, here are some <...... _7_ ..... >
general guidelines.
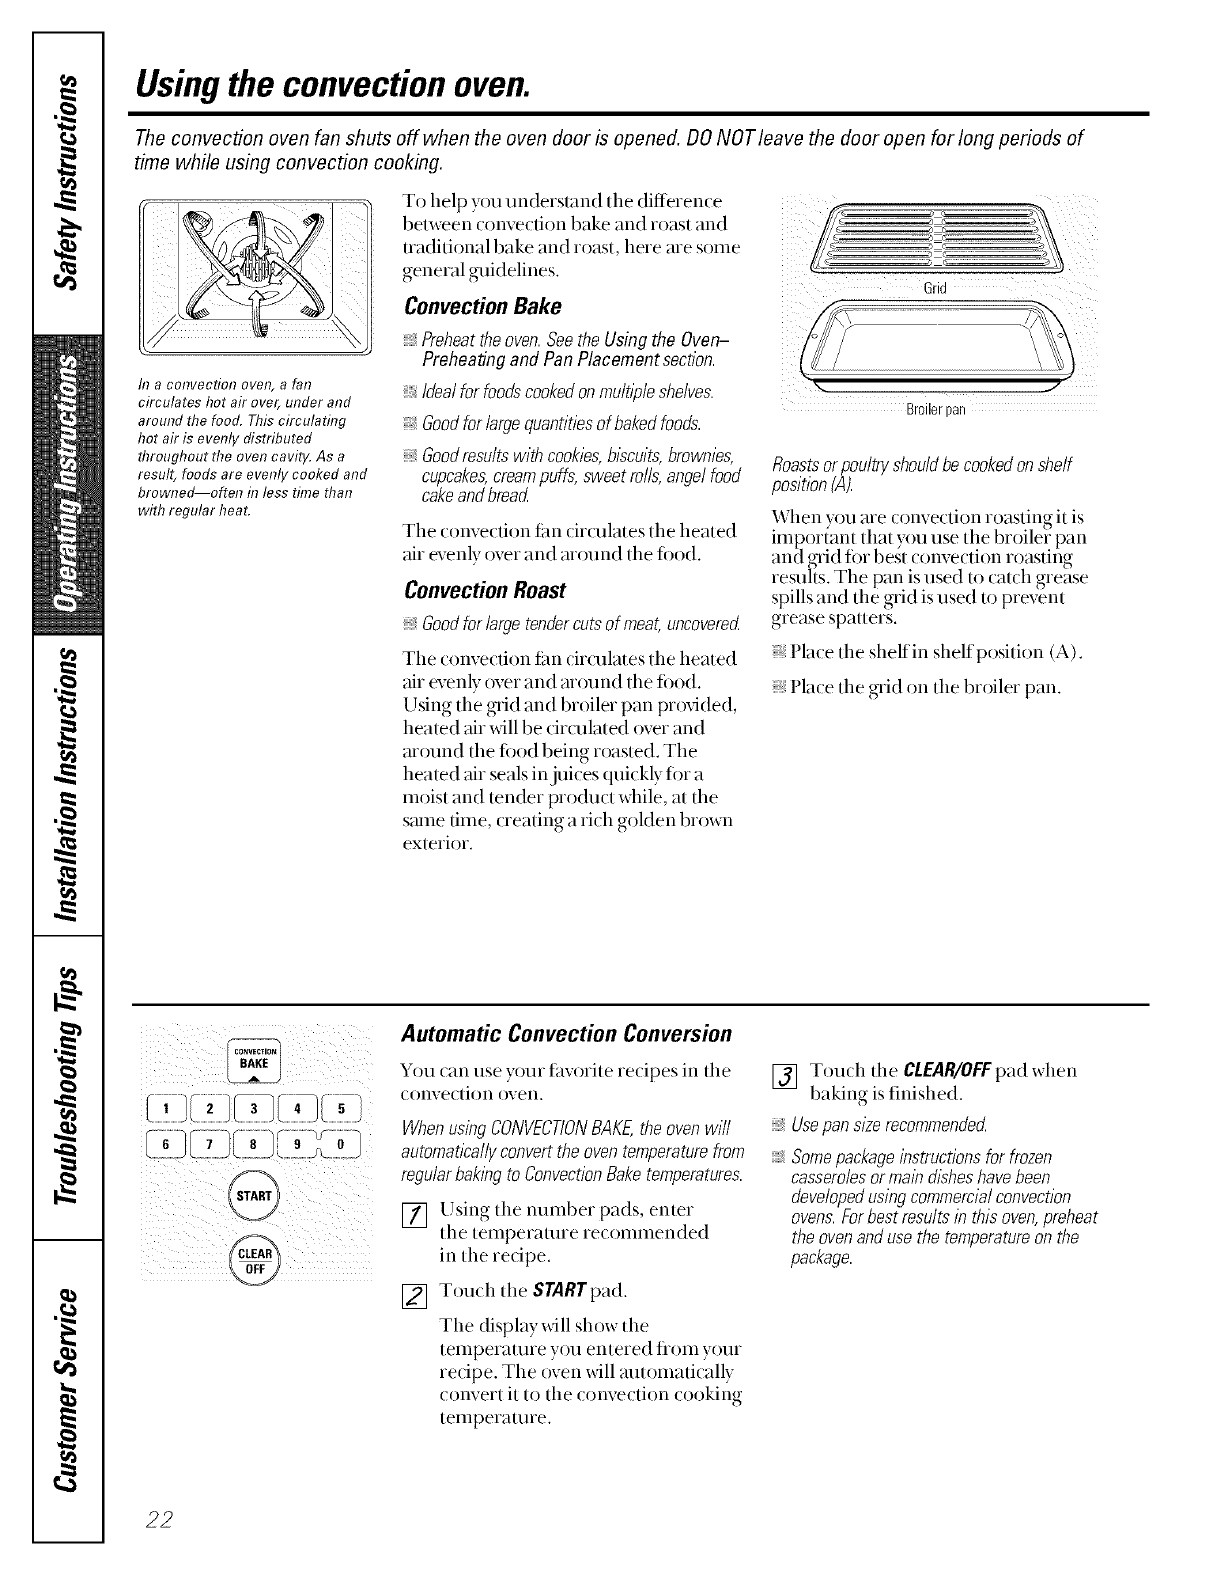
' ' Grid
Convection Bake
Preheatthe oven. Seethe Using the Oven-
Preheating and Pan Placement section.
Idealforfoodscookedonmu/@/eshelves.
Goodforlargequantifiesof bakedfoods.
\
Broilerpan
Goodresults with cookies,biscuits, brownies,
cupcakes,creampuffs, sweet rolls, angel food
cakeand bread
Tile convection fhn circulates tile heated
air m_enlyover and atound tile ti)od.
Convection Roast
Goodfor large tender cuts of meat, uncovered
The convection tim cirollates tile heated
air evenly over and mound tile ti)od.
Using the grid and broiler pan pr{wided,
heated air will be drculated over and
around the t_Jo(1being roasted. The
heated air seals in juices quickly ti)r a
moist and tender product while, at the
stone dine, creating a rich golden brown
exterior.
Roastsorpoultryshouldbecookedonshelf
position(A).
When you are (onve(tion r()ktsting it is
impor(ant that you use the broilei pan
and grid for best (onve(tion roasting
resuhs. The pan is used to catch grehse
spills and the grid is used to prevent
grease spatters.
Place tile shelf in shelf position (A).
;, Pla(e tile grid on the broiler pan.
ii iii!ii}i/i iiiiii ili! ii Automatic Convection Conversion
You (an use your tiworite redpes in tile
convection oven.
When using CONVECTIONBAKE,the oven will
automatically convert the oven temperature from
regular baklbg to ConvectionBake temperatures.
[] Using the number pads, enter
tile temperature recommended
in tile recipe.
[] Touch the STARTpad.
The display will show the
temperature you entered fiom your
redpe. The oven will automatically
convert it to the convection cooking
temperature.
[] Touch tile CLEAR/OFFpad when
baking is finished.
Usepans/_erecommende_
:_Somepackage instructions for frozen
casseroles or main &shes have been
developed using commercial convection
ovens. Forbest results in this oven, preheat
the oven and use the temperature on the
package.
22
Cookware for Convection Cooking
Befine using your convection oven, check
to see if your cookwme leaves room tOT air
drculation in the oven. If}_m are baking
xdth several pans, leave space between
them. Also, be sure the pans do not touch
each other or the walls of the oven.
Paper and Plastic
Heat-resistant paper and plastic
containers that are recommended
fi)r use in regular ovens can be used
in convection ovens. Plastic cookware
that is heat-resistant to temperatures
of 400°F. can also be used, when oven
isbelow 400 °F.
Metal and Glass
Any type of cookwme will work in your
convection oven. However, melnl pans
heat tile fitstest and me recommended
fin coiwection baking.
:, Darkenedormatte-f/bL_hedpans wi// bake
faster than shiny pans.
Glassor ceramicpans cook more slowly
When baking cookies, you xdll get tile
best resuhs if you use a fiat cookie sheet
instead of a pan with low sides.
For redpes like oven-baked chicken,
use a pan with low sides. Hot air cannot
circulate well mound fi)od in a pan with
high sides.
_0NVECTI0__ C0_ECl10N
BAKE O! ROAST
How to Set the Oven for Convection Baking or Roasting
[] Touch tile CONVECTIONBAKEor
CONVECTIONROASTpad.
[] Touch tile number pads to set tile
desired oven temperature.
[] Touch tile STARTpad.
When tile oven stmts to heat tile changing
temperature, stztrting at 100°F., will be
displayed. When the oven reaches tile
temperature y_)u set, 3 beeps will s_)und.
[] Touch tile CLEAR/OFFpadwhen
finished.
To change the oven temperature, touch
the CONVECTIONBAKEor CONVECTION
ROASrpadand then tile numl)er pads to
set tile new teillperature.
NOTE:Youwill heara fanwhilecook/bgwith
convection.Thefanwill stopwhenthedooris
openedbut theheatwi// notturnoff.
Thefanwi//notstartuntil thepreheat
temperatureis reached
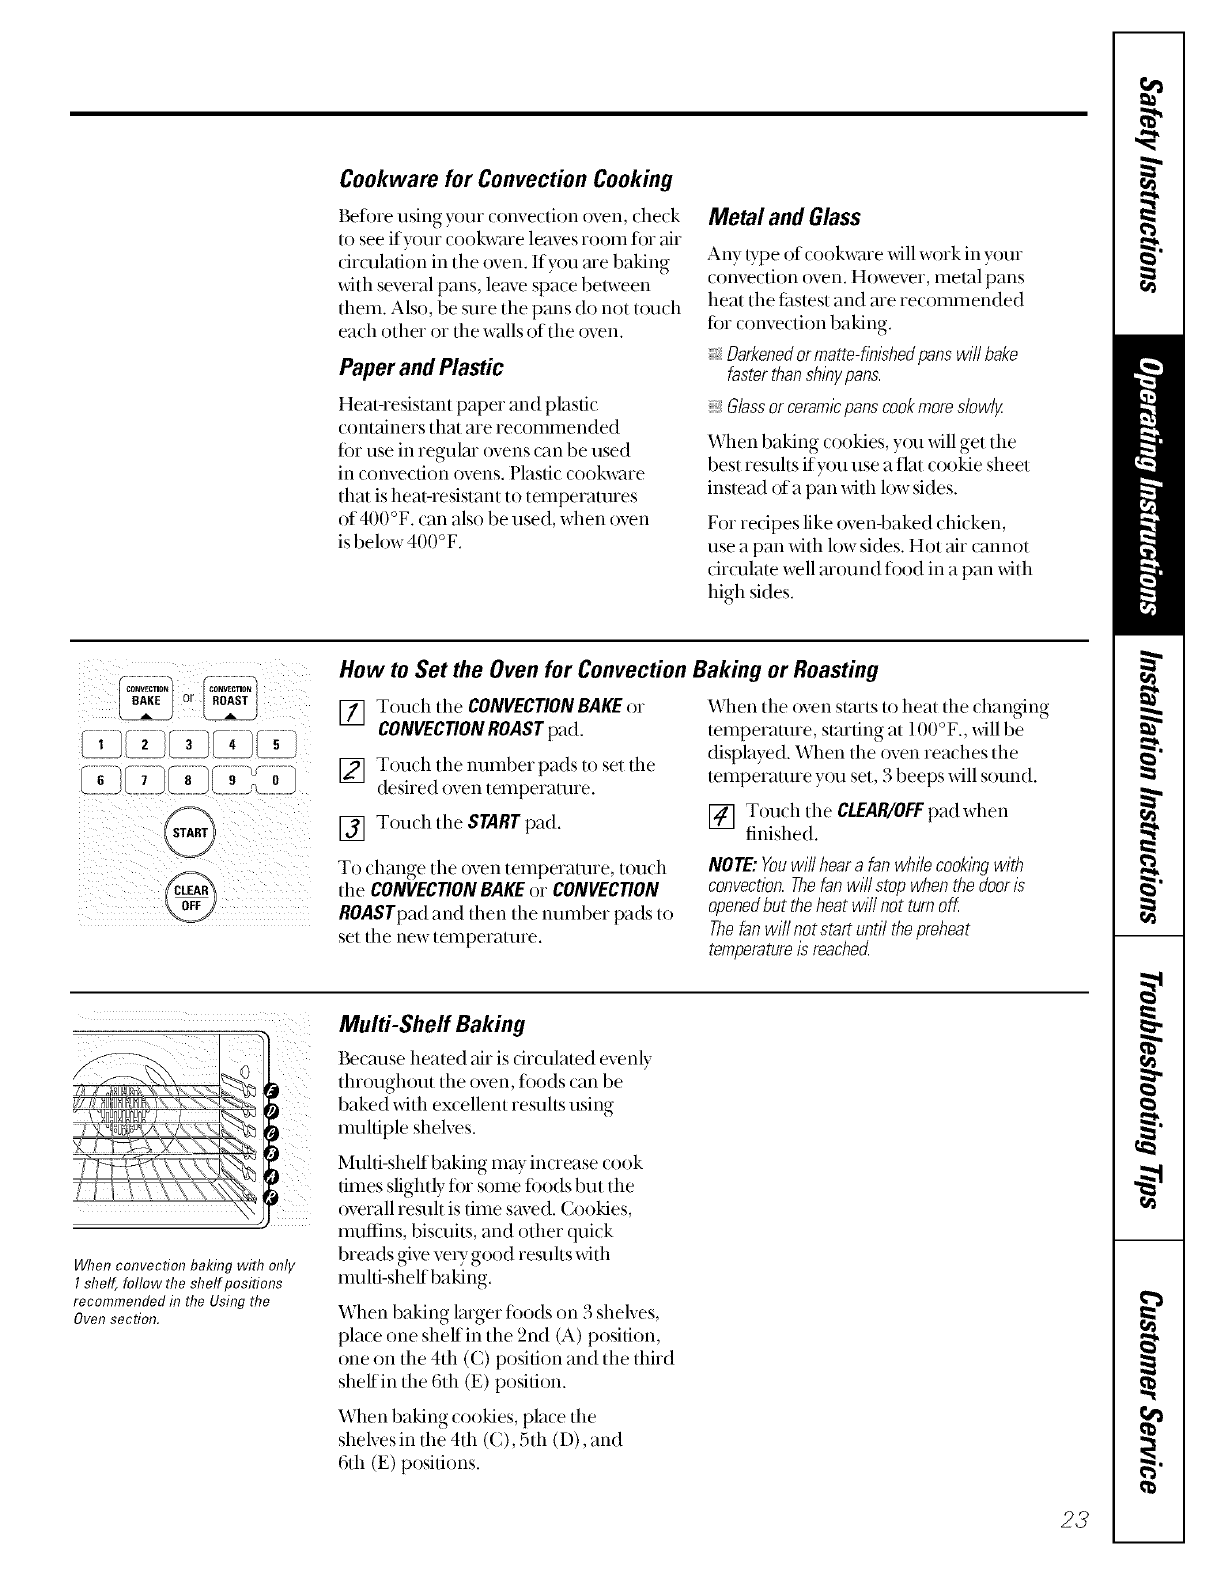
When convection baking with only
Ishelf, follow the shelf positions
recommended h7the Using the
Oven section.
Multi-Sheff Baking
Becmlse heated air is drculated evenly
throughout tile oven, fix)(ls can be
baked with ex{ellent resuhs using
nmltiple shelves.
Multi-shelf baking may inoease cook
times slightly fi)r some fl)ods but tile
overall resuh is time saved. Cookies,
nmflins, biscuits, and other quick
breads give very good resuhs with
nmlti-shelfbaking.
When baking lmger fi)ods on 3 shelves,
place one sheffin tile 2nd (A) position,
one on tile 4th (() position and tile third
shelf in the 6th (E) position.
When baking cookies, place tile
shelves in tile 4th ((), 5th (D), and
6th (E) positions.
23
Usingthe convectionoven (cont.).
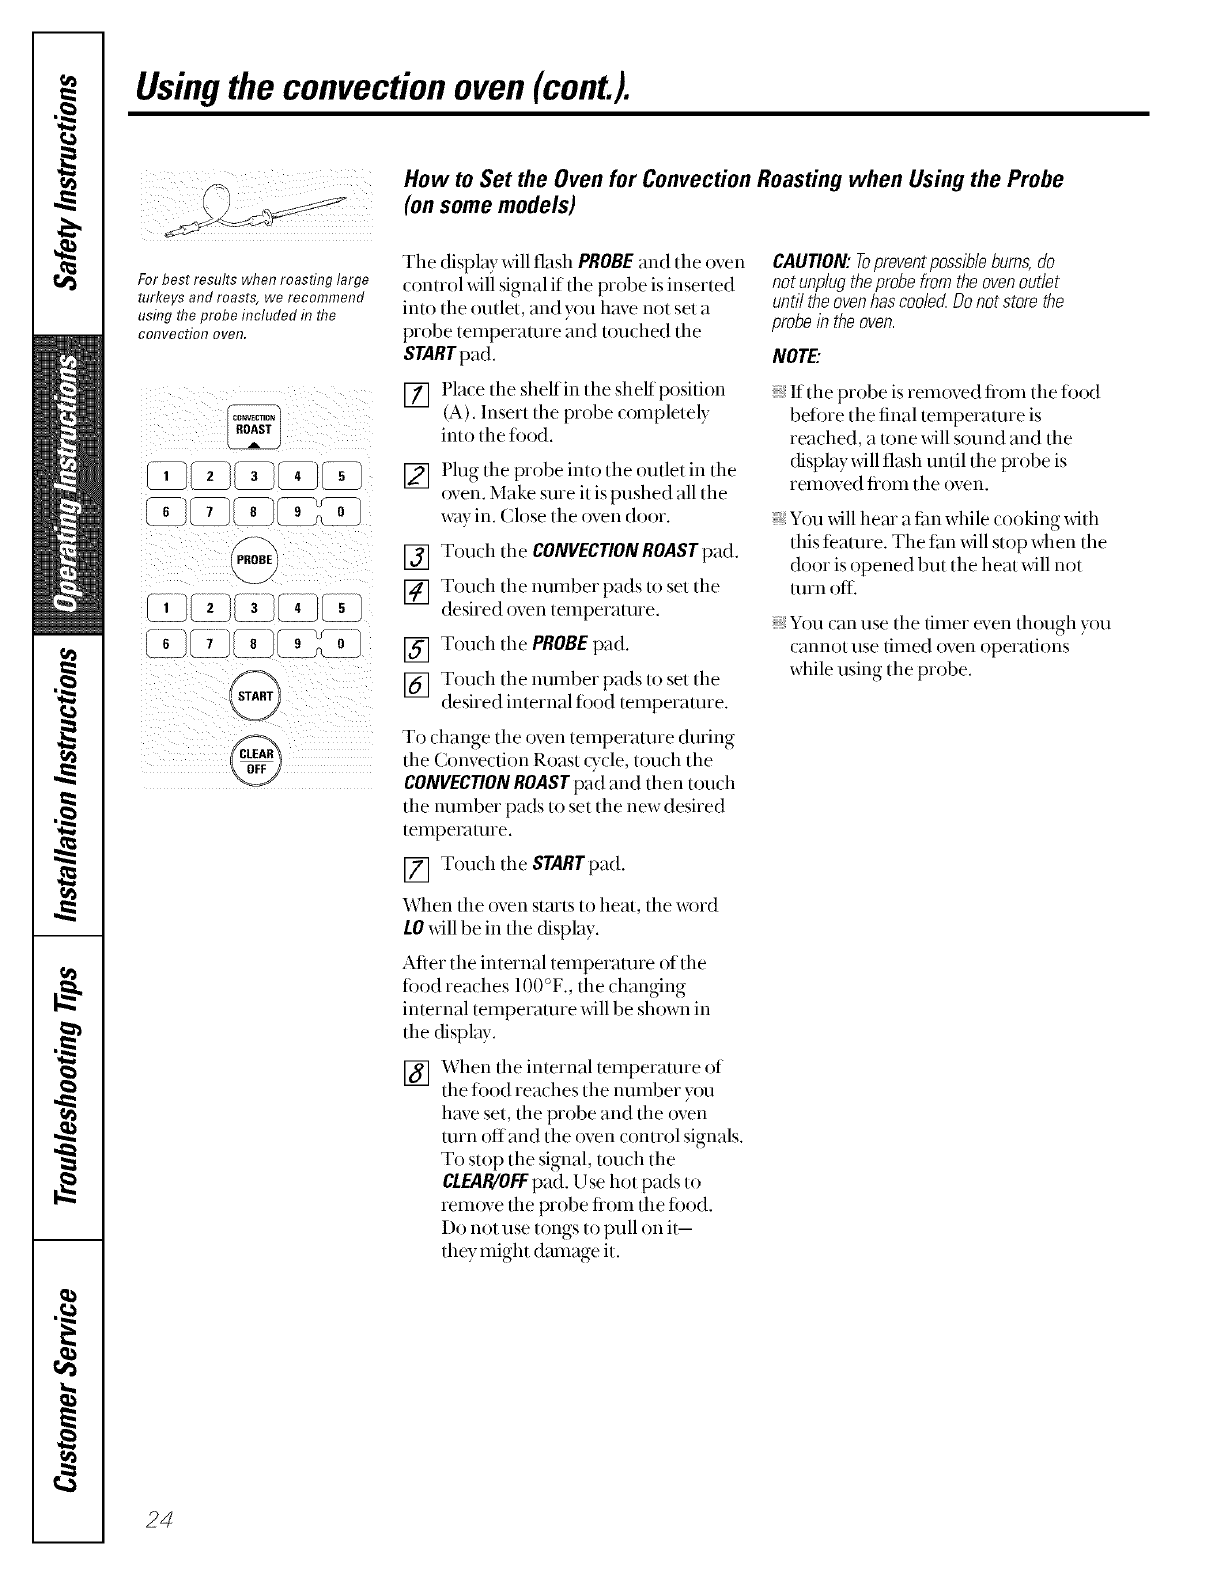
For best results when roasting large
turkeys and roasts, we recommend
usflTg the probe included h7 the
cotTvectiol7 oven.
f_
PROBE
@
How to Set the Oven for Convection Roasting when Using the Probe
(onsome models)
The display xdll flash PROBEand the oven
control xdll signal if tile probe is inserted
into tile outlet, and you have not set a
probe temperature and touched the
STaRT pad.
[] Pla(e flEeshelf in the sheffposifion
(A). Insert flEeprobe (ompletely
into the food.
[] PhEg flEe probe into tile outlet in flEe
oven. Make sure it is pushed all flEe
way in. Ch)se the oven door.
[] Toudl flEe CONVECTIONROAST pad.
[] Touch tile number pads to set flEe
desired oven teilEperatEEre.
[] Touch tile PROBE pad.
[] Touch flEe number pads to set tile
desired internal food temperature.
To change tile oven temperature dtMng
the Convection Roast (_+(:le,touch the
CONVECTIONROASTp+(dand then touch
the number pads to set the new desired
tempexvmne.
[] Touch flEeSTARTpad.
When tile oven starts to heat, the word
LOwill be in tile display,
After tile internal temperature of the
tood reaches 100°F., the changing
internal temperature will be sh{)wn in
the display.
[] When flEeinternal temperature of
flEefood rea(hes the number you
have set, the probe and tile oven
UErnoffand the oven control signals.
To stop the signal, touch the
CLEAR/OFFpad. Use hot pads to
remove tile probe fiom tile tood.
Do not use tongs to pull on i/--
they might damage it.
CAUTION'.Topreventpossibleburns,do
not unplugtheprobefromtheovenoutlet
untiltheovenhascoo/ecLDonot storethe
probeintheoven.
NOTE"
_, If the probe is removed fiom tile food
befi)re the final temperature is
reaEhed, a/one will sound and the
display will flash tmtil the probe is
rem_)ved fiom the _)ven.
_, You x_4lllEe_ua tim while cooking xdflE
fibs feature. The fan will stop when tile
door is opened but the heat will not
ttnn oJ{t_
_, You can Elsethe timer even flEough you
cannot use timed oven operations
while using flEeprobe.
24
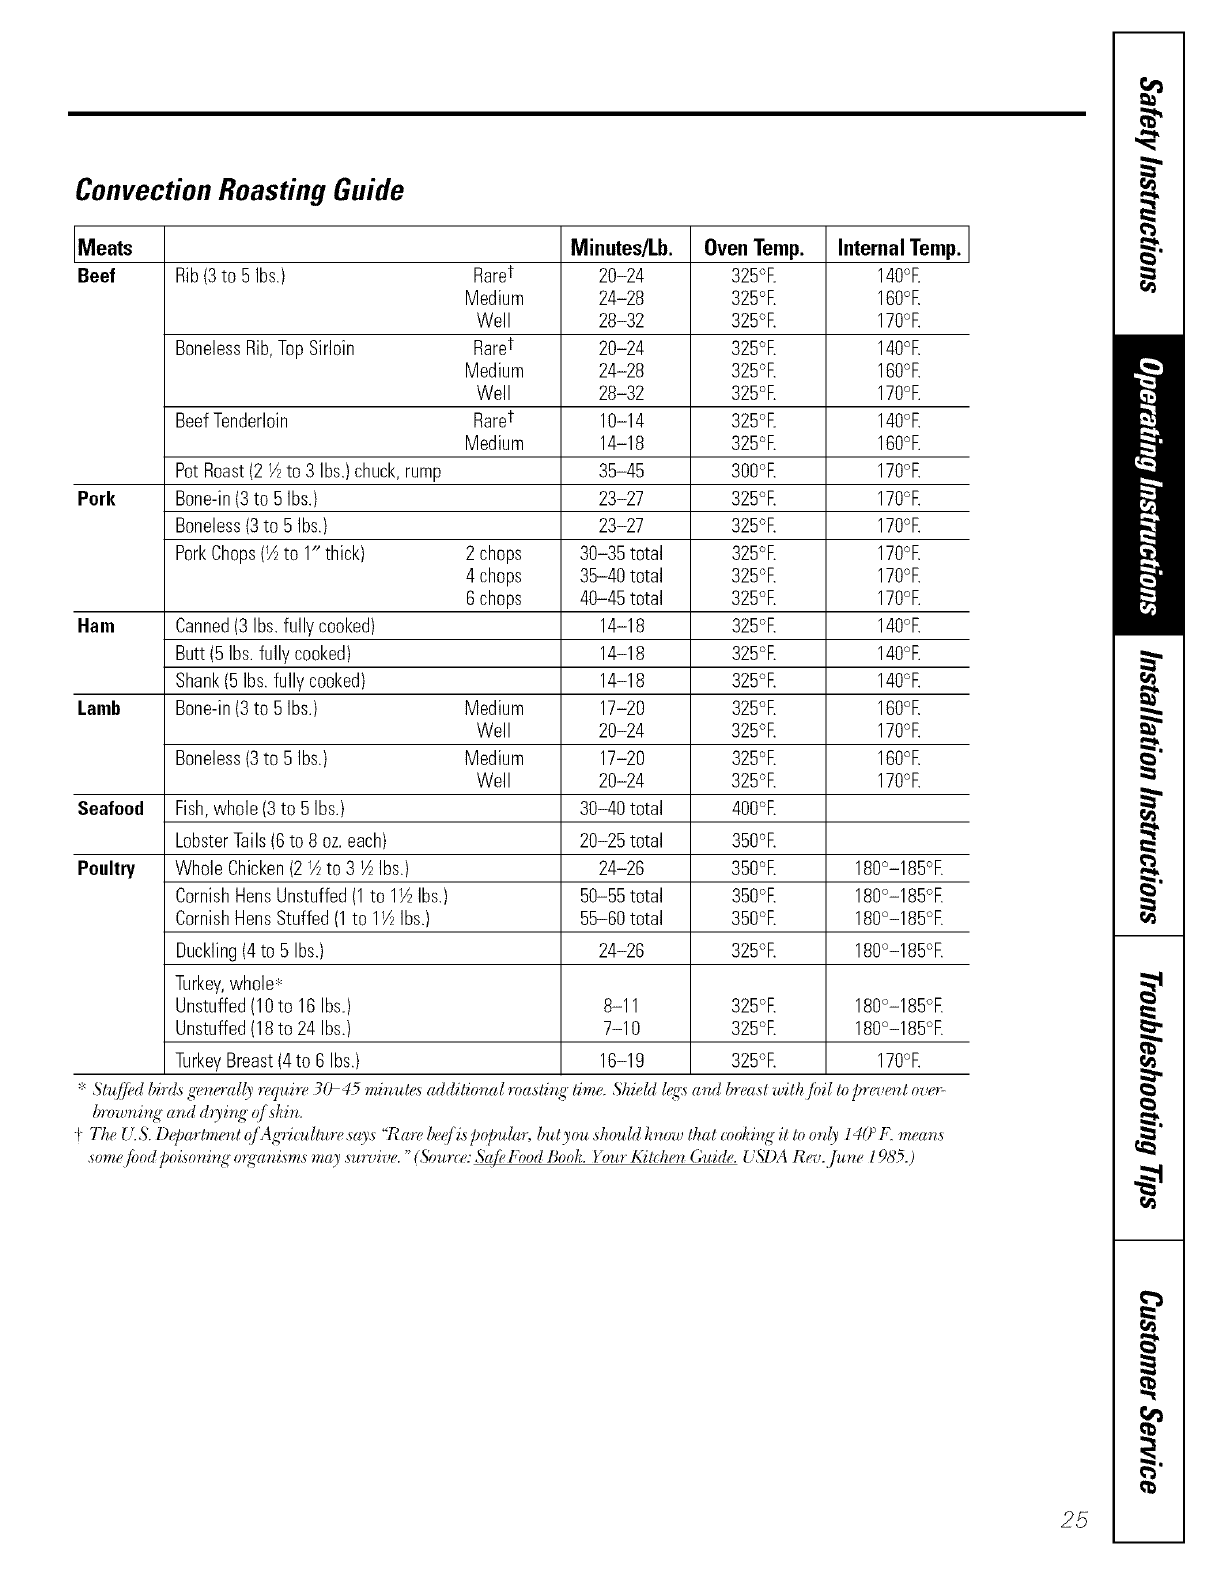
Convection Roasting Guide
Meats Minutes/Lb. Oven Temp. Internal Temp.
Beef Rib(3to 5 Ibs.) Raret 20-24 325°E 140%
Medium 24-28 325°E 160°E
Well 28-32 325°E 170°E
BonelessRib,TopSirloin Raret 20-24 325°E 140%
Medium 24-28 325°E 160°E
Well 28-32 325°E 170°E
BeefTenderloin Raret 10-14 325% 140°E
Medium 14-18 325°E 160°E
PotRoast(2 ½ to 3 Ibs.)chuck,rump 35-45 3OO°E 170°E
Pork Bone-in(3to 5Ibs.) 23-27 325°E 170°E
Boneless(3to 5 Ibs.) 23-27 325°E 170°E
PorkChops(½to 1" thick) 2 chops 30-35total 325°E 170%
4 chops 35-40total 325°E 170°E
6chops 40-45total 325°E 170°E
Ham Canned(3Ibs.fully cooked) 14-18 325°E 140°E
Butt(5Ibs.fully cooked) 14-18 325°E 140°E
Shank(5Ibs.fully cooked) 14-18 325°E 14O°E
Lamb Bone-in(3to 5Ibs.) Medium 17-20 325°E 160°E
Well 20-24 325°E 170°E
Boneless(3to 5 Ibs.) Medium 17-20 325°E 160%
Well 20-24 325°E 170°E
Seafood Fish,whole (3to 5 Ibs.) 30-40total 4OO°E
LobsterTails(6to 8 oz.each) 20-25total 350°E
Poultry Whole Chicken(2 ½ to 3 i_ Ibs.) 24-26 350°E 180°-185°E
CornishHensUnstuffed(1to 1½ Ibs.) 50-55total 350°E 180°-185°E
CornishHensStuffed(1to 1½ Ibs.) 55-60total 350°E 180°-185°E
Duckling(4to 5 Ibs.) 24-26 325°E 180°-185°E
Turkey,whole_
Unstuffed(10to 16Ibs.) 8-11 325°E 180°-185°E
Unstuffed(18to 24 Ibs.) 7-10 325°E 180°-185°E
TurkeyBreast(4to 6 Ibs.) 16-19 325°E 170°E
'_ Sh_]_d bird.s g'_n_l[) ' require 3(F 45 minut_._ addition_d rc_asti_t 'time. Shield 1_'._ and br_st with /i_il to pr_,v_t t ove_
browni_t_" and d_yi_tg _!/'skin.
t_ The U_S. D@_l_b_u_nt _JAg_i_dlur_s_l)'s "R_m_ b_(j'ispo[m[_l_, butyou should know thud _oki_tg" it to only 14() _F. means
some /_od poi.soni_q" o_q_nisms m_y surefire. "(Source: _Sr_/_ }FOOd Book. )#mr Kitch_t Cuide. USI)A R_,_.June 1985.)
25
Usingthe timed featuresfor convectionbaking.
Youwill hear a fan while cooking with this feature. The fan will stop when the door is opened but the heatwill
not turn off.
NOTE"Foods that spoil easily-such as milk, eggs, fish, stuffings, poultry and pork-should not be allowed to sit for
more than 1hour before or after cooking. Room temperature promotes the growth of harmful bacteria. Be sure
that the oven light is off because heat from the bulb will speed harmful bacteria growth.
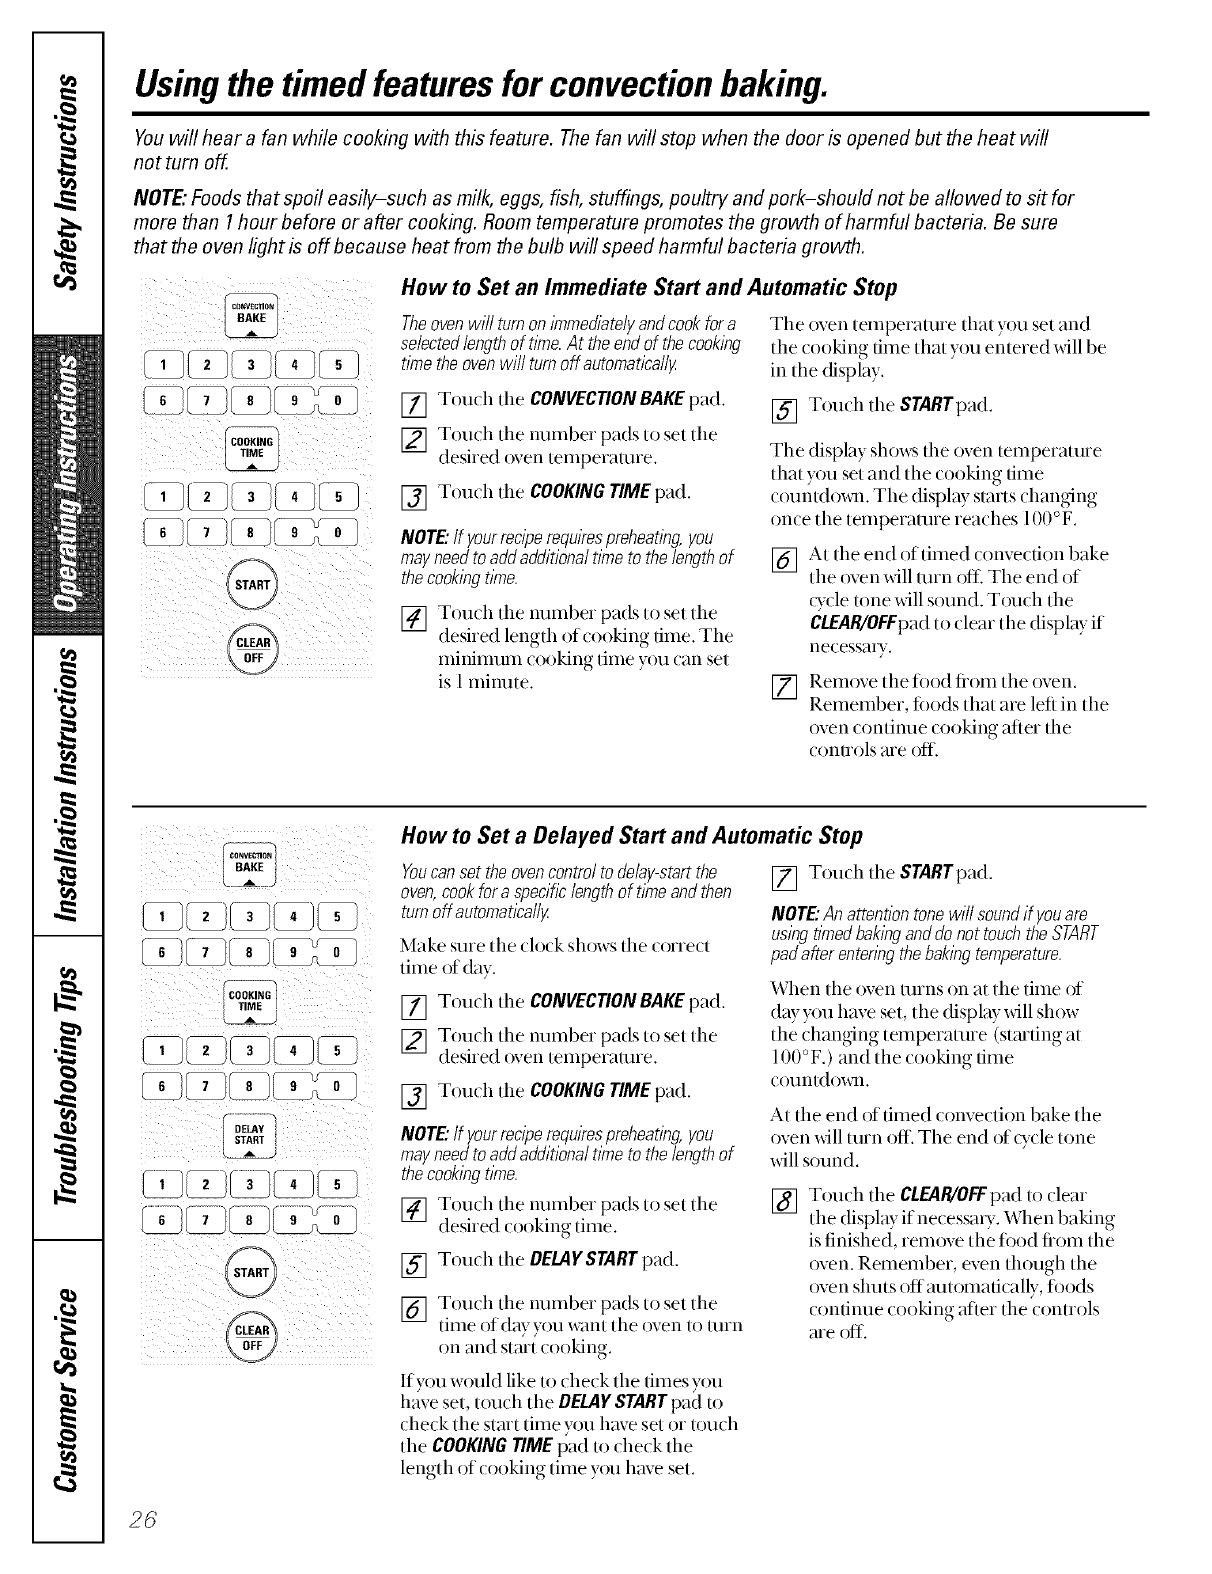
[ ¸/i How to Set an Immediate Start and Automatic Stop
Theovenwill turnonknmediate/yandcookfora The oven temperature that you set and
selectedlengthof tline.At theendof thecooking
tline theovenwill turnoffautomatically
[] Touch tile CONVECtiONBAKEpad.
[] Touch tile number pads to set tile
desired oven temperature.
[] Tou(h tile COOKINGTIME pad.
NOTE."If yourreciperequkespreheatlbg,you
mayneedtoaddaddifionaltimetothelengthof
thecooklbgtime.
[] Touch tile number pads to set tile
desired length of cooking time, The
minimum (()()king time you (an set
is l minute.
tile cooking time that you entered will be
in the display.
[] Touch tile STARTpad.
Tile display shows tile oven temperature
that you set and the cooking time
count& roll. The display starts changing
once the temperature reaches 100 °F.
[]
[]
At tile end of timed convection bake
tile oven _dll mrn ott_ Tile end of
o_cle tone _dll sound. Touch tile
CLEAR/OFFpad to dear the display if
necessai)<
Remove tile food fiom tile oven.
Remember, ti)ods that are left in tile
oven continue cooking after tile
conuols are off.
i7[ /i[i! II /)i[iiii( iii<
Z_
i¸¸:; _M_>
How toSet a Delayed Start and Automatic Stop
Youcansettheovencontroltode&y-startthe
oven,cookforaspecificlengthof timeandthen
turnoffautomatica//y
Make stne tile clock shows tile correct
time of (kiy.
[] Touch the CONVECTIONBAKEpad.
[] Touch tile number pads to set tile
desired oven temperature.
[] Touch tile COOKINGTIME pad.
NOTE."If yourreciperequkespreheating,you
mayneedtoaddaddifiona/timeto thelengthof
thecookingtime.
[] Touch tile number pads to set tile
desired cooking time.
[] Touch the BELAVSTART pad.
[] Touch tile number pads to set tile
time of day you want tile oven to turn
on and start cooking.
[] Touch tile STARTpad.
NOTE."Anattentiontonewill soundif youare
usingtlinedbakIw anddonottouchtheSTART
padafier entenngthebakingtemperature.
When the oven tlnns on ;it tile time of
day you have set, the display will show
the changing temperature (siretiny ;it
100°F.) and the cooking time
( Otlntdol_,ql.
At tile end oftimed convection bake tile
oven will turn off. Tile end of o_cle tone
will sound.
[] Touch tile CLEAR/OFFpad to clear
tile display if necessa U. When baking
is finished, rem{)ve the ti)od fiom the
oven. Remember, even though tile
oven shuts offmltomafically, ti)ods
continue cooking after the controls
are off.
If)_m w{mld like to check tile times y_)u
have set, touch the DELAY START pad/o
check the start time you have set or touch
tile COOKING TIME pad to check tile
length of cooking time y{)u have set.
2_
Adjust the oven thermostat--Do it yourself!
Youmay find that your new oven cooks differently than the one it replaced. Use your new oven for a few
weeks to become more familiar with it. If you still think your new oven is too hot or too cold, you can adjust
the thermostat yourself.
Do not use thermometers, such as those found in grocery stores, to check the temperature setting of your oven.
These thermometers may vary 20_40 degrees.
NOTE: This adjustment will not affect the broiling or the self-cleaning temperatures. The adjustment will be retained
in memory after a power failure.
START
_J
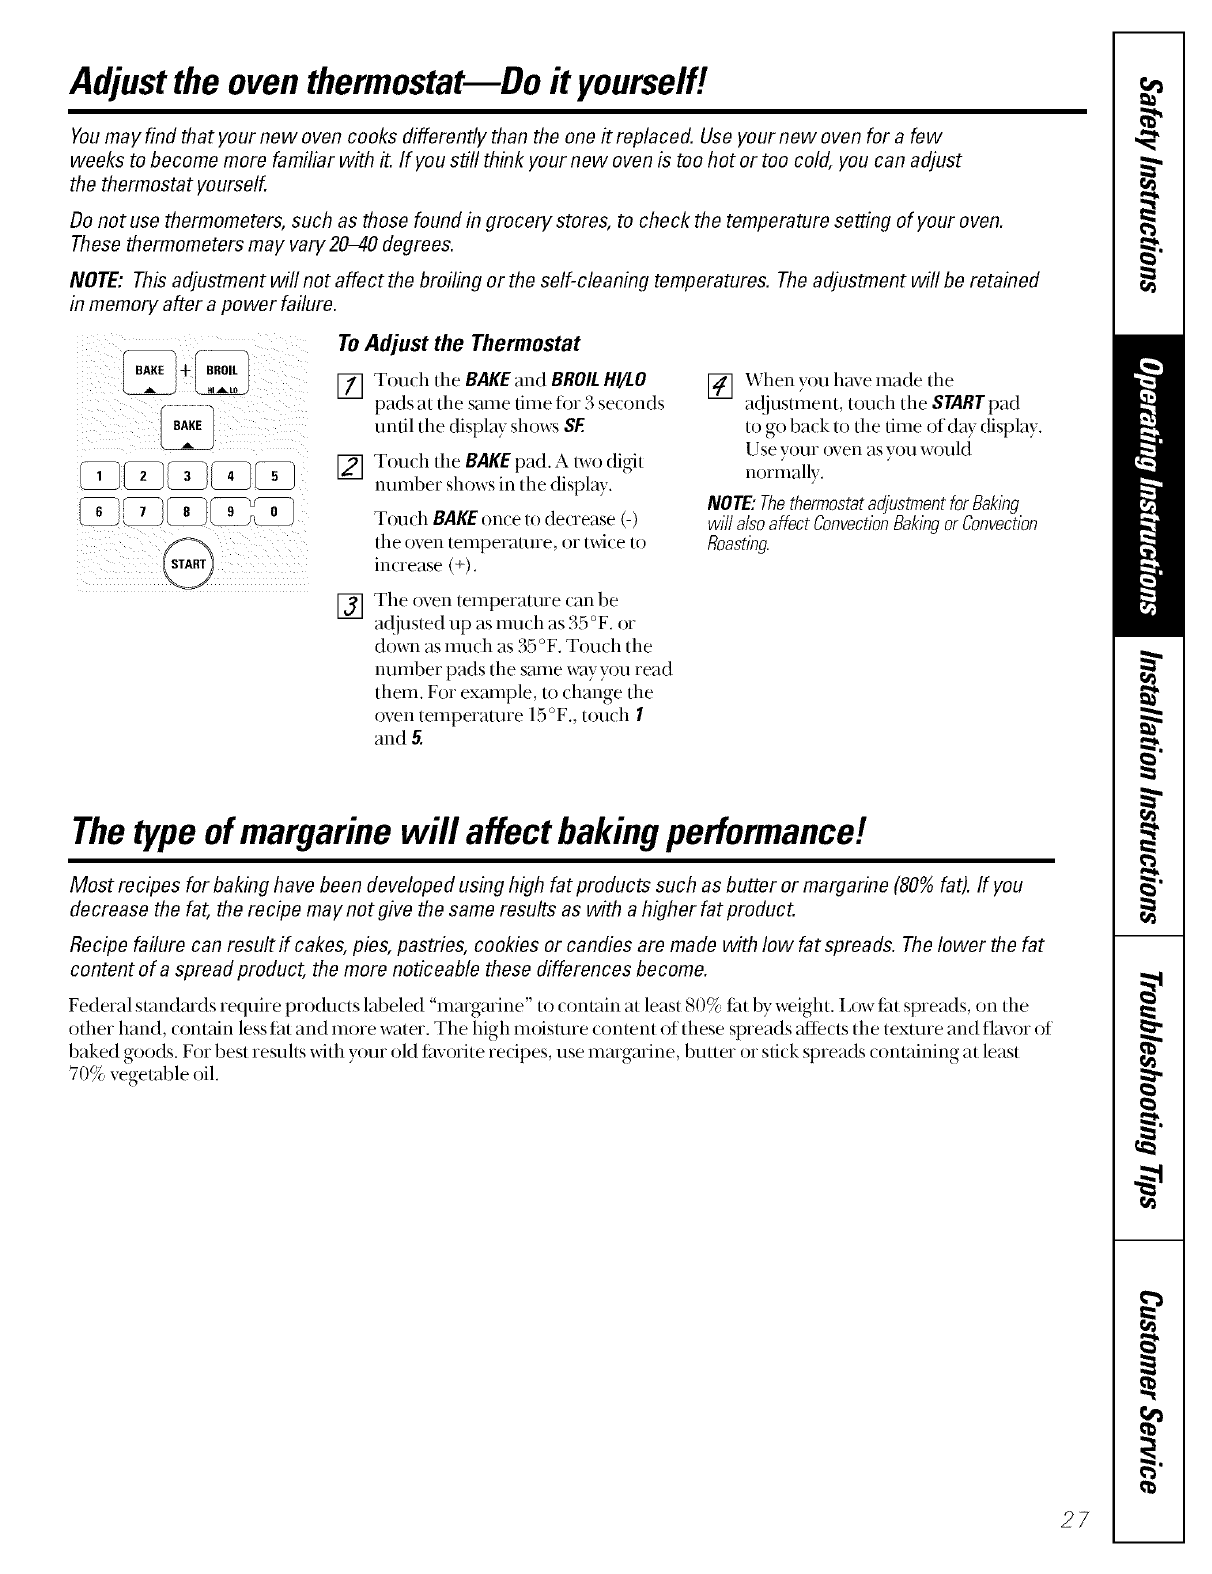
To Adjust the Thermostat
[] Touch the BAKEand BROILH!/LO
pads at tile same time fi)r 3 seconds
until tile display shows SE
[] Touch tile BAKE pad. A two di_t
number shows in tile display.
Touch BAKE once to decrease (-)
[lie overl [erllperaIure, ()r"twi(e to
in(tease (+).
[] The oven temperature can be
a(!iusted up as inuch as 35 °F, or
(1o_1_as nmch as 35 °F. Touch the
number pads tile stone w_lyy(ru read
them. For example, to change the
oven temperature 15°F., t(ruch I
and 5.
[] When you have made the
a@lstment, touch the STARTpad
to go back to the time of day display.
Use y(rur ()ven as y(ru would
normally.
NOTE:Thethermostatadjustmentfor Baking
wi// alsoaffectConvectionBakingorConvection
Roasting.
Thetype ofmargarine will affect baking performance!
Most recipes for baking have been developed using high fat products such as butter or margarine (80% fat). If you
decrease the fat, the recipe may not give the same results as with a higher fat product.
Recipe failure can result if cakes, pies, pastries, cookies or candies are made with low fat spreads. The lower the fat
content of a spread product, the more noticeable these differences become.
Federal smnd_uds require pro(hlcts labeled "mmgmine" to contain at least 80% tilt by weight. Ix)wtilt spreads, on the
other hand, cormfin less tat and more wzlter. The high moisture con/ent of these spreads affects the texture and flavor of
baked goods. For best resuhs with y_rur old tilvorite redpes, use margarine, butter or stick spreads containing at least
70% vegetable oil.
27

Usingthe electric warmingdrawer.
The warming drawer will keep hot, cooked foods at serving temperature. Always start with hot food. Do not use to
heat cold food other than crisping crackers, chips or dry cereal.
WARM,"G0 O WER
iii ,FS ¸
Control Knob
Push and turn tile (ontrol knob to any
desired setting.
NOTE:The wamfing drawer cannot be
used during aself:_ lean (yde.
LO ...................... 140-170°F
Medium (mid-position
on the knob) ............. 170-21 ()°F
HI ....................... 210-250 °F
ONSignalLight
Tile ON signal light is located above tile
control knob and glows when tile knob is
in tile on position. It stays on until tile
knob is moved to tile OFFposition.
_n
For use in tile winruing drawer only.
Do not use in tile oven.
Use the side handle edges to lift the
pan in and out of tile &awer tin ease of
cleaning.
Do not Dlt liquid or water in tile
w,u'ming pan.
Rack
:, For use in tile winruing (hawer only.
Do not use in the _)ven.
:, Rack will fit fiom fiont to back.
:, Preheat with the rack in place.
:, U sing the rack allows tin double stacking
of items.
When Using the Warming Drawer
Tile warming drawer will keep hot, cooked
foods at sev_dng tempemtme. Ahvays st_ut
wifll hot food. Do not use 1oheat cold food
other than crisping crackers, chips or &y
(ereal.
Donotfinethe warmingdrawerorpanwith
aluminumfoil. Foilis an excellentheat
insulator andwill trapheatbeneathit. This
willupset theperformanceof thedrawerand
coulddamagethe interiorfinish.
:, Allow time fi)r tile drmver to be
preheated:
LO ................... 10-15 minutes
Medium (mid-position
on tile knob) .......... 25-30 minutes
HI .................... 25-35 minutes
Do n()t put liquid ()rwarer in th e warlning
drawer.
iiiiiii_Forinoistfoods, cover thelnxdth a lid or
alulIlinulIl fi)il.
:_ For crisp foods, leave them uncovered.
:, Food shouM be kept hot in its cooking
container or transfened to a heat-safe
serving dish.
CAUTION:Plasticcontainersorp/ast/2wrap w///
meltif in dYectcontactwiththedrawer,panora
hotutensil.Meltedplasticmaynot beremovable
andis notcoveredunderyourwarranty
:, Rem_)ve setting spoons, etc., befi)re
placing containers in winruing drawer.
Preheat prior to use according to
2oo reconnnended times.
Temperature Selection Chart
To keep seve_al diktorem lbods hoL se_
the _emperam_:e _od_e fi_od needing die
highes_ seuing, Place die i_ems needing die
highes_ seuing on d_e bouom of die &rover
and hems needing less hea_ on die rack,
;, The temperature, type and amount of
food, and the time held will afl:ect the
quality of the food.
Food in heat-safe glass and glass4reramic
utensils may need a higher them_ostat
setting as compared to food in metal
utensils.
Repeated opening of the &awer allows
the hot air to es(ape and the fi)od to (ool.
_, Allow exUa time fi)r the temperature
inside the drawer to stabilize after
adding items.
_,Wifll large loads it may be necessat T to
use a higher themmstat setting and cover
some of the cooked food items.
Do not use plastic containers or plastic
x_map.
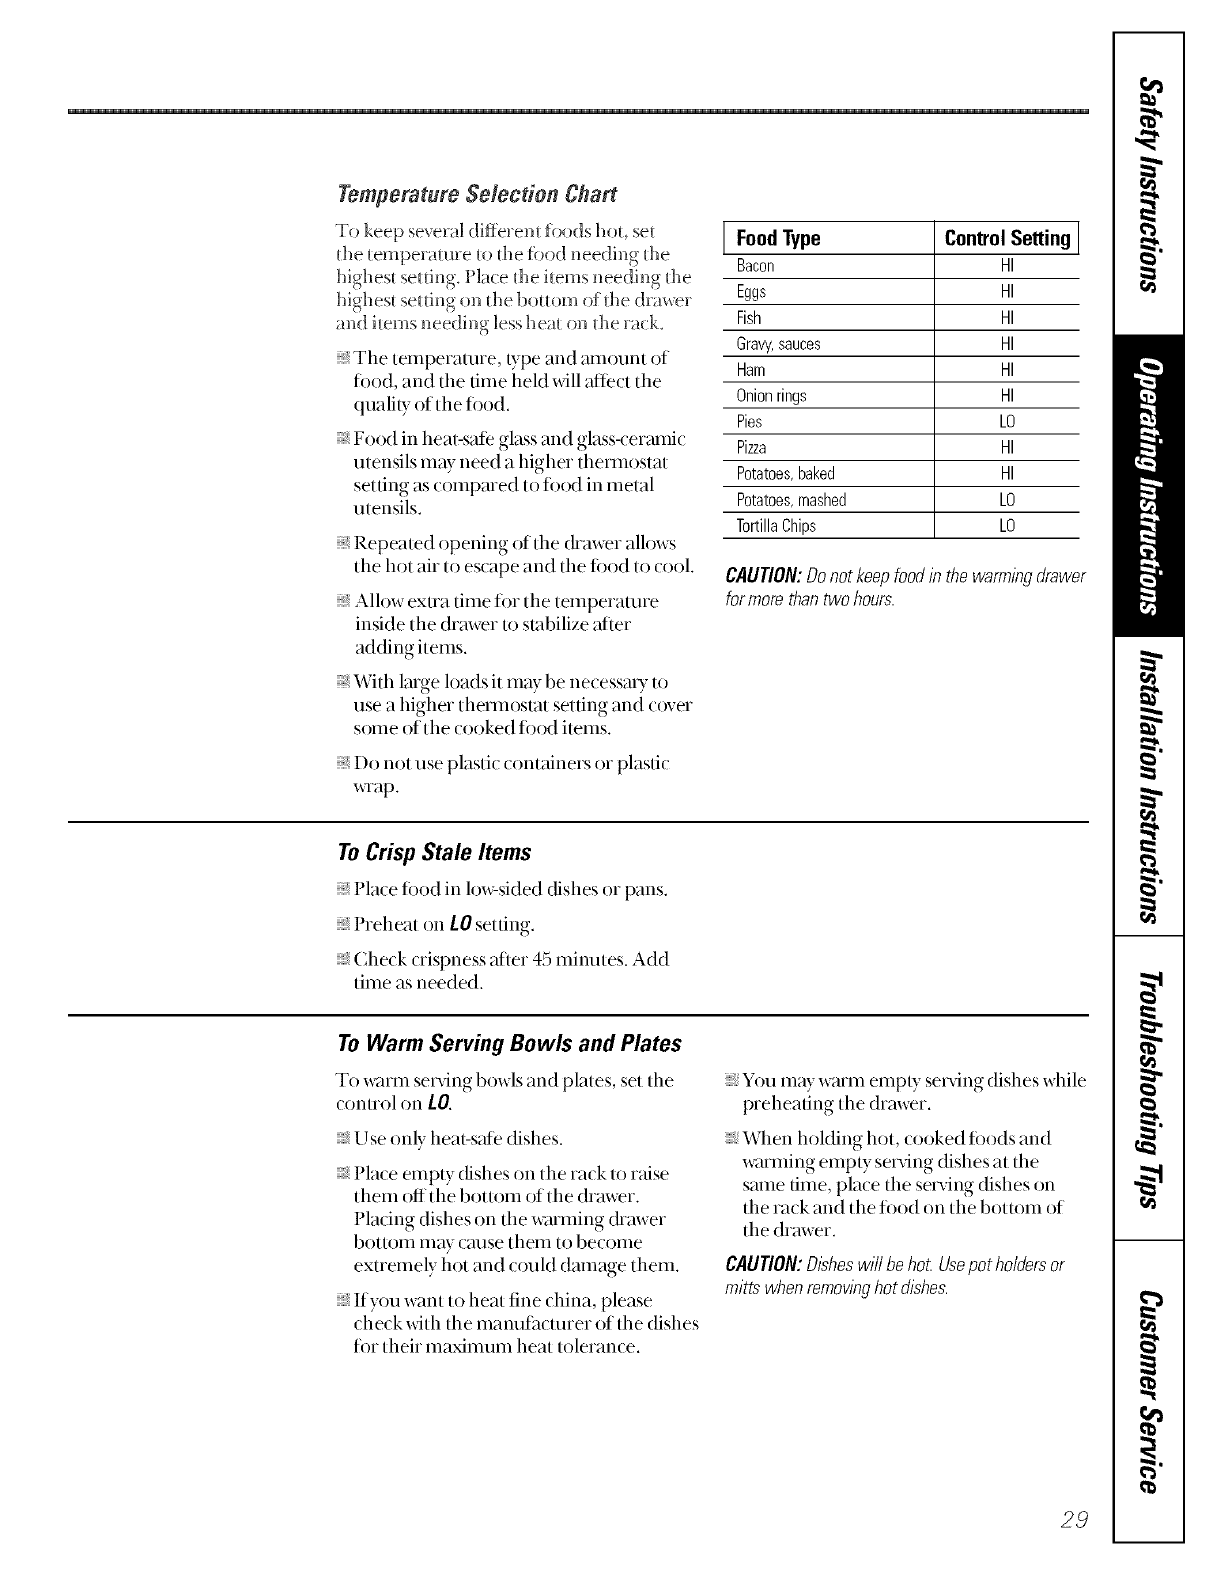
[FoodType Control Setting [
Bacon HI
Eggs HI
Fish HI
Graw,sauces HI
Ham HI
Onionrings HI
Pies LO
Pizza HI
Potatoes, baked HI
Potatoes, mashed LO
TortillaChips LO
CAUTION: Donot keep food in the warming drawer
for more than two hours.
ToCrisp Stale Items
:_ l'la( e tood in lo_=si(]ed (fishes or pans.
:_ Preheat on LOsetting.
:, (heck (rispness alier 45 mim_tes. Add
time as needed.
To Warm Serving Bowls and Plates
To w;um se_4ng bowls and plates, set the
control on LO.
Use only heat-safe dishes.
_,Place empty dishes on the rack to raise
them off the bottom of the drawer,
Placing dishes on the w;uming (hawer
bottoln inay cause theln to become
extremely hot and could dmnage them.
If yOU want tOheat fine china, please
check xdth the manufacturer of tile dishes
tot their illaxililUlil heat tolerance.
You may warm empty set_4ng dishes while
preheating the drawer.
When holding hot, cooked foods and
warming empty serving dishes at the
same time, place the serving dishes on
the rack and the fi)od on tile bottom of
tile drawer.
CAUTION:Disheswill behot Usepot holdersor
mittswhenremovinghot dishes.
28
Usingthe self-cleaning oven.
The oven door must be closed and all controls set correctly for the cycle to work properly.
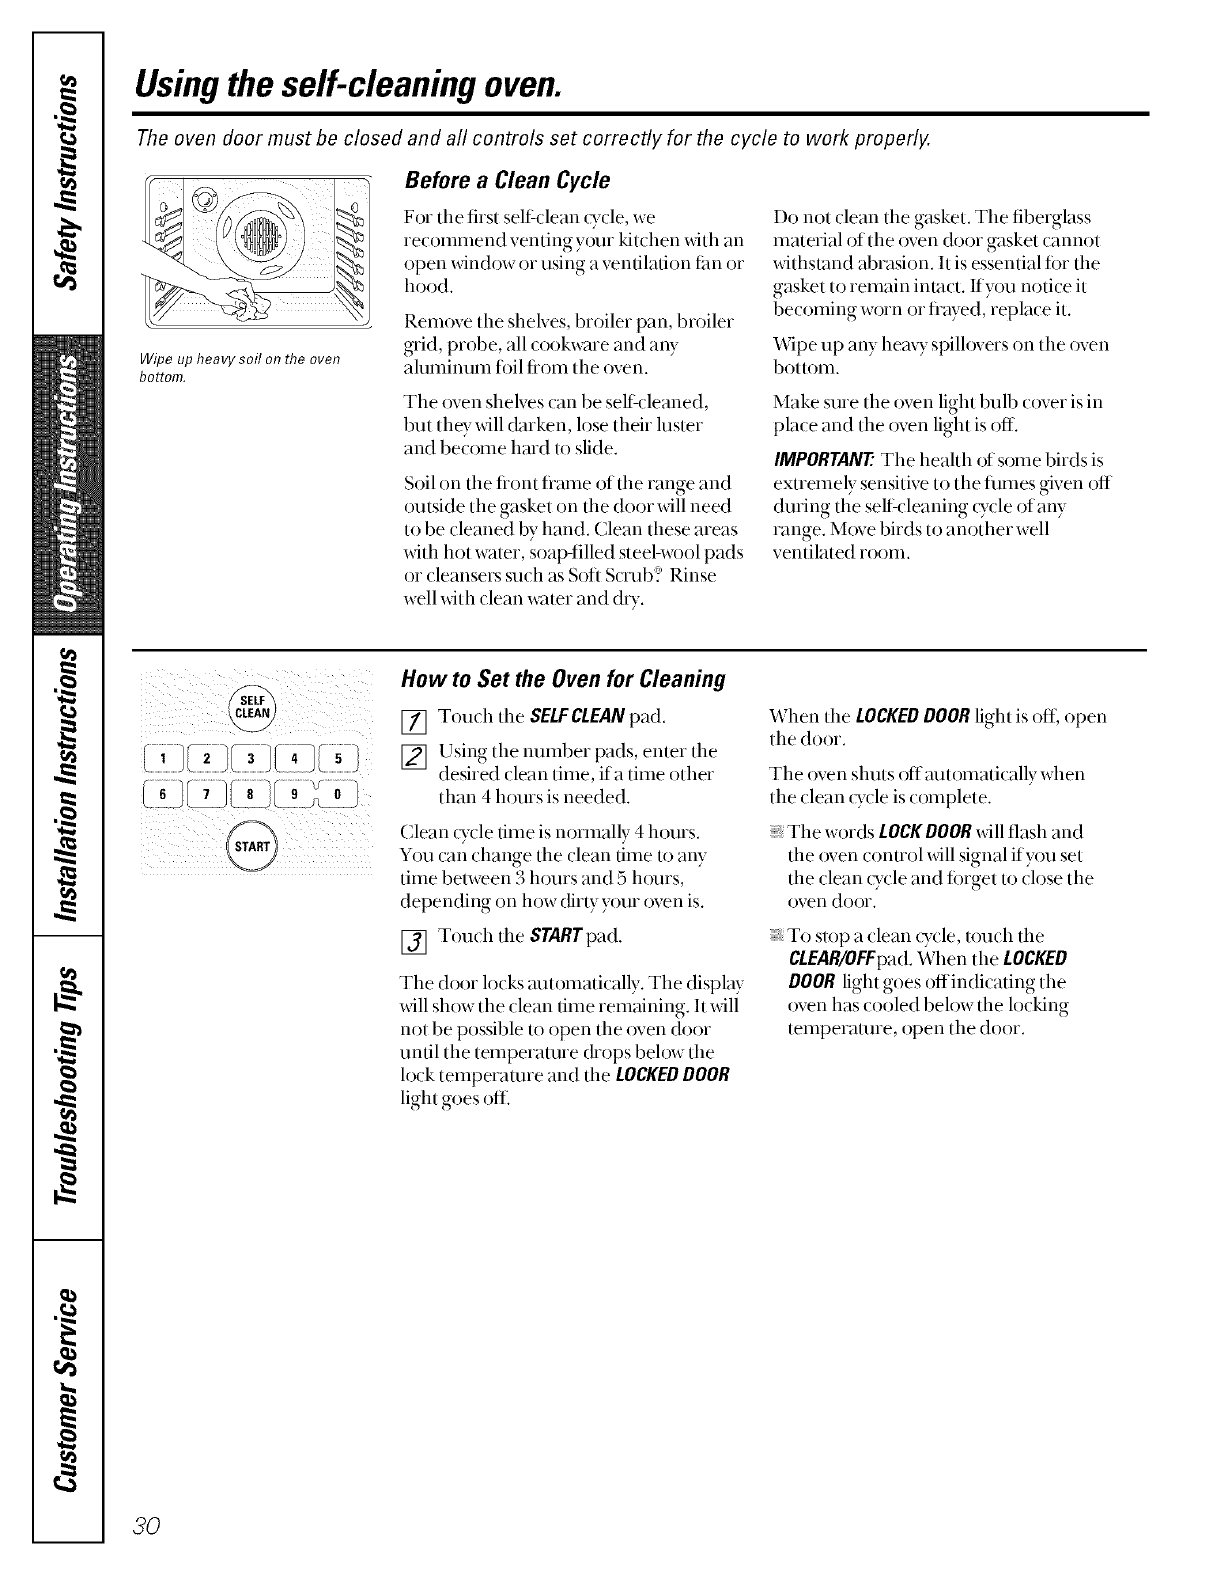
Wipe up heavy soil on the oven
bottom.
Before a Clean Cycle
For tile first self-clean o_cle, we
recommend venting your kitchen with an
open window or using a ventilation fan or
hood.
Remove the shelves, broiler pan, broiler
grid, probe, all cookware and any
ahnninum foil fiom tile oven.
The oven shelves can be seltk:leaned,
but flley will (hrken, lose flmir luster
and become hard to slide.
Soil on the fiont fiame of the range and
outside the gasket on the door will need
to be cleaned by hand. Clean these areas
with hot water, soap-tilled steel-w{)ol pads
or cleansers such as Soft Scrub:? Rinse
well with clean wamr and dU.
Do not clean the gasket. The fiberglass
material of the _)ven door gasket cannot
_dths/and abrasion. It is essential titr the
gasket to remain in/act, lfy_tu notice it
becoming worn or flayed, replace it.
Wipe up any hea W spillovers on the oven
bottom.
Make sure tlle oven light bulb cover is in
plate and the oven light is off.
IMPORTANT'. The heahh of some birds is
extremely sensitive to the throes given off
during the self cleaning _y(le of any
range. Move birds to anoflmr well
ventilated room.
How to Set the Oven for Cleaning
[] Toudl tile SELFCLEANpad.
[] Using tile number pads, enter tile
desired clean time, ifa time other
fllan 4 hours is needed.
Clean _ycle time is normally 4 hours.
You can change the clean time to any
time between 3 hours and 5 h_turs,
depending on how dir Uyour oven is.
[] Touch tile STARTpad.
The (loot locks m_tomatically. The display
will show the clean time remaining. It will
not be possible to open the oven door
until the temperature &ops beh)w the
lock temperature and the LOCKEDDOOR
light goes oil
When the LOCKEDDOORlight is oil open
tlle door.
The oven shuts offautomatically when
tlle dean _)_le is _omplete.
;;;;;;_,The words LOCKDOORwill flash and
the oven (onuol _611signal if you set
the clean ()<le and fi)rget to close the
oven dooI'.
:_ To slop a clean {Tcle,/ouch the
CLEAR/OFFpad.When the LOCKED
DOORlight goes oHindicating the
oven has cooled below the locking
temperature, open the (loot.
3O
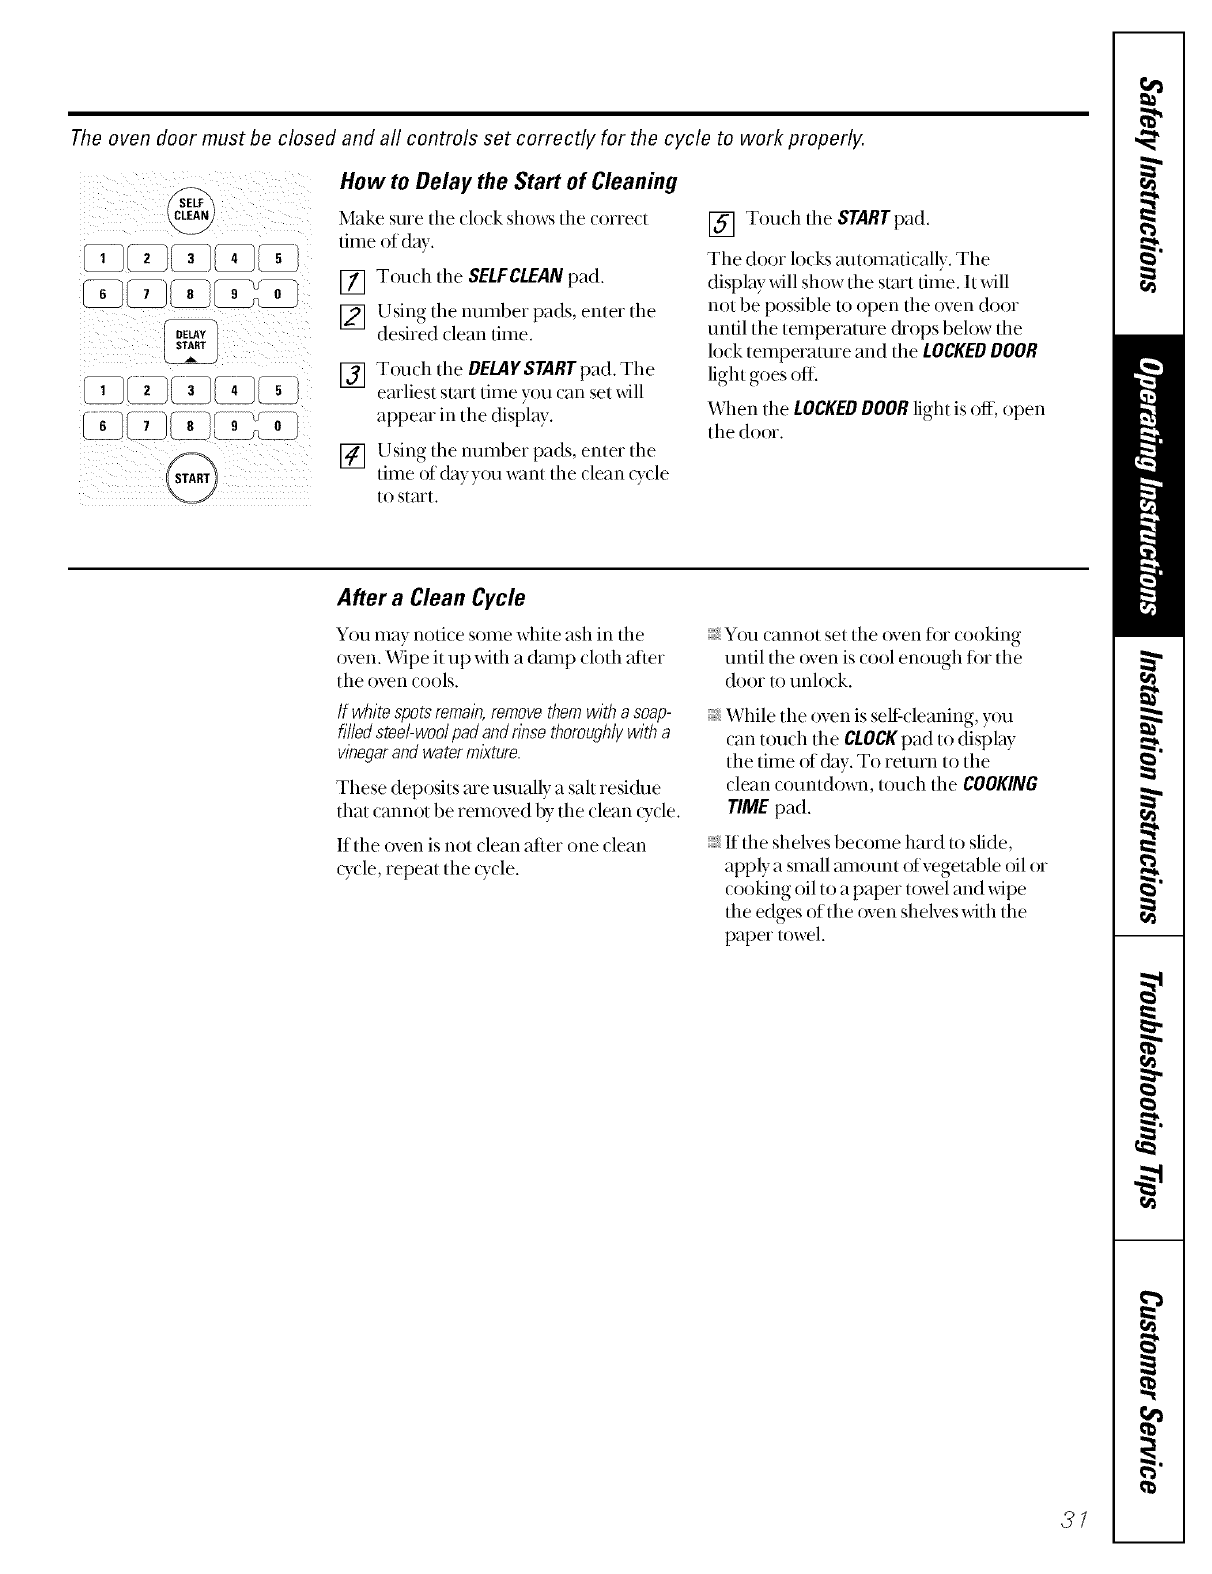
The oven door must be closed and all controls set correctly for the cycle to work properly.
DELAY
START
How to Delay the Start of Cleaning
Make sure tile (lo(k showsthe (oned
time of day.
[] Tou(h the SELFCLEANpad.
[] Using the number pads, enter the
desired dean time.
[] Tou(h the DELAYSTARTpad. The
earliest start time you (an set will
appear in tlle display.
[] Using the number pads, enter the
time of (by you want the clean o_cle
[O S[;/I'[.
[] Touch tile STARTpad.
The door locks mltomatically. The
display will show the s/mt time. It will
not be possible to open the oven door
until the temperature &ops beh)w the
lock temperaune and the LOCKEDDOOR
light goes oil
When the LOCKEDDOORlight is off, open
tlle door.
After a Clean Cycle
You may notke some white ash in the
oven. Wipe it up with a damp (loth after
the oven cools.
If whitespotsremain,removethemwithasoap-
filledsteel-woolpadandnnsethoroughlywitha
vinegarandwatermlkture.
These deposits ;ue usually a sah residue
that cannot be removed by tile clean o_cle.
If the oven is not clean afiei one clean
o_cle, repeat tile o_cle.
You cannot set the oven for cooldng
until the oven is cool enough for tile
door to unlo(k.
:, While tile oven is self cleaning, you
can touch the CLOCKpad to display
the time of (by. To remm to the
clean countdox_l_, touch the COOKING
TIME pad.
:, If tile shelves become hard to slide,
apply a small mnount of vegetable oil or
cooking oil to a paper u)wel and wipe
the edges of the oven shelves with the
paper towel.
3I
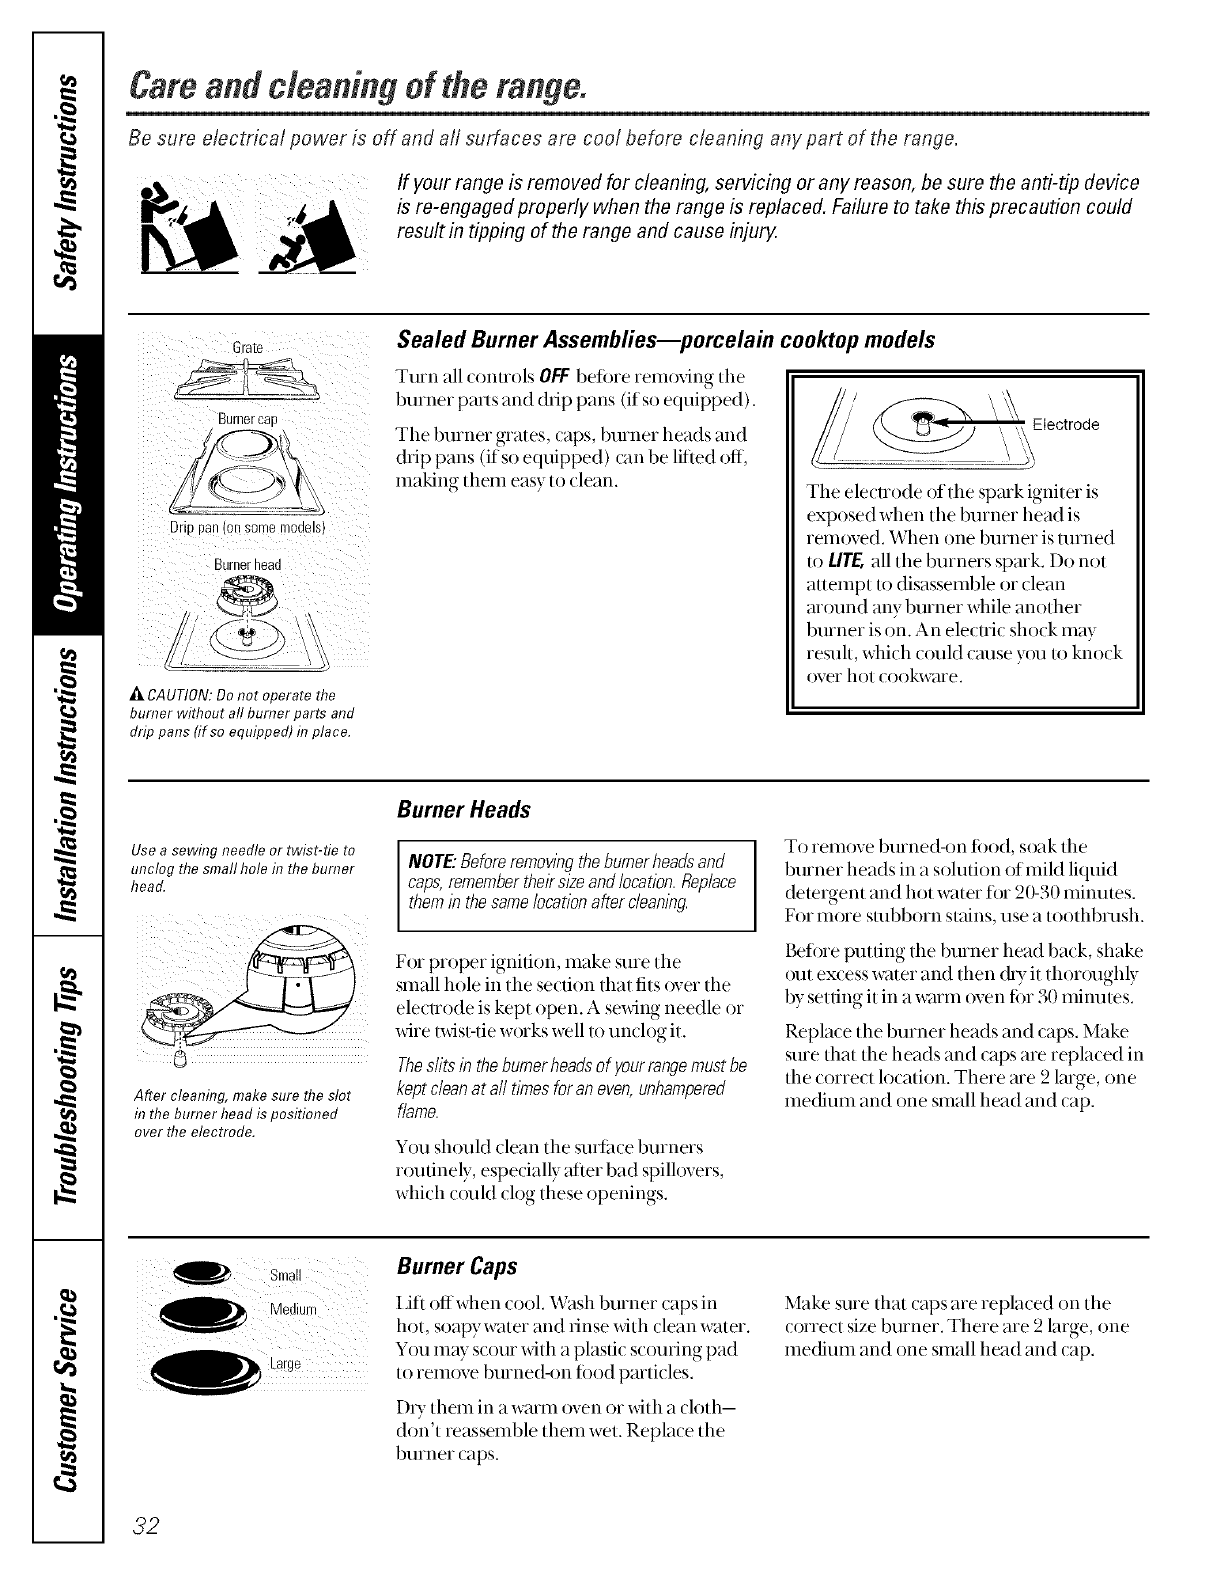
Careendcleaningof therange.
Be sure electrical power is off and all surfaces are cool before cleaning any part of the range,
If your range is removed for cleaning, servicing or any reason, be sure the anti-tip device
/s re-engaged properly when the range is replaced. Failure to take this precaution could
result in tipping of the range and cause injury.
3rate
Burner cab
Dnu uar oll solee rnooel
Burnerhead
_ CAUTION: Do not operate the
burner without all burner parts and
drip pans (if so equipped) in place.
Sealed Burner Assembfies--porcelain cooktop models
Turn all controls OFFbefine removing the
burner parts and drip pans (ifso equipped).
The burner grates, caps, burner heads and
drip pans (if so equipped) (an be lilied off,
making them easy to (lean.
'I\_E Iectr°de
The elecuode of the spa& igniter is
exposed when the burner head is
rem{)ved. When one burner is turned
to UTE,all the burners spark. Do not
attempt to disassemble or clean
mound any burner while another
burner is on. An elecuic shock may
result, which could cruise you m knock
over hot cookware.
Use a sewing needle or twist-tie to
unclog flTesmall hole in the burner
head.
After cleaning, make sure fire slot
in the burner head is positioned
over fire electrode.
Burner Heads
NOTE."Beforeremowbgtheburnerheadsand
caps,remembertheksloeandlocation.Replace
themtbthesamelocationafterclean/bg.
For proper ignition, make sure the
small hole in the section that fits over the
ele(uode is kept open. A sexdng needle or
wire twist-tie works well to unclog it.
Thesiltsin thebumerheadsof yourrawe mustbe
keptdeanat a//timesforaneven,unhampered
flame.
You should clean the surlhce burners
routinely, especially after bad spillovers,
whi(h (ould (log these openings.
To remove burne&on fi)od, soak the
burner heads in a solution ofnfild liquid
detergent and hot water tbr 20-30 nfinutes.
For more stubborn stains, use a toothbrush.
Before putting the burner head back, shake
out excess water and then (hy it thoroughly
by setting it in a warln oven fi)r 30 inilmtes.
Replace the burner heads and caps. Make
sure that the heads and caps are replaced in
the conect location. There are 2 large, one
medium and one small head and cap.
Medium
Large
Burner Caps
I Jfl offwhen cool. Wash burner caps in
hot, soapywater and rinse with (lean water.
You may scour xdth a plastic scouring pad
to remove burned-on food particles.
DIT theln in a warm oven or xdth a cloth-
don't reassemble theln wet. Repla(e the
burner (aps.
Make suie that crapsare replaced on the
correct size burner. There are 2 large, one
medium and one small head and (ap.
32
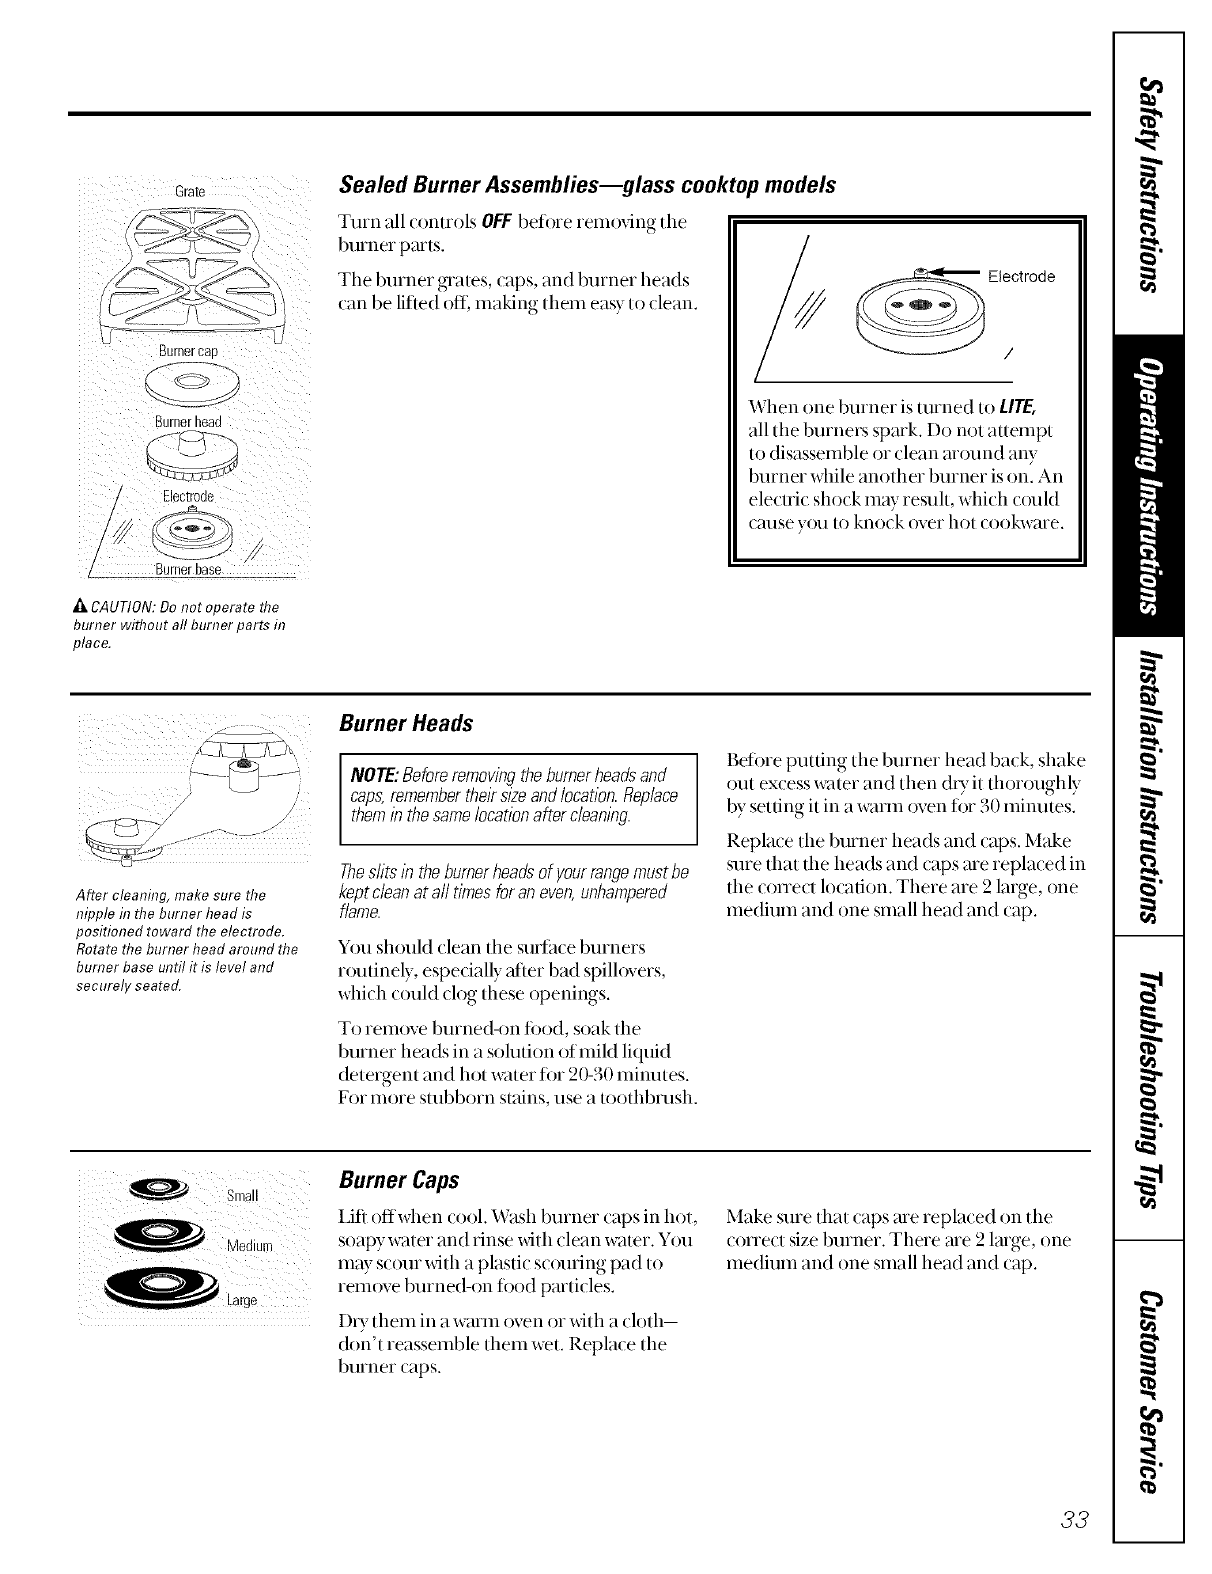
Grate
Burnercae
Burnerhead
Electrode
Sealed Burner Assemblies--glass cooktop models
Turn all controls OFFbetore removing tile
burner pmls.
The burner grams, caps, and burner heads
can be litied oil making them easy to clean.
_ Electrode
/
When one burner is turned to LITE,
all tile burners spark. Do not attempt
to disassemble or clean m{nmd any
burner while another burner is oil. An
elecuic shock may result, which c{nlld
cruise y{nl to knock over hot cookw, ue.
ACAUTION: Donot operate flTe
burner wiflwut all burner parts in
place.
After cleanflTg make sure the
nipple f17the burner head is
positioned toward the electrode.
Rotate the burner head around the
burner base until it is level and
securely seated.
Burner Heads
NOTE:Before removing the burnerheadsand
caps,remember thek sloe and location.Replace
them in the same location after cleaning.
Theshts /n the burnerheadsof yourrange must be
kept cleanat all times for an even, unhampered
flame.
You should clean tile SUltilce burners
routinely, espedally at/er bad spillovers,
whkh could dog these openings.
To rem(_ve burned-on fi)od, soak tile
burner heads in a solution of mild liquid
detergent and hot water fi)r 20-30inilmtes.
For more stubborn stains, use a toothbrush.
Before putting tile burner head back, shake
out excess water and then dUit thoroughly
by setting it in a warm oven fi)r 30 minutes.
Replace tile burner heads and caps. Make
sure that the heads and caps me replaced in
the conect location. There are 2 large, one
medium and one small head and cap.
S,ea,
Medlurn
Burner Caps
I,iti offwhen cool. Wash burner caps in hot,
soapy water and rinse wifll clean water. You
illay SCOUI"with a plastic:scouring pad to
remove burned-on food particles.
DI T theln ill a watiil oven or with a cloth-
don't reasselnble theln wet. Repla(e the
burner caps.
Make sure that caps are replaced on tile
(orre(t size burner. There are 2 large, one
medium and one small head and cap.
33
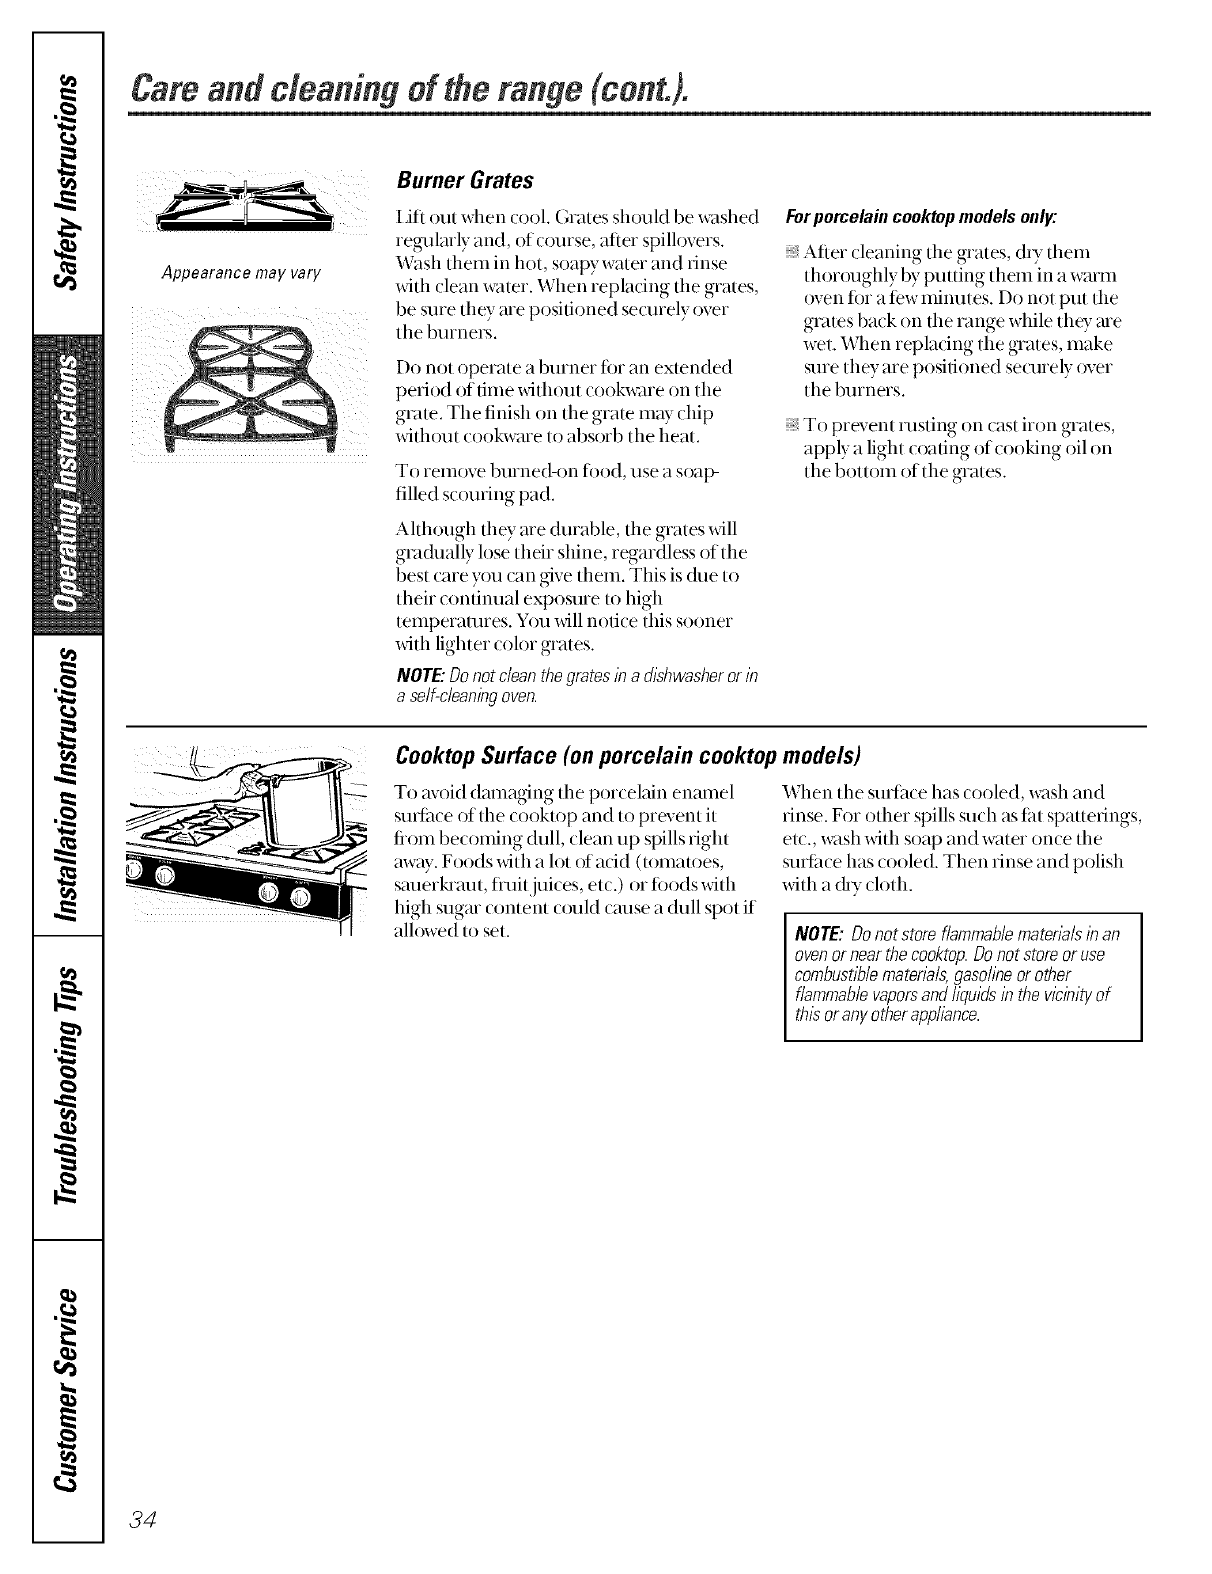
Careandcleaningof therange(cent.).
Appearance may vary
Burner Grates
I.ifl out when cool. Grates should be washed
regulmly and, of course, after spill()vers.
"v\_tshthem in hot, soapywater and rinse
xdth clean water. When repladng the grates,
be sure they me positioned seou'ely over
the burners.
Do not operate a bt]iner J{()ran extended
period of time without (ookware on the
grote. The finish on the grate may chip
without cookware to absorb the heat.
To remove bt]ri_ed-on food, use a soap-
filled st ouring pad.
Ahh()ugh they me durable, the grates will
gt'4(hmlly lose thdr shine, regardless of the
best care you can ,givethem. This is (hm to
their continual exposure to high
temperatures. Y()u will nodce this sooner
with lighter color grates.
NOTE."Donotcleanthegratesinad12hwasherorin
aself-cleaningoven.
Forporcelaincooktopmodelsonly:
;, After cleaning the grates, (hT them
thoroughly by putting them in a wmm
()yen fi)r a t>ewnfinutes. Do not put the
gr4tes back on the range while they me
wet. When replacing the grates, make
sure they are positioned seo_rely over
the burners.
To prevent resting on cast iron grates,
apply a light coaling of cooking oil on
tile bottom of din grates.
Cooktop Surface (on porcelain cooktop models)
To avoid dmnaging the porcelain enmnel
surtime of the cooktop and to prevent it
fiom becoming dull, clean up spills right
axvay.Foods with a lot of add (tomatoes,
smmrkrm_t, fl-uit juices, etc.) or toods with
high sugm content c()uld cm_sea dull spot if
all( )wed to set.
When the sudhce has cooled, wash and
rinse. For other spills such as tilt spatterings,
el(., wash with soap and water once the
sudime has cooled. Then rinse and polish
xdth a (hT cloth.
NOTE:Donotstoreflammablematerb/sinan
ovenornearthecooktop.Donotstoreoruse
combustiblematerb/s,gasolineorother
flammablevaporsandliquidsinthe vicinityof
thisoranyotherapp/iance.
34
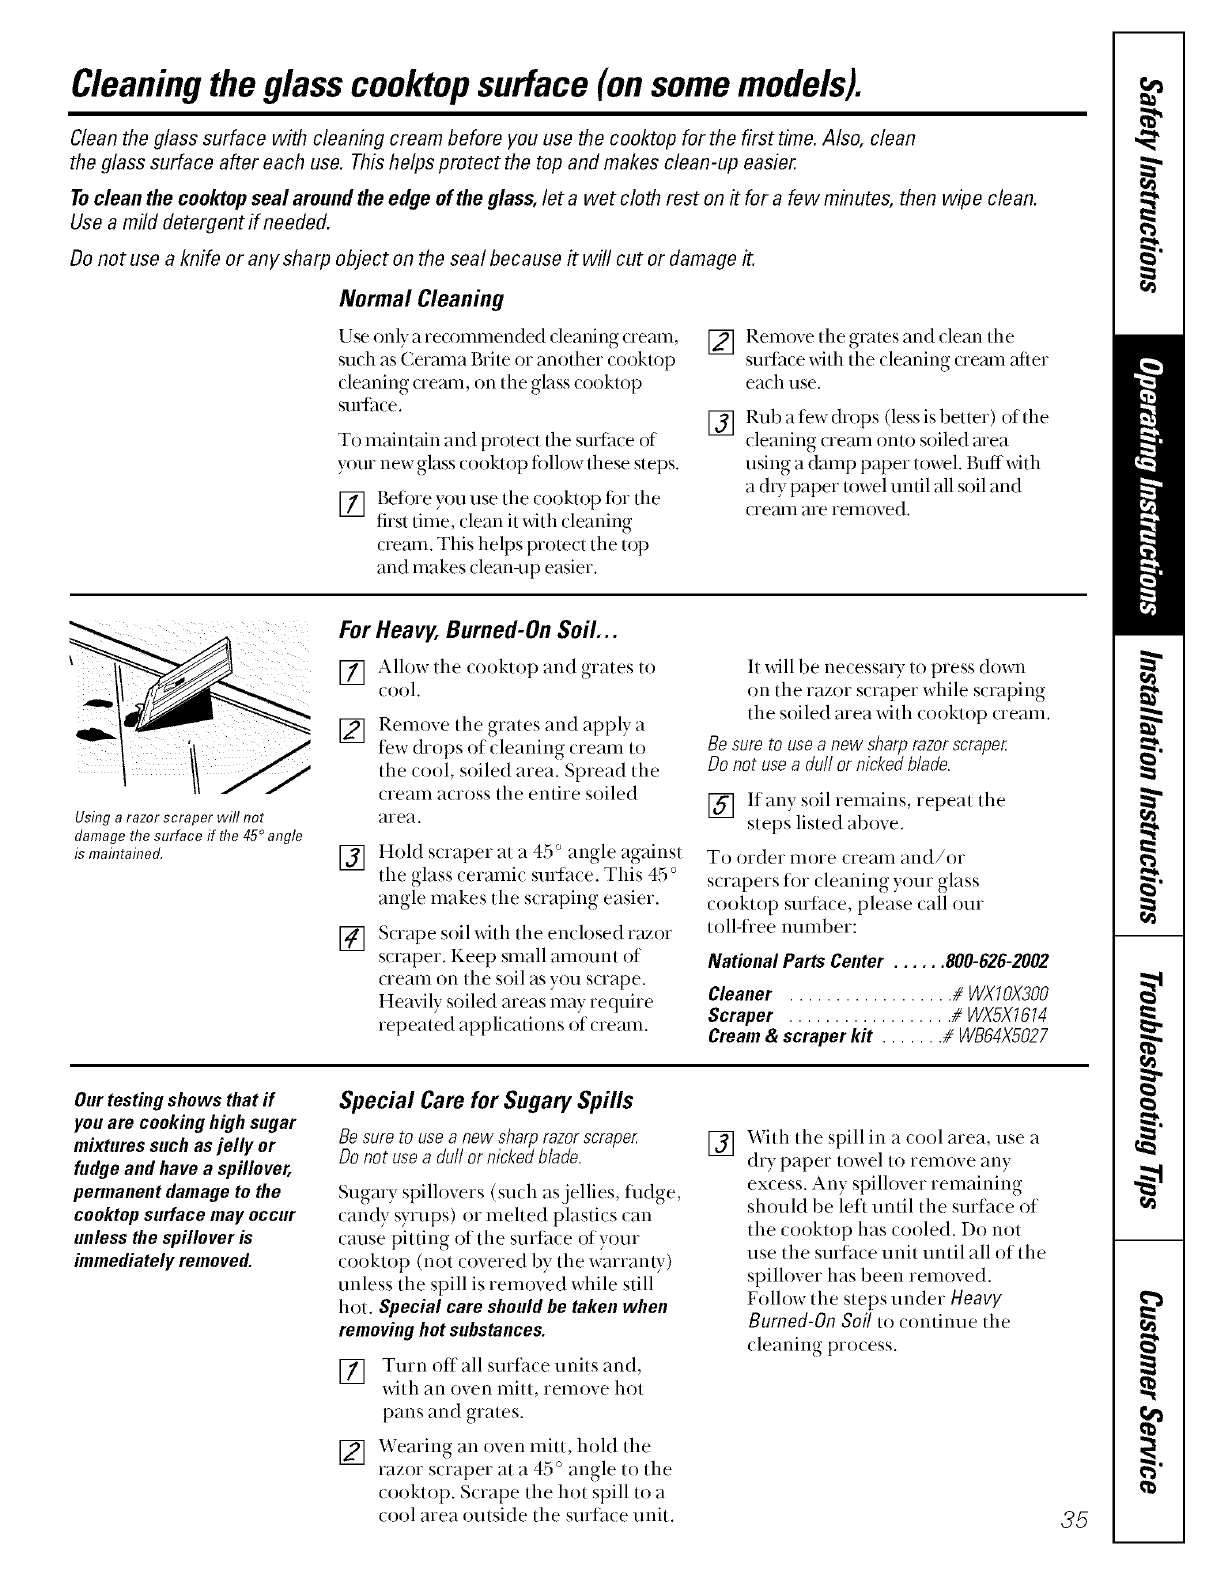
Cleaningthe glass cooktopsurface (onsomemodels).
Clean the glass surface with cleaning cream before you use the cooktop for the first time. Also, clean
the glass surface after each use. This helps protect the top and makes clean-up easier.
Toclean the cooktop seal around the edge of the glass, let a wet cloth rest on it for a few minutes, then wipe clean.
Use a mild detergent if needed.
Do not use a knife or any sharp object on the seal because it will cut or damage it.
Normal Cleaning
Use only a re(ommended deaning (ream,
such as Cerama Brite or another cooktop
cleaning cream, on tile glass cooktop
sufa(e.
To maintain and protect tile surface of
your new glass cooktop fi)llow these steps.
[] Before you use the cooktop for the
first tiine, clean it with cleaning
cieam. This helps protect the top
and makes clean-up easier.
[]
[]
Remove tile givttes and clean tile
surfa( e with the (leaning (ream after
eadl use.
Rub a fb'w drops (less is better) of the
(leaning (ream onto soiled area
using a damp paper towel. Buffwith
a (hy paper towel until all soil and
cI'eatll aie ieiiloved.
Using a razor scraper will not
damage the surface if flTe45° angle
is maintained.
For Heavy, Burned-On Soil...
[] Allow tile (ooktop and grates to
(ool.
[] Remove tile grates and apply a
few drops of cleaning cream to
the (ool, soiled area. Spread the
(ream a(ross the entire soiled
aiea.
[]
[]
Hold scraper at a 45 ° angle against
the glass (eramk surta(e. This 45 °
angle makes the s(raping easier.
Scrape soil with the enclosed razor
scraper. Keep small amount of
cream oil the soil as you scrape,
Heavily soiled areas may require
repeated applications of cream,
It will be necessa Uto press down
oil tile razor scraper while scraping
the soiled area with cooktop cream.
Besure to usea new sharprazorscraper
Do not usea dull ornickedblade.
[] If any soil remains, repeat tile
steps listed above.
To order more cream and/or
s(rapers for (leaning your glass
(ooktop surfh(e, please call our
t oll-fiee number:
National Parts Center ...... 800-626-2002
Cleaner .................. # WXIOX3OO
Scraper .................. # WX5XI 614
Cream& scraper kit ....... # WB64X5027
Our testing shows that ff
you are cooking high sugar
mixtures such as jelly or
fudge and have a spillover,
permanent damage to the
cooktop surface may occur
unless the spillover is
immediately removed.
Special Care for Sugary Spills
Besureto useanew sharprazorscraper
Donot usea dullor nickedblade.
Sugary spillovers (such as jellies, fl_dge,
candy syrups) or mehed plastics can
cause pitting of the surtace of your
cooktop (not covered by the warranty)
unless the spill is removed while still
hot. Special care should be taken when
removinghotsubstances.
[] Turn offall surtace units and,
with an oven mitt, remove hot
pails and grates.
[] Wearing an oven initt, hold tile
razor s(raper at a 45 ° angle to the
(ooktop. S(rape the hot spill to a
(ool area outside the surta(e unit.
[] With tile spill in a cool area, use a
diT paper towel to remove any
excess. Any spillover remaining
should be left until the smthce of
the cooktop has cooled. Do not
use the surtace unit until all of the
spillover has been removed.
Follow tile steps under Heavy
Burned-On Soil to continue tile
cleaning process.
35

Careandcleaningof therange(cont.).
Lift the door straight up and off the
hinges.
The gasket is designed with a gap
at the bottom to allow for proper air
circulation.
Do not rub or clean the door
gasket--it has an extremely low
resistance to abrasion.
If you notice the gasket becoming
worn, frayed or damaged f17any
way or if it has become displaced
on the door, you should have it
replaced.
Lift=Off Oven Boor
Theovendoor is removable,but it is heavy: Youmay
needhelp removingand rap/acing tire door
Te remove the door, open it afew inches to
die special stop posidon dlat will hem tile
door open. Grasp firmly on each side m_d
hfl tile door suaight up arid off tile hinges,
NOTE,' Be careful not to p/ace handsbetween tire
hinge and tire oven doorframe as thehinge could
snapback and pinch fingers',
To replace the door, make sme tile hinges
are in die spe(ial stop poshion. Poshion the
slots in tile bouom of die doe; squmely over
die hinges. Then lowe; tile door slowly and
evenly ove_ bodl hinges at tile same dine.
If tile hinges snap back against tile oven
flTame, pull diem ba(k out.
Dclean the inside of the door:
1)O not allow excess water to ixln into any
holes or sh)ts in the door.
_, Becm]se tile area inside tile gasket is
cleaned (hning the self clean _ycle, you
do not need to clean this by hand. Any
soap left on the liner causes additional
stains when tile oven is heated.
The area outside the gasket can be
(leaned x_4th a soap-filled steel wool or
plasti( pad.
Dclean the outside of the door:
_, Use soap and water to thoroughly clean
the top, sides and flont of the oven door.
Rinse well. Y_)u may also use a glass
cleaner to clean the glass on the outside
of the door.
_, Spillage ofmminades, fl_uitjuices, tomato
sauces and basting materials containing
acids m W cruise discoloration and should
be wiped up immediately. When the
sudime is cool, clean and rinse.
Do not use oven (Tleaners, (Tleansing
powders or harsh abrasives on the outside
of the door.
Oven Bottom
The oven bottom has a porcelain enmnel
finish. To Inake cleaning easier, protect the
oven bottom fl'om excessive spillovers by
pladng a cookie sheet on the shelf below
tile shelf you are cooking on. This is
pmticulmly important when baking a fi_uit
pie or other ti)ods with a high add content.
Hot fl_fit fillings or other fi)ods that are
highly addic (such as tomatoes, sauerkraut,
and smlces _dth xinegm or lemon juice) mW
cause pitting and (hmage to tile porcelain
enmnel surlitce and should be _dped up
immediately.
We don't recommend using aluminum foil
on the oven bottom. It can afl_'ct air flow if
the holes are bh)cked and it can concentrate
heat at the bottoln of the oven, resuhing in
poor baking pedormance.
To clean up spilh)vers, use soap and water,
an abrasive cleaner or soap-filled steel-wool
pad. Rinse well to rein()ve any soap befi)re
self cleaning.
Grid
Ii i
Pal/
36
Broiler Pan and Grid
After broiling, remove the broiler pan fl'om
the oven. Remove the grid fiom the pan.
Carefiflly p_)ur out grease flom the pan into
a proper container. Wash and rinse the
broiler pan and grid in hot wamr with a
soap-filled or plastic so)uring pad.
Iffood has burned on, sprinkle the grid
xdth detergent while hot and cover with wet
paper towels era dish(h)th. Soaking the pan
_dll remove burned-on ti)ods.
The broiler pan and grid may be cleaned
with a cornrnercial oven cleaner.
Both the broiler pan and grid can also be
(leaned in a dishwasher.
Do not store a soiled broiler pan and grid
an)where in the range.
CAUTION:Donot clean thebroilerpanorgridina
self-c/eanrngoven.
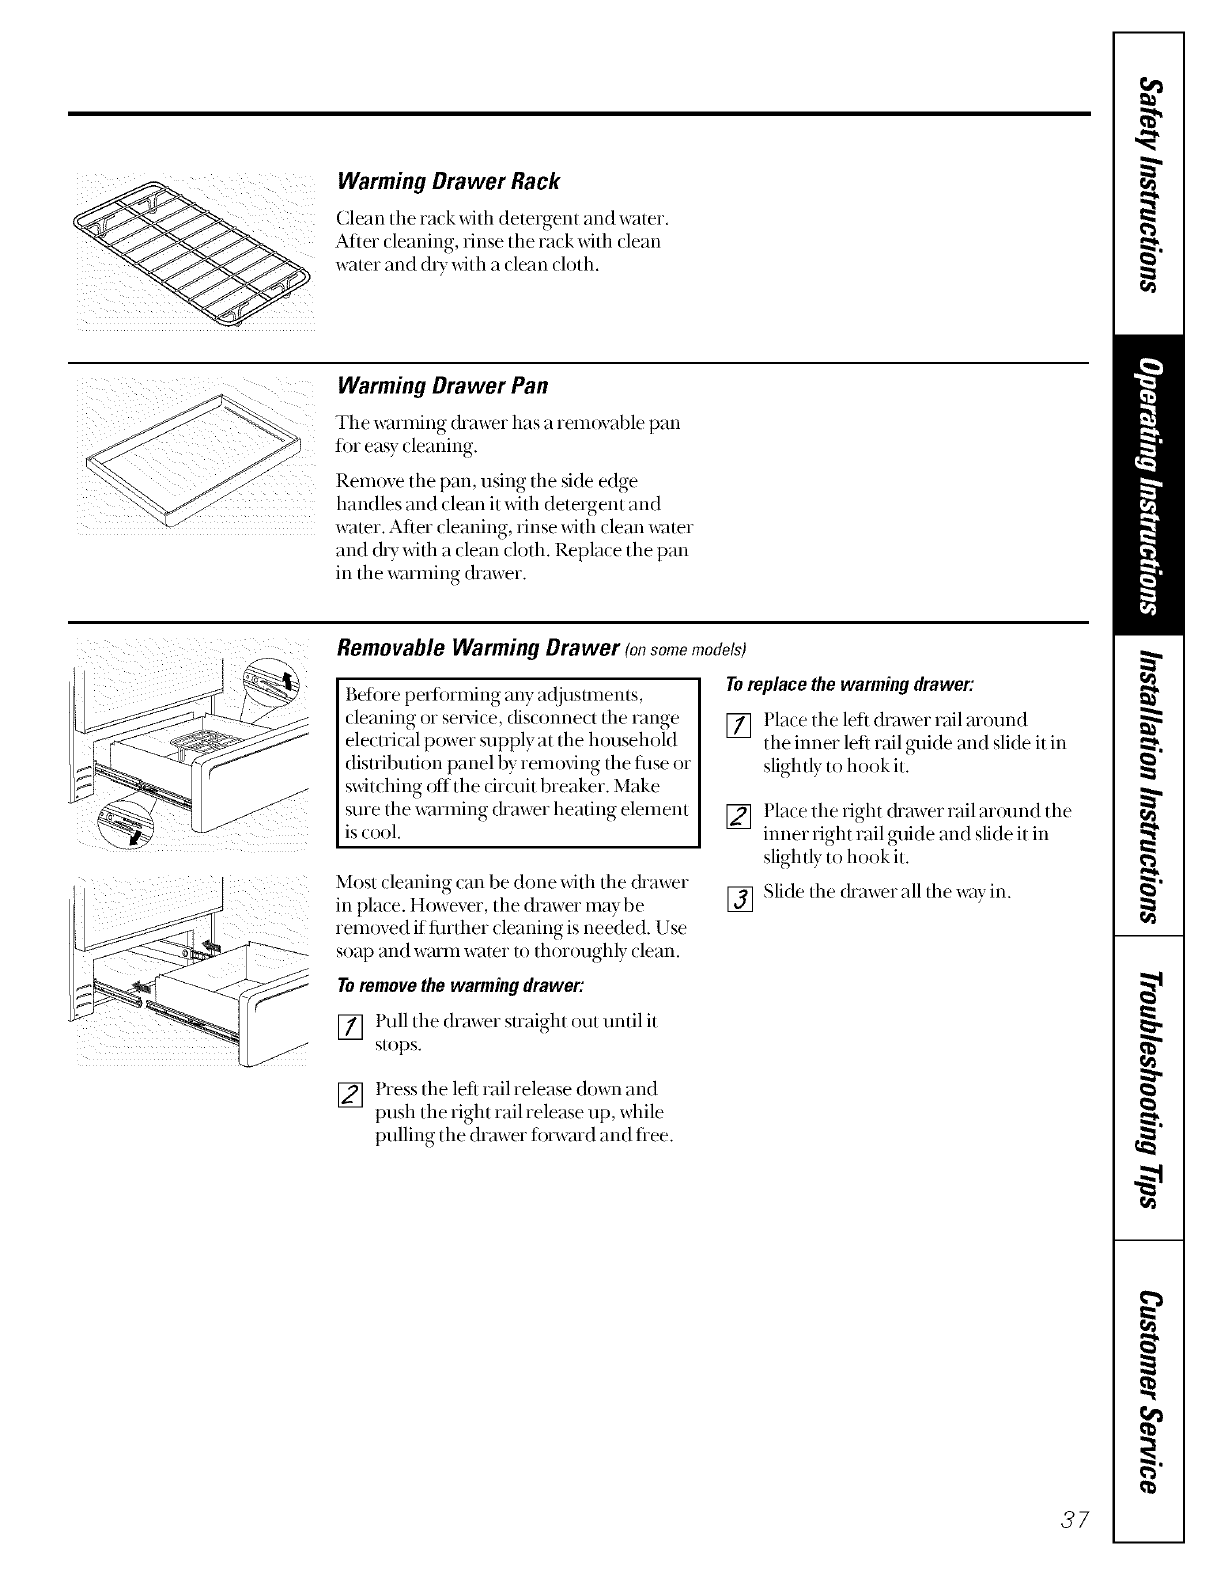
Warming Drawer Rack
(lean tile rack _4tll detergent and water.
After (leaning, rinse the rack with dean
water and (h T _dth a (lean doth.
Warming Drawer Pan
The wamfing &awer has a removable pan
for easy deaning.
Rem{)ve the pan, using the side edge
handles and clean it with detergent and
water. After cleaning, rinse with clean wamr
and &T with a clean cloth. Replace the pan
in the wamfing &awer.
Removable Warming Drawer (onsomemode/s)
Befine pet_bmfing any a_!jusunems,
cleaning or service, disconnect the range
electrical power supply at the househoM
disu'ibufion panel by rem_Mng tile fllse or
s_Mtching offthe circuit breaker, Make
sure the wanning _hawer heating element
is cool.
Most cleaning can be done with the &awer
in place. H_wever, tile drawer may be
rem{)xvd if finther cleaning is needed. Use
soap and wmm water to thoroughly clean.
Toreplacethe warming drawer:
[] Pla(e tile left (hmver rail around
tlle inner left rail guide and slide it in
slightly to hook it.
[] !qace tile fight &awer rail around tile
tuner fight rail guide and slide it in
slightly to hook it.
[] Slide tile &awer all tile way in.
Toremove the warming drawer:
[] Pull tile drawer straight out until it
stops.
[] Press tile left rail release down and
push tlle right rail release up, while
pulling tile drawer fi)iwald and flee.
97
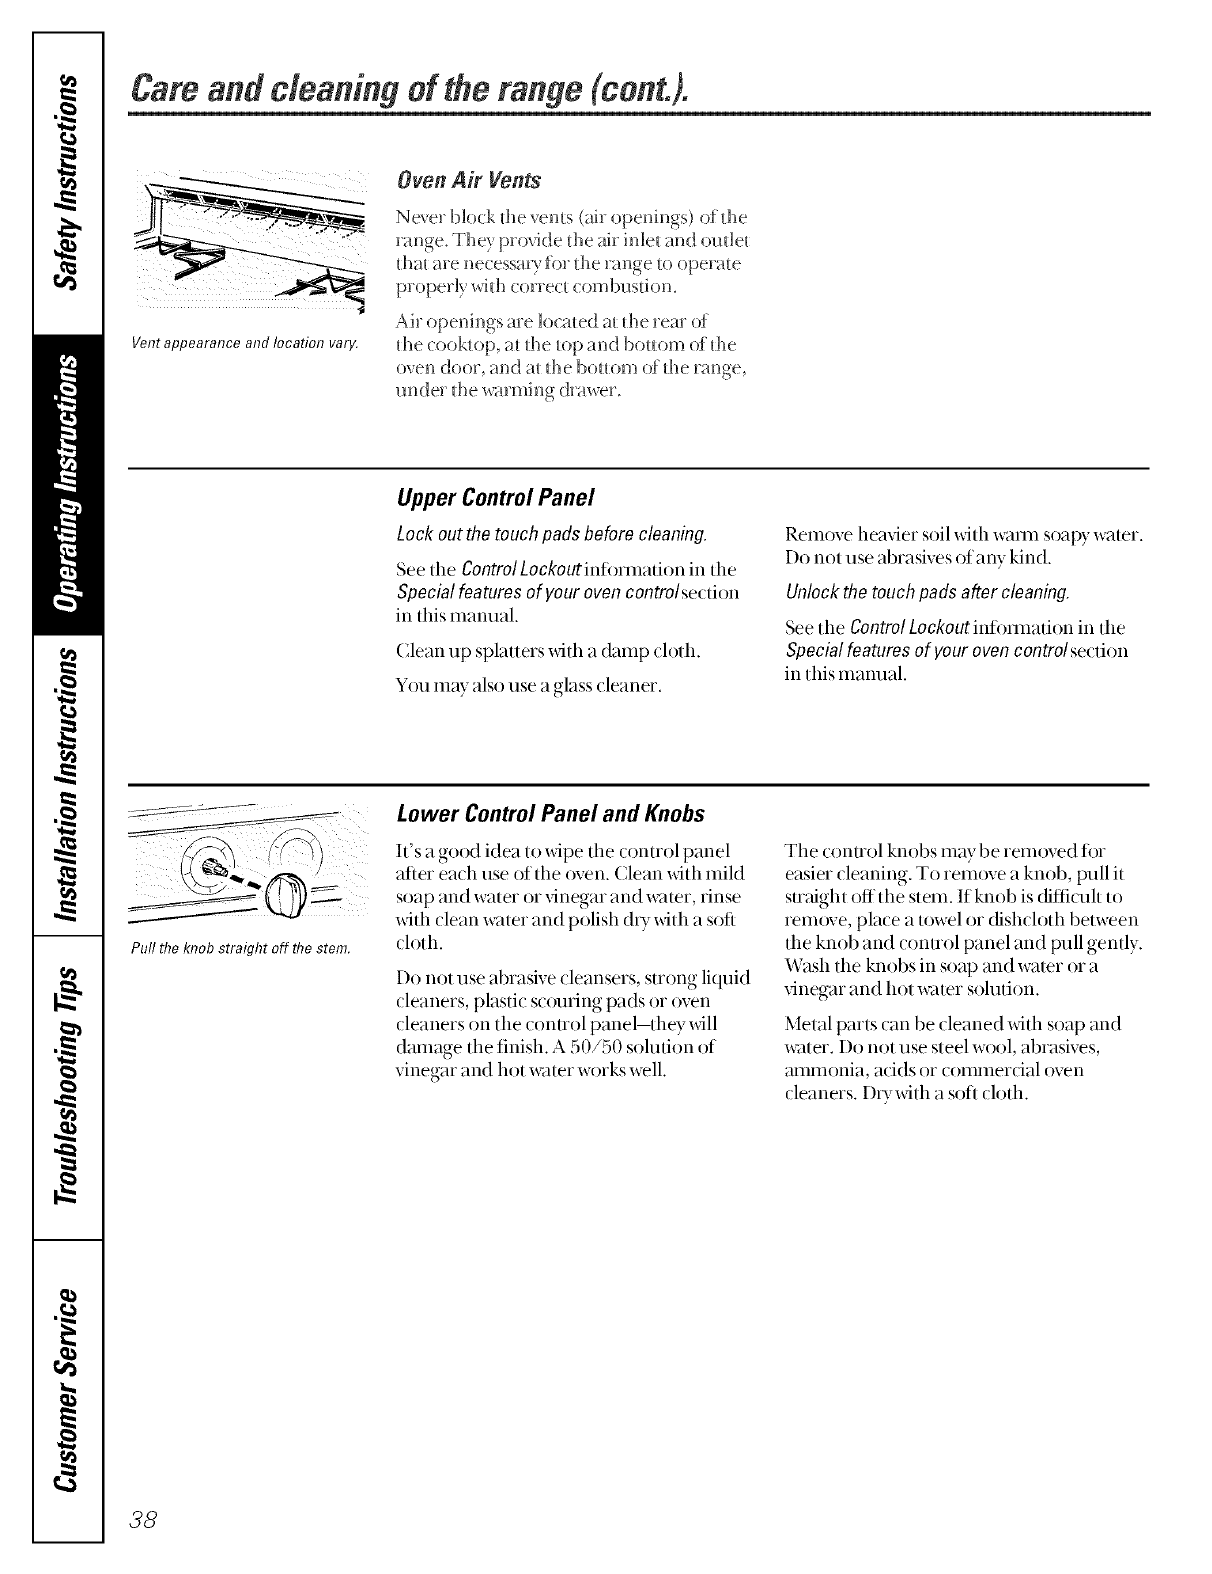
Camandcleaningof therange(cont.).
Oven Air Vents
Vent appearance and location vary.
Never block the vents (air openings) of the
range. They pr_Mde d_e air inlet and oudet
d_at are necessa Ufor d_e range to operate
properly with (orre( t(ombustion.
Ah openh)gs are located at the rein (#
the (ooktop, at the top and bottom of the
over_ door, and at fi_e bouom of the range,
under the winruing drawer.
Upper Control Panel
Lock outthe touch pads before cleaning.
See the ControlLockoutinti)rlnation in tile
Special features of your oven controlsection
in this manual.
Clean up splatters with a damp cloth.
Y_nlmay also use a glass cleaner.
Rem()ve heavier soil with waml soapy water.
Do not use abrasives (fla W kind.
Unlockthe touch pads after cleaning.
Seethe ControlLockoutinfinmation in the
Special features of your ovencontrol section
in this rnanual.
Pull the knob straight off flTestem.
Lower Control Panel and Knobs
It's a good idea to xdpe tile control panel
after each use of the oven. (lean with mild
soap and water or vinegar and water, rinse
xdth clean water and polish (h)_with a soft
cloth.
Do not use abrasive cleansers, strong liquid
cleaners, plastic scouring pads or oven
cleaners on the conuol panel-they will
dmnage tile finish. A 50/50 solution of
vinegar and hot water works well.
Tile conu'ol knobs may be rem{)ved tisr
easier cleaning. To remove a knob, pull it
suaight off the stem. If knob is diflicuh to
remove, place a towel or dishcloth belween
the knob and conuol panel and pull gently.
Wash the knobs in soap and water or a
vinegar and hot water solution.
Metal parts can be cleaned with soap and
water. Do not use steel wool, abrasives,
mnmonia, adds or commerdal oven
cleaners. D_T_dth a soft cloth.
38
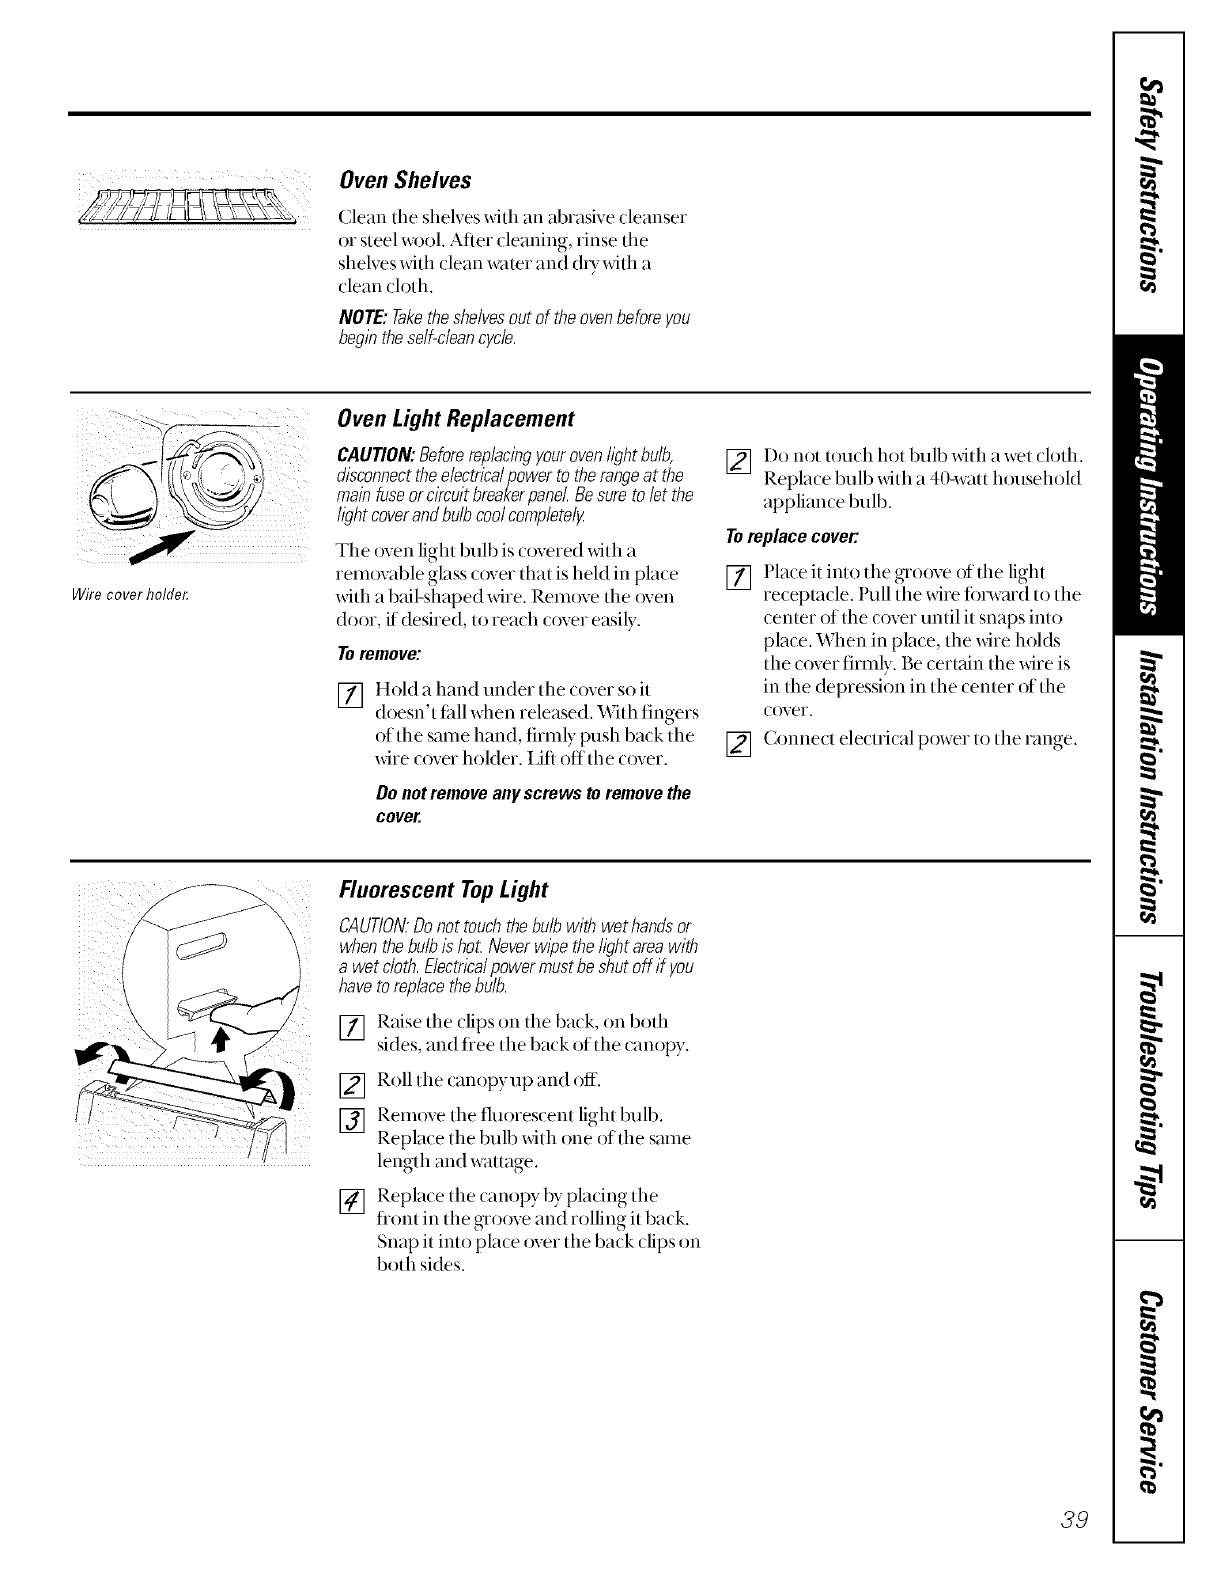
Oven Shelves
Clean tile shelves _dth an abrasive cleanser
or steel wool. After cleaning, rinse tile
shelves xdth (lean water and chTwith a
dean (loth.
NOTE: Takethe shelvesout of the ovenbefore you
begin the self-clean cycle.
'
Wire cover holfle_
Oven Light Replacement
CAUTION:Beforereplacingyourovenlightbulb,
disconnecttheelectricalpowerto therangeat the
mainfuseorcircuitbreakerpanel.Besureto let the
hghtcoverandbulbcoolcompletely
The oven light bulb is _overed with a
removable glass cover that is held in place
with a bail-shaped _dre. Remove the oven
door, if desired, to reach cover easily.
Toremove:
[] Hold a hand under the cover so it
doesn't fall when released. With fingers
of the same hand, firmly push back the
wire cover hoMer. IJfi offthe cover.
Do not remove any screws to remove the
cover.
[] Do not touch hot bulb xdth a wet ch)th.
Replace bulb with a 40-watt househoM
appliance bulb.
Toreplace cover:
[] Place it into the gro¢_ve of the light
receptacle. Pull the wire fi)rward to the
center of the c¢)veruntil it snaps into
place. When in place, the wire holds
the c¢)verfirmly. Be cert>fin the wire is
in the depression in the center of the
c()ver.
[] Connect electrical power to the range.
Fluorescent Top Light
CAUTIONDonottouchthebulbwithwethandsor
whenthebulbis hoLNeverwipethelightaraawith
a wetcloth.Electrlaalpowermustbeshutoffif you
havetoreplacethebulb.
[] Raise tile clips on the back, on 1)off1
sides, and fiee the ba(k ofthe (anopy.
[] Roll the canopyup and off.
[] Remove tile fluores(ent light bulb.
Replace the bulb with one of the same
length and wattage.
[] Replace the canopy by pladng the
front in the groove and rolling it back.
Snap it into pla_e over the ba_k dips on
both sides.
39
Insta#aden of therange.
Read these instructions completely and carefufly,
BEFOREYOUBEGIN
Installation of this range must conform with local codes, or in the absence of local codes, with the
National Fuel Gas Code,ANSI Z223.1,latest edition. In Canada, installation must conform with the current
Natural Gas Installation Code, CAN/CGA-B 149.1or the current Propane Installation Code, CAN/CGA-
B149.2,and with local codes where applicable. This range has been design-certified by theAmerican
Gas Association according to ANSI Z21.1, latest edition and Canadian Gas Association according to
CAN/CGA-1.1latest edition.
As with any appliance using gas and generating
heat, flle,e are certain saiety precautkms you
should fk)llow. You will find these precautions
in tile Important Safety Information section in the
fi_)nt of this manual. Read timm car_fully.
IMPORTAN_ Save these instructions for the local
electrical inspector's use.
NOTE TOINSTALLER:Leave these instructions
with the appliance after installation is completed.
NOTE TO CONSUMER:Keep this Owner's Manual
and Installation Instructions for future use.
NOTE."This applbnce must be properly grounded.
FORYOURSAFETY
Do not store or use combustible materials, gasoline or other flammable vapors and liquids in the vicinity
of this or any other appliance.
ff yousmellgas:
[] Open windows.
[] Don't touch electrical switches.
[] Exdngafish any open flame.
[] Immediately call >)ur gas supplier.
40
TOOLSYOUWILLNEED
Phillips and flat-blade screwdrivers
Pencil and ruler
ADDITIONAL MATERIALS YOU MAY NEED:
Gas line shut-offvalve
Two pipe wrenches (one for backup)
3"
1_ open-end or adjustable wrench
Nut drivers or wrenches: 3/16" and 1/4"
Pipejoint sealant or UL-approved pipe thread
tape with Teflon that rasists action of natural
and LP gases
Flexible metal appliance connector (1/2" LD.)
A 5-foot length b recommended for ease of
installation but other lengths are acceptable.
Never use an old connector when installing a
new range.
Flare union adapter for connection to gas supply
line (3/4" or 1/2" NPTx I/2" I.D.)
Flare union adapter for connection to pressure
regulator on range (1/2" NPTx 1/2" I.D.)
*Teflon.Registeredtrademarkof DuPont

Read these instructions completely and carefully.
WARNING!INSTALLATIONSAFETYINSTRUCTIONS
Improper installation, adjustment, alteration, service or maintenance can cause injury or property
damage. Refer to this manual For assistance or additional information, consult a qualified instafler,
service agency, manufacturer (dealer) or the gas supplier.
Never ,euse old flexible connectors. Tile use
of old flexible connectors can cause gas leaks
and personal in,juU. AMays use NEW flexible
connectors when installing a gas applian(e.
IMPORTANT."Remove all pacldng material and
literature fiom oven befb,e connecting gas and
electrical supply m range.
CAUTION:Do not attempt to operate the oven
ofthis range during a pox_er f_dlure (Electric
Ignition models only).
Have your range installed by a qualified
installer.
Your range nmst be elecuically g_)un(le(1
in accorxlance with local codes or, in the
absence of local codes, in ac(:o_xlance with
tire National Elecuical (]ode (ANSI/NFI'A
70, latest edition). In Canada, electrical
g_mn(ling nmst be in accorxlance with tire
curCent CSA C22.1 Canadian Electrical Code
Part 1 and/or local codes. See Electrical
Connections in this section.
l',efbre installing your range on linoleum
or any other s}q_thetic floor covering, make
sure the floor covering can withstand 180°F.
without shrinking, warping or discoloring.
Do not install the range over carpeting
unless a sheet of 1/4" thick ply_x)od or
sinfilar insulator is placed between the
range and carpeting.
Make sure the wall coverings around the
range can withstand heat generated by the
range up to 200°F.
Avoid placing cabineLs above the range.
To reduce tire hazard caused by reaching
over the open flames of operating burners,
install a ventilation hood over the range that
projects fbrwar,1 at least 5" beyond the tiont
of the cabineLs.
Tire ventilating hood nmst be constricted
of sheet metal not less than 0.0122" thicl<
Install above the cooktop with a clearance of
not less than 1/4" between the hood and the
underside of tire combustible material or
metal cabinet. Tire hood must be at least as
wide as tire appliance and centered over the
appliance. Clearance between the cooking
SUlihce mid the ventilation hood smiace
MUSTNEVERBELESSTHAN24INCHES.
EXCEPTION."Installation of a listed microwave
oven or cooking appliance over tire cookmp
shall confbrm to the installation insm|ctions
packed with that appliance.
If cabineLs ark placed above tire range,
allow a minimum clearmlce of 30" between
the cooking snvla(e and the bottom of
unprotected cabinets.
lea 30" clearance between cooldng su_ta(:e
and overhead combustible material or metal
cabinets cannot be maintained, protect tire
underside of the cabinets above tire cooktop
with not less than 1/4" insulating millboa_,l
covered with sheet metal not less than
0.0122" thicl<
Clearance betx_een the cooking snvlace and
protected cabineLs MUSTNEVERBELESS
THAN24INCHES.Tire vertical distance tiom
tire plane of tire cooking suxtace to tire
bottom of a(!ja(:ent overhead cabinets
extending closer thml 1" U) the plane of the
range sides nmst not be less than 18". (See
the Dimensions and Clearances ilh|stration in
this section.)
CAUTION."Items of interest m children
should not be stored in cabinets above a
range or on the ba(:ksplash of a range-
children climbing on tire range m reach
items could be seriously iqjured.
41
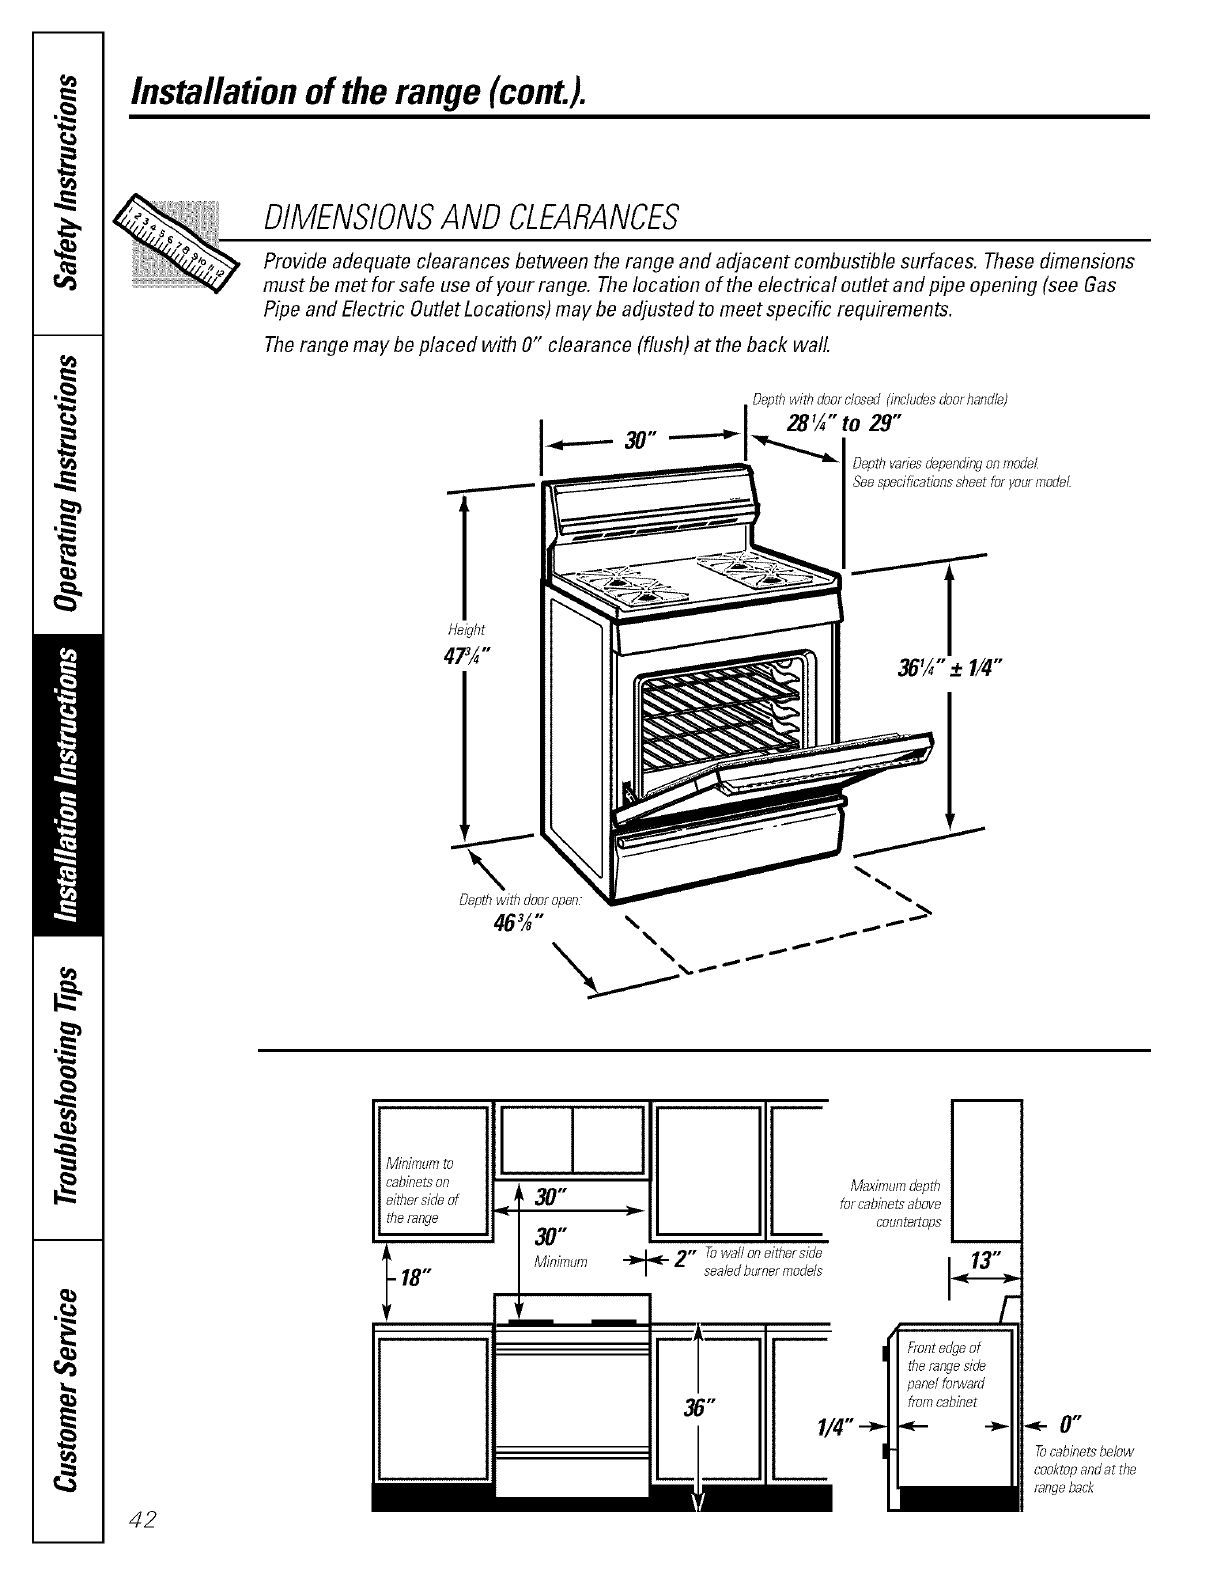
Installation of the range (cont.).
DIMENSIONSAND CLEARANCES
Provide adequate clearances between the range and adjacent combustible surfaces. These dimensions
must be met for safe use of your range. The location of the electrical outlet and pipe opening (see Gas
Pipe and Electric Outlet Locations) may be adjusted to meet specific requirements.
The range may be placed with O" clearance (flush) at the back wall.
eepthwithd_rclosed/!_c/udesdoerhand/e)
_1 28'/, to 29
Seespecificationssheetforyourmodel
Depthwith dooropen
42
Minimumto
cabinetson
eithersideof
therange
18"
0#
30"
Minimum _2" Towalloneitherside
seabd burner models
Maximum depth
for cabinets above
countertops
18"
Front edge of
the range side
panel forward
from cabinet
0"
Tocabinetsbelow
cooktopandat the
rangeback
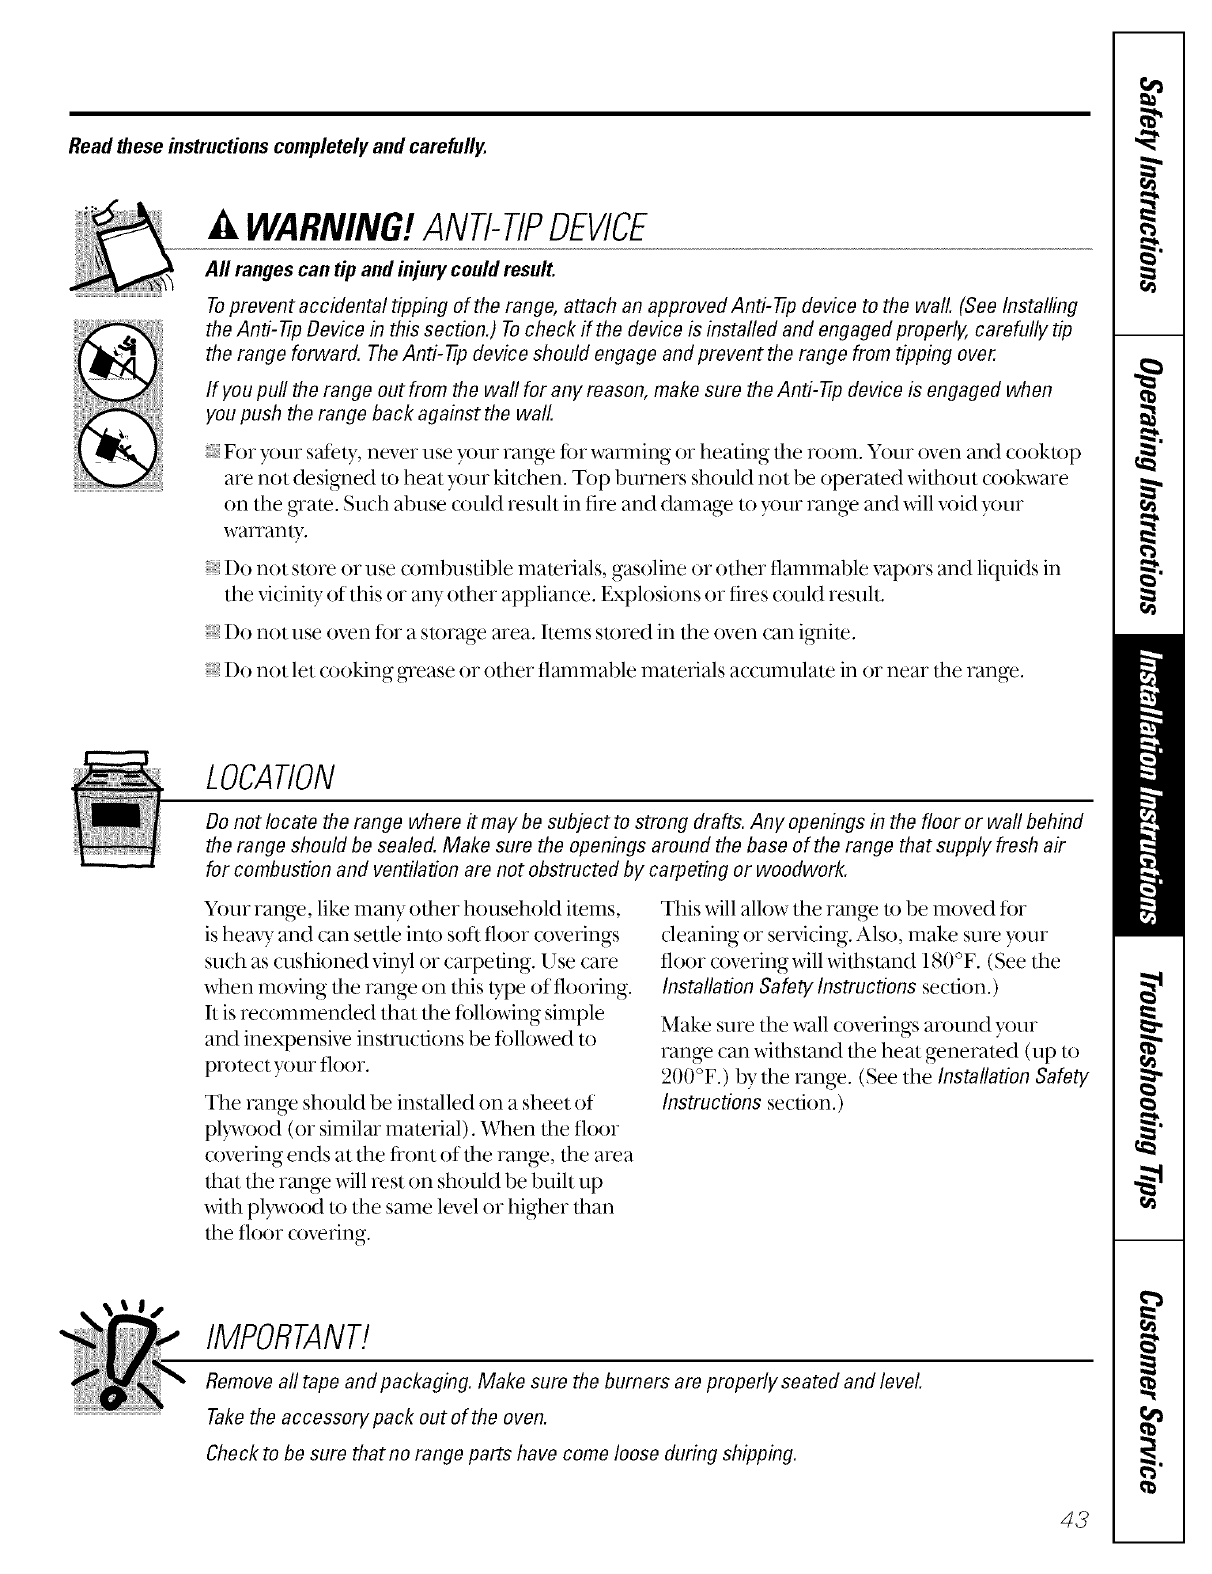
Read these instructionscompletely and carefully.
WARNING!ANTI-TIPDEVICE
All ranges can tip and injury could result.
Toprevent accidental tipping of the range, attach an approved Anti--tp device to the wall. (See Installing
the Anti--tp Device in this section.) Tocheck if the device is installed and engaged properly, carefully tip
the range forward. The Anti--tp device should engage and prevent the range from tipping over.
If you pu# the range out from the wall for any reason, make sure the Anti-tip device is engaged when
you push the range back againstthe wall.
For your satety, never use x_)ur range for x_rming or beating dae room. Your oven and cooktop
are not designed to heat your kitchen. Top burners should not be operated without (:ookware
on the gTate. Such abuse (:ould result in fire and damage to your range and will void your
warTanty.
Do not store or use combnstible materials, gasoline or other flammable vapors and liquids in
the vicinity of this or any other appliance. Explosions or fires could resuh.
Do not use oven for a storage area. Items stored in dm oven can ignite.
Do not let (:ooking g_ease or other flammable materials accumulate in or near dm range.
LOCATION
Do not locate the range where it may be subject to strong drafts. Any openings in the floor or waft behind
the range should be sealed. Make sure the openings around the base of the range that supply fresh air
for combustion and ventilation are not obstructed by carpeting or woodwork.
Your range, like nrmly oilier household items,
is heaxT and can settle into soft floor coverings
such as cushioned vinyl or carpeting. Use care
when moving the range on this type of flooring.
It is recommended that the following simple
and inexpensive instructions be fbllox_d to
protect your floor.
Tire range should be installed on a sheet of
plDvood (or similar material). V_qmntire floor
(:overing ends at tire fiont of the range, the area
that the rmNe will rest on should be built up
with pb_vood to the same level or higher than
the floor (:overing.
This will allow tire range to be re(wed for
deaning or servicing. Also, make sure your
floor coveringwill withstand 180°F. (See the
InstallationSafety Instructions section.)
Make sure tire x_ll coverings around }_)ur
range can witbsland tire heat generated (up to
200°F.) by tire range. (See the Installation Safety
Instructions section.)
IMPORTANT!
Remove aft tape and packaging. Make sure the burners are properly seated and level
Takethe accessory pack out of the oven.
Check to be sure that no range parts have come loose during shipping.
43
Installationof therange(cont.).
[] Provide Adequate Gas Supply
Yourrange is designed to operate at a pressure of 4"
LP gas (propane or butane), 10" of water column.
Make sure you are suppl)dng your range with the
type of gas for whi(h it is designed.
This range is convertible tin use on nattnvd or
propane gas. If y()u dedde to use this range on I,P
gas, conversion nmst be made by a qualified I,P
installer befine attempting to operate the range on
that gas.
For proper operation, the pressure of natural gas
supplied to the regulator must be between 4" and
13 of water cohHnn.
For I_l_gas, the pressure supplied inust be between
10 and 13 of water (olumn.
of water column on natural gas or, if designed for
When checking fi)r proper operation of the
regulator, the inlet pressure must be at least 1"
greater than the operating (manili)ld) pressure as
given ab,)ve.
The pressure regulator lo(ated at the inlet of the
range manifold must remain in the supply line
regardless of whether natural or I J) gas isbeing used.
A flexible metal appliance connector used to
connect the range to the gas supply line sh{)uld have
an I.D. of 1/2" and be 5 teet in length tbr ease of
installation. In Canach, flexible connectors must
be single wall metal connectors no longer than
6 feet in length.
[] Connect the Range to Gas
Shut off the main gas supply valve before disconnecting the old range and leave it off until the new
hook-up has been completed. Don't forget to relight the pilot on other gas appliances when /ou turn
the gas back on.
Becm_se hard piping resuicts m()vement of the
range, the use of an A.G.A.-certified flexible metal
appliance connector is recommended unless local
codes require a hard-piped connection.
Never use an old (onne(tor when installing a new
range. If the hard piping method is used, you must
(arefiflly align the pipe; the range (annot be moved
after the (onne(tion is made.
To prevent gas leaks, put pipejoint compound on,
or x_wap pipe tlnead tape with Teflon* around, all
male (external) pipe threads.
[]
[]
Install a manual gas line shut-offvalve in the gas
line in an easily a((essed location outside of the
range. Make sure m,euone operating the range
knows where and how to shut off the gas supply
to the range.
Install male l/2" flare union adapter to the
1/2" NPT internal thread elbow at inlet of
regulator. On models equipped with standmd
twin burners, install the male pipe thread end
of the 1/2" flare union adapter to the 1/2"
NPT internal thread at inlet of pressure
regulator. Use a backup x_Tench on the
regulator fitting to avoid damage.
When installing the range from the front,
remove the 90 ° elbow for easier installation.
[]
[]
[]
Install male l/2" or 3/4" flare union adapter to
the NPT internal thread of the manual shut-off
valve, taking care to back-up the shut=offvalve
to keep it from turning.
Connect flexible metal appliance connector to
the a(hpter on the range. Position range to
permit (onne(tion at the shut-offvalve.
When all connections have been made,
make sure all range (onuols are in the off
position and turn on the main gas supply valve.
Use a liquid leak detector at alljoints and
connections to check t_)t leaks in the system.
CAUTION:DONOT USEA FLAME TO
CHECKFORGASLEAKS.
When using test pressures greater than 1/2 psig to
pressure test the gas supply system of the residence,
disconnect the range and indixi(h_al shut-offv:tlve
fiom the gas supply piping. When using test
pressures of 1/2 psig or less to test the gas supply
system, simply isolate the range fiom the gas supply
system by closing the incfivi&ml shut-offvalve.
*Teflon.Registeredtrademarkof OuPont
44
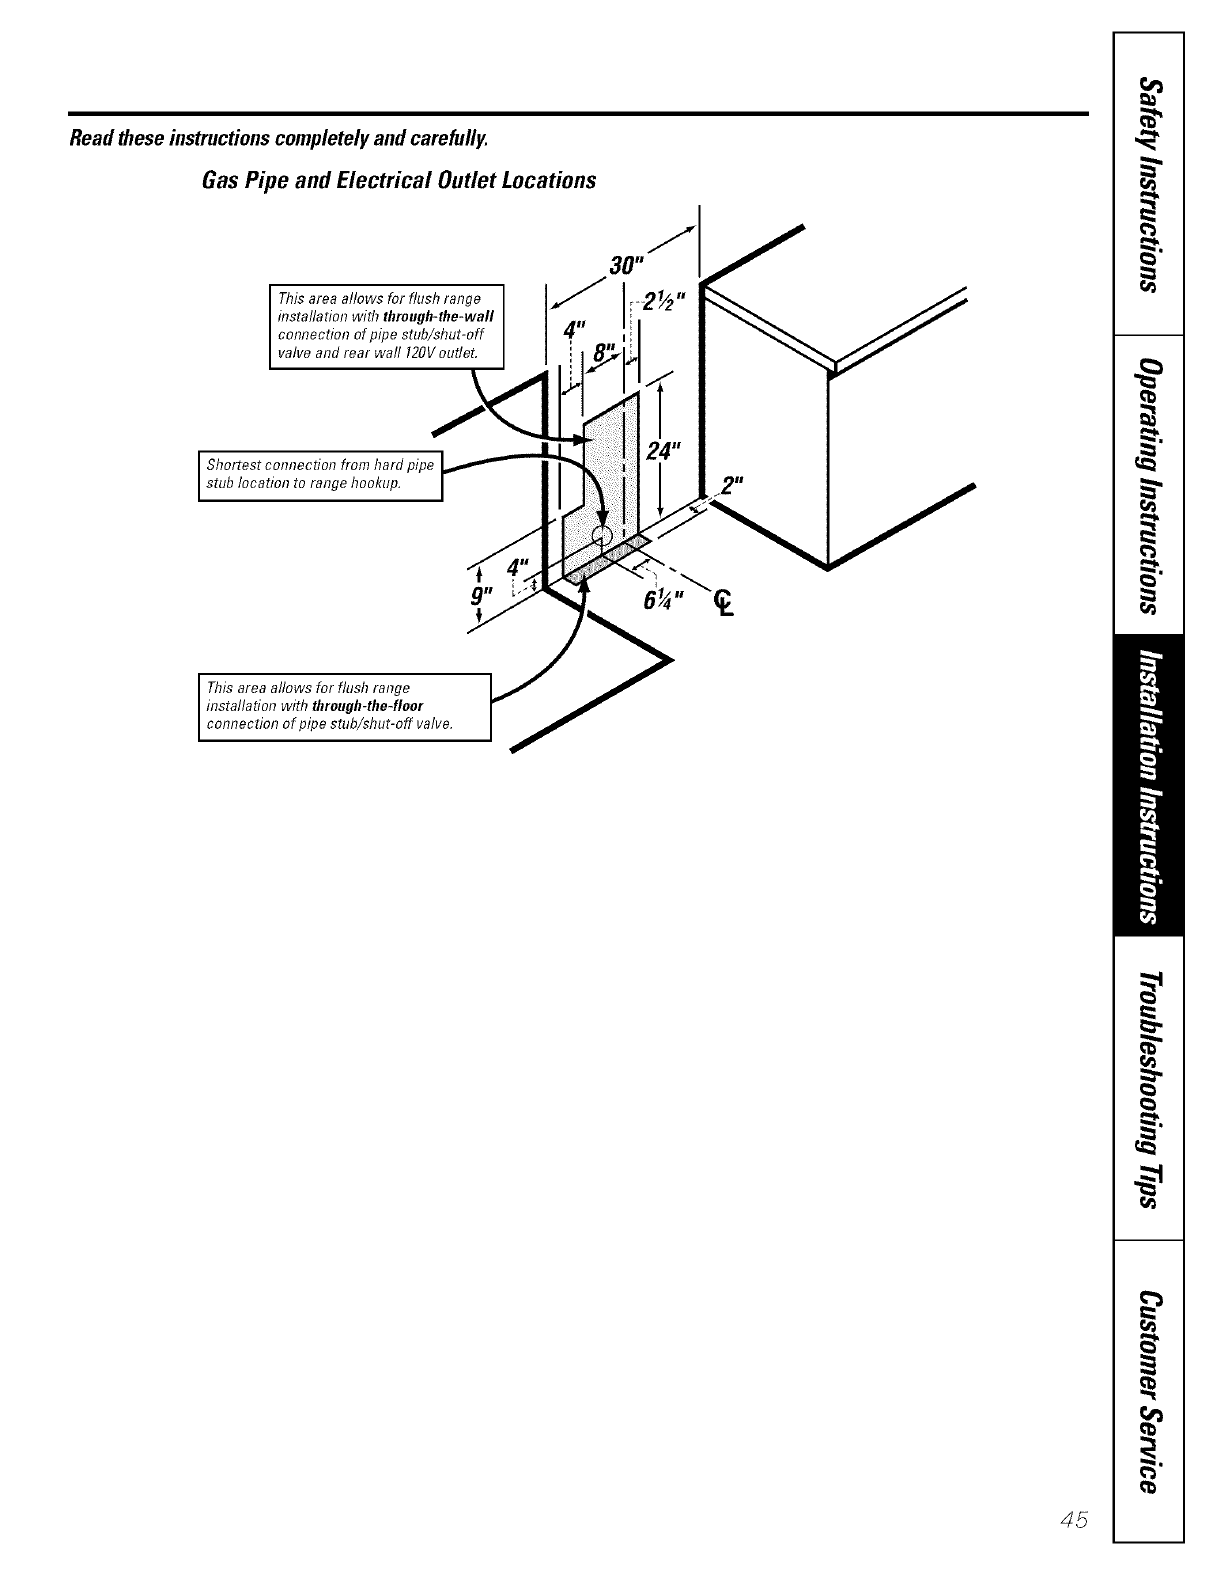
Read these instructions completely and carefully.
Gas Pipe and Electrical Outlet Locations
This area allows for flush range I
installation wifl7 through-the-wall I
cmTnection of pipe stub/shut-off I
valve and rear wall 120Vouflet. I
Shortest comTection from hard pipe
stub location to range hookup.
This area allows for flush range
installation wifl7 through-the-floor
connection of pipe stub/shut-off valve.
45
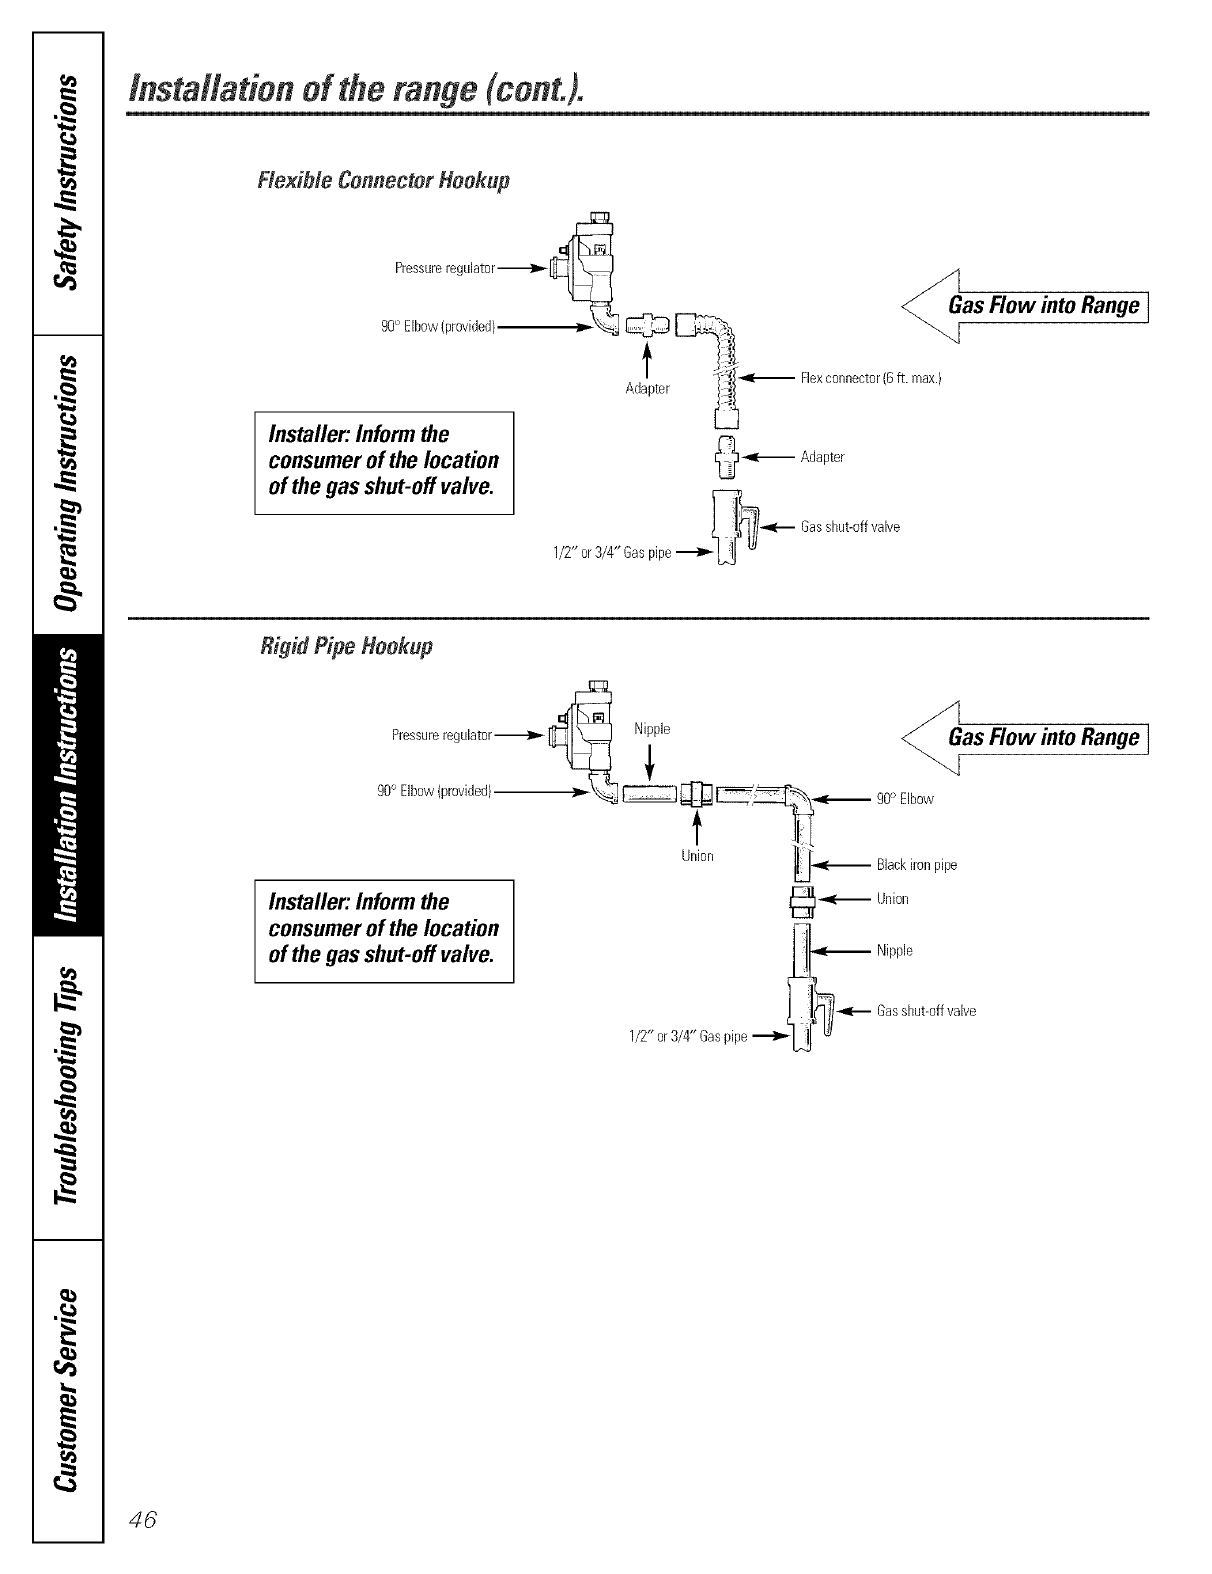
/nstaltadonof therange(cont.).
Flexible Connector Hookup
Installer:Inform the
consumerof the location
ofthe gas shut-offvalve.
Pressureregulator----_'-_ _1
_=_ _ GasFlow into Range I
_ooE,bewIprovidedl"_ _ _ _4
i .--FlexcenoecterIB maxl
Adapter _ " "
_rr-- Adapter
--- Gasshut-offvalve
1/2" or3/4" Gaspipe"--_' L)J _
RigidPipeHookup
Pressure regulator
90° Elbow (provided)
Installer: Inform the
consumer of the location
of the gas shut-off valve.
Niple _asFIowintoRange]
_ _ _..,._ 90oElbow
Ultn '_1" Blackironpipe
_ _[--- Union
_.....__ Nipple
Gasshut-offvalve
1/2" or3/4" Gaspipe
46
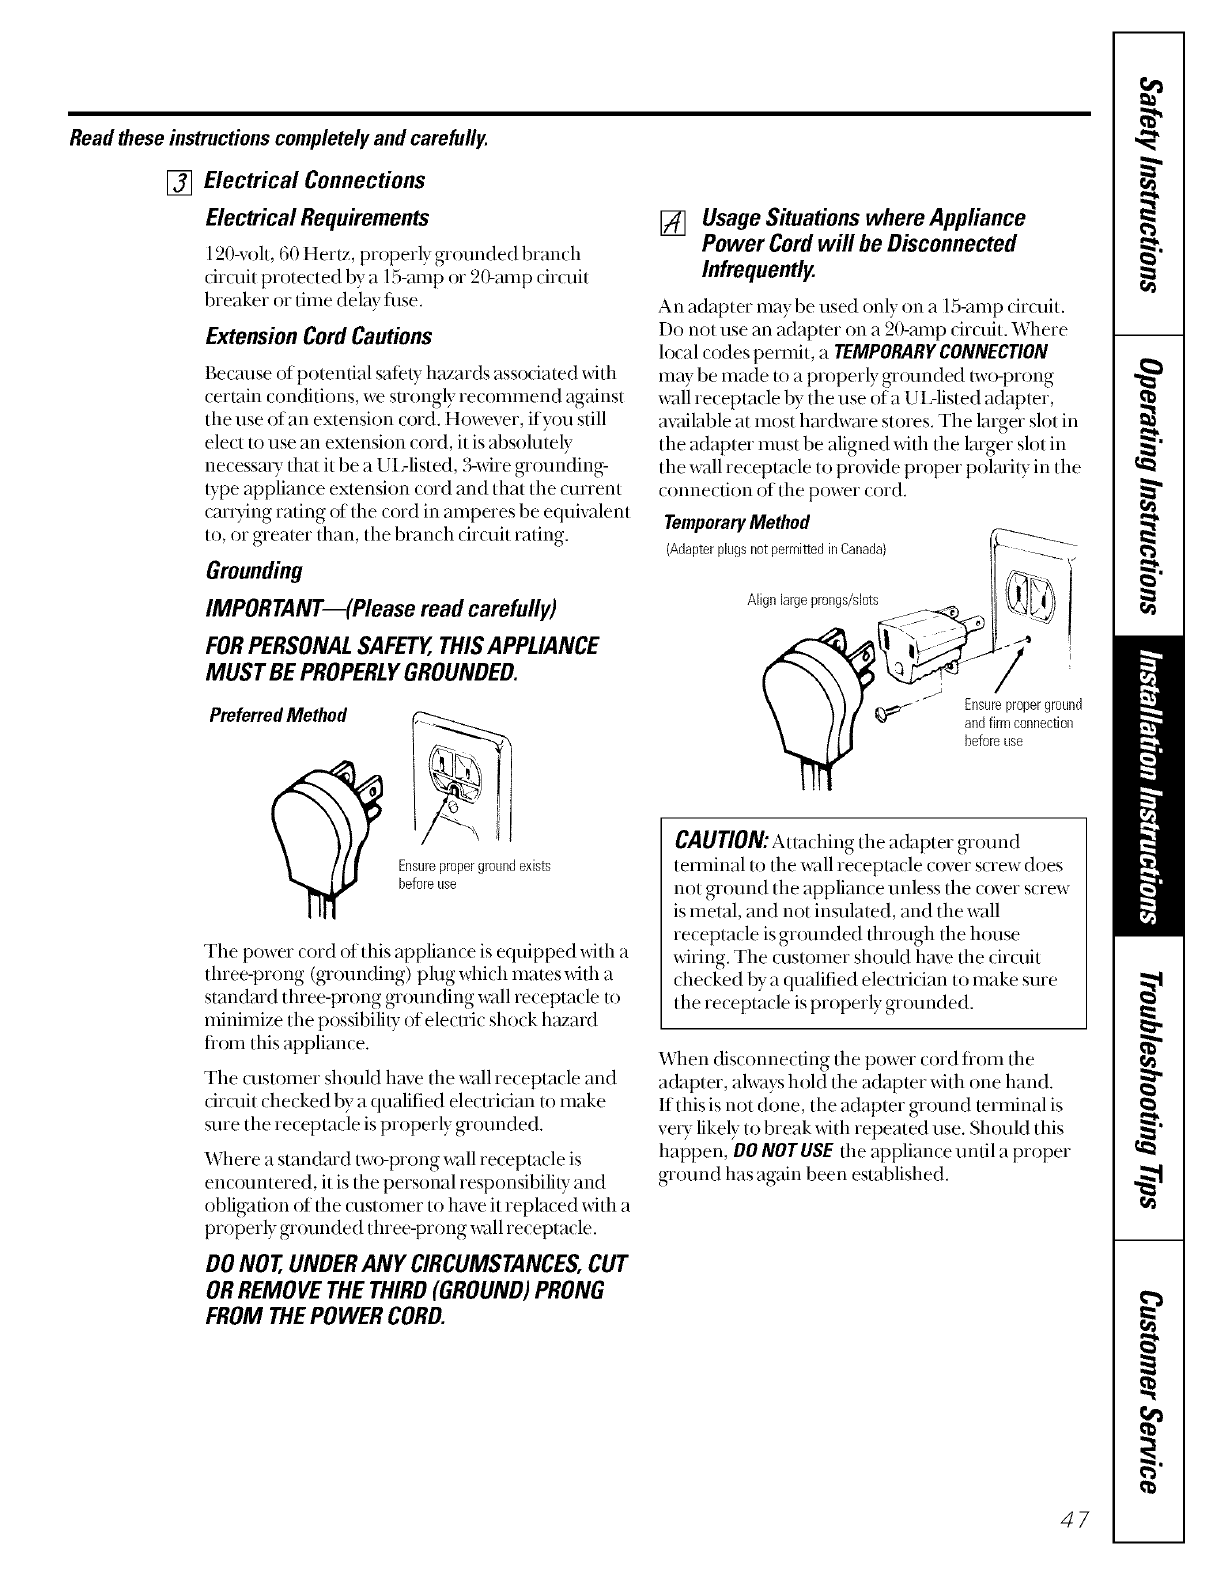
Read these instructions completely and carefully.
[] Electrical Connections
Electrical Requirements
12()-_xfit, 60 Hertz, properly gn)unded branch
dr(uit protected by a 15-mnp or 20-mnp drcuit
breaker or time delay fl_se.
ExtensionCordCautions
Becm_se ofpo/enfial sadly hazards assodated _dth
certain conditions, we su'ongly recommend against
the use of an extension cord. However, if you still
elect m use an ex/ension cord, it is absolutely
necessm T that it be a UI Aisted, 3-wire grounding_
bpe appliance extension cord and that the oment
cm_ying rating of the cord in amperes be equivalent
to, or greamr than, the branch cirofit rating.
Grounding
IMPORTANT--(Please read carefully)
FORPERSONALSAFETE,THISAPPLIANCE
MUST BE PROPERLYGROUNDED.
PreferredMethod
Ensurepropergroundexists
beforeuse
The power cord of this appliance is equipped with a
three-prong %ounding) plug which mates with a
standmd three-prong grounding wall receptacle to
minimize the possibili b"of elecuic shock hazard
flom this appliance.
The customer shouM have the wall receptacle and
drcuit checked by a qualified electridan to make
sure the receptacle is properly grounded.
Where a standmd two-prong wall receptacle is
eno)untered, it is the personal responsibili/y and
obligation of the customer to have it replaced with a
properly grounded three-prong wall receptacle.
DO NOT UNDERANY CIRCUMSTANCES,CUT
ORREMOVE THETHIRD (GROUND)PRONG
FROM THEPOWERCORD.
[] UsageSituations where Appliance
Power Cordwill be Disconnected
Infrequently.
An adapter may be used only on a 15-amp drcuit.
Do not use an adapter on a 20-mnp dr(uit. Where
local codes permit, a TEMPORARYCONNECTION
may be made/o a properly gr_)unded m'_-prong
wall receptacle by the use ofa UI Aisted adapter,
available at most hmdwme stores. The larger slot in
the adapter nmst be aligned with the larger slot in
the wall receptacle to provide proper polmi b in the
connection of the power cord.
TemporaryMethod
(AdapterplugsnotpermiriedinCanada)
Align largeprongs/slots
Ensureproperground
_r andfirmconnection
beforeuse
CAUTION:Attaching the adapter gn)und
temfinal/o the wall recepmde ('_)versoew does
not g'r()und the appliance unless the (over s(Tew
is metal, and not insulated, and the wall
receptacle is gr()unded through the house
_dring. The (ustomer shouM have the cir(uit
checked by a qualified elecuician to make sure
the receptacle isproperly gr{)unded.
When disconnecting the power cord fl'om the
adapter, always hold the adapter with one hand.
If this is not done, the adapter ground terminal is
ve Ulikely to break with repeated use. ShouM this
happen, D0 NOT USE the appliance until a proper
ground has again been established.
47
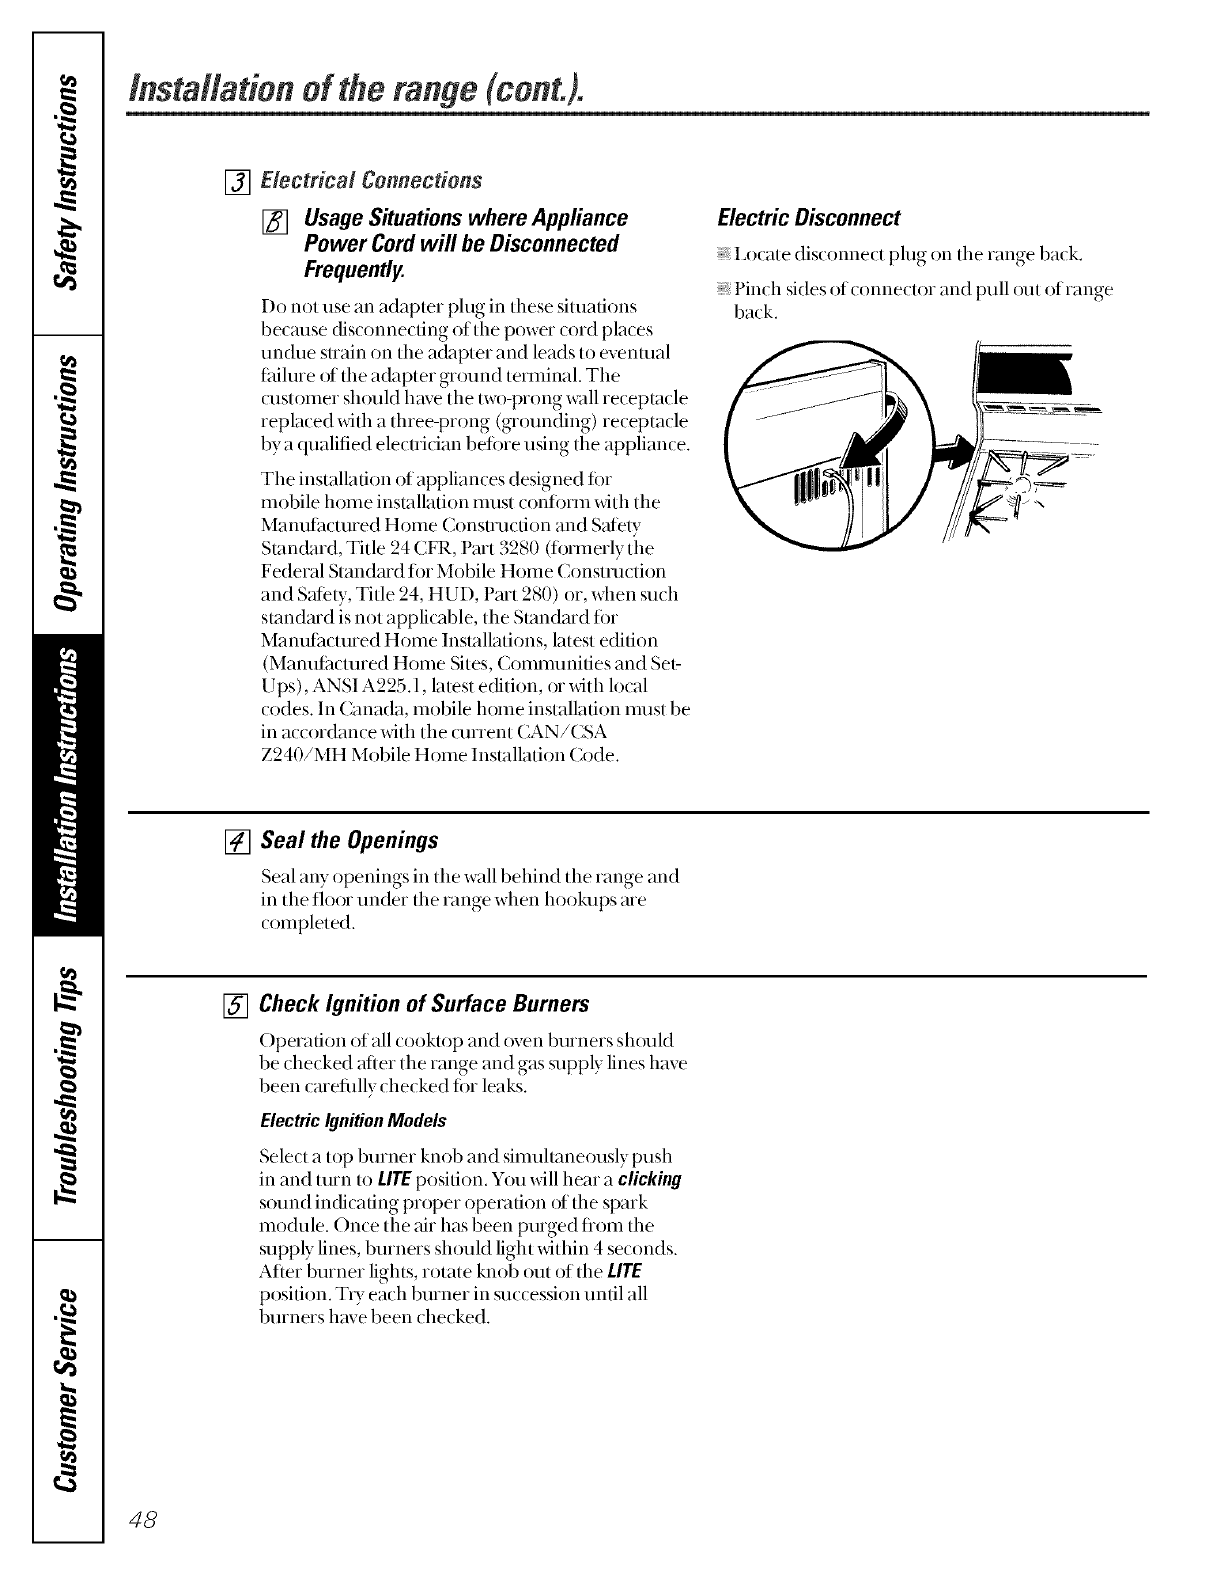
Instal&tion of therange(cont.).
[] Electrical Connections
[] Usage Situations where Appliance
Power Cord will be Disconnected
Frequently.
Do not use an adapter plug in these situations
becmlse disconnecting of the power cord places
undue strain on tile a(btpter and leads to evemual
t_tilure of the adapter ground terminal. The
(ustomer should have the two-prong wall receptacle
replaced with a three-prong (grounding) receptacle
by a qualified elecuidan beiore using the appliance.
The installation of appliances designed tk)r
mobile home installation must conli)rm _dth the
Manutacmred Home Consu_lcfion and S_ely
Standard, Title 24 (FR, Pmt 3280 (Iormerly the
Federal Standard lot Mobile Home ( onstmction
and Sately, Title 24, HUD, Pmt 280) or, when such
smndmd is not applicable, the Smndmd tin
Manutacmred Home Installations, latest edition
(Manutacmred Home Sites, Comnmnifies and Set-
Ups), ANSI A225.1, latest edition, or with local
codes. In ( anada, mobile home installation nmst be
in accordance with the current CAN/CSA
Z240/MH Mobile Home Installation Code.
Electric Disconnect
I_o(ate dis(onne(t plug on tile range balk.
Pinch sides of connector and pull out of range
back.
[] Seal the Openings
Seal any openings in tile wall behind tile range and
in tile floor under tile range when hookups are
completed.
[] Check Ignition of Surface Burners
Operation of all cooktop and oven burners should
be checked after the range and gas supply lines have
been carefiflly checked for leaks.
ElectricIgnitionModels
Select a top burner knob and simultaneously push
in and unn to LifE position. You will hear a clicking
s(mnd indicating proper operation of tile spark
module. Once the ;fir has been purged flom the
supply lines, Nnners sh{mld light within 4 seconds.
After burner lights, rotate knob out of tile LITE
position. T Ueach burner in succession until all
burners have been checked.
43
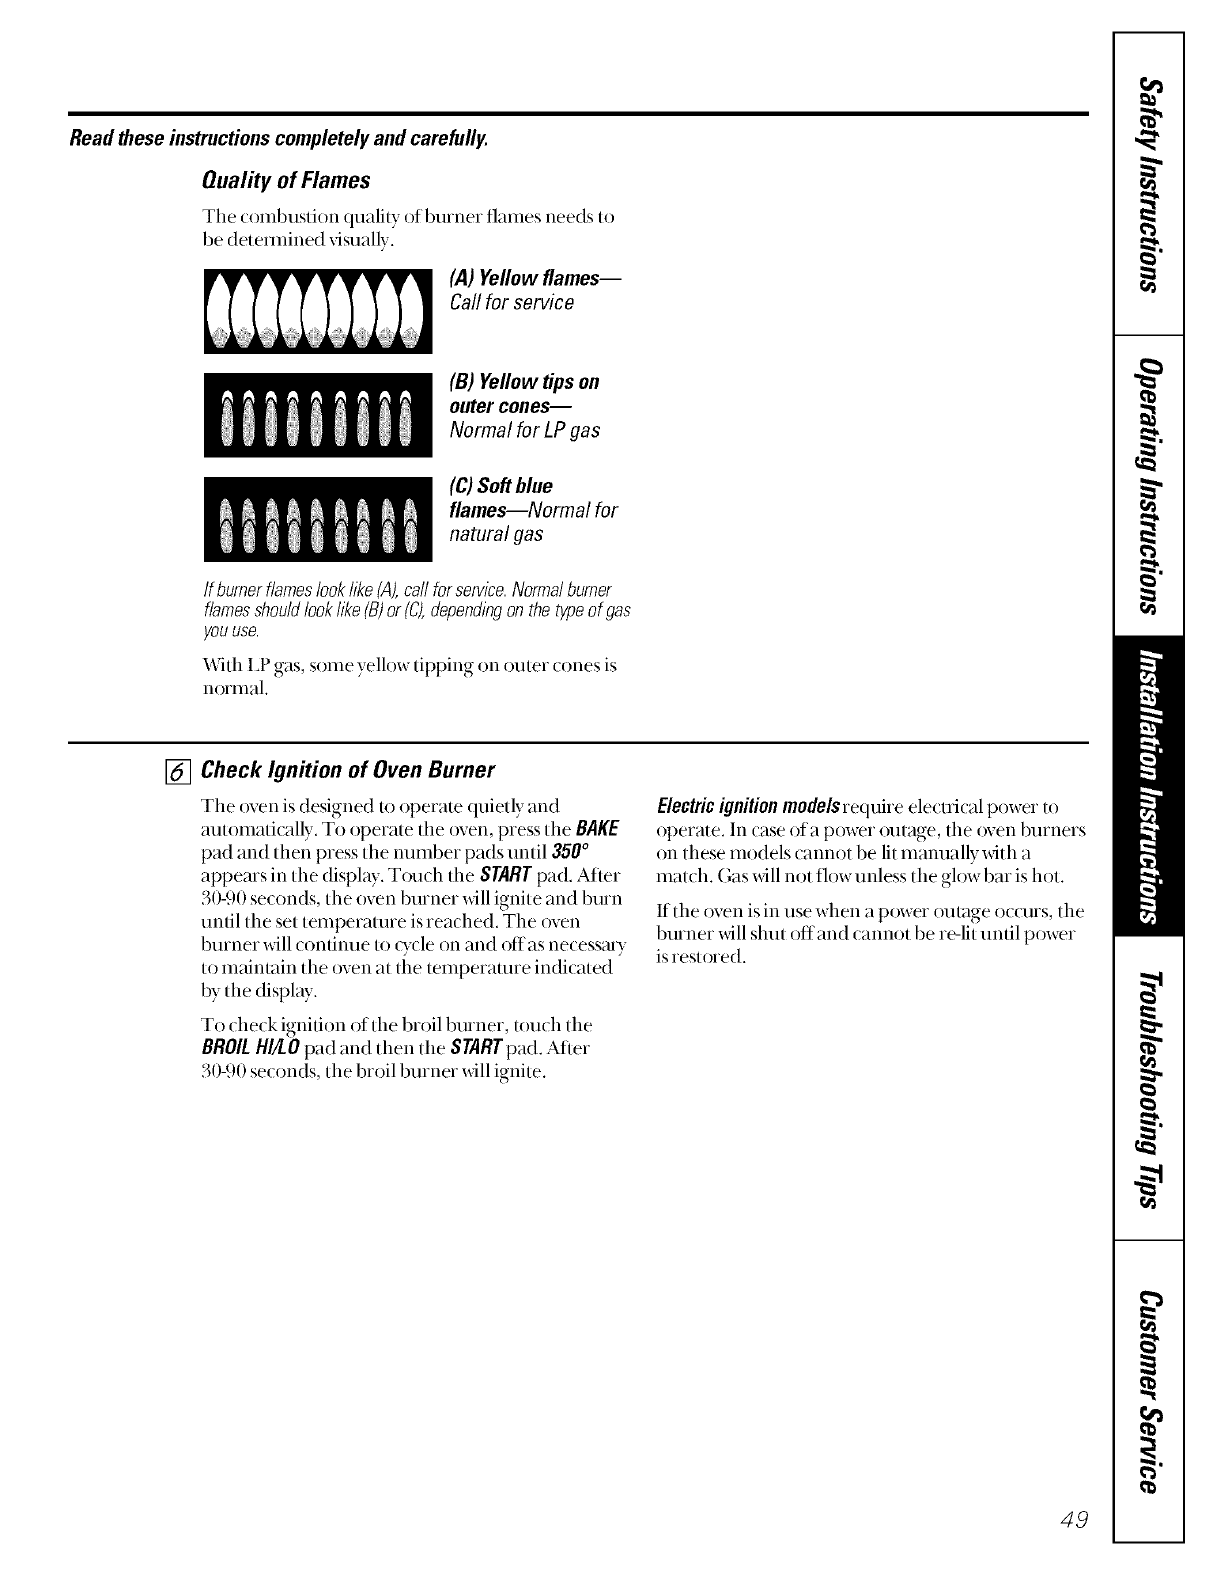
Read these instructions completely and carefully.
Quality of Flames
Tile combustion fluali/y of burner flames needs to
be detemfined _isually.
(,4) Yellow flames--
Call for service
(B)Yellowtipson
outer cones--
Normal for LP gas
(C) Soft blue
flames--Normal for
natural gas
If bumerflameslooklike{A),carlforservice.Normalburner
flamesshouldlooklike(B)or(C),dependingonthetypeofgas
youuse.
With I,P gas, some yellow tipping on ou/er cones is
nom_al.
[] Check Ignition of Oven Burner
The oven is designed u) operate quietly and
automatically. To operate the oven, press the BAKE
pad and then press the number pads until 350 °
appears in the display. Touch the STARTpad. After
30-90 seconds, the oven burner will ignite and burn
until the set temperature is reached. The oven
burner will continue/o _ycle on and offas necessmy
to maimain the oven at the temperature indicated
by the display.
To check ignition of the broil burner,/ouch the
BROILHI/LOpad and then the STARTpad. After
30410 seconds, the broil burner will ignite.
Electric ignition models require electrk al power to
operate. In case of a power outage, the oven burners
on these models cannot be lit manually xdth a
match. Gas will not flow unless the ghtw bat is hot.
If the oven is in use when a power outage occurs, the
burner will shut off and cannot be re-lit until power
isrestored.
49
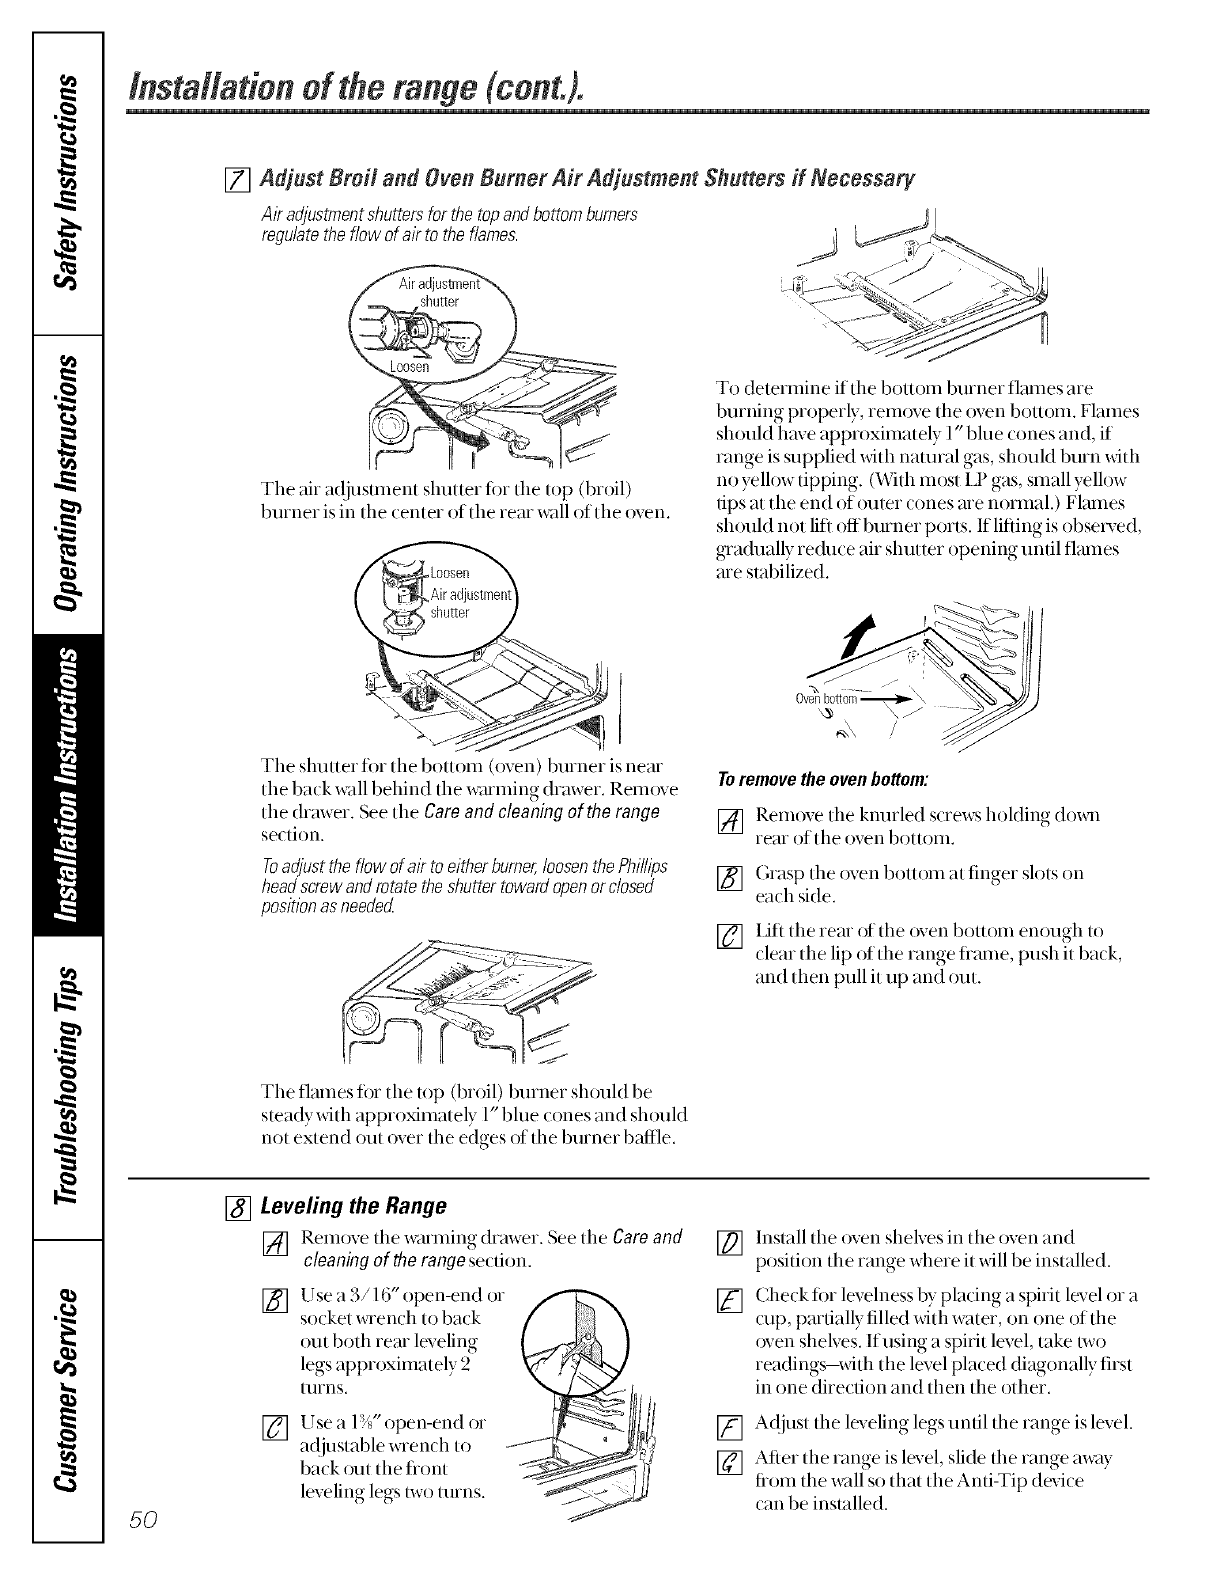
Insta#adonof therange(cont.).
[] Adjust Broil and Oven Burner Air Adjustment Shutters if Necessary
AI7adjustmentshuttersfor thetopandbottomburners
regulatethe flowof airto theflames. _}
S
Tile air a_[iustment shutter fi)r tile top (broil)
burner is in the center of the rear wall of the oven.
Tile shutter fi)r tile bottom (oven) burner is near
the back wall behind the winruing drawer. Remove
tlle drawer. See tl_e Care and cleaning of the range
section.
Toadjust the flow of a/7to either burner,loosen the Phillips
head screwand rotate the shutter toward openor dosed
position as needed
The flatnes fo,"the top (broil) burner should be
steadywifll approximately 1"blue (ones and shouM
not extend out over the edges of tlle burner baffle.
To determine if tile bottom burner flmnes are
burning properly, rem{)ve the oven bottom. Flames
sh{mld have approximately 1" blue cones and, if
range is supplied with natural gas, shouM burn xdth
no yellow tipping. (With most I.P gas, small yellow
tips at the end of outer cones me normal.) Flmnes
sh{,uld ,lot lift off burner ports. If lifting is obsecved,
gra(hmlly re&me air shuuer opening until flmnes
me stabilized.
Toremovetheovenbottom:
[] Remove tile knurled screws hoMing dox_ll
rear of the oven bottom.
[] (;rasp tile oven bottom at finger slots on
each side.
[] Lift the rear of tim oven bottom enough to
clear tile lip of the range fiame, push it back,
and then pull it up and out.
50
[] Levering the Range
[] Remove tile wa,ming drawer. See tile Careand
cleaningof the rangesection.
[] Use a 3/16" open-end or
s,xketwrendltoba(k /" I 1 \
out both ,eat leveling {_._ )
legsapp,,,Xil,l.ely2
[ul'ns, _
[] Usea F!//' open-end or
a({justable x_Tench to _[_.._
back out the flont
leveling legs two [Ul'nS,
[]
[]
Install the oven shelves in tile oven and
position file range where it _411be installed.
Check ti)r levelness by placing a spirit level or a
cup, pmfially filled with water, on one of the
oven shelves. Ifusing a spirit level, take/wo
readings-with the level placed diagonally first
in one direction and then the other.
[] A(!just tile leveling legs until the range is level.
[] After tlle range is lm,el, slide tlle range away
fiom tile wall so that tile Anti-Tip device
{an be installed.
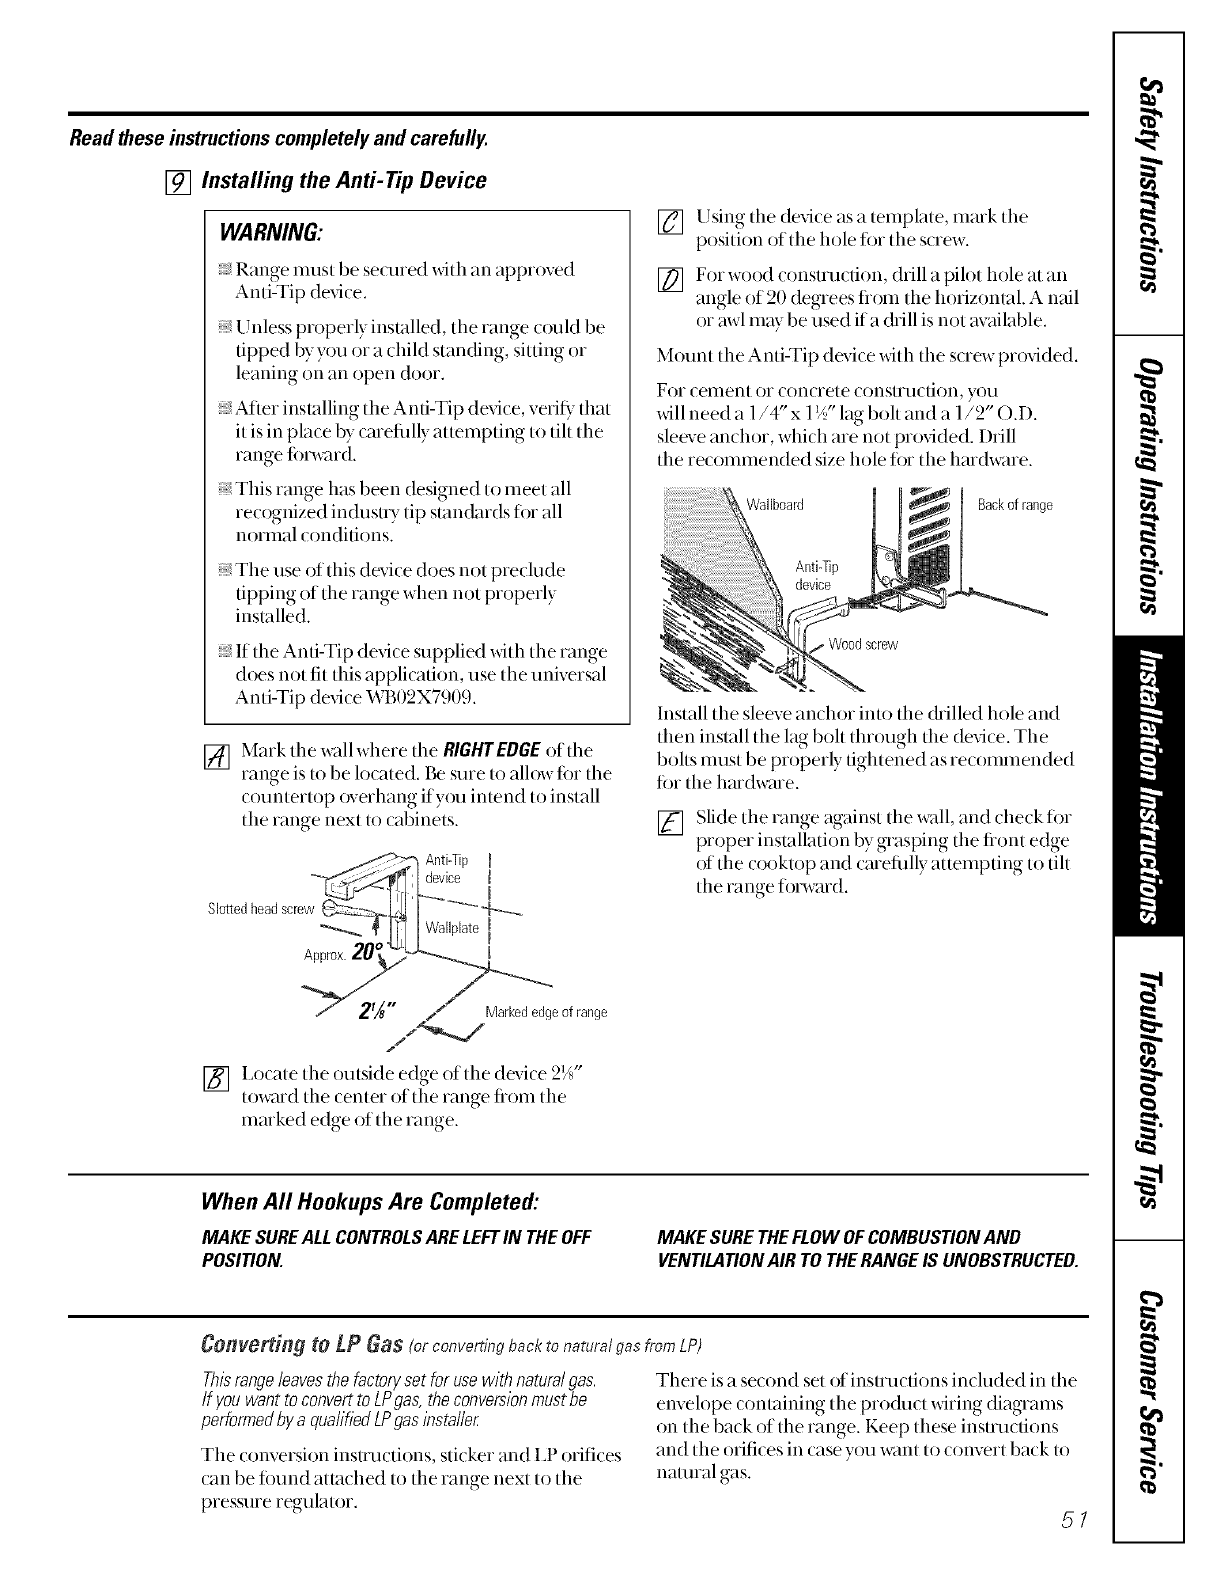
Read these instructions completely and carefully.
[] Installing the Anti-Tip Device
WARNING:
Range must be secured with an approved
Anti-Tip device.
Unless properly installed, the range couM be
tipped by you or a child stan(fing, sitting or
leaning on an open door.
After installing the Anti-Tip dexdce, veri6, that
it is in pla(e by (arefiflly attempting to tilt the
range fi)m_ud.
This range has been designed to meet all
recognized indusuy tip stan(knds for all
noiillal (onditions.
The use of this device does not preclude
tipping of the range when not properly
installed.
_,If the Anti-Tip device supplied with the range
does not fit this appli(ation, use tim universal
Anti-Tip device WB02X7909.
[] Mark tile wall where tim RIGHTEDGEof the
range is to be lo(ated. Be sure to allow fi)r the
( ountertop overhang if you intend to install
the range next to cabinets.
_ devAnti-Tipl
ice t
Slottedheadscrew _-::._L,[j ' P "_
_I-_l wallplate I
L
/7 2'A" /" Markededgeofrange
[] Locate tim outside edge of tim device 2¼"
toward the (enter of the range fiom the
marked edge of the range.
[] Using the device as a template, mark the
position of the hole ti)r the screw.
[] For wood consuuction, drill a pilot hole at an
angle of 20 degrees fiom the horizontal. A nail
or awl may be used if a drill is not available.
Mount the Anti-Tip device xdth the screw proxfded.
For cement or concrete constI'tlction, you
will need a 1/4" x 1_//'lag bolt and a 1/2" O.D.
sleeve anchor, whicll are not prox4ded. Drill
the recommended size hole for the hardware.
Wallboard Backof range
Anti-_p
device
Install tim sleeve anchor into tim &illed hole and
then install the lag bolt flnough tim dex4(e. The
bolts nmst be properly tightened as re(ommended
fin"the hardware.
[] Slide the range against the wall, and check fi)r
proper inslallation by grasping the fiont edge
of the cooktop and cmefiflly atmmpting to tilt
the range fi)_wmd.
When All Hookups Are Completed'.
MAKESUREALLCONTROLSARELEFTIN THEOFF
POSITION.
MAKESURETHEFLOWOFCOMBUSTIONAND
VENTILATIONAIR TOTHERANGEIS UNOBSTRUCTED.
Cofivertifi# to LP _aS (or convertingback to natura/ gas fromLP)
Thisrangeleavesthefactoryset forusewithnaturalgas.
Ifyouwanttoconvertto LPgas,theconversionmustbe
performedbya qualifiedLPgasinstaller
)
The conversion instructions, sticker and I,l orifices
can be found attached to the range next to the
pressure regulator.
There is a second set of insu_ucfions included in the
envelope contzdning the pro&_ct wMng diagrams
on the back of the range. Keep these instmcdons
and the orifices in case you want to convert back to
natural gas.
5/
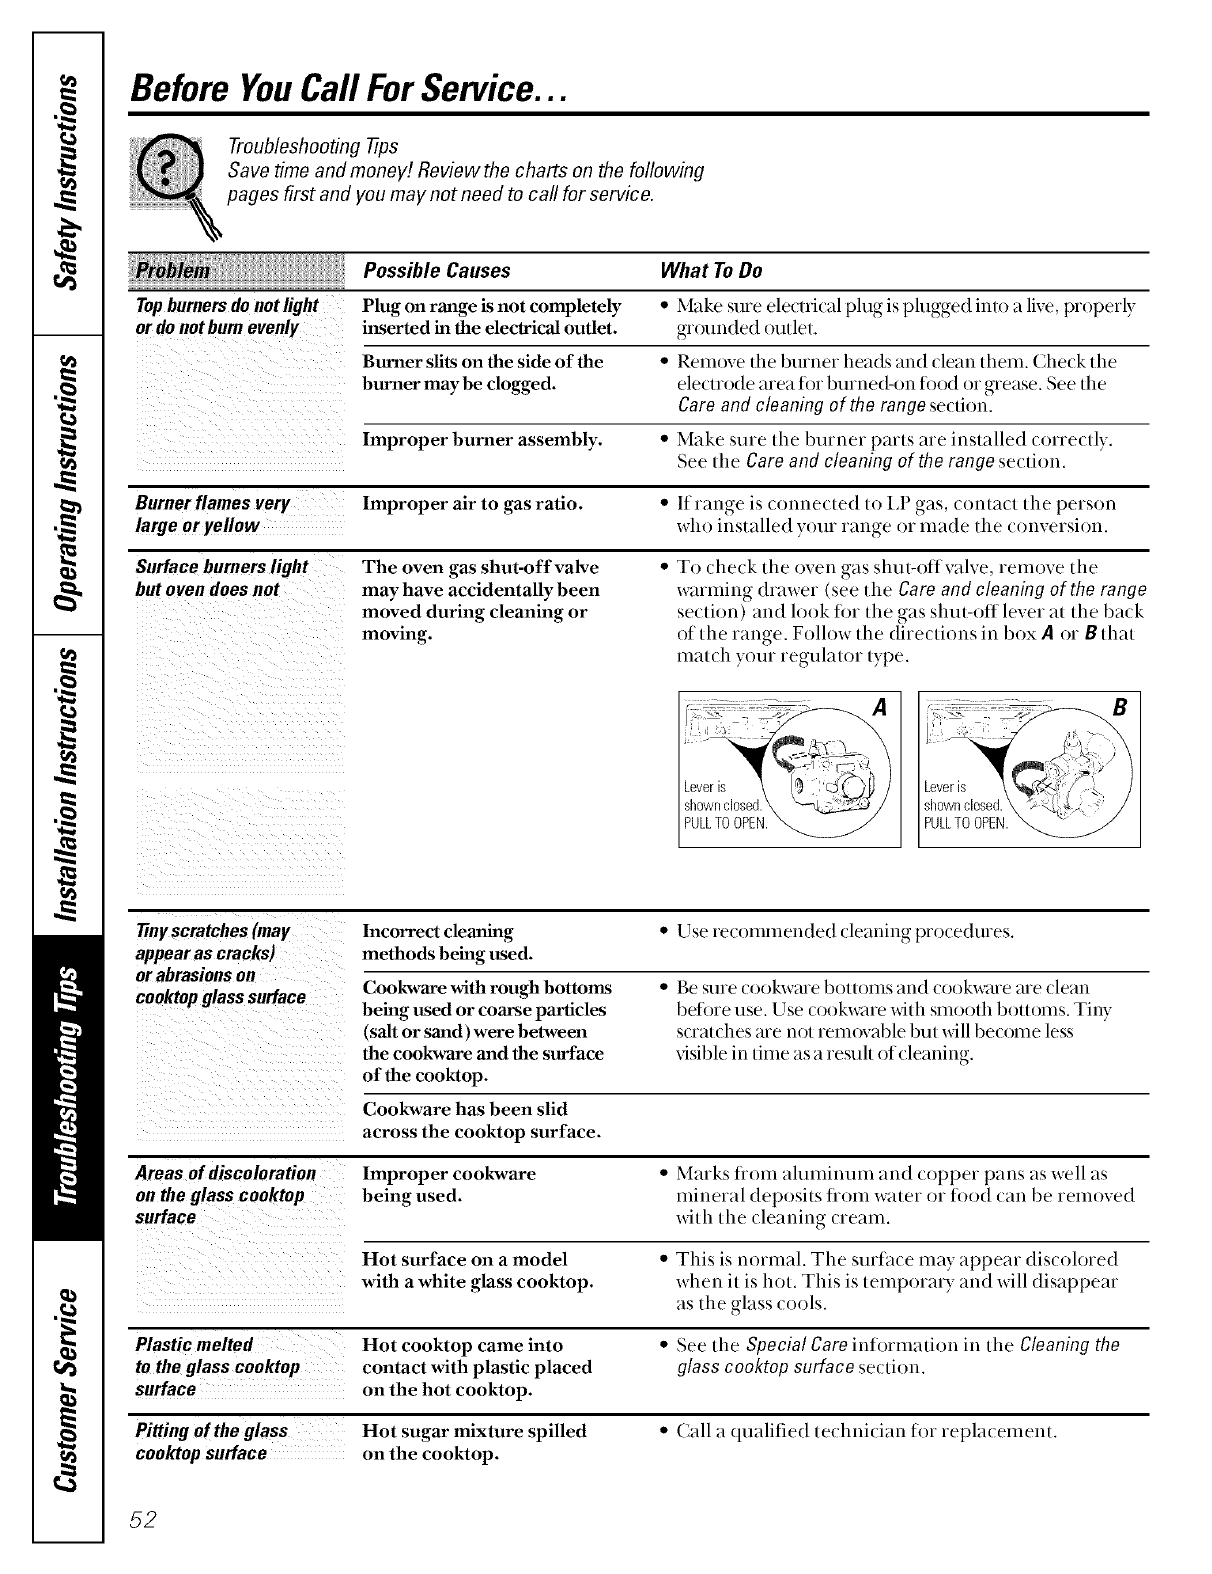
Before YouCall ForService...
Troubleshooting -tips
Save time and money! Review the charts on the following
pages first and you may not need to call for service.
Possible Causes What To Do
Top burners do not light Plug on range is not completely
or do not bum evenly inserted in the electrical outlet.
Burner silts on the side of the *Remove tile burner heads and clean them. Check tile
burner may be clogged, electrode area tbr burned-on lend or grease. See tile
Care and cleaning of the range section.
Improper burner assembly. *Make sure tile burner parts are installed correctly.
See tile Care and cleaning of the range section.
Burner flames very Improper air to .gas ratio. * If range is couuected to I,P gas, contact tile person
large or yellow who installed your range or ula(le tile couversiou.
Surface burners light The oven gas shut-off valve • To check tile oveu gas shut-ellvalve, remove tile
but oven does not mayhave accidentally been w,auling drawer (see tile Care and cleaning of the range
moved during cleaning or section) and look fi)r tile gas shut-off lever ,tt tile back
moving, of tile range. Follow tile directions in box A or Bill,it
match your regulator type.
•Make sure electrical plug is plugged lute alive, properly
grounded outlet.
Tinyscratches (may Incorrect cleaning •Use recoululended cleaniug procedures.
appearas cracks) methods being used.
or abrasions on
cooktop glass surface Cookware with rough bottoms • I_)e SUl'e cookware boltouls and cookware are clean
being used or coarse particles befine use. Use cookware with smooth bottoms. Tiny
(salt or sand) were between scratches me not reul_wable but will become less
the cookware and the surface visible in time as a resuh of cleaning.
of the cooktop.
Cookware has been slld
across the cooktop surface.
Areas of discoloration Improper cookware • Marks fl'om alumiuuul and copper pans as well as
on the glass cooktop being used. mineral deposits fl'oul water or ti)od can be removed
surface _dth tile cleaning cream.
Hot surface on a model •This is normal. Tile surtace may appear discolored
with a white glass cooktop, when it is hot. This is teulporaly and will disappear
as tile glass cools.
Plastic melted Hot cooktop came into •See tile Special Care iuforulation in tile Cleaning the
to the glass cooktop contact with plastic placed glass cooktop surface section.
surface on the hot cooktop.
Pitting of the glass Hot sugar mixture spilled •Call a qualified technician tbr replaceulent.
cooktop surface on the cooktop.
52
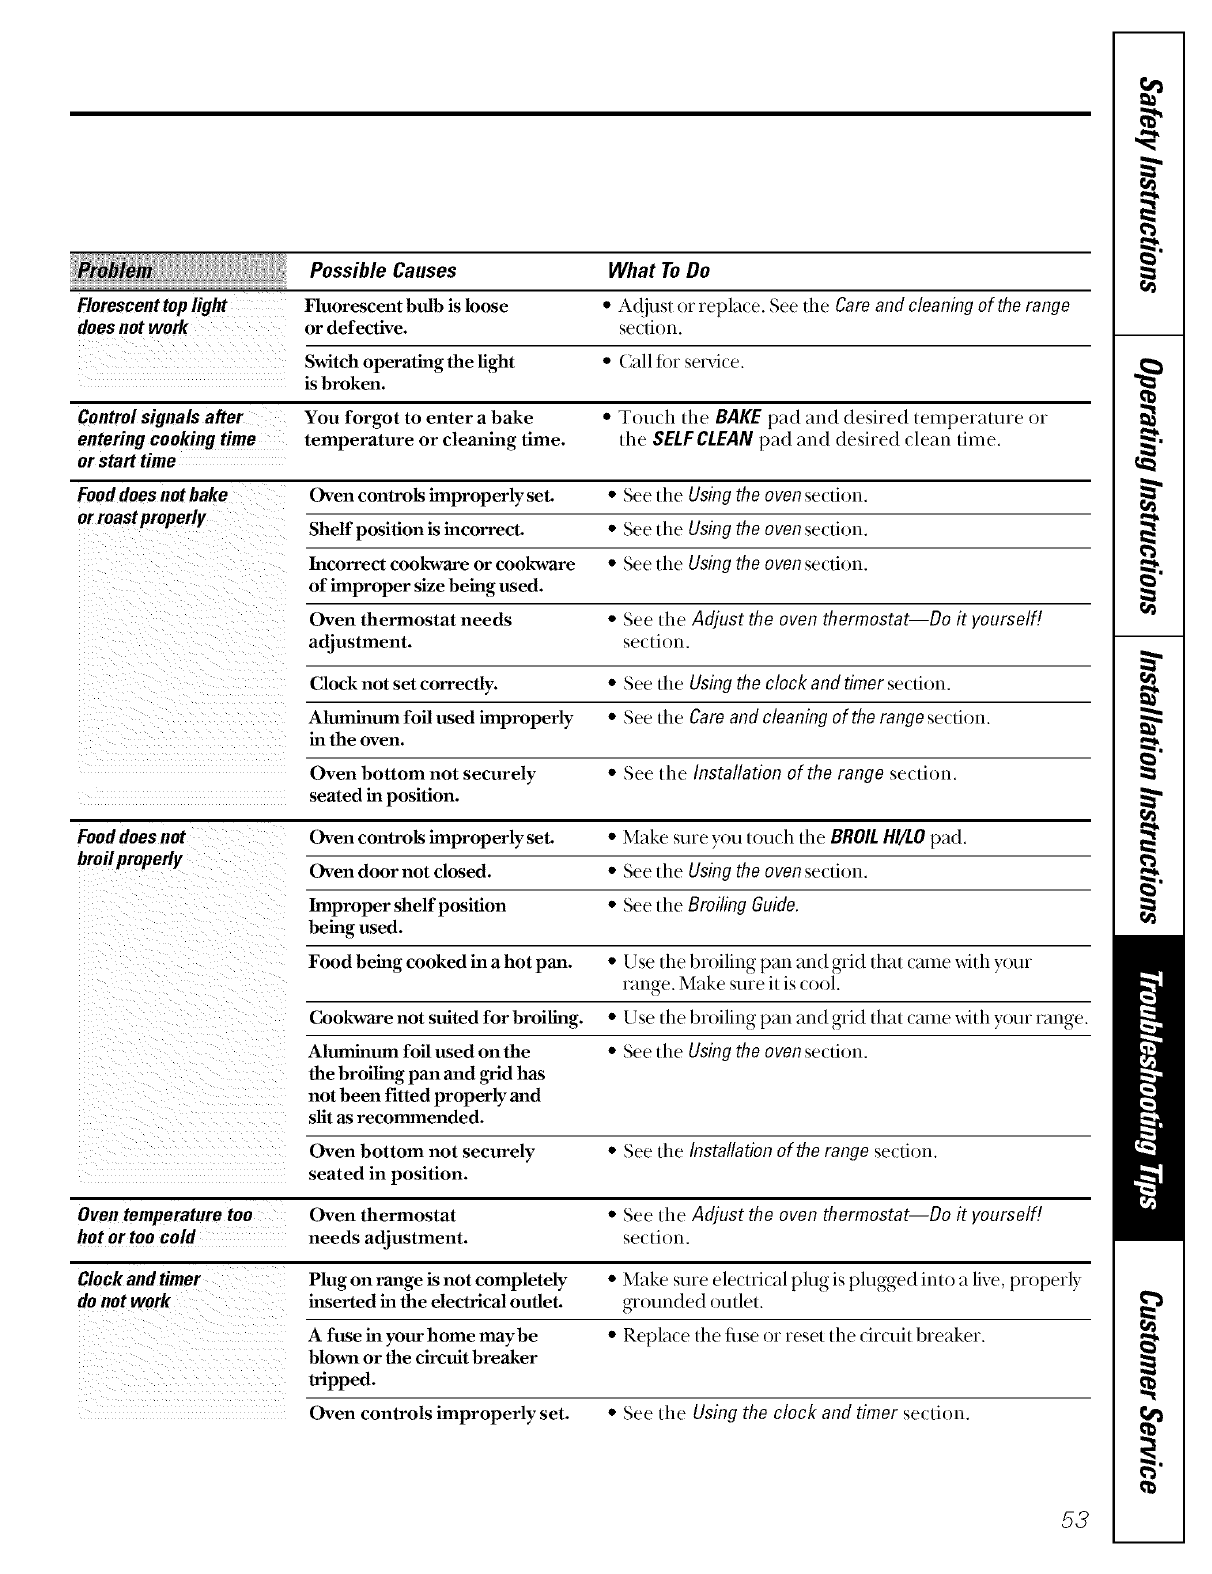
Possible Causes What To Do
Florescent top light Fluorescent bull) is loose * A(!just or replace. See the Care and cleaning of the range
does not work or defective, se(liou.
Switch operating the light *Call tbr serd(e.
is broken.
Control signals aRer You forgot to enter a bake *Touch tile BAKE pad and desired temperature or
entering cooking time temperature or cleaning time. the SELF CLEAN pad and desired (lean time.
or start time
Food does not bake Oven controls improperly set. * See the Using the oven se(liou.
or mast properly Shelf position is incorrect. *See tile Using the oven se(liou.
Incorrect cookware or cookware *See tile Using the oven se(liou.
of improper size being used.
Oven thermostat needs *See the Adjust the oven thermostat--Do it yourself!
adjustment, section.
Clock not set correctly. *See tile Using the clock and timer se(liou.
Aluminum foil used improperly *See the Care and cleaning of the range se(liou.
in the oven.
Oven bottom not securely *See die Installation of the range section.
seated in position.
Food does not Oven controls improperly set. *Make sure you touch tile BROIL HI/LO pad.
broilproperly Oven door not closed. *See the Using the oven se(fiou.
Improper shelf position *See tile Broiling Guide
being used.
Food being cooked in a hot pan. *Use the broiling pan and grid that came xdth your
range. Make sure it is cool.
Cookware not suited for broiling. • Use [lie broiling pan and grid thai came xd/h your range.
Aluminum foil used on the •See file Using the oven se(-fiou.
the broiling pan and grid has
not been fitted properly and
slit as recommended.
Oven bottom not securely *See the Installation of the range se('tiou.
seated in position.
Oven temperature too Oven thermostat *See tile Adjust the oven thermostat--Do it yourself!
hot or too cold needs adjustment, setlion.
Plug on range is not completely * Make sure electrical plug is plugged into alive, properly
do not work inserted in the electrical outlet, grounded outlet.
Afuse in your home maybe *Replace the fi]se or resel the (irtui[ breaker.
blown or the circuit breaker
tripped.
Oven controls improperly set. *See tile Using the clock and timer se('tiou.
53
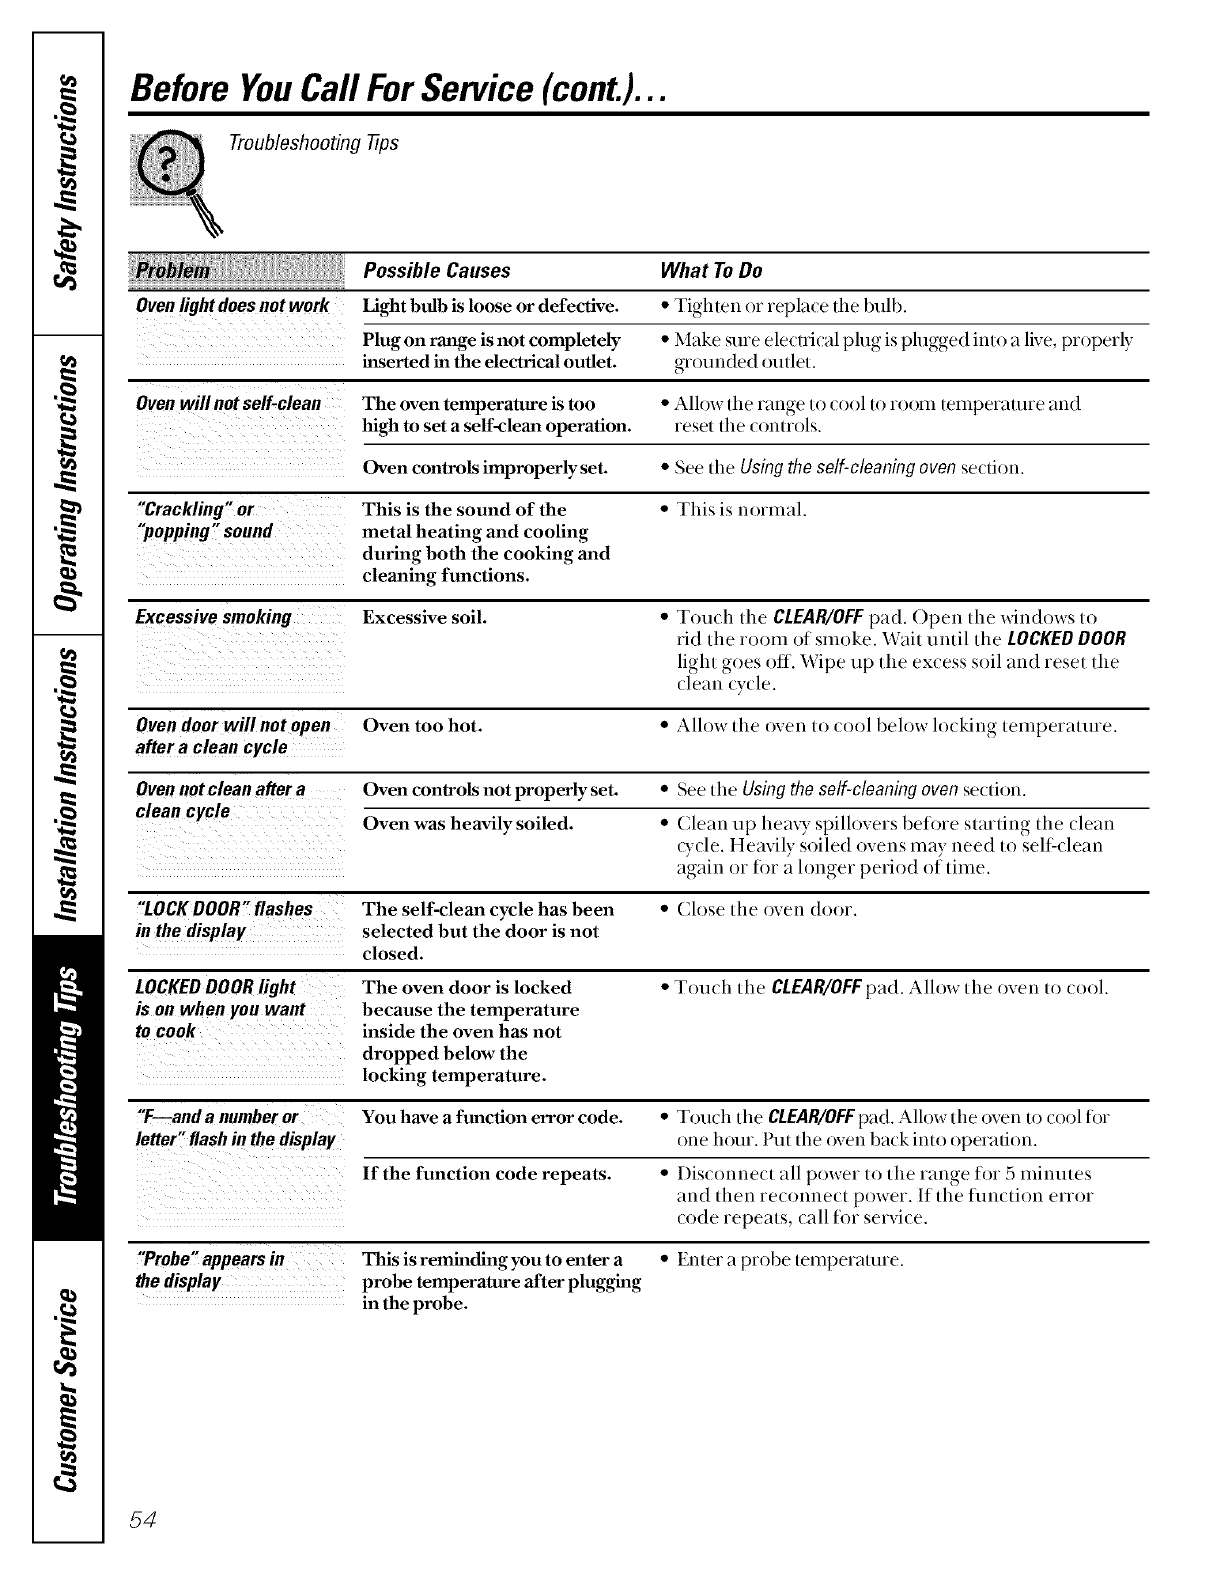
Before YouCall ForService (cont.)...
Troubleshooting -tips
Oven light does not work
What To Do
•Tighten or replace the bull).
• Make sure electrical plug is plugged into a live, properly
grounded outlet.
Oven willnot self-clean The oven temperature is too • Allow the range to cool to room temperature and
high to set a self-clean operation, reset the controls.
Oven controls improperly set. • See the Using the self-cleaning oven se('lion.
"Crackling" or This is the sound of the • This is normal.
"popping" sound metal heating and cooling
during both the cooking and
cleaning functions.
Excessive smoking Excessive soil. •Touch the CLEAR/OFF pad. Open the windows to
rid the room of smoke. Wait until the LOCKED DOOR
light goes off. Wipe up the ex(ess soil and reset the
(lean cycle.
Oven door will not open Oven too hot. • Alh)w the oven to cool beh)w h)cking temperature.
after a clean cycle
Oven not clean after a Oven controls not properly set. •See the Using the self-cleaning oven se(ti_m.
clean cycle Oven was heavily soiled. • Clean up hea_ T spillovers before starting the (lean
(Tcle. Heavily soiled ovens may need to self:clean
again or tbr a h)nger period of time.
"LOCK DOOR" flashes The self-clean cycle has been • (;lose the oven door.
in the display selected but the door is not
closed.
LOCKED DOOR light The oven door is locked • Touch the CLEAR/OFF pad. Alh)w the oven to cool.
is on when you want because the temperature
to cook inside the oven has not
dropped below the
locking temperature.
Possible Causes
Light bulb is loose or defective.
Plug on range is not completely
inserted in the electrical outlet.
"T--and a number or You have a function error code. • Touch the CLEAR/OFFpad. Allow the (wen to co(_l tbr
letter" flash in the display one hour. Put the oven back into operation.
If the function code repeats. • Disconnect all power to the range for 5 minutes
and then reconnect power. If the flmction error
code repeats, call tbr service.
"Probe" appears in This is reminding you to enter a • Enter a probe temperature.
the display probe temperature after plugging
in the probe.
54
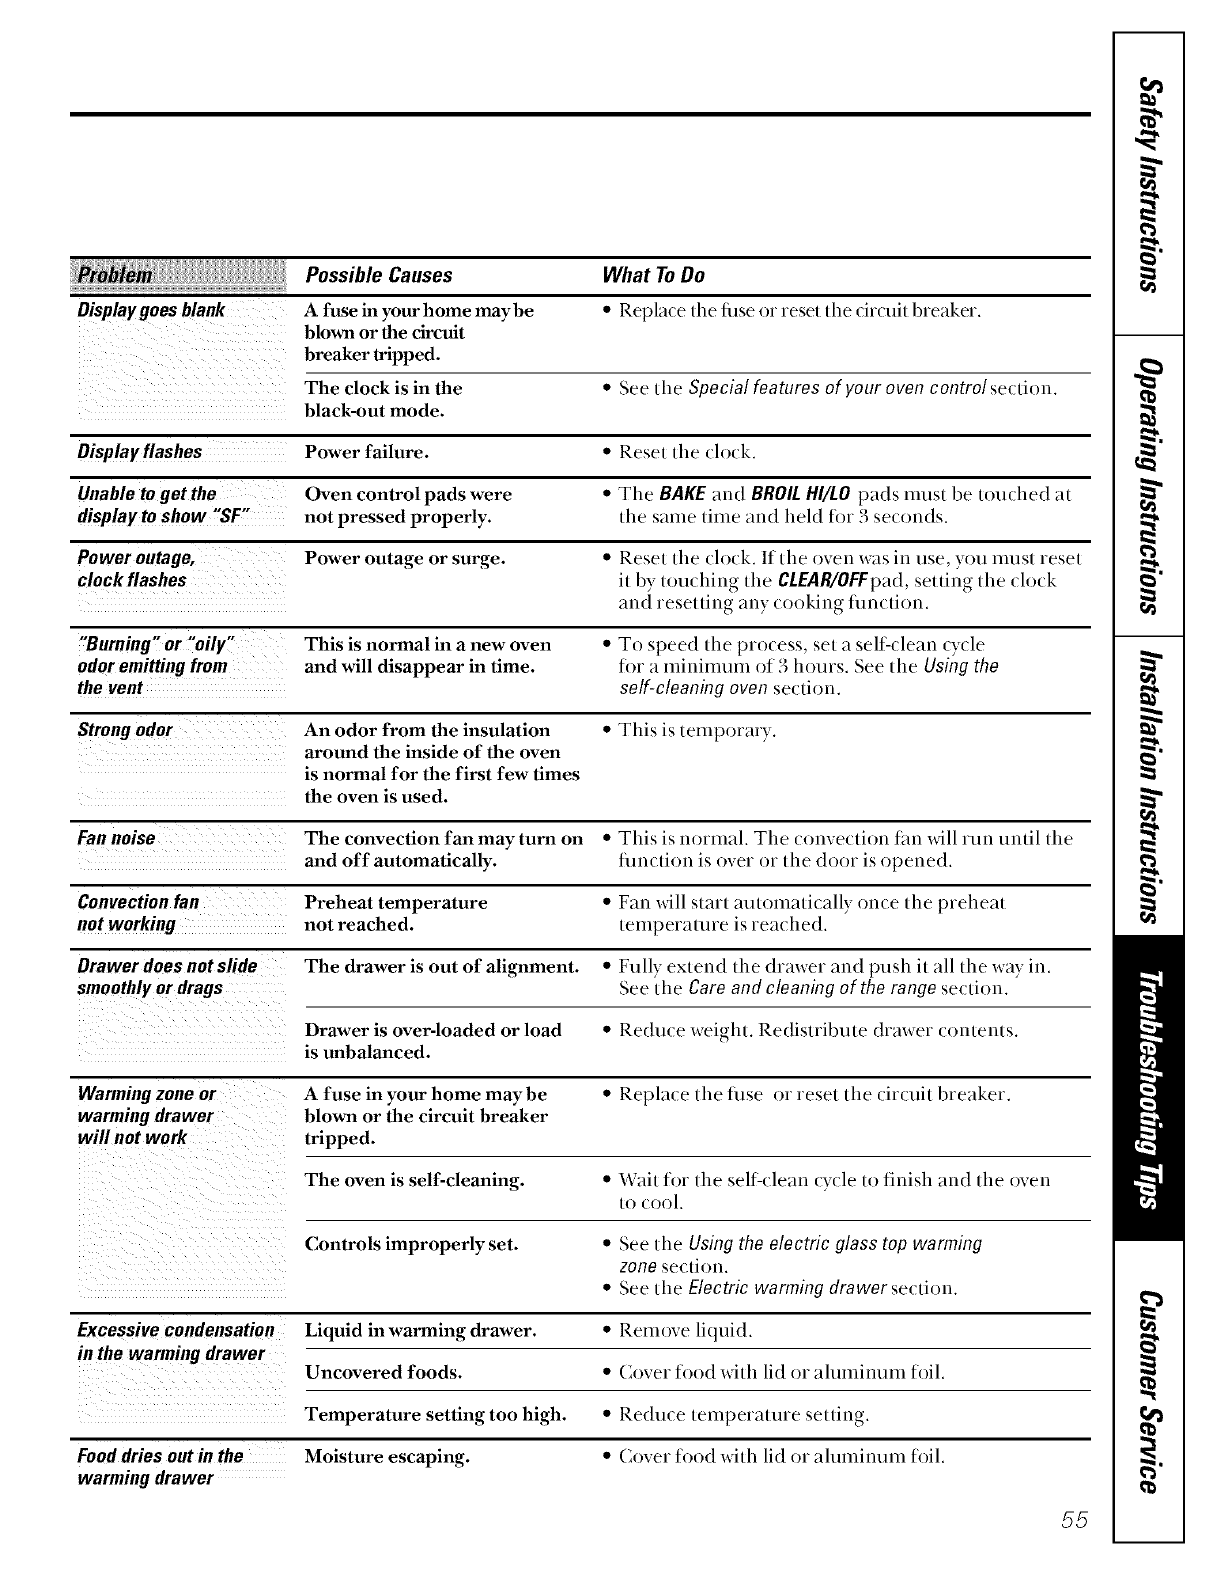
Display goes blank Afuse in your home maybe
blown or the circuit
breaker tripped.
What ToDe
•Repla(e tile filse or reset tile (ir(uit 1)reaker.
The clock is in the • See tile Special features of your oven control section.
black-out mode.
Displayflashes Power failure. •Reset tile chwk.
Unable to get the Oven control pads were • Tile BAKE and BROIL HI/LO pads nmst be touched at
display to show "SF" not pressed properly, tile same time and held for 3 seconds.
Power outage, Power outage or surge. • Reset tile clock. If tile ()','ell WaS ill use, you must reset
clock flashes it by touching tile CLEAR/OFFpad, setting tile clock
and resetting any cooking time)ion.
"Burning" or "oily" This is normal in a new oven •To speed tile process, set aself'clean cycle
odor emitting from and will disappear in time. fi)r a mininmm of 3 hours. See tile Using the
the vent self-cleaning oven section.
Strong odor An odor from the insulation • This is temporary.
around the inside of the oven
is normal for the first few times
the oven is used.
Fan noise The convection fan may turn on •This is normal. Tile convection thn will run until tile
and off automatically, tmlction is over or tile door is opened.
Convection fan Preheat temperature •Fan will sl_tI'[ automatically once tile preheat
not working not reached, temperature is reached.
Drawer does not slide The drawer is out of alignment. • Fully extend tile drawer and push it all tile way in.
smoothly or drags See tile Care and cleaning of the range section.
Drawer is over-loaded or load •Reduce weight. Redistribute drmver contents.
is unbalanced.
Warming zone or A fuse in your home may be • Replace tile fnse or reset tile circuit breaker.
warming drawer blown or the circuit breaker
will not work tripped.
The oven is self-cleaning. •Wait for tile selfqlean cycle to finish and tile oven
to cool.
Controls improperly set. •See tile Using the electric glass top warming
zone se(tion.
• See tile Electric warming drawer section.
Excessive condensation Liquid in warming drawer. •Remove liquid.
in the warming drawer Uncovered foods. • (;over food with lid or alunlinum foil.
Temperature setting too high. •Reduce temperature setting.
Food dries out in the Moisture escaping. • Cover food with lid or alunlinum tbil.
warming drawer
55
m
Notes
,0
,0
q_
m
I
w
ww_
,0
m
0
0
_rJ
m
m
r_
56
GE Service Protection Plug _
GE, a name recognized worldwide fin qualify and dependabilhy, offers you
Senice Pro_ecdon Plus'-comprehensive pro_ecdon on aU your appliances-
No Matter What Brand!
Benefits Include:
+Backed by GE
+All brands covered
+ Unfimlted service calls
*All parts and labor costs included
* No outool2pocket expenses
* No hidden deductibles
+One 800 number to call
WE71 Corot Any +qppfianc+.
AnywhErE. Anytimeo +
You will be compldely satisfied _d_h our service pro_ecdon or you ma? reques_ ?our mone? back
on _he remaining value +ifyour con_racL No questions asked, h's Iha_ simple.
Pro_e(_ your refrigera_or, dishwasher, washer and dryer, range, TV, VCR and much more-anybrand!
Plus d_ere's no extra charge _hr emergency servi(e and low mommy financing is available. Even icemaker
+:overage and food spoilage pro_ecdon is offered. You can res_ easy, knowing d_a_ all your valuable
household produc_s are pro_ec_ed agains_ expensive repairs+
P+,+:e,+mrc++nf+den(ein(;Eand +:allusin d_eU.S.+H-++eea+800:626:2224
for more inforn+adon+
_A]} [ir rods (:ore1 ed, up I0 2{}_eU:S old, hi _]le (:on_i!ier!l d [.S,
Please place in envelope and mail to:
General Electric Company
Warranty Registration Department
P.O. Box 32150
Louisville, KY 40232:2150
57
Consumer Product Ownership Registration
[)ear Customer:
Thank you ff)r purchasing our product and thank you fi)r placing your c(mfidence in us.
We are proud to have you as a customer!
Follow these three steps to protect your new appliance investment:
Complete and mail
your Consumer
Product Ownership
Registration today.
Havc 1he peacc (d"
mind of knowing wt'
(all coniacl )()u in th(
unlikely cxcnl of a
salely m()dificadon.
Afier mailing Ihe
regislrmion below,
store Ihis docunlent
in a saR' place. 11
contains inlbrmalion
you will need should
you l'e(]uiYe set-,-ice.
Our service number is
800 GE (ARES
(800-432-2737).
Read your Owner's
Manual carelully.
It will help you
operme youi new
appliance properly.
liyou have questions,
or need more
infi)rmadon, call 1he
GEAns_,_erCenter®
800.626.2000.
Model Number Serial Number
, , , , , , I I , , , , ,
Important: If you did not get a registration card with your
product, detach and return the form below to
ensure that your product is registered, or register
online at www.geappliances.com. ._ (;tit herr
Consumer Product Ownership Registration
_Model Number Serial Number
I,,,,,, , , , , , I I , , , , , ,
Mr. Ms. Mrs. Miss
Firsl I ] Last]
Name IIIIIIIII Nam( I I I I I I I I I I I I
, I
SII'_t 1 I
Addr(ss I I I I I I I I I I I I I I I I I I I I I I I I
Apl. # I ,IIIII,I e-mai__',.dd,'ess
Zi )
D_IIC PI_tCC(I _um,_,t-II , II , , I-I ,
Nlonlh 'Year
()ccasionall}, we may allow s_lec/ed companies I() send you inli)rmation.
Cl-let k htrt if}()u d() nol want this iniormali()n.
8E Appliances
Genera] Electric Company
LowsviNe, Kentucky
www_geapp[iances _om
58

GEGasRange Warranty
Aft warranty service provided by our Factory Service Centers
or an authorized Customer Care®technician. For service,
call 800-GE-CARES.
GE Will Replace, At No Charge To You:
Anypartof tile range whi(h tails due to a (letbct in materials or workmanship.
From the date of the I)uring this full one-year warranty, (;E will also proxdde, free of charge, all labor
origina!purchase and in-home service to replace the defective part.
Fromthe date of the
origina!purchase
(o0glass cooktop
modelsonly)
Areplacementglasscooktopif it should crack (h_e to thermal shock, discolor,
or crack at the rubber seal between the glass cooktop and the porcelain edge.
It will also be replaced if the pattern wears off or if the w:trming zone suditce
unit burns out. During this five-year warranty, you will be responsible tbr any
labor or in-home sercice.
:_ Service trips to your home to teach you how to use
the product.
:_ Improper installation.
:_ Failure of the product if it is abused, misused,
or used for other than the intended purpose or
used commercially.
:_ Damage to the glass cooktop caused by hardened
spills of sugarymaterials or melted plastic that
are not cleaned according to the directions in
the Owner's Manual.
:_ Damage to the glass cooktop caused by use of cleaners
other than the recommended cleaning creams.
:_ Replacement of house fuses or resetting of circuit
breakers.
Damage to the product caused by accident, fire, floods
or acts of God.
Incidental or consequential damage to personal
property caused by possible defects with this appliance.
This warranty is extended to the original purchaser and any succeeding owner for products purchased for
home use within the USA. In Alaska, the warranty excludes the cost of shipping or service calls to your home.
Some states do not allow the exclusion or limitation of incidental or consequential damages. This warranty
gives you specific legal rights, and you may also have other rights which vary from state to state. To know
what your legal rights are, consult your local or state consumer affairs office or your state's Attorney General.
Warrantor: General Electric Company.Louisville, lot"40225
59
ServiceTelephoneNumbers.
GEAnswer Center®800.626.2000
Tile (,E Ans_e_ (_ente_ is open 24 horn s a (la)., /days a week.
In-HomeRepairService800-GE-CARES(800-432-2737)
Expert (;E repair servi(e is only a phone (all away.
SpecialNeedsService800.626.2000
800-TDD-GEAC(800-833-#322)
(;E offers, fiee of charge, a brodmre to assist in planning a barrier-fiee kit(hen fi)r persons
_dth limited mobility.
ServiceContracts800-626-2224
] ur(hase a (,E ser_(e (onUa(t while your warranty Is still m effect and you llre(ewe a
substantial discount. (;E Consumer Set_dce xdll still be there after your warranty expires.
PartsandAccessories800-626-2002
Individuals qualified to setwice their ox_11appliances can have p_uts or accessories sent directly
to thdr homes (VISA, Master( md and Discover cmds are accepted).
Instructions contained in this manual cover procedures to be performed by any user. Other servicing
generally should be referred to qualified service personnel Caution mustbe exercised, since
improper servicing may cause unsafe operation.
ServiceSatisfaction
Ifyou are not satisIied xdth the service you receive flom GE:
First,contact the people who sex_iced your appliance.
Next, if you me still not pleased, x_ite all the details-including your phone number-to:
Manager, ( onsumer Relations
GE Appliances
Appliance Park
Louisville, KY 40225
_0 Printed in Mexico
