GEOVISION 0OPAL000000 Cloud FishEye Camera User Manual
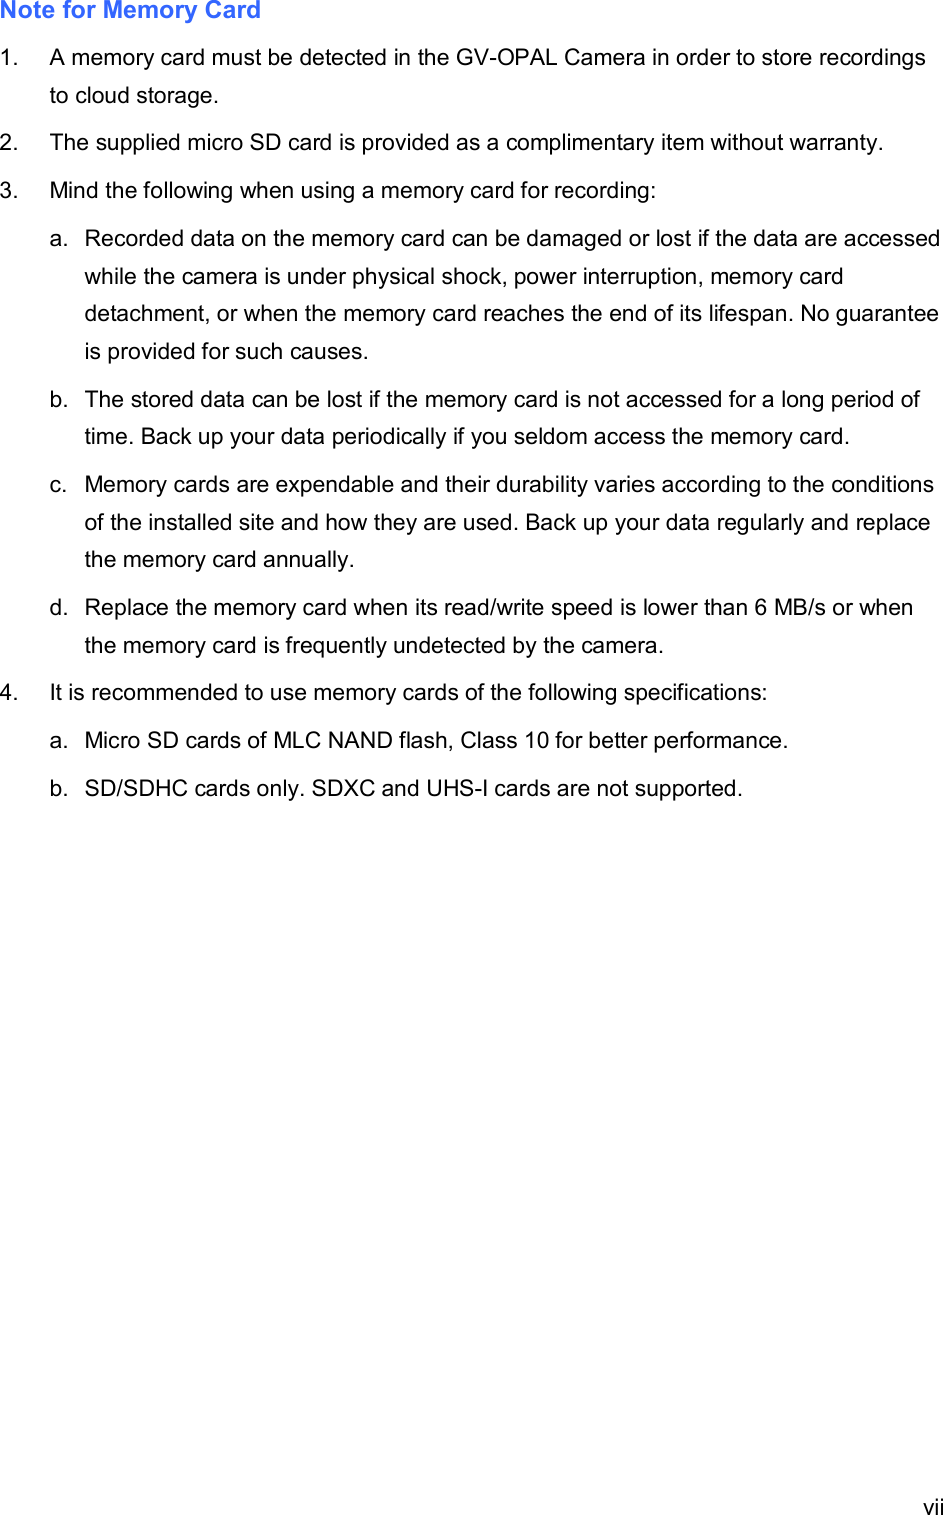
GEOVISION INC. Cloud FishEye Camera
UserManual.wiki
>
GEOVISION
>
0OPAL000000 User Manual
User manual
Navigation menu
Upload a User Manual
Namespaces
Wiki Guide
HTML
PDF
Info
Views
User Manual
Discussion / Help
Navigation
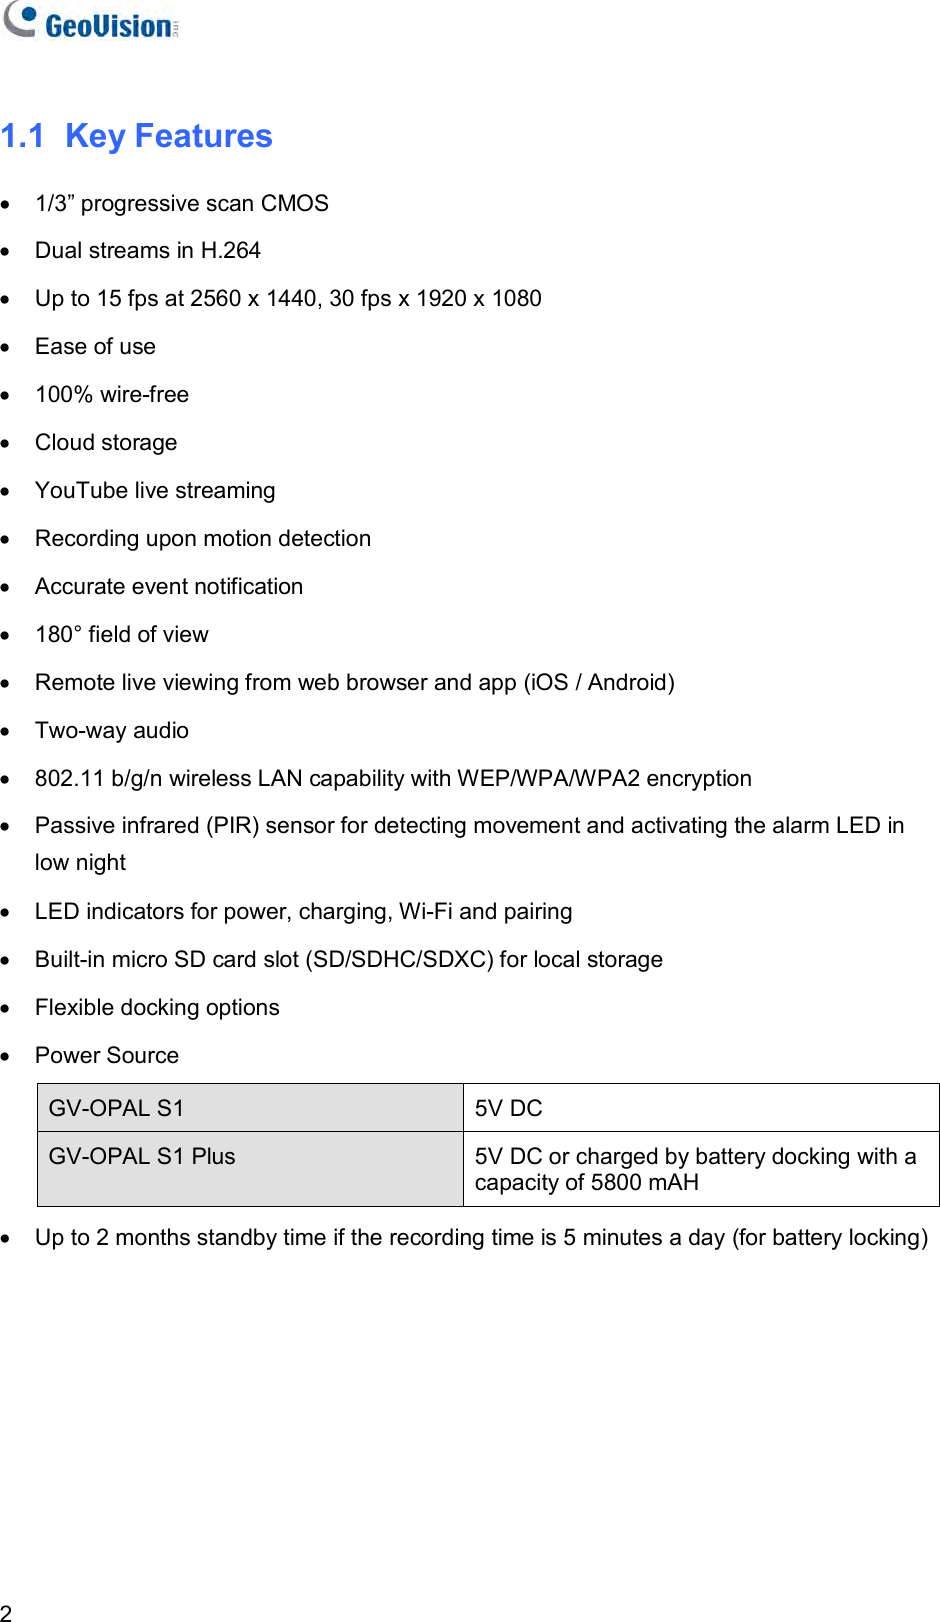


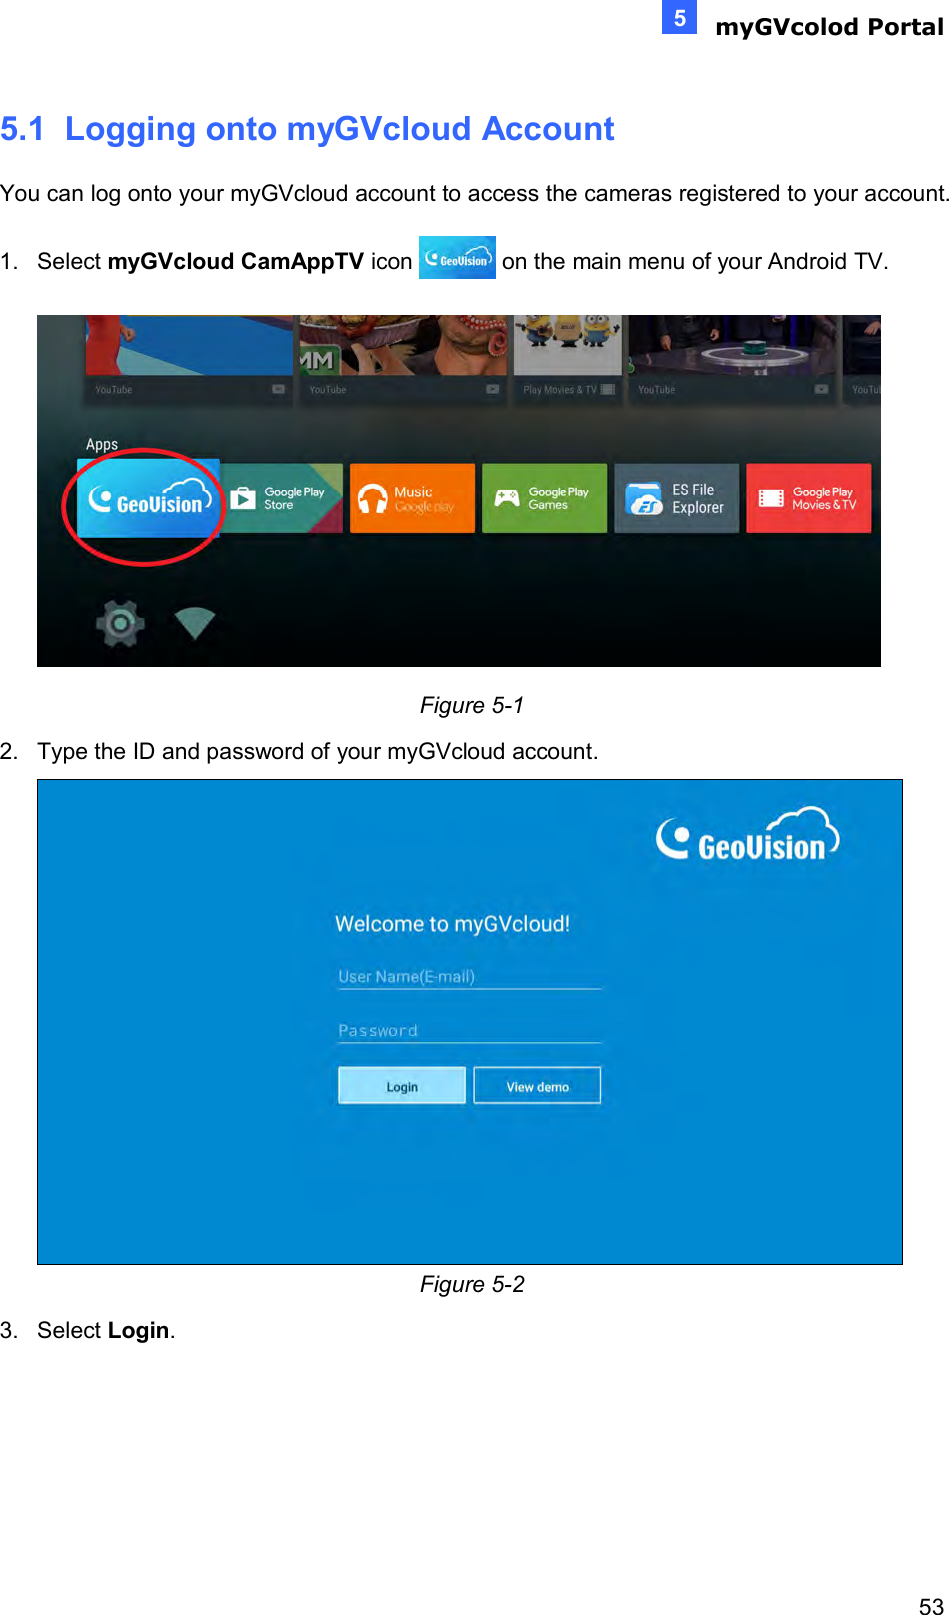
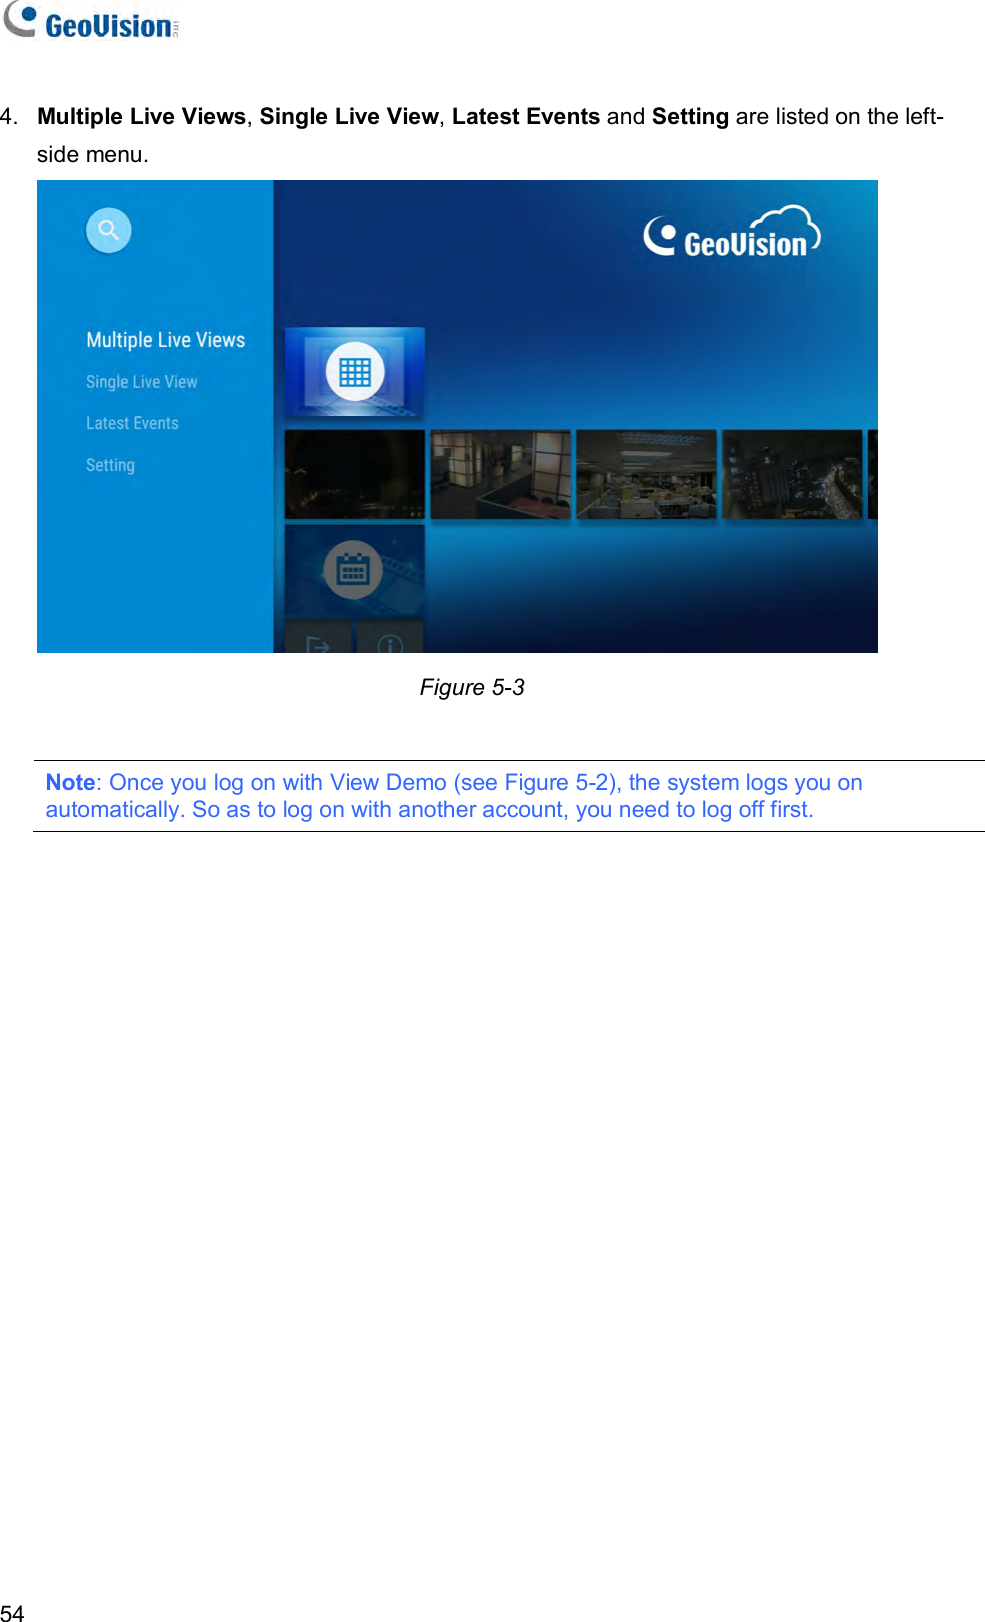
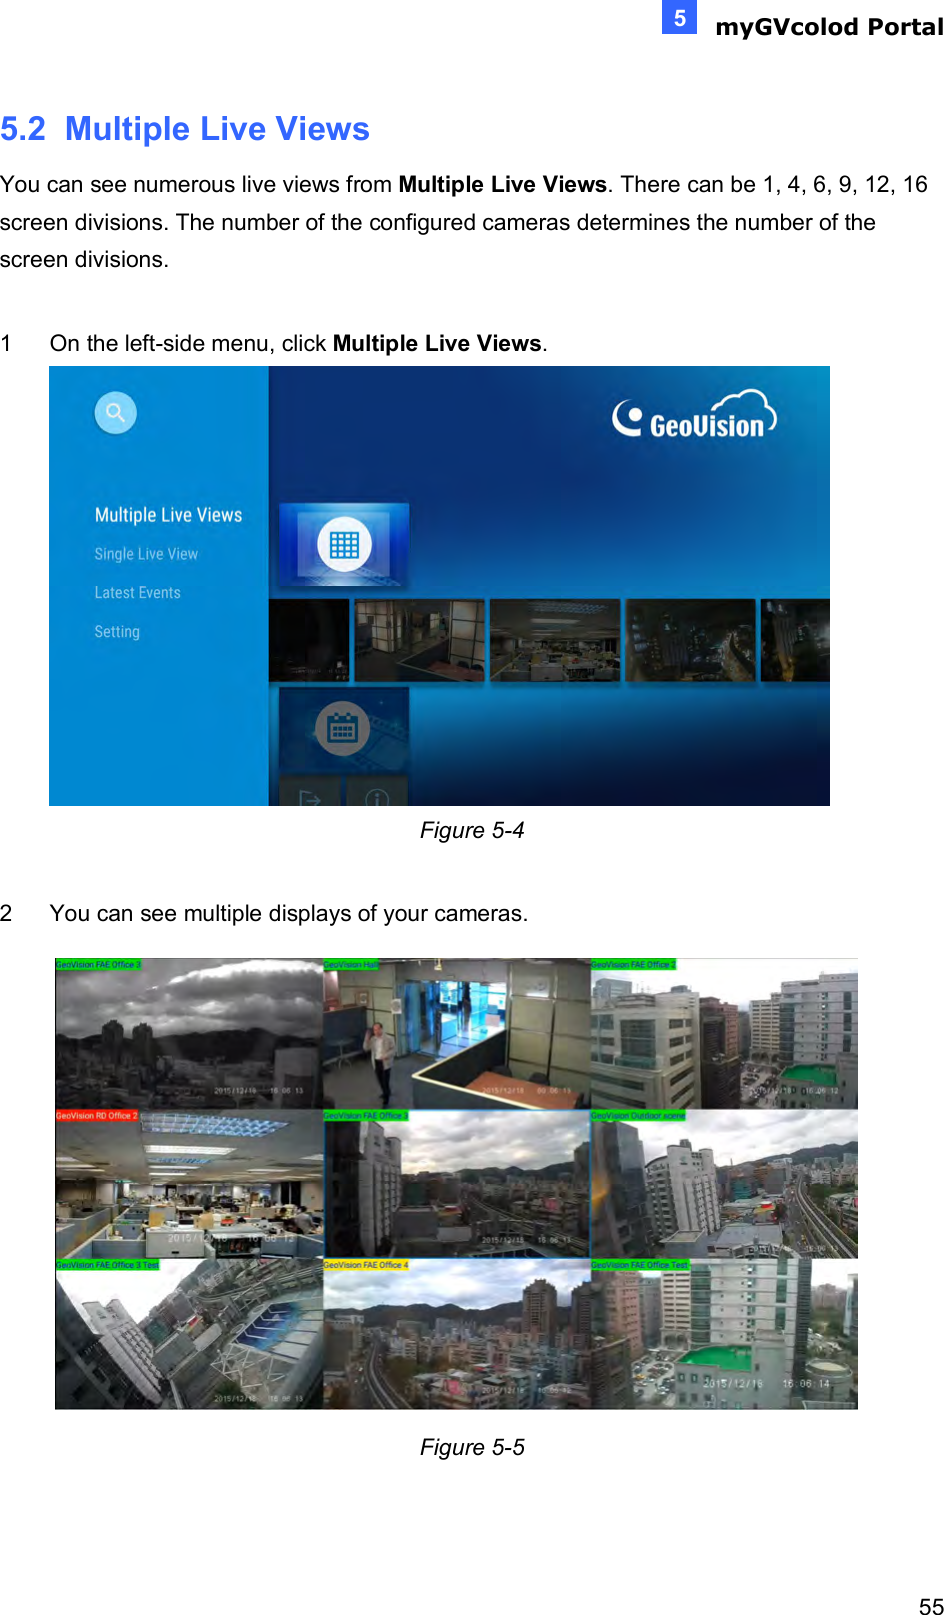
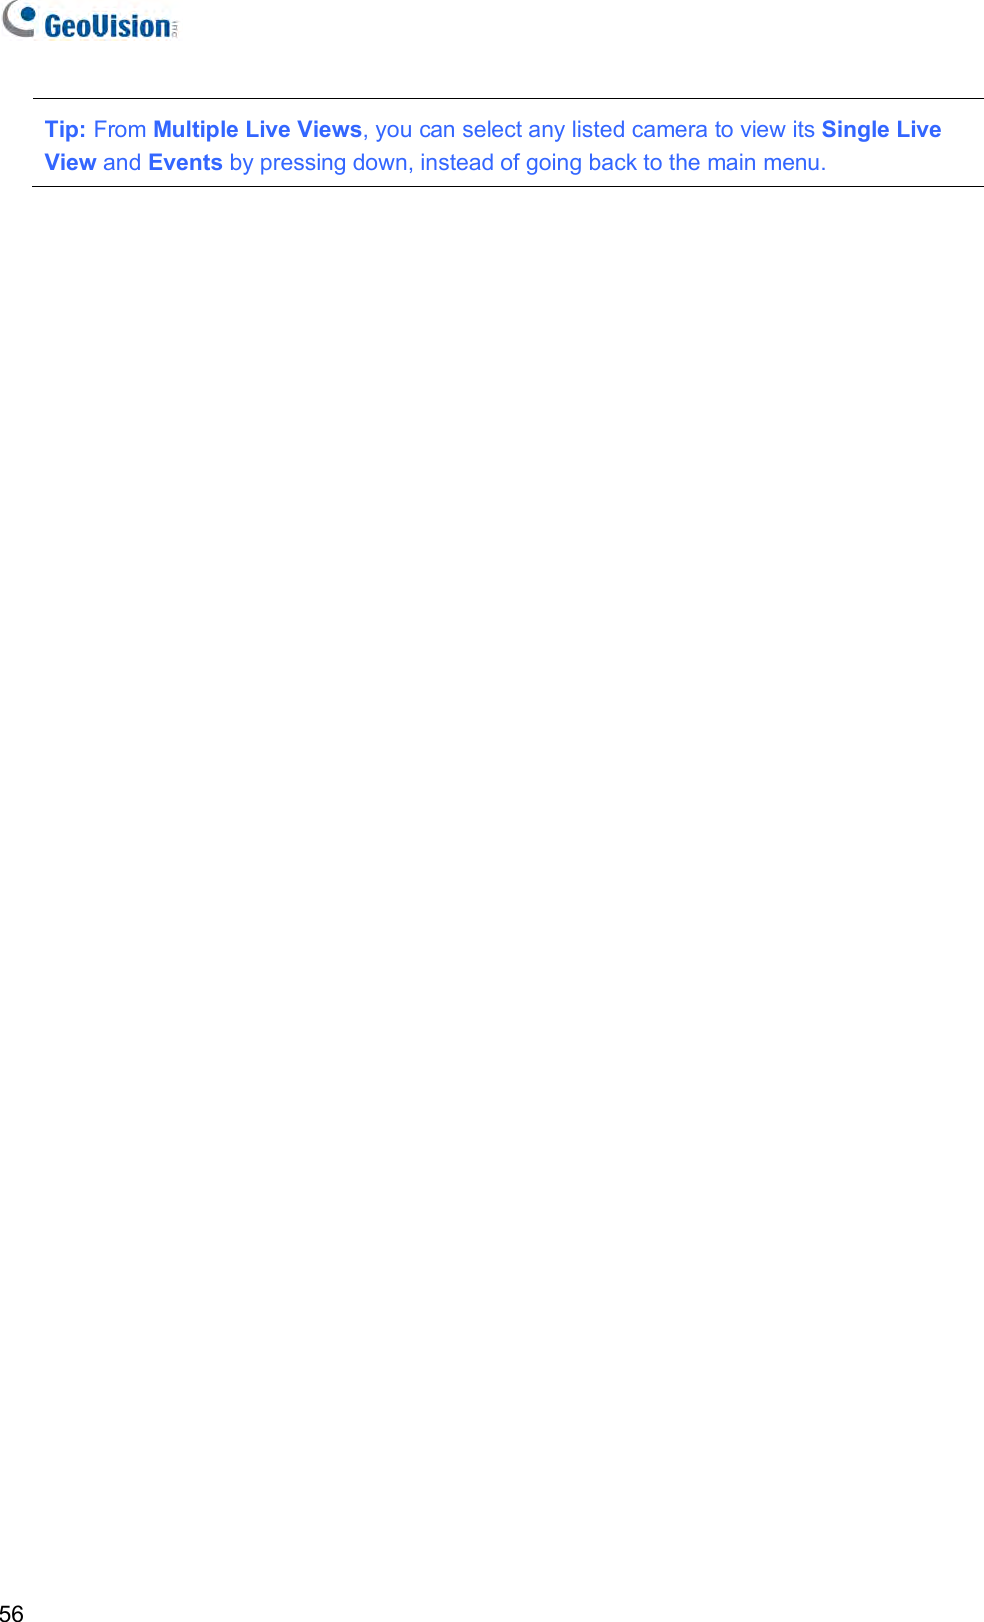
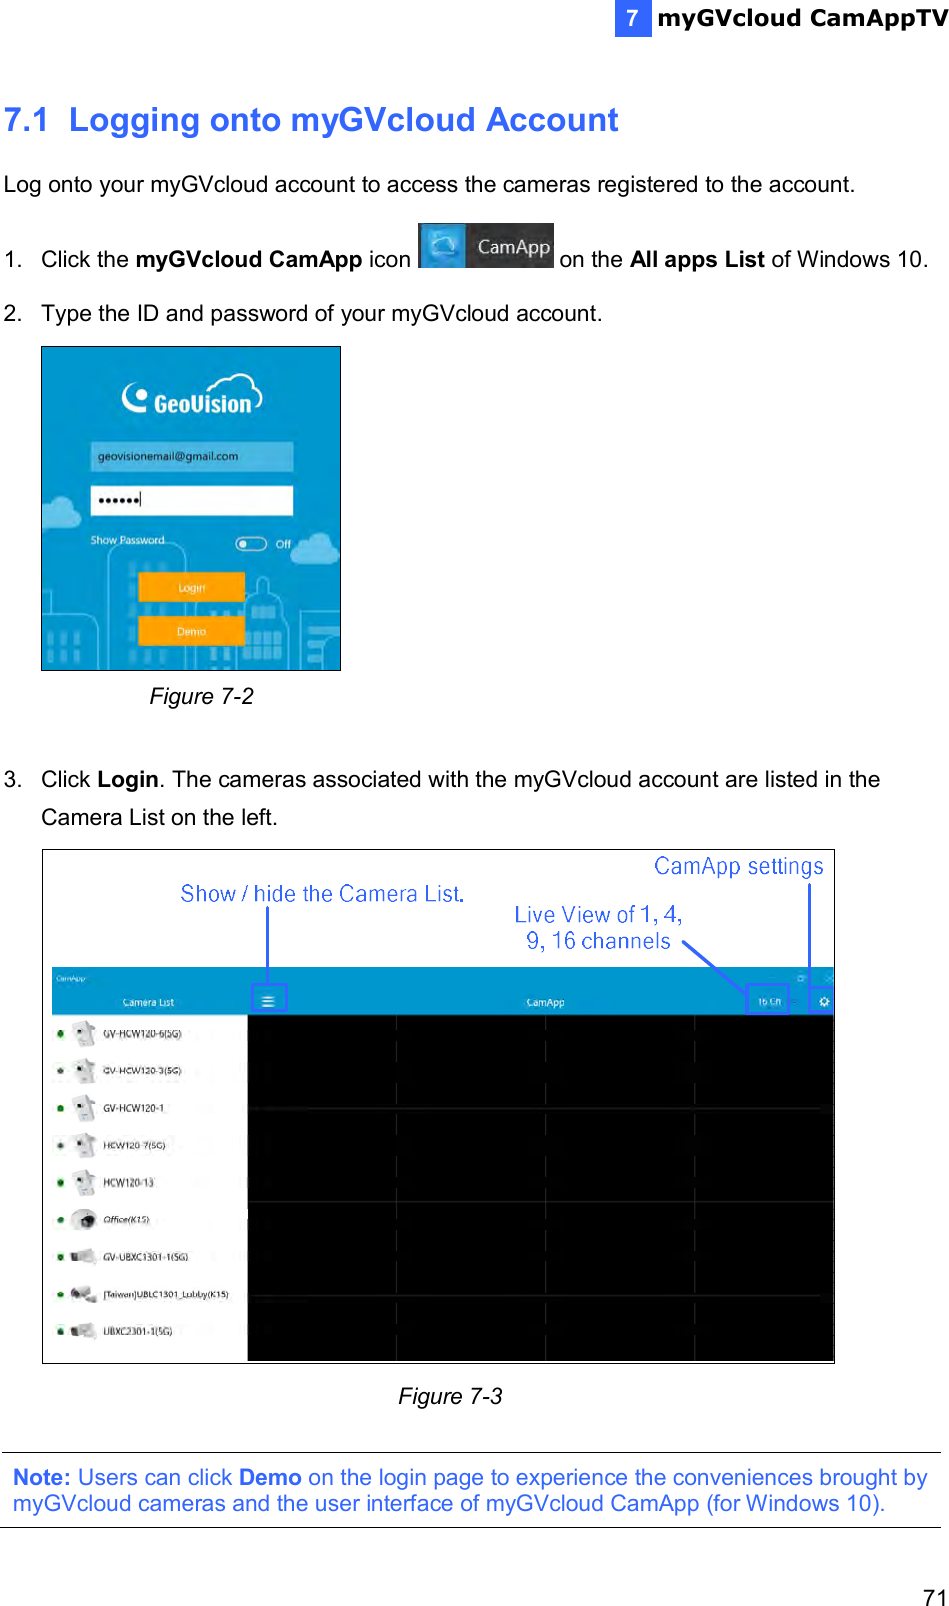
![myGVcloud CamApp 353 3.8 Configure myGVcloud CamApp Settings To configure the settings of myGVcloud CamApp, tap Settings on the main page. Figure 3-22 [Live View] Keep Image Ratio: Displays the live view in the device’s original image ratio. [System Setting] Disable Screen Off: Turns off sleep mode of the mobile device when myGVcloud CamApp is running. This function is disabled by default.](https://usermanual.wiki/GEOVISION/0OPAL000000/User-Guide-3518660-Page-42.png)

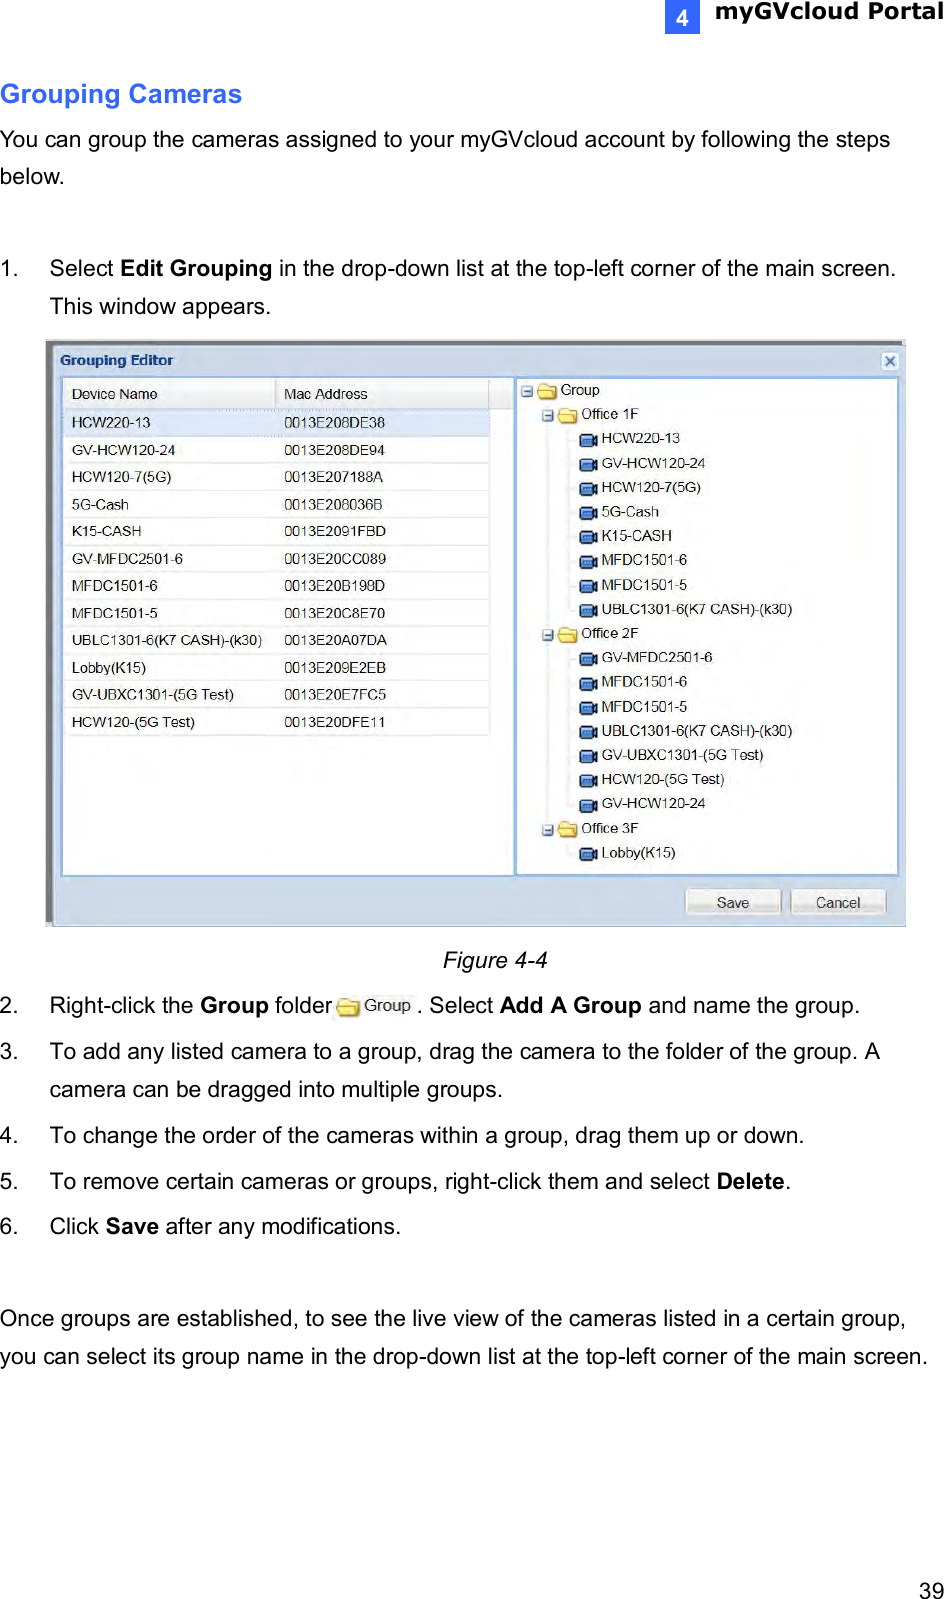
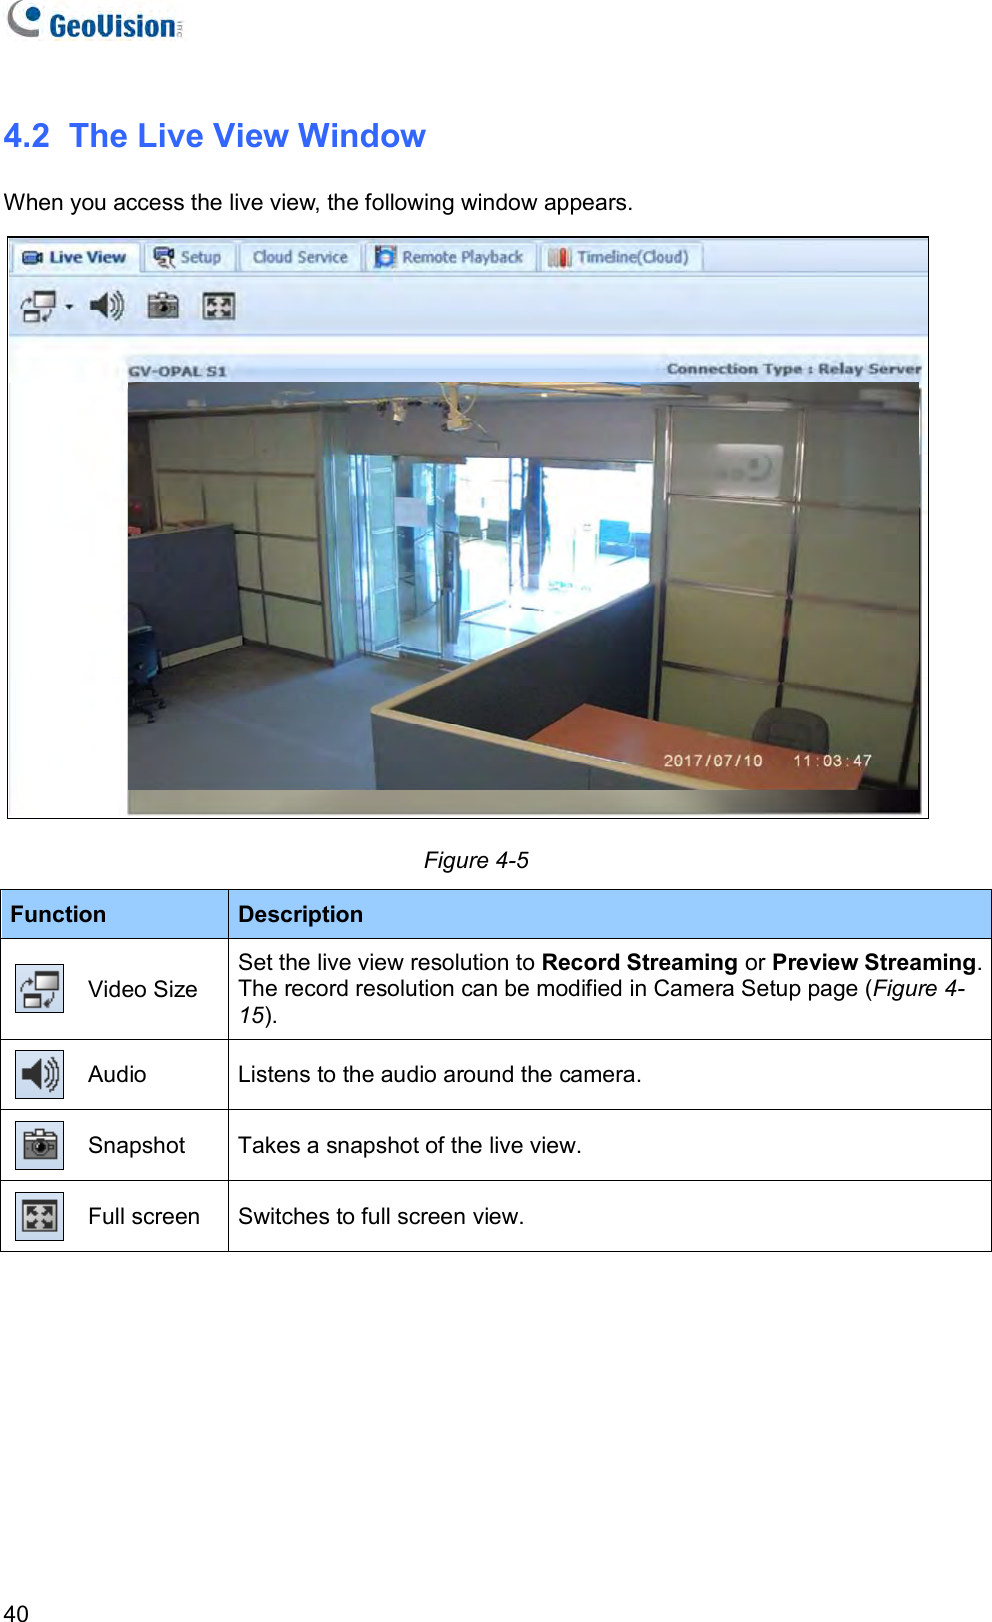
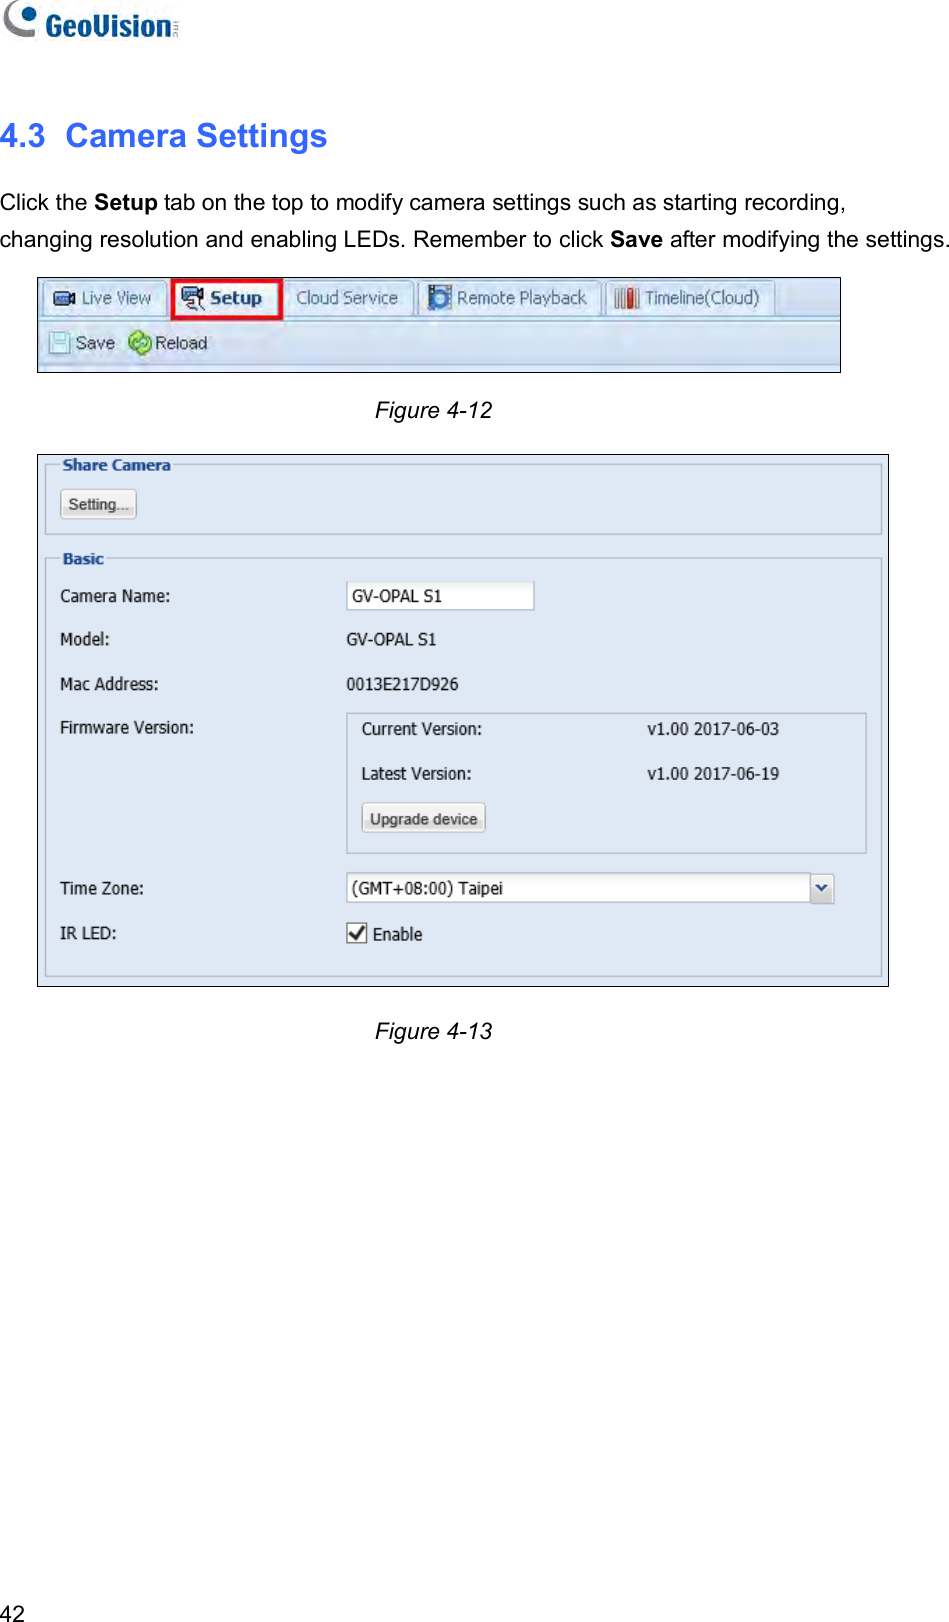
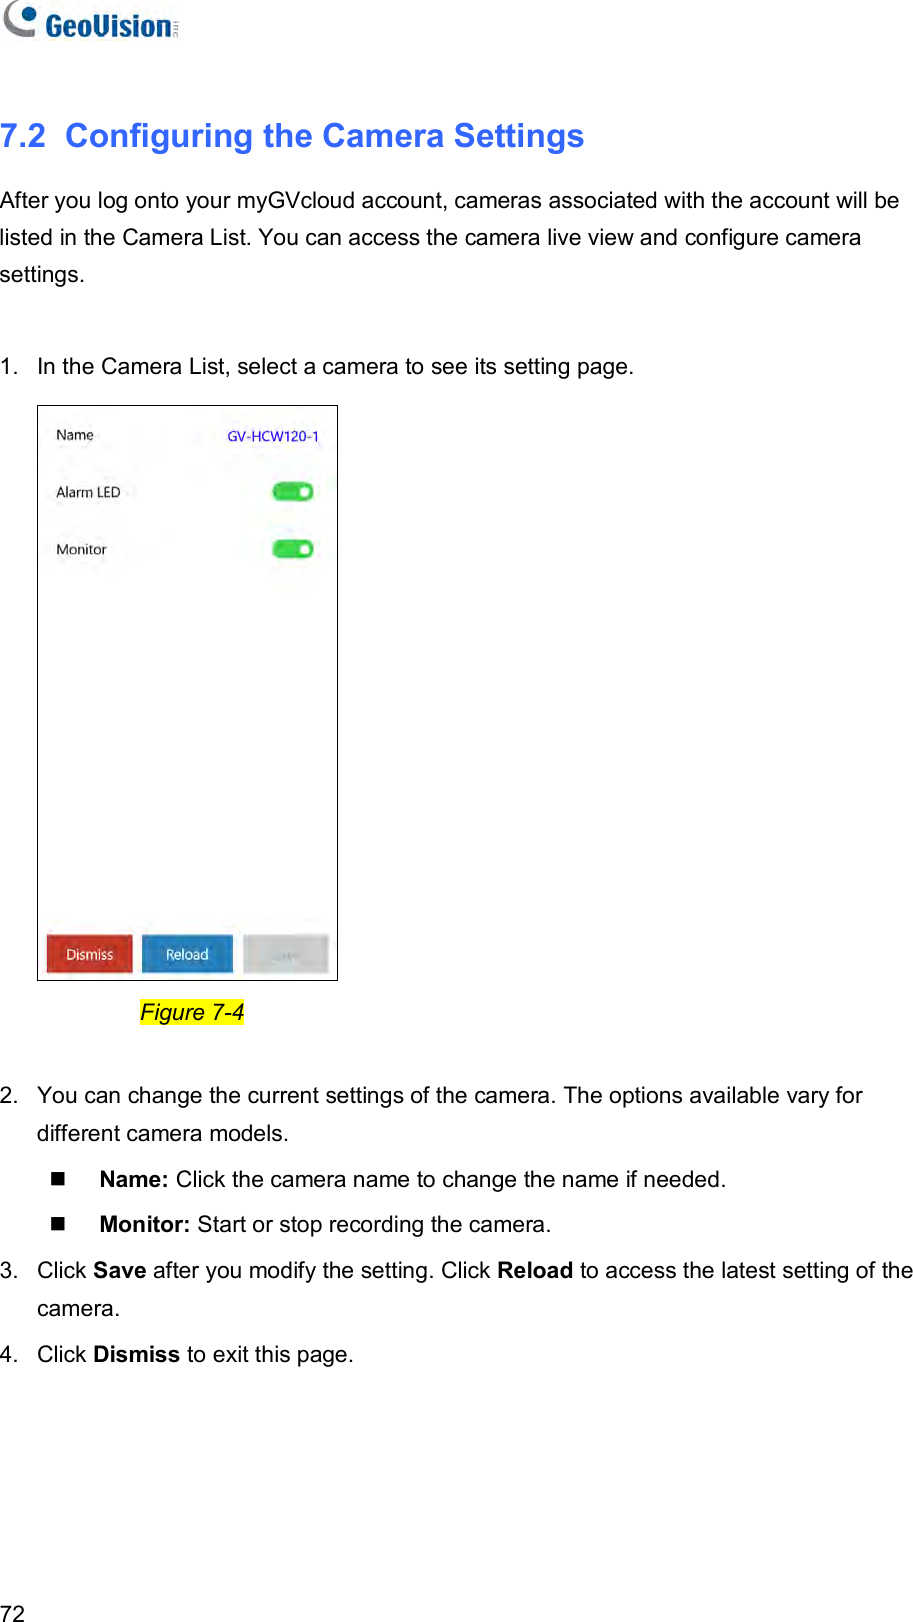
![myGVcloud Portal 434 [Share Camera] Click Setting to share the cameras assigned to your myGVcloud account to up to 4 other myGVcloud accounts. Type the myGVcloud account and click Invite to send a confirmation e-mail with activation link to the account. After activation, the other myGVcloud account will be able to access the live view of the selected camera. If Allow Video Playback is selected, they will also be able to play back motion events. Figure 4-14 Note: If the user was previously logged into a myGVcloud account on the same PC, be sure to log out of the previous account before clicking the activation link. Otherwise, the user will be directed to the previous account instead of the account in the activation link. [Basic] Camera Name: Change the display name of the camera if needed. Model: Show the camera model. Mac Address: Show the MAC address of the camera. Firmware Version: Show the current firmware version of the camera. You can click Upgrade Device to upgrade to the latest firmware if available.](https://usermanual.wiki/GEOVISION/0OPAL000000/User-Guide-3518660-Page-50.png)
![44 Note: A micro SD card is required for the firmware update. Time Zone: Set the time zone of the camera. IR LED: When enabled, the IR LED on the camera lights up under low lights to allow night vision. Figure 4-15 [Video / Audio] Record Streaming Resolution: Set the recording resolution for the camera. The Large resolution (Stream 1) of the camera will be used. Orientation: You can adjust the image orientation by selecting Normal, Horizontal Mirror, Vertical Flip or Rotate 180. Figure 4-16 [Event Monitor] Record upon Motion: Select Enable to record video upon motion detection. The Large resolution (Stream 1) of the camera will be recorded to the micro SD card. Make sure the SD card is inserted and formatted.](https://usermanual.wiki/GEOVISION/0OPAL000000/User-Guide-3518660-Page-51.png)
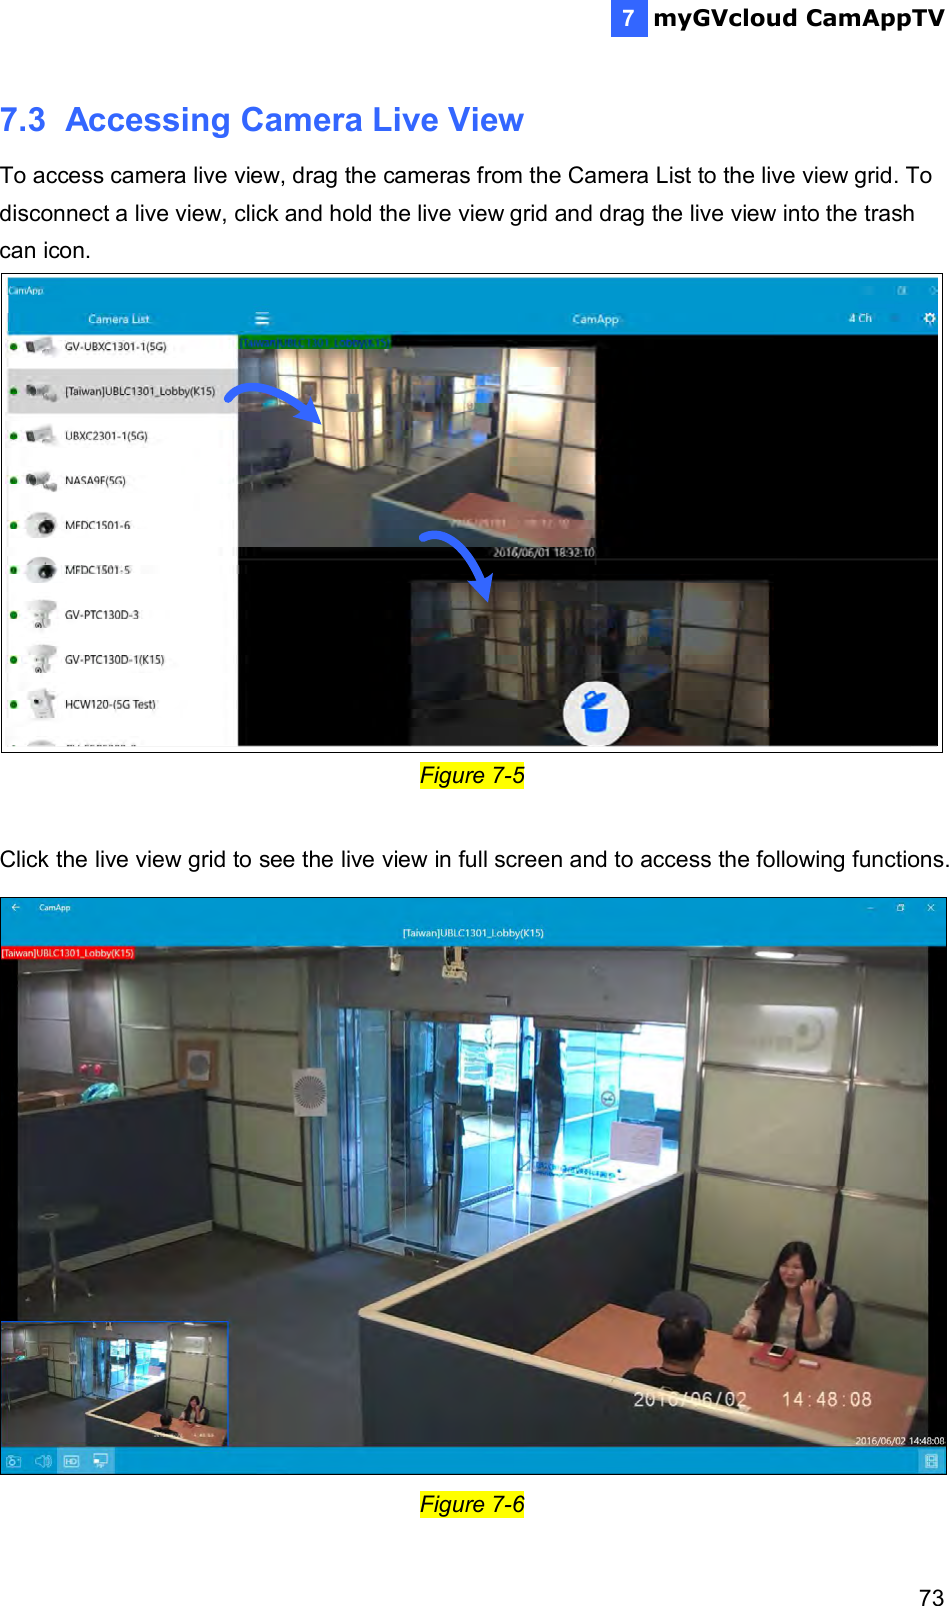
![myGVcloud Portal 454 Motion Sensitivity: Set the sensitivity level for motion detection. This function is not available for GV-HCW Cameras. Motion Detection Region: 1. Click Motion Detection Region. This window appears. Figure 4-17 2. By default, the whole red area is selected for motion detection. Select Delete Region and drag your mouse to specify the areas where you do not wish to detect any motion. The grey area will not be detected. 3. Select Add Region to specify the detection area. [Mobile Notification] Motion Event: Select Enable to send notifications to mobile devices upon motion detection. For this function to work, myGVcloud CamApp needs to be installed on the mobile device. See Chapter 3 for details. Notification Interval: Set an event interval to limit the frequency of notifications to mobile devices during continuous motion detection. For example, if motion is detected continuously and event interval has been set to 1 minute, notifications will be sent to mobile devices once every minute.](https://usermanual.wiki/GEOVISION/0OPAL000000/User-Guide-3518660-Page-52.png)
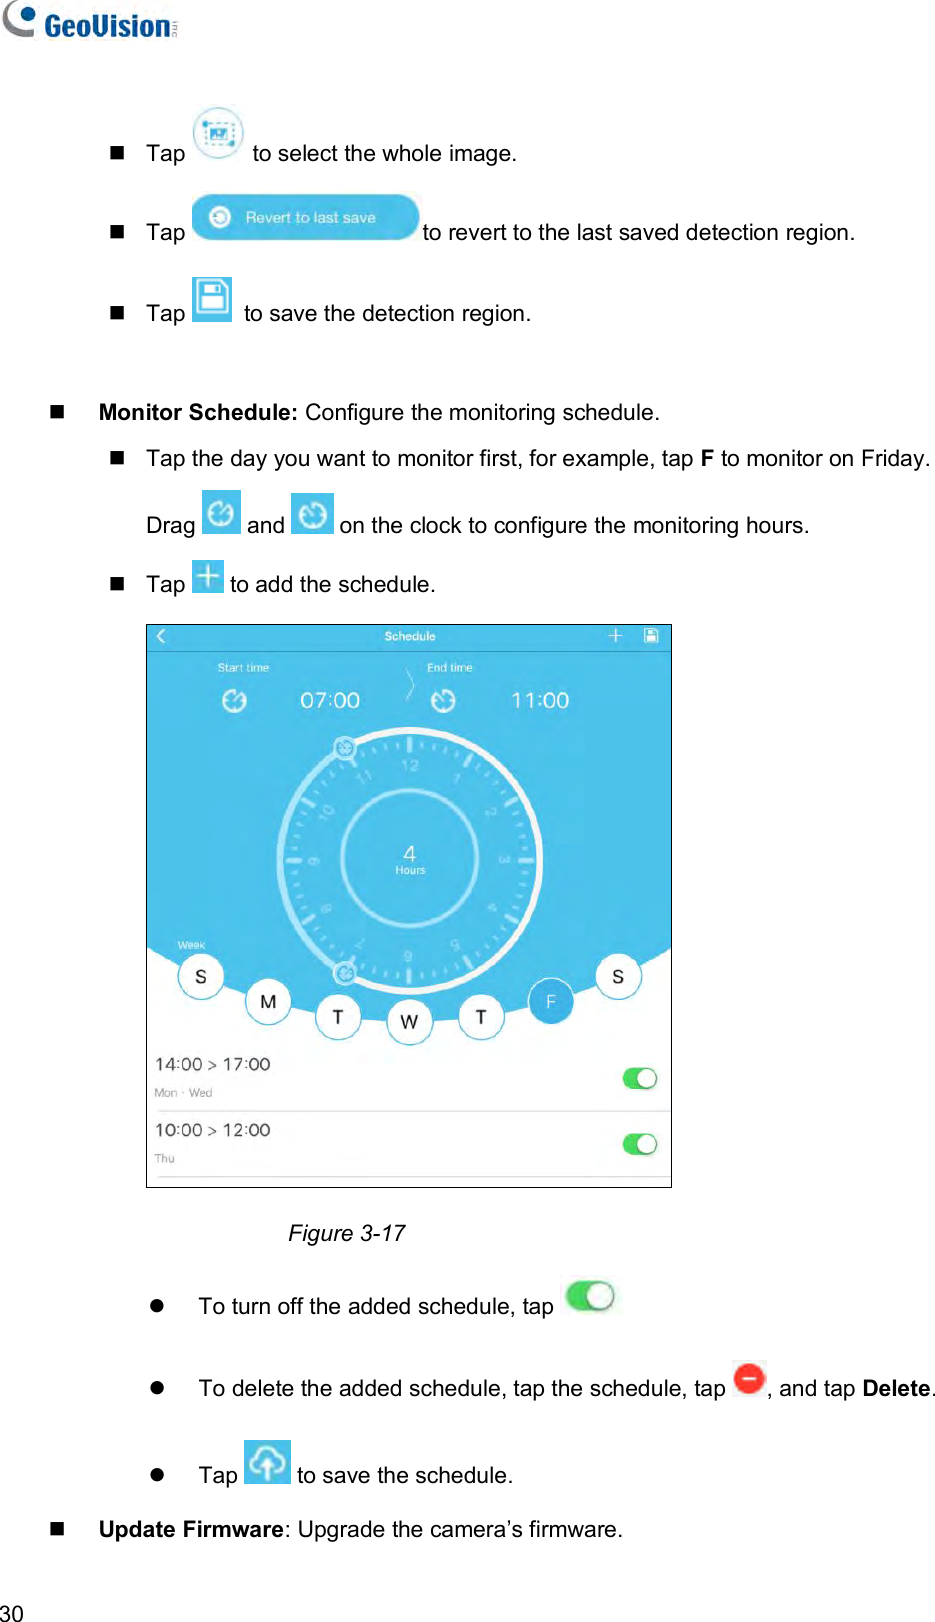
![46 Notification Schedule: Click Enable to enable notification to mobile devices only during the scheduled times. Click Configure Schedule and drag across the weekly schedule to highlight where you want mobile notification to be enabled. You can also click Disable at the top and drag on the weekly schedule to disable notification during these time periods. Figure 3-18 Below the Event Monitor section, you can click Show advanced settings to see the storage related settings. Figure 3-19 [Storage] SD Card: To format the micro SD card, click Format SD Card. Note: Saving recordings to cloud storage is only functional when an SD card is detected.](https://usermanual.wiki/GEOVISION/0OPAL000000/User-Guide-3518660-Page-53.png)
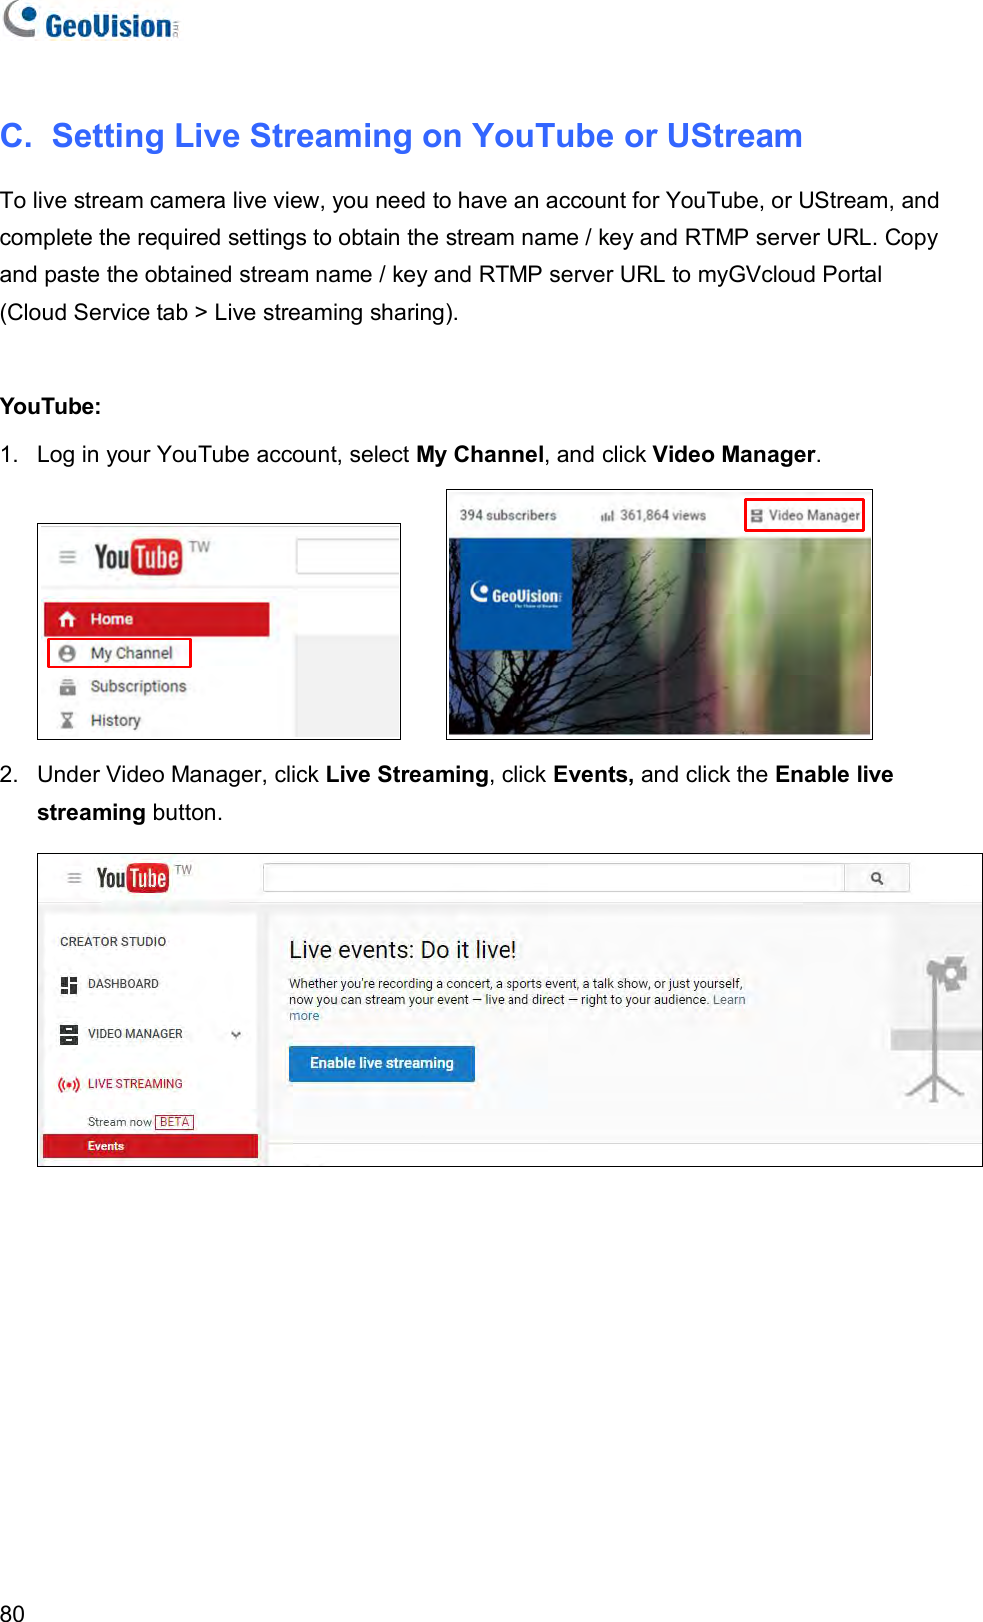
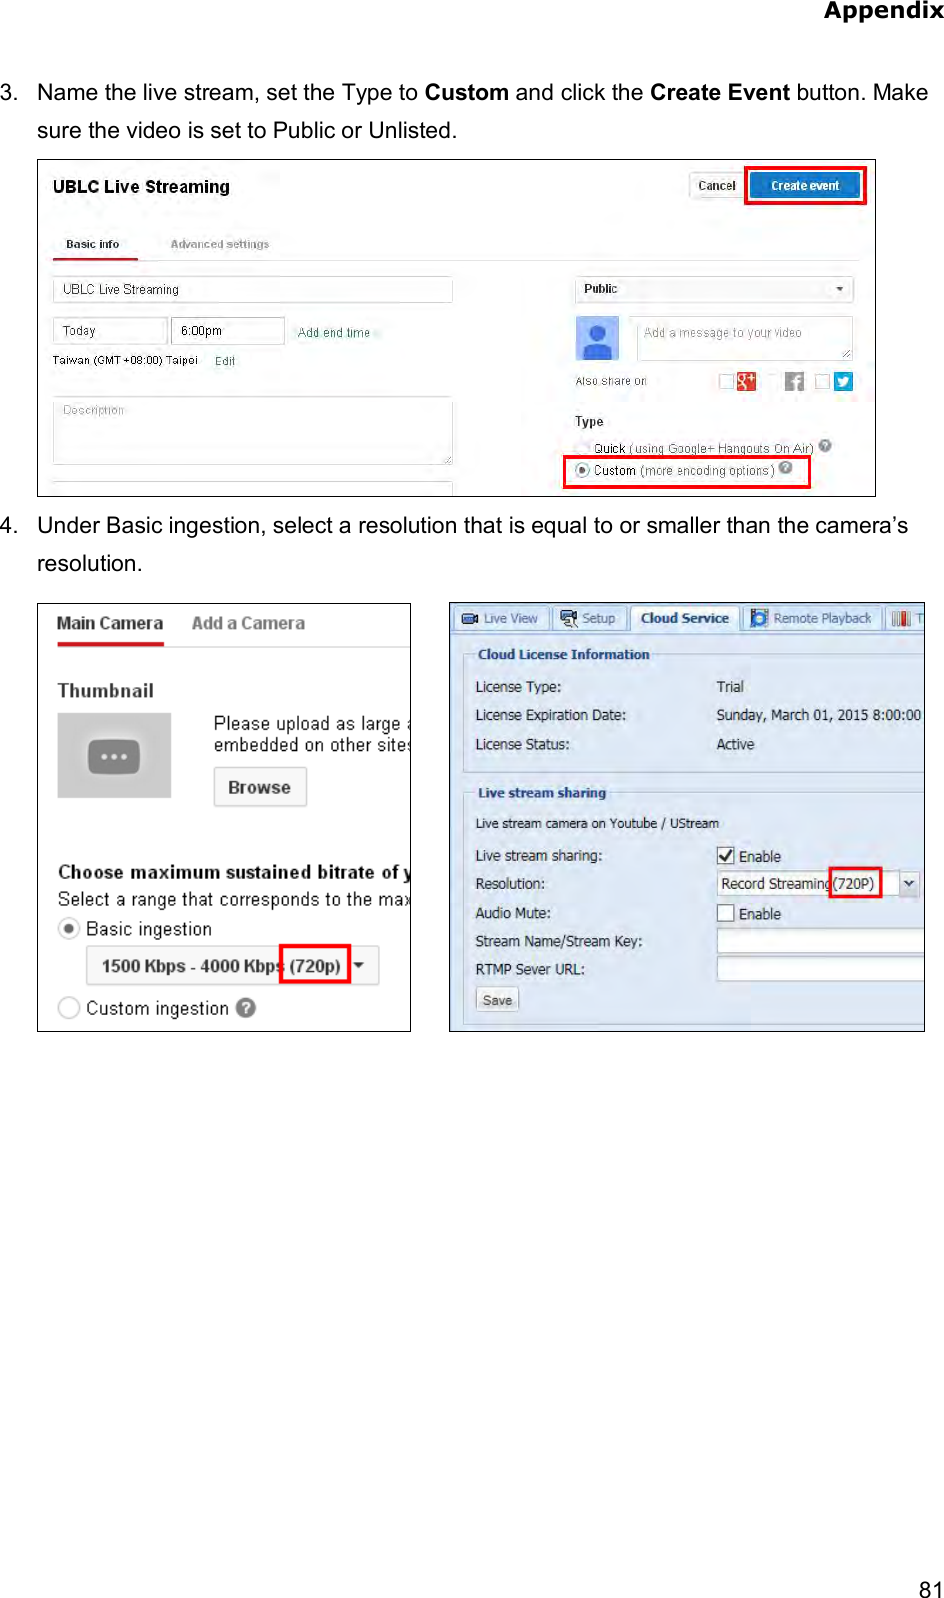
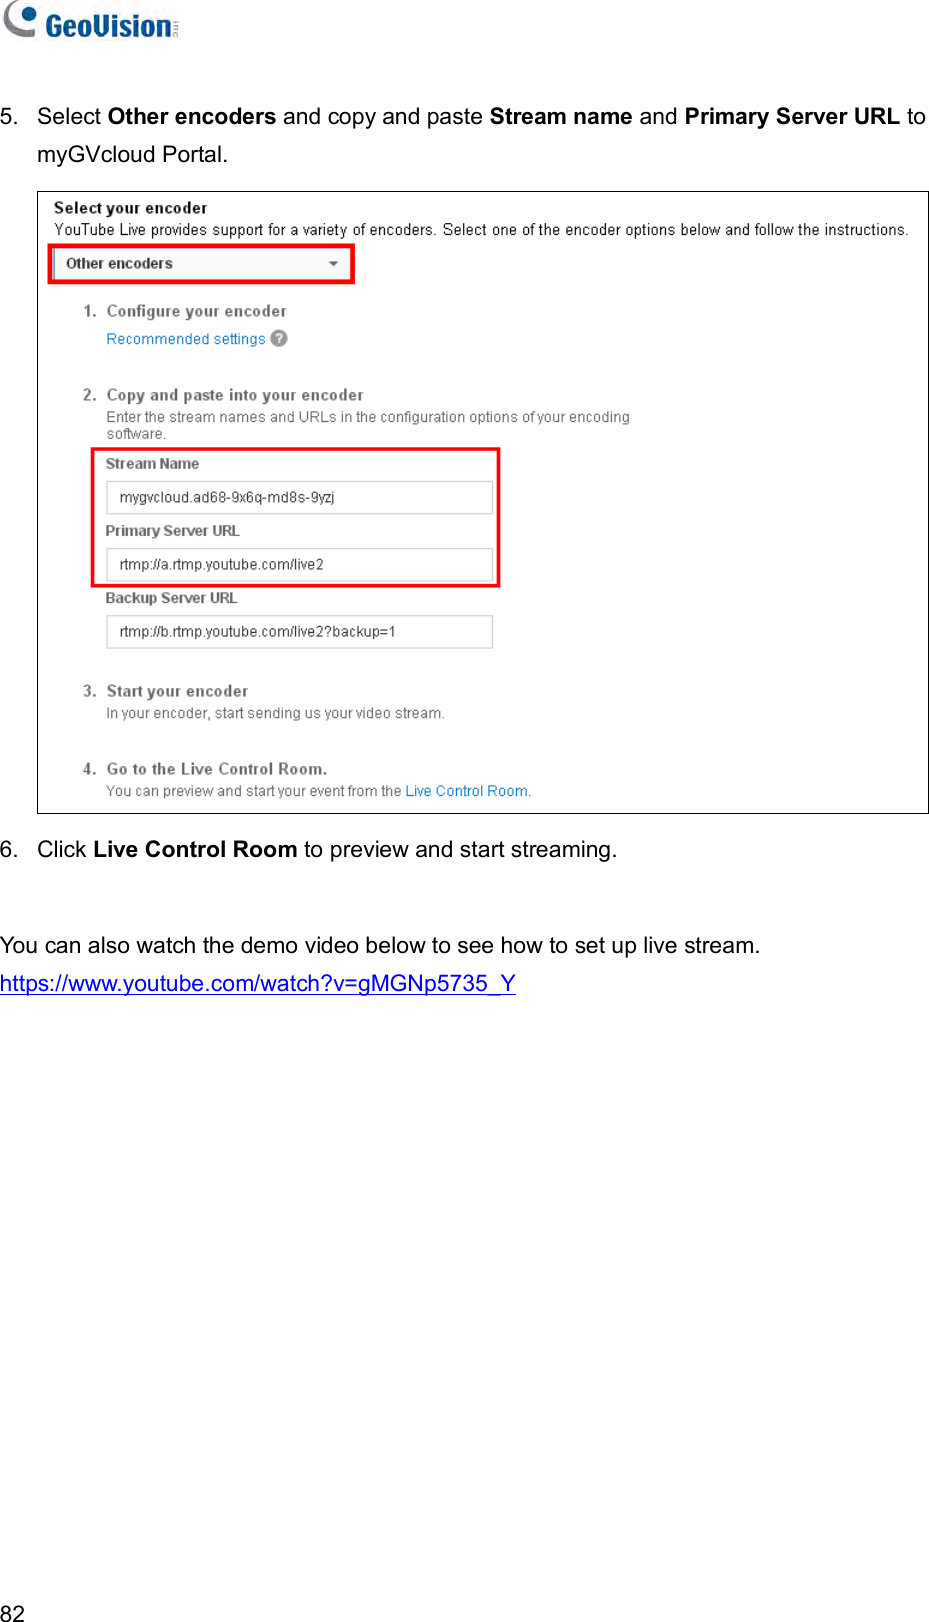
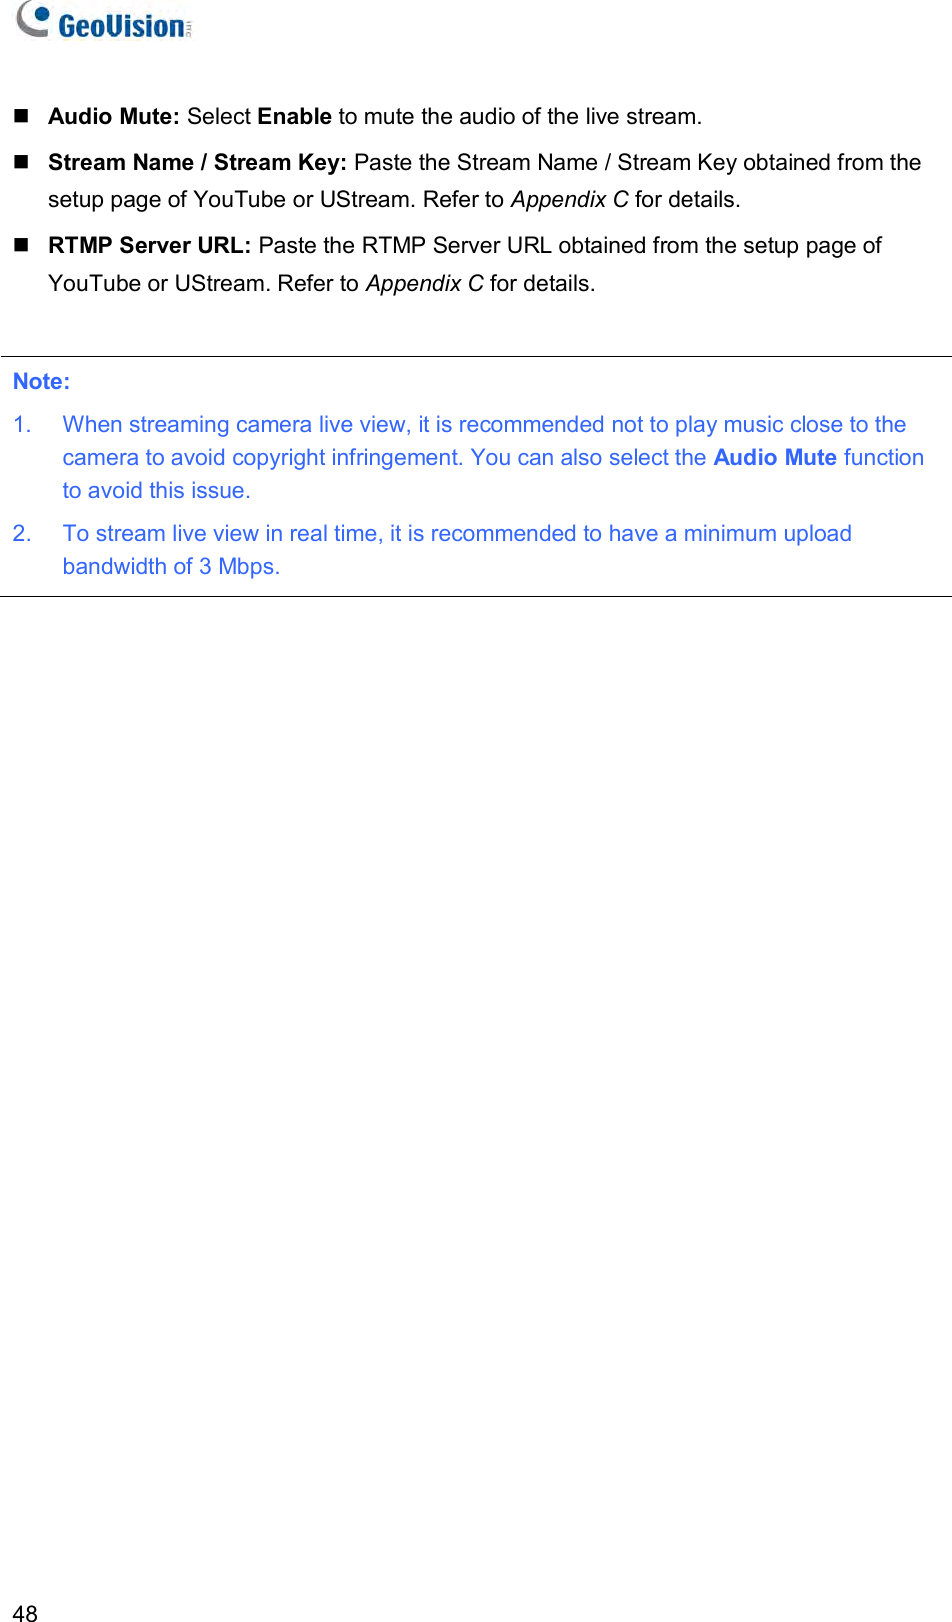
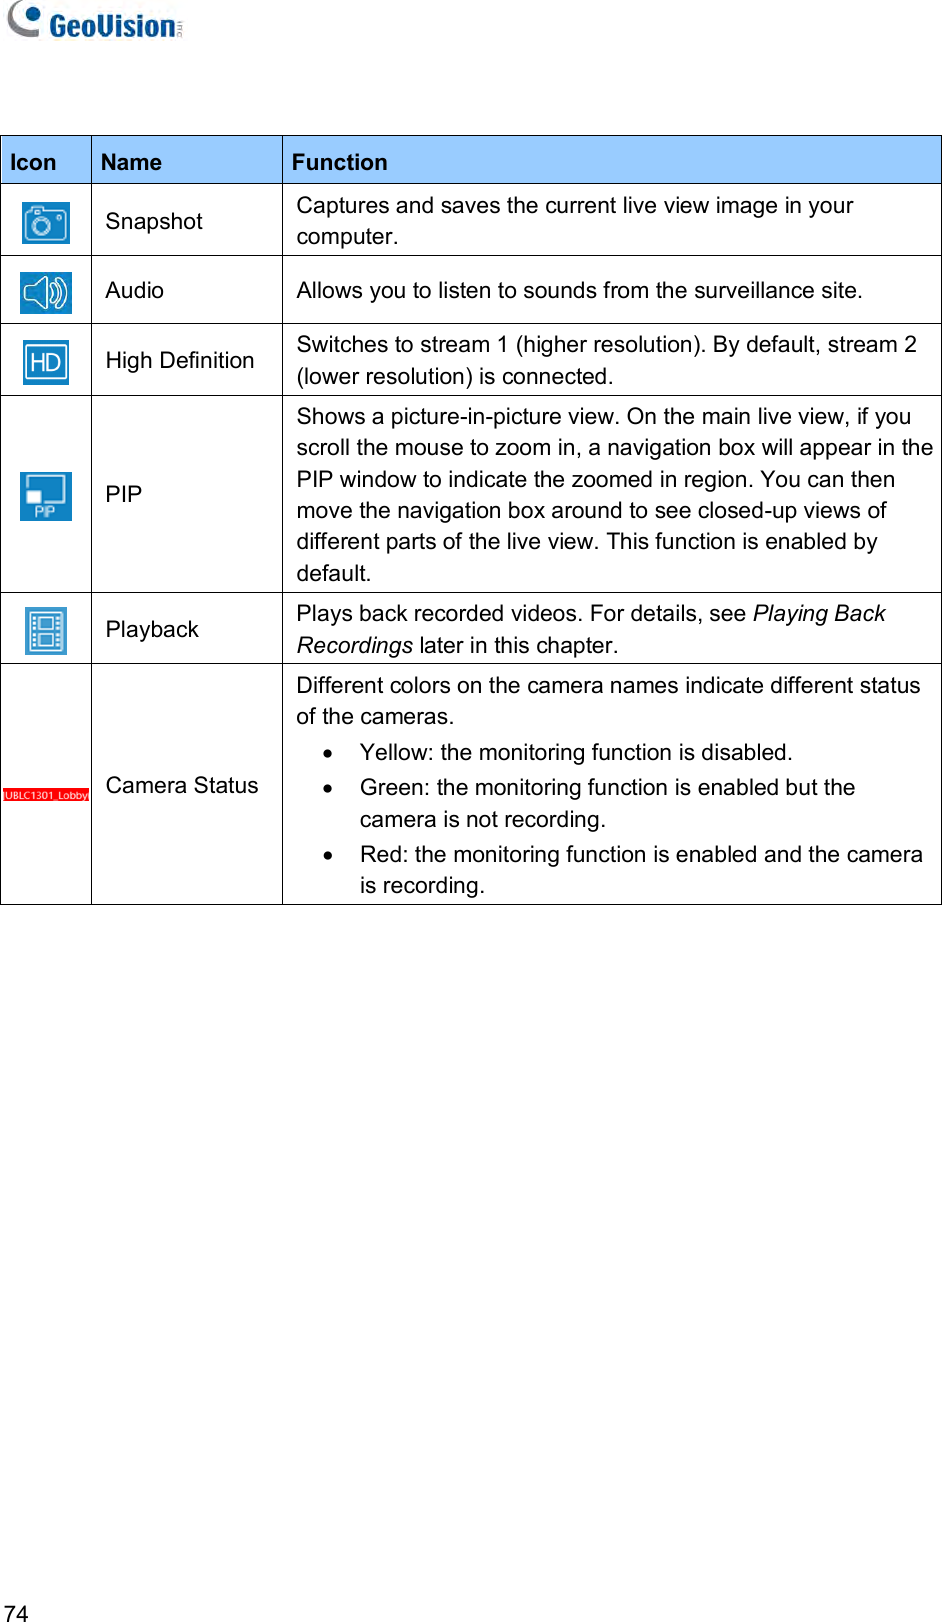
![myGVcloud Portal 474 4.4 Cloud Service To enable Cloud Service for the selected camera, click the Cloud Service tab. Figure 4-20 [Cloud License Information] Shows information of the cloud license acquired for this camera. GeoVision’s Cloud Service allows you to store recordings in the cloud storage. To manage cloud license, click Purchase in the top-right corner. [Sync Video Clip to Cloud Storage] Enable (Default) or disable recorded videos to to be uploaded to Cloud storage. [Live Stream Sharing] You can live stream the camera image on YouTube or UStream. You will need to have an account for YouTube or UStream and complete the required settings to obtain the stream name / key and RTMP server URL. For details, refer to Appendix C. Setting Live Streaming on YouTube or UStream. Live stream sharing: Select Enable to live stream the camera live view. Resolution: Select the resolution of the live stream. The resolution selected must be equal or larger than the resolution selected in YouTube or UStream.](https://usermanual.wiki/GEOVISION/0OPAL000000/User-Guide-3518660-Page-54.png)
![myGVcloud Portal 514 4.7 General Account Settings To modify the password of myGVcloud account or to set e-mail notification for camera disconnection, click Setup at the top-right corner. Figure 4-23 [User Account] Change Password: Click Edit to change the password of your myGVcloud account. Hint: Modify the password hint if needed. Last Login Time: Shows the time this account logged into myGVcloud Portal. [General Setup] E-mail: Set the e-mail to receive notification upon camera disconnection. Nick Name: Change the account display name at the top-right corner. Camera disconnection notification: Select Enable to send e-mail notification upon camera disconnection. Click the Save button after modifying the settings.](https://usermanual.wiki/GEOVISION/0OPAL000000/User-Guide-3518660-Page-58.png)

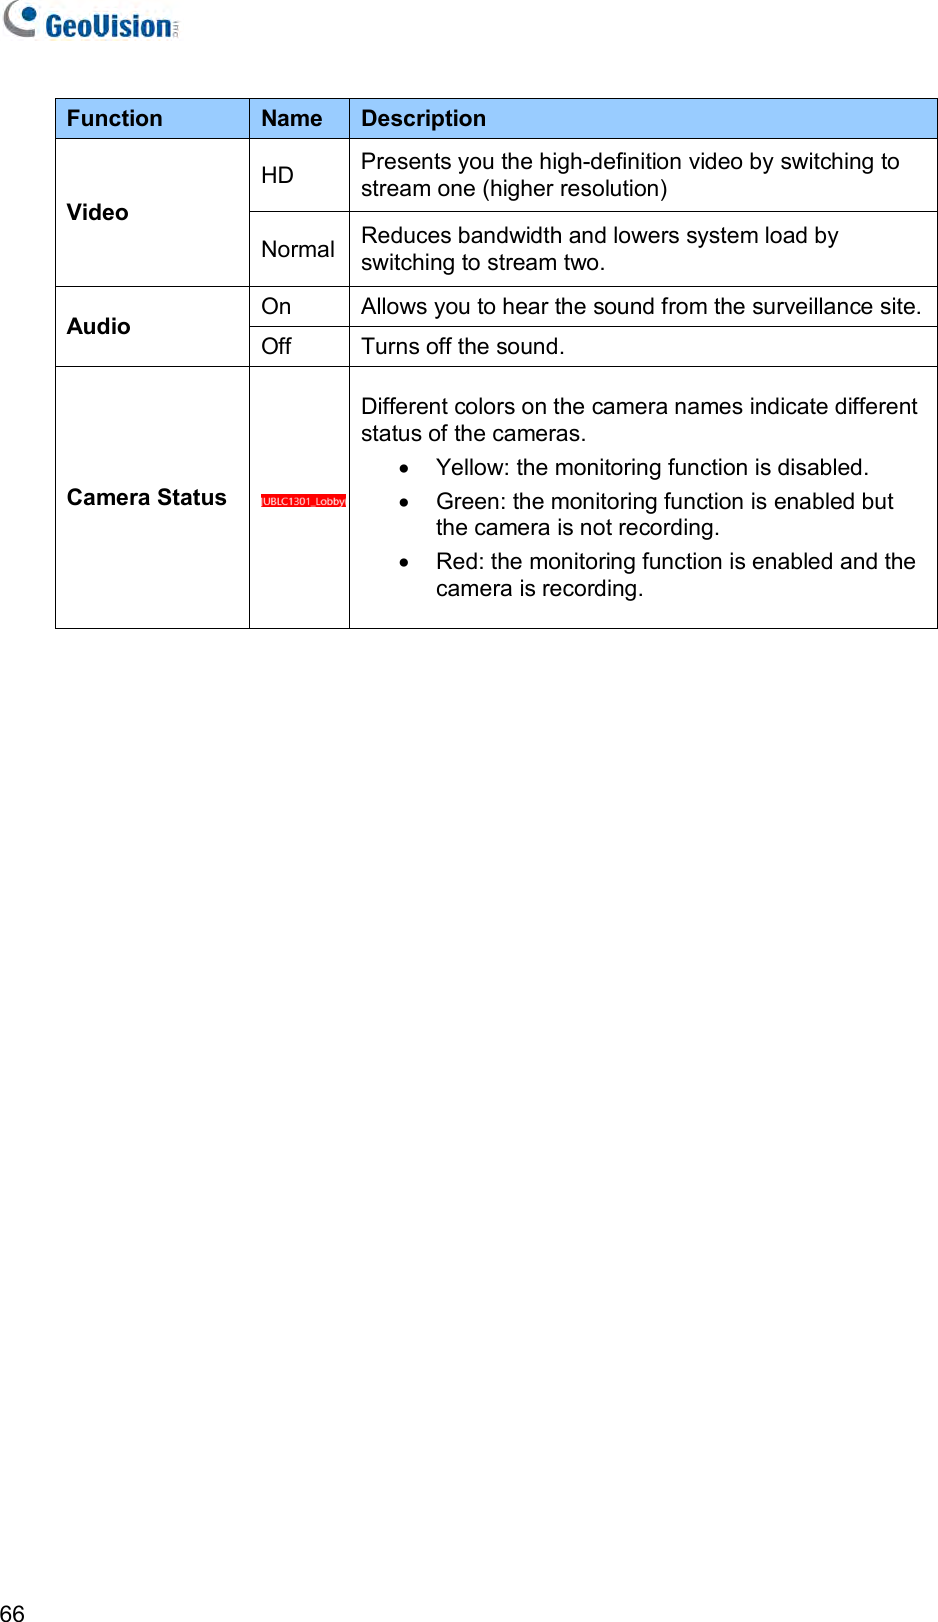

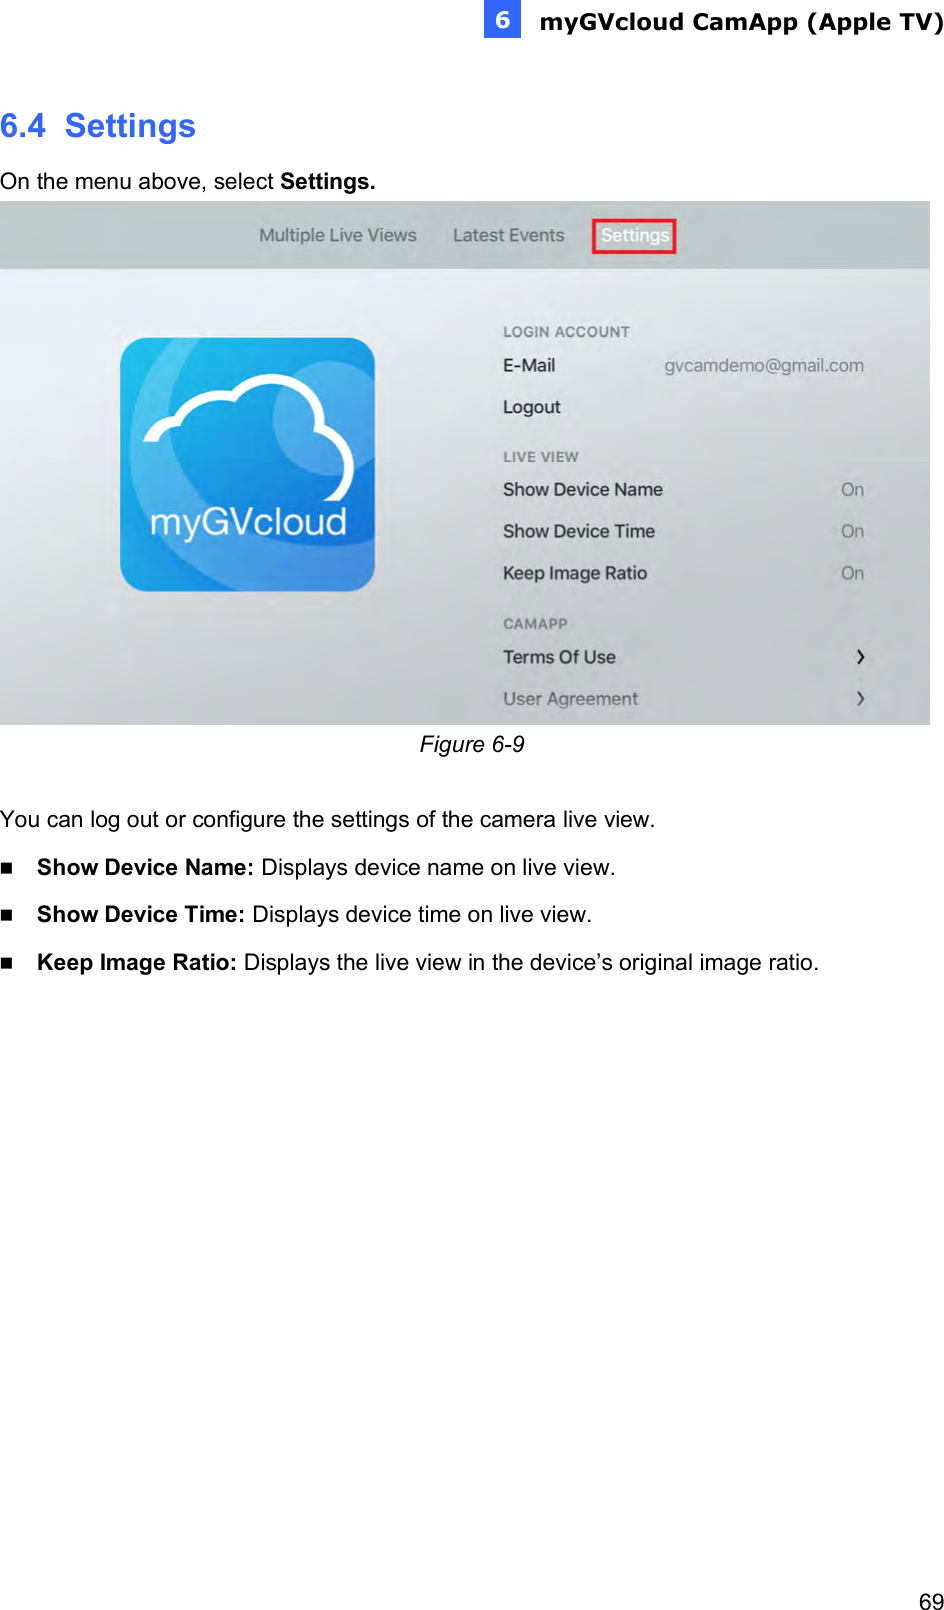
![76 7.5 Configure myGVcloud CamApp (Windows 10) Settings To configure settings of myGVcloud CamApp, click the setting icon on the main page. Figure 7-8 [Login Account] Logout: Logs out of the myGVcloud account. [Live View] Show Device Name: Displays device name on live view. Show Device Time: Displays device time on live view. Keep Image Ratio: Displays the live view in the device’s original image ratio.](https://usermanual.wiki/GEOVISION/0OPAL000000/User-Guide-3518660-Page-83.png)