GIGA BYTE Communications 9QDENIM000 PDA PHONE WITH WIFI, BLUETOOTH, AND GSM/EDGE User Manual 20070711UMforPV indd
GIGA-BYTE Communications Inc. PDA PHONE WITH WIFI, BLUETOOTH, AND GSM/EDGE 20070711UMforPV indd
Contents
USERS MANUAL 2
Chapter 8
Multimedia
8.1 Camera
8.2 Video recorder
8.3 Photo editor
8.4 FM radio
8.5 Pictures & videos
8.6 JAVA
8.7 Streaming player
8.8 Recorder
92
Chapter 8 Multimedia
8.1 Camera
You may use camera function in your O2 Xda Denim to capture important moments.
Tap Start > Programs > Camera, or press down Camera key to launch camera.
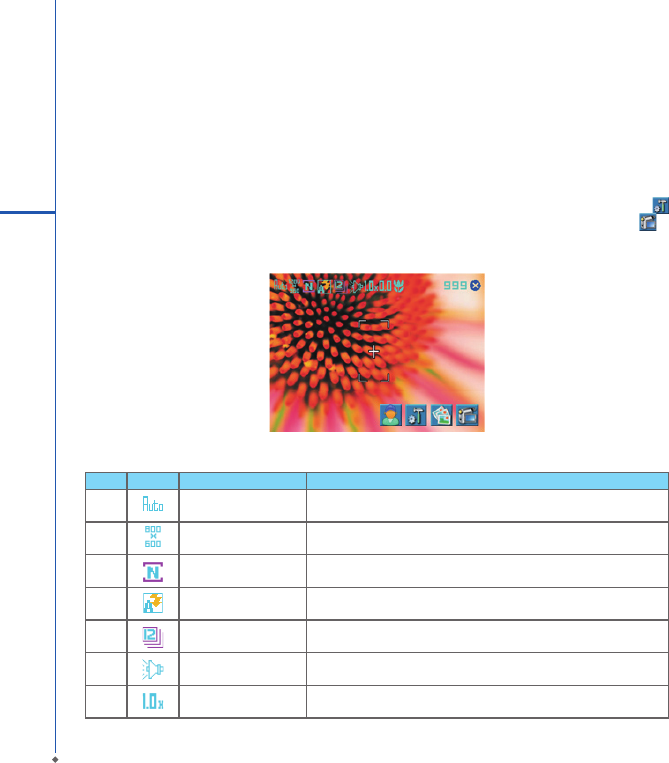
Capture mode
During capture mode, you can tap the icons on the top of the screen to switch through different modes, or tap
to open the full camera options menu. To switch to Video mode, simply press the center navigation key or tap to
enter the video standby mode.
No. Icon Function Description
1Image Mode Includes the following modes: Auto (default) / Day /
Cloudy / Fluorescent and Night
2Image Size You can choose among:1600 x 1200 / 1280 x 960 / 800x 600 / 640 x
480 (default) / 320 x 240 / 160 x 120
3Image Quality Normal (default), Fine, Low.
4Flash Light Auto (default), On, Off.
5Sequential Shot 18,12,6,3,Off (default)
6Shutter Sound On (default), Off
7Zoom Zoom Range: 1.0x (default) / 1.2x / 1.4x / 1.6x / 1.8x /2.0x / 2.2x / 2.4x
8
Multimedia
93
8
Multimedia
No Icon Function Description
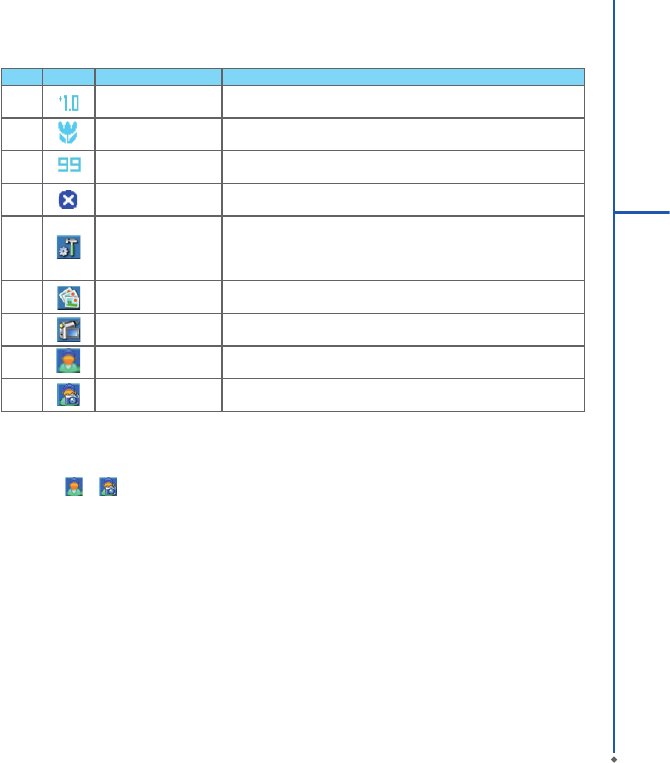
8EV Compensation Provides the following values: +2.0 / +1.5 / +1.0 / +0.5 /0.0 (default) /
-0.5 / -1.0 / -1.5 / -2.0
9Macro/Normal mode Tap this icon to switch between Macro (within 10~60
cm) mode and normal mode.
10 Remained Shots Indicates estimate number of photos you can take
using the current storage location.
11 Exit Tap this icon to exit camera mode.
12 Options Menu
Tap this icon to open options menu, in which the
following options are provided: Mode, Effect, EV ,
Size, Quality, Timer, Sequential Shot, Flash, Shutter
Sound, Storage, Reset Camera Settings and Flicker Frequency.
13 Pictures & Videos Tap this icon to go to Pictures & Videos where the
taken photos and videos are stored.
14 Video Mode Tap this icon to change to Video mode.
15 Front camera lens Tap this icon to take picture from the front lens.
16 Digital camera lens Tap this icon to take picture from the back lens.
Switching between video conference camera lens and digital camera lens:
Tap the icon or to switch between the two camera lenses. You can choose the camera lens you would like to
use.
Taking a photo
1. On Camera capture mode, focus on the object.
2. You can also tap on the icons on the top or open options menu to change camera settings.
3. Half way press Camera key to auto-focus, fully press Camera key to take photo.
4. After you take a photo, the image will be categorized in Pictures& Videos.
Please note: The default storage location is phone memory.
94
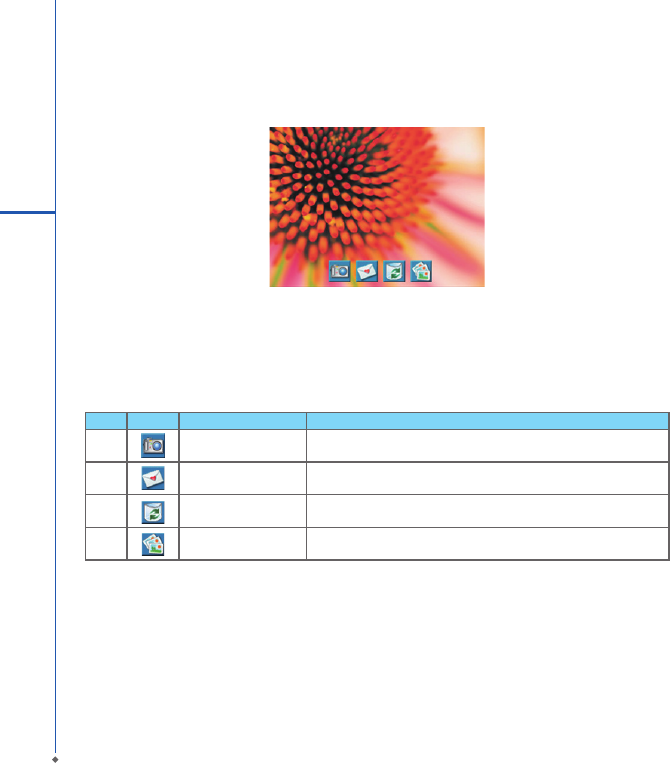
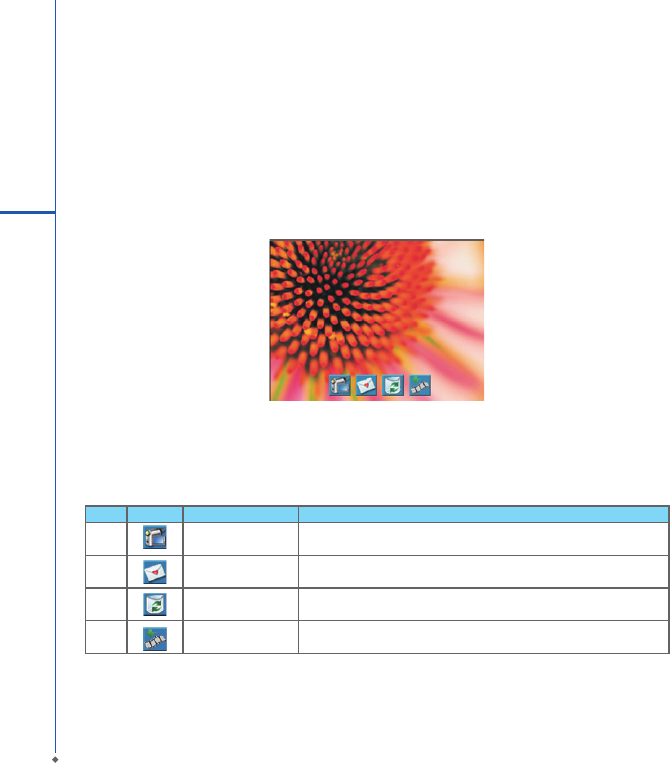
Photo con rm screen
After taking a photo, you will enter the con rm screen where you can choose to delete or send out the image.
On this screen you can tap the following icons to:
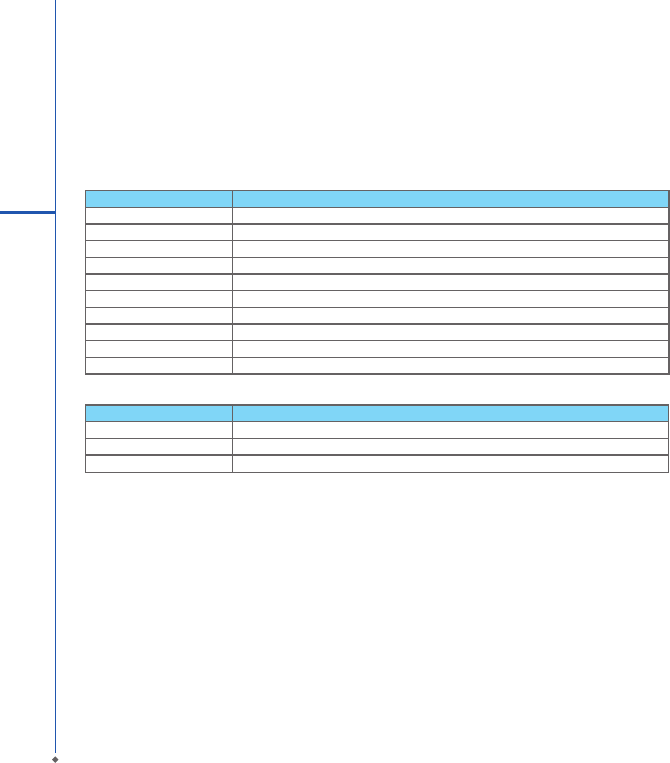
No Icon Function Description
1Camera Return to camera capture mode.
2Send Choose to send out this photo via E-mail or MMS.
3Delete Delete the photo on screen.
4Pictures & Videos Go to Pictures & Videos.
8
Multimedia
95
8
Multimedia
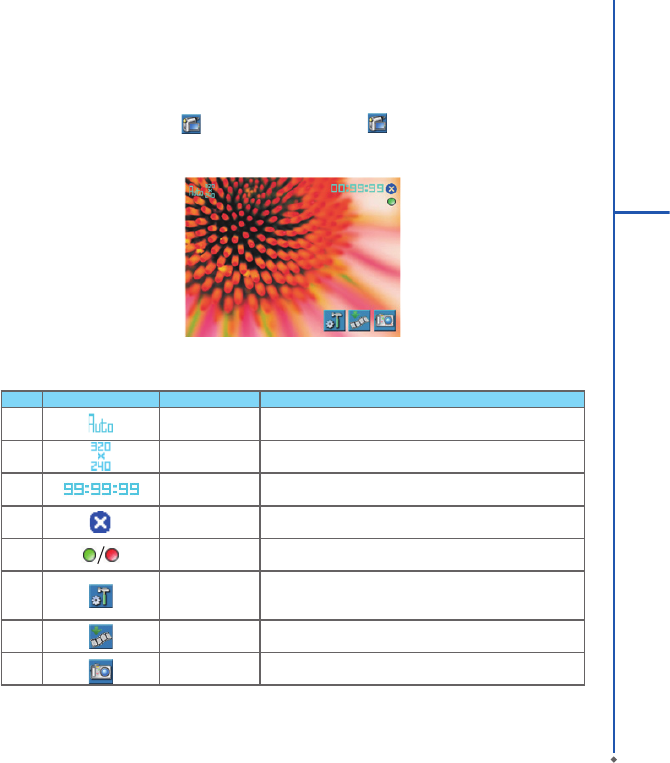
8.2 Video recorder
The phone camera can also be used as a video recorder to record memorable moments of your life.
Tap Start > Programs > Camera > , or directly press Camera key > to enter video mode.
No Icon Function Description
1Video Mode Tap this icon to switch among the following modes: Auto
(default) / Day / Cloudy /Fluorescent and Night.
2Video Size Set to be 320 x 240.
3Remained Video
Length
Indicates the estimated length of video you can take using the
current storage location.
4Exit Tap this icon to exit video mode.
5
Prepared to
record
/Recording Indicates the video recorder status.
6Options Menu
Tap this icon to open options menu, in which the following
options are provided: Mode, Effect, Video Format, M MS
Video, Storage and Flicker Frequency.
7Pictures & Videos Tap this icon to go to Pictures & Videos where the taken clips
are stored.
8Video Mode Tap this icon to change to Video mode.
96
Recording a clip
1. On Video recorder mode, focus on the object. You can also tap on the icons on the top or open options menu to
change video recorder settings.
2. Press Camera key to start video lming.
3. Press Camera key again to stop lming.
4. After you record a clip, it will be categorized in Pictures & Videos.
Please note: The default storage location is phone memory.
Video con rm screen
After recording, you will enter the con rm screen where you can choose to delete or send out the clip.
On this screen you can tap the following icons to:
No Icon Function Description
1Video Return to video mode.
2Send Choose to send out this clip via E-mail or MMS.
3Delete Delete the photo on screen.
4Pictures & Videos Go to Pictures & Videos.
8
Multimedia
97
8
Multimedia
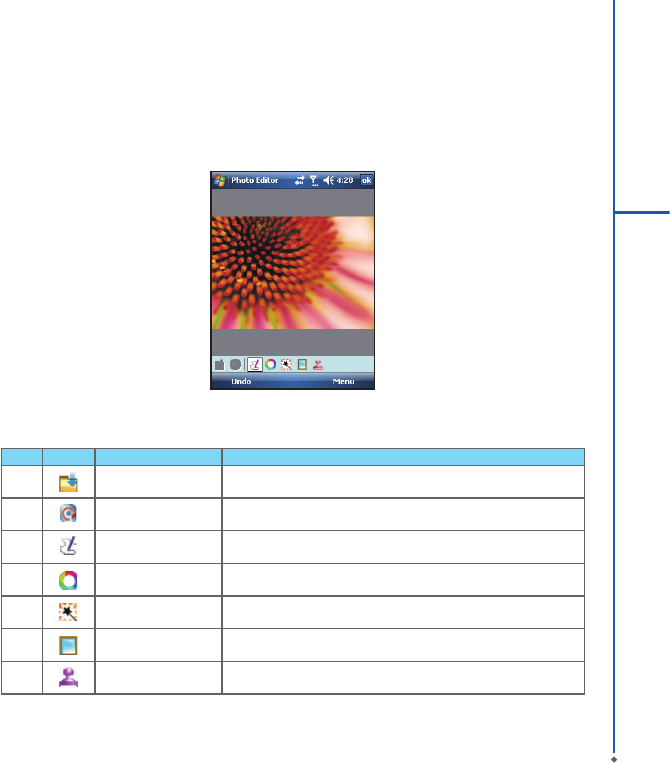
8.3 Photo editor
You can handwrite messages on photos, or apply colorful frames and stamps by tapping Start > Programs > Photo
Editor.
On the editor screen, you can tap Undo to reverse the steps, or tap Menu to get further editing options.
The tool bar on the bottom also provides 7 functions:
No Icon Function Description
1Save This button appears after you have modied a picture. Tap this to save
the current image.
2Undo Revert
3Pen Size Choose a brush size.
4Choose Color Choose a color of your pen from color palette or mix a paint by
yourself .
5Effect 5 effects are available: Gray / Blur / Emboss / Negative / Classic
6Choose Frame 3 photo frames are available: Star / Fall / Flower
7Add Stamp 5 stamps for you to add more fun touches to your picture.
98
8
Multimedia
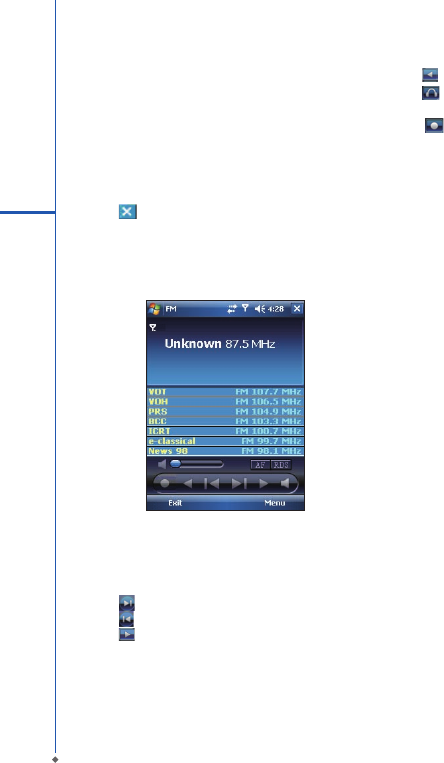
8.4 FM radio
You can listen to FM radio through your O2 Xda Denim
by searchin g c hannels. Please plug in the stereo
headset before listening to FM radio.
1. Select Start > Programs > FM Radio.
2. You may use function bar or number key on radio
screen to enter your favorite channel.
3. Tap Exit to turn off the radio and exit, or
4. Tap on the top right of screen to exit radio screen
and play the radio on the background. Now the radio
function is still running and you may use some other
applications at the same time.
Radio Function Bar:
1. Channel Tuner: you may use this bar to tune to your
desired channel.
2. Tap to switch to the next available channel.
3. Tap to switch to the previous available channel.
4. Tap to increase frequency by 0.1 MHz.
5. Tap to decrease frequency by 0.1 MHz.
6. Tap to switch between loudspeaker or headset
mode.
7. Tap to start recording the FM radio broadcast
of the channel you are currently listening to. The
recording time will be displayed on the top of screen.
Tap “STOP” to stop recording.
Options:
Tap Options for the following options:
● Favorites: your favorite channels.
● AutoScan: autoscan all the channels.
● Options: some options like output le format, le foler
default or save as....
● Pre-Record: you can set when, what channel and
how long you want to record.
● Save: you can save the channel name, frequency and
URL of program guide.
● Sleep Timer: you can choos e none, 15, 30, 60
mintues.
● About: display information related to this program.
Radio Volume Control Method:
You may adjust radio volume using the volume control
key on the side of mobile phone. Slide the volume
control key upwards or downwards, and then select
a suitable volume by tapping on the pop-up volume
adjustment bar.

99
8
Multimedia
8.5 Pictures & videos
You may use Pictures & Videos function to manage
your photos or videos. By tapping Start > Programs >
Pictures & Videos, you can:
1. Enter different folders.
2. Select photo arrangement.
3. Tap on a thumbnail picture to view the picture.
4. Select Menu for more options.
8.6 JAVA
This device supports JAVA, providing you the freedom
of using JAVA applications and games. You can manage
and execute the Java applications here.
Installing JAVA applications
You can run the installation of a JAVA application stored
on your device or storage card:
Please note:
A JAVA application suite normally consists of a .jad le
and a .jar le that have the identical le name.
They ought to be stored at the same location.
1. Tap Start > Programs > JAVA > Menu > Install,
and select My Documents, Storage Card, or From
URL.
2. Double tap the .jad le you wish to install.
3. Choose the category you wish the application to be
placed in, and the installation will begin.
Running JAVA applications
1. Once a JAVA application is successfully installed,
you can tap Start > Programs > JAVA, and enter
the category to locate the application.
2. Select the application and tap Option > Launch to
execute it.
3. You can also choose Make a shortcut to create a
shortcut in Programs.
8.7 Streaming player
You can use this function to watch TV or listen to the
streaming video on internet or operator WAP portal.
This function supports all the streaming files. TV and
radio content are provided by your operator, click any
streaming link on Pocket Internet Explorer will launch
this player.
Go to streaming client:
Today > Start > Streaming Player.
100
8
Multimedia
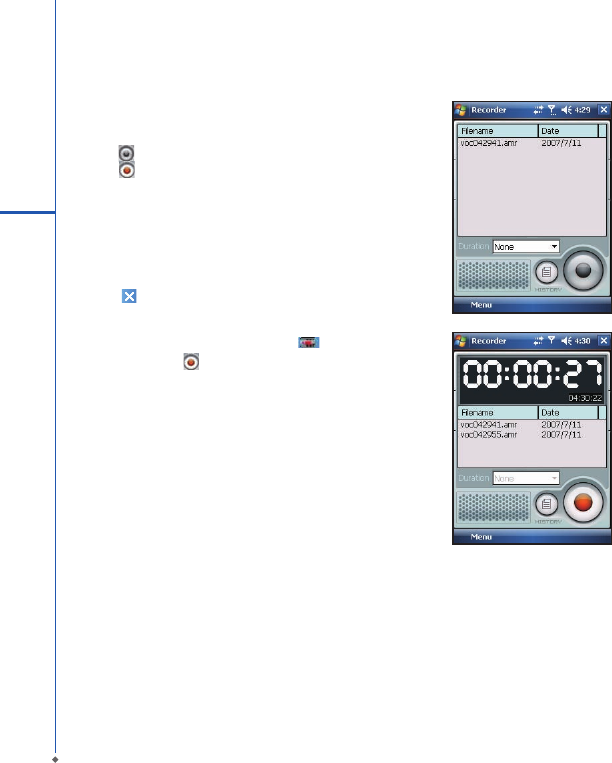
8.8 Recorder
Use Recorder to record voice memo and make note
taking simple and efficient. Tap Start > Programs >
Recorder.
1. Tap to activate sound recording function.
2. Tap to stop recording sound.
3. Before you start recording, you may set the recording
time in Duration.
4. Check History to show all your recorded les.
Tap on any recorded le on your history list to play
the le.
5. Uncheck History to hide the history window.
6. Tap Menu > Save To to choose the le location.
7. Tap to leave recorder screen while still keep
recording on the background; or tap Menu > Exit, to
stop recording and exit.
8. When recording in the background, tap to return
to Recorder. Tap to stop recording.
Please note: If t he re is a n in c om ing c a ll d ur i ng
re c o r di n g, a ns w er in g t h e c a l l w i ll aut o mat i c all y
terminate recording. If you want to continue recording
after ending the call, you need to reactivate recording
function.
Chapter 9
Applications
9.1 Calendar
9.2 Tasks
9.3 File explorer
9.4 Internet explorer
9.5 Windows media
9.6 Games
9.7 Calculator
9.8 Torch
9.9 ZIP
9.10 PDF viewer
9.11 Excel mobile
9.12 PowerPoint mobile
9.13 Word mobile
9.14 Answer machine
9.15 Self diagnostics
9.16 Notes
9.17 Search
9.18 Windows live

102
Chapter 9 Applications
9.1 Calendar
Appointments and meetings
You may use Calendar to arrange appointments, meetings, and other events. You may view your appointments in
different display modes. You may select preferred display mode by tapping on the bottom left of screen to switch
between day, week, month, and year.
1. Tap Start > Calendar, Select a date to go to the desired date.
2. Select an appointment on the list to view or edit appointment details.
3. Tap on Day (or Week, Month, Year and Agenda) on the bottom left of the screen to switch between display
modes.
4. Tap on the keypad icon to activate or hide screen keypad.
5. Tap Menu on the bottom right of the screen to open menu.
6. Tap Options in Menu, you may change the display setup of Calendar by preference.
Creating an appointment
1. Tap Start > Calendar. Select the date and time of appointment.
2. Highlight the desired date and time, and then tap Menu > New Appointment.
3. Tap OK to save the entry and return to calendar.
4. Tap Subject to edit the eld or select predened text.
5. Tap Location to edit the eld.
6. Tap Start to select the start time.
7. Tap Ends to change the end time.
8. You can add your personal notes in Notes tab.
9. Tap OK to save the appointment and return to Calendar screen.
If you select Remind Me in Reminder eld, then your O2 Xda Denim will remind you according to the settings in
Start > Settings > Personal tab > Sounds & Notifications.
Viewing and updating calendar
Select an appointment on Calendar to view appointment summary. If you want to change the details of an
appointment, tap Edit.
Sending a meeting notice
You may use Calendar to set meeting notice by combining with the information on Outlook or Pocket Outlook.
When you synchronize messages or connect your O2 Xda Denim with e-mail server, meeting reminders will be
generated automatically. Tap Calendar > Menu > Tools > Appointments tab, and select desired meeting sending
method in Send meeting requests via eld.
9
Applications

103
9
Applications
Generating a meeting notice
1. Tap Start > Calendar > Menu > New Appointment.
2. Tap Attendees field, and then tap Add Required Attendee and/or Add Optional Attendee. You will enter
Contacts.
3. Select attendees from the e-mail addresses of your contacts.
4. The new meeting notice will be generated automatically and saved in Outbox folder.
9.2 Tasks
You may use Tasks to help you track unnished tasks.
1. To add a new task, tap Tap here to add a new task.
2. ” ! ” Represent rst priority.
3. Select a single item to enter the details screen of this time.
4. Select a single item and hold to activate the pop-up menu.
5. You may change the arrangement of the tasks list. On Tasks screen, tap Menu > Sort By.
6. You may choose to display a specic task category on your tasks list. Tap Menu > Filter.
Adding a new task
1. On Tasks screen, tap Tap here to add a new task to add the new text’s subject. The newly created task will show
on Tasks list.
2. Tap on the new task to enter the detail information screen of task.
3. Tap Edit to enter the editing screen.
4. Select Starts and Due eld to set the rst and the last day of the task.
4. You may select Occurs to select whether this task has periodicity.
5. You may select Reminder to set a time to remind you or select None (unnecessary to alert).
6. To appoint a task as certain category, tap on Categories eld to select a category from the options list.
7. To add notes, tap Note tab and input desired content here.
8. Tap OK to save the task and return to tasks screen.
Checking and updating tasks
You may select a task from tasks list to view task summary. To change the details of this task, select Edit.
104
9.3 File explorer
This feature allows you to view and manage all the les saved in your O2 Xda Denim or theme memory card. To
access File Explorer, tap Start > Programs > File Explorer. Select the source of where the les are saved.
To sort les by its types, tap Sort By and select a sorting method: Name, Date, Size, and Type. Tap Up to go up a
level on the le hierarchy.
Tap Menu to access options:
9
Applications
Option Description
My Documents Display les saved in My Document.
Open Path Create a new path to open a le.
Send Send the selected document via e-mail.
Beam File Send the le via Infrared or Bluetooth.
Refresh Refresh the document display screen.
Show All Files Show all the stored les.
New Folder Create a new folder.
Rename Rename a le.
Delete Delete a le.
Edit Manage the le list by using Undo, Cut, Copy, Paste, Paste Shortcut, and Select All.
Tap and hold on a le for more options:
Option Description
Set As Ringtone Set the le (must be in music format) as your current ringtone.
Set As Today Background Set the le (must be in picture format) as your Today background.
Add to Zip File Compress the le.
9.4 Internet explorer
Connecting to the web
1. Connect your O2 Xda Denim with the Internet using GPRS or WI-FI.
2. Tap Start > Internet Explorer.
3. Input website address in the blank text eld.
● Select the arrow next to the blank eld to go to the link.
● You may use navigation keys or the scroll on browser screen to adjust your screen browsing content.
● Tap Back to return to previous page.
● Tap the keypad icon in the bottom center to hide or reveal screen input panel or select input method.
● Tap Menu to open Menu.
● Select and hold any location of website content to open the pop-up menu.

105
9
Applications
Viewing favorites
1. On browser screen, tap Menu > Favorites.
2. On Favorites screen, select the website you want to view.
● Select the website you would like to go to.
● You may add or delete folders or URL links.
Mobile Favorites folder
After installing ActiveSync to your computer, Mobile Favorites folder will be added to Favorites in your computer.
Only items saved in Mobile Favorites can be synchronized with your O2 Xda Denim. Follow the steps below to add
your favorite website to Mobile Favorites:
1. On your computer, select Internet Explorer > Tools > Create Mobile Favorites.
2. To change name, enter the new name in the new window.
3. To change storage location, select Create In > to create a new folder or select a folder in the new window.
4. Click on OK to add this website to your Mobile Favorites folder.
9.5 Windows media
You can use Microsoft Windows Media Player 10 to play the audio and video les stored in your O2 Xda Denim or
from Internet.
1. Tap Start > Programs > Windows Media to activate Windows Media Player.
2. Tap Menu > Library to display the library screen.
3. Select a library folder.
4. Tap Menu, and then select Open File to open les not in the library; Select Update Library to update library list.
5. Select and hold the le or folder for playing, and then select Play or Queue Up.
6. By tapping Back icon, you can return to the Windows Media Player control panel.
Playing Audio or Video Files
1. Tap to view in full screen.
2. Tap to connect to Windows Media Mobile website, from which you can nd the music and image.
3. you want to play.
4. Tap to return to the beginning of current le or previous le.
5. Tap or to play or pause.
6. Tap to skip to next le.
7. Tap or to adjust volume.
8. Tap the icon to active or disable sound.
You may use synchronization to copy sound and image les from your computer to this device. The Windows Media
Player in this device can play Windows Media and MP3 les.

106
9
Applications
9.6 Games
You may access Games to select games you like in your O2 Xda Denim for entertainment.
1. Tap Start > Programs > Games.
2. Tab Bubble Breaker or Solitaire to launch a game.
9.7 Calculator
Calculator allows you to run simple operations in your O2 Xda Denim.
Tap Start > Programs > Calculator to use your calculator.
9.8 Torch
By tapping this icon, you can switch on/off the LED light beside the camera lens to get signicant light to let you see
in the dark.
9.9 ZIP
You can save storage space and increase efciency of your O2 Xda Denim by compressing some of your les with
this ZIP tool.
Zipping les
1. To zip a le, tap Start > File Explorer.
2. Tap and hold on a le you would like to zip. A pop-up menu will appear.
3. Select Add to Zip le in the pop-up menu. In the newly appeared window, you may:
● Select a zip method according to your need.
● Set a password, which will be asked for when you unzip the le.
4. Tap Start to start compressing the le.
Unzipping Files
1. To unzip a le, tap Start > Programs > ZIP.
2. Tap Unzip button on the pop-up window. A list of zipped les will appear.
3. You may select a different folder for more zip les. In the le list, tap on the le you would like to unzip.
4. Tap OK and enter the password (if required) to decompress the zip le.
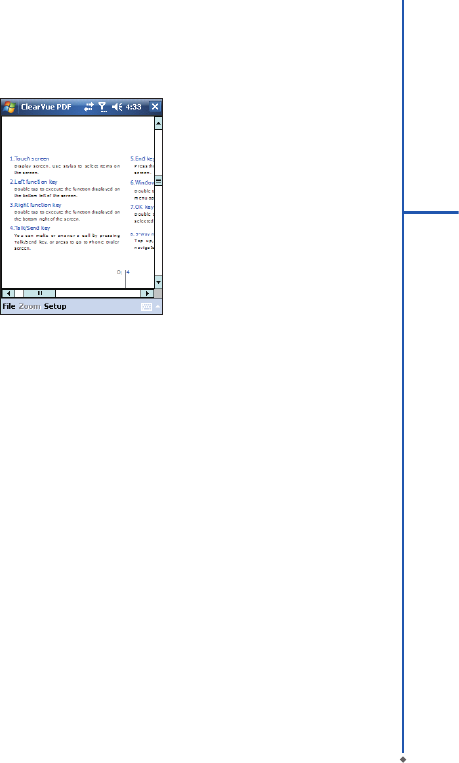
9.10 PDF viewer
PDF Viewer allows you to read Portable Document Format les. These les usually have a .pdf extension.
Opening a PDF le
1. Tap Start > Programs > PDF Viewer.
2. Tap File > Open to view a list of PDF les stored on your O2 Xda Denim, and choose the le you would like to
view.
107
9
Applications
Reading a PDF le
You can move around using scroll bars in the page when a document is larger than one screen:
● Tap the up/down and right/left arrows to move one line in the desired direction. You can also use the navigation
pad to move around the screen.
● Click and hold the space between the arrow and the scroll bar to move one screen to the desired position.
● Use the left, right, up and down arrow keys on the soft keyboard to move to the desired position.
● You can also tap and hold and then drag the screen to move around the document to the desired position.
Zooming in/out
The Zoom feature allows you to enlarge or reduce the document content on display. Zoom is available from Zoom
menu.
To get a different view of a document, select from the preset Zoom settings, or choose a Custom.
9.11 Excel mobile
You may use Excel Mobile in your O2 Xda Denim with Microsoft Excel in your computer to easily copy or move les
between your O2 Xda Denim and your computer. Through computer synchronization, you can keep updated content
in both your O2 Xda Denim and your computer.
Creating a new Excel document
Tap Start > Office Mobile > Excel Mobile > New, and the screen will open a new Excel le.
Please note: Your Excel Mobile can only open one le at a time. When you open a second le at the same time,
your O2 Xda Denim will ask you to save rst le. The saved Excel Mobile le in your O2 Xda Denim could be opened
by selecting from Excel Mobile list screen.

108
9
Applications
Deleting / copying or sending a document
To delete, copy or send a le, tap and hold the desired le name to open pop-up menu. Your Excel Mobile provides
basic worksheet tools, for example, formula, function, sorting and ltering. To show toolbar, tap View > Toolbar.
Synchronizing with Excel les on you PC
Excel Mobile workbooks can be synchronized with Excel workbooks on your PC. To synchronize les, select the
Files type for synchronization in ActiveSync Options settings on your PC. When you select Files, a \My Documents
folder is created on your PC’s desktop. Place all the les you want to synchronize with your O2 Xda Denim in this
folder. Password-protected les cannot be synchronized. All Excel Mobile les that are stored in \My Documents
and its subfolders are synchronized with the PC. ActiveSync converts documents during synchronization. When
you delete a le on your PC or your O2 Xda Denim, the le will be deleted in the other location the next time you
synchronize. For more information on synchronization or le conversion, see ActiveSync Help on the PC.
Workbook conversion
Excel les (.xls) and templates (.xlt), created in Excel version 5.0/95 or later on the PC, will be converted to Excel
Mobile workbook (.pxl) or template (.pxt) les. The conversion takes place during the following actions:
● During le synchronization.
● When you copy an Excel le to your device from the PC.
● When you open an e-mail message with an Excel le as an attachment.
Excel Mobile workbooks are converted to Excel workbooks when they are synchronized or copied back to the PC.
Tips:
When working with Excel Mobile, the following tips will help simplify your tasks:
1. Tap View > Full Screen to view in full screen. To exit full screen view, tap View > Full Screen to return to general
view.
2. You can freeze panes: select a cell, then tap View > Freeze Panes. You may freeze the top and most left window
cell on worksheet. Once you freeze the panes, you can see the frozen window cell no matter where the screen is
scrolled.
3. You can split the worksheet to view different areas of this worksheet on the same screen. Tap View > Split, and
then drag the split line to the desired location. To remove the split, select View > Remove Split.
4. Display or hide full horizontal and vertical lines. To hide a row or a column, select any cell on the row or column
you wish to hide, then tap Menu > Format > Row or Column > Hide. To unhide a column or row, Menu > Format
> Row or Column > and select Unhide.
Please note: When you are synchronizing or copying les from your O2 Xda Denim to PC, Excel Mobile les will be
transformed into Excel les. While most of the settings will be kept during this transformation, some of the format
and properties may be lost.

109
9
Applications
9.12 PowerPoint mobile
You may use PowerPoint Mobile in your O2 Xda Denim with Microsoft PowerPoint in your computer to easily copy
or move document between your O2 Xda Denim and your computer. Through computer synchronization, you may
keep the les in both your O2 Xda Denim and your computer updated. You may use PowerPoint Mobile to browse or
play PowerPoint le.
Opening a PowerPoint le
Tap Start > Office Mobile > PowerPoint Mobile, the screen will show your PowerPoint les list, from which select
the le you want to open.
1. Select the folder type displayed in the list.
2. Select Name (or Date, Size, Type) to change the arrangement of list.
3. Select the document to open.
4. Select and hold a document to activate pop-up menu.
5. Tap Open to open a le.
6. Select the keypad icon to hide or reveal screen input panel and select input method.
7. Tap Menu for options.
Overriding the playback options in a PowerPoint presentation
1. Tap Start > Office Mobile > PowerPoint Mobile.
2. Open the presentation le you want to view, tap ▲ > Show Options.
3. Tap playback tab, select the Override playback options for all les, and do any of the following:
● To turn off builds and other animations, select Show without animation.
● To prevent slide transitions from playing, select Show without slide transition.
● To use the timings recorded with each slide in a presentation, select Use timings, if present.
● To automatically advance to the rst slide after the last slide in a presentation, select Loop continuously.
4. Tap OK.
Zooming in / out
Zoom in to see a portion of a slide in more detail and zoom out to see the entire slide again.
1. In a PowerPoint Mobile presentation, tap▲ arrow > Zoom In.
2. Do one of the following:
● To zoom in another level, tap .
● To zoom out, tap .
● To return to the slide show, tap .

9.13 Word mobile
You may use Word Mobile in your O2 Xda Denim with Microsoft Word in your computer to easily copy and move
document between the phone and your computer. Through computer synchronization, you may keep updated
contents in both your O2 Xda Denim and your computer. You may use Word Mobile to generate documents like
letters, meeting minutes and reports.
Generating a new word document
Tap Start > Office Mobile > Word Mobile > New, a new blank document will appear on screen. You may also select
default settings from Menu > Options.
Please note: Your Word Mobile can only open one document at a time. When you open a second document at the
same time, your O2 Xda Denim will ask you to save the rst document rst. When creating a new document or editing
an old document, you may choose to save in the following format:
Word le, RTF le and text-only le.
The saved Word Mobile le in your O2 Xda Denim could be opened by selecting from Word Mobile list screen. To
delete, copy, or send a le, select and hold desired le names to open pop-up menu. After opening a Word Mobile
le, you may tap View to set Toolbar, Wrap to Window, and Zoom.
1. Select a folder category shown on list display eld.
2. Tap Name (or Date, Size, Type) to change the arrangement of list.
3. Tap on a le to open it.
4. Tap and hold a le to open pop-up menu.
5. Tap New to create a new document.
6. Tap the keypad icon to show or hide screen input panel and select input method.
7. Tap Menu to open menu for more options.
Synchronizing with Word les on you PC
Word Mobile documents can be synchronized with Word documents on your PC. To synchronize les, select the
Files type for synchronization in ActiveSync Options settings on your PC. When you select Files, a \My Documents
folder is created on your PC’s desktop. Place all the les you want to synchronize with your O2 Xda Denim in this
folder. Please note that password protected les cannot be synchronized. All Word Mobile les that are stored in
\My Documents and its subfolders are synchronized with the PC. ActiveSync will convert the documents during
synchronization. When you delete a le on your PC or your O2 Xda Denim, the le will be deleted in the other location
the next time you synchronize. For more information on synchronization, or le conversion, see ActiveSync Help on
the PC.
Document Conversion
The Word documents (.doc) and templates (.dot), created in Word 6.0 or later on the PC, are converted to Word
Mobile documents (.psw) and templates (.psw). The conversion takes place during the following actions:
● During le synchronization.
● When you copy a Word le from the PC to your O2 Xda Denim.
● When you open an e-mail message with an attached Word le on your O2 Xda Denim.
110
9
Applications

Please note: When you are synchronizing or copying les from your O2 Xda Denim to PC, Word Mobile les will be
transformed into Word les. While most of the text and paragraphing will be kept during this transformation, some of
the format and properties may be lost.
9.14 Answer machine
This function is different from voice mail, you may use answer machine in your O2 Xda Denim to directly save caller’s
message to it, which allows you to listen to message more easily and also save call expenses.
Tap Start > Programs > Answer Machine.
1. Check Enable Answer Machine to activate answer machine function.
2. Tap Save In to select a storage location for messages.
3. Select Recording Time to set the time length for a caller message.
4. Select Activate Time to set how many seconds that your answer machine will wait before answering an incoming
call.
5. Select Greeting Setup to set up answer machine greeting.
6. Tap OK to save setup and return to System tab screen.
You will nd callers’ messages in My Greeting folder.
Greeting Setup
Tap Greeting Setup to set default answer machine greeting or record your own greeting. Tap on the le name to
listen to the current greeting. To record a new greeting.
1. Tap User Define under Greeting Setup column.
2. User can type in the le name preferred or use the default one.
3. Tap the record button to record your own greeting.
4. Tap the play button to listen to greeting recorded.
5. Tap OK to validate the settings and exit.
Please note:
1. Your answer machine will stop recording when caller ends the call. After activating answer machine, you may
press Stop to stop recording without interrupting the conversation.
2. When Caller 1 is leaving a message, the incoming call from Caller 2 will become call waiting. You may select to
answer or reject call waiting. If you select to answer call waiting, the message of Caller 1 will stop; if you select to
reject call waiting, the call waiting from Caller 2 will continue to ring until Caller 2 enters voice mail.
3. If you have checked Auto Answer in Phone, Answer Machine will automatically be deactivated.
111
9
Applications

112
9
Applications
9.15 Self diagnostics
This function can help you check if specic functions in your O2 Xda Denim are normal.
Opening Self Diagnostics:
Tap Today > Start > Programs > Self Diagnostics.
When you get into the Self Diagnostics, you’ll see:
i. LED
ii. vibrator
iii. Backlight
iv. SD card
v. USB/AC charging
vi. Keypad
vii Screen
viii. TouchPanel
ix. Speak
x. Earphone
xi. Microphone
xii. Camera Preview
xiii. Camera Flash
xiv. FM
xv. WiFi
xvi. Bluetooth
xvii. Radio Module
You can choose which function you want to test. The screen will display information on whether the function you
tested is performing normally.
9.16 Notes
You may use text notes or voice notes to record information. You may also record voice in Notes. If a note le
contains voice notes in addition to text, a small icon representing voice notes will appear in the content area of the
note. If notes recording is done under the notes le list, then the recording content will be saved as a single le. You
can also share your notes with others through e-mail and PC synchronization.

113
9
Applications
Creating a new note
Tap Menu > View Recording Toolbar to show or hide recording tool bar. To add a new note:
1. On Notes screen, tap New.
2. You may generate notes by writing, drawing, text entry and recording.
● Tap the keypad icon to hide or display screen input panel.
● Tap ▲ next to the keypad icon to select input method.
Applications
● Tap Menu for Options.
● Tap OK to save the note and return to Notes screen.
3. To insert the date in a note, deselect and make sure that no drawings are selected. Next, tap and hold anywhere
on the note and tap Insert Date.
Sending a note by e-mail
In Notes, Word Mobile, Excel Mobile, PowerPoint Mobile, and Pictures & Videos, you can send files and
information to other devices via e-mail.
1. First you must set up Messaging to send and receive messages.
2. From the program, select the item you want to send.
3. Tap Menu > Send. A new message is created with the item attached.
4. Enter the recipient name and subject and tap Send. The message will be sent the next time you synchronize your
O2 Xda Denim.
Beaming a note
To beam a note, on the note list, tap and hold the note. On the pop-up menu, tap Beam File.
9.17 Search
This feature allows you to search a le easily.
Finding a le
1. Tap Start > Programs > Search.
2. Enter the le name on Search for eld and select a le type in Type eld.
3. Tap Search to start searching and the result will be displayed in Results eld.
9.18 Windows live
Go to Windows Live:
Today > Start > Programs > Windows Live
Windows Live provides a rich set of Windows Live services including e-mail, IM, search and more.
1. Windows Live Messenger: Send IMs or join group chats to stay connected.
• Set status (online, ofine and mobile) and see the presence of friends and colleagues.
• Send messages via voice as well as text.
• Use emoticons to express exactly how you feel.

114
9
Applications
2. Windows Live Mail: Powerful, free e-mail with security features.
• Get up-to-date access to Hotmail or Windows Live Mail.
• View graphics, Web links, and contact photos in e-mails.
• Respond to e-mails with voice recordings.
• With push e-mail your inbox is always up-to-date.
3. Live Search: Quickly search the Web for information, directions, maps and images.
• Find local listings for business and entertainment.
• Access one-click calling to phone numbers.
• Get maps and driving directions.
• Get answers via SMS with Instant Answers.
Chapter 10
Managing Your O2 Xda Denim
10.1 O2 AutoInstall
10.2 O2 Connect
10.3 O2 AutoCong
10.4 O2 SMS plus
10.5 Memory management
10.6 Running programs management
10.7 Adding or removing programs

116
Chapter 10 Managing Your O2 Xda Denim
10.1 O2 AutoInstall
O2 AutoInstall provides you with a list of ready-to-install applications for your O2 Xda Denim. These optional
applications can help you do more with your device. When you need them, you can choose to install them anytime
by tapping Start > Programs > O2 AutoInstall > checking Option next to the application and tap Next to start.
10.2 O2 Connect
O2 Connect gives you a direct access to the latest software upgrades, downloads, repair center locations, helpdesk
numbers, products and promotions.
Accessing O2 Connect
You can access O2 Connect via ActiveSync, GPRS or Wireless L AN. Once connected, you can synchronize
information to your O2 Xda Denim and read it offline. If you find an item in O2 Connect that you would like to
download, you can do so and install it instantly, or choose to install later.
Options
Some content items require a user name and password. You can save this username and password on your O2
Xda Denim so you don’t have to enter them again; simply tap Menu > Options and then enter your user name and
password when prompted. You can program your O2 Xda Denim to receive O2 Connect updates at 1, 2, 4, 8 and
12-hour intervals through an ActiveSync connection, or choose between 6 and 12-hour intervals through an active
Internet connection. Please register on http://SeeO2.com to have your own login and password.
Enabling/disabling O2 Connect
To disable O2 Connect, tap Menu > Options and then select stop O2 Connect Service. To enable O2 Connect, tap
Menu > Options and then select Start O2 Connect service. By default, if your O2 Xda Denim is connected to the
Internet via ActiveSync, O2 Connect will make a connection to the O2 Server every 4 hours to refresh contents. You
will always have access to the latest information.
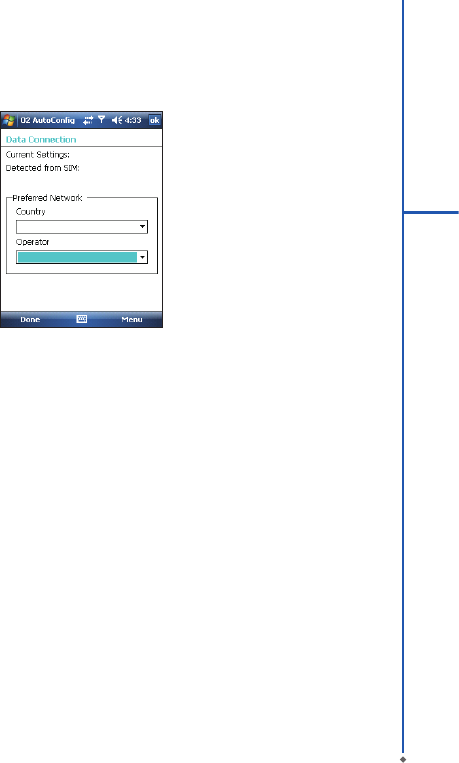
10.3 O2 Autocong
When you rst switch on your O2 Xda Denim, you can use it to setup your GPRS for using MMS and surng the
Internet. This application provides a user-friendly way to set up operator specic settings, including GPRS, WAP,
and MMS. The auto-conguration process can be performed as soon as the SIM card is accessible.
10
Managing Your O2 Xda Denim
117
10
Managing Your O2 Xda Denim
The ways in which this function operates are:
1. During every cold/warm boot, your O2 Xda Denim will compare the operator ID with the current setting. If these
two don’t match, a dialog box will ask if you want to perform network conguration now. Once conrmed, the auto
congurator will be launched to congure your O2 Xda Denim to the current preferred network.
2. By tapping Start > Programs > O2 AutoConfig, the same detection process will be carried out and possible
selections will be listed in the preferred network. Conrm your choice and tap Done to apply the setting or tap List
All Settings to choose other operator settings. If you cannot nd your operator network in the list, you can always
setup data connection manually. Launch O2 AutoConfig by tapping Start > Program > O2 AutoConfig. The
application will search from its internal database for appropriate network setting proles and display the names of
these proles in the Preferred Network list.
Please note: Please ensure your SIM card is inserted and flight mode is turned off, for the auto configuration
process is started only when your O2 Xda Denim is in HOME network (not international roaming).
10.4 O2 SMS plus
Opening O2 SMS Plus:
To access O2 SMS plus: tap Start > Programs > O2 SMS Plus.
When you open O2 SMS plus, you will see a message list window on your screen. You can control this list window to
display.
1. Received messages only.
2. Sent messages only.
3. Messages from a selected contact only.
4. Both received and sent messages.
5. Unread messages only.

Chatting with contacts
To chat with someone on your contact list
1. Select Menu > Chat > Other.
2. In the TO eld, enter the destination phone number or select a name from the contact list by tapping To or Edit >
Select Contact.
3. Compose your message, to enter a preset text tap Insert My Text and select the message.
to enter emoticons, Edit > Insert Emoticons.
4. Send.
Scheduling messages
To schedule SMS to be sent at a chosen date and time
1. Menu > Set schedule.
2. To create a schedule, Menu > Add.
3. The messages window display.
4. In the To eld, select a name from the contact list by tapping To or Menu > Select contact.
5. In the Date and Time elds, select the date and time to send.
6. Compose your message. To enter a preset text message, tap My Text and select the message. To enter
emoticons, tap Menu > Insert Emoticons.
7. Ok and done.
Sending group messages
To send SMS to a group of people
1. Menu > Group SMS.
2. Tapping To or Menu > Edit Recipients to select group. A group window is displayed.
3. To select individual contact names, tap Menu > Insert Contact.
4. Tap Done to exit.
5. Compose you message. To enter a preset text message, tap Insert My Text and select the message. To enter
Emoticons, tap Edit > Insert Emoticon.
6. Tap Send.
10.5 Memory management
When the memory is insufcient, this device cannot automatically allocate memory, you may follow the steps below
to free up more memory:
Moving some les to micro SD card
1. Tap Start > Programs > File Explorer.
2. Tap and hold selected items.
3. Tap Cut on the pop-up menu.
4. Switch to Storage Card category.
5. Tap and hold and then tap Paste.
118
10
Managing Your O2 Xda Denim

Deleting the unwanted les
1. Tap Start > Programs > File Explorer.
2. Tap and hold selected items.
3. Select Delete.
Saving attachments to micro SD card
1. Tap Start > Messaging > Menu > Tools > Options > Storage tab.
2. If you have inserted a memory card, check Store attachments on storage card.
3. E-mail attachments will automatically be saved to memory card.
Clearing histories and deleting les from Internet Explorer
1. Tap Start > Internet Explorer > Menu > Tools > Options > Memory tab.
2. Tap Clear History and Delete Files to delete browsed web page related record.
10.6 Running programs management
1. Tap Start > Settings > System tab > Memory > Main tab:
Display current memory status of this device.
2. Tap Start > Settings > System tab > Memory > Storage Card tab:
Display the memory status of storage card in this device.
3. Tap Start > Settings > System tab > Memory > Running Programs tab:
Display all current running programs in this device. Select any program from Running Programs List, you may
select to Activate or Stop.
Activate: run the highlighted programs.
Stop: stop running highlighted programs.
Stop All: stop running all programs on Running Programs List.
10.7 Adding or removing programs
All programs pre-installed in the device will be saved in ROM (Read Only Memory) and are not removable. Data
saved in ROM will not be lost by accident. All programs that you installed will be saved in RAM (Random Access
Memory). As long as there is sufcient space in this device, you may install suitable programs by preference.
Adding programs through ActiveSync
1. Before installing the program, please make sure that your O2 Xda Denim processor is suitable for the software.
Tap Start > Settings > System tab > About > Version tab to check for information of this device.
2. Download the desired software to your computer (Please select software that is designed for Pocket PC and this
device).
3. Read installation instructions, readme le, or accompanied programs provided to you.
4. Connect your computer with this device.
5. Install executive le to your computer.
119
10
Managing Your O2 Xda Denim

120
10
Managing Your O2 Xda Denim
If this file contains installation program, the installation wizard will automatically activate. Please follow the
instructions on screen. Once the installation on your computer is completed, the program will automatically be
installed to this device. If this le does not contain any installation program, an error message will show on the
screen and tell you this program is invalid, which is not suitable for your computer. You must move this program to
this device manually. If you cannot nd any installation instructions for this program, please use “Browse” function
of ActiveSync to copy program le to Program Files folder in this device. After completing installation, tap Start >
Programs, and then select the program icon to launch that program.
Adding programs through Internet
You may download software suitable for this device from Internet.
1. Before installing the program, please make sure that your O2 Xda Denim processor is suitable for the software.
Tap Start > Settings > System tab > About > Version tab to check information in this device.
2. Directly download programs to this device by using Internet Explorer in this device. (Please select programs
designed for Pocket PC and this device).
3. Read installation instructions, readme le, or accompanied programs provided to you.
4. Run installation executive le in your computer.
Adding programs to Start menu
Tap Start > Settings > Personal tab > Menu.
1. Check the programs to be displayed on Start menu.
2. Tap OK to save settings and return to Personal tab screen.
Removing programs
Tap Start > Settings > System tab > Remove Programs.
Select the programs you would like to delete from Programs in storage memory list, and then select Remove to
delete highlighted programs. If the installed programs list does not contain the program you intend to remove, you
may use File Explorer in this device to nd the program and delete it by selecting and holding the program’s name
and then select Delete from the pop-up menu.
Chapter 11
Important Safety Information
11.1 Safety information
11.2 Phone care
11.3 Driving safety
11.4 Electronic devices
11.5 Other safety guidelines
11.6 Cautions
11.7 About this guide

122
Chapter 11 Important Safety Information
11.1 Safety information
Read this information
Your O2 Xda Denim Pocket PC Phone has been designed, manufactured and tested not to exceed the limits for
exposure to electromagnetic elds recommended by the Council of the European Union. These limits are part of
comprehensive guidelines developed by independent scientic organizations.
European standards provide for the amount of radio frequency electromagnetic energy absorbed by the body when
using a phone to be measured by reference to the Specic Absorption Rate (SAR). The SAR limit for the general
public is currently 2 watts per kilogram averaged over 10 grams of body tissue.
The maximum SAR values for O2 Xda Denim are:
0.414 W/Kg @10g (CE) head
1.3 W/Kg @10g (CE) body
0.422 W/Kg @1g (FCC) head
1.36 W/Kg @1g (FCC) body
11.2 Phone care
You should never attempt to open the phone casing. There are no user-serviceable parts inside and you might
damage sensitive electronic circuits and components. Unauthorized disassembly will void the warranty.
You should never leave your phone in the window of your car or otherwise expose it to strong sunlight or excessive
heat for a prolonged period. This may damage it.
You should never handle your phone with wet hands or expose it to moisture or liquids of any kind. Continuous
changes from a cold a warm environment may lead to condensation inside the phone, resulting in corrosion and
possible damage.
If you pack your phone in your suitcase during travel, beware damage. Cramming a suitcase may crack the LCD
display. Remember to switch off your wireless connections during air travel.
As with all other radio devices, touching the built-in antenna area during telephone conversation may impair the
quality and lead to shorter standby time due to increased power consumption.
The battery
Your phone is equipped with a high-performance Li-lon battery. Optional battery types may be available; check with
your local retailer. Observe the maintenance guidelines and your battery should give you a long service life.
1. At the beginning of the battery’s life, fully charge and discharge (let it go at) three times.
2. Do not overcharge the Li-lon battery, as this can result in a reduction in battery performance and lifespan. The
recommended maximum charge time is 2.5 hrs.
11
Important Safety Information

123
11
Important Safety Information
3. Avoid repeated short charging. It is preferable to let the battery o at and then recharge it completely.
4. Avoid charging in strong heat of extreme cold. Ambient room temperature is preferable. The battery has its
optimum performance in an ambient temperature of + 5 oC to + 50 oC.
5. Don’t store a battery near a re or heat source.
6. Use only the battery approved by the manufacturer.
7. Never replace the battery with a non-approved battery.
8. Never soak the battery in water or any other uid.
9. Never try to open the battery as it contains substances that might be harmful if swallowed or allowed to come into
contact with unprotected skin.
10. Never short-circuit the battery, as it may overheat and cause a re. Keep it away from jewellery and other metal
objects.
11. Never dispose of the battery in a re. It could explode and release harmful substance into the environment.
12. Never dispose of the battery with your regular household waste. Take it to a hazardous material collection point.
13. Do not touch the battery terminals.
The charger
1. Use only the charger supplied with your phone.
2. Never pull the charger cord to release it from the mains- pull the charger itself.
Memory card
1. Do not remove or insert a memory card or turn off the handset while data on the card is being edited.
2. Do not touch the metal terminals with your hands or metal objects.
3. Don not bend the memory card or subject it to violent impacts. Keep it away from water and high temperatures.
4. Keep all memory cards out of the reach of small children.
5. Do not short circuit the contact points or expose it to liquids or moisture. When not in use, keep in the antistatic
container it came in.
6. Do not use force when inserting or Handling the card, and do not expose it to excessive hear or strong magnetic
elds.
Cleaning and storing
1. Your phone should always be handled with care and protected from dirt, dust and dampness. To avoid scratches,
never place your phone face down.
2. If cleaning is necessary, switch the phone off and wipe carefully with a soft, slightly damp (not wet) cloth. Use
a cotton swab to clean the camera lens. Allow the phone to dry completely before switching it on. Never use
solvents for cleaning.
3. If you are not going to use your phone for some time, fully charge the battery and store the phone in a dry place
away from direct sunlight. Your phone should be switched off during storage. Recharge every 6 to 12 months.
4. Never expose your phone to hear or strong sunlight.
5. Never expose your phone to moisture or liquids of any kind.
6. Do not paint your phone or otherwise block the keypad, microphone or earpiece function, i.e. with stickers.

124
11
Important Safety Information
11.3 Driving safety
Never use th handheld phones while driving. Ti’s an offence while driving to hold a phone or cradle it in your neck,
at any point during the setup, making or taking of a phone call, text message or any other data related mobile
communication. Use of fully installed car kits are still permitted, as are the use of alternate handsfree accessories.
In the interest of safety, we would recommend use of a cradle while using any form of handsfree accessory.
While driving, we recommend that you use voicemail wherever possible, and that you listen to your messages when
you are not in the car. If you must make a handsfree call when driving, keep it brief.
An airbag inates with great force. Do not place objects, including both installed or portable wireless equipment, in
the area over the airbag or in the airbag deployment area. If in-vehicle wireless equipment is improperly installed and
the air bag inates, serious injury could result.
11.4 Electronic devices
Most modern electronic equipment is shielded from RF energy. However, certain electronic equipment may not be
shielded against the RF signals from your Pocket PC phone.
Pacemakers
The Health Industry Manufacturers’ Association recommends that a minimum separation of six inches be maintained
between a phone and a pacemaker to avoid potential interference with the pacemaker. These recommendations are
consistent with the independent research by and recommendations of Wireless Technology Research.
If you have a pacemaker:
1.Always keep your phone more than six inches from your pacemaker when turned on.
2.Do not carry your phone in a breast pocket.
3.Use the ear opposite the pacemaker to minimize the potential for interference.
4.If you have any reason to suspect that interference is taking place, turn your phone off immediately.
Hearing aids
Some digital phones may interfere with some hearing aids. In the event of such interference, call o2 Customer
Service to discuss alternatives.
Other medical devices
If you use any other personal medical device, consult the manufacturer of your device to determine if it is adequately
shielded from external RF energy. Our physician may be able to assist you in obtaining this information. Turn you
phone off in healthcare facilities when any regulations posted in these areas instruct you to do so. Hospitals or
healthcare facilities may be using equipment that could be sensitive to external RF energy.
Vehicles
RF signals may affect improperly installed of inadequately shielded electronic systems in motor vehicles. Check
with the manufacturer or its representative regarding your vehicle. You should also consult the manufacturer of any
equipment added to your vehicle.

125
11
Important Safety Information
Posted facilities
Turn you phone off when posted notices so require.
Magnetic media
Magnetic elds generated by PC Phone phones may damage data on magnetic storage media, such as credit cards,
computer discs or tapes. Do not place your phone next to such media.
11.5 Other safety guidelines
Aircraft
Regulations prohibit using your phone while in the air. Switch off your phone before boarding an aircraft or turn off
the wireless connections.
Blasting areas
To avoid interfering with blasting operations, turn you phone off when in a blasting area or in areas posted: turn off
two-way radio. Obey all sighs and instructions.
Potentially explosive environments
Turn you phone off when in any area with a potentially explosive environment and obey all signs and instructions
Sparks in such areas could cause an explosion or re resulting in bodily injury or even death. Areas with a potentially
explosive environment are often, but not always, clearly marked. They include fuelling areas such as gas stations,
below decks on boats, fuel or chemical transfer or storage facilities, vehicles using liqueed petroleum gas (such as
propane or butane), area where the air contains chemicals or articles, such as grain, dust, or metal powders, and
any other area where you would normally be advised to turn off you vehicle’s engine.
Choking
Keep your phone away from children as the SIM card and other small parts present a choking hazard.
11.6 Cautions
Your Pocket PC Phone is a high quality piece of equipment. Before operation, read all instructions and cautionary
markings on (1) AC Adaptor (2) Battery and (3) Product Using Battery.
1.Do not use this equipment in an extreme environment where high temperature or high humidity exists.
2.Do not abuse the equipment. Avoid striking, shaking or giving it a shock. When not using the unit, lay it down to
avoid possible damage due to instability.
3.Do not expose this equipment to rain or spilled beverages.
4.Do not use unauthorized accessories.
5.Do not disassemble the phone or its accessories. If service or repair is required, return the unit to an authorized
service center. If the unit is disassembled, a risk of electric shock or re may result.
6.Do not short-circuit the batter terminals with metal items.

126
11
Important Safety Information
FCC Regulations:
● This device complies with part 15 of the FCC Rules. Operation is subject to the following two conditions: (1) This
device may not cause harmful interference, and (2) this device must accept any interference received, including
interference that may cause undesired operation.
● This device has been tested and found to comply with the limits for a Class B digital device, pursuant to Part 15
of the FCC Rules. These limits are designed to provide reasonable protection against harmful interference in
a residential installation. This equipment generates, uses and can radiated radio frequency energy and, if not
installed and used in accordance with the instructions, may cause harmful interference to radio communications.
However, there is no guarantee that interference will not occur in a particular installation If this equipment does
cause harmful interference to radio or television reception, which can be determined by turning the equipment off
and on, the user is encouraged to try to correct the interference by one or more of the following measures:
-Reorient or relocate the receiving antenna.
-Increase the separation between the equipment and receiver.
-Connect the equipment into an outlet on a circuit different from that to which the receiver is connected.
-Consult the dealer or an experienced radio/TV technician for help.
Changes or modications not expressly approved by the party responsible for compliance could void the user‘s
authority to operate the equipment.
RF Exposure Information (SAR)
This device meets the government’s requirements for exposure to radio waves. This device is designed and
manufactured not to exceed the emission limits for exposure to radio frequency (RF) energy set by the Federal
Communications Commission of the U.S. Government.
The exposure standard for wireless devices employs a unit of measurement known as the Specific Absorption
Rate, or SAR. The SAR limit set by the FCC is 1.6W/kg. *Tests for SAR are conducted using standard operating
positions accepted by the FCC with the device transmitting at its highest certied power level in all tested frequency
bands. Although the SAR is determined at the highest certied power level, the actual SAR level of the device while
operating can be well below the maximum value. This is because the device is designed to operate at multiple
power levels so as to use only the poser required to reach the network. In general, the closer you are to a wireless
base station antenna, the lower the power output.
The highest SAR value for the device as reported to the FCC when tested for use at the ear is 0.356 W/kg for PCS
Head SAR and 0.422 W/kg for WLAN Head SAR and when worn on the body, as described in this user guide, is
1.36 W/kg for PCS Body SAR and 0.016 W/kg for WLAN Body SAR. (Body-worn measurements differ among device
models, depending upon available enhancements and FCC requirements.)
While there may be differences between the SAR levels of various devices and at various positions, they all meet the
government requirement.

127
11
Important Safety Information
The FCC has granted an Equipment Authorization for this device with all repor ted SAR levels evaluated as in
compliance with the FCC RF exposure guidelines. SAR information on this device is on le with the FCC and can be
found under the Display Grant section of http://www.fcc.gov/oet/fccid after searching on FCC ID: UJU9QDENIM000.
For body worn operation, this device has been tested and meets the FCC RF exposure guidelines for use with an
accessory that contains no metal and the positions the handset a minimum of 1.5 cm from the body. Use of other
enhancements may not ensure compliance with FCC RF exposure guidelines. If you do no t use a body-worn
accessory and are not holding the device at the ear, position the handset a minimum of 1.5 cm from your body when
the device is switched on.
11.7 About this guide
This document is provided as a user guide to the O2 Xda Denim Pocket PC Phone and to this system only. O2 Xda
Denim is a trademark of the O2 group of companies.
The latest version of the user guide can be found on our website: http://Seeo2.com.
Year of Manufacturing:2007
Chapter 12
Specications
130
Chapter 12 Specications
12
Specications
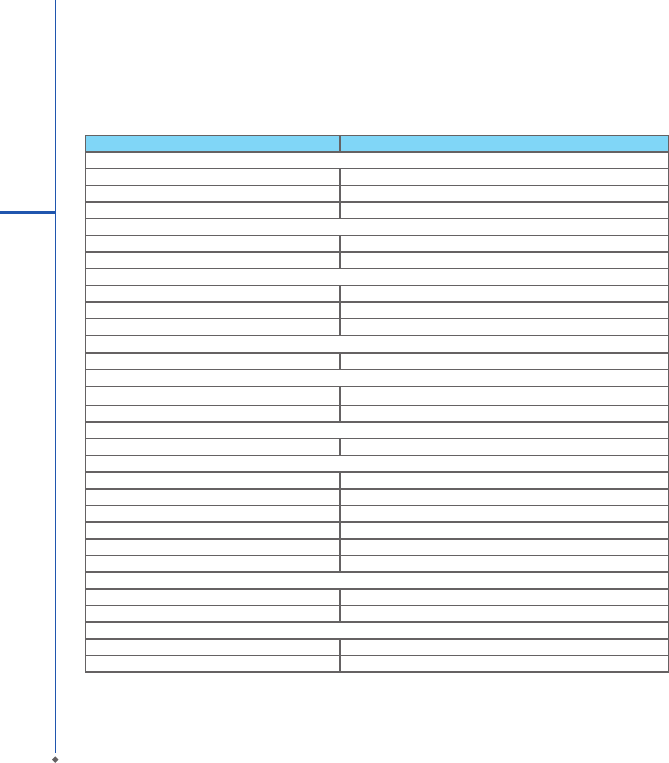
Item Specications
System Information
Operating System Windows Mobile® 6 professional
Processor PXA 270 Processor at 520 MHz
Memory 256 MB ROM, 64 MB RAM
Size
Dimensions (mm) 115(L) x 55.8(W) x 18.2(T) mm
Weight (in grams) 150 g
Battery
Battery capacity Lithium Polymer battery, 1,300mAh
Standby time 150 Hr
Talk time 4.5 Hr
Charging time
Charger 2 Hr
Display Characteristics
Type 2.6” LTPS, 65K-colour TFT LCD display with touch panel
Resolution 320 x 240 QVGA
Band
Band HSDPA, WCDMA 2100MHz, GSM 900/1800/1900
Connectivity
Bluetooth 2.0
WLAN IEEE 802.11b/g
GPRS EDGE class 12
WAP Yes
CSD Yes
USB 1.1
Image
Format JPG, BMP, GIF, PNG
Max size (per) Depends on available RAM
Audio
Format MIDI, MP3, WMA, WAV, AMR, AAC, AAC+
Max size Depends on available RAM
131
12
Specications
Item Specications
Video
Format 3GPP, MP4, RTSP
Max size Depends on available RAM
Phonebook
Size Depends on available RAM
Ring tone
Type MP3, WMA, WAV, MIDI
Polyphone 192 Polyphonic
Digital camera
Type CMOS
Front Camera 0.3 mega pixels
Back Camera 2 mega pixels
Auto focus Yes
Video recording Yes
Messaging
Push E-mail Windows Direct Push
SMS Yes
MMS Yes
E-mail Yes
Windows Live Messenger Yes
External memory
Type Micro SD CARD
Chapter 13
FAQs

134
Chapter 13 FAQs
Why can’t I turn on my device as I press Power key?
Either you didn’t press the key long enough, or the device has shut down because the battery power level is too low
to make calls. Please recharge the battery.
How do I suspend the screen display or wake up the device?
Press and hold Power key to turn off the device. If the screen display is off, press Power key to wake up your device.
Why does the screen freezes and does not respond to my commands or input?
Reboot the system to free up memory. The system shall operate more efficiently. If the system still lags after
rebooting, you will need to clean boot your O2 Xda Denim. To clean boot, power off your O2 Xda Denim and then
press Camera key and Power key at the same time, for about 5 seconds. Your O2 Xda Denim will reset to factory
defaults and reboot.
Please note:
When you perform a clean boot on this device, all your personalized settings, information, and programs installed
will be removed. The system will reset to factory defaults.
Why does my device display “INSUFFICIENT MEMORY” when I open a le or a program?
The device memory is shared by both storage and programs. You can free up some memory by removing some of
the rarely used programs you installed or removing rarely used les.
How can I free up RAM memory?
You can free up RAM memory by closing the programs that are running in the background. Tap the O2 Menu icon on
the bottom of Today screen to view all the running programs. You could close the programs you do not need to use.
Why doesn’t the screen respond accurately to my stylus taps?
Tap Start > Settings > System tab > Screen > General tab. Select Align Screen to align the screen.
Why does my O2 Xda Denim launch wrong programs or ignore my command when I press a device key?
Tap Start > Settings > Personal tab > Buttons and check whether the programs assigned to each key is correct.
You can change these key assignments by preference.
My O2 Xda Denim can’t form a successful connection with ActiveSync.
Please make sure you have installed ActiveSync 4.5 or later on your computer. You can nd ActiveSync in the
installation CD, or you can download the latest version from Microsoft’s website. Please make sure you have
connected your O2 Xda Denim to the computer by plugging in the USB cable to both your O2 Xda Denim and the
computer. Make sure that you are not running another program that uses the same serial port. If the connection still
fails, remove ActiveSync on your computer and reinstall it.
13
FAQs

135
13
FAQs
Why does my device display ‘Insert SIM’, what does this mean?
Please insert the SIM card before you can use the device. If it is already installed, remove and clean the metal
contacts area with a dry cloth, and then insert it again.
Why does my device display ‘EMERGENCY ONLY’, what does this mean?
You may not have your SIM card properly installed, or you are out of network range.
Why does my device display ‘NO NETWORK’, what does this mean?
You’re outside network range. If you’re inside a building or a basement, try moving towards a window.
Why are there double entries in my Contacts list?
You may have selected Show SIM Contacts in Contacts menu. If you have already copied your SIM contacts to the
device, then you do not need to select this option.
I found that some calls are not processed, why does it happen?
Certain call barring function may have been set to restrict phone usage. Check the call barring status and cancel it
as necessary.
Can I send and receive emails and surf the Mobile Internet on my device?
Your O2 Xda Denim allows you to access the Internet from your device. For sending and receiving emails, please
refer to the user manual or contact O2 Customer Service.
Why can’t my device make any sound alerts?
Tap on the speaker icon on the top right corner of the screen, and then adjust the alert or ring volume. You could
also use the volume key on the left side of the device to adjust volume.
Where can I check why my device has gone wrong?
Please have your warranty card and device ready and contact your local dealer.

136
Index
Index
A
About 2, 4, 10, 14, 17,
21, 37, 46, 49, 55,
56, 61, 68, 69, 98,
119, 120, 121, 126,
132
ActiveSync Tool 2, 55, 59
Answer Machine 3, 10, 18, 101, 111
Applications 3, 19, 21, 47, 61,
98, 99, 101, 102,
103, 113, 116
Attachments 60, 81, 88, 108,
119
B
Background 18, 20, 45, 48, 85,
98, 100, 104, 119,
132
Backlight 13, 14, 15, 21, 49,
51, 112
Backup 1, 15, 31, 44
Battery 1 , 5 , 6 , 8 , 9 ,
10, 12, 14, 22, 24,
46, 49, 51, 69, 74,
122, 123, 125,
128, 132
Beam 23, 46, 68, 69,
70, 104, 113
Block Recognizer 27, 28
Bluetooth 2, 8, 10, 23, 24,
56, 57, 58, 63, 64,
68, 69, 70, 71,
72, 74, 104, 112,
128
Buttons 20, 46, 50, 64, 86,
132
C
Calculator 3, 10, 18, 101, 106
Calendar 3, 26, 29, 30, 31,
59, 70, 101, 102
Call Barring 46, 133
Call Forwarding 46
Call History 2, 31, 32, 33, 36,
42
Call Waiting 45, 46, 111
Caller ID 46, 86
Camera 3, 7, 8, 9, 10, 39,
40, 82, 91, 92, 93,
94, 95, 96, 106,
112, 123, 129, 132
Cell Broadcast Setting 2, 23, 63, 74
Certicates 21, 49
Connections 10, 20, 23, 58, 60,
61, 64, 65, 69, 70,
71, 73, 74, 122,
125
Contacts 2, 19, 21, 29, 31,
35, 37, 41, 47, 59,
81, 82, 103, 118,
133
D
Device Lock 13, 34, 51
DNS 74
Download 19, 22, 36, 45, 75,
86, 88, 119, 120,
132
E
E-mail 3, 29, 59, 60, 64,
65, 77, 78, 80, 81,

137
Index
87, 88, 89, 94, 96,
102, 103, 104,
108, 110, 112,
113, 114, 119, 129
Excel Mobile 3, 101, 107, 108,
113
F
Favorites 75, 105
File Explorer 3, 10, 18, 70, 101,
104, 106, 118,
119, 120
Flash light 9, 19, 46, 92
Frame 97
G
Games 3, 10, 18, 99, 101,
106
GPRS 2, 10, 18, 23, 24,
63, 64, 65, 66, 68,
74, 78, 89, 104,
116, 128
GPS 22, 50, 73
H
Headset Volume Limiter 22, 50
I
Input 1, 7, 13, 15, 16,
20, 27, 28, 30, 33,
44, 82, 88, 89,
103, 104, 109,
110, 113, 132
Input Method 1, 15, 20, 27, 28,
40, 104, 109, 110,
113
Insert the battery & SIM card 1, 5, 11
Installing ActiveSync 2, 55, 57, 105
Internet Explorer 3, 47, 48, 65, 75,
99, 101, 104, 105,
119, 120
Internet Sharing 2, 10, 19, 63, 74
ISP 64, 73, 74, 88
J
JAVA 3, 10, 19, 91, 99
K
Keyboard 27, 28, 83, 107
L
Landscape 25
Letter Recognizer 28
Lock 1, 5, 12, 13, 14,
20, 34, 44, 51
M
Making a call 1, 31, 33, 34
Memory 1, 4, 15, 20, 22,
30, 49, 50, 51, 52,
81, 93, 96, 104,
115, 116, 119,
120, 123, 128,
129, 132
Menus 20, 45, 58
Messaging 2, 19, 29, 77, 78,
79, 81, 88, 89, 90,
113, 119, 129
Microsoft® Exchange Server 56, 59, 60
Multimedia messages (MMS) 2, 60, 77, 82

138
Index
N
Navigation Key 7, 10, 12, 33, 35,
92, 104
Notes 3, 19, 29, 30, 45,
59, 60, 61, 101,
102, 103, 112, 113
O
O2 Auto Congurator 4, 65
O2 AutoInstall 4, 10, 19, 116
O2 Connect 4, 10, 19, 115, 116
Outlook E-mail 59, 60, 80, 88
Owner Information 21, 30, 45
P
Password 1, 2, 15, 20, 30, 31,
36, 38, 44, 60, 74,
88, 89, 106, 108,
116
Personal settings 2, 43, 44
Phone 1, 4, 6, 7, 10, 12, 18,
19, 21, 22, 24, 29,
3 0 , 3 1 , 3 2 , 3 3 ,
34, 36, 37, 38, 45,
46, 47, 48, 53, 60,
64, 65, 68, 73, 74,
78, 87, 93, 95, 96,
98, 110, 111, 114,
118, 121, 122, 123,
124, 125, 126, 133
Photo Editor 3, 19, 91, 97
Pictures & Videos 3, 10, 19, 91, 93,
94, 95, 96, 98, 113
PIN 44, 45, 69
Portrait 25
Power 1, 5, 8, 11, 12, 13,
14, 21, 22, 24, 46,
49, 51, 58, 69, 73,
74, 122, 132
Power Management 22, 51
Power on/off 8
PowerPoint Mobile 3, 101, 109, 113
Programs 1, 10, 16, 17, 18, 19,
20, 22, 25, 29, 30,
34, 44, 45, 47, 48,
50, 51, 52, 56, 58,
59, 60, 61, 66, 68,
74, 75, 89, 92, 95,
97, 98, 99, 100
R
Recorder 3, 91, 95, 96, 100
Recording Time 98, 100, 111
Regional Settings 22, 50, 52
Remove Programs 22, 52, 56, 120
Reset 8, 26, 44, 46, 50,
52, 61, 85, 93, 132
S
Screen 1, 7, 10, 12, 13, 14,
15, 16, 18, 21, 22,
25, 26, 27, 28, 29,
30, 31, 32, 33, 34,
35, 36, 37, 38, 45,
46, 50, 52, 64, 65,
69, 73, 74, 75, 82,
83, 84, 86, 87, 88,
89, 92, 94, 96, 97,
98, 100, 102, 103,
104, 105, 107, 108,
109, 110, 112, 113,
117, 120, 132

Search 3, 19, 34, 46, 69,
73, 98, 101, 113,
114, 117
Shutter Sound 92, 93
SIM 1, 2, 5, 9, 10, 11, 12,
31, 32, 37, 45, 65,
74, 87, 116, 117,
125, 133
SMS 2, 4, 10, 19, 23, 48,
60, 77, 78, 80, 88,
114, 115, 117, 118
Sounds & Notications 24, 48, 102
Spb GPRS Monitor 18
Speed Dial 19, 21, 34, 35, 49,
50, 87
System Info 22, 54, 128
T
Tasks 3, 19, 30, 59, 60,
64, 68, 70, 101,
103, 108
Today 7, 13, 16, 18, 20,
21, 34, 36, 37, 45,
46, 51, 64, 65, 66,
87, 88, 104, 112,
113, 132
Torch 3, 10, 19, 101, 106
Transcriber 28
U
USB Cable 6, 11, 12, 56, 57,
58, 74, 75, 132
V
Vibrate 34, 46
Voice Mail 3, 24, 33, 45, 46, 77
87, 111
Voice Speed Dial 19, 21, 47, 48
W
Wi-Fi 2, 8, 23, 24, 63, 64,
73, 74, 89, 104
Wi-Fi Utility 23, 73
Windows Media 3, 20, 101, 105
Wireless LAN 10, 64, 73, 116
Wireless Manager 2, 23, 63, 64, 65,
73, 88
Word Mobile 3, 101, 110, 113
Z
ZIP 3, 10, 20, 101, 106
139
Index