GN Audio USA GN6110 GN6110 User Manual GN6110 contents EU 21 10 03 indd
GN Netcom Inc GN6110 GN6110 contents EU 21 10 03 indd
UserMan
1
1552-099 Rev.A
User guide
Bedienungsanleitung
Guide d’utilisation
Manual del usuario
Guia do utilizador
Istruzioni d’uso
Gebruikershandleiding
Brugsanvisning
Bruksanvisning
Käyttöohje
UK
D
F
ES
P
I
NL
DK
S
FIN
2
xx
xx
xx
xx
xx
xx
xxx
xxx
xxx
xxx
xxx
GN6110_contents_EU_21-10-03.indd 1 23-10-2003, 09:39:19
2 3
English – GN 6110 user guide
This user guide provides you with information on setting up, using and maintaining
your GN 6110.
CONTENTS
1. Product information
1.1 GN 6110 – what’s in the box
1.2 Parts and signatures
2. Assembling your GN 6110
2.1 Setting up for desk telephone use
Connecting cords
Charging headset
Clear dial tone adjustment
2.2 Setting up for mobile telephone use
Pairing
3. Operating the GN 6110
3.1 Operation – with desk telephone
3.2 Operation – with mobile telephone
4. Additional functionality and features
4.1 Volume settings and functions
4.2 Wearing and wearing styles
4.3 Setting up your GN 1000 RHL (accessory)
4.4 Operation with your GN 1000 RHL (accessory)
4.5 Battery charging
4.6 Pairing your headset to the desk telephone
4.7 Reset
4.8 Audio and visual indicators
5. Frequently asked questions
6. Cleaning, safety and maintenance
1. Product information
Congratulations on purchasing the GN 6110, which consists of a base and headset. The
GN 6110 accepts calls from both your desk and mobile phone, letting you answer/make
a call from either your desk or mobile phone via your headset. If using your headset
for a call from your desk phone, an incoming call from your mobile phone will not be
accepted by your headset. If using your headset for a call from your mobile phone, an
incoming call from your desk phone will not be accepted by your headset.
To fully benefi t from your GN 6110, follow the instructions in this user guide step by
step.
1.1 GN 6110 – What’s in the box
1 GN 6110 headset, with built-in
rechargeable battery
2 GN 6110 base (connectivity unit)
3 Connection cord for telephone
connection
4 Power adapter with cord
5 Quick Set Up guide
6 User guide
7 Cord management strips
8 Headset travel charger (90-240 V)
3
4
6
5
7
8
2
1
GN6110_contents_EU_21-10-03.indd 2-3 23-10-2003, 09:39:20
4 5
1.2 GN 6110 – Parts and signatures
1 Power adapter socket
2 Telephone socket
3 Handset socket
4 Hook switch [AUX] socket (accessory)
5 Additional functionality port
6 Volume match dial
7 Microphone volume dial
8 Reset button
9 Clear dial tone termination switch
10 Base Multifunction Button (MFB)
11 Pairing indicator
12 Battery indicator
13 On-line indicator
14 Charging cradle
15 Headset release button
16 Headset boom arm
17 Earhook
18 Charging port
19 Speaker
20 Volume buttons
21 Headset Multifunction Button (MFB)
22 Microphone
23 Headset indicator
2. Assembling your GN 6110
First assemble your GN 6110 to work with your desk telephone, and then set it up to
work with your mobile phone. The GN 6110 supports the GN 1000 Remote Handset
Lifter for desk telephones as well as newer telephones with built-in electronic hook
switches.
See Section 4.3 for hook switch set up instructions and use.
2.1 Setting up for desk telephone use
Connecting cords
To set up your GN 6110, connect the cords by
completing the following instructions:
1. Connect the power adapter cord to the socket
marked 2 [A]. All of the base’s indicators
will fl ash once when power is connected.
2. Unplug your telephone’s handset from the
handset port on the bottom of your tele-
phone and plug its cord into the base’s socket
marked 0 . [C]
3. The blue colored cord will go from the blue
socket on the base back to the now free hand-
set port. [B].
4. Place all cords into the base’s slots to ensure
a fully functional product. [D]
G
F
E
D
C
B
A
AUX
2
1
16
12
10
17
6
22
3
414
11
7
815
19
21
18
20
23
13
5
9
AUX
AB
C
D
E
AUX
GN6110_contents_EU_21-10-03.indd 4-5 23-10-2003, 09:39:21
6 7
Note: For your convenience, you may also feed the telephone cord through the
base’s right or left slot, depending if your desk telephone is positioned to the right
or left of the base.
5. Use the cord management strips to fasten and organise the cords. [E]
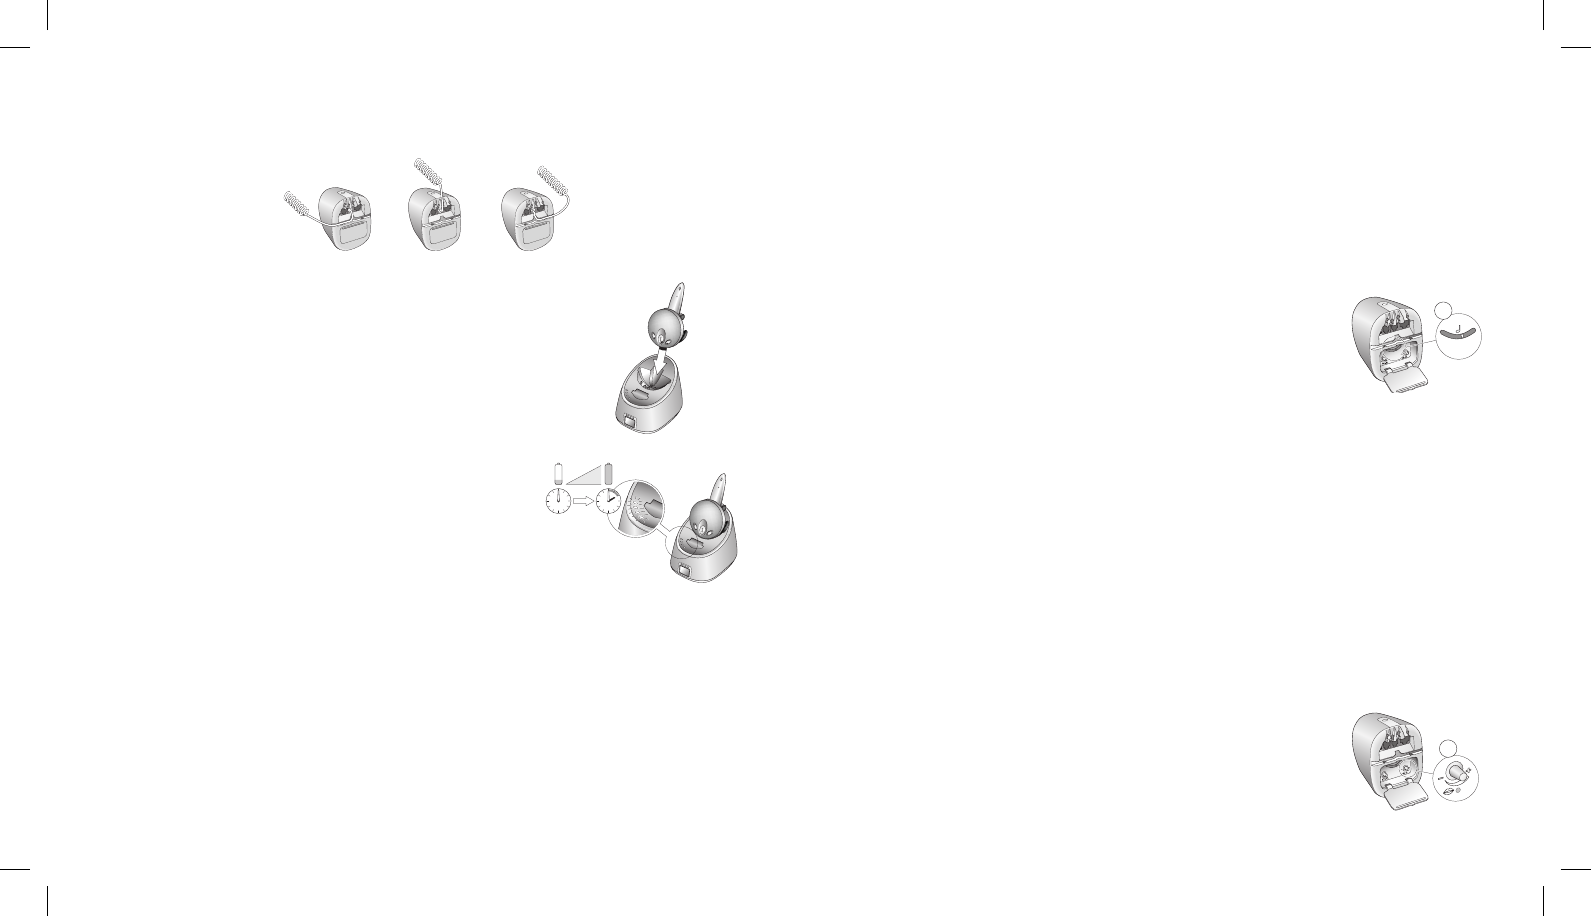
Charging headset
Before using your headset, charge it for a minimum of
two hours. You may charge the headset by placing it in
the base or with the travel charger cord.
During initial (and subsequent) charging, you may con-
tinue to use your desk telephone as normal.
See Section 4.5 for full details on charging batteries and
the battery charge level indication.
Pairing of headset to the desk telephone and verifying
pairing
The headset and the base in their original product box have been factory-paired to
ensure proper functioning of your GN 6110. You do not need to pair these two devices,
and you may now proceed to the Clear dial tone adjustment section.
If original pairing is lost (by resetting the base, changing your headset or changing your
base), you will have to pair your headset to the base again. You may also verify pairing
between the headset and base at any point (except during telephone conversations).
See Section 4.6 for these instructions.
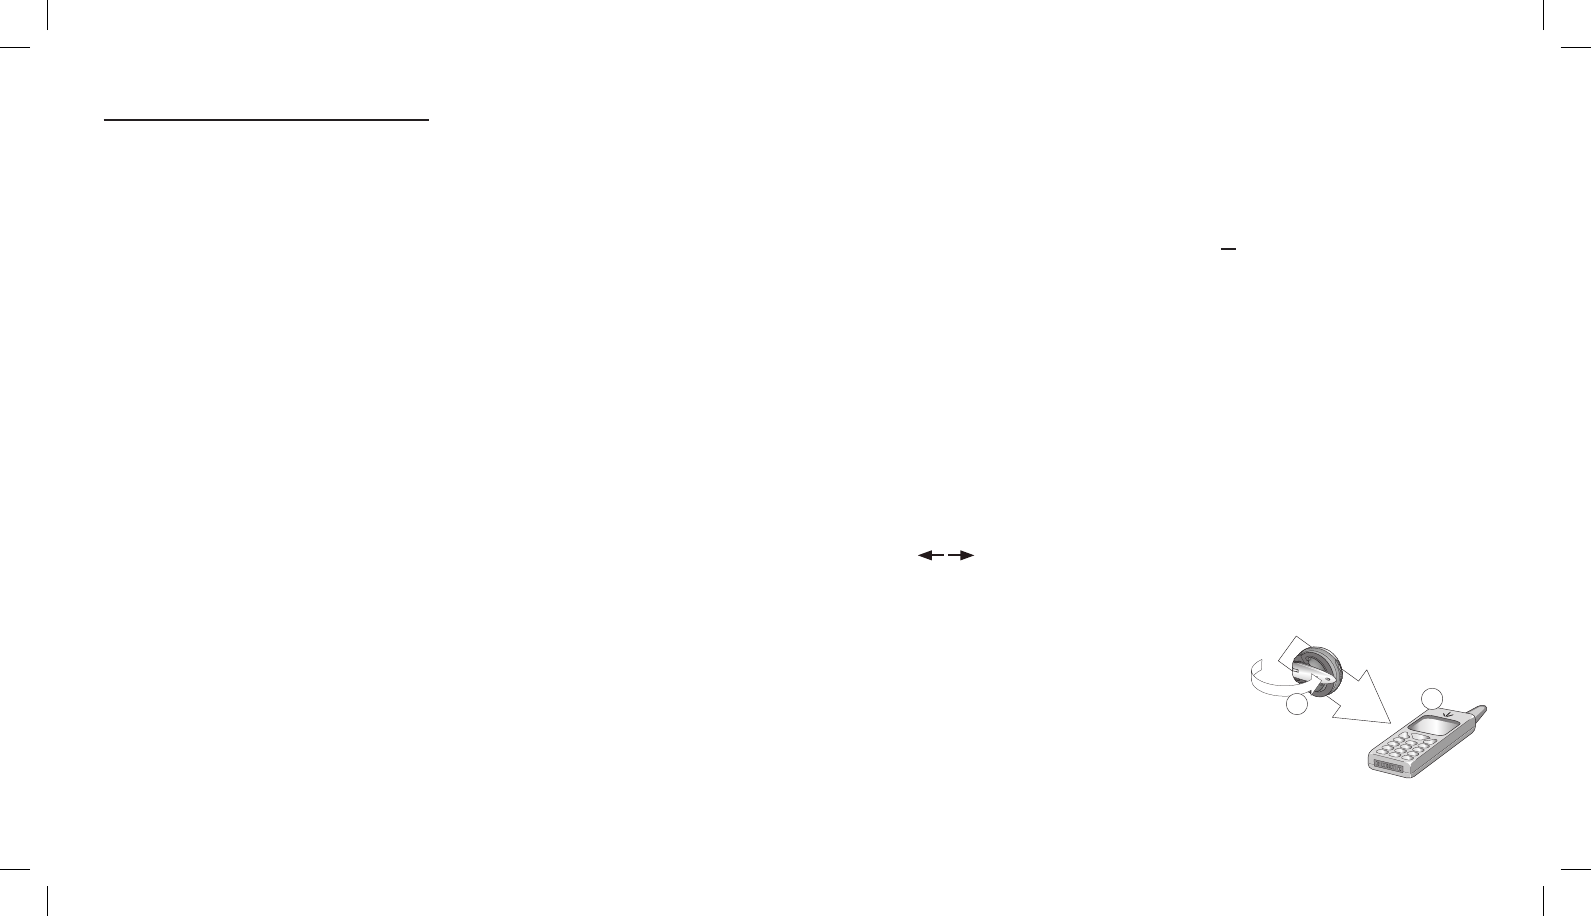
Clear dial tone adjustment
Desk telephones operate on a range of standards. In order for your GN 6110 to work
with your desk telephone and to hear a clear, crisp dial tone, you must set the correct
dial tone setting. Consult the inside back cover of this user guide for the most common
telephone models and settings.
Complete the following instructions to set the correct dial tone adjustment:
1. Open the compartment cover on the bottom of the base and
locate the termination switch [A].
2. Put on your headset and press the base’s Multifunction but-
ton. An audible tone will shortly be heard.
3. Lift the telephone’s handset from the cradle and listen for a dial tone in your headset.
4. If there is no dial tone or it is not clear, stepwise slide the termination switch
through all 7 settings (along the A-G range), listening for the clearest possible dial
tone. If the dial tone is just as clear in position A as in position G, leave the switch in
position A.
5. When you hear the clearest dial tone, you have located the correct termination set-
ting.
Microphone volume adjustment
In order to ensure that your voice is neither too loud nor too soft when calling others,
adjust the transmit sound volume. You will need to make a call with your desk tele-
phone to adjust it.
Complete the following instructions to adjust the transmit volume:
1. Open the compartment cover on the bottom of the base and
locate the blue microphone volume adjustment button [A].
G
F
E
D
C
B
A
G
F
E
D
C
B
A
A
G
F
E
D
C
B
A
A
GN6110_contents_EU_21-10-03.indd 6-7 23-10-2003, 09:39:21
8 9
2. Put on your headset and press the Multifunction Button on the base. An audible
tone will shortly be heard.
3. Lift the telephone’s handset from the cradle and listen for a dial tone in your headset.
4. Using your desk telephone, make a call to someone who will act as your test person.
5. While speaking with your test person, adjust the blue microphone volume adjust-
ment button until he/she hears your voice at an appropriate level.
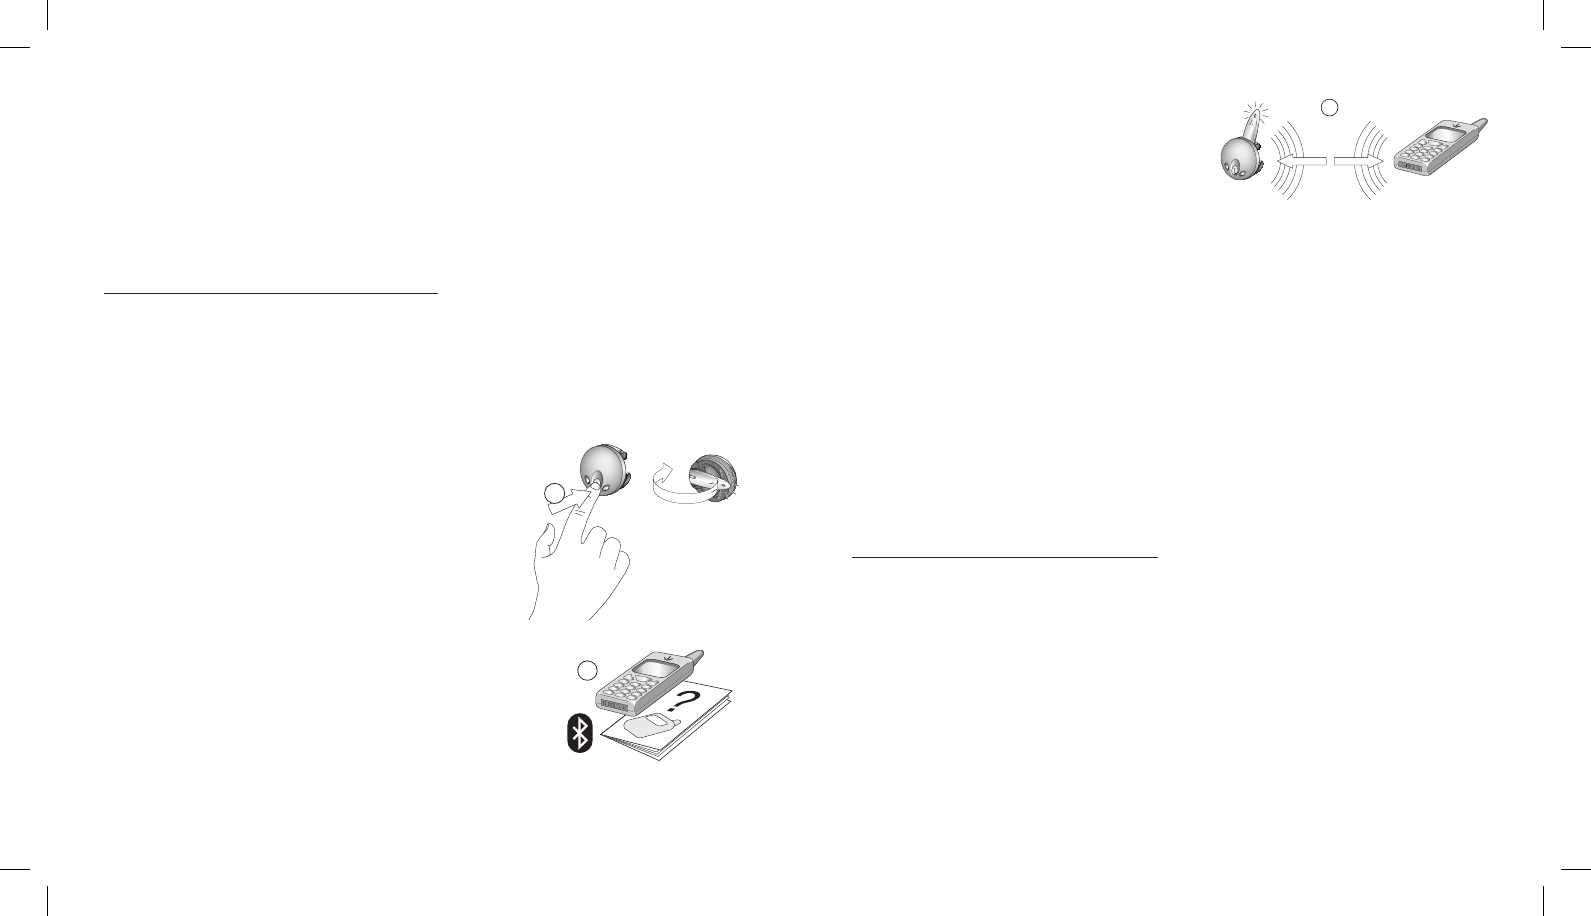
2.2 Setting up for mobile telephone use
The GN 6110 headset is also compatible with Bluetooth mobile phones. The mobile
phone you use with your GN 6110 must be Bluetooth technology-equipped.
Setting up the headset to a mobile phone (pairing)
Before using your headset for the fi rst time with a mobile
phone, you must pair your headset and mobile telephone
by completing the following:
1. Press and hold down the Multifunction Button on the
headset for 5 seconds, after which the headset indica-
tor will light. [A]
2. Within 3 seconds, open the headset boom arm. The
headset can be paired within the next 5 minutes.
3. Put the mobile phone into pairing mode, according to
your mobile phone’s user manual. [B]
Note: Your mobile phone must be Bluetooth-equip-
ped in order to pair it with the GN 6110.
4. From your mobile phone, perform a device discovery
so that your mobile phone will fi nd your headset and
pair to it. This may take several seconds.
Note: Ensure that the mobile device and
the headset are within 1 metre of each
other. [C]
5. When your mobile phone prompts you, enter the following
4-digit passkey code: 0000.
The mobile phone will now begin pairing and store your GN 6110 headset in its
memory. Your mobile phone screen will advise that pairing has been successful.
The headset indicator will rapidly fl ash 10 times, and a beep will be heard in the
headset to indicate successful pairing.
After successful pairing, your headset is ready to use with your mobile phone. Consult
your mobile phone’s user guide for full details on utilising a Bluetooth headset with
your mobile phone.
3.0 Operating the GN 6110
3.1 Operation – with desk telephone
If your headset is in its base, press the release headset button to free the headset before
using it.
Turning headset ON:
Open the headset boom arm. The headset indicator will light for 2 seconds, and then
continue to fl ash slowly as long as the headset is on.
Turning headset OFF:
Close the headset boom arm. The headset indicator will light for 2 seconds, after which
it will turn off.
A
B
C
max
1m
Bluetooth™ is a trademark owned by Bluetooth SIG, Inc. USA and licensed to GN Netcom.
GN6110_contents_EU_21-10-03.indd 8-9 23-10-2003, 09:39:22
10 11
Making calls:
1. With the boom arm open, press
the Multifunction Button on either
the headset [C] or the base [B].
An audible tone will be heard and
the connection will be established
shortly.
2. Lift the telephone’s handset, or
press the telephone’s line button
if your telephone has one. A dial
tone will be heard.
3. Dial the desired number when the
dial tone is heard in your headset.
The headset indicator and the on-line indicator will fl ash rapidly for the duration of the call.
Answering calls:
1. With the boom arm open, press the Multifunction Button on either the headset
or the base. An audible tone will be heard and the connection will be established
shortly.
2. Lift the telephone’s handset, or press the line button if your telephone has one.
The headset indicator and the pairing indicator will fl ash rapidly for the duration of the
call.
Ending calls:
1. Press the Multifunction Button on either the base or the headset.
2. Lower the telephone’s handset, or press the line button if your telephone has one.
Headset handset switching (while on a call).
To switch from using the headset to the
handset during a call:
1. Terminate the link between the head-
set and the base by either closing the
headset boom arm [A] or pressing the
Multifunction Button on the base [B] or
the headset [C].
2. The call is now terminated in the headset,
and can be continued in the handset.
3. To end the call, hang up the telephone
handset.
To switch from using the handset to the headset during a call:
1. With the boom arm open, press the Multifunction Button on either the headset
or the base. An audible tone will be heard and the connection will be established
shortly.
2. The call is now terminated in the handset, and can be continued in the headset.
3. To end the call, press the Multifunction Button on either the base or the headset, or
close the headset boom arm.
4. Lower the telephone’s handset. On telephones equipped with a line button, press
the line button to end the call.
5. You may continue wearing the headset, or place it in the base (with the boom arm
closed) for recharging.
AB
C
D
B
C
A
GN6110_contents_EU_21-10-03.indd 10-11 23-10-2003, 09:39:23
12 13
3.2 Operation – with mobile telephone
If your headset is in its base, press the release headset button to free the headset before
using it.
Turning headset ON:
Open the headset boom arm. The headset indicator will light for 2 seconds, and then
continue to fl ash slowly as long as the headset is on.
Turning headset OFF:
Close the headset boom arm. The headset indicator will light for 2 seconds, after which
it will turn off.
Making calls:
1. Open the headset boom arm and place the headset on the ear.
2. Dial the desired number on your mobile, and press the mobile’s
Yes/Send/Call button to begin calling.
The headset indicator will fl ash rapidly for the duration of the call.
Making voice-activated calls:
Note: Before making voice-activated calls, voice dialling must be activated on your
mobile phone and voice tags stored. Consult your mobile phone’s user guide for
full details.
To make voice-activated calls:
1. Open the headset boom arm and place the headset on the ear.
2. Press the Multifunction Button on the headset for 3 seconds. The headset will go
into voice command mode, and an audible tone will be heard indicating that the
headset is expecting a voice command.
3. Give the desired voice command.
The headset indicator will fl ash rapidly for the duration of the call.
Answering calls:
1. Press the Multifunction Button on the headset, or open the headset boom arm if not
already opened.
The connection will be established shortly.
2. An audible tone will be heard, and you are now connected to your caller.
The headset indicator will fl ash rapidly for the duration of the call.
Ending calls:
Press the Multifunction Button on the headset. An audible tone will be heard.
The call will also terminate if the mobile phone’s End Call button/functionality is used,
or if the second party hangs up.
Headset mobile phone switching (while on a call).
To switch from using the headset to mobile phone
during a call:
1. Terminate the link between the headset and the
mobile phone by closing the headset boom arm
[A]
Note: do not press the Multifunction Button.
2. The mobile phone will prompt you to continue
the call [B].
AB
GN6110_contents_EU_21-10-03.indd 12-13 23-10-2003, 09:39:23
14 15
3. You have 30 seconds to accept the transfer to your mobile phone; after accepting
continue the call on your mobile phone.
4. To end the call, use the mobile phone’s End Call button/functionality.
To switch from using the mobile phone to the headset during a call:
1. With the boom arm open, press the Multifunction Button on the headset.
2. An audible tone will shortly be heard, and the connection will be established mo-
mentarily.
3. Continue the call on your headset.
4. To end the call, press the Multifunction Button on the headset.
5. You may continue wearing your headset, or close the headset boom arm and place
in the base for charging.
Consult your mobile phone’s user guide for full details.
4.0 Additional functionality and features
4.1 Volume settings and functionality
Volume adjust [A]
There are two volume buttons, one on each side of
the headset’s Multifunction Button. The GN 6110’s
headset comes equipped with intelligent volume
re-orientation, so no matter which ear you wear the
headset on, the topmost of the two volume buttons is
always volume + (up) and the lower button is always
volume – (down).
Press the volume + (up) or volume – (down) button until the desired volume level has
been reached. If minimum/maximum volume is reached, an audible tone will be heard
in the headset.
Volume match
For your own comfort, match the volume level of your desk telephone to that of your
mobile phone. This will ensure that you get a consistent volume level for all of your
calls, no matter which device you use. After the initial volume match, subsequent vol-
ume level changes made on your headset will be replicated on your desk and mobile
phones.
You will need to make 2 calls to adjust the volume match, one using your mobile phone
and the other using the desk telephone.
1. Open the compartment cover on the bottom of the base and
locate the black volume match button [A]
2. Using your mobile telephone, make an initial test call to some-
one and have a brief conversation, keeping in mind the volume
level of the conversation.
3. Using your desk telephone, make a second test call to the
same person.
4. While speaking with your test person, again adjust the black volume match adjust-
ment button until the volume level of this conversation matches that of the fi rst
mobile phone’s test conversation.
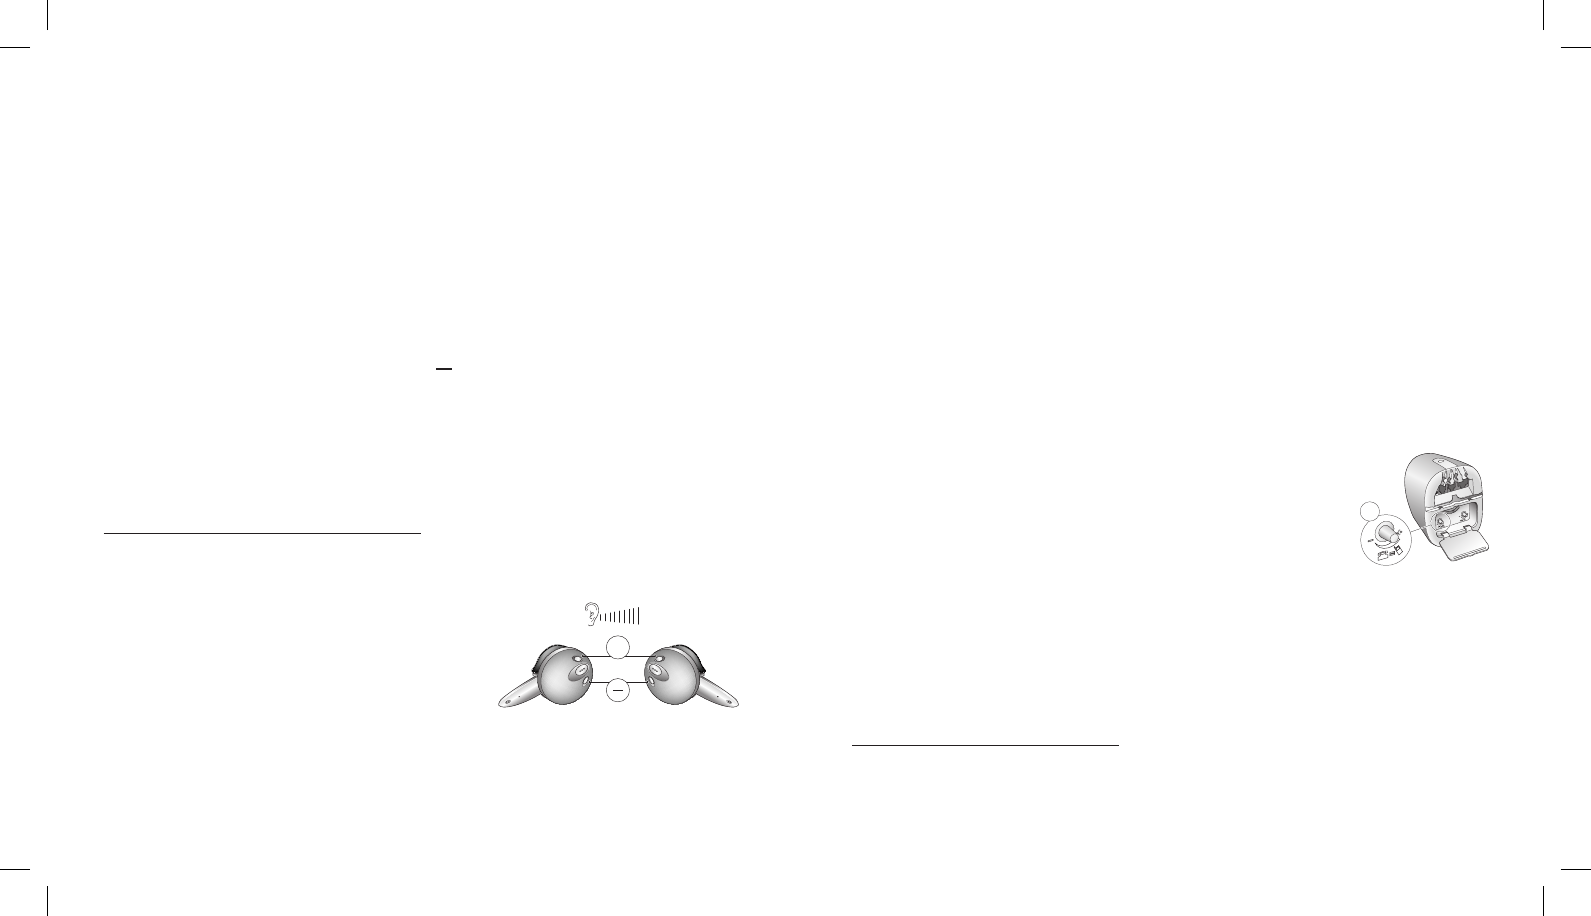
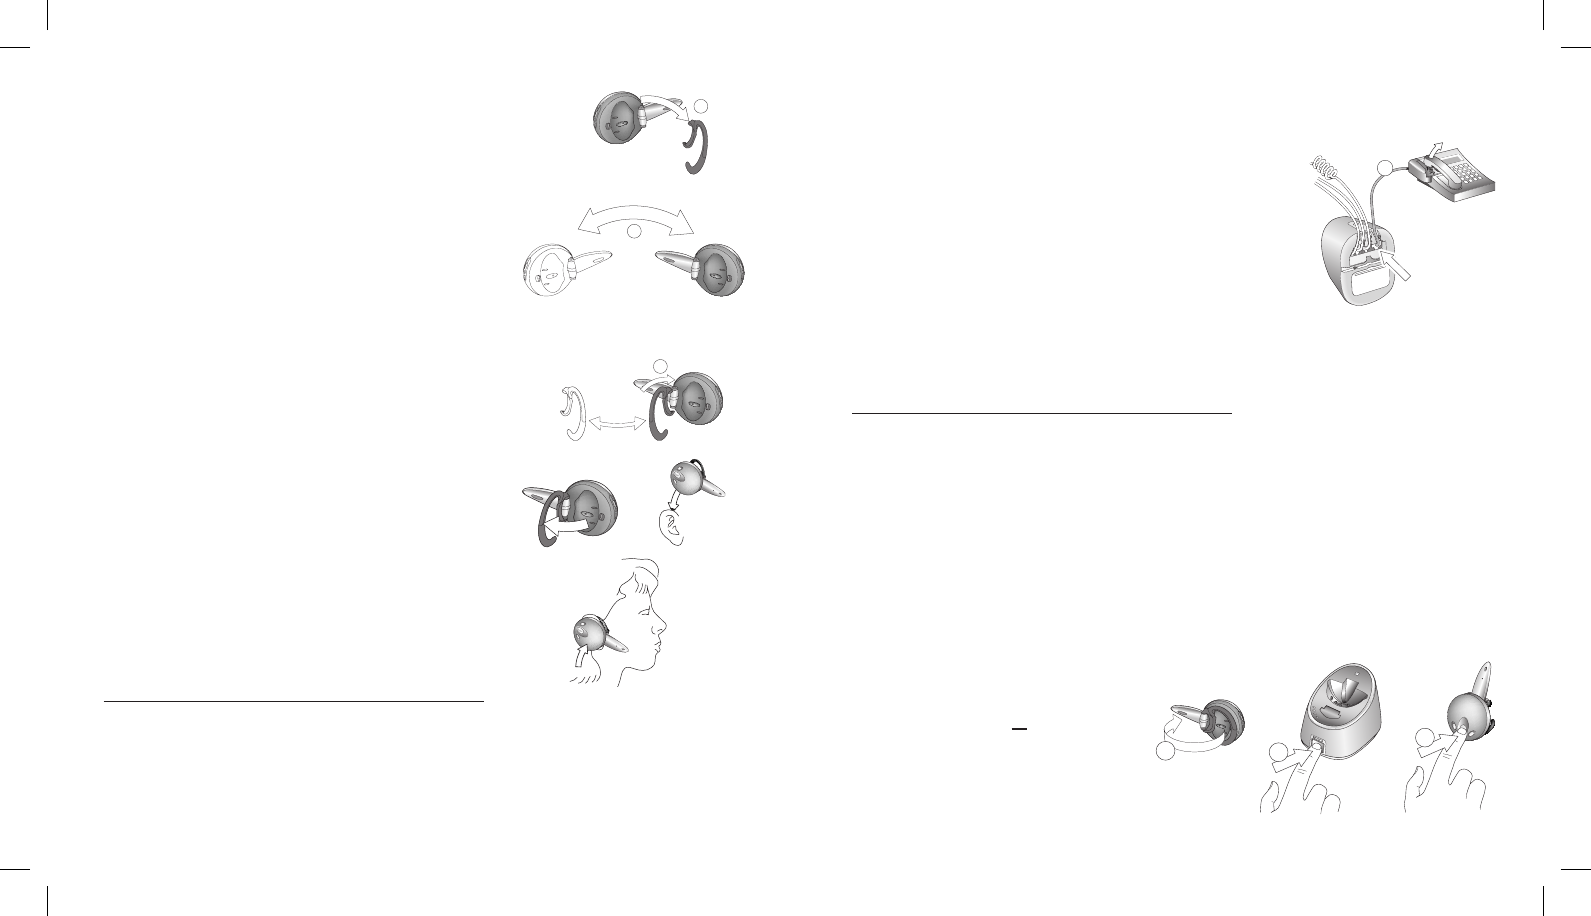
4.2 Wearing and wearing styles
Choosing right or left ear wearing styles
The GN 6110’s headset comes confi gured for wearing on your right ear.
+
G
F
E
D
C
B
A
A
GN6110_contents_EU_21-10-03.indd 14-15 23-10-2003, 09:39:24
16 17
To change for left ear wearing, use the instructions as
follows:
1. Open the headset boom arm.
2. Put the headset’s earhook in its opened position.
3. Gently lift and pull the top of the earhook up from
the upper hinge pin and pull away to remove [A].
4. Turn the headset over [B].
5. Hook the bottom of the earhook on to the lower
hinge pin and lift and pull the top of the earhook
over the upper hinge pin [C].
The volume + (up) or volume – (down) buttons will
re-orient automatically.
Placing the headset on your ear [A]
In order to wear the headset follow these instructions:
1. Open the headset boom arm.
2. Put the earhook in its opened position
(90° away from the headset).
3. Loop the earhook behind your ear.
4. Close the headset boom arm towards your ear.
The headset boom arm will then point towards your
mouth.
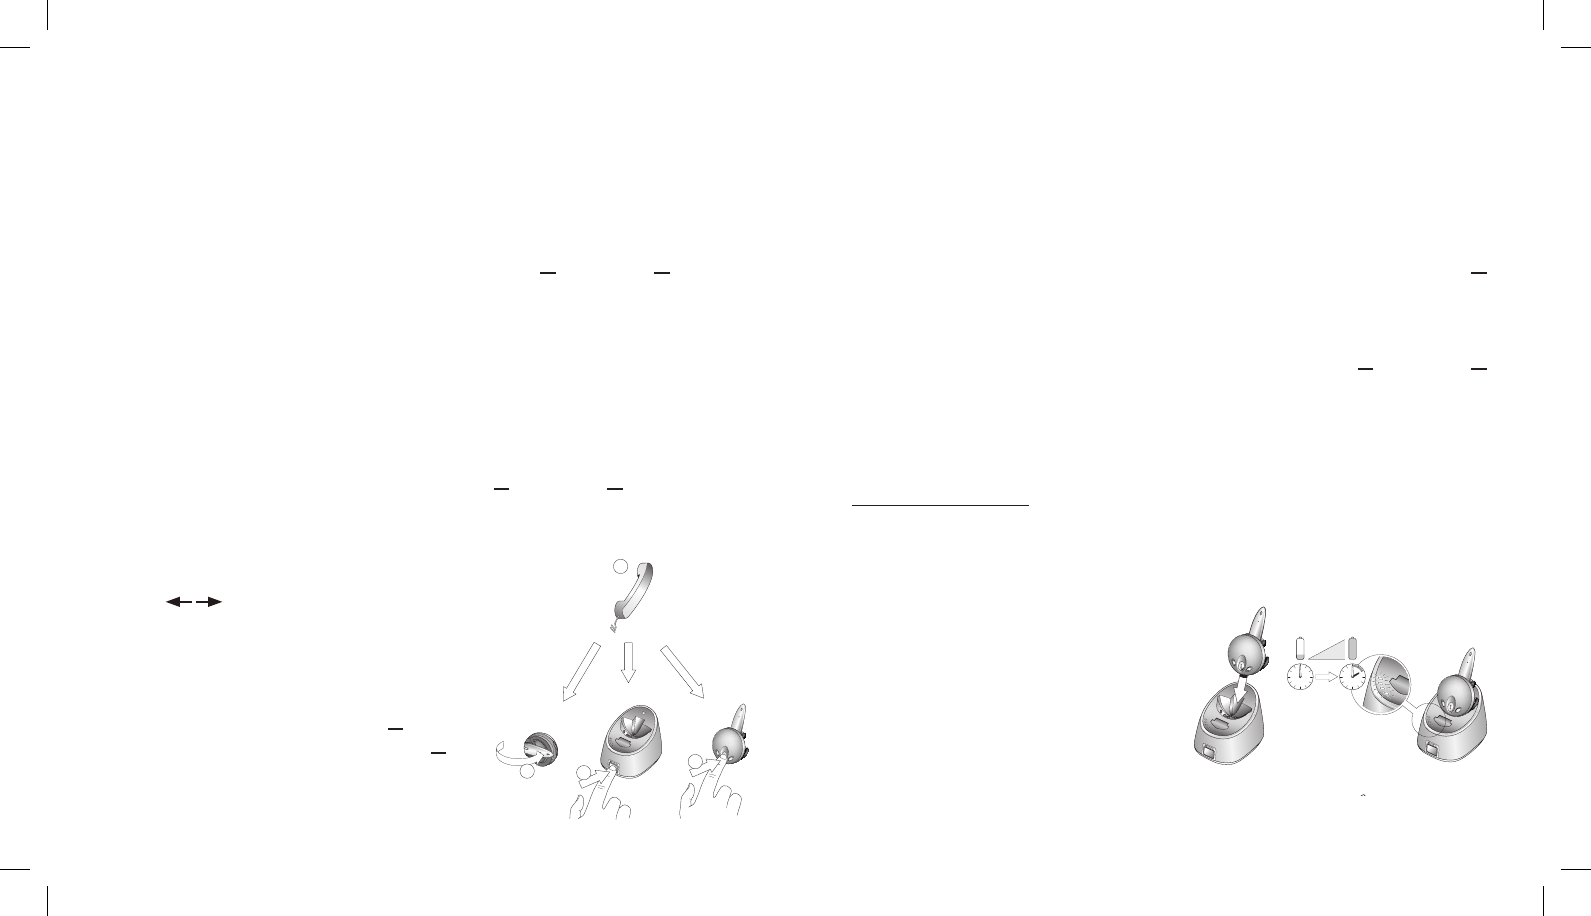
4.3 Setting up your GN 1000 RHL (accessory)
The GN 6110 can be connected to GN Netcom’s GN 1000 Remote Handset Lifter (acces-
sory). This gives you the additional convenience of answering and ending calls even
while away from your desk.
To connect your GN 1000 to the GN 6110, complete the following:
1. Connect the GN 1000’s connector cord to the yellow-
marked hook switch [AUX] socket on the bottom of the
base [A].
2. Consult the GN 1000 user guide to complete the set up.
Note: If you cannot locate the GN 1000 product box
and/or user guide, consult GN Netcom’s web pages at
www.gnnetcom.dk.
Your GN 6110 is now ready to use with your GN 1000, and you may proceed to Section 4.4.
4.4 Setting up your GN 1000 RHL (accessory)
Turning headset ON:
Open the headset boom arm. The headset indicator will light for 2 seconds, and then
continue to fl ash slowly as long as the headset is on.
Turning headset OFF:
Close the headset boom arm. The headset indicator will light for 2 seconds, after which
it will turn off.
Making calls:
1. With the boom arm open, press
the Multifunction Button on either
the headset [C] or the base [B].
An audible tone will be heard and
the connection will be established
shortly.
A
A
B
C
B
C
A
GN6110_contents_EU_21-10-03.indd 16-17 23-10-2003, 09:39:24
18 19
2. The hook switch will be activated, and your telephone’s handset will be lifted.
3. Dial the desired number when the dial tone is heard.
The headset indicator and the base’s on-line indicator will fl ash rapidly for the dura-
tion of the call.
Answering calls:
1. Press the Multifunction Button on either the headset [C] or the base [B], or open the
headset boom arm [A] if not already opened. If the headset is already being worn,
an audible beep will indicate an incoming call, after which press the Multifunction
Button.
2. An audible tone will be heard, and you are now connected to your caller.
The headset indicator and the pairing indicator will fl ash rapidly for the duration of
the call.
Ending calls:
1. Press the Multifunction Button on either the base or the headset, or close the head-
set boom arm. Your call is now terminated.
2. You may continue wearing your headset, or replace the (closed) headset boom arm
in the base for charging.
Headset handset switching (while on a call)
To switch from using the headset to the handset
during a call:
1. Pick up the telephone’s handset [A].
2. Close the headset boom arm [B], or press the
Multifunction Button on the base [C] or the
headset [D] to continue the call on the hand-
set.
3. To end the call, hang up the telephone handset.
Note: Closing the boom arm gives you a few seconds to pick up the telephone
handset.
To switch from using the handset to the headset during a call:
1. With the boom arm open, press the Multifunction Button on either the headset or
the base.
The connection will be established shortly.
2. When the hook switch is activated, place the handset on the lifter arm.
3. To end the call, press the Multifunction Button on either the base or the headset, or
close the headset boom arm.
4. You may continue wearing the headset, or place it in the base (with the boom arm
closed) for recharging.
4.5 Battery charging
With an initial full battery charge and continual daily charging, the GN 6110’s battery will
give you years of reliable service.
Charging in the base charger
To charge in the base, place the headset into
the base. The headset indicator will light to
indicate charging, and will turn off when
fully charged.
Note: To ensure optimal charging, ensure
that the headset is placed fi rmly and com-
pletely into the base.
BC
D
A
GN6110_contents_EU_21-10-03.indd 18-19 23-10-2003, 09:39:25
20 21
To use your headset, press the release headset button to free the head-
set from its base.
During initial (and subsequent) charging, you may use your desk tele-
phone’s handset.
Battery charge indication
The headset indicator will light to indicate charging, and will turn off when fully
charged. The 4 lights of the battery indicator show the approximate battery charge
level of the headset:
• 1 lit indicator represents 25% of a full charge
• 4 lit indicators represent a full charge.
Charging with the travel charger
The travel charger works universally (90-240 V), letting you charge the headset in any
country. You will need to purchase separately any required electrical outlet plug-in
adapters.
To charge with the travel charger, insert the travel charger cord’s electrical plug into the
electrical outlet and the cord’s mains plug into headset.
Note: To ensure optimal charging, ensure that the mains plug of the travel charger is placed
correctly into the headset. The headset indicator will light when the headset is charging.
Battery saving mode
To save power, the headset enters snooze mode after 1 minute of inactivity. This will
in no way affect the normal use of the headset, and it will re-activate itself immediately
when used or when a call is received.
4.6 Pairing your headset to the desk telephone
Pairing your headset
In order for your GN 6110 to work correctly, the headset and the base must be paired
together. For your convenience, these two devices in their original product box have
been factory-paired.
If this original pairing is lost (by resetting the base, changing your headset or changing
your base), you will have to pair your headset again to the base. Complete the following
steps to pair your headset again to the base:
1. Press and hold down the Multifunc-
tion Button on the headset for 5
seconds [A], after which the headset
indicator will light [B].
2. Within 3 seconds, open the headset
boom arm. The headset can now be
paired within the next 5 minutes [B].
3. Press and hold down the Multifunc-
tion Button on the base for 5 seconds,
after which the pairing indicator will
light. [C]
Note: Ensure that the headset and
base are within 1 metre of each other. After 5 seconds, the base will automatically
pair with the headset.
Successful pairing will be indicated by 10 rapid fl ashes of both the headset indicator
and the pairing indicator. A beep will also be heard in the headset.
A
B
~ 5 sec
~ 5 sec
C
GN6110_contents_EU_21-10-03.indd 20-21 23-10-2003, 09:39:26
22 23
Verifying pairing
To verify pairing, create an audio link between the headset and base by completing the
following:
1. With the boom arm open, press
the Multifunction Button on either
the headset [C] or the base [B].
An audible tone will be heard, and
the headset indicator and online
indicator will fl ash rapidly.
2. To end the audio link, press the
Multifunction Button on either the
headset or base, or close the headset boom arm.
Note: You may verify pairing at any point. However, during telephone conversa-
tions, verifying pairing is not possible.
4.7 Reset
You may reset the base to remove pairing settings and return to the default hook switch
solution setting (RHL) if needed. To reset the base, complete the following:
1. Open the compartment cover on the bottom of the base
and locate the reset button.
2. With a pointed object (such as an unfolded paperclip),
press the reset button on the base for 10 seconds [A].
When the base is reset, the pairing indicator will light for 2
seconds.
Note: If you reset the base you will have to pair your headset to the base again.
See Section 4.6 for pairing instructions.
4.8 Audio and visual indicators
The GN 6110’s headset and base have audio and visual indicators, which represent
various actions and aspects associated with setting up and operating the product.
The headset gives audio indicators and various visual indicators via its headset indica-
tor. The base gives various visual indicators via its on-line, link and general indicators.
Familiarise yourself with these indicators to fully benefi t from your GN 6110.
The headset’s audio indicators:
Headset action Audio indication
Volume Limit Repeated single high tone when min. or max.
limits achieved (when button is pressed)
Low Battery Tone Two rapid high tones repeated every 20 seconds
Out of Range No audio indications; gradual deterioration of
audio quality
Incoming Call from Mobile Ring tone A (when using mobile phone or hook
switch)
Incoming Call from desk phone Ring tone B (only when using hook switch)
Pairing Confi rmation Single high tone
Establish Audio Link Series of tones, low to high
Initiate Voice Dial Single low tone
Voice Tag not Recognised Dual high-low tone
End Call/Audio Link Closed Series of tones, high to low
Power ON/OFF No audible tone
B
C
A
G
F
E
D
C
B
A
A
~ 3 sec
GN6110_contents_EU_21-10-03.indd 22-23 23-10-2003, 09:39:26

24 25
The headset’s visual indicators:
Headset mode Headset indicator
Power Off OFF (no charger)
Charging in Process ON (charger plugged in, or headset placed in
base)
Charging Complete OFF (charger plugged in, or headset placed in
base)
Pairing Mode ON (no charger) with headset boom arm opened
Pairing Successful Series of 10 rapid fl ashes
Audio Link (on a call) Rapidly fl ashes
Headset ON, but not on a call Continously fl ashes (slow rate)
Opened boom arm (turn ON) Lights for two seconds
Closed boom arm (turn OFF) Lights for two secons
Test link established Flashes twice
The base’s visual indicators:
Base’s on-line indicator On-line indicator
On-line with a call Flashes
Base’s pairing indicator Pairing indiator
Pairing Mode ON
Pairing Successful Series of 10 rapid fl ashes
Base reset Successful Light for two seconds
Base’s multifunction indicator Multifunction indicator
Battery indication Number of lit indicators indicates level of charge
1 lit indicator = 25% charged
2 lit indicators = 50% charged
3 lit indicators = 75% charged
4 lit indicators = 100% charged
Hook Switch setting mode Number of lit indicators indicates hook switch
mode:
1 lit indicator = RHL hook switch mode selected
(default)
2 lit indicators = DHSG hook switch mode
selected
3 lit indicators = AEI hook switch mode
selected
ALL base’s indicators
Power is turned ON
All indicators
Light for a few moments.
5. Frequently asked questions
Should I unplug my telephone’s line cord from the wall?
No, do not unplug your telephone’s line cord from the wall. Your GN 6110 is not a
telephone, but rather works with your desk telephone. The GN 6110 base accesses the
telephone line via your existing desk telephone.
I’ve set up my GN 6110 but I still don’t hear a dial tone?
There are several possible reasons why you do not hear a dial tone. Check that:
• The various cords are correctly set up and inserted.
• The clear dial tone adjustment (using the termination switch at the bottom of the
base) is correct.
• The power supply is correctly hooked to the base.
• You have not unplugged your desk telephone’s telephone line.
What is the yellow-coloured AUX button on the bottom of the base for?
The yellow-marked AUX socket is where you may connect the (optional) GN 1000
Remote Handset Lifter’s connector cord. By connecting the GN 1000, you may answer/
end calls while away from your desk.
GN6110_contents_EU_21-10-03.indd 24-25 23-10-2003, 09:39:26

26 27
How long do I have to charge the headset before I can use it?
It takes 2 hours to fully charge your headset. Although you may already use your head-
set after 20 minutes of charging, we recommend you allow 2 hours of charging before
you use your headset.
The battery indicator represents the charge level of your headset. One lit indicator light
represents a 25% charge and when all four indicator lights are lit the headset is fully
charged.
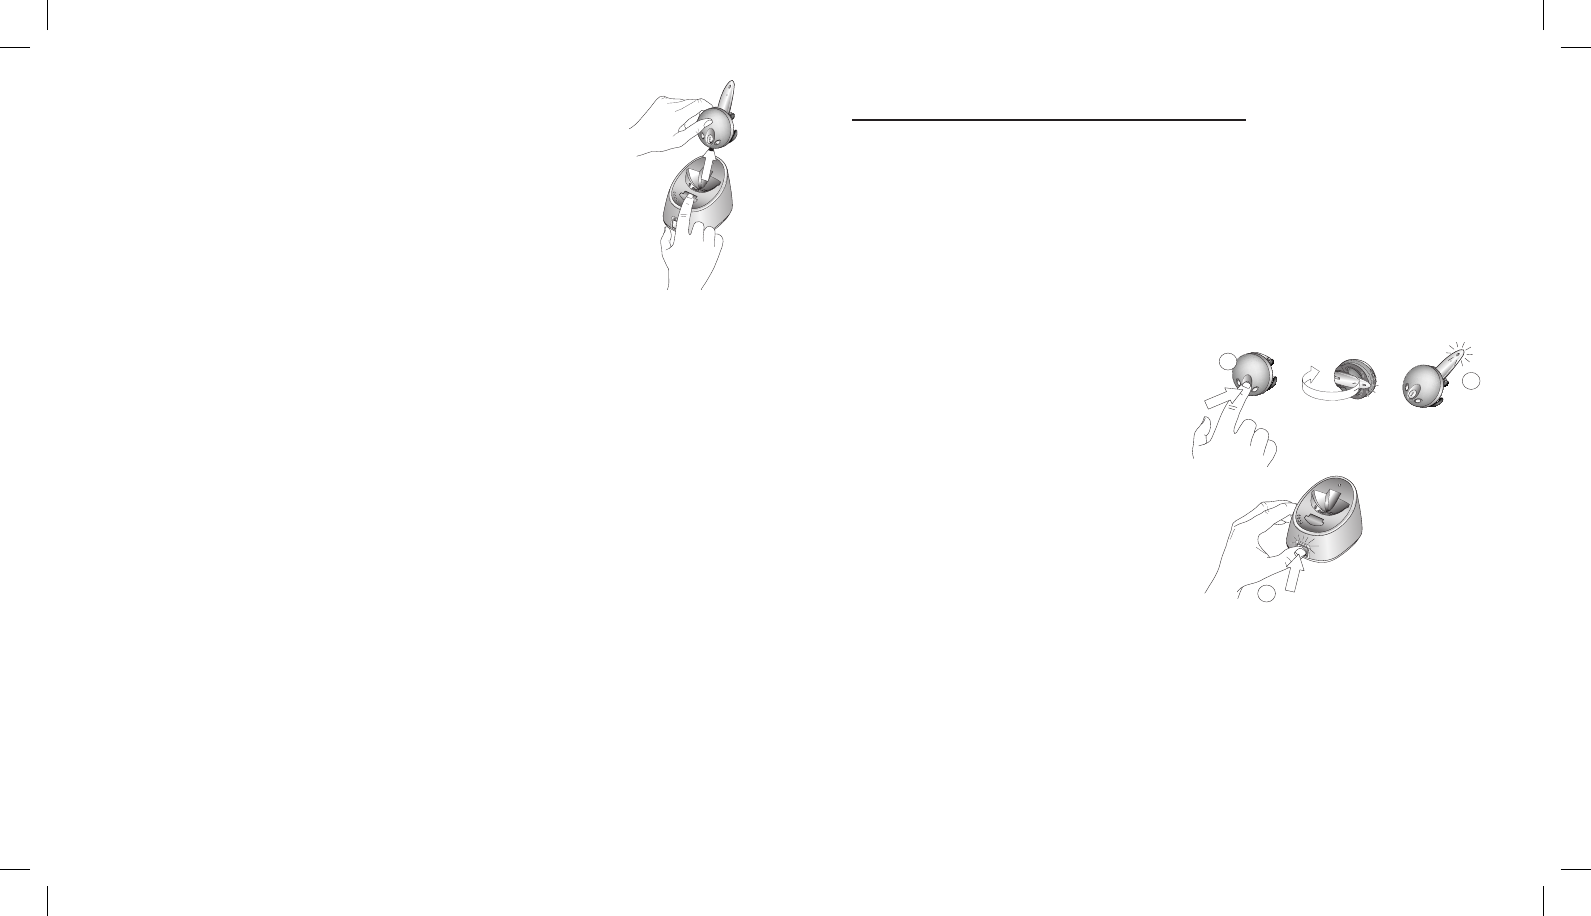
How do I lift the headset out of its base?
Press the headset release button fi rst, and then lift the headset from the base unit. The
headset release mechanism allows the headset to sit fi rmly in the base, thus guarantee-
ing its charging.
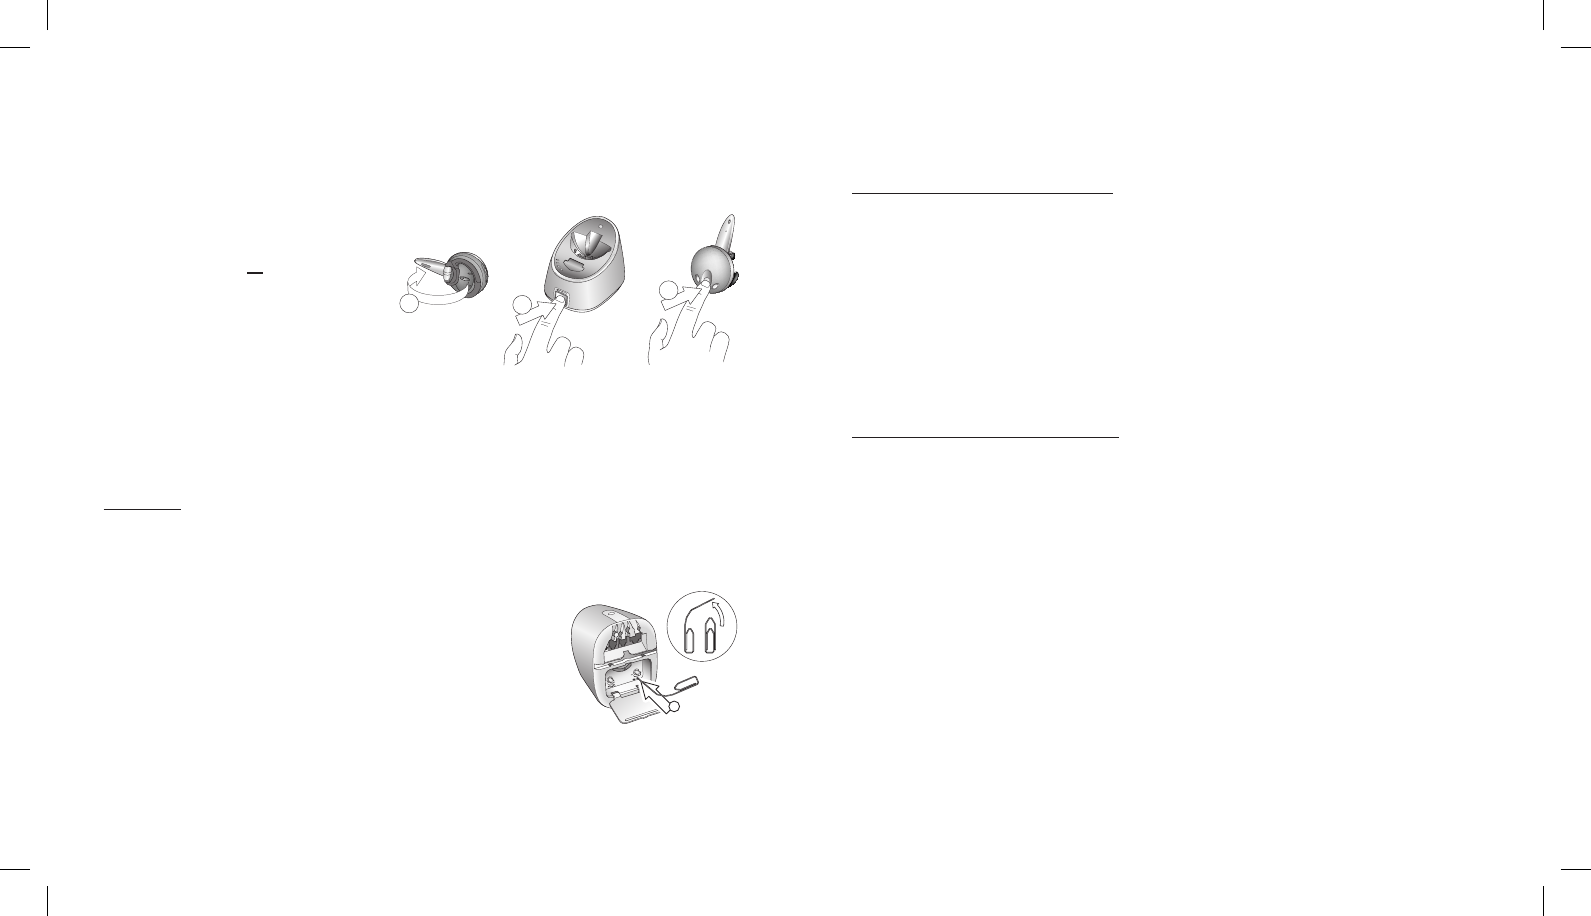
Can I wear the headset on either the left of the right ear?
Yes, you can wear the headset on either the left or the right ear. To change the wear-
ing ear, open the headset boom arm, open and remove the earhook, turn the headset
over and fi nally reinsert the earhook. Full instructions and illustrations can be found in
Section 4.3.
What is the clear dial tone adjustment for?
Desk telephones operate on a wide range of standards and use different kinds of inter-
nal components. The GN 6110 works with a very wide range of desk telephones, but it
still must be set to match your desk telephone’s standard. The GN 6110’s termination
switch (located at the bottom of the base) has a sliding 7-setting range that must be
adjusted until you hear a clear, crisp dial tone. Once you have a clear dial tone, your GN
6110 is correctly adjusted.
Why do I need to volume match the headset and desk telephone?
Volume match ensures consistency between the volume levels of received calls. Once
you have completed volume match, the volume you hear in your ear will be at the same
level, irrespective of if the call comes from your desk or mobile phone. Furthermore,
if you adjust the headset’s volume up or down during normal use, it will apply consis-
tently for calls from both your desk and mobile phone.
How do I make and end calls with my headset?
To make a call, open the boom arm, press the Multifunction Button, lift the telephone’s
handset (or simply press its line button), listen for the dial tone and dial the desired
number.
To end a call, press the Multifunction Button on the headset or base and lower the
telephone’s handset (or simply press its line button).
6. Cleaning, safety and maintenance
Clean the headset, including the headset boom arm and ear hook piece, by wiping
with a slightly damp cloth as required. Dampen the cloth with only water and a little
washing-up liquid if needed. Avoid getting moisture into any button sockets or other
openings. The base and cords may be dry-dusted as required.
Do not immerse the GN 6110 in water.
The plastic bags the GN 6110 and its parts are wrapped in are not toys for children. The
bags themselves or the many small parts they contain may cause choking if ingested.
GN6110_contents_EU_21-10-03.indd 26-27 23-10-2003, 09:39:27

28 29
Only authorised dealers or service centres may open the product. If any parts of
your GN 6110 require replacement for any reason, including normal wear and tear or
breakage, contact your dealer.
Dispose of the product and battery according to local standards and regulations. The
battery is guaranteed for one year.
Declaration
This product is CE marked according to the provisions of the R & TTE Directive (99/5/
EC). Hereby, GN Netcom as declares that this product is in compliance with the essen-
tial requirements and other relevant provisions of Directive 1999/5/EC.
Please note that this product uses radio frequency bands not harmonised within EU.
Within the EU, this product is intended to be used in Austria, Belgium, Denmark,
Finland, France, Germany, Greece, Ireland, Italy, Luxembourg, The Netherlands,
Portugal, Spain, Sweden, United Kingdom and within EFTA in Iceland, Norway and
Switzerland.
• Never try to dismantle the product yourself. None of the internal components can be
replaced or repaired by users.
• Avoid exposing the product to rain or other liquids.
• The headset may become warm during battery charging. This is normal and will not
affect the safety or performance of the headset.
If you have any problems or questions regarding the product, please contact your
vendor or go to http://www.gnnetcom.com
There is an international patent pending for the GN 6110 and its elements.
USA FCC part15
FCC Notice to Users/Product Statements
This device complies with part 15 of the FCC rules. Operation is subject to the following two conditions:
(1) This device may not cause harmful interference, and (2) This device must accept any interference received,
including interference that may cause undesired operation.
Users are not permitted to make changes or modify the device in any way. Changes or modifi cations not expressly
approved by GN Netcom will void the user’s authority to operate the equipment.
Note: This equipment has been tested and found to comply with the limits for a Class B digital device, pursuant to
part 15 of the FCC Rules. These limits are designed to provide reasonable protection against harmful interference
in a residential installation.
This equipment generates, uses and can radiate radio frequency energy and, if not installed and used in accordance
with the instructions, may cause harmful interference to radio communications. However, there is no guarantee that
interference will not occur in a particular installation. If this equipment does cause harmful interference to radio or
television reception, which can be determined by turning the equipment off and on, the user is encouraged to try to
correct the interference by one or more of the following measures:
• Reorient or relocate the receiving antenna.
• Increase the separation between the equipment and receiver.
• Connect the equipment into an outlet on a circuit different from that to which the receiver is connected.
• Consult the dealer or an experienced radio/TV technician for help.
The user must place the base 8” (20cm) or more from any personnel in order to comply with FCC RF exposure
requirements.
USA FCC part68
FCC Notice to Users/Product Statements
1. This equipment is compliant with part 68 of the FCC Rules. On the equipment is a label that contains, among other
information, the FCC registration number for this equipment. If requested, this information must be provided to
the telephone company.
2. The device may not be connected directly to the telephone network, but must connect to a FCC registered tele-
phone.
3. If this device is malfunctioning, it may also be causing harm to the telephone network. The device should then be
disconnected until the source of the problem can be determined and until repair has been made. If this is done,
the telephone company will notify you in advance that temporary discontinuance of service may be required. But
if advance notice is not practical, the telephone company will notify the customer as soon as possible. Also, you
will be advised of your right to fi le a complaint with the FCC if you believe it is necessary.
4. The telephone company may make changes in its facilities, equipment, operations and/or procedures that may
affect the operation of this equipment. If this happens, the telephone company will provide advanced notice in
order for you to take the necessary steps to maintain uninterrupted service.
5. If the telephone company requests information on what equipment is connected to their lines, inform them of:
(a) The telephone number that this unit is connected to.
(b) The FCC Registration number located on the label.
Service Requirements
6. In the event of equipment malfunction, all repairs should be performed by our Company or an authorized agent.
It is in the responsibility of users requiring service to report the need for service to our Company or to one of our
authorized agents. Service can be obtained at:
GN6110_contents_EU_21-10-03.indd 28-29 23-10-2003, 09:39:27
The user must place the base at least 8" (20cm) or more from any personnel and must not be co-loaded or operating in
conjunction with any other antenna or transmitter in order to comply with FCC RF exposure requirements.

30 31
GN Netcom Inc.
77 Northeastern Blvd.
Nashua
NH 03062
Canada
IC Notice to Users/Product Statements
Operation is subject to the following two conditions:
(1) This device may not cause interference and (2) This device must accept any interference, including interference
that may cause undesired operation of the device.
The term “IC:” before the certifi cation/registration number only signifi es that registration was performed based on
a Declaration of Conformity indicating that Industry Canada technical specifi cations were met. It does not imply that
industry Canada approved the equipment
Canada Terminal equipment
IC Notice to Users/Product Statements
NOTICE: This equipment meets the applicable Industry Canada Terminal Equipment Technical Specifi cations. This
is confi rmed by the registration number.
The Ringer Equivalence Number (REN) assigned to each terminal device provides an indication of the maximum
number of terminals allowed to be connected to a telephone interface. The termination on an interface may consist
of any combination of devices subject only to the requirement that the sum of the Ringer Equivalence Numbers of
all the devices does not exceed fi ve.
Australia
CAUTION
• The Telephone Headset may hold small objects in the area of the earpiece.
• Do not use in areas where there are explosive hazards.
• Base unit must be operated at a distance of more than 20 cm from the body.
GN6110_contents_EU_21-10-03.indd 30-31 23-10-2003, 09:39:27