GN Otometrics A S 1012 Medical Bluetooth Device User Manual 7 50 00000 U2 Book
GN Otometrics A/S Medical Bluetooth Device 7 50 00000 U2 Book
UserManual.wiki
>
GN Otometrics A S
>
1012 User Manual
Users Manual
Navigation menu
Upload a User Manual
Namespaces
Wiki Guide
HTML
PDF
Info
Views
User Manual
Discussion / Help
Navigation
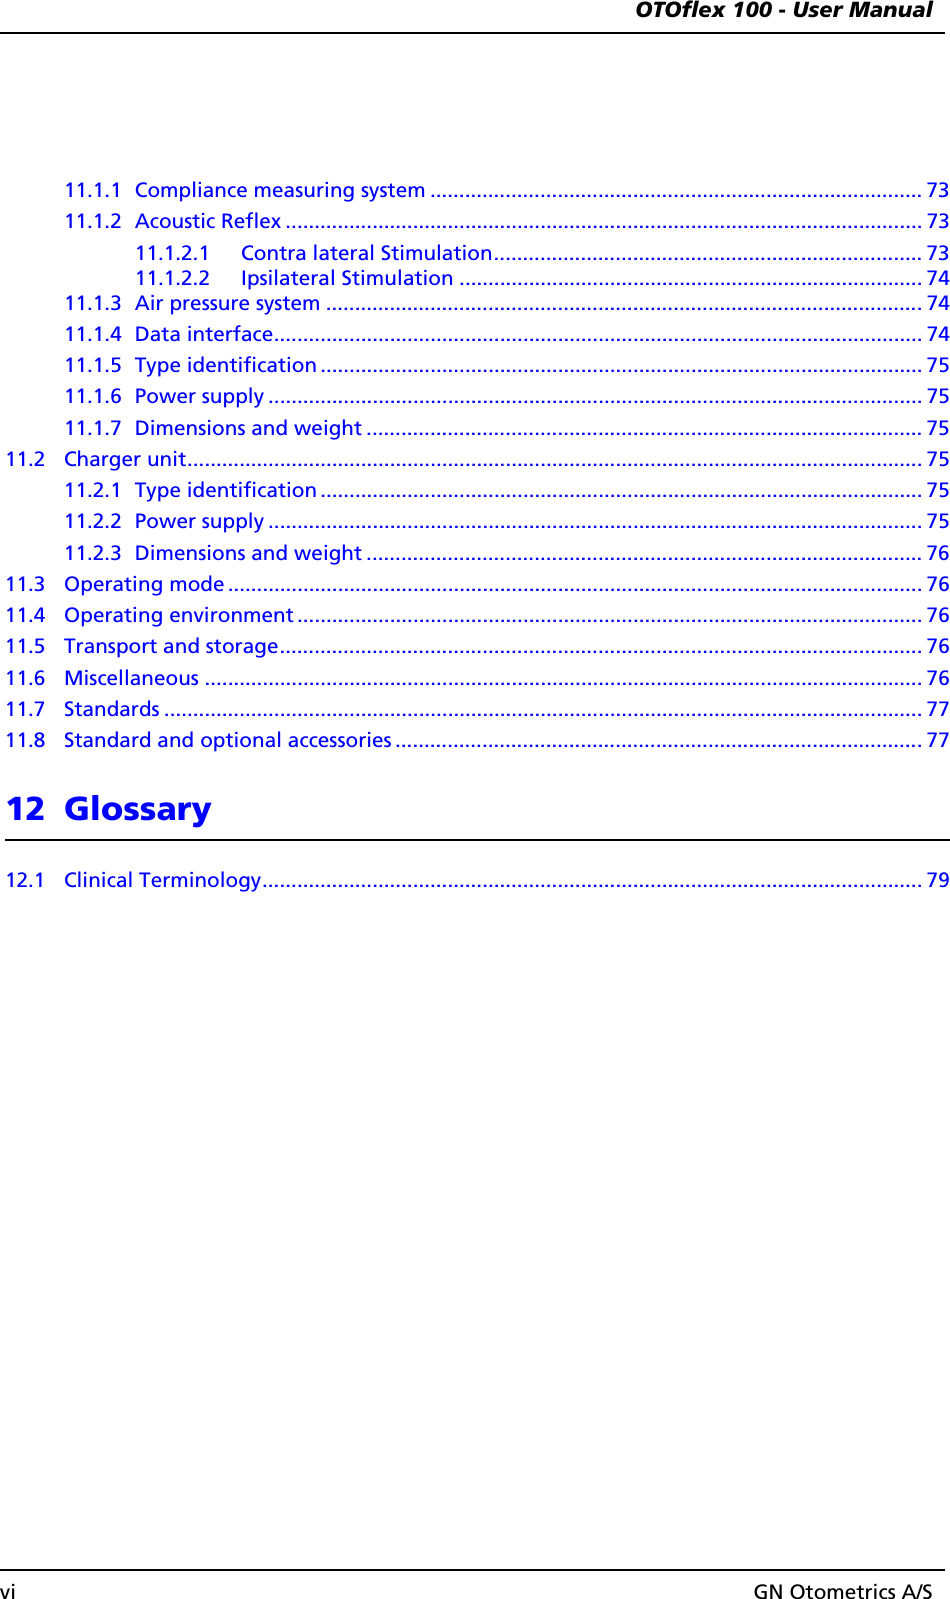


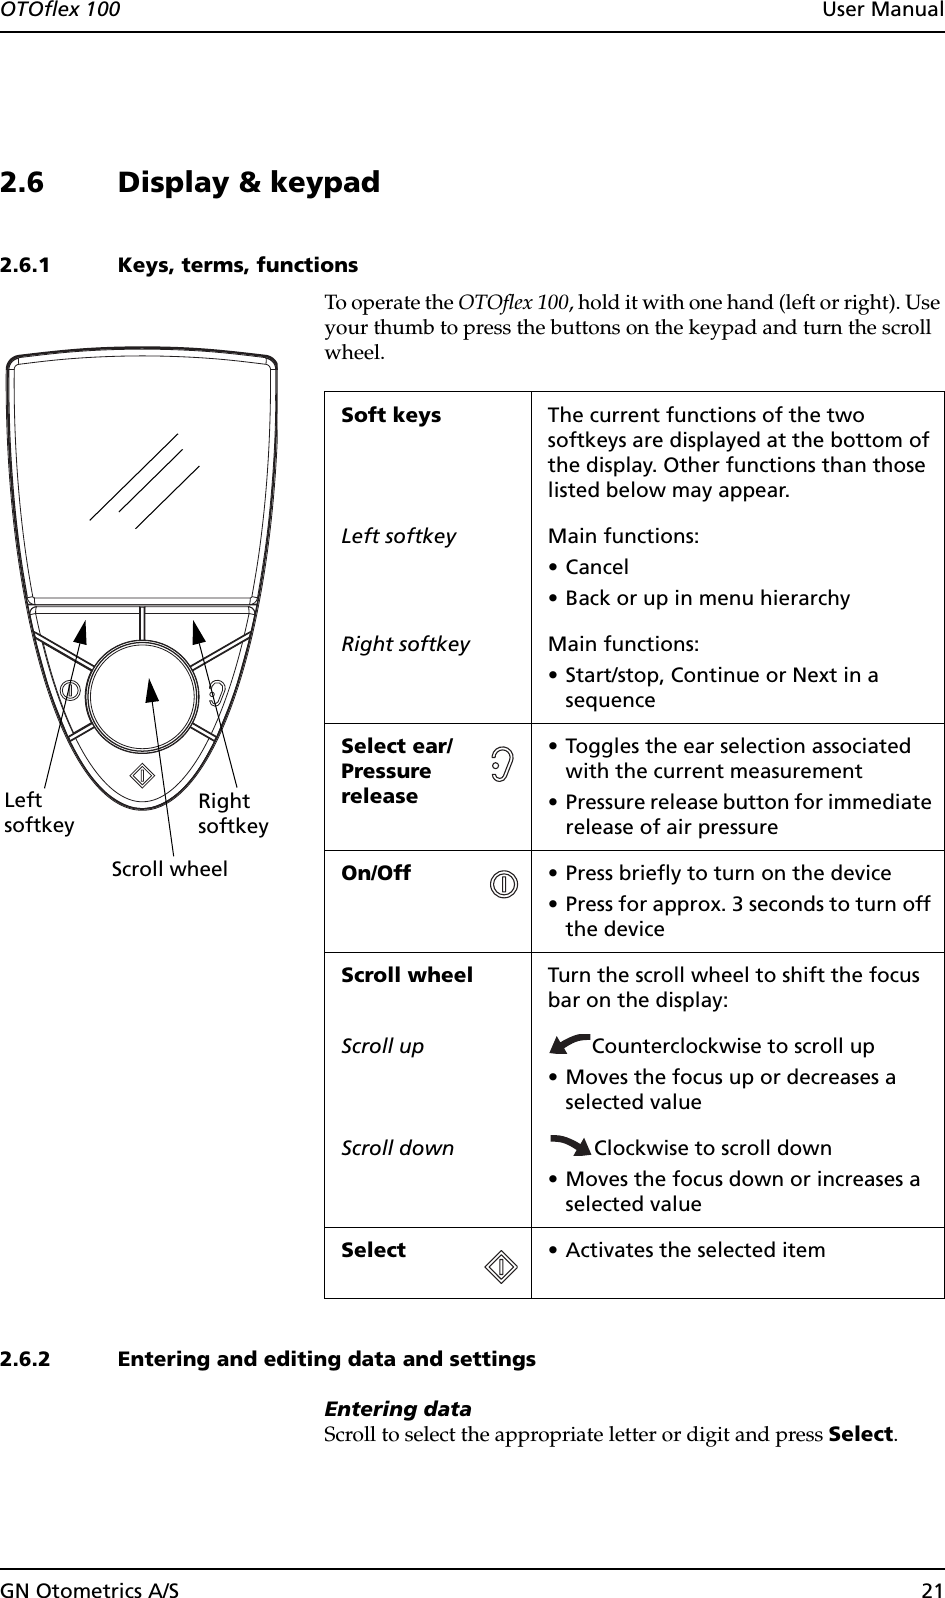

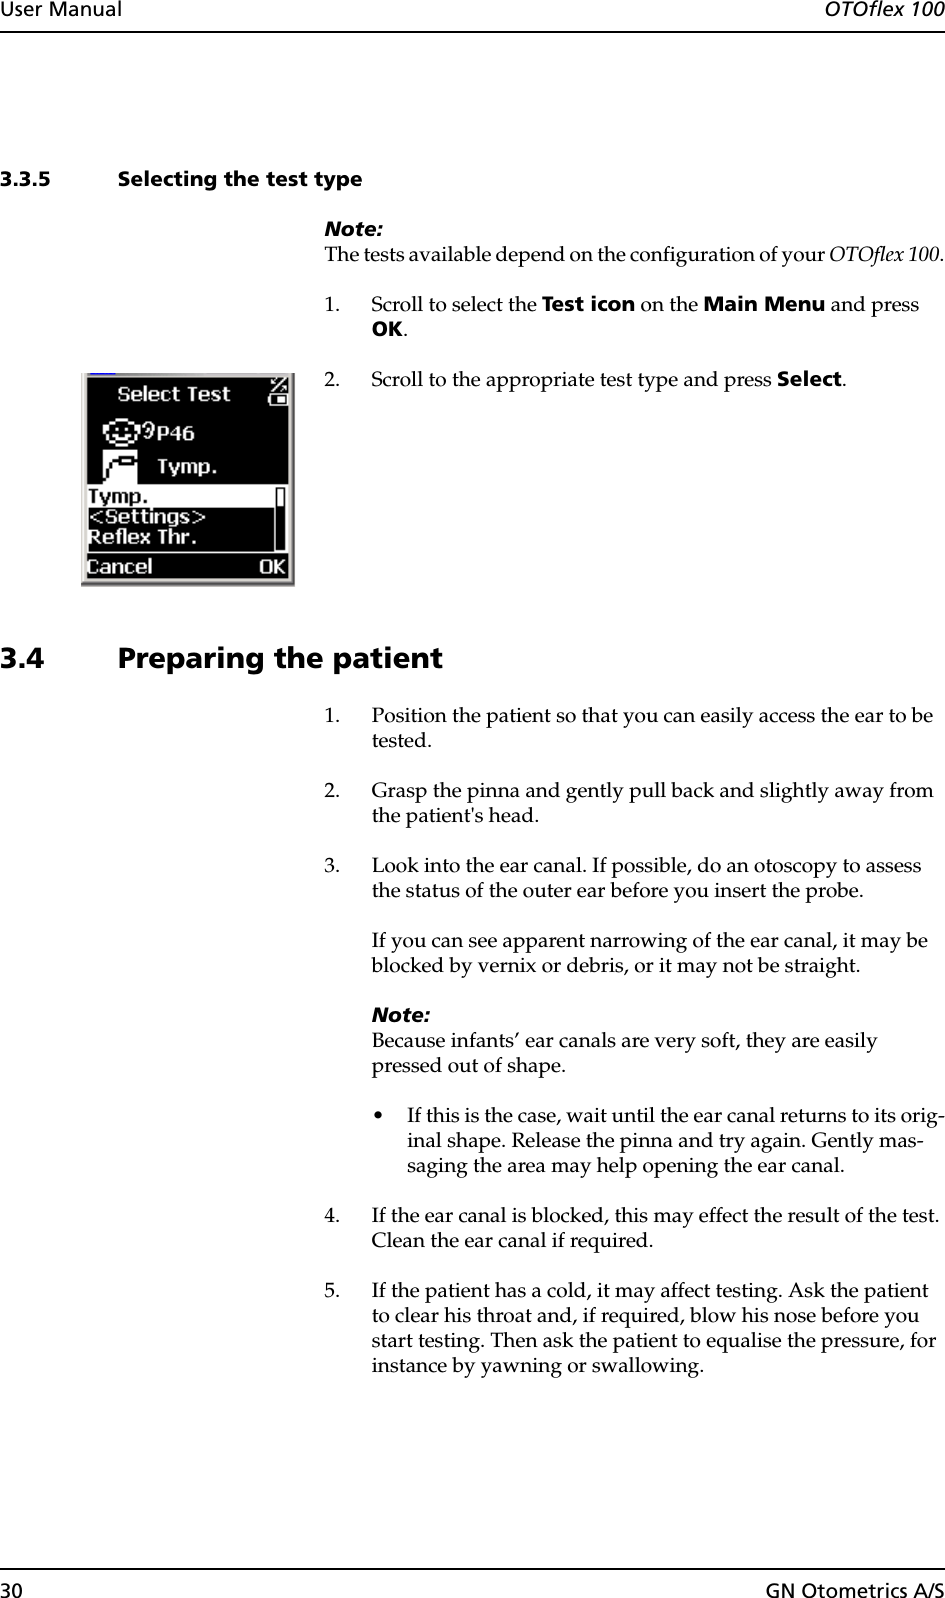
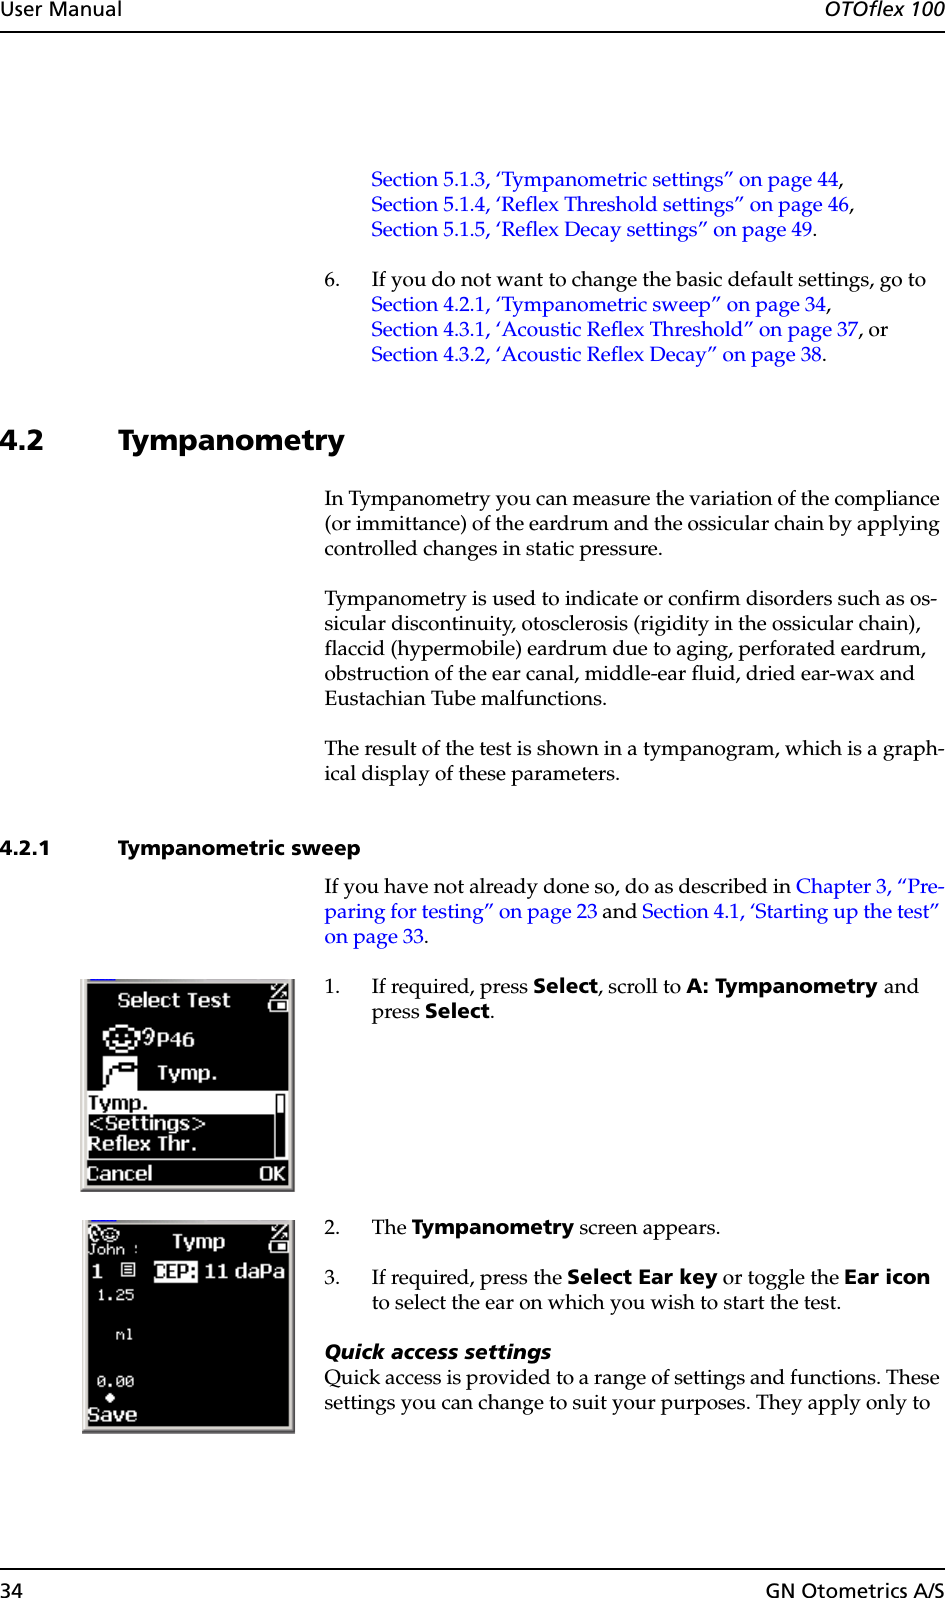
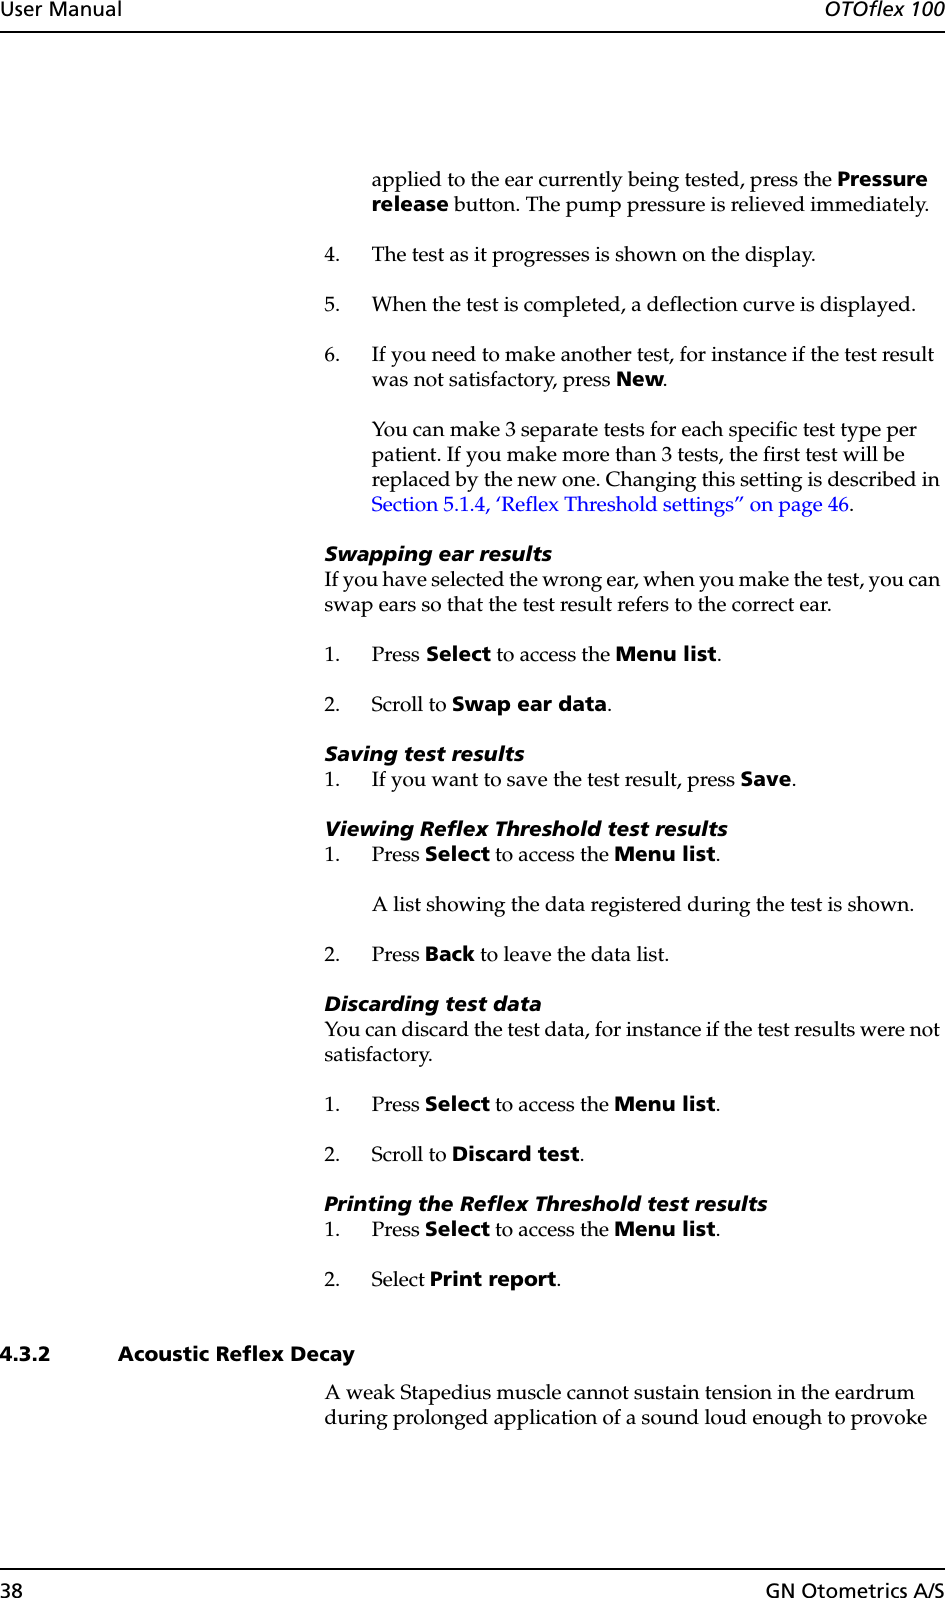
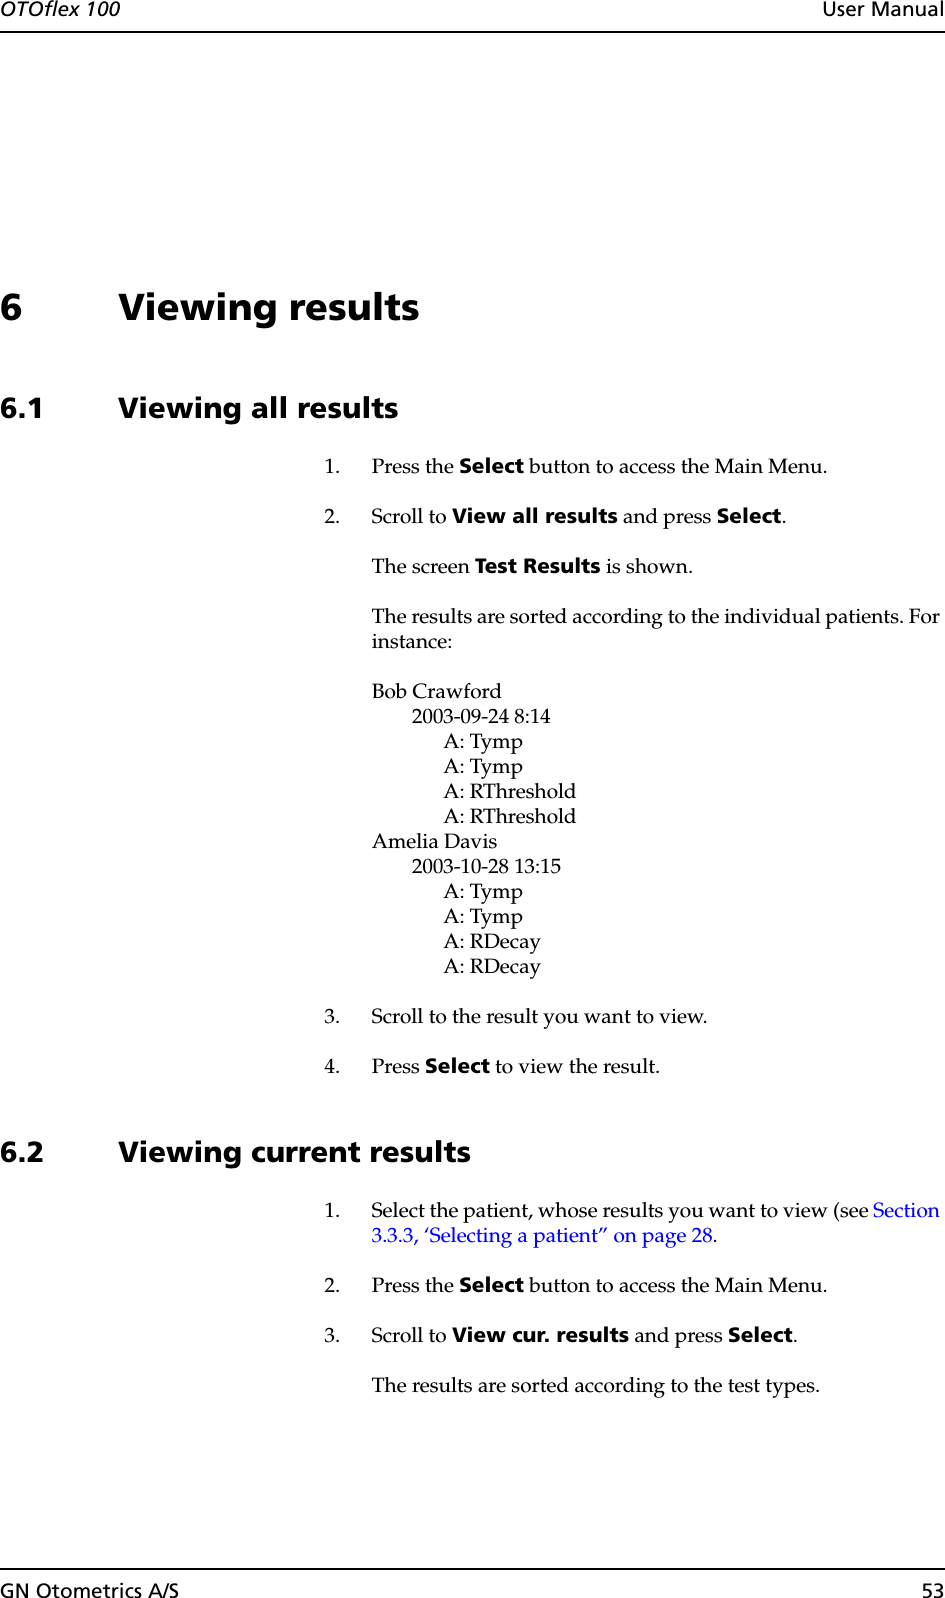
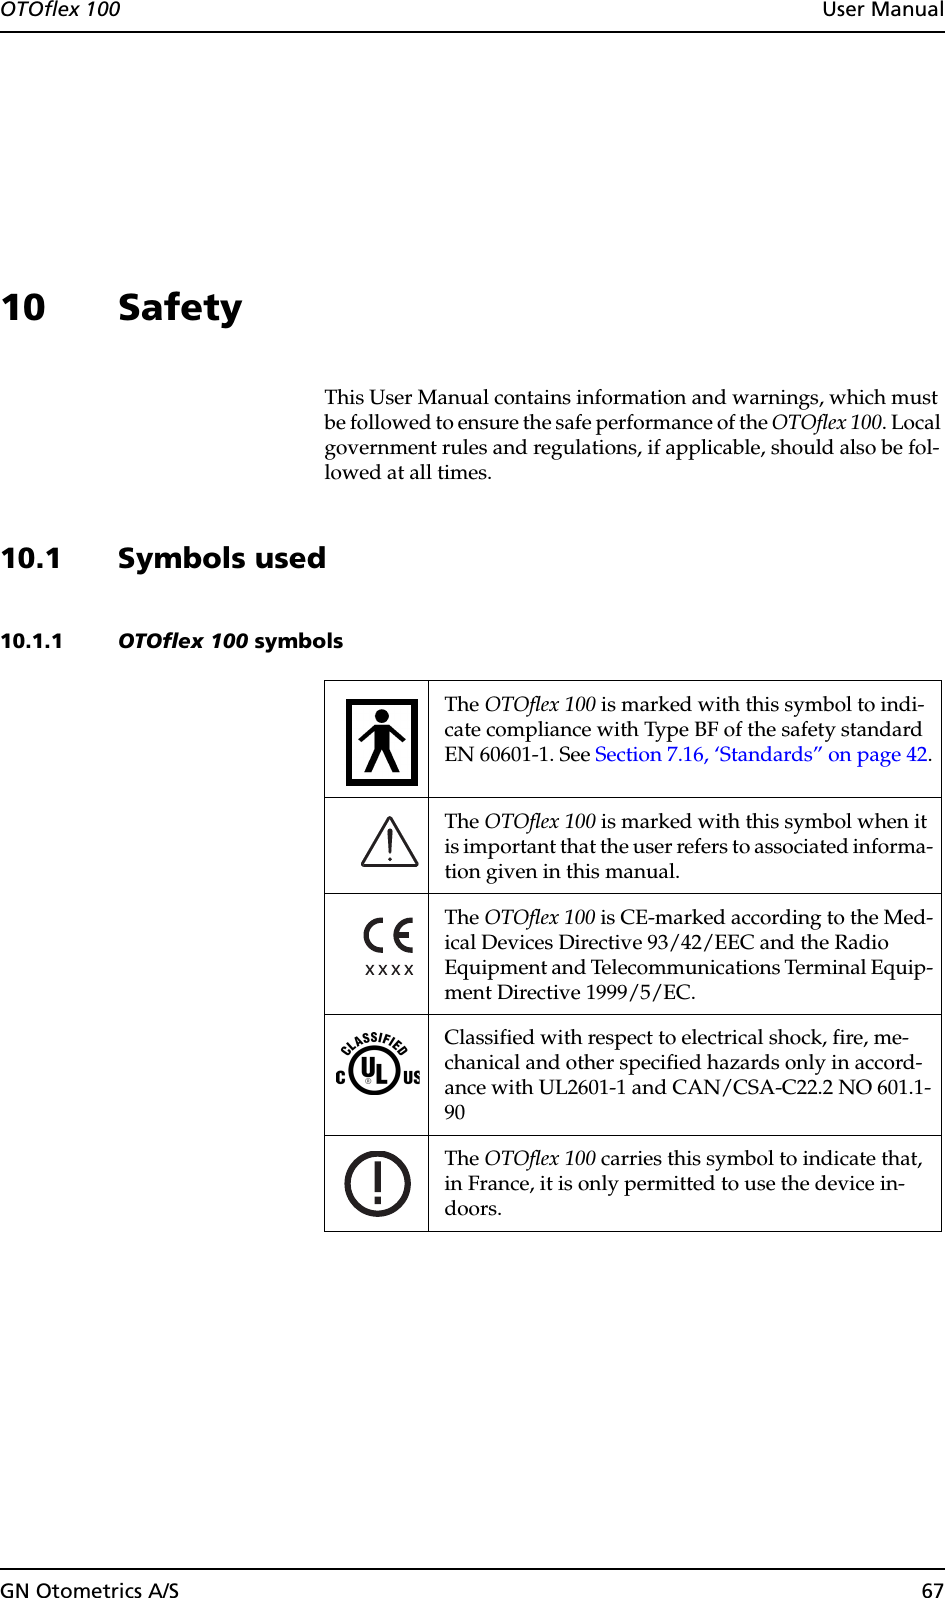
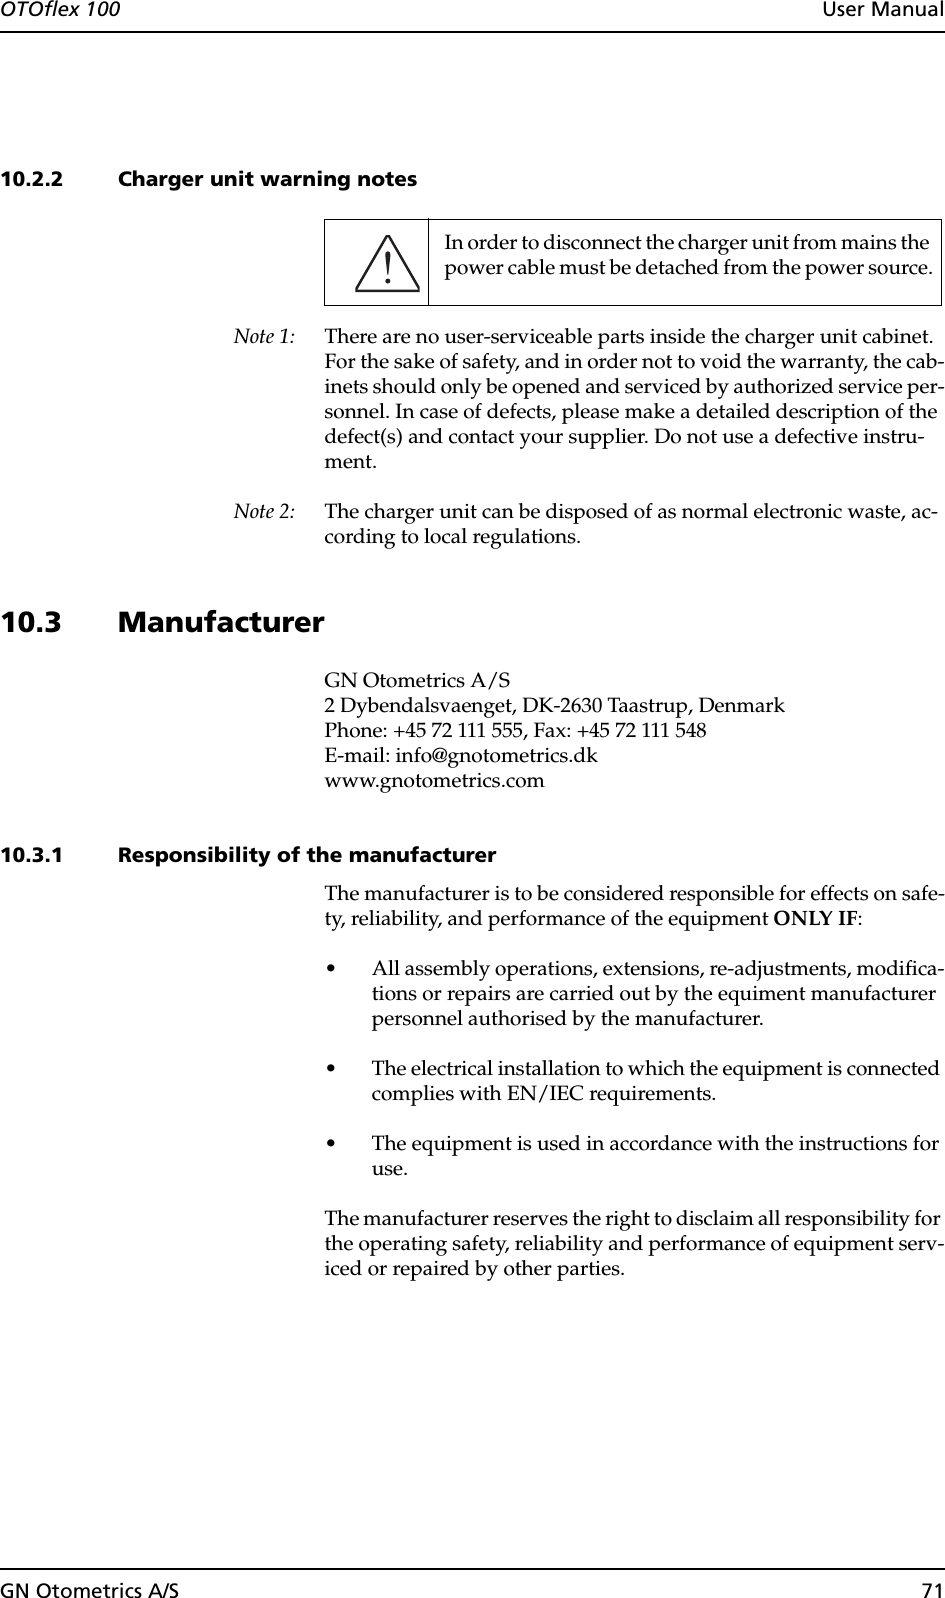
![OTOflex 100 User ManualGN Otometrics A/S 435 Setup5.1 Measurement settingsWhen you are going to do a test, and you have selected the specific test screen in the OTOflex 100, you can change a number of test spe-cific settings.These settings you can either download from the OtoDiagnostics Suite, or you can change them directly in the OTOflex 100.5.1.1 Changing measurement settingsTo change the settings directly in the OTOflex 100, select the appro-priate test screen and then select the Measurement Settings dialog box:1. Press Select, scroll to the appropriate test type and press Select again. The test screen is displayed.2. Press Select, scroll to Meas. settings, and press Select again. The test specific settings menu is shown.3. For a description of the test specific settings see:•Section 5.1.3, ‘Tympanometric settings” on page 44•Section 5.1.4, ‘Reflex Threshold settings” on page 46•Section 5.1.5, ‘Reflex Decay settings” on page 49The settings may be shown in abbreviated form. The actual wording is included in square brackets, as for instance in Pump dir[ection].4. Scroll to the setting you want to change.5. Press Select. The value is shown in a highlighted frame.6. Scroll to the desired value and press Select to select the set-ting. The new setting is now shown in a highlighted box.7. To save changes you have made to the settings, press Save.](https://usermanual.wiki/GN-Otometrics-A-S/1012/User-Guide-382797-Page-43.png)
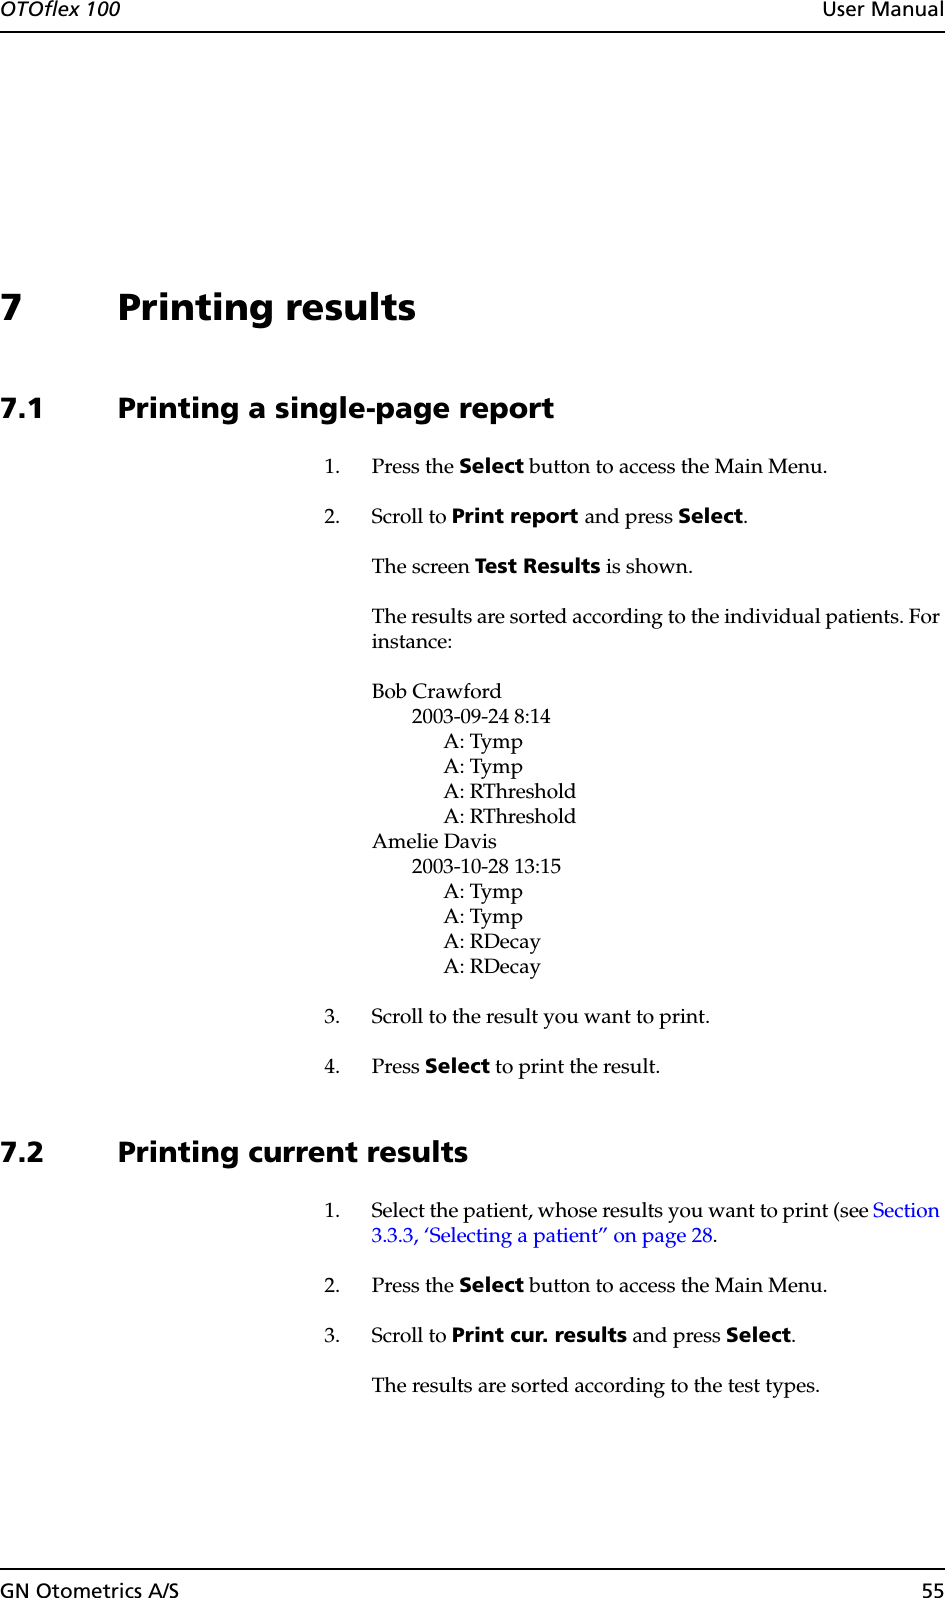
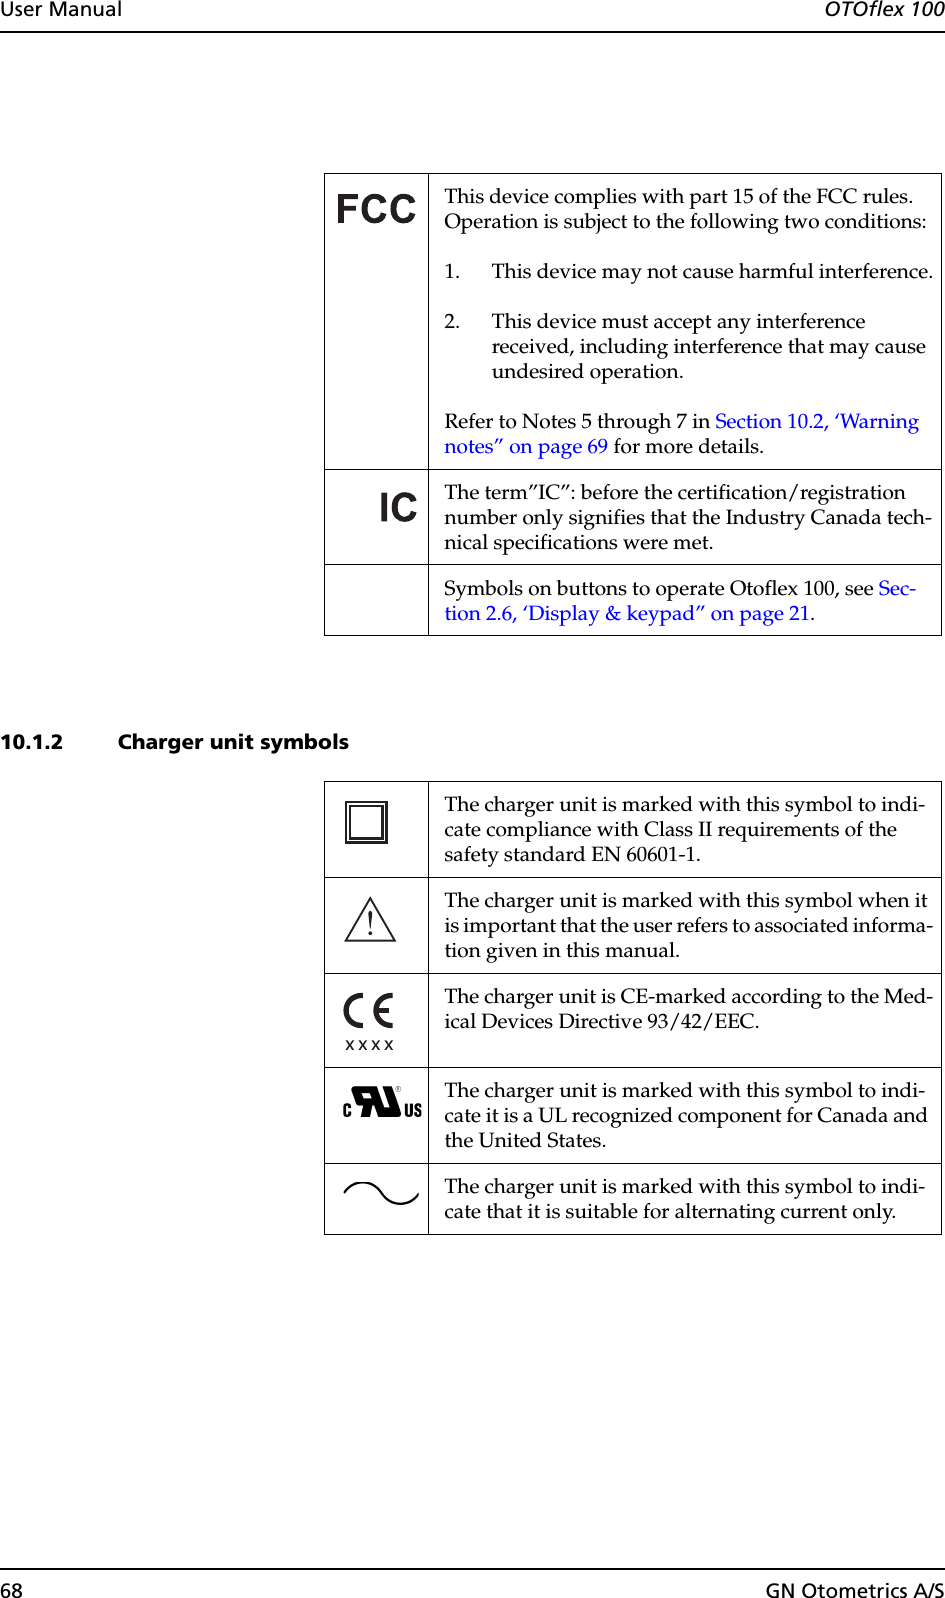
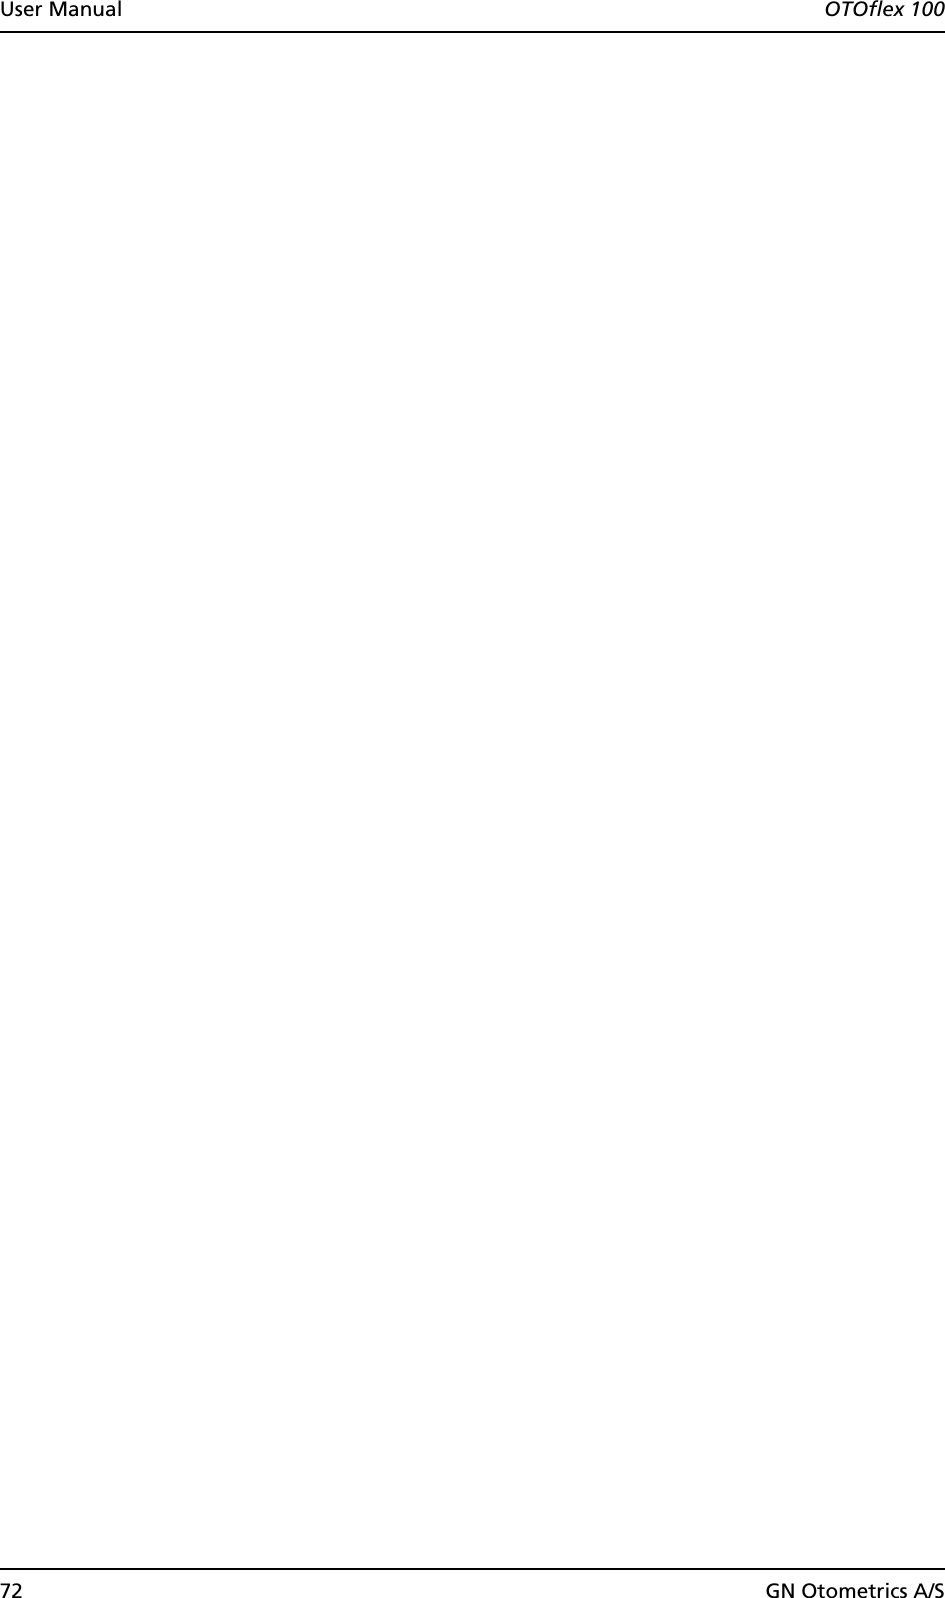
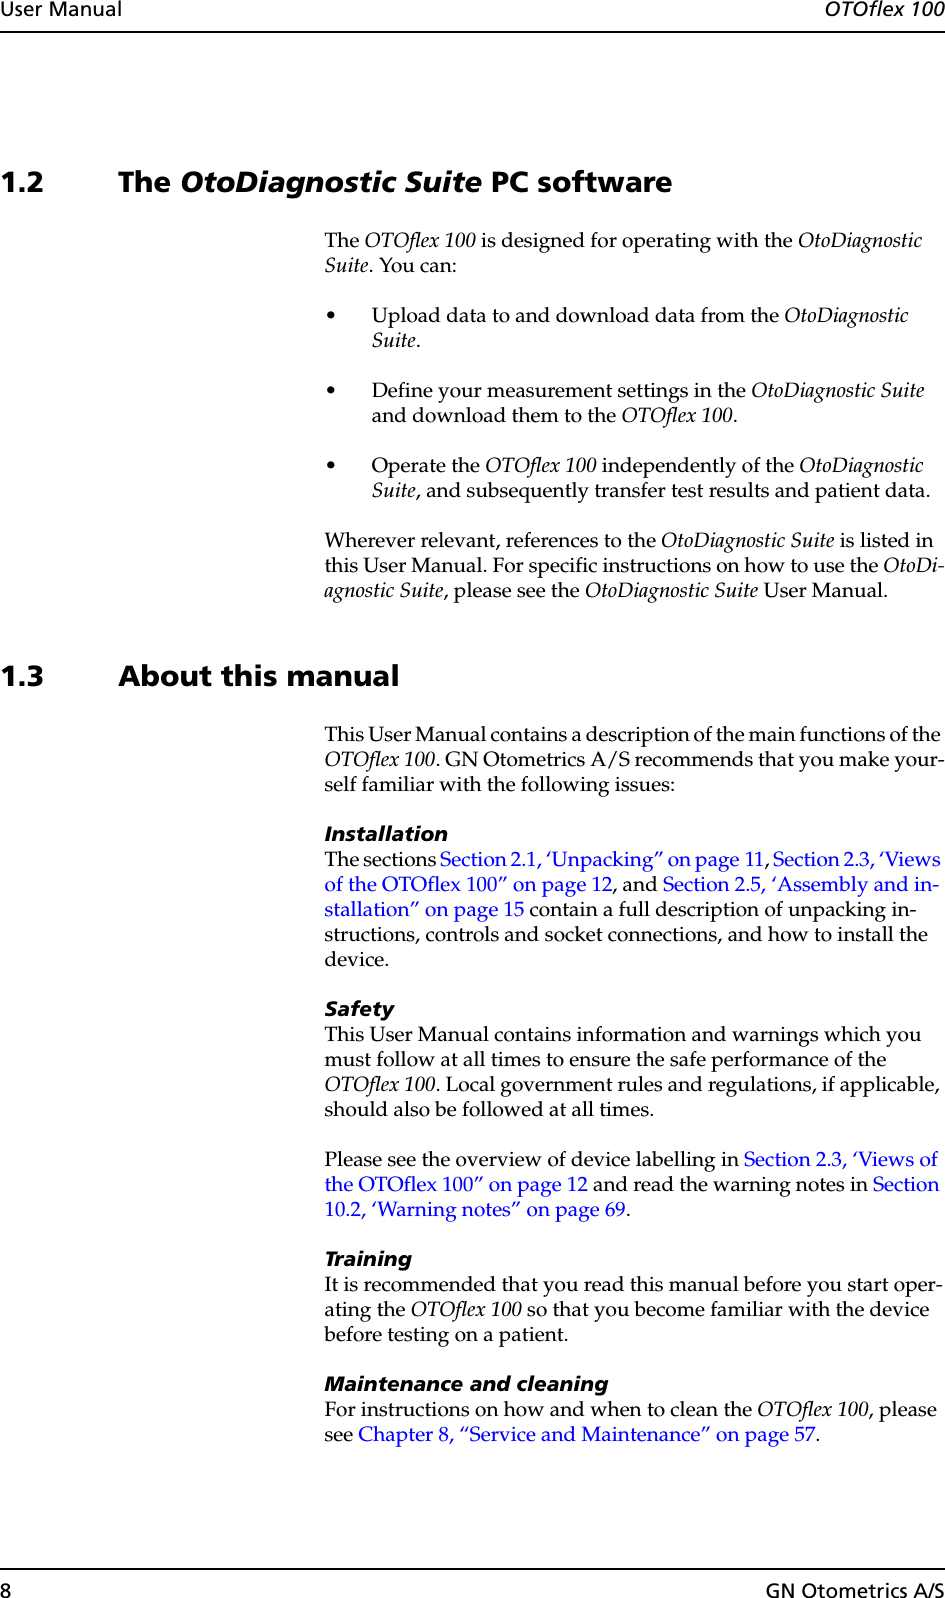
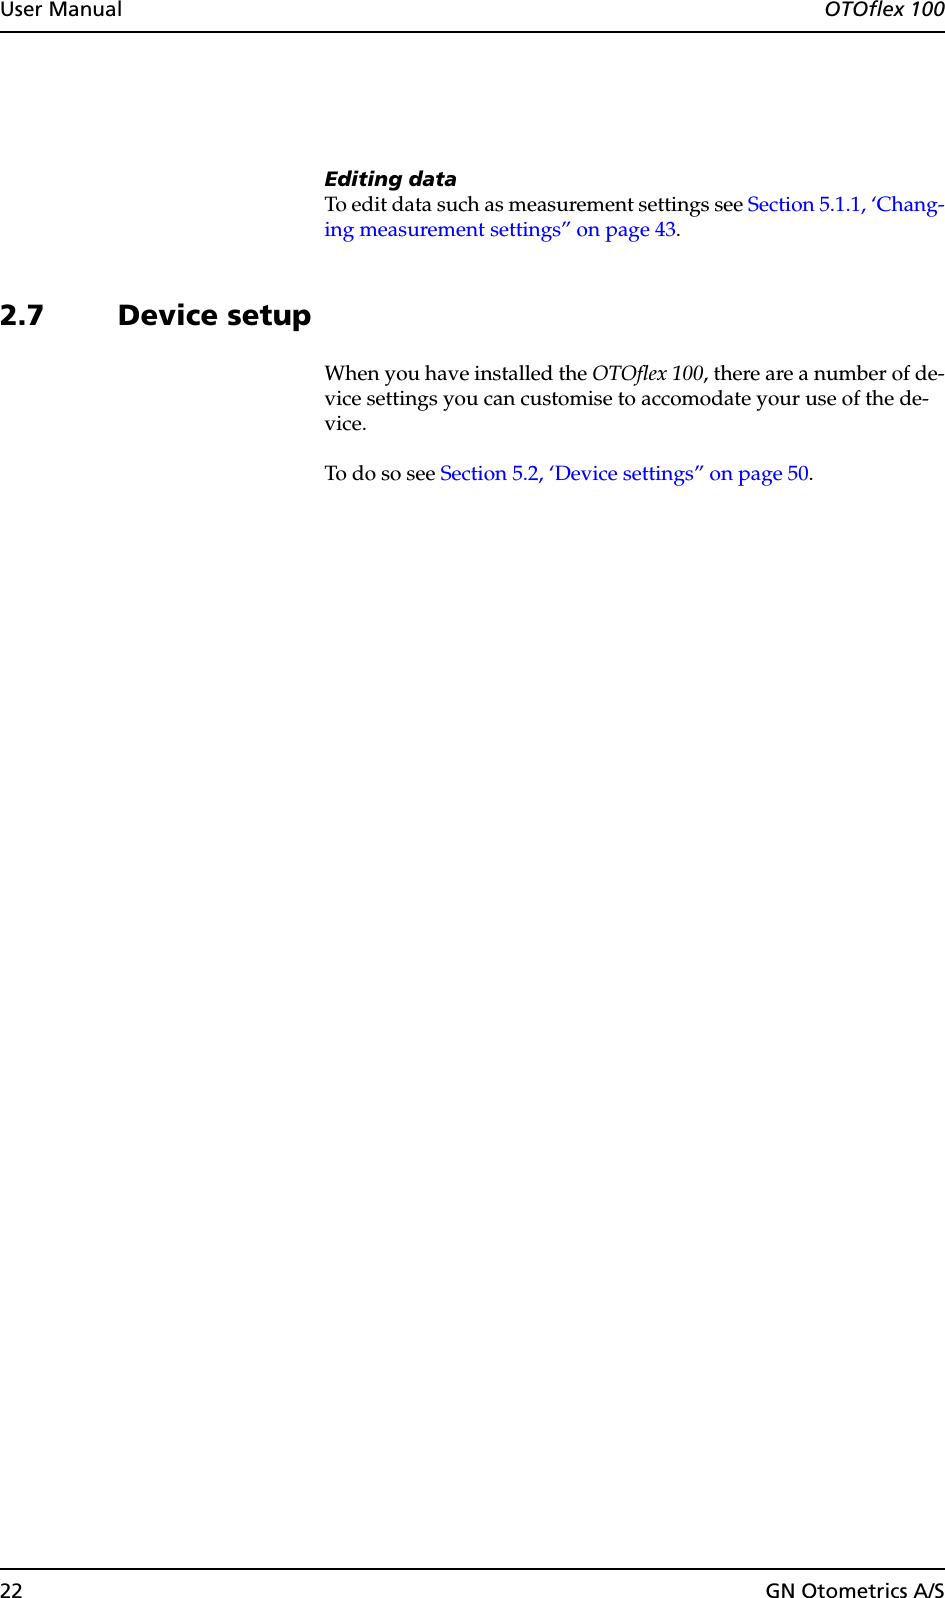
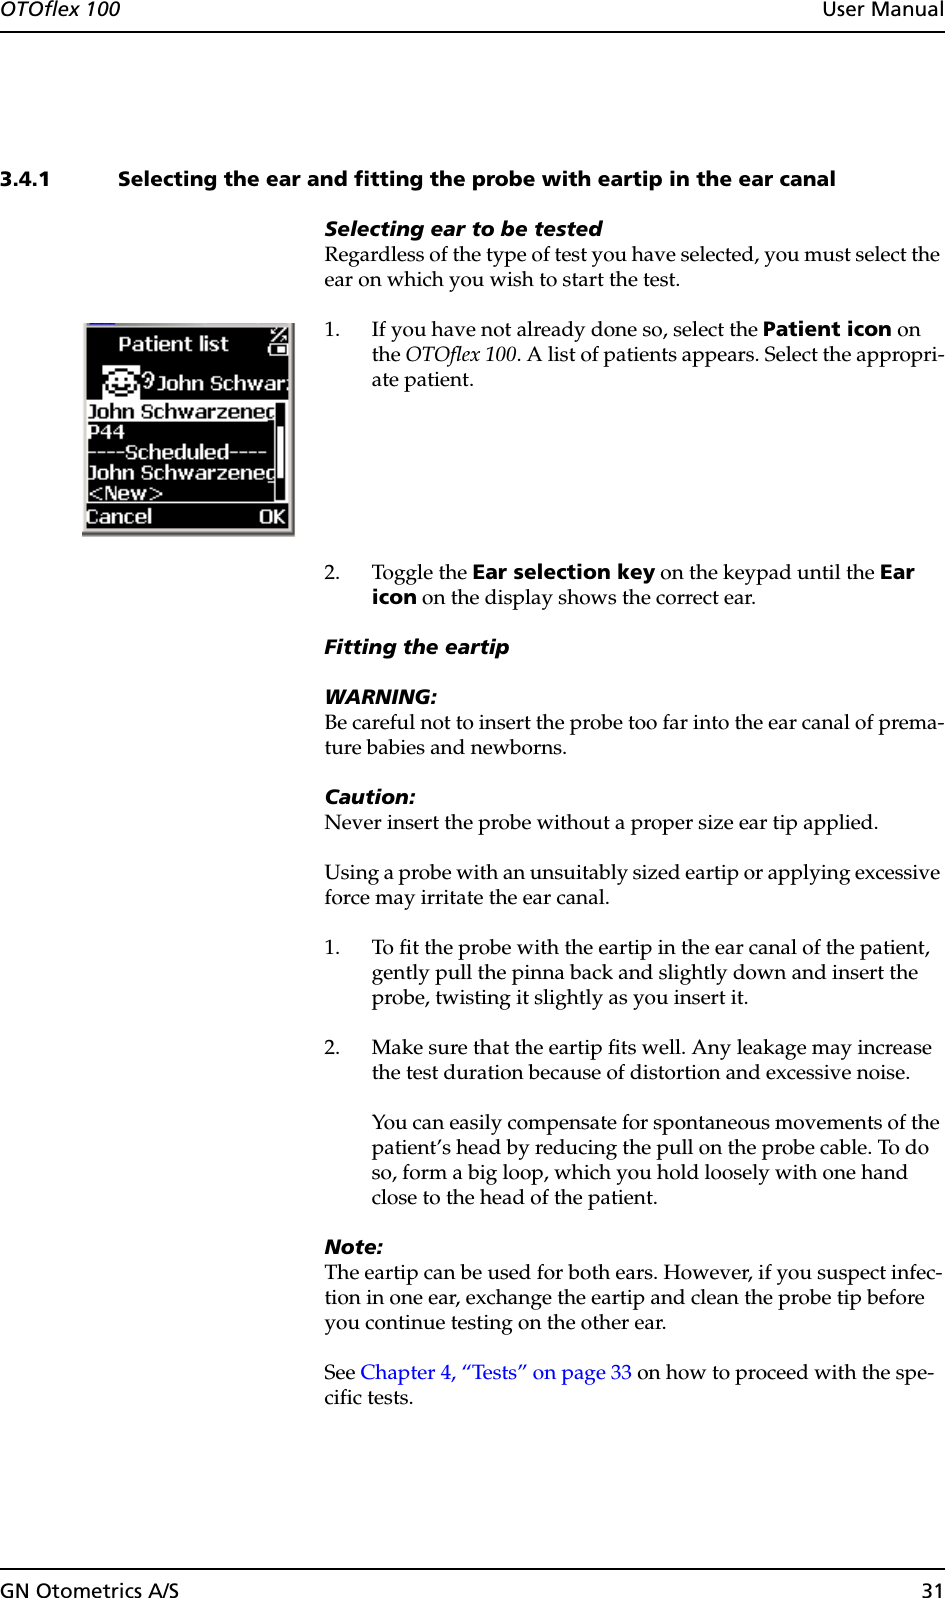
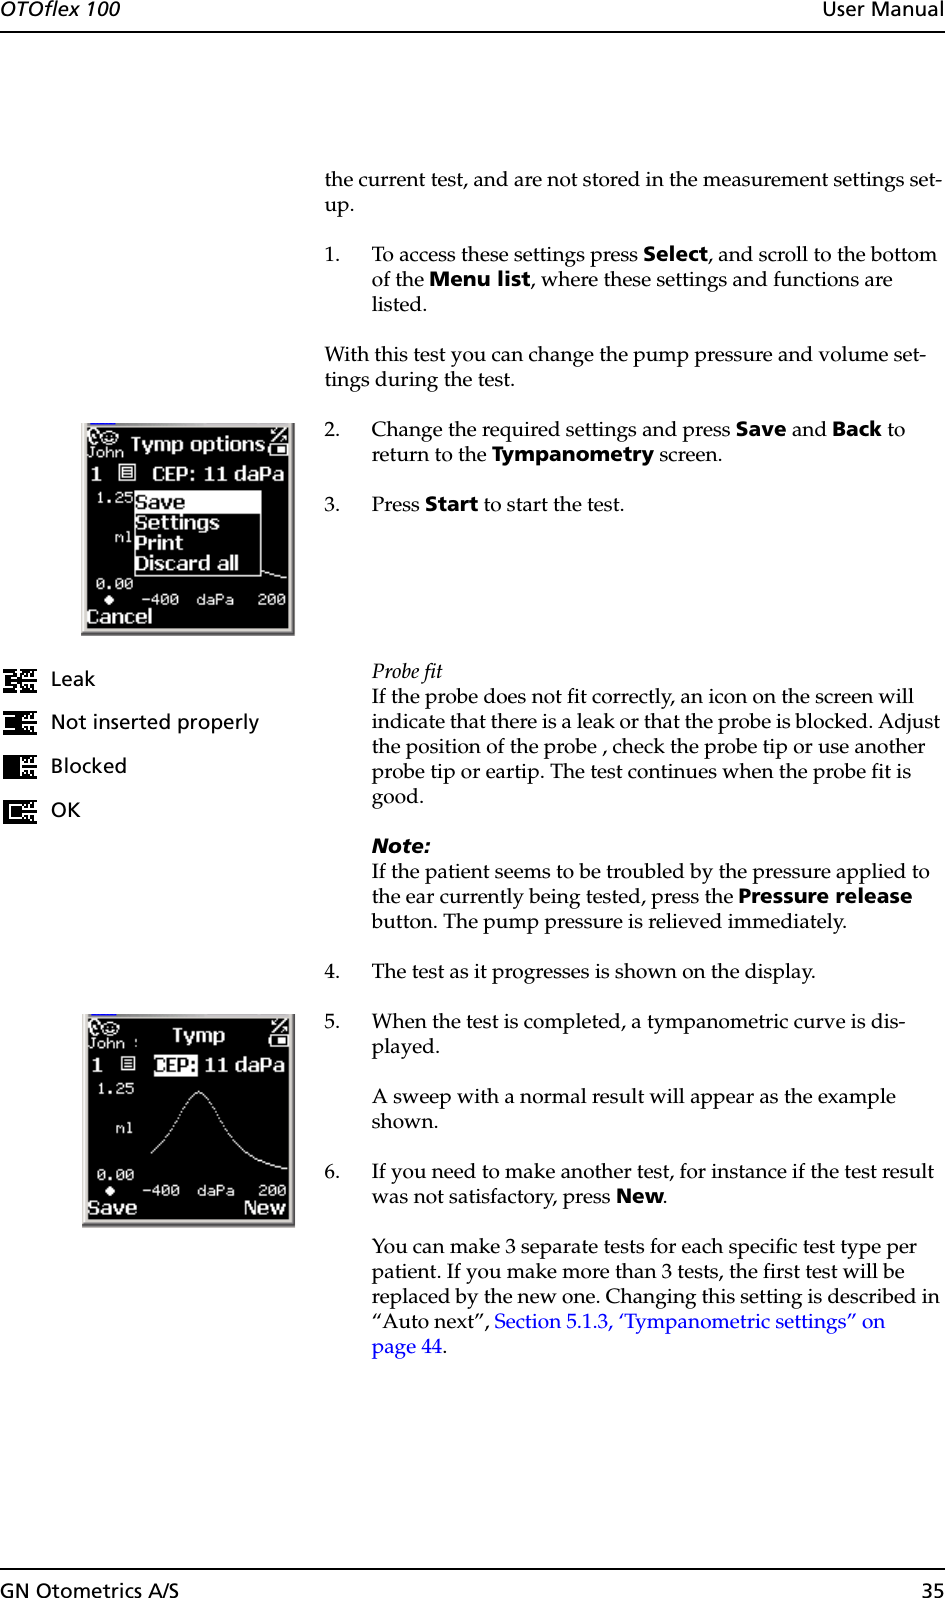
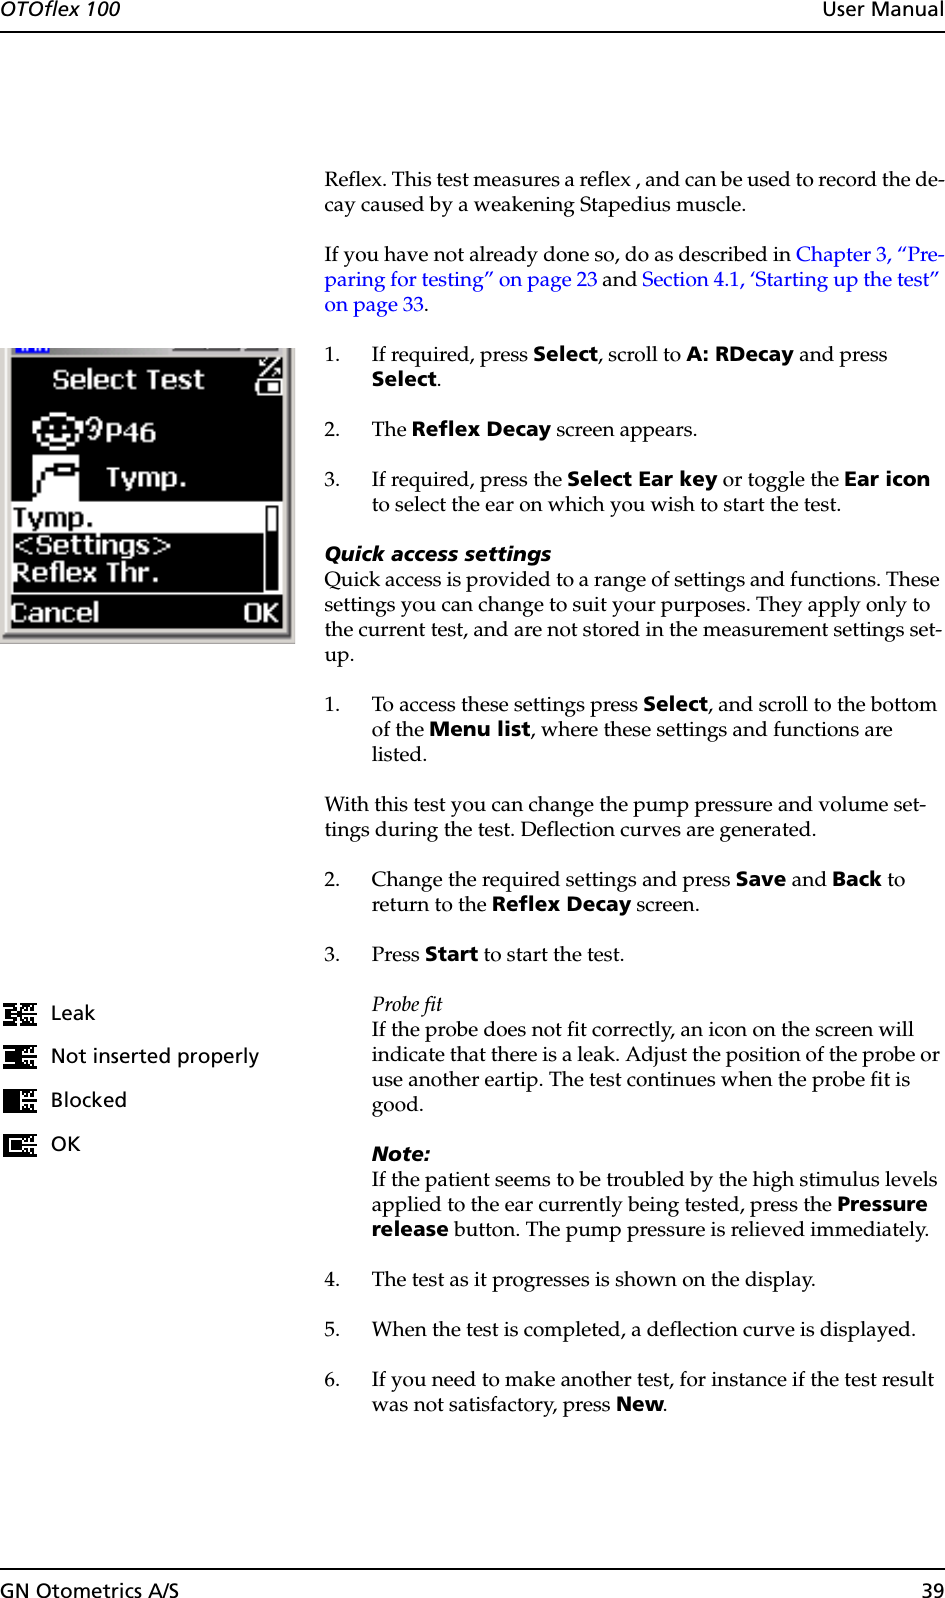
![44 GN Otometrics A/SUser Manual OTOflex 1005.1.2 Uploading measurement settings to the OtoDiagnostics Suite1. Press Select.2. Scroll to Upload data, and press Select again. The test spe-cific settings menu is shown.5.1.3 Tympanometric settingsProbe tone Default: 226 HzIf you select 226 Hz, you can set admittance to be shown in mmho or in ml in the field Y unit listed below.If you select frequencies other than 226 Hz, admittance is shown only in mmho. The value in Y unit below automatically changes to mmho.• 226 Hz• 1000 HzRecommended for testing on infants younger than 4-6 months.Press rng [Pressure range] Default: Norm•Norm+200 to -400 daPa•Ext.+400 to -600 daPaLeak det[ection] Default: OnPump dir[ection] Default: Neg(ative)Pump speed Default: 400 daPa/s• 50, 100, 200, 400 daPa• AFAP (As Fast As Possible)500 daPa/s, reduces the speed at peak to 400 daPa/s.AFAP is particularly suited for screening with screening ear-tips, and if you suspect difficulty in maintaining seal, for instance in patients that are difficult to test, such as infants.Start press[ure] Default: 200 daPa](https://usermanual.wiki/GN-Otometrics-A-S/1012/User-Guide-382797-Page-44.png)

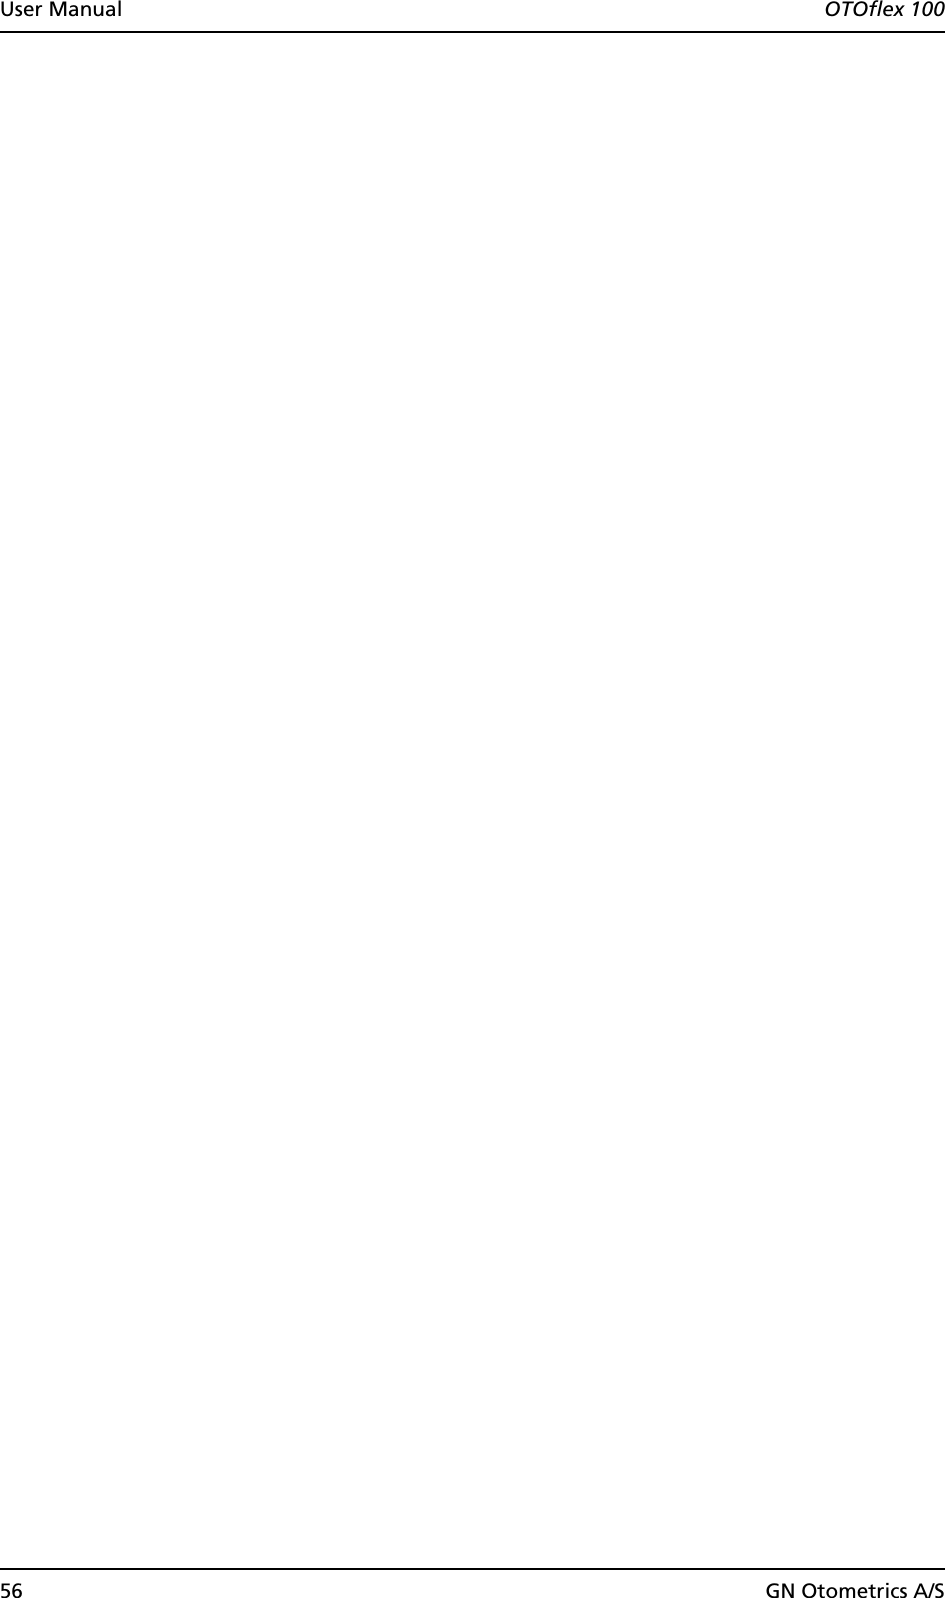
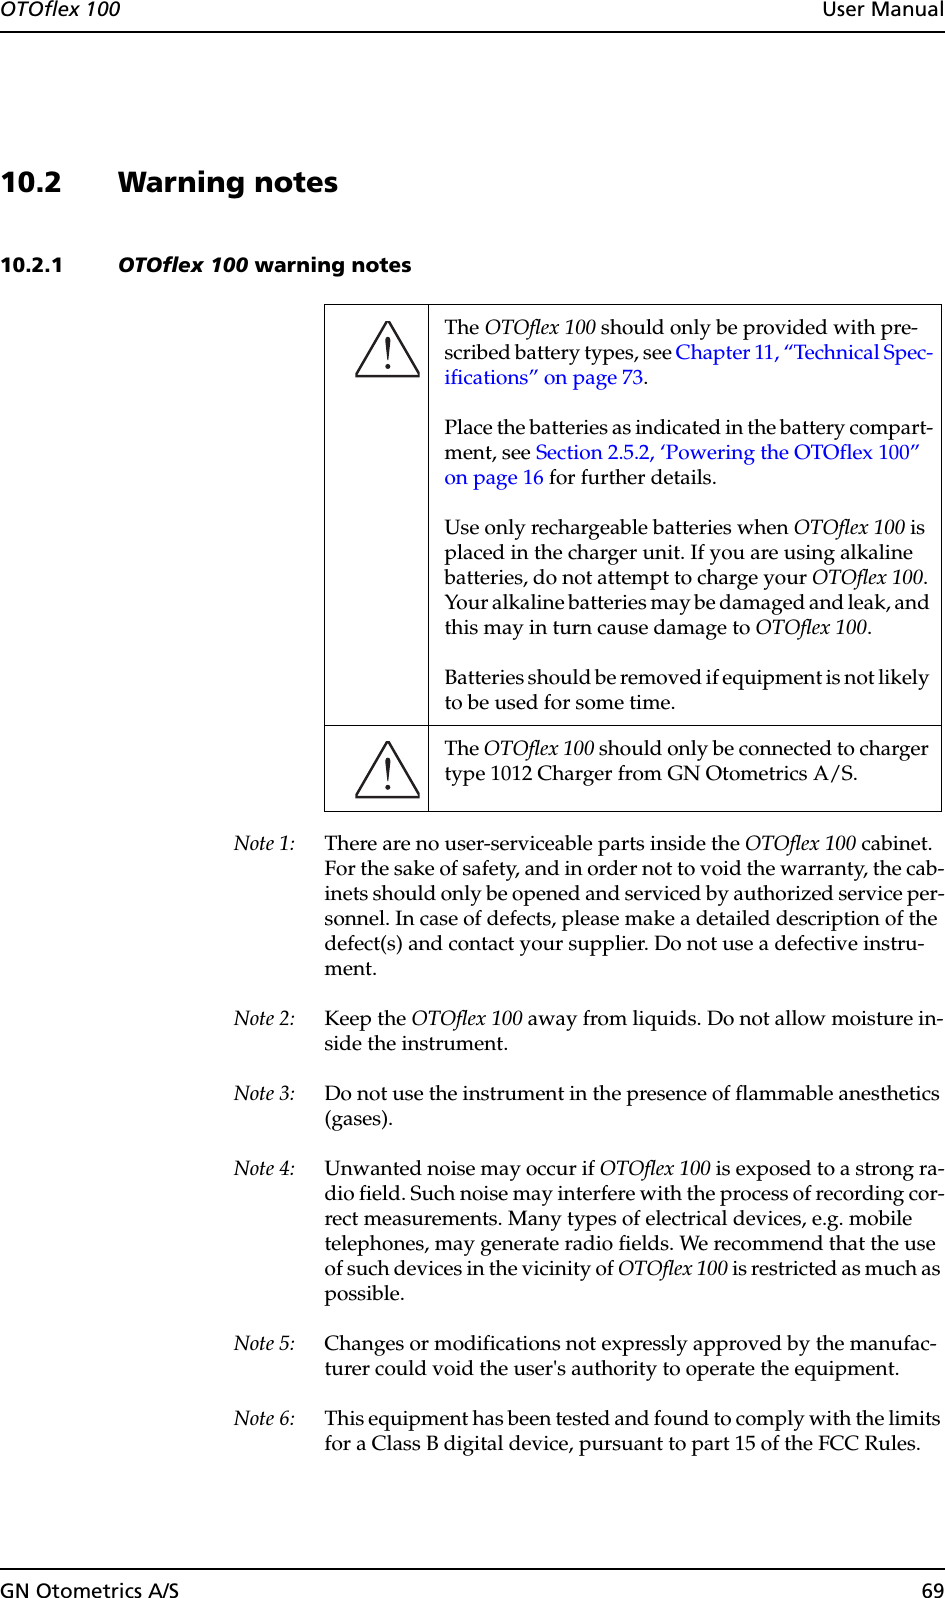
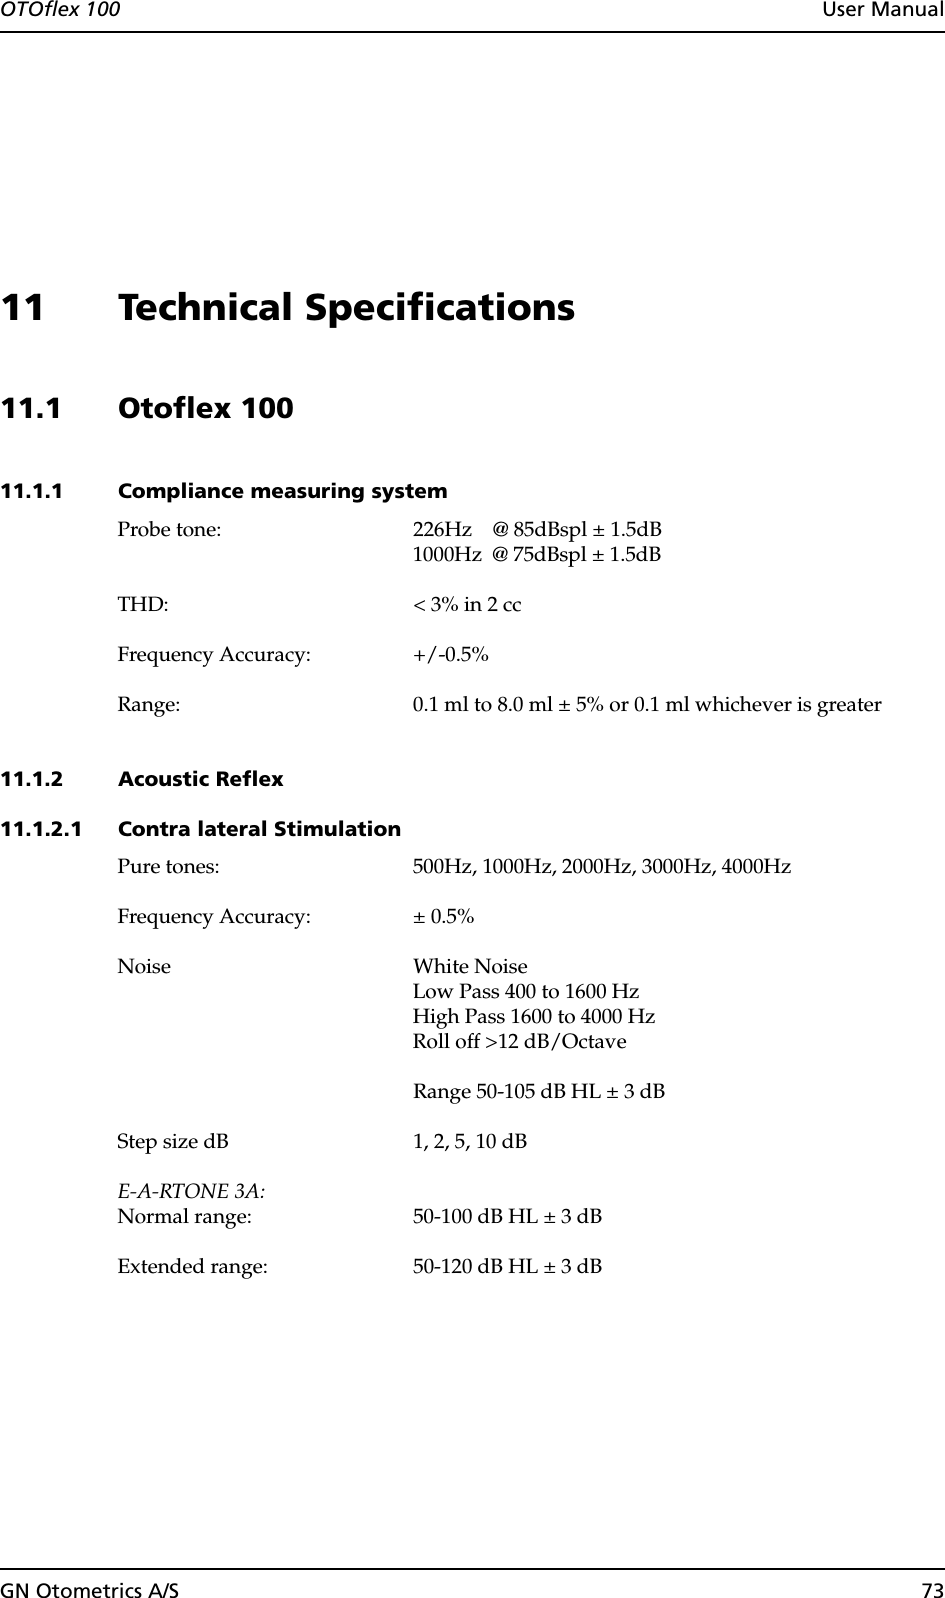
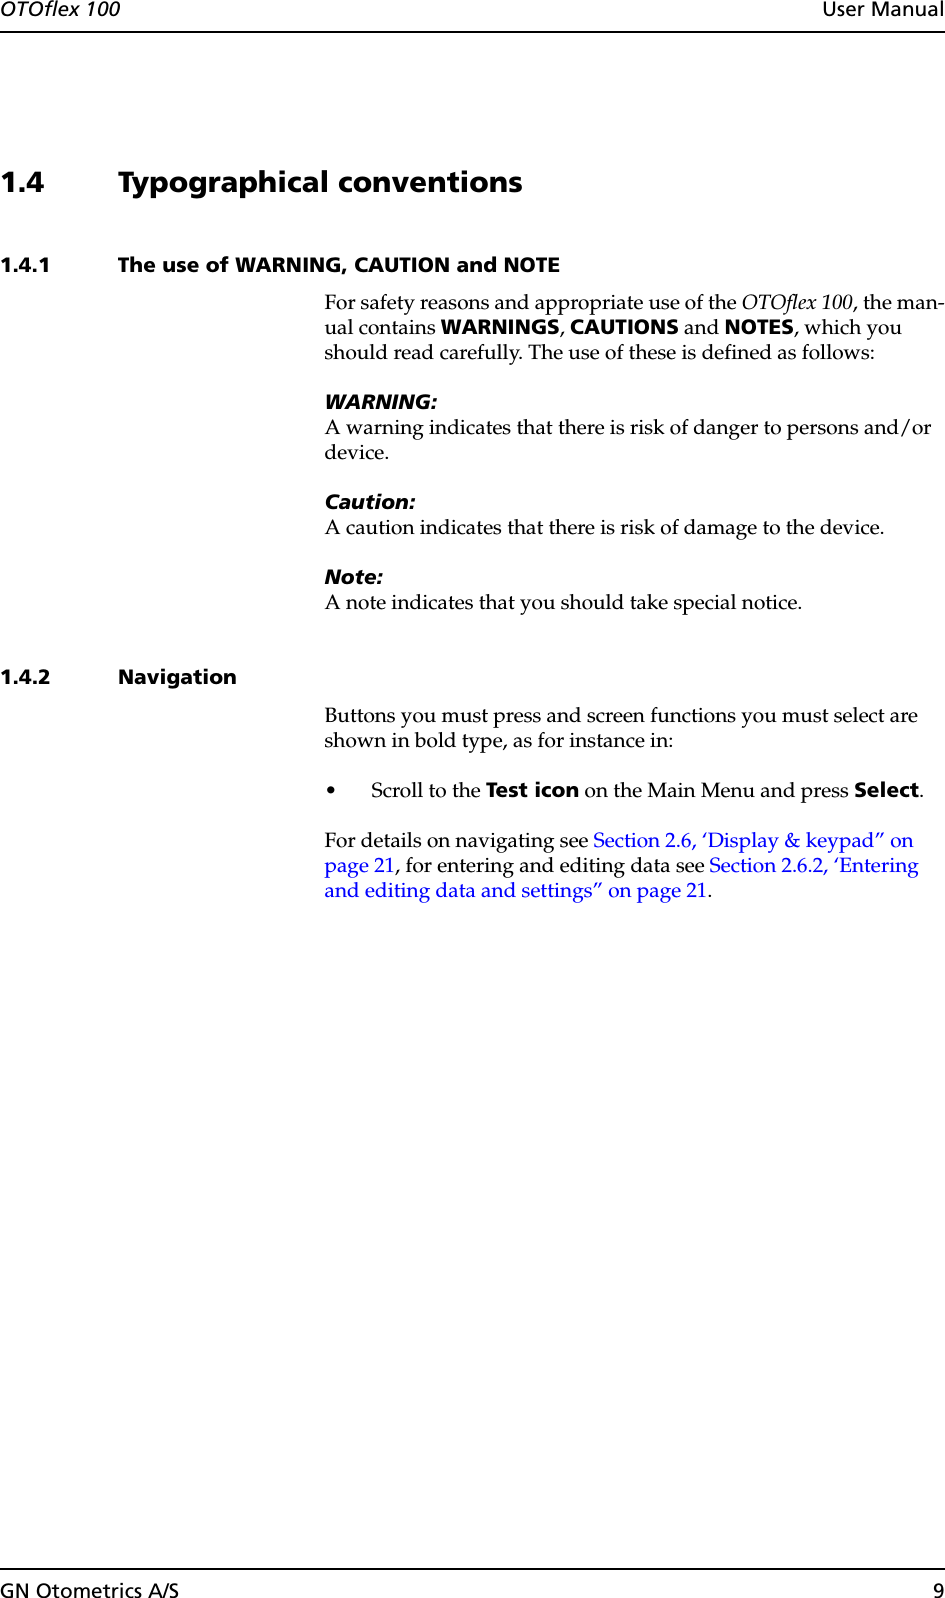
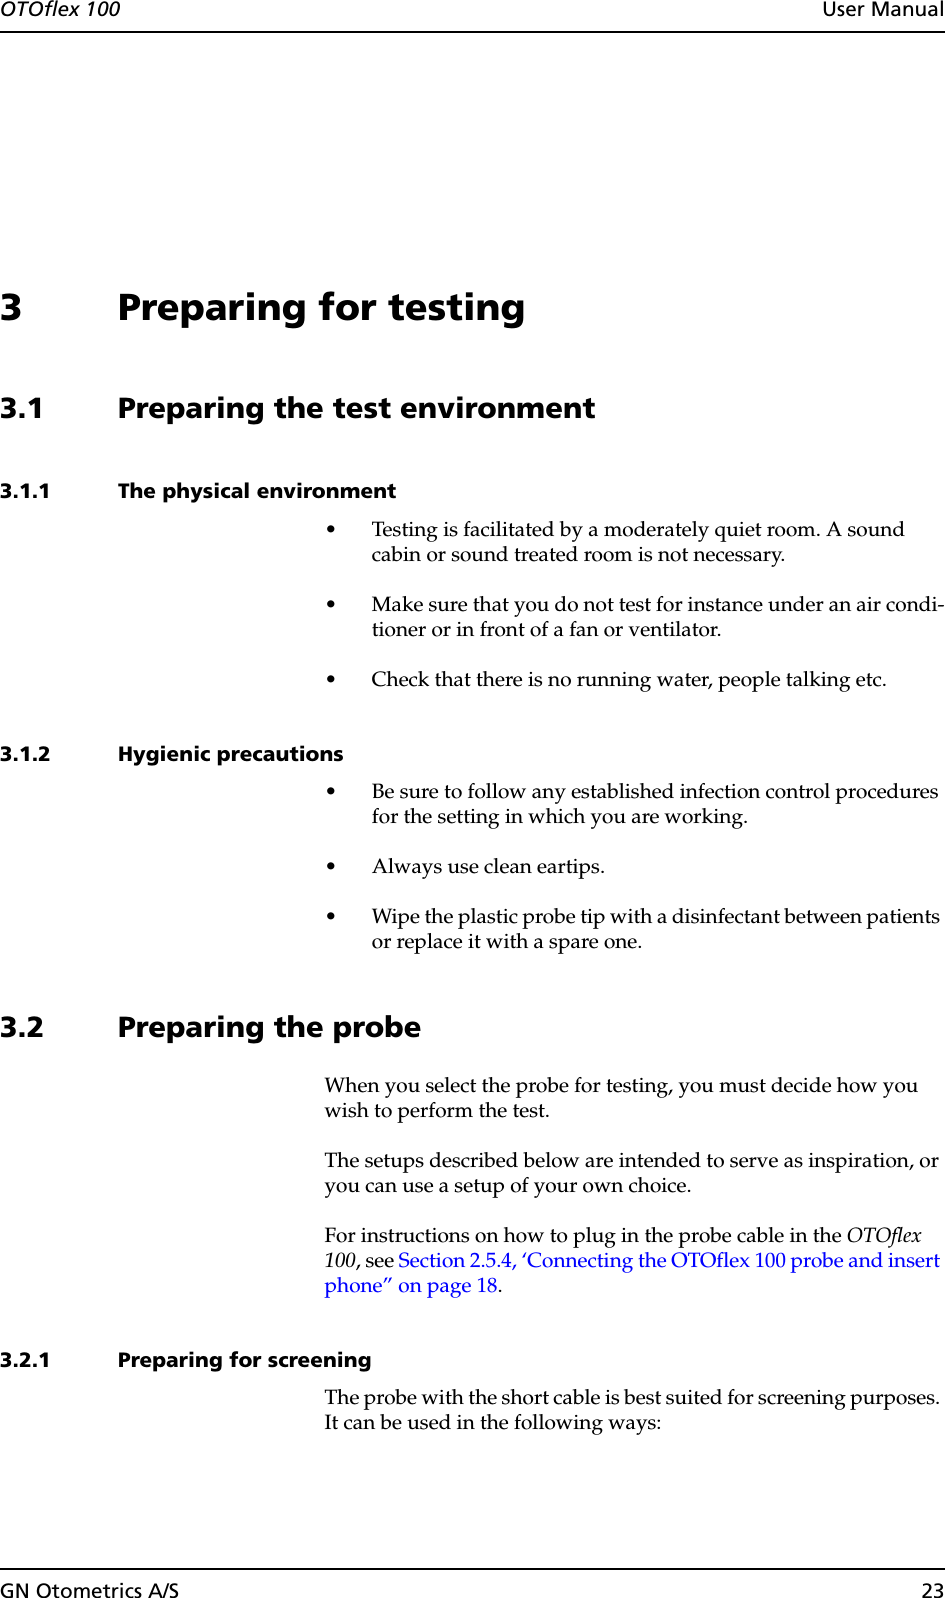
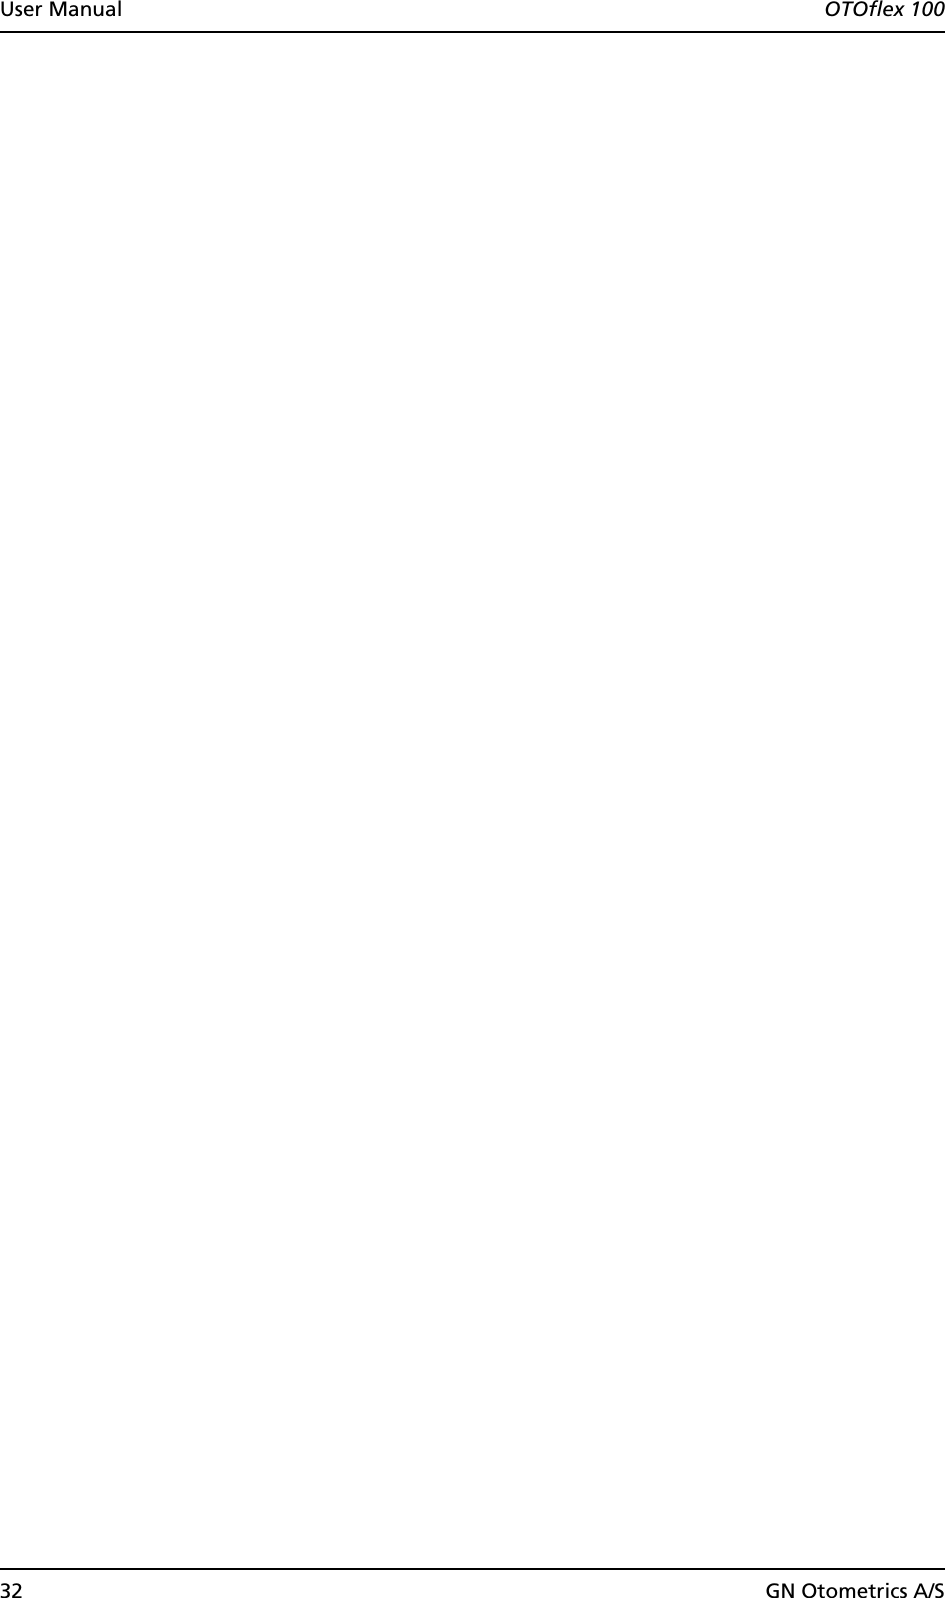
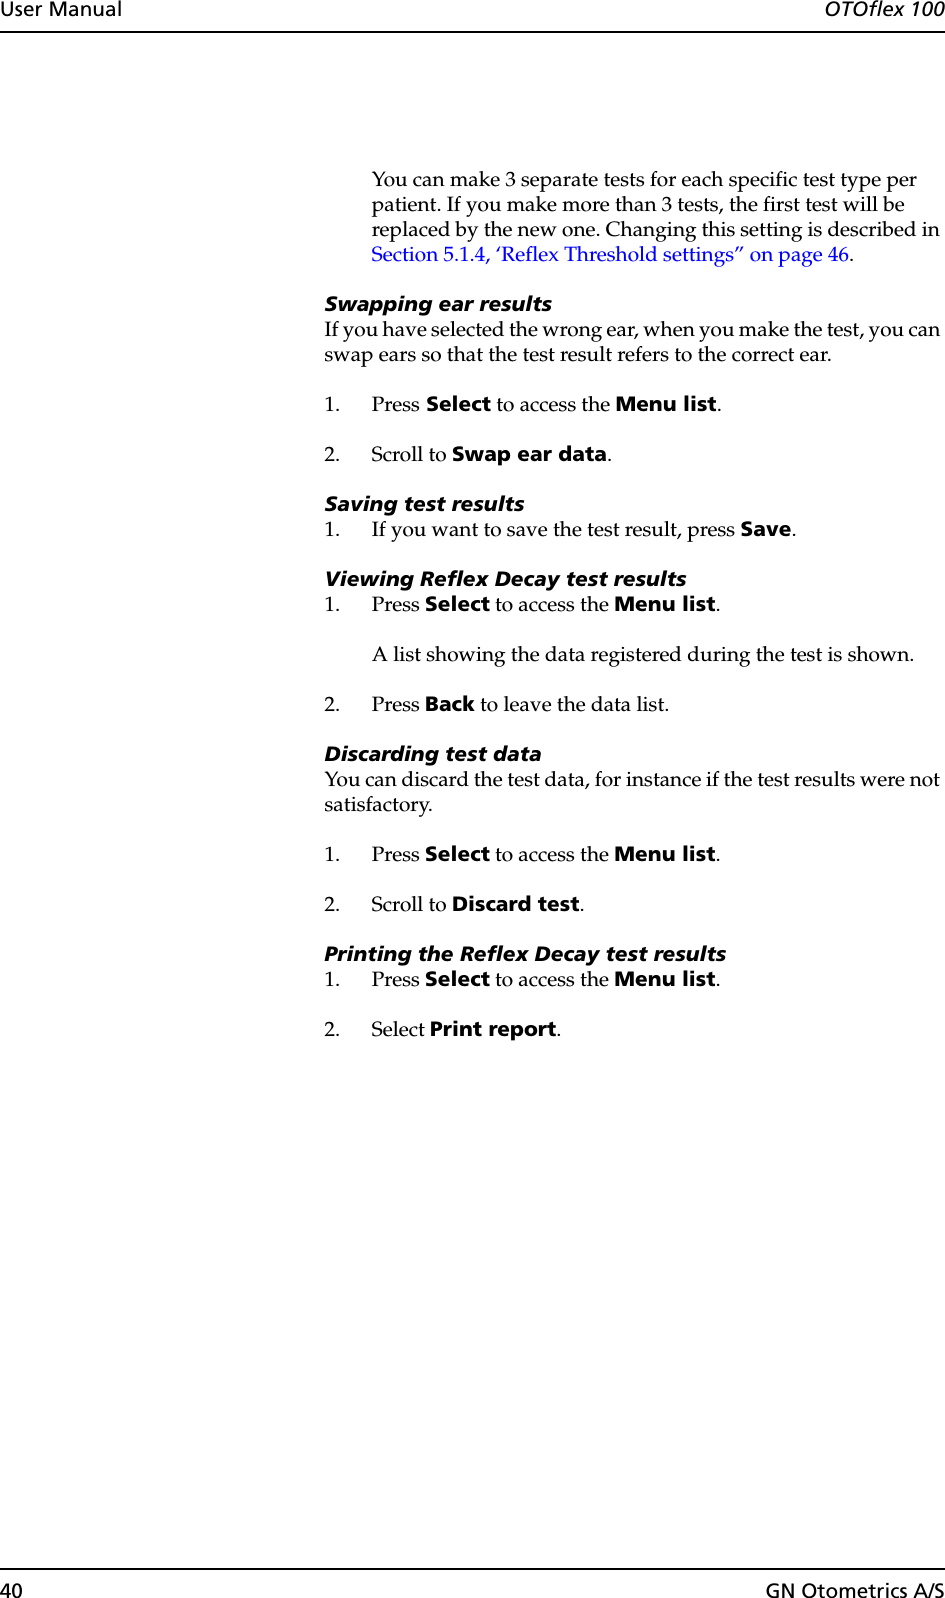
![46 GN Otometrics A/SUser Manual OTOflex 100Smooth crv [curve] Default: OffBase line Default: On•On•OffIf you select a probe tone frequency other than 226 Hz, the base line setting is automatically set to “Off”.5.1.4 Reflex Threshold settingsMan[ual] timing Default: OffProbe tone Default: 226 Hz.If you select 226 Hz, you can set admittance to be shown in mmho or in ml in the field Y unit listed below.If you select frequencies other than 226 Hz, admittance is shown only in mmho. The value in Y unit below automatically changes to mm-ho.• 226 Hz• 1000 HzRecommended for testing on infants younger than 4-6 months.](https://usermanual.wiki/GN-Otometrics-A-S/1012/User-Guide-382797-Page-46.png)
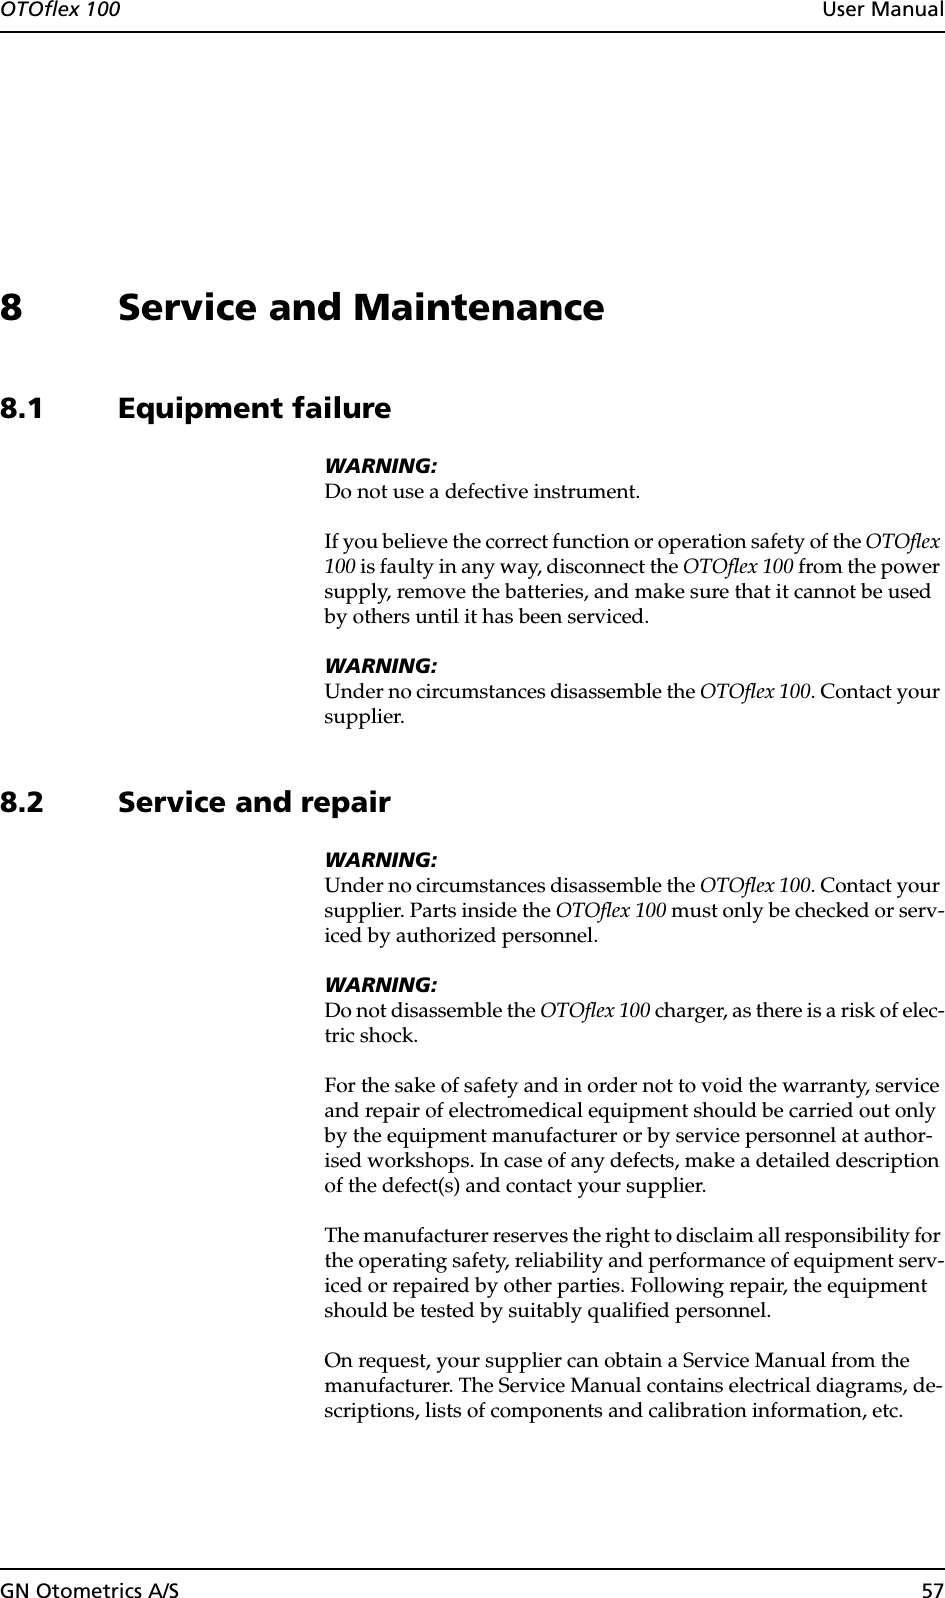
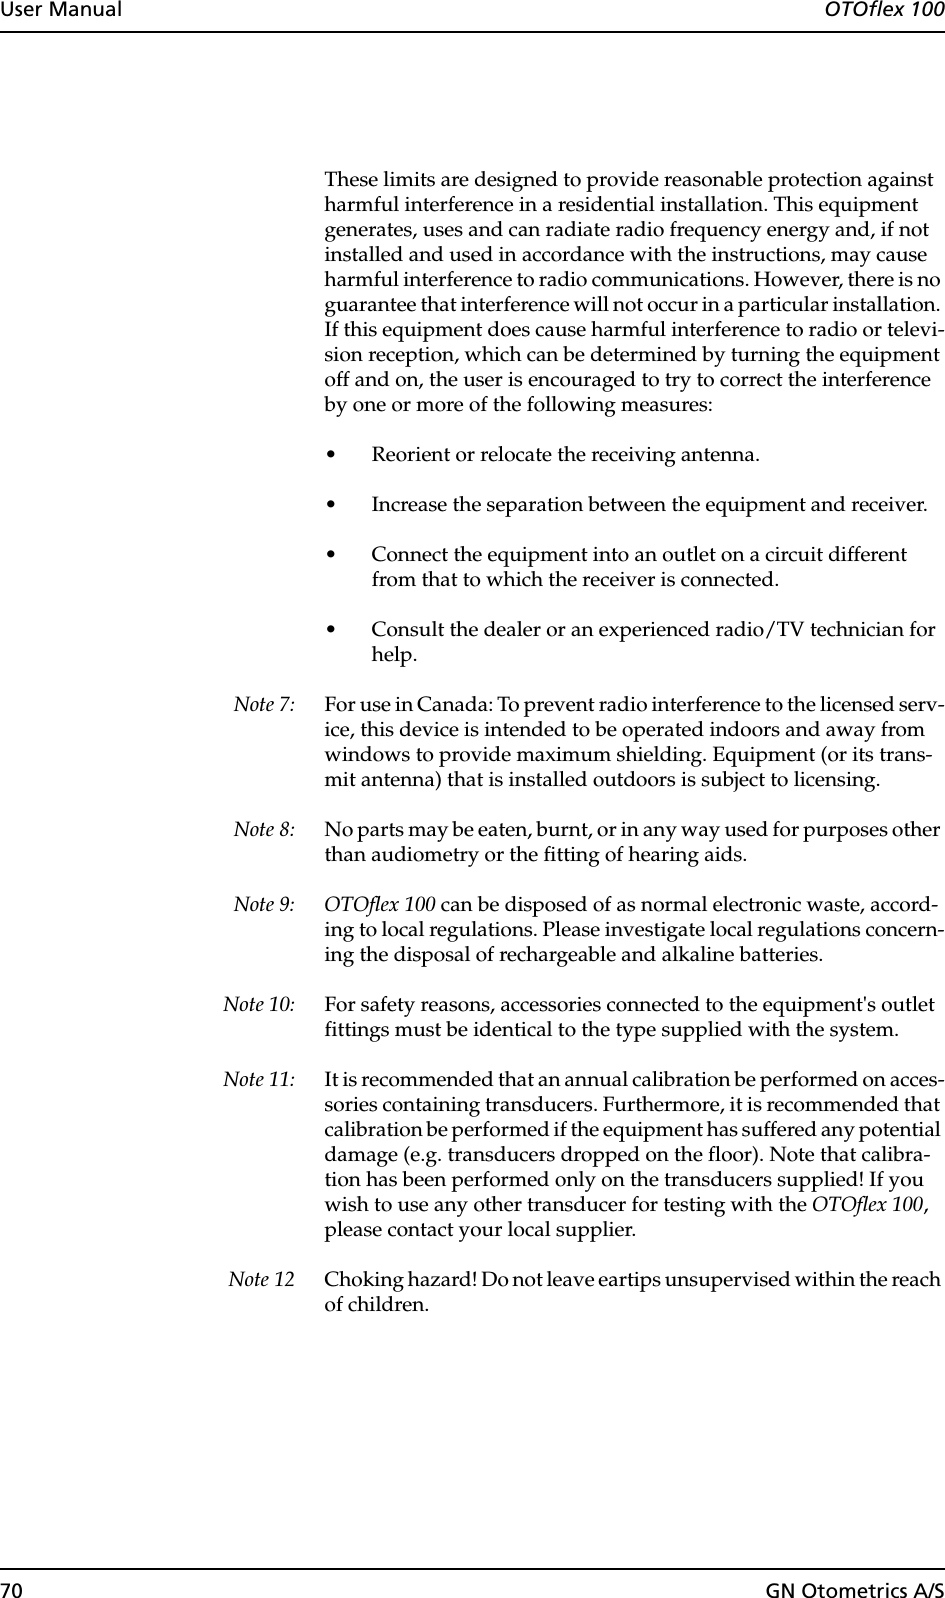
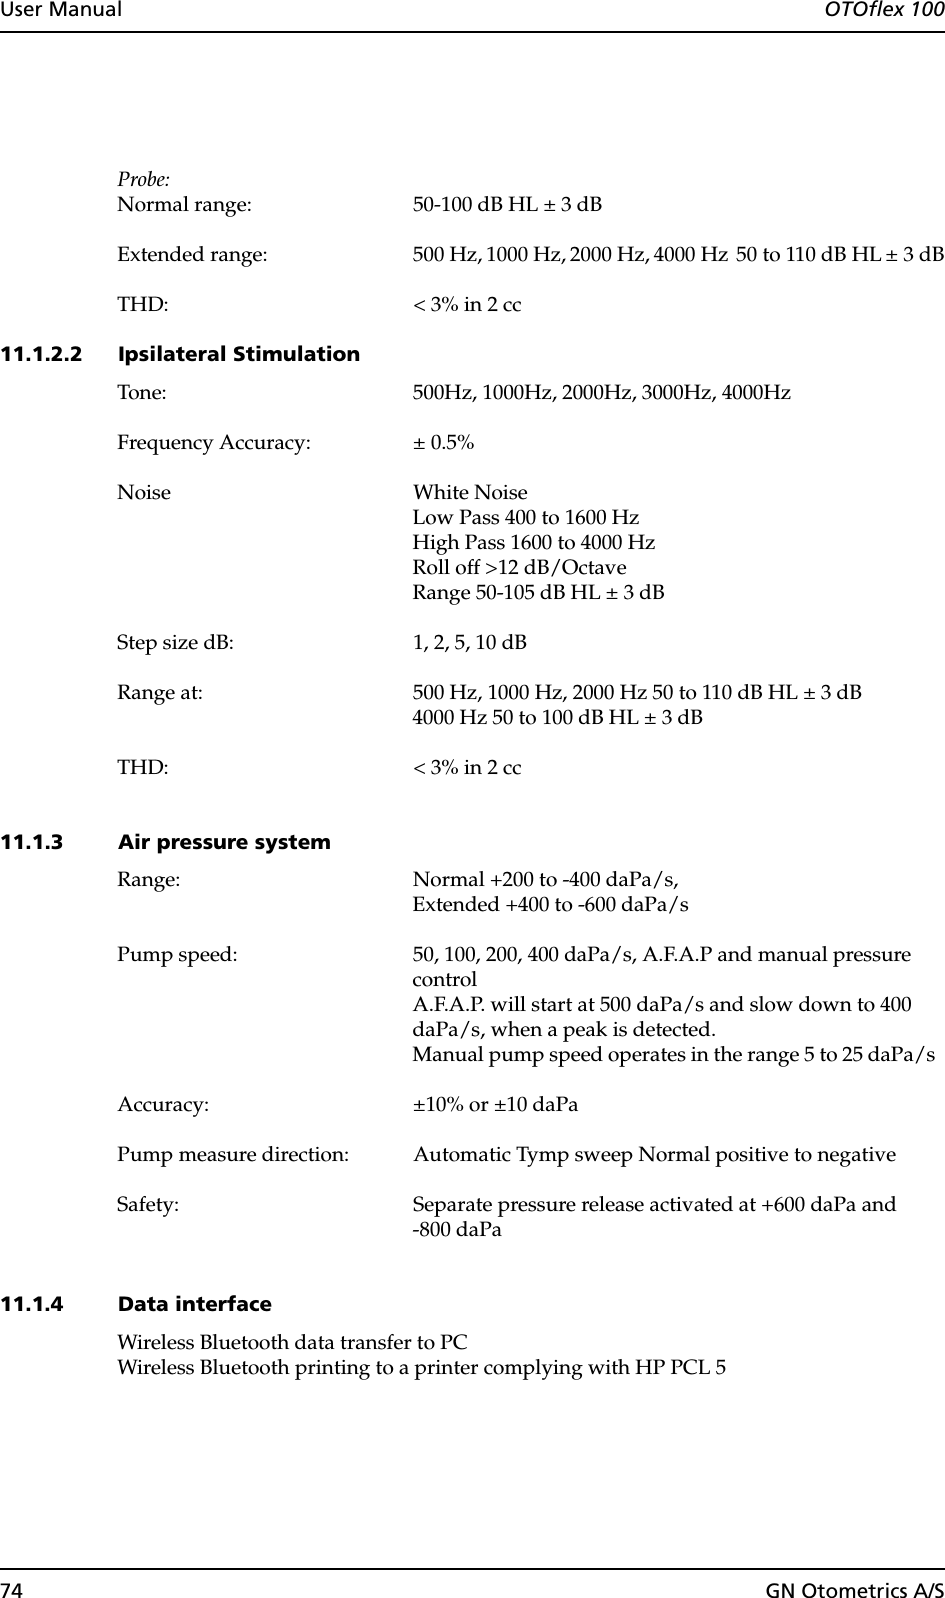
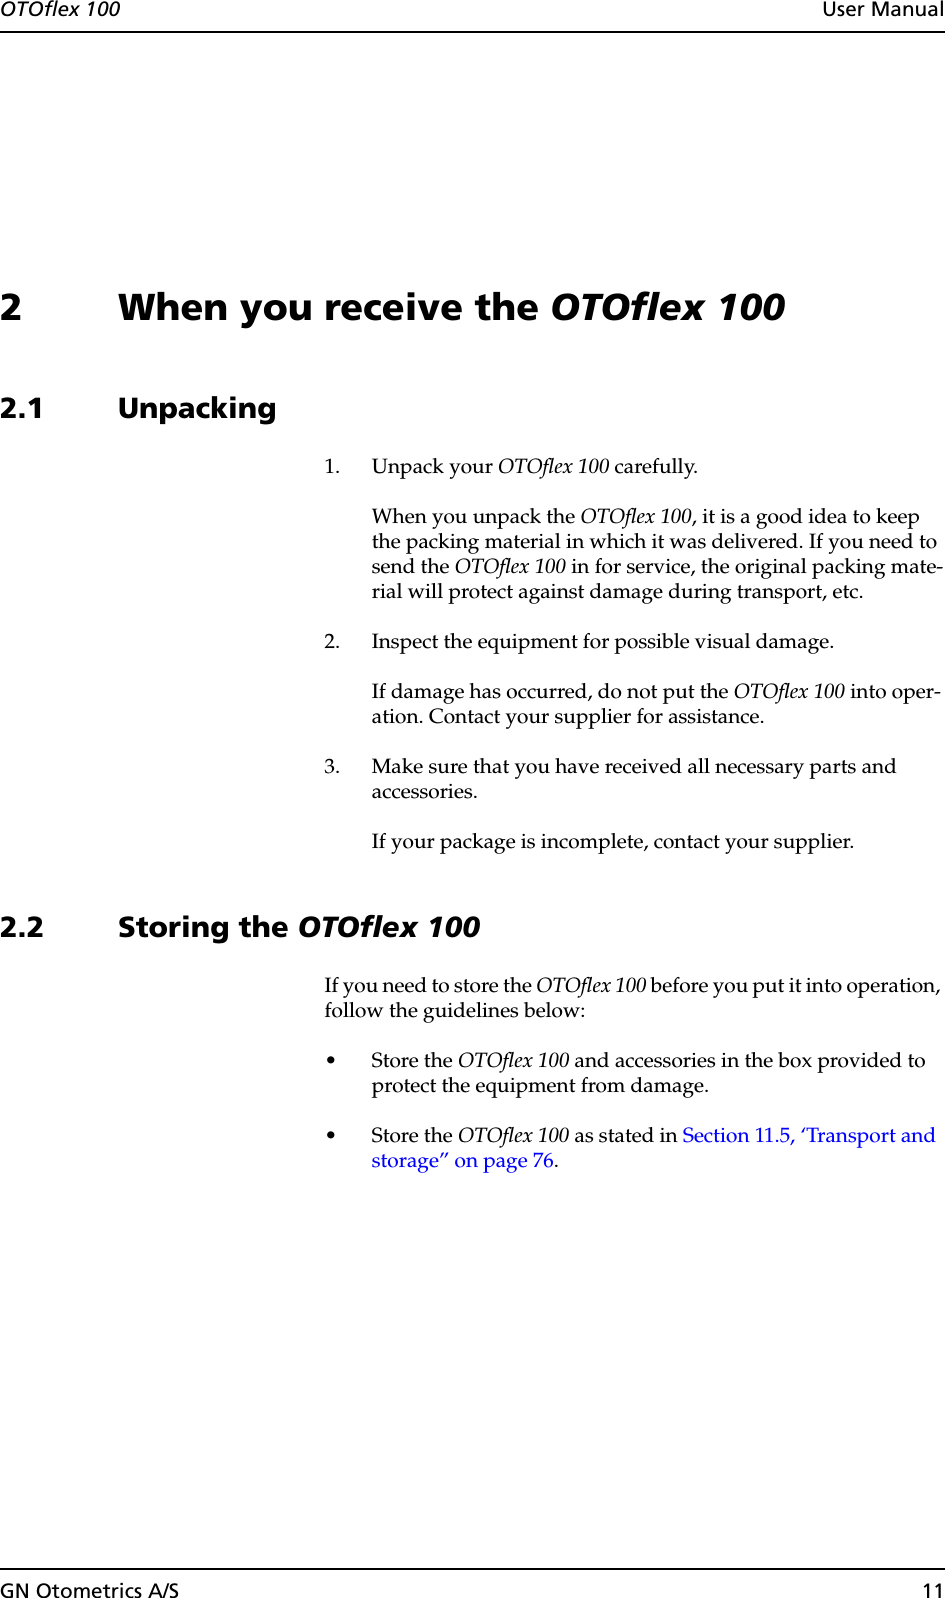
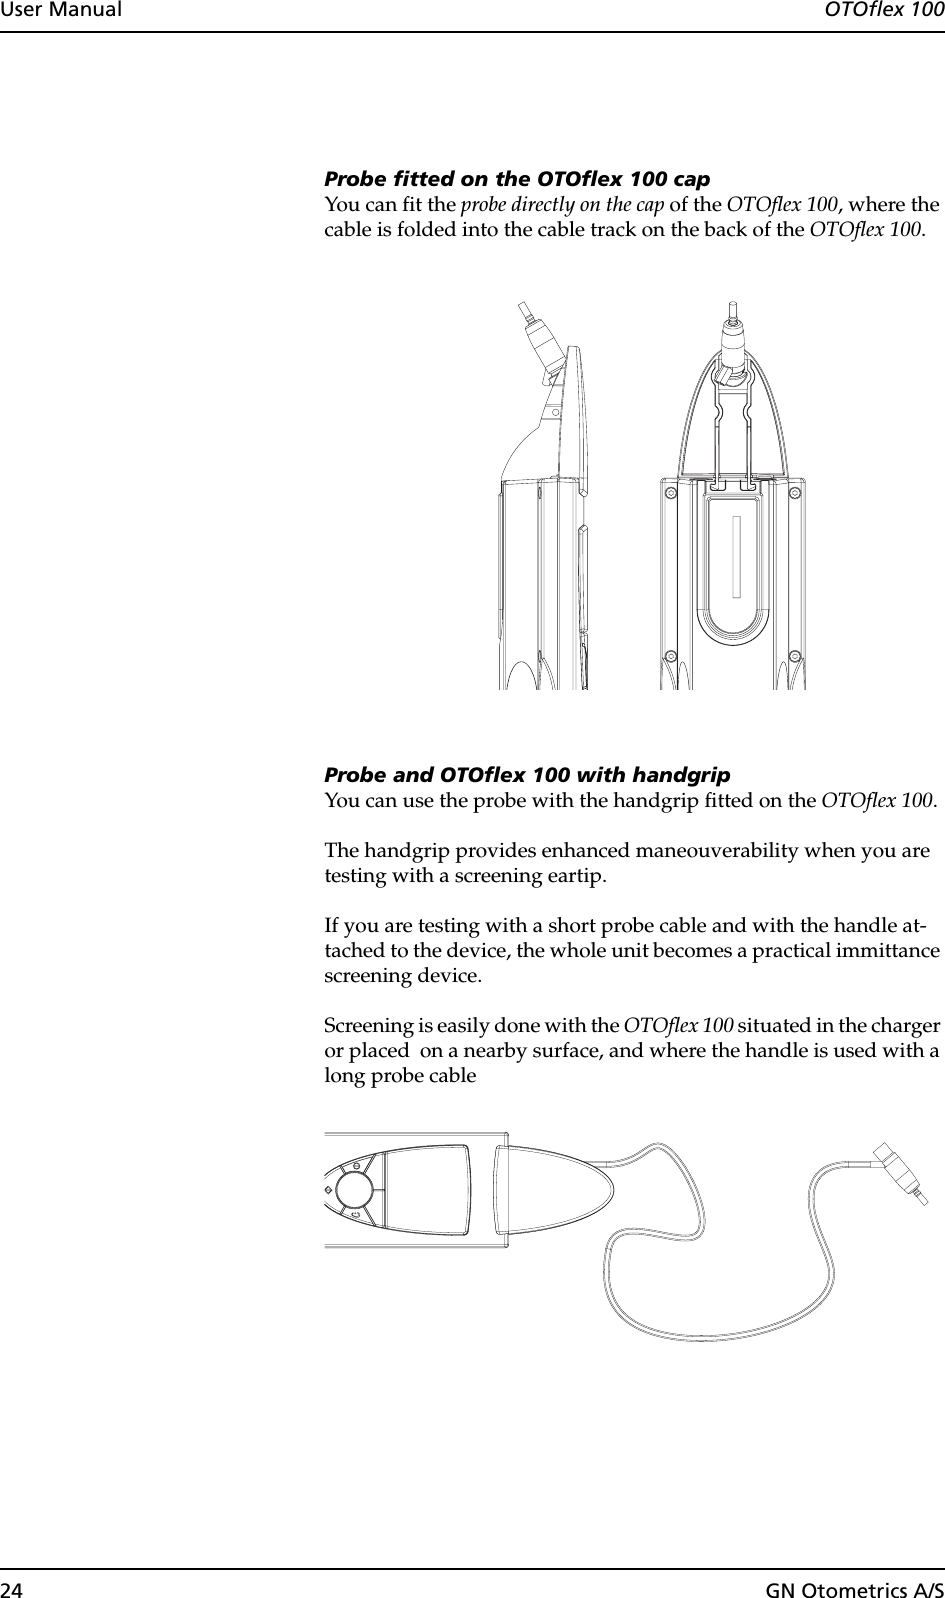
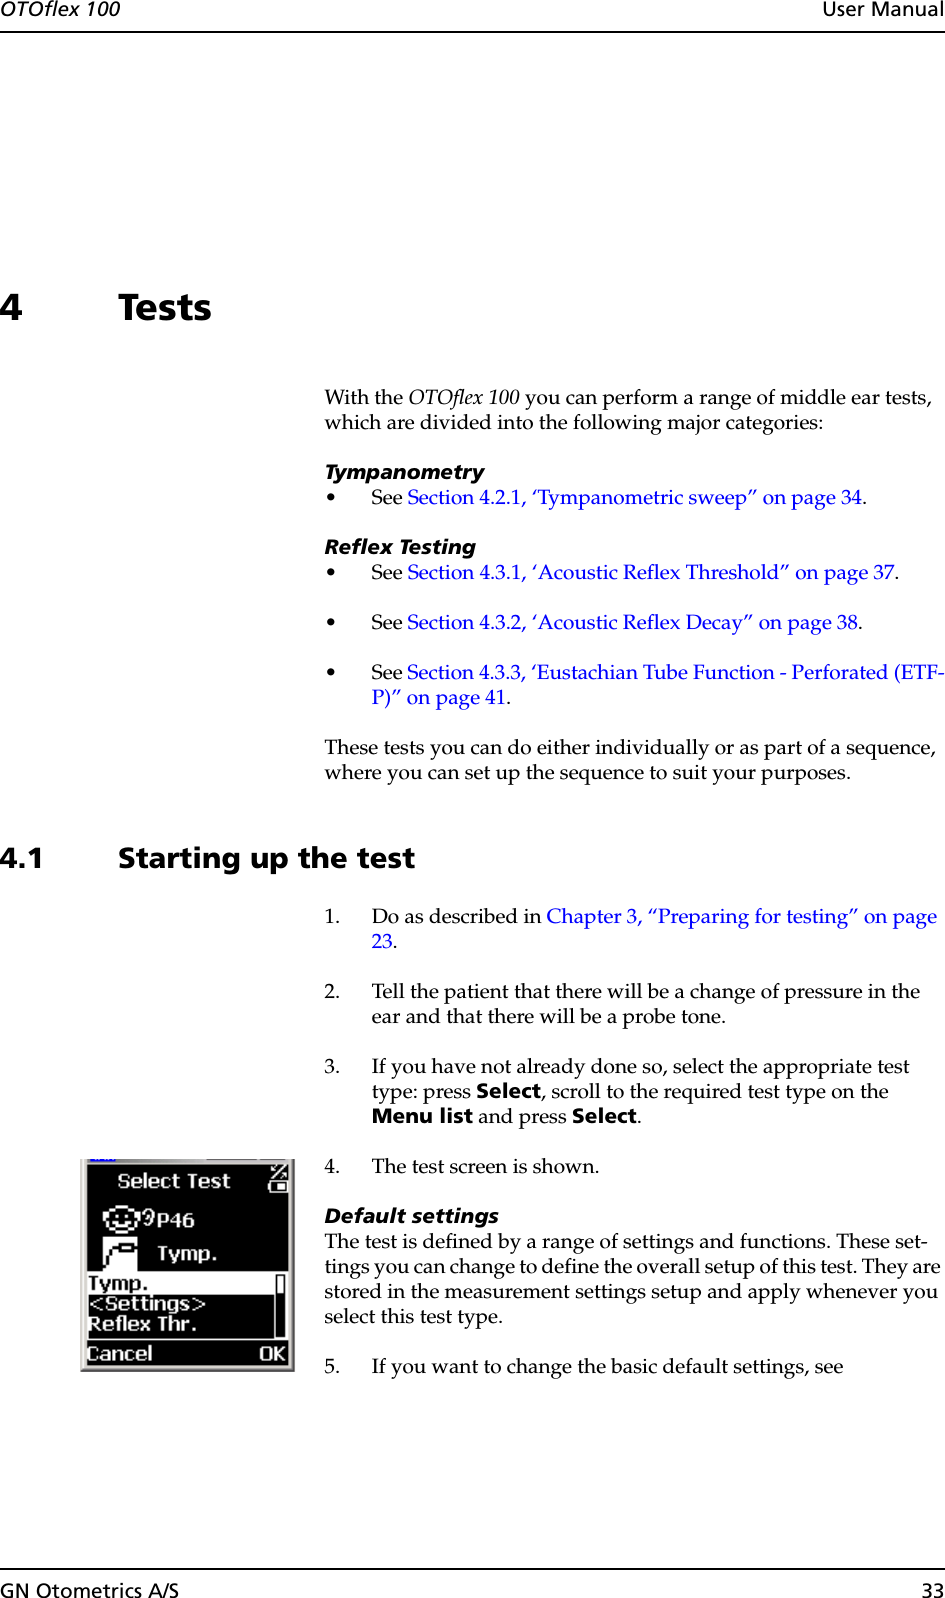
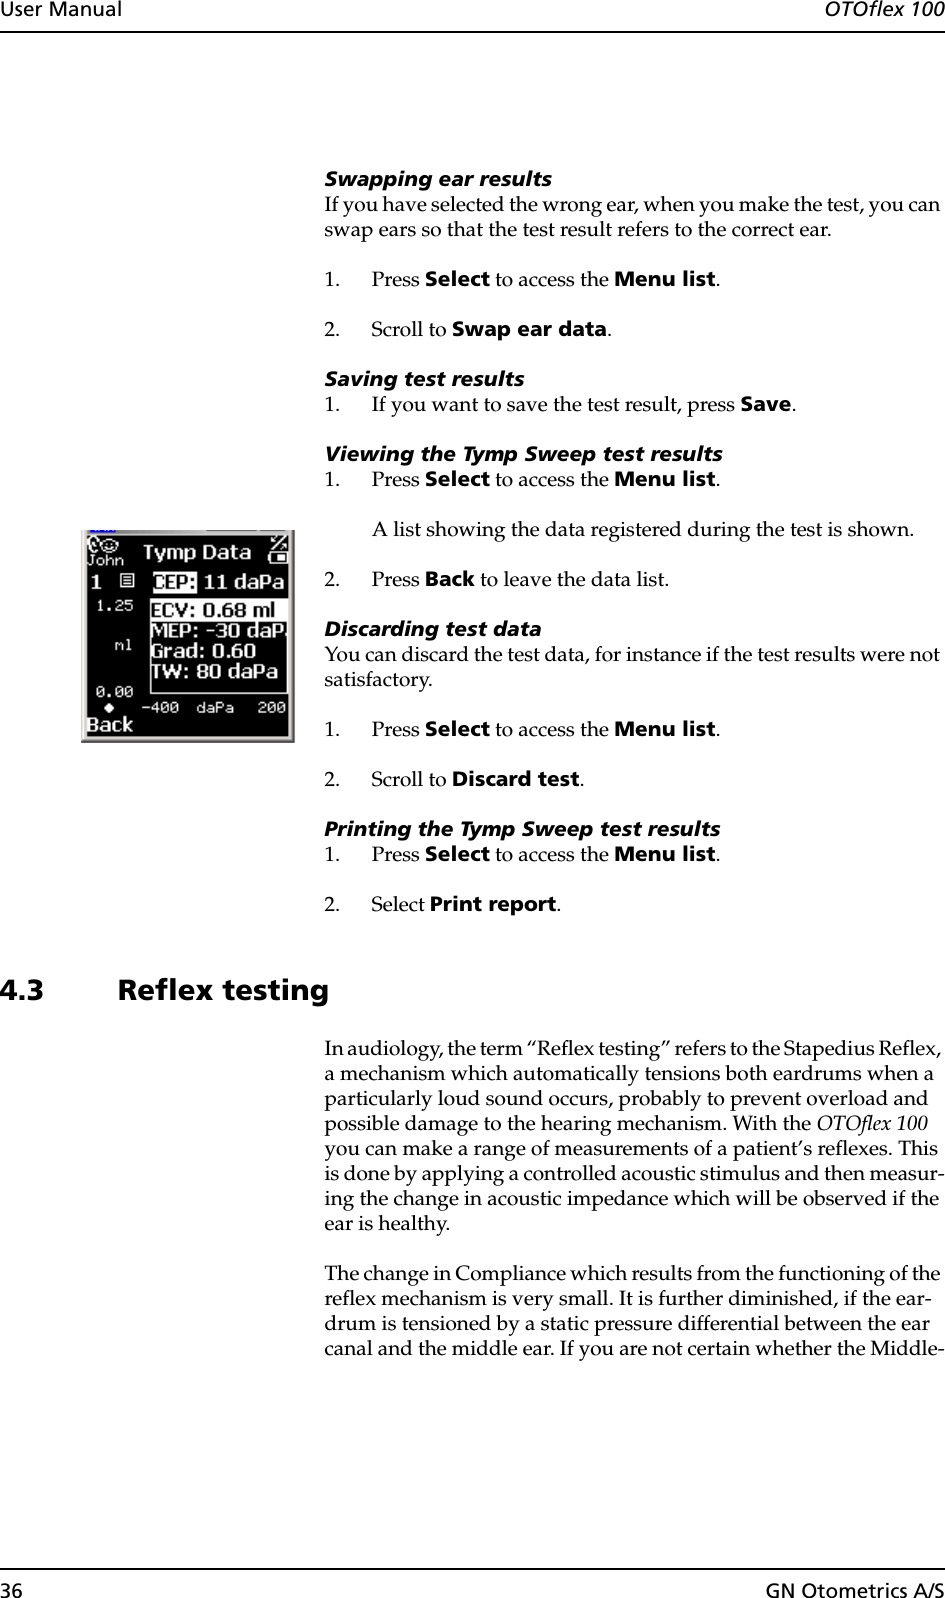
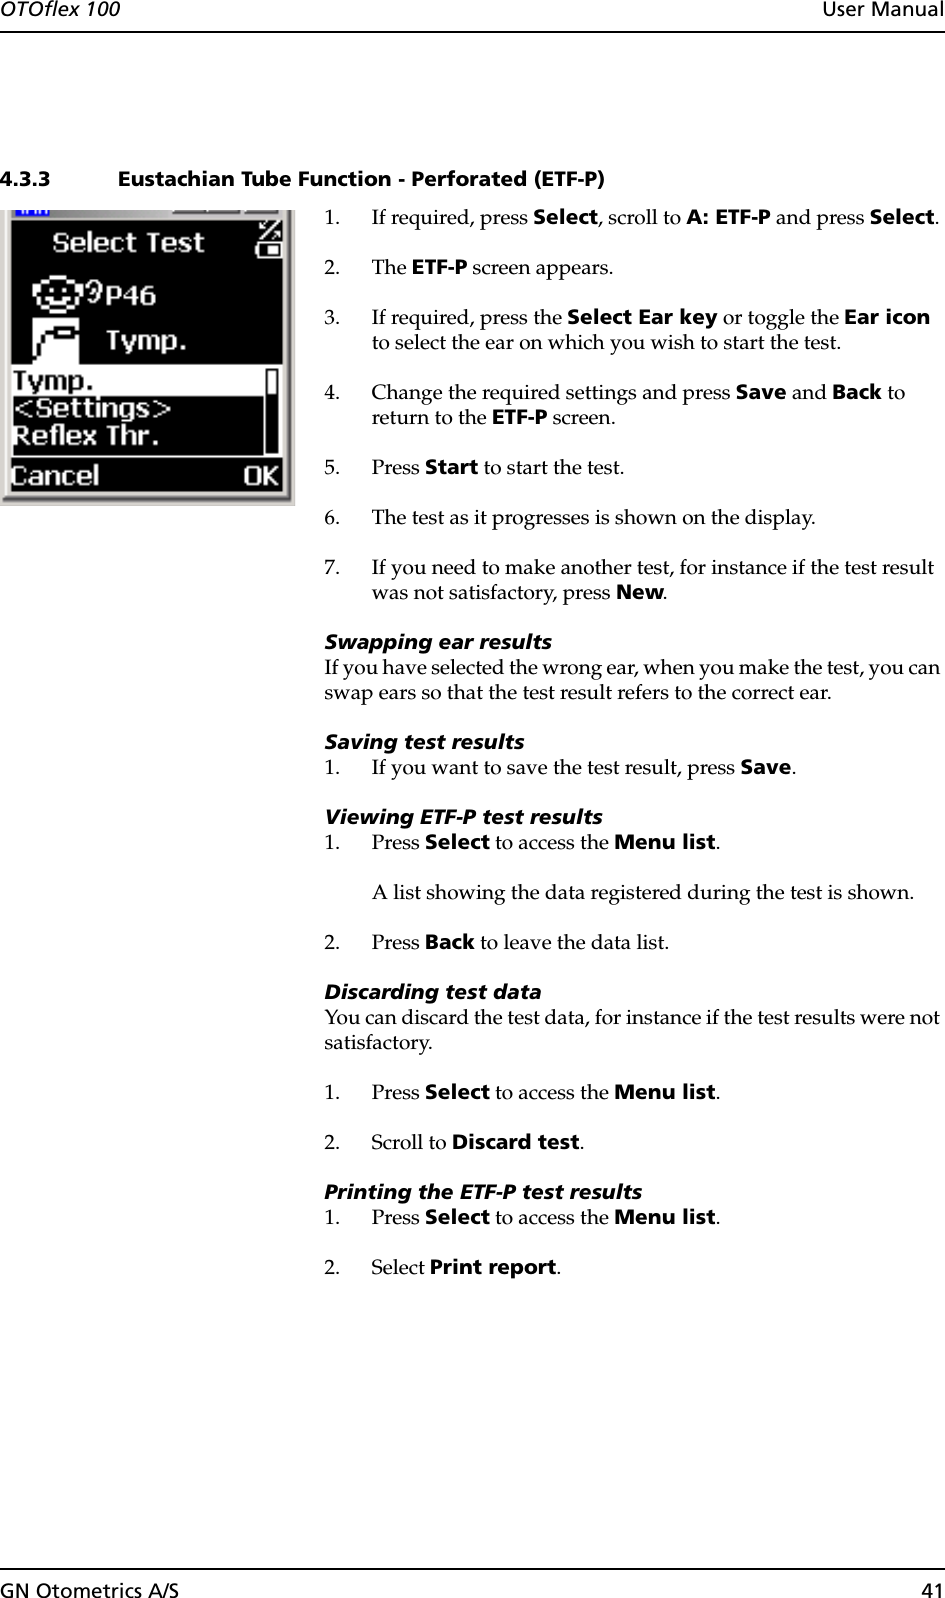
![GN Otometrics A/S 47OTOflex 100 User ManualReflex activator signals(stimuli)Stim[ulus] 0.5 kHz Default: OnStim[ulus] 1 kHz Default: OnStim[ulus] 2 kHz Default: OnStim[ulus] 3 kHz Default: OnStim[ulus] 4 kHz Default: OnStim[ulus] WB Noise Default: OffStim[ulus] LB Noise Default: OnStim[ulus] HB Noise Default: OnOther settingsStim[ulus] side Default: IPSI dB HL or SPL Max [activator signal] level Default: 105 dB HL or SPL Rsm [Resume] on seal Default: OffStart level Default: 75 dB HL or SPL Y unit Default: mmhoThe 1000 Hz frequency is as default shown in mmho. If required, you can set the frequency 226 Hz to be shown in ml.Increment 5 dBIncrement of the reflex activator signals.Pres[sure] offset Default: 0 daPaIs used to stabilise a highly flaccid tympanic membrane for reflex measurements.Pre[-stimulus] t[ime](ms) Default: 100 msStim[ulus] t[ime] Default: 3000 msPost[-stimulus] t[ime] Default: 500 ms](https://usermanual.wiki/GN-Otometrics-A-S/1012/User-Guide-382797-Page-47.png)
![48 GN Otometrics A/SUser Manual OTOflex 100Verification Default: None•None•RpeatRepeats the same level by doing one more stimulus at the same sound level.•DoNxtDoes the next stimulus at the next sound level for verification of reflex growth.Y axis mode Default: Neg[ative]•Po-NeAt 226 Hz the deflection curve is always shown as negative, the remaining probe tone settings are always shown as posi-tive.•PosAll deflection curves are shown as positive.•NegAll deflection curves are shown as negativeY scale Default: 300 µlIf you select Auto, the most suitable scale will be selected automat-ically to give the best display of the current deflection curve.Note:Auto can result in different scales being selected for the left and right deflection curves. Check the values shown in the Y-axis.Smooth Crv [curve] Default: OffStart stim[ulus] Default: DfltDefines which activator signal you wish to start the test.](https://usermanual.wiki/GN-Otometrics-A-S/1012/User-Guide-382797-Page-48.png)
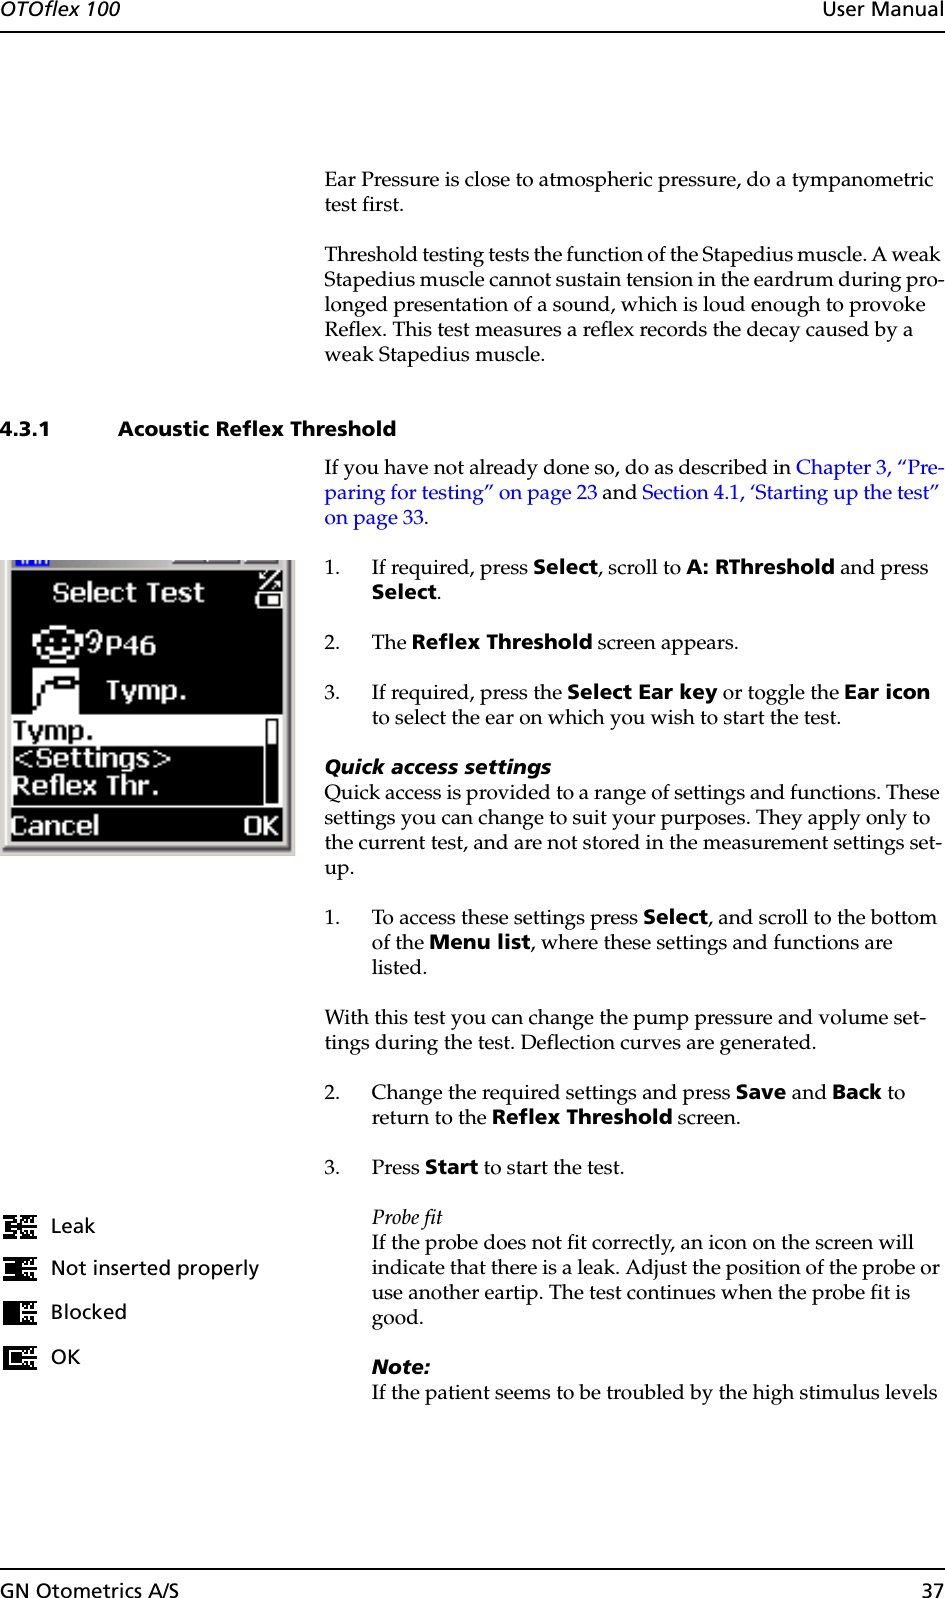
![GN Otometrics A/S 49OTOflex 100 User Manual5.1.5 Reflex Decay settingsProbe tone Default: 226 Hz.If you select 226 Hz, you can set admittance to be shown in mmho or in ml in the field Y unit listed below.If you select frequencies other than 226 Hz, admittance is shown only in mmho. The value in Y unit below automatically changes to mm-ho.• 226 Hzused for diagnostic purposes combined with a stimulus of 0.5 and/or 1 kHz.• 1000 HzStim[ulus] .5 kHz Default: OnFor diagnostic purposes combined with a probe tone of 226 Hz.Stim[ulus] 1 kHz Default: OnFor diagnostic purposes combined with a probe tone of 226 Hz.Stim[ulus] 2 kHz Default: OnStim[ulus] 3 kHz Default: OnStim[ulus] 4 kHz Default: OnStim[ulus] WB Noise Default: OffStim[ulus] LB Noise Default: OnStim[ulus] HB Noise Default: OnStim[ulus] side Default: IPSIIpsi level Default: 85 dB HLAcoustic Reflex Threshold + 10 dB HL.Contra level Default: 85 dB HLAcoustic Reflex Threshold + 10 dB HL.Track press[ure] 0 daPaIs used to stabilise a highly flaccid tympanic membrane for reflex measurements.Pre[-stimulus] t[ime] Default: 1000 msStim[ulus] t[ime] Default: 10000 msPost[-stimulus] t[ime](ms) Default: 500 ms](https://usermanual.wiki/GN-Otometrics-A-S/1012/User-Guide-382797-Page-49.png)
![50 GN Otometrics A/SUser Manual OTOflex 100Y axis mode Default: Po-NeY scale Default: 150 µlIf you select Auto, the most suitable scale will be selected automat-ically to give the best display of the current deflection curve.Note:Auto can result in different scales being selected for the left and right deflection curves. Check the values shown in the Y-axis.Smooth Crv [curve] Default: OffCurve Smooth Default: 755.2 Device settingsThere are a number of settings relating directly to the OTOflex 100. To access these settings:1. Press Select, scroll to Device Settings, and press Select again.2. The Device Settings menu is shown. Scroll and press Select to access the menu items. They are described in the following.Set user In this screen you can select the user, who is going to do the tests, and you can add new users.Selecting a userScroll to the user of your choice and press Select. This user will be registered as doing the tests made by the OTOflex 100.Location In this screen you can select the location where the tests are being made.License info. This screen shows license-specific information.System info This screen shows system-specific information.Print settings The various print settings available are listed here.Calibration This screen shows when the device was last calibrated and the next calibration date.Volume check Volume check information is listed here.](https://usermanual.wiki/GN-Otometrics-A-S/1012/User-Guide-382797-Page-50.png)
![GN Otometrics A/S 51OTOflex 100 User ManualHardware In this screen you can set a number of hardware options, which are described in the following:BrightnessIn this field you can select the brightness of the display. Press Select to access the value field, scroll to see the level of brightness and press Select.Wheel vol[ume]Playback vol[ume]BluetoothBattery typeNiHM or Alka.Localization In this screen you can select language, date format and altitude (in meters).5.3 Sequence setupYou can adjust the sequence and define which tests to perform. These settings are available in the Measurement Settings dialog box.1. Select Main Menu > Tools > Measurement Settings or click on the Measurement Settings icon on the toolbar. Click on the Sequence tab.2. In this dialog box you can define the sequence and the tests to be included in the sequence.3. To use the sequence, click on the Sequence radiobutton in the Autostart field in the control panel on the left side of the screen, before you start testing.5.3.1 Procedure optionsIn the menu item Procedure Opts, you can set the sequence of ac-tions you want the OTOflex 100 to perform, when you switch on the device.Auto start Default: On](https://usermanual.wiki/GN-Otometrics-A-S/1012/User-Guide-382797-Page-51.png)
![52 GN Otometrics A/SUser Manual OTOflex 100Autonew cl[ient] Default: OnAuto cl[ient] id Default: OnPatient sel[ection] Default: BeforeStart ear Default: RightDefault test Default: TympAuto print D Default: OffAuto print E Default: OFFAudible seal Default: OnAudible test Default: OnHide upldd Default: OffAuto delete Default: Off](https://usermanual.wiki/GN-Otometrics-A-S/1012/User-Guide-382797-Page-52.png)