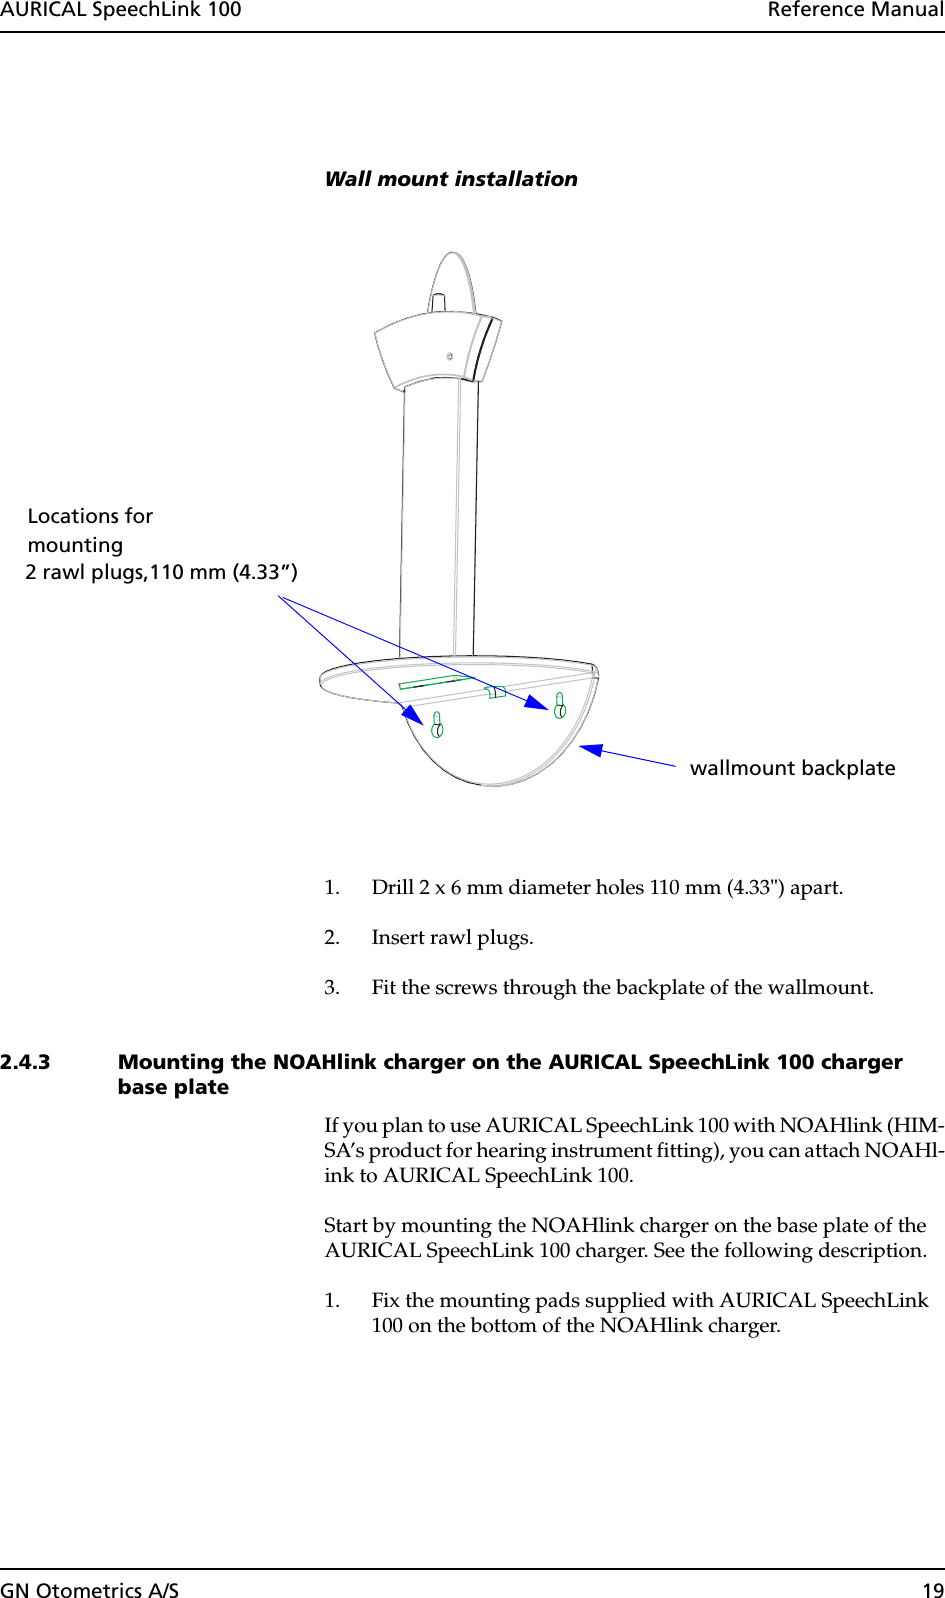
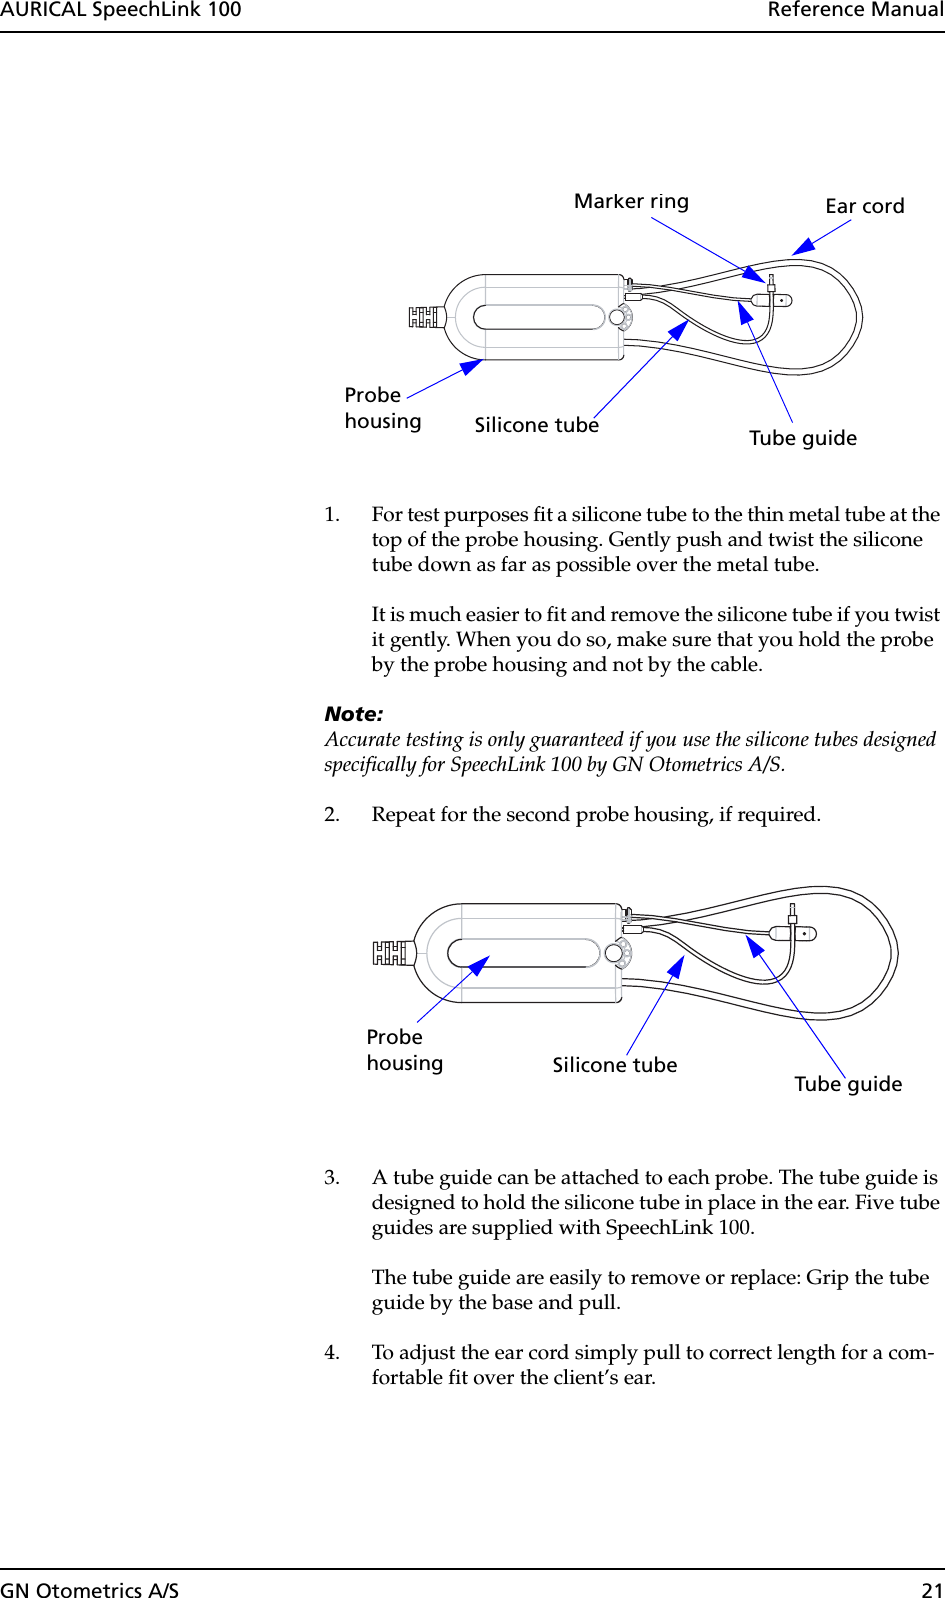
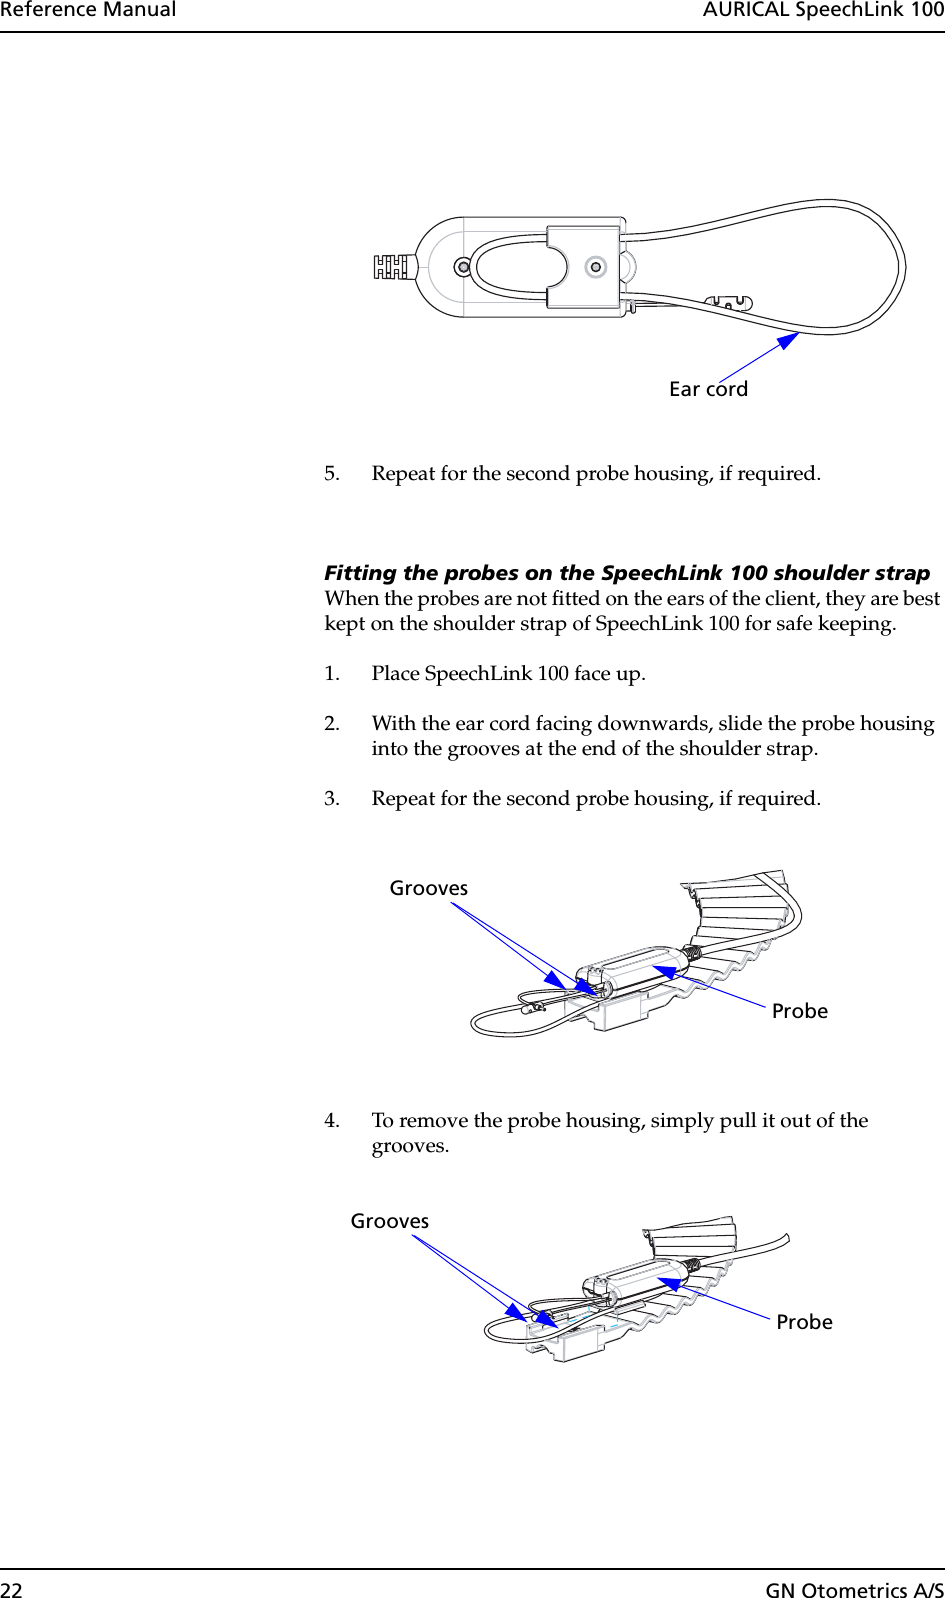
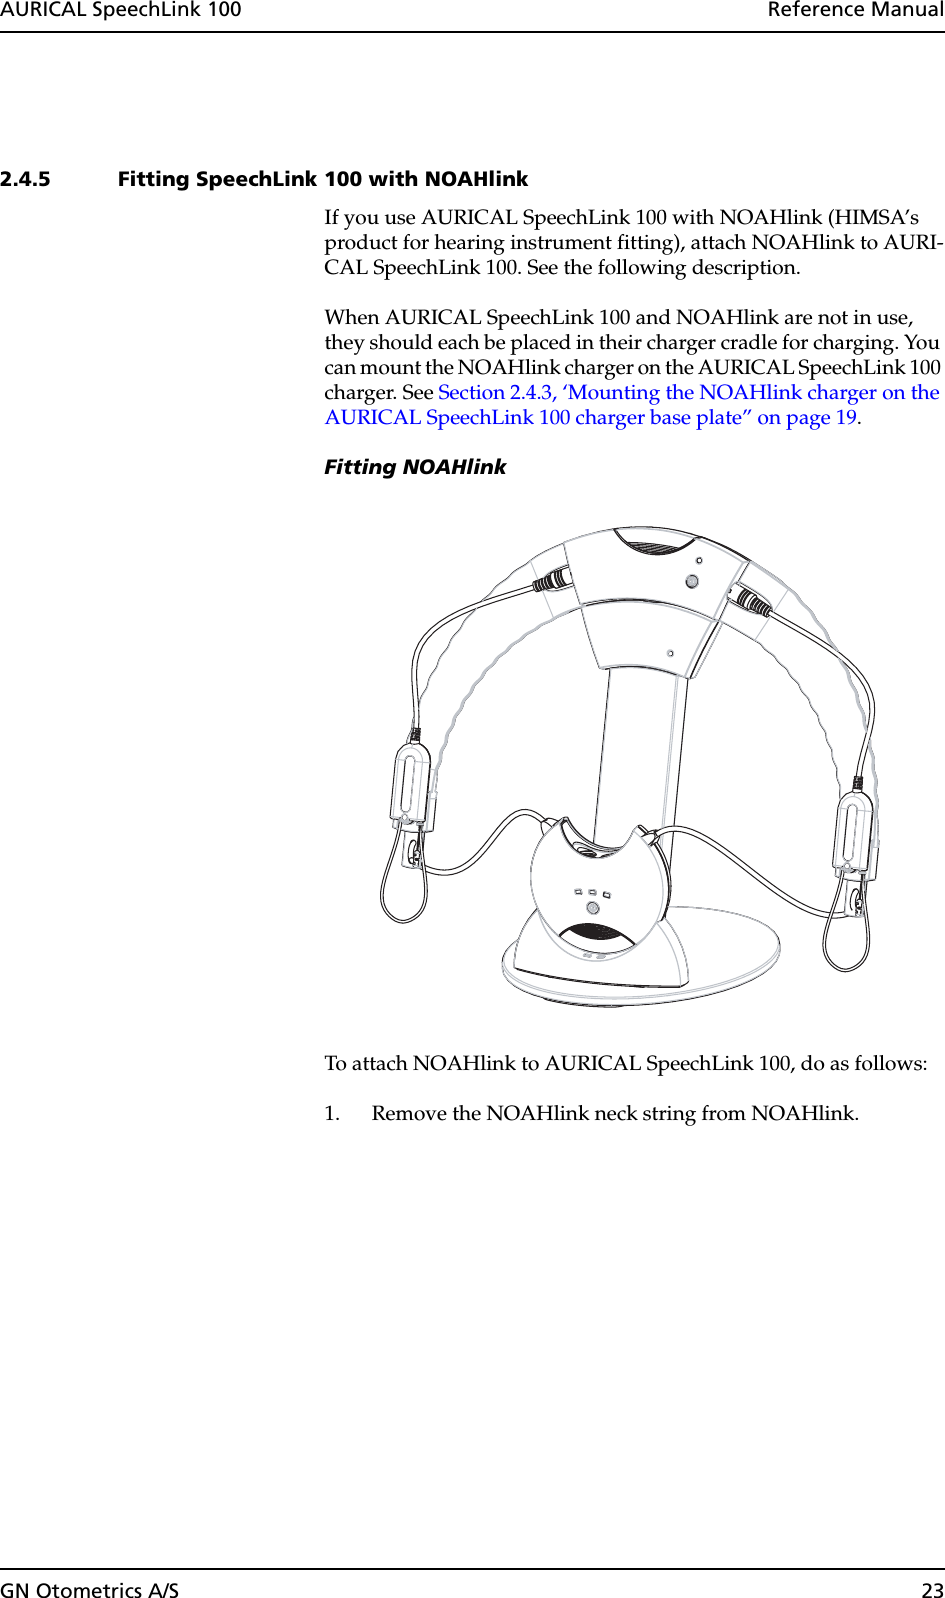
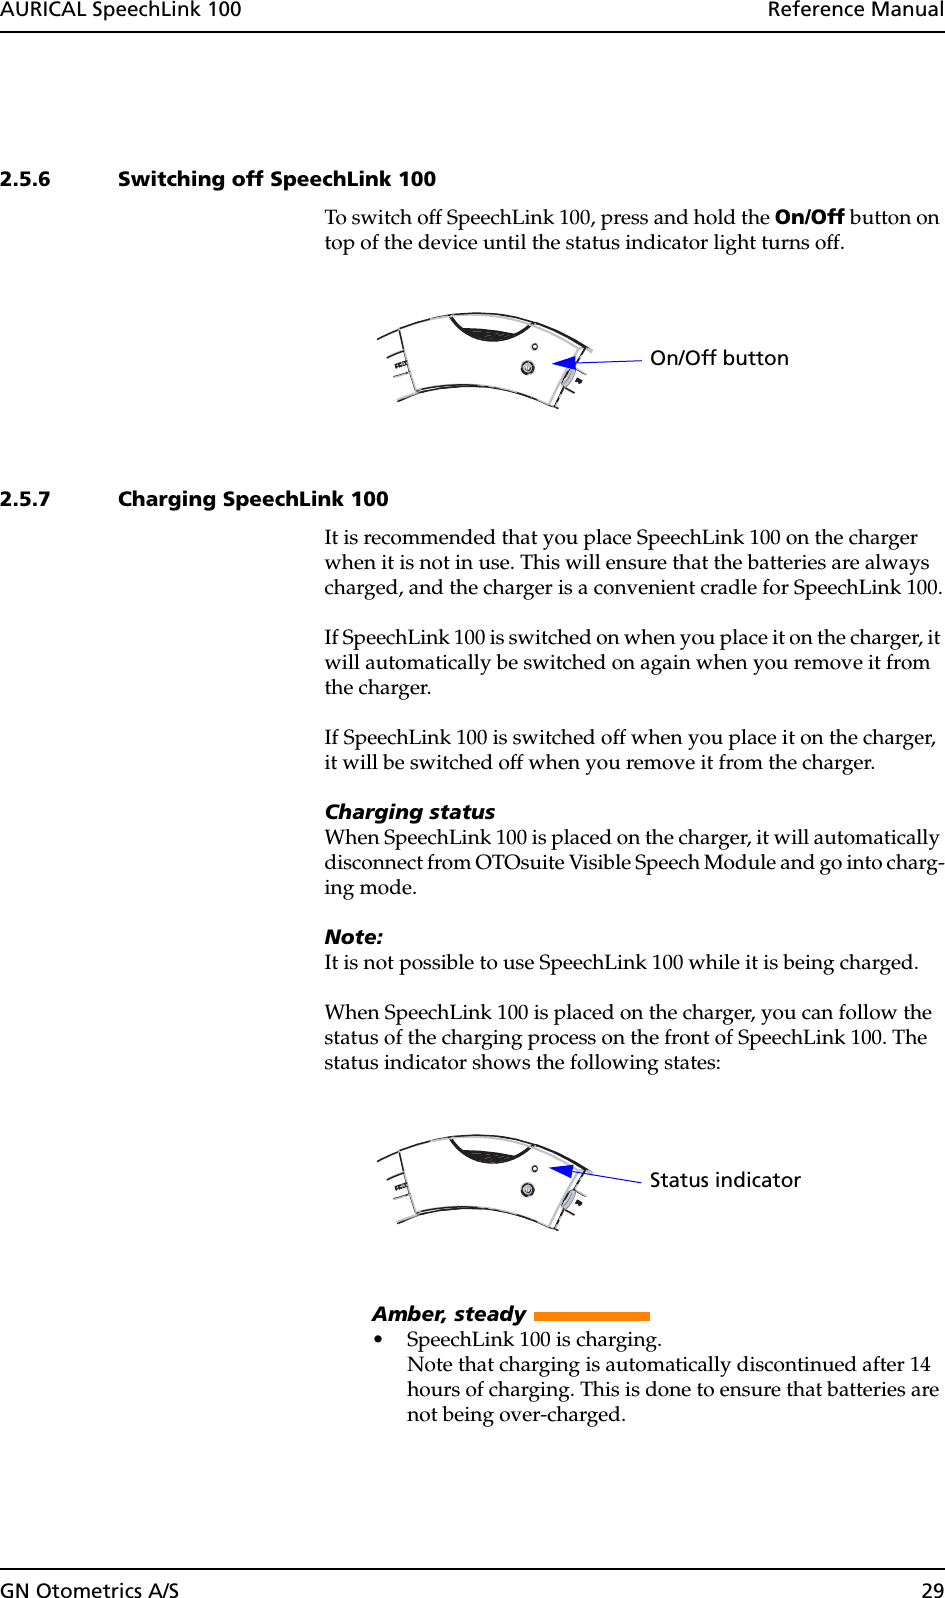
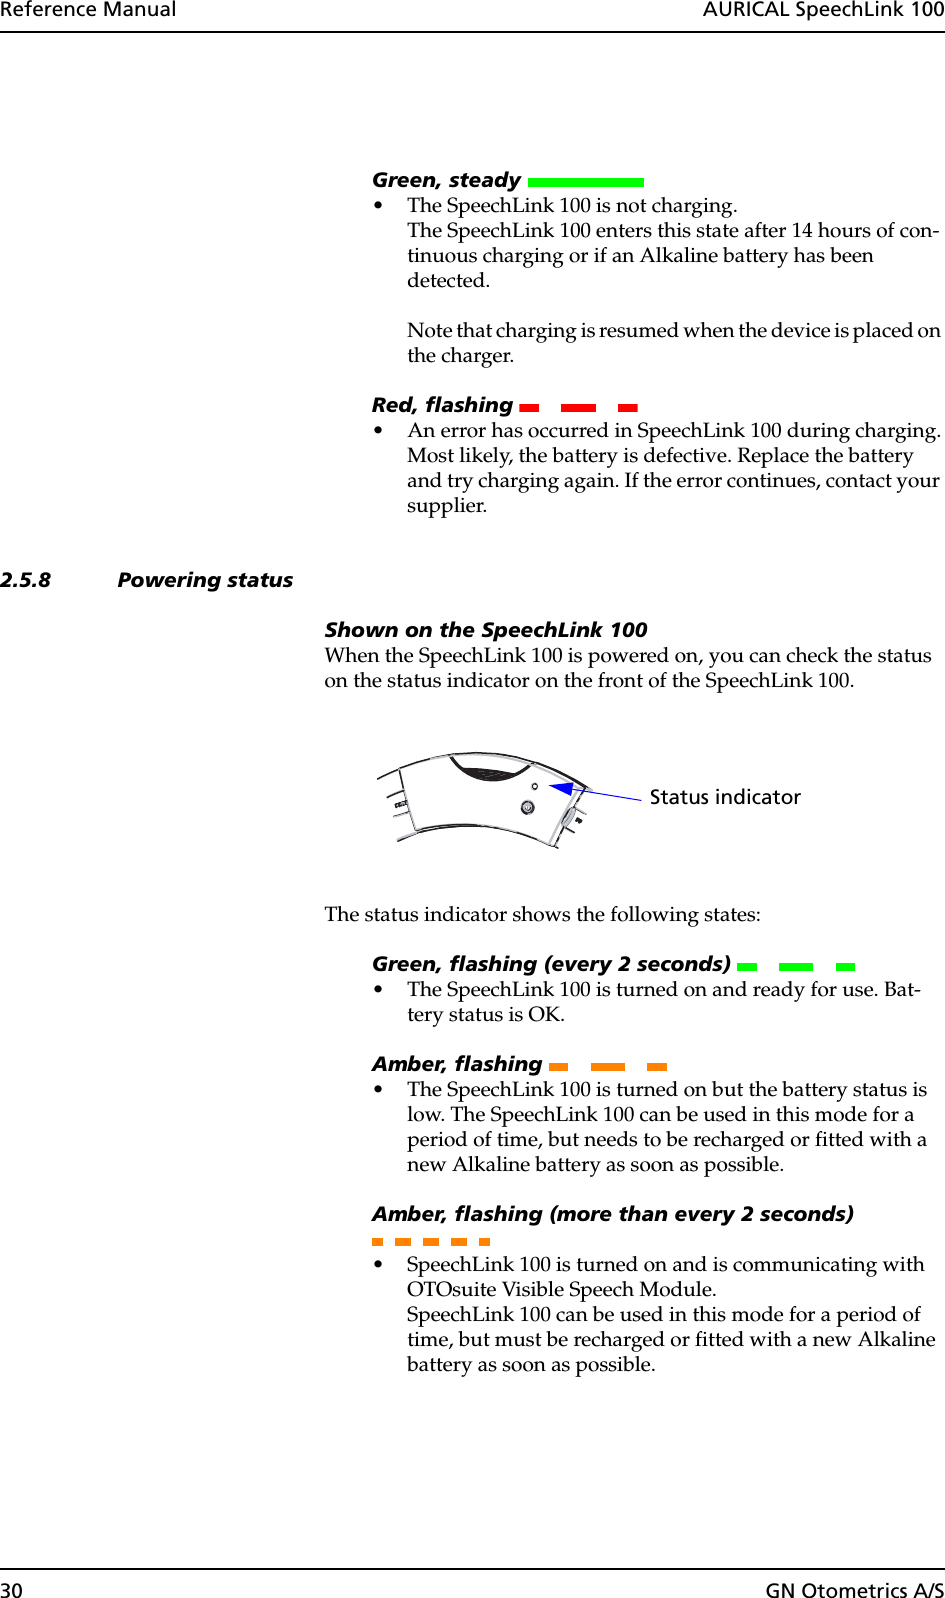
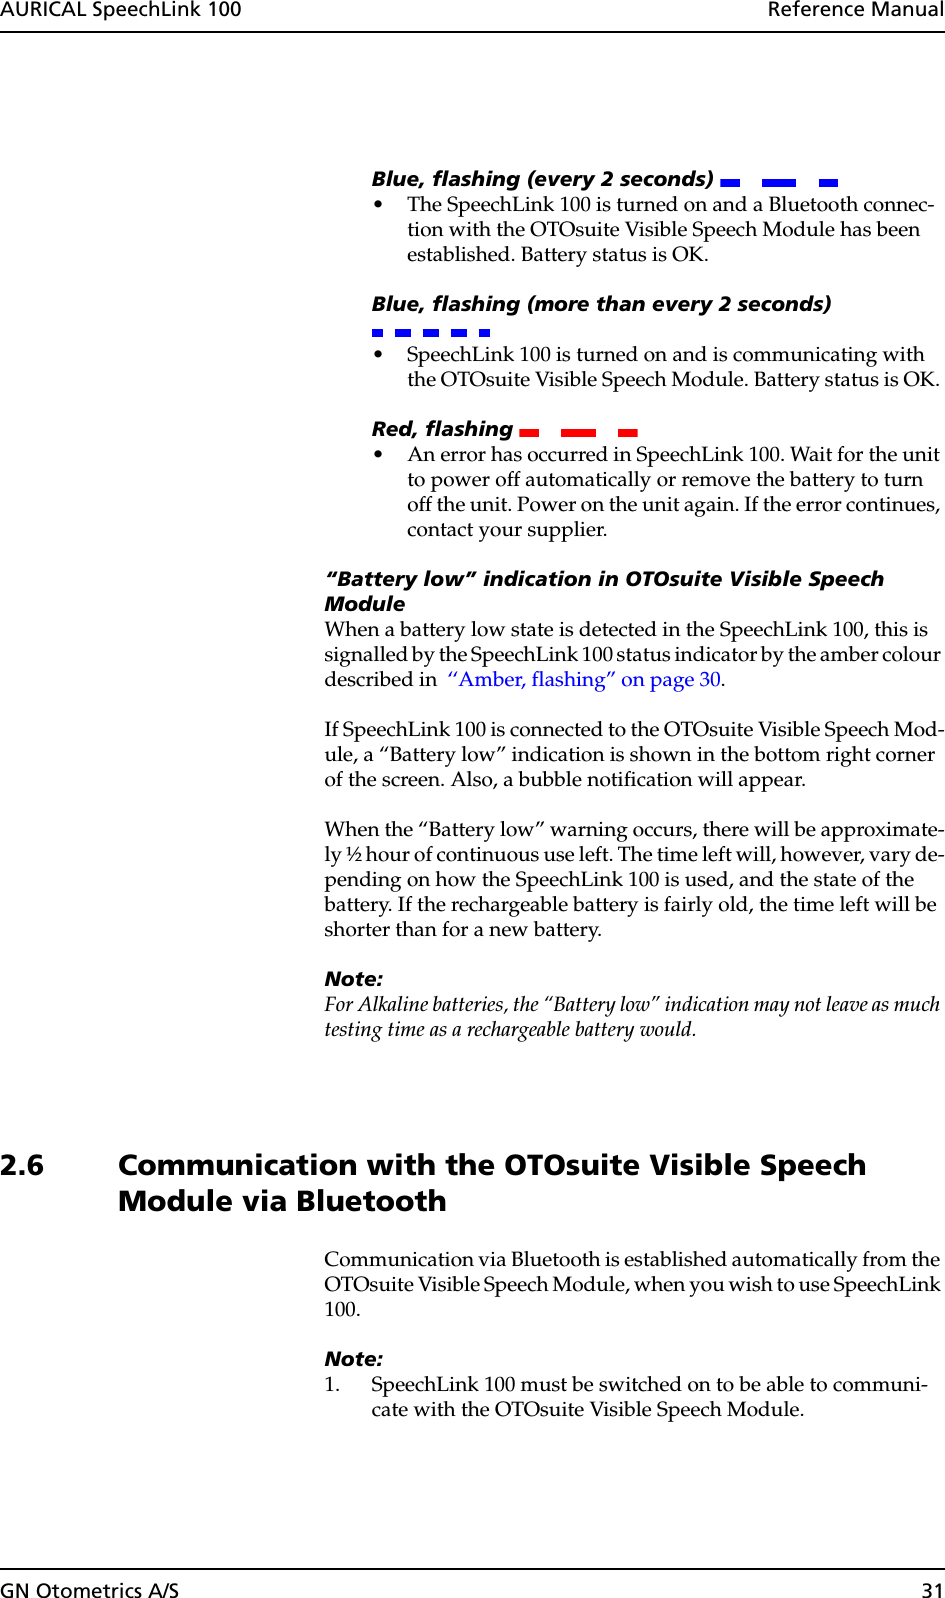
GN Otometrics A S 1053 Medical Bluetooth Device User Manual 7 60 046xALL
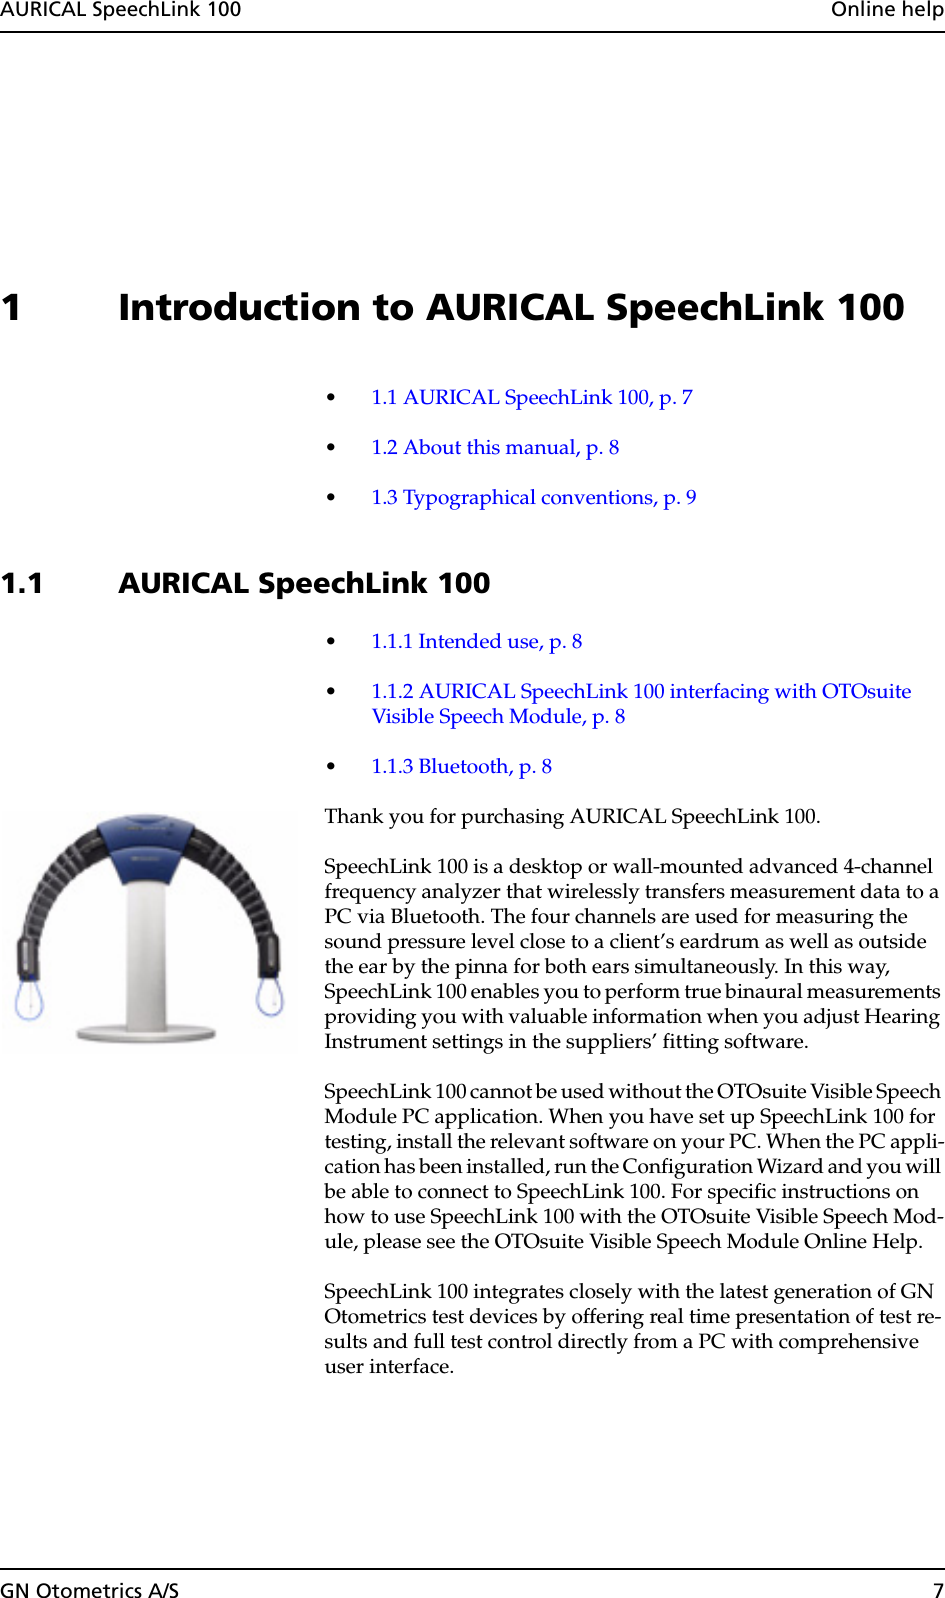
GN Otometrics A/S Medical Bluetooth Device 7 60 046xALL
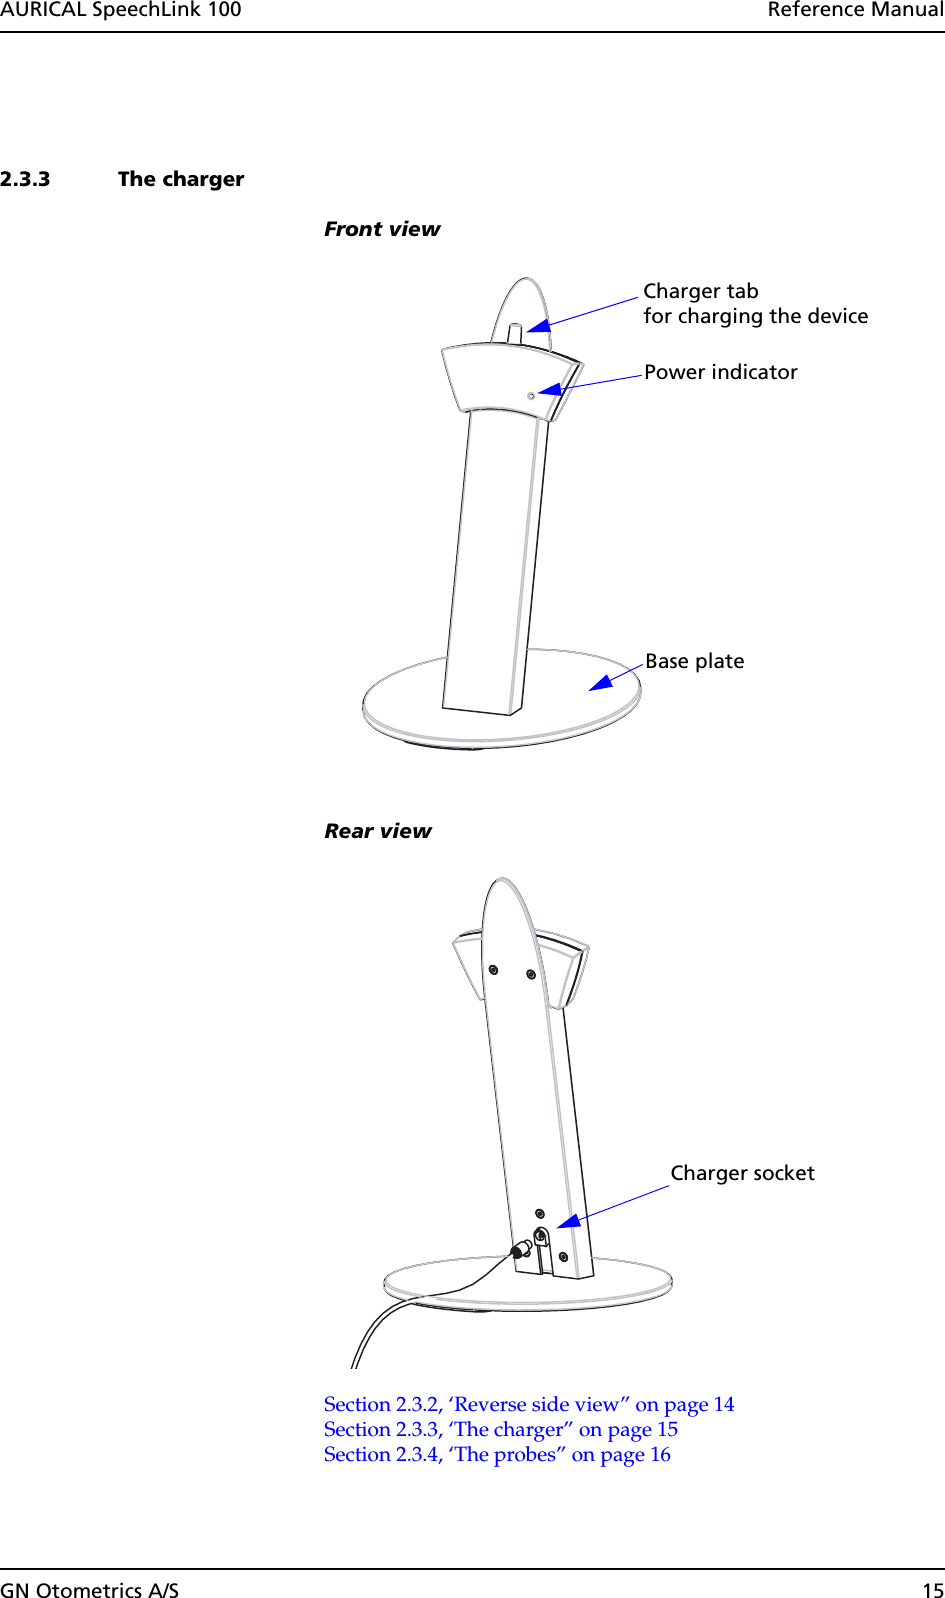
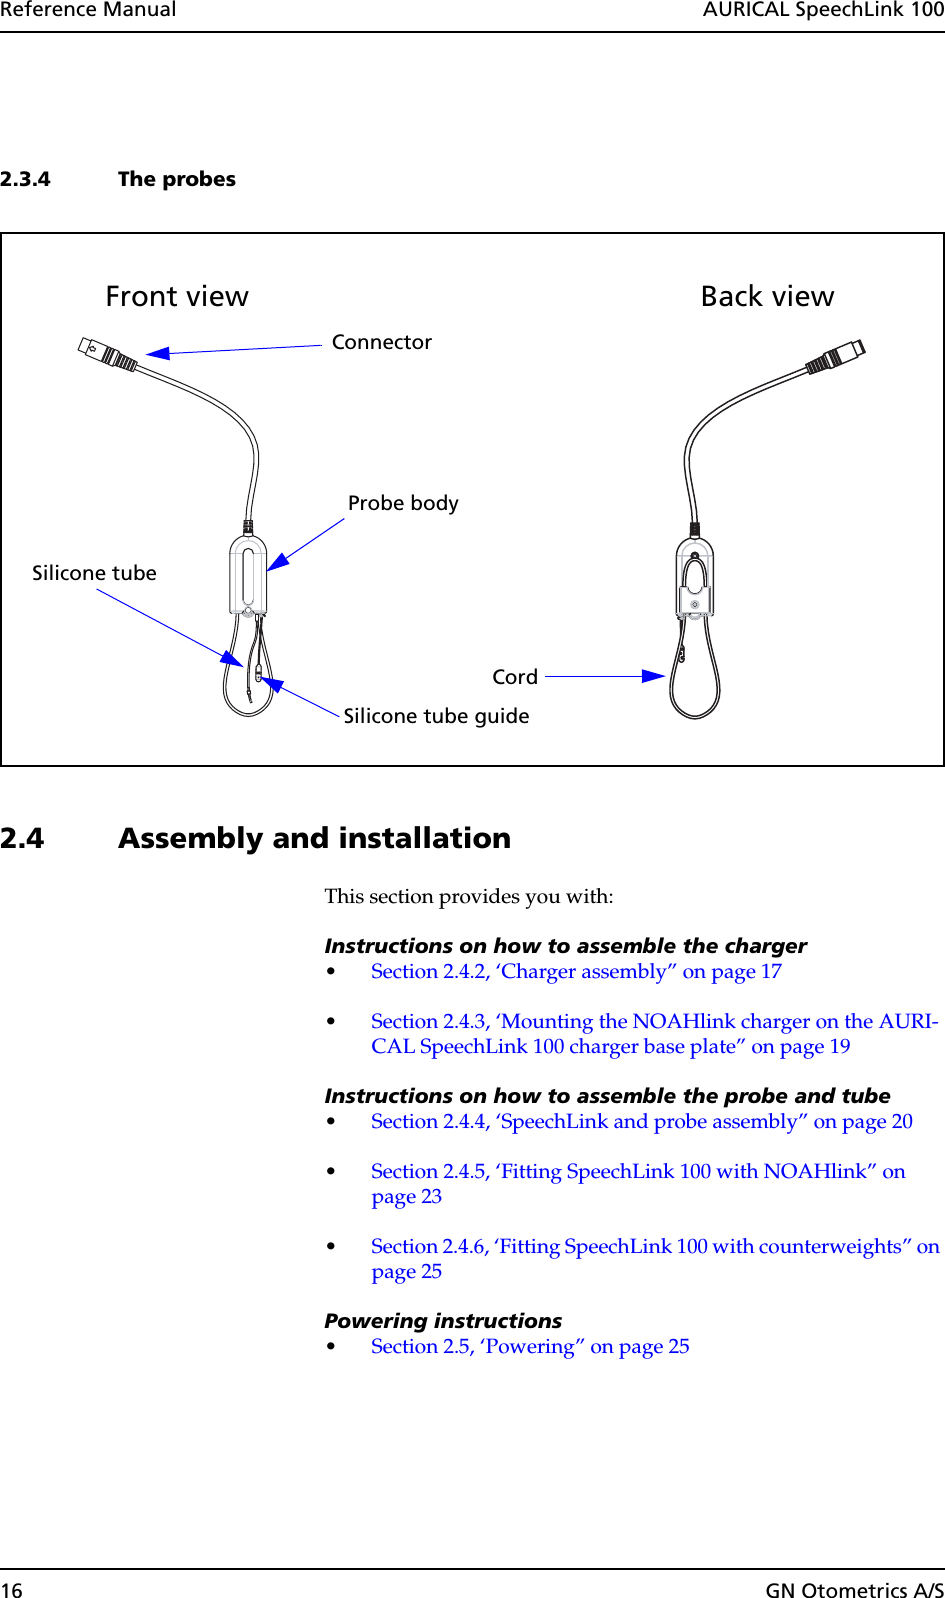
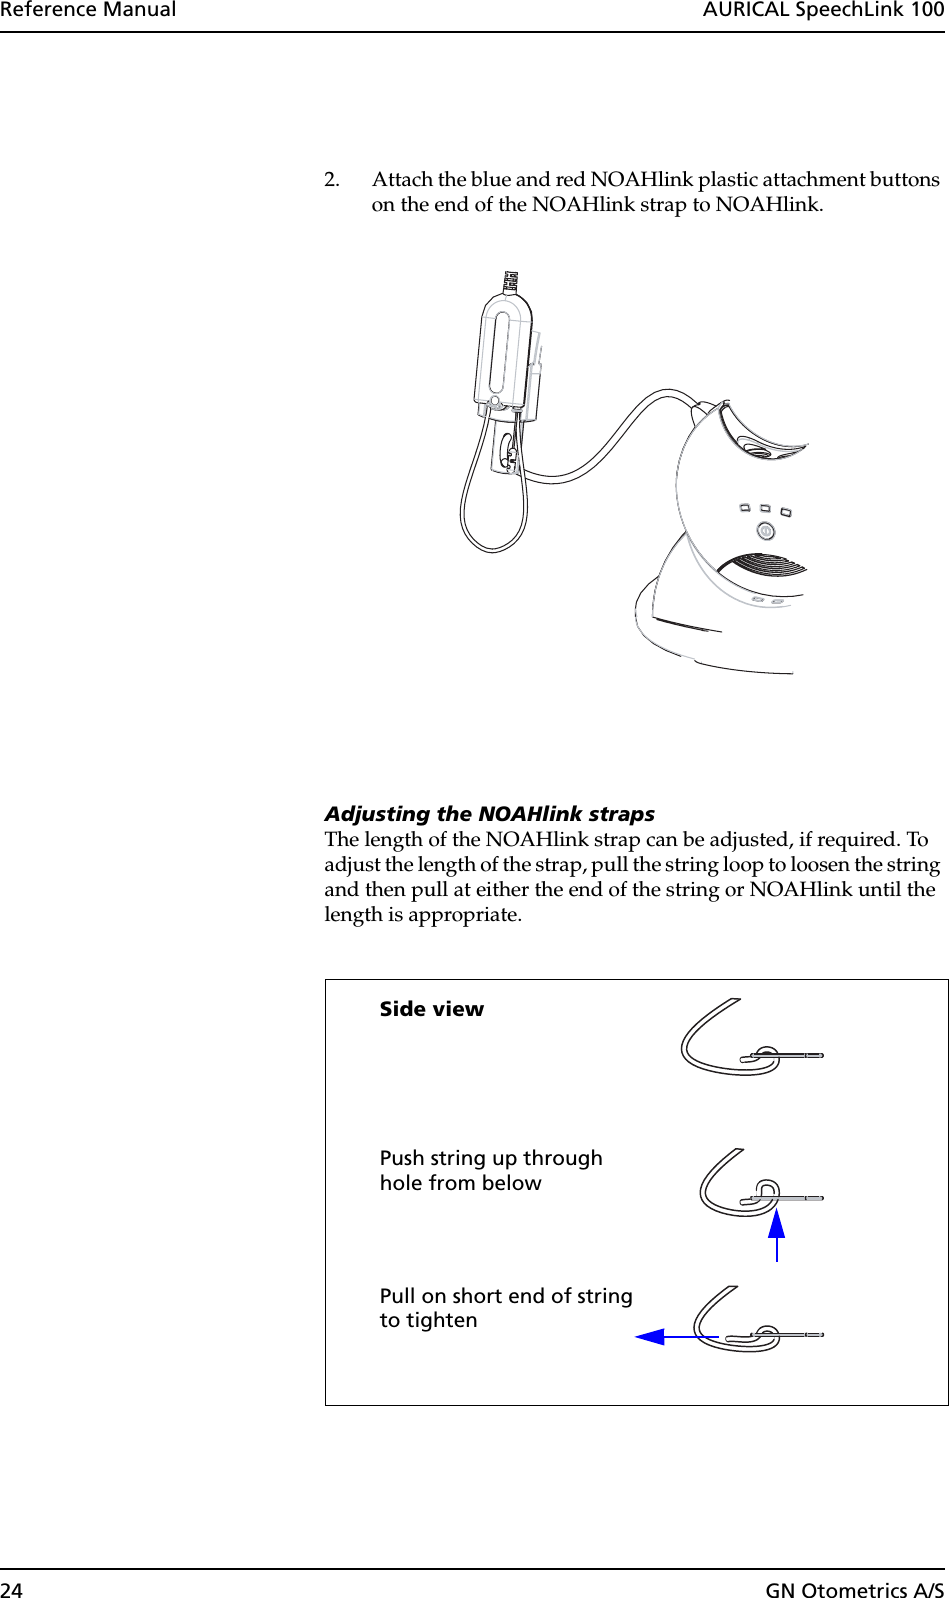
UserManual.wiki
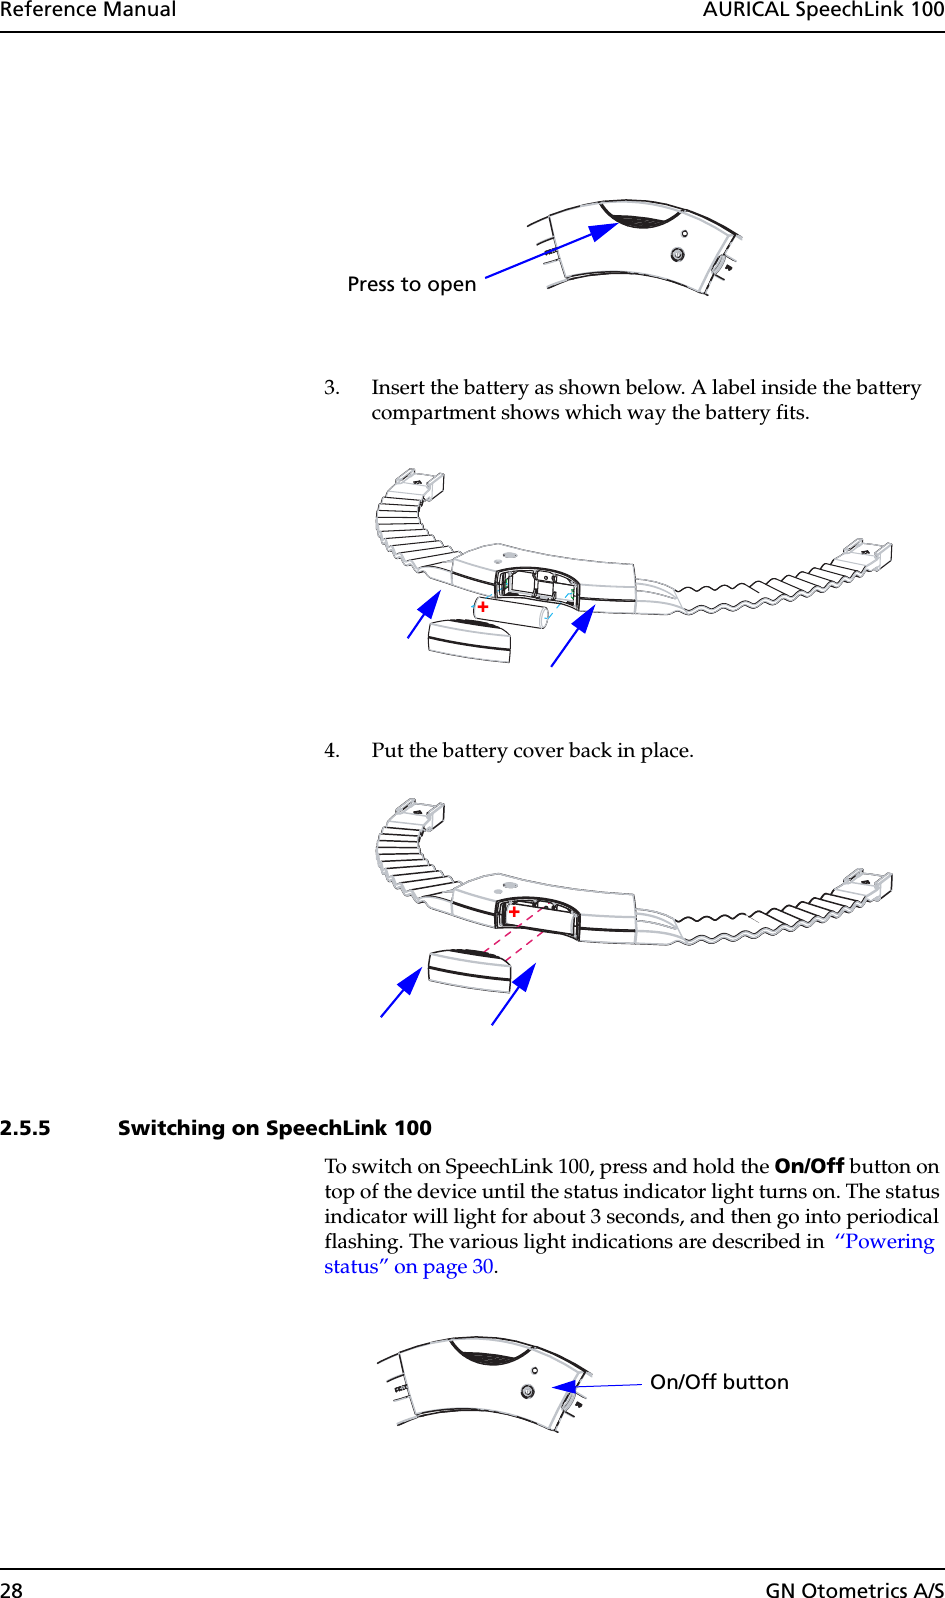
>
GN Otometrics A S
>
1053 User Manual
User Manual
Navigation menu
Upload a User Manual
Namespaces
Wiki Guide
HTML
PDF
Info
Views
User Manual
Discussion / Help
Navigation