Garmin 01748 LOW POWER TRANSMITTER (2400-2483.5 MHz) User Manual
Garmin International Inc LOW POWER TRANSMITTER (2400-2483.5 MHz) Users Manual
UserManual.wiki
>
Garmin
>
01748 User Manual
Users Manual
Navigation menu
Upload a User Manual
Namespaces
Wiki Guide
HTML
PDF
Info
Views
User Manual
Discussion / Help
Navigation

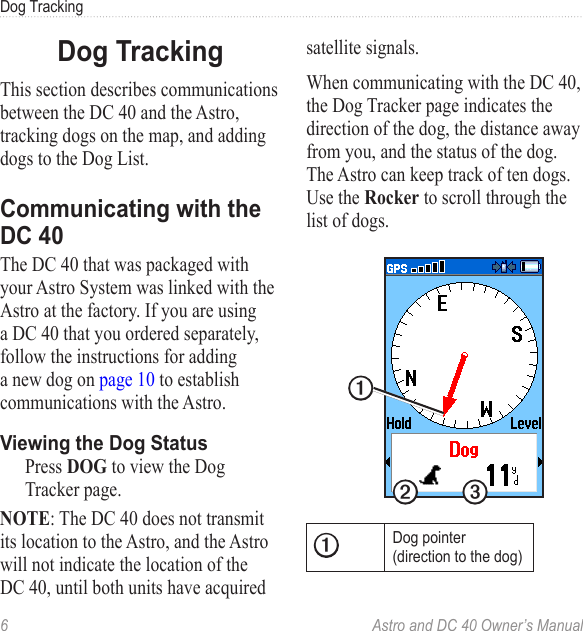
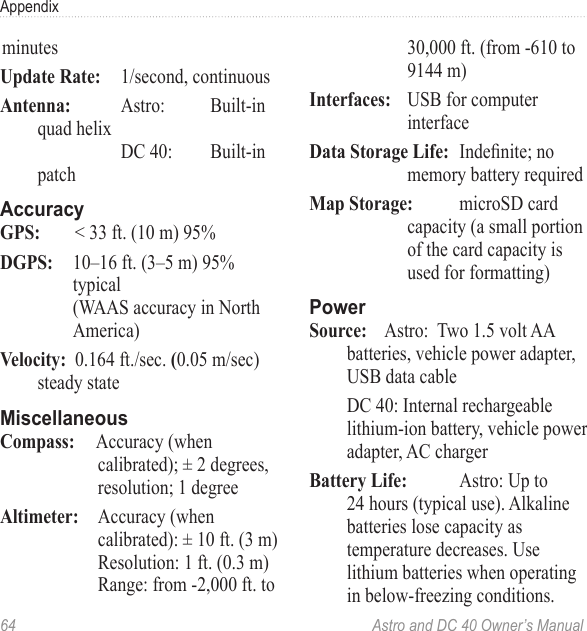
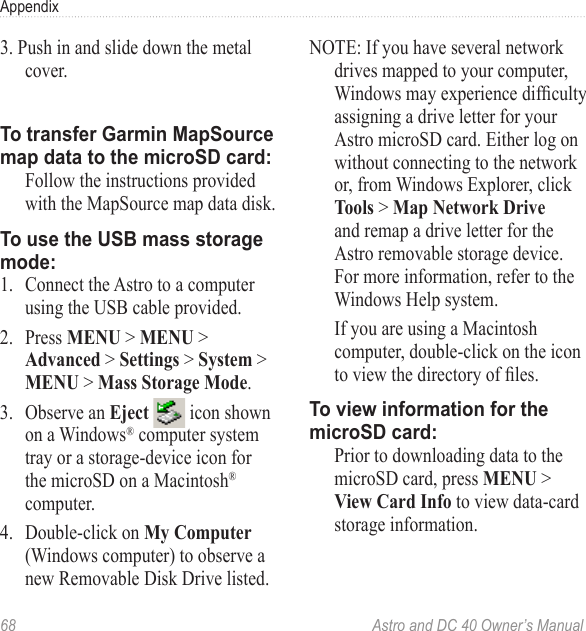
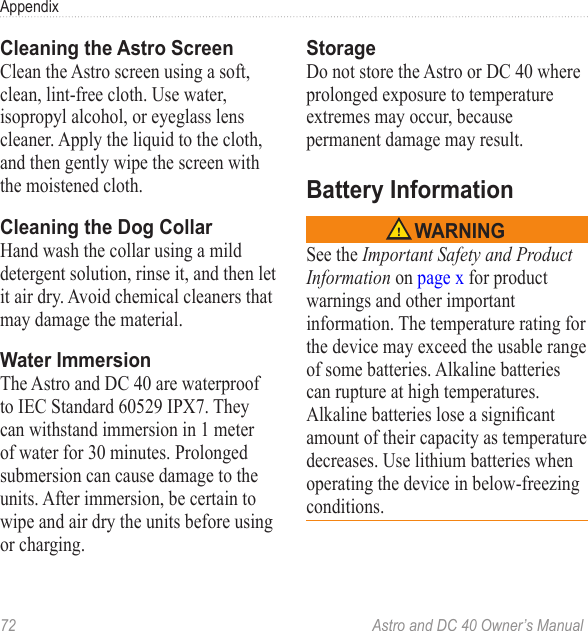
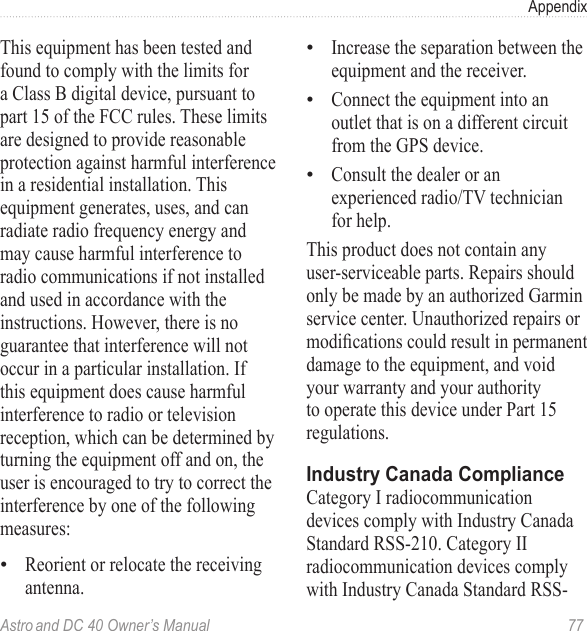
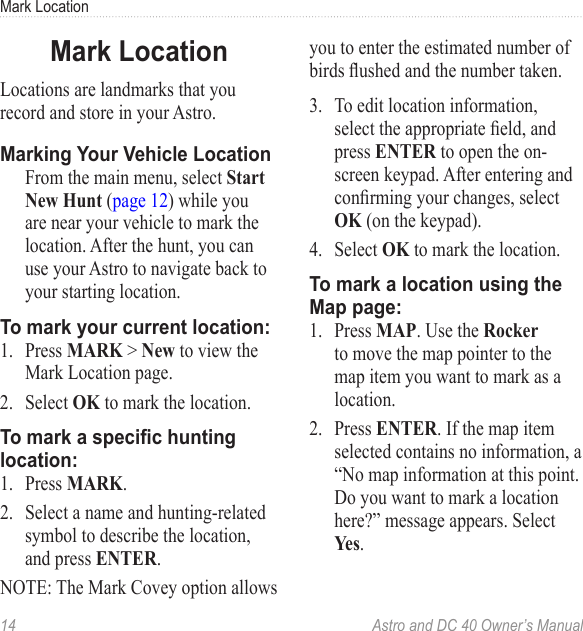
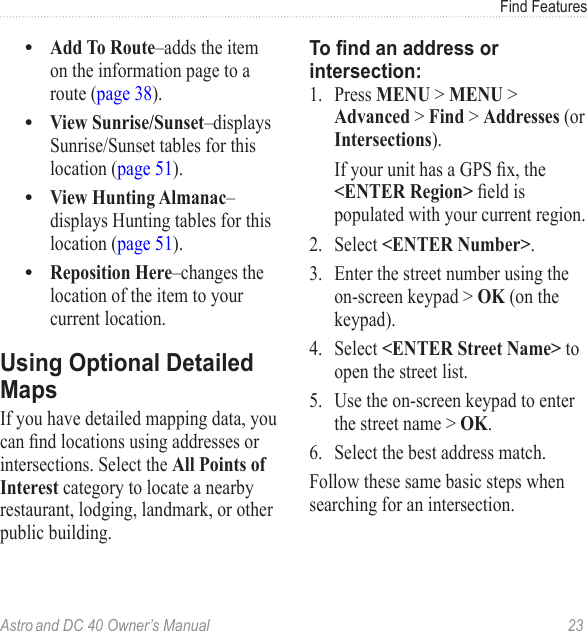
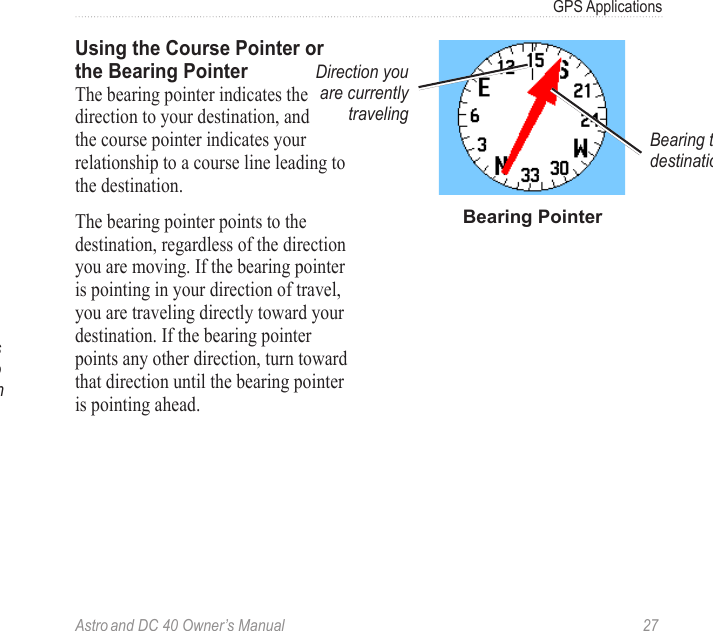
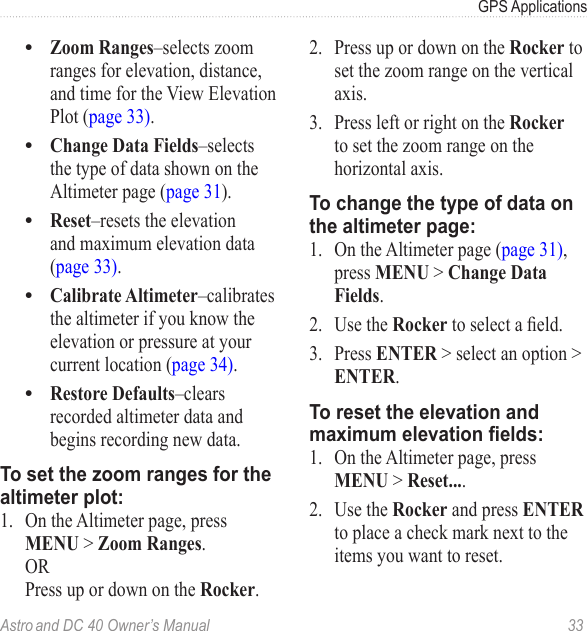
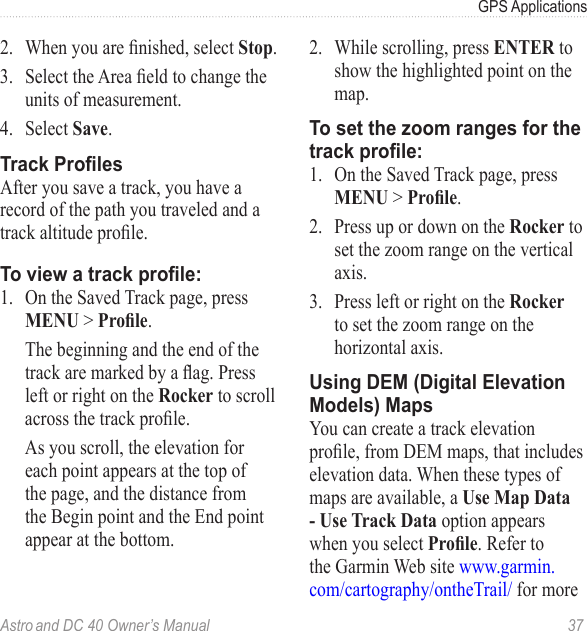
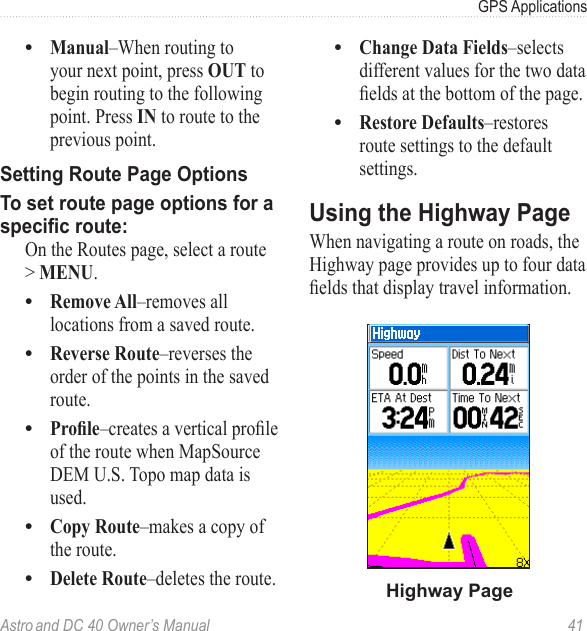
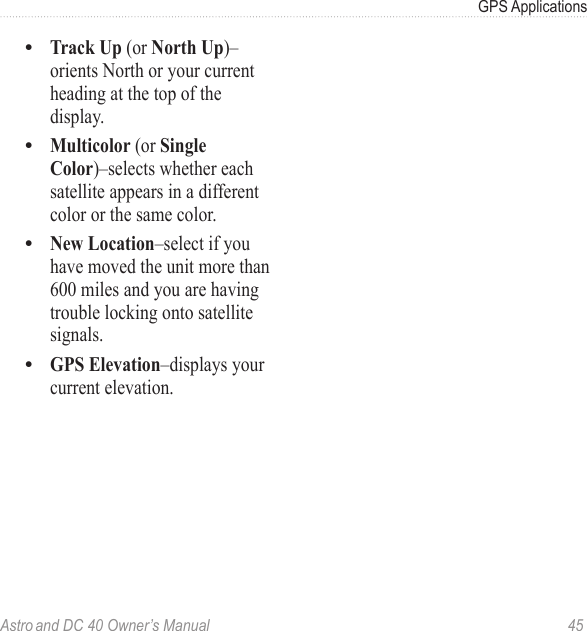
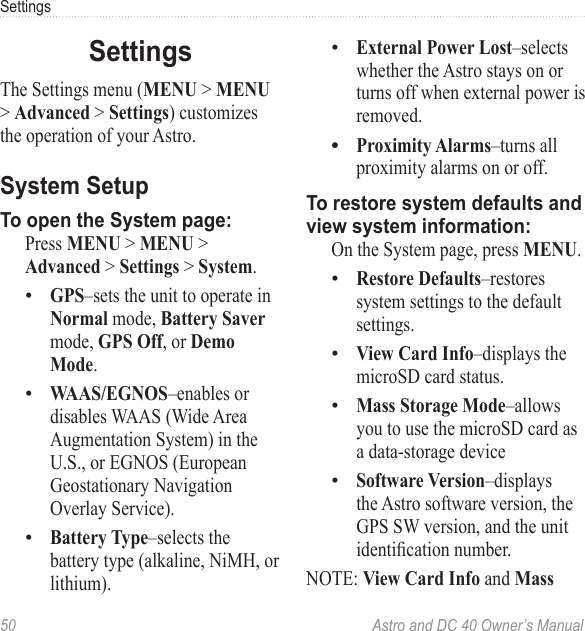
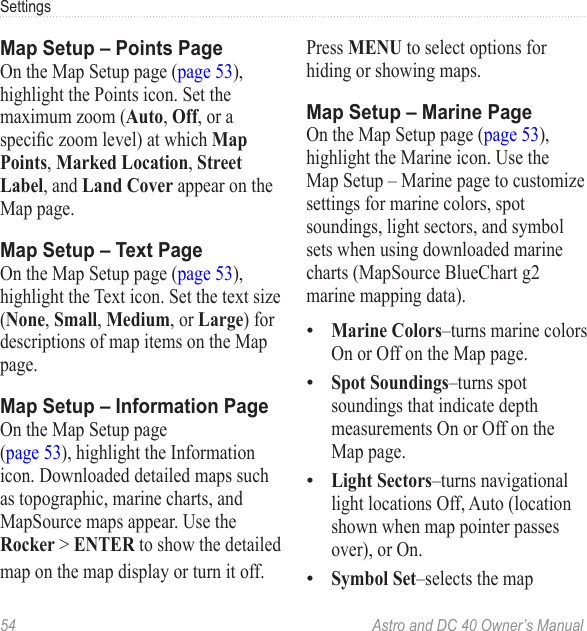
![Astro and DC 40 Owner’s Manual 9Dog Trackingis most accurate when you are holding the Astro level and the dog is farther than 30 feet (9.1 meters) away. At less than that distance, a NEAR message appears, and the dog pointer is shortened. When you are close to the dog, the dog pointer may be inaccurate.Dog Status IconsSittingRunningOn PointTreedUnknownThe Unknown status symbol [?], indicates that the DC 40 has not acquired a satellite signal and that the Astro cannot determine the location of the dog.Tracking a Dog on the Map Press MAP.➍➋➎➌➊➊Marked locations on the map➋Accuracy circle➌Dog location➍Your location](https://usermanual.wiki/Garmin/01748/User-Guide-1293826-Page-13.png)

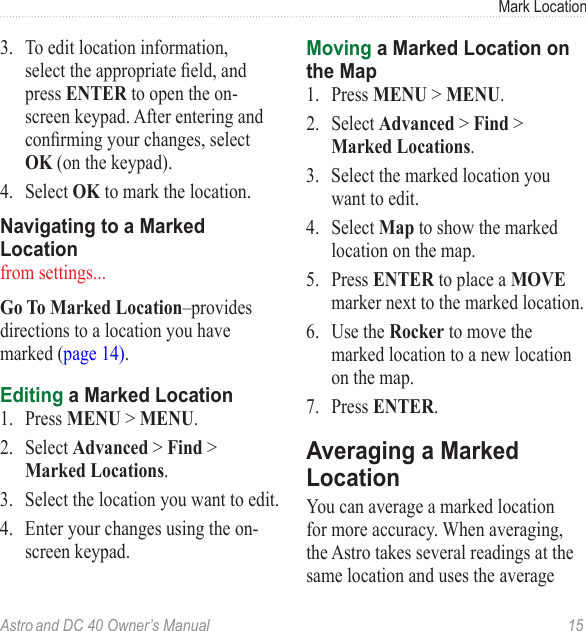

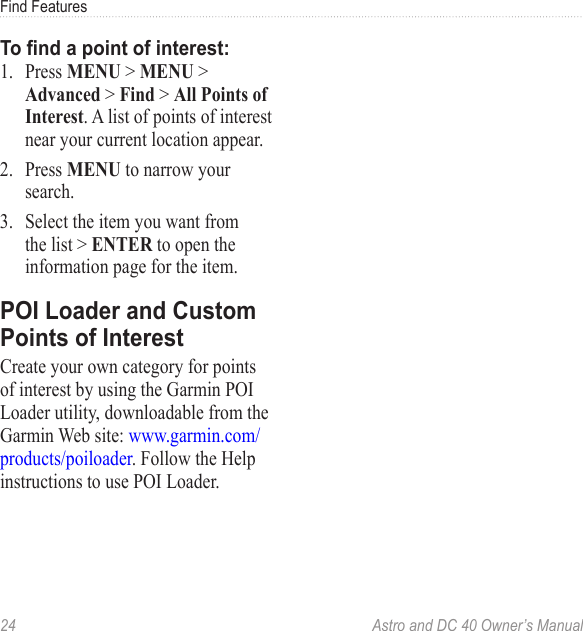
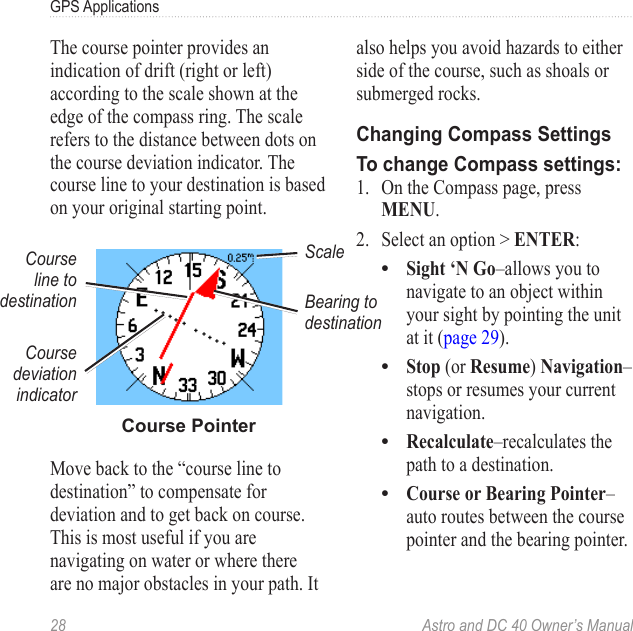
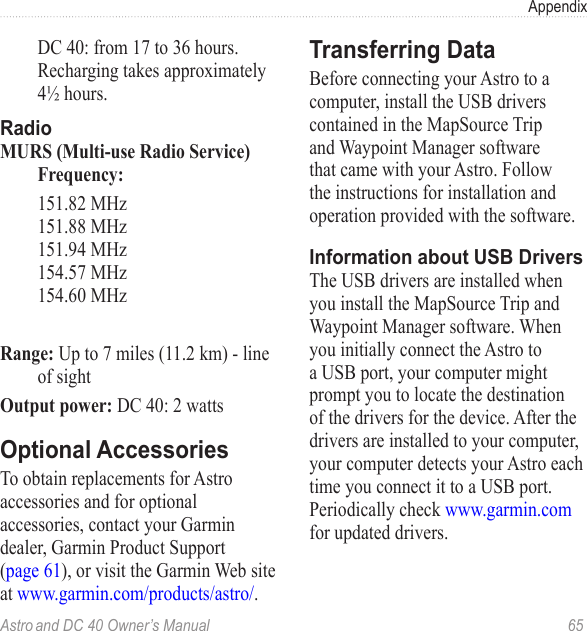
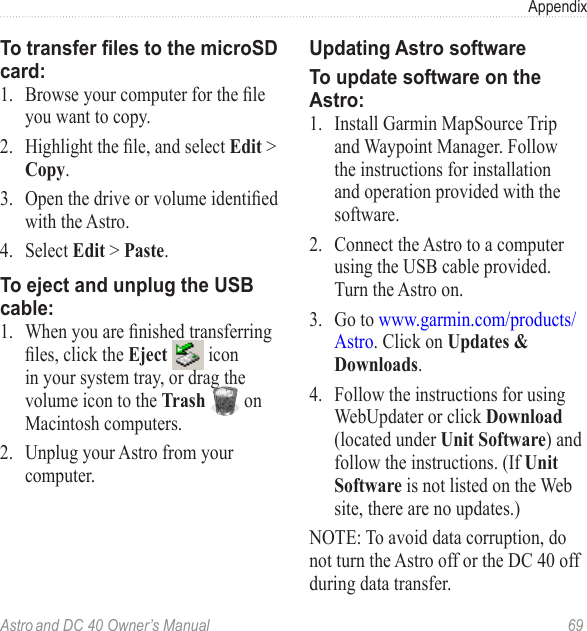
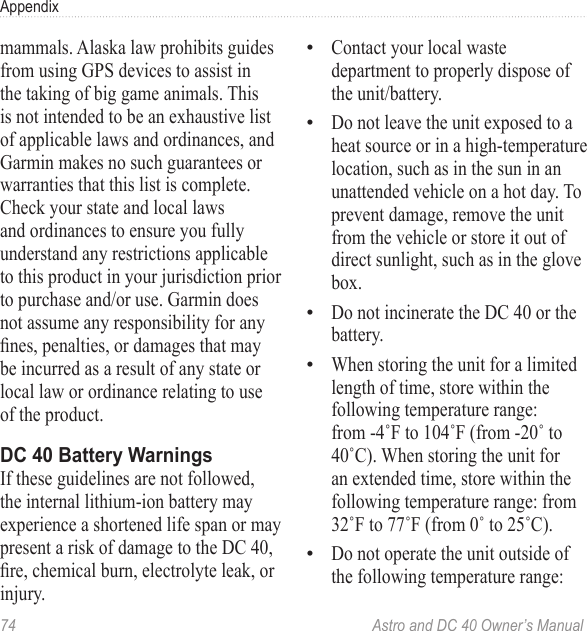
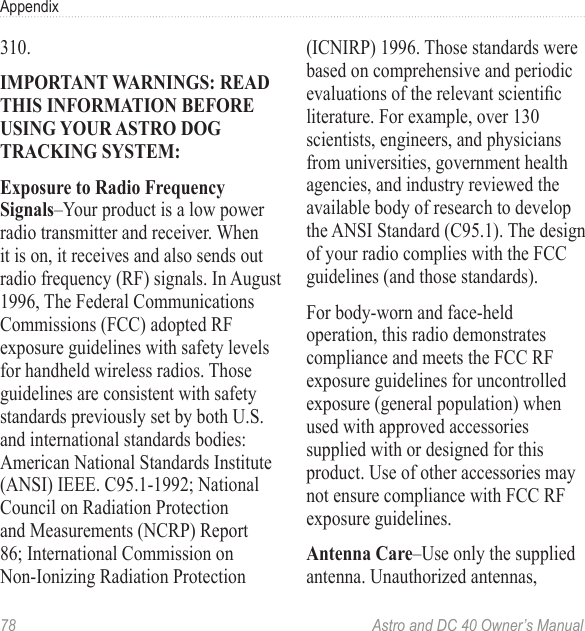
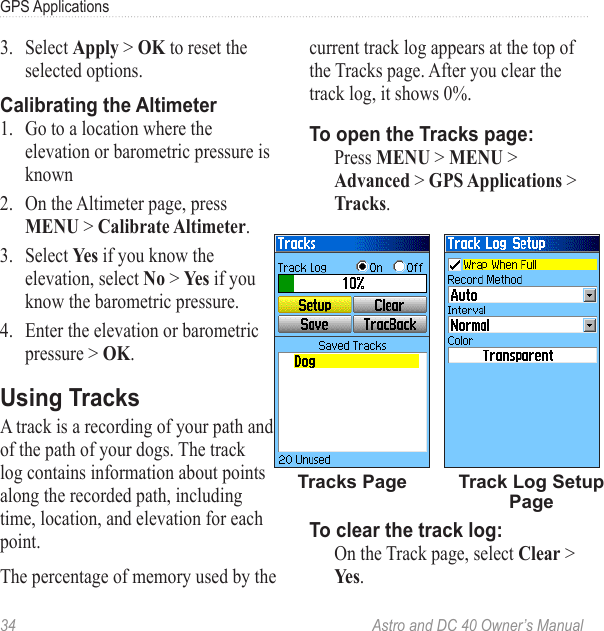
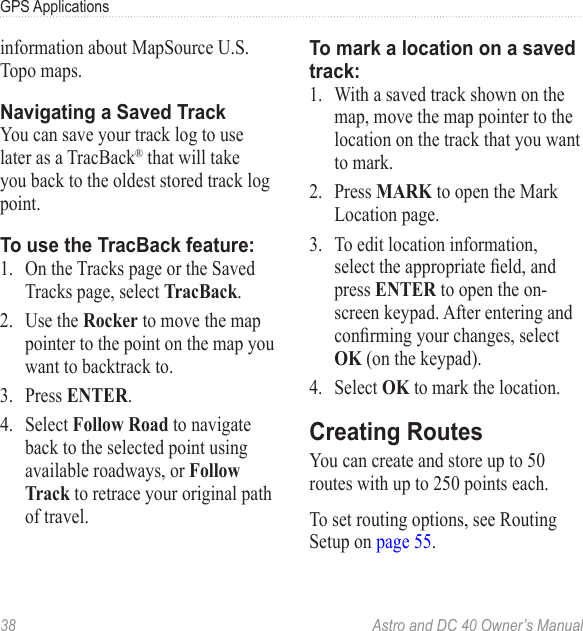
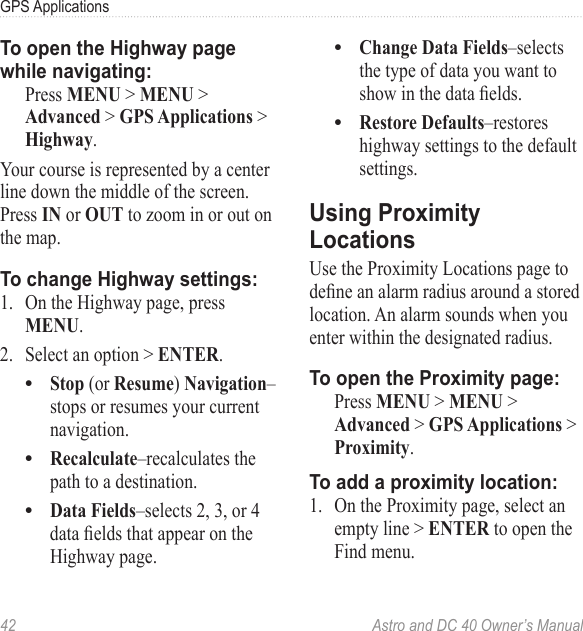
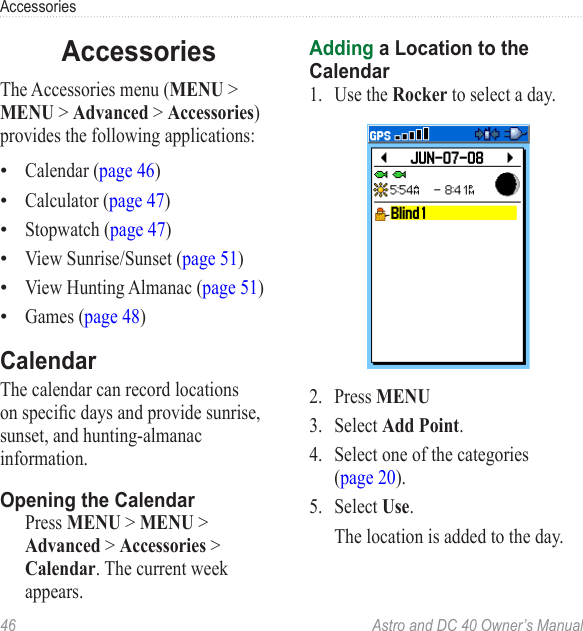
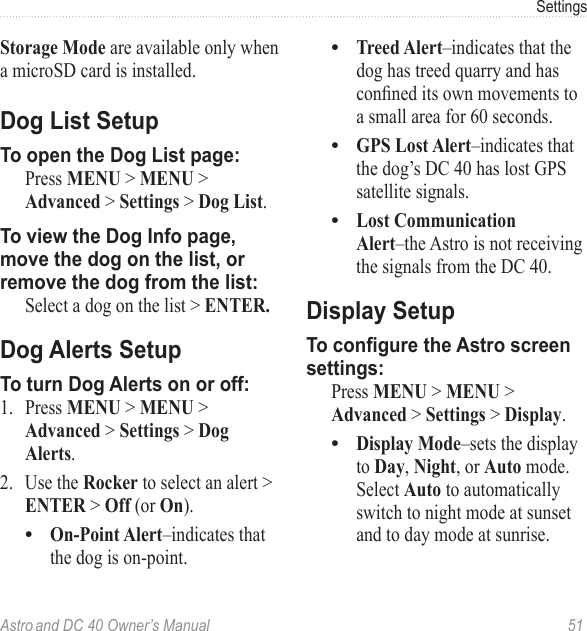
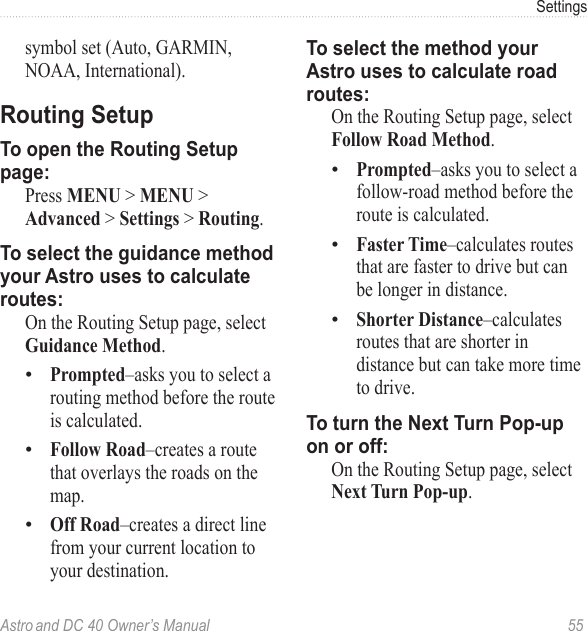
![30 Astro and DC 40 Owner’s ManualGPS Applications3. Press ENTER to lock the direction and open the Sighting page.Sighting PageBearing pointer4. Select Set Course to open the Compass page and navigate to the distant object (select Re-Sight to set course on a different object). OR Select Project Location (page 16).Calibrating the CompassnoticeCalibrate the electronic compass outdoors. Do not stand near objects that inuencemagneticelds,suchascars,buildings, or overhead power lines.Calibrate the Astro electronic compass thersttimeyouuseit,afterlongperiods of storage, after you install new batteries, or when the unit has been exposed to temperature changes of greater than 20°F (11°C).You should calibrate the compass after moving long distances, experiencing temperature changes, or changing the batteries.[from 62]1. From the dog tracker page, press MENU.2. Select Calibrate Compass > Start.3. Follow the on-screen instructions.](https://usermanual.wiki/Garmin/01748/User-Guide-1293826-Page-34.png)

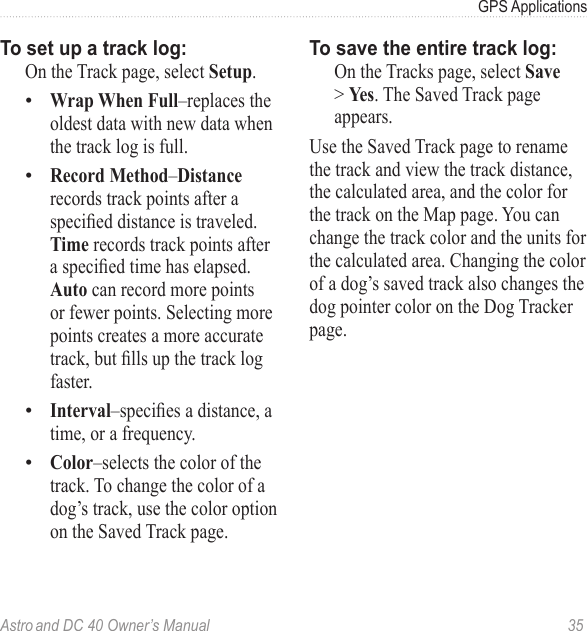
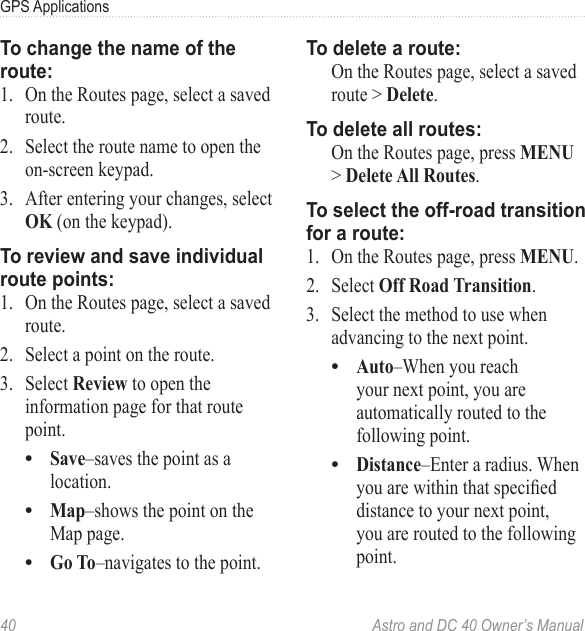
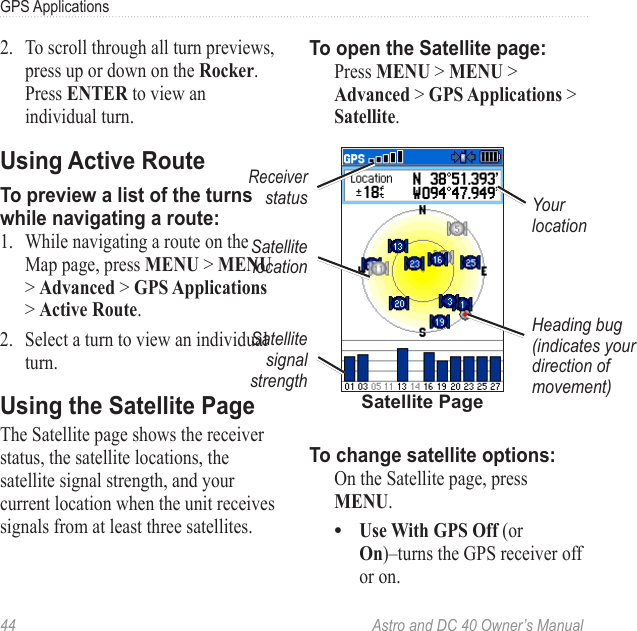
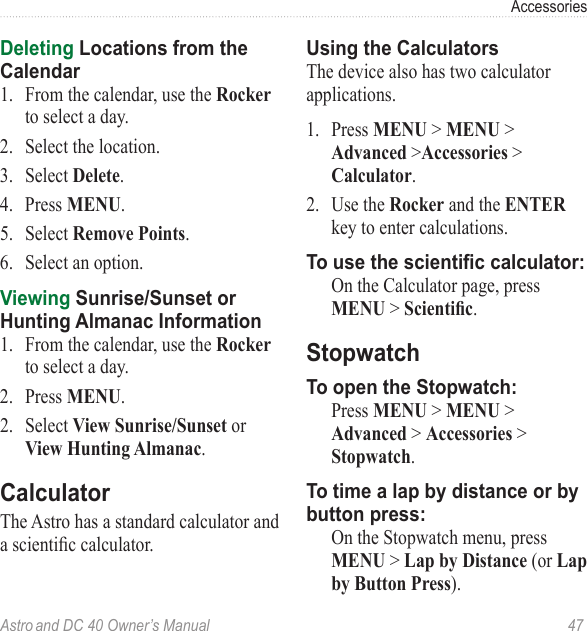

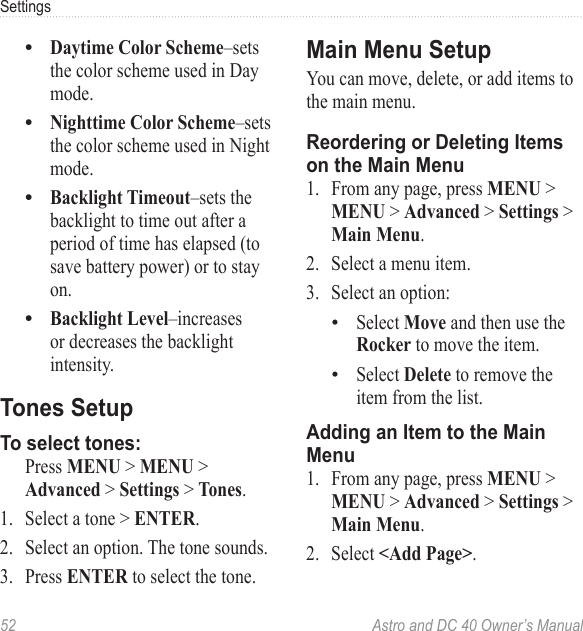

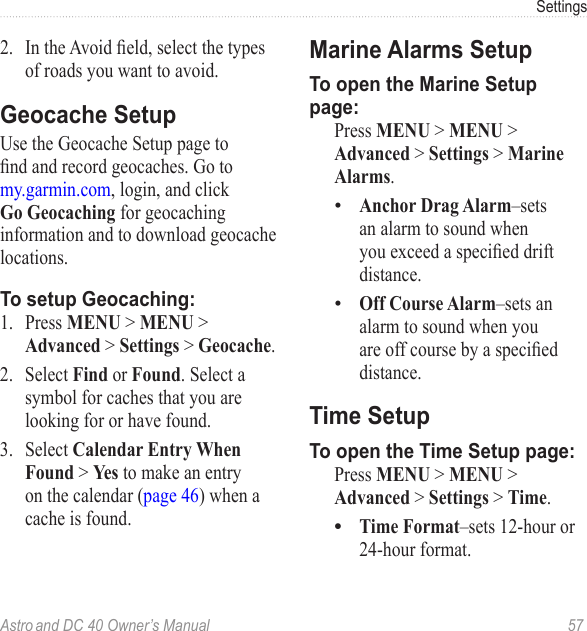

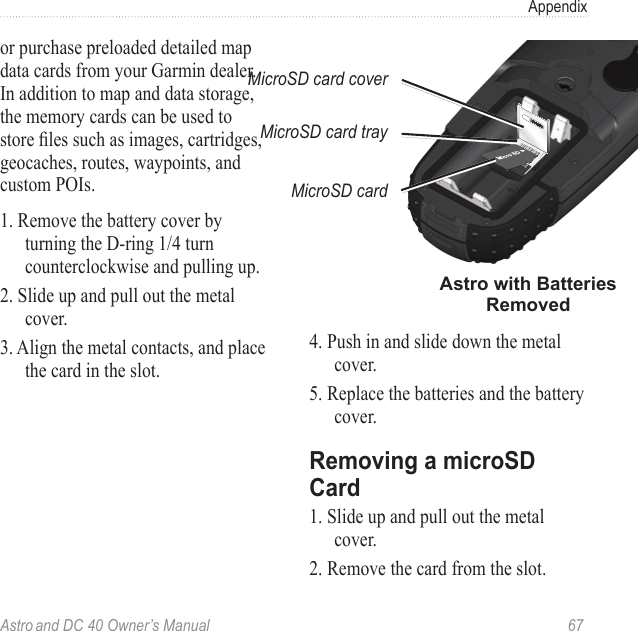
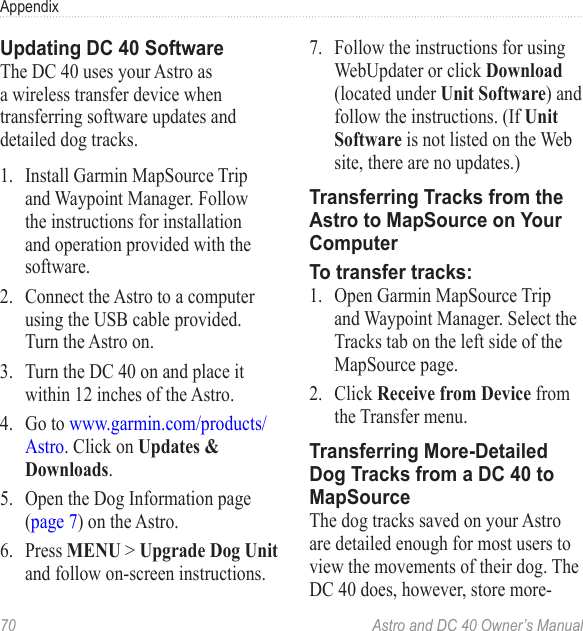
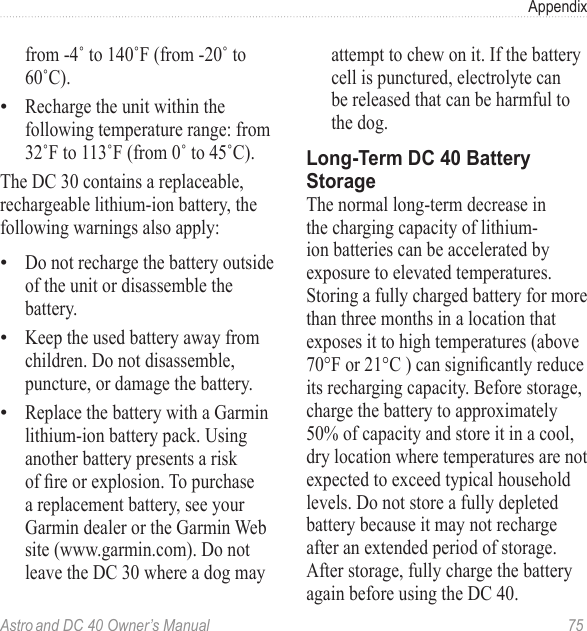
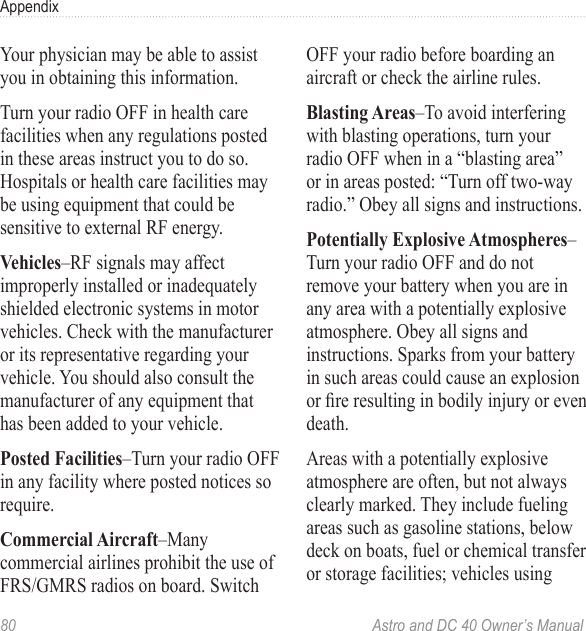
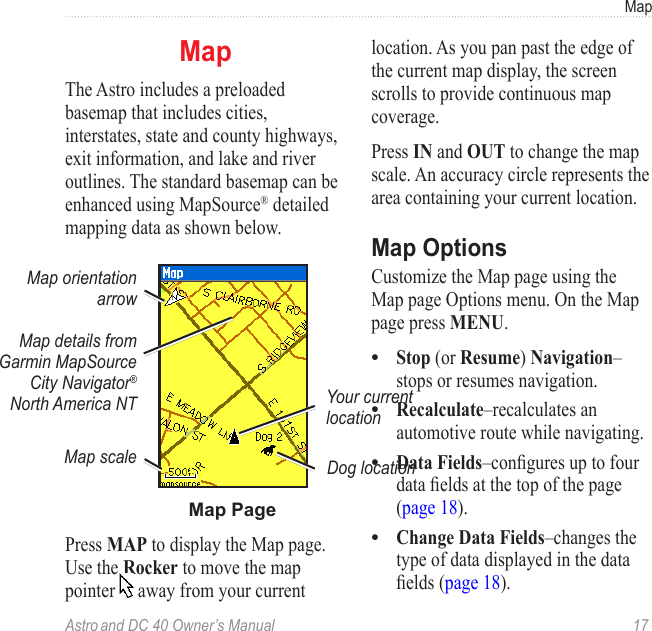
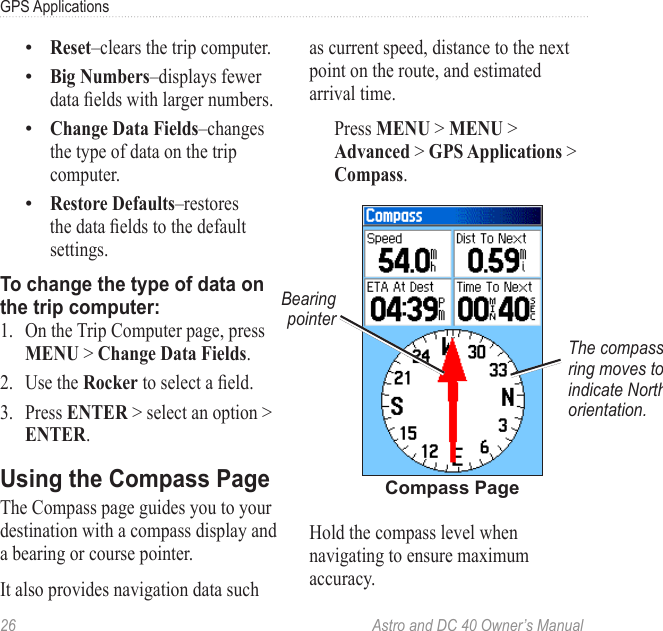
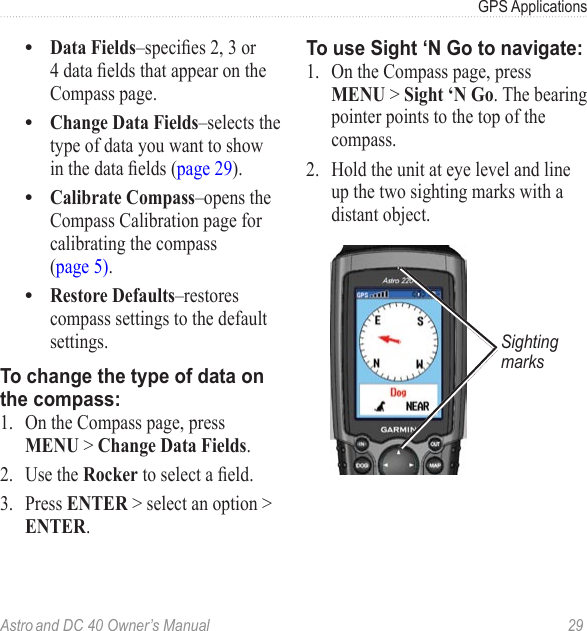
![Astro and DC 40 Owner’s Manual 63AppendixSpecications [table]PhysicalSize: Astro: 2.25 in. W × 6.25 in. H × 1.25 in. D (57 × 159 × 32 mm) DC 40: 1.5 in. W × 1.9 in. H × 3.7 in. D (38 × 48 × 94 mm)Weight: Astro: 6.5 oz. (185 g) without batteries. DC 40: 7.5 oz. (213 g) with batteries and antenna and collar. 4.7 oz. (133 g) without collar.Display: 1.5 in. W × 2.2 in. H (38.1 × 55.9 mm), 256-color, high resolution, transreective (160 × 240 pixels) with backlighting.Water resistance: Both the Astro and the DC 40 are water resistant IEC-529, IPX7Temperature Range: Astro: from -4°F to 158°F (from -20°C to 70°C) DC 40: from -4°F to 140°F (from -20°C to 60°C)DC 40 charging temperature: from 32°F to 113°F (from 0°C to 45°C) Warning: The temperature rating of the Astro System may exceed the usable range of certain batteries. Certain batteries can rupture at high temperatures.GPS PerformanceReceiver: WAAS enabledAcquisition Times: average, for a stationary receiver with an open sky view. Warm: 15 seconds Cold: 45 seconds AutoLocate: 2](https://usermanual.wiki/Garmin/01748/User-Guide-1293826-Page-67.png)