Garmin 01891 LOW POWER TRANSMITTER (2400-2483.5 MHz) User Manual 1
Garmin International Inc LOW POWER TRANSMITTER (2400-2483.5 MHz) Users Manual 1
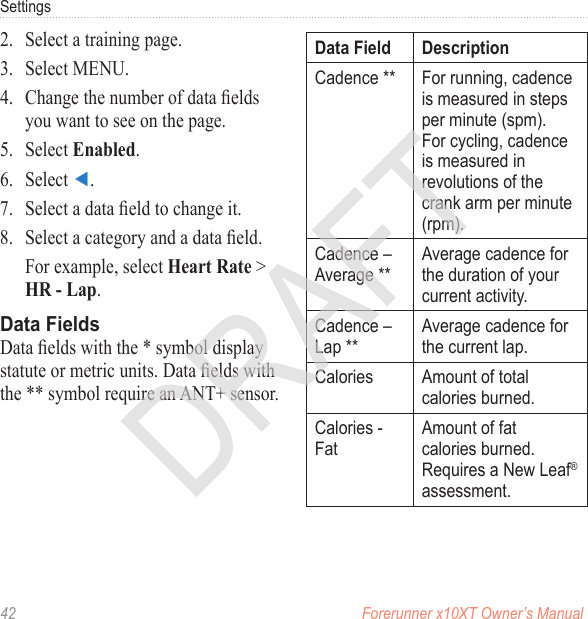
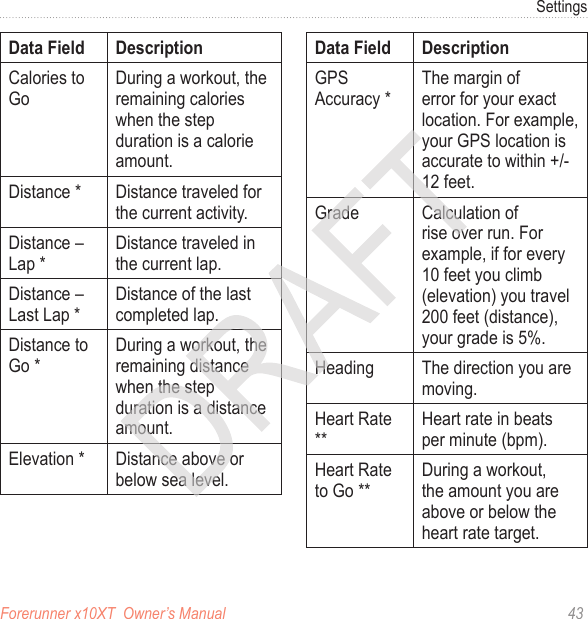
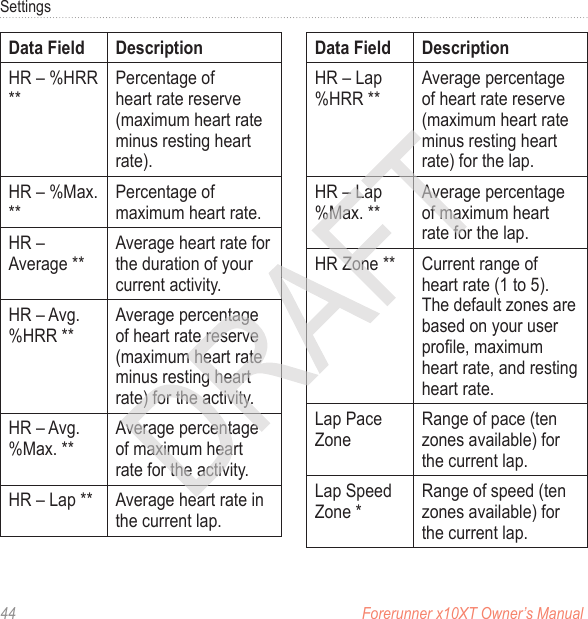
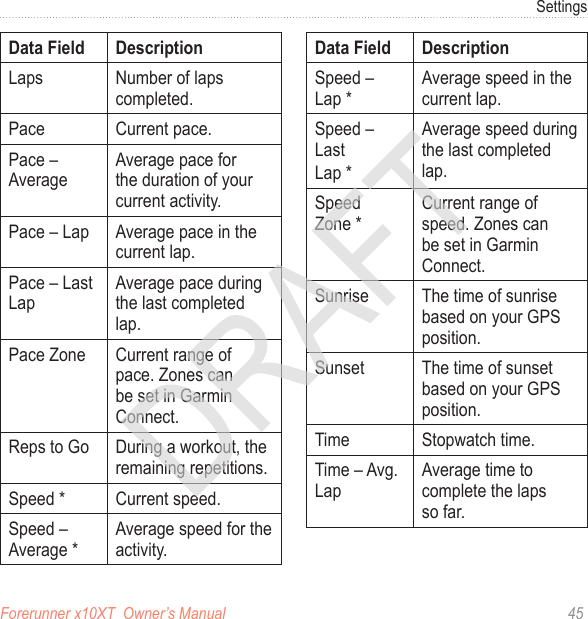
UserManual.wiki
>
Garmin
>
01891 User Manual
>
Users Manual 1
Contents
1.
Users Manual 2
2.
Users Manual 1
Users Manual 1
Navigation menu
Upload a User Manual
Namespaces
Wiki Guide
HTML
PDF
Info
Views
User Manual
Discussion / Help
Navigation

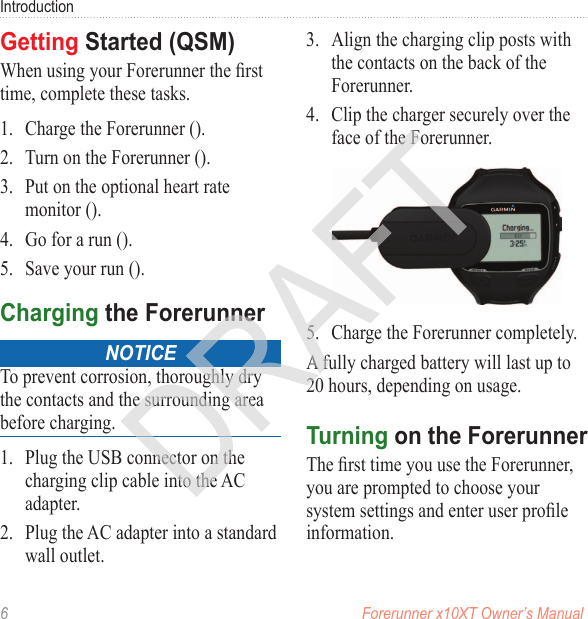
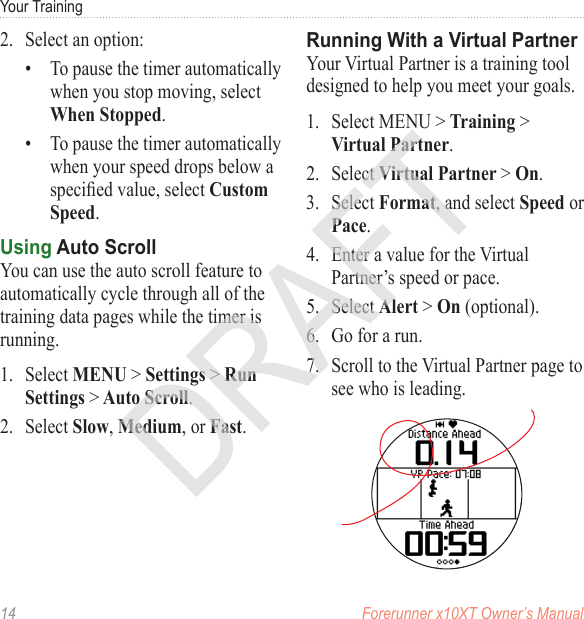


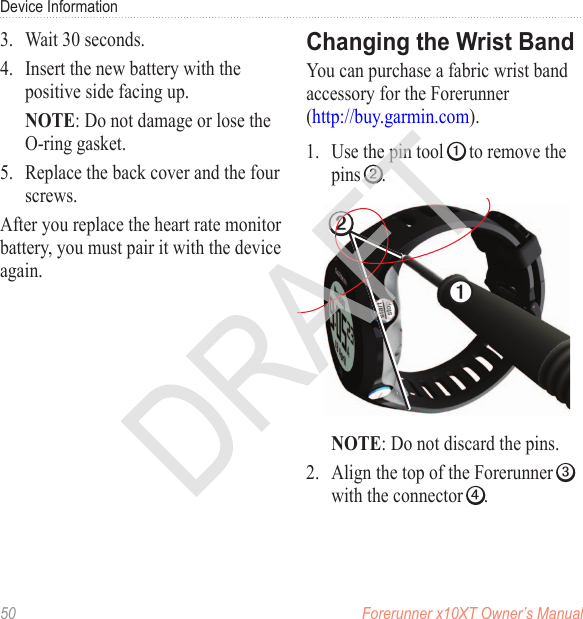
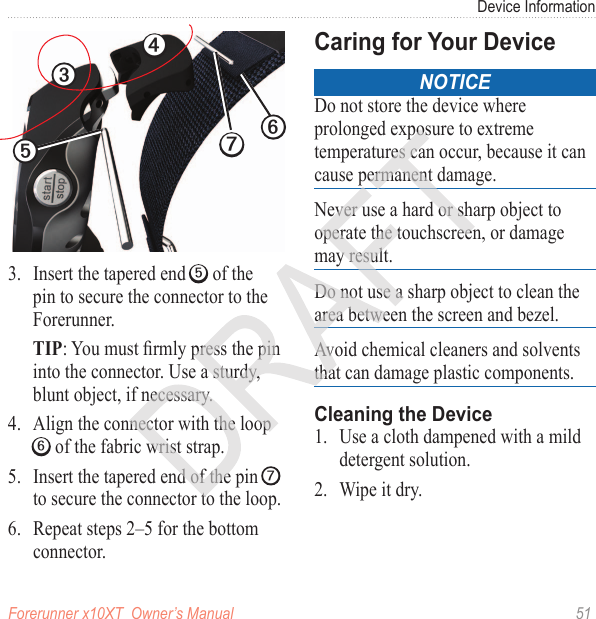
![Forerunner x10XT Owner’s Manual 29ANT+ SensorsSince Garmin only has one accessory in this category, I assume it will be selected as the default. Maybe this topic is not necessary.Before you customize the bike sensor options, you must change your sport to cycling (page 20). Before you can calibrate the bike sensor, it must be properly installed and actively recording data. Calibrating your bike sensor is optional and can improve accuracy. For calibration instructions specic to your bike sensor, refer to the manufacturer’s instructions.1. Select MODE > Settings > Bike Settings > [Bike 1] > ANT+ Spd/Cad > Calibration.2. Select an option:• To use GPS to determine your wheel size, select Auto.• To enter your wheel size, select Manual.For a list of third-party ANT+ sensors that are compatible with the Edge, go to www.garmin.com/intosports.Refer to the manufacturer’s instructions.When the power meter is paired, a message appears, and appears solid on the status page.For calibration instructions specic to your power meter, refer to the manufacturer’s instructions.Before you can calibrate your power meter, it must be properly installed and](https://usermanual.wiki/Garmin/01891.Users-Manual-1/User-Guide-1555970-Page-29.png)