Users Manual
A03250
Quick Start Manual
Introduction
WARNING
See the Important Safety and Product
Information guide in the product box for
product warnings and other important
information.
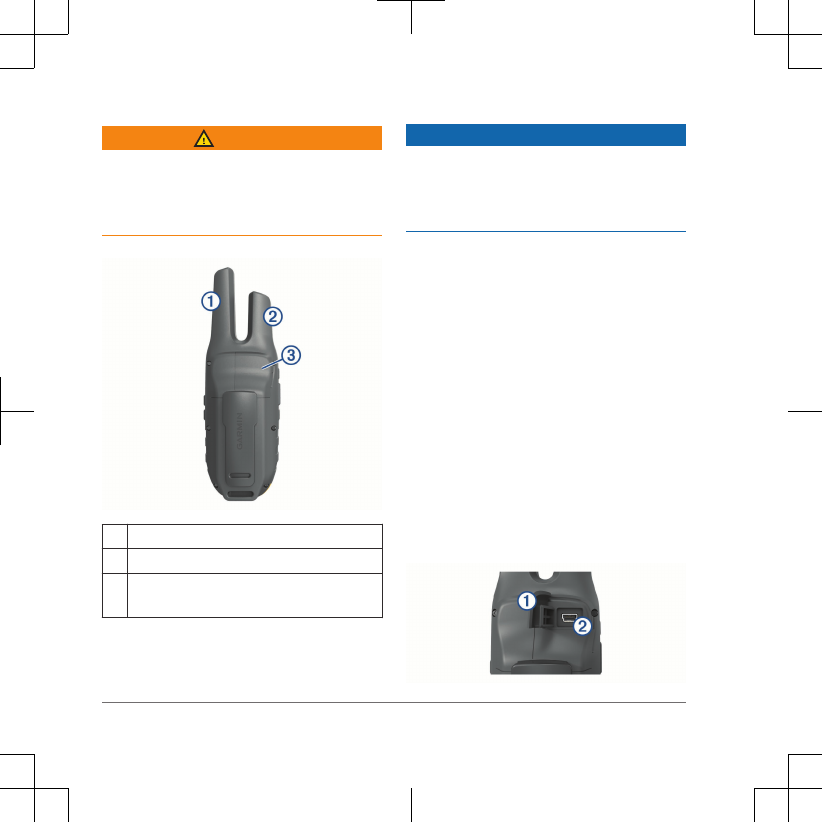
Device Overview
ÀGMRS antenna
ÁGPS antenna
ÂMini-USB port (under weather cap)
2.5 mm headset jack (under weather cap)
Charging the Battery
NOTICE
To prevent corrosion, thoroughly dry the
USB port, the weather cap, and the
surrounding area before charging or
connecting to a computer.
You must charge the device fully before
using it for the first time.
Before you can connect the straight
connector of the USB cable to your device,
you may need to remove optional mount
accessories.
NOTE: The device does not charge when
outside the approved temperature range
(page 8).
You can charge the battery using a USB
port on your computer if necessary, but
using the included AC adapter is the
fastest way to charge the device.
1Pull up the weather cap À from the
mini-USB port Á.
2 Quick Start Manual
2Plug the small end of the USB cable
into the mini-USB port.
3Plug the large end of the USB cable
into an AC adapter or a computer USB
port.
4If necessary, plug the AC adapter into
a standard wall outlet.
When you connect the device to a
power source, the device turns on.
5Charge the battery completely.
TIP: You can hold for two seconds
to view the charge level and place the
device into power saving mode.
Turning On the Device
Hold .
Device Operation
À
(Call key)
Press to transmit an
attention tone on the current
channel.
Hold to send an emergency
alert.
Á
(Power key)
Press to adjust the backlight
and check battery level.
Hold to turn the device on
or off.
While charging, hold to put
the device in power saving
mode.
Â
(Menu/zoom
key)
Press to open the menu for
a page or item.
Press twice to return to the
main menu.
Hold to adjust the zoom
level of the map.
Ã
(Back key)
Press to return to the
previous item or menu.
ÄThumb Stick Move to highlight a menu
item and control the map
cursor.
Press to select an item.
Hold to mark a waypoint.
Quick Start Manual 3
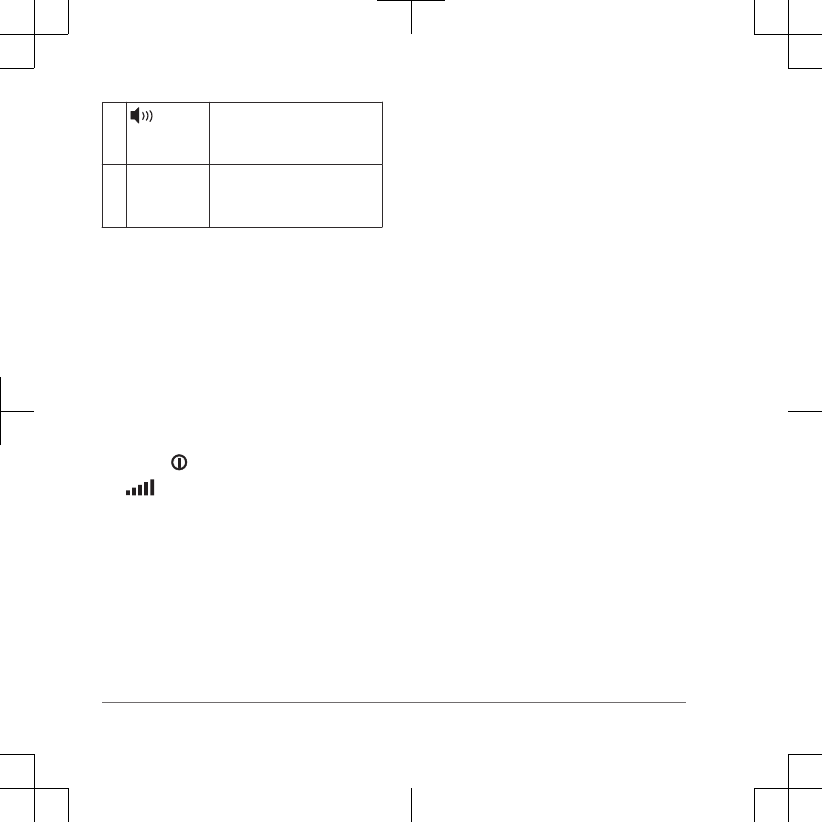
Å
(Volume/
squelch key)
Press to adjust the volume
and squelch levels.
ÆPTT
(Push-to-
talk key)
Hold to transmit on the
current radio channel.
Acquiring Satellite Signals
It may take 30 to 60 seconds to acquire
satellite signals.
1Go outdoors to an open area.
2If necessary, turn on the device.
3Wait while the device searches for
satellites.
A question mark flashes while the
device determines your location.
4Select to open the status page.
shows the GPS/GLONASS signal
strength.
When the bars are full, the device has
acquired satellite signals.
Radio
In the United States and Canada, this
device uses General Mobile Radio Service
(GMRS) for two-way communication with
other compatible radio devices.
In Australia, this device uses UHF Citizen
Band Radio Service (UHF CBRS), and in
New Zealand, this device uses UHF
Personal Radio Service (PRS) for two-way
communication with other compatible radio
devices.
When communicating with other Garmin®
Rino devices, additional features are
available.
Opening the Radio App
You can manage your channel, code, and
other radio settings in the radio app.
From the home screen, select Radio.
Channels and Codes
To communicate with other Rino and
GMRS or UHF CBRS/PRS radio users,
you must be on the same channel.
For a list of channels for your region and
device, see the owner's manual.
NOTE: GMRS frequencies are regulated
by the FCC in the United States. To
transmit on GMRS frequencies, you must
obtain a license from the FCC.
Squelch codes allow you to filter calls from
other users on the same channel, so you
hear only the radios you want to hear. The
device has two different squelch modes,
4 Quick Start Manual

Continuous Tone Controlled Squelch
System (CTCSS) and Digital-Coded
Squelch (DCS). Calls on the channel that
are not using the same squelch code in
the same squelch mode are ignored.
For a list of squelch codes for your region
and device, see the owner's manual.
NOTE: Squelch codes do not make your
conversation private. Anyone on the same
channel can hear your conversation.
Selecting a Channel
1From the radio app, select Channel.
2Select a channel from the list.
Selecting a Squelch Code
1From the radio app, select Code.
2Select a code from the list.
NOTE: Selecting Off allows you to
hear everything on the channel.
Monitoring a Channel for Activity
You can monitor a single channel for any
activity, including static and weak voice
signals. This is helpful if a signal is going
out of range.
1From the radio app, select the channel
you want to monitor.
2Select Monitor.
Scanning Channels
You can scan the channels for voice
activity. This can help you find a channel
with light activity for your group to use, or
to find other radio users in the area.
From the radio app, select Scan.
Peer-to-Peer Positioning
You can send your location information to
other Rino users using peer-to-peer
positioning. Through peer-to-peer
positioning, you can also track the
movement of other Rino users on the
same channel and code, and navigate to
their locations.
Peer-to-peer positioning is enabled by
default, and your position information is
sent to other Rino users on the same
channel and code when you press the
PTT key (push-to-talk) or the key
(call).
NOTE: You can send location information
only once every 30 seconds, due to FCC
restrictions.
Polling Other Rino Users
You can request position updates for other
Rino users who are in your saved contacts
(page 6).
Quick Start Manual 5
1From the contacts app, select a saved
contact.
2Select Poll Location.
The location of the contact is updated
on the map.
Contacts
You can save information about another
Rino user as a contact. You can view
location information and navigate to the
location of users in your contacts list.
Saving a New Contact
The first time the device receives a peer-
to-peer positioning signal from another
Rino user, the new contact page appears.
To save the contact details or navigate to
the contact in the future, you must save
the new contact in your contacts list.
From the new contact page, select
Save.
The new contact is saved in your
contacts list.
Navigating to a Contact
1From the home screen, select
Contacts.
2Select a contact.
3Select View Map > Go.
4Follow to the contact's location.
Creating, Saving, and Sending Notes
You can send a short text note to Rino
users on your current channel and code.
NOTE: Notes transmit to all users on your
current channel and code, not just to your
saved contacts.
1From the home screen, select Notes.
2Select Send Note > New Note.
3Enter the note text.
Due to FCC regulations, you can enter
a maximum of 13 characters in a note.
4Select Done.
5Select Send and Save.
Navigation
You can navigate to a route, track,
waypoint, geocache, or any saved location
in the device. You can use the map or the
compass to navigate to your destination.
Navigating to a Destination
1From the home screen, select Where
To?.
2Select a category.
3Select a destination.
4Select Go.
6 Quick Start Manual

Opening the Map
You can browse the map or use the map
to view your position and route when
navigating to a destination.
From the home screen, select Map.
NOTE: You can use the Thumb Stick
to pan or browse the map.
Opening the Compass
When you are navigating to a destination,
you can use the compass to point toward
your destination or toward the next
waypoint in a route.
When you are not actively navigating, you
can use the compass to determine your
orientation.
From the home screen, select
Compass.
NOTE: The device uses GPS to determine
the heading on the compass, so you must
be moving to view accurate compass
information.
Customizing the Device
Adjusting the Backlight Brightness
You can adjust the backlight brightness to
maximize the battery life. For a longer
battery life, you should turn off the
backlight when using the device in
daylight.
1Select .
2Use the Thumb Stick to adjust the
backlight brightness.
Device Information
Long-Term Storage
When you do not plan to use the device
for several months, you should charge the
battery to at least 50% before you store
the device. You should store the device in
a cool, dry place with temperatures around
the typical household level. After storage,
you should fully recharge the device
before using it.
Product Updates
On your computer, install Garmin
Express™ (www.garmin.com/express).
This provides easy access to these
services for Garmin devices:
• Product registration
Getting the Owner's Manual
The owner's manual includes instructions
for using device features and accessing
regulatory information.
Go to www.garmin.com/
manuals/A03250.
Quick Start Manual 7
Specifications
Battery type Non-removable Lithium-ion
battery
Battery life Up to 13 hours of typical
usage.
Water rating IEC 60529 IPX7*
Operating
temperature
range
From -20º to 55ºC (from
-4º to 131ºF)
Charging
temperature
range
From 0º to 40°C (from 32º
to 104°F)
Radio channels
and output power
For complete information
on radio channels and
output power for your
device in your region, see
the owner's manual.
*The device withstands incidental
exposure to water of up to 1 m for up to
30 min. For more information, go to
www.garmin.com/waterrating.
8 Quick Start Manual


support.garmin.com
© 2017 Garmin Ltd. or its subsidiaries
Garmin®, the Garmin logo, and Rino® are trademarks of Garmin Ltd. or its subsidiaries, registered in the USA and other
countries. Garmin Express™ is a trademark of Garmin Ltd. or its subsidiaries. These trademarks may not be used without
the express permission of Garmin.
Printed in Taiwan
June 2017
190-02247-92_EN