Garmin A4BVNX01 Digital Transmission System 2403-2476 MHz User Manual
Garmin International Inc Digital Transmission System 2403-2476 MHz
Garmin >
Contents
- 1. User Manual 1
- 2. User Manual
- 3. User Manual 2
User Manual
BC™ 30 Wireless
Backup Camera
Owner’s Manual
Introduction
WARNING
See the Important Safety and Product Information guide in the
product box for product warnings and other important
information.
Viewing Wireless Camera Video
Before you can view video from your wireless camera, you must
install the camera, transmitter, and receiver. See the installation
instructions for your backup camera for more information.
Your GPS device shows video from your paired wireless
cameras in different ways, depending on how the camera
transmitter is connected to power.
1Select an option to show video:
• If the transmitter is connected to a reverse lamp
(recommended), place the vehicle into reverse.
The device automatically shows video from the backup
camera.
• If the transmitter is connected to a running lamp or other
steady 12 VDC source, select the camera icon on the
device to show video from the backup camera.
2Select an option to resume normal device operation:
• If the transmitter is connected to a reverse lamp
(recommended), take the vehicle out of reverse.
The device automatically resumes normal operation.
• If the transmitter is connected to a running lamp or other
steady 12 VDC source, select the camera icon on the
device to resume normal operation.
Guidance Lines
NOTICE
The guidance lines feature is intended for informational and
reference purposes only. You are responsible for maintaining
awareness of your surroundings.
Guidance lines provide an approximate visual representation of
the vehicle's path when in reverse. To provide the most accurate
reference, you must align the guidance lines for each backup
camera. You should not use the guidance lines feature if you
have not aligned the guidance lines.
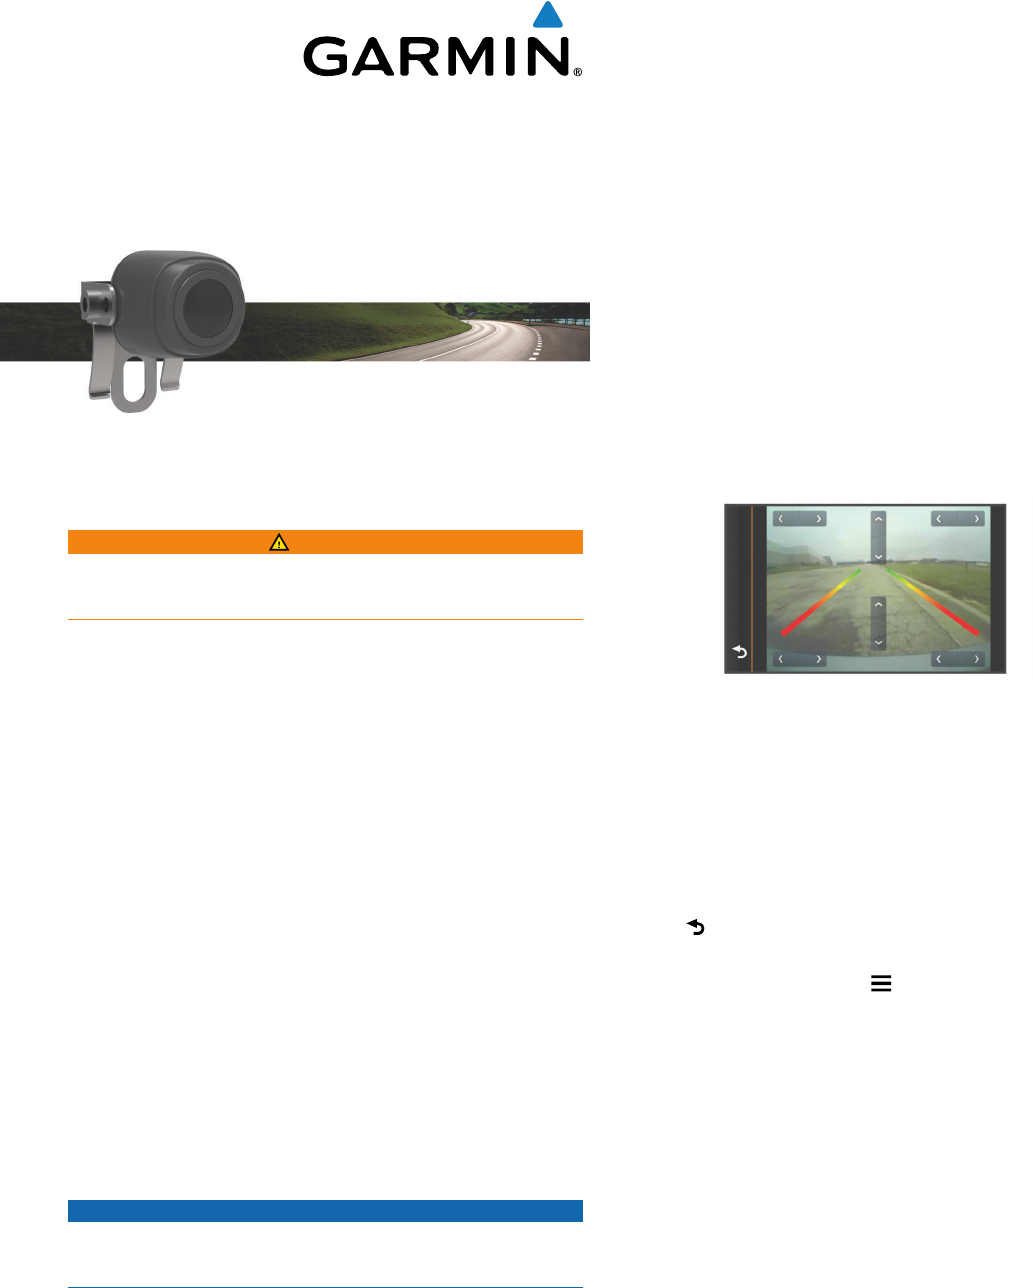
Aligning the Guidance Lines
For best reference, the guidance lines should be aligned to
reflect the outside edges of the vehicle. You should align the
guidance lines separately for each backup camera.
1Position the vehicle with one side closely aligned to a curb,
driveway, or parking stall lines.
You may want to position the vehicle in the center of a
parking stall, and then pull forward into the next stall. This
allows you to use the parking stall lines in the rear of the
vehicle as reference points for alignment.
The curb, driveway, or parking stall lines should be clearly
visible on the device.
2From the main menu, select Settings > Backup Camera.
3Select the camera to adjust, and select Guidance Lines >
Adjust Guidance Lines.
4Use the arrows in the corners of the screen to move the
guidance lines to match the angle and position of the curb,
driveway, or parking stall lines.
The guidance lines should appear directly on top of your
reference points.
5Use the arrows in the center of the screen to move the
guidance lines up or down.
The red section of the guidance lines should be aligned with
the rear of your vehicle.
6If necessary, reposition the vehicle with the other side closely
aligned to a curb, driveway, or parking stall lines, and repeat
the alignment process.
You should attempt to keep the guidance lines symmetrical,
even if your vehicle is not in perfect alignment with the curb,
driveway, or parking stall lines.
7Select when alignment is complete.
Showing or Hiding Guidance Lines
1From the camera view, select > Guidance Lines.
2Select or clear the Show Guidance Lines check box.
Restoring Alignment
You can reset the guidance lines to their default settings.
1Select Settings > Backup Camera.
2Select the camera to adjust, and select Guidance Lines >
Restore.
Multiple Cameras
You can pair up to four wireless cameras with the BC 30
receiver cable. For example, you can pair one backup camera
installed on your vehicle and a second backup camera installed
on a trailer. From the camera view, you can cycle through the
video feeds from all paired cameras. You can change the order
in which cameras appear when you switch cameras.
Pairing a Transmitter with the Receiver Cable
You can pair up to four wireless cameras with the BC 30
receiver cable. If your camera, transmitter, and receiver cable
were packaged together, they come paired from the factory. If
the transmitter and receiver cable are properly installed and you
are not receiving video on the GPS device, you can manually
pair the transmitter and the receiver cable again.
November 2014 Printed in Taiwan 190-01838-00_01
DRAFT

1Select an option:
• Place the vehicle in park.
• Turn off the steady power source connected to the
transmitter.
2Turn on the GPS device connected to the receiver cable.
3From the GPS device, select Settings > Backup Camera >
Add New Camera.
4Follow the on-screen instructions.
Switching Cameras
You can cycle through the video feeds from all paired cameras.
From the camera view, select .
The video feed from the next camera appears, and the
camera name appears at the top of the screen.
Changing the Camera Order
You can change the order in which cameras appear when you
switch cameras.
1Select Settings > Backup Camera.
2Select a camera.
3Select Set Default Camera.
A list of installed cameras appears.
4Drag each camera to the desired location in the list.
When you switch cameras from the camera view, the
cameras appear in the listed order, from top to bottom. The
camera at the top of the list is the default camera and
appears first whenever the camera view appears.
Renaming a Camera
You can change the name that appears above a camera in the
camera view. You should use a descriptive name that clearly
identifies the location of the camera.
1Select Settings > Backup Camera.
2Select a camera.
3Select Rename.
Removing a Paired Camera
If you have already paired four cameras with your BC 30
receiver cable, you must remove a paired camera before you
can pair a new one.
1Select Settings > Backup Camera.
2Select a camera.
3Select Unpair.
Appendix
Specifications
Camera and transmitter input
voltage
From 9 to 28 Vdc
Transmitter fuse 500 mA, fast-blow
Camera and transmitter current
usage
150 mA at 12 Vdc
Camera and transmitter waterproof
rating
IEC 60529 IPX7*
Camera temperature range From -40° to 185°F (from -40° to
85°C)
Transmitter and receiver cable
temperature range
From -4° to 158°F (from -20° to
70°C)
Receiver cable input voltage From 10 to 24 V
Receiver cable fuse 2 A, 250 V
*The device withstands incidental exposure to water of up to 1 m
for up to 30 min. For more information, go to www.garmin.com
/waterrating.
Garmin® and the Garmin logo are trademarks of Garmin Ltd. or its subsidiaries, registered in the USA and other countries. BC™
is a trademark of Garmin Ltd. or its subsidiaries. These trademarks may not be
used without the express permission of Garmin.
© 2014 Garmin Ltd. or its subsidiaries www.garmin.com/support
DRAFT